stratus data systems, inc. using stratus mls
TRANSCRIPT

Multiple Listing Service of Long Island
Stratus Data Systems, Inc.
Using Stratus MLS
v 3.31

Copyright 2014 Stratus Data Systems, Inc. All rights reserved.
The software described in this document is furnished under contractual agreement with the
Multiple Listing Service of Long Island for use by approved members.
Information in this document is subject to change without notice. No part of this publication may
be reproduced, stored in a retrieval system, or transmitted in any form or any means electronic or
mechanical, including photocopying and recording for any purpose other than the members’
personal use, without the written permission of Stratus Data Systems, Inc.
Stratus MLS v3.31.1 August 26, 2014
Stratus Data Systems, Inc.
25 Moseman Avenue
Katonah, NY 10536
914-517-1804
Contents
Getting Started ........................................................................................................ 1
Startup and Shutdown .................................................................................... 2
News .............................................................................................................. 4
Menus and Navigation ................................................................................... 5
Settings .......................................................................................................... 8
About Site Actions....................................................................................... 12
Print ............................................................................................................. 13
Download..................................................................................................... 17
New Window ............................................................................................... 20
Get Help ....................................................................................................... 21
Info Center ............................................................................................................ 25
About Info Center ........................................................................................ 26
News ............................................................................................................ 27
Today’s Listings .......................................................................................... 28
Links ..................................................................................................................... 29
Links ............................................................................................................ 30
Add and Edit Listings ........................................................................................... 31
About Add/Edit Listing ............................................................................... 32
Add Listing Overview ................................................................................. 34
Add Listing Procedures ............................................................................... 38
Listing Detail Edit Form .............................................................................. 40
Edit a Listing ............................................................................................... 44
Clone a Listing............................................................................................. 48
Convert Private to Public ............................................................................. 49
Manage Photos ............................................................................................ 50
Edit Photos ................................................................................................... 52
Manage Attachments ................................................................................... 54
Manage Map Location ................................................................................. 56
About Status and Price Changes .................................................................. 57
Performing Status Changes ......................................................................... 59
Performing Price Changes ........................................................................... 60
Search Listings ...................................................................................................... 61
About Listing Searches ................................................................................ 62
Ways to Search Listings .............................................................................. 65
Search Across Classes ................................................................................. 67
Search Archived Listings ............................................................................. 68
Dynamic Criteria Panel ............................................................................... 69
Enter Search Criteria ............................................................................................. 73
About Search Criteria .................................................................................. 74
Work With Criteria ...................................................................................... 75
Results List............................................................................................................ 79
About Search Results................................................................................... 80
Work With Results ...................................................................................... 81
Detail View ........................................................................................................... 85
About Detail View ....................................................................................... 86
Work with Detail View ................................................................................ 87
Mapped Listings.................................................................................................... 91
About Mapping Listings .............................................................................. 92
Work with Mapped Listings ........................................................................ 93
Map Searches ...................................................................................................... 101
About Map Searches .................................................................................. 102
Start a Map Search ..................................................................................... 103
Run Map Searches for Listings ................................................................. 105
New Searches ...................................................................................................... 111
Start a New Search or Change Search Type .............................................. 112
Save and Share Searches ..................................................................................... 115
Saved and Shared Searches ....................................................................... 116
Pre-Defined Searches .......................................................................................... 119
Run Pre-Defined Searches ......................................................................... 120
MLS Number Searches ....................................................................................... 121
Run an MLS Number Search ..................................................................... 122
Public Records Searches ..................................................................................... 123
About Public Records Searches ................................................................. 124
Enter Public Records Search Criteria ........................................................ 125
Enter Public Records Search Criteria in Map Format ............................... 128
Start a New Public Records Search or Change Search Type .................... 129
Run Public Records Map Searches ............................................................ 130
Run Public Records Saved Searches ......................................................... 136
Run Public Records Pre-Defined Searches ............................................... 138
Open Public Records Links ....................................................................... 139
Map Properties From Public Records ........................................................ 140
View Public Records Detail Forms ........................................................... 145
Run a Public Records Bulk Download ...................................................... 149
My Lists .............................................................................................................. 151
Favorite Listings ........................................................................................ 152
Listing Cart ................................................................................................ 154
My Listings ................................................................................................ 155
Office Inventory ........................................................................................ 156
Recent Searches ......................................................................................... 159
Recently Viewed ........................................................................................ 160
Photo & Slideshows ............................................................................................ 161
View Photos ............................................................................................... 162
Manage Photos .......................................................................................... 164
Edit Photos ................................................................................................. 166
View Slide Shows ...................................................................................... 168
Driving Directions .............................................................................................. 171
Get Driving Directions .............................................................................. 172
Contacts............................................................................................................... 175
About Contacts .......................................................................................... 176
Add and Edit Groups and Contacts ........................................................... 177
Search Contacts ......................................................................................... 180
Work With the Contacts List ..................................................................... 183
Work With the Contacts View................................................................... 185
Print and Download Personal Contacts and Rosters ................................. 187
Prospect Match.................................................................................................... 191
About Prospect Match ............................................................................... 192
Work with Prospect Match ........................................................................ 194
CMA ................................................................................................................... 201
About CMAs.............................................................................................. 202
Data Entry at CMA Sections ..................................................................... 204
Work with CMAs ...................................................................................... 216
Send Listings by Email ....................................................................................... 221
Send Listings ............................................................................................. 222
Formatting Email ....................................................................................... 224
Update ................................................................................................................. 227
About Update ............................................................................................. 228
Work with Update ..................................................................................... 229
History................................................................................................................. 231
About History ............................................................................................ 232
Work with History ..................................................................................... 233
Financial .............................................................................................................. 235
About Financials ........................................................................................ 236
Buy vs Rent ............................................................................................... 237
Home Financing Calculators ..................................................................... 239
Custom Column Sets........................................................................................... 243
About Customize Columns ........................................................................ 244
Customize a Column Set ........................................................................... 245
Market Share Analysis ........................................................................................ 249
About Market Share................................................................................... 250
Set Up Market Share Criteria .................................................................... 251
Saved Market Share Criteria ...................................................................... 254
Work With the Market Share Report ......................................................... 256
................................................................................................................... 259


Getting Started
1
Getting Started
Using Stratus MLS
2
Startup and Shutdown
You are assigned a Username (your member number) and Password that authorizes you
to log in to Stratus MLS.
Start Your Session If you make an error when entering your Username and Password, the system prompts
you to retry.
Only one user can log in with his or her log in codes. If a user is logged in to a Stratus
MLS session and a second user logs in with the same codes, a pop-up message displays
for the new user:
Another user is currently signed in with the same codes. That user has been
terminated to allow you to access the system.
End Your Session To properly end your session, rather than using your browser’s Close button, log out by
clicking Log Out on the site action bar.
When you log out, the system saves your last-used column set, criteria form, and View
form. In your next session, these will be used by default, and can be changed as needed.
Settings changes are also saved and used by default; for example, the page size setting at
results lists.
If you have more than one window open when you log out, and if your browser permits,
the system logs out of your entire session and closes all open windows.
System Timeout The system displays a five-minute warning when your session has been inactive for
twenty-five minutes. The system automatically logs you out if you take no action while it
counts down to zero seconds.
Getting Started
3
How . . .
To Log In
1. Enter Username and Password.
2. If prompted, select New Stratus MLS.
3. Click Log In.
To Log Out
At any page that displays the site action toolbar, click Log Out.
To Remain Logged In at System Timeout Warning
Click Renew while the timeout warning dialog box displays.
To Close Your Session at System Timeout Warning
Click Log Out while the timeout warning dialog box displays.
To Change Your Password
If prompted at Log In, change your password to prevent another person’s
unauthorized access with your codes.
You may also change your password at Settings, anytime you want. See “Settings”
on page 8.
Using Stratus MLS
4
News
News items display at Info Center each day. You can choose to view news in headline or
summary format, clicking to display each full article.
Note:
At log in, before InfoCenter opens, urgent articles may automatically display.
To close the article after reading, click Close.
How . . .
To See News Headlines
1. At Info Center, select the Headlines Only checkbox at the far right side of the day’s
first news item.
2. To display an article, click its headline.
3. To print the displayed article, if your browser enables this feature, right-click on
the article and click Print at the context menu.
4. To close the article, click Close.
To See News Summaries
1. At Info Center, deselect the Headlines Only checkbox at the far right side of the
day’s first news item. The first lines of the article display.
2. To display the whole article, click Read More. At the News dialog box, to see a
related web page if one is available, click See Details.
3. To print the displayed article, use your browser’s Print command.
4. To close the News dialog box, click Close.
Getting Started
5
Menus and Navigation
You can display the main menu as a vertical panel positioned to the left of the Stratus
MLS main window, or as a horizontal bar along the top of the main window.
In addition to Main Menu commands the system offers an action bar customized for each
particular page, a site toolbar displayed at all pages, navigation buttons, and a
breadcrumb path.
How . . .
To View the Main Menu Two Ways
You can choose left-side or top navigation as desired. Regardless of the menu view you
choose, the same commands display.
The Left-Side Panel, which displays along the left side of the system window, may be
best for wide screen monitors.
The Top Tab Menu, which displays along the top of the system window just below
the ads, may be best for square monitors.
To Use the Left-Side Panel
1. Click the down arrow at the left side of the top menu.
2. The left panel opens.
3. Click the desired submenu command under the main headings.
To Use the Top Menu
1. Click the up arrow at the top of the left panel.
2. The top menu opens.
3. Mouse over the desired main menu tab.
4. Move the mouse to - and then click - the desired submenu command.

Using Stratus MLS
6
To navigate the system
Using the Browser Back button, click to go back one page.
Using the Main and submenu commands, click a main menu command then one of the
submenu commands that display below it.
Using the Breadcrumb path, click any segment to open the associated feature.
Using the Action toolbar, click an action appropriate for the displayed page.
Using navigation buttons when provided, click arrows to move through pages.
Getting Started
7
To Fill the Entire Screen with the Browser Window
Click your browser’s maximize-window button. This button is available if the
browser window is not already maximized.
Browser menus and toolbars continue to display and take up some room at the top
of the window. To fill the entire screen with Stratus MLS, see below.
To Fill the Entire Screen with the Stratus MLS Window
By expanding the browser window so that it fills your entire screen, you maximize the
viewing space and minimize the need to scroll.
1. Press F11 to expand the system window (or follow instruction for your computer
and browser.
2. To return to normal browser display, press F11 again.
Note:
Browser menus and toolbars disappear when the system window takes up the
whole screen.

Using Stratus MLS
8
Settings
Choose Settings on the main menu to customize your Stratus MLS experience. You can
manage a Profile, your Agent Photo, Market Areas for “Today’s Listings” on page 28, the
Appearance of the Stratus MLS window, your Password; and default text for “Send
Listings” on page 222.
Note:
When you make a change at any Settings tab, the page’s Save button becomes
available; clicking it saves changes at all Settings tabs. If text at any unsaved
Settings tab is invalid, an alert displays when you save. When all Settings have
been properly saved, a confirmation displays.
How . . .
To Manage Your Profile
1. At the main menu, click Settings.
2. Click the Profile tab.
3. Add or change your preferred Email address, as well as your website url in the following
format: http://www.yourdomain.com
4. If you share listings with another agent whose name should appear next to your
own in the headers and footers of listing detail printouts, select a name from the
2nd Agent dropdown list. To remove the name, click Remove.
5. Click Save.
To Manage Your Agent Photo
For best results use a photo in Portrait orientation. The system will size it appropriately.
1. At the main menu, click Settings.
2. Click the Agent Photo tab.
3. At Upload a Photo, click Choose File.
4. Navigate to the photo on your computer, and after selecting it, click your browser’s
Open button.
5. The uploaded photo displays; to replace the photo, repeat steps 3-4.
6. Click Save.
Getting Started
9
Note:
To delete the uploaded photo, select the Delete Agent Photo checkbox, then click
Save.
To Manage “My Links” at Info Center
For convenient access while working in Stratus MLS, the system allows you to set four
personal links at Info Center. Enter the URL and a display name for each of four web
sites to display at the “My Links” section in “About Info Center” on page 26“About Info
Center” on page 26“About Info Center” on page 26.
1. At the main menu, click Settings.
2. Click the My Links tab.
3. At the Link 1 URL field, type the first website url in the following format:
http://www.domain.com.
4. At the Link 1 Web Site Display Name field, type the name of the website as you
want it to appear in Info Center.
5. Repeat steps 3-4 for up to four links.
6. Click Save.
To Manage Your Market Areas
1. At the main menu, click Settings.
2. Click the Market Areas tab.
3. At Market Area 1, enter a name for the market area.
4. At Select Class(es), select one or more classes.
5. At Select Town(s), click to select a from the dropdown list, or CTRL+Click to
select more than one.
6. To confirm towns selected, click Show Selected.
7. To define more market areas, scroll down. Repeat steps 3 through 5 as needed for
each.
8. At Calendar, to cause Open Houses to display as Calendar events, select Show
Open Houses in your Market Areas on your Calendar
9. Click Save.
Using Stratus MLS
10
To Manage the Appearance of Stratus MLS Screens
1. At the main menu, click Settings.
2. Click the Appearance tab.
3. At Theme, choose a theme from the dropdown list to change the window’s color
scheme.
4. At Number of results per page at search results list, from the dropdown list, select
the number of search results you want displayed by default at List pages. Note:
You can override this default setting at any List page during any Stratus MLS
session, but when you start a new session the default you define at Settings is
restored.
5. At Column Set for listing search results lists, choose a column set from the
dropdown list.
6. Click Save.
7. Click OK at “Your settings have been saved.”
To Manage Your Stratus MLS Password
Password requirements display on the Password tab. It may take up to two minutes for
the system to change your password after you save Settings. Allow up to forty-eight
hours for ancillary websites to accept your new password.
1. At the main menu, click Settings.
2. Click the Password tab.
3. At Current Password, enter your current password.
4. Review displayed password requirements. To see MLS password policies, click
MLSLI’s Password Tips & Policy.
5. At New Password, enter a new password that conforms to requirements.
6. Note the password strength, and confirm the password when you have a strong one.
7. At Confirm New Password, type the new password again; it must match the
password entered at step 4.
8. Click Save.

Getting Started
11
To Manage “Send Listings” Text
Enter text for your own personal default Subject, Body, and Signature text. These are
used when you send listings from search results. If you leave these fields blank at
Settings, the MLS default text is used.
1. At the main menu, click Settings.
2. Click the Send Listings tab.
3. At Default Email Subject, clear text as necessary and enter a subject for your Send
Listings email.
4. At Default Email Body and Signature, clear text as necessary and enter a message,
closing, and signature line for your Send Listings email. Format the message as
needed. See “Formatting Email” on page 224.
5. Click Save.
Using Stratus MLS
12
About Site Actions
The system’s site action bar, at the top of the Stratus MLS window, provides actions that
can be applied at most pages. Depending on the page, additional actions display.
Click Help ? for information about all of the current page’s features and actions.
Click Print to print the current page.
Click Send to email a link to particular listings; for example, the contents of the
listing cart, or selected listings at any results list.
Click Download to download listings or public records, detail views, photos, and public
records.
Click New Window to open multiple system windows for multi-tasking.
Click Log Out to end your session.
Click List to view search results in a list.
Click Map to view search results on the map, or start a map search.
Click View to view a display details page in your selection of detail forms.
Click Results to view search results.
Getting Started
13
At List, View, Map and other pages, the system offers the site action Print, which opens
the Print Options Dialog. Before printing takes place, the system prepares pages to print in
PDF format.
To print at a dialog box (for example, Photos, Statistics, Driving Directions, Contacts)
click the Print tool in the upper right corner, next to the dialog box’s Close icon.
How . . .
To Print at List
1. Display results at List or another page that lists search results.
2. Optionally change the default column set.
3. Select properties you want to print.
4. Click Print on the site action bar.
5. At the Print Options dialog box, select List Rows or Detail Views.
6. For List Rows, use the dropdown lists to choose what you want to print, and a
column set . For Detail Views, use the dropdown lists to choose what you want to
print.
7. To preview the page(s) as they will print, click Print Preview. The preview opens in
a new window, which you must close before printing.
8. Listings may print immediately, or a browser dialog box may display. Choose
landscape mode when printing a list.
To Print at View
1. Display selected results at View.
2. Optionally change the default Form.
3. Use navigation arrows to change your selections, if needed.
4. Click Print on the Site action bar.
5. At the Print Options dialog box, select List Rows or Detail Views.
6. For Detail Views, use the dropdown lists to choose what you want to print, and a
detail form. For List Rows, use the dropdown lists to choose what you want to
print.
Using Stratus MLS
14
7. To preview the page(s) as they will print, click Print Preview. The preview opens in
a new window, which you must close before printing.
8. To print the pages, click the site action Print.
9. Listings may print immediately, or a browser dialog box may display. Choose
landscape mode when printing a list, and at the photos viewer.
To Print Driving Directions
1. Display driving directions at List, View, or Map. See “Driving Directions Dialog.”
2. At the Driving Directions dialog, click the Print tool in the upper right corner, next
to the dialog box’s Close icon.
3. At the Print Options dialog box, select or clear one or more options:
Map: Print the mapped route with optional round trip, reference # markers, intermediate
destinations, and the distance at each destination.
Directions: Print turn-by-turn directions in text with distance notations and reference
numbers.
Detail Views: Print the detail views in the format you select from the Detail Form
dropdown list.
4. To print the pages, click the Print button.
5. Directions may print immediately, or a browser dialog box may display.
To Print Contact Records
1. Select one or more contacts at the contacts List or View page.
2. Click Print.
3. At the Print dialog box, to print rows, select List Rows; or to print each record,
select Detail Views.
4. At For, to print the displayed record (if any), select The Current Contact; to print all
records in List, select All X Contacts; or to print currently selected records, select X
Selected Contacts.
5. At Column Set, applicable only to List Rows, select the desired column set format.
6. At Form, applicable only to Detail Views, select the desired form.
7. Click Print. Contact records may print immediately, or a browser dialog box may
display.
Getting Started
15
To Print Contact Labels
1. Select one or more contacts at the contacts List or View page.
2. Click Print.
3. At the Print dialog box, select Detail Views.
4. At For, to print labels for the displayed record (if any), select The Current Contact;
to print labels for all records in List, select All X Contacts; or to print labels for
currently selected records, select X Selected Contacts.
5. At Form, select the Avery label you want.
6. At Replace Contact’s Name With, enter a different name to display on the labels, if
needed. Note: The replacement name (for example, My Neighbor or Recipient)
appears on all the labels.
7. Click Print Preview; confirm that the labels appear as you want them.
8. Click Print. Labels may print immediately, or a browser dialog box may display.
To Print Member or Office Records at Contacts
1. Select one or more roster records at the contacts List or View page.
2. Click Print.
3. At the Print dialog box, select List Rows to print rows, or Detail Views to print each
record.
4. At For, to print the displayed record, select The Current Contact; to print all listed
records, select All X Contacts; or to print the currently selected records, select X
Selected Contacts.
5. At Column Set, applicable only to List Rows, select the desired column set format.
6. Click Print. Roster records may print immediately, or a browser dialog box may
display.
To Print Public Record Labels
1. Select one or more public records at the List or View page. (See “About Public
Records Searches” on page 124.)
2. Click Print.
3. At the Print dialog box, select Detail Views.
4. At For, to print labels for the displayed record (if any), select The Current Contact;
to print labels for all records in List, select All X Contacts; or to print labels for
currently selected records, select X Selected Contacts.
5. At Form, select the Avery label you want.
Using Stratus MLS
16
6. At Replace Owner’s Name With, enter a different name to display on the labels, if
needed. Note: The replacement name (for example, “My Neighbor”, “Recipient”)
appears on all the labels.
7. Click Print Preview; confirm that the labels appear as you want them.
8. Click Print. Labels may print immediately, or a browser dialog box may display.
Getting Started
17
Download
Use the Download site action in order to store items on your PC for use outside Stratus
MLS. You can download listings at List and View, public records at List and View and at
the criteria page for “Run a Public Records Bulk Download” on page 149, contacts and cma’s.
The system downloads files in .pdf format.
To Download Listings or Public Records at View
1. Select one or more property detail views on the navigation bar.
2. Click Download at the site action bar.
3. At the Download dialog box, choose what you want to download: List Rows, Detail
Views, or Photos.
4. For List Rows, choose what you want to download at the For dropdown list. Then
choose a Column Set from the dropdown list. To include column names as the first
row, select the checkbox for that option.
5. For Detail Views, choose what you want to download at the For dropdown list.
Then choose a Form from the dropdown list.
6. For Photos, choose what you want to download at the For dropdown list.
7. Click Download to start the packaging process.
8. At the Download Ready dialog box, click Download.
9. At the File Download dialog box, choose to Open or Save the .pdf file. When
saving, choose a folder in which to store the downloaded .pdf file.
Note:
When you click the Download site action at the Criteria or Map pages for a
public records search, the Bulk Download dialog box opens. Bulk records are
downloaded before the search is submitted. This feature is unique to public
records. See “Public Records Bulk Download Dialog”.
To Download Personal Contacts
1. Select one or more personal contacts at the contacts List or View page.
2. Click Download.
3. At the Download dialog box, to download rows, select List Rows; or to download
contact records, select Detail Views.
Using Stratus MLS
18
4. At For, to download the displayed personal contact (if any), select The Current
Contact; to download all contacts, select All X Contacts; or to download currently
selected contacts, select X Selected Contacts.
5. At Column Set, applicable only to List Rows, select the desired column set format:
“Outlook or Windows Live Mail” or “All Downloadable Fields”.
6. At Include column names as first row, applicable only to List Rows, select the
checkbox if you want to include headings. Note: You cannot clear this checkbox
when downloading contacts for Outlook or Windows Live Mail, which require
headings.
7. At Form, applicable only to Detail Views, select the desired form.
8. Click Download.
9. At the Ready prompt, click Download again, then complete information in your
browser’s dialog box as needed.
To Download Personal Contact Labels
1. Select one or more personal contacts at the contacts List or View page.
2. Click Download.
3. At the Download dialog box, select Detail Views.
4. At For, to download a label for the displayed record (if any), select The Current
Contact; to download labels for all contacts in List, select All X Contacts; or to
download labels for currently selected contacts, select X Selected Contacts.
5. At Form, select the desired Avery form.
6. At Replace Contact’s Name With, enter a different name to display on the labels, if
needed. Note: The replacement name (for example, My Neighbor or Recipient)
appears on all the labels.
7. Click Download.
8. At the Ready prompt, click Download again, then complete information in your
browser’s dialog box as needed.
To Download CMA’s
1. Click Download on the action bar, after selecting a CMA at the list or at the open
CMA.
2. At the Download Ready dialog box, choose what you would like to download
(current section or entire CMA).
3. Click Download.
Getting Started
19
To Download Public Record Labels
1. Select one or more public records at the List or View page. (See “About Public
Records Searches” on page 124.)
2. Click Download.
3. At the Download dialog box, select Detail Views.
4. At For, to download labels for the displayed record (if any), select The Current
Property; to print labels for all records in List, select All X Public Records; or to
print labels for currently selected records, select X Selected Public Records.
5. At Form, select the Avery label you want.
6. At Replace Owner’s Name With, enter a different name to display on the labels, if
needed. Note: The replacement name (for example, “My Neighbor”, “Recipient”)
appears on all the labels.
7. Click Download. Labels may print immediately, or a browser dialog box may
display.
8. At the Ready prompt, click Download again, then complete information in your
browser’s dialog box as needed.
Using Stratus MLS
20
New Window
Use the New Window site action in order to open one or more new system windows. This
allows you to perform more than one system activity without losing your place when, for
example, you are interrupted by a phone call and taken off task.
To open a new system window, click New Window on the site action bar. You can
perform any action in the new window, and may open as many new windows as you
want.
Depending on your browser, the new window will open either as another tab, or as
another instance of the browser.
While you are active in any system window, your session remains active and will not
time out. If all windows have been inactive for twenty-five minutes, the standard timeout
warning displays, and the session ends in all windows unless renewed.
If you log out at any open system window, you may be presented with the option to log
out of your session and close all windows, or leave all remaining windows open. If you
use a browser that doesn’t allow you to browse more than one window at a time, click the
browser’s Close button to close each one.
Getting Started
21
Get Help
If you have questions as you use the system, Help is a click away. Help is organized so
you can search topics for any key word, read it like a book, select a topic by index, or go
to page-specific information by clicking ? from the site action bar.
How . . .
To Open Help
At the site action bar, click Help to open the Stratus MLS help system.
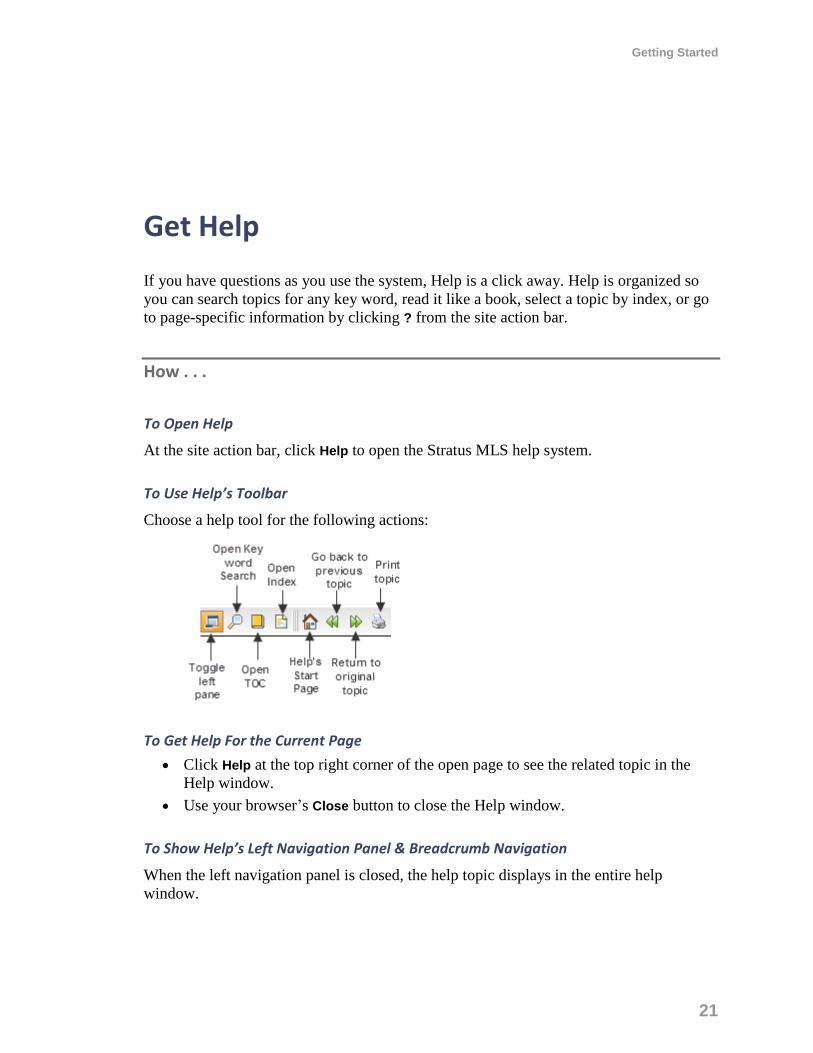
To Use Help’s Toolbar
Choose a help tool for the following actions:
To Get Help For the Current Page
Click Help at the top right corner of the open page to see the related topic in the
Help window.
Use your browser’s Close button to close the Help window.
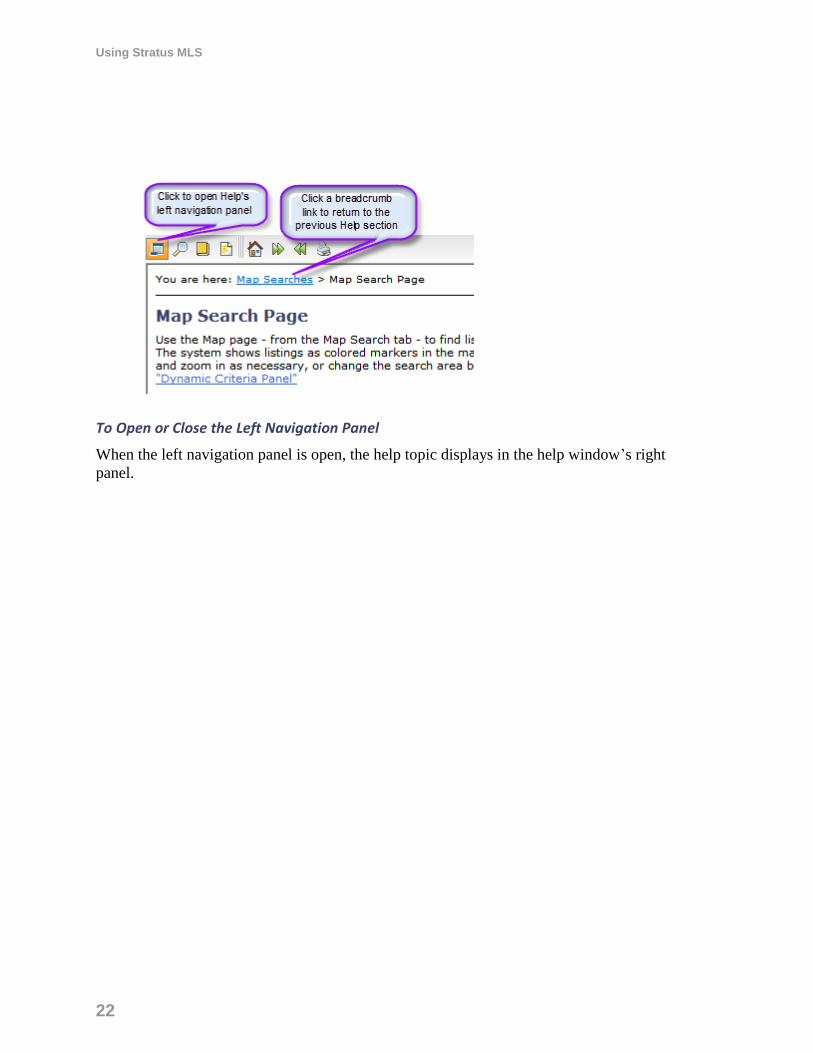
To Show Help’s Left Navigation Panel & Breadcrumb Navigation
When the left navigation panel is closed, the help topic displays in the entire help
window.
Using Stratus MLS
22
To Open or Close the Left Navigation Panel
When the left navigation panel is open, the help topic displays in the help window’s right
panel.
Getting Started
23
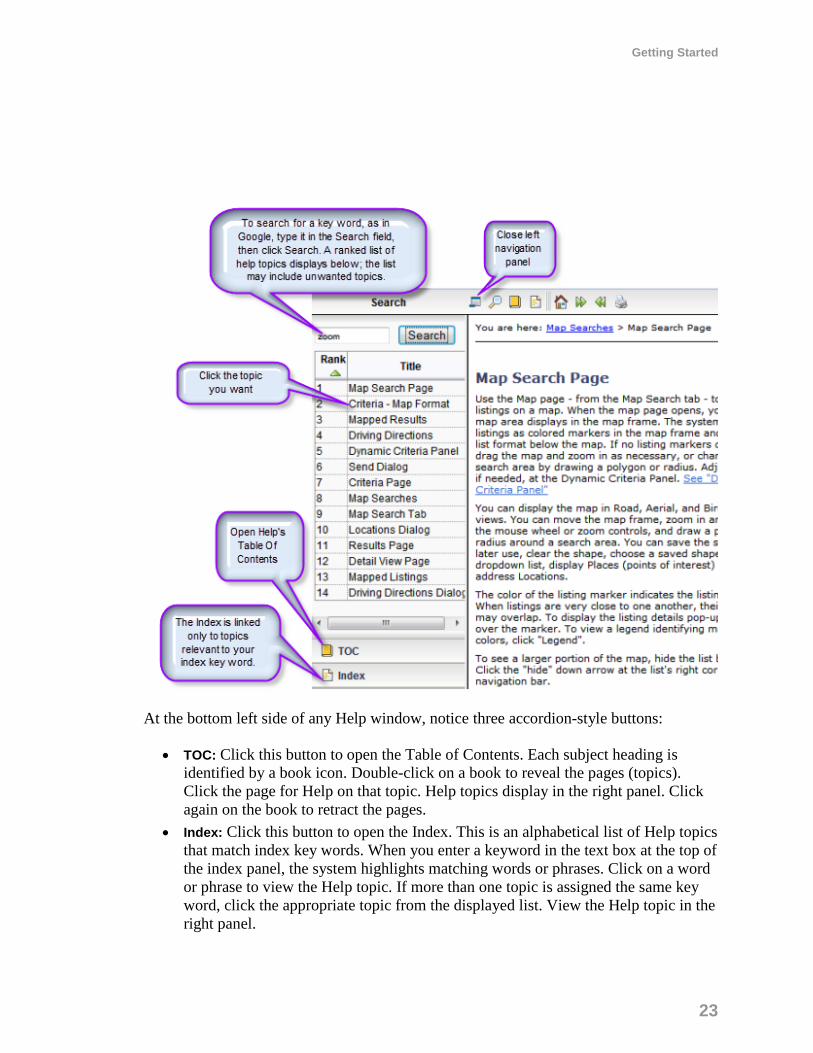
At the bottom left side of any Help window, notice three accordion-style buttons:
TOC: Click this button to open the Table of Contents. Each subject heading is
identified by a book icon. Double-click on a book to reveal the pages (topics).
Click the page for Help on that topic. Help topics display in the right panel. Click
again on the book to retract the pages.
Index: Click this button to open the Index. This is an alphabetical list of Help topics
that match index key words. When you enter a keyword in the text box at the top of
the index panel, the system highlights matching words or phrases. Click on a word
or phrase to view the Help topic. If more than one topic is assigned the same key
word, click the appropriate topic from the displayed list. View the Help topic in the
right panel.
Using Stratus MLS
24
Search: Click this button to use the full text search. Type a keyword or words into
the text box. Click the Search button. The system finds topics containing your
search text, and ranks them by relevance. Click a topic to display in the right panel.
To Print a Help Topic
1. Display the desired topic.
2. Click the print tool in Help’s toolbar.
3. At the Print dialog box, click Print.
To Use Links in Help Topics
Help topics offer links just as web pages do.
Inline links let you jump to another topic or to a place within the same topic. Links
show as underlined text in blue or purple. Click on the link to display the linked
text.
See Also links are located at the end of many Help topics. Click to open the desired
topic in a new topic window.
Top of Page links, below each procedure, let you jump to the top of the Help topic.
To View the Previously Displayed Topic
1. To show the previously displayed topic, click the Back tool .
2. To return to the original topic, click the Forward tool .
To Get Help in PDF Format
PDF versions of Help are available for printing or viewing as a book or in individual
chapters. You must have Adobe Acrobat Reader installed on your computer in order to
view and/or download a PDF file.
1. At the bottom of any topic, click Get Documentation in PDF Format.
2. Click the chapter (book) you want to open or download.
3. Once open, you can view, print, and save the file.

Info Center
25
Info Center
Using Stratus MLS
26
About Info Center
Info Center is your Stratus MLS dashboard, where you can see current news, today’s
listings, alerts, and informative links to web sites and media.
News In the left column, News headlines or summaries display each day. (See “News” on page
4.)
Today’s Listings In the middle column, Today’s Listings display the current listing activity in your market
areas. (See “Today’s Listings” on page 28).
Alerts Under Today’s Listings, linked Alerts display when the system finds listings for prospect
searches, expiring prospects, and expiring CMAs. Member surveys and other board and
MLS alerts may also appear. To manage or open more information about an alert, click
its link.
My Links Under Today’s Listings and Alerts, links display for up to four websites you have
selected at Settings.
Info Center
27
News
News items display at Info Center each day. You can choose to view news in headline or
summary format, clicking to display each full article.
Note:
At log in, before InfoCenter opens, urgent articles may automatically display.
To close the article after reading, click Close.
How . . .
To See News Headlines
1. At Info Center, select the Headlines Only checkbox at the far right side of the day’s
first news item.
2. To display an article, click its headline.
3. To print the displayed article, if your browser enables this feature, right-click on
the article and click Print at the context menu.
4. To close the article, click Close.
To See News Summaries
1. At Info Center, deselect the Headlines Only checkbox at the far right side of the
day’s first news item. The first lines of the article display.
2. To display the whole article, click Read More. At the News dialog box, to see a
related web page if one is available, click See Details.
3. To print the displayed article, use your browser’s Print command.
4. To close the News dialog box, click Close.
Using Stratus MLS
28
Today’s Listings
Stratus MLS highlights today’s listing activity in up to four market areas. You specify the
property classes and location at “Settings” on page 8, and Stratus MLS displays links to
new and updated listings for that day (or your chosen number of days) at Info Center and
the New Search page. To see the list of properties in a market area and category, click the
desired count.
To View Today’s Listings
1. Click Info Center at the Main Menu.
2. At Today’s Listings, to see new listings for a particular market area click a market
area’s new link; to see changed listings click the update link.
3. If a results list displays more than one match, double click a listing to see it at
View.
4. To return to results click List.

Links
29
Links At the main menu, use the Links submenu to locate resources and to look up particular
MLS documents and web pages via keyword.
Selecting a LinksOption Click any Linkssubmenu item to open the corresponding document or site in a new
window.
Searching By Keyword Enter a search keyword or words, as you would in a Google search, and then click Go to
display MLSLI’s document matches in a new window.
Using Stratus MLS
30
Links
At the main menu, use the Links submenu to locate resources and to look up particular
MLS documents and web pages via keyword.
Selecting a LinksOption
Click any Linkssubmenu item to open the corresponding document or site in a new
window.
Searching By Keyword
Enter a search keyword or words, as you would in a Google search, and then click Go to
display MLSLI’s document matches in a new window.

Add and Edit Listings
31
Add and Edit Listings
Using Stratus MLS
32
About Add/Edit Listing
Use Add/Edit to add and maintain public and private listings of all classes.
Listings are linked to the property’s public record. When you establish this link before
starting data entry, the system can auto-fill many of the fields describing property
characteristics, link to the public record from the listing detail form, and link to the listing
from the public record detail form.
To create the link, you must locate the appropriate public record using the Link Listing to
Public Record search. Once linked, the listing detail edit form displays; here you enter
listing details, upload photos and attachments, and change the map location if necessary.
Add Listing Use the Add Listing tab to begin adding a public or private listing and link to its public
record. As you add information at the listing detail edit form, the system auto-saves the
listing as a draft. If you can’t complete the draft in one session, plan to do so quickly;
check MLS restrictions on the number of days that drafts remain available. Once you
complete all required information and either upload or order a photo, the system assigns
an MLS# and stores the listing in the MLS listing database.
Edit Listing If the listing is complete and no longer in draft form, use the Edit Listing tab to make
changes at the listing detail edit form. Edit Listing allows you to change most listing
details, change the status or price, upload and manage photos and attachments, change the
map location, convert private listings to public, and delete a listing.
Drafts Use the Drafts tab to add to or complete a listing you began in an earlier session.
Clone Listing Use the Clone Listing tab to create a draft based on the details of an existing listing.
Add and Edit Listings
33
Online Forms Use the Online Forms tab to access the Instanet website and its property data sheet
(PDS).
ShowingTime Use the ShowingTime tab to access Showing Time tools for a particular listing.
Using Stratus MLS
34
Add Listing Overview
Use Add Listing to enter public listings in the MLS listing database. You can also enter
private listings in your office’s private database. See “Listing Detail Edit Form”. for more
information.
The system provides field-level assistance and validation based on your MLS rules, auto
spell checking, auto correction, and quick field location. You can pick up where you left
off without losing your work.
Add and manage photos and attachments without leaving listing entry. Upload photos
singly or in bulk, drag to order them the way you want, and enhance or crop them.
Public Record Link With the exception of co-ops and listings that fall outside of Nassau, Suffolk, Queens,
and Kings/Brooklyn; when you create a new listing, the linked public record becomes a
starting point, allowing the system to auto-fill some of the listing information. In addition
to simplifying the listing process, the public record link creates a link from the listing
detail form to the public record, and from the public record detail form to the listing. The
link also provides valuable information about the property’s listing history.
To establish the link between a new listing and a public record, Add Listing includes a
Link Listing to Public Record search. After you select the appropriate public record from
search results, the system displays the information it will auto-fill. You can revise the
information without affecting the public record itself, or exclude any field. Once the
system transfers the edited public record information to the new listing, enter the
remainder of the listing information at the Listing Detail Edit Form.
It is possible to add a listing without a public record link. However, this is not desirable
and should only be considered if, after exhausting all search options, a public record
cannot be found.
Drafts Because it is not always practical to enter listing data in a single session, the system
creates a draft for each new listing. You can add information to the draft over a number
of sessions, but be sure to do so quickly; check with the MLS regarding the number of
days drafts remain available.
Add and Edit Listings
35
As you enter information, the system auto-saves your draft once every minute; the system
also saves the draft when you leave Add/Edit. You may prefer to click the Save Draft
action to be sure the draft is saved. To return to the draft, click the Draft tab, where a list
of your drafts displays.
Once you complete all listing information, click Submit to add the listing.
Notes:
The draft is a temporary document, purged according to a schedule set by the
MLS; it is a good idea to check the Original Date at the Drafts tab to insure you
don’t lose your work.
The draft is available only to the user who creates it. If you create the listing
draft on behalf of another agent, you alone can update it.
Data Entry
Tab
Moves to next field.
F11
Enlarges the Stratus MLS window by removing the browser toolbar.
Reset Action
Restores all fields to the last-loaded defaults.
Help for Data Fields
Click any field label for a dialog box that shows an explanation of the field and
information about the type of value you should enter. Click off the dialog box to close
pop-up help.
Required Fields
The system indicates required fields with a blue asterisk (*). If you submit a listing before
completing all required fields, the system displays an alert for the first required field that
is empty, flagging the field label in red. Enter the information, then resubmit the listing
until the system accepts it.
Using Stratus MLS
36
A complete list of all required fields that are empty, along with incorrect values displays,
displays in red at the bottom of the form. Click any alert to go directly to the field that
needs correction.
Data Entry Errors
The system helps prevent incorrect entry in certain fields. For example, at price fields you
cannot enter a non-numeric character. The system rejects dollar signs, commas, and
periods and deletes these characters as you enter them.
At other fields, the system flags errors when you press Tab or click away from a field.
For example, an alert displays when you move to another field after entering an
expiration date earlier than the listing date. The system flags the field label in red and
requires that you change the data before you submit the listing.
Dates
You can enter dates in the following formats:
Date Format: 6/30/2007; 6/3/11; June 30, 2011; 6/30; 6-30.
Today Format: T (today’s date); T+1 (tomorrow’s date); T-1 (yesterday’s date); T+90
(three months from today). Type T or t; the system accepts both upper and lower case.
Responsive Data Fields
The system sometimes customizes input fields depending on your entry at an earlier field.
Dependent Data Fields
Some fields are dependent on your entry at another field. For example, when you select a
Town, the system allows only valid Zips for that Town.
Clear Entries
To clear your entries, click the Reset action.
Navigate Fields
Press the Tab key to move from field to field, or click the mouse at the desired field.
You can scroll through the form or click the tabs at the top of the form to jump to a
particular section of the Listing Detail Edit Form.

Add and Edit Listings
37
Photos and Attachments
Add and manage photos and attachments in the “Listing Detail Edit Form” on page 40. The
Upload action is available at both sections.
Using Stratus MLS
38
Add Listing Procedures
Use Add Listing to enter public listings in the Multiple Listing Service. You can also
enter private listings in your office’s private database.
See “Add Listing Overview” on page 34 for an overview about linking the public record,
working with drafts, and data entry.
To Add a Listing
1. Select Add Listing from the Listings sub-menu.
2. Select a Class. Note: If the listing is a Condo, HOA, or Co-op, select the specific class.
(If Co-op, select Public or Private then click Continue and skip to step 4. For all other
classes, continue at step 3.)
3. Select a County.
4. Select Public or Private, then click Continue.
5. At Link to Public Record, if displayed, read the message then click Close.
6. At Link to Public Record Criteria, if displayed, enter criteria to locate the
appropriate public record.
7. Click Submit. At the Results - Link with Public Record page, select the appropriate
public record, click View if necessary, then click Link with Listing.
8. Information auto-fills from the public record. You can revise this information. If
you do not want a field to display at the listing, clear its checkbox.
9. After reviewing auto-filled information, click Continue. The listing detail edit form
displays, auto-filled with information from the public record.
10. At the listing detail edit form, press the Tab key to move from field to field.
Required fields are marked with a blue asterisk (*).
11. Enter or choose information at each section. You can scroll the length of the form
or jump to a particular section by clicking its tab at the top of the form.
12. At the Photo and Attachment sections, click Upload to browse for and upload files.
13. When the draft is accurate and complete, click Submit to see the newly-assigned
ML# and additional options at the Add/Edit Complete dialog box.
14. If prompted for a photo, you may choose to upload one or more photos, or order
them. See “Manage Photos” on page 164 for instructions to upload, edit, and move
photos.

Add and Edit Listings
39
Note:
If the listing is incomplete and you plan to add information later, optionally
click Save Draft. Click Close at the confirmation prompt.
Using Stratus MLS
40
Listing Detail Edit Form
Use the listing detail edit form to enter or edit listing information. The listing’s Class
determines the fields and section tabs displayed.
Some fields may be auto-filled from a linked public record or a cloned listing.
In this article . . .
About Drafts The system creates a Draft when you open a new listing detail edit form, and saves it
automatically while you work and when you navigate away from Add/Edit. You can
return to the Draft in a later work session.
Navigating the Form Press the Tab key to move from field to field, or click the mouse at any field.
To move to a different section you can use the scroll bar, click the section tab along the
top of the form to jump, or press the Page Up and Page Down keys.
Entering Information Fields on the Edit Listing Details Form match the order of input fields in the Listing
Contract. Enter a value for each field name on the screen. For example, for listing price,
the value might be 550000.
Required Fields
Fields you must enter are marked with a blue asterisk (*).
Responsive Fields
Responsive data fields display based on your entry at another field. For example, if you
enter Y at Price Range Listing, the system displays two text boxes, one for the low list
Add and Edit Listings
41
price and one for the high list price. If you enter N at Price Range, the system displays
one text box for the list price.
Dependent Fields
Dependent fields have dropdown lists with options determined by the data you entered at
other fields. For example, if you select a value at Town the system provides only those
zipcodes valid for that town.
Blocked Data Entry
The system prevents some inappropriate data entry. For example, you cannot type
alphabetic characters in a price text box.
Date Formats
You may use any of the following date formats in a date field:
1/31/2012 or 1/12
1-31-2012 or 1-31-12
1/31 or 1-31 (the system assumes the current year)
T or t (today)
T+1 (tomorrow)
T-1 (yesterday)
T+/-n (today plus or minus n days)
Field Help Links
Fields on Add/Edit data entry forms provide links to data-entry help. Click on a field
label to open instructions.
Spell Check at Comments
Comments text boxes provide spell checking and auto correction.
Using Stratus MLS
42
Locating a Field To locate a particular field on the form, click the Find action. The Find a Field dialog box
opens. Enter all or part of the field label then click Find. When the dialog box closes the
listing detail edit form displays at the located field.
To locate the next occurrence of the text, if desired, click the Find action again. At the
dialog box, click Find once again.
Previewing the Draft To preview the listing as you work, click the Preview action. Draft information displays
in the Broker-Full detail form. If you have uploaded one or more photos or attachments,
these also display. To print the preview, click the Print icon.
Submitting for Validation When you submit a complete and valid draft, the system assigns an ML# to the new
listing. If required fields * remain empty, or you have neglected to correct a field flagged
in red, the form does not pass validation. A validation summary displays for the Draft.
The system flags each erroneous field in red; click the red label for a help pop-up
message. Until you correct these fields and re-submit, the system cannot store the listing
in the MLS database.
When you successfully submit a valid listing, the Add/Edit Complete dialog box displays
with further options. If the listing is new, a newly assigned MLS# displays.
If you have not yet uploaded a photo, you may be prompted for one in lieu of an
immediate charge.
Resetting the Form To return the listing detail edit form to the state it was in when you opened a Draft or
began to add or edit a listing, click the Reset action. The system prompts you to confirm
the reset, because all changes made during your current session will be undone.
Leaving the Draft The system automatically saves a new listing’s Draft periodically while you work.
Although it is not necessary, you may use the Save Draft action if you need to leave the
work session and want to ensure that your draft is saved.
Add and Edit Listings
43
When you navigate away from Add/Edit, the browser requires a short period of time to
finish saving the form before loading the new page. A confirmation prompt displays to
confirm your intention to leave Add/Edit. The time it takes for you to enter your
confirmation is sufficient for the system to automatically save the Draft.
Using Stratus MLS
44
Edit a Listing
Choose the Edit Listing tab from the Add/Edit page to make changes in listing details,
status and price, photos and attachments, convert private listings to public, and delete the
listing. The system tracks all edit changes in History.
How . . .
To Start Any Listing Edit
1. At the Add/Edit menu, click Edit Listing.
2. At the Edit Listing tab, type the ML# and click Open. Review the summary details to
confirm this is the correct listing to edit.
3. If the Try to Link to a Public Record dialog box displays, decide which option you
want. If you decide to search for a public record in order to link it to your listing:
At Link Listing to Public Record, enter criteria to locate the appropriate public
record. See “Enter Public Records Search Criteria” on page 125.
At the search results List, select the appropriate public record, click View if
necessary, then click Link with Listing.
Information that will auto-fill from the public record displays. You can revise any
information. If you do not want a field to display at the listing, clear its checkbox.
After confirming auto-fill information, click Continue.
The listing detail edit form displays, auto-filled with information from the public
record.
4. Choose an option from the list of edit types, then click Continue.
To Edit Listing Details
1. At the Edit Listing tab, type the ML# and click Open. Review summary details to
confirm this is the correct listing to edit.
2. Choose Edit Listing Details from the list of edit types, then click Continue.
Add and Edit Listings
45
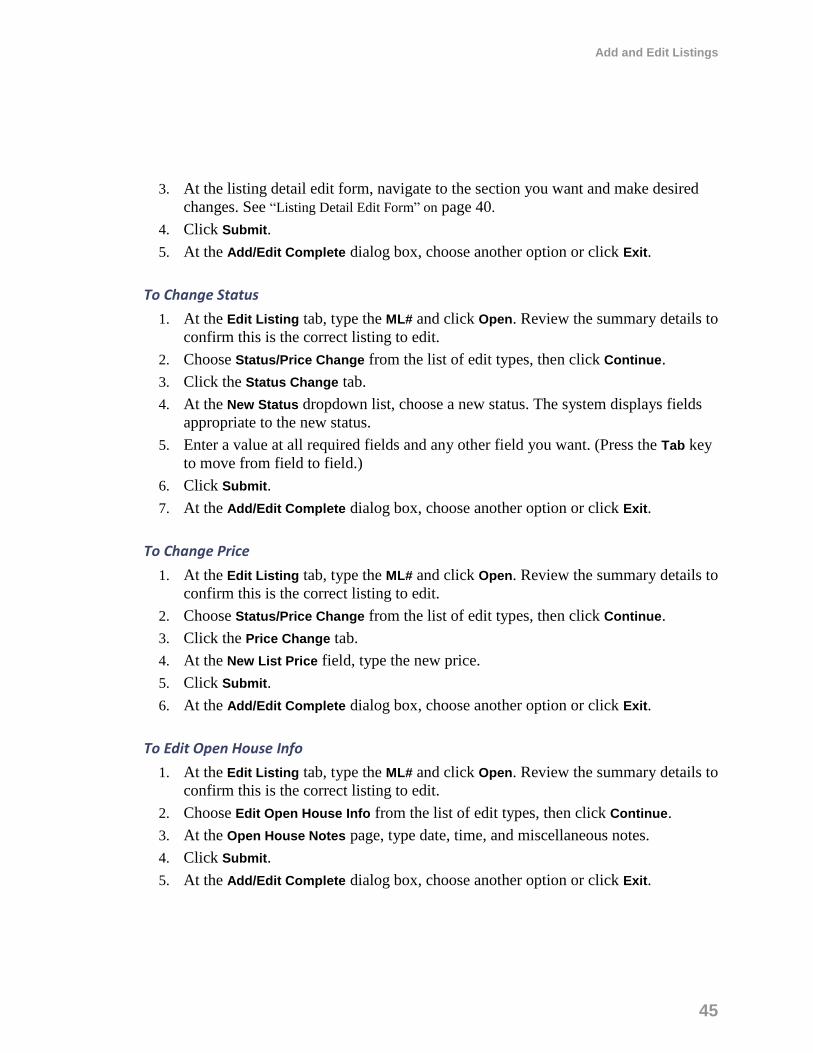
3. At the listing detail edit form, navigate to the section you want and make desired
changes. See “Listing Detail Edit Form” on page 40.
4. Click Submit.
5. At the Add/Edit Complete dialog box, choose another option or click Exit.
To Change Status
1. At the Edit Listing tab, type the ML# and click Open. Review the summary details to
confirm this is the correct listing to edit.
2. Choose Status/Price Change from the list of edit types, then click Continue.
3. Click the Status Change tab.
4. At the New Status dropdown list, choose a new status. The system displays fields
appropriate to the new status.
5. Enter a value at all required fields and any other field you want. (Press the Tab key
to move from field to field.)
6. Click Submit.
7. At the Add/Edit Complete dialog box, choose another option or click Exit.
To Change Price
1. At the Edit Listing tab, type the ML# and click Open. Review the summary details to
confirm this is the correct listing to edit.
2. Choose Status/Price Change from the list of edit types, then click Continue.
3. Click the Price Change tab.
4. At the New List Price field, type the new price.
5. Click Submit.
6. At the Add/Edit Complete dialog box, choose another option or click Exit.
To Edit Open House Info
1. At the Edit Listing tab, type the ML# and click Open. Review the summary details to
confirm this is the correct listing to edit.
2. Choose Edit Open House Info from the list of edit types, then click Continue.
3. At the Open House Notes page, type date, time, and miscellaneous notes.
4. Click Submit.
5. At the Add/Edit Complete dialog box, choose another option or click Exit.
Using Stratus MLS
46
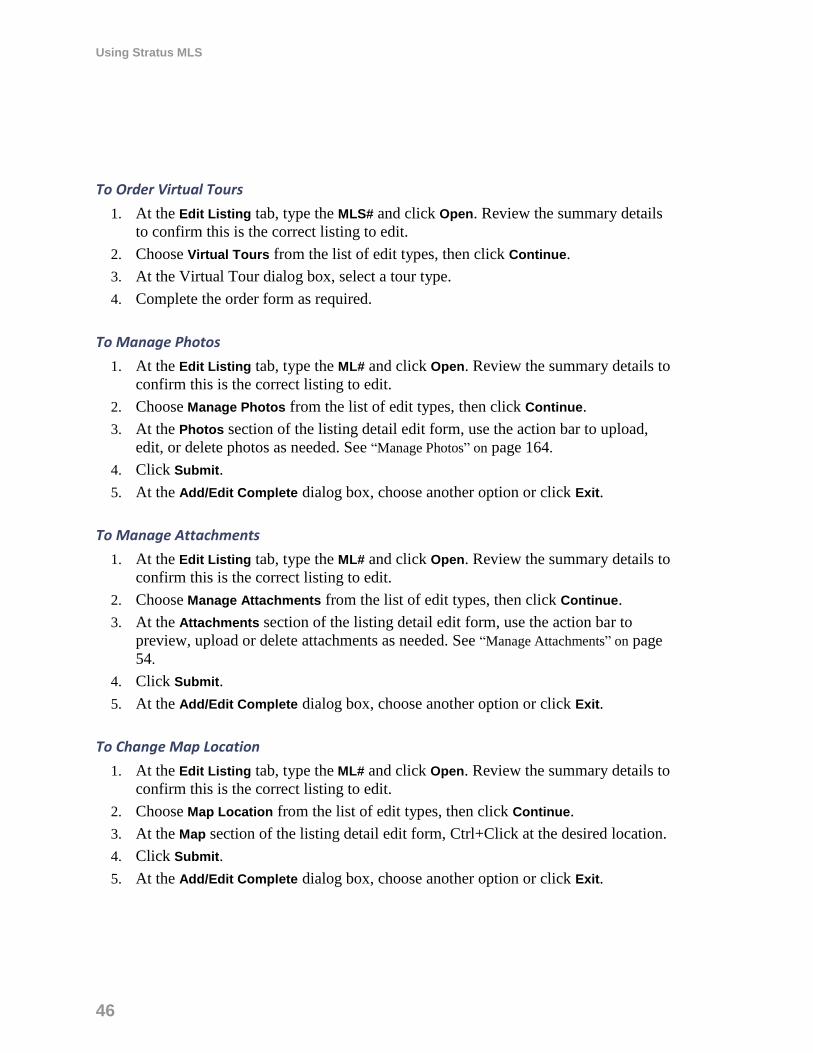
To Order Virtual Tours
1. At the Edit Listing tab, type the MLS# and click Open. Review the summary details
to confirm this is the correct listing to edit.
2. Choose Virtual Tours from the list of edit types, then click Continue.
3. At the Virtual Tour dialog box, select a tour type.
4. Complete the order form as required.
To Manage Photos
1. At the Edit Listing tab, type the ML# and click Open. Review the summary details to
confirm this is the correct listing to edit.
2. Choose Manage Photos from the list of edit types, then click Continue.
3. At the Photos section of the listing detail edit form, use the action bar to upload,
edit, or delete photos as needed. See “Manage Photos” on page 164.
4. Click Submit.
5. At the Add/Edit Complete dialog box, choose another option or click Exit.
To Manage Attachments
1. At the Edit Listing tab, type the ML# and click Open. Review the summary details to
confirm this is the correct listing to edit.
2. Choose Manage Attachments from the list of edit types, then click Continue.
3. At the Attachments section of the listing detail edit form, use the action bar to
preview, upload or delete attachments as needed. See “Manage Attachments” on page
54.
4. Click Submit.
5. At the Add/Edit Complete dialog box, choose another option or click Exit.
To Change Map Location
1. At the Edit Listing tab, type the ML# and click Open. Review the summary details to
confirm this is the correct listing to edit.
2. Choose Map Location from the list of edit types, then click Continue.
3. At the Map section of the listing detail edit form, Ctrl+Click at the desired location.
4. Click Submit.
5. At the Add/Edit Complete dialog box, choose another option or click Exit.
Add and Edit Listings
47
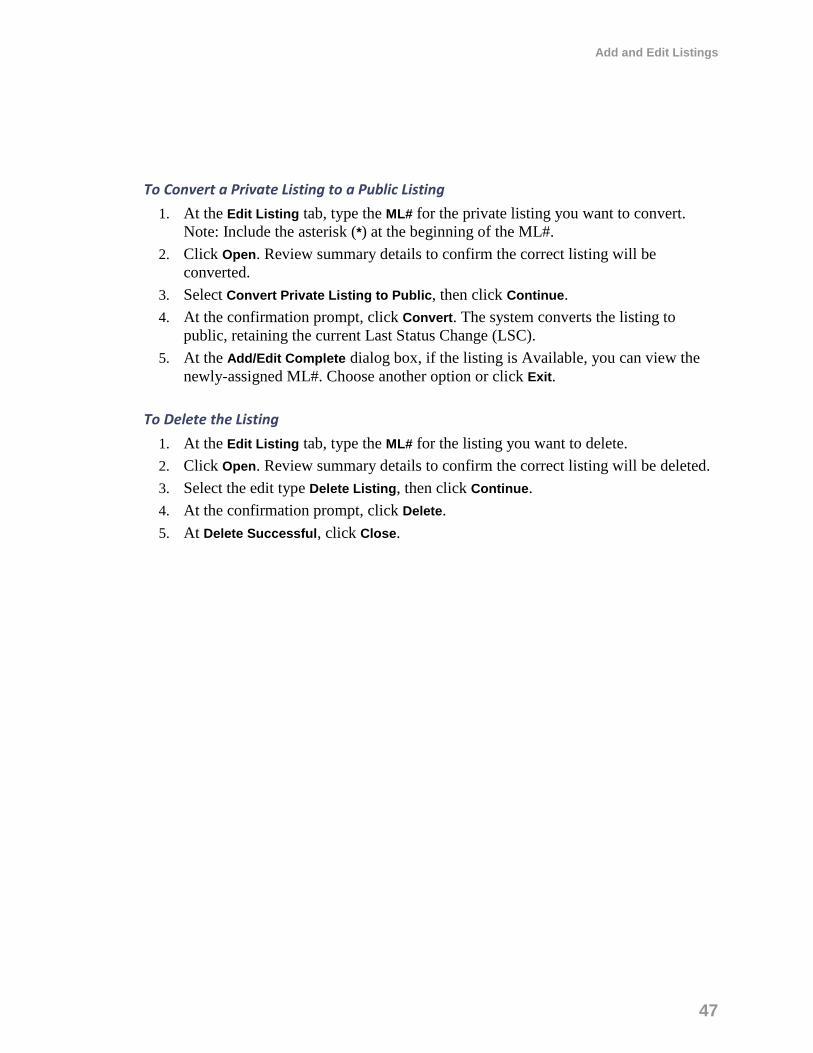
To Convert a Private Listing to a Public Listing
1. At the Edit Listing tab, type the ML# for the private listing you want to convert.
Note: Include the asterisk (*) at the beginning of the ML#.
2. Click Open. Review summary details to confirm the correct listing will be
converted.
3. Select Convert Private Listing to Public, then click Continue.
4. At the confirmation prompt, click Convert. The system converts the listing to
public, retaining the current Last Status Change (LSC).
5. At the Add/Edit Complete dialog box, if the listing is Available, you can view the
newly-assigned ML#. Choose another option or click Exit.
To Delete the Listing
1. At the Edit Listing tab, type the ML# for the listing you want to delete.
2. Click Open. Review summary details to confirm the correct listing will be deleted.
3. Select the edit type Delete Listing, then click Continue.
4. At the confirmation prompt, click Delete.
5. At Delete Successful, click Close.
Using Stratus MLS
48
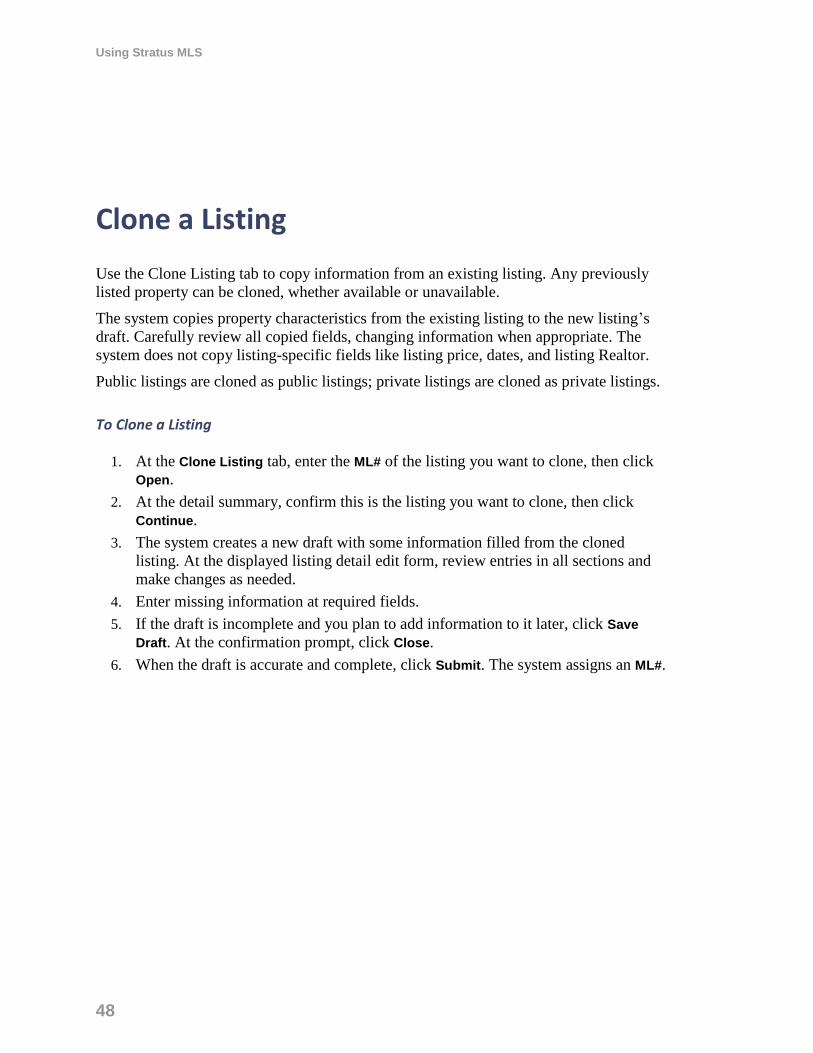
Clone a Listing
Use the Clone Listing tab to copy information from an existing listing. Any previously
listed property can be cloned, whether available or unavailable.
The system copies property characteristics from the existing listing to the new listing’s
draft. Carefully review all copied fields, changing information when appropriate. The
system does not copy listing-specific fields like listing price, dates, and listing Realtor.
Public listings are cloned as public listings; private listings are cloned as private listings.
To Clone a Listing
1. At the Clone Listing tab, enter the ML# of the listing you want to clone, then click
Open.
2. At the detail summary, confirm this is the listing you want to clone, then click
Continue.
3. The system creates a new draft with some information filled from the cloned
listing. At the displayed listing detail edit form, review entries in all sections and
make changes as needed.
4. Enter missing information at required fields.
5. If the draft is incomplete and you plan to add information to it later, click Save
Draft. At the confirmation prompt, click Close.
6. When the draft is accurate and complete, click Submit. The system assigns an ML#.
Add and Edit Listings
49
Convert Private to Public
You can convert private listings to public regardless of whether the listing is Available or
Unavailable. (For example, if the listing is Private Closed the system will convert it to
Public Closed.)
To Convert a Private Listing to Public
1. At the Edit Listing tab, type the ML# for the private listing you want to convert.
Note: Include the asterisk (*) at the beginning of the ML#.
2. Click Open. Review the listing’s summary details to confirm the correct listing will
be converted.
3. Select the edit type Convert Private listing to Public, then click Continue.
4. At the confirmation prompt, click Convert. The system converts the listing to
public, retaining the current Last Status Change (LSC).
5. At the Primary Photo Required dialog box, if displayed, click OK if you will upload
your own photo to avoid a fee.
6. At the Add/Edit Complete dialog box, if the listing is Available, you can view the
newly-assigned ML#.
Using Stratus MLS
50
Manage Photos
While editing a listing at the listing detail edit form, or after choosing Manage Photos at
the Edit menu, you can upload your own photos or pull in available photos at Photo
Library. With the photo work space displayed, you can preview the listing with photos,
add photo descriptions, and move or delete photos. You can also edit and format a
selected photo.
When displayed in the listing and photo gallery, each photo is placed in a rectangular
space in 4:3 aspect ratio (1/3 wider than tall). While photos of any shape can be displayed
within that space, your photos will look best if you ensure they are the same shape as the
space. You may optionally use the Crop tool in the Photo Editor to fit them to the
standard rectangle. See “Edit Photos” on page 166.
Notes:
No photos are visible until at least one is added.
Once you add photos to the work area, a thumbnail photo displays for each,
and the Edit action is available.
Photos that don’t match the standard shape display with an asterisk *, an alert
prompting you to review them.
How . . .
To Manage Photos
1. At the Edit Listing tab, type the ML# and click Open. Review the summary details to
confirm this is the correct listing to edit; OR
At Add/Edit Complete, choose Manage Photos from the list of edit types when
submitting or editing a listing.
2. At the Photos work space, use the action bar to Upload a photo or choose from
Photo Library; and/or Edit, Delete, Preview, or change the order of selected photos
as needed.
3. Click Submit.
4. At the Add/Edit Complete dialog box, choose another option, or click Exit.

Add and Edit Listings
51
To Upload Photos
1. At the Photos work space, click Upload on the action bar.
2. At the Upload Photos dialog box, browse for a photo, type a description, then click
Upload.
To Preview the Listing with Photos
1. At the Photos work space, click Preview on the action bar. The listing (or draft)
displays in detail view. Photos display in the top left corner, and can be navigated
using forward and back arrows.
2. Click Close to close the Preview window.
To Add or Change a Description After Uploading
1. At the Photos work space, click the text box under the photo thumbnail.
2. Type a description.
To Move a Photo
1. At the Photos work space, select the desired photo.
2. While pressing the mouse button, drag the photo to the desired location, midway
between two others.
3. Wait for space to open, then release the mouse button to drop the photo at the new
location.
4. Drag and drop additional photos as needed.
To Delete a Photo
1. At the Photos work space, select the desired photo.
2. Click Delete on the action bar.
3. At the confirmation prompt, confirm the deletion.
To Edit a Photo
1. At the Photos work space, select the desired photo.
2. Click Edit on the action bar.
3. Optionally enhance the photo. See “Edit Photos” on page 166.
4. Click Save when changes are complete.

Using Stratus MLS
52
Edit Photos
Use the Edit Photo dialog box - available from the Edit action at the Photos tab during
listing Add/Edit - to enhance a listing’s photos. You can make a photo darker or brighter;
change its contrast; or rotate, re-size, crop, or delete it.
Use navigation arrows to move between photos, and the delete button to delete the photo.
Note:
While maximizing resolution, the system automatically reduces the file size of
each of your uploaded photos to a maximum set by your MLS. However, the
system does not crop or change your photo’s aspect ratio. Instead, the system
allows you to upload a photo cropped to a non-standard shape, which you may
prefer, for example, when displaying a small detail. You can, if desired,
quickly crop photos of non-standard shape to better fit the space allowed: 1/3
wider than their height. (See “To Crop a Photo,” below. )
How . . .
To Change Brightness
To darken the overall photo, click the Darken action at Edit Photo. To continue
darkening, repeat the action as needed.
To lighten the overall photo, click the Lighten action at Edit Photo. To continue
lightening, repeat the action as needed.
To Change Contrast
To decrease the contrast between the photo’s light and dark colors, click the - Contrast
action. To continue decreasing contrast, repeat the action as needed.
To increase the contrast between the photo’s light and dark colors, click the + Contrast
action. To continue increasing contrast, repeat the action as needed.

Add and Edit Listings
53
To Rotate a Photo
To rotate a photo counterclockwise 90°, click the - Rotate action. To continue rotating in
the same direction, repeat the action as needed.
To rotate a photo clockwise 90°, click the + Rotate action. To continue rotating in the
same direction, repeat the action as needed.
To Crop a Photo
When you upload a listing photo, the system retains its original aspect ratio. However,
your photos will be shown in spaces that are rectangular — 1/3 wider than tall. While
photos of any shape can be displayed within that space, you can maximize their
appearance by ensuring they are the same shape as the space. You may optionally use the
Crop tool to fit them to the standard rectangle, with an aspect ratio of 4:3.
If the system determines that a photo’s aspect ratio differs significantly from the standard
4:3, an asterisk displays on the photo thumbnail. To crop a photo to standard dimensions,
use the Crop action on the Photo Edit dialog box.
The Crop action applies to the photo currently displayed in the Edit Photo dialog box.
The action toggles on and off. To enable cropping, click the Crop action. To exit
cropping, click Crop again, or click Cancel.
When you enable cropping, the system grays out any portion of the photo that must be
removed in order to match standard dimensions. Drag a corner handle in either direction.
While you drag, the system constrains the photo to the correct aspect ratio. To complete
the crop, click the Apply button. The system removes the grayed out portion and displays
the cropped version of the photo.
Review the cropped photo. To permanently save the change and close the Edit Photo
dialog box, click Save.
To Navigate Through Photos
To view more photos and move between them, use the Previous and Next actions that
display as green arrows.
To Delete a Photo
To delete the photo currently displayed in the Photo Edit dialog box, use the Delete
action.
Using Stratus MLS
54
Manage Attachments
While editing a listing at the listing detail edit form, or after choosing Manage
Attachments at the Edit menu, you can upload attachments and preview, describe, and
delete them. The system provides a dropdown list of available attachment types.
Once you upload attachments to the work space, a pdf thumbnail displays for each.
Click to open the attachment.
The system automatically saves changes at the attachment work area.
To select an attachment before deleting, click its checkbox.
Note:
Maximum file size may be restricted by the MLS.
How . . .
To Manage Attachments
1. At the Edit Listing tab, type the ML# and click Open. Review summary details to
confirm this is the correct listing to edit.
2. Choose Manage Attachments from the list of edit types, then click Continue.
3. At the Attachments work space, use attachment actions available on the action bar,
including preview, upload, and delete; you can also change the order of
attachments as needed.
4. Click Submit.
5. At the Add/Edit Complete dialog box, choose another option or click Exit.
To Upload Attachments
1. At the Attachments work space, click Upload.
2. At the Upload Attachments dialog box, browse for a file to attach, type or choose a
description from the dropdown list, then click Upload.
3. Click Submit.
4. At the Add/Edit Complete dialog box, choose another option or click Exit.
Add and Edit Listings
55
To Preview a Listing’s Attachments
1. At the Attachments work space, click Preview. The listing (or draft) displays at the
Details page.
2. Double click an attachment to view it in Adobe Reader, then close the Reader
window.
3. Click Close to close the Preview window.
To Add or Change an Attachment Type
1. At the Attachments work space, click the text box under the attachment thumbnail.
2. Choose a type from the dropdown list.
To Delete Attachments
1. At the Attachments work space, click the desired attachment’s checkbox to select
it.
2. Click Delete.
3. At the confirmation prompt, confirm the deletion.
Using Stratus MLS
56
Manage Map Location
While editing a listing at the listing detail edit form, or after choosing Map Location at
the Edit menu, you can add or change latitude and longitude values for a listed property.
To change the map location of the property, hold the control key and click the desired
location on the map below.
Zoom in or out as needed using the zoom controls on the map. You can also double-click
the map to simultaneously zoom in and center the map on the clicked point. Click and
drag to move the map. See “Work with Mapped Listings” on page 93.
You can set Map Location at Add Listing or Edit Listing. The procedure below is for Edit
Listing.
To Edit the Listing’s Map Location
1. At the Edit Listing tab, type the ML# and click Open. Review summary details to
confirm this is the correct listing to edit.
2. Choose Map Location from the list of edit types, then click Continue.
3. At the Map work space, Ctrl+Click at the desired location.
4. Click Submit.
5. At the Add/Edit Complete dialog box, choose another option or click Exit.
Add and Edit Listings
57
About Status and Price Changes
At Edit Listing, the edit type Status/Price Change allows you to update a listing’s contract
status and price. Once you click Confirm at Edit Listing, the screen shows two tabs: See
“Performing Status Changes” on page 59 and “Performing Price Changes” on page 60.
Both types of changes are tracked in History. The listing displays its contract status at the
Last Status Change (LSC) field.
You can change the contract status of your own offices’ listings with Status
Change: UC, PBA, BOM, CL, W/R, and RE.
You can change the listing price of your own offices’ listings with Price Change:
PC.
Other changes to LSC are made by the system. When you submit a new listing, the
system automatically sets LSC to NEW. When the listing’s expiration date is reached
without an extension, the system sets LSC to EXP (Expired).
To start a status or price change, choose Status/Price Change from the Edit Type list.
Note:
The system allows you to make only those status changes appropriate for the
listing’s Class and LSC.
Use the Status Change Option to Change:
UC - Under Contract
PBA - Pending Bank Approval (for Short Sales)
BOM - Back on Market
CL - Closed
W/R - Withdrawn/Released
RE - Rented
Use Price Change to Change:
PC - Price Change

Using Stratus MLS
58
Use Edit Listing Details to Change:
EXT - Extended (by changing the expiration date)
Modify Property Characteristics, remarks, and so forth
Open Houses
Automatic System Changes:
NEW - Listing with no contract changes
EXP - Expired
Add and Edit Listings
59
Performing Status Changes
You can change the contract status of your office’s listings with Status Change. The
system tracks status changes in History, and displays each listing’s contract status at the
Last Status Change (LSC) field.
Status changes depend on rules set by the MLS, and are affected by Class and LSC.
See”About Status and Price Changes” on page 57.
To Perform a Status Change
1. At the Add/Edit menu click Edit Listing.
2. At the Edit Listing tab, type the ML# then click Open. Review summary details to
confirm this is the correct listing to edit.
3. At the Edit Type list, choose Status/Price Change, then click Continue.
4. At the Status/Price Change page click the Status Change tab.
5. The page shows the listing’s Current Status. At New Status, select a status from the
dropdown list.
6. Enter information at all required fields.
7. Click Submit.
Using Stratus MLS
60
Performing Price Changes
You can change the price of your office’ss listings with Price Change. The system tracks
price changes in History. See “About Status and Price Changes” on page 57.
If the listing is not a Price Range listing, the Current List Price field displays.
Update the value at New List Price.
If the listing is a Price Range listing, the Current Low List Price and Current High
List Price fields display. Update the value at New Low List Price and/or at New
High List Price.
To Perform a Price Change
1. At the Add/Edit menu click Edit Listing.
2. At the Edit Listing tab, type the ML# and click Open. Review summary details to
confirm this is the correct listing to edit.
3. At the Edit Type list, choose Status/Price Change then click Continue.
4. At the Status/Price Change page click the Price Change tab.
5. The page shows the listing’s current price. At New Price, enter a new price.
6. Click Submit.

Search Listings
61
Search Listings
Using Stratus MLS
62
About Listing Searches
Search finds listings of any status, in any class, by any search criteria you choose. You
can search across classes and find available and/or unavailable listings. You can also
specify that the listings should be public, private, or both.
The system offers a number of ways to search; allows you to save and share search
criteria; and collect, map, and work with results.
As needed, enter or select criteria for any field displayed. You can add more fields to the
search form from the Other Fields dropdown list.
General Notes on Searches To help avoid performance problems over the Internet, the system limits the number of
listings displayed in Search Results. Although a search may produce more than it can
show, for all searches except Map Search and New search with a shape, listings are
limited to a number determined by the MLS.
Use sufficient criteria to insure that your search finds fewer than the maximum number of
listings. Before you submit the search, check the counter at the Criteria page to see the
number of listings the search will find.
You can stop a search by clicking the browser’s Stop button.
Choose a Search Type New Searches Search forms present a set of commonly-searched fields. Available search
forms for a single class include Quick Search and Flex Search forms; search forms for
more than one class are limited to Flex Search.
Pre-defined Searches Provides search forms for the most common, requiring minimal data
entry.
Saved Searches Provides a selection of your own saved searches, as well as those shared
by others in your office. When selected, the saved search opens, showing all saved
criteria.
Map Searches Allows you to locate listings on a map, optionally starting with a saved
shape or location. Listings show as colored markers in the geographic location that you
either define in criteria or draw on the map, and in a list below the map.
Search Listings
63
MLS# Searches Allows you to search for particular listings.
Searches and Search Results Listing searches have two basic components: search criteria and search results.
Search criteria may be entered in search fields or located dynamically on a map.
Save and share a search as desired.
Search results may be viewed in three different modes: Search Results list (List),
Detail View (View), and Map.
Search Criteria Using one of the five search types, designate your location by entering field criteria at the
search form, or draw a shape or location on the map page. Complete criteria entry. The
number of search fields entered affects the number of listings found; you can view a
dynamic count before submitting your search.
Search Results and Actions Once your search finds matches, you may display and explore the matching listings at
List, View, or Map pages.
Standard actions for all three pages include List, View, Map, Photos, Slide Shows,
Virtual Tours, Attachments, Statistics, and Directions. Actions also allow you to narrow
the list, revise criteria, add listings to a cart, add to Favorites, print, send e-mail, and get
help.
Search Results (List)
If you enter criteria in search fields, results display at the Search Results (List) page. You
can sort, print, and download the list, or a narrowed version of the list, and change the
list’s columns. From list mode you can switch to Viewor Map mode, and choose any of
the actions listed above.
Detail View (View)
The Detail View (View) page displays detail forms for listings that you selected at List or
Map pages. Detail forms can be in one-per-page format or multiple-per-page format.
From the Viewpage you can switch to List or Map, and choose any of the actions
mentioned above.
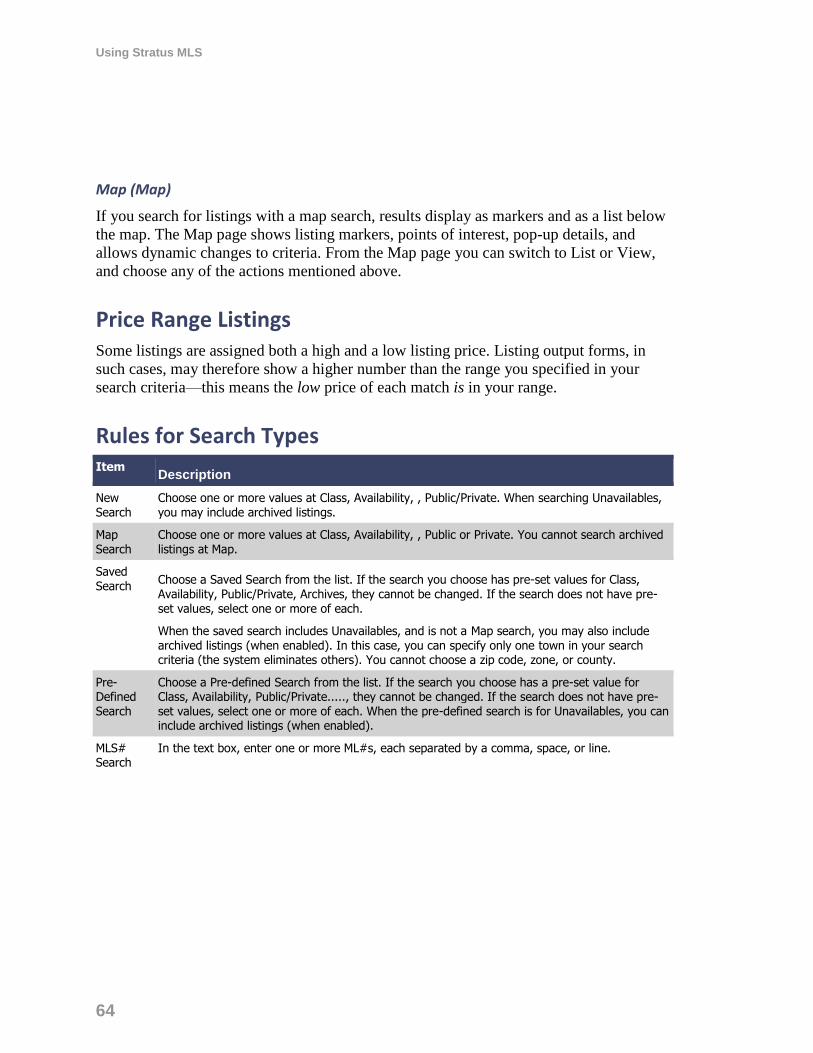
Using Stratus MLS
64
Map (Map)
If you search for listings with a map search, results display as markers and as a list below
the map. The Map page shows listing markers, points of interest, pop-up details, and
allows dynamic changes to criteria. From the Map page you can switch to List or View,
and choose any of the actions mentioned above.
Price Range Listings Some listings are assigned both a high and a low listing price. Listing output forms, in
such cases, may therefore show a higher number than the range you specified in your
search criteria—this means the low price of each match is in your range.
Rules for Search Types Item
Description
New Search
Choose one or more values at Class, Availability, , Public/Private. When searching Unavailables, you may include archived listings.
Map Search
Choose one or more values at Class, Availability, , Public or Private. You cannot search archived listings at Map.
Saved Search
Choose a Saved Search from the list. If the search you choose has pre-set values for Class, Availability, Public/Private, Archives, they cannot be changed. If the search does not have pre-set values, select one or more of each.
When the saved search includes Unavailables, and is not a Map search, you may also include archived listings (when enabled). In this case, you can specify only one town in your search criteria (the system eliminates others). You cannot choose a zip code, zone, or county.
Pre-Defined Search
Choose a Pre-defined Search from the list. If the search you choose has a pre-set value for Class, Availability, Public/Private....., they cannot be changed. If the search does not have pre-set values, select one or more of each. When the pre-defined search is for Unavailables, you can include archived listings (when enabled).
MLS# Search
In the text box, enter one or more ML#s, each separated by a comma, space, or line.
Search Listings
65
Ways to Search Listings
A number of ways to find listings are available. Some are easier for newcomers, while
others demand more familiarity with the system’s listing fields.
To choose a search type, click one of the tabs provided at the New Search page.
New Search At New Search you have two distinctly different ways to perform a search, through
selection of search forms: Quick Search and Flex Search. Select the one you want from
the Search Form dropdown list.
Quick Search
The Quick Search form is suitable for commonly-searched fields for each listing
class. Enter (or select) criteria for any search field displayed, and add more fields
as needed.
Flex Search
The Flex Search form offers a customized search for users familiar with the names
of the search fields. After designating a search location, create your own search
form by adding any field from a single, alphabetized dropdown list. The system
displays your search criteria as you build it.
Note:
Your latest choice of search form becomes the default for future searches, but you can
change search forms at any time.
Using Stratus MLS
66
Pre-Defined Search Pre-defined searches require minimal data entry, offering a shortcut to the most common
searches.
Saved Search Saved searches include those you have created and saved yourself, as well as those
shared by your office. By choosing a saved search you can immediately view search
results, or make modifications in criteria before you submit.
Prospect Search Prospect searches allow you to create a new prospect profile and enter her criteria, run a
search for a saved prospect, manage a prospect’s profile and criteria, extend an expiring
prospect match, and Delete a prospect.
Map Search Interactive Map searches offer points of interest, drawn boundaries, and zoom levels to
locate properties. Listings display as markers, with mouse-over pop-up detail. A dynamic
criteria panel allows quick changes in price, address, and other criteria. In road, aerial,
and birds-eye views, mapped results automatically update as you zoom or pan to a
precise location.
MLS# Search MLS# searches are a quick way to retrieve listings when you know the desired MLS
numbers.
Search Listings
67
Search Across Classes
Search fields are customized for each class. Differences may be in the kind of search
control (for example, dropdown list, text box, and so forth); the difference may also be
listed in the options at a particular field.
The system combines the search fields for selected classes in a meaningful way. Some
fields require special attention:
When options in a dropdown list vary between classes (as do, for example, Style
options), the system combines options from all the chosen classes into a single list.
In such cases, either avoid choosing an option for the particular field, or choose an
option that applies to all selected classes.
When a field offers dropdown options for one class and a text box for another
class, the system offers the search field in the form of a text box. Choose Starts/w
from the drop-down list and enter the first few characters of the value.
Using Stratus MLS
68
Search Archived Listings
Listings that are off the market for a long period of time are archived. The time period is
specified by the MLS. With the exception of Map searches, archived listings can be
included in searches for Unavailable listings.
If you choose to include archived listings in a search, you can specify only one town in
your criteria. You cannot choose a zone, zip code, or county.
When a saved search includes archived listings, and its criteria is pre-set with more than
one town, the system eliminates all but one in your search criteria.
Check with the MLS for the schedule that the system uses for archiving listings of each
status.
To Search Archived Listings
If your search allows, select the Include Archived Listings checkbox along with other
basic criteria, then proceed with your search as usual.
Search Listings
69
Dynamic Criteria Panel
The dynamic criteria panel (DCP) lets you add and revise criteria while viewing search
results at Map or List, and is a quick and powerful alternative to the Revise Criteria
button. You can show or hide the dynamic criteria panel as needed. When opened, the
panel is positioned at the right side of a Map or List.
Use the criteria panel to add, remove, or revise criteria. Use the Other Fields dropdown
list to add fields to the panel. The system updates search results after each change you
make; if you prefer not to see property markers on the maps, select the Hide checkbox in
the dynamic criteria panel.
Once opened, the dynamic criteria panel remains open until you close it.
The panel automatically opens when you run a map search - or any other search that
includes a drawn shape - and the panel’s “Map Search” checkbox is automatically
selected. Although the panel is automatically closed at List, you can open the panel if
needed. When opened at List, the “Map Search” checkbox is unselected.
Note:
When viewing Favorites or Listing Cart while at List or Map, the dynamic
criteria panel is not available.
How . . .
Use the Map Search Checkbox
At the top of the dynamic criteria panel, a checkbox labeled “Map Search” controls
whether or not a map offers a full map search that updates automatically as you change
the map, shape, or criteria; or a fixed set of mapped results. By selecting and clearing the
Map Search checkbox you can switch between a searchable map and one that, even when
zoomed or dragged, does not change the current set of mapped listings.
When you select Map Search, you enable a full map search. The system removes
the following fields from the dynamic criteria panel: Town, Zip, Zone, County, and
ML#. To define or change a location you must drag, zoom, or draw a map shape.
Using Stratus MLS
70
All changes trigger an automatic re-run of the search. Updated results are
immediately reflected in the map frame and in the results list below.
When you clear Map Search, the set of mapped results remains fixed. The system
restores Town, Zip, Zone, County, and ML# fields. If, however, you attempt to
draw shapes, the system prompts you to enable Map Search.
Whether the dynamic criteria panel is open or closed, the current state of the Map Search
checkbox remains the same. If the Map Search checkbox is selected before you close the
criteria panel, it remains selected when you close the panel.
Notes:
When you start a Map Search at the Search Type page, search results display at
Map. The dynamic criteria panel automatically opens with Map Search
selected, so a full map search is enabled.
When you start a New Search at the Search Type page and define the location
by field (Town, Zip, Zone, County, ML#), results display at List. The dynamic
criteria panel automatically closes with the Map Search checkbox cleared.
Without leaving List, you can open the dynamic criteria panel and change
criteria to update the results list. To see those changes at Map, click Map at the
action bar. In this case, at Map, the dynamic criteria panel is closed by default,
and the Map Search checkbox remains cleared.
o To enable a full map search at Map, open the dynamic criteria panel and select
Map Search.
o To work instead with a fixed set of mapped properties at Map (without enabling a
full map search) leave the Map Search checkbox deselected.
When you start a New Search at the Search Type page and define the location
by shape (polygon or radius), results display at Map. The dynamic criteria panel
automatically opens with Map Search selected, enabling a full map search.
To Hide Map Markers
At the top of the dynamic criteria panel, a checkbox labeled “Hide Listings” controls
whether or not listing markers display on the Map along with search results below. When
selected, Hide Listings prevents markers and results from showing, even when the Map
Search checkbox is selected at the criteria panel.
Search Listings
71
Note:
Hide Listings does not prevent searches from being run with every change to the
map or criteria when the Map Search checkbox is selected; Hide Listings merely
suppresses the display of markers and results.
1. View the map with markers displayed.
2. Click Hide Listings at the dynamic criteria panel. The markers and results are
hidden from view.
3. Clear the Hide Listings checkbox to show the listings.
To Open and Close the Dynamic Criteria Panel
To open the dynamic criteria panel, if it is not already open, click the down arrow at
the top right side of List’s control bar. (Find the arrow next to the Revise Criteria button.)
To close the dynamic criteria panel, click the up arrow to the right of the panel’s title.
To Conserve Display Space for the Map and Dynamic Criteria Panel
If the display on your screen is too crowded to simultaneously display the left-side menu,
map, and dynamic criteria panel, the system automatically closes the left menu and opens
the top menu to allow room for the map and dynamic criteria panel.
To close the dynamic criteria panel, click the up arrow to the right of the panel’s title.
To re-open the left menu, click the down arrow at the left side of the horizontal menu
bar.
To Preview Search Results at the Dynamic Criteria Panel
Just as you can preview criteria at the Criteria page, you can preview criteria at the
dynamic criteria panel. The panel has its own small action bar.
To preview search results, click Preview on the action bar. Preview shows a summary of
the search criteria in the form of search statements. If the criteria is valid, you can see
how each search statement reduces the count of results the search will find.
To Save the Updated Search
Just as you can save a search at the Criteria page, you can save a search at the dynamic
criteria panel. The panel has its own small action bar.
Using Stratus MLS
72
To save a search, click Save Search on the action bar, enter a name, and click Save.
To save changes to a previously-saved search, click Save Search on the action bar. Then
save the changed search with a new name: Click Save As, enter a name, and click Save.
To Save a New Prospect Search
You can save a prospect search at the dynamic criteria panel. The panel has its own small
action bar.
To save a prospect search, click Prospect on the action bar. At the Create Prospect dialog
box, fill in the fields and click Save Prospect.
The new Prospect is now available from the Search Type page, and is visible at Contacts.
To Clear Criteria in the Dynamic Criteria Panel
Just as you can clear Criteria at the Criteria page, you can clear criteria at the dynamic
criteria panel. The panel has its own small action bar.
To clear criteria, click Clear on the action bar.

Enter Search Criteria
73
Enter Search Criteria
Using Stratus MLS
74
About Search Criteria
Use the Criteria page - from a search tab or the Revise Criteria button at search results -
to choose characteristics for the listings you want to find.
First choose a Search Form from the dropdown list. For example, at a New search for
residential available listings, the Search Form options are Quick Search and Flex Search.
At each desired field, enter a full or partial value or choose one or more values from a
dropdown list. To add more fields, choose them at the Other Fields dropdown list. After
submitting your criteria, the results list (List) page shows results that match your criteria.
If there is only one match, the system opens the listing at View.
Selecting the Location - Mandatory All listing searches except MLS# Search require that you select a location before you
submit criteria.
To choose a location by field: select towns, zipcodes, zones, counties from the
dropdown lists on the Criteria page. When you select the location by field, search
results display at the Results List (List) page.
To choose a location by drawing a map See “Work With Criteria” on page 75. When
you draw the location by shape, search results display at the Map page.
Enter Search Criteria
75
Work With Criteria
When performing New Search, Saved Searches, and Pre-Defined Searches, you must
choose characteristics for the listings you want to find. Enter or select search criteria at
the Criteria page, where a search form displays.
When you have clicked Continue after beginning your search and entering basic criteria,
a suitable search form displays. You can change the search form, except in the case of
cross-class searches.
The field types included on a search form vary. They include:
Multi-Select and Dropdown Lists where you select one or more options (for
example, Town), or exclude options with the Not checkbox.
Min/Max fields where you type a range of values (for example, List Price from
500000 to 600000).
Text fields where you enter all or part of the search text you want (for example,
Street Name), or exclude options with the Not checkbox.
Multi-Select Checkboxes (for example, Features).
Not Criteria “Not” checkboxes are available in drop-down lists and text boxes. The checkbox doesn’t
display if a field is numeric, currency, identifier (such as ML#) or date/timestamp (such
as expiration date).
When you select the Not checkbox, the search criteria you select is excluded from the
search results. For example, if the selection at Style is “Contemporary” and the Not
checkbox is selected, the search finds listings for all Styles except Contemporary.
How . . .
To Choose a Search Form
1. At the Search Form dropdown list, choose the form you want:
Quick Search: To search by the characteristics relevant to your basic criteria
choices, use the Quick Search form. Enter or select values at any field; add more
fields as needed from the Other Fields dropdown list.
Using Stratus MLS
76
Flex Search: To customize a form, use the Flex Search form. In order to build a
search, choose more fields from the Other Fields dropdown list.
Pre-Defined: Available for Pre-Defined searches. These search forms have a
limited number of fields relevant to the chosen search.
2. Enter criteria.
To Define the Location by Field or Map Shape
For all searches except MLS# Search, you must define a location before you submit your
criteria. You can define locations two ways: by selecting Town, Zip, Zone, County fields
at the Criteria form; or by drawing a polygon or radius at Map.
You must choose either geographic fields at the criteria form or a map shape at Map.
You cannot use both methods to define a location.
You can switch back and forth between the Criteria and Map actions, and submit the
search at either page.
By Field, at the Criteria Form
Choose Towns, Zips, Zones, Counties from the dropdown lists. You must make a
selection from these fields unless you plan to draw the location at the Criteria
page’s Map tab. When you choose a value from more than one geographic field
(for example, two Towns and a Zone), search results include properties in all the
selected locations. This allows you to search properties in a particular zone along
with bordering towns.
By Shape, at Map
Start at the Criteria page, then click Map on the action bar. The map displayed is
limited to drawing a shape, and optionally submit the search without returning to
the Criteria form. You can move the map, zoom in and out, and draw a polygon or
radius around the region you want. You can also save the shape for later use, clear
the shape, choose a saved shape from the Used Saved Shape dropdown list, and
choose from Places (points of interest) or address locations.
If you use Map to define and submit the location by drawing a shape, the system
displays search results at the Map page instead of the search results list (List).
Enter Search Criteria
77
To Enter Criteria at Various Field Types
Select an option at dropdown lists (for example, Street Name starts w/) then enter
all or part of a text value. To enter more than one text value, click the Or button. To
exclude options, click the Not checkbox.
Select one or more options at multi-select lists (for example, Style) or exclude
options with the Not checkbox. To choose more than one option, Ctrl+Click each
one you want.
Select one or more checkboxes at multi-select checkboxes.
Type a range of values at Min/Max fields (for example, Baths from 2 to 3).
To Exclude Values with NOT
1. Click the Not checkbox at the desired field.
2. Select or enter the value(s) you want to exclude from results.
To Clear Criteria
To clear field criteria, click Clear on the action bar.
Note:
To clear a map shape, switch to Map, then click Clear on the action bar.
To Add More Fields to the Search Form
1. Click the Other Fields dropdown list at the bottom of the search form.
2. Select a field.
3. Choose or enter criteria as needed.
To Count Results On the Fly
As you enter criteria, a counter on the action bar dynamically updates the number
of results.
Using Stratus MLS
78
To Preview the Search
1. Enter desired search criteria.
2. Click Preview on the action bar.
3. At the criteria summary, review how each search statement reduces the number of
results the search will find.
4. Click Close to return to the Search Criteria page.
To Save and Share the Search
1. Click Save Search on the action bar.
2. Enter a name, and click Save.
To save changes to a previously-saved search, click Save Search on the action bar,
then click Save As, enter a name, and click Save.
To save a copy of another owner’s search with changes, click Save Search on the
action bar, then click Save As and name the search. Search assigns you ownership
of the new copy.
To Submit the Search
1. At Criteria or Map, click Submit after entering field criteria or drawing a map
shape.
New, Saved, Pre-Defined, and MLS# Search Results display at the List page; they
display at the Map page if you drew a shape at Map.
Map search results display at the Map page.

Results List
79
Results List
Using Stratus MLS
80
About Search Results
Use the Results (List) page - after submitting search criteria - to view search results in a
simple one line format called a column set. By default, results open in the column set
appropriate for the Class, Availability, and type of search.
You can display all the results in a single scrollable list, or page through them. You can
double click to open detail reports (View) for all or selected results, view a count of the
results, sort by one or more columns, choose or customize a column set, and add results
to your listing cart.
Use the action bar to switch between List, View, and Map. You can also view photos,
slide shows, statistics-and-counts data, get driving directions, narrow or expand the list of
results, flag favorites, print, send, or download the detail views or listing rows, and add
results to your listing cart.
To change your criteria and view immediate results, open the dynamic criteria panel and
make your changes without leaving the Results page. (See “Dynamic Criteria Panel” on page
69.) Alternatively, click Revise Criteria, make your changes, and submit your search
again.
Note:
In order to avoid Internet performance problems, the MLS limits the number of
search results at List.
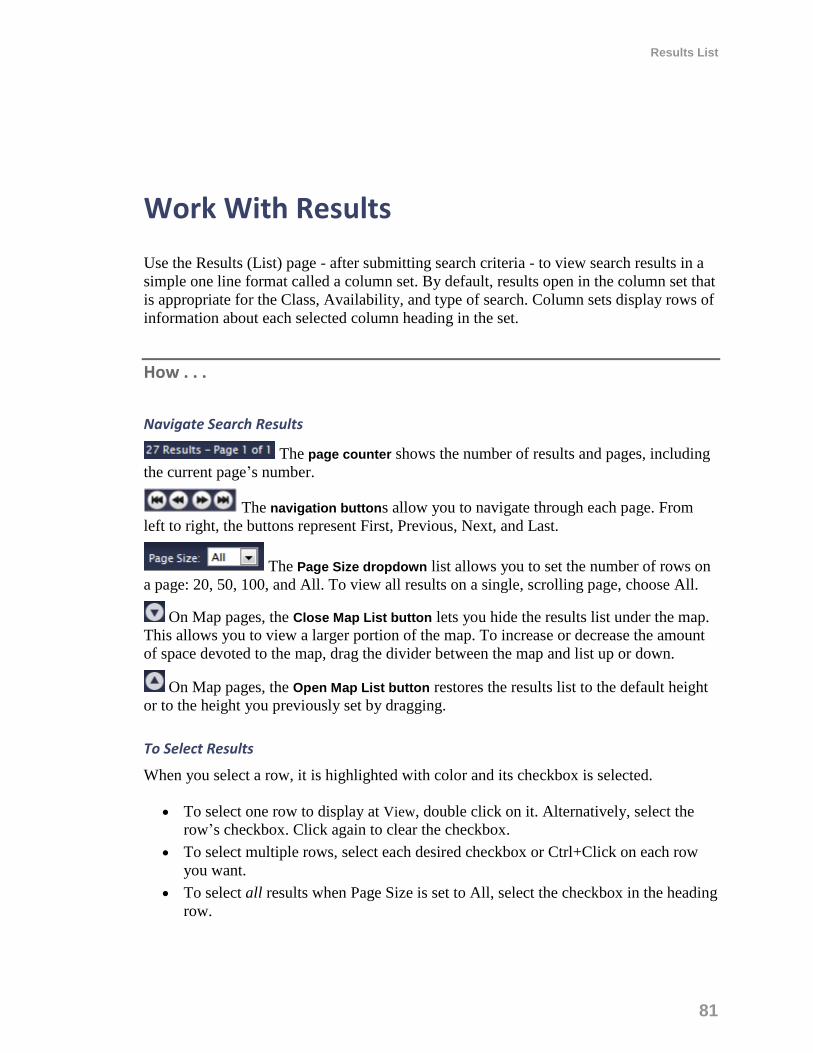
Results List
81
Work With Results
Use the Results (List) page - after submitting search criteria - to view search results in a
simple one line format called a column set. By default, results open in the column set that
is appropriate for the Class, Availability, and type of search. Column sets display rows of
information about each selected column heading in the set.
How . . .
Navigate Search Results
The page counter shows the number of results and pages, including
the current page’s number.
The navigation buttons allow you to navigate through each page. From
left to right, the buttons represent First, Previous, Next, and Last.
The Page Size dropdown list allows you to set the number of rows on
a page: 20, 50, 100, and All. To view all results on a single, scrolling page, choose All.
On Map pages, the Close Map List button lets you hide the results list under the map.
This allows you to view a larger portion of the map. To increase or decrease the amount
of space devoted to the map, drag the divider between the map and list up or down.
On Map pages, the Open Map List button restores the results list to the default height
or to the height you previously set by dragging.
To Select Results
When you select a row, it is highlighted with color and its checkbox is selected.
To select one row to display at View, double click on it. Alternatively, select the
row’s checkbox. Click again to clear the checkbox.
To select multiple rows, select each desired checkbox or Ctrl+Click on each row
you want.
To select all results when Page Size is set to All, select the checkbox in the heading
row.
Using Stratus MLS
82
To select all the results when Page Size is set to 20, 50, or 100, select the checkbox
in the first page’s heading row. A message displays below the column headings.
Click the message’s underlined link (for example, select all 53) in order to choose
all search results on all pages.
To Narrow and Expand the List
1. Select the rows you want to keep.
2. Click Narrow on the action bar. The narrowed list displays.
3. To further reduce results in a narrowed list, repeat steps 1-2.
4. To restore all results after narrowing once, click Expand on the action bar.
5. To return to the original list when you have narrowed more than once, click
Expand repeatedly.
To Add Results to the Listing Cart
At any row, click the Listing Cart icon to add the listing to the listing cart.
To Add Results to Favorites
At any row, click the star to select the item as a favorite.
To Display Detail Reports
To view all or selected results in detail format, click View at the action bar.
To Map the Results
To see all results on the map, click Map at the action bar.
Note:
You can narrow results before mapping them. See “About Mapping Listings” on
page 92.
Results List
83
To View Photos
1. Select properties whose photos you want to see.
2. Click Photos at the action bar to open the photo viewer.
When displaying multiple properties at the photo viewer, the primary photos
display. When displaying one property at the photo viewer, all photos for that
property display.
3. Click a photo to enlarge it. To restore its original size, click again.
4. Click Close to close the photo viewer.
To View Slide Shows
1. Select properties whose slide shows you want to see.
2. Click Slideshow at the action bar to open the slide show viewer.
When displaying a slide show for multiple properties, the primary photo displays
for each. When displaying a slide show for one property, all photos for that
property display.
3. If desired, mouse over the current photo to show navigation arrows. Click right or
left arrows to move to the desired photo or simply click the desired photo
thumbnail.
4. Click Close to close the slide show.
Note:
To see a slide show of the primary photo for multiple properties at View,
choose a form that displays several properties per page (for example, a
thumbnail form).
To View Statistics
To display tables of statistical and count data for all or selected results, click Statistics on
the action bar.
To Choose a Column Set
1. Select a column set from the Columns dropdown list. The dropdown list includes
MLS sets, your custom sets, and sets that others have shared with you.
2. Select a set from the list. The newly-selected set becomes your default, which you
can change any time.
Using Stratus MLS
84
To Sort by a Column
1. Click on a column heading to sort results in ascending order. An upward arrow
indicates ascending order.
2. Click again to reverse the order. A downward arrow indicates descending order.
3. To define a multi-level sort for the column set, if needed, click Customize. See
“Customize a Column Set” on page 245.
To Sort by Multiple Columns
1. Click on a column heading for the broadest category, such as Town.
2. Ctrl+Click another column to sort by a second category, such as Style.
3. If desired, Ctrl+Click another column to sort by a third category, such as LSC.
To Get Driving Directions
1. Choose results in the order that you want to travel.
2. Click Directions on the action bar. The Driving Directions dialog box displays.
3. To move, edit, or remove selected addresses, select the corresponding checkbox
then click a button for the appropriate action.
4. To add another address to the list, click Add.
5. To customize your route, select options for Avoid Traffic, Show Listings on Map,
and Round Trip as needed.
To Edit a Listing
1. Select the listing you want to edit.
2. Click Edit on the action bar.
3. At the Edit dialog box, select the option you want then click Continue. See “Edit a
Listing” on page 44.
To Change Criteria Instantly at the Dynamic Criteria Panel
1. To open the dynamic criteria panel, click the white downward arrow at the far
right of the title bar.
2. Choose or type criteria at any field, or add a field at the Other Fields dropdown
list.
3. To close the open panel, click the white upward arrow at the top of the panel.
To Return to the Criteria Page
Click Revise Criteria on the title bar.

Detail View
85
Detail View
Using Stratus MLS
86
About Detail View
Use the Viewaction - from List or Map - to display the details for all or selected listings.
A detail form can display in one-per-page format (for example Client Full, Flyer) or
multiple-per-page format (for example Comparison, Consumer Thumbnail).
At View you can choose a detail form, page through the listings, select favorites, and
more.
To switch from View to List or Map, use the action bar. At the action bar you can view
photos and slide shows, get directions, and add to your listing cart. You can return to the
Criteria page to revise your criteria and re-submit your search. You can access the
listing’s history, edit the listing, and more.
Note:
If you choose the View action without first selecting results at List, Map, or
Photos, the Detail View page displays the first of all the listings. Use the
navigation buttons to page through the listings.
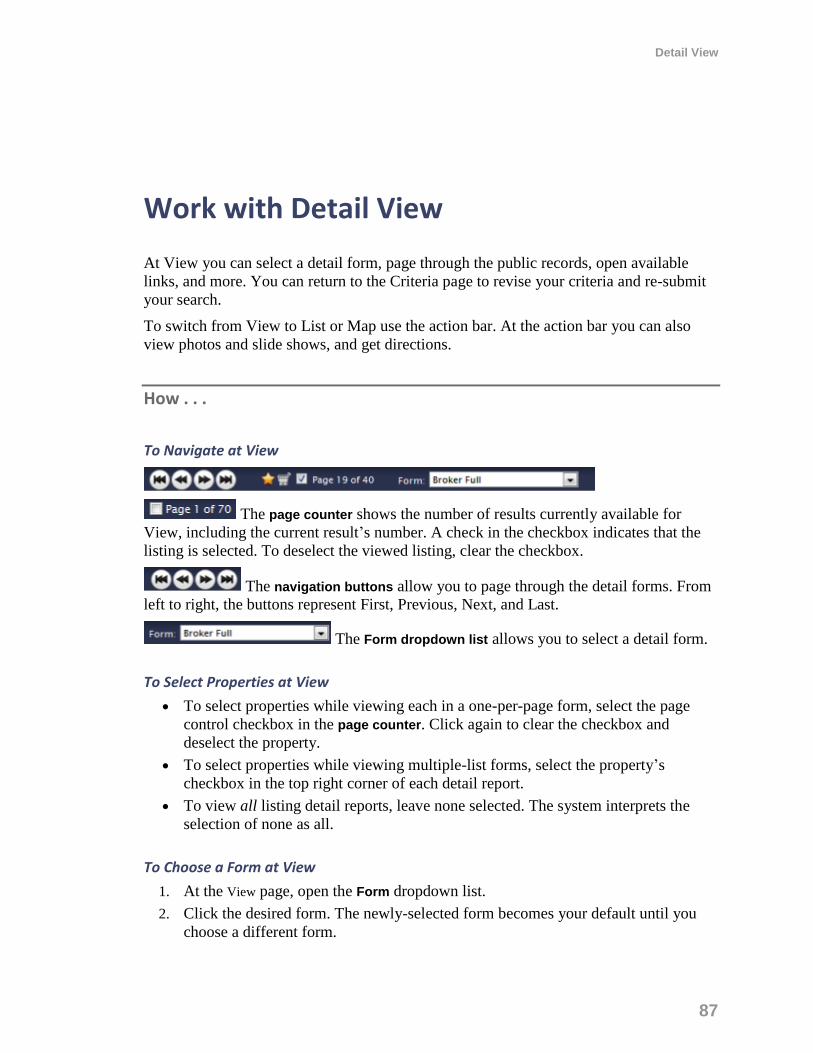
Detail View
87
Work with Detail View
At View you can select a detail form, page through the public records, open available
links, and more. You can return to the Criteria page to revise your criteria and re-submit
your search.
To switch from View to List or Map use the action bar. At the action bar you can also
view photos and slide shows, and get directions.
How . . .
To Navigate at View
The page counter shows the number of results currently available for
View, including the current result’s number. A check in the checkbox indicates that the
listing is selected. To deselect the viewed listing, clear the checkbox.
The navigation buttons allow you to page through the detail forms. From
left to right, the buttons represent First, Previous, Next, and Last.
The Form dropdown list allows you to select a detail form.
To Select Properties at View
To select properties while viewing each in a one-per-page form, select the page
control checkbox in the page counter. Click again to clear the checkbox and
deselect the property.
To select properties while viewing multiple-list forms, select the property’s
checkbox in the top right corner of each detail report.
To view all listing detail reports, leave none selected. The system interprets the
selection of none as all.
To Choose a Form at View
1. At the View page, open the Form dropdown list.
2. Click the desired form. The newly-selected form becomes your default until you
choose a different form.
Using Stratus MLS
88
To Add to the Listing Cart
At any detail report, regardless of selection, click the Listing Cart icon on the
navigation bar to add the listing to the listing cart; or
Click the Add action on the action bar.
To remove a listing from the cart, click the Listing Cart icon on the navigation bar
again; or
Click the Remove action on the action bar.
To Edit a Listing
1. In one-per-page format, click Edit at the action bar. (In multiple-per-page format,
select a listing then click Edit.)
2. At the Edit dialog box, select the desired edit option then click Continue. See “Edit
a Listing” on page 44.
To Add to Favorites
At any detail report, regardless of selection, click the star icon on the navigation
bar to select the listing as a favorite.
To remove a listing from Favorites, click its gold star. The removal of color
confirms the listing’s removal from Favorites.
To View the Results List
Click List at the action bar.
To Map the Listings
Click Map at the action bar.
To View Photos
To page through each photo displayed at the top left corner of a detail form, use
the photo viewer’s previous and next navigation buttons. Each photo displays one
at a time. To display a photo’s comment, if any, mouse over the photo.
To display all the photos for a single property in the Photo dialog box, click any
one of the photo viewer’s photos, or click Photos on the action bar.
If you switch to the Photo dialog box when viewing a single property in a one-per-
page format, all of the property’s photos display. If you switch when viewing
Detail View
89
multiple properties at View, each property’s primary photo displays. The Photo
dialog box shows each property’s primary photo with a checkbox.
Any photo selected or deselected at the checkbox affects selections at the List,
View, and Map pages and vice-versa.
To View Slide Shows
1. Click Slideshow on the action bar.
2. When using a one-page format, all of the property’s available photos display in the
slide show.
3. When using a multi-page format, if you select more than one property, the
slideshow displays the primary photo in each.
4. To navigate to a particular photo in a slide show, mouse over the current photo to
show the navigation arrows. Click right or left arrows to move to the desired photo;
or simply click the desired photo’s thumbnail.
5. To close the slide show, click Close in the top right corner of the Slideshow dialog
box.
To View Attachments
At View, when a single listing displays in a one-per-page format (for example, Client
Full, Flyer), a list of attachments may display at the top of the detail form. A paperclip
icon displays in front of each attachment category or name. Standard Document
categories are Agency Disclosure, Lead Paint Disclosure, Floor Plan, Survey, Property
Condition Disclosure, Other 1, Other 2.
1. In one-per-page format, click an available attachment at the top of the page.
2. The attachment opens in a new window.
3. Click Close or Cancel to return to View.
Note:
Depending on your browser, you may see a download dialog box. Choose
Open or Save as desired.
To View Links
At View, when a single listing displays in a one-per-page format, a list of links may
display at the top of the detail form. Links for listings include Virtual Tour, Video,
Using Stratus MLS
90
Neighborhood Info, School Profiles, Schedule a Showing, and many other MLS-supplied
links.
1. In one-per-page format, click an available link at the top of the page.
2. The link opens in a new window.
3. Click Close to return to View.
To Get Driving Directions
1. At the View page, navigate and select properties in the order that you want to
travel.
2. Click Directions on the action bar.
3. At the Driving Directions dialog box, you may optionally click the Move Up, Move
Down, and Edit buttons to re-order addresses for routing.
4. Zoom or move the map as needed.
5. To add another address to the list, click Add.
6. To customize your route, select Avoid Traffic, Show listings on map, and Round-trip
checkboxes as needed.
To View the Listing’s History
1. In one-per-page format, click History on the action bar.
2. The listing’s History report opens in a new window. Select or deselect the Hide
Original Listing Data checkbox, as desired. (See “About History” on page 232.)
3. Click Close to return to View.
Mapped Listings
91
Mapped Listings
Using Stratus MLS
92
About Mapping Listings
Use the Map action—from List or View—to see the results of your search as a fixed set
of markers on a map. You can zoom and move the map as needed, mouse over a marker
for pop-up details, and switch the map view from Road to Aerial (or Birds-Eye, when
available).
At the action bar you can switch to List or View, and view Places (points of interest) and
address Locations. A standard search results List displays beneath the map, allowing
standard List actions.
To switch from a fixed set of markers to a full map search, open the dynamic criteria
panel and select the Map Search checkbox. Once you select Map Search, the current map
frame is the location, and can be moved. Beyond a distance determined by the MLS,
searching is suspended, and you must zoom in to search the map. Map Search does not
support archived listings.
Mapped Listings
93
Work with Mapped Listings
Use the Map action - from List or View - to see the results of your search as a fixed set of
markers on a map. You can zoom and move the map as needed, mouse over a marker for
pop-up details, and switch the map view from Road to Aerial (or Birds-Eye, when
available).
How . . .
To See Mapped Results from a List Page
Unlike results from a New search, the system does not limit Map to a display of selected
results. When you view search results at Map, all listings display, not just those that are
selected at List.
1. At any search results List - including My Lists - select the listings you want to view
on a map, or select none if you want to view all at map.
2. Click Map on the action bar. The mapped listings display.
Note:
If the system can’t display a particular listing at Map, that listing is flagged (!) in
the List below the map.
To See Mapped Results from View
At View in multiple-per-page format, click Map on the action bar. All listings
display on the map.
To Understand Markers
Mapped listings display as markers on the map. They are numbered to match listings
displayed in the search results list below the map.
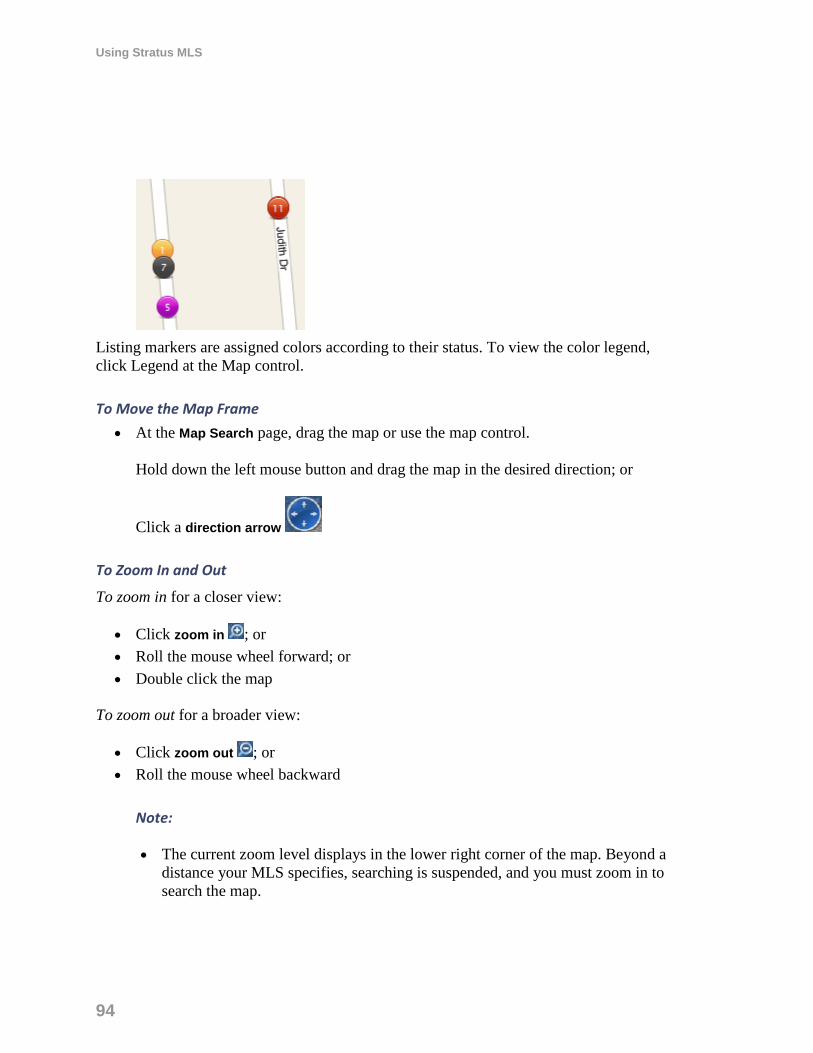
Using Stratus MLS
94
Listing markers are assigned colors according to their status. To view the color legend,
click Legend at the Map control.
To Move the Map Frame
At the Map Search page, drag the map or use the map control.
Hold down the left mouse button and drag the map in the desired direction; or
Click a direction arrow
To Zoom In and Out
To zoom in for a closer view:
Click zoom in ; or
Roll the mouse wheel forward; or
Double click the map
To zoom out for a broader view:
Click zoom out ; or
Roll the mouse wheel backward
Note:
The current zoom level displays in the lower right corner of the map. Beyond a
distance your MLS specifies, searching is suspended, and you must zoom in to
search the map.
Mapped Listings
95
To Change Map Views
Use the map control in the top left corner. Click one of the following to change the map
view:
Road: Street Map
Aerial: Satellite photos
Birds Eye: Aerial photos from four angles, not available at all locations
To View the Listing Details Pop-up
To display a detail pop-up, hover the mouse pointer over the map marker.
To select a property, click the pop-up checkbox.
To view the property at the Detail View page, click the ML#.
To page through each available photo in a pop-up, use the previous and next
buttons. To display the photos n the Photo dialog box click any one of the pictures.
To Open and Close the Results List
The results list opens automatically below the map.
To close the list, click the Close Map List arrow.
To open the list, click the Open Map List arrow.
To Shrink or Expand the Results List
1. Mouse over the divider line between the map and list panels.
2. Wait for the cursor to change to a double arrow icon.
3. To show more of the map, drag the divider line down; to show more of the list,
drag the divider line up.
To Navigate the Results List Below the Map
The page counter shows the number of results and pages, including
the current page’s number.
The navigation buttons allow you to navigate through each page. From
left to right, the buttons represent First, Previous, Next, and Last.

Using Stratus MLS
96
The Page Size dropdown list allows you to set the number of rows
displayed on a page: 20, 50, and 100. To view all results on a single, scrolling page,
choose All. Unless you change it, your Page Size selection remains in effect throughout
your current session.
On Map pages, the Close Map List button allows you to hide the results list in order to
view a larger portion of the map. Alternatively, drag the divider between the map and list
lower to see a larger map and smaller portion of the list.
On Map pages, the Open Map List button restores the results list to the default height -
or to a height you set by dragging the divider.
Notes:
In Map Search mode, any change in the size of the map frame causes a re-run
of the search
In Map Search mode, results do not include archived listings
To Switch to a Full Map Search Using the Dynamic Criteria Panel
Once you switch to a full map search, the current map frame becomes the location, and
can be moved.
1. To open the dynamic criteria panel, click the white downward arrow at the far
right of the title bar .
2. Select the Map Search checkbox to switch from a fixed set of markers to a full map
search.
Note:
Beyond a zoom limit set by the MLS, searching is suspended, and you must
zoom in to search the map.
To Change Criteria Instantly at the Dynamic Criteria Panel
1. To open the dynamic criteria panel, if it is not already open on the right side of
the page, click the white downward arrow at the far right of the title bar.
2. Choose or type criteria at any field, or add a field at the Other Fields dropdown list.
Mapped Listings
97
To draw a location using radius and polygon shapes, make sure the Map Search
checkbox at the top of the panel is selected. With Map Search selected, the location
fields Town, Zip, Zone, County, and ML# are unavailable.
3. To close the dynamic criteria panel, click the white upward arrow at the top of
the open Panel .
To Return to the Criteria Page
Click Revise Criteria on the title bar.
To Draw a Radius
1. Click Radius on the action bar.
2. Move the mouse pointer to the center point of the circle, then click to set the point.
3. Move the mouse to draw a line to the outside edge of the radius. The size of the
radius increases as you move the mouse.
4. When the circle is the desired size, click the mouse to finish the circle.
To Draw a Polygon
1. Click Polygon on the action bar.
2. Move the mouse pointer to the desired first point, then click to set the point.
3. Move the mouse to draw a line to the next location, then click to set the point.
4. Click at additional points as necessary.
5. To close the polygon, double-click the mouse.
To Save a Shape
1. At the Map page, after drawing a shape, click Save Shape at the action bar.
2. At the Save Shape dialog box, enter a name for the shape, then click Save.
To Clear a Shape
At the Map page, click Clear Shape on the action bar.
To Use a Saved Shape
1. At the Map page, click the down arrow to open the Use Saved Shape dropdown list,
available on the action bar.
2. Choose the desired shape from the dropdown list.
Using Stratus MLS
98
Display Places, Locations, and Directions
To Display Places (POI)
1. At the Map page, click Places on the action bar.
2. At the Show Places dialog box, click one or more Place categories or enter a
category not on the list.
3. To deselect a place category, click Places on the action bar, and at the dialog box
clear checkboxes for the categories you don’t want.
4. To clear all the categories from the map, click Clear All.
To Display Locations and Use Defaults
1. At the Map page, click Location on the action bar.
2. At the Locations dialog box, choose the task you want.
To find a location: At the Find a Location text box, enter a full or partial you want
to locate on the map, then click Find. The dialog box closes and the location is
marked with a blue pushpin. To add more than one pushpin to the map, repeat
these steps.
To display details of the location: mouse over a pushpin to view its pop-up.
To select one or more saved locations: At the Saved Locations list, click
checkboxes to select saved locations to be used for a task.
To set your default map location: At the Saved Locations list, choose a saved
location and click Set as Default.
To go to your default map location: Click Go to Default.
To save the current location: After finding a location, click Save Current As. Enter
a name, then click Save.
To delete a saved location: At the Saved Locations list, use checkboxes to select
one or more locations for deletion, then click Delete.
To Get Driving Directions
1. At the Map page, select properties in the order you want to travel.
2. Click Directions on the action bar.
3. At the Driving Directions dialog box, you may optionally click the Move Up, Move
Down, and Edit buttons to re-order addresses for routing.
4. Zoom or move the map as needed.
5. To add another address to the list, click Add.
Mapped Listings
99
6. To customize your route, click Avoid Traffic, Show listings on map, and Round-trip
checkboxes as needed. Route displays on the map, followed by distance and
driving directions.
To Save a Map Search
1. At the Map page, enter shapes and criteria as needed until the properties you want
are displayed.
2. Click Save Search at the top of the dynamic criteria panel.

Using Stratus MLS
100

Map Searches
101
Map Searches
Using Stratus MLS
102
About Map Searches
You can start a new map search and use the map tools to define a location; or start by
choosing a saved map location or shape. Display the map in Road, Aerial, or Bird’s Eye
view.
When performing a Map Search, the system dynamically finds matches as you zoom in
and out, move the map, draw a shape to define the location, or change criteria at the
dynamic criteria panel. You can display Places (points of interest) and address Locations.
Center the map as needed.
Properties display as markers and in a results list below the map. If the map shows no
markers, zoom in. Note: The system suspends searching at a zoom level your MLS has
defined.
The marker’s color reflects its status. To view a legend identifying marker colors, click
Legend.
When listings are very close to one another, their markers may overlap. To display the
listing details pop-up, mouse over the marker.
If you haven’t defined a location or chosen a saved location or shape, your default map
area displays. If you draw a polygon or radius to define the location, listing markers are
confined to that shape. You can save the shape for later use, clear the shape, and choose a
saved shape from a dropdown list.
Adjust criteria, if needed, at the dynamic criteria panel. See “Dynamic Criteria Panel” on
page 69
To see a larger portion of the map, hide the results list below it. Click the hide arrow at
the top right of the list’s navigation bar.
Notes:
You can enter criteria at the dynamic criteria panel to the right of the map
Map Search does not display archived searches
If no markers display, look for zoom instructions below the map.
The system can’t map listings that don’t have a geocode. Such listings appear
in the results list below the map, where an exclamation mark (!) symbol
indicates they are not mapped.
Map Searches
103
Start a Map Search
Use the Map Search tab to start a map search. When performing a Map Search, the
system finds results dynamically as you zoom in and out, move the map, draw a shape to
define the location, or change criteria at the dynamic criteria panel.
You can start a brand new map search and use the map tools to define a location; or start
by choosing a saved location or shape. Center the map as needed.
How . . .
To Enter Basic Criteria
1. At the Search Type page, click the Map Search tab.
2. Choose one or more options for Class.
3. Choose Available, Unavailable, or both.
4. Choose one or more options for Public/Private: Public listings are MLS listings; Private
listings are exclusive to your office.
To Choose a Shape or Location
1. Sort by the Type column to easily find the shape or location you want to start with.
2. Select the name of a location or shape then click Continue. Alternatively, you may
double-click the name in order to open the map immediately.
To Delete and Rename Shapes & Locations
1. Select the shape or location you want to rename or delete. If you do not have
permission to perform these actions, the Rename and Delete buttons are disabled.
To rename the shape or location, click Rename. Clear and enter a new name, then
click Rename.
To delete the shape or location, click Delete. At the confirmation prompt, click
Delete.
Using Stratus MLS
104
To Share Saved Shapes & Locations
1. Select the shape or location you want to share. If you are not the owner or are not
otherwise permitted to perform this action, the Share button is disabled.
2. At the Share Saved Location dialog box, select My Office or MLSLI.
3. Click Share.
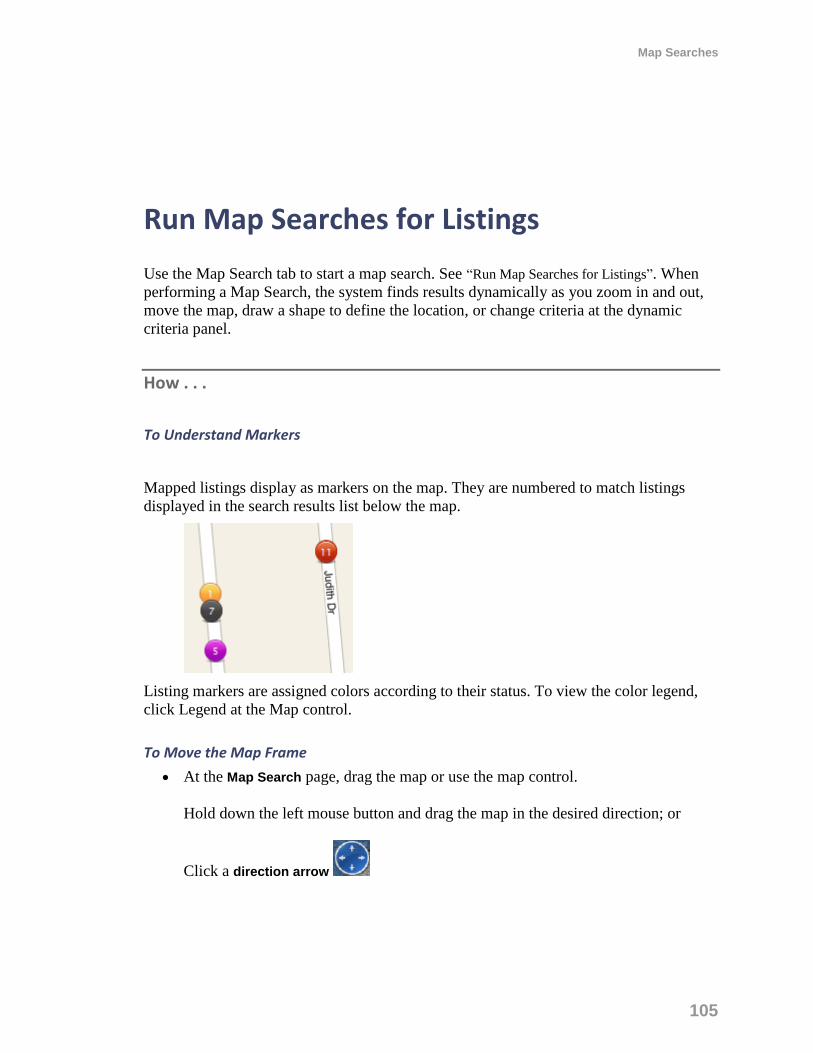
Map Searches
105
Run Map Searches for Listings
Use the Map Search tab to start a map search. See “Run Map Searches for Listings”. When
performing a Map Search, the system finds results dynamically as you zoom in and out,
move the map, draw a shape to define the location, or change criteria at the dynamic
criteria panel.
How . . .
To Understand Markers
Mapped listings display as markers on the map. They are numbered to match listings
displayed in the search results list below the map.
Listing markers are assigned colors according to their status. To view the color legend,
click Legend at the Map control.
To Move the Map Frame
At the Map Search page, drag the map or use the map control.
Hold down the left mouse button and drag the map in the desired direction; or
Click a direction arrow
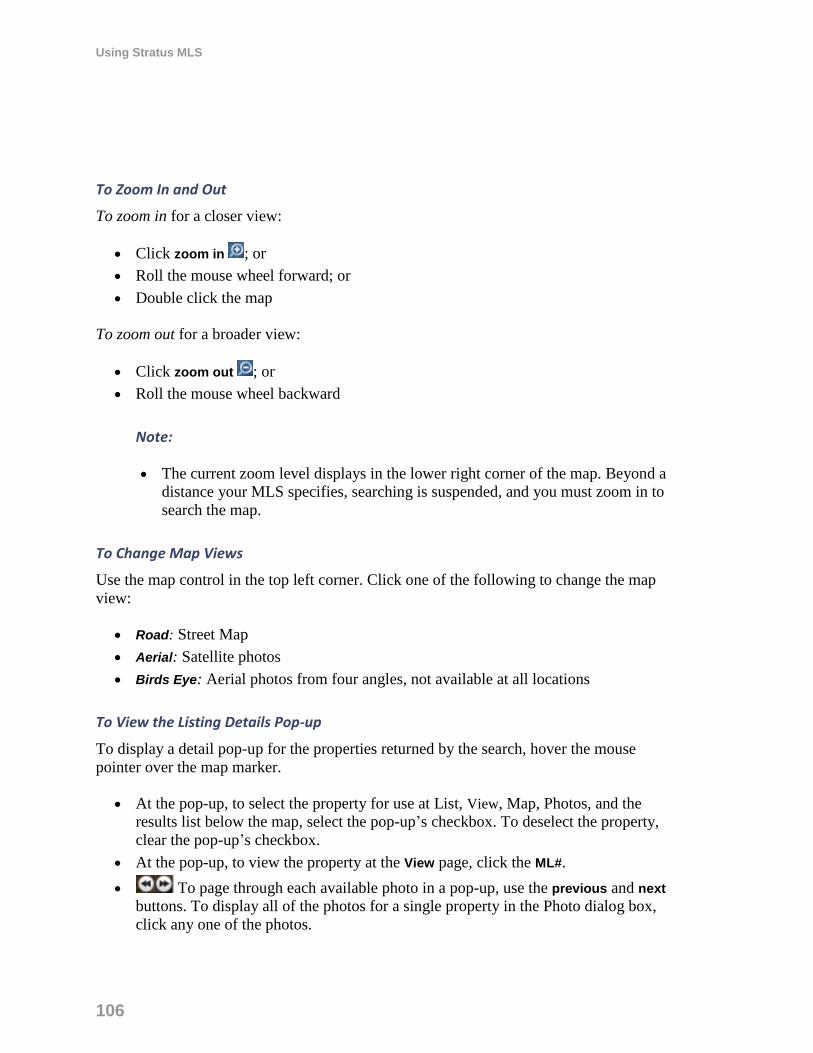
Using Stratus MLS
106
To Zoom In and Out
To zoom in for a closer view:
Click zoom in ; or
Roll the mouse wheel forward; or
Double click the map
To zoom out for a broader view:
Click zoom out ; or
Roll the mouse wheel backward
Note:
The current zoom level displays in the lower right corner of the map. Beyond a
distance your MLS specifies, searching is suspended, and you must zoom in to
search the map.
To Change Map Views
Use the map control in the top left corner. Click one of the following to change the map
view:
Road: Street Map
Aerial: Satellite photos
Birds Eye: Aerial photos from four angles, not available at all locations
To View the Listing Details Pop-up
To display a detail pop-up for the properties returned by the search, hover the mouse
pointer over the map marker.
At the pop-up, to select the property for use at List, View, Map, Photos, and the
results list below the map, select the pop-up’s checkbox. To deselect the property,
clear the pop-up’s checkbox.
At the pop-up, to view the property at the View page, click the ML#.
To page through each available photo in a pop-up, use the previous and next
buttons. To display all of the photos for a single property in the Photo dialog box,
click any one of the photos.
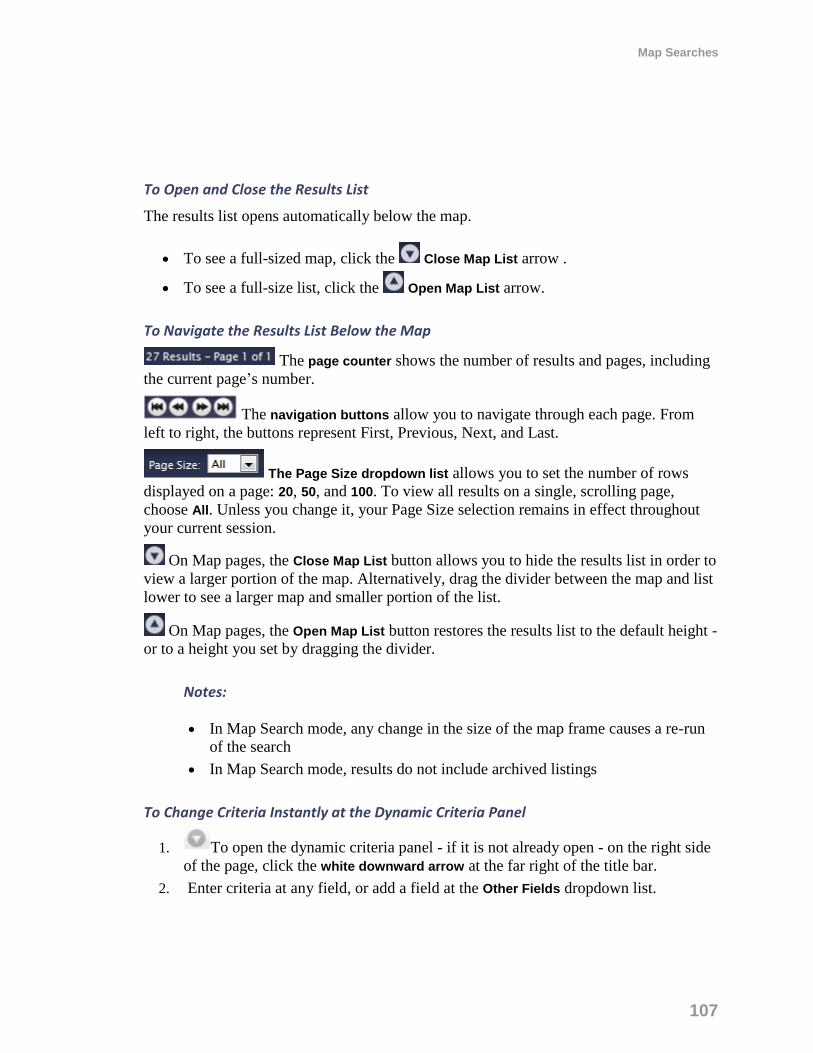
Map Searches
107
To Open and Close the Results List
The results list opens automatically below the map.
To see a full-sized map, click the Close Map List arrow .
To see a full-size list, click the Open Map List arrow.
To Navigate the Results List Below the Map
The page counter shows the number of results and pages, including
the current page’s number.
The navigation buttons allow you to navigate through each page. From
left to right, the buttons represent First, Previous, Next, and Last.
The Page Size dropdown list allows you to set the number of rows
displayed on a page: 20, 50, and 100. To view all results on a single, scrolling page,
choose All. Unless you change it, your Page Size selection remains in effect throughout
your current session.
On Map pages, the Close Map List button allows you to hide the results list in order to
view a larger portion of the map. Alternatively, drag the divider between the map and list
lower to see a larger map and smaller portion of the list.
On Map pages, the Open Map List button restores the results list to the default height -
or to a height you set by dragging the divider.
Notes:
In Map Search mode, any change in the size of the map frame causes a re-run
of the search
In Map Search mode, results do not include archived listings
To Change Criteria Instantly at the Dynamic Criteria Panel
1. To open the dynamic criteria panel - if it is not already open - on the right side
of the page, click the white downward arrow at the far right of the title bar.
2. Enter criteria at any field, or add a field at the Other Fields dropdown list.

Using Stratus MLS
108
To draw a location using radius and polygon shapes, make sure the Map Search
checkbox at the top of the Dynamic Criteria panel is checked.
3. To close the panel, click the white upward arrow at the top of the panel.
To Draw a Radius
1. Click Radius on the action bar.
2. Move the mouse pointer to the center point of the circle, then click to set the point.
3. Move the mouse to draw a line to the outside edge of the radius. The size of the
radius increases as you move the mouse.
4. When the circle is the desired size, click the mouse to finish the circle.
To Draw a Polygon
1. Click Polygon on the action bar.
2. Move the mouse pointer to the first point of the polygon, then click to set the point.
3. Move the mouse to draw a line to the next location, then click to set the point.
4. Click at additional points as necessary.
5. To close the polygon, double-click the mouse.
To Save a Radius or Polygon
1. At the Map page, after drawing a shape, click Save Shape at the action bar.
2. At the Save Shape dialog box, enter a name for the shape, then click Save.
To Clear a Radius or Polygon
At the Map page, click Clear Shape on the action bar.
To Use a Saved Radius or Polygon
1. At the Map page, click the down arrow to open the Use Saved Shape dropdown list,
available on the action bar.
2. Choose the desired shape from the dropdown list.
To Display Places (POI)
1. At the map page, click Places on the action bar.
2. At the Show Places dialog box, click one or more Place categories or enter a
category not on the list.
Map Searches
109
3. To deselect a place category, click Places on the action bar, and at the dialog box
clear checkboxes for the categories you don’t want.
4. To clear all place categories from the map, click Clear All.
To Display Locations and User Defaults
1. At the Map page, click Location on the action bar.
2. At the Locations dialog box, choose the task you want.
To Find a Location: At the Find a Location text box, enter a full or partial . Click
Find. The dialog box closes and the location is marked with a blue pushpin. To add
more than one pushpin to the map, repeat these steps.
To display more details: mouse over a marker to view its pop-up.
To select one or more saved locations: At the Saved Locations list, select
checkboxes to select saved locations to be used for a task.
To set your default map location: At the Saved Locations list, choose a saved
location and click Set as Default.
To go to your default map location: Click Go to Default.
To save the current location: After finding a location, click Save Current As. Enter
a name then click Save.
To delete a saved location: At the Saved Locations list, select checkboxes at
locations you want to remove. Click Delete.
To Get Driving Directions
1. At the Map page, click properties under the map in the order that you want to
travel.
2. Click Directions on the action bar.
3. At the Driving Directions dialog box, you may optionally click the Move Up, Move
Down, and Edit buttons to re-order addresses for routing.
4. Zoom or move the map as needed.
5. To add another address to the list, click Add.
6. To customize your route, click Avoid Traffic, Show listings on map, and Round-trip
checkboxes as needed.
Using Stratus MLS
110
To Save a Map Search
1. At the Map page, enter shapes and criteria as needed until the properties you want
are displayed.
2. Click Save Search at the top of the dynamic criteria panel.

New Searches
111
New Searches
Using Stratus MLS
112
Start a New Search or Change Search Type
At New Search, you can start any type of search; proceed with a standard New Search or
click one of the other search tabs (for example Map Search, Saved Searches, MLS#
Search).
For the next steps in running a New search, See “About Search Criteria” on page 74
and”About Search Results” on page 80.
How . . .
To Start a New Search
1. On the New Search tab, choose one or more options for Class, Availability,
Public/Private, and Archives.
2. To continue to the Criteria page where you can (1) choose a search form and (2)
define criteria for the search, click Continue.
Field Description
Class Choose one or more listing Classes.
Availability Choose whether your search is for available listings, unavailable listings, or both:
Available listings are new or back on market. They may have had
a price change or extension.
Unavailable listings are closed, expired, under contract, withdrawn,
and rented.
Public/Private Choose whether your search is for Public (MLS) listings, Private listings, or both.
Archives When a search includes Unavailable listings, you may include archived listings in the search. (Note: archived listings are not searchable at Map.) This requires that you choose no more than five towns in your location. You cannot choose a zip code, zone, or county, nor can you draw a shape if you map the results.
New Searches
113
Note:
The ability to choose more than one option at a field depends on selected classes.
To Choose a Different Type of Search
At the Search Type page, where the New Search tab opens by default, choose a
different search tab.

Using Stratus MLS
114

Save and Share Searches
115
Save and Share Searches
Using Stratus MLS
116
Saved and Shared Searches
Use the Saved Searches tab - at the Search Type page - to open a list of saved searches.
The Saved Searches tab shows the columns Name, Shared By, and Modified. Sort any
column by clicking the column heading.
The Name column shows an alphabetized list of saved searches.
The Shared By column shows your name if you saved the search; shows the name
of another member who has shared a saved search with your office; or shows no
name if no one has shared the saved search with your office.
The Modified column shows the date and time that the saved search was last
modified.
How . . .
To Start a Saved Search
1. At the Listings Search Type page, click the Saved Searches tab.
2. Click to select a search. Take note of the selected Class, Availability, Public/Private,
and Archives selections.
3. Click Continue to proceed to the Criteria page; or to open the saved search
immediately, double-click the one you want to run.
4. At the Criteria page, enter search criteria.
To Sort the List of Saved Searches
1. Click a column heading (Name, Shared By, Modified) to sort in ascending order.
2. Click again to sort in descending order.
Save and Share Searches
117
To Delete and Rename a Saved Search
1. Click to select the search you want to rename or delete. If you do not have
permission to perform these actions, the Rename and Delete buttons are disabled.
To rename the search, click Rename. Clear and enter a new name, then click
Rename again.
To delete the search, click Delete. At the confirmation prompt, click Delete
again.
To Share a Saved Search
1. Click to select the saved search you want to share.
2. Click Share. Note: If you are not the owner or are not otherwise permitted to
perform this action, the Share button is disabled.
3. At the Share Saved Search dialog box, click My Office.
4. Click Share.

Using Stratus MLS
118

Pre-Defined Searches
119
Pre-Defined Searches
Using Stratus MLS
120
Run Pre-Defined Searches
Use the Listings Pre-Defined Searches tab to start a pre-defined search for Addresses,
Just Expired, and other common searches. These frequent searches use forms that require
minimal data entry.
Because the MLS defines pre-defined searches, you cannot save them with your own
changes. You can, however, save a pre-defined search as a new search with a unique
name.
When saving changes, if you do not make changes to the pre-defined Class, Availability,
Public/Private, , or Archives, the saved search displays in the Saved Search list but opens
with the pre-defined search form. If you do make changes at these fields, the saved search
opens with the appropriate Quick Search or Flex Search form.
How . . .
To Run a Pre-Defined Search for Listings
1. At the New Search page, choose the Pre-Defined Searches tab.
2. Select a search, adjust basic criteria where enabled, then click Continue; or, double
click to open the search form without changes.
3. At the Criteria page, enter criteria then click Continue.
To Sort the List of Pre-Defined Searches
1. Click the Name column heading once to sort in alphabetical order.
2. Click again to sort in reverse alphabetical order.
MLS Number Searches
121
MLS Number Searches
Using Stratus MLS
122
Run an MLS Number Search
Use the MLS# Search tab at the New Search page to search for one or more listings by
their ML#. Before you submit the MLS# Search, you may save the search, making it
available at Saved Searches.
How . . .
To Run an MLS# Search
1. At the New Search page, click the MLS# Search tab.
2. Enter one or more ML numbers in the text area. Separate each number by a comma,
space, or line break.
3. Click Continue.
4. At the Results (List) page, search results display for each ML# entered.
To Save the MLS# Search Before You Run It
1. After entering your list of MLnumbers, click Save Search.
2. At Name, enter a name for the search.
3. Click Save. The dialog box closes.
4. At the MLS# Search tab, click Continue.

Public Records Searches
123
Public Records Searches
Using Stratus MLS
124
About Public Records Searches
Stratus MLS’s Public Records Search feature lets you find tax record, mortgage, deed,
property characteristics, and related information for over 1.6 million properties in Nassau,
Suffolk, Queens and Kings/Brooklyn Counties.
The system offers a number of ways to search, save and share searches, as well as collect,
map, download, and work with results.
At any public records search form, enter or select search text for any field and add more
fields, if desired, from the Other Fields dropdown list.
Searching public records is very similar to searching Listings. The action and site action
bars provide the same functionality.
Choose a Public Records Search Type New Searches A search form presents a set of commonly-searched public records fields.
Available search forms include Quick and Flex.
Map Searches Locate listings on a map. Listings show as colored markers in the
geographic location that you either define in criteria or draw on the map, and in column
format below the map. Start by selecting a saved shape or location, making certain that
your selection is located within the chosen County.
Saved Searches Selection of your own saved public records searches, as well as those
shared by others in your office. When selected, the saved search opens showing all saved
criteria.
Pre-Defined Searches Pre-Defined Templates for the most commonly-used public records
searches, requiring minimal data entry. Find Deeds & Mortgages, Lis Pendens, Owner’s
Name, and Property Address search forms here.
Links Searches Choose CASS forms for bulk mailing, or start interactive tax map searches
for Queens/Brooklyn, Suffolk, and Nassau.
Public Records Searches
125
Enter Public Records Search Criteria
When performing New Search, Saved Searches, and Pre-Defined Searches for public
records, you must choose characteristics for the properties you want to find. To do so,
enter or select search criteria at relevant fields.
The default search form is suitable for the county or counties you selected. You can
change the search form if needed.
How . . .
To Change a Public Records Search Form
1. At the Search Forms dropdown list, choose the form you want:
Quick Search form: To search by property characteristics with the option to add
Owner’s Name, Property Address & Parcel ID, and Deeds and Mortgages, use the
Quick Search form. Enter or select values at any field; add more fields as needed
from the Other Fields dropdown list.
Flex Search form: To customize a form, use the Flex Search form. In order to build
a search, choose more fields from the Other Fields dropdown list.
Pre-Defined Search form: Available for Pre-Defined searches. These search forms
have a limited number of fields that are relevant to the chosen pre-defined search.
Options include Deeds & Mortgages, Lis Pendens, Owner’s Name, and Property
Address.
2. Enter criteria.
To Enter Criteria at Various Field Types
Select an option at dropdown lists (for example, Owner Last starts w/) then enter
all or part of a text value. To enter more than one text value, click the Or button. To
exclude options click the Not checkbox.
Select one or more options at multi-select lists (for example, Property Description)
or exclude options with the Not checkbox. To choose more than one option,
Ctrl+Click each one you want.
Using Stratus MLS
126
Type a range of values at Min/Max fields (for example, Mortgage Amount from
150000 to 200000).
To Exclude Values with NOT
1. Click the Not checkbox at the desired field.
2. Select or enter the value(s) you want to exclude from results.
To Add More Fields to the Search Form
1. Click the Other Fields dropdown list at the bottom of the search form.
2. Select a field.
3. Choose - or enter - criteria as needed.
To Preview the Search
1. Enter desired search criteria.
2. Click Preview on the action bar.
3. At the criteria summary, review how each search statement reduces the count of
results the search will find.
4. Click Close to return to the Search Criteria page.
To Count Results On the Fly
As you enter criteria, a counter on the action bar dynamically updates the number
of results .
To Save and Share the Search
1. Click Save Search on the action bar.
2. Enter a name, and click Save.
To save changes to a previously-saved search, click Save Search on the action bar,
then click Save As, enter a name, and click Save.
To save a copy of another owner’s search with changes, click Save Search on the
action bar, then click Save As and name the search. Search assigns you ownership
of the new copy.
3. To share a saved search, click My Office or MLSLI. When you have made your
selection, click Share.
Public Records Searches
127
To Clear Criteria
Click Clear on the action bar.
Note:
To clear a map shape, switch to Criteria - Map, then click Clear on the action
bar.
To Submit the Search
1. After entering criteria, click Submit at the top or bottom of the page.
2. Results display at the List page.
Using Stratus MLS
128
Enter Public Records Search Criteria in Map Format
To restrict the public records location and view results on a map, you can draw a radius
or polygon shape from the Criteria - Map Format page. Finding public records located in
map format is just like finding listings.
When you submit a search with a shape, results display at the Map Search page instead of
the Results (List) page. See “Public Records - Map Search Page”.
How . . .
To Use the Map to Draw a Shape
1. At the Criteria page, click the Map action. The Criteria - Map format page displays.
2. Move and zoom the map so the desired location is visible.
3. Click Polygon or Radius, then draw the shape.
To Draw a Radius
1. Click Radius on the action bar.
2. Move the mouse pointer to the center point of the circle, then click to set the point.
3. Move the mouse to draw a line to the outside edge of the radius. The size of the
radius increases as you move the mouse.
4. When the circle is the desired size, click the mouse to finish the circle.
To Draw a Polygon
1. Click Polygon on the action bar.
2. Move the mouse pointer to the first point of the polygon, then click to set the
point.
3. Move the mouse to draw a line to the next location, then click to set the point.
4. Click at additional points as necessary.
5. To close the polygon, double-click the mouse.
Public Records Searches
129
Start a New Public Records Search or Change Search Type
Use the Public Records New Search tab to start a new search or change the search type.
How . . .
To Start a New Search for Public Records
1. At the New Search tab, click to choose one or more County options. If you don’t
choose at least one county, all are searched.
2. Click Continue. The Criteria page displays in the default search form. Note: If you
choose more than one county, field dropdown lists include choices for all those
selected. See “Public Records Criteria Page”.
To Choose a Different Type of Public Records Search
At the Search Type page, where New Search opens by default, click the tab for the
desired search: “Run Public Records Map Searches” on page 130, “Run Public Records
Saved Searches” on page 136, “Run Public Records Pre-Defined Searches” on page 138, or
“Open Public Records Links” on page 139.
Using Stratus MLS
130
Run Public Records Map Searches
Use the Public Records Map Searches tab to start a map search for public records. When
the map page opens, your default map area - or a selected shape or location - displays in
the map frame.
The system shows matching public records as markers within the map frame and lists
them below the map. When public records are very close to one another, their markers
may overlap. To display the public record details pop-up, mouse over the marker.
The current map frame is the location, and can be moved. Zoom in or narrow search
criteria if the map returns no results. If you draw or select a polygon or radius to define
the location, public record markers are limited to that shape. To see a larger portion of the
map, hide the results list below it. Click the hide down arrow at the top right of the list’s
navigation bar.
Adjust criteria, if needed, at the “Dynamic Criteria Panel” on page 69
How . . .
To Start a Map Search for Public Records
To continue directly to the Map page, click Continue. Or;
To start with a shape or location, see below.
To Start with a Shape or Location
1. On the Public Records Map Search tab, sort the list as desired.
2. Click to select the name of a location or shape, then click Continue to open the
map. Alternatively, double-click the shape or location you want to open it directly.
Note:
To insure results, make sure your location or shape is located in the selected
county.
Public Records Searches
131
To Sort the List of Shapes and Locations
1. On the Public Records Map Search tab, click a column heading (Name, Type,
Shared By, Modified By) to sort in alphabetical (ascending) order.
2. Click again to resort in reverse alphabetical (descending) order.
To Delete and Rename Shapes & Locations
1. On the Public Records Map Search tab, click the shape or location you want to
rename or delete. If you do not have permission to perform these actions, the
Rename and Delete buttons are disabled.
2. To rename the shape or location, click Rename. Clear and enter a new name, then
click Rename again. To delete the shape or location, click Delete. At the
confirmation prompt, click Delete again.
To Share Saved Shapes & Locations
1. On the Public Records Map Search tab, click the shape or location you want to
share.
2. Click Share.
Note:
If you are not the owner or are not otherwise permitted to perform this action,
the Share button is disabled.
To Set a Shape or Location as the Default Map
1. On the Public Records Map Search tab, click the shape or location you want to set
as your default start point.
2. Click Set as Default.
3. Click Continue to view the location or shape on the map.
To Move the Map Frame
At the Map Search page, drag the map or use the map control.
Hold down the left mouse button and drag the map in the desired direction; or
Click a direction arrow
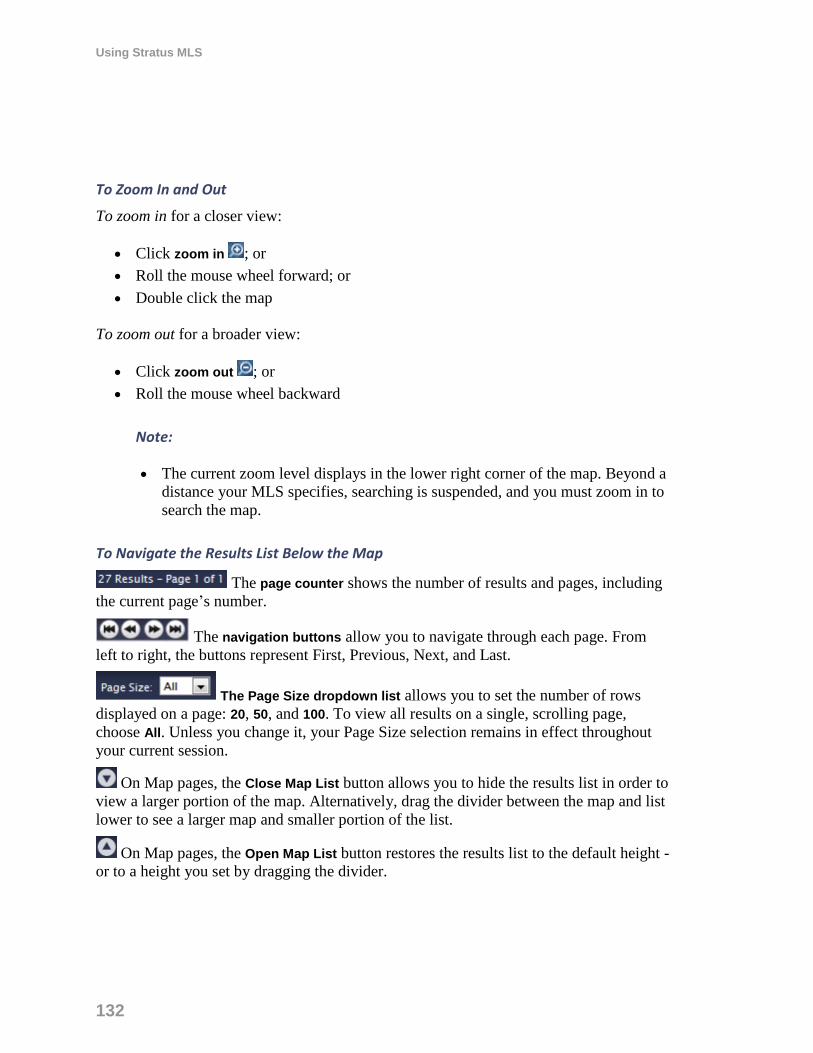
Using Stratus MLS
132
To Zoom In and Out
To zoom in for a closer view:
Click zoom in ; or
Roll the mouse wheel forward; or
Double click the map
To zoom out for a broader view:
Click zoom out ; or
Roll the mouse wheel backward
Note:
The current zoom level displays in the lower right corner of the map. Beyond a
distance your MLS specifies, searching is suspended, and you must zoom in to
search the map.
To Navigate the Results List Below the Map
The page counter shows the number of results and pages, including
the current page’s number.
The navigation buttons allow you to navigate through each page. From
left to right, the buttons represent First, Previous, Next, and Last.
The Page Size dropdown list allows you to set the number of rows
displayed on a page: 20, 50, and 100. To view all results on a single, scrolling page,
choose All. Unless you change it, your Page Size selection remains in effect throughout
your current session.
On Map pages, the Close Map List button allows you to hide the results list in order to
view a larger portion of the map. Alternatively, drag the divider between the map and list
lower to see a larger map and smaller portion of the list.
On Map pages, the Open Map List button restores the results list to the default height -
or to a height you set by dragging the divider.
Public Records Searches
133
Notes:
In Map Search mode, any change in the size of the map frame causes a re-run
of the search
In Map Search mode, results do not include archived listings
To Change Map Views
Use the map control in the top left corner. Click one of the following to change the map
view:
Road: Street Map
Aerial: Satellite photos
Birds Eye: Aerial photos from four angles, not available at all locations
To View the Public Record Details Pop-up
To display a detail pop-up containing the parcel ID, address, owner, sold price,
taxes, and other information pertinent to the public record, hover the mouse pointer
over the map marker .
To select a public record for List, View, Map, Photos, and the results below the
map, click the pop-up checkbox.
To view the public record at the Detail View page, click the ID#.
To page through each available photo in a pop-up, use the previous and next
buttons. To display all of the photos for a single property in the Photo dialog box -
if more than one- click any one of the pictures.
To Draw a Shape
1. At the Map page, move and zoom the map so the desired area is visible.
2. Click Polygon or Radius, then draw the shape.
To Draw a Radius
1. Click Radius on the action bar.
2. Move the mouse pointer to the center point of the circle, then click to set the point.
3. Move the mouse to draw a line to the outside edge of the radius. The size of the
radius increases as you move the mouse.
4. When the circle is the desired size, click the mouse to finish the circle.
Using Stratus MLS
134
To Draw a Polygon
1. Click Polygon on the action bar.
2. Move the mouse pointer to the first point of the polygon, then click to set the
point.
3. Move the mouse to draw a line to the next location, then click to set the point.
4. Click at additional points as necessary.
5. To close the polygon, double-click the mouse.
To Save a Shape
1. At the Map page, after drawing a shape, click Save Shape at the action bar.
2. At the Save Shape dialog box, enter a name for the shape, then click Save.
To Clear a Shape
At the Map page, click Clear on the action bar.
To Use a Saved Shape
At the Map page, click the down arrow to open the Use Shape dropdown list, available on
the action bar.
Choose the desired shape from the dropdown list.
To Display Places (POI)
1. At the Map page, click Places on the action bar.
2. At the Show Places dialog box, click one or more Place categories or enter a
category not on the list.
3. To deselect a place category, click Places on the action bar, and at the dialog box
clear checkboxes for the categories you don’t want.
4. To clear all the categories from the map, click Clear All.
To Display Locations and Use Defaults
1. At the Map page, click Location on the action bar.
2. At the Locations dialog box, choose the task you want.
To find a location: At the Find a Location text box, enter the address, zip, and/or
town you want to locate on the map, then click Find. The dialog box closes and the
Public Records Searches
135
location is marked with a blue pushpin. To add more than one pushpin to the map,
repeat these steps.
To display the street address, town, state, and zip code: mouse over a pushpin to
view its pop-up.
To select one or more saved locations: At the Saved Locations list, select
checkboxes at saved locations to be used for a task.
To set your default map location: At the Saved Locations list, choose a saved
location and click Set as Default.
To go to your default map location: Click Go to Default.
To save the current location: After finding a location, click Save Current As. Enter
a name then click Save.
To delete a saved location: At the Saved Locations list, select checkboxes, at one
or more locations, for deletion. Click Delete.
To Get Driving Directions
1. At the Map page, click properties under the map in the order that you want to
travel.
2. Click Directions on the action bar.
3. At the Driving Directions dialog box, you may optionally click the Move Up, Move
Down, and Edit buttons to re-order addresses for routing.
4. Zoom or move the map as needed.
5. To add another address to the list, click Add.
6. To customize your route, select Avoid Traffic, Show listings on map, and Round-trip
checkboxes as needed.
To Save a Map Search
1. At the Map page, enter shapes and criteria as needed until the public records you
want are displayed.
2. Click Save Search at the top of the “Dynamic Criteria Panel” on page 69.
Using Stratus MLS
136
Run Public Records Saved Searches
Use the Public Records Saved Searches tab to open a list of saved searches.
The Saved Searches tab shows the columns “Name”, “Shared By”, and “Modified”. All
columns may be sorted by clicking the column heading.
The Name column shows an alphabetized list of saved searches.
The Shared By column shows the name of the member who has shared a saved
search with your office; or shows no name if no one has shared the saved search
with your office.
The Modified column shows the date and time that the saved search was last
modified.
How . . .
To Start a Saved Search
1. At the public records Search Type page, click the Saved Searches tab.
2. Click to select a search. Take note of the selected County, then click Continue; or
To open the saved search immediately, double-click the one you want to run.
3. At the public records Criteria page, enter search criteria. (See “Enter Public Records
Search Criteria” on page 125)
To Sort the List of Saved Searches
1. Click a column heading (Name, Shared By, Modified) to sort in ascending order.
2. Click again to sort in reverse alphabetical order.
To Delete and Rename Saved Searches
1. Click to select the search you want to rename or delete. If you do not have
permission to perform these actions, the Rename and Delete buttons are disabled.
To rename the search, click Rename. Clear and enter a new name, then click
Rename again.
Public Records Searches
137
To delete the search, click Delete. At the confirmation prompt, click Delete again.
To Share Saved Searches
1. Click to select the saved search you want to share. If you are not the owner or are
not otherwise permitted to perform this action, the Share button is disabled.
2. At the Share Saved Search dialog box, click My Office or MLSLI.
3. Click Share.
Using Stratus MLS
138
Run Public Records Pre-Defined Searches
Use the Public Records Pre-Defined Searches tab to start a pre-defined search for Deeds
& Mortgages, Lis Pendens, Owner’s Name, and Property Address. These frequently used
public records searches require minimal data entry.
How . . .
To Run a Pre-Defined Search for Public Records
1. At the Public Records search type page, click Pre-Defined Searches.
2. Select one or more County checkboxes.
3. Click a search, then click Continue. The Criteria page opens for field entry.
4. At the Criteria page, enter criteria then click Continue.
Note:
If you double click a pre-defined search, the search form opens immediately
using default options for the selected County option(s).
To Sort the list of Pre-Defined Searches
1. Click the Name column heading once to sort in alphabetical order.
2. Click again to sort in reverse alphabetical order.
Public Records Searches
139
Open Public Records Links
Use the Public Records Links tab to print CASS forms for bulk mailings or to search tax
maps for Queens/Brooklyn, Suffolk, and Nassau counties.
Click any link to open the corresponding resource in a new window.
How . . .
To Print CASS Forms for Bulk Mailing
1. At the Public Records search type page, click Links.
2. Click CASS Forms.
3. Click the desired form. The form opens in a new window.
4. At the new window, print the corresponding CASS Certification Form and bring it
to the Post Office with your bulk mailing. Check with your local Post Office for
rates and requirements.
To Run Tax Map Searches for Queens/Brooklyn
1. At the Links tab, click Queens/Brooklyn. The interactive tax map displays in a new
window.
2. To get information on the use of the tax map, click the ? Help button.
3. To return to Stratus MLS, click Close on the new window.
To Run Tax Map Searches for Suffolk
1. At the Links tab, click Suffolk. Tax Map resources display in a new window.
2. To search by Address, Owner’s Name, Phone, or Ad/Tax ID/Folio, click the
Searches menu option.
3. At the search criteria form, select or enter text as needed, then click Search.
4. For further information, click the FAQ link.
To Run Tax Map Searches for Nassau
1. At the Links tab, click Nassau. Tax Map resources display in a new window.
2. To get information on the use of the tax map, click ? Help.
3. To return to Stratus MLS, click Close on the new window.
Using Stratus MLS
140
Map Properties From Public Records
Use the Map action - from List or View - to see the results of your search as a fixed set of
markers on a map. You can zoom and move the map as needed, mouse over a marker for
pop-up details, and switch the map view from Road to Aerial or Birds-Eye.
At the action bar you can switch to List or View, and view Places (points of interest) and
address Locations. A standard search results List displays beneath the map, allowing
standard List actions and a switch to List or View.
To switch from a fixed set of markers to a full map search, open the dynamic criteria
panel and select the Map Search checkbox. Once you select Map Search, the current map
frame is the location, and can be moved. Beyond a five mile limit, searching is
suspended, and you must zoom in to search the map.
How . . .
To Share Saved Shapes & Locations
1. On the Public Records Map Search tab, click the shape or location you want to
share.
2. Click Share. If you are not the owner or are not otherwise permitted to perform this
action, the Share button is disabled.
To Set a Shape or Location as the Default Map
1. On the Public Records Map Search tab, click the shape or location you want to set
as your default start point.
2. Click Set as Default.
3. Click Continue to view the location or shape on the map.
To Move the Map Frame
At the Map Search page, drag the map or use the map control.
Hold down the left mouse button and drag the map in the desired direction; or
Click a direction arrow
Public Records Searches
141
To Zoom In and Out
To zoom in for a closer view:
Click zoom in ; or
Roll the mouse wheel forward; or
Double click the map
To zoom out for a broader view:
Click zoom out ; or
Roll the mouse wheel backward
Note:
The current zoom level displays in the lower right corner of the map. Beyond a
distance your MLS specifies, searching is suspended, and you must zoom in to
search the map.
To Navigate the Results List Below the Map
The page counter shows the number of results and pages, including
the current page’s number.
The navigation buttons allow you to navigate through each page. From
left to right, the buttons represent First, Previous, Next, and Last.
The Page Size dropdown list allows you to set the number of rows
displayed on a page: 20, 50, and 100. To view all results on a single, scrolling page,
choose All. Unless you change it, your Page Size selection remains in effect throughout
your current session.
On Map pages, the Close Map List button allows you to hide the results list in order to
view a larger portion of the map. Alternatively, drag the divider between the map and list
lower to see a larger map and smaller portion of the list.
On Map pages, the Open Map List button restores the results list to the default height -
or to a height you set by dragging the divider.
Using Stratus MLS
142
Notes:
In Map Search mode, any change in the size of the map frame causes a re-run
of the search
In Map Search mode, results do not include archived listings
To Change Map Views
Use the map control in the top left corner. Click one of the following to change the map
view:
Road: Street Map
Aerial: Satellite photos
Birds Eye: Aerial photos from four angles, not available at all locations
To View the Public Record Details Pop-up
To display a detail pop-up containing the parcel ID, address, owner, sold price,
taxes, surrounding properties, and other information pertinent to the public record,
hover the mouse pointer over the map marker .
To select a public record for List, View, Map, Photos, and the results below the
map, click the pop-up checkbox.
To view the public record at the Detail View page, click the ID#.
To page through each available photo in a pop-up, use the previous and next
buttons. To display all of the photos for a single property in the Photo dialog box -
if more than one- click any one of the pictures.
To Draw a Shape
1. At the Map page, move and zoom the map so the desired area is visible.
2. Click Polygon or Radius, then draw the shape.
To Draw a Radius
1. Click Radius on the action bar.
2. Move the mouse pointer to the center point of the circle, then click to set the point.
3. Move the mouse to draw a line to the outside edge of the radius. The size of the
radius increases as you move the mouse.
4. When the circle is the desired size, click the mouse to finish the circle.
Public Records Searches
143
To Draw a Polygon
1. Click Polygon on the action bar.
2. Move the mouse pointer to the first point of the polygon, then click to set the
point.
3. Move the mouse to draw a line to the next location, then click to set the point.
4. Click at additional points as necessary.
5. To close the polygon, double-click the mouse at the last point.
To Save a Shape
1. At the Map page, after drawing a shape, click Save Shape at the action bar.
2. At the Save Shape dialog box, enter a name for the shape, then click Save.
To Clear a Shape
At the Map page, click Clear on the action bar.
To Use a Saved Shape
1. At the Map page, click the down arrow to open the Use Shape dropdown list,
available on the action bar.
2. Choose the desired shape from the dropdown list.
To Display Places (POI)
1. At the Map page, click Places on the action bar.
2. At the Show Places dialog box, click one or more Place categories or enter a
category not on the list.
3. To deselect a place category, click Place on the action bar, and at the dialog box
clear checkboxes for the categories you don’t want.
4. To clear all the categories from the map, click Clear All.
To Display Locations and Use Defaults
1. At the Map page, click Location on the action bar.
2. At the Locations dialog box, choose the task you want.
To find a location:At the Find a Location text box, enter the address, zip, and/or
town you want to locate on the map, then click Find. The dialog box closes and the
location is marked with a blue pushpin. To add more than one pushpin to the map,
repeat these steps.
Using Stratus MLS
144
To display the street address, town, state, and zip code, mouse over a pushpin to
view its pop-up.
To select one or more saved locations: At the Saved Locations list, click
checkboxes to select saved locations to be used for a task.
To set your default map location: At the Saved Locations list, choose a saved
location and click Set as Default.
To go to your default map location: Click Go to Default.
To save the current location: After finding a location, click Save Current As. Enter
a name then click Save.
To delete a saved location: At the Saved Locations list, click checkboxes to select
one or more locations for deletion. Click Delete.
To Get Driving Directions
1. At the Map page, click properties under the map in the order that you want to
travel.
2. Click Directions on the action bar.
3. To re-order addresses for routing, at the Driving Directions dialog box, you may
optionally click the Move Up, Move Down, and Edit buttons .
4. Zoom or move the map as needed.
5. To add another address to the list, click Add.
6. To customize your route, click Avoid Traffic, Show listings on map, and Round-trip
checkboxes as needed.
To Save a Map Search
1. At the Map page, enter shapes and criteria as needed until the items you want are
displayed.
2. Click Save Search at the top of the “Dynamic Criteria Panel” on page 69.
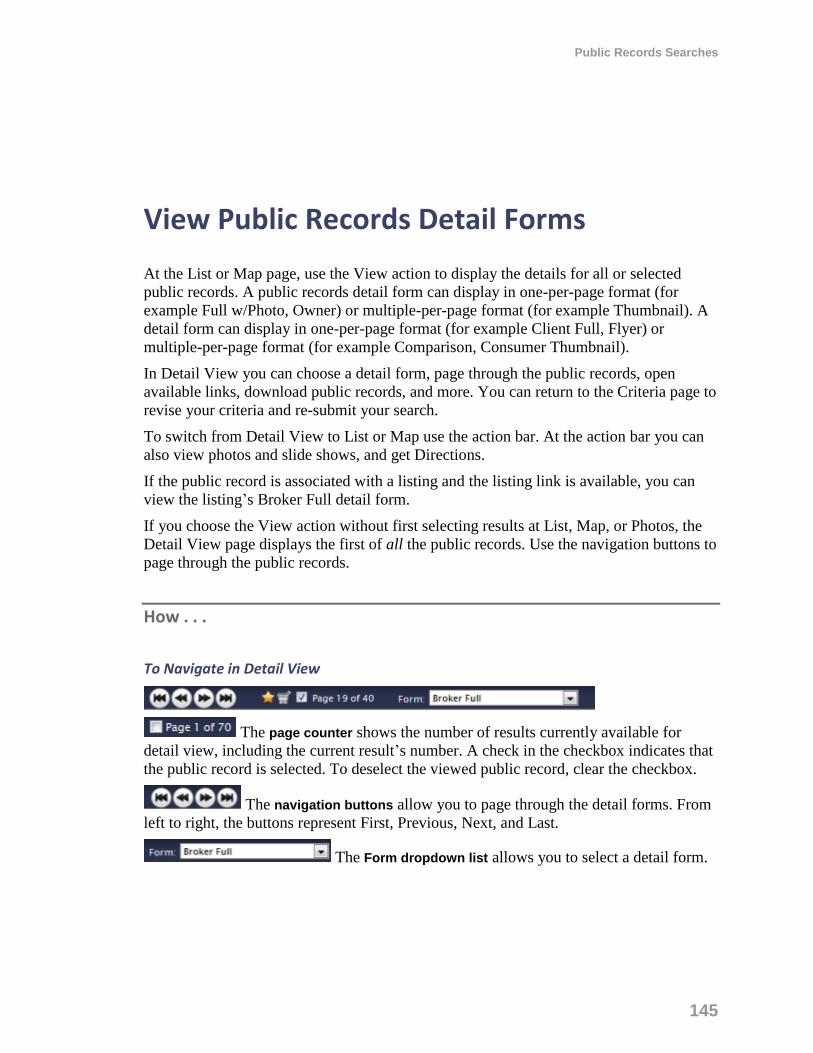
Public Records Searches
145
View Public Records Detail Forms
At the List or Map page, use the View action to display the details for all or selected
public records. A public records detail form can display in one-per-page format (for
example Full w/Photo, Owner) or multiple-per-page format (for example Thumbnail). A
detail form can display in one-per-page format (for example Client Full, Flyer) or
multiple-per-page format (for example Comparison, Consumer Thumbnail).
In Detail View you can choose a detail form, page through the public records, open
available links, download public records, and more. You can return to the Criteria page to
revise your criteria and re-submit your search.
To switch from Detail View to List or Map use the action bar. At the action bar you can
also view photos and slide shows, and get Directions.
If the public record is associated with a listing and the listing link is available, you can
view the listing’s Broker Full detail form.
If you choose the View action without first selecting results at List, Map, or Photos, the
Detail View page displays the first of all the public records. Use the navigation buttons to
page through the public records.
How . . .
To Navigate in Detail View
The page counter shows the number of results currently available for
detail view, including the current result’s number. A check in the checkbox indicates that
the public record is selected. To deselect the viewed public record, clear the checkbox.
The navigation buttons allow you to page through the detail forms. From
left to right, the buttons represent First, Previous, Next, and Last.
The Form dropdown list allows you to select a detail form.
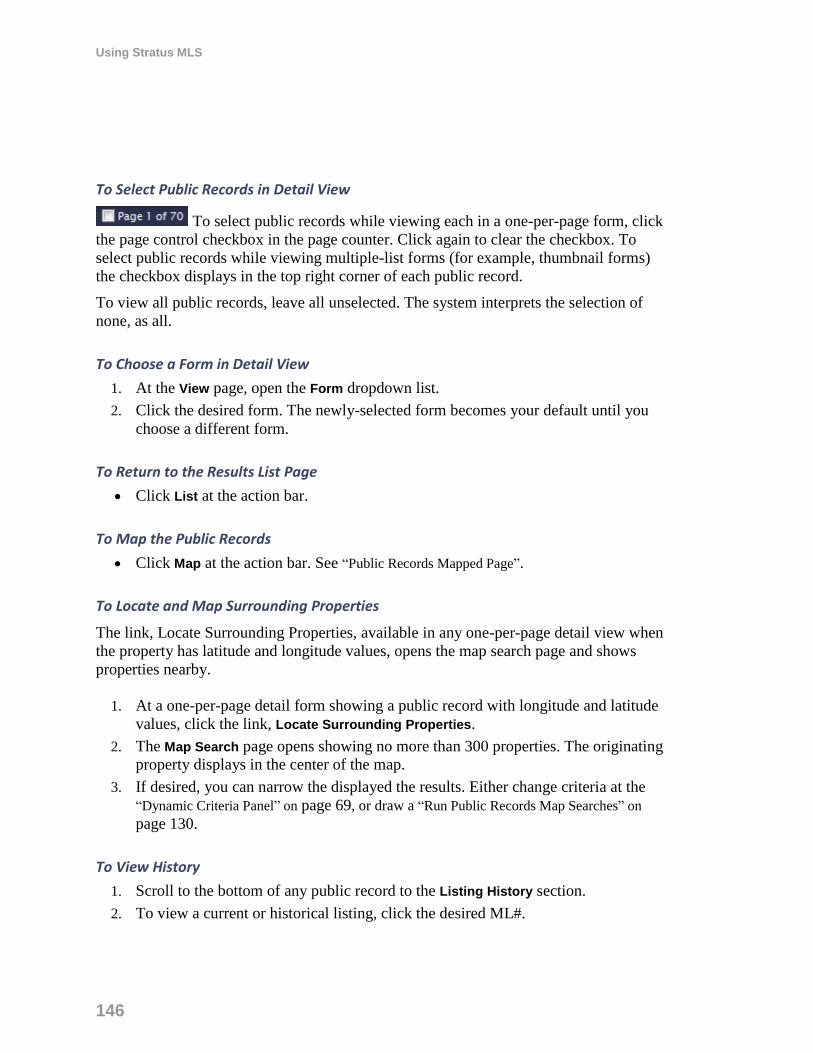
Using Stratus MLS
146
To Select Public Records in Detail View
To select public records while viewing each in a one-per-page form, click
the page control checkbox in the page counter. Click again to clear the checkbox. To
select public records while viewing multiple-list forms (for example, thumbnail forms)
the checkbox displays in the top right corner of each public record.
To view all public records, leave all unselected. The system interprets the selection of
none, as all.
To Choose a Form in Detail View
1. At the View page, open the Form dropdown list.
2. Click the desired form. The newly-selected form becomes your default until you
choose a different form.
To Return to the Results List Page
Click List at the action bar.
To Map the Public Records
Click Map at the action bar. See “Public Records Mapped Page”.
To Locate and Map Surrounding Properties
The link, Locate Surrounding Properties, available in any one-per-page detail view when
the property has latitude and longitude values, opens the map search page and shows
properties nearby.
1. At a one-per-page detail form showing a public record with longitude and latitude
values, click the link, Locate Surrounding Properties.
2. The Map Search page opens showing no more than 300 properties. The originating
property displays in the center of the map.
3. If desired, you can narrow the displayed the results. Either change criteria at the
“Dynamic Criteria Panel” on page 69, or draw a “Run Public Records Map Searches” on
page 130.
To View History
1. Scroll to the bottom of any public record to the Listing History section.
2. To view a current or historical listing, click the desired ML#.
Public Records Searches
147
To View Photos
To page through each photo displayed at the top left corner of a detail report, use
the photo viewer’s previous and next navigation buttons. Each photo displays one at a
time. To display a photo’s comment, if any, mouse over the photo.
To display all the photos for a single property in the Photo dialog box, click any one of
the photo viewer’s photos, or click Photos on the action bar.
If you switch to the Photo dialog box when viewing a single property in a one-per-page
format, all the property’s photos display. If you switch when viewing multiple properties
in View, as in a thumbnail form, each property’s primary photo displays. The Photo
dialog box shows each property’s primary photo with a checkbox. See “Photos Dialog”.
Any photo selected or deselected at the checkbox affects selections at the List, View, and
Map pages and vice-versa.
To View Slide Shows
1. Click Slideshow on the action bar.
2. When in a one-page format, all of the property’s available photos display in the
slide show.
3. In a multi-page format, select more than one property.
4. To navigate to a particular photo in a slide show, mouse over the current photo to
show the navigation arrows. Click right or left arrows to move to the desired photo;
or simply click the desired photo.
5. To close the slide show, click X in the top right corner of the Slideshow dialog box.
To View Links
1. In one-per-page format, click an available link at the top of the page. Links for
public records include Building Footprint, My Nassau Property, and Tax Map.
2. The link opens in a new window.
3. Click Close to return to Detail View.
To Get Driving Directions
1. At the View page, navigate and select properties in the order that you want to travel.
2. Click Directions on the action bar.
3. At the Driving Directions dialog box, you may optionally click the Move Up, Move
Down, and Edit buttons to re-order addresses for routing.
4. Zoom or move the map as needed.
Using Stratus MLS
148
5. To add another address to the list, click Add.
6. To customize your route, select Avoid Traffic, Show listings on map, and Round-trip
checkboxes as needed.
To Return to the Criteria Page
Click Revise Criteria on the title bar.
Public Records Searches
149
Run a Public Records Bulk Download
Use the Bulk Download dialog box - from the site action Download at the Criteria page -
to download up to 15,000 public records in .csv format. The dialog box displays the exact
count of items that will be downloaded in a single file.
Bulk downloads are useful for spreadsheet and database applications, for mailing labels,
and so forth. The Bulk Download bypasses the creation of a search results list, instead
displaying the Open or Save dialog box.
To insure the desired columns are included in the download, choose the appropriate
column set from the Column Set dropdown list:
Default column set with County name;
Property Addresses named Bulk Download - PA;
Mailing Addresses named Bulk Download - MA;
Property & Mailing Addresses named Bulk Download - PM.
To include column names as the first row in the downloaded file, select the provided
checkbox. Clear the checkbox to exclude column names in the downloaded file.
To start the download, click Download. You are prompted to open the file or save it to
disk.

Using Stratus MLS
150

My Lists
151
My Lists
Using Stratus MLS
152
Favorite Listings
You can select a listing as a favorite at any results list, map detail pop-up, and detail
report. Once selected, the new favorite is added to the Favorite Listings counter at the My
Lists menu where all favorites are available for display.
Note:
The Favorite page displays in results list format, where most List page
functions are available. However, the dynamic criteria panel is not available at
either List or Map.
How . . .
To Select and De-Select a Favorite
At a List, View, or Map detail pop-up, click the star beside or above the listing.
The star turns golden when selected. When a Favorite appears in a Results List,
View, Map, or Map pop-up, its star is golden.
Click a favorite’s gold star to remove a listing from Favorites. The removal of
color confirms its removal from Favorites.
To View All Favorites
1. Choose My Lists on the main menu.
2. Choose Favorite Listings on the sub-menu.
3. Work with the Favorite Listings list as you would any list.
To Remove All Favorites
1. Choose Favorite Listings on the menu. Your favorites display with all stars golden.
2. Select the checkbox at the top of the list. All favorites are selected.
3. Click Remove on the action bar. All favorites are de-selected.

My Lists
153
To Add all Listings in a List to Favorites
1. At any List, select the checkbox at the top of the list. All listings are selected.
2. Click Add on the action bar. All listings display the gold star, and are added at
Favorite Listings.
Using Stratus MLS
154
Listing Cart
Listing Cart allows you to gather listings from multiple searches in a single place; for
example, before you send them to a customer. Listings remain in the cart until you
remove them, so the next time you log in you can continue gathering them.
Select a listing for your cart at List and View. Once selected, the listing is added to the
listing cart counter at the My Lists menu.
Note:
The Listing Cart page displays in results list format, where most List page
functions are available. However, the dynamic criteria panel is not available at
either List or Map.
How . . .
To Add and Remove a Listing for the Cart
At List, View, or the Map detail Pop-up, click the cart icon beside or above the
listing. The cart turns bold when selected. When a listing-cart item appears in a
List, View, or Map pop-up, its cart icon is bold. Note: At List and View, you can
also select the listing you want to add to the cart and click Add on the action bar.
Click a listing’s cart icon to remove a listing from the Listing Cart. The removal of
bold formatting confirms the listing’s removal from the cart. Alternatively, select
the listing you want to remove from the cart and click Remove on the action bar.
To View Listings in the Listing Cart
1. Click My Lists on the main menu.
2. Click Listing Cart on the sub-menu.
3. Work with the listing cart list as you would any list.
My Lists
155
My Listings
Use My Listings - from My Lists on the main menu - to view a results list of all your
active and under contract listings. As you accumulate new listings or their status changes,
they are added to or removed from the My Listings counter at the My Lists menu, where
they are available for display.
When you log in, the system identifies you and your office. Only you can access your
own or your office’s listing information. When you are a Co-Listing Agent for a listing,
that listing also displays at My Listings.
Note:
The My Listings page displays in results list format, and all the functionality of
the List page is available.
To View My Listings
1. Click My Lists on the main menu.
2. Click My Listings on the sub-menu.
3. Work with the My Listings list as you would any list.
Using Stratus MLS
156
Office Inventory
Use Office Inventory - from the My Lists menu - to create a variety of reports
summarizing office inventory. You may, for example, want to know how many listings
are under contract to determine upcoming closings and anticipated commissions. Or you
may want to view each agent’s inventory including total volume, average price, and,
when appropriate, average DOM (days on market).
To allow a variety of ways to review the Office Inventory, the system provides a choice
of grouping schemes.
You can generate inventory reports for your office alone, or for one or more offices in
your firm. You can include listings of one or more class and status. The listings can be
public, private, or both.
Grouping the Results At the Group By field, select a grouping scheme for your Office Inventory. Schemes
include Status, Agent, and Class. Alternatively, you may leave the report ungrouped.
Once you select a grouping scheme and submit the criteria, results are segmented and
labeled according to that scheme.
The following column set options are available at Group By:
Status Groups listings by Office; within Office by Status. Key information -
appropriate for each status - displays for each listing. Listing agent is excluded.
Agent Groups listings by Office; within Office by Agent (in alpha order by last
name); within Agent by Status.
Class Groups listings by Office; within Office by Class; within Class by Status.
Full Results (not grouped) Displays listings without grouping them.
Group Statistics
When you run Office Inventory after selecting your Group By scheme (Status, Agent, or
Class) the system calculates and displays statistics at the bottom of each status grouping.
Statistics include the number of listings, dollar volume, and both average and mean price.
Additionally, the average DOM displays when the status group is Under Contract,
Closed, or Rented.
My Lists
157
Sorting the Results Listings are numbered consecutively even when grouped. If the results are grouped and
you click on a column heading to change the sort order, the system applies sorting to all
groups simultaneously.
Selecting a Column Set Use any column set to display results, or add your own. Columns from the selected
column set display at results, grouped by whatever scheme you select at Group By.
Running the Office Inventory
To Run an Office Inventory
1. From the My Lists menu, click Office Inventory.
2. As needed, change selections for Class, Status, and Public/Private.
3. At Listings For, choose My Office to generate a report for your office only; or
choose My Firm to generate a report for one or more offices in your firm. (Note: If
you choose My Firm, select one or more offices from the dropdown list. To choose
multiple offices, CTRL+Click each as needed.)
4. At Date Range, enter dates to generate a report that reflects a particular time frame.
The date range is used to filter results for every status except Available.
5. At Group By, choose a primary grouping scheme: Status, Agent, Class, or Full
Results (not grouped).
6. Click Continue to see grouped search results.
To Work with Office Inventory Results
Set Page Size to “All” in order to scroll through the entire report. You can use a different
Page Size setting, but if you do so, groupings are not as easy to review.
To Display a Listing in Detail View
At the Office Inventory results list page, double click an ML# to display the listing
in detail view. Click the browser Back button to return to List.
Using Stratus MLS
158
To Print the Office Inventory
1. At the Office Inventory results list page, click Print at the action bar.
2. At the Print Options dialog box, leave defaults selected: List Rows, and For All n
Listings
3. Click Print (or click Print Preview, followed by Print).
4. Follow browser prompts.
To Change the Grouping Scheme at the Results List
1. Click the arrow at the Group By dropdown list. Note: It appears on the toolbar with
arrows for navigation as well as page size and column set selections.
2. Select Agent, Class, Status, or No Grouping.
3. Results re-display with the new grouping scheme applied.
My Lists
159
Recent Searches
Use Recent Searches - from My Lists on the main menu - to view a list of your recent
searches, allowing you to re-run or change any you choose. Each time you run an
instance of the recent search, the system tracks and updates search results and the results
counter.
The list of searches displays the most recent search first, in reverse-chronological order.
If the search was a pre-defined or saved search, its name appears in the list (for example,
Address Search). If the search was a New search, the Class and Availability and
Public/Private values appear at the name.
Note:
Recent Searches do not include Map and dynamic criteria panel searches. If,
however, you click Revise Criteria at a Map Search, then resubmit the search at
the Criteria page, the search is stored in the Recent Search list.
To Run a Recent Search
1. Click My Lists on the main menu.
2. Click Recent Searches on the sub-menu.
3. To separate listings from public records, click the Type column heading. To select a
search, click its row.
4. To view current search results immediately, click Results ; or
To view a selected search at the Criteria page, click Continue ; or double-click the
search.
Using Stratus MLS
160
Recently Viewed
Use Recently Viewed - from My Lists on the main menu - to display a list of your
recently viewed listings.
Note:
The Recently Viewed page displays in results list format, and all the
functionality of the List page is available.
To See Recently Viewed Listings
1. Click My Lists on the main menu.
2. Click Recently Viewed on the sub-menu.
3. Work with the Recently Viewed list as you would any list.
To Clear Recently Viewed Listings
1. At the Recently Viewed list, select the rows you want to clear. (To select all rows,
select the checkbox in the heading row.)
2. Click Clear on the action bar.
3. At the confirmation prompt, click Delete.

Photo & Slideshows
161
Photo & Slideshows
Using Stratus MLS
162
View Photos
Use the Photos action - from List or View- to view all the photos for a single property or
the primary photos for multiple properties.
Each detail report displays a photo at the top left corner of a one-per-page form, or
the left side of a multiple-per-page form. When more than one photo is available,
use the navigation arrows to scroll through all.
If you click the Photo action when viewing a property in a one-per-page format, all
the property’s photos display. If you click the Photo action when viewing multiple
properties, as in a thumbnail form, each property’s primary photo displays.
See “Manage Photos” on page 164 to add or change photos.
How . . .
To Navigate Photos in the Detail Form
1. At a detail form with multiple photos, click the previous and next buttons to page
through each photo. If the listing has a single photo, navigation buttons do not
appear.
2. Mouse over the photo to display its comment, if any.
To Work with the Photos Dialog Box
1. Click any photo in the current detail form.
2. At the Photos dialog box:
scroll if necessary to view all the photos
click a photo to enlarge and optionally print it; click Return to Photos to close the
enlargement
click to print all the photos
click Close X to return to View.
Photo & Slideshows
163
To View the Photos Dialog Box from a Multiple-Per-Page Form
1. Click any photo in the detail form photo viewer to display all photos stored for the
single listing. (See “To Work with the Photos Dialog Box” above for instructions);
or
Select desired listings then click Photos on the action bar to view the primary
photo for the selected listings. The checkbox below each listing’s primary photo is
selected. If you clear a checkbox, that photo is no longer selected at List, View, and
Map.
To View the Photo Dialog Box from a Search Results List
1. To view photos for all or selected listings, at a List page, click Photos at the action
bar.
2. The Photo dialog box displays. If a single listing is selected, all of its photos
display. If multiple or all listings are selected, the primary photo for each displays
at the Photo dialog box.
3. At the Photo dialog box, click any photo to enlarge it. (See “To Work with the
Photos Dialog Box” above for instructions.)

Using Stratus MLS
164
Manage Photos
While editing a listing at the listing detail edit form, or after choosing Manage Photos at
the Edit menu, you can upload your own photos or pull in available photos at Photo
Library. With the photo work space displayed, you can preview the listing with photos,
add photo descriptions, and move or delete photos. You can also edit and format a
selected photo.
When displayed in the listing and photo gallery, each photo is placed in a rectangular
space in 4:3 aspect ratio (1/3 wider than tall). While photos of any shape can be displayed
within that space, your photos will look best if you ensure they are the same shape as the
space. You may optionally use the Crop tool in the Photo Editor to fit them to the
standard rectangle. See “Edit Photos” on page 166.
Notes:
No photos are visible until at least one is added.
Once you add photos to the work area, a thumbnail photo displays for each,
and the Edit action is available.
Photos that don’t match the standard shape display with an asterisk *, an alert
prompting you to review them.
How . . .
To Manage Photos
1. At the Edit Listing tab, type the ML# and click Open. Review the summary details to
confirm this is the correct listing to edit; OR
At Add/Edit Complete, choose Manage Photos from the list of edit types when
submitting or editing a listing.
2. At the Photos work space, use the action bar to Upload a photo or choose from
Photo Library; and/or Edit, Delete, Preview, or change the order of selected photos
as needed.
3. Click Submit.
4. At the Add/Edit Complete dialog box, choose another option, or click Exit.
Photo & Slideshows
165
To Upload Photos
1. At the Photos work space, click Upload on the action bar.
2. At the Upload Photos dialog box, browse for a photo, type a description, then click
Upload.
To Preview the Listing with Photos
1. At the Photos work space, click Preview on the action bar. The listing (or draft)
displays in detail view. Photos display in the top left corner, and can be navigated
using forward and back arrows.
2. Click Close to close the Preview window.
To Add or Change a Description After Uploading
1. At the Photos work space, click the text box under the photo thumbnail.
2. Type a description.
To Move a Photo
1. At the Photos work space, select the desired photo.
2. While pressing the mouse button, drag the photo to the desired location, midway
between two others.
3. Wait for space to open, then release the mouse button to drop the photo at the new
location.
4. Drag and drop additional photos as needed.
To Delete a Photo
1. At the Photos work space, select the desired photo.
2. Click Delete on the action bar.
3. At the confirmation prompt, confirm the deletion.
To Edit a Photo
1. At the Photos work space, select the desired photo.
2. Click Edit on the action bar.
3. Optionally enhance the photo. See “Edit Photos” on page 166.
4. Click Save when changes are complete.
Using Stratus MLS
166
Edit Photos
Use the Edit Photo dialog box - available from the Edit action at the Photos tab during
listing Add/Edit - to enhance a listing’s photos. You can make a photo darker or brighter;
change its contrast; or rotate, re-size, crop, or delete it.
Use navigation arrows to move between photos, and the delete button to delete the photo.
Note:
While maximizing resolution, the system automatically reduces the file size of
each of your uploaded photos to a maximum set by your MLS. However, the
system does not crop or change your photo’s aspect ratio. Instead, the system
allows you to upload a photo cropped to a non-standard shape, which you may
prefer, for example, when displaying a small detail. You can, if desired,
quickly crop photos of non-standard shape to better fit the space allowed: 1/3
wider than their height. (See “To Crop a Photo,” below. )
How . . .
To Change Brightness
To darken the overall photo, click the Darken action at Edit Photo. To continue
darkening, repeat the action as needed.
To lighten the overall photo, click the Lighten action at Edit Photo. To continue
lightening, repeat the action as needed.
To Change Contrast
To decrease the contrast between the photo’s light and dark colors, click the - Contrast
action. To continue decreasing contrast, repeat the action as needed.
To increase the contrast between the photo’s light and dark colors, click the + Contrast
action. To continue increasing contrast, repeat the action as needed.
Photo & Slideshows
167
To Rotate a Photo
To rotate a photo counterclockwise 90°, click the - Rotate action. To continue rotating in
the same direction, repeat the action as needed.
To rotate a photo clockwise 90°, click the + Rotate action. To continue rotating in the
same direction, repeat the action as needed.
To Crop a Photo
When you upload a listing photo, the system retains its original aspect ratio. However,
your photos will be shown in spaces that are rectangular — 1/3 wider than tall. While
photos of any shape can be displayed within that space, you can maximize their
appearance by ensuring they are the same shape as the space. You may optionally use the
Crop tool to fit them to the standard rectangle, with an aspect ratio of 4:3.
If the system determines that a photo’s aspect ratio differs significantly from the standard
4:3, an asterisk displays on the photo thumbnail. To crop a photo to standard dimensions,
use the Crop action on the Photo Edit dialog box.
The Crop action applies to the photo currently displayed in the Edit Photo dialog box.
The action toggles on and off. To enable cropping, click the Crop action. To exit
cropping, click Crop again, or click Cancel.
When you enable cropping, the system grays out any portion of the photo that must be
removed in order to match standard dimensions. Drag a corner handle in either direction.
While you drag, the system constrains the photo to the correct aspect ratio. To complete
the crop, click the Apply button. The system removes the grayed out portion and displays
the cropped version of the photo.
Review the cropped photo. To permanently save the change and close the Edit Photo
dialog box, click Save.
To Navigate Through Photos
To view more photos and move between them, use the Previous and Next actions that
display as green arrows.
To Delete a Photo
To delete the photo currently displayed in the Photo Edit dialog box, use the Delete
action.
Using Stratus MLS
168
View Slide Shows
You can view a slide show of property photos from List or View.
To display a dynamic slide show of property photos, click Slideshow on the action bar.
When you select one property for a slide show, all of that property’s photos display
in the form of a slide show. If available, a comment displays below the photo. At
View, only the currently-displayed property appears in the slide show viewer,
regardless of whether the property is selected at View.
When you select several or all properties for a slide show, all of the properties’
primary photos display in the form of a slide show.
To navigate to a particular photo in a slide show, mouse over the current photo to show
the navigation arrows. Click right or left arrows to move to the desired photo; or simply
click the desired photo below the slide show.
To close the slide show, click Close in the top right corner of the Slideshow dialog box.
Note:
To see a slide show of this kind at View, select more than one property at a
form that displays several (for example, a thumbnail form).
How . . .
To View a Slide Show from a One-Per-Page Detail Form
1. To display a slide show of all photos stored for the current listing, click Slideshow
at the action bar.
2. Click any photo below the slide show to switch to it, or mouse over the large photo
to use the floating navigation arrows.
3. Click Close to return to the detail report.
To View a Slide Show from a Multiple-Per-Page Detail Form
1. Select the checkbox for desired listing(s) then click Slideshow on the action bar.
2. Click Close to return to the detail form.
Photo & Slideshows
169
To View a Slide Show from a Search Results List
1. At a search results list, click Slideshow at the action bar to view a slide show for all
or selected listings.
2. Click Close to return to List.

Using Stratus MLS
170

Driving Directions
171
Driving Directions
Using Stratus MLS
172
Get Driving Directions
Use the Driving Directions dialog box - from List, View, and Map pages - to get driving
directions from your default location to selected addresses. The dialog box displays
addresses selected at List or Map in the order you choose them, or the address of the
currently displayed listing at View. Alternatively, you can type the addresses. Re-order
the addresses as needed.
Below the list of addresses, a map displays the suggested route. You may zoom or move
the map as needed. Below the map, textual driving directions show distance and travel
time.
To customize your route, select options for Avoid Traffic, Show listings on map, and
Round-trip as needed.
Note:
If an address lacks a proper geocode and cannot be mapped, Driving Directions
does not include that listing among the addresses.
How . . .
To Select Listings to Route
On the Results List page:
To choose addresses at List, select each property in the desired order, then click
Directions, on the action bar, to initiate routing.
On the View page:
To choose addresses at Viewwhen using a one-per-page form, you can get driving
directions from your default location to the listing currently displayed. Click
Directions, on the action bar, to initiate routing.
To choose addresses at Viewwhen using a multiple-per-page form, you can get
driving directions from your default location to selected listings. Select each
property in the desired order, then click Directions, on the action bar, to initiate
routing.
Driving Directions
173
On the Map page, there are two ways to select addresses for driving directions:
To choose addresses at listing pop-ups, open the first pop-up for your route and
select its checkbox. Repeat this step - in the desired order - for each address you
want to include in the route. Each property you choose is selected in the results list
below the map. Click Directions on the action bar to initiate routing.
To choose addresses from the results list below the map, select each property in the
desired order, then click Directions on the action bar to initiate routing.
To Add and Reposition Addresses in the Route
1. At the Driving Directions dialog box, click Add. The new address is added to the
bottom of the list.
2. Select an address checkbox and click Move Up or Move Down as needed.
To Edit and Remove Addresses in the Route
To edit an address, select the address and click Edit. At the Edit Address dialog
box, change the address as needed, then click Save.
To remove an address, select the address checkbox and click Remove. The address
is removed from the route.
To Customize the Route
At Directions Options, select options for Avoid Traffic, Show listings on map, and
Round-trip as needed. With Show Listings selected, markers display for
surrounding properties that match your search.
To Print Driving Directions
1. Display driving directions at List, View, or Map.
2. At the Driving Directions dialog, click the Print icon.
3. At the Print Options dialog box, select or clear one or more options:
Map: Print the mapped route with optional round trip, reference # markers, intermediate
destinations, and the distance at each destination.
Directions: Print turn-by-turn directions in text with distance notations and reference
numbers.
Detail Views: Print the details in the format you select from the Detail Form
dropdown list.
Using Stratus MLS
174
4. To print the pages, click the Print button.
5. Browsers vary. Directions may print immediately, or a dialog box may display.
You may need to choose the Print option from the browser’s File menu.
To Send Driving Directions
1. Display driving directions at List, View, or Map.
2. At the Driving Directions dialog, click the Send icon.
3. At the Send dialog box, complete the form as you want. “Send Listings” on page 222
4. To send the directions, click the Send button. At the confirmation prompt, click
OK.

Contacts
175
Contacts
Using Stratus MLS
176
About Contacts
Use Contacts - from the main menu - to add, manage, print, and look up information
about your personal contacts as well as Office and Member Rosters.
Along with a search text box for quick lookup, the action bar at List and View allows you
to upload, add, edit, and delete contacts; manage groups; narrow the list to selected
contacts; and switch to Details.
My Contacts
Your contacts are grouped for convenient access in standard and custom groups. You can
add to the selection of custom groups, as needed. After opening Contacts at the main
menu, click “My Contacts” to locate all groups and rosters. This dropdown list is
provided in the top left corner of the List and View pages. It lists all standard groups,
custom groups you have added, and options to Search Offices and Members.
Contact List Page
At List you can view a list of all contacts or those in a particular group or roster, select
one or more contacts from the list to display and print them at View, search contacts
using criteria, preview search criteria, save the search, and run a previously-saved search.
Search results update dynamically at List as you add search criteria. See “Work With the
Contacts List” on page 183 .
Contact View Page
At View, you can display the details for selected contacts and move through all with
navigation arrows. You can access a particular contact from an alphabetical names
directory. When View opens, the first-selected contact displays. (See “Work With the
Contacts View” on page 185.) At View, use the arrows to navigate through the contacts in
turn.
You can scroll through a contact’s entire form or click tabs to jump directly to View,
Financials (if available), Activities, Notes, as well as Prospects if any are stored for the
contact. See “Work with Contact View”. At the Prospect section, which displays if a
prospect search exists for the contact, you can access or manage existing prospect
searches and create new ones.
Contacts
177
Add and Edit Groups and Contacts
Associating your contacts with a particular group helps you organize them for quick
retrieval. To further organize your contacts, add custom groups.
When adding or editing a contact, Stratus MLS displays the contact detail edit form. The
detail edit form has sections that correspond to the tabs across the top of the form. To
navigate the form, scroll or click a tab. You can edit your own contacts, but not those in
the Brokerage or Member Rosters.
How . . .
To Add a Custom Group
1. Click the Manage Groups action.
2. At the Manage Groups dialog box, click Create New.
3. At the Add Group dialog box, type a name then click Add.
4. At the Manage Groups dialog box, click Close.
To Rename or Delete a Custom Group
1. Click the Manage Groups action.
2. At the Manage Groups dialog box, select a group.
3. To rename a group, click Rename. At the Rename Group dialog box, type a new
name, then click Rename.
4. To delete a group, click Delete. At the confirmation prompt, click Delete. Note:
Contacts in the deleted group remain in the general “My Contacts” group and can
be reassigned to another group.
5. At the Manage Groups dialog box, click Close.
To Add a Contact
1. Click the Add Contact action.
2. At Contact View, enter the contact’s information. Required fields are starred with
an asterisk (*). Assigning a Status (Active/Inactive) is recommended, since it allows you
to exclude inactive contacts from contact searches.
3. At Financials, optionally enter income, debt, and other financial information.
Using Stratus MLS
178
4. At Notes, enter comments about communications, interactions, and contact
requirements.
5. Optionally click the Preview action to see the new contact in detail view. To close
the Preview and return to a particular field, click that field at Preview; otherwise,
click Close.
6. To find a particular field, click Find on the action bar. At Field Name Contains,
enter a portion of the field name, then click Find. Enter information at the field as
needed.
7. Click Save. The new contact appears in the Contact List.
To Upload Contacts
You can upload contacts from Windows Live Mail, Windows Mail, Outlook Express, and
Outlook. Note: No Financial data can be uploaded.
1. Click Upload on the action bar.
2. At the Upload Contacts dialog box, click Browse.
3. At Choose file to upload dialog box, browse for the contacts file, select it, then
click Open.
4. At Add Contacts to Custom Group, type the name of a new custom group in order
to create it, or select an existing group.
5. Click Upload.
6. At the Upload Log dialog box, review the list of successfully uploaded contacts,
then click Close.
To Edit a Contact
1. Select a contact at List, or display the desired contact at View.
2. Click the Edit action.
3. Navigate through the edit form, OR:
Click the Find action to open the Find a Field dialog box. At Field Name Contains,
enter a portion of the field name, then click Find.
4. Edit fields as needed.
5. Click Save.

Contacts
179
To Delete a Contact
1. Select a contact at List, or display the desired contact at View.
2. Click the Delete action.
3. At the confirmation prompt, click Delete.
Using Stratus MLS
180
Search Contacts
At the contacts List page, the left side panel offers dynamic criteria entry. As you enter
each desired field value, the results list updates accordingly. At List, the criteria panel
provides Preview, Save Search, Clear, and Rename actions. Be sure to clear the panel
before entering criteria for a new search.
Note:
To look up a particular contact in a group already displayed, use the search text
box on the action bar. Type part or all of a contact’s name to narrow search
results accordingly.
The MLS determines the maximum number of search results to display for
Office and Member Searches.
How . . .
To Clear the Criteria Panel
To clear all entered and selected values, click Clear at the panel’s small action bar.
To Search Contacts by Criteria
There is no need to submit criteria, because the system finds matches dynamically as you
enter criteria.
1. In the left-side criteria panel, find a field you want to search by.
2. Type the start of a field value or the whole value (for example, Last Name starts w/
Smi or Smith).
3. Optionally, select another comparator (such as equals, contains) from the
dropdown list.
4. Optionally, select the “not” checkbox to exclude contacts that match the value you
enter in the text box.
5. Optionally, click the “or” button to enter more than one value for the field.
6. Review the search results in the main panel.
Contacts
181
To Preview Search Criteria
To preview all entered criteria so the system can check for validity and display a
count, click Preview at the panel’s small action bar.
To Save a Search
A search is saved with all the criteria from the dynamic criteria panel (the template and
Add a Field) and the current value from the group dropdown list.
1. Enter search criteria and preview to validate.
2. If you are happy with the list of search results, click Save Search at the panel’s
small action bar.
3. At the Save Search dialog box, enter a Name for the search.
4. Click Save.
To Use a Saved Search
1. At the top of the criteria panel, click Use Search.
2. Select a saved search from the dropdown list.
3. The criteria panel fills with the selected search’s criteria and applies the group that
was saved with the search. Results display immediately at the results list.
To Rename a Saved Search
1. At Use Search, select a saved search.
2. Click Rename at the panel’s small action bar.
3. At the Rename Saved Search dialog box, type a different Name.
4. Click Rename.
To Delete a Saved Search
1. At Use Search, select a saved search.
2. Click the red “X” at the top of the panel.
3. At the confirmation prompt, click Delete.
To Use the Search Text Box
This feature acts as a “Contains” search and checks for matches - within the current
group - in the following fields: First Name, Middle Name, Last Name, Organization, and
email address.

Using Stratus MLS
182
1. With a group displayed, click inside the Search text box on the action bar.
2. Type part of the First Name, Middle Name, Last Name, Organization, or email
address.
3. As you type, the contact list refreshes to display a narrowing list of contacts.
4. Select a contact or continue typing until one contact remains.
5. Clear the search text box to avoid improper display of subsequently selected
groups.
Contacts
183
Work With the Contacts List
The Contacts List page allows searches and a list of contacts displayed by Group or
search results. To narrow the contact list, use the search text box on the action bar, or
enter criteria at the search panel. (See “Search Contacts” on page 180 .)
The groups dropdown list appears at the top left corner of the page, just below the action
bar. The groups list includes all system groups as well as custom groups you have added.
Groups also include Member and Office Rosters, and temporary groups generated by the
system for search results.
Note:
The MLS determines the maximum number of search results to display in
member and office searches.
How . . .
To Open a Group and View Contacts
1. At the Group list at the top left corner of the page, select one or more groups.
2. At the resulting list of contacts, scroll and select contacts as desired, then click
View on the action bar.
3. The first contact displays in the detail view form. Use arrows to navigate.
To Use the Member Roster
1. At the Contacts submenu, or at the Group list at the top left corner of the page,
select Member Roster.
2. At the list of search results, select one or more members then click View on the
action bar; OR
Click Show Office to see the selected member’s office.
3. The first member displays in the detail view form. Use arrows to navigate.
Using Stratus MLS
184
To Use the Office Roster
1. At the Contacts submenu, or at the Group list at the top left corner of the page,
select Office Roster.
2. Select an office then click View on the action bar; OR
Click Show Members to see members of the selected office.
3. The first office displays in the detail view form.
4. Use arrows to navigate.
To Narrow and Expand the List
1. Select one or more contacts you want to keep in the list.
2. Click Narrow at the action bar.
3. Repeat steps 1-2 to narrow further.
4. To expand the pre-narrowed list, click Expand on the action bar.
5. If the list was narrowed more than once, repeat step 4 until the full list displays.
To Narrow the List with the Search Text Box
This feature acts as a “Contains” search and checks for matches - within the current
group - in the following fields: First Name, Middle Name, Last Name, Organization, and
email address.
1. With a group displayed, click inside the Search text box on the action bar.
2. Type part of the First Name, Middle Name, Last Name, Organization, or email
address.
3. As you type, the contact list refreshes to display a narrowing list of contacts.
4. Select a contact or continue typing until one contact remains.
5. Clear the search text box to avoid improper display of subsequently selected
groups.
To Sort the List
To sort the list in ascending order, click a column heading. Click again to sort in
descending order
To sort by name, click the First, Middle, or Last column heading accordingly.
Contacts
185
Work With the Contacts View
The Contacts View page provides an alphabetical directory in the left panel, where you
can look up a last name, see a group, and narrow a list of contacts by alphabet.
For instructions to open groups, view rosters, use the search text box, manage groups, and
add, edit, and delete contacts, see “Work With the Contacts List” on page 183.
The Names Directory A directory of contact names displays in the left panel at View. Names are listed in
alphabetical order.
To narrow the list, select a group, then:
To limit the list to names beginning with a particular letter, click the letter
To limit the list to a particular name, enter text at the search text box
To display a contact’s detail form, click any name.
To navigate through more contacts in the narrowed list, click an arrow.
The Alphabet Pick List The list includes letters A through Z in addition to the default “A-Z” choice at the top,
which causes all contacts in the current group to display.
To use the pick list to narrow the names to a particular letter, click the letter.
The Detail View Form In the main panel, View displays the contact detail forms for all contacts currently
displayed in the directory. To make changes in any section of the Contact detail form,
click Edit .
To navigate through a group of detail forms, click an arrow.
To view a contact’s entire form, use the scroll bar
To jump directly to a section of the form, click tabs for Details, Financials (if
available), Activities, Notes, and Prospects (if any).
Using Stratus MLS
186
The Activities Tab Activities you enter for the contact display at Calendar.
To add an activity for the contact, click the Activities tab, then enter details at the
available fields.
The Prospects Tab If a contact has one or more prospect searches, the prospects remain at the Prospects tab
until you delete them. This allows you to salvage an expired prospect beyond the normal
limit.
To salvage a prospect beyond expiration, select it and click Extend.
To find matches for a prospect, select it and click Matches.
To create a new prospect, click Create.
To manage a prospect, select it and click Manage.
To change a prospect’s criteria, select it and click Search.
Contacts
187
Print and Download Personal Contacts and Rosters
Print Contact records in List Row, Detail View, or Avery Label format. When printing
Contacts in Detail View, Avery choices for printing labels are included in the list of
Forms. You can select Avery 5160 (3 across) or Avery 5161 (2 across) for Contact
Addresses.
Download personal Contact records for Outlook and Windows Live Mail, Avery Label
format, or all available data. When downloading Contacts in List Row format, column set
options allow selection of all available data, or data supported by Outlook and Windows
Live Mail.
Note:
Members and Offices cannot be downloaded.
How . . .
To Print Contact Records
1. Select one or more contacts at the contacts List or View page.
2. Click Print.
3. At the Print dialog box, to print rows, select List Rows; or to print each record’s
details, select Detail Views.
4. At For, to print the displayed record (if any), select The Current Contact; to print all
records in List, select All X Contacts; or to print currently selected records, select X
Selected Contacts.
5. At Column Set, applicable only to List Rows, select the desired column set format.
6. At Form, applicable only to Detail Views, select the desired form.
7. Click Print. Contact records may print immediately, or a browser dialog box may
display. Note: To preview before printing, click Preview. Click Print when you’re
ready to print.
Using Stratus MLS
188
To Print Contact Labels
1. Select one or more contacts at the contacts List or View page.
2. Click Print.
3. At the Print dialog box, select Detail Views.
4. At For, to print labels for the displayed record (if any), select The Current Contact;
to print labels for all records in List, select All X Contacts; or to print labels for
currently selected records, select X Selected Contacts.
5. At Form, select the Avery label you want.
6. At Replace Contact’s Name With, enter a different name to display on the labels, if
needed. Note: The replacement name (for example, My Neighbor or Recipient)
appears on all the labels.
7. Click Print Preview; confirm that the labels appear as you want them.
8. Click Print. Labels may print immediately, or a browser dialog box may display.
To Print Member or Office Records
1. Select one or more member or office records at the contacts List or View page.
2. Click Print.
3. At the Print dialog box, select List Rows to print rows, or Detail Views to print each
record.
4. At For, to print the displayed record, select The Current Contact; to print all listed
records, select All X Contacts; or to print the currently selected records, select X
Selected Contacts.
5. At Column Set, applicable only to List Rows, select the desired column set format.
6. Click Print. Roster records may print immediately, or a browser dialog box may
display.
To Download Personal Contact Records
1. Select one or more personal contacts at the contacts List or View page.
2. Click Download.
3. At the Download dialog box - to download for Outlook, Windows Live Mail, or all
data - select List Rows; or to download contact records, select Detail Views.
4. At For, to download the displayed contact (if any), select The Current Contact; to
download all contacts, select All X Contacts; or to download currently selected
contacts, select X Selected Contacts.
5. At Column Set, applicable only to List Rows, select the desired column set format:
“Outlook or Windows Live Mail” or “All Downloadable Fields”.
Contacts
189
6. At Include column names as first row, applicable only to List Rows, select the
checkbox if you want to include headings. Note: You cannot clear this checkbox
when downloading contacts for Outlook or Windows Live Mail, which require
headings.
7. At Form, applicable only to Detail Views, select the desired form.
8. Click Download.
To Download Personal Contact Labels
1. Select one or more contacts at the contacts List or View page.
2. Click Download.
3. At the Download dialog box, select Detail Views.
4. At For, to download a label for the displayed record (if any), select The Current
Contact; to download labels for all contacts in List, select All X Contacts; or to
download labels for currently selected contacts, select X Selected Contacts.
5. At Form, select the desired Avery form.
6. Click Download.

Using Stratus MLS
190

Prospect Match
191
Prospect Match
Using Stratus MLS
192
About Prospect Match
With Prospect Match, you store a prospective buyer’s home requirements, allowing
Stratus MLS to automatically track available listings that match the prospect’s search
criteria. The system runs the search once each day at midnight, and automatically emails
a summary of the day’s matches to all designated recipients.
For each prospect, create a profile and enter search criteria. Once the search is saved, the
system emails an alert each time new listings, back-on-markets, or price changes generate
matches.
If you know a prospect won’t be able to check email for a period of time, you can
suspend prospect searches and email alerts, resuming them when needed.
Note:
Prospect Match is agent-specific. You are the only one with access to your
prospects.
New Prospects You can create a new prospect wherever it is convenient to do so:
At the Search Type page, select “Prospect Search”.
At any search for available listings, click “Create Prospect” before submitting the
search.
At Contact View, select the Prospects tab.
New Matches When the system finds new matches:
All specified recipients receive emailed links to new matches.
At Info Center, a linked “New Prospect Matches” alert displays.
The latest set of matches are also available at the Prospect Match page via the
“Matches” button.
Prospect Match
193
Prospects Linked to Contacts By linking a contact to your prospect search you allow the system to automatically fill
information in the prospect profile, and you can access and add, manage, and extend
prospect searches directly from the contact’s detail view page. When you create a
prospect search for a new customer, it is simple to create the contact on the fly.
Extending Prospects When a prospect is due to expire within fourteen days of the expiration date - or has
already expired within the last fourteen days, the prospect is eligible for extension and an
alert to this effect displays at Info Center.
If not extended within fourteen days of the expiration date, the prospect is hidden at the
list of prospect searches at the Search Type page. However, the expired prospect can be
restored at the contact, if one exists.
Using Stratus MLS
194
Work with Prospect Match
Prospects include three sections:
Name and date
Information about the prospect
Search
You can enter the first two sections directly or let the system automatically fill
information from an existing contact.
You can define search criteria for the prospect search directly, or let the system pass
criteria from an open search you want linked to a prospect.
When a prospect is linked to a contact, you can add, manage, extend, and review prospect
searches from Contact.
How . . .
To Create a Prospect at the Search Type Page
1. At the main menu click Search.
2. At the Search Type page click Prospect Matches.
3. At the Prospect Searches page click Create.
4. At the Create Prospect dialog box, enter information for the prospect profile (see
field descriptions below) then click Continue.
5. Enter criteria at the Criteria page. Click Save Prospect on the blue bar at the
window bottom.
6. Click OK.
7. To run the search and see matches, click Submit at the Criteria page; or click
Manage Prospect to make changes (see below).
Prospect Match
195
To Enter a Prospect’s Profile Information
At the Create Prospect dialog box, enter or edit the following:
Prospect Name: Enter a name to identify the prospect. The name need not be unique. (To
change a saved prospect’s name, enter a new one and save the prospect.)
Expiration Date: For new prospects the system automatically fills a date ninety days from
the current date. You can change a date provided it meets MLS requirements. To extend a
saved prospect’s expiration date, if the prospect is eligible for extension (see “About
Prospect Match” on page 192), enter a new one and click Extend.)
Suspend this Prospect: Select this check box to suspend searching for the prospect, for
example while the prospect is on vacation. Clear the check box to resume searching.
Note: If the Expiration Date passes while the prospect is suspended the prospect expires.
Email Options
Contact: Optionally select an existing contact. The full name and primary email address,
if any, are available at the corresponding fields. Alternatively you can type in the full
name and email addresses. You can change the selected contact.
Full Name: If using a saved contact, the full name automatically fills. You can edit the
name. If you do not use an existing contact, type the name.
Email: If using a saved contact, the primary email address, if there is one, automatically
fills. If you do not use an existing contact, type a name. To prevent the contact receiving
a prospect match email, clear the check box.
Include Bcc: Enter email addresses or Contacts to whom you want to send a blind copy.
Note: Bcc addresses are visible only in the body of the Agent’s copy. To avoid triggering
a spam filter, the number of Bcc addresses is restricted.
Form: Select the detail form the recipient will access from emailed prospect match alerts.
Send a Copy to Yourself: Select the checkbox to receive a copy of the prospect matches at
your email address; clear it to discontinue receipt. Note: If you have multiple prospects,
matches for each are combined into one email message.
Include Photo Gallery: If enabled, select the checkbox to include a photo gallery for each
linked listing. Note: When the specified form excludes listing addresses, the photo gallery
is not provided.
Include Map: If enabled, select the checkbox to include a map displaying the locations for
all linked listings. Note: When the form excludes listing addresses, the map is not
provided.
Using Stratus MLS
196
Additional Recipients: Type the email addresses for additional recipients. Separate
addresses with a comma, space, or line break. You can enter additional contact addresses,
an address for another agent, or an alternate address for yourself. To prevent additional
recipients receiving a prospect match email, clear the checkbox.
Search
For a new prospect this section allows selection of one or more classes, listing types, and
a search type.
To Define a Prospect’s Search Criteria
1. After creating the prospect profile (see above) click Continue.
2. At the Criteria page, enter the prospect’s criteria as you would for any search.
3. Click Save Prospect.
4. When prompted, click OK. The Criteria page redisplays.
5. To submit the search for current matches, click Submit.
6. To make changes in the profile or search at any time, click Manage Prospect.
To Create a Prospect While Searching
If the criteria in a search for available listings meets a customer’s needs, you can create
a new prospect profile for that customer and set up prospect match alerts for yourself
and the customer.
1. After entering criteria at the Criteria page for a new, saved, or pre-defined search,
before you submit the search click Create Prospect on the action bar.
At the Create Prospect dialog box, enter information for the prospect profile and
email settings (see above: To Enter a New Prospect’s Profile Information).
2. At the blue notification bar, click Save Prospect.
3. Click OK at the confirmation prompt.
To run the search and see matches, click Submit at the Criteria page; or to make
immediate changes to the prospect click Manage Prospect. (See To Manage Saved
Prospects, below).
Prospect Match
197
To Create a Prospect in Map Search
1. After locating the desired search area and optional criteria at a map search, click
Prospect on the criteria panel’s action bar.
At the Create Prospect dialog box, enter information profile and email information
(see above: To Enter a New Prospect’s Profile Information).
2. Review the criteria summary.
3. Click Save Prospect; or to make immediate changes click Manage Prospect. (See
To Manage Saved Prospects, below).
To Manage Saved Prospects
1. At the Prospect Searches page select a prospect, then click Manage; or
At the Criteria page after saving the prospect, click Manage.
2. Change profile info as needed and review the displayed search summary.
3. To continue without changing criteria, click Save Prospect; OR
To save then edit criteria, click Save Prospect and Edit Criteria, then edit criteria.
4. Click Save Prospect, then click OK.
To Create or Manage a Prospect Search for a Contact
At a contact’s detail form you can manage existing prospect settings or create another
prospect search for the contact. Creating a prospect is possible only if one already exists
for the contact.
1. At a contact’s detail view, the Prospects tab displays if a prospect search exists for
the contact.
2. Click the Prospects tab.
To create a prospect click Create then enter information for the prospect profile
and email settings (see above: To Enter a New Prospect’s Profile Information).
Click Continue. Define search criteria then click Save Prospect.
To manage a saved prospect click Manage then review and change information for
the profile and email settings as needed.
o To continue without changing criteria, click Save Prospect; OR
o To save then edit criteria, click Save Prospect and Edit Criteria, make criteria
changes then click Save Prospect.
Using Stratus MLS
198
To See a Saved Prospect’s Matches
1. At the Prospect Searches page (displayed when you select Prospect Searches at the
Search Type page) click to select a prospect.
2. To display the results list, click Matches.
3. At the Days Back dropdown list, select the number of days for which you want to
see the prospect’s matches.
4. The results list displays.
To Extend Prospects
You can extend prospects that are due to expire or that expired within the last two weeks.
Note: Prospect searches are extendable beyond two weeks of expiration when viewed at
Contacts.
1. Click a prospect expiry alert at Info Center, or choose Prospect Searches at the
Search Type page. The Prospect Searches list displays.
2. Select one or more prospects that are within two weeks of expiration.
3. Click Extend.
4. At the confirmation prompt, click Yes.
To Suspend Prospects
1. At the Prospect Searches page click to select one or more prospects.
2. Click Manage.
3. Select the Suspend this prospect checkbox.
4. Click Save Prospect.
5. At the Prospect Searches list, confirm that the suspension took place.
To Delete Prospects
1. At the Prospect Searches page click to select one or more prospects.
2. Click Delete.
3. At the confirmation prompt, click Delete.
Prospect Match
199
To Review Prospects
1. At the Prospect Searches page click to select one or more prospects.
2. Click Review. The Review Prospects dialog box displays.
3. To print prospect settings, click Print.
4. To close the Review Prospects dialog box, click Close.

Using Stratus MLS
200

CMA
201
CMA
Using Stratus MLS
202
About CMAs
Use CMA from the main menu to add and maintain a customizable Comparative Market
Analysis.
The CMA provides prospective sellers an analysis of market activity for comparable
properties in any class. The report provides the information sellers need in order to
understand and feel comfortable with a pricing strategy and with you as their agent.
What’s In the CMA
The CMA allows data entry at each of the following sections, and each can be opened at
the CMA detail edit form by selecting a tab or by scrolling. See “Data Entry at CMA
Sections” on page 204 :
Contact
Subject Property Details
Agent
Cover Page
Cover Letter
Comparables
Edits & Adjustments
Marketing
Attachments
Contents
The CMA presentation may include any or all of the following pages:
Cover Page
Cover Letter
Table of Contents
Subject Property Details
Subject Property Photo Gallery
Side-by-Side Property Comparison
Comparable Summary
Edits & Adjustments
Consumer Medium Detail Form
Another selected Detail Form
Consumer Thumbnail Form
Photo Gallery
Flyer
CMA
203
Road or Aerial Map
Market Statistics Report
Days on Market Report
Marketing Plan
How it Works
Stratus MLS streamlines CMA generation and provides a comprehensive and
customizable report for client presentations.
While adding or updating a CMA, add information in the appropriate sections of the
CMA detail edit form, rewrite and format components to customize them, and upload as
needed. Scroll through the detail edit form, or select a particular section from the tabs
across the top of the CMA page.
Choose comparables from listing and public record search results or a map, and by
ML# or by listing cart. The listing search can include private as well as MLS listings.
Create the CMA with or without a subject property, in order to meet a variety of
presentation needs. You can include a marketing plan and financial analyses in
your presentation, and make numeric adjustments as needed.
Save, print, and email the CMA. You can also copy it, specify components you
want to include in the report, and customize your cover page and other sections.
Using Stratus MLS
204
Data Entry at CMA Sections
When you start a new CMA or open an existing one, the system presents fields in a
single, scrollable CMA detail edit form. Fields are organized in sections that correspond
to tabs at the top of the form.
To jump directly to a new section, click its tab. To move sequentially from field to field,
press the Tab key. Fields starred with an asterisk (*) are required.
To include particular components in the presentation, select them at the Contents tab.
How to Complete Data Entry at CMA Sections . . .
Contact You can create a CMA with or without associating the presentation with a particular
contact. If you don’t want to associate the presentation with a contact, you can choose
instead to enter client information directly on the Cover Page and Cover Letter, or
exclude client information altogether.
If the contact is new, you can enter and save the contact details directly in the CMA, and
the system will add the new person to your Contacts.
Select or clear the “Include a Contact in this CMA” checkbox accordingly.
Choose an Existing Contact
When you choose an existing contact, the system automatically fills information about
that contact in the CMA detail edit form.
To Pick from All Contacts or By Group
1. Select Include a Contact in this CMA.
2. Click the Contacts button. All your contacts display.
3. To narrow contacts to a particular group, click the down arrow at the My Contacts
dropdown list then select a group.
4. Select one of the current group’s contacts or, to further narrow the list before
selection, start typing the name in the Search text box.
CMA
205
5. The system automatically completes the CMA’s Contact section. Edit or add
information as needed.
6. Click Save or navigate to the next CMA section.
To Pick from a Narrowed List
1. Select Include a Contact in this CMA.
2. At the Use Existing Contact text box, start typing the name. The contacts browser
opens and automatically narrows the list as you type.
3. Finish typing the name or select from the narrowed list in the contacts browser.
4. The system automatically completes the CMA’s Contact section. Edit or add
information as needed.
5. Click Save or navigate to the next CMA section.
Add New or Edit Existing Contact Information
If the contact is new, you can enter the information directly at CMA. Likewise, you can
edit information for existing contacts directly at the CMA edit detail form.
1. At Contact Details, enter information for the contact. Fields starred with a blue
asterisk (*) are required. Assigning a Status (Active/Inactive) is recommended, since it
will allow exclusion of inactive contacts from searches.
2. Click Save. The system updates new or edited contact information at Contacts.
3. Navigate to the next CMA section as needed.
Subject Property The subject property is included so that readers can see how it compares to other
properties included in the presentation. You can create a CMA with or without a subject
property. If you want to include a subject property that is not yet in the MLS database,
you can enter details directly at the CMA detail edit form.
If a subject property is currently in the Multiple Listing System or Public Records
database, even if expired or archived, you can search for the property or enter an existing
ML# or Parcel ID.
Whether you search and select from results, or enter an ML# directly, the system
automatically transfers the appropriate information to the Subject Property detail edit
form.
Using Stratus MLS
206
To include or exclude a subject property for comparison with comparable listings or
public records, select or clear the “Include a Subject Property in this CMA” checkbox as
appropriate.
Choose an Existing Subject Property
When you choose an existing property for a CMA’s subject property, the system
automatically completes information in the CMA detail edit form.
To Search for an Existing Property
1. Select the Include a Subject Property in this CMA checkbox.
2. Click Search Listings or Search Public Records.
3. At the Search Listings or Search Public Records dialog box, select basic criteria then click
Continue.
4. At the Criteria page, enter additional criteria as needed. Optionally, to limit matches to a
particular location by drawing a radius or polygon, click Map on the action bar. (See “Work
With Criteria” on page 75.) Click Submit.
5. At the search results List, select a row, then click Use As Subject Property.
6. The system automatically completes the CMA’s Subject Property section.
7. Edit or add information as needed, and upload photos (see below).
8. Click Save or navigate to the next CMA section.
To Select a Subject Property by ML#or Parcel ID
1. Select the Include a Subject Property in this CMA checkbox.
2. Enter an ML# or Parcel ID then click Use.
3. At the search results List, select a property, then click Use As Subject Property.
4. The system automatically completes the CMA’s Subject Property section.
5. Edit or add information as needed, and upload photos (see below).
6. Click Save or navigate to the next CMA section.

CMA
207
Delete a Subject Property
1. At the Subject Property section of the CMA, click Delete on the action bar.
Upload Subject Property Photos
1. At Subject Property Photos, click Upload.
2. At the Upload Photos dialog box, click Browse.
3. Browse and select photos, then confirm the selection at your browser’s dialog box.
(See “Manage Photos” on page 164.)
4. At the Upload Photos dialog box, click Upload.
5. Optionally click a photo to enhance it. (See “Edit Photos” on page 166.)
6. Click Save or navigate to the next CMA section.
To Delete Subject Property Photos
1. At Subject Property Photos, select a photo.
2. Click Delete on the action bar.
3. At the confirmation prompt, click Delete.
Agent The Agent section of the CMA detail edit form contains information about the primary
agent and co-agent (if another agent in your company is acting as co-agent).
Complete Agent Information
1. Based on your Log In, the system automatically completes the primary Agent
Name, telephone, and other information.
2. If there is a co-agent, select an office from the Office dropdown list and select a person
from the Co-Agent dropdown list.
3. Click Use to allow the system to complete available co-agent information.
4. Add or edit information as needed.
5. Click Save or navigate to the next CMA section.
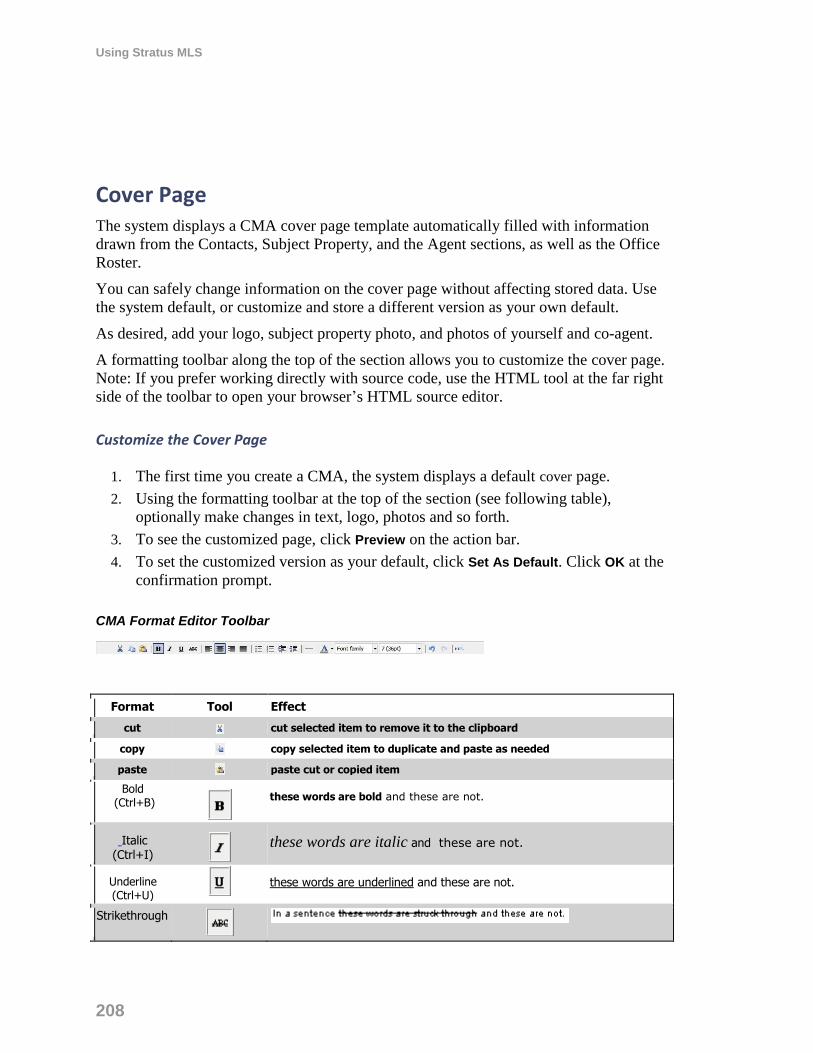
Using Stratus MLS
208
Cover Page The system displays a CMA cover page template automatically filled with information
drawn from the Contacts, Subject Property, and the Agent sections, as well as the Office
Roster.
You can safely change information on the cover page without affecting stored data. Use
the system default, or customize and store a different version as your own default.
As desired, add your logo, subject property photo, and photos of yourself and co-agent.
A formatting toolbar along the top of the section allows you to customize the cover page.
Note: If you prefer working directly with source code, use the HTML tool at the far right
side of the toolbar to open your browser’s HTML source editor.
Customize the Cover Page
1. The first time you create a CMA, the system displays a default cover page.
2. Using the formatting toolbar at the top of the section (see following table),
optionally make changes in text, logo, photos and so forth.
3. To see the customized page, click Preview on the action bar.
4. To set the customized version as your default, click Set As Default. Click OK at the
confirmation prompt.
CMA Format Editor Toolbar
Format Tool Effect
cut cut selected item to remove it to the clipboard
copy copy selected item to duplicate and paste as needed
paste paste cut or copied item
Bold (Ctrl+B)
these words are bold and these are not.
Italic (Ctrl+I)
these words are italic and these are not.
Underline (Ctrl+U)
these words are underlined and these are not.
Strikethrough
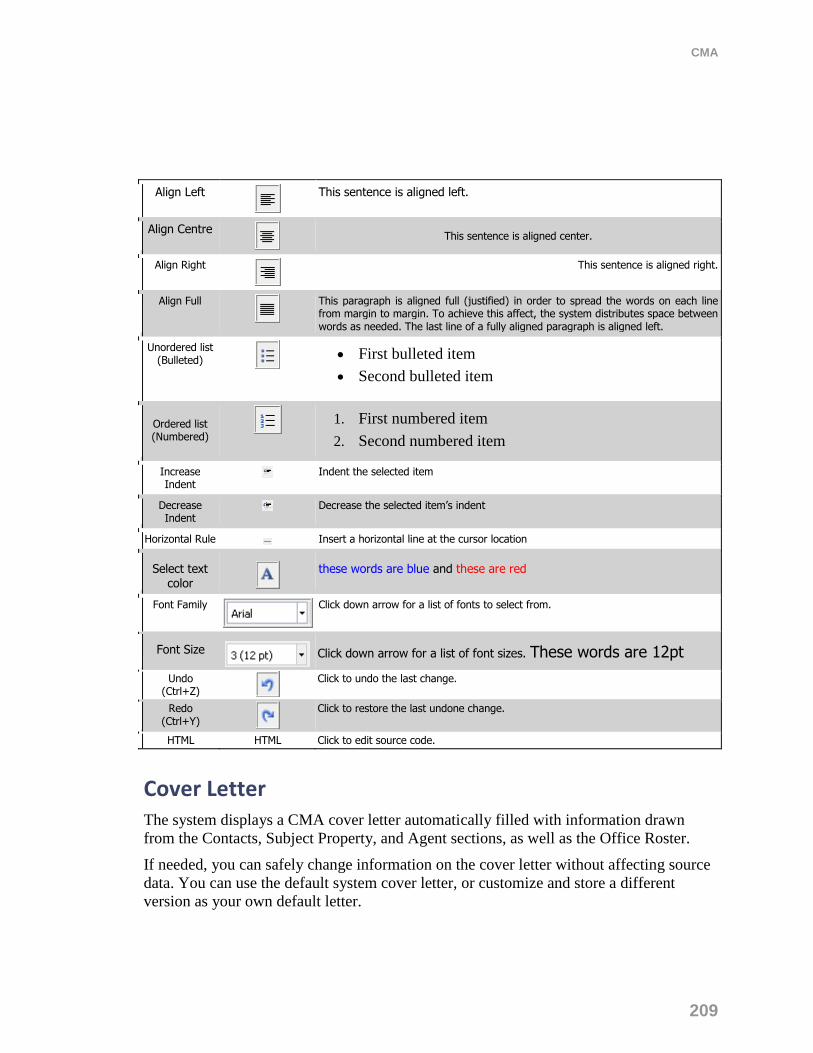
CMA
209
Align Left
This sentence is aligned left.
Align Centre
This sentence is aligned center.
Align Right
This sentence is aligned right.
Align Full
This paragraph is aligned full (justified) in order to spread the words on each line from margin to margin. To achieve this affect, the system distributes space between words as needed. The last line of a fully aligned paragraph is aligned left.
Unordered list (Bulleted)
First bulleted item
Second bulleted item
Ordered list (Numbered)
1. First numbered item
2. Second numbered item
Increase Indent
Indent the selected item
Decrease Indent
Decrease the selected item’s indent
Horizontal Rule Insert a horizontal line at the cursor location
Select text color
these words are blue and these are red
Font Family
Click down arrow for a list of fonts to select from.
Font Size
Click down arrow for a list of font sizes. These words are 12pt
Undo (Ctrl+Z)
Click to undo the last change.
Redo (Ctrl+Y)
Click to restore the last undone change.
HTML HTML Click to edit source code.
Cover Letter The system displays a CMA cover letter automatically filled with information drawn
from the Contacts, Subject Property, and Agent sections, as well as the Office Roster.
If needed, you can safely change information on the cover letter without affecting source
data. You can use the default system cover letter, or customize and store a different
version as your own default letter.
Using Stratus MLS
210
A formatting toolbar allows you to customize the letter. Note: If you prefer to work
directly with source code, use the HTML tool at the far side of the toolbar to open your
browser’s HTML source editor.
To use the default letter for existing CMAs, open the CMA then click Use Default.
Customize the Cover Letter
1. The first time you create a CMA, the system displays a default cover letter.
2. Using the formatting toolbar at the top of the page (see previous table), optionally
make changes in text, logo, photos and so forth.
3. To review the letter, click Preview on the action bar.
4. To set the edited version as your default, click Set As Default. Click OK at the
confirmation prompt.
Understanding Comparables At the Comparables section, build a list of properties useful for comparison purposes.
These may include available or sold, rented, expired, public records and archived. You
may find it convenient to use a Map Search for comps of all statuses, because map
markers are distinguished by color. Search and add comps to the list, then review and
narrow the list to suit the needs of the presentation.
Comparables (comps) may include:
Listings you select at a listings search
Public records you select from a public records search
Listings you add directly by ML#
Your listing cart contents
Specify a price range for which you want to find comps. For available comps, the List
Price applies. For expired comps, the List Price applies. For sold comps, the Sold Price
applies. For rentedcomps, Rentprice applies.
Specify a date range for which you want to find unavailable comps. The date range
applies to Sold Date for Sold, Expired Date for Expireds, andRented Date for Rented.
Note:
Public records provide limited information. To enhance the CMA’s benefit to a
client, use the edit feature, when possible, to manually add information.
CMA
211
Search and Select Comparable Properties
Search comparables by criteria (New Search) or by map (Map Search).
1. At the Comparables tab, click Search Listings or Search Public Records. You can
also Add by ML# or Add from Listing Cart.
2. At the Search Listings or Search Public Records dialog box, select one or more
statuses for the comps you want to find.
3. Enter a price range and date range then click Continue.
4. At the Criteria page, enter and select criteria as needed. To limit matches to a
particular location by drawing a radius or polygon, click Map. Click Submit.
5. At the search results List, select one or more comparable properties, then click Add
to Comparables or Replace Comparables, as needed.
6. You may add additional comps, save, and navigate to the next CMA section.
Manage Comparables for the CMA Presentation
Once selected from search results, comparables display in a single list. The CMA uses
every property displayed in the list with the exception of those you exclude. Excluded
properties remain in the list but are grayed out. To include one of these excluded
properties later, select it and click Include. (Properties you remove no longer appear in
the list.)
Exclude: Excludes a property from the current CMA report, but allows future
inclusion
Include: Resets an excluded property to included, thereby reversing the exclude
action
Remove: Deletes the property from the comparables list.
1. Select properties you want to remove altogether, then click Remove.
2. Select properties you want to exclude from the current presentation (without
removing it altogether), then click Exclude.
3. To include a property you previously excluded, select the property, then click
Include.
Add Comps by ML#
1. Click Add by ML#.
2. At the Add ML#s dialog box, enter one or more numbers then click Add.
3. You may add additional comps, save, and navigate to the next CMA section.
Using Stratus MLS
212
Add Comps from the Listing Cart
1. Click Add from Listing Cart. When prompted, click Yes or No to emptying your
Listing Cart.
2. You may add additional comps, save, and navigate to the next CMA section.
Edits & Adjustments Once you choose the comparables for your CMA, you may adjust property details to
reflect the most recent and accurate information, so that the system can adjust the
comparable’s value for accurate comparison with the subject property
At the Adjustments section, type a descriptive item in the Edits column, then enter a
positive or negative dollar amount in the Adjustments column.
One by one, the Edits & Adjustments section displays a comparable side-by-side with the
subject property, if one is included. Click the right and left arrows at the top of the
worksheet to navigate through all the selected comparables. Click View Broker Full to
view the comparable with edits.
Edits and adjustments are applied to the CMA only, and do not affect the listing or public
record.
Edits
To note a beneficial or detrimental feature in the current comparable, use the Edit
column, wherever a text box displays. Editsdisplay on the property’s detail form.
Adjustments
To adjust a comparable’s price to reflect a beneficial feature you’ve corrected, type a
positive value, for example 5000. To adjust the price to reflect a missing or detrimental
feature you’ve corrected, type a negative value, for example -5000). The adjustment
value must be a number and should not include a dollar sign, comma, or decimal. If the
adjustment is negative, type a minus sign in front of the adjustment value. For example,
type “-2500” to alert the system to subtract $2,500 - on the presentation - from the
comparable’s price. The system tallies all adjustments and determines the total
adjustment.
If the adjustment is alphanumeric (for example, you change “N” to “Y”), determine as
accurately as possible the effect this change should have on the adjusted price, and enter a
numeric adjustment accordingly.
CMA
213
Note:
Adjustments are reflected on the CMA’s side-by-side property comparison
form, but not on the property’s detail form.
Adjust Comparables
In the CMA presentation, the system automatically displays the subject property, if
included, side-by-side with the first comparable. To make adjustments to the comparable
price:
1. Scroll to any desired field where a text box indicates it may be adjusted.
2. At the Note column, type a brief description.
3. At the Adjustments column, enter a numeric adjustment.
4. Repeat steps 2 and 3 at additional fields, if needed.
5. Click Save, then click the right arrow at the top of the Comparables section to
navigate to the next comparable.
6. Repeat all steps for each comparable.
7. When you are finished with adjustments, click Save and navigate to the next CMA
section.
Marketing Your CMA can include a timetable of activities to demonstrate to prospective clients
your plan for marketing their property.
Tip:
If desired, you can save a revised marketing plan as your default. Add or revise
activities as needed for each new presentation.
Create A Marketing Plan
1. At the Marketing section, click Add Activity.
2. At Timeframe, enter the date (or step, number, or week) you anticipate for an
activity.
3. At Activity, enter a description of the activity.
4. Repeat steps 2-3 as necessary until all activities are defined.
Using Stratus MLS
214
5. To rearrange activities, select one then click Move Up or Move Down. Repeat as
necessary.
6. To remove activities select one then click Delete. At the confirmation prompt, click
Delete again.
7. Optionally, to save this marketing plan for default use in new CMAs, click Set As
Default.
Attachments Use the Attachments section to upload documents to the CMA.
Upload Attachments
1. At the Attachments section, click Upload.
2. At the Upload Attachments dialog box, click Browse. Use your browser’s
instructions to navigate and open the file you want to upload.
3. Optionally, add or select a description.
4. Repeat steps 2-3 for each attachment you want to upload.
5. Click Upload.
6. At the CMA’s Attachments section, optionally, drag and drop to re-order the
attachments.
Preview Attachments
Use the Preview action to open the attachment in preview form, or double click the
thumbnail to open the document in its native application.
1. Select an attachment and click Preview on the action bar.
2. Select The Current Section and click Preview.
3. Click Close after reviewing the attachment.
Delete Attachments
1. Select one or more attachments and click Delete on the action bar.
2. At the confirmation prompt, click Delete.
CMA
215
Contents Use the Contents section to select items you want to include in the CMA presentation.
Check or uncheck an item to include or exclude it in this CMA
Click to preview an item’s content
Drag an item up or down in the list to rearrange its order in this CMA
Select any or all of the following items for inclusion in the CMA presentation:
Cover Page
Cover Letter
Table of Contents
Subject Property Details
Subject Property Photo Gallery
Side-by-Side Property Comparison
Comparable Summary
Edits & Adjustments
Consumer Medium Detail Form
Another selected Detail Form
Consumer Thumbnail Form
Photo Gallery
Flyer
Road or Aerial Map
Market Statistics Report
Days on Market Report
Marketing Plan
Generate the CMA Presentation
1. At Select Items to include in this CMA, check or uncheck the items you want for
this CMA
2. At Order Statuses in Output, choose a sort order for the display of comparables by
status.
3. At Include Page Numbers, check or uncheck the box to include or exclude page
numbering. Note: Page numbers do not display for the Cover Page, Cover Letter, and
Contents.
4. Click Save. At the CMA Saved prompt, click Close.
5. To preview, print, send, download, and more, see “Work with CMAs” on page 216.
Using Stratus MLS
216
Work with CMAs
Use the CMA main menu option to start or manage a CMA presentation. (See “About
CMAs” on page 202.)
If you have no saved CMAs, the system prompts you to add one. If you’ve created one or
more CMAs, they appear in a list. To update an existing CMA, double click on its row to
open it. To add a CMA, click New CMA on the action bar.
If the CMA has unsaved changes, the system prompts you to keep or discard the changes.
CMA will remember your unsaved information for thirty days, but it’s a good idea to
save throughout your session to insure all information is stored.
Navigating the CMA
When you click the CMA main menu option, a list of saved CMAs displays. When you
open a CMA a tabbed set of CMA sections displays. (See “Data Entry at CMA Sections” on
page 204.) To navigate in the CMA do one of the following:
To jump to a particular section, click its tab at the top of the CMA
To scroll through the CMA, use the scroll bar
To move from field to field, press the Tab key
To jump to each comparable in turn, at the Adjustments section, use Page Forward
and Back arrows
Saving the CMA
You can click Save as often as you want. Each time you click Save the system checks the
CMA draft for valid entries. If the draft does not pass validation, click each flagged field
to correct its entry.
When you save the CMA, the system saves new or changed contact information.
CMA
217
How . . .
To Add a New CMA
1. At the main menu, click CMA.
2. If no CMAs exist, the system prompts you to add one before you proceed. If one or
more CMAs exists and displays in the CMA list, select New CMA on the action bar.
3. At CMA Name, enter a unique name for the presentation.
4. Select a Class and click Continue.
5. At the CMA detail edit form, scroll or tab to desired sections, and complete the
information you want to include in the presentation. (See “Data Entry at CMA
Sections” on page 204.)
6. Click Save. If prompted, make any needed corrections or additions, then click Save
again.
To Open a CMA
1. At the main menu, click CMA.
2. At the CMA list, choose “All” or “Due to Expire” from the Show dropdown list.
3. double click the row where the name of the desired CMA displays.
To Edit an Existing CMA
1. Select a CMA then click Edit on the action bar, or just double click the row.
2. The CMA detail edit form displays.
3. Scroll or tab to the desired section. Note: To find a particular field, click the Find
action, then enter the field name at the Find a Field dialog.
4. Enter, format, and upload information, as needed. (See “Data Entry at CMA Sections”
on page 204.)
5. Click Save. If prompted, make any needed corrections or additions, then click Save
again.
To Preview a CMA
1. With a CMA open or selected, click Preview on the action bar.
2. At the Preview Options dialog box, choose what you would like to preview (the
current section or the entire CMA) then click Preview.
3. Scroll to review, then click Print or Close as needed.
Using Stratus MLS
218
To Copy a CMA
1. Select a CMA at the list, then click the Copy action.
2. At the New CMA dialog box, optionally edit or replace the CMA name. Click
Continue.
3. The newly named copy displays on the list.
To Extend CMAs Due to Expire
To view all CMAs that are eligible for extension, click the Extend action at the
CMA list without selecting any. To extend all eligible CMAs click Yes at the
Extend CMA dialog box.
To view selected CMAs that are eligible for extension, select one or more CMAs
then click the Extend action at the CMA list. To extend all selected and eligible
CMAs, click Yes at the Extend CMA dialog box.
To Rename a CMA
1. At the CMA list, select a CMA checkbox, then click Rename on the action bar.
2. At the Rename CMA dialog box, edit the CMA name then click Rename.
3. At the CMA list, the new name displays.
To Delete a CMA
1. At the CMA list, select one or more checkboxes, then click Delete on the action
bar.
2. At the confirmation prompt, click Delete .
To Print a CMA
1. Click Print on the action bar, after selecting a CMA at the list or at the open CMA.
2. At the Print Options dialog box, choose what you want to print (current section or
the entire CMA).
3. Click Print (or to review the presentation before printing, click Print Preview then
click Print).
4. At the browser’s Print dialog box, select print options then click Print.
Note: You can also print a CMA from the Preview dialog box
CMA
219
To Send a CMA
1. Click Send on the action bar, after you’ve selected a CMA at the list or at an open
CMA.
2. At the Send dialog box, fill out the To, Subject, and Message sections. (See “Send
Listings” on page 222.)
3. Optionally select Send a copy to yourself.
4. At the Include Bcc field, enter email addresses or Contacts to whom you want to
send a blind copy. Note: Bcc addresses are visible only in the body of the Agent’s
copy. To avoid triggering a spam filter, the number of Bcc addresses is restricted.
5. Click Send.
To Download a CMA
1. Click Download on the action bar, after selecting a CMA at the list or at the open
CMA.
2. At the Download Ready dialog box, choose what you would like to download
(current section or entire CMA).
3. Click Download.
To Reset or Clear Sections in an Open CMA
Depending on the section at which you want to change information, Reset or Clear are
available on the action bar.
At the Agent and Contents tab pages, to reset all fields to the state they were in
when the section was opened, click Reset on the action bar. At the confirmation
prompt, click Reset.
At the Contact, Subject Property, Edits & Adjustments, and Marketing tab pages,
to clear all fields, click Clear on the action bar. At the confirmation prompt, click
Clear.
At the cover page and cover letter sections, to restore the default template click Reset to MLS Default

Using Stratus MLS
220

Send Listings by Email
221
Send Listings by Email
Using Stratus MLS
222
Send Listings
You can email your customer a link to particular listings with the site action Send. Send
is available at List, View, and Map. The Send action causes the system to email links to
listings, allowing recipients to see each one with optional maps and photos. Listings
may be sent in detail view or as list rows.
The emailed link remains active for a period determined by the MLS. Format the
message as you like, using the formatting toolbar. See “Formatting Email” on page 224.
How . . .
To Create the Email Message
1. To open the Send dialog box, click Send at the site action bar.
2. At the To field, enter one or more email addresses, or click Contacts to select one
or more contacts by group or search.
3. At the Include Bcc field, enter email addresses or Contacts to whom you want to
send a blind copy. Note: Bcc addresses are visible only in the body of the Agent’s
copy. To avoid triggering a spam filter, the number of Bcc addresses is restricted.
4. At the Subject field, change or accept the default subject for the message.
5. In the Message text area, change or accept the default text.
6. Edit the message as required. Note: If your browser does not automatically perform
a spell check and flag (or correct) spelling errors, click away from the message text
area to run the spell check.
7. At What do you want to send?, choose Detail Views or List Rows.
8. At the For dropdown list, select the listings you want to send: Current, All, or
Selected.
9. At the Form dropdown list, if you chose Detail Views at step 7, select a detail form in
which your customer will view the listings. To send listing forms with no address, use
a form such as Client Full - No Address. To send listing forms with an address (which
allows you to send a map as well), use a form such as Client Full.
10. To send a duplicate message to your MLS email account, select the Send Copy to
Yourself checkbox. (The form linked to from your copy of the email will always be
Broker Full, regardless of the one you selected at step 7.)
Send Listings by Email
223
11. To include a Photo Gallery along with the already-selected detail form, select the
Include Photo Gallery checkbox. The checkbox is available only in one-per-page
forms.
12. To include a map with your email, select the Include Map checkbox.
13. To send the email with included options, click Send.
To Understand What the Recipient Receives
When the email recipient opens your message and clicks “View Details”, a new window
opens with the following options displayed for each listing, when chosen:
A Map (if this option is available and you have selected it along with a results list
that corresponds to the map’s marker numbers. Listings you selected for the
recipient, along with available links, display on the map and the list below it. You
can choose to include points of interest (Places) on the sent map.
A Detail form or list rowsfor each emailed listing, with links included.
A Photo Gallery for each emailed listing (if this option is available and selected).
Download and Print actions.
To Provide Instructions to the Recipient
Instructions for viewing the properties and replying to the email are provided in the
default email message. In the Message text area, change or accept the default text,
including further instructions if you like.
Help for recipients is available at the properties of interest page.
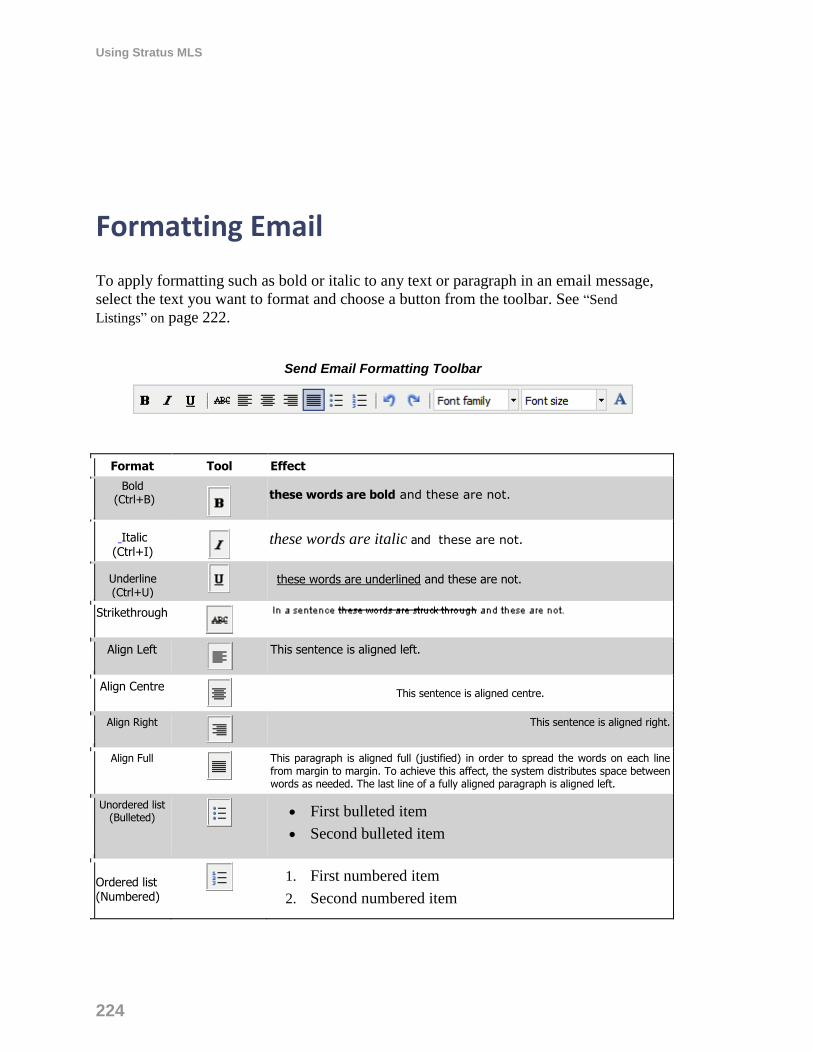
Using Stratus MLS
224
Formatting Email
To apply formatting such as bold or italic to any text or paragraph in an email message,
select the text you want to format and choose a button from the toolbar. See “Send
Listings” on page 222.
Send Email Formatting Toolbar
Format Tool Effect
Bold (Ctrl+B)
these words are bold and these are not.
Italic (Ctrl+I)
these words are italic and these are not.
Underline (Ctrl+U)
these words are underlined and these are not.
Strikethrough
Align Left
This sentence is aligned left.
Align Centre
This sentence is aligned centre.
Align Right
This sentence is aligned right.
Align Full
This paragraph is aligned full (justified) in order to spread the words on each line from margin to margin. To achieve this affect, the system distributes space between words as needed. The last line of a fully aligned paragraph is aligned left.
Unordered list (Bulleted)
First bulleted item
Second bulleted item
Ordered list (Numbered)
1. First numbered item
2. Second numbered item
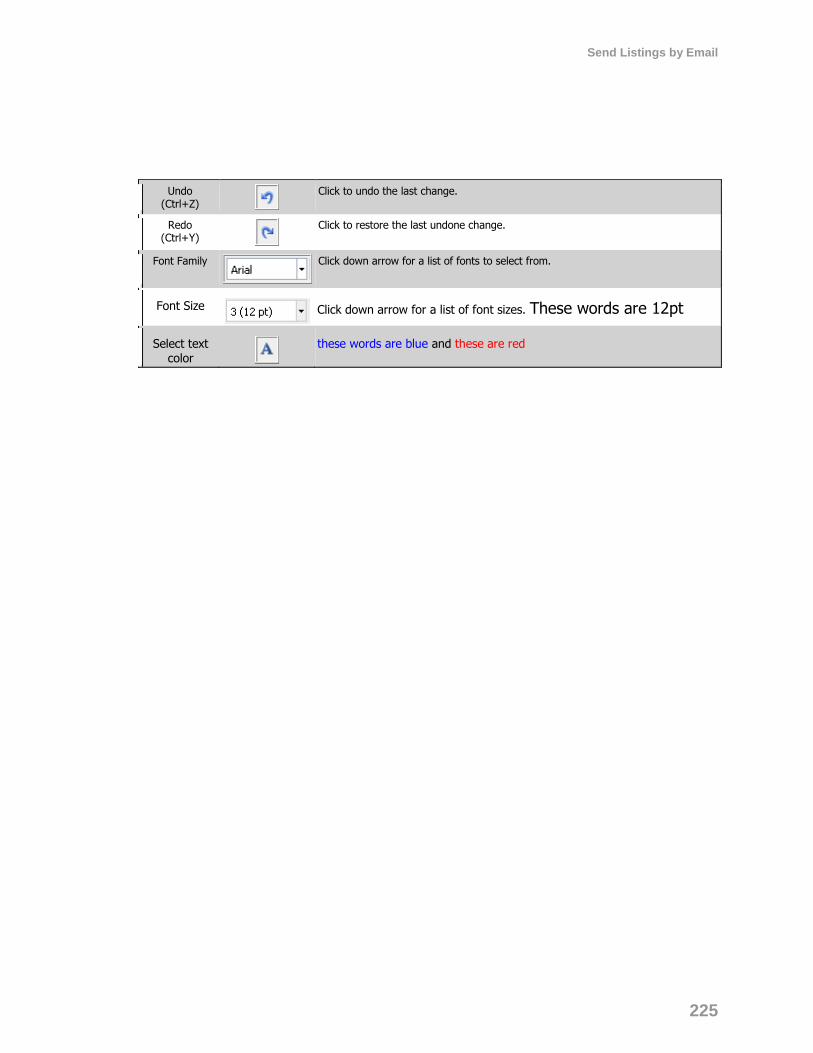
Send Listings by Email
225
Undo (Ctrl+Z)
Click to undo the last change.
Redo (Ctrl+Y)
Click to restore the last undone change.
Font Family
Click down arrow for a list of fonts to select from.
Font Size
Click down arrow for a list of font sizes. These words are 12pt
Select text color
these words are blue and these are red

Using Stratus MLS
226

Update
227
Update
Using Stratus MLS
228
About Update
Update provides a report of new and changed listings in your market areas, presenting
them in categories by status and class, for example New Residential and Back on Market.
(See “Work with Update” on page 229.)
Customize Update by selecting your desired property class(es) and town(s). Select a time
frame and a View (Display or Print), with or without notes and revisions.
Once you assign Update settings, you can save them for future Updates. You can
revise your Update settings at any time.
The system keeps track of the date of your last Update. To run an Update
representing all new and changed listings since your last report, select “Since Last
Update” at the Days Back field. Alternatively, you can select the number of “Days
Back” you want to run an Update (up to 14 days).
You can rerun your last Update by choosing “Rerun Last Update” at the Days Back
field.
The Update displays thumbnail listings and a count for each category. You can
scroll through all categories or go directly to a particular one by clicking on its
corresponding link at the top of the Update.
To view a listing’s full broker report, click on the ML# at the displayed thumbnail.
Click Back to return to the Update report.
Before running the report, you may choose to display or print the Update. To do
both, select “Display” then, when you’re ready, click “Print View” at the displayed
Update.
Update
229
Work with Update
How . . .
To Create or Change Update Settings
1. Select Update at the main menu.
2. At the Update page, select one or more Class(es).
3. Select one or more Town(s). To choose multiple towns, press and hold down the
Ctrl key, then scroll and click on each town you want to select.
4. At Days Back, choose the time frame for the Update.
5. At View, choose Display or Print.
6. Select Notes & Revisions if you want to include these in the Update.
7. Click Save Update.
To Run Updates with Previous Settings
1. Change View if needed.
2. Click Update Now to run the Update with the current saved settings.
To Display the Update
If your View setting is Display, the Update report displays on screen. Listings are
categorized by type.
To see listings in a particular category, scroll through the report or click a link at
the top of the page.
To see a listing at View, click the linked ML#. At the report click Back to return to
Update.
To Print the Update
If your View setting is Print, the Update displays in a printable format in a secondary
browser window. To print:
1. Run an Update with View set to Print.
2. At the printable display, choose Print from the browser’s File menu.
Using Stratus MLS
230
3. Specify printer options.
4. Click Print.
5. Close the browser window to return to the Update page.
To Display Listings from Update
1. In the Update Display report displayed on the screen, click an ML#.
2. To print the listing, click Print.

History
231
History
Using Stratus MLS
232
About History
Stratus MLS tracks all listing edit changes, price changes, and status changes. The system
also tracks all listings that have been linked over time to a property’s public record.
A Listing’s Transaction History By showing changes, in particular price reductions and prior offers, History helps you
evaluate how motivated a seller is likely to be to accept an offer or lower a price.
You can view and print a listing’s history at an MLS# search, at any search results List,
and at View. When you view a listing’s History, two forms display:
The first form shows details of the listing as it was originally entered. Note: if you
don’t want to display the original listing, select the “Hide Original Listing Data”
checkbox at the top left side of the history form.
The second form shows changes made to the ML#’s fields, price, and status.
A Property’s Listing History Available at the Public Record A history of listings associated with a particular property, if one or more have been
linked, is visible at the property’s public record. You can see days-on-market history and
review every linked listing, whether current or archived, to research owner/renter history,
price history, and other indicators of potential resale value.
History
233
Work with History
You can view and print a listing’s history at an MLS# search, at any search results List,
and at View. See “About History” on page 232.
Note:
When pulling histories for several listings at once, it may be useful to select
Hide Original Listing Data so that only transaction reports display.
How . . .
To View a Listing’s History at MLS# Search
1. At the Search Type page click MLS# Search.
2. At the Search by MLS# box, type one or more ML#’s separated by commas, spaces,
or lines.
3. Click View History.
To View a Listing’s History at List
1. At List, click to select one or more listings.
2. Click History on the action bar.
To View a Listing’s History at View
1. At View, navigate to the listing for which you want to see History.
2. Click History on the action bar.
To Hide Original Listing Data from the History Form
1. At History, select the Hide Original Listing Data checkbox.
2. To restore original listing data after hiding it, clear the checkbox.
Using Stratus MLS
234
To View Past and Current Listings Linked to a Public Record
1. At any public record, scroll to the Listing History section at the bottom of the page.
2. Click any ML# to open the corresponding listing in detail view.

Financial
235
Financial

Using Stratus MLS
236
About Financials
Financial options include tools such as Buy vs Rent analysis, and home financing
calculators.

Financial
237
Buy vs Rent
The Buy vs Rent analysis presents the investment advantage in purchasing a home versus
renting a home. This financial tool calculates a buyer's increase in equity in the home,
and savings on income tax and rent.
All required data fields are indicated with an asterisk (*).
To Run a Buy vs Rent Analysis
1. Select Financial at the main menu.
2. At the Financial page, click Financial Tools.
3. At Financial Tools, click Buy Vs Rent.
4. At Prepare For, enter the name of the client for whom you're preparing the analysis.
5. Enter data. (See "Data Entry for Buy vs. Rent," below.)
6. Click Submit to display the analysis.
7. To print the analysis, click the Print icon then click Print Preview or Print, as
needed.
Data Entry for Buy vs Rent
Field Definition Value
Prepare for Client's name Enter buyer's name
1. Purchase Price Purchase price of house Enter dollar amount (no $
or ,)
2. Mortgage Amount Amount of mortgage Enter dollar amount (no $
or ,)
3. Desired Term of
Mortgage (years)
Term of mortgage (e.g., 15, 30) Enter number of years
4. Mortgage Rate (Fixed
Full Term)
Interest rate of mortgage Enter interest percent (no
%)
5. Home Appreciation
Rate
Avg. annual rate of appreciation
for home of this type in this locale
Enter average annual
percent (no %)
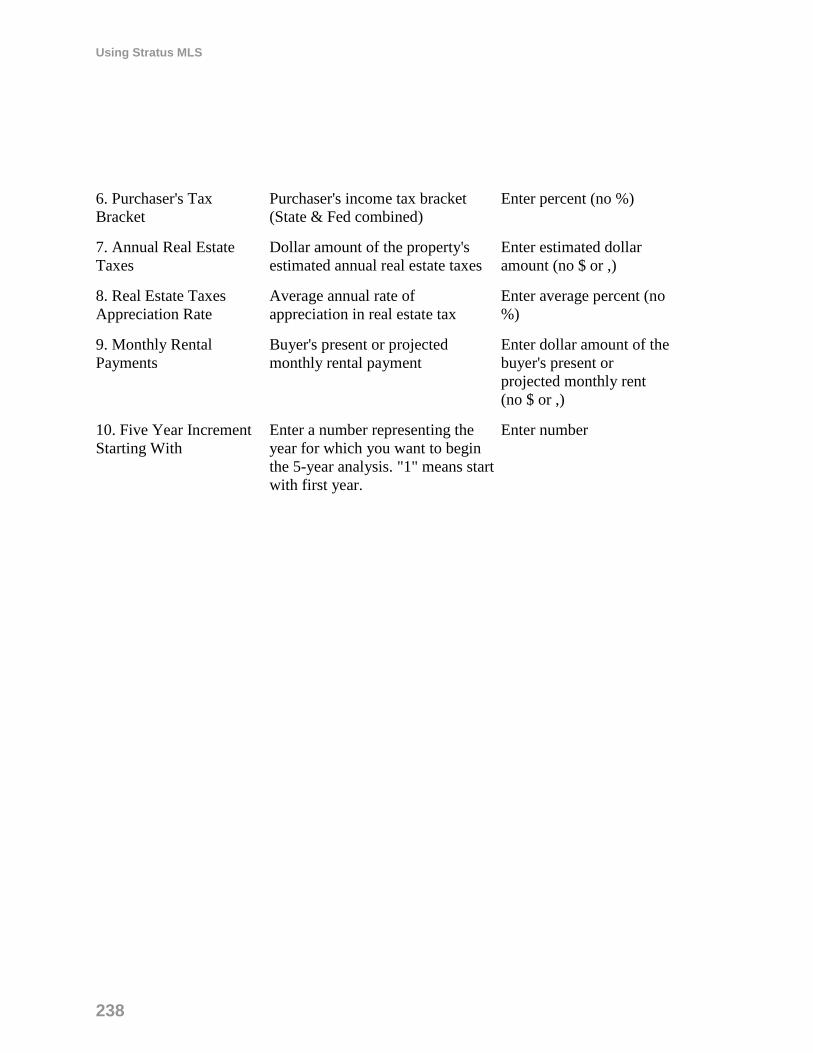
Using Stratus MLS
238
6. Purchaser's Tax
Bracket
Purchaser's income tax bracket
(State & Fed combined)
Enter percent (no %)
7. Annual Real Estate
Taxes
Dollar amount of the property's
estimated annual real estate taxes
Enter estimated dollar
amount (no $ or ,)
8. Real Estate Taxes
Appreciation Rate
Average annual rate of
appreciation in real estate tax
Enter average percent (no
%)
9. Monthly Rental
Payments
Buyer's present or projected
monthly rental payment
Enter dollar amount of the
buyer's present or
projected monthly rent
(no $ or ,)
10. Five Year Increment
Starting With
Enter a number representing the
year for which you want to begin
the 5-year analysis. "1" means start
with first year.
Enter number
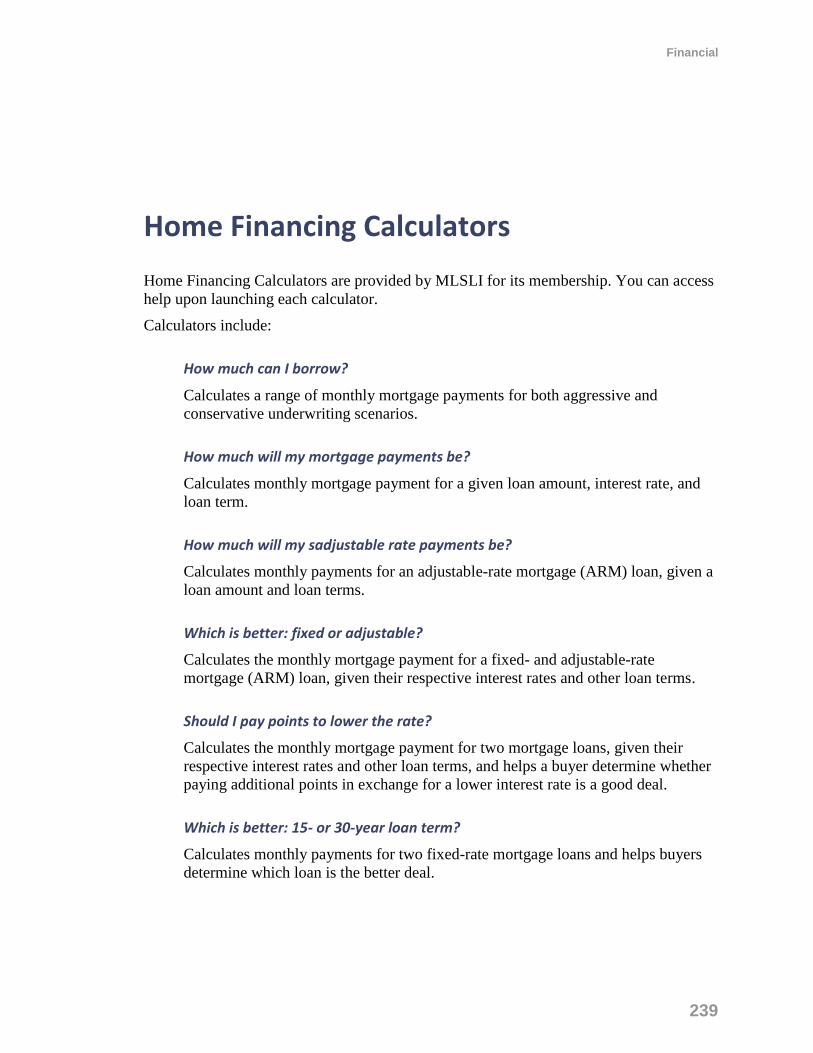
Financial
239
Home Financing Calculators
Home Financing Calculators are provided by MLSLI for its membership. You can access
help upon launching each calculator.
Calculators include:
How much can I borrow?
Calculates a range of monthly mortgage payments for both aggressive and
conservative underwriting scenarios.
How much will my mortgage payments be?
Calculates monthly mortgage payment for a given loan amount, interest rate, and
loan term.
How much will my sadjustable rate payments be?
Calculates monthly payments for an adjustable-rate mortgage (ARM) loan, given a
loan amount and loan terms.
Which is better: fixed or adjustable?
Calculates the monthly mortgage payment for a fixed- and adjustable-rate
mortgage (ARM) loan, given their respective interest rates and other loan terms.
Should I pay points to lower the rate?
Calculates the monthly mortgage payment for two mortgage loans, given their
respective interest rates and other loan terms, and helps a buyer determine whether
paying additional points in exchange for a lower interest rate is a good deal.
Which is better: 15- or 30-year loan term?
Calculates monthly payments for two fixed-rate mortgage loans and helps buyers
determine which loan is the better deal.

Using Stratus MLS
240
How much should I put down for a new home?
Calculates your monthly mortgage payment for two loans, given a down payment
and other loan terms.
How much can I save in taxes?
Shows a buyer's average yearly tax savings on a mortgage loan and calculates the
loan's after-tax interest rate.
What will my closing costs be?
Calculates a buyer's mortgage closing costs for a given set of loan terms, grouping
costs into origination charges and other settlement services.
Am I better off renting?
Calculates whether buying a home is a better deal than renting, weighing the
potentially smaller monthly cash outflow with a rental against a combined
mortgage payment that includes principal, interest, insurance, taxes, and possible
mortgage insurance.
Am I better off refinancing?
Calculates whether the decision to refinance a mortgage is a good one based on the
terms entered for a current loan and for the refinance loan.
What will my refinancing costs be?
Calculates closing costs for a given set of loan terms, grouping costs into
origination charges and other settlement services
How can I reduce mortgage insurance costs?
Estimates monthly payments for private mortgage insurance (PMI) over a range of
down payments.
Which lender has the better loan?
Calculates which of two mortgage loans is the better deal. Either or both of the
loans may be fixed- or adjustable-rate loans.
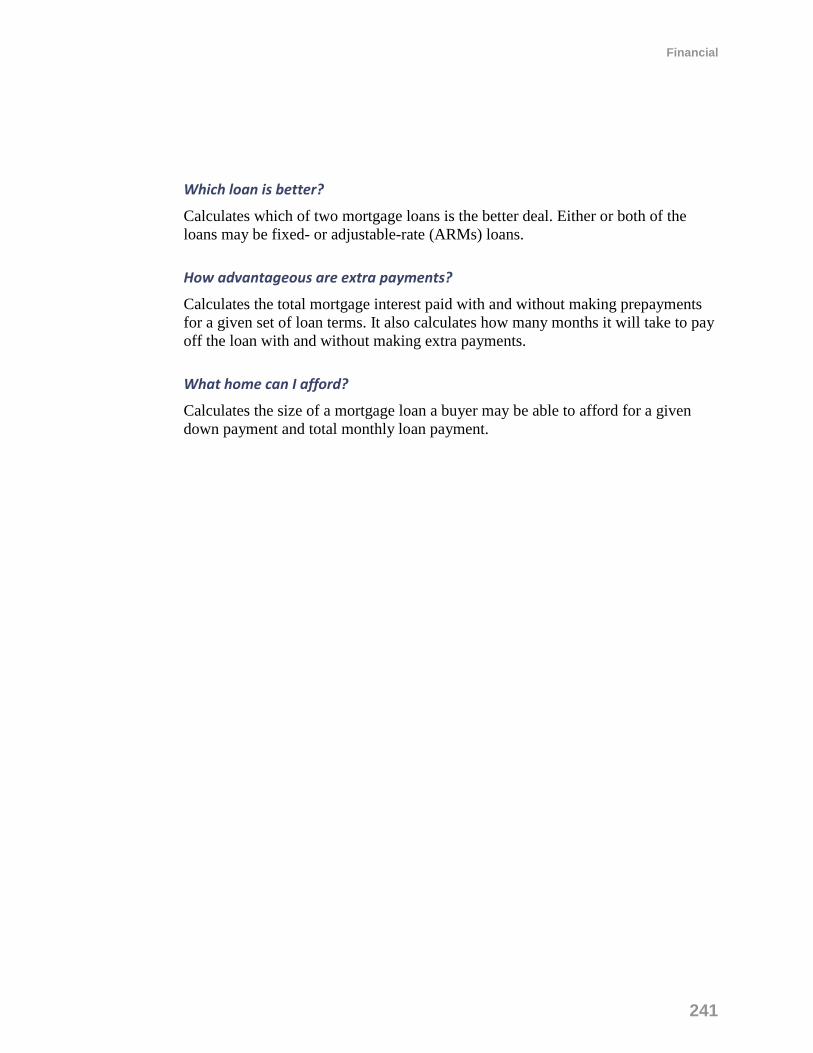
Financial
241
Which loan is better?
Calculates which of two mortgage loans is the better deal. Either or both of the
loans may be fixed- or adjustable-rate (ARMs) loans.
How advantageous are extra payments?
Calculates the total mortgage interest paid with and without making prepayments
for a given set of loan terms. It also calculates how many months it will take to pay
off the loan with and without making extra payments.
What home can I afford?
Calculates the size of a mortgage loan a buyer may be able to afford for a given
down payment and total monthly loan payment.

Using Stratus MLS
242

Custom Column Sets
243
Custom Column Sets
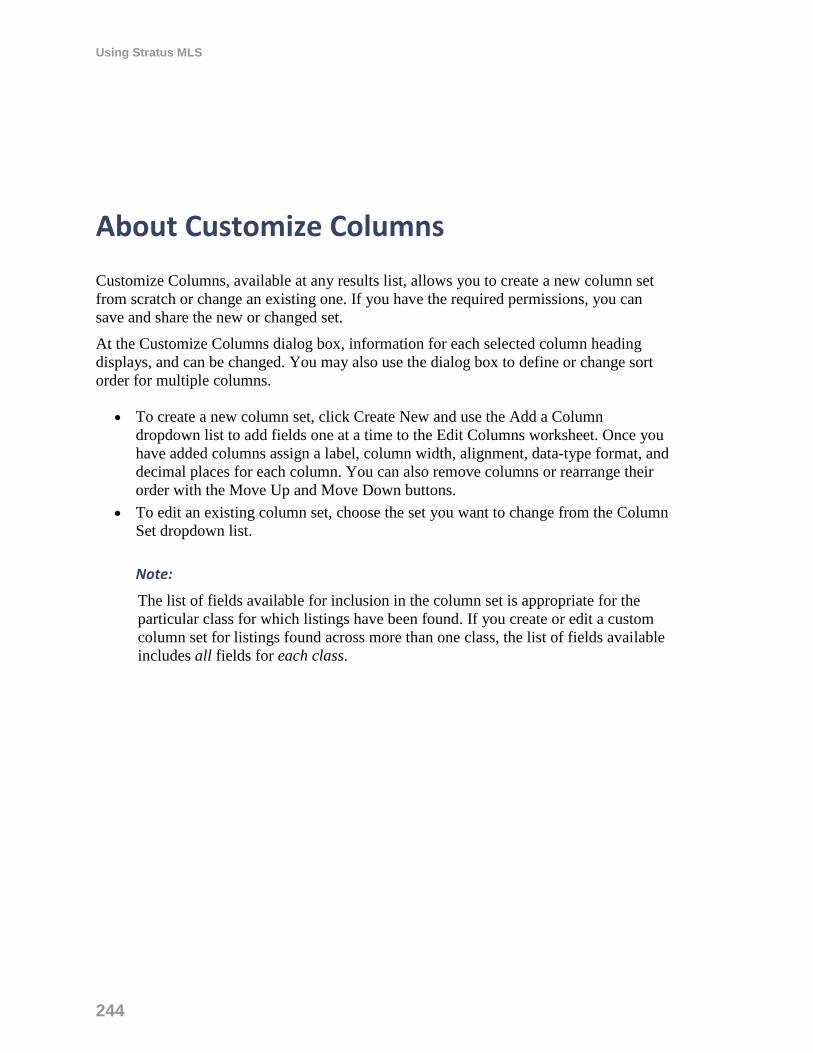
Using Stratus MLS
244
About Customize Columns
Customize Columns, available at any results list, allows you to create a new column set
from scratch or change an existing one. If you have the required permissions, you can
save and share the new or changed set.
At the Customize Columns dialog box, information for each selected column heading
displays, and can be changed. You may also use the dialog box to define or change sort
order for multiple columns.
To create a new column set, click Create New and use the Add a Column
dropdown list to add fields one at a time to the Edit Columns worksheet. Once you
have added columns assign a label, column width, alignment, data-type format, and
decimal places for each column. You can also remove columns or rearrange their
order with the Move Up and Move Down buttons.
To edit an existing column set, choose the set you want to change from the Column
Set dropdown list.
Note:
The list of fields available for inclusion in the column set is appropriate for the
particular class for which listings have been found. If you create or edit a custom
column set for listings found across more than one class, the list of fields available
includes all fields for each class.
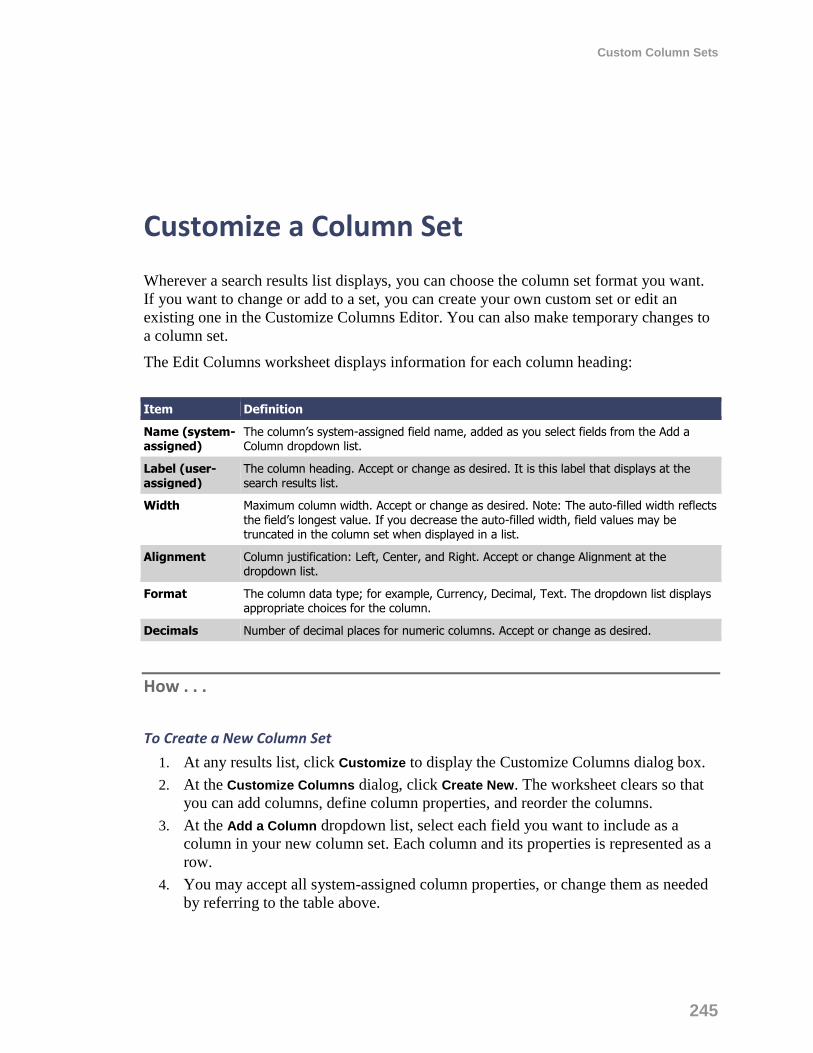
Custom Column Sets
245
Customize a Column Set
Wherever a search results list displays, you can choose the column set format you want.
If you want to change or add to a set, you can create your own custom set or edit an
existing one in the Customize Columns Editor. You can also make temporary changes to
a column set.
The Edit Columns worksheet displays information for each column heading:
Item Definition
Name (system-assigned)
The column’s system-assigned field name, added as you select fields from the Add a Column dropdown list.
Label (user-assigned)
The column heading. Accept or change as desired. It is this label that displays at the search results list.
Width Maximum column width. Accept or change as desired. Note: The auto-filled width reflects the field’s longest value. If you decrease the auto-filled width, field values may be truncated in the column set when displayed in a list.
Alignment Column justification: Left, Center, and Right. Accept or change Alignment at the dropdown list.
Format The column data type; for example, Currency, Decimal, Text. The dropdown list displays appropriate choices for the column.
Decimals Number of decimal places for numeric columns. Accept or change as desired.
How . . .
To Create a New Column Set
1. At any results list, click Customize to display the Customize Columns dialog box.
2. At the Customize Columns dialog, click Create New. The worksheet clears so that
you can add columns, define column properties, and reorder the columns.
3. At the Add a Column dropdown list, select each field you want to include as a
column in your new column set. Each column and its properties is represented as a
row.
4. You may accept all system-assigned column properties, or change them as needed
by referring to the table above.
Using Stratus MLS
246
5. Reorder and remove columns as described below.
6. Click Save and enter a name. Click Save again.
To Edit an Existing Column Set
1. At any results List, open the Columns dropdown list.
2. Choose a column set from the dropdown list.
3. Click Customize to display the set.
4. Make desired changes then click Save.
5. At the Save Column Set dialog box click Save); or to save a new copy of the set
click Save As, type a unique name, then click Save.
To Reorder Columns
The order in which you position each column determines its placement (from left to right)
at the search results list.
At Edit Columns:
To move a column up, select its checkbox and click Move Up as many times as
needed.
To move a column down, select its checkbox and click Move Down as many times
as needed.
To Remove a Column From the Set
1. At Edit Columns, select a column’s checkbox.
2. Click Remove.
To Save a New or Changed Column Set
1. At Edit Columns, define fields and properties.
2. At the Save Column Set dialog box click Save); or to save a new copy of the set
click Save As, type a unique name, then click Save.
3. The system makes the column set available at the Columns dropdown list at any
search results page.
Custom Column Sets
247
To Use an Unsaved Column Set Temporarily
1. At Edit Columns, define appropriate fields and properties.
2. Click Use Without Saving.
3. The system uses your modified set to display the current search results.
To Share a Column Set
1. At the Customize Columns dialog box, open the Column Set dropdown list.
2. Select a column set.
3. Click Share.
4. At the Share Column Set dialog, click My Office to share with others in your office.
5. Click Share.
To Rename or Delete a Column Set
1. Choose the column set you want to rename or delete from the Column dropdown
list. You must have permission to do so.
2. To rename the set, click Rename. To delete the set, click Delete.
3. When renaming, the Rename Column Set dialog box displays with the current
name.
4. Clear and enter the desired name, click Rename, then click OK at the confirmation
prompt.
5. The system reflects the renamed or deleted column set in the Columns dropdown
list.
To Define a Multi-Level Sort for a Column Set
You can define a multi-level sort for the column set by up to three columns. For example,
main category Town, second category Style, third category Price. In this case, the results
are sorted by Town, within Town by Style, and within Style by Price. In this case,
Townis the first column, Style is the second, and Price is the third.
To choose the first column for the sort, choose a column from the Sort By dropdown list.
You must also choose a sort order for the column: Ascending (low to high) or
Descending (high to low). Choose a second column, if desired, from the newly-revealed
Then By dropdown list. Choose a third column, if desired, from the next Then By
dropdown list.
Using Stratus MLS
248
1. At Multi-Level Sort, select a column from the Sort By dropdown list, then choose
Ascending or Descending.
2. At Then By, select another column then choose Ascending or Descending.
3. Repeat step 2 if desired.
4. Click Save.
Note:
It is not necessary to define a multi-level sort for every column set. To
temporarily sort by a particular column while viewing search results, click the
column heading once to sort in ascending order, then click again to sort in
descending order.
To Import Column Sets from the Legacy System
1. Click Import Your Column Sets.
2. At the Import Column Sets dialog box, click Import.
Note:
The function imports all of your office saved custom one-line reports as column
sets, for you alone. The imported column sets are not shared with anyone in
your office.
If you click the import link more than once, duplicates are imported.
To share the imports with your office, optionally change, then save and share
the column sets.
To Delete Imported Column Sets
Click the Delete Unused Imported Column Sets to delete imported sets that you
won’t be using, modifying, or sharing.

Market Share Analysis
249
Market Share Analysis
Using Stratus MLS
250
About Market Share
Market Share provides a ranked analysis of listing inventory by office, for the location
you specify. You can rank offices by number of units or dollar volume, and group them
by office or firm. The analysis can include all MLS offices, top offices, your office versus
the entire MLS, or offices you specify by name. All reports may be limited to a particular
price range, and some may be limited to particular dates.
Stratus provides market share reports for current availables and under-contracts; as well
as for listings taken, under-contracts, and closings transacted within a date range you
specify.
See “Set Up Market Share Criteria” on page 251 for a discussion of data entry.
Customize the market share report by specifying a price range or a date range for
date-specific transactions.
You can view, print, and graph the report, and save graphs in PDF format.
Once you create your Market Share criteria settings, you can save them to run
again; see “Saved Market Share Criteria” on page 254.
To view all the relevant listings for offices displayed on the report, click on the
office link. Listings display in search result format.
Sort the generated report by clicking a column heading. Click once to sort from
low-to-high; click again to sort from high-to-low.

Market Share Analysis
251
Set Up Market Share Criteria
Stratus indicates required fields with a blue asterisk *. Enter data at all required fields.
How . . .
To Select the Geographic Area
At Select Geographic Area for your Market Share Analysis, click to select Town,
Zone, or County from the list boxes. (CTRL+Click for multiple selections). To de-
select all options in a list, click on the blank area at the top of the list.
To Select Transactions
At Select Which Side of Transaction, click to select the type of transactions you
want Market Share to rank. The choices are:
Available Inventory: all listings currently available
Listings Taken During a Specified Period: listings of any status that were listed
during a date range you specify
All Listings Currently Under Contract: all listings currently under contract
Under Contracts During a Specified Period: listings going under-contract during a
date range you specify
Closings During a Specified Period: listings closed during a date range you specify
To Select the Transaction Side
At Select Which Side of Transaction (available only if you selected Closings or
Under-Contract transactions above), which Listing Side Only, Sales Side Only, or
Both Sides, depending on what you want Market Share to rank. (Note: If an office
lists and sells the same listing, the report reflects both transactions.)
To Select Office Categories
At Select Ofices to Include choose one of the following ranking categories:
Top 5, 10, 25, 50, 100: The system ranks all offices that match your search criteria,
but the Market Share report is limited to a particular number of top-ranked offices.
“Totals Shown” sums the volume for the displayed offices. “Totals Entire Report”
sums the volume for all offices meeting the search criteria, including those not
displayed.
All: The system ranks, displays, and totals all offices matching the search criteria.
Using Stratus MLS
252
Your office vs. the entire MLS: The report includes a display of your office alone,
but it is ranked against all offices that match the search criteria. “Totals Shown”
displays your office’s total volume. “Totals Entire Report” sums the volume for all
offices matching the search criteria.
Select specific offices: Only offices you specify display in the report, but they are
ranked against all offices meeting the search criteria. “Totals Shown” sums the
volume for the displayed offices. “Totals Entire Report” sums the volume for all
offices meeting the search criteria. See “To Select Specific Offices”, below.
To Select Specific Offices
At Specific Offices to Include, available only if you chose “Select specific offices” above,
use look up office names as follows:
1. At Starts With, type the first character(s) of an office name.
2. Click (or tab) away from Starts With in order to fill the list box with offices
matching your lookup text.
3. Scroll through the choices and select one or more offices from the list.
CTRL+Click each when selecting more than one.
4. Click Add to move current selections to the lower list box, then make additional
selections. Repeat as necessary.
5. Repeat steps 1-4 as necessary to add all the desired offices.
To Select Property Classes
At Select Classes of Property to Include, select one or more property classes, such
as Residential, Commercial/Industrial.
To Set a Date Range
Available only if you chose transactions that fall within a particular date range.
1. At Enter Date Range for Analysis: at From, enter the earliest date in the range.
2. At To, enter the latest date in the range.
To Set a Price Range
Available for any transaction type. Enter a price range to insure that the analysis isn’t
skewed by a few very high-priced (or low-priced) listings; to rank offices according to
listings that fall only within the price range your office handles; and/or to customize a
report for a particular range of prices.
1. At Enter Price Range, if desired: at Min, enter the lowest price in the range.
2. At Max, enter the highest price in the range.
Market Share Analysis
253
To Set a Ranking Method
At Rank By, choose how you want to rank results:
o # Units:Rank offices by transaction quantity.
o $ Volume: Rank offices by transaction dollar volume.
To Group Results
At Group By, choose how you want to group results:
o Office: Rank offices only.
o Firm: Rank firms and offices, grouping offices within each firm. In the Rank
column, firm rankings display on the left, office rankings display on the right.
To Set a Sort Order
The “Sort the Analysis By” field affects the report’s initial sort order. You can re-sort by
any field once you generate the report. Your choice at this field does not affect the rank
assigned each office.
At Sort the Analysis By, choose how you want to sort results:
o Highest to Lowest: Firms and/or offices display from high (1) to low (n) ranking.
o Alphabetical: Firms and/or offices display in alphabetical order, regardless of rank.
Using Stratus MLS
254
Saved Market Share Criteria
Stratus MLS allows you to save Market Share search criteria so that you can run the
report whenever you want. Use the saved criteria, in its original form or modified, for
subsequent searches.
How . . .
To Save Search Criteria
1. After entering criteria, go to the Save Criteria As text box.
2. Enter a name for the Market Share analysis.
3. Click Save.
4. Stratus prompts, “Criteria Saved”. Click OK.
To Use Saved Criteria
1. At Use Saved Criteriaselect the name of the saved search criteria from the drop-
down list.
2. Click Use.
3. The form fills with the saved criteria. Verify the accuracy of the criteria for the new
search. Use the criteria as presented or modify it.
4. Click Submit.
To Delete Saved Criteria
1. At Use Saved Criteriaselect the name of the saved market share criteria from the
drop-down list.
2. Click Delete.
3. Stratus prompts, “Are you sure you want to delete ‘saved criteria name’?”. Click
OK to delete the saved criteria, or Cancel to retain the saved criteria.
4. Stratus prompts, “Criteria Deleted”. Click OK.
Market Share Analysis
255
To Modify Saved Criteria
If you modify saved criteria, you can save the modified criteria as a new and unique
search, keeping the original search intact. Alternatively, you can replace the original
saved search with the modified one.
1. At Use Saved Criteria, select a Market Share search from the dropdown list.
To save the modified criteria as a unique search, enter a different name at the Save
Criteria As text box.
To replace the original search with the modified version leave the original search’s
name in the Save Criteria As text box.
2. Click Save.
3. At the confirmation prompt, click OK.
4. Stratus prompts, “Criteria Saved”. Click OK.
Using Stratus MLS
256
Work With the Market Share Report
The Market Share report ranks all offices with listing transactions that match your
submitted Market Share search criteria. However, the report displays only those offices
you selected in criteria (Top, All, Yours, or specific selections).
Clues to interpreting the report are offered in its text. Headings and report summaries
include the following information:
The date the report was run (just under the office name and phone number);
The type of listing inventory and transaction side are stated in the heading; for
example, “Market Share for Available Inventory By Listing Broker”, or “Market
Share for Listings Closed by Selling Office”.
The number of offices included, the class(es) of listings included, the date range if
any, and the geographic location (stated in summary lines, at the bottom left).
Full color charts and graphs provide visual clarification.
How . . .
To Understand Rankings
The lower the assigned rank’s number, the “higher” the ranking. The office ranked “1” in
a report has either the largest number of transaction units, or the largest dollar volume,
depending on which field you ranked by.
If two or more offices (or firms) share the same rank number, this indicates that they hold
equal market share for this particular search criteria. If two offices share rank 5, the next
rank displayed is 7; no office is assigned rank 6.
If you grouped offices by firm, the report’s Rank column displays the firm rank, on the
left, and within the firm the office rank, on the right. When you sort such a grouping
“Highest to Lowest”, Stratus lists the firms in consecutive rank order from 1 to n.
To Understand Totals
“Totals Shown” provides each column’s total for displayed offices only.
“Totals Entire Report” provides each column’s total for all offices that match your search
criteria. The report indicates the number of offices represented by these totals at the
bottom left, at “Report represents ___ Offices”.
Market Share Analysis
257
To Change the Sort Order
Changing the sort order does not affect the office rankings, it only affects the sequence in
which offices appear. You can re-sort the offices by any column heading. (Original sort
order is determined on the criteria page: see “Set Up Market Share Criteria” on page 251.)
Click once on a column heading to sort from low to high. Click again to sort from
high to low.
To Start a New Market Share
While displaying a generated Market Share report, click New Search in the upper
right corner.
To Print the Report
1. Click Print on the action bar while viewing the generated report.
2. The report may print immediately, or a browser dialog box may display. Choose
landscape mode.
To Print Charts Only
1. Click Print charts only while viewing the generated report.
2. The charts may print immediately, or a browser dialog box may display.
To View an Office’s Listings
1. To view listings for any office displayed in a generated report (that is, those listings
matching Market Share search criteria), click on the underlined office name.
2. Listings display in List format. Click Return to Market Share to re-display the
report page.
To Download the Market Share Report
You can download data for listings represented in the report. The system downloads in
.csv (comma separated value) file format, compatible with database programs such as
Top Producer, Microsoft Access, and Microsoft Excel.
1. Click Download.
2. At Include Field Names as first record of Download file?, clear the check box if you
do not want to include field names for use in column headings, then click
Download.
3. Follow browser prompts.
4. When prompted to open or save the file, select Save, and choose a folder in which
to store the downloaded file.
Using Stratus MLS
258
Caution:
The download file may be very large. While your report may display only the
top 5 offices in Suffolk County, for example, the total listings considered for
analysis is represented by the “Totals Entire Report” figure for the “#Units”
column. This number may represent thousands of listings.
The following fields are downloaded for each listing: ML#, Address, Town,
Zip, Zone, County, Listing Date, Contract Date, Title Date, Days on Market,
Last Status Change, Original Price, Listing Price, Sold Price, Listing Broker
Code, Listing Broker Branch, Listing Agent, Selling Broker Code, Selling
Broker Branch, Selling Broker Commission, Buyer Broker Commission, and
Class.
Index
259
Index
A
add edit listing, 40
add fields, 77
add listing, 34
add/edit listing, 32
agent photo, 8
alerts, 26
archived listings, 68
attachments, 38, 46, 54, 81, 89
B
bulk download, 149
C
cart, 88, 154
CASS forms, 139
clone listing, 48
CMAs, 17, 18, 202, 204, 216
column sets, 244, 245
contacts, 13, 14, 15, 17, 18, 176, 177, 180,
183, 185, 187
counter, 77
create, 38, 116, 152, 172
criteria, 63, 69, 74, 75, 96, 125
D
data entry, 35
dates, 36
delete listings, 47
dependent fields, 36
detail view, 13, 86, 87
directions, 90, 98, 109, 172
download, 17, 149, 187
drafts, 32, 34
driving directions, 13, 14, 90, 98, 109, 172
dynamic criteria panel, 69, 96, 107
E
edit listing, 36, 44
email, 222, 224
F
favorites, 81, 87, 152
favourites, 81, 87
fields, 69, 77
financial, 236, 237, 239
flex search forms, 76
format email, 224
H
help, 21, 35
history, 232, 233
I
iLookAbout, 50, 164
info center, 26
info center | Default.MLSLIOnly | [4], 28

Using Stratus MLS
260
L
labels, 13, 15, 17, 18, 19, 187
links, 29, 30
links at detail view, 26, 89
list, 13, 81
listing cart, 88, 154
listing detail edit form, 40
listing history, 232, 233
listings
add & edit, 32, 34, 38, 44, 60
clone, 48
convert public private, 49
download, 17
drafts, 32
public record link, 34, 139
searching, 62, 65, 67, 68, 69
log in and log out, 2
LSC, 57
M
map details pop-up, 93, 105
map location, 46, 56
map search, 62, 66, 69, 102, 103, 105
mapped listings & properties, 56, 81, 92, 93,
140
markers, 105
market areas, 9
market share, 250, 251, 254
about, 250
report, 256
viewing office listings, 256
members, 15
menus, 5
MLS# search, 66, 122
my links, 9
my links | Default.MLSLIOnly | [78], 26
my listings, 155
my lists
favorite listings, 152
listing cart, 154
my listings, 155
recent searches, 159
recently viewed, 160
N
navigating, 5, 81, 87, 105
new search, 112
new window, 20
news, 4, 26, 27
NOT criteria, 75
not searches, 75, 77
O
Office Inventory, 156
P
password, 2, 10
photo library, 50, 164
photos, 46, 50, 52, 87, 162, 164, 166, 168
polygon, 76, 97
popup help for fields, 35
pre-defined forms, 76
pre-defined searches, 66, 120
price changes, 57, 60
price range listing, 36, 60
print, 13
private and public listings, 47, 49
profile, 8
Index
261
prospect match, 66, 192, 194
prospects, 69, 192, 194
prospect search, 66
public record link, 34, 125, 139
public records, 15, 17, 19, 124, 125, 128,
129, 130, 136, 138, 139, 140, 145, 149
Q
quick search forms, 75
R
radius, 76, 97
recent searches, 159
recently viewed, 160
reports
history, 232, 233
market share, 250, 254
required fields, 35
responsive fields, 36
results, 13, 63, 80, 81
return to criteria, 81
rosters, 187
route listings, 87, 172
S
save & share searches, 66, 105, 116
search criteria, 63, 74, 75, 105
search forms, 75
search results, 63, 80, 81, 244
search type
map, 66, 102, 103, 105
mls#, 66, 122
new, 65, 112
pre-defined, 66, 120
saved, 66, 116
searches, 66
searches for listings, 62, 65, 67, 68, 69
send e-mail, 11, 222
settings, 8
shapes, 76
share
saved search, 116
site action bar, 12, 13, 17, 20, 21
slideshows, 87, 168
sort multi level, 247
startup, 2
status changes, 57, 59
system appearance, 10
T
today's listings, 8, 26, 112
today's listings | Default.MLSLIOnly | [4],
28
type of search, 62, 65
U
update, 228, 229
W
window appearance, 8
Z
zoom, 94, 106