summer vacation survival kit - kidscookrealfood.com · children come up with given a few simple...
TRANSCRIPT
Summer
Vacation
Survival
Kit
Over 20 field-tested ideas for
those "Mom, I'm bored!" moments
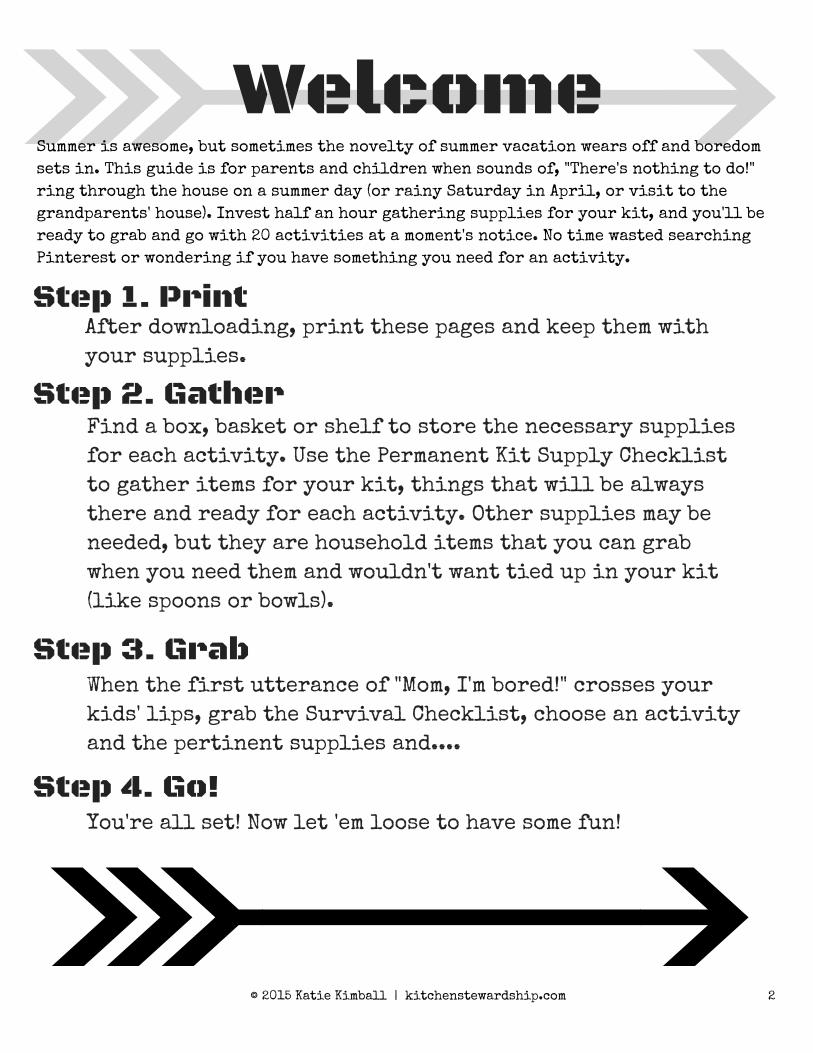
WelcomeSummer is awesome, but sometimes the novelty of summer vacation wears off and boredom
sets in. This guide is for parents and children when sounds of, "There's nothing to do!"
ring through the house on a summer day (or rainy Saturday in April, or visit to the
grandparents' house). Invest half an hour gathering supplies for your kit, and you'll be
ready to grab and go with 20 activities at a moment's notice. No time wasted searching
Pinterest or wondering if you have something you need for an activity.
Step 1. Print
Step 2. Gather
Step 3. Grab
Step 4. Go!
After downloading, print these pages and keep them with
your supplies.
Find a box, basket or shelf to store the necessary supplies
for each activity. Use the Permanent Kit Supply Checklist
to gather items for your kit, things that will be always
there and ready for each activity. Other supplies may be
needed, but they are household items that you can grab
when you need them and wouldn't want tied up in your kit
(like spoons or bowls).
When the first utterance of "Mom, I'm bored!" crosses your
kids' lips, grab the Survival Checklist, choose an activity
and the pertinent supplies and....
You're all set! Now let 'em loose to have some fun!
© 2015 Katie Kimball | kitchenstewardship.com 2
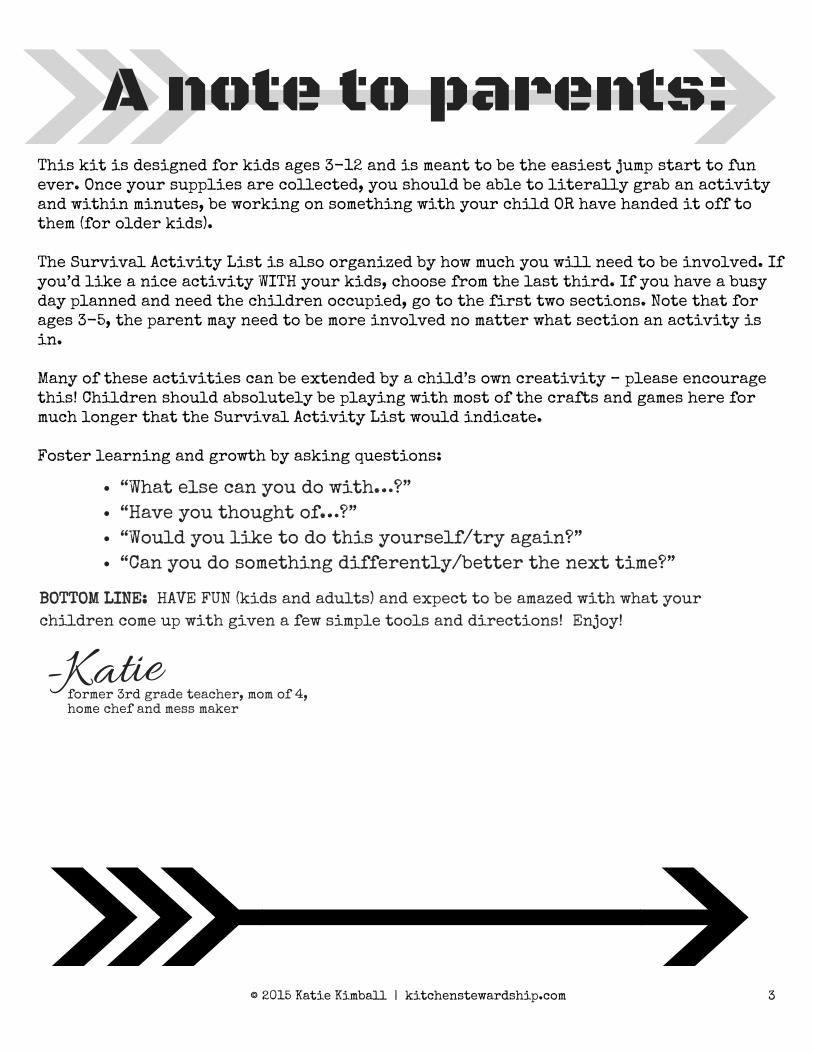
A note to parents:
This kit is designed for kids ages 3-12 and is meant to be the easiest jump start to funever. Once your supplies are collected, you should be able to literally grab an activityand within minutes, be working on something with your child OR have handed it off tothem (for older kids).
The Survival Activity List is also organized by how much you will need to be involved. Ifyou’d like a nice activity WITH your kids, choose from the last third. If you have a busyday planned and need the children occupied, go to the first two sections. Note that forages 3-5, the parent may need to be more involved no matter what section an activity isin.
Many of these activities can be extended by a child’s own creativity – please encouragethis! Children should absolutely be playing with most of the crafts and games here formuch longer that the Survival Activity List would indicate.
Foster learning and growth by asking questions:
“What else can you do with…?”
“Have you thought of…?”
“Would you like to do this yourself/try again?”
“Can you do something differently/better the next time?”
BOTTOM LINE: HAVE FUN (kids and adults) and expect to be amazed with what your
children come up with given a few simple tools and directions! Enjoy!
-Katieformer 3rd grade teacher, mom of 4,home chef and mess maker
© 2015 Katie Kimball | kitchenstewardship.com 3
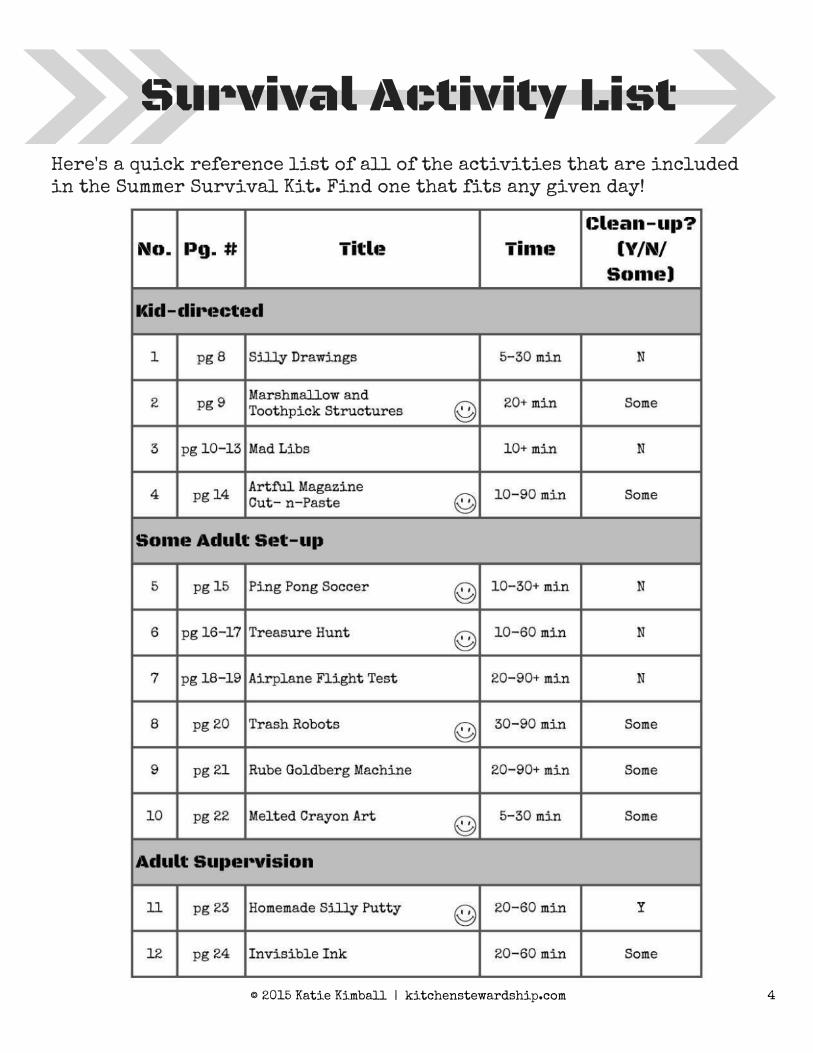
Survival Activity List
Here's a quick reference list of all of the activities that are includedin the Summer Survival Kit. Find one that fits any given day!
© 2015 Katie Kimball | kitchenstewardship.com 4
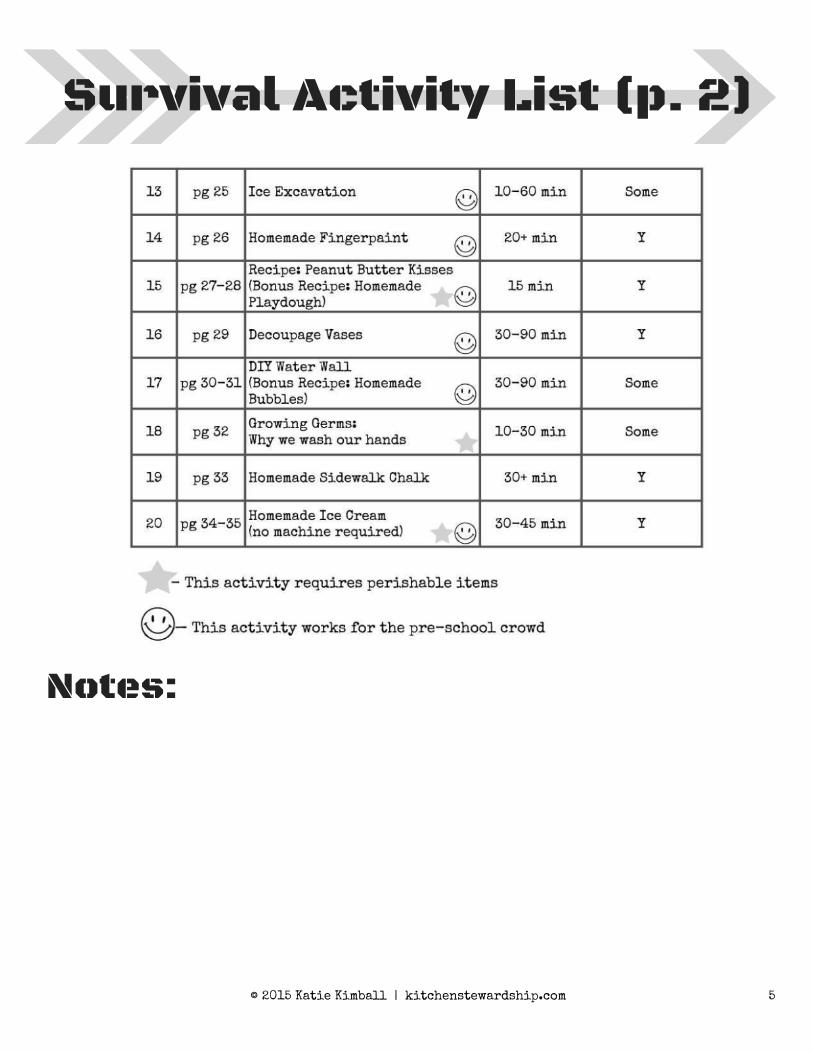
Survival Activity List (p. 2)
Notes:
© 2015 Katie Kimball | kitchenstewardship.com 5
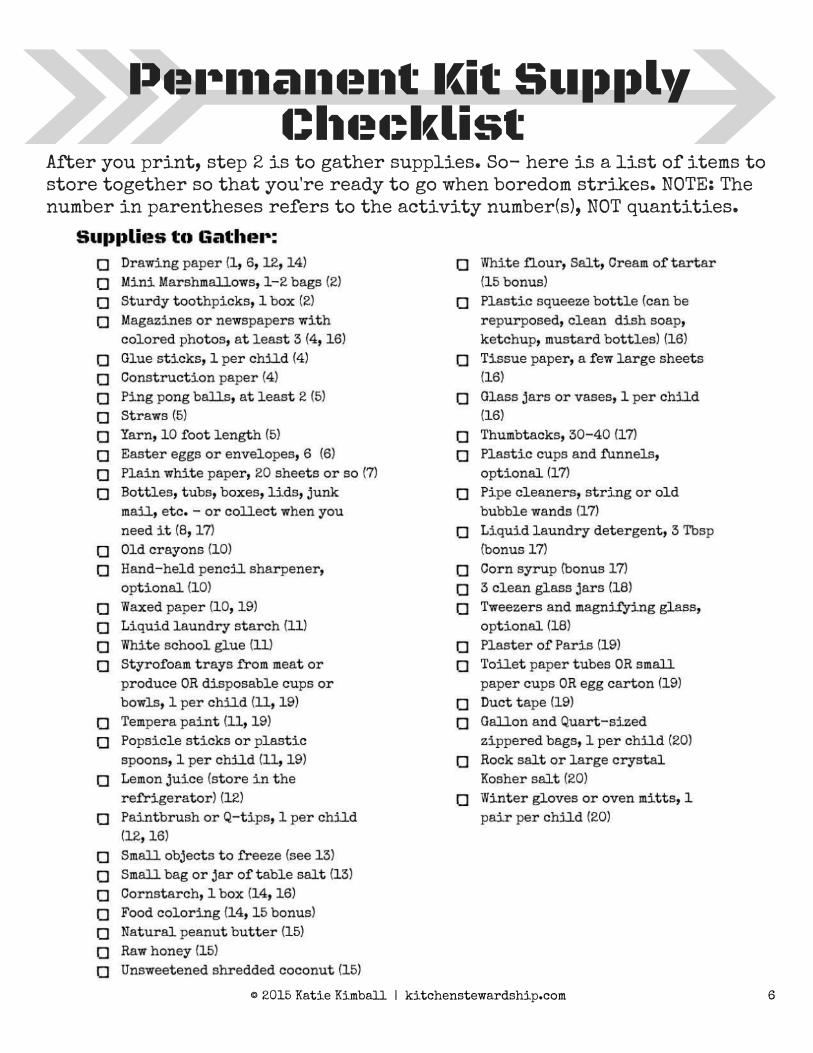
Permanent Kit Supply
Checklist After you print, step 2 is to gather supplies. So- here is a list of items to
store together so that you're ready to go when boredom strikes. NOTE: The
number in parentheses refers to the activity number(s), NOT quantities.
© 2015 Katie Kimball | kitchenstewardship.com 6
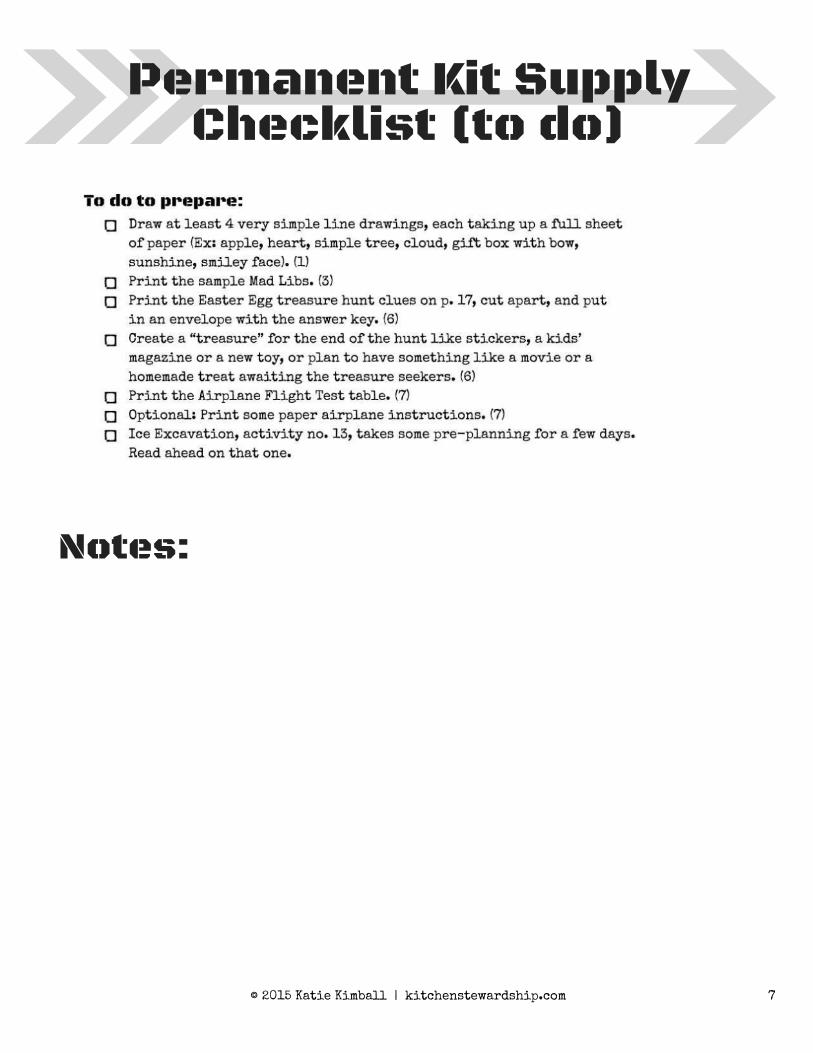
Permanent Kit Supply
Checklist (to do)
Notes:
© 2015 Katie Kimball | kitchenstewardship.com 7
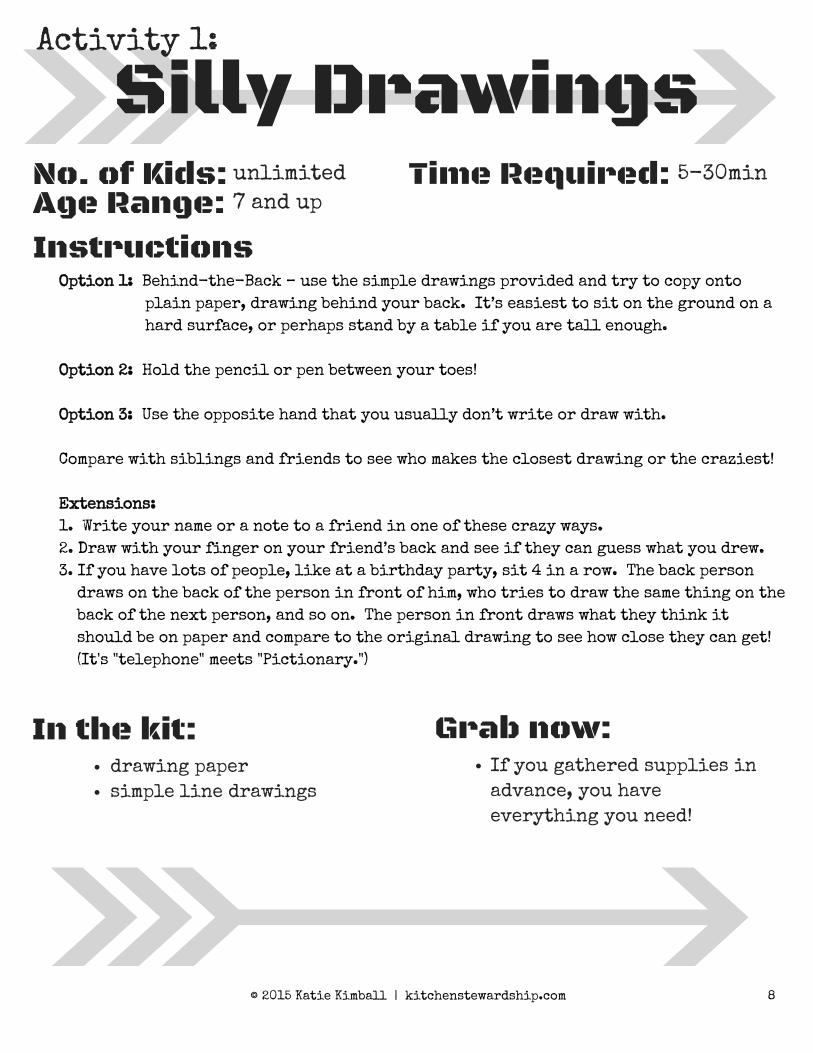
Silly Drawings
Option 1: Behind-the-Back – use the simple drawings provided and try to copy onto
plain paper, drawing behind your back. It’s easiest to sit on the ground on a
hard surface, or perhaps stand by a table if you are tall enough.
Option 2: Hold the pencil or pen between your toes!
Option 3: Use the opposite hand that you usually don’t write or draw with.
Compare with siblings and friends to see who makes the closest drawing or the craziest!
Extensions:
1. Write your name or a note to a friend in one of these crazy ways.
2. Draw with your finger on your friend’s back and see if they can guess what you drew.
3. If you have lots of people, like at a birthday party, sit 4 in a row. The back person
draws on the back of the person in front of him, who tries to draw the same thing on the
back of the next person, and so on. The person in front draws what they think it
should be on paper and compare to the original drawing to see how close they can get!
(It's "telephone" meets "Pictionary.")
Instructions
In the kit: Grab now:
No. of Kids:
If you gathered supplies in
advance, you have
everything you need!
Activity 1:
Age Range:
Time Required:unlimited
7 and up
5-30min
drawing paper
simple line drawings
© 2015 Katie Kimball | kitchenstewardship.com 8
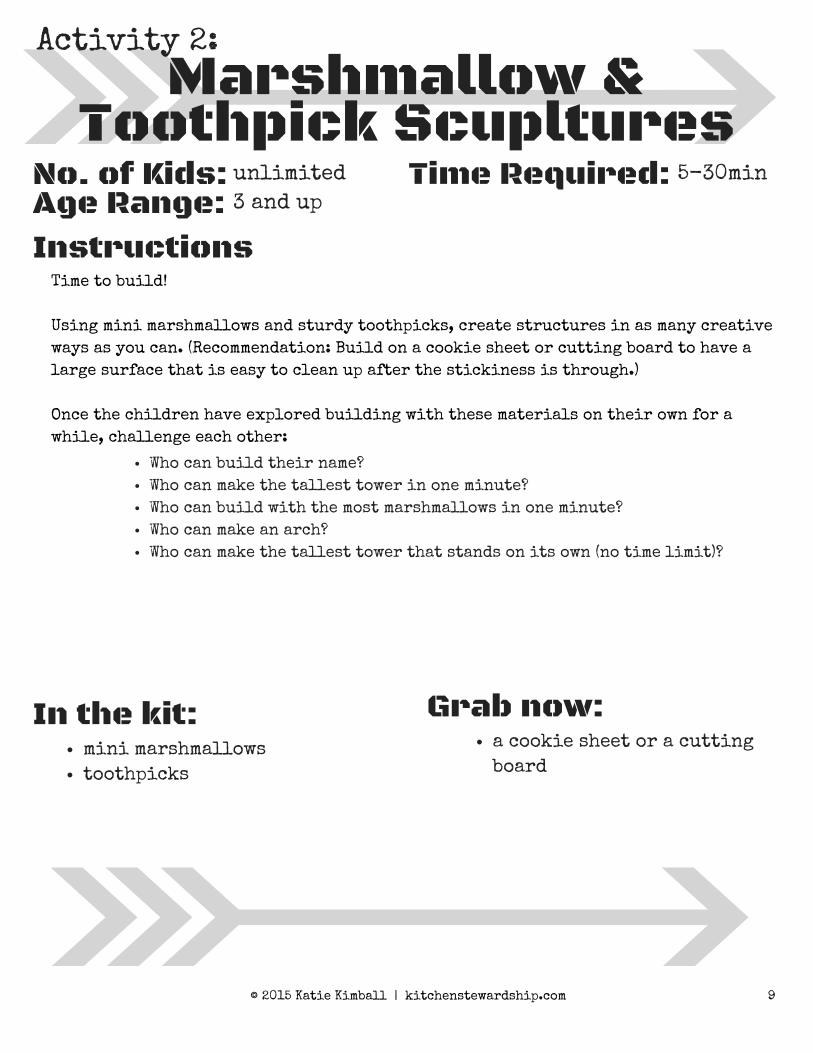
Marshmallow &
Toothpick Scupltures
Time to build!
Using mini marshmallows and sturdy toothpicks, create structures in as many creative
ways as you can. (Recommendation: Build on a cookie sheet or cutting board to have a
large surface that is easy to clean up after the stickiness is through.)
Once the children have explored building with these materials on their own for a
while, challenge each other:
Instructions
In the kit: Grab now:
No. of Kids:
mini marshmallows
toothpicks
a cookie sheet or a cutting
board
Activity 2:
Age Range:
Time Required:unlimited
3 and up
5-30min
Who can build their name?
Who can make the tallest tower in one minute?
Who can build with the most marshmallows in one minute?
Who can make an arch?
Who can make the tallest tower that stands on its own (no time limit)?
© 2015 Katie Kimball | kitchenstewardship.com 9
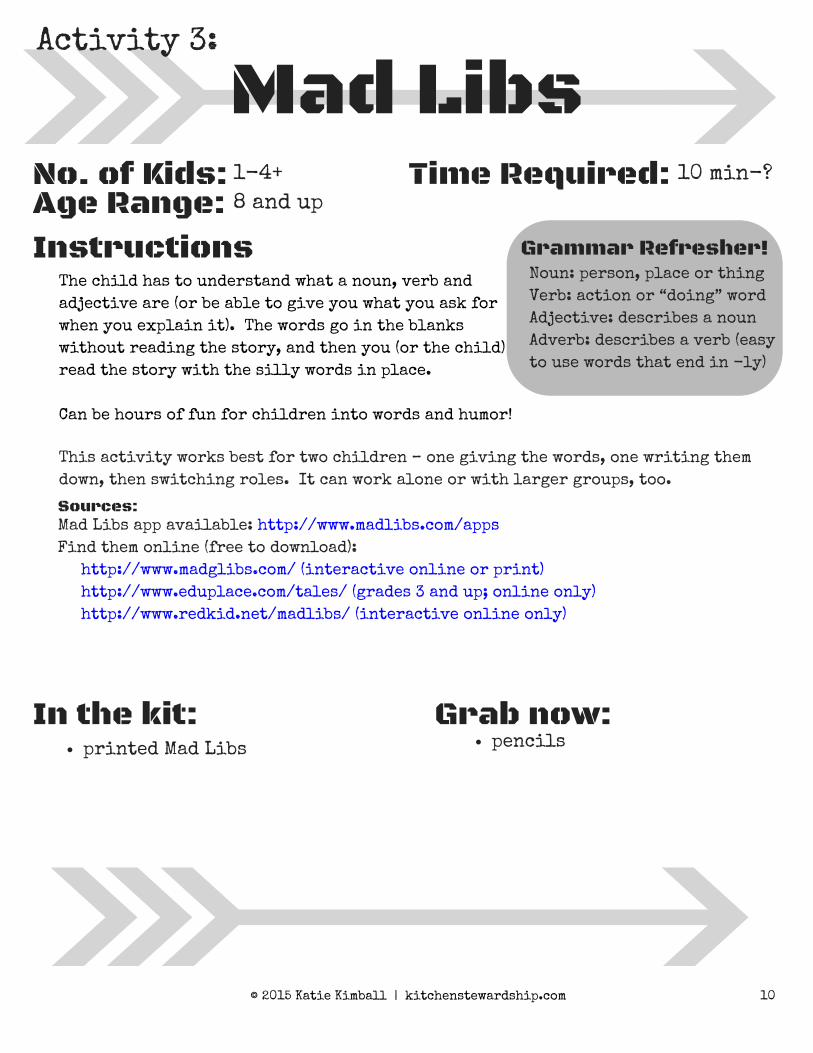
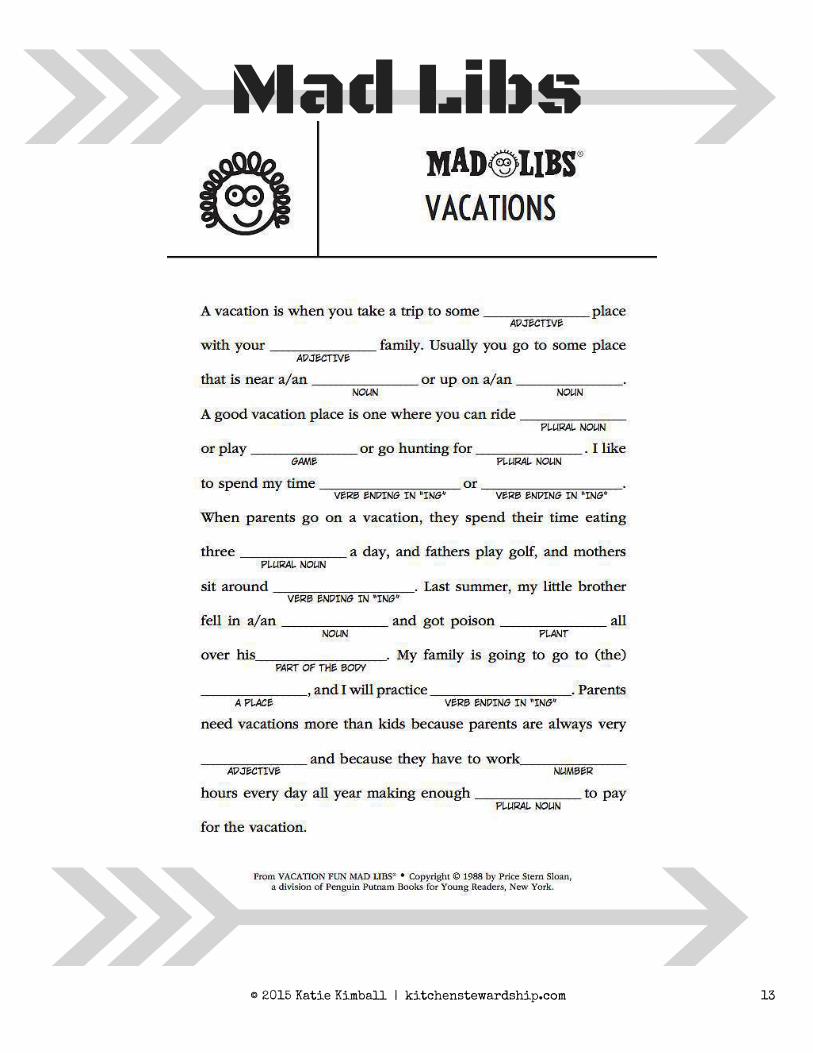
Mad Libs
The child has to understand what a noun, verb and
adjective are (or be able to give you what you ask for
when you explain it). The words go in the blanks
without reading the story, and then you (or the child)
read the story with the silly words in place.
Can be hours of fun for children into words and humor!
Instructions
In the kit: Grab now:
No. of Kids:
printed Mad Libs pencils
Activity 3:
Age Range:
Time Required:1-4+
8 and up
10 min-?
Grammar Refresher!
Noun: person, place or thing
Verb: action or “doing” word
Adjective: describes a noun
Adverb: describes a verb (easy
to use words that end in -ly)
Find them online (free to download):
Mad Libs app available: http://www.madlibs.com/apps
http://www.madglibs.com/ (interactive online or print)
http://www.eduplace.com/tales/ (grades 3 and up; online only)
http://www.redkid.net/madlibs/ (interactive online only)
This activity works best for two children – one giving the words, one writing them
down, then switching roles. It can work alone or with larger groups, too.
Sources:
© 2015 Katie Kimball | kitchenstewardship.com 10
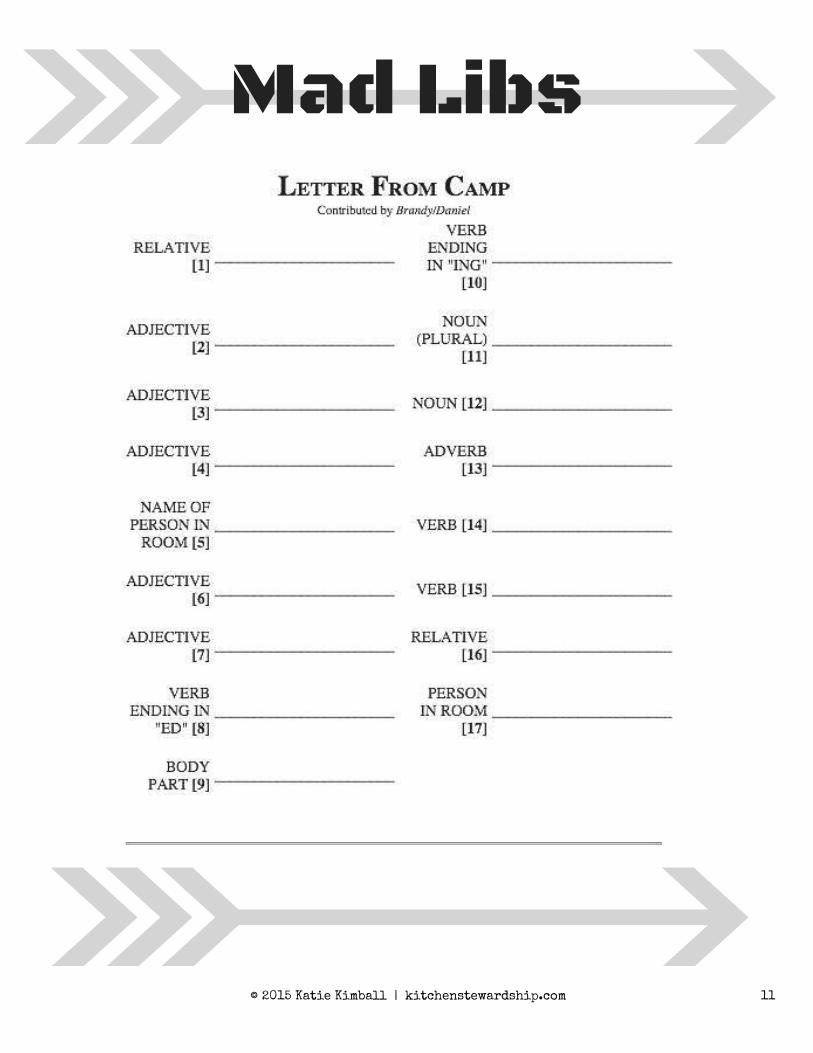
Mad Libs
© 2015 Katie Kimball | kitchenstewardship.com 11
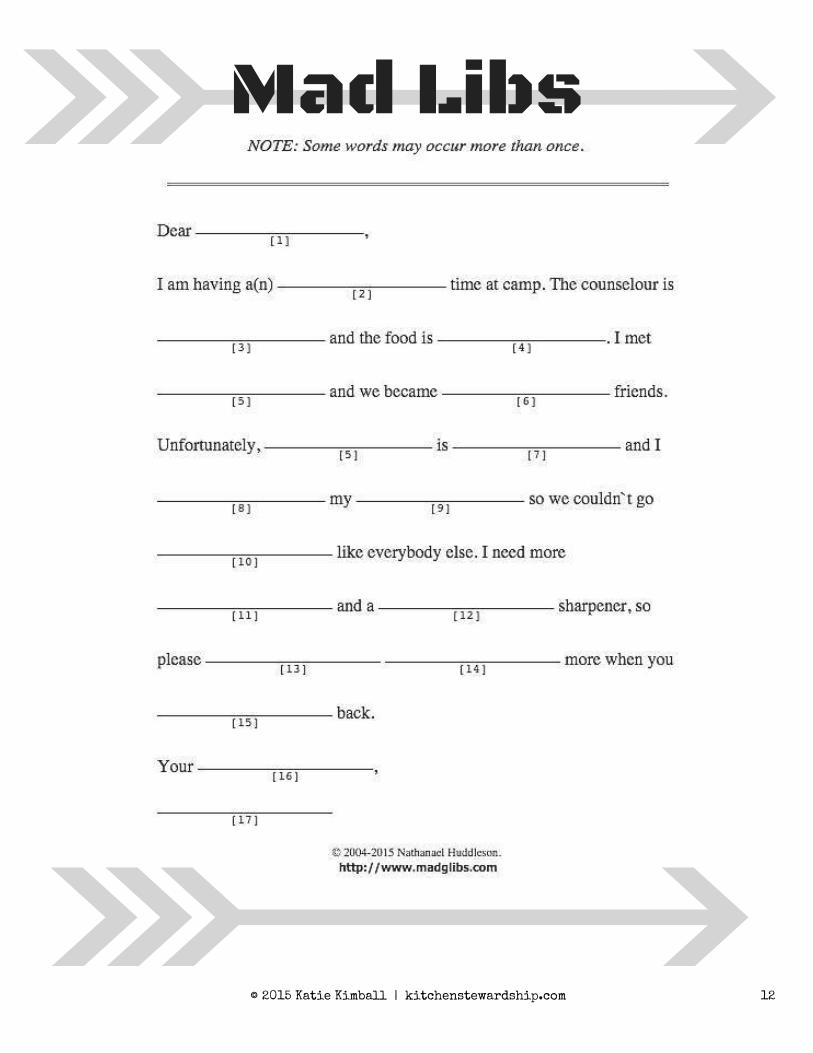
Mad Libs
© 2015 Katie Kimball | kitchenstewardship.com 12
Mad Libs
© 2015 Katie Kimball | kitchenstewardship.com 13
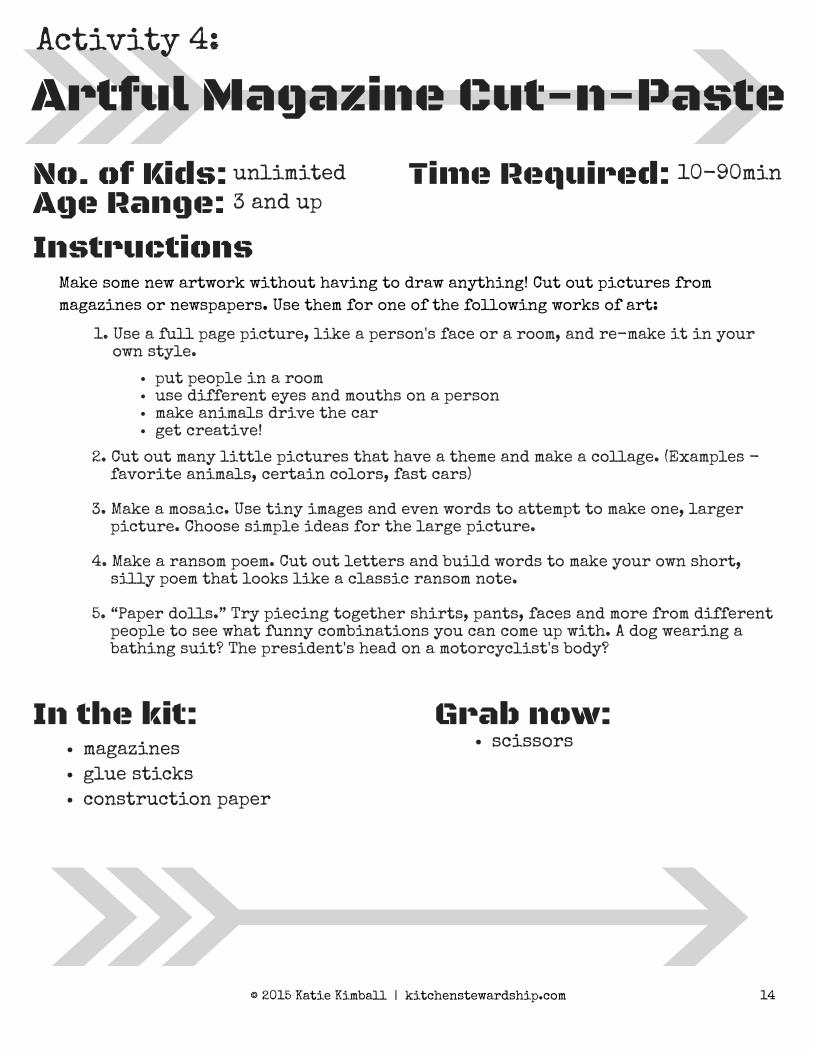
Artful Magazine Cut-n-Paste
Make some new artwork without having to draw anything! Cut out pictures from
magazines or newspapers. Use them for one of the following works of art:
Instructions
In the kit: Grab now:
No. of Kids:
magazines
glue sticks
construction paper
scissors
Activity 4:
Age Range:
Time Required:unlimited
3 and up
10-90min
1. Use a full page picture, like a person's face or a room, and re-make it in yourown style.
put people in a roomuse different eyes and mouths on a personmake animals drive the carget creative!
2. Cut out many little pictures that have a theme and make a collage. (Examples -favorite animals, certain colors, fast cars)
3. Make a mosaic. Use tiny images and even words to attempt to make one, largerpicture. Choose simple ideas for the large picture.
4. Make a ransom poem. Cut out letters and build words to make your own short,silly poem that looks like a classic ransom note.
5. “Paper dolls.” Try piecing together shirts, pants, faces and more from differentpeople to see what funny combinations you can come up with. A dog wearing abathing suit? The president's head on a motorcyclist's body?
© 2015 Katie Kimball | kitchenstewardship.com 14
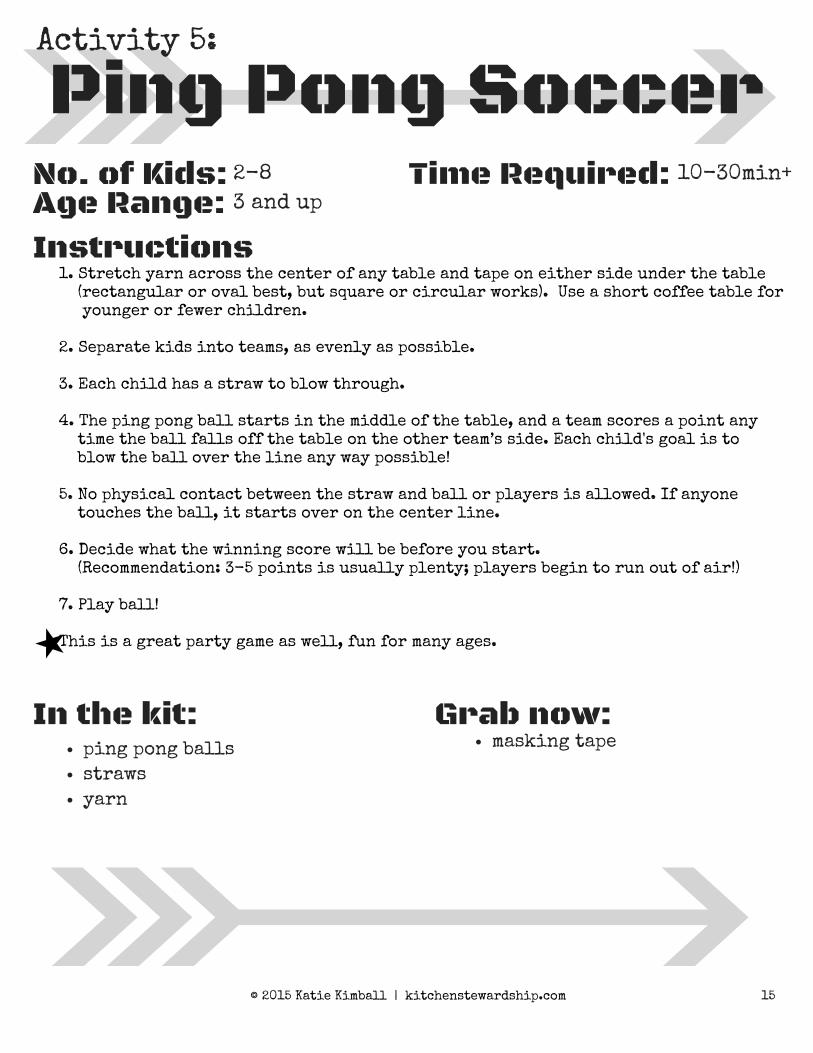
Ping Pong Soccer
1. Stretch yarn across the center of any table and tape on either side under the table(rectangular or oval best, but square or circular works). Use a short coffee table foryounger or fewer children.
2. Separate kids into teams, as evenly as possible.
3. Each child has a straw to blow through.
4. The ping pong ball starts in the middle of the table, and a team scores a point anytime the ball falls off the table on the other team’s side. Each child's goal is toblow the ball over the line any way possible!
5. No physical contact between the straw and ball or players is allowed. If anyonetouches the ball, it starts over on the center line.
6. Decide what the winning score will be before you start.(Recommendation: 3-5 points is usually plenty; players begin to run out of air!)
7. Play ball!
This is a great party game as well, fun for many ages.
Instructions
In the kit: Grab now:
No. of Kids:
ping pong balls
straws
yarn
masking tape
Activity 5:
Age Range:
Time Required:2-8
3 and up
10-30min+
© 2015 Katie Kimball | kitchenstewardship.com 15

Treasure Hunt
Who says you can’t have an Easter egg hunt in the summer? This treasure hunt is written tofit any house.
Instructions
In the kit: Grab now:
No. of Kids:
printed clues
Easter eggs or envelopes
with clues
ending treasure box
drawing paper
pencils
Activity 6:
Age Range:
Time Required:1-5
3 and up
10-60min
1. Place clues 2 through 7 in Easter eggs (or envelopes).
2. Hide them in the following places in your house:
Adult preparation:
#2 – In someone's shoe near the door#3 – On/in the couch or armchair in a room with a TV#4 – In a pot in the kitchen#5 – Under the vacuum cleaner#6 – On or under the kitchen table#7 – With the toothbrushes
Give the child(ren) the first clue and let them go! When they find the treasure, encouragethe kids to write clues for each other (or you!) and play again. (It used to take me two hoursto make a treasure hunt for my parents and was a great exercise in creativity and wordusage.)
Adapt for non-readers by just reading the clues out loud that they find. For very youngchildren, just let it be a regular hunt – you hide the eggs anywhere and they find them. Youcan do this over and over with the preschool/toddler set.
3. Hide the ending treasure under a bed.
© 2015 Katie Kimball | kitchenstewardship.com 16
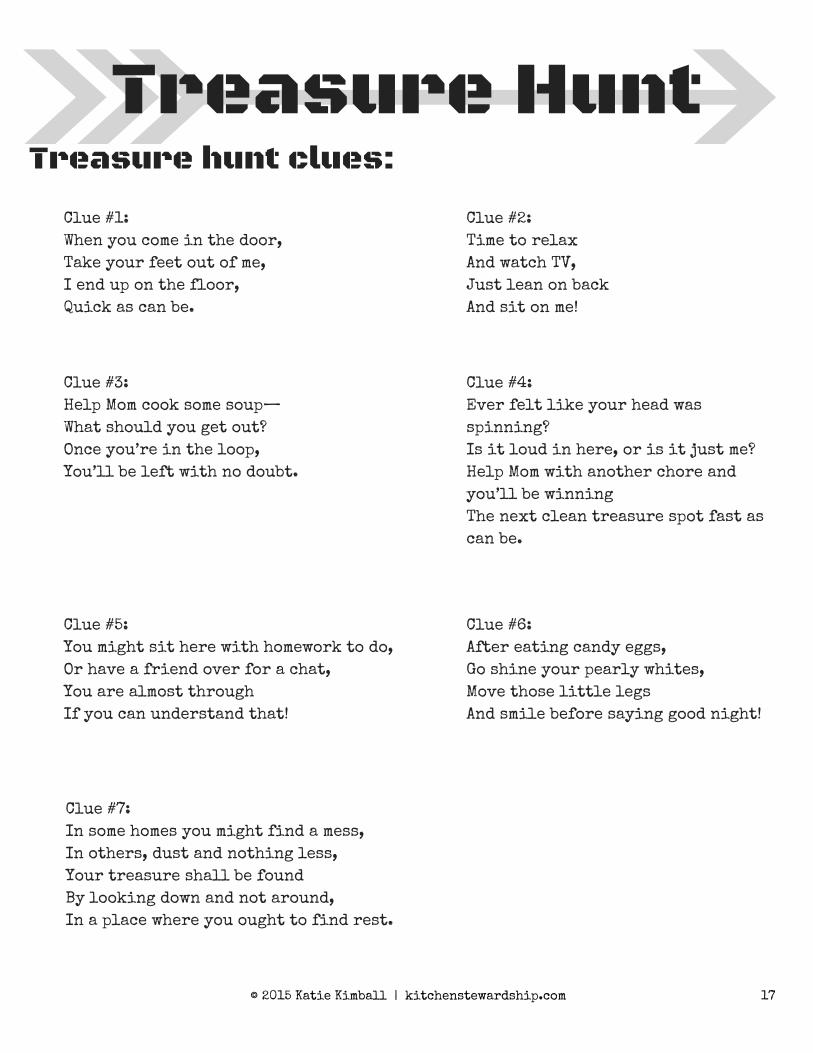
Treasure HuntTreasure hunt clues:
Clue #1:
When you come in the door,
Take your feet out of me,
I end up on the floor,
Quick as can be.
Clue #2:
Time to relax
And watch TV,
Just lean on back
And sit on me!
Clue #3:
Help Mom cook some soup—
What should you get out?
Once you’re in the loop,
You’ll be left with no doubt.
Clue #4:
Ever felt like your head was
spinning?
Is it loud in here, or is it just me?
Help Mom with another chore and
you’ll be winning
The next clean treasure spot fast as
can be.
Clue #5:
You might sit here with homework to do,
Or have a friend over for a chat,
You are almost through
If you can understand that!
Clue #6:
After eating candy eggs,
Go shine your pearly whites,
Move those little legs
And smile before saying good night!
Clue #7:
In some homes you might find a mess,
In others, dust and nothing less,
Your treasure shall be found
By looking down and not around,
In a place where you ought to find rest.
© 2015 Katie Kimball | kitchenstewardship.com 17
Airplane Flight Test
A little artsy, a little science, a little detective work. Let's figure out what kind of
airplane flies the best!
Instructions
In the kit: Grab now:
No. of Kids:
printed data sheet
plain white paper
pencils
tape measure or yard stick
Activity 7:
Age Range:
Time Required:1-5
6 and up
20-90min
1. Make a crowd of paper airplanes.2. Number each airplane to help keep track.3. Try to make at least 5 or 6 different styles.4. Decorate them if you like!5. Predict:
Which will fly the farthest?
Can you make loop-the-loops?
Can you make an airplane that turns a corner?
Can you put anything on the airplane, like a jewel, and still fly it?
6. Mark a starting position in a large room in your house and test how far eachairplane flies. Make sure you are standing in the same way and try to throweach airplane the same, then measure the distance and mark on the chart.
Adapt for younger children by removing the chart and just eyeing the distance.Teach the little ones how to throw an airplane properly to keep it in the air.
I think it’s best to try making your own first, then try some patterns from otherplaces. Challenge yourself to fly farther or straighter than some of “the best” onthese websites!
http://www.josephpalmer.com/planes/Airplane.shtml
http://www.zurqui.com/crinfocus/paper/air-bld1.html
http://bestpaperairplanes.com/
© 2015 Katie Kimball | kitchenstewardship.com 18

Airplane Flight Test
© 2015 Katie Kimball | kitchenstewardship.com 19
Trash Robots
A fun activity for the creative-minded. What sort of zany robot (or other creature
that fits your fancy, I suppose!) can you create using (mostly) only things you would
normally recycle or throw away?
Raid the recycling bins and maybe even collect “junk” for a week to really make your
creation perfect. How tall? How many eyes? Antennae? Arms and legs? Will your
robot wear clothes? Use junk mail for fun colors of paper, and maybe you can figure
out how to use the little windows from the envelopes. Remember, everything (except
glue, tape or string) should be something you would normally call “junk”.
Go “social” and take photos of your robots, then see what friends in social media
suggest for their names!
Instructions
In the kit: Grab now:
No. of Kids:
bottles, tubes, boxes, lids,
junk mail, etc. (optional)
junk!
tape
glue
scissors
Activity 8:
Age Range:
Time Required:unlimited
3 and up
30-90min
© 2015 Katie Kimball | kitchenstewardship.com 20
Rube Goldberg Machine
A Rube Goldberg Machine is something that makes a chain reaction happen, likedominoes. When one falls, the next one falls, and so on.
In a Rube Goldberg Machine, you might have a book fall over and hit a cup which tipsout a bouncy ball, which rolls down a paper towel tube...and so on.
Try making your own Rube Goldberg Machine! Use supplies like:
Instructions
In the kit: Grab now:
No. of Kids:
none- unless you want to add
things that you know will be
good for building
whatever you want to use to
make your machine (see the
suggestions above)
Activity 9:
Age Range:
Time Required:1-4
7 and up
20-90min+
ballstubes – paper towel, toilet paper, PVC pipesDominoesboxesitems from the kitchen – utensils, cupspopsicle sticks (make great levers)Take a walk around your house – what might youuse?
After you've tried a few, THEN watch this example of a really cool one made by a kid:
https://www.youtube.com/watch?v=0uDDEEHDf1Y
Do you think the boy in the video had help making his machine?
How did his results differ from his prediction?
What was the most surprising part of his machine?
Do you want to try to make another one?
Discuss what you saw!
© 2015 Katie Kimball | kitchenstewardship.com 21
Melted Crayon Art
On a HOT day, you can melt crayons in the sun!
Instructions
In the kit: Grab now:
No. of Kids:
waxed paper
old crayons
hand-held pencil sharpener
large paper
SUN!
a hairdryer (if it's not hot
enough from the sun)
Activity 10:
Age Range:
Time Required:1-5
3 and up
5-30min
(plus wait
time)
1. Gather old crayons that aren't much good for coloring anymore. Break or shavethem into tiny pieces (a handheld pencil sharpener, if it's big enough to fit acrayon, works great).
2. Make art out of them on a piece of large paper set outside in a very sunny area. Setout the pieces of crayon in designs, patterns, or simple pictures.
3. Cover the entire paper with a piece of waxed paper. You might need to hold it downwith something heavy if it's windy.
4. Let the sun have at it!
5. If it's not quite hot enough to at least start melting the crayons within half anhour, you can add the heat of a hair dryer, briefly run over the waxed paper with awarm (not hot, no steam) iron, or if you can move the art to a vehicle sitting in thesun, that will turn the heat up too.
6. As the crayon pieces melt, kids can slide the colors around a bit with a stick (oreven fingers) through the waxed paper.
7. Once it's all melted, let the wax harden up in a cool place, then peel the waxed paper off and display your work of art.... but NOT in the sun!
Idea adapted from Kids Activities Blog.
© 2015 Katie Kimball | kitchenstewardship.com 22
Homemade Silly Putty
1. Use Styrofoam trays leftover from buying meat or produce (washed well), plasticzippered bags or disposable cups or bowls.
2. Eye up the starch and glue or measure 1 Tbs. per child of each to be more precise.
3. Mix with a popsicle stick or your finger.
4. Add more glue if the mixture is too liquid-y after some good stirring and morestarch if it is sticking to everything.
5. Put a drop of tempera paint in for color.
6. You'll know it's ready when the goo moves as one piece and sticks back together whenyou pull it apart. See a demo
7. You can add a little glue or starch at any time if you’d like it stickier/stretchieror less sticky.
8. Store in a plastic zippered bag in the refrigerator for best longevity.
9. The Styrofoam trays are a great surface to play on.
10. Use plastic knives and spoons, cookie cutters and rolling pins just like you wouldwith playdough.
Instructions
In the kit: Grab now:
No. of Kids:
liquid laundry starch
white school glue
styrofoam trays or
disposable cups/bowls
tempera paint
plastic zippered bags
utensils & cookie cutters
for playing
Activity 11:
Age Range:
Time Required:unlimited
3 and up
20-60min
1 part liquid laundry starch + 1 part white school glue =
super fun silly putty!
here.
© 2015 Katie Kimball | kitchenstewardship.com 23
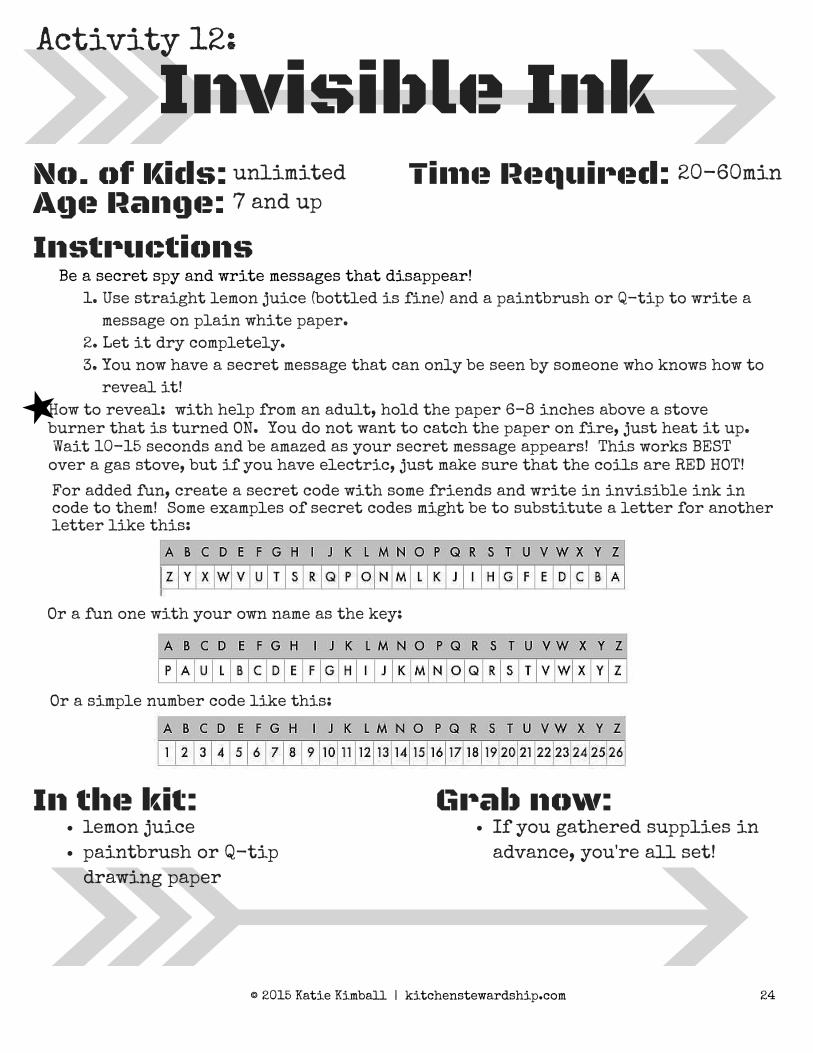
Invisible Ink
Be a secret spy and write messages that disappear!
Instructions
In the kit: Grab now:
No. of Kids:
If you gathered supplies in
advance, you're all set!
Activity 12:
Age Range:
Time Required:unlimited
7 and up
20-60min
1. Use straight lemon juice (bottled is fine) and a paintbrush or Q-tip to write a
message on plain white paper.
2. Let it dry completely.
3. You now have a secret message that can only be seen by someone who knows how to
reveal it!
How to reveal: with help from an adult, hold the paper 6-8 inches above a stoveburner that is turned ON. You do not want to catch the paper on fire, just heat it up. Wait 10-15 seconds and be amazed as your secret message appears! This works BESTover a gas stove, but if you have electric, just make sure that the coils are RED HOT!
For added fun, create a secret code with some friends and write in invisible ink incode to them! Some examples of secret codes might be to substitute a letter for anotherletter like this:
Or a fun one with your own name as the key:
© 2015 Katie Kimball | kitchenstewardship.com 24
lemon juice
paintbrush or Q-tip
drawing paper
Or a simple number code like this:
Ice Excavation
Perfect for almost any age child on a hot summer day! This project is the only one that
takes pre-planning a day or two ahead, but it's worth it.
Instructions
In the kit: Grab now:
No. of Kids:
small objects to freeze (see
above for ideas)
salt
prep your ice/objects
butter knives
spoons
forks
hammer
screwdriver
warm water
Activity 13:
Age Range:
Time Required:1-4
3 and up
10-60min
1. The simple way: Place a few small toys or household objects in a shallow plastic
container, cover with water and freeze. (One for each child is recommended.)
2. The layered way: Put less than an inch of water in the bottom of a freezer-proof
container. Freeze until solid. Add 2-3 small items and cover with water. Freeze
again. Add 2-3 more small items and repeat until the entire container is filled with
layered ice.
3. Possible objects include: Tiny animals and cars, rubber bands, buttons and beads,
nails, rocks, legos, keys, paper clips, coins...
Prep:
1. Provide tools for the “ice excavation” - hammers, screwdrivers, butter knives,
forks, spoons, warm water, salt, etc.
2. Allow children to work (outside) on extracting the various items in their ice
block.
3. Ask questions: What is the best way to get an item out? How will this work? Why is
there salt here? What items are easier to get out? Why?
Play:
© 2015 Katie Kimball | kitchenstewardship.com 25
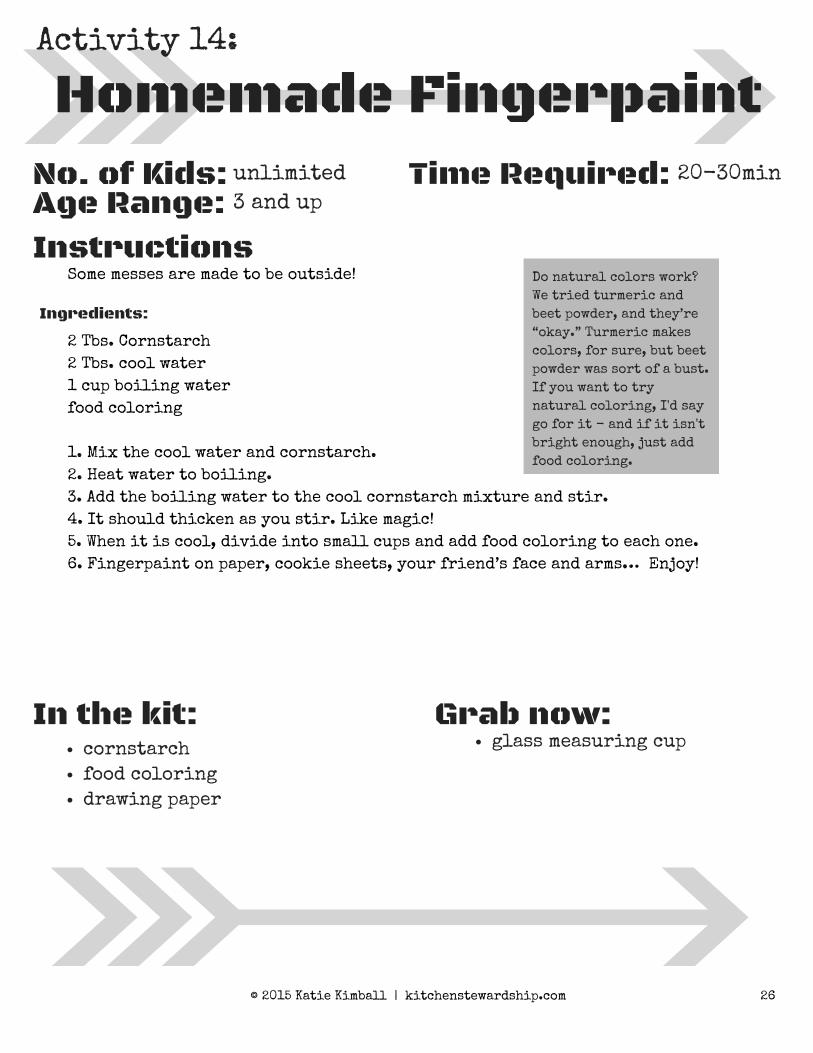
Homemade Fingerpaint
Some messes are made to be outside!
2 Tbs. Cornstarch
2 Tbs. cool water
1 cup boiling water
food coloring
1. Mix the cool water and cornstarch.
2. Heat water to boiling.
3. Add the boiling water to the cool cornstarch mixture and stir.
4. It should thicken as you stir. Like magic!
5. When it is cool, divide into small cups and add food coloring to each one.
6. Fingerpaint on paper, cookie sheets, your friend’s face and arms… Enjoy!
Instructions
In the kit: Grab now:
No. of Kids:
cornstarch
food coloring
drawing paper
glass measuring cup
Activity 14:
Age Range:
Time Required:unlimited
3 and up
20-30min
Ingredients:
Do natural colors work?
We tried turmeric and
beet powder, and they’re
“okay.” Turmeric makes
colors, for sure, but beet
powder was sort of a bust.
If you want to try
natural coloring, I'd say
go for it - and if it isn't
bright enough, just add
food coloring.
© 2015 Katie Kimball | kitchenstewardship.com 26

Recipe: Peanut Butter
Kisses
This simple recipe is perfect to make with busy kids and delicious to eat, too. If youhave peanut allergies or concerns, there's a bonus recipe for homemade playdoughbelow.
Instructions
In the kit: Grab now:
No. of Kids:
natural peanut butter
raw honey
unsweetened coconut
add-in ingredients
bowl/fork
waxed paper (optional)
Activity 15:
Age Range:
Time Required:unlimited
any age
15min
1 part natural peanut butter1 part honey, raw if possible1-2 parts unsweetened coconutOther add-in options: mini chocolate chips, sesame seeds, flax meal, chopped crispynuts or sunflower seeds
1. Grab a bowl and fork, mix honey and peanut butter until uniform, then add thecoconut until everything holds together like a sticky playdough. Grab a hunk, rollinto a ball between your palms, and eat!
2. You can add one or more of the optional add-ins before rolling if you like.
3. Store in an airtight container at room temperature, or wrap in waxed paper like ahard candy (twist both ends of a square/rectangular piece to make the wrapper) ifyou’d like to serve them individually.
4. If you really need a recipe, use 1/3 cup peanut butter, 1/3 cup honey, and 2/3 cupcoconut and you’ll be just fine.
Ingredients:
Method:
This recipe is reprinted from Healthy Snacks to Go. For more kid-friendly snacks to get you on your waywith real food, fast, use the coupon SUMMERKIT for 50% off the book, right here:http://www.kitchenstewardship.com/hstg
© 2015 Katie Kimball | kitchenstewardship.com 27
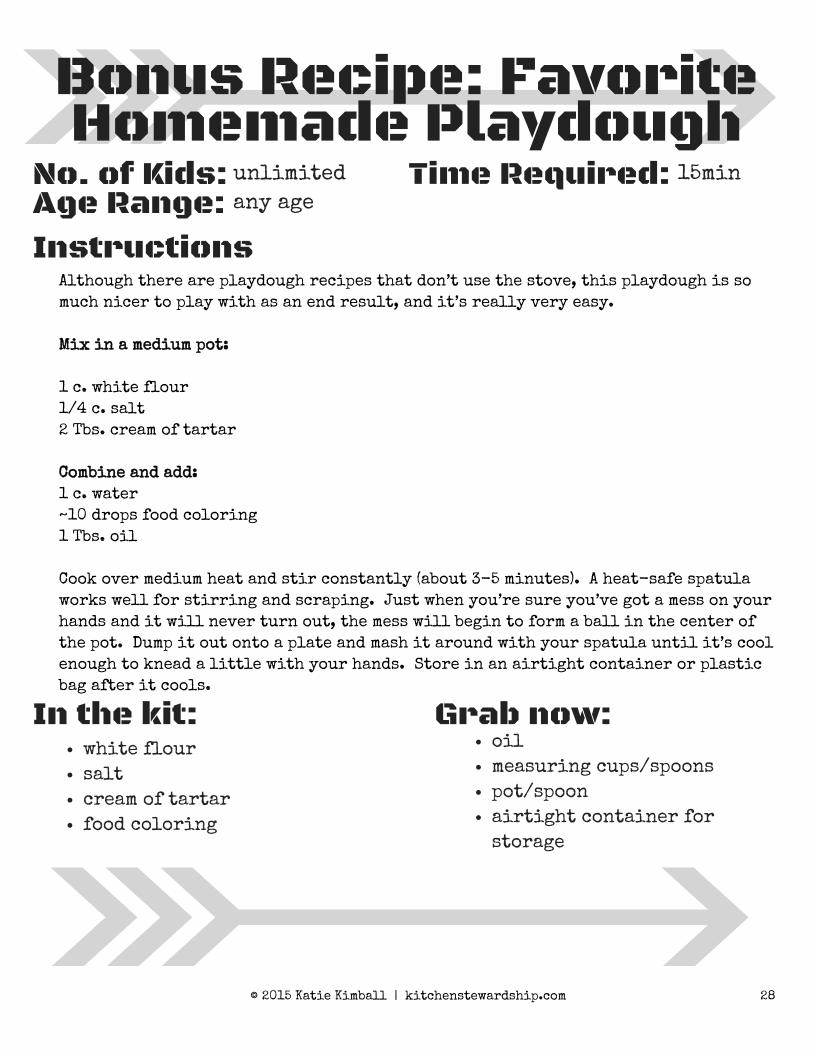
Bonus Recipe: Favorite
Homemade Playdough
Although there are playdough recipes that don’t use the stove, this playdough is so
much nicer to play with as an end result, and it’s really very easy.
Mix in a medium pot:
1 c. white flour
1/4 c. salt
2 Tbs. cream of tartar
Combine and add:
1 c. water
~10 drops food coloring
1 Tbs. oil
Cook over medium heat and stir constantly (about 3-5 minutes). A heat-safe spatula
works well for stirring and scraping. Just when you’re sure you’ve got a mess on your
hands and it will never turn out, the mess will begin to form a ball in the center of
the pot. Dump it out onto a plate and mash it around with your spatula until it’s cool
enough to knead a little with your hands. Store in an airtight container or plastic
bag after it cools.
Instructions
In the kit: Grab now:
No. of Kids:
white flour
salt
cream of tartar
food coloring
oil
measuring cups/spoons
pot/spoon
airtight container for
storage
Age Range:
Time Required:unlimited
any age
15min
© 2015 Katie Kimball | kitchenstewardship.com 28
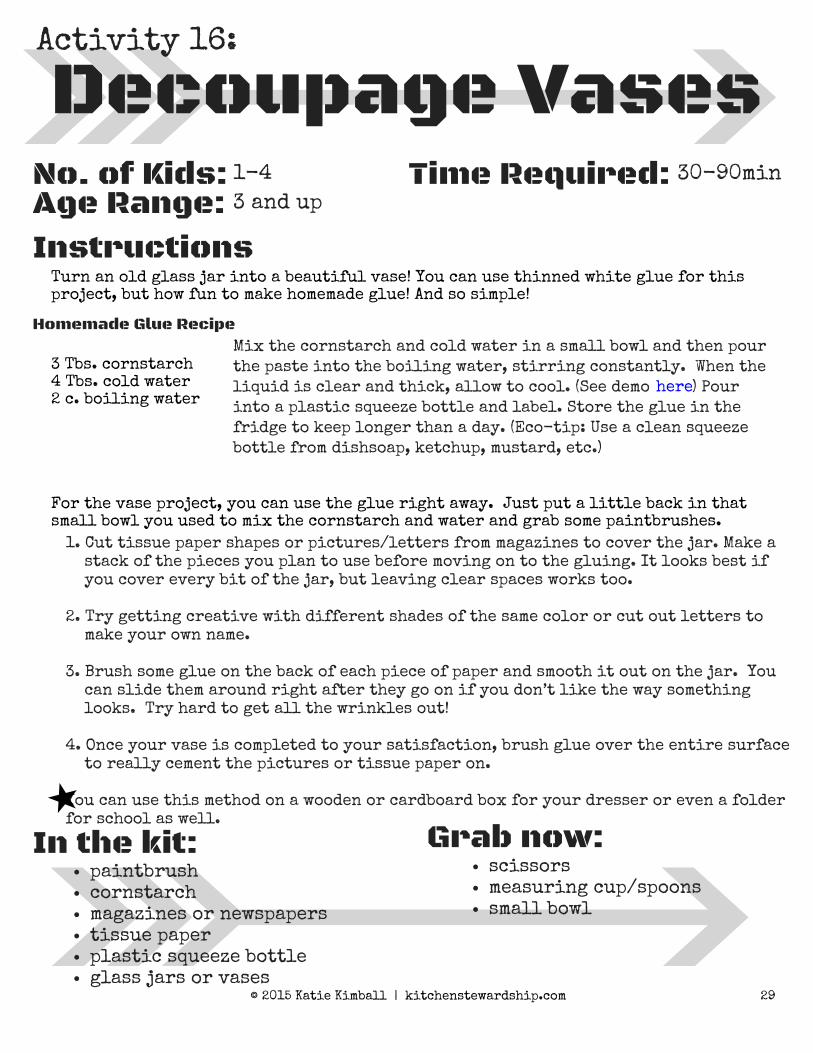
Decoupage Vases
Turn an old glass jar into a beautiful vase! You can use thinned white glue for thisproject, but how fun to make homemade glue! And so simple!
3 Tbs. cornstarch4 Tbs. cold water2 c. boiling water
For the vase project, you can use the glue right away. Just put a little back in thatsmall bowl you used to mix the cornstarch and water and grab some paintbrushes.
Instructions
In the kit: Grab now:
No. of Kids:
paintbrushcornstarchmagazines or newspaperstissue paperplastic squeeze bottleglass jars or vases
scissorsmeasuring cup/spoonssmall bowl
Activity 16:
Age Range:
Time Required:1-4
3 and up
30-90min
Homemade Glue Recipe
1. Cut tissue paper shapes or pictures/letters from magazines to cover the jar. Make astack of the pieces you plan to use before moving on to the gluing. It looks best ifyou cover every bit of the jar, but leaving clear spaces works too.
2. Try getting creative with different shades of the same color or cut out letters tomake your own name.
3. Brush some glue on the back of each piece of paper and smooth it out on the jar. Youcan slide them around right after they go on if you don’t like the way somethinglooks. Try hard to get all the wrinkles out!
4. Once your vase is completed to your satisfaction, brush glue over the entire surfaceto really cement the pictures or tissue paper on.
You can use this method on a wooden or cardboard box for your dresser or even a folderfor school as well.
Mix the cornstarch and cold water in a small bowl and then pour
the paste into the boiling water, stirring constantly. When the
liquid is clear and thick, allow to cool. (See demo ) Pour
into a plastic squeeze bottle and label. Store the glue in the
fridge to keep longer than a day. (Eco-tip: Use a clean squeeze
bottle from dishsoap, ketchup, mustard, etc.)
here
© 2015 Katie Kimball | kitchenstewardship.com 29
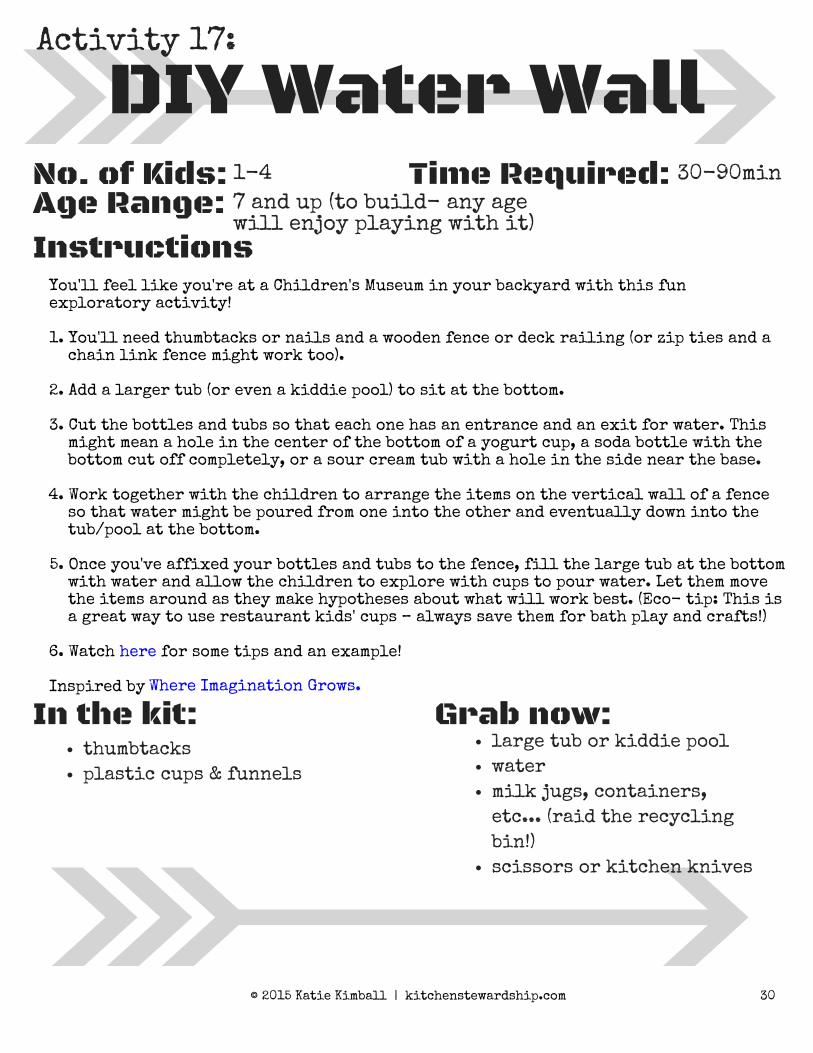
DIY Water Wall
Instructions
You'll feel like you're at a Children's Museum in your backyard with this funexploratory activity!
1. You'll need thumbtacks or nails and a wooden fence or deck railing (or zip ties and a
chain link fence might work too).
2. Add a larger tub (or even a kiddie pool) to sit at the bottom.
3. Cut the bottles and tubs so that each one has an entrance and an exit for water. This
might mean a hole in the center of the bottom of a yogurt cup, a soda bottle with the
bottom cut off completely, or a sour cream tub with a hole in the side near the base.
4. Work together with the children to arrange the items on the vertical wall of a fence
so that water might be poured from one into the other and eventually down into the
tub/pool at the bottom.
5. Once you've affixed your bottles and tubs to the fence, fill the large tub at the bottom
with water and allow the children to explore with cups to pour water. Let them move
the items around as they make hypotheses about what will work best. (Eco- tip: This is
a great way to use restaurant kids' cups – always save them for bath play and crafts!)
6. Watch here for some tips and an example!
Inspired by
In the kit: Grab now:
No. of Kids:
thumbtacks
plastic cups & funnels
large tub or kiddie pool
water
milk jugs, containers,
etc... (raid the recycling
bin!)
scissors or kitchen knives
Activity 17:
Age Range:
Time Required:1-4
7 and up (to build- any agewill enjoy playing with it)
30-90min
Where Imagination Grows.
© 2015 Katie Kimball | kitchenstewardship.com 30
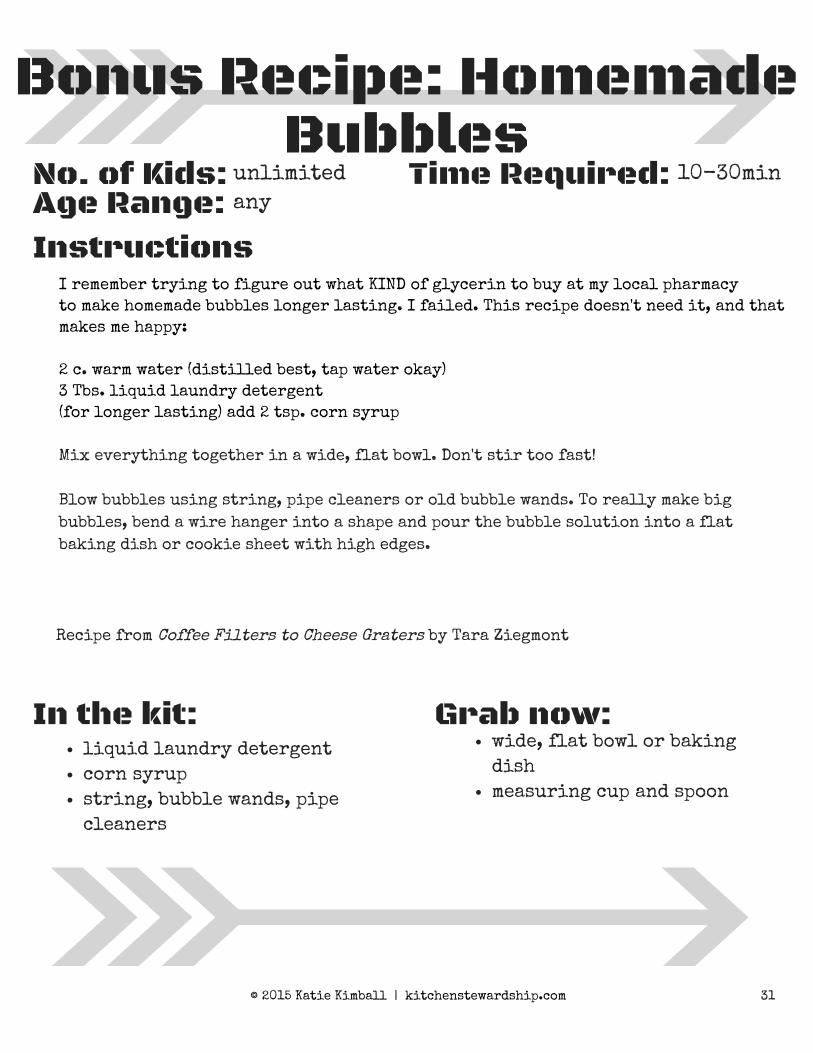
Bonus Recipe: Homemade
Bubbles
I remember trying to figure out what KIND of glycerin to buy at my local pharmacy
to make homemade bubbles longer lasting. I failed. This recipe doesn't need it, and that
makes me happy:
2 c. warm water (distilled best, tap water okay)
3 Tbs. liquid laundry detergent
(for longer lasting) add 2 tsp. corn syrup
Instructions
In the kit: Grab now:
No. of Kids:
liquid laundry detergent
corn syrup
string, bubble wands, pipe
cleaners
wide, flat bowl or baking
dish
measuring cup and spoon
Age Range:
Time Required:unlimited
any
10-30min
Mix everything together in a wide, flat bowl. Don't stir too fast!
Blow bubbles using string, pipe cleaners or old bubble wands. To really make big
bubbles, bend a wire hanger into a shape and pour the bubble solution into a flat
baking dish or cookie sheet with high edges.
Recipe from Coffee Filters to Cheese Graters by Tara Ziegmont
© 2015 Katie Kimball | kitchenstewardship.com 31
Growing Germs
This is WHY we wash our hands! Parents, you'll love this one. And actually, kids will too.Growing bacteria and mold is gross and fun!
1. Use 3 pieces of white bread (or some other baked good that will decompose, but not tooquickly).
2. Touch just the corner of one and seal it in a clean jar.
3. Moisten the second with just a sprinkle of water and place it outside for 20 minutes,then seal it in a second clean jar.
4. Moisten the third piece in the same way and introduce it to the germs on your hands,the floor, or wherever your child might touch before lunch and not wash his/herhands. Seal it in a third clean jar.
5. Label all 3 jars and put them in a dark cupboard.
6. Set a calendar reminder for 3 days, 7 days, and 10 days to check on them.
7. Observe. Discuss. Wash your hands. (If you have tweezers to pick up the bread and amagnifying glass to examine, all the better. Please dispose of carefully!)
Instructions
In the kit: Grab now:
No. of Kids:
3 clean class jars with lids
tweezers (optional)
magnifying glass (optional)
white bread
Activity 18:
Age Range:
Time Required:unlimited
5 and up
20min,plus waittime
Activity borrowed with gratitude from Kids Activities Blog.
© 2015 Katie Kimball | kitchenstewardship.com 32
Homemade Sidewalk
Chalk
Sure, you can buy sidewalk chalk pretty cheap, but this is double the fun!
Instructions
In the kit: Grab now:
No. of Kids:
cookie sheet
newspapers
warm water
Activity 19:
Age Range:
Time Required:unlimited
5 and up
30-60minplus waittime
just about everything
2. Place your molds on a newspaper lined cookie sheet to contain drips.3. Measure the warm water into the container.4. Add Plaster of Paris a little at a time. Start with one cup and add more if necessary
to get a very thick, frosting-like consistency that won't absorb any more water.(Work quickly, you only have 20-30 minutes until it dries.)
5. Stir in tempera paint, either making all one color in your mixing container OR stirindividual colors into each mold after pouring. (Partial stirs will make swirlychalk.)
6. Carefully pour or spoon plaster into molds.7. Set aside to dry, which may take 6 hours or even a few days to finish completely,
depending on humidity and size of molds.8. When completely hardened, remove from molds by tearing/peeling off the mold, and
you're ready to make sidewalk art!9. Store in a dry place.
1 1/2 c. plaster of Paris3/4 c. warm water disposable container for mixing (sour cream or yogurt tub works great)popsicle stick or plastic spoon for stirring2-3 Tbs. tempera painttoilet paper tubes, small paper cups, or egg cartonwaxed paperduct tape
Ingredients/Supplies:
egg cartons are ready to go.
Cardboard tubes need to be lined with waxed paper (leave it slightly sticking
out the top) and closed at the bottom with plenty of duct tape.
Paper cups should be lined with waxed paper as well to ensure they come off (if
they're already waxed, you might be okay).
Method:
1. Prepare your “molds.”
© 2015 Katie Kimball | kitchenstewardship.com 33
Homemade Ice Cream
What's better on a warm day (ok, any day) than ice cream – especially when you're incharge of the ingredients?!
Instructions
No. of Kids:
Activity 20:
Age Range:
Time Required:1-5
3 and up
30-45min
For each person you will need:
quart-size zippered bag
gallon-size zippered bag
1 cup milk (whole milk is best or even cream)
1 tsp. to 2 Tbs. sugar, sucanat, maple syrup or sweetener of your choice
flavoring
ice to fill large bag partway
rock salt or large grained Kosher salt, at least 1/4 cup
winter gloves, oven mitt or dish towels
spoon
(no ice cream machine needed!)
Method:
Ingredients:
1. Place the milk, sweetener, and flavoring into quart-sized plastic bag and seal well.
Note about sweeteners: Honey is fine, but it just doesn't mix in quite as well as other
options. Sweeten to taste (you can taste the mixture before making it into ice cream).
2. Place the small bag in the gallon-sized bag.
3. Pack ice in the large bag all around the small bag to completely encase the milk
mixture, then sprinkle salt generously on the ice- at least 1/4 cup. (All in the large
bag – you won't be eating this part!)
4. Seal the large bag.
5. Put on gloves or oven mitts (or use a thick towel) and begin squeezing and kneading
the small bag through the large bag and ice.
(1 tsp vanilla extract or 2 T cocoa powder, chocolate syrup, crushed mint candies, fruit)
© 2015 Katie Kimball | kitchenstewardship.com 34
Homemade Ice Cream
In the kit: Grab now:
gallon & quart zippered bags
rock salt or large-crystal
Kosher salt
winter gloves or mittens
ice
milk
vanilla/chocolate
sweetener
measuring cups & spoons
Can you explain the science behind this? If your children are old enough to
understand, demonstrate what happens if you just put some milk in the freezer or
just put some ice in the milk. Neither will make ice cream – so what’s the key?
6. Continue doing this (5-10 minutes) until the milk in the small bag begins to
thicken and freeze. Keep kneading until the ice cream reaches the desired
consistency – either milkshake, soft-serve, or hard (although hard is tough to
achieve, especially if the temp in your house is warmer).
7. Of course you can add extras like nuts, chocolate chips, or fruit if you like.
8. Remove the small bag and rinse/wipe the salty water off it before opening.
9. Eat and enjoy, out of the bag or poured into a bowl.
10. Ice and salty water can go down the drain.
Discussion for older kids:
© 2015 Katie Kimball | kitchenstewardship.com 35
Copyright 2015 | Katie Kimball, Kitchen Stewardship, LLC
All rights reserved
Material is not to be copied, shared, or republished without prior written consent of
the author. Please visit k i t c h e n s t e w a r ds h i p . c o m for nutritious recipes, kitchen tips
and a healthy dose of wit, or if you’d like to purchase more copies of the Summer
Vacation Survival Kit or perhaps check out my popular recipe books, written in a
leave-no-stone-unturned style.
Although in electronic form, an eBook is meant to be the personal property of the
purchaser. Feel free to share an activity with a friend, but it is a violation of
copyright and purchase agreement to forward the entire book to another person.
© 2015 Katie Kimball | kitchenstewardship.com 36
Cover Photo Attributions:
Bubbles (img_8045a) photo by Kari Haley, available under a Creative Commons Attribution license.
Ice Cream (untitled) photo by Neil Conway, available under a Creative Commons Attribution license.
Paper Airplane photo by woodleywonderworks, available under a Creative Commons Attribution license.
Finger Painting photo by Quinn Dombrowski, available under a Creative Commons Attribution license.