sunrise, sunset quilt · ris.com finished quilt size 58" x 80" quilt design by heidi...
TRANSCRIPT
www.studioefabrics.com
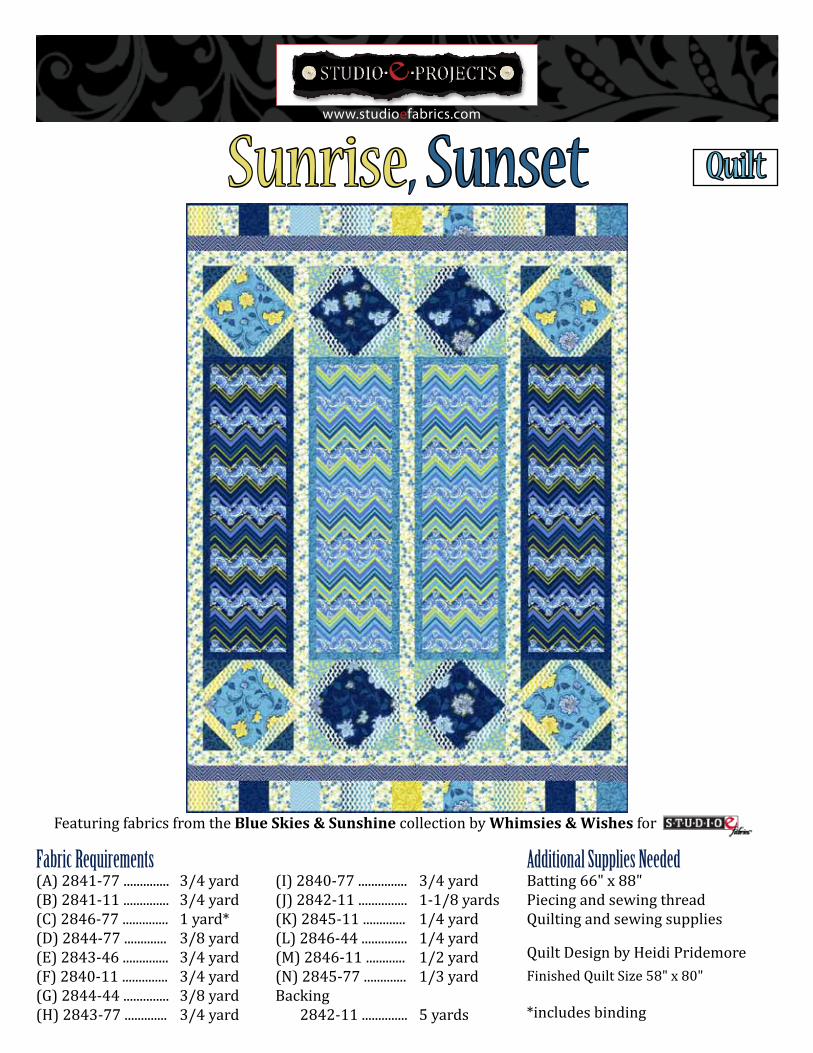
Finished Quilt Size 58" x 80"Quilt Design by Heidi Pridemore
Sunrise, Sunset
Fabric Requirements Additional Supplies NeededBatting 66" x 88"Piecing and sewing threadQuilting and sewing supplies
*includes binding
(A) 2841-77 .............. 3/4 yard(B) 2841-11 .............. 3/4 yard(C) 2846-77 .............. 1 yard*(D) 2844-77 ............. 3/8 yard(E) 2843-46 .............. 3/4 yard(F) 2840-11 .............. 3/4 yard(G) 2844-44 .............. 3/8 yard(H) 2843-77 ............. 3/4 yard
(I) 2840-77 ............... 3/4 yard(J) 2842-11 ............... 1-1/8 yards(K) 2845-11 ............. 1/4 yard(L) 2846-44 .............. 1/4 yard(M) 2846-11 ............ 1/2 yard(N) 2845-77 ............. 1/3 yardBacking 2842-11 .............. 5 yards
Quilt
Featuring fabrics from the Blue Skies & Sunshine collection by Whimsies & Wishes for
www.studioefabrics.com•STUDIO e PROJECTS• Page 2 of 6
CuttingCutting InstructionsPlease Note: All strips are cut across the width of fabric (WOF) from selvage to selvage edge unless otherwise noted.
WOF= Width of Fabric • LOF = Length of Fabric
Fabric A (2841-77 Lacy Chevron-Dk. Blue), cut: • (2) 10-1/2” x 38-1/2” strips.
Fabric B (2841-11 Lacy Chevron-Lt. Blue), cut: • (2) 10-1/2” x 38-1/2” strips.
Fabric C (2846-77 Tone on Tone-Dk. Blue), cut: • (4) 1-1/2” x 38-1/2” strips • (2) 1-1/2” x WOF strips. Sub-cut (4) 1-1/2” x 12-1/2” strips. • (1) 4-1/2” x WOF strip. Sub-cut (4) 4-1/2” squares. • (7) 2-1/2”x WOF strips for binding.
Fabric D (2844-77 Multi Scroll-Dk. Blue), cut: • (2) 4-1/2” x WOF strips. Sub-cut into (16) 4-1/2” squares.
Fabric E (2843-46 Tonal Chevron-Yellow/Blue), cut: • (3) 6-1/2” x WOF strips. Sub-cut into (16) 6-1/2” squares. • (1) 4-1/2” x WOF strip. Sub-cut (4) 4-1/2” squares.
Fabric F (2840-11 Lacy Floral-Lt. Blue), cut: • (2) 12-1/2” x WOF strips. Sub-cut into (4) 12-1/2” squares and (2) 4-1/2” squares.
Fabric G (2844-44 Multi Scroll-Yellow), cut: • (2) 4-1/2” x WOF strips. Sub-cut into (16) 4-1/2” squares.
Fabric H (2843-77 Tonal Chevron-Blue), cut: • (3) 6-1/2” x WOF strips. Sub-cut into (16) 6-1/2” squares and (2) 4-1/2” squares.
Fabric I (2840-77 Lacy Floral-Dk. Blue), cut: • (2) 12-1/2” x WOF strips. Sub-cut into (4) 12-1/2” squares.
Fabric J (2842-11 Mini Floral-Lt. Blue), cut: • (2) 4-1/2” x WOF strips. Sub-cut into (16) 3-1/2” x 4-1/2” strips. • (13) 2-1/2” x WOF strips. Sew together and cut (5) 2-1/2” x 64-1/2” strips and (2) 2-1/2” x 58-1/2” strips.
Fabric K (2845-11 Chevron-Lt. Blue), cut: • (1) 4-1/2” x WOF strip. Sub-cut (2) 4-1/2” squares.
Fabric L (2846-44 Tone on Tone-Yellow) • (1) 4-1/2” x WOF strip. Sub-cut (2) 4-1/2” squares.
www.studioefabrics.com•STUDIO e PROJECTS• Page 3 of 6
Cutting - Cont.Fabric M (2846-11 Tone on Tone-Lt. Blue), cut: • Cut (1) 4-1/2” x WOF strip. Sub-cut (2) 4-1/2” squares. • Cut (4) 1-1/2” x 38-1/2” strips • Cut (2) 1-1/2” x WOF strips. Sub-cut (4) 1-1/2” x 12-1/2” strips.
Fabric N (2845-77 Chevron-Dk. Blue), cut: • Cut (3) 2-1/2” x WOF strips. Sew the strips together and cut (2) 2-1/2” x 58-1/2” strips.
Backing (2842-11 Mini Floral-Lt. Blue), cut: • Cut (2) 88” x WOF strip. Sew the strips together and cut (1) 66” x 88” back.
SewingSew using a ¼” seam allowance with right sides together (RST) unless otherwise indicated. Always
press towards the darker fabric while assembling, unless otherwise noted by the arrows.
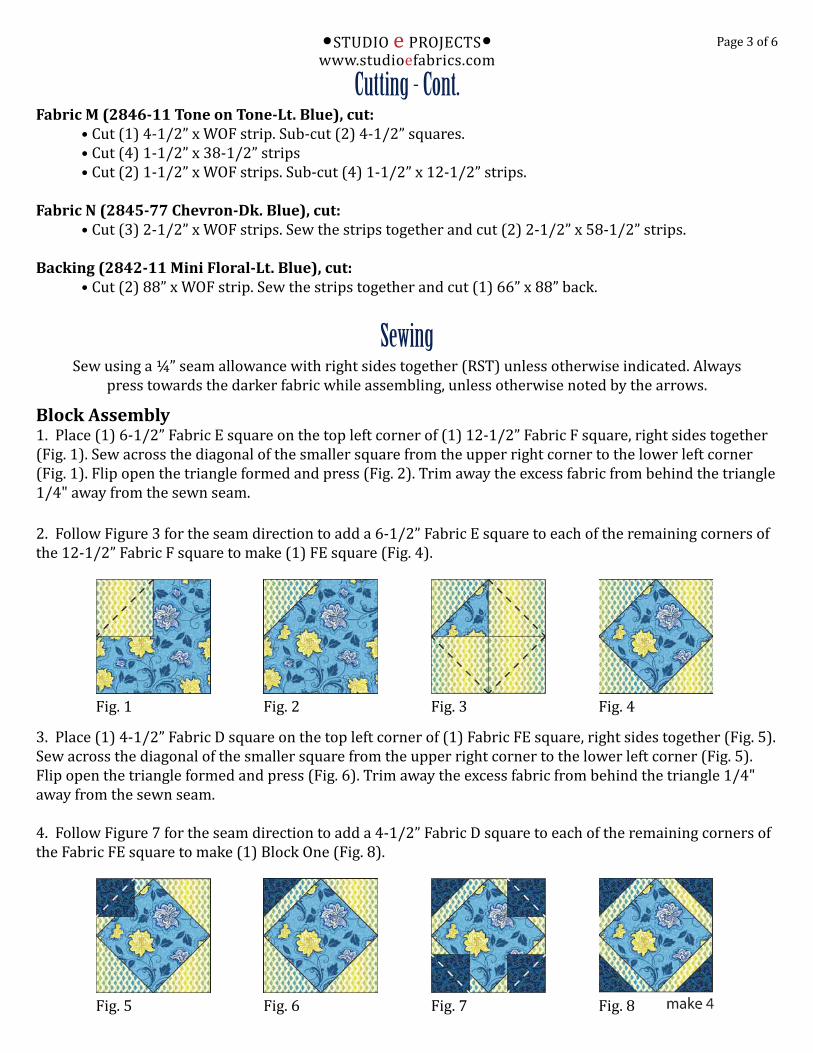
Block Assembly1. Place (1) 6-1/2” Fabric E square on the top left corner of (1) 12-1/2” Fabric F square, right sides together (Fig. 1). Sew across the diagonal of the smaller square from the upper right corner to the lower left corner (Fig. 1). Flip open the triangle formed and press (Fig. 2). Trim away the excess fabric from behind the triangle 1/4" away from the sewn seam.
2. Follow Figure 3 for the seam direction to add a 6-1/2” Fabric E square to each of the remaining corners of the 12-1/2” Fabric F square to make (1) FE square (Fig. 4).
Fig. 1 Fig. 2
Fig. 5
Fig. 3
Fig. 6
Fig. 4
3. Place (1) 4-1/2” Fabric D square on the top left corner of (1) Fabric FE square, right sides together (Fig. 5). Sew across the diagonal of the smaller square from the upper right corner to the lower left corner (Fig. 5). Flip open the triangle formed and press (Fig. 6). Trim away the excess fabric from behind the triangle 1/4" away from the sewn seam.
4. Follow Figure 7 for the seam direction to add a 4-1/2” Fabric D square to each of the remaining corners of the Fabric FE square to make (1) Block One (Fig. 8).
Fig. 7 Fig. 8
www.studioefabrics.com•STUDIO e PROJECTS• Page 4 of 6
Fig. 10
Fig. 12
Fig. 11
Fig. 13
Fig. 9
5. Repeat Steps 1-4 to make (4) Block Ones total.
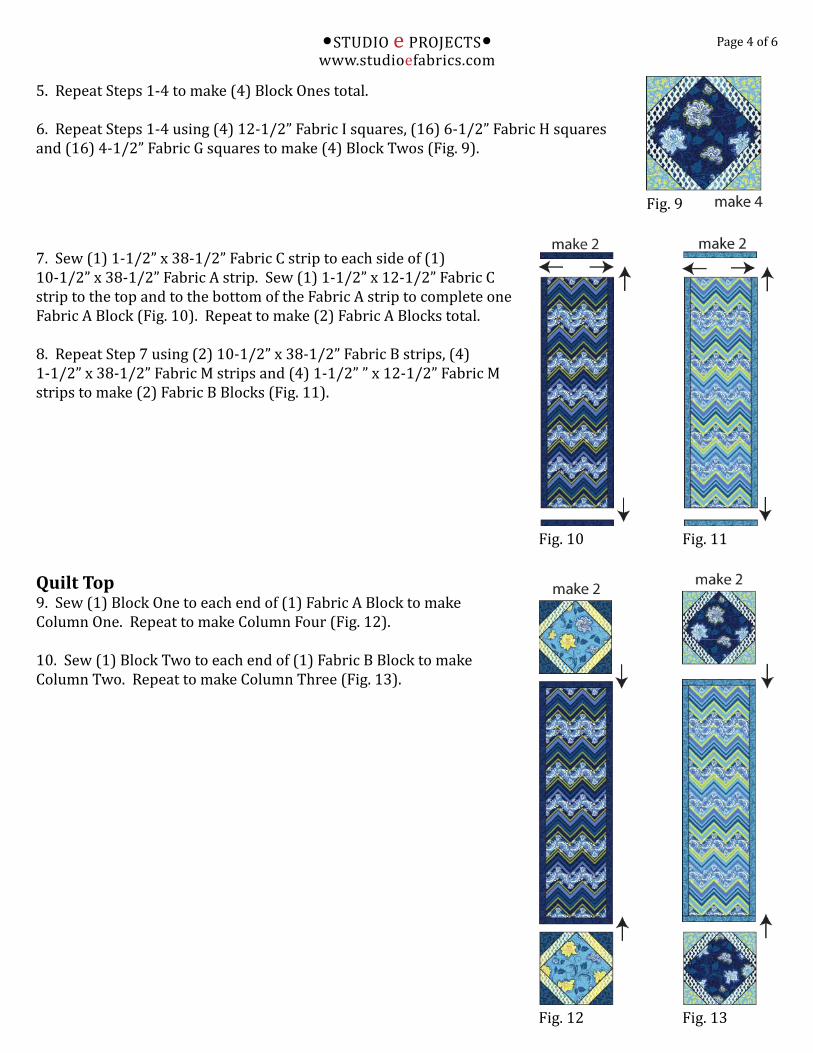
6. Repeat Steps 1-4 using (4) 12-1/2” Fabric I squares, (16) 6-1/2” Fabric H squares and (16) 4-1/2” Fabric G squares to make (4) Block Twos (Fig. 9).
7. Sew (1) 1-1/2” x 38-1/2” Fabric C strip to each side of (1) 10-1/2” x 38-1/2” Fabric A strip. Sew (1) 1-1/2” x 12-1/2” Fabric C strip to the top and to the bottom of the Fabric A strip to complete one Fabric A Block (Fig. 10). Repeat to make (2) Fabric A Blocks total.
8. Repeat Step 7 using (2) 10-1/2” x 38-1/2” Fabric B strips, (4) 1-1/2” x 38-1/2” Fabric M strips and (4) 1-1/2” ” x 12-1/2” Fabric M strips to make (2) Fabric B Blocks (Fig. 11).
Quilt Top 9. Sew (1) Block One to each end of (1) Fabric A Block to make Column One. Repeat to make Column Four (Fig. 12).
10. Sew (1) Block Two to each end of (1) Fabric B Block to make Column Two. Repeat to make Column Three (Fig. 13).
www.studioefabrics.com•STUDIO e PROJECTS• Page 5 of 6
Fig. 14 Fig. 15
Fig. 16
Fig. 17
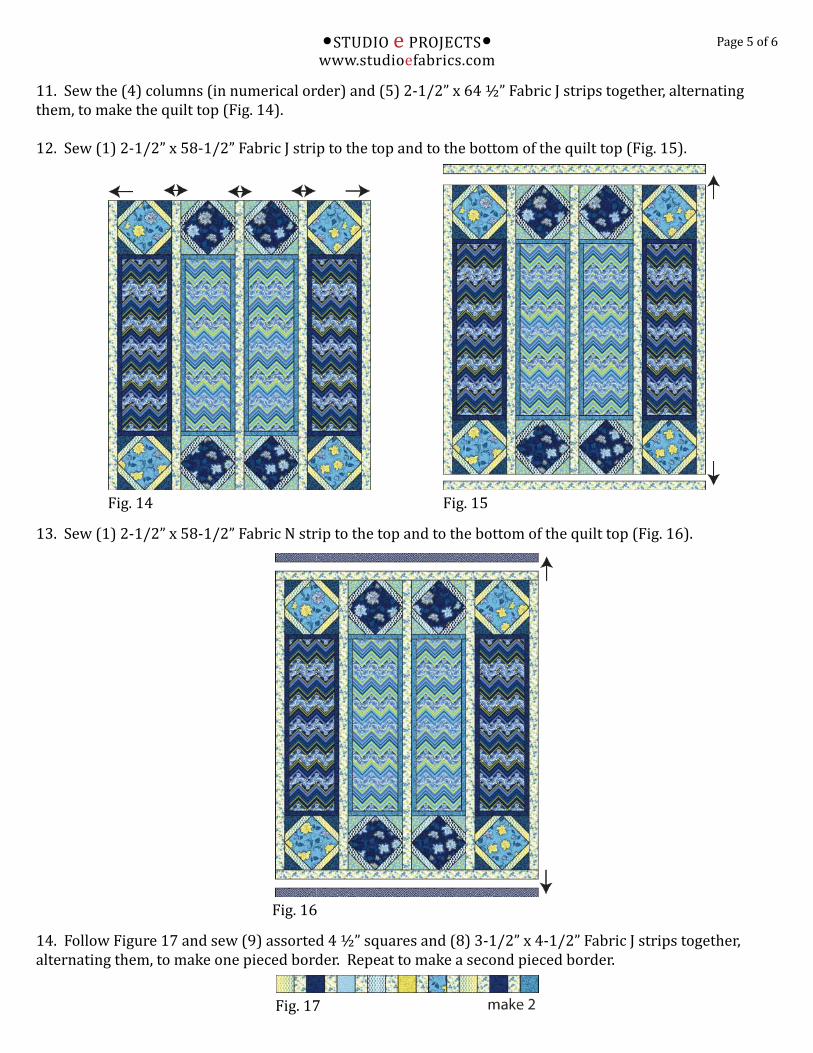
11. Sew the (4) columns (in numerical order) and (5) 2-1/2” x 64 ½” Fabric J strips together, alternating them, to make the quilt top (Fig. 14).
12. Sew (1) 2-1/2” x 58-1/2” Fabric J strip to the top and to the bottom of the quilt top (Fig. 15).
13. Sew (1) 2-1/2” x 58-1/2” Fabric N strip to the top and to the bottom of the quilt top (Fig. 16).
14. Follow Figure 17 and sew (9) assorted 4 ½” squares and (8) 3-1/2” x 4-1/2” Fabric J strips together, alternating them, to make one pieced border. Repeat to make a second pieced border.
www.studioefabrics.com•STUDIO e PROJECTS•
© 2014 Studio e Fabrics®
Page 6 of 6
Layering, Quilting and Finishing16. Sew the (2) 88” x WOF strips together and trim to make (1) 66” x 88” backing piece.
17. Press the quilt top and backing well. Layer backing (wrong side up), batting, pressed quilt top (right side up) and baste. Quilt as desired and trim excess batting and backing when quilting is complete.
Binding18. Cut the ends of the (7) Fabric C binding strips at a 45-degree angle and sew end to end to make one continuous piece of binding. Fold in half lengthwise and press wrong sides together.
19. Sew the binding to the front of the quilt, raw edges together. Turn the folded edge to the back, and hand stitch in place.
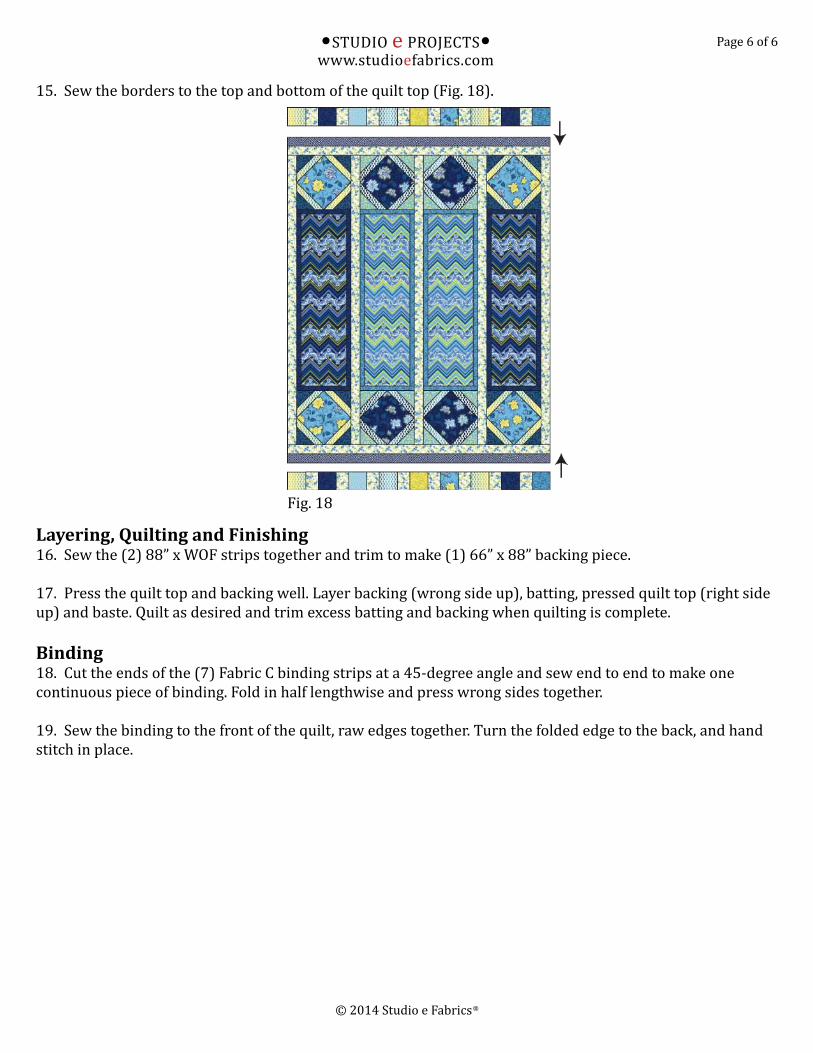
15. Sew the borders to the top and bottom of the quilt top (Fig. 18).
Fig. 18