switch to infinity data corp for your processing needs! infinity
TRANSCRIPT

This file provided by
Switch to Infinity Data Corp for your processing
needs! Infinity offers great rates, excellent customer support and a wide range of payment processing
solutions.
http://www.infinitydata.com/
Call Today! Sales 1 800 393 6665
Lip Lipman Electronic Engineering Ltd.
NURIT 2050
NNUURRIITT 22005500 CASH & DRAFT REGISTER POS EDC TERMINAL USER MANUAL
NURIT 2050 CASH & DRAFT REGISTER
USER MANUAL
NOTICE The information contained in this publication is for informational
purposes only and subject to change without notice. It does not represent a commitment on the part of Lipman USA Inc. or Lipman Electronic Engineering Ltd.
No part of this publication may be reproduced, transmitted, transcribed, stored in a retrieval system, or translated to any language in any form by any means without the prior written permission of Lipman.
Copyright © 1997 by Lipman Electronic Engineering Ltd. All rights reserved.
TRADEMARKS Trademarks and trade names contained in this document belong to their respective companies.
LIPMAN USA INC. March 1997 95 Seaview Blvd, Suite 200 Original Port Washington, NY 11050 Publication No. 061-32-006 Tel: (1) 516-484-9898 Fax: (1) 516-484-9057 E-mail: [email protected]

WARNING Changes or modifications to this unit not expressly approved by the party responsible for compliance could void the user's authority to operate the equipment.
FCC compliance statement This equipment has been tested to be found to comply with the limits for class A digital device, pursuant to Part 15 of the FCC Rules. These limits are designed to provide reasonable protection against harmful interference in a residential installation. This equipment generates, uses and can radiate radio frequency energy and, if not installed and used in accordance with the instructions, may cause interference to radio communications. However, there is no guarantee that interference will not occur in a particular installation. If this equipment does cause harmful interference to radio or television reception, which can be determined by turning the equipment off and on, the user is encouraged to try to correct the interference by one or more of the following measures: • Reorient or relocate the receiving antenna. • Increase the separation between the equipment and the receiver. • Connect the equipment into an outlet on a circuit different from that to which the receiver is
connected. • Consult your dealer or an experienced technician for help. FCC requirements The Federal Communications Commission (FCC) has established Rules which permit this device to be directly connected to the telephone network. Standardized jacks are used for these connections. This equipment should not be used on party or coin lines. If this devise is malfunctioning, it may be causing harm to the telephone network; this devise should be disconnected until the source of the problem can be determined and until repair has been made. If this is not done, the telephone company may be temporarily disconnect service. The telephone company may make changes in its technical operations and procedures; if such changes affect the compatibility or use of this devise, the telephone company is required to give adequate notice of the changes. You will be advised to file a complaint with the FCC. If the telephone company requests information on what equipment is connected to their lines, inform them of: One.The telephone number this unit is connected to Two.The ringer equivalence number: 0.3B Three.The USOC jack required: USOC (RJ-11C) Four.The FCC Registration number: 3D71SR-20124-DT-E The Ringer Equivalence Number (REN) is used to determine how many devices can be connected to your telephone line. In most areas, the sum of the RENs of all devices on any one line should not exceed five (5). If too many devices are attached, they may not ring properly.
LIPMAN USA - NURIT 2050 Limited Warranty
Lipman USA Inc. will repair this product with new or rebuilt parts, free of charge, in the USA for one (1) year from the date of original purchase in the event of a defect in materials or workmanship. Carry-in or mail-in service in the continental USA can be obtained during the warranty period from our NY Service Center or call 1-800-4-LIPMAN toll free. In New York State call (516) 484-9898. This warranty is extended only to the original purchaser. A purchase receipt or other proof of date of original purchase will be required in order to exercise your rights under this warranty. This warranty only covers failures due to defects in materials or workmanship which occur during normal use. It does not cover damage which occurs in shipment; failures which are caused by products not supplied by Lipman USA; or failures which result from accident, misuse, abuse, neglect, mishandling, misapplication, alteration or modification; service by anyone other than the Lipman USA Service Center or accredited service centers, or damage that is attributable to acts of God. Limits and Exclusions There are no express warranties except as listed above. LIPMAN USA SHALL NOT BE LIABLE FOR INCIDENTAL OR CONSEQUENTIAL DAMAGES RESULTING FROM THE USE OF THIS PRODUCT, OR ARISING OUT OF ANY BREACH OF THIS WARRANTY. ALL EXPRESSED AND IMPLIED WARRANTIES, INCLUDING THE WARRANTIES OF MERCHANT ABILITY AND FITNESS FOR A PARTICULAR PURPOSE, ARE LIMITED TO THE APPLICABLE WARRANTY PERIOD SET FORTH ABOVE. Some states do not allow the exclusion or limitation of incidental or consequential damages, or limitations on how long an implied warranty lasts, therefore some of the above exclusions or limitations may not apply to you. This warranty gives you specific legal rights and you may also have other rights which vary from state to state. If a problem with this product develops during or after the warranty period, you may contact your dealer or Service Center. If the problem is not handled to your satisfaction, then write to: LIPMAN USA INC.,Seaview Blvd, Suite 200, Port Washington, NY 11050 e-mail: [email protected] Tel: (516)-484-9898 FAX: (516)-484-9057
If you ship the product Carefully pack and send the package prepaid, adequately insured and preferably in the original carton. Attach a postage-paid letter to the outside of the package detailing the complaint. PLEASE NOTE: SHIPMENT MUST BE SENT TO AN AUTHORIZED DEALER OR SERVICE CENTER ONLY. PRODUCTS SHIPPED TO OTHER LOCATIONS WILL BE RETURNED AT OWNERS EXPENSE. CONTACT YOUR DEALER FOR THE CORRECT ADDRESS.
For your future reference
SERIAL NO. ____________________________ (found on the bottom of the unit)
DATE OF PURCHASE _______________________________
NAME OF DEALER
_________________________________
_________________________________
DEALER’S ADDRESS
_________________________________
_________________________________
000666111---333222---000000666
UUUSSSEEERRR SSSAAAFFFEEETTTYYY IIINNNSSSTTTRRRUUUCCCTTTIIIOOONNNSSS aaa
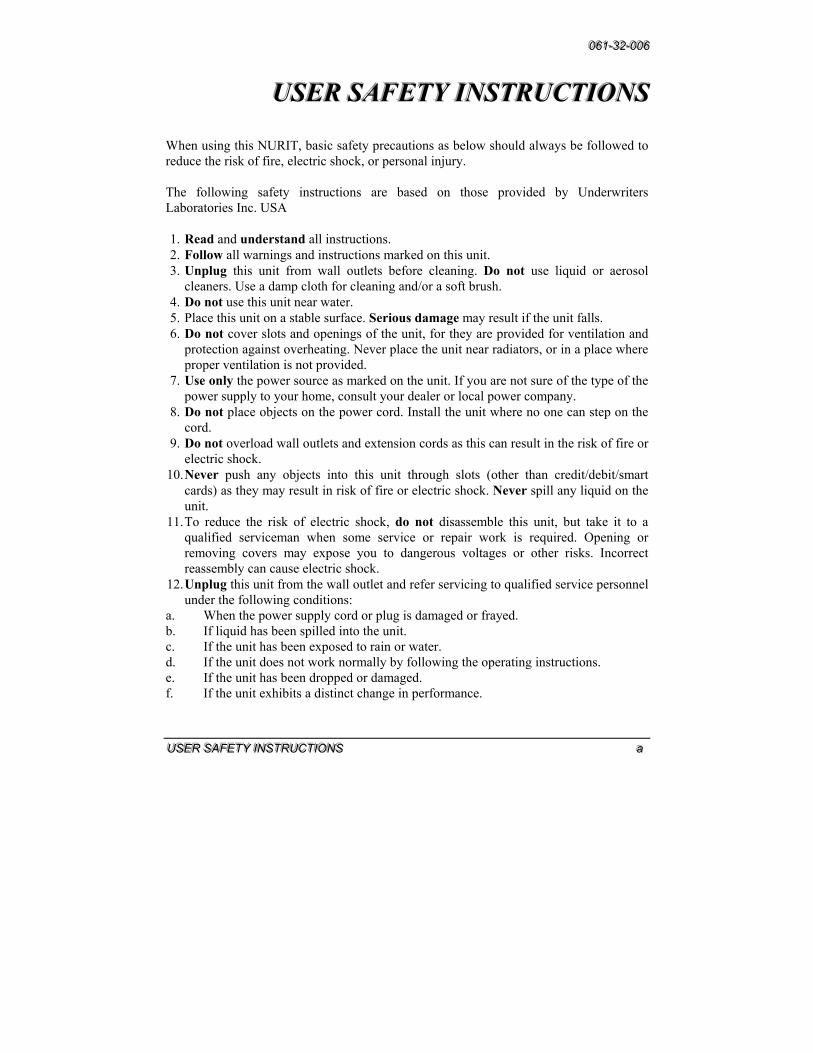
UUUSSSEEERRR SSSAAAFFFEEETTTYYY IIINNNSSSTTTRRRUUUCCCTTTIIIOOONNNSSS When using this NURIT, basic safety precautions as below should always be followed to reduce the risk of fire, electric shock, or personal injury. The following safety instructions are based on those provided by Underwriters Laboratories Inc. USA 1. Read and understand all instructions. 2. Follow all warnings and instructions marked on this unit. 3. Unplug this unit from wall outlets before cleaning. Do not use liquid or aerosol
cleaners. Use a damp cloth for cleaning and/or a soft brush. 4. Do not use this unit near water. 5. Place this unit on a stable surface. Serious damage may result if the unit falls. 6. Do not cover slots and openings of the unit, for they are provided for ventilation and
protection against overheating. Never place the unit near radiators, or in a place where proper ventilation is not provided.
7. Use only the power source as marked on the unit. If you are not sure of the type of the power supply to your home, consult your dealer or local power company.
8. Do not place objects on the power cord. Install the unit where no one can step on the cord.
9. Do not overload wall outlets and extension cords as this can result in the risk of fire or electric shock.
10. Never push any objects into this unit through slots (other than credit/debit/smart cards) as they may result in risk of fire or electric shock. Never spill any liquid on the unit.
11. To reduce the risk of electric shock, do not disassemble this unit, but take it to a qualified serviceman when some service or repair work is required. Opening or removing covers may expose you to dangerous voltages or other risks. Incorrect reassembly can cause electric shock.
12. Unplug this unit from the wall outlet and refer servicing to qualified service personnel under the following conditions:
a. When the power supply cord or plug is damaged or frayed. b. If liquid has been spilled into the unit. c. If the unit has been exposed to rain or water. d. If the unit does not work normally by following the operating instructions. e. If the unit has been dropped or damaged. f. If the unit exhibits a distinct change in performance.

000666111---333222---000000666
bbb NNNUUURRRIIITTT 222000555000 UUUssseeerrr MMMaaannnuuuaaalll
13. During thunderstorms, disconnect telephone line, if possible. There may be a remote risk of electric shock from lightning.
14. Never install telephone wiring during a lightning storm. 15. Never install telephone jacks in wet locations unless the jack is specifically designed
for wet locations. 16. Never touch un-insulated telephone wires or terminals unless the telephone line has
been disconnected at the network interface. 17. Use caution when installing or modifying telephone lines. 18. When in the vicinity of a gas leak, do not use a telephone connected to a NURIT to
report such a leakage. CONVENTIONS Notes, cautions and warnings are used like this:
"Notes" contain helpful hints and other important information that will help you get better use from your NURIT.
"Cautions" provide information about procedures which, if not observed, could result in damage to the NURIT or other equipment.
"Warnings" mean failure to follow specific procedures and practices may result in personal injury.
000666111---333222---000000666
CCCOOONNNTTTEEENNNTTTSSS ccc
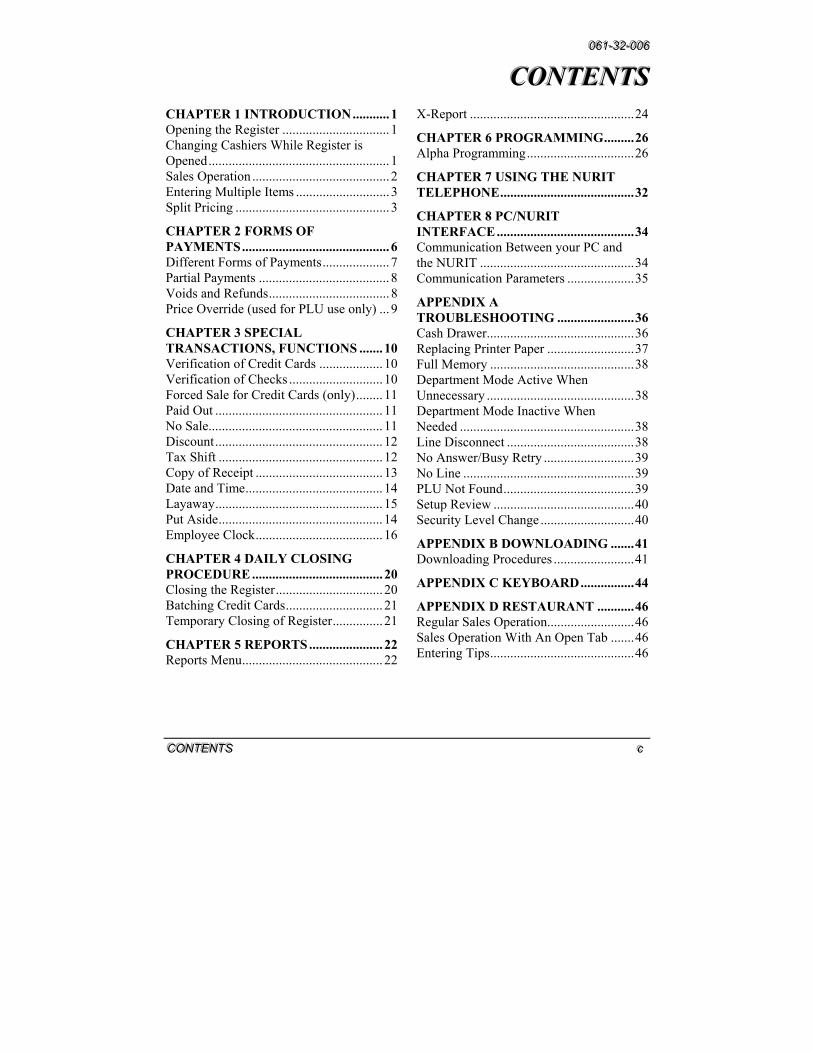
CCCOOONNNTTTEEENNNTTTSSS CHAPTER 1 INTRODUCTION........... 1 Opening the Register ................................ 1 Changing Cashiers While Register is Opened...................................................... 1 Sales Operation ......................................... 2 Entering Multiple Items ............................ 3 Split Pricing .............................................. 3
CHAPTER 2 FORMS OF PAYMENTS............................................ 6 Different Forms of Payments.................... 7 Partial Payments ....................................... 8 Voids and Refunds.................................... 8 Price Override (used for PLU use only) ... 9
CHAPTER 3 SPECIAL TRANSACTIONS, FUNCTIONS ....... 10 Verification of Credit Cards ................... 10 Verification of Checks ............................ 10 Forced Sale for Credit Cards (only)........ 11 Paid Out .................................................. 11 No Sale.................................................... 11 Discount.................................................. 12 Tax Shift ................................................. 12 Copy of Receipt ...................................... 13 Date and Time......................................... 14 Layaway.................................................. 15 Put Aside................................................. 14 Employee Clock...................................... 16
CHAPTER 4 DAILY CLOSING PROCEDURE ....................................... 20 Closing the Register................................ 20 Batching Credit Cards............................. 21 Temporary Closing of Register............... 21
CHAPTER 5 REPORTS ...................... 22 Reports Menu.......................................... 22
X-Report .................................................24
CHAPTER 6 PROGRAMMING.........26 Alpha Programming................................26
CHAPTER 7 USING THE NURIT TELEPHONE........................................32
CHAPTER 8 PC/NURIT INTERFACE.........................................34 Communication Between your PC and the NURIT ..............................................34 Communication Parameters ....................35
APPENDIX A TROUBLESHOOTING .......................36 Cash Drawer............................................36 Replacing Printer Paper ..........................37 Full Memory ...........................................38 Department Mode Active When Unnecessary ............................................38 Department Mode Inactive When Needed ....................................................38 Line Disconnect ......................................38 No Answer/Busy Retry ...........................39 No Line ...................................................39 PLU Not Found.......................................39 Setup Review ..........................................40 Security Level Change ............................40
APPENDIX B DOWNLOADING .......41 Downloading Procedures ........................41
APPENDIX C KEYBOARD................44
APPENDIX D RESTAURANT ...........46 Regular Sales Operation..........................46 Sales Operation With An Open Tab .......46 Entering Tips...........................................46
000666111---333222---000000666
ddd NNNUUURRRIIITTT 222000555000 UUUssseeerrr MMMaaannnuuuaaalll
NOTE
This publication could include technical inaccuracies or typographical errors. Changes are periodically made to our publications; these changes will be incorporated in future editions.
000666111---333222---000000666
IIINNNTTTRRROOODDDUUUCCCTTTIIIOOONNN 111
CCC HHH AAA PPP TTT EEE RRR 111
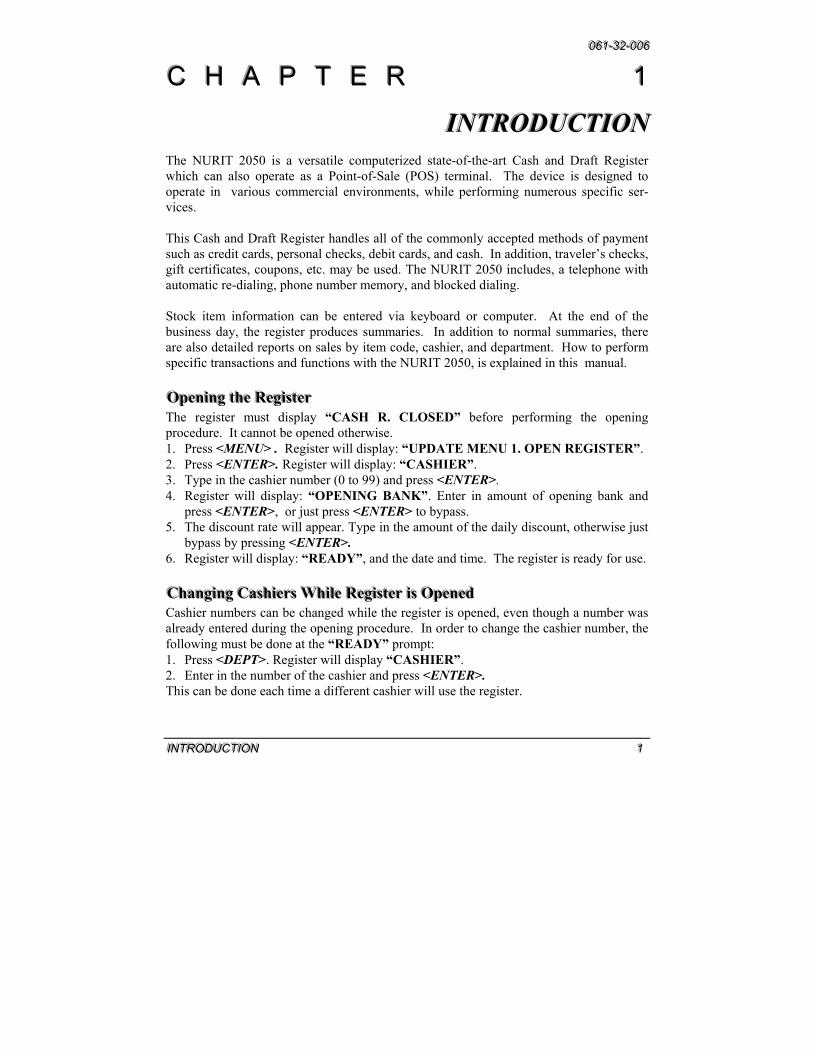
IIINNNTTTRRROOODDDUUUCCCTTTIIIOOONNN The NURIT 2050 is a versatile computerized state-of-the-art Cash and Draft Register which can also operate as a Point-of-Sale (POS) terminal. The device is designed to operate in various commercial environments, while performing numerous specific ser- vices. This Cash and Draft Register handles all of the commonly accepted methods of payment such as credit cards, personal checks, debit cards, and cash. In addition, traveler’s checks, gift certificates, coupons, etc. may be used. The NURIT 2050 includes, a telephone with automatic re-dialing, phone number memory, and blocked dialing. Stock item information can be entered via keyboard or computer. At the end of the business day, the register produces summaries. In addition to normal summaries, there are also detailed reports on sales by item code, cashier, and department. How to perform specific transactions and functions with the NURIT 2050, is explained in this manual.
OOOpppeeennniiinnnggg ttthhheee RRReeegggiiisssttteeerrr The register must display “CASH R. CLOSED” before performing the opening procedure. It cannot be opened otherwise. 1. Press <MENU> . Register will display: “UPDATE MENU 1. OPEN REGISTER”. 2. Press <ENTER>. Register will display: “CASHIER”. 3. Type in the cashier number (0 to 99) and press <ENTER>. 4. Register will display: “OPENING BANK”. Enter in amount of opening bank and
press <ENTER>, or just press <ENTER> to bypass. 5. The discount rate will appear. Type in the amount of the daily discount, otherwise just
bypass by pressing <ENTER>. 6. Register will display: “READY”, and the date and time. The register is ready for use.
CCChhhaaannngggiiinnnggg CCCaaassshhhiiieeerrrsss WWWhhhiiillleee RRReeegggiiisssttteeerrr iiisss OOOpppeeennneeeddd Cashier numbers can be changed while the register is opened, even though a number was already entered during the opening procedure. In order to change the cashier number, the following must be done at the “READY” prompt: 1. Press <DEPT>. Register will display “CASHIER”. 2. Enter in the number of the cashier and press <ENTER>. This can be done each time a different cashier will use the register.
000666111---333222---000000666
222 NNNUUURRRIIITTT 222000555000 UUUssseeerrr MMMaaannnuuuaaalll
SSSaaallleeesss OOOpppeeerrraaatttiiiooonnn The NURIT 2050 can operate in several different modes: no departments, in department mode, or with PLUs. The following are steps for each mode of operation. No Departments To key in the price of a $20.00 item, without departments, follow this procedure: 1. At the “READY” prompt, press <2>, <0>, <0>, <0>, and <ENTER> (DO NOT press
the < . > [Decimal] key when entering in prices). 2. The register will show a $20.00 sub-total. If you need to enter in several items, such as
$20.00 item, $5.00 item, and a $10.00 item: Type in each item and then the <DEPT> key after each item is entered instead of
<ENTER>. 3. After entering all the items being purchased, press <ENTER> twice, until “TOTAL
PAYMENT” appears on screen. Then select the form of payment (see chapter 2). In Department Mode If the register is programmed for departments, a sales operation can be performed in two different ways. The sale can be done by entering the price first, and then the department, or it can be done by entering the department first, and then the price. This is an option that must be turned on or off, depending on your preference (call technical help desk, if unsure of this option). The two operations are as follows: Price First 1. Enter in the price of the item, and then press <DEPT> key. The register will display
“DEPARTMENT 0.00” (the amount of sale will be displayed). 2. Type in the department number, and press <ENTER>. The department name and
price will appear on screen. Continue entering items in this manner. After all the items have been entered, press <ENTER>. Register will display “SUBTOTAL” (without tax). Press <ENTER> again and register will display “TOTAL PAYMENT” (including tax). Then select the form of payment (see chapter 2). Department First 1. At the “READY” prompt, type in the department number first, then press the
<DEPT> key. 2. Register will display: “ENTER PRICE”. Type in the amount of item and press
<ENTER>. 3. Register will display the department name, and price.
NOTE: Register has “hot keys” for the first eight departments (Refer to keyboard diagram in appendix c). To use: enter dollar amount, and then press the hot key corresponding to the department.
000666111---333222---000000666
IIINNNTTTRRROOODDDUUUCCCTTTIIIOOONNN 333
By PLUs If the terminal has been programmed with PLUs (price look ups), then the sale is done as follows: Manually 1. Enter in the PLU code (ignoring the decimal point that appears automatically), then
press the <PLU> key. 2. The item name and price will appear on the register. 3. Continue entering in items in this manner until done. Press <ENTER> twice until the
“TOTAL PAYMENT” prompt is displayed. Barcode Reader 1. Scan the product, and the name of the item and price will appear. 2. Continue entering items with the scanner and press <ENTER> twice until the
“TOTAL PAYMENT” prompt is displayed. 3. When “TOTAL PAYMENT” is displayed, select your form of payment (see
chapter 2).
EEEnnnttteeerrriiinnnggg MMMuuullltttiiipppllleee IIIttteeemmmsss For example, five items at $1.00 each: 1. Press <5>, and then the <@/FOR> key. 2. Enter in the amount ($1.00) of the item and <ENTER> (or the <DEPT> if
departments are being used. OR
If using PLUs:
1. Press <5>, and then the <@/FOR> key. 2. Enter PLU code, and press the <PLU> key. Register will display the item purchased,
and total amount. 3. When you are done with sale, press <ENTER> twice until “TOTAL PAYMENT”
appears on screen.
SSSpppllliiittt PPPrrriiiccciiinnnggg For example, five items at four for a $1.00: 1. Enter the quantity being purchased (5). 2. Press the <@/FOR> key. 3. Enter the base quantity (4). 4. Press the <@/FOR> key. 5. Enter in the unit price ($1.00). 6. Press <ENTER>, or the <DEPT> key; depending on whether departments are being
used.

000666111---333222---000000666
444 NNNUUURRRIIITTT 222000555000 UUUssseeerrr MMMaaannnuuuaaalll

000666111---333222---000000666
IIINNNTTTRRROOODDDUUUCCCTTTIIIOOONNN 555
THIS PAGE LEFT BLANK INTENTIONALLY

000666111---333222---000000666
666 NNNUUURRRIIITTT 222000555000 UUUssseeerrr MMMaaannnuuuaaalll
CCC HHH AAA PPP TTT EEE RRR 222
FFFOOORRRMMMSSS OOOFFF PPPAAAYYYMMMEEENNNTTTSSS There are five forms of payments that can be used on the NURIT 2050. They are as follows: CASH, CHECK, CREDIT, DEBIT, and COUPON. Once you have finished entering in your sale, and the register displays “TOTAL PAYMENT”, press the key corresponding to the form of payment the customer will be using to pay.
CCCaaassshhh PPPaaayyymmmeeennnttt For example if the total payment is $25.75, and the customer gives you $27.00: 1. Enter in $27.00 (DO NOT press the decimal point), and press <CASH>. 2. The register will display “CHANGE $1.25”, and the drawer will pop open. This
message will stay on for about 30 seconds. A new sale can be started, with or without this message displayed.
CCChhheeeccckkk PPPaaayyymmmeeennnttt UUUsssiiinnnggg CCChhheeeccckkk GGGuuuaaarrraaannnttteeeeee 1. At the “TOTAL PAYMENT” prompt , press the <CHECK> key. 2. The register will display “CHECK GUARANTEE”. Press <ENTER>. 3. Enter in the information prompted by the specific check guarantee company you are
using.
CCChhheeeccckkk PPPaaayyymmmeeennnttt WWWiiittthhhooouuuttt GGGuuuaaarrraaannnttteeeeee 1. At the “TOTAL PAYMENT” prompt, press the <CHECK> key. 2. The register will display “CHECK GUARANTEE”. Press <CLEAR/VOID>. 3. Register will display: “ARE YOU SURE?” Press <ENTER>. 4. Register will prompt you for account number of check, enter information and press
<ENTER>. 5. Registers will display: “OFF LINE” (this indicates that no guarantee has been
obtained), and receipt will finish printing out.
000666111---333222---000000666
FFFOOORRRMMMSSS OOOFFF PPPAAAYYYMMMEEENNNTTTSSS 777
PPPaaayyymmmeeennnttt bbbyyy CCCrrreeedddiiittt CCCaaarrrddd 1. At the “TOTAL PAYMENT” prompt, press the <CREDIT CARD> key. 2. Register will display: “ACCOUNT NUMBER”. At this time, the credit card should
be swiped, or the account number may be entered in manually. If the account number is entered manually, then the register will also prompt you for the four-digit expiration date on the credit card (mmyy).
3. After the card is swiped, the following will appear respectively: “DIALING HOST”, “CONNECTED”, and “PROCESSING”.
4. The receipt will finish printing out, after the response from the host has been received. 5. Register will display: “TEAR SLIP”. This is prompting you to tear receipt. A
customer copy will follow two seconds later.
PPPaaayyymmmeeennnttt bbbyyy DDDeeebbbiiittt CCCaaarrrddd 1. At the “TOTAL PAYMENT” prompt, press the <DEBIT CARD> key. 2. Register will display: “ACCOUNT NUMBER”. Swipe the ATM Card. ATM cards
MUST be swiped - they cannot be entered in manually. 3. After card has been swiped, register will display: “CASH BACK”. 4. Press <ENTER> for yes, and enter amount of cash back requested by customer. Press
<CLEAR/VOID> for no. 5. Register will then display: “ENTER PIN PLEASE”. 6. Have customer enter PIN number on PIN pad. 7. After PIN number is entered, the following will appear respectively: “DIALING
HOST”, “CONNECTED”, and “PROCESSING.”
NOTE: If your NURIT is programmed with a debit EDC, a PIN pad is required for transactions to be processed.
PPPaaayyymmmeeennnttt bbbyyy SSStttooorrreee CCCrrreeedddiiittt 1. At the “TOTAL PAYMENT” prompt, press the <COUPON> key. 2. Register will display: “STORE CREDIT”. Press <ENTER>. 3. Register will display: “ENTER NON-ZERO #”. 4. Type in store credit number, and press <ENTER>. 5. Receipt will finish printing out.

000666111---333222---000000666
888 NNNUUURRRIIITTT 222000555000 UUUssseeerrr MMMaaannnuuuaaalll
PPPaaarrrtttiiiaaalll PPPaaayyymmmeeennntttsss 1. At the “TOTAL PAYMENT” prompt, enter in partial payment amount. 2. Press an applicable payment key (Cash, Credit, Debit, Check). The NURIT will
process the specific tender given. 3. Register will then display: “BALANCE DUE” and the remaining sum will appear. 4. Follow the same procedure for the balance due.
VVVoooiiidddsss aaannnddd RRReeefffuuunnndddsss Sales can be voided before “SUBTOTAL”, at “SUBTOTAL”, or at the “TOTAL PAYMENT” prompt, by pressing <CLEAR/VOID>. If a particular sale or refund needs to be voided, follow these steps: Voiding a Transaction 1. At the “READY” prompt, press <CLEAR/VOID>. Register will display: “VOID
TRAN. #”. 2. Type in transaction number you wish to void, and press <ENTER>. 3. Register will automatically print a voided receipt for that transaction. 4. Register will display: “VOID TRANSACT. ?”. Press <ENTER> for yes, or
<CLEAR/VOID> for no. The NURIT is just assuring you that this transaction will be voided, and you may still cancel.
5. Register will then display: “TYPE OF VOID”. 6. Press the key that corresponds to the correct form of payment used for that transaction. Item Void To void an item before TOTAL PAYMENT: 1. Press <MENU> and <CLEAR/VOID>. 2. Register will display: “1- ITEM VOID 2-ITEM REFUND”. 3. Press <1>. Register will display: “ENTER VOID ITEM”. 4. Type in the amount of the item you want to void, and press <ENTER> (or <DEPT> if
using departments). If using PLUs, type in the PLU code and press <PLU>. 5. Register will display item voided. Press <ENTER> twice to reach “TOTAL
PAYMENT”, and then select form of payment (see chapter 2).
000666111---333222---000000666
FFFOOORRRMMMSSS OOOFFF PPPAAAYYYMMMEEENNNTTTSSS 999
Item Refund To refund, or subtract a specific amount on an item before “TOTAL PAYMENT”: 1. Press <MENU> and <CLEAR/VOID>. 2. Register will display: “1- ITEM VOID 2-ITEM REFUND”. 3. Press <2>. Register will display: “ENTER RFND ITEM”. 4. Type in the refund amount after the item has been entered (this could also be used for
coupons), and press <ENTER> or <DEPT> if using departments. 5. Register will display item, and amount of refund. Press <ENTER> twice, to reach
“TOTAL PAYMENT”, and then select form of payment (see chapter 2). General Refund 1. Press <REFUND>. Register will display: “GEN. REFUND, ENTER AMOUNT...”. 2. Type in the refund amount, without tax (or enter PLU number), and press <ENTER>
twice. 3. Register will display: “TYPE OF REFUND”. 4. Press the payment key that applies to refund (cash, credit card, debit card, check, etc.).
Enter information that follows.
PPPrrriiiccceee OOOvvveeerrrrrriiidddeee (((uuussseeeddd fffooorrr PPPLLLUUU uuussseee ooonnnlllyyy))) To change the price of a PLU temporarily: 1. Scan or enter PLU code manually, and press <OVERRIDE/TIP>. 2. Register will display: “ENTER PLU AMOUNT”. 3. Type in the new amount of the item, and press <ENTER>. Continue with sale.

000666111---333222---000000666
111000 NNNUUURRRIIITTT 222000555000 UUUssseeerrr MMMaaannnuuuaaalll
CCC HHH AAA PPP TTT EEE RRR 333
SSSPPPEEECCCIIIAAALLL TTTRRRAAANNNSSSAAACCCTTTIIIOOONNNSSS,,, FFFUUUNNNCCCTTTIIIOOONNNSSS
VVVeeerrriiifffiiicccaaatttiiiooonnn ooofff CCCrrreeedddiiittt CCCaaarrrdddsss An authorization can be obtained for a credit card without charging the customer’s account. It will place a hold on the amount authorized for approximately 24 hours, depending on your host processor. To perform an authorization only, follow these steps: 1. Press <AUTH.ONLY>. 2. Register will display: “VERIFY ONLY, ENTER AMOUNT....”. 3. Enter in amount that needs to be verified on the account, and press <ENTER>. 4. Register will prompt for the account number. Swipe card, or enter account number
manually. 5. Register will call in for an authorization, and if accepted, will print a receipt with
VERIFY ONLY printed on top.
NOTE: The approval code obtained on the receipt can be used to force the transaction through, if transaction is for the same amount that was verified or less.
VVVeeerrriiifffiiicccaaatttiiiooonnn ooofff CCChhheeeccckkksss Verification of check guarantee allows the merchant to “OK” a check without performing an actual sale (same purpose as a credit card verification). Perform the following procedure: 1. Press <MENU>, and then <CHECK>. 2. Register will display: “UPDATE MENU: 13.TEST OF CHECK”. 3. Press <ENTER>. 4. Register will display: “ENTER AMOUNT...”. Type in the amount of check you
would like to verify and press <ENTER>. 5. Depending on your selection, the register will prompt you for different information.
The register will print host response.
000666111---333222---000000666
SSSPPPEEECCCIIIAAALLL TTTRRRAAANNNSSSAAACCCTTTIIIOOONNNSSS,,, FFFUUUNNNCCCTTTIIIOOONNNSSS 111111
FFFooorrrccceeeddd SSSaaallleee fffooorrr CCCrrreeedddiiittt CCCaaarrrdddsss (((ooonnnlllyyy))) This type of transaction is done, when an authorization number for a credit card sale has already been obtained, either by phone, or an authorization only transaction. 1. Press <FORCED SALE>. 2. Register will display: “FORCED SALE, ENTER AMOUNT...”. 3. Type in amount of sale (without tax) that you obtained an authorization for (the
amount must be equal or less, never more), and press <ENTER>. 4. Register will then prompt you for the account number, and then authorization number. 5. Type in the authorization number you obtained over the phone, or from the
authorization only transaction.
OR
At the “TOTAL PAYMENT”, or “BALANCE DUE” prompt, press <FORCED SALE> and continue with operation explained above.
PPPaaaiiiddd OOOuuuttt To remove cash from the register in order to pay for a miscellaneous item and keep record of the transaction, the following can be done: 1. Press <MENU>, and then <CASH>. 2. Register will display: “UPDATE MENU: 16. PAID OUT”. 3. Press <ENTER>. 4. Register will display: “AMOUNT?”. 5. Enter the amount of cash that will be taken from register and press <ENTER>. 6. Register will display: “COMMENT”. 7. If desired to type in why money was taken out, you may do so (see chapter 6 for text
programming). If not, just press <ENTER> to bypass. 8. A receipt will print out with the amount taken out, comment, and the cashier number.
NNNooo SSSaaallleee If the cash drawer needs to be opened bypassing the Paid Out option, just press <CASH> and the draw will pop open. Please keep in mind that these are options in the register, that may be turned off or on.
000666111---333222---000000666
111222 NNNUUURRRIIITTT 222000555000 UUUssseeerrr MMMaaannnuuuaaalll
DDDiiissscccooouuunnnttt The register can discount an item, or subtotal. If a fixed discount is given while “opening” the register, perform the following procedure after an item is entered. Item Discount 1. After the item has been entered (or scanned), press the <DSCNT> key. 2. Register will display discount amount that was entered at the “opening”. 3. Press <ENTER> if the discount amount is correct. If the discount amount is incorrect,
just type over the current discount amount and press <ENTER>. 4. Register will display the price with discount. Subtotal Discount 1. At the “SUBTOTAL” prompt, press <DSCNT> if the discount amount is correct. 2. If the discount amount is incorrect, just type over the current discount amount and
press <ENTER>. 3. Register will display the subtotal with discount.
TTTaaaxxx SSShhhiiifffttt If you need to change the state tax, perform the following procedure: 1. Press <MENU> and then <TAX EXCPT/EXMPT>. 2. Register will display: “UPDATE MENU: 14. CHANGE TAXES”. 3. Press <ENTER>. 4. Register will display: “TAX1, 0.000”. 5. Type in the correct tax amount (excluding the decimal), and press <ENTER>. 6. Register will display: “TAX2, 0.000”. 7. Type in the correct tax amount (excluding the decimal), and press <ENTER>. 8. Register will display: “TAX3, 0.000”. 9. Type in the correct tax amount (excluding the decimal), and press <ENTER>. 10. Register will display: “CHANGE TAX NAME?”. 11. Press <ENTER> for yes and <CLEAR/VOID> for no. If you choose to change tax
name, refer to chapter 6 for text programming. NOTE: Please keep in mind, that not all states use three taxes. If you require to use only one tax, you can press <ENTER> to bypass the other two taxes.

000666111---333222---000000666
SSSPPPEEECCCIIIAAALLL TTTRRRAAANNNSSSAAACCCTTTIIIOOONNNSSS,,, FFFUUUNNNCCCTTTIIIOOONNNSSS 111333
Tax Exception If you need to perform a tax exception on a single item, just press <TAX EXCPT/EXMPT> , after the item has been entered. The register will not tax that specific item, however, other items being purchased will still be taxed. Tax Exemption If a customer has a tax exemption card, and you need to tax exempt the total purchase: 1. Press <TAX EXCPT/EXMPT> at the “SUBTOTAL” prompt. 2. Register will display: “1.TAX1 + 2.TAX2 + 3.TAX3 + ENTER” (These tax names
will differ according to what you programmed them to be). 3. Press the correct keys corresponding to the tax that needs to be deducted. As you press
a number, the plus signs will change to minus signs. They will toggle back and forth. 4. Press <ENTER> after making selections. 5. Register will prompt you for a tax exemption number. 6. Enter in tax exemption number, and press <ENTER>. 7. Continue with the regular sales operation. This will exclude tax from the total
purchase.
CCCooopppyyy ooofff RRReeeccceeeiiipppttt The NURIT has the capability of printing a copy of a specific transaction, as well as a gift copy. In order to print a receipt copy of the last transaction, specific sale, or specific return, perform the following procedure: 1. Press <MENU>, and then <6>. 2. Register will display: “UPDATE MENU: 6. PRINT RECEIPT”. 3. Press <ENTER>. 4. Register will display: “1-LAST TRANSACTION, 2-TRAN. NUMBER”. 5. If you press <1>, register will display: “1-REGULAR, 2-GIFT COPY” (will not
print item prices). If you press <2>, register will display: “ENTER TRANS #”. Type in the transactio number, and press <ENTER>. Register will then display: “1-REGULAR, 2-GIFT COPY”. Select the number according to the option.
6. When you select the copy you want, the register will automatically print copy of receipt (there is no need to press <ENTER> after your selection).
000666111---333222---000000666
111444 NNNUUURRRIIITTT 222000555000 UUUssseeerrr MMMaaannnuuuaaalll
DDDaaattteee aaannnddd TTTiiimmmeee The NURIT’s date and time are automatically registered after it is programmed by Technical Support. There is no need to change the time during normal register operation. If for any reason the date and time need to be changed, it is done in the following way: 1. Press <MENU>, and then <7>. 2. Register will display: “UPDATE MENU: 7. SET DATE/TIME”. 3. Press <ENTER>. Register will display current date. If it needs to be changed, just
type in the correct date, and press <ENTER>. If it doesn’t need to be changed, just press <ENTER> to keep same date (same for time).
4. Register will display current time. If it needs to be changed as well, just type in correct time, otherwise just press <ENTER> to bypass.
5. Register will print a record of the change made in date and time.
PPPuuuttt AAAsssiiidddeee This feature allows you to “put aside” a transaction, and recall it later. For example, if a customer leaves the register for a while, then you may put aside the sale, and help the next customer. To do so, follow these steps: 1. At the “TOTAL PAYMENT” prompt, press <SHIFT/DEPOSIT>. 2. Register will display: “READY”. 3. Continue with next sale. Receipt will finish printing, and read “SUSPEND” at bottom of receipt. At the “READY” prompt, you are ready to take the next sale. To recall a transaction that has been “put aside”, follow these steps: 1. At the “READY” prompt, press <SHIFT/DEPOSIT>. 2. Register will display: “1-LAYAWAY, 2-PUT ASIDE”. 3. Press <2>. Register will display: “ENTER TRANS. #”. 4. Type in the number of the transaction, that was “put aside”, and press <ENTER>. 5. Register will display: “TOTAL PAYMENT”. 6. Continue as a regular sale.
000666111---333222---000000666
SSSPPPEEECCCIIIAAALLL TTTRRRAAANNNSSSAAACCCTTTIIIOOONNNSSS,,, FFFUUUNNNCCCTTTIIIOOONNNSSS 111555
LLLaaayyyaaawwwaaayyy This option allows, customers to make payments on a purchase over an extended period of time. Each layaway receives a unique invoice number, and is stored in a special database. Transactions with layaway payments will be stored in a common transaction database. To open new layaway accounts, follow these steps: 1. Press <SHIFT/DEPOSIT>. Register will display: “1-LAYAWAY, 2-PUT ASIDE”. 2. Press <1>. Register will display: “1-NEW, 2-ADD PAYMENTS, 3-DELETE”. 3. Press <1>. Register will display: “ENTER CLIENT #”. (If register is in Client
Mode, it will not prompt you for a client #). 4. Type in client number, and press <ENTER>. 5. Register will display: “INVOICE NUMBER”. 6. Type invoice number, and press <ENTER> . 7. Register will display: “BEGIN LAYAWAY”. At this prompt, begin to enter in the sale for the total purchase. Enter in as you would a regular sale. At the “TOTAL PAYMENT” prompt: 1. Type in the amount of the deposit, and select the form of payment. 2. Register will display: “BALANCE DUE”. 3. Press <SHIFT>. Adding Payments to Layaways 1. Press <SHIFT/DEPOSIT>. Register will display: “1-LAYAWAY, 2-PUT ASIDE”. 2. Press <1> . Register will display: “1-NEW, 2-ADD PAYMENTS, 3-DELETE”. 3. Press <2> . Register will display: “ENTER INVOICE NUMBER”. 4. Type in invoice number, and press <ENTER>. 5. Register will display: “TOTAL PAYMENT”. 6. Type in the amount of payment being made, and then select form of payment. 7. Register will display: “BALANCE DUE”. 8. Press <SHIFT>.
NOTE: Layaway will automatically finish after last payment is made, and will no longer show on layaway journal. To Delete An Existing Layaway 1. Press <SHIFT/DEPOSIT>. Register will display: “1-LAYAWAY, 2-PUT ASIDE”. 2. Press <1>. Register will display: “1-NEW, 2-ADD PAYMENTS, 3-DELETE”. 3. Press <3>. Register will display: “ENTER INVOICE NUMBER”. 4. Type in invoice number, and press <ENTER>. 5. Register will display: “TYPE OF REFUND”. 6. Select form of payment.
000666111---333222---000000666
111666 NNNUUURRRIIITTT 222000555000 UUUssseeerrr MMMaaannnuuuaaalll
IIInnnvvveeennntttooorrryyy The NURIT 2050 also has an inventory feature, that can be used to control the quantity of items being sold. If this option is used, the PLU Editor, will have three additions: 1. STORE AMOUNT - the amount of products the store has in stock 2. MINIMUM AMOUNT - when the amount of products falls below the minimum
stock level, it will be included in the replenishment report. 3. PLU COST - the cost to the merchant 4. PLU PRICE - the price of the PLU To access the inventory menu, follow these steps: 1. Press <MENU>, and then the <COUPON> key 2. Register will display: “UPDATE MENU, 20. INVENTORY” 3. Press <ENTER> register will display:“INVENTORY 1. UPDATE”. The inventory
menu has three other options: 2. SCROLL, 3. PRINT, 4. PROFIT REPORT. 1. UPDATE The update menu has four options: 1. ADD - will add merchandise received to the Store Amount 2. DECREASE - this option will subtract merchandise from the Store Amount 3. MIN - this will change the Minimum Amount 4. COST - this will change the PLU Cost The PLU code and price will be necessary for all of these functions. The PLU code can be entered manually, or scanned. 2. SCROLL This will allow to scroll through the PLU list by 1. RANGE, 2. DEPARTMENTS, 3. ALL PLUs, or scroll through a 4. REPLENISHMENT REPORT. The REPLENISHMENT REPORT will show you the store amount and current amount in stock, the PLU code, name, and price. Use the <↑> key to scroll through the store amount, name, and price. To change the store amounts, or costs, press <ENTER>. This will allow you to make changes. After pressing <ENTER>, the register will first prompt you for the minimum amount, then the current amount. After current amount, register will return to scroll mode. 3. PRINT This menu will allow you to print the PLU list by 1. RANGE, 2. DEPARTMENTS, 3. ALL, and 4. REPLENISHMENT REPORT. The <CLEAR VOID> key will interrupt the printing process. The print format will include, the PLU code, PLU name, PLU cost, and PLU price. It will also show the quantity in stock, and the store amount. 4. PROFIT REPORTS This option will print two different kinds of profit reports.

000666111---333222---000000666
SSSPPPEEECCCIIIAAALLL TTTRRRAAANNNSSSAAACCCTTTIIIOOONNNSSS,,, FFFUUUNNNCCCTTTIIIOOONNNSSS 111777
EEEmmmpppllloooyyyeeeeee CCCllloooccckkk The NURIT can be used as a time clock, so that employees can clock in and out for the day. 1. At the “READY” prompt, press <EMPL.CLOCK>. 2. Register will display the date, time, and in/out. 3. Press <ENTER> to toggle between in and out. 4. Once you are at the correct prompt (in or out), swipe the employee card, or type in the
number manually, and press <ENTER>. 5. Press <CLEAR/VOID> to return to the “READY” prompt. To Print Employee Clock Report: 1. At the “READY” prompt, press <EMPL.CLOCK> twice. 2. Register will display three options: “1. SPECIFIC, 2. ALL, 3. CLEAR LIST”. 3. Once option is selected, report will start to print. 4. Press <CLEAR/VOID> to return to the “READY” prompt.
Available Options for Employee Clock 1. Employee Clock - switches NURIT to work with or without Time and Attendance. 2. Time & Attendance Manual Entry -to allow to enter employee number manually.
Default for this option is without Time and Attendance manual entry. 3. Time & Attendance Upload In Z-Tape - If this option is switched on, Time and
Attendance information will be sent to PC during close cash register procedure and if communication was successful, all sent information is deleted from NURIT memory. This option can be switched on only from the Technical Utlities menu, and not from the Terminal Control Center. This option is available in application version 4.05, or greater.
4. Time & Attendance Parity Needs - Parity Needs means that every check-out should
correspond to one check-in action, and vise versa. If “T & A Parity Needs” is in use, than on attempt of parity violation, the program prompts to enter pair time with manager card confirmation. The program also asks for manager card confirmation if the actual working time is a continuous 17 hours. If Time & Attendance Parity Needs is not in use, the Time and Attendance subsystem registers each check-in/check-out action without parity and overwork control. Default for this option is - without “Parity Needs”. This option can be switched only from the menu, and not from the Center. This option is present from version 4.05.

000666111---333222---000000666
111888 NNNUUURRRIIITTT 222000555000 UUUssseeerrr MMMaaannnuuuaaalll
If NURIT works with Time and Attendance, it will restrict any change in time by SET DATE/TIME function. This function will be allowed only when all employees are “OUT,” or Time and Attendance database is cleared.
000666111---333222---000000666
SSSPPPEEECCCIIIAAALLL TTTRRRAAANNNSSSAAACCCTTTIIIOOONNNSSS,,, FFFUUUNNNCCCTTTIIIOOONNNSSS 111999
THIS PAGE LEFT BLANK INTENTIONALLY

000666111---333222---000000666
222000 NNNUUURRRIIITTT 222000555000 UUUssseeerrr MMMaaannnuuuaaalll
CCC HHH AAA PPP TTT EEE RRR 444
DDDAAAIIILLLYYY CCCLLLOOOSSSIIINNNGGG PPPRRROOOCCCEEEDDDUUURRREEE
CCClllooosssiiinnnggg ttthhheee RRReeegggiiisssttteeerrr When closing the register at the end of the day, a Terminal Report (Z-report) will be printed out. This report can be programmed to print a store and office copy, a journal, cashier report, PLU report, department report, and drawer miscellaneous (see chapter 4 to set defaults). If your NURIT is working in conjunction with a PC at your location, upload transactions daily to the PC, or the register memory will fill up. As previously mentioned, you may also batch your credit cards during this procedure. The register will prompt you for both your PC batch and EDC (credit card) batch. To close the register, perform the following procedure: 1. Press <MENU>, and then <4>. 2. Register will display: “UPDATE MENU: 4. Z REPORT”. 3. Press <ENTER> . 4. Register will display “PRINT JOURNAL?” . A journal will print a copy of each
transaction done for the day (press <ENTER> for yes, or <CLEAR/VOID> for no). 5. Register will then flash: “PRINTING Z REPORT”. 6. Register will display: “DEPART REPORT”. 7. Register will then display: “PRINT PLUs?”. A PLU report will show the daily sales
of each PLU (see chapter 4 for more details). Press <ENTER> for yes, or <CLEAR/VOID> for no.
8. Then register will display: “CASHIER REPORT”. 9. If you have NOT batched your credit cards, register will display: “EDC BATCH
OPEN, BATCH WITH HOST?”. Keep in mind, that if no credit cards were processed, the NURIT will bypass this question.
10. Press <ENTER>. Register will dial, connect, and process. 11. After the credit cards have batched, the register will display: “PC BATCH OPEN,
BATCH WITH PC?” (only if your register is linked to your computer and you have the proper software).
12. Press <ENTER>. Register will dial to your computer, connect, and upload the day’s transactions to your PC. When done and everything has processed successfully, register will display: “CASH R. CLOSED”.
000666111---333222---000000666
DDDAAAIIILLLYYY CCCLLLOOOSSSIIINNNGGG PPPRRROOOCCCEEEDDDUUURRREEE 222111
BBBaaatttccchhhiiinnnggg CCCrrreeedddiiittt CCCaaarrrdddsss If you processed credit card transactions, and followed the steps for closing the register correctly, then you have already batched your credit cards (refer to step #9 in the previous paragraph). Some merchants batch more than once a day, and this can be done without going through the entire closing procedure. In order to settle your credit card batch without closing the register, perform the following procedure: 1. At the “READY” prompt, press <EDC UTIL> (on left-hand side of register). 2. Register will display: “EDC BATCH TYPE, CREDIT”. 3. Press the <CREDIT CARD> key. 4. Register will display and print the host options (they will differ for all hosts). 5. Select “CLOSE BATCH”, and register will go through the following procedures:
DIALING HOST, CONNECTED, PROCESSING..., BATCH APPROVED. 6. If batch is approved, the register will print a batch report, showing credit card
transactions (sales, returns, voids, etc.) for the day. Each credit card host will have several different options for batching, such as, closing batch, batch inquiry, edit transactions, force batch, etc. The batching process may also be done during the closing procedure. If your NURIT is programmed to process debit cards, they may batch automatically, but it should be confirmed with your processor.
TTTeeemmmpppooorrraaarrryyy CCClllooosssiiinnnggg ooofff RRReeegggiiisssttteeerrr Assuming that the merchant wants to leave the register for a period of time, the register may be closed temporarily. To close the register temporarily, follow this procedure: 1. Press <MENU>, and then <EMPL.CLOCK>. 2. Register will display: “UPDATE MENU: 10. TMP. CLOSE REG”. 3. Press <ENTER>. 4. Register will display: “TEMP. CLOSED?”. 5. Press <ENTER> to close temporarily, or <CLEAR/VOID> to cancel operation. To reopen register, swipe your manager card. Register will return to the “READY” prompt.

000666111---333222---000000666
222222 NNNUUURRRIIITTT 222000555000 UUUssseeerrr MMMaaannnuuuaaalll
CCC HHH AAA PPP TTT EEE RRR 555
RRREEEPPPOOORRRTTTSSS
RRReeepppooorrrtttsss MMMeeennnuuu In addition to the daily reports, additional reports may be generated from the register, such as Department, PLU, Cashier, Periodical, Cumulative, Terminal, Journal, Server, and Non-Tax Cumulative reports. To access the report menu: 1. Press <MENU>, and then the <DEPT> key. 2. Register will display: “UPDATE MENU: 12. REPORTS”. 3. Press <ENTER>. 4. Register will display: “REPORTS: 1. DEPARTMENT RPT”. 5. Pressing the <DSCNT> and <PLU> keys, allows you to scroll up and down, viewing
the different types of reports. 0. Setup Defaults for Z-Report This option allows you to setup defaults for the closing report of the day (Z-Report). It provides the option to include the following: DAILY JOURNAL, PLU REPORT, CASHIER REPORT, DEPARTMENT REPORT, DRAWER MISCELLANEOUS, and OFFICE COPY. The defaults for the Z-report can always be changed. If defaults are not set for the Z-report, it will prompt these options during the printing of the Z-Report. 1. Department Report This report gives you the totals of each department for the day. It will print the quantity of items sold in each department, total amount, and percentage of sales. 2. PLU Report This is a daily report of each PLU sold. It will print the number of PLUs sold, and the dollar amount. 3. Cashier Report This report gives the totals summary for each cashier. It shows the quantity of transactions done by each cashier, total amount, and the percentage of total sales.
000666111---333222---000000666
RRREEEPPPOOORRRTTTSSS 222333
4. Periodical Report The NURIT 2050 contains a counter that summarizes all transactions over a given period of time. This counter can be zeroed, thus enabling the start of a new period. If the counters are not reset, this report will print totals from the first time the register was used. 5. Cumulative Report This report is similar to the Periodical Summary, except that it cannot be zeroed. This will give you totals from the first day the register was used. It includes checks, credit cards, debit cards, vouchers (coupon), and total refunds. 6. Terminal Report This report summarizes NURIT balances and incorporates the department, PLU, and cashier reports. This is similar to the X-Report, showing the total of incoming, outgoing, gross total, and net total. 7. Non-Tax Cumulative Report This is the same as the cumulative report, except it will not include the tax. 8. Journal Report This will print out a copy of each transaction for a specific journal. The NURIT gives you three options: 1-CURRENT, 2-ALL, 3-SPECIFIC. You must keep in mind, that if the NURIT is linked to your PC, and it is uploaded every night, then you will not be able to print a previous journal. The previous journal has already been uploaded to your PC, so technically it has been emptied out of the register. If you need a specific journal, it may be obtained from your PC. 9. Server Report This report is similar to the cashier report, however this only works for restaurant applications, and not retail. You must have the server option turned on, for the report to be generated. 10. Employee Report This report will give the time and attendance information of each employee. Again, this report can only be generated, if the employee clock option is being used. This report gives three options: 1-SPECIFIC, 2-ALL, 3-CLEAR LIST. 11. Layaway Report This report will print all layaway plans, or a specific layaway plan by invoice number. The layaway plan is explained in chapter 3.
000666111---333222---000000666
222444 NNNUUURRRIIITTT 222000555000 UUUssseeerrr MMMaaannnuuuaaalll
XXX---RRReeepppooorrrttt The X-Report is similar to the Z-Report in the closing procedure, but no totals or journals are erased from the memory, and it will not close the register. This report allows for “up-to-the-minute” follow up of daily transactions. The X-report is not found in the Reports Menu, it can be generated by the following procedure: 1. Press <MENU>, and then <3>. 2. Register will display: “UPDATE MENU: 3. X-REPORT”. 3. Press <ENTER>. 4. Register will flash: “PRINTING X REPORT”.

000666111---333222---000000666
RRREEEPPPOOORRRTTTSSS 222555
THIS PAGE LEFT BLANK INTENTIONALLY
000666111---333222---000000666
222666 NNNUUURRRIIITTT 222000555000 UUUssseeerrr MMMaaannnuuuaaalll
CCC HHH AAA PPP TTT EEE RRR 666
PPPRRROOOGGGRRRAAAMMMMMMIIINNNGGG
AAAlllppphhhaaa PPPrrrooogggrrraaammmmmmiiinnnggg Since the NURIT can generate alphanumeric characters and symbols (bold, UPPERCASE, and lowercase), it is possible to program receipt headers, trailers, department names, and cashier names. In order to program the NURIT with headers, trailers, etc. your must first go to the programming menu: 1. Press <MENU>, and then <@/FOR> (on right hand side of register). 2. Register will display: “UPDATE MENU: 11. EDIT DATA/PRM”. 3. Press <ENTER> , this will bring you into the programming menu, allowing you to
program the receipt trailer, header, department names, cashier names, and receipt questions.
1. Receipt Trailer A receipt trailer can be added to the end of the receipt for up to 3 lines with 23 characters and symbols (standard), or 12 characters and symbols (bold), including spaces, per line. Once in the programming menu, as explained above, continue with the following steps: 1. At the “PROGRAMMING, 1. RECEIPT TRAILER” prompt, press <ENTER>. 2. Register will display: “RECEIPT TRAILER”. 3. Press <SHIFT> once, and the terminal will display an uppercase A in the upper right-
hand corner of the display. When the uppercase A is displayed, then you may start typing your first line of the trailer. The <SHIFT> key will toggle between three options:
1. Uppercase (A) 2. Lowercase (a) 3. Numbers (#) 4. When you are done typing each line, you must be at the “#”prompt, and press <PC
COMM>. This will move you down to the next line. When you are completely done typing the trailer, press <ENTER> at the “#” prompt.
NOTE 1: If you want BOLD letters, press the <LINE> key, before typing. To end BOLD typing, press the <TIP> key.
NOTE 2: If you make a mistake, and need to erase, you must be at the “#” prompt, and press <TAX EXCPT/EMPT>.
000666111---333222---000000666
PPPRRROOOGGGRRRAAAMMMMMMIIINNNGGG 222777
2. Department Names Department data (name, tax status, and HALO) can be downloaded directly from a PC to a NURIT. If you are not using a PC with the NURIT, departments can still be programmed manually in the following way: 1. At the “PROGRAMMING, 1. RECEIPT TRAILER” prompt, press <2>. 2. Register will display: “PROGRAMMING, 2. DEPARTMENT NAMES”. 3. Press <ENTER>. 4. Register will display: “1. LIST, 2. ADD, 3. DELETE, 4. PRINT”. 1. LIST - will display departments programmed in the NURIT, along with tax
status and name. 2. ADD - used to add new departments. 3. DELETE - used to delete departments. 4. PRINT - same information as listing, except it will print list (it will print 10
departments at a time, press <ENTER> to print next 10 departments). 5. Follow steps 3 and 4 (Receipt Trailer). 6. After typing department name, register will display: “TAX1, Yes (NO)”. Press
<CLEAR/VOID> to toggle between yes and no. 7. Press <ENTER> when done. Register will repeat itself for the next two taxes. 8. After the taxes, register will display: “SALE HALO”. 9. Enter amount of HALO for that department, and press <ENTER>. 10. Register will display: “REFUND HALO”. 11. Enter amount of HALO for that department, and press <ENTER>.
NOTE: The HALO amount is a High Amount Lock Out (the highest priced item in that department). 3. Cashier Name The NURIT 2050 allows you to program the names of cashiers (1 to 9999), so that in addition to the cashier number appearing on the receipt, the name of that cashier will also appear. The Cashier Editor is similar to the Receipt Trailer except that only one line of 16 alphanumeric characters (including spaces) can be generated. To program cashier names, the following steps can be done: 1. At the “PROGRAMMING, 1. RECEIPT TRAILER” prompt, press <3>. 2. Register will display: “PROGRAMMING, 3. CASHIER NAMES”. 3. Press <ENTER> . Register will display: “1. CASHIER LIST, 2. ADD, 3.
DELETE”. 1. CASHIER LIST - will display cashier numbers and names that have already
been programmed. 2. ADD - add new cashiers. 3. DELETE - delete cashiers. 4. Press <2> to add cashier.

000666111---333222---000000666
222888 NNNUUURRRIIITTT 222000555000 UUUssseeerrr MMMaaannnuuuaaalll
5. Register will display: “NEW CASHIER NUM”. 6. Type in the number and press <ENTER>. 7. Register will display: “NEW CASHIER NAME”. 8. Follow steps #3 and #4 (in Receipt Trailer). 9. When done, press <ENTER> at the # prompt. 4. Receipt Header A receipt header is usually programmed when you first receive your register. If it should need to be changed, it can be programmed manually. The header can be up to five lines with 23 alphanumeric characters and symbols, or 12 bold characters (including spaces). 1. At the “PROGRAMMING, 1. RECEIPT TRAILER” prompt, press <4>. 2. Register will display: “PROGRAMMING, 4. RECEIPT HEADER”. 3. Press <ENTER> . Register will display: “RECEIPT HEADER”. 4. Follow steps #3 and #4 (Receipt Trailer). 5. Opening Bank Sum This allows you to change the opening bank amount: 1. At the “PROGRAMMING, 1. RECEIPT TRAILER” prompt, press <5>. 2. Register will display: “PROGRAMMING, 5. OPENING BANK SUM”. 3. Press <ENTER>. Register will display: “OPENING BANK 00.00”. 4. Type in new amount, and press <ENTER>. 6. Receipt Questions Allows you to program up to three questions at the end of a transaction, such as telephone number, zip code, etc.: 1. At the “PROGRAMMING, 1. RECEIPT TRAILER” prompt, press <6>. 2. Register will display: “PROGRAMMING, 6. RECEIPT QUEST”. 3. Press <ENTER> . Register will display: “ENTER QUEST. #1”. 4. Follow steps #3 and #4 (Receipt Trailer). 5. Continue in the same manner for questions #2 and #3. If you do not need more than
one question, press <CLEAR/VOID> at “ENTER QUEST. #2”. 7. View PLUs This will allow you to view all the PLUs you have programmed into the register. 1. At the “PROGRAMMING, 1. RECEIPT TRAILER” prompt, press <7> . 2. Register will display: “PROGRAMMING, 7. VIEW PLU”. 3. Press <ENTER> . Register will display: “1-RANGE, 2-DEPT, 3-ALL”. Choose option. 8. Change Batch Number This allows you to change your batch number.
000666111---333222---000000666
PPPRRROOOGGGRRRAAAMMMMMMIIINNNGGG 222999
1. At the “PROGRAMMING, 1. RECEIPT TRAILER” prompt, press <8>. 2. Register will display: “PROGRAMMING, 8. CHANGE BATCH NUMBER”. 3. Press <ENTER> . Register will display: “ENTER BATCH NUM”. 4. Type in new batch number, and press <ENTER>.
NOTE: Do not change batch number without knowing for sure why you need it changed. If you are uncertain, call the technical support help desk. This could cause a problem for future batches, if it is not done correctly. If changing batch number, new batch number must be greater than the current batch number. 9. E-Mail If your NURIT is linked to your PC through the Windows Bridge you can send and receive E-Mail on the registers. To do so, follow these steps: 1. At the “PROGRAMMING, 1. RECEIPT TRAILER” prompt, press <9>. 2. Register will display: “PROGRAMMING, 9. E-MAIL”. 3. Press <ENTER>. Register will display: “1 INCOMING (will allow you to view any
messages received), 2 OUTGOING”. 4. To send E-Mail, select #2. 5. Register will display: “ENTER NEW MESSAGE”. 6. Follow steps #3 and #4 (Receipt Trailer). 0. Change Halo This allows you to change the general HALO amount for sales and refunds. It also allows to set the maximum cash back for debit transactions only. Journal type should always be 9. Editing PLUs The NURIT allows you to program PLUs manually, as well as edit them if they have been downloaded from your PC. To enter or modify a PLU, follow these steps: 1. At the “READY” prompt, press <MENU>, and then <0>. 2. Register will display: “UPDATE MENU: 0. EDIT PLU”. 3. Press <ENTER>. Register will display: “ENTER ITEM CODE”. There are two
available options here: 1. scan the product if you have a barcode, or 2. type in the UPC code, and press <ENTER>.
4. Register will display: “ENTER ITEM NAME”. Follow steps #3 (Receipt Trailer). 5. Register will display: “KEY IN AMOUNT”. 6. Type in the amount of item and press <ENTER>. 7. Register will display: “DEPARTMENT”. Type in the department number and press
<ENTER>.

000666111---333222---000000666
333000 NNNUUURRRIIITTT 222000555000 UUUssseeerrr MMMaaannnuuuaaalll
8. Register will display: “TAX1 YES (NO)”. Press <CLEAR/VOID> to toggle between yes and no.
9. Press <ENTER> after making selection. 10. Repeat steps #8 and #9 for TAX2 and TAX3. 11. Register will display: “DISCOUNTABLE? YES (NO)”. Press <CLEAR/VOID> to
toggle between yes and no. 12. Press <ENTER> after making selection.
NOTE: If you are using the Bridge Program, you may modify the PLUs on your PC.

000666111---333222---000000666
PPPRRROOOGGGRRRAAAMMMMMMIIINNNGGG 333111
THIS PAGE LEFT BLANK INTENTIONALLY
000666111---333222---000000666
333222 NNNUUURRRIIITTT 222000555000 UUUssseeerrr MMMaaannnuuuaaalll
CCC HHH AAA PPP TTT EEE RRR 777
UUUSSSIIINNNGGG TTTHHHEEE NNNUUURRRIIITTT TTTEEELLLEEEPPPHHHOOONNNEEE To use the telephone on the NURIT register, the option must be turned on first. If you are uncertain about this, call the help desk number your salesman has provided. To use the phone, follow these steps: 1. Pick up the handset, and press the <PHONE> key. 2. Once the register displays: “PHONE”, dial the number you want to call. 1. Storing Telephone Numbers The NURIT has the capability to store phone numbers for speed dialing. Follow these steps, to program telephone numbers: 1. Press the <PHONE> key, and then <MENU>. 2. Register will display: “DEFINITIONS: 1. SPEED DIAL”. 3. Press <ENTER>. Register will display: “SPEED DIAL 1. <empty>”. 4. Press <ENTER>. Register will display: “ENTER PHONE NO”. 5. Type in phone number and press <ENTER>. 6. Register will display the phone number. 2. Phone Blocking This feature allows you to block certain prefixes, such other area codes. To block a specific number, or prefix, follow these steps: 1. Press the <PHONE> key, and then <MENU>. 2. Register will display: “DEFINITIONS: 1. SPEED DIAL”. 3. Press <2>, register will display: “DEFINITIONS: 2. PHONE BLOCKING”. 4. Press <ENTER> register will display: “MANAGER CARD”. 5. Swipe manager card, register will display: “PHONE BLOCKING, 1. ENABLE
BLOCKING”. 6. Press <ENTER> to toggle between enable and disable blocking. 7. Number <2> will allow you to enter the prefixes you want blocked. You can block up
to 20 numbers or prefixes.

000666111---333222---000000666
UUUSSSIIINNNGGG TTTHHHEEE NNNUUURRRIIITTT TTTEEELLLEEEPPPHHHOOONNNEEE 333333
3. Exchange Prefix If an exchange prefix is needed to dial an outside line, it needs to be entered here. 1. Press the <PHONE> key, and then <MENU>. 2. Register will display: “DEFINITIONS: 1. SPEED DIAL”. 3. Press <3> . Register will display: “DEFINITIONS: 3. EXCHANGE PREFIX”. 4. Press <ENTER>, register will display: “EXCHANGE PREF”. 5. Type in exchange prefix needed, and then press <ENTER> . 4. Dialing Type The phone can be programmed for pulse or touch-tone dialing. The register needs to be the same dialing type as the phone line. To change the dialing type, follow these steps: 1. Press the <PHONE> key, and then <MENU>. 2. Register will display: “DEFINITIONS: 1. SPEED DIAL”. 3. Press <4>. Register will display: “DEFINITIONS 4. DIALING TYPE”. 4. Press <ENTER> . Register will display: “1. PULSE DIALING” (rotary) “2. DTMF
DIALING” (touch tone). 5. Select either one or two, and press <ENTER>. Speed Dial 1. Press the <PHONE> key, and then <DEPT>. 2. Register will display: “DIAL FROM MEM NO. 1. <NUMBER STORED>”. Press
<DSCNT> to scroll through stored numbers. 3. When you have selected the desired memory number to be dialed, press <ENTER>. Printing Stored Numbers To print a list of phone numbers in the NURIT’s memory: 1. At the READY prompt, press <PHONE>. 2. Register will display: PHONE. 3. Press <MENU>. 4. Register will display: “DEFINITIONS: 1. SPEED DIAL”. 5. Press <ENTER>, register will display: “SPEED DIAL 1.” (first number stored) 6. Press <CLEAR/VOID> . Register will display: “PRINT LIST?”. 7. Press < . > (the decimal point). Register will print phone list.
NOTE: To exit the PHONE menu, press the <PHONE> key.
000666111---333222---000000666
333444 NNNUUURRRIIITTT 222000555000 UUUssseeerrr MMMaaannnuuuaaalll
CCC HHH AAA PPP TTT EEE RRR 888
PPPCCC///NNNUUURRRIIITTT IIINNNTTTEEERRRFFFAAACCCEEE
CCCooommmmmmuuunnniiicccaaatttiiiooonnn BBBeeetttwwweeeeeennn yyyooouuurrr PPPCCC aaannnddd ttthhheee NNNUUURRRIIITTT This chapter pertains only to those merchants that will have their NURIT communicate with their PC. You must have the proper software for this option. This chapter will briefly describe the <PC COMM> key on your register. Pressing this key will display: “1-E-MAIL, 2-INVENT” (PLUs), “3-TRANS” (Transactions), “4-T&A” (Time and Attendance). The following will give you a brief description of each display topic. If further explanation is needed, please refer to the manual received with the Bridge Program, or call the help desk number. 1. E-Mail This option allows you to send and receive E-Mail from the PC. This option is helpful if you have more than one NURIT in different locations. You will be able to send the same E-mail to all registers at once, or you can send different E-mail messages to each register. Your E-Mail is only sent in this PC Comm menu. The E-Mail message is programmed in the Edit Data/Param menu (Chapter 5). 2. Inventory This option downloads the PLUs and departments into the register. If there is change in the PLU file, it can be downloaded to the register. When there is a change in PLUs, it will only download the changes made. 3. Transactions This allows you to upload the daily journal to the PC. This can also be done during the closing procedure. The register will prompt you to “batch to the PC.” There are two ways of uploading to the PC. 4. Time and Attendance This allows you to upload the time and attendance records daily. This can only be used if the Employee Clock option is being used. This can also be prompted during the closing procedure. This is option needs to be turned on by a technician, at the help desk.
000666111---333222---000000666
PPPCCC///NNNUUURRRIIITTT IIINNNTTTEEERRRFFFAAACCCEEE 333555
NOTE: Each one of these downloads, or uploads will print a record of the communication. It will print if communication was successful, or if it failed. When there is a change in PLUs or departments, the Bridge will automatically download the change to the NURIT, after it has uploaded the transactions.
CCCooommmmmmuuunnniiicccaaatttiiiooonnn PPPaaarrraaammmeeettteeerrrsss The NURIT and your PC can communicate in two ways; modem or direct cable. Whichever the case may be, the NURIT must have the communication parameters programmed in the following manner: 1. Press <MENU>, and then <8>. 2. Register will display: “UPDATE MENU: 8. COMM. PARAMS”. 3. Press <ENTER>. Register will display: “MODEM?” (used for modem
communication); press <CLEAR/VOID> to toggle between “MODEM” and “RS232” (select for direct cable communication).
4. Press <ENTER> when you have made your selection. 5. Depending on your selection, the register will display: “DTMF DIALING” (for
modem), or “BAUD RATE? 19200” and then “RS232 port?” (for RS232). 6. Press <ENTER> after each selection, and then press <CLEAR/VOID> to return to the
“READY” prompt. Phone Numbers To program the phone number to your PC’s modem, follow these steps: 1. Press <MENU>, and then <5>. 2. Register will display: “UPDATE MENU: 5. PHONE INFO”. 3. Press <ENTER>. Register will display: “EXCHANGE PREFIX”. Type exchange
prefix if needed, otherwise just press <ENTER>. 4. Register will display: “CREDIT HOST”. Register will display your credit host
authorization number. 5. Press <ENTER> . Register will display “BAUD RATE”. 6. Press <ENTER> . Register will display “SERVICE COMPUTER”. 7. Press <ENTER> . Register will display “BAUD RATE”. 8. Register will display: “BACKROOM PC”. 9. Type in your modem’s phone number, and press <ENTER>. 10. Press <CLEAR/VOID> to return to the “READY” prompt.

000666111---333222---000000666
333666 NNNUUURRRIIITTT 222000555000 UUUssseeerrr MMMaaannnuuuaaalll
AAA P P E N D I X A PP PP EE NN DD II XX AA
TROUBLESHOOTING TTRROOUUBBLLEESSHHOOOOTTIINNGG
Cash Drawer CCaasshh DDrraawweerr If the cash drawer is not opening, check the following: • Make sure the drawer is not locked. • Check the connection between the NURIT and the drawer - that is has not been
disconnected. • Check that the register is set up for CASH REGISTER mode. To check this, print an
EDC SETUP REPORT: 1. At the “READY” prompt, press <MENU>, <9>, and <ENTER>. 2. Register will display “PASS TECH CARD”. 3. Type in password for the day (this can only be obtained by the help desk),
and press <ENTER>. 4. Register will display: “TECH UTILITIES, 1. MERCH PARAMS”. 5. Press <3>, and then <ENTER>. Register will print a setup report. The following displays the top portions of two setup reports:
Setup as Cash Register Setup as POS only
NURIT SETUP 02/14/97 11:37 7 ------------------------ Nurit 2050 Ver 500H ------------------------ ------------------------ MANAGER CARD 7 GEN. SALE HALO 4000.00 GEN. REFUND HALO 4000.00 MAX. CASH BACK 200.00 OPERATING MODE: DEPARTMENTS YES TAX1 2.000% TAX2 3.000% TAX3 4.000%
NURIT SETUP 02/14/97 11:37 7 ------------------------ Nurit 2050 Ver 500H ------------------------ ------------------------ MANAGER CARD 7 GEN. SALE HALO 4000.00 GEN. REFUND HALO 4000.00 MAX. CASH BACK 200.00 OPERATING MODE: EDC ONLY ------------------------
000666111---333222---000000666
TTTRRROOOUUUBBBLLLEEESSSHHHOOOOOOTTTIIINNNGGG 333777
If the register should happen to be in POS mode and not CASH REGISTER mode, go into TECHNICAL UTILITIES. Before doing so, you must close your register, and make sure that there are no open batches. 1. At the “READY” prompt, press <MENU>, <9>, and <ENTER>. 2. Register will display “PASS TECH CARD”. 3. Type in password for the day (this can only be obtained by the help desk), and press
<ENTER>. 4. Register will display: “TECH UTILITIES, 1. MERCH PARAMS”. 5. Press <ENTER> . Register will display: “POS”. 6. Press <CLEAR/VOID> . Register will display: “CASH REGISTER”. 7. Press <ENTER>. Register will display: “DEPARTMENTS YES (or NO)”.
<CLEAR/VOID> will toggle between yes and no. The NURIT is asking if you will be using departments. Make your selection accordingly and press <ENTER>.
8. Register will display: “TAX1”. Type the amount of state tax and press <ENTER>. 9. Register will display: “TAX2”. If a second tax is required, type it in this field (press
<ENTER> to bypass). 10. Register will display: “TAX3”. If a third tax is required, type it in this field (press
<ENTER> to bypass). Unless you use dual tax, then you will enter in a third tax rate. 11. Register will display: “CHANGE TAX NAME?”. This is giving you the option of
changing “TAX1” to “STATE TAX” (Refer to chapter 5). If you wish to bypass this option, just press <ENTER>.
12. Register will display: “ACCEPTED”, and return to the Tech Utilities Menu. 13. Afterwards, press <CLEAR/VOID> twice to return to “READY”.
RRReeeppplllaaaccciiinnnggg PPPrrriiinnnttteeerrr PPPaaapppeeerrr 1. Open the paper roll compartment cover 2. Remove the paper roll and spool by pulling upward. Remove any paper that remains
in the feeder. 3. Mount the new paper roll on the spool. Grasp the edge of the paper and gently insert it
through the designated opening in the paper roll compartment. This opening is located between two metal plates.
4. The edge of the paper will slide in only a few millimeters. Since thermal paper is used, the register will only print on the thermal side. Be sure to feed the paper underhand.
5. Hold the paper in one hand, and with the other press the <PAPER FEED> key on the upper right hand side (next to <CLEAR/VOID>). Continue pressing this key until the paper exits the opening on the upper panel of the NURIT.
6. The PIN pad will beep and prompt the customer to enter the PIN number on the pad. 7. The terminal will dial, process, and print out a receipt.
000666111---333222---000000666
333888 NNNUUURRRIIITTT 222000555000 UUUssseeerrr MMMaaannnuuuaaalll
FFFuuullllll MMMeeemmmooorrryyy This happens when the memory in the register has filled its capacity. This is caused by an open batch to the host or an open batch to your BACKROOM PC. Because the register is not batching, the memory is filled. It is advisable that you first check with your Technical Support Desk before performing the following: 1. If register is open, close your batches by pressing <EDC UTIL>, and follow your
batching procedure. 2. If your batches are closed, and your BACKROOM PC option is turned on, the register
needs to upload to BACKROOM PC with the Bridge Program. If this does not remedy the memory problem, reset the register (8, level 7) in TECHNICAL UTILITIES, after closing and getting your Z-REPORT. You will need the assistance of the Technical Support help desk. WARNING: DOING THIS RESET WILL ERASE ANY PRIOR MEMORY, INCLUDING TRANSACTIONS, DEPARTMENTS, PLUs, AND PARAMETERS!!! THE REGISTER WILL NEED TO BE REDOWNLOADED, AND MAKE SURE THAT THE BACKROOM PC OPTION IS OFF, IF IT IS NOT NEEDED!!!
DDDeeepppaaarrrtttmmmeeennnttt MMMooodddeee AAAccctttiiivvveee WWWhhheeennn UUUnnnnnneeeccceeessssssaaarrryyy The NURIT can be operated in Department or Non-Department Mode. If a sale cannot be performed without entering any department, then the register is in Department Mode. Again to check this option, an EDC SETUP REPORT can be printed. The SETUP REPORT will show if it is in Department mode or not (Refer to the SETUP REPORTS displayed previously). To turn off the Department Mode when on, go into TECHNICAL UTILITIES, 1. MERCH PARAMS. Remember, the register must first be closed before accessing this submenu.
DDDeeepppaaarrrtttmmmeeennnttt MMMooodddeee IIInnnaaaccctttiiivvveee WWWhhheeennn NNNeeeeeedddeeeddd If a sale can be done without entering any departments, then the register is in Non-Department Mode. Again, if the Department Mode needs to be turned on, follow the same directions above. Remember to close register and all batches before doing this.
LLLiiinnneee DDDiiissscccooonnnnnneeecccttt This response is usually given when the phone line is not connected to a wall jack. This should be checked, as well as the phone line itself. If it happens to be connected, then try another wall jack.

000666111---333222---000000666
TTTRRROOOUUUBBBLLLEEESSSHHHOOOOOOTTTIIINNNGGG 333999
NNNooo AAAnnnssswwweeerrr///BBBuuusssyyy RRReeetttrrryyy This response is given when an exchange prefix is needed to dial an outside line. If one is not needed, then there may be one entered when not needed. To enter or remove an exchange prefix, follow this procedure: 1. At the “READY” prompt, press <MENU>, and then <5>. 2. Register will display: “UPDATE MENU: 5. PHONE INFO”. 3. Press <ENTER>. Register will display: “EXCHANGE PREFIX”. 4. Enter the exchange prefix needed and then press <ENTER>. If there is an exchange
prefix, and it is not needed, press <CLEAR/VOID> and then <ENTER>. 5. Register will display: “1-TELEPHONE LINE, 2-CELLULAR”. 6. Select whichever is applicable, by pressing <1> or <2>. 7. Register will then display: “CREDIT HOST” (and the phone number). 8. Press <ENTER> after each phone number and baud rate, until you return back to
“UPDATE MENU”. Then press <CLEAR/VOID>.
NNNooo LLLiiinnneee The following is a list of things to check after getting this response: 1. Register not connected to a phone line 2. Register phone line is in use (register should be on a dedicated phone line).
PPPLLLUUU NNNooottt FFFooouuunnnddd If the NURIT displays this message after scanning an item or entering in manually, the following should be checked. • View PLUs and make sure PLU is in the register 1. To view PLUs, press <MENU>, <@/FOR> and <ENTER>. 2. Register will display: “PROGRAMMING, 1. RECEIPT TRAILER”. 3. Press <7>, and then <ENTER>. Register will display a few options. Select
the one needed. • If the PLU is listed, then go into “TECHNICAL UTILITIES, 7. OPTIONS”. 1. Press <ENTER>. You will need a password for this operation. 2. Scroll with the <DSCNT> key to “ACCEPT PLU LAST DIGIT” and press
<CLEAR/VOID> at this option. 3. Press <MENU> to exit the menu, and then press <CLEAR/VOID> to
return to the “READY” prompt. Try scanning the item again.
000666111---333222---000000666
444000 NNNUUURRRIIITTT 222000555000 UUUssseeerrr MMMaaannnuuuaaalll
SSSeeetttuuuppp RRReeevvviiieeewww To review how a particular NURIT is set up, press <3> in the TECHNICAL UTILITIES menu. The EDC SETUP REPORT includes the following: 1. Manager Card Number 2. General Halo Amount 3. Operating Mode (POS, Cash Register
with or without departments) 4. Tax Rate 5. Security Levels 6. Credit Host Setup
7. Debit Host Setup 8. Check Host Setup 9. Available Options 10. Hardware Version 11. Software Version 12. Service Computer Phone Numbers
SSSeeecccuuurrriiitttyyy LLLeeevvveeelll CCChhhaaannngggeee The NURIT has the ability to ask for a manager card on specific operations for security reasons. If security levels need to changed, it can be done in TECHNICAL UTILITIES, #6 SECURITY LEVELS. The following is a list of functions that can have a security level added on: 1. Employee Clock 2. Open Bank Amount 3. Cashier Change 4. General Refund 5. Open Drawer 6. Open Register 7. NURIT Def. 8. Reg. Tmp. Close 9. Clock Menu 10. X Report 11. Z Report 12. Close Register 13. Modem/Drct Switch
14. PLU Editor 15. Paid Out 16. Auto Answer 17. Tax Shift 18. Programming 19. Reports 20. Cancel Operation 21. PC Communication 22. Over Limit 23. Batch Util. 24. Layaway 25. Load to Bridge
When setting the security levels, press <CLEAR/VOID> to toggle between No Security, Employee Card, and Manager Card. When done, press <DSCNT> to scroll to the next security level. When completely done, press <ENTER>.

000666111---333222---000000666
DDDOOOWWWNNNLLLOOOAAADDDIIINNNGGG 444111
AAA PPP PPP EEE NNN DDD III XXX BBB
DDDOOOWWWNNNLLLOOOAAADDDIIINNNGGG
DDDooowwwnnnllloooaaadddiiinnnggg PPPrrroooccceeeddduuurrreeesss NURIT 2050 Application Download 1. At the “READY” prompt, press <CASH>, <REFUND>, <CREDIT CARD>, and
<FORCED SALE>. All four keys must be pressed simultaneously. Screen will go blank - let go of the four keys.
2. Register will display: “MAIN MENU: 1. RUN PROGRAM>”. 3. Press <2> . Register will display: “MAIN MENU: 2. DOWNLOAD>”. 4. Press <ENTER> . Register will display: “MERCHANT CARD”. 5. Swipe manager card. Register will display: “KB CLICK Y/N”. 6. Press <ENTER> . Register will display: “DOWNLOAD MENU: 1. LOAD>”. 7. Press <2>. Register will display: “DOWNLOAD MENU: 2. VIA MODEM>”. If
downloading by direct cable, press <ENTER>, and select number <2>, and <ENTER>.
8. Press <3> . Baud rate should be 2400 for modem, and 9600 for direct wire. 9. Press <4>. Register will display: “DOWNLOAD MENU: 4. PHONE (MODEM)”. 10. Press <ENTER>. Register will display: “PHONE NUMBER”. 11. Type in modem phone number and press <ENTER>. 12. Press <1>, and <ENTER>.
NOTE: The application download will take approximately 45 to 60 minutes. After the application download is finished, the NURIT 2050 will require an additional 30 second download for the parameters.

000666111---333222---000000666
444222 NNNUUURRRIIITTT 222000555000 UUUssseeerrr MMMaaannnuuuaaalll
NURIT 2050 Parameter Download This download will reprogram all the host and merchant information. If this download is done after an application download, skip steps #6 to #11. 1. At the “READY” display, press <MENU>, and then <9>. 2. Register will display: “UPDATE MENU: 9. TECH UTILITIES”. 3. Press <ENTER>. Register will display: “PASS TECH CARD”. 4. Swipe Tech card, or enter password. 5. Register will display: “TECH UTILITIES: 1. MERCH PARAMS”. 6. Press <8>. Register will display: “TECH UTILITIES 8. DATA RESET”. 7. Press <ENTER>. Register will display: “LEVEL ?”. 8. Press <6>, and <ENTER>. Register will display: “ENTER JOURNAL #”. 9. Enter the correct journal number, and press <ENTER>. 10. Register will reset, drawer will pop open, and the “READY” prompt will be
displayed. 11. Repeat steps #1 through #5. 12. Press <0>. Register will display: “TECH UTILITIES 0. SYSTEM IDENT”. 13. Press <ENTER>. Register will display: “MERCHANT CARD”. 14. Swipe manager card. Register will display: “SERVICE COMPUTER”. 15. Type in modem phone number and press <ENTER>. If using direct wire, just press
<ENTER>. 16. Press <CLEAR/VOID> twice and register will return to “READY” prompt. 17. Press <PC COMM>, and then <ENTER>.
000666111---333222---000000666
DDDOOOWWWNNNLLLOOOAAADDDIIINNNGGG 444333
THIS PAGE LEFT BLANK INTENTIONALLY

000666111---333222---000000666
444444 NNNUUURRRIIITTT 222000555000 UUUssseeerrr MMMaaannnuuuaaalll
AAA PPP PPP EEE NNN DDD III XXX CCC
KKKEEEYYYBBBOOOAAARRRDDD NURIT 2050 Keyboard for Application 4.00

000666111---333222---000000666
KKKEEEYYYBBBOOOAAARRRDDD 444555
NURIT 2050 Keyboard for Application 5.00 (to be released March 1997)

000666111---333222---000000666
444666 NNNUUURRRIIITTT 222000555000 UUUssseeerrr MMMaaannnuuuaaalll
AAA PPP PPP EEE NNN DDD III XXX DDD
RRREEESSSTTTAAAUUURRRAAANNNTTT The restaurant application for the NURIT 2050 can work in several different modes; reference numbers, and/or server numbers. The following procedures will explain their use:
RRReeeggguuulllaaarrr SSSaaallleeesss OOOpppeeerrraaatttiiiooonnn A sales operation is performed the same as explained in Chapter 1.
SSSaaallleeesss OOOpppeeerrraaatttiiiooonnn WWWiiittthhh AAAnnn OOOpppeeennn TTTaaabbb This feature allows you to start a transaction, and call it back later. When it is called back, the server may add on items, print a receipt, or make payment. To process this sale follow these steps: 1. After entering the first few items, press <SHIFT/DEPOSIT>. This key must be
pressed before, or at the “SUBTOTAL” prompt. 2. To recall, the transaction press <ENTER/SBTL>. 3. Register will display: “TRANS #”. Enter the transaction number you want to recall. 4. Register will display: “1. ITEMS, 2. PAYM. 3. PRINT, 4. CANCEL”.
“ITEMS”- allows adding on items to tab “PAYM” - allows making payment on tab “PRINT” - allows printing total transaction receipt with tab amount “CANCEL” - allows canceling a transaction
EEEnnnttteeerrriiinnnggg TTTiiipppsss There are several ways of entering tips for transactions. They are as follows: 1. At the “READY” prompt, press <OVERRIDE/TIP>. 2. Register will display: “1. TRANS#, 2. ALL, 3. SERVER #, 4. OPEN”.
“TRANS#” - allows entering tips by transaction number “ALL” - allows scrolling through all credit card transactions “SERVER #” - allows scrolling through all credit card transactions for
a specific server “OPEN” - allows scrolling through opened credit card transactions
only. Open transactions refers to credit card transactions missing tip amounts
3. Select the option you prefer, and follow the prompts.
000666111---333222---000000666
RRREEESSSTTTAAAUUURRRAAANNNTTT 444777
By Transaction Number 1. At the “READY” prompt, press <OVERRIDE/TIP>. 2. Register will display: “1. TRANS#, 2. ALL, 3. SERVER #, 4. OPEN”. 3. Press <1>. Register will display: “ENTER TRANS #”. 4. Type in the transaction number, and press <ENTER>. 5. Register will display: “ENTER TIP”. 6. Type in the tip amount, and press <ENTER> 7. Register will display: “1. TRANS#, 2. ALL, 3. SERVER #, 4. OPEN”. By Scrolling This procedure is used for options #2, #3, and #4. 1. At the “READY” prompt, press <OVERRIDE/TIP>. 2. Register will display: “1. TRANS#, 2. ALL, 3. SERVER #, 4. OPEN”. 3. Press <2>, <3>, or <4>. Register will display the transaction number, and total
amount. 4. To scroll the transactions, use the <DSCNT> and <PLU> keys. 5. When you see the transaction that needs a tip entered, press <ENTER>. 6. Register will display: “ENTER TIP”. 7. Type in the tip amount, and press <ENTER>. 8. Register will display the same transaction, with the tip amount. 9. Press <CLEAR/VOID> when done entering tips.
NOTES:
* During closing, or batching procedures, the register will display: “CAN’T CLOSE, OPENED TRANSACTIONS”. Press <ENTER>, and close transaction by entering tips. When all transactions are closed, register will continue closing procedure.
* All transactions must have a tip entered in, to close transaction. If there is no tip, enter in 0.00 tip amount.
* If you are using reference and server numbers, the register will prompt you for this information, when needed. Type in number and continue with transaction.