table of content - seminar topics : computer science, it
TRANSCRIPT

Table of content
1. Introduction to Android ……………………………………………… 3
2. Early History …………………………………………………………. 4
3. OHA …………………………………………………………………… 4
4. Members of OHA …………………………………………………….. 5
5. What is Android ……………………………………………………… 7
6. A look of OHA on Android …………………………………………. 8
Openness ……………………………………………………………… 8
All application are created equal ……………………………………. 8
Breaking down application boundary ………………………………. 9
Fast and easy development …………………………………………… 9
Android is appealing for developers ………………………………… 9
Android is future rich ………………………………………………… 10
7. Software stack of Android ……………………………………………. 11
The Application Layers …………………………………………….... 11
The Application framework …………………………………………. 11
The Libraries …………………………………………………………. 11
The Kernel ……………………………………………………………. 12
8. Some more features ………………………………………………….. 13
9. Another software stack of android ………………………………….. 14
Runtime ………………………………………………………………. 14
Core Libraries ……………………………………………………….. 14
Delvik Virtual Machine …………………………………………… 14
10. Anatomy Of Android Application ………………………………….. 14
Activity ……………………………………………………………….. 16
Intent/Intent Filters …………………………………………………. 17
Intent Receiver ………………………………………………………. 18
Service ………………………………………………………………… 18
Content Provider …………………………………………………….. 19
11. Android UI …………………………………………………………… 19
Website : http://www.svminfotech.com 1

12. Hierarchy of screen elements ……………………………………….. 20
Views ………………………………………………………………….. 20
Viewgroups …………………………………………………………… 21
A tree structure UI …………………………………………………… 21
13. The Android XML file ……………………………………………….. 23
14. Installation of Android ………………………………………………. 27
Downloading and Installing JRE ……………………………………. 29
Downloading and Installing Eclipse IDE ............................................ 32
Downloading and Installing Eclipse Plugin ………………………… 36
Configuring Android plugin for Eclipse ……………………………. 41
Creating virtual Device ………………………………………………. 42
15. Versions of Android …………………………………………………… 45
16 Features of Android SDK ……………………………………………… 46
17 Creating Android Application ………………………………………… 48
18 Creating HelloAndroid in Eclipse …………………………………….. 49
Website : http://www.svminfotech.com 2
An Introduction To Android
Website : http://www.svminfotech.com 3

“There should be nothing that users can access on their desktop that they can’t access on their cell phone.”
Andy Rubin
This statement given by Andy Rubin, Google’s director of mobile
platforms, reflects exactly the goal of the Android mobile stack (a
stack inculdes a mobile operating system, middle ware and
applications). Android is intended to revolutionize the mobile market
by bringing the internet to the cell phone and allowing its use in the
same way as on the PC.
Early History
Android, Inc. was founded in Palo Alto, California, United States in October, 2003 by
Andy Rubin, Rich Miner , Nick Sears (once VP at T-Mobile), and Chris White
(headed design and interface development at WebTV).to develop, in Rubin's words
"smarter mobile devices that are more aware of its owner's location and
preferences."
Despite the obvious past accomplishments of the founders and early employees,
Android Inc. operated secretively, admitting only that it was working on software for
mobile phones.
In July, 2005 google acquired android.
OHA
In November 2007, a business alliance called Open Handset Alliance(OHA) lead by
google. OHA,a business alliance of 80 firms to develop open standard for mobile
devices. Members of OHA include Google, HTC, Sony, Dell, Intel, Motorola,
Qualcomm, Texas Instruments, Samsung, LG, T-Mobile, Nvidia and Wind
RiverSystems.
The Open Handset Alliance released the Google Android SDK on November 12th,
2007, having announced it about a week before.
Website : http://www.svminfotech.com 4

Members of OHA
Following are the members of OHA
Mobile Operators
• China Mobiles
• KDDI Corpotation
• NTT DoCoMo
• Sprint Nextel
• T-Mobile
• Telecom Italia
• Telefonika
Software Companies
• Ascender Corporation
• eBay
• Esmertec
• LivingImage
• NMS Communications
• Pocket Video
• SkyPop
• Sonivox
Mobile Operators
• China Mobiles
• KDDI Corpotation
• NTT DoCoMo
• Sprint Nextel
• T-Mobile
• Telecom Italia
Website : http://www.svminfotech.com 5

• Telefonika
Software Companies• Ascender Corporation
• eBay
• Esmertec
• LivingImage
• NMS Communications
• Pocket Video
• SkyPop
• Sonivox
Commercialisation
• Aplix
• Noser Engineering
• The Astounding Tribe
• Wind River Sstem
Handset Manufacturers
• HTC
• LG
• Samsung Electronics
• Motorola
Semiconductor Companies
• Audience
• Broadcom Corporation
• Intel Corporatin
• Marvell Tecnology Group
• Nvidia Corporation
• Qualcomm Website : http://www.svminfotech.com 6

• SiRF Technology Holdings
• Synaptics
• Texas Instrument
What is Android
The term “Android” has its origin in the Greek word andr-, meaning “man or male” and the suffix -eides, used to mean “alike or of the species”. This together means as much as “being human
Android is a software platform and operating system for mobile devices, based on the
Linux operating system, developed by Google and later the Open Handset Alliance. It
allows developers to write managed code in a Java-like language that utilizes Google-
developed Java libraries, but does not support programs developed in native code.
Andorid is a software stack for mobile devices which means a reference to a set of
system programs or a set of application programs that form a complete system. This
software platform provides a foundation for applications just like a real working
platform.
The idea of the Android Platform was and still is amazing and is of course attracting
more and more programmers every day. Especially the open architecture based on
Intents and the possibility to replace even the Home-application grant a really large
amount of flexibility to the whole platform.
“Android – Imagination is the limit”
Google within the Open Handset Alliance (OHA) delivers a complete set of software
for mobile devices: an operating system, middleware and key mobile applications.
What was released a week later was not a final product, but a “First Look SDK” what
many did not realize. Major news sites grabbed the discomforts of some developers
who said that Android is full of bugs and heavily lacks of documentation. But the
majority says that Android is not buggier than any other software at this stage.
Website : http://www.svminfotech.com 7

Let’s take a look at what the OHA emphasizes on its Android Platform:
Openness
“Android was built from the ground-up to enable developers to create compelling
mobile applications that take full advantage of all a handset has to offer. It is built to
be truly open. For example, an application could call upon any of the phone's core
functionality such as making calls, sending text messages, or using the camera,
allowing developers to create richer and more cohesive experiences for users.”
This is true, as a developer you can do everything, from sending short messages with
just 2 lines of code, up to replacing even the HOME-Screen of your device. One could
easily create a fully customized operating system within weeks, providing no more of
Google’s default application to the user.
“Android is built on the open Linux Kernel. Furthermore, it utilizes a custom virtual
machine that has been designed to optimize memory and hardware resources in a
mobile environment. Android will be open source; it can be liberally extended to
incorporate new cutting edge technologies as they emerge. The platform will continue
to evolve as the developer community works together to build innovative mobile
applications.”
All applications are created equal
“Android does not differentiate between the phone's core applications and third-party
applications. They can all be built to have equal access to a phone's capabilities
providing users with a broad spectrum of applications and services. With devices
built on the Android Platform, users will be able to fully tailor the phone to their
interests. They can swap out the phone's home screen, the style of the dialer, or any of
Website : http://www.svminfotech.com 8

the applications. They can even instruct their phones to use their favorite photo
viewing application to handle the viewing of all photos.”
Once again this is all true. Developers can 100% customize their Android-Device.
The Android System Communication is based on so called Intents, which are more or
less just a String (with some data attached) which defines an action that needs to be
handled.
Breaking down application boundaries
“Android breaks down the barriers to building new and innovative applications. For
example, a developer can combine information from the web with data on an
individual's mobile phone - such as the user's contacts, calendar, or geographic
location - to provide a more relevant user experience. With Android, a developer
could build an application that enables users to view the location of their friends and
be alerted when they are in the vicinity giving them a chance to connect.”
Fast & easy application development
“Android provides access to a wide range of useful libraries and tools that can be
used to build rich applications. For example, Android enables developers to obtain
the location of the device, and allows devices to communicate with one another
enabling rich peer-to-peer social applications. In addition, Android includes a full set
of tools that have been built from the ground up alongside the platform providing
developers with high productivity and deep insight into their applications.”
All of the recent hype in the mobile industry has been around the iPhone. But with the
unveiling of the open-source, license-free mobile operating system Google Android,
that is destined to change. And why is that so?
Android is appealing to developers
• Android apps can be developed on any platform (Windows XP and Vista, Linux,
and Mac OSX) where iPhone apps can only be developed on a fairly new Mac.
Website : http://www.svminfotech.com 9

• iPhone apps require developers to learn Objective-C (which is used almost nowhere
outside Apple). But Android is Java which all mobile app developers are familiar
with.
• Anyone can develop and launch an Android app whereas Apple has strict control of
their App Store.
• Getting your iPhone app available in the App Store requires you to jump through the
hoops of an approval process which can take 2-3 months (and could be rejected for
"competing"
with a native application!) But Android apps can be available in the Android Market
instantly.
Android is feature rich • Android can support the same hardware as the iPhone: touchscreen,
accelerometer,GPS,WiFi,SMS & still camera;plus features that the iPhone doesn't
support: MMS, video camera & bluetooth
• Android has some fresh ideas like Google Maps "street view" and customisable
home page
• Unlike the iPhone, apps on an Android handset can run in parallel (eg an app
running in the background can send an alert)
• The Android platform is open source and extensible by the developer community
where as the iPhone is controlled by Apple.
Website : http://www.svminfotech.com 10

Software stack. of Android –
The software stack has divided in four different layers.
• The application layer
The Android software platform will come with a set of
basic applications like browser, email client, SMS program,
maps, calendar, contacts and many more. All these
applications are written using the Java programming
language. It should be mentioned that applications can be run
simultaneously, it is possible to hear music and read an email
at the same time. This layer will mostly be used by commonly
cell phone users.
• The application framework
An application framework is a software framework that
is used to implement a standard structure of an application for
a specific operating system. With the help of managers,
content providers and other services programmers it can
reassemble functions used by other existing applications.
• The libraries
The available libraries are all written in C/C++. They will
be called through a Java interface. These includes the Surface
Manager (for compositing windows), 2D and 3D graphics, Website : http://www.svminfotech.com 11
Media Codecs like MPEG-4 and MP3, the SQL database SQLite
and the web browser engine WebKit.
• The kernel
The Linux Kernel will be used by Android for its device
drivers, memory management, process management and
networking.
The following diagram shows the major component of Android Operating
system listed above.
Website : http://www.svminfotech.com 12

Figure: Major component of Android Operating System
Android offers many features cover many areas such as application
development, internet, media and connectivity. Some of the most
important ones are presented in the following list
• Application framework enabling reuse and replacement of
components.
• Dalvik virtual machine optimized for mobile devices
• Integrated browser based on the open source WebKit engine
Website : http://www.svminfotech.com 13

• Optimized graphics powered by a custom 2D graphics library,
3D graphics based on the OpenGL ES 1.0 specification
(hardware acceleration optional)
• SQLite for structured data storage
• Media support for common audio, video, and still image
formats( MPEG4, H.264, MP3, AMR, JPG. PNG, GIF)
• GSM Telephony (hardware dependent)
• Bluetooth, EDGE, 3G, and WiFi (hardware dependent)
• Camera, GPS, compass, and accelerometer (hardware
dependent)
• Rich development environment including a device emulator,
tools for debugging memory and performance profiling, and
plugin for the Eclipse IDE
The another software stack of android is Runtime
• Runtime
There are two parts of Android Runtime Stack.
Website : http://www.svminfotech.com 14
• Core Libraries
Providing most of the functionality available in the core
libraries of the Java language.
APIs
Data Structures
Utilities
File Access
Graphics
Etc.
• Delvik Vertual Machine(DVK)
Providing environment on which every Android application runs.
Each Android application runs in its own process, with its
own instance of the Dalvik VM.
Dalvik has been written so that a device can run multiple
VMs efficiently.
Register based virtual machine
In the words “register based” we find the first difference to
normal Java virtual machines (JVM) which are stack based.
It is an interpreter-only virtual machine that executes files in the
Dalvik Executable (*.dex) format, a format that is optimized for
efficient storage and memory-mappable execution .
Website : http://www.svminfotech.com 15

.dex format is optimized for minimal memory footprint.
Compilation
Relying on the Linux Kernel for:
Threading
Low-level memory management
Anatomy of an Android Application
Website : http://www.svminfotech.com 16

There are four building blocks to an Android application
• Activity - a single screen
• Intent Receiver - to execute in reaction to an external event
• Service - code that is long-lived and runs without a UI
• Content Provider - an application's data to be shared with other applications
Activity
Activities are the most common of the four Android building blocks. An
activity is usually a single screen in your application. Each activity is implemented as
a single class that extends the Activity base class. Your class will display a user
interface composed of Views and respond to events. Most applications consist of
multiple screens. For example, a text messaging application might have one screen
that shows a list of contacts to send messages to, a second screen to write the message
to the chosen contact, and other screens to review old messages or change settings.
Each of these screens would be implemented as an activity. Moving to another screen
is accomplished by a starting a new activity.
In some cases an Activity may return a value to the previous activity – for
example an activity that lets the user pick a photo would return the chosen photo to
the caller.
When a new screen opens, the previous screen is paused and put onto a history
stack. The user can navigate backward through previously opened screens in the
history. Screens can also choose to be removed from the history stack when it would
be inappropriate for them to remain. Android retains history stacks for each
application launched from the home screen.
Intent/Intent filters
` Android uses a special class called Intent to move from screen to screen.
Intent describe what an application wants done. The two most important parts of the Website : http://www.svminfotech.com 17

intent data structure are the action and the data to act upon. Typical values for action
are MAIN (the front door of the application), VIEW, PICK, EDIT, etc. The data is
expressed as a Uniform Resource Indicator (URI). For example, to view a website in
the browser, you would create an Intent with the VIEW action and the data set to a
Website-URI.
There is a related class called an IntentFilter. While an intent is effectively a
request to do something, an intent filter is a description of what intents an activity (or
intent receiver, see below) is capable of handling. An activity that is able to display
contact information for a person would publish an IntentFilter that said that it knows
how to handle the action VIEW when applied to data representing a person. Activities
publish their IntentFilters in the AndroidManifest.xml file.
Navigating from screen to screen is accomplished by resolving intents. To
navigate forward, an activity calls startActivity(myIntent). The system
then looks at the intent filters for all installed applications and picks the activity
whose intent filters best matches myIntent. The new activity is informed of the
intent, which causes it to be launched. The process of resolving intents happens at run
time when startActivity is called, which offers two key benefits:
• Activity can reuse functionality from other component simply by making a
request in the form of an Intent.
• Activities can be replaced at any time by a new activity with an equivalent
IntentFilter.
Intent Reciver
We can use an IntentReceiver when you want code in your application to
execute in reaction to an external event, for example, when the phone rings, or when Website : http://www.svminfotech.com 18

the data network is available, or when it's midnight. Intent receivers do not display a
UI, although they may display Notifications to alert the user if something
interesting has happened. Intent receivers are also registered in
AndroidManifest.xml, but you can also register them from code using
Context.registerReceiver(). Your application does not have to be running
for its intent receivers to be called; the system will start your application, if necessary,
when an intent receiver is triggered. Applications can also send their own intent
broadcasts to others with Context.broadcastIntent()
Service
A Service is code that is long-lived and runs without a UI. A good example of this
is a media player playing songs from a play list. In a media player application, there
would probably be one or more activities that allow the user to choose songs and start
playing them. However, the music playback itself should not be handled by an
activity because the user will expect the music to keep playing even after navigating
to a new screen.
In this case, the media player activity could start a service using
Context.startService() to run in the background to keep the music going.
The system will then keep the music playback service running until it has finished.
(You can learn more about the priority given to services in the system by reading Life
Cycle of an Android Application.) Note that you can connect to a service (and start it
if it's not already running) with the Context.bindService() method. When
connected to a service, you can communicate with it through an interface exposed by
the service. For the music service, this might allow you to pause, rewind, etc.
Content Provider
Website : http://www.svminfotech.com 19

Applications can store their data in files, a SQLite database, preferences or any other
mechanism that makes sense. A content provider, however, is useful if you want your
application's data to be shared with other applications. A content provider is a class
that implements a standard set of methods to let other applications store and retrieve
the type of data that is handled by that content provider.
Android User Interface(UI)
User Interfaces (UI) in Android can be built within two ways, by defining XML-Code
or by writing Java-Code. Defining the GUI structure in XML is highly preferable,
because as one knows from the Model-Viewer-Control principle that the UI should
always be separated from the program-logic. Additionally adapting a program from
one screen-resolution to another is a lot easier. Defining a UI in XML is very similar
to creating a common HTML-document, where you have i.e. such a simple file:
<html>
<head>
<title>Page Title</title>
</head>
<body>
The content of the body element.
</body>
</html>
Just the same as in Android’s XML-Layouts. Everything is well structured and can be
expressed by tree-structures:
Website : http://www.svminfotech.com 20

<?xml version="1.0" encoding="utf-8"?>
<LinearLayout
xmlns:android=http://schemas.android.com/apk/res/android
android:orientation="vertical"
android:layout_width="fill_parent"
android:layout_height="fill_parent">
<TextView
android:layout_width="wrap_content"
android:layout_height="wrap_content"
android:text="Hello World"/>
</LinearLayout>
Hierarchy of Screen Elements
The basic functional unit of an Android application is the activity-an object of the
class android.app.Activity. An activity can do many things, but by itself it
does not have a presence on the screen. To give your activity a screen presence and
design its UI, you work with views and viewgroups - basic units of user interface
expression on the Android platform.
Views
A view is an object extending the base class android.view.View. It's a data
structure whose properties store the layout and content for a specific rectangular area
of the screen. A View object handles measuring, its layout, drawing, focus changes,
scrolling, and key/gestures for the screen area it represents.
The View class serves as a base class for all widgets - a set of fully implemented
subclasses that draw interactive screen elements. Widgets handle their own measuring
and drawing, so you can use them to build your UI more quickly. The list of widgets
available includes i.e. TextView, EditText, Button, RadioButton, Checkbox,
ScrollView, …
Website : http://www.svminfotech.com 21

Viewgroups
A viewgroup is an object of class android.view.Viewgroup. As its name
indicates, a viewgroup is a special type of view object whose function is to contain
and manage a subordinate set of views and other viewgroups, Viewgroups let you add
structure to your UI and build up complex screen elements that can be addressed as a
single entity.
The Viewgroup class serves as a base class for layouts - a set of fully implemented
subclasses that provide common types of screen layout. The layouts give you a way to
build a structure for a set of views.
A Tree Structure UI
On the Android platform, you define an Activity's UI using a tree of view and
viewgroup nodes, as shown in the diagram below. The tree can be as simple or
complex as you need to make it, and you can build it up using Android's set of
predefined widgets and layouts or custom view types that you create yourself.
Picture : Android UI – Tree Structure
Website : http://www.svminfotech.com 22

To attach the tree to the screen for rendering, your Activity calls its
setContentView() method and passes a reference to the root node object. Once
the Android system has the reference to the root node object, it can work directly with
the node to invalidate, measure, and draw the tree. When your Activity becomes
active and receives focus, the system notifies your activity and requests the root node
to measure and draw the tree. The root node then requests that its child nodes draw
themselves - in turn, each viewgroup node in the tree is responsible for drawing its
direct children.
// Android
myView.setOnClickListener(new OnClickListener(){ ...
//
Swing
myButton.addActionListener(new ActionListener() {...
Website : http://www.svminfotech.com 23

The AndroidManifest.XML file
Before the Android system can start an application component, the system must know
that the component exists by reading the application's AndroidManifest.xml file (the
"manifest" file). Your application must declare all its components in this file, which
must be at the root of the application project directory.
The manifest does a number of things in addition to declaring the application's
components, such as:
• Identify any user permissions the application requires, such as Internet access
or read-access to the user's contacts
• Declare the minimum API Level required by the application, based on which
APIs the application uses.
• Declare hardware and software features used or required by the application,
such as a camera, bluetooth services, or a multitouch screen.
• API libraries the application needs to be linked against (other than the Android
framework APIs), such as the Google Maps library.
Besides declaring our application's Activities, Content Providers, Services, and
Intent Receivers, we can also specify permissions in AndroidManifest.xml.
Website : http://www.svminfotech.com 24

A very simple AndroidManifest.XML looks like this :
<manifest xmlns:android=http://schemas.android.com/apk/res/android
package="org.anddev.android.hello_android">
<application android:icon="@drawable/icon">
<activity android:name=".Hello_Android"
android:label="@string/app_name">
<intent-filter>
<action android:name="android.intent.action.MAIN" />
<category
android:name="android.intent.category.LAUNCHER" />
</intent-filter>
</activity>
</application>
</manifest>
What follows is a detailed list of the structure of an AndroidManifest file,
describing all available <tags>
Let’s discuss about each tag of AndroidManifet file
<manifest>
This is the root node of each AndroisManifest.xml. It contains the package-attribute,
which points to any package in out Activity.
<uses-permission> Describes a security permission, which your package must be granted in order for it to
operate correctly (i.e. when you want to send SMS or use the Phone-Contacts). The
permissions get granted by the user during installation of your application.
<permission> Declares a security permission that can be used to restrict which applications can
access components or features in your (or another) package.
Website : http://www.svminfotech.com 25

<instrumentation>
Declares the code of an instrumentation component that is available to test the
functionality of this or another package. See Instrumentation for more details.
<application> Root element containing declarations of the application-level components contained
in the package. This element can also include global and/or default attributes for the
application, such as a label, icon, theme, required permission
<activity> An Activity is the primary thing for an application to interact with the user. The initial
screen the user sees when launching an application is an activity, and most other
screens they use will be implemented as separate activities declared with additional
activity tags.
Note: Every Activity must have an <activity> tag in the manifest
whether it is exposed to the world or intended for use only within its own package. If
an Activity has no matching tag in the manifest, you won't be able to launch it.
<intent-filter> Declares what kind of Intents a component supports. In addition to the various kinds
of values that can be specified under this element, attributes can be given here to
supply a unique label, icon, and other information for the action being described.
<action> An action-type that the component supports.
<category> A category-type that the component supports.
<data> An MIME type, URI scheme, URI authority, or URI path that the component
supports. You can also associate 1+ pieces of meta-data with your activity:
Website : http://www.svminfotech.com 26

<meta-data> Adds a new piece of meta data to the activity, which clients can retrieve through
ComponentInfo.metaData.
<receiver> An IntentReceiver allows an application to be told about changes to data or actions
that happen, even if it is not currently running. As with the activity tag, you can
optionally include 1+ <intent-filter> elements that the receiver supports or <meta-
data> values, just all the same as with <activity>.
<service> A Service is a component that can run in the background for an arbitrary amount of
time. As with the activity tag, you can optionally include one or more <intent-filter>
elements that the service supports or <meta-data> values; see the activity's <intent-
filter> and <meta-data> descriptions for more information.
<provider>
A ContentProvider is a component that manages persistent data and publishes it for
access by other applications. You can also optionally attach one or more <meta-data>
values, as described in the activity's <meta-data> description.
Website : http://www.svminfotech.com 27

Installation of Android
Website : http://www.svminfotech.com 28

For installing Android to our system we have to download and install the
Eclipse IDE.
Android applications are developed in Java. Android itself is not a language, but
rather an environment within which to run applications. As such, we can theoretically
use any distribution or integrated development environment (IDE) you have at your
disposal to begin your development.
If you are more comfortable with one Java IDE over any other, such as JBuilder by
Borland or the open source NetBeans, feel free to use it. However, the Open Handset
Alliance and Google do endorse one Java IDE over any others: Eclipse
Before installing Eclipse a question occurs in our mind that why we use Eclipse.
So there are following reasons why we are using Eclipse. These are :
• In keeping with the Open Handset Alliance’s theme of truly opening the mobile
development market, Eclipse is one of the most fully featured, free, Java IDEs
available. Eclipse is also very easy to use, with a minimal learning curve. This
makes Eclipse a very attractive IDE for solid, open Java development.
• The Open Handset Alliance has released an android plugin for Eclipse that allows
us to create Android-specific projects, compiling them, and use the Android
Emulator to run and debug them. These tools and abilities will prove invaluable
when we are creating our first Android apps. We can still create Android apps in
other IDEs, but the Android plugin for Eclipse creates certain setup elements-
such as files and compiler settings for us.
.
Website : http://www.svminfotech.com 29

Downloading and installing JRE
Before we start downloading and installing Eclipse we have to make sure that we
have Java Runtime Environment(JRE) downloaded and installed in our machine.
Because Eclipse as an application was written in java, it requires the JRE to run. If
JRE is not installed or is not detected, we will see the following error, if we try to
open Eclipse environment.
If you are an existing Java developer and already have Java installed on yourcomputer, you will still want to follow along here, just to be sure you have the correct version of the JRE installed.
Note : Most people who have used the Web, or applications that are web-based, have the JRE installed. The JRE allows us to run Java-based applications, but it does not allow us to create them. To create Java applications, we need to download and install the Java Development Kit (JDK), which contains all the tools and libraries needed to create Java applications. If we are not familiar with Java, keep these differences in mind. For the examples in this book, we will be downloading the JDK, because it also includes the JRE.
Website : http://www.svminfotech.com 30

For downloading the JDK
Navigate
http://www.oracle.com/technetwork/java/javase/downloads/index.html
And we will see the following page to download JDK
Figure : Download page for downloading JDK
Website : http://www.svminfotech.com 31

If you are downloading to a Microsoft Windows environment, when you see the notification in the following illustration, click Run to begin the installation of the JDK.
If you want to have a copy of the JDK then click on the save button, and after saving run it to your machine.
During the installation process, you will be prompted to read and accept the License Agreement, shown next. After agreeing to the standard License Agreement and clicking Next, you will be able to select your custom setup options.
Website : http://www.svminfotech.com 32

To keep the process simple, and fairly standardized, you should accept the suggested
packages—by default everything is selected—and continue the installation by
clicking Next. Once again, if you are comfortable with making specific changes, feel
free to do so. However, if you have trouble in later chapters, you will want to modify
your installation options. When the Installation Completed page appears, shown in the
following illustration, click Finish and your installation should be completed.
Once we complete the Java JDK installation—and by default the JREInstallation we can begin to install Eclipse.
Downloading and installing Eclipse
For downloading Eclipse navigate :
http://www.eclipse.org/downloads/
Website : http://www.svminfotech.com 33
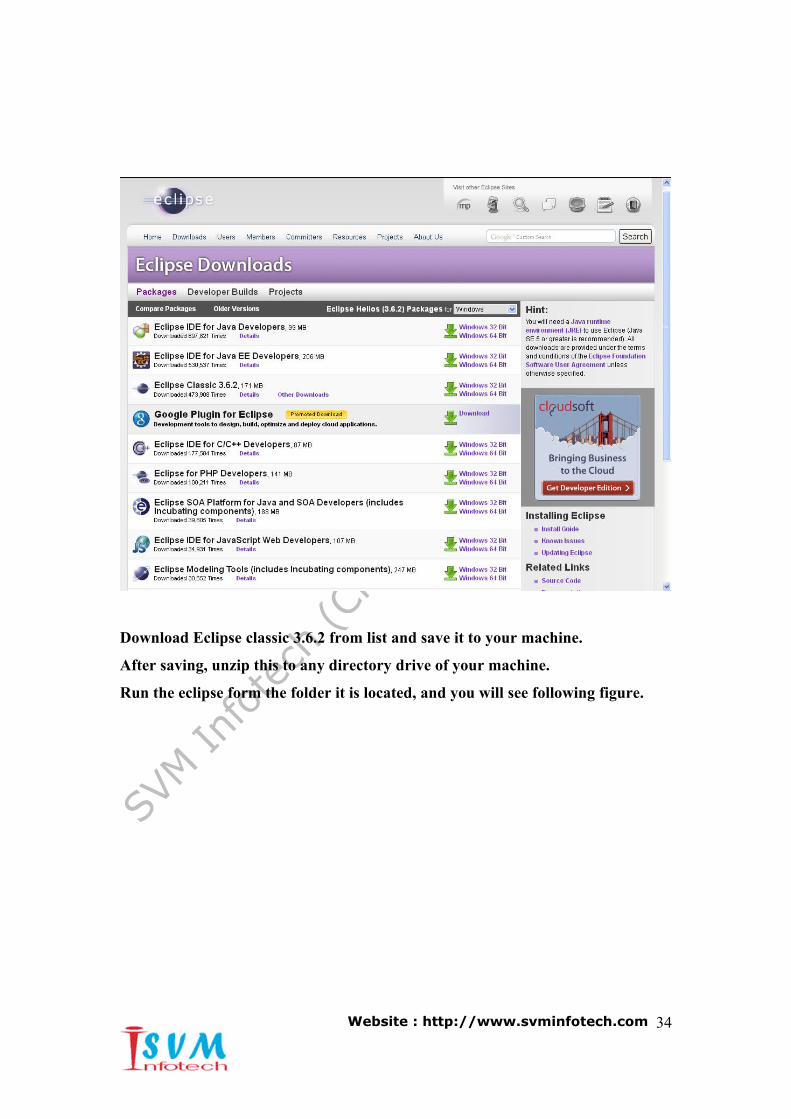
Download Eclipse classic 3.6.2 from list and save it to your machine.
After saving, unzip this to any directory drive of your machine.
Run the eclipse form the folder it is located, and you will see following figure.
Website : http://www.svminfotech.com 34

Once it starts then it will ask to create workspace to your system. Where it will
save your all projects by default. For making workspace the following screen will
come
After you select a location for your workspace, click OK.
At this point, your development environment is downloaded and installed. While the
installation of Eclipse seemed deceivingly quick, you still need to do some
configuration work before you can create your first Android project. Much of the
configuration work that you need to do centers on the Android SDK and the Android
plugin for Eclipse. Website : http://www.svminfotech.com 35

Downloading SDK and Android plugin for Eclipse.
The android SDK can be download from the following URL
http://developer.android.com/sdk/index.html
After clicking it following page will open to the screen.
Website : http://www.svminfotech.com 36

Figure : Android SDK Location page
Select SDK’s latest version for your machine from the list and save the zip file to
any disk drive of your machine.
Unzip the zip folder at any location.
There is no “setup” or installation process to speak of for the Android SDK; rather,
you must follow a series of steps to associate the SDK with your Eclipse development
environment. The first of these steps is to obtain the Android plugin for Eclipse, after
which you will configure it.
Click on SDK manager from android-sdk folder. After clicking on it this will
start downloading SDK Release for android till date.
This may take time depending on your internet connection speed.
Downloading and installing Eclipse Plugin Website : http://www.svminfotech.com 37

You can install plugin by two steps.
1. By giving the location of ADT Plugin from Eclips SDK
We can install it by Step by step.
2. Go to help menu of Eclips and click install new software
A new window will open . Write down the following URL to the work with
box., or click on add button and give the url to the box, and give the name
ADT Plugin or any thing you want.
URL : https://dl-ssl.google.com/android/eclipse/
Give Url to the work with text box or click on add button
3. After clicking on add the following screen will appear.
Give any name and url of plugin and click ok.
Website : http://www.svminfotech.com 38

4. After writing url and clicking OK a window will open
5. Click on select all button and then click on next
Eclips will start downloading plugins .
Website : http://www.svminfotech.com 39

6. Click next after processing.
A new window appears
7. Click on next and check combo box for accepting the license agreement
and then click finish.
Website : http://www.svminfotech.com 40

Clicking on finish this will start downloading application.
After this it will ask you to restart your Eclipse, click Ok.
Website : http://www.svminfotech.com 41

The another way to install ADT plugin
1. Download ADT plugin from the following url
http://developer.android.com/sdk/eclipse-adt.html#installing
and save it in your system as a zip folder.
2. Follow step 2 and 3 form previous installation
3. In step 3 instead of giving url click on archive button and give the path of
your ADT Plugin zip file and then click ok.
4. And follow steps 4-7 for remaining installation.
Configuring Android plugin for Eclipse Website : http://www.svminfotech.com 42

The Android plugin for Eclipse is configured from the Preferences window of
Eclipse. Proceed as follows:
• From the main Eclipse window, choose Window | Preferences.
• In the preference window, shown next, select Android in the menu on
the left. On the right side of window, click browse, find the location of
android SDK on your hard drive, and enter in the SDK location field.
Eclipse need this information to be able to access all the same tools
that are supplied with Android.
• Click apply and then OK.
Website : http://www.svminfotech.com 43
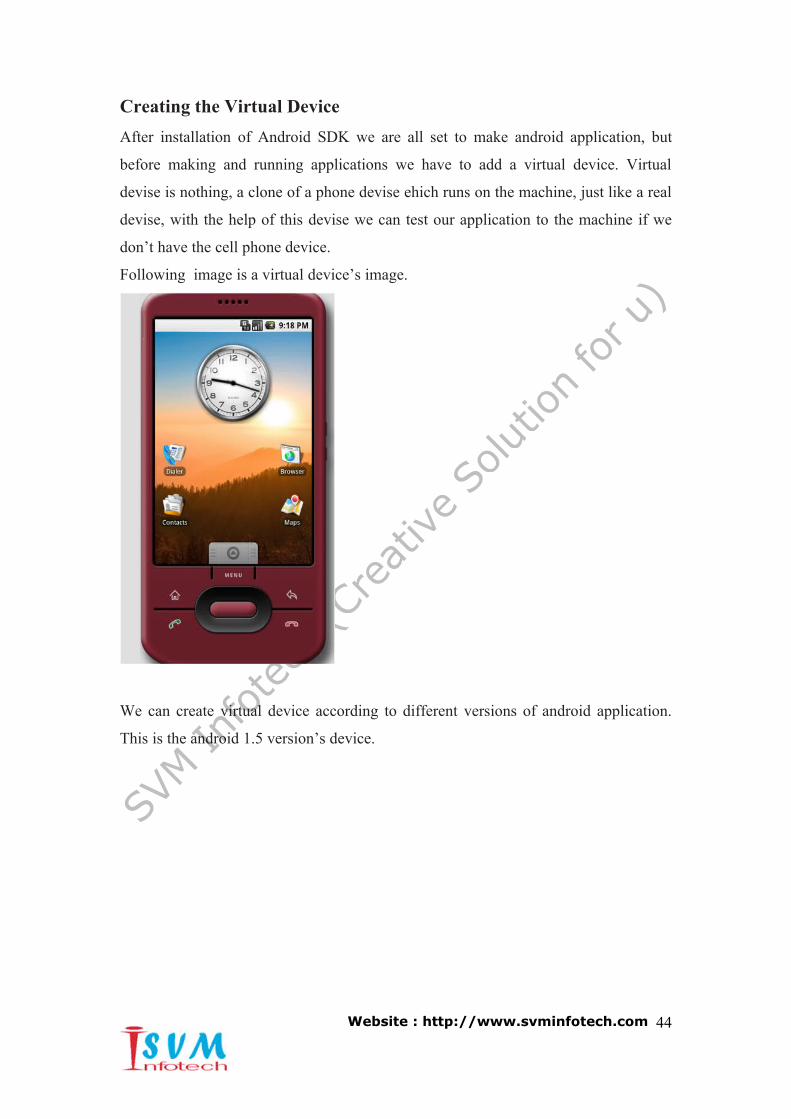
Creating the Virtual Device
After installation of Android SDK we are all set to make android application, but
before making and running applications we have to add a virtual device. Virtual
devise is nothing, a clone of a phone devise ehich runs on the machine, just like a real
devise, with the help of this devise we can test our application to the machine if we
don’t have the cell phone device.
Following image is a virtual device’s image.
We can create virtual device according to different versions of android application.
This is the android 1.5 version’s device.
Website : http://www.svminfotech.com 44

How to add a virtual device
Following are the steps of adding virtual device
• Go to Window menu of Eclipse then click on the Android SDK and
AVD manager
• On the left side click on the virtual device
• From the right side click on New button
Website : http://www.svminfotech.com 45

• In the next window give the name of virtual device name and in next
field select its version or target.
• Click on create AVD .
These steps will create a virtual device for your application
Website : http://www.svminfotech.com 46

Versions Of android
Android has seen a number of updates since its original release. These updates to the
base operating system typically focus on fixing bugs as well as adding new features.
Generally each new version of the Android operating system is developed under a
code name based on a dessert item.
Evolution of versions
Platforms Name API LevelAndroid 1.5 Cupcake 3Android 1.6 Donut 4Android 2.1 Éclair 7Android 2.2 Froyo 8Android 2.3 Gingerbread 9Android 2.4 Gingerbread 10Android 3.0 Honeycomb 11
The upcoming version of Android is Ice Cream
Details of recent released versions of Android
• 2.0/2.1 , which revamped the user interface and introduced HTML5 and
Exchange ActiveSync 2.5 support
• 2.2 , which introduced speed improvements with JIT optimization and the
Chrome V8 JavaScript engine, and added Wi-Fi hotspot tethering and Adobe
Flash support.
• 2.3 , which refined the user interface, improved the soft keyboard and
copy/paste features, and added support for Near Field Communication.
Website : http://www.svminfotech.com 47

• 3.0 , a tablet-oriented release which supports larger screen devices and
introduces many new user interface features, and supports multicore
processors and hardware acceleration for graphics. The Honeycomb SDK has
been released and the first device featuring this version, the Motorola Xoom
tablet, went on sale in February 2011.[50] Google has chosen to withhold the
source code for the time being, which calls into question the "open-ness" of
this Android release. Google claims this is done to eliminate manufacturers
putting a tablet-specific OS on phones, much like the previous autumn, where
tablet manufacturers put a non-tablet optimized phone OS (Android 2.x) on
their Tablets resulting in bad user experiences.
Features of Android SDK
As an application-neutral platform, Android gives you the opportunity to create
applications that are as much a part of the phone as anything provided out of the box.
The following list highlights some of the most noteworthy Android features:
• No licensing, distribution, or development fees
• Wi-Fi hardware access
• GSM,EDGE, and 3G networks for telephony or data transfer, allowing
you to make or receive calls or SMS messages, or to send and receive
data across networks.
• Comprehensive APIs for location-based services such as GPS.
• Full multimedia hardware control including playback and recording
using the camera and microphone
• APIs for accelerometer and compass hardware
• IPC message passing
• Shared data stores
• An integrated open source WebKit-based browser.
• Full support for applications that integrate Map controls as part of their
user interface.
Website : http://www.svminfotech.com 48

• Peer-to-peer (P2P) support using Google Talk.
• Mobile-optimized hardware-accelerated graphics including a path-
based 2D graphics library and support for 3D graphics using Open GL
ES.
• Media libraries for playing and recording a variety of audio/video or
still image formats.
• An application framework that encourages reuse of application
components and the replacement of native applications.
Website : http://www.svminfotech.com 49

Creating Android Projects/Applications
Before going to making any Project/ application we have to understand the life cycle
of any application.
Application life cycle
An application life cycle consists of the steps that the application’s processes must
follow from execution to termination. Every application, regardless of the language it
was written in, has a specific life cycle, and Android applications are no exception.
Android Application life cycle
The Android application life cycle is unique in that the system controls much of the
life cycle of the application. All Android applications, or Activities, are run within
their own process. All of the running processes are watched by Android and,
depending on how the activity is running (this is, a foreground activity, background
activity, and so forth), Android may choose to end the activity to reclaim needed
resources.
Some of the specific methods called during the life cycle of an android activity are
• onCreate
• onStart
• Process-specific events
• onStop
• onDestroy
Following the same logic as other application life cycles, an Android application is
created, the processes are started, events are fired, processes are stopped, and the
application is destroyed.
Creating “Hello Android” in Eclipse
Website : http://www.svminfotech.com 50
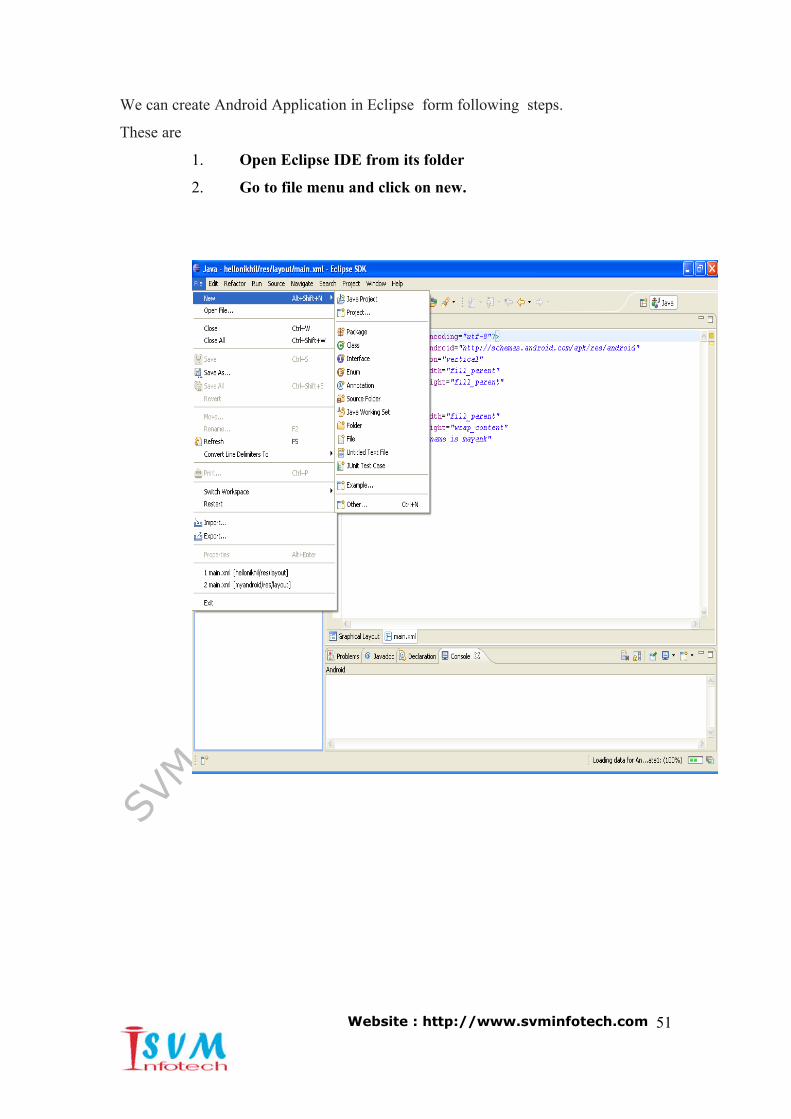
We can create Android Application in Eclipse form following steps.
These are
1. Open Eclipse IDE from its folder
2. Go to file menu and click on new.
Website : http://www.svminfotech.com 51

3. Go to project menu and select Android Project
And click on Next
4. After clicking on next a new window will open, in which there
are many fields. We have to fill all these fields. Before filling
these field let’s have a look at these field.
• Project Name : In this field we write the project name, which
will be the our project folder for android.
• We will check option to create new project on workspace.
• We will check a check box for our source target for
Android Application.
• Next is Application name whatever we give it.
Website : http://www.svminfotech.com 52

• Next is package name which is same as java package we
cannot make two packages with the same name.
• Next is activity it is nothing, a class name of our project
which we create .
Click on finish to make project.
Website : http://www.svminfotech.com 53

After finish a project window will open with a directory structure of the project.
Which is given below
For making our first HelloAndroid there are two approaches
By going through layout directory and going through the xml file
The XML file called main.xml that is referenced by your application
when building its interface.
For making HelloAndroid Application we will edit this XML file .
This file will allow us to insert views, into application’s layout and will
display it.
The actual unaltered xml file’s layout ig giving next, let’s have a look
to it
Website : http://www.svminfotech.com 54

<?xml version="1.0" encoding="utf-8"?>
<LinearLayout
xmlns:android=http://schemas.android.com/apk/res/android
android:orientation="vertical"
android:layout_width="fill_parent"
android:layout_height="fill_parent"
>
<TextView
android:layout_width="fill_parent"
android:layout_height="wrap_content"
android:text="HelloAndroid"
/>
</LinearLayout>
For creating HelloAndroid we have to make changes to TextView tag of main.xml
file’s android:text , and we can give any name of that view.
Save the project and with right click on the project directory and run it as a Android
Project.
Website : http://www.svminfotech.com 55
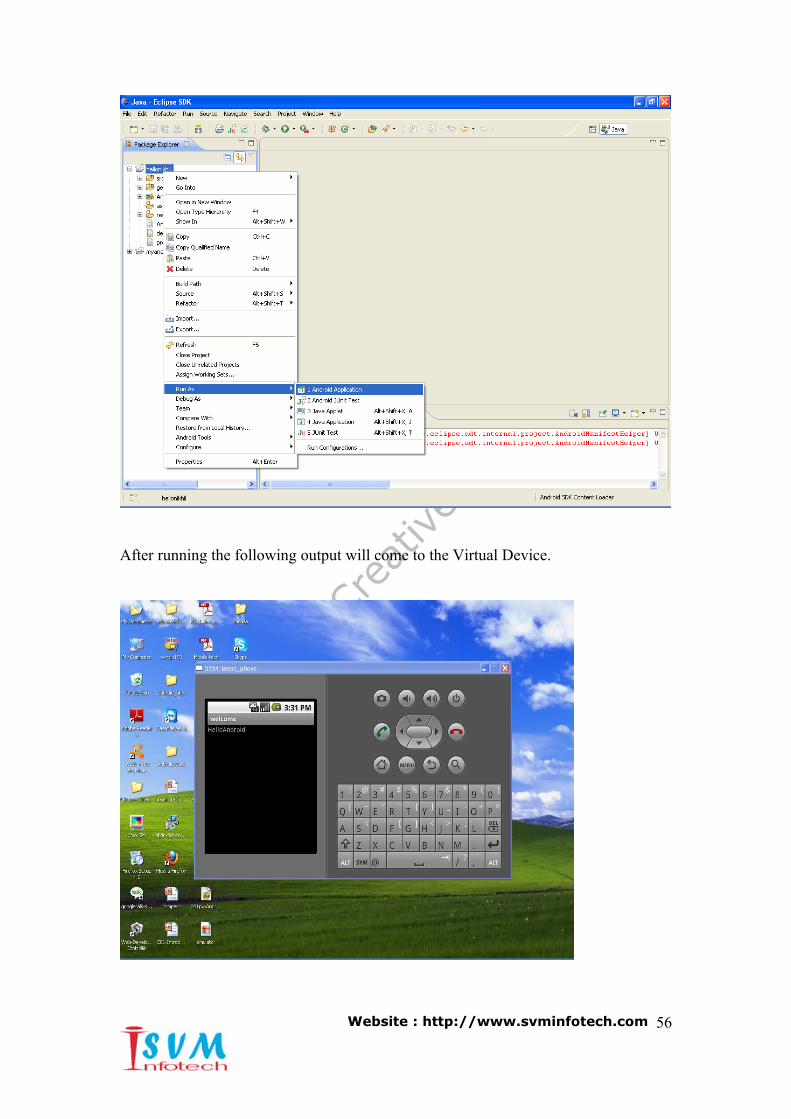
After running the following output will come to the Virtual Device.
Website : http://www.svminfotech.com 56

Another way to create HelloAndroid in Eclipse IDE
In first method we made HelloAndroid by editing the main.xml file, but
this time we will program the UI in code rather than by using the xml file, and we will
do most of work for this.
So the first step is to remove TextView Tag from main.xml file in the layout
directory.
After remoing TextView the main.xml file should look like this.
<?xml version="1.0" encoding="utf-8"?>
<LinearLayout
xmlns:android=http://schemas.android.com/apk/res/android
android:orientation="vertical"
android:layout_width="fill_parent"
android:layout_height="fill_parent"
>
</LinearLayout
After cleaning main.xml file we have to write code for HelloAndroid application.
Now open source directory form directory structure and open HelloAndroid.java file
and remove setContentView(R.layout.main); line from that file.
This line uses setContentView( ) to draw the main.xml file to the screen. Since you
will not be using main.xml to define your TextView, you will not be setting it to your
view. Instead, you will be building the TextView in code.
Our next step is to import the package TextView from android.widget. This will
give you access to the TextView and let you create your own instance of it. Place this
code near the top of your current HelloAndroid.java file, where the existing import
statements are
import android.widget.TextView;
Website : http://www.svminfotech.com 57

Now, create an instance of TextView. By creating the TextView instance, you can
use it to display text to the screen without directly modifying main.xml. Place the
ollowing code after the onCreate( ) statement is fired:
TextView HelloTextView = new TextView(this);
The preceding line creates an instance of TextView named HelloldTextView
and then instantiates HelloTextView, by setting it to a new TextView. The new
TextView is passed the context of this to be fully instantiated.
Now that the TextView is defined, you can add your text to it. The following line of
code assigns the text “HelloAndrid” to the TextView
HelloTextView.setText(“HelloAndroid”);
Now our text view is ready, and we want to display. Because simply passing
TextView does not display any thing to the screen..
For that we have to set the ContentView to display something on the screen.
So we have to use the following code to set the TextViw to Context and display it.
To the screen.
setContentView(HelloTextView);
Now full HelloAndroid.java file look like this :-
package android_programmers_guide.HelloWorldText;import android.app.Activity;import android.os.Bundle;import android.widget.TextView;public class HelloWorldText extends Activity {
/** Called when the activity is first created. */@Overridepublic void onCreate(Bundle icicle) {
Website : http://www.svminfotech.com 58

super.onCreate(icicle);/**Hello World JFD *//**BEGIN *//**Create TextView */TextView HelloTextView = new TextView(this);/**Set text to Hello World */HelloWorldTextView.setText("HelloAndroid");/**Set ContentView to TextView */setContentView(HelloTextView);/**END */}
}
Save this and run it. This will also give the same result as previous example given.
Website : http://www.svminfotech.com 59