tabor electronics ltd. hands-on training - arbconnection by moti glazer
Post on 19-Dec-2015
226 views
TRANSCRIPT

Tabor Electronics Ltd.
Hands-on Training - ArbConnection
By Moti Glazer

Agenda
Learn to initialize ArbConnection
Learn how to use ArbConnection to operate the instrument
Prepare memory segments and download waveforms
Prepare pulse trains and download pulses
Learn how to use the Waveform Studio
Prepare and download tables

Invoke ArbConnection
Double-Click on the ArbConnection icon
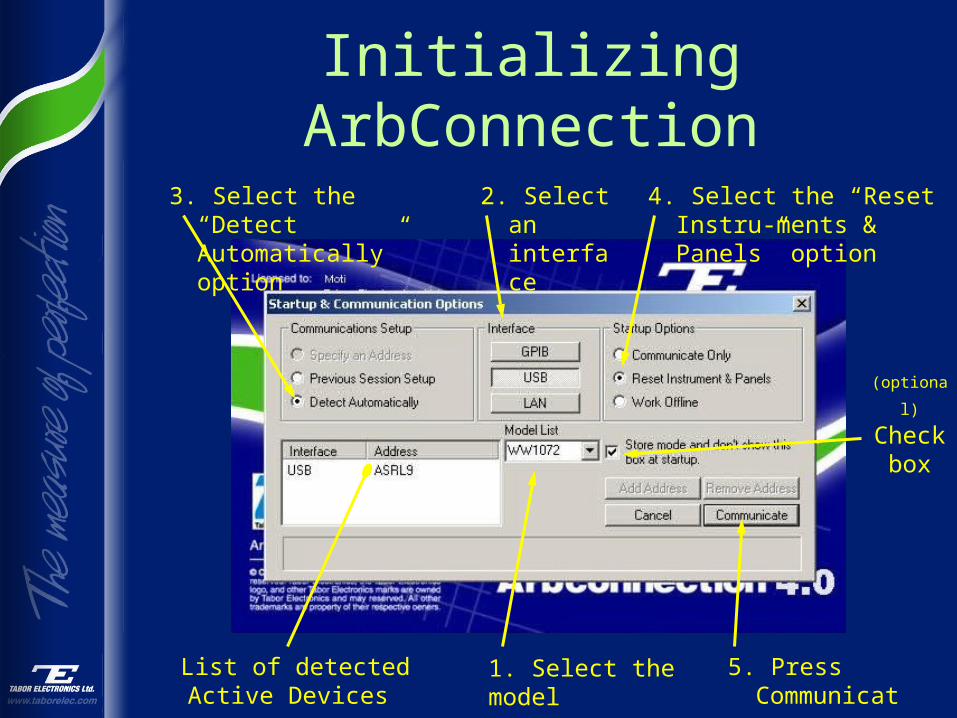
Initializing ArbConnection
2. Select an interface
(optional) Check
box
List of detected Active Devices
3. Select the “Detect Automatically” option
1. Select the model
4. Select the “Reset Instru-ments & Panels” option
5. Press Communicate

Tip!
Resetting the instrument to factory defaults is automatically done when selecting the “Reset Instruments & Panels” option

Panels Bar
1. Click on Panels icons to remove unwanted panels
Some panels may appear as left from the last session
Turning Outputs ON
2. Click on Channel 1 and Channel 2
2. Click on Sync State

Tips!
Digital display shows the current parameter and its programming limits
Darker shade LED designates the selected parameter on the display
Darker shade Button designates ON position

Selecting a Std. Waveform
1. Click on STD to display the Standard Panel
2. Select “Triangle” for channel 1
3. Select “Square” for cannel 2

Tips!
1. Programmable parameters pop up as output shape is selected
2. Frequency is common to both channels
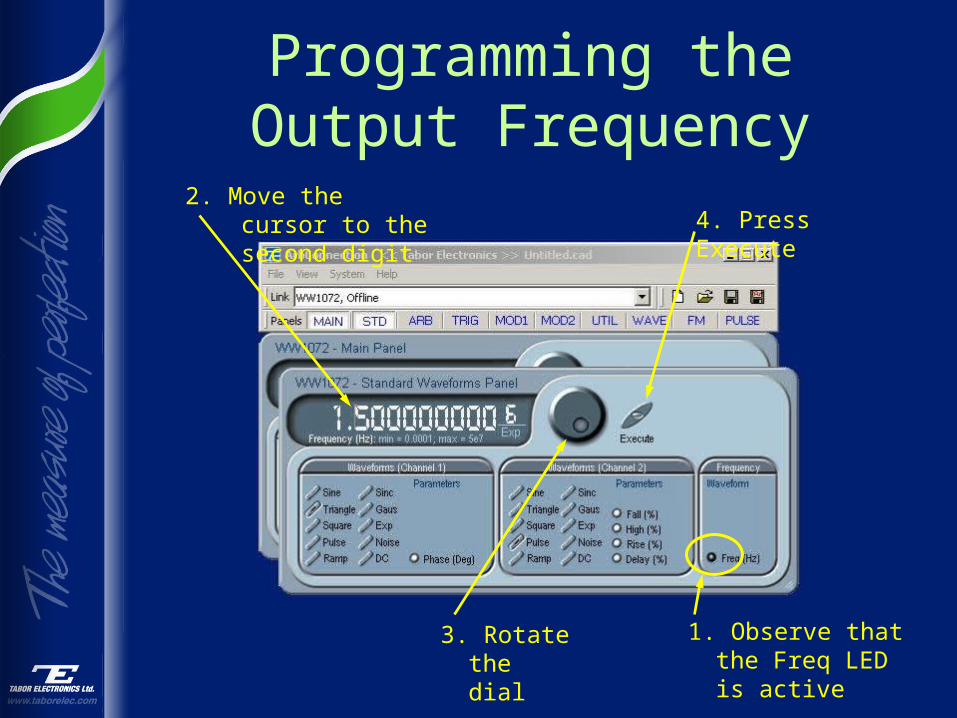
Programming the Output Frequency
2. Move the cursor to the second digit
3. Rotate the dial
4. Press Execute
1. Observe that the Freq LED is active

Programming Run Modes
2. Select the required Run Mode. Options are: Continuous, Triggered, Gated or Counted Burst
1. Click on MAIN to display the Main Panel
Tips!
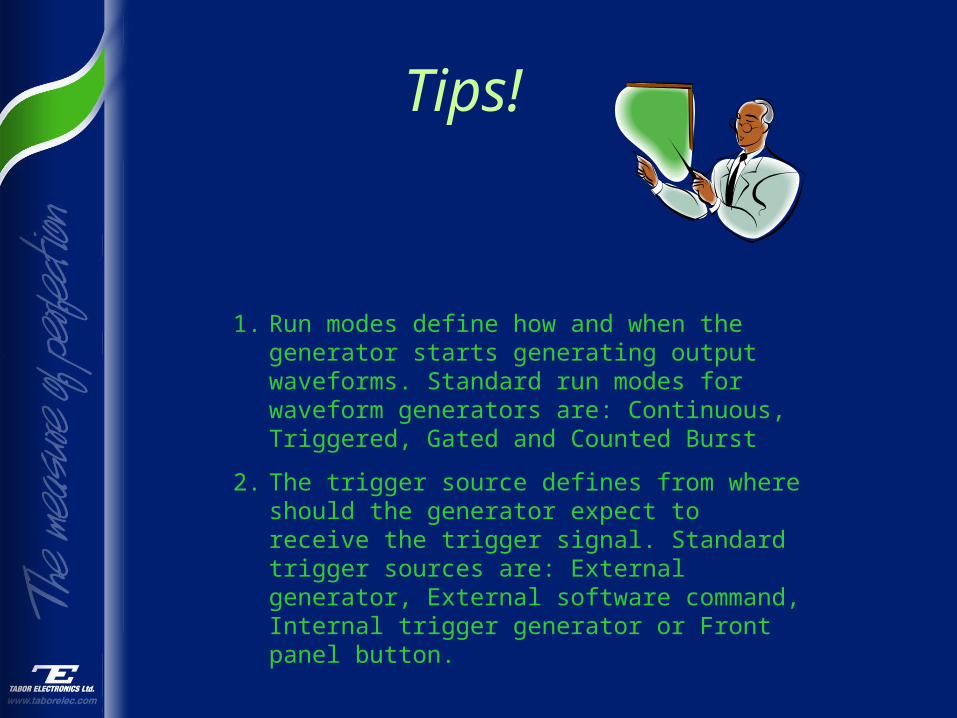
1. Run modes define how and when the generator starts generating output waveforms. Standard run modes for waveform generators are: Continuous, Triggered, Gated and Counted Burst
2. The trigger source defines from where should the generator expect to receive the trigger signal. Standard trigger sources are: External generator, External software command, Internal trigger generator or Front panel button.

Programming Trigger Parameters
2. Program burst count for channels 1 and 2
1. Click on TRIG to display the Trigger Panel
3. Program internal trigger timer period

ArbConnection Programming Exercise
1. Waveforms:
Channel 1 – Standard Pulse, 20% Delay, 20% Rise Time, 30% High Time, 10% fall TimeChannel 2 – Standard Square, 30% Duty Cycle
2. Amplitude:
Channel 1 – 3.5Vp-pChannel 2 – 2Vp-p
3. Frequency: 105kHz

Selecting Waveform Types
2. Select the required Waveform Type. Options are: Standard, Arbitrary and Sequenced
1. Click on MAIN to display the Main Panel

Programming Arbitrary Parameters
2. Program SCLK and CH2 Divider
1. Click on ARB to display the Arbitrary Panel
3. Program Sequence Advance Mode and Source
4. You may access the Waveform Studio from here

Using the Waveform Composer
1. Click on WAVE to display the waveform composer

Getting Familiar with the Waveform Composer
Waveform Screen
Channel & Download control
Waveform edit buttons
Active segment and length
Waveform composer commands
Horizontal and vertical scales

Creating and Downloading Waveforms
1. Click on Wave, then click on Sine
2. Click on Preview, then click on Ok
3. Click on Download

Waveform Composer Programming Exercise
1. Waveforms:
Channel 1 – Arbitrary Pulse, 20% Delay, 20% Rise Time, 30% High Time, 10% fall TimeChannel 2 – Arbitrary Square, 30% Duty Cycle
2. Frequency: 1kHz
RememberFrequency = SCLK / # points

Using the Pulse Composer
1. Click on PULSE to display the pulse composer
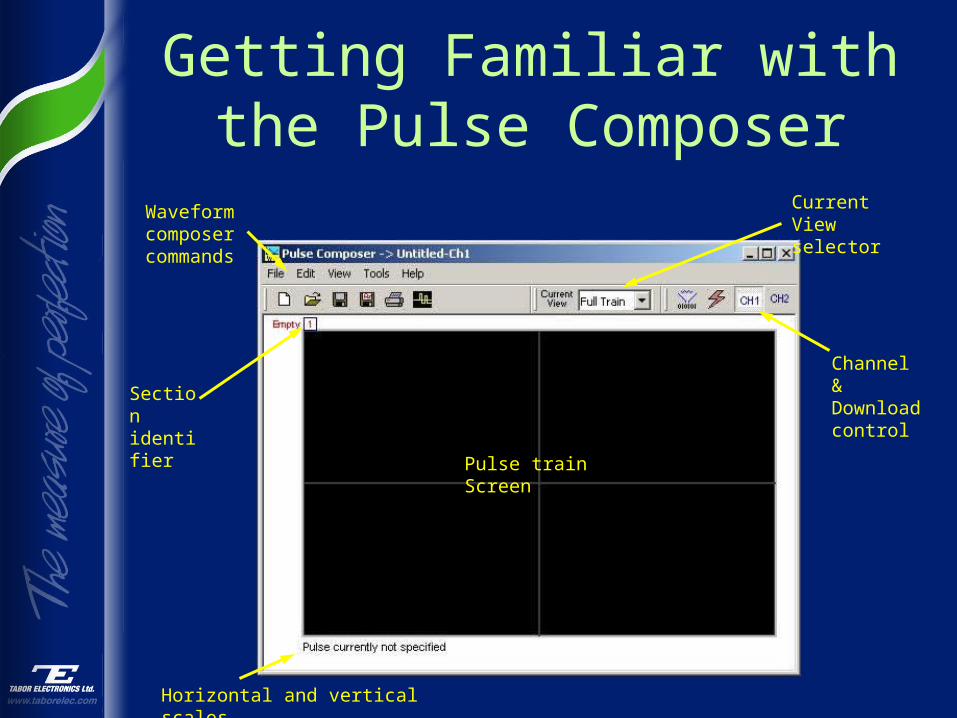
Getting Familiar with the Pulse Composer
Pulse train Screen
Channel & Download control
Current View selector
Section identifier
Waveform composer commands
Horizontal and vertical scales

Using the Pulse Editor
1. Click on the Pulse Editor icon
Section identifier
Section design format
Line controls
Section propertiesPulse
design area
Type in the pulse values Type in the repeat values
Click to remove the Pulse Editor

Downloading the Pulse Section
1. Click on the Download icon
2. Evaluate the Download Summary
3. Accept or Reject the download
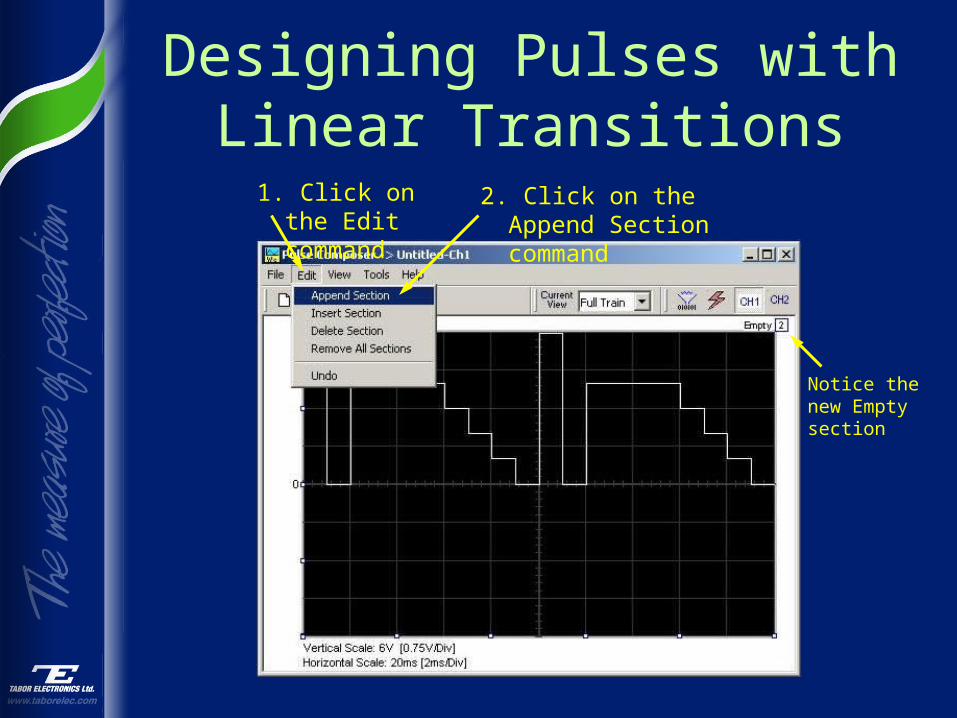
Designing Pulses with Linear Transitions
1. Click on the Edit command
2. Click on the Append Section command
Notice the new Empty section

Designing Pulses with Linear Transitions
1. Click on the Pulse Editor icon
1. Select Time/ Level Points
2. Type in the pulse values 3. Type in the repeat values
4. Click to remove editor

Downloading the Pulse Train
1. Click on the Download icon
2. Evaluate the Download Summary
3. Accept or Reject the download

Use the Pulse Editor Options to define the waveform mode, memory usage and design units.
Tip!

Pulse Composer Programming Exercise
Design and download pulse train as follows:
Channel 1 – 1us delay, 2us high time, 3us low timePulse levels: Low = 0V; High = +2V
Channel 2 – 1us delay, 0.5us rise time, 2us pulse high time, 0.5us fall time, 3us low time Pulse levels: Low = 0V; High = -1V