taking care of the child with a...
TRANSCRIPT

Taking Care of the Child With a Tracheostomy
Anatomy of the Respiratory Tract
When your child needs a tracheostomy, it is important to understand the structures involved inbreathing.
• The NOSE warms, humidifies and cleans the air.• Air enters the nose and/or mouth and travels down to the LARYNX (voice box).• The larynx is located at the top of the TRACHEA (windpipe) and houses the VOCAL
CORDS.• When your child breathes, the VOCAL CORDS open allowing air to pass through the
LARYNX and into the TRACHEA.• When a TRACHEOSTOMY is present, air bypasses the nose, larynx and vocal cords and
enters the trachea directly through a tube inserted into the trachea. As a result the air is notwarmed, humidified or cleaned.
What is a Tracheostomy?
A tracheostomy is an incision made into the trachea (windpipe) to form a temporary orpermanent opening. This opening is called a stoma. A plastic or metal tube is placed into theincision (tracheostomy tube). Children with tracheostomies breathe air through the tracheostomytube. A tracheostomy tube is also called a ”TRACH”.
SDICN0200 • 7/03
Types of Tracheostomy Tubes
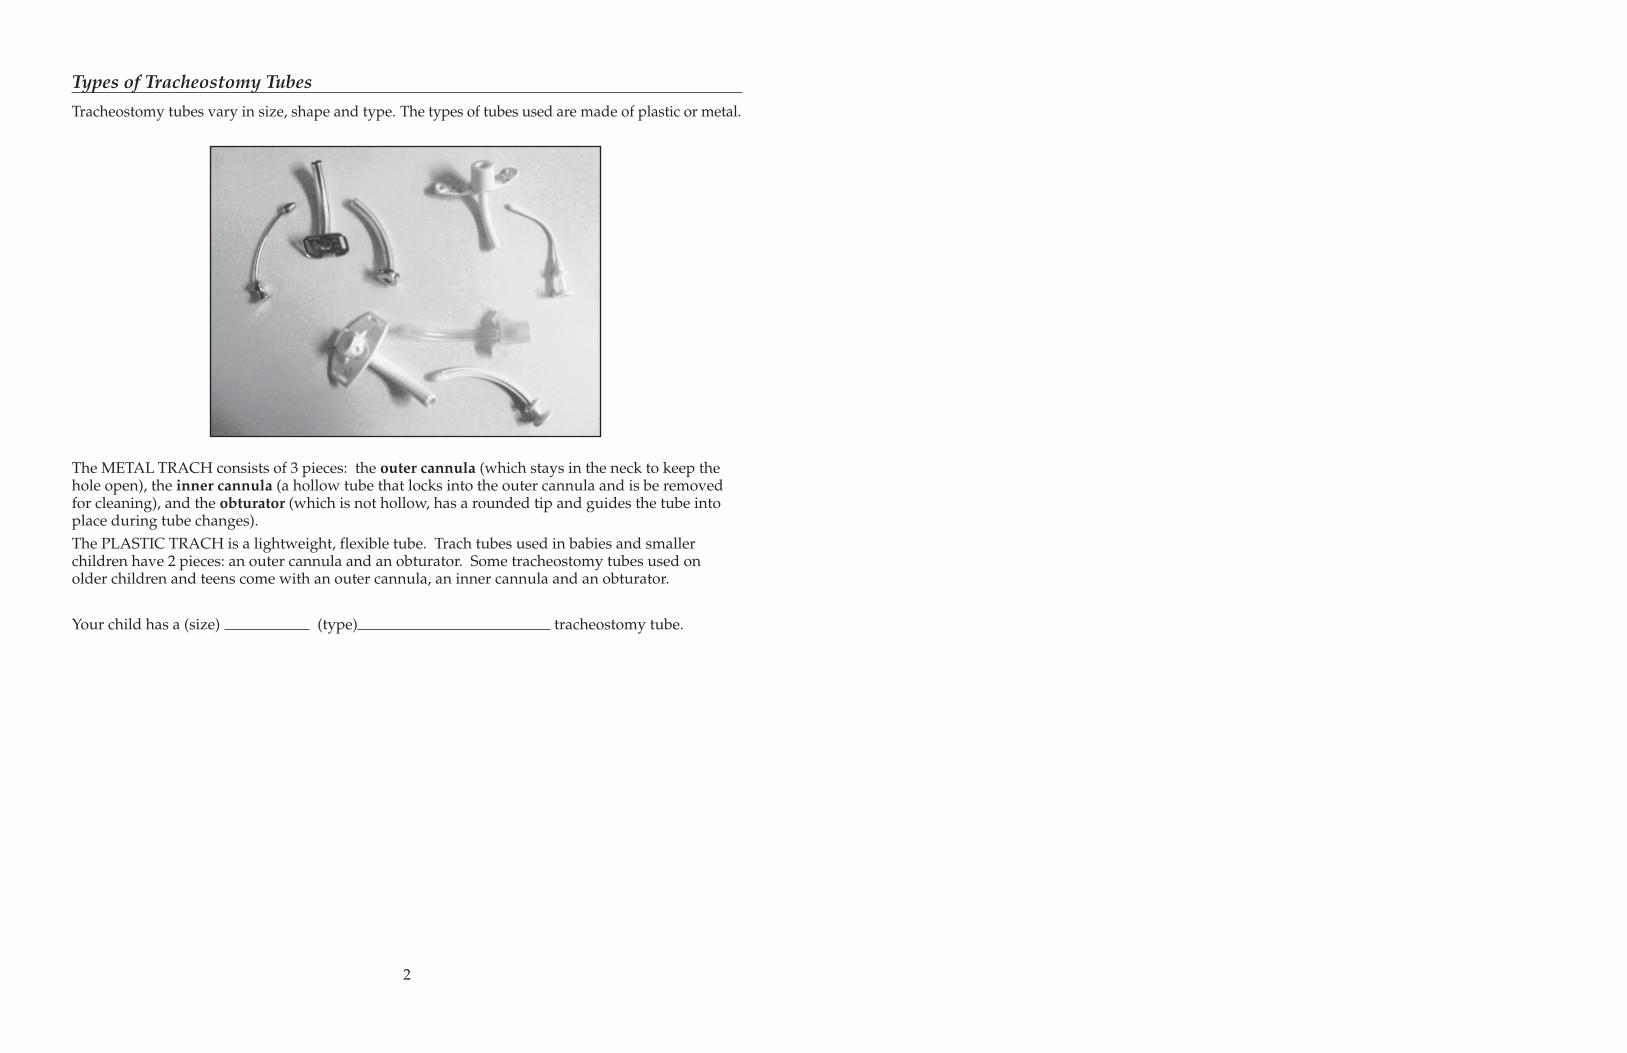
Tracheostomy tubes vary in size, shape and type. The types of tubes used are made of plastic or metal.
The METAL TRACH consists of 3 pieces: the outer cannula (which stays in the neck to keep thehole open), the inner cannula (a hollow tube that locks into the outer cannula and is be removedfor cleaning), and the obturator (which is not hollow, has a rounded tip and guides the tube intoplace during tube changes).The PLASTIC TRACH is a lightweight, flexible tube. Trach tubes used in babies and smallerchildren have 2 pieces: an outer cannula and an obturator. Some tracheostomy tubes used onolder children and teens come with an outer cannula, an inner cannula and an obturator.
Your child has a (size) (type) tracheostomy tube.
2
Tracheostomy Care
Before you take your child home, you and another family member will learn how to safely care foryour child’s tracheostomy.Remember to explain what you are going to do to your child before you begin. Be calm and gentle.If you are anxious your child may sense this and in turn become anxious or uncooperative.Daily care is needed to prevent infection and skin breakdown. Cleaning should be done twice aday or every 6-8 hours if an odor is present.
Cleaning the Stoma
EQUIPMENT:• Q-Tips (4-6 is usually enough)• Saline• Trach ties (twill tape) only if ties are to be changed• 2 sterile or clean disposable paper cups
PROCEDURE:• Prepare a clean surface• Wash hands• Open Q-tips• Cut new trach ties to appropriate length• Pour normal saline into a cup and place the Q-tips in the cup.• Starting at the stoma, roll the wet Q-tip outward over the skin to clean the area.
**NEVER DIP DIRTY Q-TIP BACK INTO SOLUTIONS**• Clean any crusted secretions off the rim of the trach tube• Dry the area around stoma with Q-tips or a clean cloth• If secretions are crusted and difficult to remove, half strength peroxide
(equal parts water & peroxide) may be used.
OBSERVATIONS / ACTIONS:Call your doctor if the tracheostomy site becomes: swollen, red, warm or tender to touch,and/or has a foul odor and drainage.*Foul odors and green/yellow drainage from the tracheostomy may be the result of infectionor granulation (scar) tissue. Granulation tissue is reddish, fleshy and moist. It protrudes fromthe incision around the stoma and may require removal by the surgeon.*For reddened, open sore areas or excessive tracheal secretions:• Clean more frequently• Use a slit 2x2 gauze sponge between the skin and tracheostomy tube.• Change gauze when wet.• Do not let the gauze flop over the tube opening, this will block the airway.
3
Suctioning the Tracheostomy Tube
The trachea and lungs produce mucous. The mucous traps particles and keeps the air we breatheclean. Mucous will move up the trachea and collect in and around the tracheostomy tube. If it isnot removed it can dry and block the tube.Suctioning removes the mucous from the tracheostomy tube and trachea. With the tube clear ofsecretions, your child will breathe easier. While your child is in the hospital, suctioning is doneusing sterile technique. However, clean technique is usually sufficient at home.
Helpful tips:• Suction only as needed: early morning, after naps, before meals and before bedtime is
usually adequate. However, some children may require more frequent suctioning.• Perform surface suctioning with a bulb syringe or shortened catheter if secretions can be
coughed up to the tracheostomy tube. This will prevent injury to the delicate lining of theairway.
• Try to suction before a feeding so that the feeding time will be uninterrupted and lessfrustrating for you and your child.
• Suction BEFORE changing diapers and always WASH HANDS well after changing diapersto prevent infection.
• Suction the trach tube before you leave the house.• Too frequent suctioning may produce more secretions.• Blood tinged secretions may appear. This often results from:
— too much suctioning— suctioning too deep into the airway— the suction machine is turned on too high— thick, dry secretions being pulled away from the lining of the trachea during suctioning
SIGNS WHICH MAY INDICATE YOUR CHILD NEEDS SUCTIONING:
• Mucus bubbling from tracheostomy tube, gurgling sound.• A frightened or worried expression.• Anxious, restless and/or unable to be calmed.• Faster and harder breathing.• Pale, blue or dark color around mouth.• Retractions (the hollow in the neck and/or skin between the ribs pulls inward).• Flaring nostrils.• Difficulty eating or sucking.• Perspiration
4
EMERGENCY NUMBERS
Emergency Services
Pediatrician
Hospital
Specialist
Home Nursing
Medical Supplies
Other
EMERGENCY NUMBERS
Emergency Services
Pediatrician
Hospital
Specialist
Home Nursing
Medical Supplies
Other

EQUIPMENT:• Suction catheter• Suction machine• Suction connecting tubing• Sterile water or Saline• Sterile or clean cup (can use a new paper cup)• 3-5cc saline ‘pillows’• Gloves (optional for home care)• Delee Suction kit if indicated
THERE ARE 3 DIFFERENT METHODS OF SUCTIONING
1. SURFACE SUCTIONINGThis is used when your child is able to cough up secretions to the opening of the tube.• Trim down the length of a suction catheter; round off edges
(Catheter should always be SHORTER than the length of the trach tube.)• This modified catheter should be inserted at the opening of the tube but not down the tube• Rinse free of secretions and keep covered between uses• Change daily or if contaminated
2. DEEP SUCTIONINGWhen surface suction is not adequate to clear the secretions, deep suctioning may benecessary. Deep suctioning is passing the catheter into the trach tube.
• Wash your hands.• Open suction catheter package.• Pour water into clean cup• Open saline “pillow”.• Apply clean gloves if indicated.• Attach catheter to suction tubing.• Turn the suction machine on.• Test the suction.• Place several drops of saline into the trach tube if indicated. (It is important to use
the saline after sleeping).• Insert the catheter into the tube (with your thumb off the opening).
— Suction only the length of the trach tube.— Do not forcibly insert the suction catheter.
• Put your thumb over the opening to create suction.
5
• Use a circular motion as you withdraw the catheter and apply suction.• Suction no longer than 10 seconds at a time.• Let the child relax between each pass of the suction catheter.• Repeat this process until the trach tube is clear.• DISCARD suction catheter unless re-usable.• RINSE suction connecting tubing with water. BE SURE IT IS LEFT CLEAR OF SECRETIONS.Note: Children on mechanical ventilator:• Will require hand ventilation with suctioning.• May need suctioning beyond the tube.
3. DELEE SUCTIONINGUse this method of suctioning when your suction machine is not available.This method allows you to suction tracheal secretions through the force of suction generatedby you. The secretions are sucked into a separate tube and trapped in a small plastic bottle.Your mouth will not come in contact with the secretions.
PROCEDURE• Open DeLee package.• Put the suction end in your mouth and hold the catheter, being careful not to touch
the end.• Insert catheter end into the trach tube and inhale to generate the suction pressure.
Suction the tube.• Throw entire DeLee system away when finished.• We recommend that a Delee system be included in your emergency trach kit
OTHER IMPORTANT TIPS TO REMEMBER FOR SUCTIONING:• Keep the suction catheter clean and inside the sleeve and do not touch anything with the
tip of catheter• Using force to insert the catheter may cause bleeding and possible damage to the trachea.• Suctioning removes oxygen as well as secretions, so only suction for brief periods of time.• Crying will allow deep breathing and help loosen secretions.• Some children may need extra breaths with a resuscitation bag during suctioning.• Instill saline using the saline pillows if secretions are thick and are not readily suctioned
into the catheter
CHECK YOUR SUPPLIES. MAKE SURE YOU HAVE ENOUGH CATHETERS ANDGLOVES TO GET THROUGH WEEKENDS, HOLIDAYS, NIGHTS, AND VACATIONS.
6
IF YOU ARE UNABLE TO INSERTA NEW TUBE EASILY
• NEVER FORCE INSERTION OF THE TUBE.
• Reposition the shoulders and head, spread theskin around the stoma and try again.
• If the new tube will not go in, try to insert thesmaller sized trach tube.
• If still unable to insert the tube and your child isbreathing comfortably call your child’s doctorimmediately.
• Administer oxygen if the child shows any signsof difficult breathing. Call 911 or emergencyservices in your area for help.
• If your child cannot breath begin CPR and call 911or emergency services in your area.
• DO NOT LEAVE YOUR CHILD ALONE.

Changing the Tracheostomy Ties
Change the tracheostomy ties every day to prevent skin irritation from wet, soiled ties. After abath is usually a good time. If two people are not available, wrap your child “mummy” style in ablanket to prevent wriggling.
EQUIPMENT:• Trach ties (twill tape)• Scissors• Tweezers or forceps• Small blanket or towel roll
PROCEDURE:• Wash hands• Cut ties to an appropriate length.• Cutting ends on a slant will allow for easier threading through the wing holes.• Place child on back with a small roll under his/her shoulders.• Slip the old ties up to the top of wing holes on tracheostomy tube.• Attach new ties as shown in picture.• Secure with a bow first, check the ties for snugness. The ties should be snug enough to
allow your little finger to get underneath.• Place index fingers into each bow loop and pull outward until bow disappears and
you are left with a knot.• Cut off old ties.• Examine the neck every day for sores and redness.• Rotate the position of the knot to prevent sores on the skin.
7
Changing the Tracheostomy Tube
The first trach tube change will be done 5-10 days after the trach is placed. The change is done inthe presence of the surgical team.Always make sure that the new tube is fully prepared and ready for insertion before removing theold tube. Do not change a tracheostomy tube without adequate assistance unless in an emergency.
CHANGE THE TRACHEOSTOMY TUBE IF:• The tube becomes plugged with secretions and suctioning does not clear the tube• The tube accidentally falls out• The tube becomes very soiled.• Routine trach changes will be done as directed by your child’s doctor.
EQUIPMENT:• Same size trach tube with obturator• Smaller size trach tube with obturator• Trach Ties (twill tape)• Bandage scissors• Tweezers or forceps• Small blanket or towel roll• Saline• Suction machine• Suction catheter
PROCEDURE:• Wash hands• Attach new ties through one end of clean tube• Insert guide (obturator) into new tube. Do not touch the part that will be inserted
into airway.• Moisten new tube with water based lubricant (K-Y jelly) or saline and leave on packaging
tray until ready to insert.• Place a roll under the child’s shoulders to expose the stoma.• Cut the old ties.• Remove the old tube.• Gently insert the new trach tube in a back and downward “arc” motion.• NEVER FORCE THE TUBE!• Remove the obturator immediately after the tube is placed.• Secure the ties.• LOOK AND LISTEN to your child to be sure that he or she is breathing comfortably.• Suction if necessary.
IMPORTANT TIP TO REMEMBER WITH TRACH CHANGES:
ALWAYS HOLD TUBE IN PLACE WHEN TIES ARE NOT SECURE (even a cough candislodge a tube)
8
IF THE TUBE BECOMES PLUGGED
• Place saline into the trach tube
• Attempt to suction
• If on mechanical ventilator begin hand ventilation
IF UNABLE TO CLEAR THE TUBE OF SECRETIONS
• Remove the old tube and insert a new tube.
IF YOUR CHILD IS NOT BREATHING
• Administer oxygen and attempt to give breathswith resuscitation bag
• Call for emergency services.
IF YOUR CHILD HAS STOPPED BREATHINGAND TUBE IS CLEAR
• Place your hand over the child’s nose and mouthand try to breathe or give breaths with resuscitationbag through the trach tube.
• Continue with CPR if no pulse is present.
• If you are alone after one minute of CPR,stop momentarily to call for emergency services.
• Continue CPR until help arrives or your childresponds.
IF YOU ARE UNABLE TO INSERT THE NEW TUBE EASILY
• NEVER FORCE INSERTION OF THE TUBE.• Reposition the shoulders and head and try again.• If the new tube will not go in, try to insert the smaller sized trach tube.• If still unable to insert the tube call 911 or emergency services in your area for help.• DO NOT LEAVE YOUR CHILD ALONE.• Administer oxygen if the child shows any signs of difficult breathing.
Humidification of Tracheostomies
When a child breathes through a tracheostomy the air is not warmed, moisturized or filtered.Therefore, some form of humidification (mist) to keep your child’s secretions loose, is necessary.Thick secretions make it harder to breathe, can cause tube blockage and encourage respiratoryinfections.With a new tracheostomy, continuous humidification is necessary. However, usually after 10 daysthe child may need the humidity only during naps and sleep.Certain climates and seasons may require you to use more or less mist.Humidification is provided through a “trach collar” attached to a nebulizer (a machine that deliv-ers humidified mist). Humidification should always be delivered while sleeping.During a power failure, or if you are traveling where there is no access to electricity, one drop ofsaline instilled hourly into the tube will keep the airway moist. Do not suction afterwards unlessthe tube becomes filled with secretions.
EQUIPMENT:• Air Compressor• Nebulizer bottle• Aerosol Tubing• Water trap bag or bottle• Trach collar• Sterile water• Humidivent / Swedish nose
THERE ARE TWO COMMON WAYS OF HUMIDIFYING TRACH SITES:• NEBULIZERS put out visible water droplets and may be cool or heated.• In most instances, cool mist from the nebulizer will be all that is needed to keep secretions
thin and easily removed.• If your child develops very thick or “plug-like” secretions changing to warm mist may be
necessary. This is called HEATED NEBULIZATION.
9
• A thermometer should be placed in-line. Temperatures should be kept between 32-36degrees Celsius. Temperatures >37 degrees may cause airway burns, and elevation ofyour child’s temperature.
• HEATED NEBULIZATION frequently “rains out” or condenses moisture in the tubing.This could obstruct the gas flow to the trach collar and/or cause accidental aspiration ordeposit large amounts of water into the trachea. This can cause tracheal irritation andincrease the need for suctioning.
• It is necessary to frequently drain the tubing or place a water trap in the system. The watertrap bags or bottles collect the ”rain out” water and are helpful in preventing the accumula-tion of moisture in the tubing. **Do not drain the water back into the nebulizer since thiswill enhance the growth of bacteria.**
• Secretions can be kept thin during the day by placing an ARTIFICIAL NOSE orHUMIDIVENT® on the end of the trach tube. This is a filter which traps moistureand humidifies the air breathed in through the trach tube.
Emergency Equipment
CHILDREN WITH TRACHEOSTOMIES SHOULD HAVE OXYGEN EQUIPMENT AND ARESUSCITATION (SELF INFLATING BAG) AVAILABLE WITH A TRACH ADAPTER.
OXYGEN:If your child becomes “blue” due to airway obstruction, suctioning, or a low heart rate, andhe/she does not readily “pink-up”, supplemental oxygen may be needed to improve yourchild’s oxygenation and color. If your child was breathing room air prior to this incidentand you are not able to take him/her off the oxygen without a color change, seek emergencymedical assistance.The nebulizer or humidifier may be hooked directly to an oxygen tank. Some systems willallow you to achieve different concentrations of oxygen; whereas others will only deliver100% oxygen.
RESUSCITATION (SELF-INFLATING) BAG:If your child stops breathing (or appears to not be moving air into the lungs) or has a pro-longed drop in heart rate that does not respond to suctioning and supplemental oxygen, itmay be necessary to begin CPR; assisted breathing and chest compressions. Do not take timeto set up the resuscitation bag to oxygen if your child is not breathing. Initiate basic CPR first.If help is available, have them dial 911 or the emergency services in your area and then set upthe resuscitation bag, using it for giving breaths.• Attach resuscitation bag to oxygen source (may be used without one if it is not readily
available).• Attach the resuscitation bag to your child’s trach tube.• Squeeze the bag just enough to see the chest rise.• Allow adequate time for your child’s chest to fall between breaths.• Give breaths until your child responds or emergency help arrives.
10
Date:Name:Address:
LETTER FOR SPECIAL CONSIDERATION TO THE ELECTRIC COMPANY*
ATTENTION:
Our child, , is under a physician’s care for a tracheostomy.While the tracheostomy is in place, the child requires constant monitoring.
Therefore, while the child is sleeping at home, breathing and heart rate are monitored with adevice to detect decreased breathing or heart rate. This monitor requires AC current and can beoperated from a battery source for a very limited period. Monitoring is important in the recog-nition of a potential emergency situation. (ie., obstruction of the tracheostomy or apnea.)
The electric company’s support is mandatory. When there are power failures, we ask that ourhome be placed on a priority list for restoration of electricity. Also, if there is a forewarning of apower discontinuation, please notify us so that we can make arrangements for emergency backuppower.
Sincerely,
*forms may be available through the home care agency or your local phone company.
Emergencies and CPR
While your child is in the hospital, you will be enrolled in a Cardiopulmonary Resuscitation(CPR) class. A booklet will be given to you to prepare for the class. Please make sure you haveread it before attending.IF AN EMERGENCY OCCURS, BE READY TO ACT IMMEDIATELY. If you know what to do andhow to do it, you can remain calm and help your child.
IF THE TUBE BECOMES PLUGGED
• Place saline into the trach tube• Attempt to suction• If on mechanical ventilator begin hand ventilation
IF UNABLE TO CLEAR THE TUBE OF SECRETIONS
• Remove the old tube and insert a new tube.
IF YOUR CHILD IS NOT BREATHING
• Administer oxygen and attempt to give breaths with resuscitation bag• Call for emergency services.
IF YOUR CHILD HAS STOPPED BREATHING AND TUBE IS CLEAR• Place your hand over the child’s nose and mouth and breathe or give
breaths with resuscitation bag through the trach tube.• Begin CPR if no pulse is present.• If you are alone after one minute of CPR, stop momentarily to call for
emergency services.• Continue CPR until help arrives or your child responds.
11
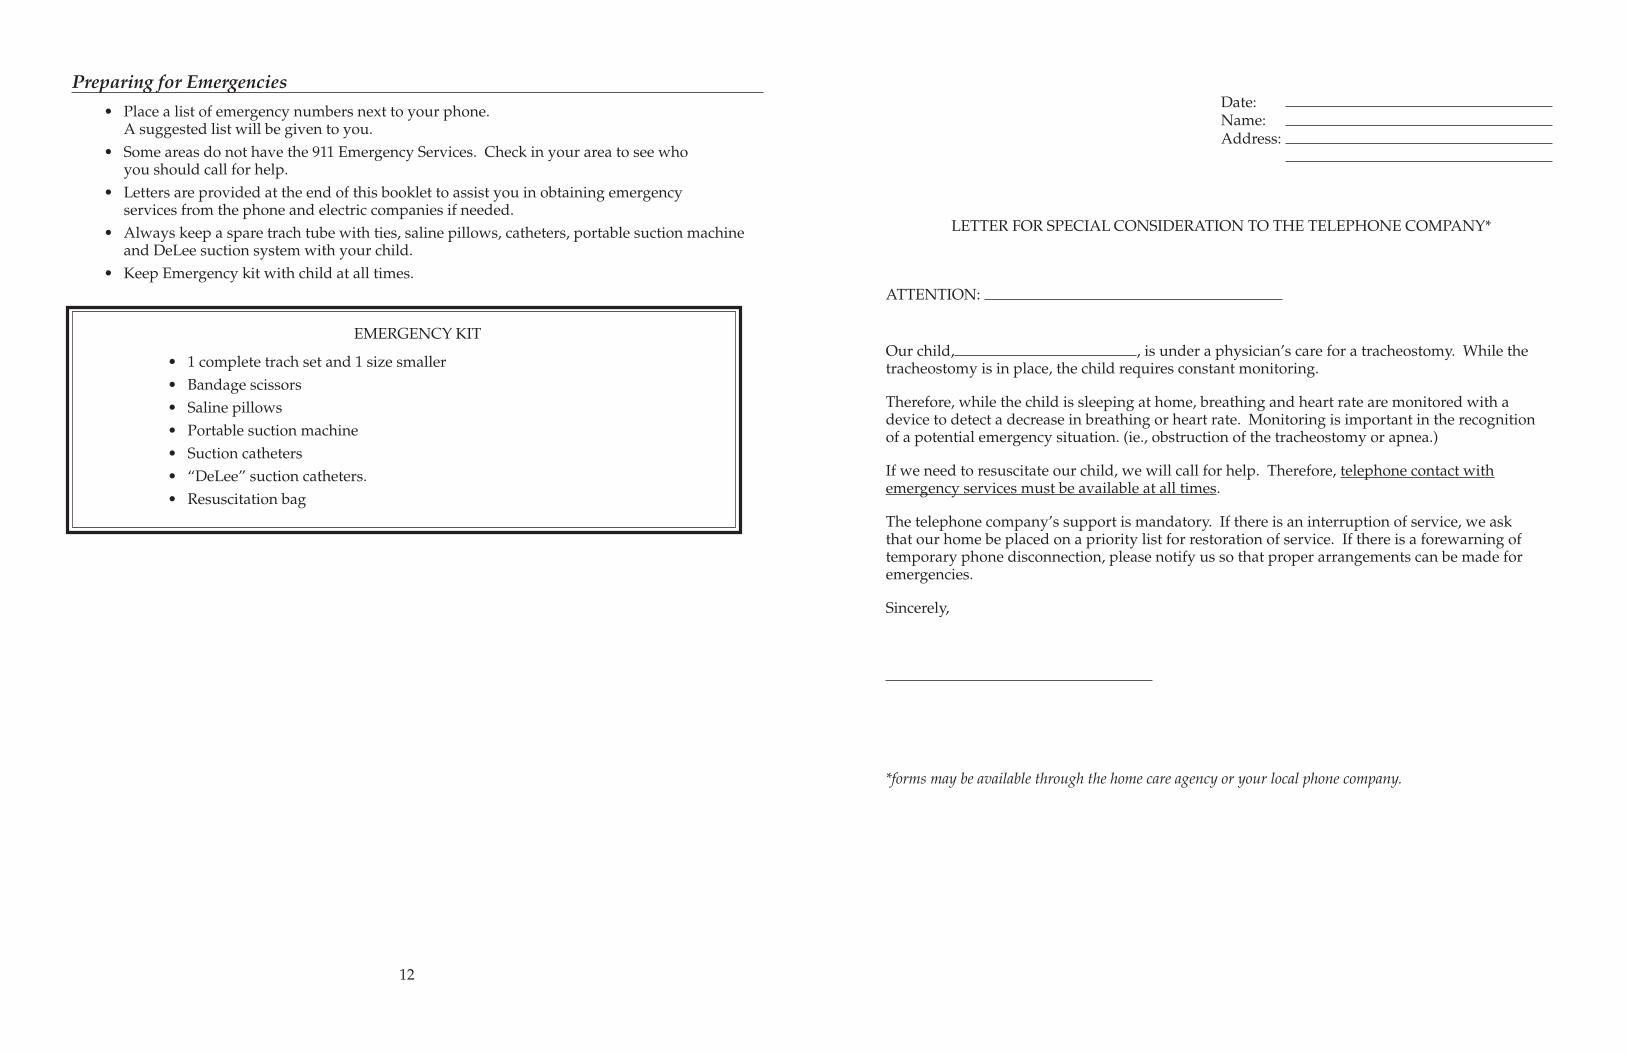
Preparing for Emergencies
• Place a list of emergency numbers next to your phone.A suggested list will be given to you.
• Some areas do not have the 911 Emergency Services. Check in your area to see whoyou should call for help.
• Letters are provided at the end of this booklet to assist you in obtaining emergencyservices from the phone and electric companies if needed.
• Always keep a spare trach tube with ties, saline pillows, catheters, portable suction machineand DeLee suction system with your child.
• Keep Emergency kit with child at all times.
EMERGENCY KIT
• 1 complete trach set and 1 size smaller• Bandage scissors• Saline pillows• Portable suction machine• Suction catheters• “DeLee” suction catheters.• Resuscitation bag
12
Date:Name:Address:
LETTER FOR SPECIAL CONSIDERATION TO THE TELEPHONE COMPANY*
ATTENTION:
Our child, , is under a physician’s care for a tracheostomy. While thetracheostomy is in place, the child requires constant monitoring.
Therefore, while the child is sleeping at home, breathing and heart rate are monitored with adevice to detect a decrease in breathing or heart rate. Monitoring is important in the recognitionof a potential emergency situation. (ie., obstruction of the tracheostomy or apnea.)
If we need to resuscitate our child, we will call for help. Therefore, telephone contact withemergency services must be available at all times.
The telephone company’s support is mandatory. If there is an interruption of service, we askthat our home be placed on a priority list for restoration of service. If there is a forewarning oftemporary phone disconnection, please notify us so that proper arrangements can be made foremergencies.
Sincerely,
*forms may be available through the home care agency or your local phone company.
Safety Tips
• Suction the trach tube before you leave the house.• Do not keep pets with fur in your home because hair can enter the tube and cause
an obstruction or infection.• Keep your home as free from lint and dust as possible.• Do not use powders or aerosol sprays on or near your child. Fumes or particles can
enter the tube and cause breathing problems.• DO NOT SMOKE. Smoke will cause irritation to your child’s lungs.• Your child may not swim.• Keep small objects (that could plug the tube) away from the child.• Do not allow siblings to play with trach equipment or the child’s trach tube.• Avoid use of chlorine bleach and ammonia near your child.• Avoid sand boxes and chalk dust.• Avoid exposure to people with colds or other illnesses.
FEEDING:The child with a tracheostomy tube usually eats normally. Some children may have a tubeplaced into their stomach to help them eat. Additional teaching and information will beprovided if your child also has this type of tube to the stomach.• Suction before a feeding (suctioning after a feeding can cause the child to gag and vomit).• Suction immediately if choking. If choking continues, give breaths with resuscitation bag
and call emergency services.• Burp your baby well.• Never prop a bottle.• Avoid plastic bibs.• Supervise children when eating.• Encourage fluids to keep secretions thin and loose.
BATHING:• Bathing is permitted as long as the water is shallow.• Do not allow water to enter the tube.• To prevent water from entering the tube, attach the the Humidivent or trach collar without
the tubing.• Never leave your child alone in the bathtub.• Your child should not shower.
CLOTHING:• Clothing should not cover the tube opening (no turtle necks).• Avoid fuzzy stuffed animals, clothing and blankets. Fibers or particles can enter and plug
the tube, making it difficult for your child to breathe.• Necklaces and beads should also be avoided.• Protect the trach tube on dusty, windy days. A cotton bib or bandana may be tied loosely
around the neck to prevent foreign objects from entering the trach tube.
13
Speaking with a Tracheostomy
Normally, speech is achieved by air that comes from the lungs through the vocal cords as weexhale. Speech development will be affected when a child has a tracheostomy since the trachtube is below the vocal cords and re-routes all or some of the exhaled air away from the cords.The ability to vocalize will vary with each child and the size of the trach tube. If the tube fitssnugly inside the trachea, all of the exhaled air will pass out the tracheostomy tube not allowingair to pass through the vocal cords to produce speech. Some children with smaller tubes can getair around the trach tube and up through the vocal cords to create sound.The PASSY-MUIR SPEAKING VALVE is a device that enables a child with a tracheostomy to vo-calize by forcing air around the tracheostomy tube and through the vocal cords. Speaking valvescannot be used in children with complete airway obstruction.Fenestrated tracheostomy tubes have an opening that allows air to pass through the vocal cordsand may be used in older children to enable them to speak.If a child is unable to vocalize, alternative methods of communication are necessary. These meth-ods include sign language, picture cards, and communication boards. A speech therapist canrecommend the best means of communication for your child.
Outpatient Care
You should bring your child to see your pediatrician during the first week you are home from thehospital. It is important for your doctor to see your child before he/she develops an illness. Thisallows him/her to get a baseline assessment of your child.An appointment will be made for your child to see the pulmonary doctors either at UCSF or one ofthe Pulmonary Outreach Clinics within 2-4 weeks. This appointment will be made before you aredischarged.
Home Nursing
We will make every effort to arrange for in-home shift nursing care. The level of support serviceswill vary with your child’s needs and your health care plan.We realize that having a nurse in your home can be a major adjustment. We encourage you tospend time with each new nurse to review your child’s care and equipment.It is also important to stay in communication with your home nursing agency case manager orsupervisor. You should feel free to contact them for any questions or concerns you might haveabout your child’s care.
14
Discharge Supply and Equipment Checklist
SUPPLIES:• Tracheostomy tube(s)• Trach protectors• Twill tape• Bandage scissors• Forceps• Suction catheters (Regular and DeLee)• Saline• Q-tips• 2x2 slit sponges• CPR manual for Infants and Children• Taking Care of the Child With a Tracheostomy booklet
EQUIPMENT:• Resuscitation bag / trach adapter• Suction machine with connecting tubing• Apnea monitor (if indicated)• Portable oxygen tank (if appropriate)• Nebulizer with tracheotomy collar (if appropriate)• Mist delivery system as ordered• Pulse oximeter (if indicated)
15