teacher: kenji tachibana digital photography i. natural gradation - found shots 14 slides copyright...
TRANSCRIPT
Teacher: Kenji TachibanaDigital Photography IDigital Photography I.
Natural Gradation - Found ShotsNatural Gradation - Found Shots
14 slides14 slides
Copyright © 2003 - 2009 Kenji TachibanaCopyright © 2003 - 2009 Kenji Tachibana
Teacher: Kenji TachibanaDigital Photography IDigital Photography INatural Gradation: Found shotNatural Gradation: Found shot
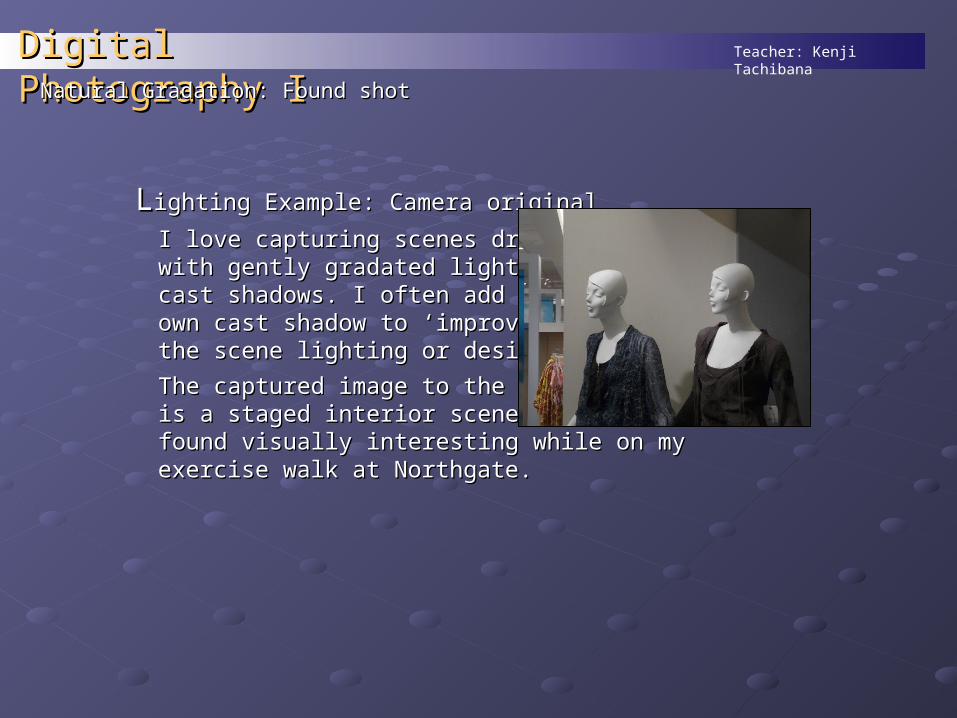
LLighting Example: Camera originalighting Example: Camera original
I love capturing scenes drawnI love capturing scenes drawnwith gently gradated lighting andwith gently gradated lighting andcast shadows. I often add mycast shadows. I often add myown cast shadow to ‘improve’own cast shadow to ‘improve’the scene lighting or design.the scene lighting or design.
The captured image to the rightThe captured image to the rightis a staged interior scene that Iis a staged interior scene that Ifound visually interesting while on my exercise walk at found visually interesting while on my exercise walk at Northgate.Northgate.
Teacher: Kenji TachibanaDigital Photography IDigital Photography INatural Gradation: Found shotNatural Gradation: Found shot
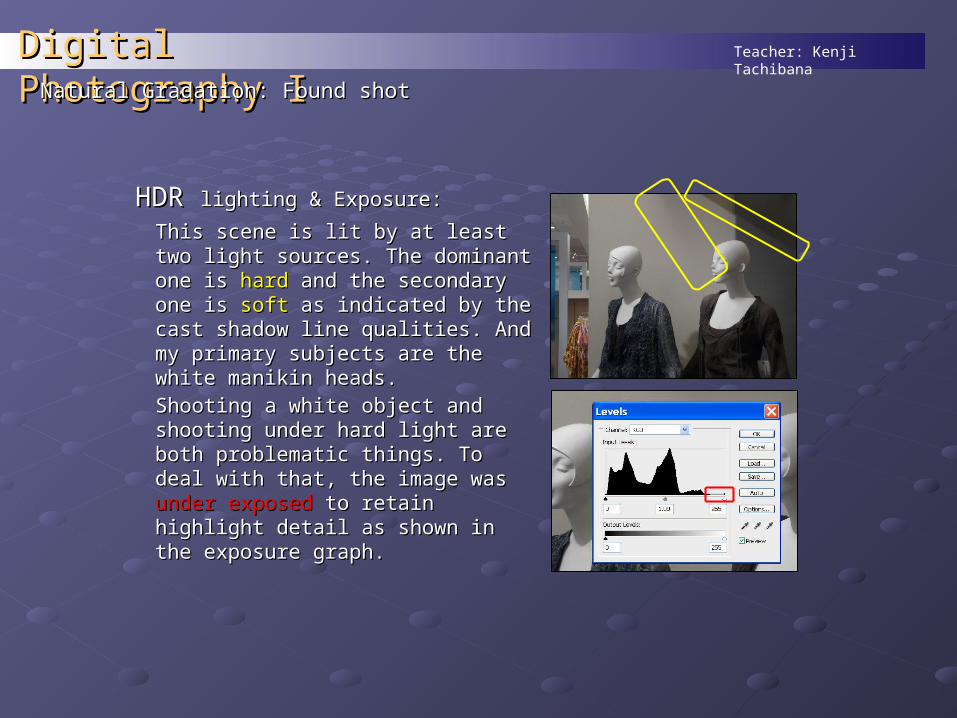
HDR HDR lighting & Exposure:lighting & Exposure:
This scene is lit by at least two light This scene is lit by at least two light sources. The dominant one is sources. The dominant one is hardhard and the secondary one is and the secondary one is softsoft as as indicated by the cast shadow line indicated by the cast shadow line qualities. And my primary subjects qualities. And my primary subjects are the white manikin heads. are the white manikin heads.
Shooting a white object and Shooting a white object and shooting under hard light are both shooting under hard light are both problematic things. To deal with problematic things. To deal with that, the image was that, the image was under exposed under exposed to retain highlight detail as shown to retain highlight detail as shown in the exposure graph.in the exposure graph.
Teacher: Kenji TachibanaDigital Photography IDigital Photography INatural Gradation: Found shotNatural Gradation: Found shot
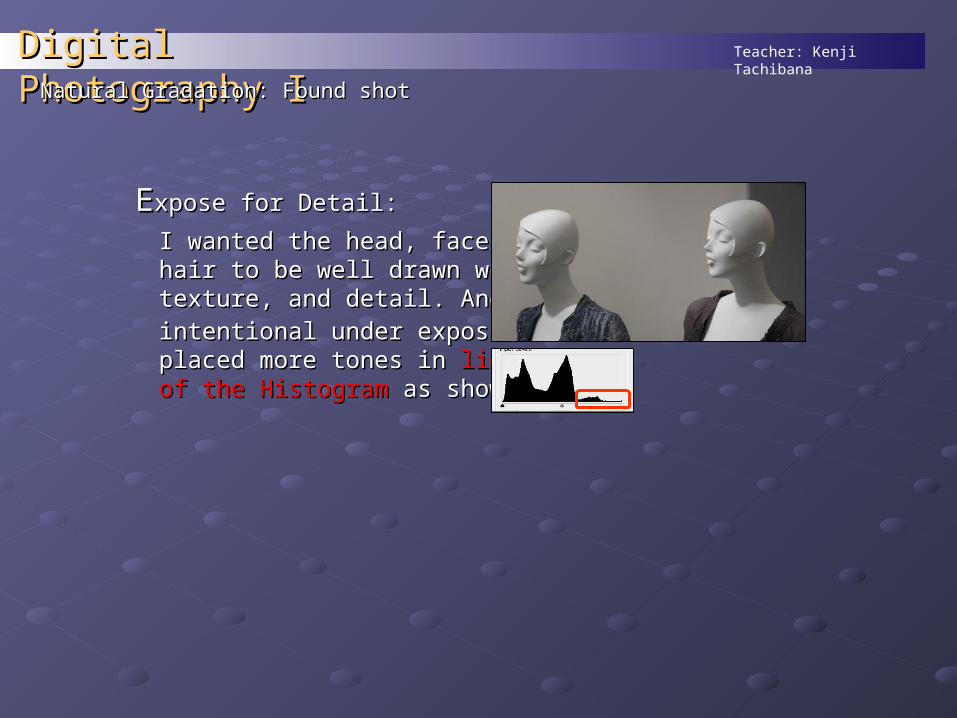
EExpose for Detail:xpose for Detail:
I wanted the head, face, andI wanted the head, face, andhair to be well drawn with form,hair to be well drawn with form,texture, and detail. And thetexture, and detail. And the
intentional under exposureintentional under exposureplaced more tones in placed more tones in light sidelight sideof the Histogram of the Histogram as shownas shown……
Teacher: Kenji TachibanaDigital Photography IDigital Photography INatural Gradation: Found shotNatural Gradation: Found shot
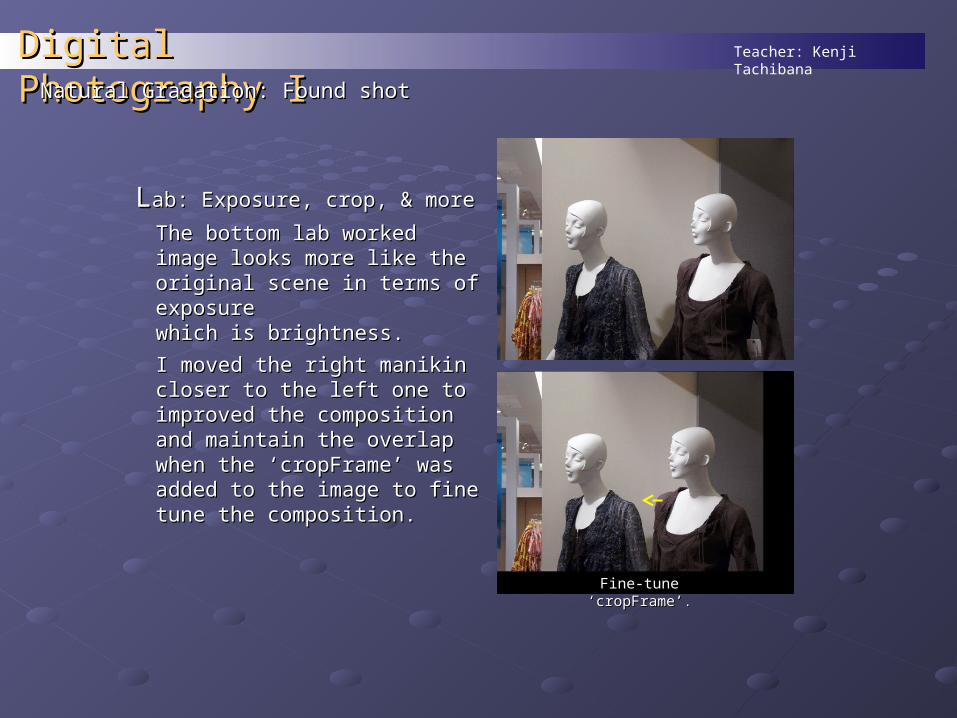
LLab: Exposure, crop, & moreab: Exposure, crop, & more
The bottom lab worked image The bottom lab worked image looks more like the original looks more like the original scene in terms of exposurescene in terms of exposurewhich is brightness.which is brightness.
I moved the right manikin I moved the right manikin closer to the left one to closer to the left one to improved the composition and improved the composition and maintain the overlap when the maintain the overlap when the ‘cropFrame’ was added to the ‘cropFrame’ was added to the image to fine tune the image to fine tune the composition.composition.
Fine-tune ‘cropFrame’Fine-tune ‘cropFrame’..
Teacher: Kenji TachibanaDigital Photography IDigital Photography INatural Gradation: Found shotNatural Gradation: Found shot
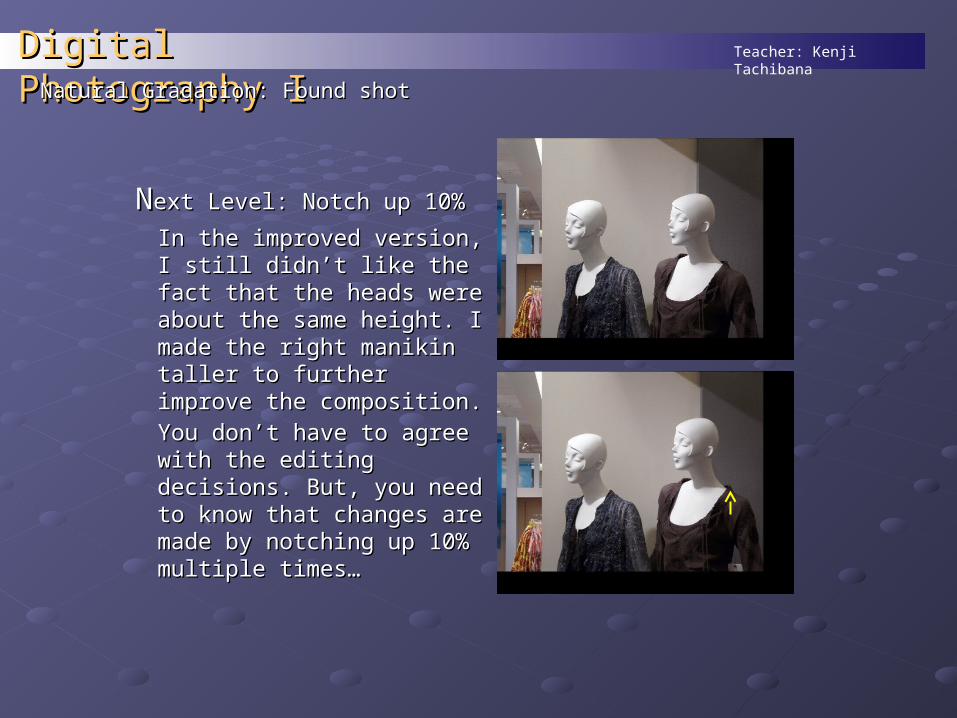
NNext Level: Notch up 10%ext Level: Notch up 10%
In the improved version, I still In the improved version, I still didn’t like the fact that the didn’t like the fact that the heads were about the same heads were about the same height. I made the right height. I made the right manikin taller to further manikin taller to further improve the composition. improve the composition.
You don’t have to agree with You don’t have to agree with the editing decisions. But, you the editing decisions. But, you need to know that changes need to know that changes are made by notching up 10% are made by notching up 10% multiple times…multiple times…
Teacher: Kenji TachibanaDigital Photography IDigital Photography INatural Gradation: Found shotNatural Gradation: Found shot
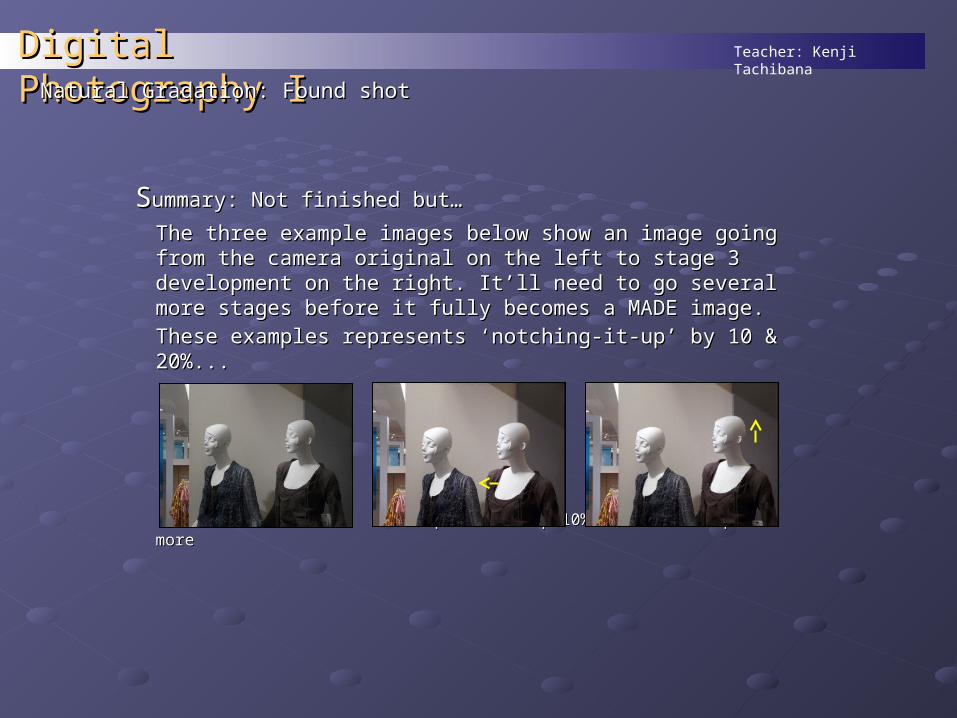
SSummary: Not finished but…ummary: Not finished but…
The three example images below show an image going The three example images below show an image going from the camera original on the left to stage 3 development from the camera original on the left to stage 3 development on the right. It’ll need to go several more stages before it on the right. It’ll need to go several more stages before it fully becomes a MADE image.fully becomes a MADE image.
These examples represents ‘notching-it-up’ by 10 & 20%...These examples represents ‘notching-it-up’ by 10 & 20%...
Found shotFound shot Crop + Notch-up 10%Crop + Notch-up 10% Notch-up 10% moreNotch-up 10% more
Teacher: Kenji TachibanaDigital Photography IDigital Photography I
SSummary: Not finished but…ummary: Not finished but…
The tThe t
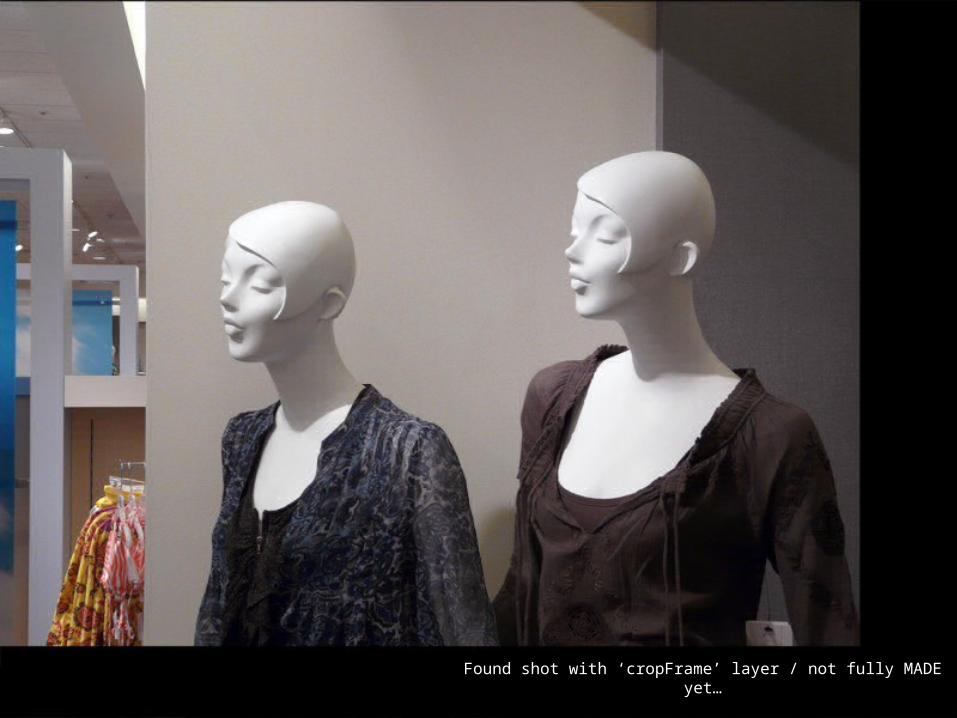
Found shot with ‘cropFrame’ layer / not fully MADE yet…Found shot with ‘cropFrame’ layer / not fully MADE yet…
Teacher: Kenji TachibanaDigital Photography IDigital Photography I
SSummary: Not finished but…ummary: Not finished but…
The tThe t
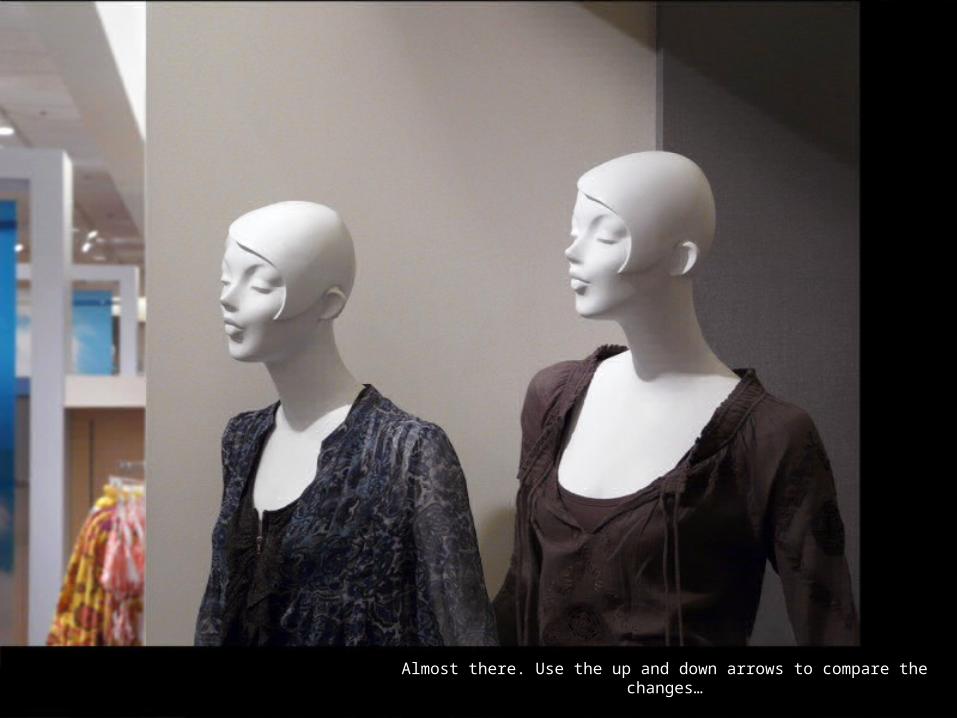
Found shot with ‘cropFrame’ layer / not fully MADE yet…Found shot with ‘cropFrame’ layer / not fully MADE yet…Almost there. Use the up and down arrows to compare the changes…Almost there. Use the up and down arrows to compare the changes…

Teacher: Kenji TachibanaDigital Photography IDigital Photography IAnother Found Shot:Another Found Shot:
CColor and Contrast:olor and Contrast:
These two found shots were store These two found shots were store staged very close to each other. staged very close to each other. And they contrast each other in And they contrast each other in multiple ways:multiple ways:
Subject face directionSubject face directionTop – frontal to cheated frontalTop – frontal to cheated frontalBottom – 3/4 to almost profileBottom – 3/4 to almost profileSubject arrangementSubject arrangementTop – side-by-side frontalTop – side-by-side frontalBottom – side-by-side ¾Bottom – side-by-side ¾Set colorationSet colorationTop – High saturationTop – High saturationBottom – Low saturation to neutralBottom – Low saturation to neutral

Teacher: Kenji TachibanaDigital Photography IDigital Photography IAnother Found Shot:Another Found Shot:
RRoutine Lab Work:outine Lab Work:
The basic lab work adjustments were The basic lab work adjustments were applied to increase Presence in the applied to increase Presence in the image.image.1.1.‘‘cropFrame’ – not neededcropFrame’ – not needed2.2.Levels adjustmentLevels adjustment3.3.Brightness/ContrastBrightness/Contrast4.4.Color adjustment – not neededColor adjustment – not needed
Use the keyboard Up and Down Use the keyboard Up and Down arrow keys to compare this with the arrow keys to compare this with the previous image.previous image.
Teacher: Kenji TachibanaDigital Photography IDigital Photography IAnother Found Shot:Another Found Shot:
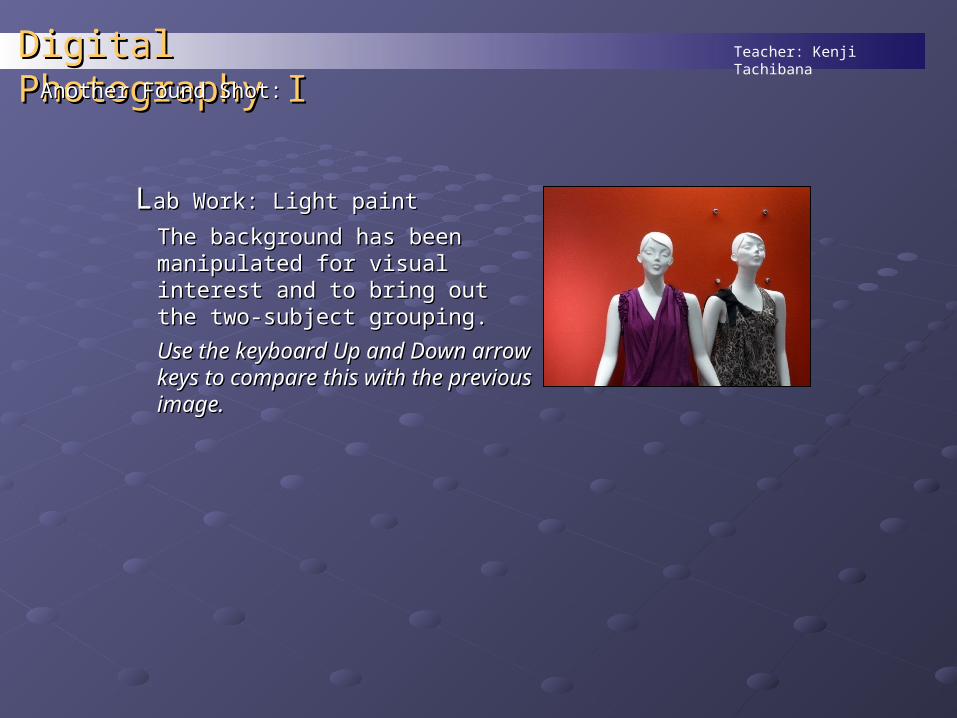
LLab Work: Light paintab Work: Light paint
The background has been The background has been manipulated for visual interest and to manipulated for visual interest and to bring out the two-subject grouping.bring out the two-subject grouping.
Use the keyboard Up and Down Use the keyboard Up and Down arrow keys to compare this with the arrow keys to compare this with the previous image.previous image.
Teacher: Kenji TachibanaDigital Photography IDigital Photography I
SSummary: Not finished but…ummary: Not finished but…
The tThe t
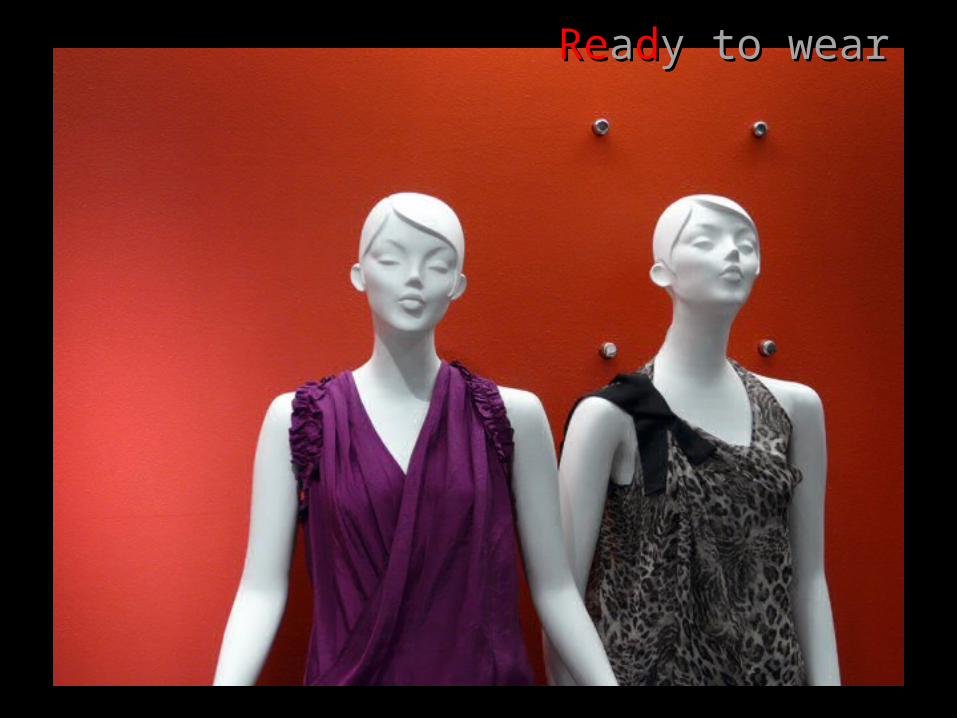
ReReaaddyy to wearto wear
Teacher: Kenji TachibanaDigital Photography IDigital Photography IFound Shots:Found Shots:
SSummary:ummary:
I like to light-paint cast shadows for enrichment and I like to light-paint cast shadows for enrichment and adding movement to images. I captured the first adding movement to images. I captured the first ‘Natural Gradation’ image to show the cast shadow ‘Natural Gradation’ image to show the cast shadow found in a real scene.found in a real scene.
In fact, there were two cast shadows in one scene, In fact, there were two cast shadows in one scene, which speaks of at least two light sources. One was which speaks of at least two light sources. One was on the hard side and the other was extremely soft.on the hard side and the other was extremely soft.
Light painting is about recreating believable lighting Light painting is about recreating believable lighting and shadow situations to enhance an image.and shadow situations to enhance an image.
Teacher: Kenji TachibanaDigital Photography IDigital Photography I
xx
EndEnd