tech report no. 107 wire rope inspection p report… · tech report no. 107 wire rope inspection p...
TRANSCRIPT
TECH REPORT No. 107Wire Rope Inspection
Periodic inspections of wire ropes in use are necessary for one very important reason:
Wire rope is a “consumed” item. It is literally “used up” as it is used, and gradually loses strength during its useful life.
The purpose of an inspection, then, is simply to ascertain - to such an extent as may be possible - whether a wire rope retains sufficient capability to perform the work to bedone before the next scheduled inspection.
That regular inspections are required by certain governmental regulations is, in a sense, of secondary importance - since the need to perform such inspections would exist anyway.
But the government does require machine owners and/or users to conduct regular, proper inspections, and to keep written records of such
inspections. The burden of this requirement is upon the owner/user.
The primary rule to follow in conducting a wire rope inspection on any typical machine or piece of equipment is that each wire
rope must be considered individually.
This individual treatment is particularly important when inspecting so-called “standing” ropes - those which are primarily supporting, or structural, members. For example, the pendants which support long crane booms are frequently made of several sections, each of which is an individual rope and must be examined individually.
Because different inspection criteria frequently apply, so-called “standing” ropes should be inspected separately from the “running”, or operating, ropes on the same machine or installation. Practicalities may dictate that parts of both running and standing ropes be inspected on the same trip to some high or inconvenient location on an installation - regardless, each rope must be given individual attention, and the pertinent information on each rope must be recorded separately.
It should not be necessary to point out, but it must be emphasized, that a proper inspection cannot be made when a wire rope is supporting a load or is in motion. A rope should be “relaxed and at rest” during the inspection. An exception might be certain types of conveyor and tramway ropes.
Several tools are useful in inspections:
> An awl and a marlin spike > A caliper > A steel tape > Two groove gauges > Chalk > Wiping cloths > Pencil, paper and carbon stick
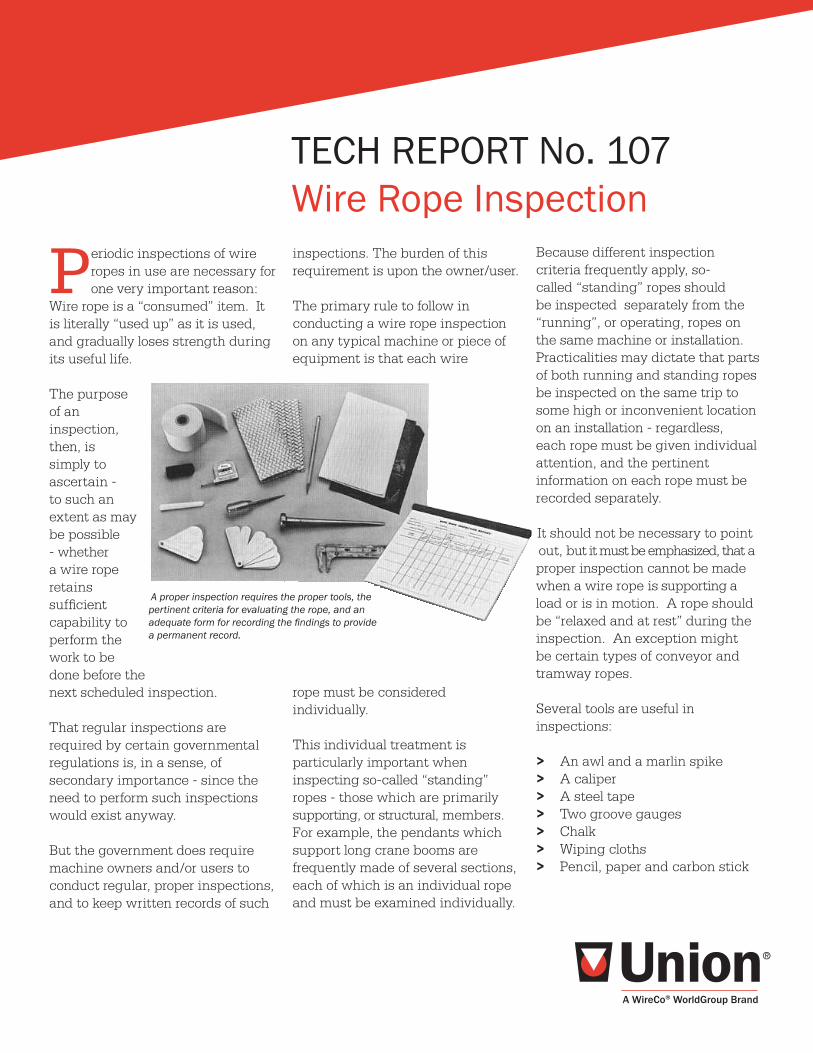
A proper inspection requires the proper tools, the pertinent criteria for evaluating the rope, and an adequate form for recording the findings to provide a permanent record.

inspection - daily to monthly intervals, (b) Periodic inspection - 1 to 12-month intervals.
The foregoing would seem to underscore the wisdom of many machine users who insist on a daily or work shift, visual inspection of all the elements in a wire rope system. The OSHA Regulations, however, are specific with reference to written and signed reports on thorough, periodic inspections.
'Critical' Points
There are certain points along any given rope which should receive more attention than
others, since some areas will usually be subjected to greater internal forces and hazards.
Carefully select the most critical points for close inspection - points where failure would be most likely to occur. The same critical points on each installation should be compared at each succeeding inspection.
Critical points which should be considered for careful inspection on most installations would include the following:
> Pick-up Points - These are sections of rope which are repeatedly placed under stress when the initial load of each lift is applied - such as those sections in contact with sheaves.
> End Attachments - At each end of the rope, two things must be inspected: the fitting that is attached to the rope, or to which the rope is attached and the condition of the rope itself, where it enters the attachment.
> Equalizing Sheaves - The section of a rope which is in contact with and adjacent to such sheaves, as on boom hoist lines, should receive careful inspection.
> Drums - The general condition of the drum, and condition of grooves if the drum is grooved, should receive careful inspection - as should the manner in which the rope “spools” onto the drum.
> Sheaves - Every sheave in the rope system must be inspected and checked with a groove gauge.
> Heat Exposure - Be especially watchful for signs that a rope has been subjected to extreme heat, or to repetitive heat exposure.
> Abuse Points - Frequently ropes are subjected to abnormal scuffing and scraping, such as contact with cross-members of a boom. Look for “bright” spots.
It must be kept in mind that minor - and frequently major - differences exist between installations, even on machines of a similar design. Therefore, points on each rope selected for close examination will necessarily require the best judgement of the inspector.
The manufacturer’s handbook or Operator’s Manual for the machine involved, and copies of pertinent governmental and other inspection criteria and specifications are also useful.
How Often to Inspect
Quite obviously, the greater the usage a rope receives, the more often inspections
would be indicated. Typical Occupational Safety and Health Act (OSHA) regulations state:
A thorough inspection of all ropes shall be made at least once a month and a full written, dated and signed report of rope condition kept on file where readily available.
OSHA Specification 1926.602 refers to Power Crane and Excavator Standards for material handling equipment as follows, regarding wire rope inspections (8.2.1.2):
All wire ropes in active service should be visually inspected once each working day. A thorough inspection of such ropes should be made at least once a month and dated records kept as to rope conditions.
The OSHA regulations for overhead and gantry cranes states:
Inspection procedure for cranes in regular service is divided into two general classifications based upon the intervals at which inspection should be performed, designated as ‘frequent’ and ‘periodic’ with respective intervals between inspections ... (a) Frequent
ROPEUSA
UNION

End Attachments
All end attachments have one characteristic in common: all restrict, to
some degree, the free movement of the wires at the end of the rope. This impairment can ultimately result in breakage of wires at the point where restriction occurs.
Broken wires are a primary concern when inspecting end attachments on a rope. A single broken wire is usually reason to question continued use of the rope, and more than one is usually sufficient cause for rejection.
Broken wires may be more difficult to locate at end fittings than in other sections of rope. An awl used to pick and probe at the point where strands enter the end attachment can often expose broken wires not otherwise visible.
Another problem frequently encountered at end fittings is corrosion or rust. Such corrosion can easily conceal broken wires, and if left to accumulate can erode the surface of wires to weaken them, or can restrict normal wire movement.
Inspection of rope ends should also include the condition of the actual attachment - worn eyes, missing thimbles, bent or “opened” hooks, worn clevis pins, and so on.
Measuring Diameter
Every periodic inspection must include diameter measurement at
critical points - and recording of measurements for future comparisons.
Most inspection standards are specific on permissible reductions in diameter, and the criteria for the installation and industry involved should be known by the inspector before starting to take measurements.
Measurements are proper only when made across the “crowns” of rope strands, so that the true diameter is the widest diameter at any given point on the rope. Always rotate the caliper on the rope - or the rope inside the caliper - to take a measurement.
Reductions in diameter are caused by several factors, including:
> Initial “Pull-Down” - All ropes are manufactured larger than nominal diameter. When placed in operation the first time, strands of a new, unused, rope will “seat in”, and the diameter will be “pulled down” from its original diameter. Therefore, the first measurements should be made and recorded for future reference after the time of such a rope’s initial loading.
> Normal Wear - In normal usage, the outer wires, particularly on the crowns of strands, will exhibit wear. Various inspection standards are specific as to the amount of such metal loss permissible.
> Internal Rope Damage - When the core of a wire rope has begun to deteriorate, diameter reduction is often the first detectable outward sign. Impending internal breakdown should always be suspected when a sudden or significant diameter reduction is noted, and if possible, an internal rope examination should be made.
Measuring Rope Lay
One rope lay is the length along the rope which a single strand requires
to make one complete spiral, or “turn”, around the core. It is an engineering factor in the design of a rope, and is carefully controlled during manufacture.
Since there is often some “adjustment” in rope lay during the initial “break-in” stages of a rope’s usage, it is recommended that rope lay measurements should be made after the initial loading, for comparison purposes at succeeding periodic inspections.
This image simulates 6x25FW construction wire ropes with surface wear (only) of 1/3 the outer wire diameter.
The correct method used to accurately measure wire rope diameter.
An awl used to probe the point where strands enter the end attachment can often expose broken wires.

One method for measuring rope lay is with a carbon stick and blank white paper. Firmly hold the paper on the rope and “stroke” with the carbon stick, so the rope’s “print” is made on the paper.
By drawing a line through one strand of the “print”, counting off the number of strands in the rope and then drawing another line on the print at the place where the same strand appears again, a measurement is established.
Many inspectors have found that a crayon or marking stick and a roll of adding machine tape are ideal for making a “print” at last three rope lays long - so that an average lay length can be determined.Changes in length of lay are usually gradual throughout the working life of a rope. It is important to compare current lay measurements with previous inspection results to note any sudden changes - for an abrupt change in the pattern can be the signal of an impending problem.
As a rule, if lengthening of lay is noted WITH loss of rope diameter, internal break-up or core destruction should be suspected.When lengthening of lay is noted WITHOUT loss of rope diameter, the rope is probably “unlaying” for some reason, and further examination should be made for the cause.
Unlaying sometimes results from operating a rope without having both ends secured to prevent rotation. An end swivel attachment permits such rotation and unlaying.
Another common cause of unlaying is worn sheaves. When the bottom of a sheave groove wears, it can restrict normal movement as the rope enters and leaves the groove; the result can be a build-up of twist which can change the length of lay.
Whatever the cause, unlaying is an abnormality, and should be noted for future reference if the immediate cause cannot be determined.
Finding Broken Wires
Probably the most common sign of rope deterioration and approaching failure is broken
wires, and inspection criteria are specific as to the number of broken wires allowable under various circumstances.
It is normal for a properly designed and used “running”, or operating, rope to exhibit broken wires as it approaches the end of its useful life. Under ideal conditions, the first wires to break would be the outside wires at the crowns of the strands - where surface wear is expected to occur. On “standing” ropes, wire breakage may not be so
easily observed. It is important that a diligent search be made for broken wires, particularly in critical areas such as “pick-up points" where stresses are concentrated.
The first step in looking for broken wires is to make sure the surface is clean enough that breaks can be seen. Wipe with a cloth. If necessary, scour with a wire brush to clean grease from the valleys between strands.
A thorough search for broken wires cannot be made when a rope is in tension or is supporting a load. Relax the rope, move “pick-up points” off sheaves, and flex the rope as much as possible.
With a sharp awl, pick and probe between wires and strands, lifting any wires which appear loose or move excessively.
If you find a number of broken wires approaching the maximum allowable permitted per strand or per rope lay, extend the search to other sections of the rope, and also take diameter and lay measurements in the area. If internal wire breaks or core damage are suspected, an internal examination should be made, if possible.
Under ideal and normal conditions, wires should break first on the crowns of the strands...as in this classic example of a worn out rope.
Flexing a rope can often expose broken wires hidden in valleys between strands.
An example of one method to accurately measure rope lay, using carbon paper, blank white paper, and a pencil.

Making an Internal Rope Examination
Any time interior damage, broken wires or core failure may be suspected, a
section of rope should be opened for internal examination. This may be accomplished without destroying the rope's future usefulness if due care is exercised and wires are not kinked or notched.
A rope can be opened for internal inspection only when completely relaxed. Using due care, "work" a marlin spike beneath two strands and rotate the spike to expose the core and "under" side of strands. Use an awl to probe for broken wires and examine inner surface.
If the rope has an independent wire rope core, look for broken wires on the "under" sides of strands where the strands contact the IWRC. Look for excessive "nicks" or broken wires in the strands caused by contact between adjacent strands or with IWRC. Examine the IWRC for broken wires also.
In the case of fiber core ropes, examine the core for excessive breakage of fibers. If short pieces of fiber - less than 1/4 inch long - sift out of the core, it is breaking up. Such short, broken fibers sometimes indicate the rope is being over-loaded, pinched in tight sheaves, or subjected to other abuse.
If a rope has been opened properly and carefully - and internal condition does not show cause for removal - strands can be returned to their original working positions without distorting the rope or impairing future usefulness.
Inspecting Sheaves
Almost every rope installation has one or more sheaves - ranging from traveling
blocks with complicated reeving patterns to equalizing sheaves where only minimal rope movement is noticeable. Each sheave should receive an individual examination at periodic inspections.
Each sheave is to be examined for the following:
> Groove depth, width and contour
> Groove smoothness > Broken or chipped flanges > Cracks in hubs, spokes, etc. > Signs of rope contact with
guards > Sheave bearings and shaft > Out-of-round condition > Alignment with other sheaves
Assessing the general physical condition of a sheave - groove smoothness, freedom from cracks and "nicks", existence of wear on guards, etc. - is a matter of careful, knowledgeable observation.
Properly gauging and evaluating the width, depth and contour of grooves with a groove gauge requires keen observation as well as knowledge of gauge design and use.
There are two types of wire rope groove gauges:
1. Those used by manufacturers of sheaves and drums, which make allowance for the maximum allowable oversize for wire rope, and are used to determine the proper contour for NEW grooves.
2. Those used "in the field", which are made to the nominal diameter of the rope PLUS one-half the allowable rope oversize. These are used to determine the MINIMUM condition for WORN grooves.
In a field inspection, when the gauge for worn grooves fits perfectly, the groove is at the minimum permissible contour. Anything narrower is unsuitable for use.
It is a good rule to keep in mind that, under normal operating conditions, as a groove wears it tends to become deeper and narrower. Excessive wear in an over-width manner frequently indicates some operating abnormality such as alignment.
A proper fitting sheave groove should support the rope over 135-150 degrees of rope circumference.
To open a rope, insert a marlin spike beneath two strands and rotate to lift strands and provide view of interior.

Sheave inspection should also include the condition of bearings and shaft. With the rope "relaxed", the sheave should be rotated by hand to determine the "fit" of the bearing and effectiveness of its lubrication...whether the sheave runs true, without "wobbling" on its shaft...whether the bottom of the groove is still concentric, or "round" in relation to the shaft...and whether the sheave and its shaft are in proper alignment with other sheaves or components of the system.
Evaluating Drums
Inspection criteria for drums will usually specify the following:
> Minimum number of dead wraps to remain on the drum
> Condition of drum grooves, if a grooved drum, and the surface of a smooth drum
> Condition of flanges at the ends of the drum
> Rope end attachments > Spooling characteristics of the
rope > Rope condition, particularly at
"pick-up points" on the rope
There is wide acceptance of the following guidelines for checking drums and drum operation.
Grooves should be of proper contour,
and checked with a groove gauge if normal tolerances apply. Bottoms of grooves should be smooth; drums that become imprinted with the rope's "tread", or excessively roughened, should be corrected or replaced. Grooves should be spaced so one wrap of rope does not "scrub" the next wrap as it spools onto the drum.
Spooling is that characteristic of a rope which affects how it wraps onto and off a drum. Spooling is affected by the care and skill with which the first layer of wraps is applied on drums with two or more layers. Wraps should be tight, and a loose condition must be corrected.
It is important to examine a rope for kinks or other damage when loose or irregular spooling has been observed.
Drum Crushing is a rope condition sometimes observed which indicates deterioration of the rope. Sometimes crushing is inevitable on a given drum winding, as is deformation of the wires in the rope, usually described as peening. Crushing and peening affect rope performance to such an extent as these conditions impair adjustment of wires in the rope and damage the wires themselves. When observed, either condition should be noted and careful evaluation of rope made.
How to Use Inspection Forms
These forms were prepared to serve as a guide for making thorough periodic
examinations of single wire ropes and serve as a permanent record of the inspection. One form should be used for each rope at each such inspection.
Before beginning an examination of an installation, fill in the blank
spaces at the top of the form. These identify the machine or installation, its owner, location, date, etc."Rope Application" refers to the specific usage of the rope...such as "Main Hoist", or "Boom Pendant", or "Boom Hoist".
After "Rope Description", fill in the diameter, construction, type, etc ...such as 1 in. 6x25 FW PRF RLL XIP IWRC.
After "Manufacturer's Ident. No.", insert data which will positively identify this rope...preferably the manufacturer's "reel number" which identifies the reel from which the rope was taken. The manufacturer's original purchase invoice or the shipping reel tag usually carries this number.
The "Applicable Standards" refer to the set of inspection criteria applicable to this installation which can be found in standards and regulations...such as ASME B30.2 for Overhead & Gantry Cranes or Federal Regulations such as OSHA.
It is the inspector's responsibility to obtain the proper inspection criteria for the application to be inspected.
At the column headings to the right of the words "Criteria for Removal", space is provided for the inspector to fill in specific criteria pertaining to each column. Fill the blank spaces with data taken from the proper set of criteria for the machine involved.A blank column is provided for inspector's use if it is desirable to check any other factor which is not listed on this form.
At the time of each inspection of an installation, refer back to previous inspection records to determine locations on each rope which should be inspected. If the installation has not previously had a thorough
Observe the groove so that it may be clearly seen whether the contour of the gauge matches the contour of the bottom of the groove.

5. A lay measurement should also be taken at the location selected for inspection.
6. Examine the entire rope end-to-end for evidence of external damage or abuse. Where damage or abuse is noted, proceed to make all the same observations for this location as at any "regular" inspection point. Try to determine the exact cause of any external damage so that "recurring" damage may be prevented.
7. Every sheave should receive a thorough examination and the condition recorded. When the rope "pick-up point" is being examined at a sheave, the data on the sheave can be recorded at that space on the form.
8. Examine and record the drum condition. In a proper inspection, the drum should be observed both in operation and at rest in order to observe "spooling".
inspection, sound judgement should be used in selecting these locations. "Critical Points" should be given first consideration.
The same locations on each rope should be examined carefully at each succeeding inspection so that rope diameter, lay, etc., may be compared to previous measurements in order to detect change in the rope condition. Sudden changes in condition may indicate deterioration.
At each inspection location on a rope, clean the rope sufficiently to be able to find broken wires and to take precise measurements. To be useful, measurements must be accurate.
For each inspection location selected on each rope, describe on the Inspection Report the exact location - such as "boom point sheave at pick-up". Then, in the order in which columns are established on the report form, make the indicated observations and write down the information:
1. Measure diameter
2. Examine for broken wires, (a) in one rope lay, and (b) in one strand of one rope lay. When a broken wire is found, look carefully for others. Record the number of breaks in that rope lay where the most breaks are found.
3. At this same location, inspect for excessive wear.
4. If the examination is being made at a rope dead-end, check for broken wires, corrosion and condition of the fitting.
To provide space for all these measurements, five horizontal spaces are provided on each Inspection Report form. Should these not be sufficient for extremely long ropes, or for any other reason, these spaces may be divided with horizontal lines - or a second form used.
When an inspection is completed - or has proceeded far enough for the inspector to decide that rejection is in order - the form should be signed by the inspector. Comments may also be written at the bottom, if desired.
Federal regulations require that signed inspection reports must be maintained on file for all ropes in active service.
Use a Wire Rope Inspection Report to maintain accurate record of all wire rope inspections.

12200 NW Ambassador Dr. Kansas City, MO 64163-1244(816) 270-4700WireCoWorldGroup.comUnionRope.com Fo
rm N
o. 1
018C
Engineering wire rope for your application is a highly specialized field - with
exacting standards - that we gladly live by. Across the entire WireCo WorldGroup organization, we draw from our global pool of talented engineers to drive results for your application.
Nine manufacturing operations and seven distribution centers in North America, plus manufacturing facilities in Germany, Poland and Portugal, give our customers unparalleled support and global reach.
Our manufacturing standards typically exceed the minimum design standards for a wire rope. We take an active role in industry associations that develop wire rope specifications and standards, such as ASTM A1023.
We apply thorough design and manufacturing controls - including complete material traceability. And we are the only manufacturer in the world that is QPL qualified, API certified, and registered to both ISO 9001: 2000 and AS-9100 Quality Systems.So look to the best: The Union brand back by the WireCo WorldGroup organization. We're dedicated to matching and advancing wire rope to your dynamic applications throughout the world.
With a global manufacturing and distribution base, along with our unmatched technical expertise, the world is our worksite.
WireCo WorldGroup world headquarters, located in Kansas City, Missouri.