teci april 2013
DESCRIPTION
matt-hickey.com are proud to present the first edition of Teci Magazine. A magazine which follows the journey of Matt Hickey's photography. In this edition you will find the reasons behind producing the magazine, and the first editions of Photoshop Tips, Photographer Reviews, Inspiration Corner and a Homework section. Enjoy.TRANSCRIPT
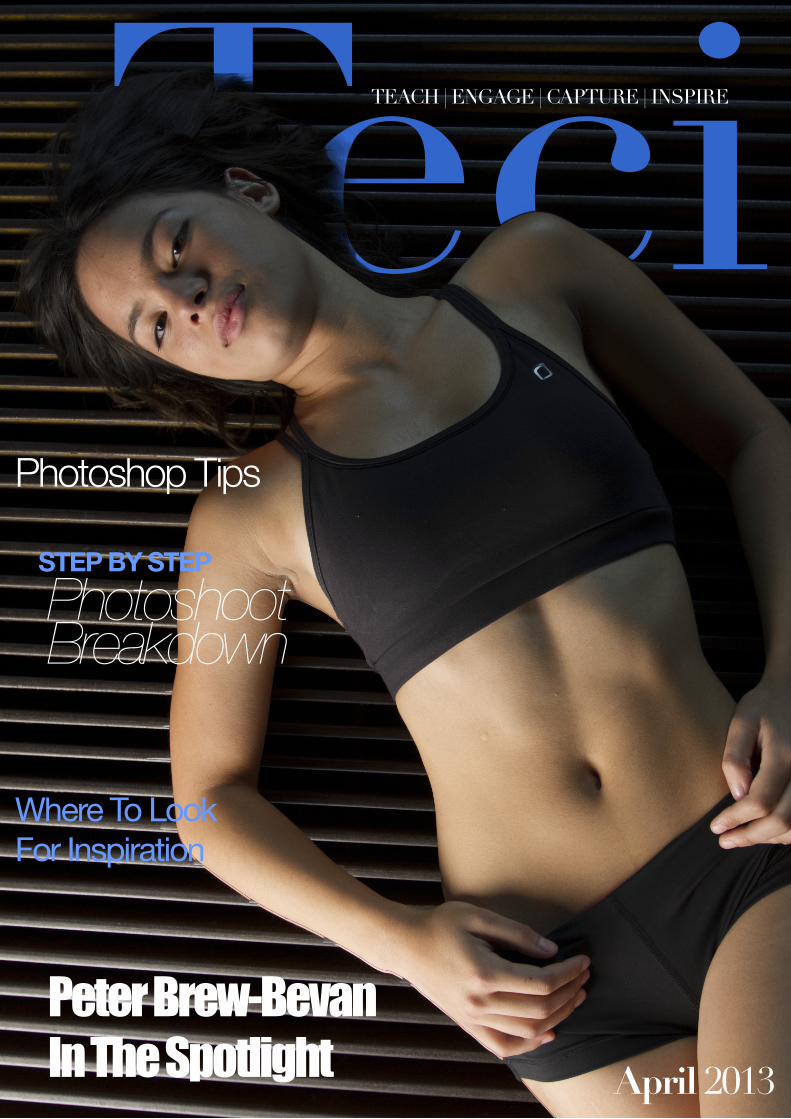
TeciTEACH | ENGAGE | CAPTURE | INSPIRE
April 2013
Photoshop Tips
Photoshoot Breakdown
Peter Brew-BevanIn The Spotlight
Where To LookFor Inspiration
STEP BY STEP
CO
NTE
NTS
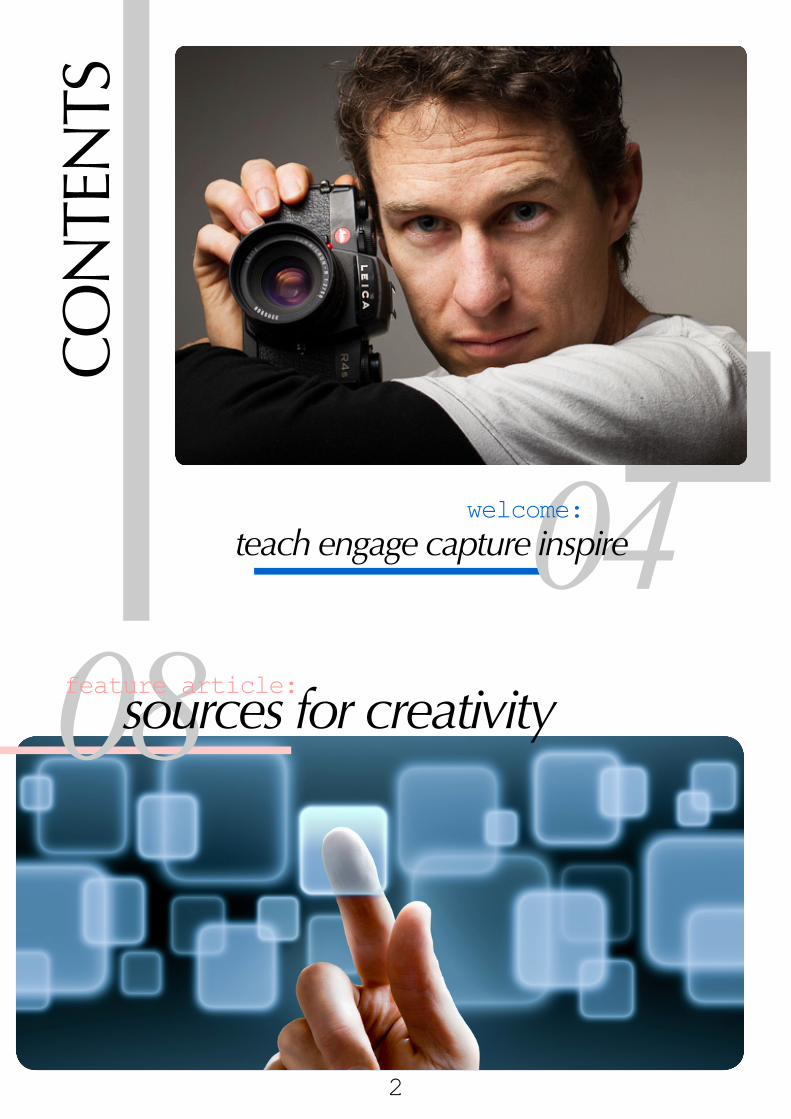
08feature article:sources for creativity
04welcome:teach engage capture inspire
2

18homework:
19inspiration:
11artist spotlight:peter brew-bevan
your inspiration feed
12project:
16photoshop corner:
family car shoot
shot-a-day
layers
3
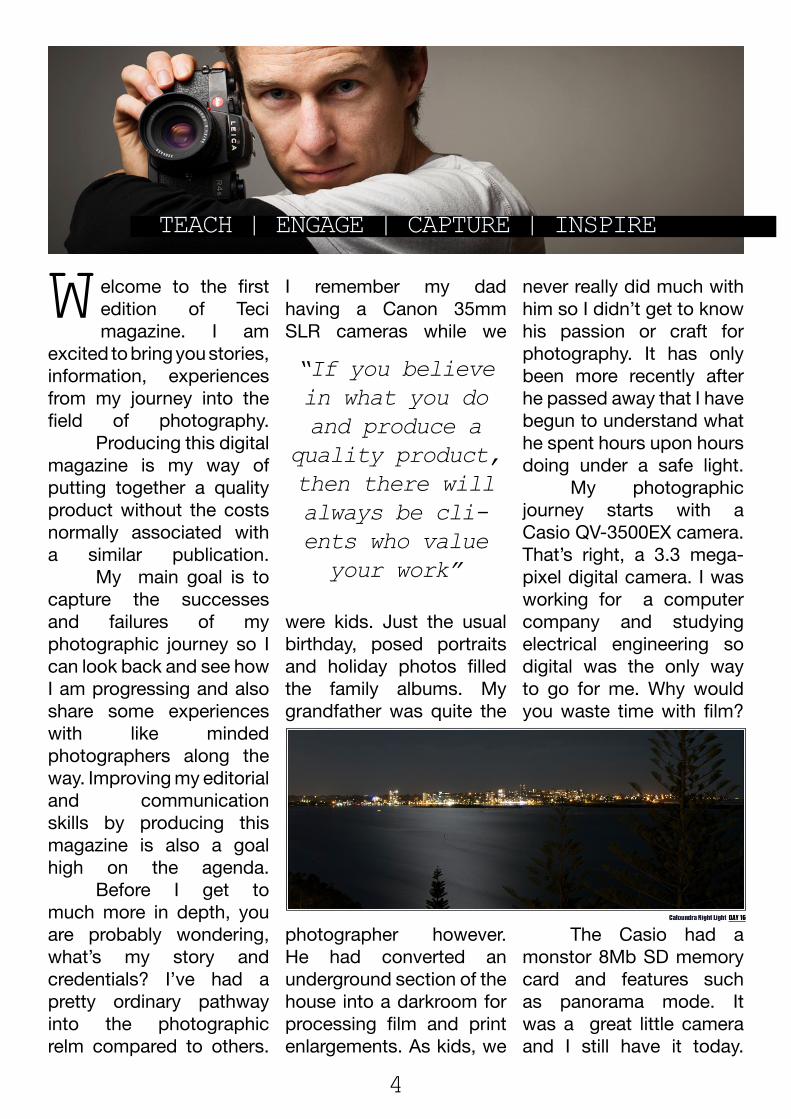
elcome to the first edition of Teci magazine. I am
excited to bring you stories, information, experiences from my journey into the field of photography. Producing this digital magazine is my way of putting together a quality product without the costs normally associated with a similar publication. My main goal is to capture the successes and failures of my photographic journey so I can look back and see how I am progressing and also share some experiences with like minded photographers along the way. Improving my editorial and communication skills by producing this magazine is also a goal high on the agenda. Before I get to much more in depth, you are probably wondering, what’s my story and credentials? I’ve had a pretty ordinary pathway into the photographic relm compared to others.
I remember my dad having a Canon 35mm SLR cameras while we
were kids. Just the usual birthday, posed portraits and holiday photos filled the family albums. My grandfather was quite the
photographer however. He had converted an underground section of the house into a darkroom for processing film and print enlargements. As kids, we
never really did much with him so I didn’t get to know his passion or craft for photography. It has only been more recently after he passed away that I have begun to understand what he spent hours upon hours doing under a safe light. My photographic journey starts with a Casio QV-3500EX camera. That’s right, a 3.3 mega-pixel digital camera. I was working for a computer company and studying electrical engineering so digital was the only way to go for me. Why would you waste time with film?
The Casio had a monstor 8Mb SD memory card and features such as panorama mode. It was a great little camera and I still have it today.
TEACH | ENGAGE | CAPTURE | INSPIRE
“If you believe in what you do and produce a
quality product, then there will always be cli-ents who value your work”
W
4
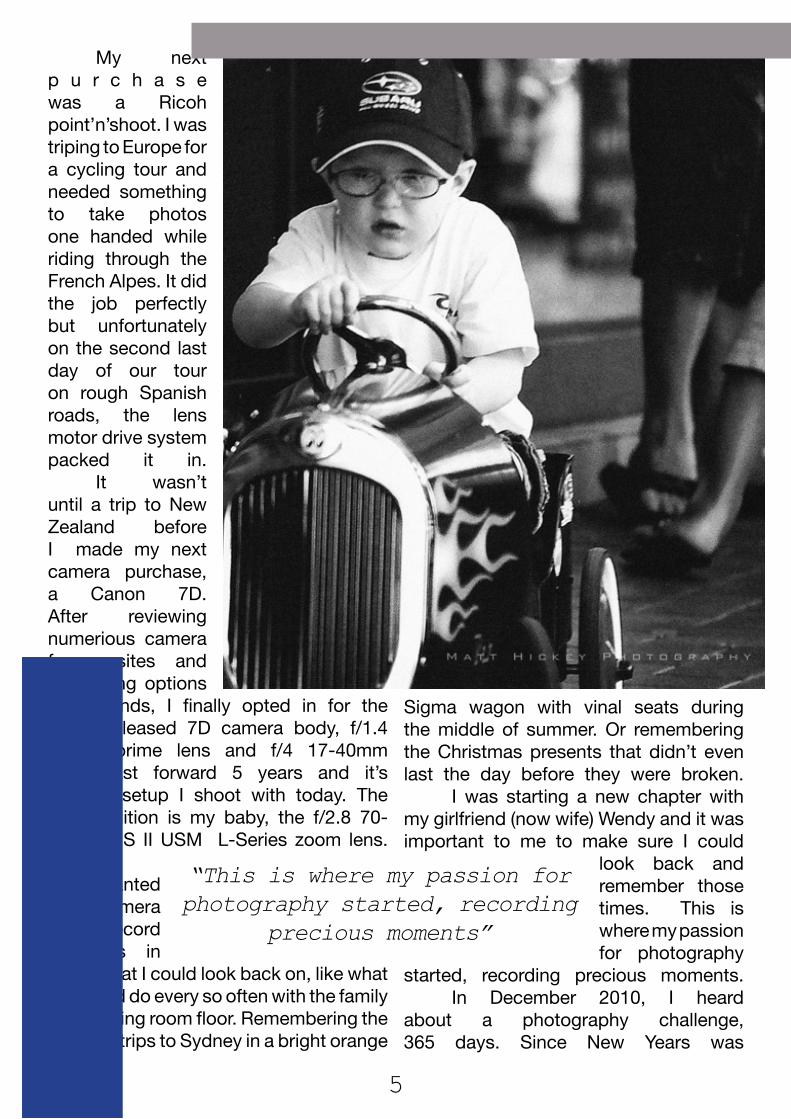
My next p u r c h a s e was a Ricoh point’n’shoot. I was triping to Europe for a cycling tour and needed something to take photos one handed while riding through the French Alpes. It did the job perfectly but unfortunately on the second last day of our tour on rough Spanish roads, the lens motor drive system packed it in. It wasn’t until a trip to New Zealand before I made my next camera purchase, a Canon 7D. After reviewing numerious camera forum sites and discussing options with friends, I finally opted in for the newly released 7D camera body, f/1.4 50mm prime lens and f/4 17-40mm lens. Fast forward 5 years and it’s still the setup I shoot with today. The only addition is my baby, the f/2.8 70-200mm IS II USM L-Series zoom lens. I wanted the camera to record moments in my life that I could look back on, like what we would do every so often with the family on the living room floor. Remembering the fun road trips to Sydney in a bright orange
Sigma wagon with vinal seats during the middle of summer. Or remembering the Christmas presents that didn’t even last the day before they were broken. I was starting a new chapter with my girlfriend (now wife) Wendy and it was important to me to make sure I could
look back and remember those times. This is where my passion for photography
started, recording precious moments. In December 2010, I heard about a photography challenge, 365 days. Since New Years was
“This is where my passion for photography started, recording
precious moments”
5

6
coming up soon I thought it would be cool to take a picture for every day of 2011. Little did I realise how much of a challenge this would be. It was the best thing I could have done. My photography improved out of sight. The challenge taught me to look for items of interest instead of just the obvious. It was also the first time I overcame a fear, asking strangers for a picture. I recorded the challenge on a blog site and started getting a number of followers checking in every other day to see the latest additions. Being bit of a geek, I tend to research ideas and concepts on my own. To date, I’m self taught and run purly for my own interest and creative outlet. If you asked my what type of photography I liked 2 years ago, I would have replied with sports or landscapes. Now it’s totally different. I’m now using strobes with medium format film cameras taking stylised glamour and fashion photography, and developing my own film. It’s only been around 3 years since picking up a camera as a serious hobby but each day I make massive leaps in my photographic journey. Understanding technical concepts, printing, digital editing, style, clients, gear, catalogues, chemicals, light, albums, framing are all areas I’ve studied, researched and applied to further my experience. My latest challenge is the business side of photography and making it a viable option for an income. My hobby is booming and it’s all through word of mouth. If you believe in what you do and produce a quality product, then there will always be clients who value your work. Educating clients is very important to me because it shows I care and understand my clients needs. From the first contact, I endevour to keep the client informed of the process of producing their beautiful artworks. Presenting them in a way that causes an emotional response when they relive their precious memories is what I strive for. TECI-Teach, Engage, Capture, Inspire, is my way of bringing you some of the wonderful stories I have experienced with my clients. I’m looking forward to the journey. TECI
“It was the best thing I could have done. My photography improved
out of sight”
7
8
Sources for Creativity
Feature Article:
e all get it, that moment when our brain just doesn’t seem
to function and the ideas get backed up. Thousands of years ago, it was common knowledge that inspiration came from the gods. These days, those who claim divine inspiration would probably be locked up or referred to a psychiatrist for their crazy ideas. Fortunately we are not that extreme and are usually just after a little creative direction to help with a
passing inspiration block. Creative blocks are usually self inflicted and caused by our own lifestyle pressures. The big one is money. We stress about it all the time. “Do I have enough to pay the bills, can I buy the latest camera gadget, am I keeping up with the Joneses?” When we worry about other issues, it blocks our creative side of the brain. Fear is also another reason for the pipes becoming blocked. Wondering if I’m good enough to take of photo
of a friends baby, or compete with professional photographers for clients. The fear of failure and fear of rejection might seem normal but there is also the fear of success and fear of trying something new which can hold us back from being a better photographer, and ultimately, a better human being. To encourage the creative process, we need to eliminate as many of the negitave aspects as possible. Forget about the bills, deadlines, kids... well maybe that’s not very
Ever wondered what your next photoshoot will be or just can’t think of a reason to pick up the camera? We look at a number of inspiring sources to get the creative juices flowing again.
W+++

9
responsible. Remove the distractions; see if a friend can look after the kids for a few hours, log out of Facebook, switch off the TV, mobile phone and any other device which may break your concentration. It’s important to not place any pressure on yourself, if you don’t achieve anything at the end of a session, that’s OK. Who cares? It’s all about getting you to the right place where you can start
thinking creatively. As you practice more regularly, you will find you can return to the creative space more quickly and ideas will start being generated. Putting on some calming instrumental music can aid the process.
Performing some stretches, breathing exercises or even some Yoga poses will help you
to slow down all the daily stresses we place on ourselves and start tapping into
Relaxation technique: Breathing meditation for stress reliefWith its focus on full, cleansing breaths, deep breathing is a simple, yet powerful, relaxation technique. It’s easy to learn, can be practiced almost anywhere, and provides a quick way to get your stress levels in check. Deep breathing is the cornerstone of many other relax-ation practices, too, and can be combined with other relaxing elements such as aromather-apy and music. All you really need is a few minutes and a place to stretch out.
Practicing deep breathing meditationThe key to deep breathing is to breathe deeply from the abdomen, getting as much fresh air as possible in your lungs. When you take deep breaths from the abdomen, rather than shallow breaths from your upper chest, you inhale more oxygen. The more oxygen you get, the less tense, short of breath, and anxious you feel.
• Sit comfortably with your back straight. Put one hand on your chest and the other on your stomach.
• Breathe in through your nose. The hand on your stomach should rise. The hand on your chest should move very little.
• Exhale through your mouth, pushing out as much air as you can while contracting your abdominal muscles. The hand on your stomach should move in as you exhale, but your other hand should move very little.
• Continue to breathe in through your nose and out through your mouth. Try to inhale enough so that your lower abdomen rises and falls. Count slowly as you exhale.
• If you find it difficult breathing from your abdomen while sitting up, try lying on the floor. Put a small book on your stomach, and try to breathe so that the book rises as you inhale and falls as you exhale.
a new unrestricted world of possibilities. In this day and age, we have unparalleled access to information and resources. The internet is an incredible source but it does have some issues. It can be a great time waster and also overwhelm people with the quality and
quantity of photography. If you use the sources listed on the following page to subliment your creative approach and designs, your are sure to go to the next level and produce some amazing work.
“remove the distractions”
+
+[ ]
10
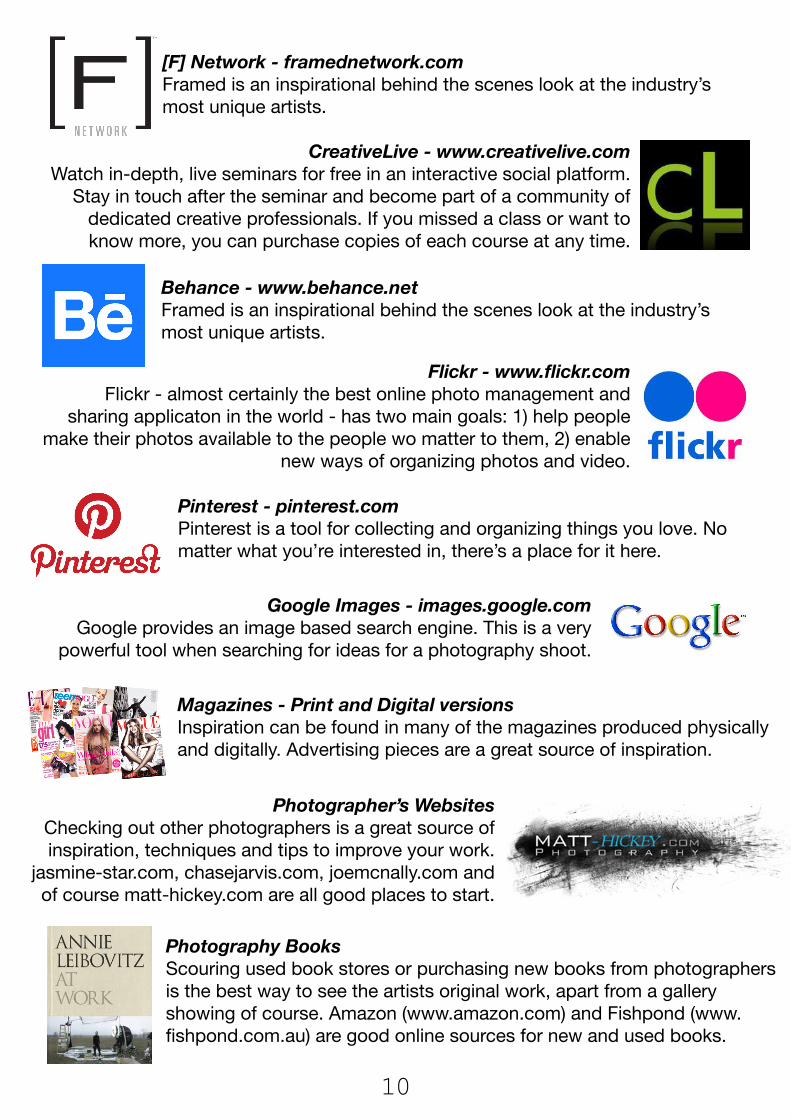
[F] Network - framednetwork.comFramed is an inspirational behind the scenes look at the industry’s most unique artists.
CreativeLive - www.creativelive.comWatch in-depth, live seminars for free in an interactive social platform.
Stay in touch after the seminar and become part of a community of dedicated creative professionals. If you missed a class or want to know more, you can purchase copies of each course at any time.
Behance - www.behance.netFramed is an inspirational behind the scenes look at the industry’s most unique artists.
Flickr - www.flickr.comFlickr - almost certainly the best online photo management and
sharing applicaton in the world - has two main goals: 1) help people make their photos available to the people wo matter to them, 2) enable
new ways of organizing photos and video.
Pinterest - pinterest.comPinterest is a tool for collecting and organizing things you love. No matter what you’re interested in, there’s a place for it here.
Magazines - Print and Digital versionsInspiration can be found in many of the magazines produced physically and digitally. Advertising pieces are a great source of inspiration.
Google Images - images.google.comGoogle provides an image based search engine. This is a very
powerful tool when searching for ideas for a photography shoot.
Photographer’s WebsitesChecking out other photographers is a great source of inspiration, techniques and tips to improve your work.
jasmine-star.com, chasejarvis.com, joemcnally.com and of course matt-hickey.com are all good places to start.
Photography BooksScouring used book stores or purchasing new books from photographers is the best way to see the artists original work, apart from a gallery showing of course. Amazon (www.amazon.com) and Fishpond (www.fishpond.com.au) are good online sources for new and used books.

11
Peter Brew-BevanPhotographer Review
eter is an award winning fashion portrait photographer, whom is best known for his celebrity portraiture both locally and internationally.
I was introduced to Peter’s work when walking past a book store with his Shoot: Studio Sessions book sitting on the front stand. After a few subtle hints, I later received the book as a Christmas present from my mother. The book is absolutely stunning and a piece of art in itself. Shoot is a very personal selection of approximately 47 celebrity photographic portraits taken by Peter Brew-Bevan. The book begins with introduction which outlines Peter Brew-Bevan’s career as both fine artist and photographer, and places his work in context. The portraits section follows. Nearly all the subjects are well-known celebrities (Australian and international) working in sport, film, literature, music, television, theatre and fine arts. Each finished portrait is accompanied by a short description summarising the shoot brief, the evolution of the concept, events on the day and post production notes. Also for every portrait there are accompanying reproductions/
facsimiles of Peter Brew-Bevan’s handwritten journals that outline the concept for the shoot, the styling, lighting set-up, his interaction with the artist, which include sketches and tearsheets from magazines etc. that inspired him in creating the portrait. The book is highly illustrated, features tip-ins on transparent film,
and journal pages that appear on distinctive pages that differ in size and stock from the larger portrait pages. Born in Adelaide, South Australia in 1969, Peter Brew-Bevan trained as an artist, specialising in painting and drawing. While still at art school he began
to experiment with photography, and was so compelled by the instant beauty achievable through the medium that he set aside his painting career. He now uses his artist’s eye through the camera lens. Peter has worked with various photographic forms over the years, including photomontage, but it is for his portraiture and fashion portraiture that he is best known, in particular for his ability to capture the essence of his subjects through the creative use of lighting and location, coupled with his ability to engage and communicate with his subjects. Peter travels the world working on commissions for clients ranging from magazines and record companies to film studios.His images have been collected and exhibited by numerous galleries, including Australia’s National Portrait Gallery in Canberra.Peter has also authored his first photographic book titled Shoot : Studio Sessions, which has won many high profile industry awards for its overall innovative concept and design.
P
TECIJack Black photographed by Peter Brew-Bevan
12
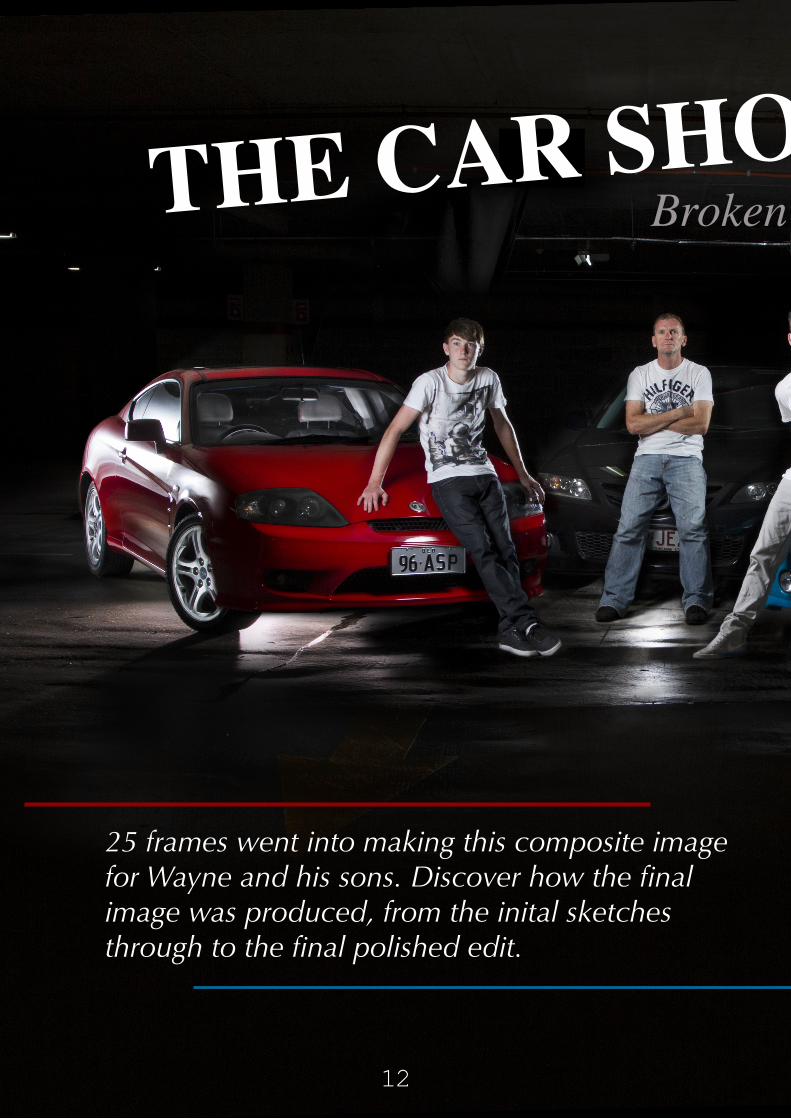
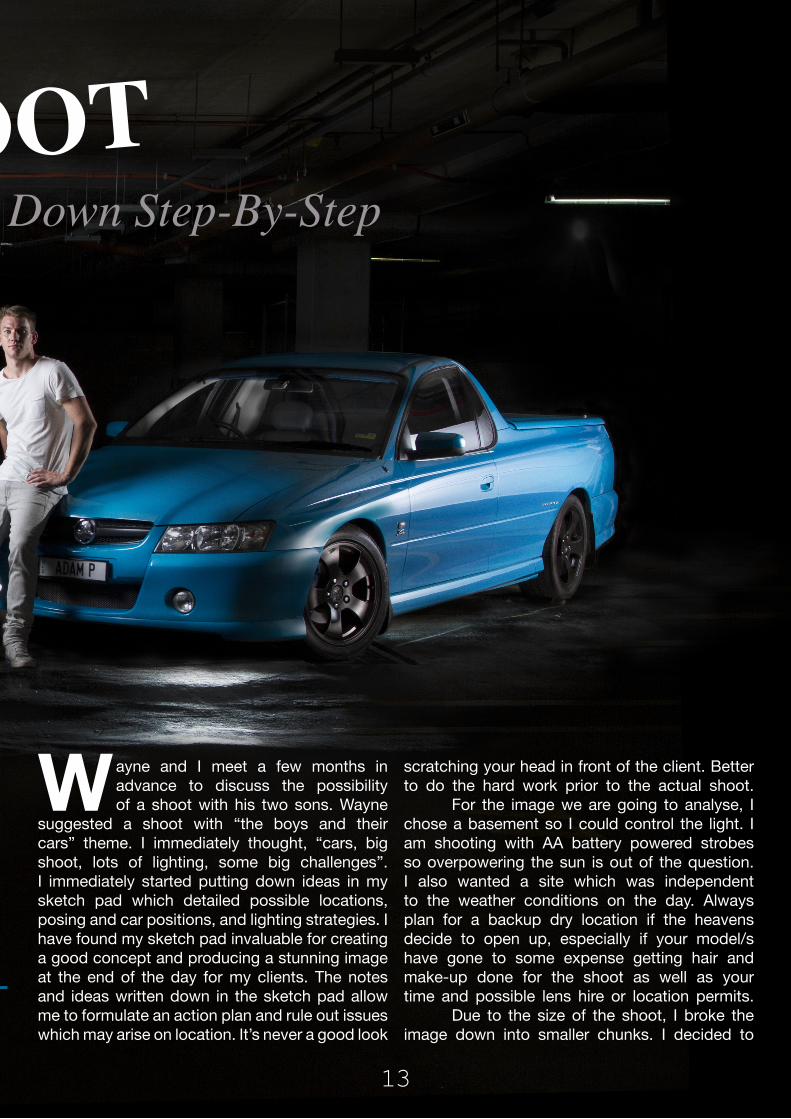
THE CAR SHOOTBroken Down Step-By-Step
25 frames went into making this composite image for Wayne and his sons. Discover how the final image was produced, from the inital sketches through to the final polished edit.
13
THE CAR SHOOTBroken Down Step-By-Step
ayne and I meet a few months in advance to discuss the possibility of a shoot with his two sons. Wayne
suggested a shoot with “the boys and their cars” theme. I immediately thought, “cars, big shoot, lots of lighting, some big challenges”. I immediately started putting down ideas in my sketch pad which detailed possible locations, posing and car positions, and lighting strategies. I have found my sketch pad invaluable for creating a good concept and producing a stunning image at the end of the day for my clients. The notes and ideas written down in the sketch pad allow me to formulate an action plan and rule out issues which may arise on location. It’s never a good look
scratching your head in front of the client. Better to do the hard work prior to the actual shoot. For the image we are going to analyse, I chose a basement so I could control the light. I am shooting with AA battery powered strobes so overpowering the sun is out of the question. I also wanted a site which was independent to the weather conditions on the day. Always plan for a backup dry location if the heavens decide to open up, especially if your model/s have gone to some expense getting hair and make-up done for the shoot as well as your time and possible lens hire or location permits. Due to the size of the shoot, I broke the image down into smaller chunks. I decided to
W

14
attack each car individually. I locked the camera down onto a tripod and setup a remote shutter release. Therefore I could take multiple exposures and know that my subjects would always be in the same location, making the post processing work much easier. I then decided on the correct exposure reading for the resulting image. I went with a large depth of field (DOF), large aperture number (f/16), so I could get most of the cars in focus. My focus point was aimed at the front of the cars where my human subjects will be located. Once set, I changed my auto focus switch on the lens to manual so this would not change for any subsequent images.
To produce the final image, there was around 25 images composited together. I could have produced this shot in one singe frame but it would have required thousands of dollars in specialised lighting equipment. I prefer to save some money and do the hard work in post-production. Firstly, the images were imported into Lightroom and a star rating was made on the good images. A filter was made to show only the starred images and these where exported to PSD format ready for Photoshop. The best way to work with multiple images is to open up Photoshop and select File > Scripts > Load Files into Stacks. This process
15
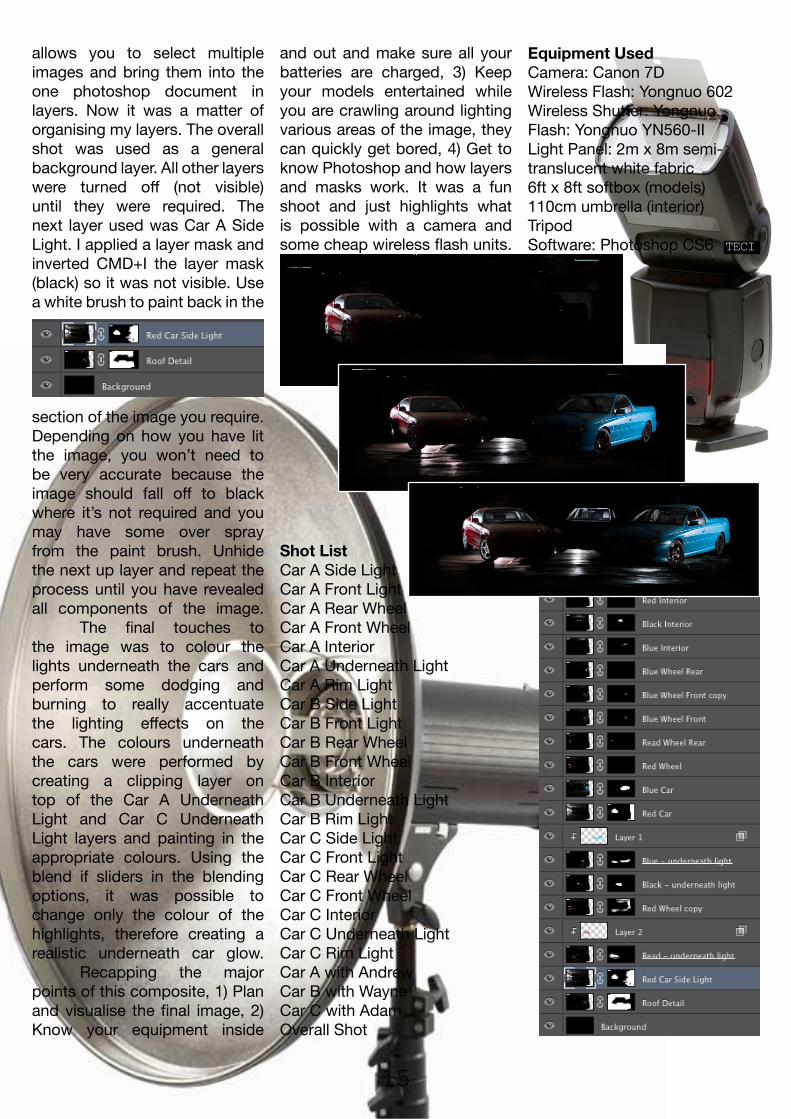
allows you to select multiple images and bring them into the one photoshop document in layers. Now it was a matter of organising my layers. The overall shot was used as a general background layer. All other layers were turned off (not visible) until they were required. The next layer used was Car A Side Light. I applied a layer mask and inverted CMD+I the layer mask (black) so it was not visible. Use a white brush to paint back in the
section of the image you require. Depending on how you have lit the image, you won’t need to be very accurate because the image should fall off to black where it’s not required and you may have some over spray from the paint brush. Unhide the next up layer and repeat the process until you have revealed all components of the image. The final touches to the image was to colour the lights underneath the cars and perform some dodging and burning to really accentuate the lighting effects on the cars. The colours underneath the cars were performed by creating a clipping layer on top of the Car A Underneath Light and Car C Underneath Light layers and painting in the appropriate colours. Using the blend if sliders in the blending options, it was possible to change only the colour of the highlights, therefore creating a realistic underneath car glow. Recapping the major points of this composite, 1) Plan and visualise the final image, 2) Know your equipment inside
and out and make sure all your batteries are charged, 3) Keep your models entertained while you are crawling around lighting various areas of the image, they can quickly get bored, 4) Get to know Photoshop and how layers and masks work. It was a fun shoot and just highlights what is possible with a camera and some cheap wireless flash units.
Shot List Car A Side Light Car A Front Light Car A Rear Wheel Car A Front Wheel Car A Interior Car A Underneath Light Car A Rim Light Car B Side Light Car B Front Light Car B Rear Wheel Car B Front Wheel Car B Interior Car B Underneath Light Car B Rim Light Car C Side Light Car C Front Light Car C Rear Wheel Car C Front Wheel Car C Interior Car C Underneath Light Car C Rim Light Car A with Andrew Car B with Wayne Car C with Adam Overall Shot
Equipment Used Camera: Canon 7D Wireless Flash: Yongnuo 602 Wireless Shutter: Yongnuo Flash: Yongnuo YN560-IILight Panel: 2m x 8m semi-translucent white fabric 6ft x 8ft softbox (models) 110cm umbrella (interior) Tripod Software: Photoshop CS6 TECI

16
LayersPhotoshop Cornern a nutshell, layers enable you to work on one part of an image without affecting others. You can change the
opacity of layers, so they’re opaque or barely visible. You can move layers, mask and subtly blend them. You need to think of your Photoshop layers as sheets of acetate stacked on your background image. A layer can be filled with image pixels, or just have a small area of an image with other areas transparent. You can also blend layers and hide parts via Layer Masks. On the third page of this post you’ll see a deconstruction of our featured image image, and how we used layers to achieve the result. Here’s the Layers palette in all its glory, showing the layers in our main image. The currently active layer is shown by the blue highlight. Each layer has its own visibility eye by the side of it, which can be used to either hide or show the layer in the image. From the top of the palette, you can choose the Blending Mode for the active layer and control the layer’s Opacity. The Trash Can at the bottom is used to delete the active layer, and the Add New Layer icon sits to its left. The bisected circle icon enables you to add new Adjustment Layers, and the small rectangle with the white circle is clicked
to add a Layer Mask. Notice that the Palette displays both image layers and Layer Masks with thumbnails, which show their contents. The Layers palette is a vital tool for organising, creating and managing layers.
The only 3 tips you need to know out Layers
1. It might seem really obvious, but to work on a layer you need to target it first in the Layers palette. A layer is active when it’s shown as highlighted in the palette.
2. Remember, layers can either be visible or hidden! You can temporarily hide a layer by clicking its visibility eye in the palette. You can’t work on a layer if its visibility eye isn’t showing, but activating it to work on is as simple as clicking again on the visibility eye.3. The ‘stacking order’ of layers can be changed. You can move a layer to any position within the palette by dragging and dropping it between layers. Those that are higher up have priority over those that are positioned further down the palette.
I
TECI
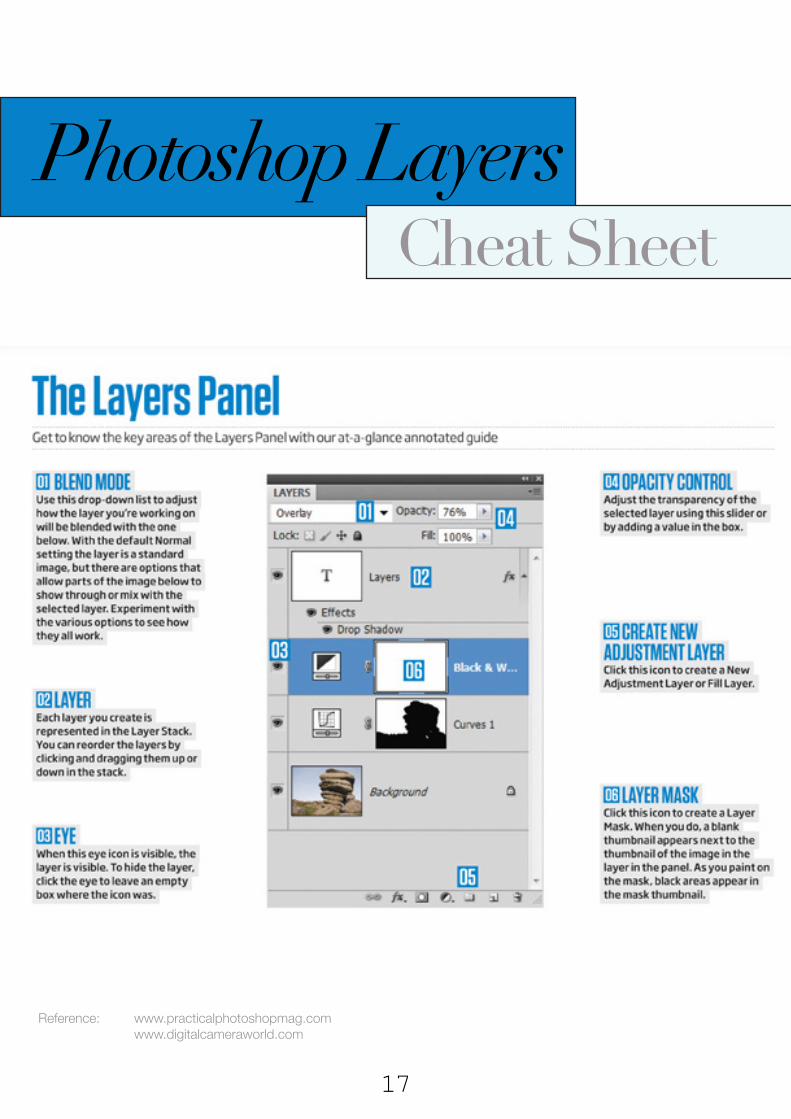
Photoshop LayersCheat Sheet
Reference: www.practicalphotoshopmag.com www.digitalcameraworld.com
17

18
Homeworkshot-a-day
The homework for this edition is focused on consistancy and placing photography at the front of your mind. A shot-a-day challenge forces you to think about your work and challenges you creatively to keep coming up with ideas.
There are several options when it comes to a shot-a-day challenges. You can go all out and do a 365 day challenge, however this is a huge commitment. The alphabet challenge is a popular choice because it gives you a structured challenge for each day. Day 1 starts with an image relating to the letter A. Day 2 will have a B theme, and so on. The 52 weeks challenge is a shot for each week of the year. It’s less pressure than the 365 day
challenge but still requires consistant focus so you are not scrambling for an image at 11:59pm on Sunday night. 100 Strangers is exactly what it sounds like. Take 100 photographs of 100 people you don’t know. Creativity is the only limiting factor to the possibilities of challenges.
For a “dip your toe in the water” challenge, start with a photo everyday for a month. Just remember, you don’t need to start on the first day of the month. Start tomorrow and go for thirty days.

19
INSPIRATION:
Items to get you creatively active
The inspiration column is devoted to items we’ve come across from our travels around the web and in day to day life.
Checking out these items could be all it takes to get some ideas flowing and make your next photoshoot a reality.
[ ]www.MindMeister.com
[ ]
[ ]
[ ]
[ ]
[ ]
www.dpchallenge.com
www.DevianArt.com
www.Phlearn.com
www.theArtofPhotography.tv
www.EverNote.com
DPChallenge A digital photography contest website.
DevianArtWhere ART meets application! deviantART was created to entertain, inspire, and empower the artist in all of us.
PhlearnProvides video tutorials to provide the skills, confidence and encouragement for creative individuals to pursue their dreams, overcome their fears, and live their passions.
The Art of PhotographyA weekly podcast designed for learning, entertaining and even making you think differently about your approach and craft.
SketchBookEverNote.com is a digital note taking application which syncronises between your computer, tablet and mobile devices. Otherwise, go old school and use a simple notebook and pencil.
MindMeisterAn online mind mapping application which can be used to plan a photo shoot or get your life structured. The free account allows you to create upto 3 mind maps.
+
+
+
+
+
+
Teci Magazine is produced by
Copyright 2013 www.matt-hickey.com
A big thank you to Wendy and Jacob for helping me produce
this magazine.