temperature measurement rtd pt100, 4-20 ma …
TRANSCRIPT
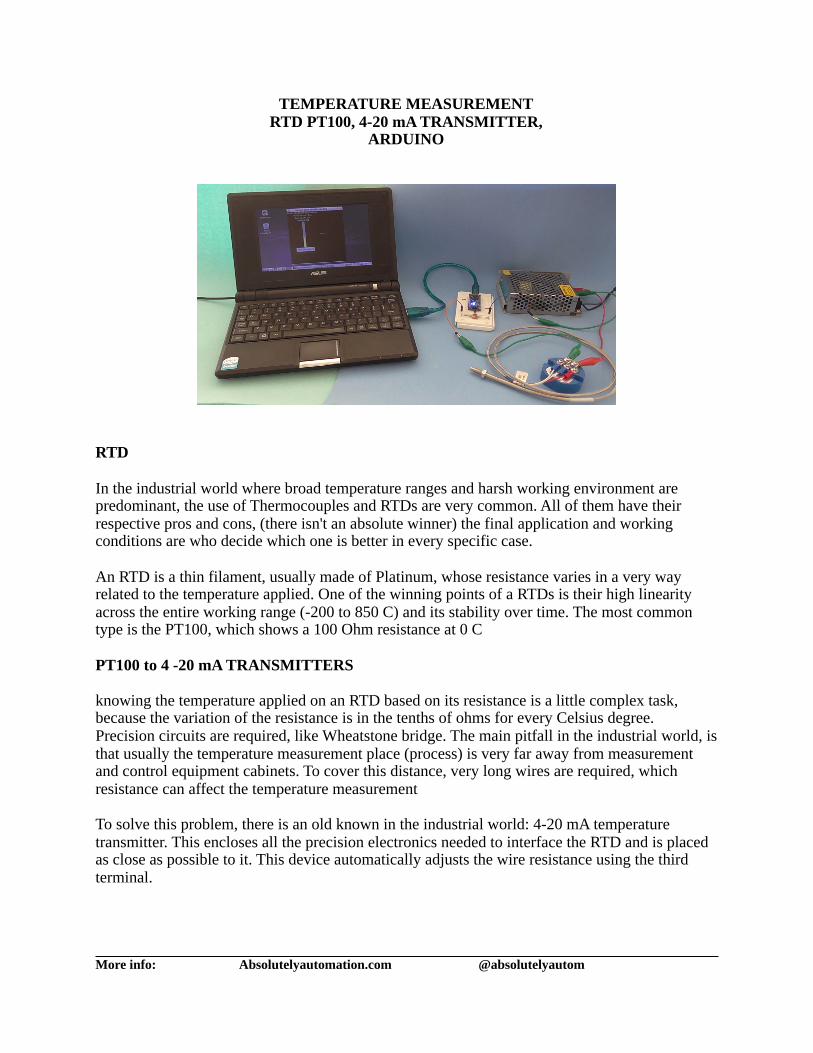
TEMPERATURE MEASUREMENTRTD PT100, 4-20 mA TRANSMITTER,
ARDUINO
RTD
In the industrial world where broad temperature ranges and harsh working environment are predominant, the use of Thermocouples and RTDs are very common. All of them have their respective pros and cons, (there isn't an absolute winner) the final application and working conditions are who decide which one is better in every specific case.
An RTD is a thin filament, usually made of Platinum, whose resistance varies in a very way related to the temperature applied. One of the winning points of a RTDs is their high linearity across the entire working range (-200 to 850 C) and its stability over time. The most common type is the PT100, which shows a 100 Ohm resistance at 0 C
PT100 to 4 -20 mA TRANSMITTERS
knowing the temperature applied on an RTD based on its resistance is a little complex task, because the variation of the resistance is in the tenths of ohms for every Celsius degree. Precision circuits are required, like Wheatstone bridge. The main pitfall in the industrial world, is that usually the temperature measurement place (process) is very far away from measurement and control equipment cabinets. To cover this distance, very long wires are required, which resistance can affect the temperature measurement
To solve this problem, there is an old known in the industrial world: 4-20 mA temperature transmitter. This encloses all the precision electronics needed to interface the RTD and is placed as close as possible to it. This device automatically adjusts the wire resistance using the third terminal.
More info: Absolutelyautomation.com @absolutelyautom
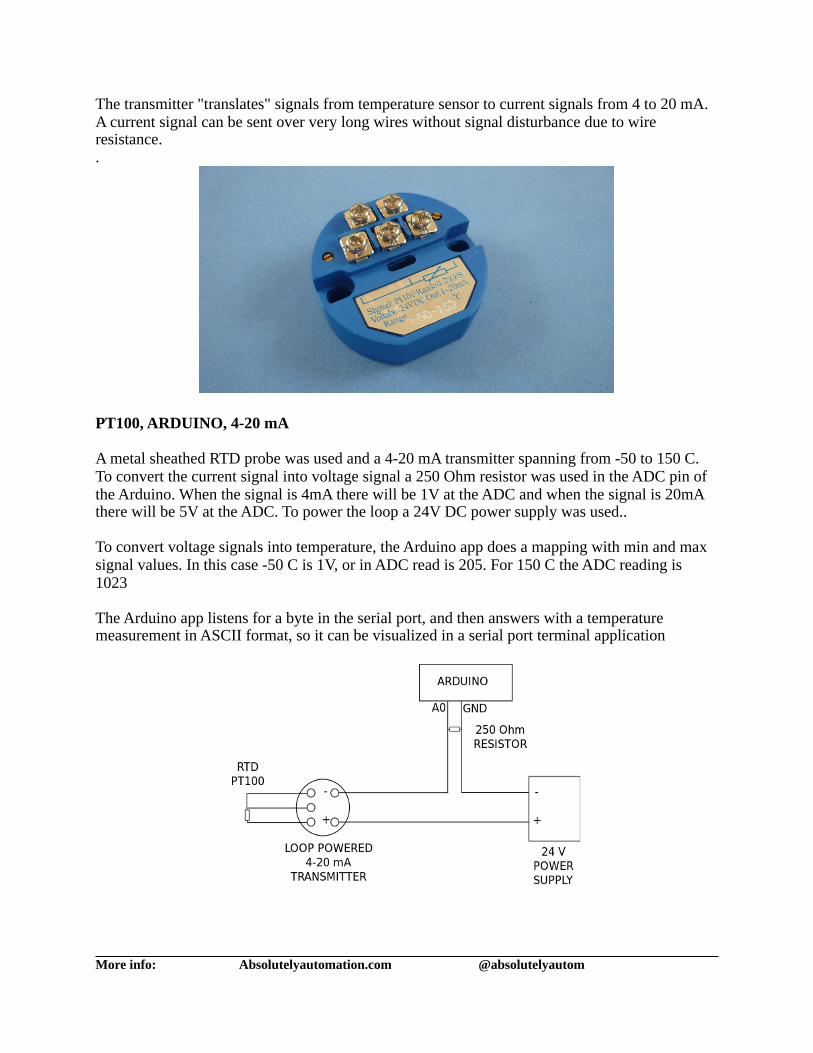
The transmitter "translates" signals from temperature sensor to current signals from 4 to 20 mA. A current signal can be sent over very long wires without signal disturbance due to wire resistance..
PT100, ARDUINO, 4-20 mA
A metal sheathed RTD probe was used and a 4-20 mA transmitter spanning from -50 to 150 C. To convert the current signal into voltage signal a 250 Ohm resistor was used in the ADC pin of the Arduino. When the signal is 4mA there will be 1V at the ADC and when the signal is 20mA there will be 5V at the ADC. To power the loop a 24V DC power supply was used..
To convert voltage signals into temperature, the Arduino app does a mapping with min and max signal values. In this case -50 C is 1V, or in ADC read is 205. For 150 C the ADC reading is 1023
The Arduino app listens for a byte in the serial port, and then answers with a temperature measurement in ASCII format, so it can be visualized in a serial port terminal application
More info: Absolutelyautomation.com @absolutelyautom
PYTHON, TKINTER
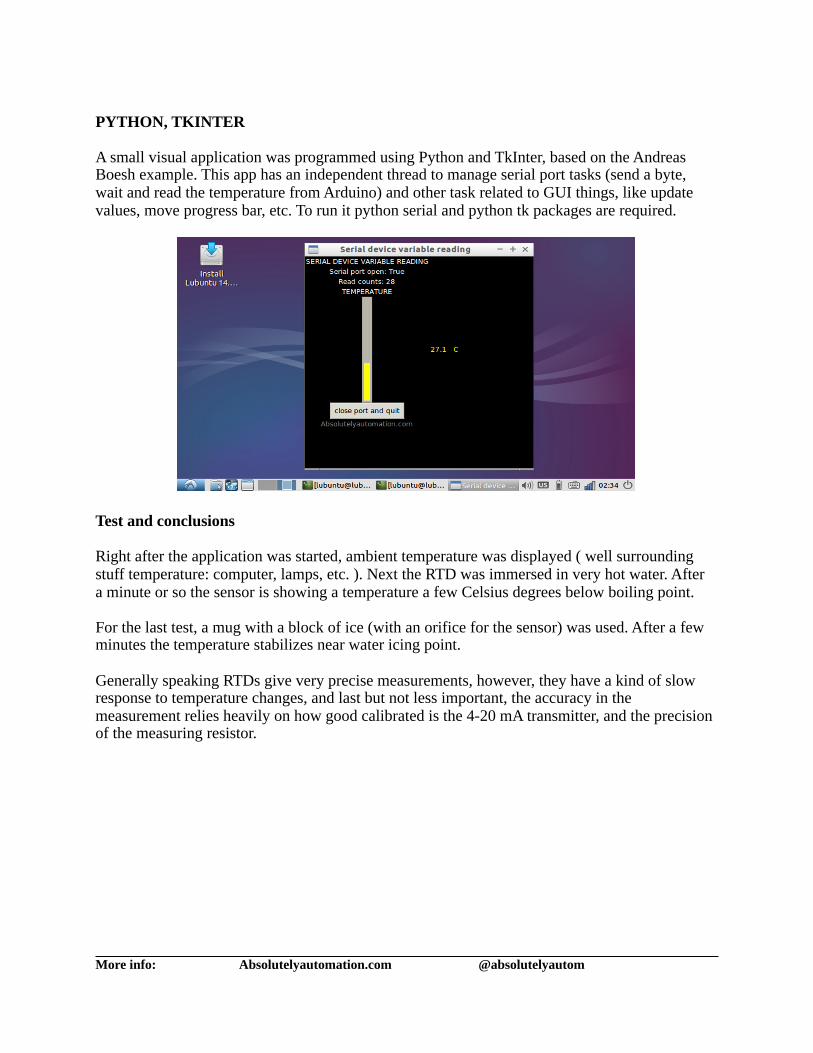
A small visual application was programmed using Python and TkInter, based on the Andreas Boesh example. This app has an independent thread to manage serial port tasks (send a byte, wait and read the temperature from Arduino) and other task related to GUI things, like update values, move progress bar, etc. To run it python serial and python tk packages are required.
Test and conclusions
Right after the application was started, ambient temperature was displayed ( well surrounding stuff temperature: computer, lamps, etc. ). Next the RTD was immersed in very hot water. After a minute or so the sensor is showing a temperature a few Celsius degrees below boiling point.
For the last test, a mug with a block of ice (with an orifice for the sensor) was used. After a few minutes the temperature stabilizes near water icing point.
Generally speaking RTDs give very precise measurements, however, they have a kind of slow response to temperature changes, and last but not less important, the accuracy in the measurement relies heavily on how good calibrated is the 4-20 mA transmitter, and the precision of the measuring resistor.
More info: Absolutelyautomation.com @absolutelyautom

LINKS
Video: Connecting parts and tests: https://youtu.be/ZKj12hfqrZQRTD PT100 3 wire -50 a +150 C 4-20 mA temperature transmitter: http://www.dx.com/es/p/zndiy-bry-sbwz-rtd-pt100-50-150-c-dc-24v-20ma-temperature-sensor-transmitter-module-deep-blue-369581?Utm_rid=24981582&Utm_source=affiliateMetal sheathed 3 wire RTD PT100: http://s.click.aliexpress.com/e/maEYFuN3z24V DC Power Supply: http://www.dx.com/es/p/24v-2a-48w-constant-voltage-switching-power-supply-for-led-395226?Utm_rid=24981582&Utm_source=affiliate
ARDUINO PROGRAM
/* 2016-FEB-09 Application for reading a 4 - 20 mA current signal over a 250 Ohm resistor on voltage analog input pins this gives voltage readings from 1 to 5 volts. The current signal represents a temperature between -50 to +150 C from a PT100 connected to a 4-20 mA current transmitter current voltage(250 Ohm) ADC Temperature ----------------------------------------------------- 4 mA 1 V 205 -50 C 20 mA 5 V 1023 +150 C
The temperature value obtained is sent over serial port in ASCII format every time a byte is received. (On demand)
Absolutelyautomation.com */
const int AnalogInput = A0; // Analog input where the resistor is placed
int sensorValue = 0; int temperature = 0;int ReceivedByte = 0;float f1 = 0;float t1 = 0;
void setup() { // inicializa comunicacion serial a 9600 bps: Serial.begin(9600); }
void loop() { // Wait until a byte is received // (On demand send) if(Serial.available() > 0){ ReceivedByte = Serial.read(); // Reading ADC sensorValue = analogRead(AnalogInput); // map the signals (multiplied by 10 // to get decimal values, because map() doesn't work with floats) temperature=map(sensorValue,205,1023,-500,1500);
f1 = temperature; // Float conversion
More info: Absolutelyautomation.com @absolutelyautom
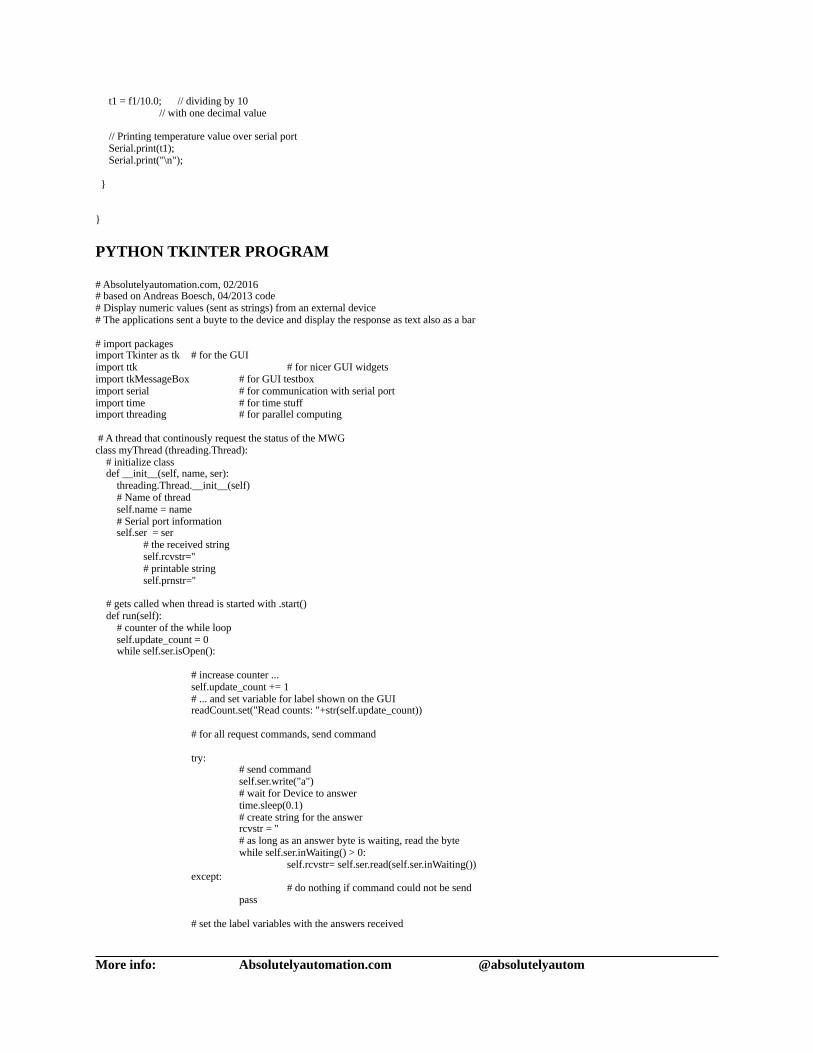
t1 = f1/10.0; // dividing by 10 // with one decimal value
// Printing temperature value over serial port Serial.print(t1); Serial.print("\n"); } }
PYTHON TKINTER PROGRAM
# Absolutelyautomation.com, 02/2016# based on Andreas Boesch, 04/2013 code# Display numeric values (sent as strings) from an external device# The applications sent a buyte to the device and display the response as text also as a bar # import packagesimport Tkinter as tk # for the GUIimport ttk # for nicer GUI widgetsimport tkMessageBox # for GUI testboximport serial # for communication with serial portimport time # for time stuffimport threading # for parallel computing # A thread that continously request the status of the MWGclass myThread (threading.Thread): # initialize class def __init__(self, name, ser): threading.Thread.__init__(self) # Name of thread self.name = name # Serial port information self.ser = ser
# the received stringself.rcvstr=''# printable stringself.prnstr=''
# gets called when thread is started with .start() def run(self): # counter of the while loop self.update_count = 0 while self.ser.isOpen():
# increase counter ...self.update_count += 1# ... and set variable for label shown on the GUIreadCount.set("Read counts: "+str(self.update_count))
# for all request commands, send command
try:# send commandself.ser.write("a")# wait for Device to answertime.sleep(0.1)# create string for the answerrcvstr = ''# as long as an answer byte is waiting, read the bytewhile self.ser.inWaiting() > 0:
self.rcvstr= self.ser.read(self.ser.inWaiting())except:
# do nothing if command could not be sendpass
# set the label variables with the answers received
More info: Absolutelyautomation.com @absolutelyautom
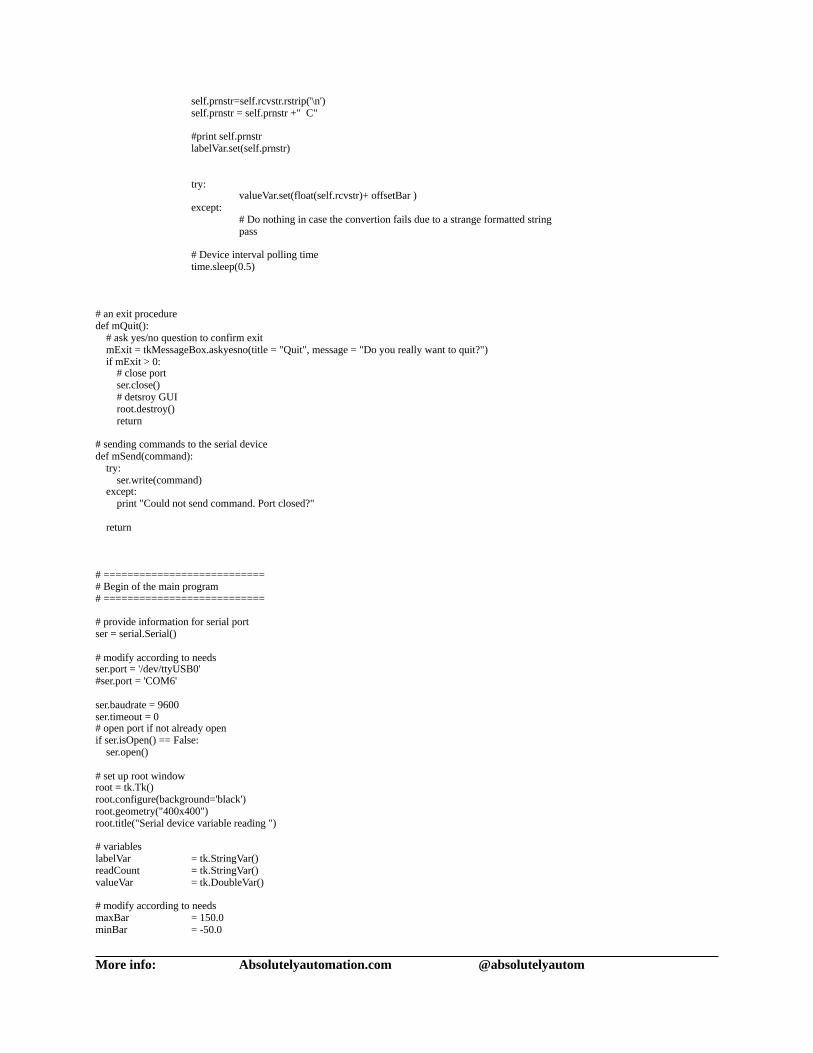
self.prnstr=self.rcvstr.rstrip('\n')self.prnstr = self.prnstr +" C"
#print self.prnstrlabelVar.set(self.prnstr)
try:valueVar.set(float(self.rcvstr)+ offsetBar )
except:# Do nothing in case the convertion fails due to a strange formatted stringpass
# Device interval polling timetime.sleep(0.5)
# an exit proceduredef mQuit(): # ask yes/no question to confirm exit mExit = tkMessageBox.askyesno(title = "Quit", message = "Do you really want to quit?") if mExit > 0: # close port ser.close() # detsroy GUI root.destroy() return # sending commands to the serial devicedef mSend(command): try: ser.write(command) except: print "Could not send command. Port closed?" return
# ===========================# Begin of the main program# =========================== # provide information for serial portser = serial.Serial()
# modify according to needs ser.port = '/dev/ttyUSB0'#ser.port = 'COM6'
ser.baudrate = 9600ser.timeout = 0# open port if not already openif ser.isOpen() == False: ser.open() # set up root windowroot = tk.Tk()root.configure(background='black')root.geometry("400x400")root.title("Serial device variable reading ") # variables labelVar = tk.StringVar()readCount = tk.StringVar()valueVar = tk.DoubleVar()
# modify according to needs maxBar = 150.0minBar = -50.0
More info: Absolutelyautomation.com @absolutelyautom
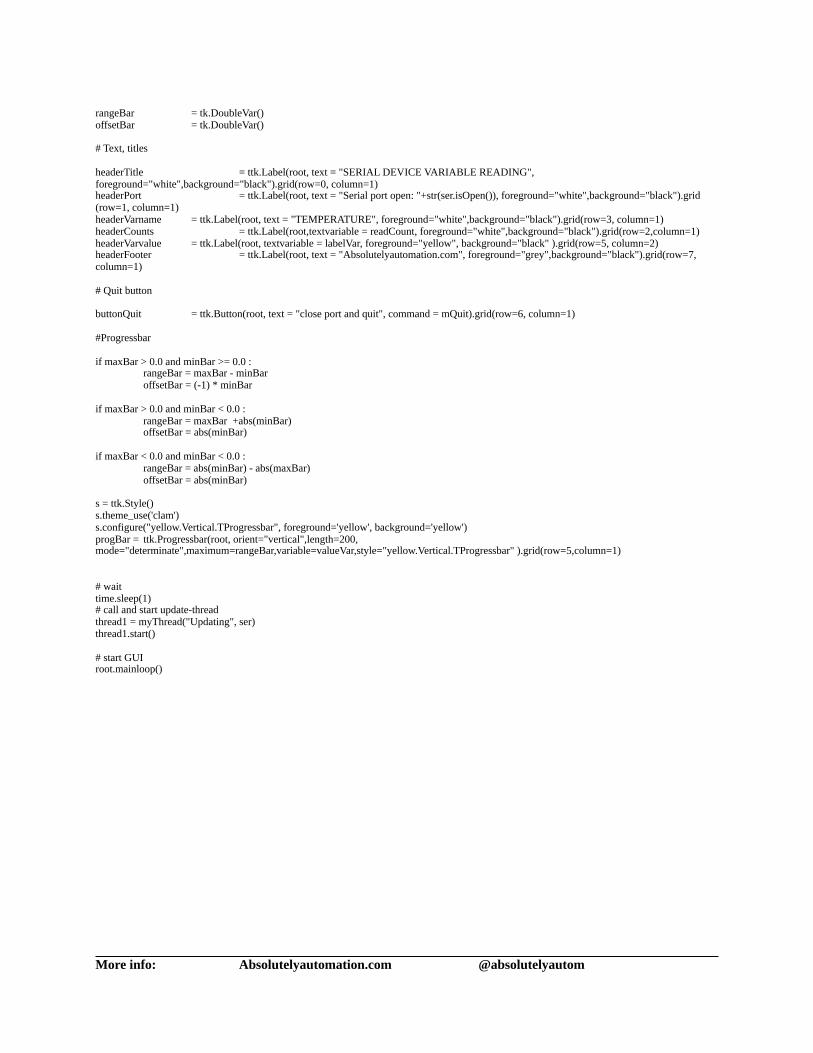
rangeBar = tk.DoubleVar()offsetBar = tk.DoubleVar()
# Text, titles
headerTitle = ttk.Label(root, text = "SERIAL DEVICE VARIABLE READING", foreground="white",background="black").grid(row=0, column=1)headerPort = ttk.Label(root, text = "Serial port open: "+str(ser.isOpen()), foreground="white",background="black").grid(row=1, column=1)headerVarname = ttk.Label(root, text = "TEMPERATURE", foreground="white",background="black").grid(row=3, column=1)headerCounts = ttk.Label(root,textvariable = readCount, foreground="white",background="black").grid(row=2,column=1)headerVarvalue = ttk.Label(root, textvariable = labelVar, foreground="yellow", background="black" ).grid(row=5, column=2)headerFooter = ttk.Label(root, text = "Absolutelyautomation.com", foreground="grey",background="black").grid(row=7, column=1)
# Quit button
buttonQuit = ttk.Button(root, text = "close port and quit", command = mQuit).grid(row=6, column=1)
#Progressbar
if maxBar > 0.0 and minBar >= 0.0 :rangeBar = maxBar - minBaroffsetBar = (-1) * minBar
if maxBar > 0.0 and minBar < 0.0 :rangeBar = maxBar +abs(minBar)offsetBar = abs(minBar)
if maxBar < 0.0 and minBar < 0.0 :rangeBar = abs(minBar) - abs(maxBar)offsetBar = abs(minBar)
s = ttk.Style()s.theme_use('clam')s.configure("yellow.Vertical.TProgressbar", foreground='yellow', background='yellow')progBar = ttk.Progressbar(root, orient="vertical",length=200, mode="determinate",maximum=rangeBar,variable=valueVar,style="yellow.Vertical.TProgressbar" ).grid(row=5,column=1)
# waittime.sleep(1)# call and start update-threadthread1 = myThread("Updating", ser)thread1.start() # start GUIroot.mainloop()
More info: Absolutelyautomation.com @absolutelyautom

More info: Absolutelyautomation.com @absolutelyautom