the abdominal exam - biomedicine with dr....
TRANSCRIPT
The Abdominal Exam
Dr. Gary Mumaugh – Western Physical Assessment
Today’s Outline
• Review anatomy of the abdomen
• Discuss general considerations to effectively
examine the abdomen
• Review the clinical skills necessary to
examine the abdomen
• Demonstrate clinical skills necessary to
examine the abdomen

Clinical Skills
• Demonstrate the ability to properly position the patient
• Demonstrate techniques for inspection of the abdomen
• Demonstrate techniques for auscultation of the abdomen
• Demonstrate technique for percussion of the abdomen.
• Demonstrate techniques for both gentle and deep palpation of the abdomen.

Clinical Skills
• Demonstrate techniques to elicit signs of peritoneal irritation
• Demonstrate techniques for palpating hepatomegaly or splenomegaly.
• Demonstrate technique for palpation of the abdominal aortic pulsations.
• Demonstrate technique for testing for shifting dullness.
• Demonstrate technique for testing for the presence of a fluid wave.
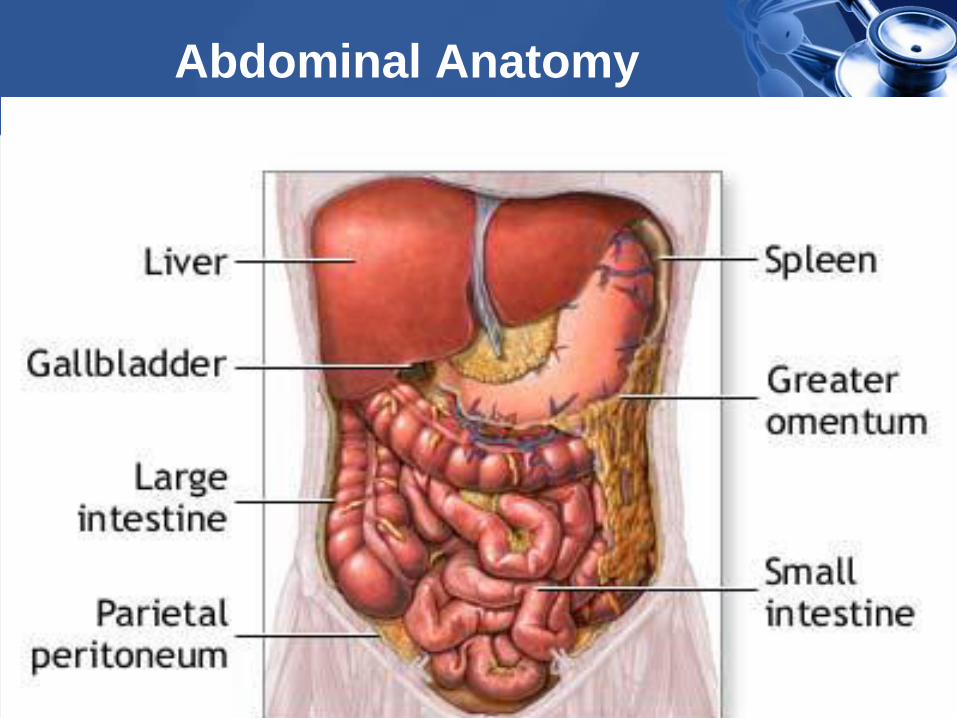
Abdominal Anatomy

Abdominal Anatomy

Abdominal Anatomy

History Taking Problems of the
Abdomen and GI Tract • How is the patient’s appetite?
• Any symptoms of the following?
– Heartburn
• burning sensation in the epigastric area
radiating into the throat
• Often associated with regurgitation
– Excessive gas or flatus
• Needing to belch or pass gas
• Patient’s state they often feel bloated
– Abdominal fullness or early satiety
– Anorexia – lack of appetite

History Taking Problems of the
Abdomen and GI Tract • Reguritation
– The reflux of food and stomach acid back into
the mouth
– Brine-like taste
• Vomiting or retching
– Retching is the spasmodic movement of the
chest and diaphragm like vomiting, but no
stomach contents are passed
– Ask about the amount of vomit
– Ask about the type of vomit
• Food, green or yellow colored bile, mucus,
blood, coffee ground emesis

History Taking Problems of the
Abdomen and GI Tract
• Qualify the patient’s pain
– Visceral pain
• When hollow organs (stomach, colon)
forcefully contract or become distended
• Solid organs (liver, spleen) can also
generate this type of pain when they
swell against their capsules
• Visceral pain is usually gnawing,
cramping, or aching and is often difficult
to localize
History Taking Problems of the
Abdomen and GI Tract
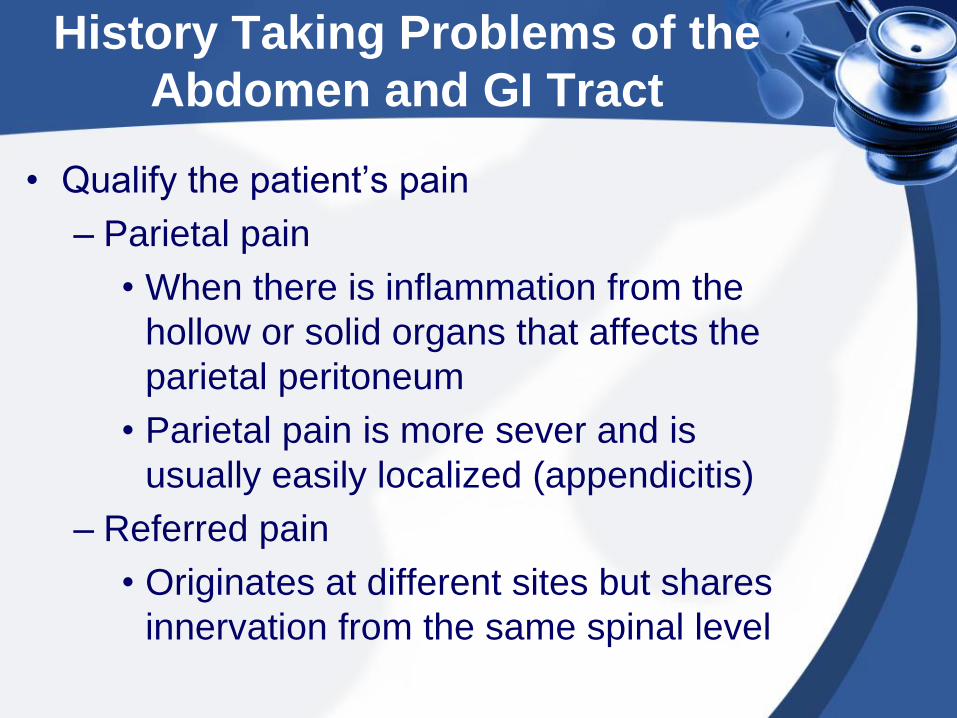
• Qualify the patient’s pain
– Parietal pain
• When there is inflammation from the
hollow or solid organs that affects the
parietal peritoneum
• Parietal pain is more sever and is
usually easily localized (appendicitis)
– Referred pain
• Originates at different sites but shares
innervation from the same spinal level


Referred Pain

History Taking Problems of the
Abdomen and GI Tract
• Ask patients to describe the pain in their own words
• Ask patient’s to point to their area of pain
• Ask about the severity of pain (Borg Scale)
• Ask what brings on the pain (timing)
• Ask patients how often they have the pain
(frequency)
• Ask how long the pain lasts (duration)
• Ask if the pain goes anywhere else (radiation)
• Ask if anything aggravates or relieves the pain
• Ask about any symptoms associated with the pain

History Taking Problems of the
Abdomen and GI Tract
• Ask the patient about bowel movements
– Frequency of bowel movements
– Consistency of bowel movements
• diarrhea vs. constipation
– Any pain with bowel movements
– Any blood (hematochezia) or black, tarry
stools (melana) with the bowel movement
– Ask about stool color (white or gray can
indicate liver or gallbladder)
– Look for associated signs such as
jaundice or icteric sclerae

History Taking Problems of the
Abdomen and GI Tract
• Ask about prior medical problems related to the
abdomen
– Hepatitis, cirrhosis, pancreatitis, gall bladder
• Ask about prior abdominal surgery
• Ask about foreign travel and occupational hazards
• Ask about use of tobacco, alcohol, illegal drugs
and medication history
• Ask about hereditary disorders affecting the
abdomen in the family history

History Taking Problems of the
Abdomen and Urinary Tract
• Ask about frequency of urination and urgency
– Feeling like one needs to urinate but very little is
passed
• Ask about urinary pain
– Urethral burning or aching in the suprapubic area
• Ask about the color and smell of urine
– Odors, hematuria
• Ask about difficulty starting to urinate
– Common in men
• Ask about leakage of urine and SUI
– Common in women

History Taking Problems of the
Abdomen and Urinary Tract
• Ask about back pain at the costovertebral
angle (kidney) and the lower back pain in
med (referred from prostate)
• In men, ask about symptoms in the penis and
scrotum

General Considerations
• It may be helpful to have the patient empty their bladder before examining their abdomen
• The patient should be draped in a manner that allows visualization from above the xiphoid process to the pubic symphysis
• A quiet room is beneficial for optimal auscultation and percussion
• Watch the patient’s face for signs of discomfort
General Considerations
• Proper lighting is necessary for inspection
• Be kind and warm your hands and stethoscope before touching the patient
• Approach the patient from their right side
• Ask the patient to point to areas of pain or discomfort… palpate those areas last
• Quick movements may startle the patient
• Conversation may distract an anxious patient
• It may be beneficial to place the patient’s hand under yours to palpate until they are comfortable with your touch
General Considerations
• Use proper terminology to describe findings
in specific locations
– LUQ, LLQ, RUQ, RLQ, epigastric,
periumbilical, suprapubic (hypogastric)
• Keep in mind: chest, pelvic, genital and rectal
problems can manifest with abdominal
symptoms

Proper Positioning
• Patient should be supine
• Having the patient flex the knees and hips may
allow the abdominal muscles to relax
• Give them a pillow or blanket to rest their head
upon, and possibly one for under their knees
• When the abdominal muscles are relaxed, the
small of the back is flat against the table (you
cannot pass your hand under the patient
• The patient’s arms should be at their side or
crossed on their chest – Let them choose

Sequence of Exams
1. LOOK - INSPECTION
2. LISTEN - AUSCULTATION
3. PERCUSS
4. PALPATE

Inspection
• Look For:
– Scars
– Striae
– Dilated Veins
– Contour
– Symmetry
– Peristalsis/Pulsations
– Rashes


Inspection
• Striae
• Veins

Inspection
• Contour:
– Flat
– Scaphoid
– Rounded
– Protuberant

Inspection
• Asymmetry due to
an umbilical hernia
• Caput Medusa

• Caput Medusa
– distended and engorged paraumbilical veins
– usually due to portal hypertension

Inspection
• Peristalsis – Movement of the bowels seen through the skin
overlying the abdomen (tangential viewing)
– Could be normal in a thin walled abdomen
– Usually signifies bowel dilatation upstream from an obstruction
• Pulsations – Visible movement of the skin in the epigastric
area as blood passes through the vessel (aorta)
– Normal in thinner patients especially children
– Concerning for AAA in older patients.

Auscultation
• Always auscultate before palpating or
percussing the abdomen
– Place the diaphragm over the abdomen to
hear bowel sounds (borborygmi) which are
long gurgles
– These sounds are transmitted across the
abdomen so it is not necessary to listen at
several places
– The normal frequency of sound is 5-34
sounds per minute

Auscultation
• Place the diaphragm over the aorta, iliac and
femoral arteries to assess for bruits
– Vascular sounds resembling murmurs
• Place the diaphragm over the liver or spleen
to listen for friction rub
• Bowel sounds

Auscultation
• Listen in all Four quadrants with the DIAPHRAGM
• Describe sounds:
– Frequency
• Normal
• Hyperactive
• Hypoactive
• Absent
– Character
• Rushes
• Tinkles

Auscultation
• Performed before percussion and palpation to
avoid altering frequency and character of the
sounds
• Absence of bowel sounds can only be
determined after listening for at least 2 minutes
or more

Auscultation
• Borborygmi
– From the Greek to rumble
• Tinkles
– High pitched ‘drips’ heard in dilated bowels
with air-fluid levels
• Rushes
– High pitched sounds of fluid flowing
through bowels with an obstruction

Auscultation
• Bruits with only a systolic component may be
normal
• Bruits with systolic and diastolic components
suggests turbulent blood flow (blockage)

Auscultation
• Bruits
– Best heard with BELL
– There are seven areas
to listen at

Percussion
• Percuss in all four quadrants
• Categorize your findings as tympanic or dull
• Normally all quadrants should be predominantly tympanic with scattered areas of mild dullness from fluid and feces
• Dullness signifies an abdominal mass
– Tumor, uterus (pregnant), hepatomegaly, splenomegaly, FOS

Percussion
• Plexor (hammer)
• Utilized for
approximating liver
span, fluid levels,
intestinal obstruction,
masses and
organomegaly

Liver Span
• Percuss downward from the chest in the mid-
clavicular line until you detect the top edge of
the liver dullness
• Then percuss upward from the abdomen in
the same line until you detect the bottom
edge of liver dullness
• Measure the distance between these two
points (normal is 6-12 centimeters)

Liver Span
• Mid-clavicular line

Splenic Dullness
• Percuss the lower costal inter-space in the
left anterior axillary line
• Ask the patient to take a deep breath and
hold it while you percuss again
• This area is normally tympanic
• Dullness suggests splenic enlargement

Spleen

Palpation
• Palpation is described as gentle (light) and deep
• Listen to the patient’s verbal responses
• But also look at their face for visible signs of
distress
• Feel for abnormalities as you press on the
abdomen
• Keep your fingers together when you palpate
• Lift your hand completely off the skin before
moving it to another location to palpate

Gentle (Light) Palpation
• Used to assess for superficial masses, areas of
tenderness and guarding
• Using one hand, lightly press with your fingers in
all quadrants of the abdomen
• Again, ticklish or anxious patients may do better
when you use their hand to palpate these areas
first

Palpation
• Gentle: One-handed

Palpation
• Guarding
– Voluntary: Patient tenses up their abdominal muscle in anticipation of pain
– Involuntary: Patient’s abdominal muscles are already tensed as a reflex to peritoneal irritation
• To help differentiate the form of guarding, utilize techniques to relax the patient
– Proper positioning
– Jaw open and mouth breathe
– Palpate during the patient’s exhalation

Deep Palpation
• Used to assess for masses and also for areas of
deeper tenderness
• Also utilized for the rebound tenderness test
• Place one hand on the abdomen and using the
other hand, press it slowly, but firmly, deeper
– Apply the pressure with the top hand
– Feel for masses with the bottom hand.

Palpation
• Deep: Two-handed

Peritoneal Signs


Peritoneal Irritation
• Increased pain suggests peritoneal irritation:
– Rebound Tenderness
• Warn the patient what you are doing
• Press slowly and deeply into the abdomen
• Quickly remove the hand
• Increased pain (rebound pain) signifies peritoneal irritation
– Cough Reflex
• Ask the patient to cough
• Identify the area of maximal pain felt while coughing

Rebound Tenderness

Peritoneal Irritation
• Increased pain suggests appendicitis
– Psoas Sign
• Place your hand above the patient’s right knee
• Ask them to flex the hip against your resistance
– Obturator Sign
• Raise the patient’s right leg with the knee flexed
• Rotate the leg internally at the hip
– Tenderness at McBurney’s Point
• Approximately two thirds of the distance from the
umbilicus to the right anterior superior iliac spine

Psoas Sign
Psoas Sign

Obturator Sign
Obturator Sign

McBurney Point

Palpation of the Liver
• Standard Method:
– Place your left hand on the patient’s posterior
lower ribs and push ventrally
– Place your extended fingers below the right
costal margin and press superiorly
– Ask the patient to take a deep breath
• You may need to ask them to consciously
use their abdominal muscles when they
inhale
– You may feel the liver edge press against
your fingers or slide underneath them

Palpation of the Liver
• Alternate method
– Stand by the patients chest
– “Hook” your fingers underneath the right costal margin and press superiorly
– Ask the patient to inhale deeply
– You may feel the liver edge against the tips of your fingers
• A normal liver may be slightly tender, but not painful

Palpation of the Liver
• Standard Method • Alternate Method

Palpation of the Spleen
• Stand at the patient’s right
• Reach across the patient and use your left hand to lift the lower rib cage and flank
• Press down just below the left costal margin with your right hand
• Ask the patient to inhale deeply (with their abdominal muscles)
• Repeat this process with the patient laying on their right side with knees and hips flexed a bit
• The spleen is NOT normally palpable in most individuals

Palpation of the Spleen

Palpation of the Aorta
• Press down deeply in the area above the umbilicus with your two hands straddling the midline
• The aortic pulsation is palpated in most individuals
• Approximate the width of the pulsating vessel with your two hands (older adults)
• Greater than 3cm width is suspicious for AAA

Palpation of the Aorta

Shifting Dullness
• Tests for peritoneal fluid (ascites)
• In the supine position, percuss the patient’s
abdomen
• Outline the areas of tympany and dullness
• Have the patient roll onto their side
• Percuss the abdomen again
• Dullness in areas of previous tympany
suggests excess peritoneal fluid

Shifting Dullness

Fluid Wave
• Ask an assistant or have the patient press the edges of both hands down on the midline of the abdomen (This helps stop the wave transmission through fat)
• Tap sharply on one flank with the fingertips of one hand
• With the palm of your other hand, feel for the transmission of the fluid wave on the other flank
• Wave transmission suggests ascites
• Fluid Wave

Fluid Wave

CVA Tenderness
• Tenderness in the costoverebral angle area
may indicate inflammation or infection of a
kidney
• Simple palpation in this area may elicit the
tenderness
• Alternately, place one hand flat on the CVA
area with the palm on the patient’s skin, and
strike it with the ulnar surface of your fist to
make a dull thump
• Sharp pain suggests kidney inflammation

CVA Tenderness
