the art of thread sketching
DESCRIPTION
ThreadTRANSCRIPT

The arT of Thread skeTching: free Thread drawing Techniques 1 Q u i lt i n g D A i lY. c o m
©interweave
the Art of threAD Sketching threAD DrAwing techniQueSQuilting Daily
The Art of Thread SketchingFree Thread drawing and
Thread PainTing Techniques
1 Thread Sketching 101: Focus on Texture
SuSAn BruBAker knApp
2 Nostalgia Series: Stitched Sketches and ephemera in art quilts
JAne LAFAzio
3 Sketchbook Quilts JJ Foley
4 Thread Sketching on Stabilizer Karen FricKe
5 Thread Painting: From Photo to Stitched Artwork
carol watKins
1
53
2
4

The arT of Thread skeTching: free Thread drawing Techniques 2 Q u i lt i n g D A i lY. c o m
©interweave
the Art of threAD Sketching threAD DrAwing techniQueSQuilting DailyThe sewing needle is the fiber artist’s
pencil: you’re simply drawing with thread. When you hand stitch, you can
guide the direction of the thread to make a design. And when you lower the feed dogs on your sewing machine, you can stitch in any direction, too.
In The Art of Thread Sketching: Free Thread Drawing and Thread Painting Techniques, five quilt artists show you how to turn machine stitching into drawings with thread. Depending on the style and density of the stitching, thread sketching and thread painting can stand on its own or be combined with other techniques to give your quilt motifs dimension and life.
Art quilt expert Susan Brubaker Knapp shows how drawing with thread can make your quilt designs look positively touchable in “Thread Sketching 101 Focus on Texture.” Susan also gives advice on needle and thread basics for successful thread art.
In “Nostalgia Series: Stitched Sketches and Ephemera in Art Quilts,” Jane LaFazio shows how to interpret drawings with threadwork, ephemera, fabric scraps, and mixed-media techniques to create lovely fabric art.
In “Thread Sketching on Stabilizer,” fiber artist Karen Fricke shows you step-by-step how a heavy-duty stabilizer can make thread sketching easier. You can print your design right onto it, then stitch your thread sketches over the image.
THe ArT oF THreAD SkeTCHinG
F ree Threa d dr awing and Threa d PainTing
Techniques
ediTor Vivika hanson denegre online ediTor cate coulacos Prato
creative services diVision arT direcTor larissa davis PhoTograPhers larry stein
Projects and information are for inspira-tion and personal use only. interweave Press LLc is not responsible for any li-ability arising from errors, omissions, or mistakes contained in this eBook, and readers should proceed cautiously, espe-cially with respect to technical information. interweave grants permission to pho-tocopy any patterns published in this issue for personal use only.
In her article “Sketchbook Quilts,” JJ Foley demonstrates two techniques for turning sketches into stitched designs: digital and direct draw. Her easy thread sketching techniques will inspire you to draw more—and stitch more!
Carol Watkins’ thread-painting tutorial will show you how to turn a photograph into thread art with machine stitching. She describes her technique in “Thread Painting: From Photo to Stitched Artwork,” and also offers tips on choosing machine embroidery thread.
With The Art of Thread Sketching: Free Thread Drawing and Thread Painting Techniques, you will look at imagery, machine stitching, and your fiber art in a whole new way.
Warmly,
ViVika Hansen Denegre
Editor
Take Quilting Daily on the go
with the FREE Mobile app for your iPhone or iPod Touch.
A swipe of your fi nger gives you access to:
� e latest posts, free patterns, and eBooks Over 100 how-to videos Tips and techniques from industry leading experts
*Apple, iPad, iPhone, iPod touch, and iTunes are trademarks of Apple Inc., registered in the U.S. and other countries. App Store is a service mark of Apple Inc. Non-US residents: if the above link does not work for you, feel free to browse our selection of Apps from within the Apple App Store itself by searching for “Interweave”.
*Apple, iPad, iPhone, iPod touch, and iTunes are trademarks of Apple Inc.,
Get your FREE Quilting Daily app at
www.QuiltingDaily.com/app

“Wool Yarn” (detail opposite) • 12" × 12" • This very close-up image of yarn balls invites viewers to examine the tiny twists in each strand of yarn.
Focus on textureThread skeTching 101, lesson Three:
The arT of Thread skeTching: free Thread drawing Techniques 3 Q u i lt i n g D A i lY. c o m
©interweave
the Art of threAD Sketching threAD DrAwing techniQueSQuilting DailyAdApted from Quilting Arts mAgAzine June/July 2010
by susan brubaker knapp

The arT of Thread skeTching: free Thread drawing Techniques 4 Q u i lt i n g D A i lY. c o m
©interweave
the Art of threAD Sketching threAD DrAwing techniQueSQuilting Daily
Texture—the way a surface feels,
or looks like it feels—is a primary
element of all art, but it is especially
important, as well as easy to
manipulate, in fiber art. Fiber
artists may not realize how much
they are naturally drawn to texture,
but it is one of the most important
characteristics of our work. Here
are some thoughts on how to use
texture to your advantage when thread
sketching.
Get specificThink about texture in subtle shades
of detail. Just as artists don’t think
“green,” but instead, “emerald,
chartreuse, seafoam, or mint,” they
also consider the intimate nature of an
object’s texture in very specific terms.
A rough object can be more accurately
described as sandy, prickly, gritty,
cracked, bumpy, coarse, corrugated,
wrinkled, rusty, puckery, leathery,
papery, spiky, or sharp. A soft object
can be furry, fluffy, velvety, or puffy. A
wet object can be sticky, gooey, slimy,
slippery, slick, shiny, or spongy.
Being precise and specific in the
words you choose to describe textures
can help you think about them in a
different way and better create them in
your art.
consider the connotations Texture can convey strong emotions
and ideas. Without consciously
knowing it, we all have powerful
emotional connections with textures.
You might feel safe and comforted
when you remember the feel of the
fuzzy baby blanket with the satin hem
that you cuddled with as a child, or
uncomfortable and anxious when you
recall the scratchy wool of the kilt
you wore as your school uniform. You
might recall the grain of the dupioni
silk in your wedding dress and feel
a sense of elegance and excitement.
Each of these very specific textures
conjures up strong emotional and
sensory memories that can be used to
an advantage in your work.
how to create texturethink about fabric Texture is also influenced by the kind
of fabric you start with. A base of
smooth, fine cotton or silk feels—and
looks—very different from a coarse
cotton or linen, even when much of it
is covered with thread.
choose threads wisely The kind of thread you use makes a
difference, too. Heavier weights of
thread add more texture while fine
threads add less. Shiny threads like
rayons and silks reflect light and
can change texture dramatically. You
might choose a fine silk to thread
sketch the glass in a window, for
example. The color shifts in variegated
thread can also change perceived
texture.
paint with thread Think of thread as you would paint:
you can make dots, smooth strokes,
or long, sinuous curves. Like paint,
you can apply thread sparingly or very
heavily.
Going over an area with several
layers of thread can create wonderful
texture, but you need to make sure
your surface is sufficiently stabilized
to support these layers without
puckering. (See “Lesson 2: Focus on
Line” in the April/May issue for tips
on stabilizing your work.) Conversely,
a very smooth texture will generally
require less thread sketching.
Vary stitch linesWhen aiming for realism in your
thread sketching, closely examine the
quality of the texture in your subject.
For example, grass can be scrubby and
coarse, long and tufted, or cropped
and sharp. Each of these types would
require a different kind of stitching.
For long blades, you would choose
long, smooth, fairly straight lines. For
scrubby grass, you would make short,
angular lines.
In “Maximum Cat Nap,” some of the
cat’s fur is short and close to the pelt,
while some is longer and shaggier,
or coarser. The individual hairs go
in different directions, forming tiny
cowlicks in some places. Attention to
these details is essential for realism.
do you ever wonder why people don’t reach out and touch
paintings, while they can’t seem to keep their hands off a piece of
fiber art? One reason is texture. Fiber art invites touch.

The arT of Thread skeTching: free Thread drawing Techniques 5 Q u i lt i n g D A i lY. c o m
©interweave
the Art of threAD Sketching threAD DrAwing techniQueSQuilting Dailybreak the rulesThe holes left by your sewing machine
needle create great texture (especially
in pieces with fused layers or painted
surfaces), as does adjusting the
machine’s tension so that some of the
bobbin thread comes up to the top.
Unlike machine quilting, where the
goal is stitches of a consistent length,
try making long stitches in some
places and short stitches in others to
achieve different textures.
pay attention to scaleScale also makes a difference. For
instance, if grass is far away, it would
have less distinct texture than if it
were close. Imagine lying on your
belly in a field of grass and taking a
macro shot of the blades right in front
of you. Now imagine standing up in
a field of grass and taking a picture
of it from there. The lines of thread
you would use to convey the texture
would be very different from each
other.
Nearby objects are also often
portrayed larger, leaving space for
more detailed thread work. In “Wool
Yarn,” the up-close look at balls of
wool yarn allows detailed examination
of how each strand of yarn was
twisted as it was spun. If the balls of
yarn were farther away and smaller, it
would be impossible to achieve this
level of detail with thread sketching.
NEEdLE & THrEAd basicsIn most of my thread sketching, I use a variety of cotton threads with weights in the light-to-middle range. Very lightweight threads (#50- or #60-weight) do not cause too much thread buildup if you go over an area several times. If you do not hoop your work, and only use one layer of stabilizer, you will find that these lighter-weight threads work great and don’t cause a lot of draw-up. When I want heavier thread lines, I use #40-weight cottons. If you crave sheen and want to use a shinier thread, I recommend polyester over rayon because it is stronger.
Needles are identified by European sizes (60–120) and American sizes (8–19). Higher numbers mean that the needle is bigger in diameter, as measured just above the eye. Most needles are labeled with both size systems: 60/8, 70/10, 80/12, 90/14, etc.
The type of point (sharp, slightly rounded, or ball) affects how the needle penetrates
the quilt, and the needle size and eye size affect the tension on the top thread.
Many variables affect needle choice when thread sketching, including fabric type and weight, stabilizer, thread type and weight, and whether you are stitching through other materials such as paint, foil, or Angelina® Fibers.
For pieces without a lot of stiff layers, and when I’m using a #50- or #60-weight thread, I often use a universal 80/12 needle because it leaves only small holes in the fabric. For stiffer fabrics, more layers, or heavier threads, a 90/14 topstitching needle works well.
Topstitching needles have longer eyes, making them easier to thread, and also reducing thread shredding and breakage. Microtex needles have very sharp points, which help them pierce stiffer, heavier cottons (like batiks) beautifully, and stitch more easily through other art quilt materials.

“Maximum Cat Nap” (detail opposite) • 181⁄2" × 22" • Realistic fur textures were created by paying close attention to the direction and coarseness of the different kinds of cat fur. The main colors of the cat were first painted with acrylic textile paint on white fabric, and then thread sketching was used to create the illusion of fur.
The arT of Thread skeTching: free Thread drawing Techniques 6 Q u i lt i n g D A i lY. c o m
©interweave
the Art of threAD Sketching threAD DrAwing techniQueSQuilting Daily
consider how you will quiltremember that after you thread
sketch a piece, you will be quilting it.
The thread sketching adds a layer of
texture that is more on the surface or
two-dimensional. The quilting adds
hills and valleys, making the surface
more three-dimensional.
When you quilt a thread-sketched
surface, heavy quilting in one area will
make it physically recede. Make sure
this is the effect you desire. It is best
to quilt more heavily in areas that you
want to push back. Thread sketching
is perfect for areas that need a lot of
texture but also need to come forward.
For example, if you were thread
sketching a lily that had long stamens
with pollen on them, you could
add that texture with thread, and
then quilt more heavily around the
stamens—and not on top of them—to
make them appear to come forward.
texture exercisesImprove your skills for using thread
sketching to convey texture by
working on these exercises:
• Go through your house and collect
textures by making rubbings.
Place a piece of paper on top of the
textured surface and rub a crayon
or soft pencil in broad strokes on
top. Find as many textures as you

The arT of Thread skeTching: free Thread drawing Techniques 7 Q u i lt i n g D A i lY. c o m
©interweave
the Art of threAD Sketching threAD DrAwing techniQueSQuilting Dailycan, then choose one to reproduce
in thread.
• Look around and write down
the objects you see (for instance:
carpet, basket, dog). Next to each
object, write down a word that
describes its texture (nubby, woven,
furry). Make a small sketch, about
two inches square, to show how
you might interpret each one using
thread on fabric. Here are some
textures to try: carpet, rock, fabric,
hair, brick, stone, rust, parched
earth, sand ripples, foam, bubbles,
wrinkles, shingles, moss, and
waves.
• Spend a day consciously thinking
about the textures you see and feel
around you. describe each texture
using a word or words as complex
as you can find. For example, you
might look at your dog and think
“furry.” Touch the dog, and really
think about what you are feeling.
More words might come, such as
“coarse, bristly, shiny” or “soft,
light, fluffy.”
bluemoonriver.com
Top: Detail from “Autumn’s Bounty” Heavy threadwork in several directions adds to
the bumpiness of these mini pumpkins. To achieve more three-dimensional texture, extra batting was added behind some of the
pumpkins before quilting.
Right: Detail from “Harbinger’s Hope” The use of variegated thread, and the fact that the lines of stitching run in a different direction
from the lines on the fabric beneath them, create a realistic texture on this
three-dimensional feather.
Left: Detail from “Eastern Tiger Swallowtail” • Under close inspection, butterfly wings have scales, just like fish. To add texture that mimics this phenomenon, the sewing machine tension was adjusted to bring the contrasting colored bobbin thread to the surface, adding subtle flecks.

The arT of Thread skeTching: free Thread drawing Techniques 8 Q u i lt i n g D A i lY. c o m
©interweave
the Art of threAD Sketching threAD DrAwing techniQueSQuilting Daily
‘nostalgia series’ sTiTched skeTches and ePhemera
in arT quilTs
i started this series of quilts after reading Cas Holmes’ book, THe FounD objecT in TexTile arT (Interweave).
I was so inspired by Cas’ stitched sketches and the addition of paper and found items in her work. In the
past, before I owned a sewing machine, I used old letters in my hand-stitched organza quilts. I’ve also used
some of the images from my sketchbook in my fiber art. And, in the last few months, I’ve been working on
my free-motion machine stitching. So Cas Holmes’ book spoke to all my interests, at just the right time, and
started me creating what I call my “Nostalgia Series.”
AdApted from Quilting Arts mAgAzine
April/mAy 2011
by jane laFazio

The arT of Thread skeTching: free Thread drawing Techniques 9 Q u i lt i n g D A i lY. c o m
©interweave
the Art of threAD Sketching threAD DrAwing techniQueSQuilting Dailydirections1. Select a richly patterned fabric
that sets the mood for your
background. I used cloth I’d
created by monoprinting with soy
wax and fabric dyes in a workshop
with Melanie Testa.
2. Attach the batting to the back of
the cloth.
3. Select a drawing from your
sketchbook, and scan it onto a
piece of sandwich wrap or deli
paper, or trace it onto a piece of
tissue paper. I have used sketches,
continuous line drawings, and
even a cyanotype print for
images. You can even experiment
with image transfer (see “Image
Transfers”).
4. determine where you want your
first stitched image to be on
the front of your quilt and pin
ephemera or sheer cloth in that
spot. (When you sew from the
back of the quilt, the stitching will
catch the ephemera/sheer cloth on
the front.)
5. Turn the quilt over and pin the
paper drawing to the back of the
quilt (on the batting).
6. Free-motion stitch from the back
of the quilt, following the lines of
your image. Tear away the excess
paper, but don’t worry about
removing it; no one will see it.
Your stitched design will be seen
on the front of the quilt, and the
stitching will have caught the bit of
ephemera on the front.
7. Stitch one image at a time,
overlapping the stitching and
ephemera to create a layered
surface design on the quilt.
M A T E r I A L S
•Fabric
•Batting
•Sandwich wrap, deli paper, or tissue paper
•Pins
•Ephemera such as paper, ribbon, maps, and old letters
•Tulle
•Sewing machine with a free-motion foot
•Your own drawings (or images from decorative paper napkins, as Cas Holmes suggests)
•Fabric scraps such as silk organza, lace, cheesecloth, and recycled silk sari ribbon
•Embroidery thread and needle
Optional•Grafix® Dura-Lar™ Wet
Media Film
•Soft gel medium
•Spoon (for burnishing)
•Water-soluble crayons
Previous page: “Zinnia” • 91⁄2" × 13" The pink zinnia is an image transfer onto a vintage cocktail napkin (see “Image Transfers”).
On this page: Two watercolors (from Jane’s journal) and a cyanotype provided inspiration for the floral motifs in her “Nostalgia Series.”
The arT of Thread skeTching: free Thread drawing Techniques 10 Q u i lt i n g D A i lY. c o m
©interweave
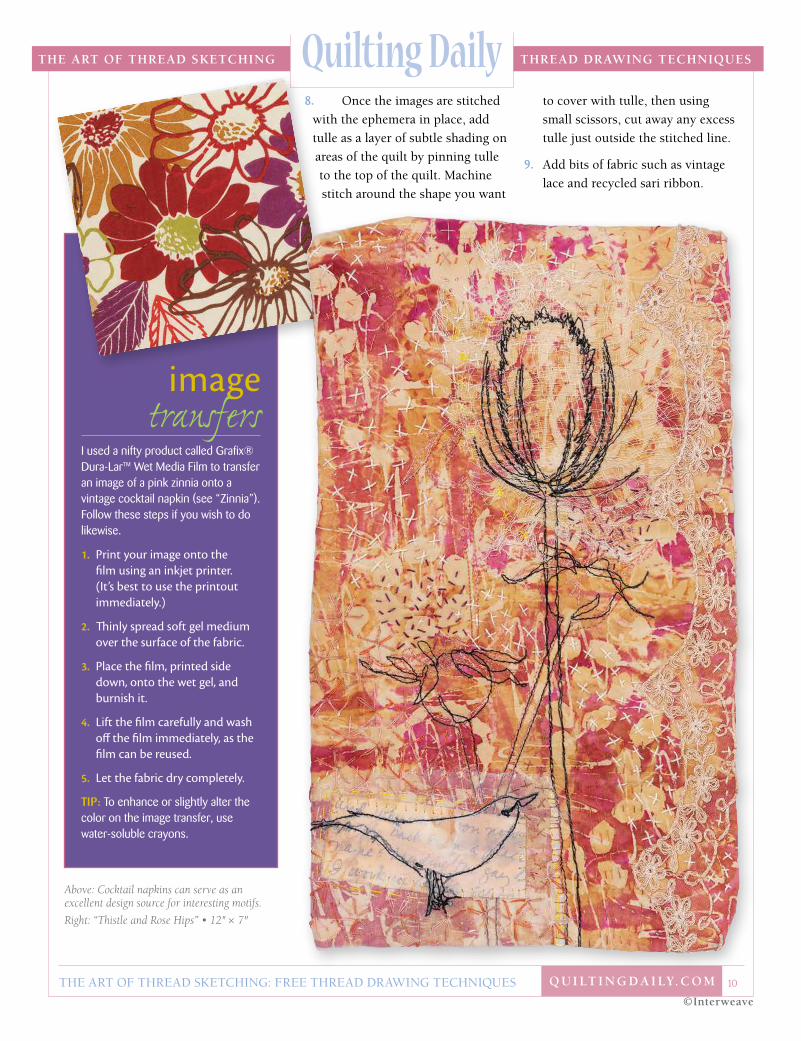
the Art of threAD Sketching threAD DrAwing techniQueSQuilting Daily8. Once the images are stitched
with the ephemera in place, add
tulle as a layer of subtle shading on
areas of the quilt by pinning tulle
to the top of the quilt. Machine
stitch around the shape you want
to cover with tulle, then using
small scissors, cut away any excess
tulle just outside the stitched line.
9. Add bits of fabric such as vintage
lace and recycled sari ribbon.
image transfers
I used a nifty product called Grafix® Dura-Lar™ Wet Media Film to transfer an image of a pink zinnia onto a vintage cocktail napkin (see “Zinnia”). Follow these steps if you wish to do likewise.
1. Print your image onto the film using an inkjet printer. (it’s best to use the printout immediately.)
2. Thinly spread soft gel medium over the surface of the fabric.
3. Place the film, printed side down, onto the wet gel, and burnish it.
4. Lift the film carefully and wash off the film immediately, as the film can be reused.
5. Let the fabric dry completely.
Tip: To enhance or slightly alter the color on the image transfer, use water-soluble crayons.
Above: Cocktail napkins can serve as an excellent design source for interesting motifs.
Right: “Thistle and Rose Hips” • 12" × 7"
The arT of Thread skeTching: free Thread drawing Techniques 11 Q u i lt i n g D A i lY. c o m
©interweave
the Art of threAD Sketching threAD DrAwing techniQueSQuilting Daily
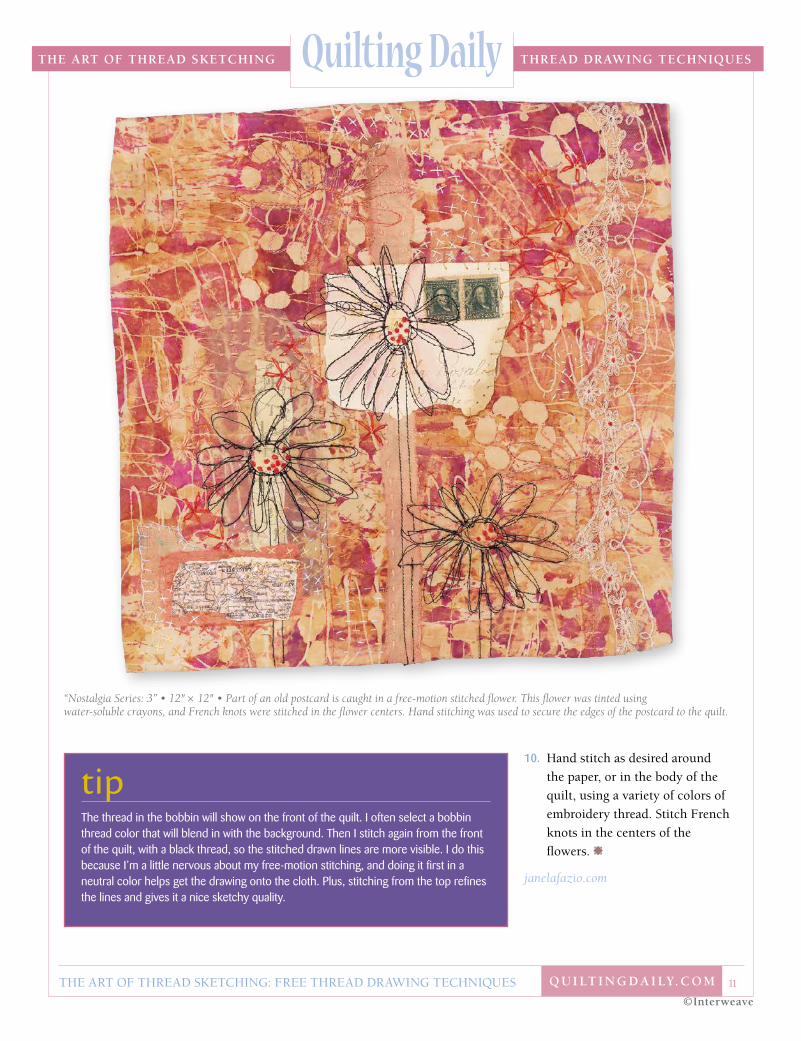
10. Hand stitch as desired around
the paper, or in the body of the
quilt, using a variety of colors of
embroidery thread. Stitch French
knots in the centers of the
flowers.
janelafazio.com
“Nostalgia Series: 3” • 12" × 12" • Part of an old postcard is caught in a free-motion stitched flower. This flower was tinted using water-soluble crayons, and French knots were stitched in the flower centers. Hand stitching was used to secure the edges of the postcard to the quilt.
tip
The thread in the bobbin will show on the front of the quilt. I often select a bobbin thread color that will blend in with the background. Then I stitch again from the front of the quilt, with a black thread, so the stitched drawn lines are more visible. I do this because I’m a little nervous about my free-motion stitching, and doing it first in a neutral color helps get the drawing onto the cloth. Plus, stitching from the top refines the lines and gives it a nice sketchy quality.
AdApted from Quilting Arts mAgAzine
october/november 2008
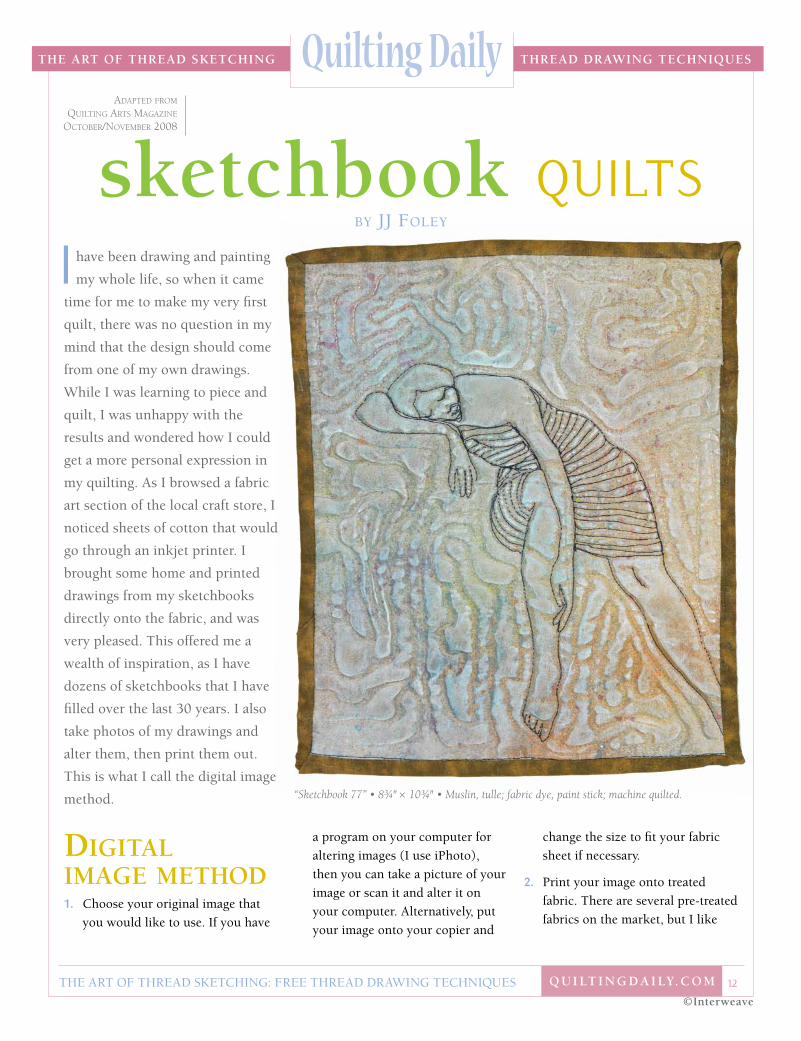
“Sketchbook 77” • 8¾" × 10¾" • Muslin, tulle; fabric dye, paint stick; machine quilted.
diGital imaGe method1. Choose your original image that
you would like to use. If you have
a program on your computer for
altering images (I use iPhoto),
then you can take a picture of your
image or scan it and alter it on
your computer. Alternatively, put
your image onto your copier and
change the size to fit your fabric
sheet if necessary.
2. Print your image onto treated
fabric. There are several pre-treated
fabrics on the market, but I like
The arT of Thread skeTching: free Thread drawing Techniques 12 Q u i lt i n g D A i lY. c o m
©interweave
the Art of threAD Sketching threAD DrAwing techniQueSQuilting Daily
sketchbook quilTs
i have been drawing and painting
my whole life, so when it came
time for me to make my very first
quilt, there was no question in my
mind that the design should come
from one of my own drawings.
While I was learning to piece and
quilt, I was unhappy with the
results and wondered how I could
get a more personal expression in
my quilting. As I browsed a fabric
art section of the local craft store, I
noticed sheets of cotton that would
go through an inkjet printer. I
brought some home and printed
drawings from my sketchbooks
directly onto the fabric, and was
very pleased. This offered me a
wealth of inspiration, as I have
dozens of sketchbooks that I have
filled over the last 30 years. I also
take photos of my drawings and
alter them, then print them out.
This is what I call the digital image
method.
by jj Foley
The arT of Thread skeTching: free Thread drawing Techniques 13 Q u i lt i n g D A i lY. c o m
©interweave
the Art of threAD Sketching threAD DrAwing techniQueSQuilting Daily
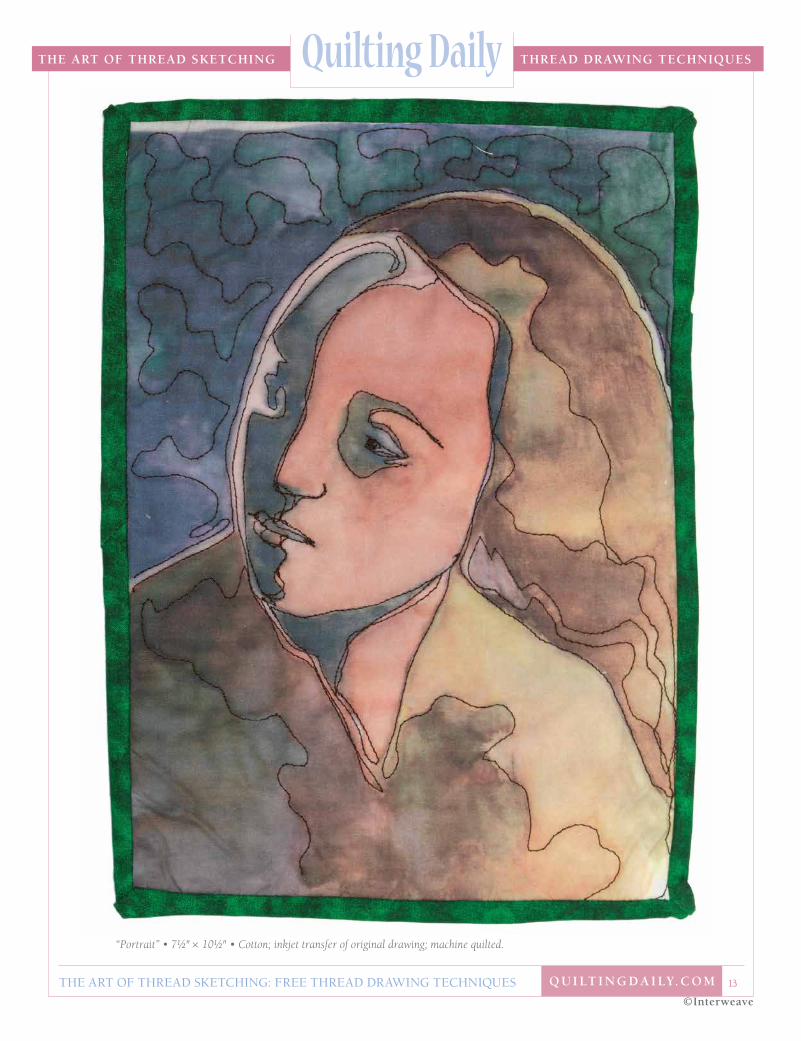
“Portrait” • 7½" × 10½" • Cotton; inkjet transfer of original drawing; machine quilted.
The arT of Thread skeTching: free Thread drawing Techniques 14 Q u i lt i n g D A i lY. c o m
©interweave
the Art of threAD Sketching threAD DrAwing techniQueSQuilting Daily
Miracle Fabric Sheets. I like to
print mine at full size so as not
to waste any of this expensive
material.
3. Take your printed fabric sheet and
iron on top of the paper backing
with a hot, dry iron to set the ink.
Now your printed fabric can be
pieced into a quilt, fused onto a
quilt square, or made into a
mini-quilt.
4. Once you have decided how the
printed fabric will fit into a project,
put it all together and add the
batting and backing. Then use the
walking foot to stitch around the
edges of the sandwich.
5. Use your free-motion quilting foot
to stitch along the lines of your
drawing, taking extra care around
small details. I try to pay attention
to each and every gradation and
puddle in the watercolor, ink, or
gouache drawing, in order to bring
out each aspect of the drawing.
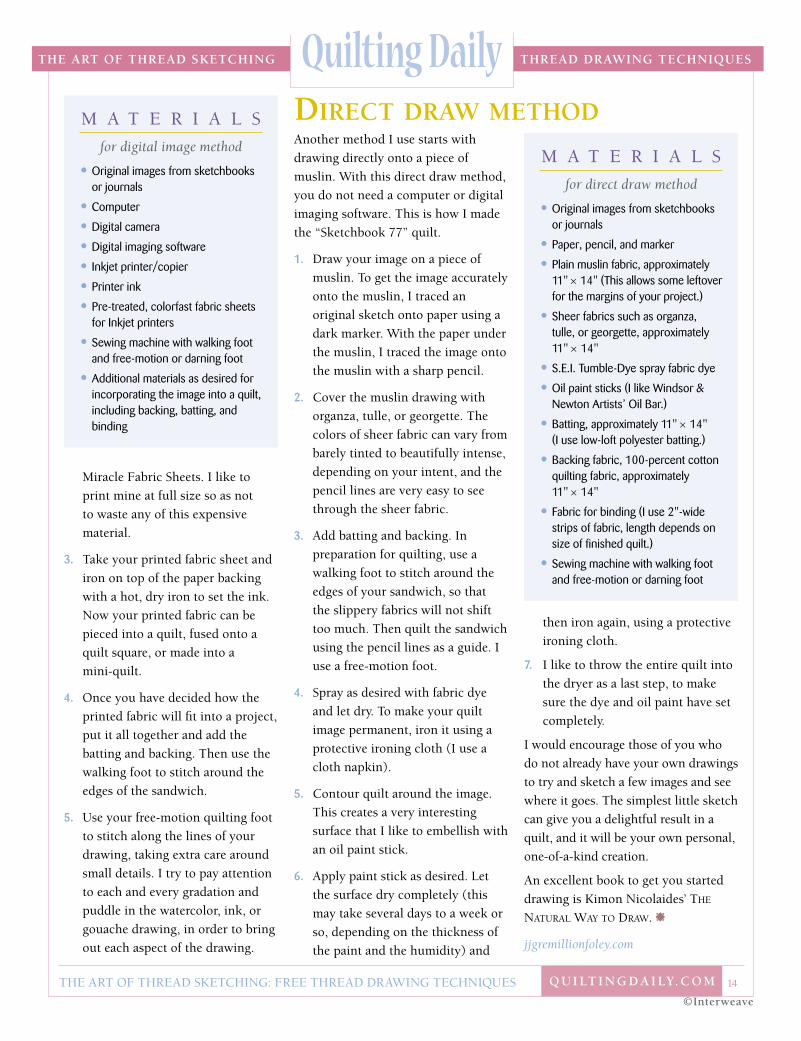
Another method I use starts with
drawing directly onto a piece of
muslin. With this direct draw method,
you do not need a computer or digital
imaging software. This is how I made
the “Sketchbook 77” quilt.
1. draw your image on a piece of
muslin. To get the image accurately
onto the muslin, I traced an
original sketch onto paper using a
dark marker. With the paper under
the muslin, I traced the image onto
the muslin with a sharp pencil.
2. Cover the muslin drawing with
organza, tulle, or georgette. The
colors of sheer fabric can vary from
barely tinted to beautifully intense,
depending on your intent, and the
pencil lines are very easy to see
through the sheer fabric.
3. Add batting and backing. In
preparation for quilting, use a
walking foot to stitch around the
edges of your sandwich, so that
the slippery fabrics will not shift
too much. Then quilt the sandwich
using the pencil lines as a guide. I
use a free-motion foot.
4. Spray as desired with fabric dye
and let dry. To make your quilt
image permanent, iron it using a
protective ironing cloth (I use a
cloth napkin).
5. Contour quilt around the image.
This creates a very interesting
surface that I like to embellish with
an oil paint stick.
6. Apply paint stick as desired. Let
the surface dry completely (this
may take several days to a week or
so, depending on the thickness of
the paint and the humidity) and
then iron again, using a protective
ironing cloth.
7. I like to throw the entire quilt into
the dryer as a last step, to make
sure the dye and oil paint have set
completely.
I would encourage those of you who
do not already have your own drawings
to try and sketch a few images and see
where it goes. The simplest little sketch
can give you a delightful result in a
quilt, and it will be your own personal,
one-of-a-kind creation.
An excellent book to get you started
drawing is Kimon Nicolaides’ THe
naTural Way To DraW.
jjgremillionfoley.com
M A T E r I A L S
for direct draw method
•Original images from sketchbooks or journals
•Paper, pencil, and marker
•Plain muslin fabric, approximately 11" × 14" (This allows some leftover for the margins of your project.)
•Sheer fabrics such as organza, tulle, or georgette, approximately 11" × 14"
•S.E.I. Tumble-Dye spray fabric dye
•Oil paint sticks (I like Windsor & Newton Artists’ Oil Bar.)
•Batting, approximately 11" × 14" (I use low-loft polyester batting.)
•Backing fabric, 100-percent cotton quilting fabric, approximately 11" × 14"
•Fabric for binding (I use 2"-wide strips of fabric, length depends on size of finished quilt.)
•Sewing machine with walking foot and free-motion or darning foot
M A T E r I A L S
for digital image method
•Original images from sketchbooks or journals
•Computer
•Digital camera
•Digital imaging software
•Inkjet printer/copier
•Printer ink
•Pre-treated, colorfast fabric sheets for Inkjet printers
•Sewing machine with walking foot and free-motion or darning foot
•Additional materials as desired for incorporating the image into a quilt, including backing, batting, and binding
direct draw method

“Butterfly” • 7¾" × 10¼" • Cotton; inkjet transfer of original drawing; machine quilted.
The arT of Thread skeTching: free Thread drawing Techniques 15 Q u i lt i n g D A i lY. c o m
©interweave
the Art of threAD Sketching threAD DrAwing techniQueSQuilting Daily

The arT of Thread skeTching: free Thread drawing Techniques 16 Q u i lt i n g D A i lY. c o m
©interweave
the Art of threAD Sketching threAD DrAwing techniQueSQuilting Daily
I began by using a light box to trace
the important features of the photo
onto tear-away stabilizer. Then I
pinned the stabilizer to the fabric,
wrong sides together, and
free-motion stitched along the traced
lines from the back. The resulting free-
motion embroidery image on the front
of the fabric wasn’t what I had hoped
for; it was more of a cartoon than a
realistic representation of the image.
As I sat there, disappointedly fiddling
with the stabilizer, I noted how much
like heavy paper it was. That’s when
the “thump myself” moment occurred.
Would it be possible to print the
photo directly onto the stabilizer?
This would preserve the details lost
through the process of tracing and
provide me with a finely detailed and
shadowed pattern on which to free-
motion embroider.
The resulting technique has proven
to be remarkably easy and versatile.
The process begins with a digital
photograph printed in grayscale
from my home computer printer
directly onto tear-away stabilizer. The
stabilizer feeds very easily through the
printer. I use a fine-line permanent
marker to highlight any shading or
details that were lost in the printing
and free-motion stitch, using black
cotton thread, following the design
on the stabilizer. Once I complete
the outline of the design, I fill in the
shadows and contours, following
the details printed on the stabilizer.
When the design has been completely
stitched, I remove the stabilizer and
turn it over to the right side of the
fabric. The resulting free-motion
embroidery is remarkably like a pen-
and-ink sketch.
directionsstitchinG the imaGe1. Choose a digital photograph. If it is
a color photo, adjust it to grayscale
and size it to suit your needs.
Unless you are using personal
photos, look for photos that are in
the public domain, i.e. copyright-
free images. Print a copy of the
photo on plain paper to use as a
reference while you stitch.
note: If the direction is important to the
composition of the image (for example,
if you want the final image to show a
right hand rather than a left) you will
need to flip the photographic image on
the computer. The image printed on
the stabilizer will be a reverse of the
original photograph.
2. Press a piece of heavy-duty,
tear-away stabilizer flat, and trim
it to 81⁄2" × 11". Print the grayscale
photo directly onto the stabilizer,
with the printer properties set to
“best” printing quality. Be sure
to feed each piece of stabilizer
through the printer individually.
Let the printer ink dry completely,
preferably 24 hours, and then heat
set it with a dry iron. (See Sample 1.)
thread sketching
on sTabilizeri t was one of those “thump myself on the head” kind of moments. I was
brainstorming ways to include a photographic image in a quilt, but
I wanted to try something different from just printing the photograph
directly onto my fabric. I was looking for a technique that would allow
more of the artist’s hand to be seen, more of a representational sketch
than a photograph.
by karen Fricke
AdApted from Quilting Arts mAgAzine october/november 2007
The arT of Thread skeTching: free Thread drawing Techniques 17 Q u i lt i n g D A i lY. c o m
©interweave
the Art of threAD Sketching threAD DrAwing techniQueSQuilting Daily
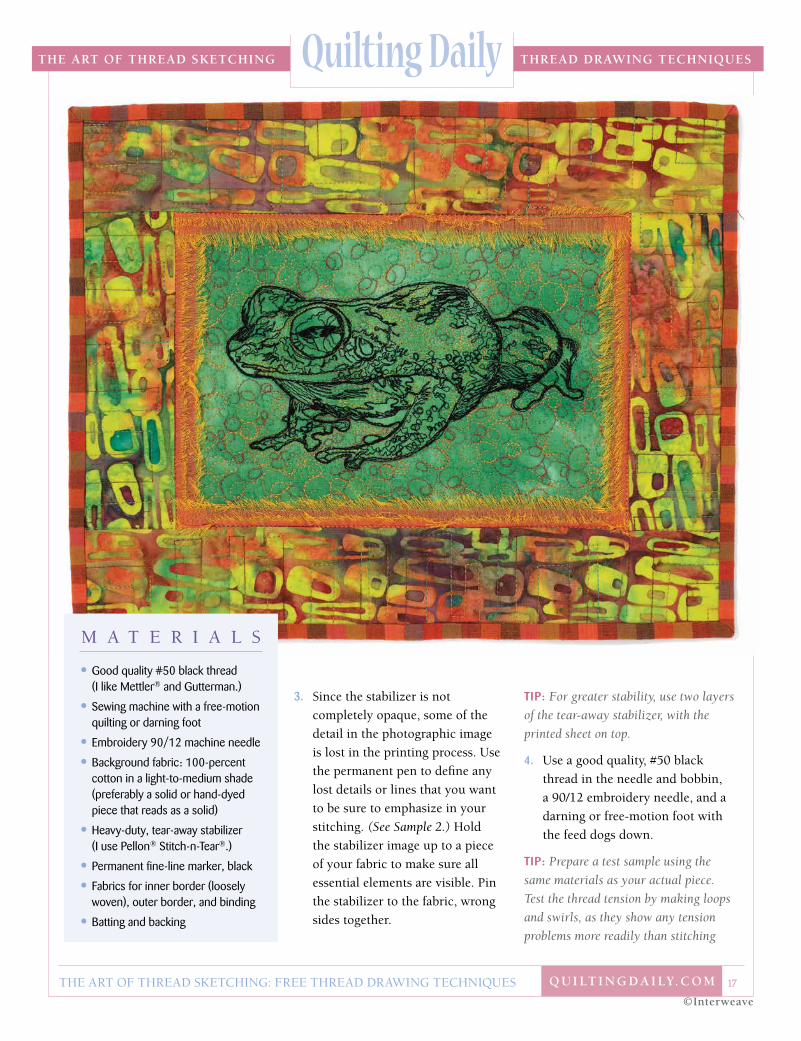
3. Since the stabilizer is not
completely opaque, some of the
detail in the photographic image
is lost in the printing process. Use
the permanent pen to define any
lost details or lines that you want
to be sure to emphasize in your
stitching. (See Sample 2.) Hold
the stabilizer image up to a piece
of your fabric to make sure all
essential elements are visible. Pin
the stabilizer to the fabric, wrong
sides together.
Tip: For greater stability, use two layers
of the tear-away stabilizer, with the
printed sheet on top.
4. Use a good quality, #50 black
thread in the needle and bobbin,
a 90/12 embroidery needle, and a
darning or free-motion foot with
the feed dogs down.
Tip: Prepare a test sample using the
same materials as your actual piece.
Test the thread tension by making loops
and swirls, as they show any tension
problems more readily than stitching
M A T E r I A L S
• Good quality #50 black thread (I like Mettler® and Gutterman.)
• Sewing machine with a free-motion quilting or darning foot
• Embroidery 90/12 machine needle
• Background fabric: 100-percent cotton in a light-to-medium shade (preferably a solid or hand-dyed piece that reads as a solid)
• Heavy-duty, tear-away stabilizer (I use Pellon® Stitch-n-Tear®.)
• Permanent fine-line marker, black
• Fabrics for inner border (loosely woven), outer border, and binding
• Batting and backing

The arT of Thread skeTching: free Thread drawing Techniques 18 Q u i lt i n g D A i lY. c o m
©interweave
the Art of threAD Sketching threAD DrAwing techniQueSQuilting Daily
straight lines. The goal is to have even
tension on the top and bottom, so that
the bobbin thread is not pulled through
to the top, nor is the top thread pulled
through to the bottom. Once you feel
comfortable with the process, try other
types of threads in the bobbin—a fine
rayon thread gives you a very precise
stitching line to achieve greater detail,
perfect for a small, intricate portrait.
A heavier thread, such as a 30-weight
quilting cotton, will create a heavy line,
which is ideal for a larger sketch. Once
you are happy with the tension, you’re
ready to sketch.
5. Begin by stitching the outline
of the image, then fill in the
shadows and contours of the
design, using a smooth back-and-
forth motion. The most difficult
part about thread sketching is to
stop thinking about what you’re
doing. Many of us delight in being
in control—I know I do—but I
have been much happier with my
thread sketching results when I
simply concentrate on following
the design on the stabilizer with
my needle and thread, rather
than debating too much about
shading and contouring. Stop
thinking, breathe, and just stitch.
I prefer stitching over each line at
least twice, without worrying too
much about accuracy, so that the
final result mimics a pen-and-ink
sketch.
note: Refer to the original photo as you
stitch. When you think you’re finished,
turn the fabric over and check for
any areas that seem empty or sparse,
finding imagesA good place to start looking for
photos is the photo archives of
the United States Department of
Agriculture. To create my “Coqui Up
Close” quilt, I searched under Google
images for “usda frog” and found this
little guy. The USDA allows free use of
the photos so long as you credit the
agency, don’t distort the reality of the
photos, and don’t use them in a way
that implies the agency is endorsing a
product or position.
Sample 1: Print a grayscale photo directly onto tear-away stabilizer.
Sample 2: Use a permanent pen to define any lost details or lines.

The arT of Thread skeTching: free Thread drawing Techniques 19 Q u i lt i n g D A i lY. c o m
©interweave
the Art of threAD Sketching threAD DrAwing techniQueSQuilting Daily
and fill in where necessary. You’ll know
you’re finished stitching when you say,
“Wow!”
6. Carefully remove the stabilizer,
where possible, using a seam
ripper and tweezers. Leave it in
place under heavily stitched areas.
Press flat. Your finished thread-
sketched image can be used as a
design element in a larger piece,
or it can be the focal point of your
quilt, as in “Coqui Up Close.”
the inner and outer borders1. Tear 11⁄4"-wide strips of a loosely
woven fabric; I used Burmese
cross-dyed cotton, but fine linen
works nicely, too.
2. Fold the strips lengthwise, not
quite in half, and, with the
narrower width on top and the
folded edge even with the raw edge
of the quilt top, pin or baste the
strips to the sides, trimming to fit.
3. Pin or baste the remaining lengths
onto the top and bottom. The
corners of this inner border will
overlap.
4. Trim a strip of your outer border
fabric to the length of each side;
attach using 1⁄4" seams and press
toward the outer borders. do the
same with the top and bottom
outer borders.
5. To create the fringe on the inner
border, gently ease out individual
threads along the raw edges.
finishinGLayer your quilt top with the batting
and backing; baste. For the quilting,
I used a 30-weight variegated cotton
thread and nudged the narrow border
aside to free-motion stitch tiny loops
and swirls (they reminded me of frog
eggs) around the frog and close to the
inner edge.
In the outer border, I stitched random
rectangles—the visual opposite of the
loopy interior—and finished the quilt
with a narrow, pieced binding.
The result is a thread sketch that
looks very much like a pen-and-
ink drawing. You’ll find that this
technique is quite versatile. You can
personalize any quilt, literally any
piece of fabric, in much the same way
fiber artists have used photo transfer
techniques to create new design
elements on fabric. Unlike photo
transfer, however, this technique
combines the representational
attributes of a photograph with
the appeal of an artist’s individual
rendering.
karenfrickequilts.com

The arT of Thread skeTching: free Thread drawing Techniques 20 Q u i lt i n g D A i lY. c o m
©interweave
the Art of threAD Sketching threAD DrAwing techniQueSQuilting Daily
thread painting
From PhoTo To sTiTched arTworkby carol WaTkins
AdApted from Quilting Arts mAgAzine April/mAy 2009
The arT of Thread skeTching: free Thread drawing Techniques 21 Q u i lt i n g D A i lY. c o m
©interweave
the Art of threAD Sketching threAD DrAwing techniQueSQuilting Daily
Quilting and photography emerged
as passions for me at about the same
time, and I thought I would have to
choose between them. In a eureka
moment I realized I could combine the
two, and I now use my own photos to
print my fabric for quilts and thread
paintings.
Early on, intimidated by
free-motion stitching, I relied on
simple line quilting using a walking
foot. Always driven to explore, I
began practicing free-motion stitching
and was enchanted by the lyrical
line, the design possibilities, and the
way stitching adds another layer of
complexity to a quilt.
I start with a photo (or several),
manipulate it, print it, and then
stitch. The process of composing
the image for use in a quilt is very
important. I take my time choosing
images, cropping, combining photos,
removing elements of the background,
enhancing color, applying filters, or
performing other manipulations with
my photo-editing software. By the
time it is printed, the photo I use may
bear little resemblance to the original.
I find inspiration everywhere,
including in such diverse subjects as
windows and wildflowers, or shoes
and boots. I am also drawn to old,
rusty farm equipment, twisted metal,
graffiti, and much more.
note: Beware of the addictive nature of
this activity.
directions1. Choose a photograph, or several,
and use your photo-editing
software to digitally manipulate
the image(s). First, open a photo
or scan an image. Make a copy of it
and close the original. You can do
various manipulations on the copy
of your photo. I suggest starting
with fairly simple designs or
shapes. There is a lot of complexity
within a simple format. Shading
for depth and mixing colors will
provide plenty of challenge.
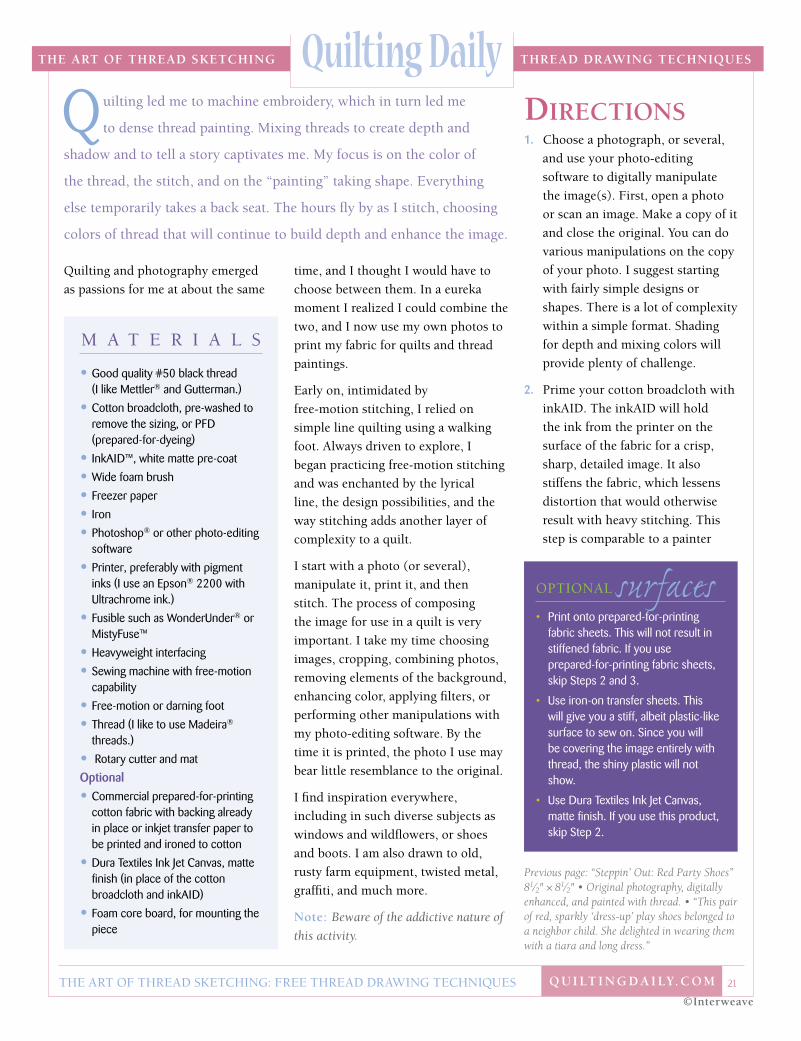
2. Prime your cotton broadcloth with
inkAId. The inkAId will hold
the ink from the printer on the
surface of the fabric for a crisp,
sharp, detailed image. It also
stiffens the fabric, which lessens
distortion that would otherwise
result with heavy stitching. This
step is comparable to a painter
M A T E r I A L S
• Good quality #50 black thread (I like Mettler® and Gutterman.)
•Cotton broadcloth, pre-washed to remove the sizing, or PFD (prepared-for-dyeing)
•InkAID™, white matte pre-coat
•Wide foam brush
•Freezer paper
•Iron
•Photoshop® or other photo-editing software
•Printer, preferably with pigment inks (I use an Epson® 2200 with Ultrachrome ink.)
•Fusible such as WonderUnder® or MistyFuse™
•Heavyweight interfacing
•Sewing machine with free-motion capability
•Free-motion or darning foot
•Thread (I like to use Madeira® threads.)
• Rotary cutter and mat
Optional•Commercial prepared-for-printing
cotton fabric with backing already in place or inkjet transfer paper to be printed and ironed to cotton
•Dura Textiles Ink Jet Canvas, matte finish (in place of the cotton broadcloth and inkAID)
•Foam core board, for mounting the piece
OPTIONAL surfaces• Print onto prepared-for-printing
fabric sheets. This will not result in stiffened fabric. If you use prepared-for-printing fabric sheets, skip Steps 2 and 3.
• Use iron-on transfer sheets. This will give you a stiff, albeit plastic-like surface to sew on. Since you will be covering the image entirely with thread, the shiny plastic will not show.
• Use Dura Textiles Ink Jet Canvas, matte finish. If you use this product, skip Step 2.
Previous page: “Steppin’ Out: Red Party Shoes” 81⁄2" × 81⁄2" • Original photography, digitally enhanced, and painted with thread. • “This pair of red, sparkly ‘dress-up’ play shoes belonged to a neighbor child. She delighted in wearing them with a tiara and long dress.”
quilting led me to machine embroidery, which in turn led me
to dense thread painting. Mixing threads to create depth and
shadow and to tell a story captivates me. My focus is on the color of
the thread, the stitch, and on the “painting” taking shape. Everything
else temporarily takes a back seat. The hours fly by as I stitch, choosing
colors of thread that will continue to build depth and enhance the image.

The arT of Thread skeTching: free Thread drawing Techniques 22 Q u i lt i n g D A i lY. c o m
©interweave
the Art of threAD Sketching threAD DrAwing techniQueSQuilting Daily
priming a canvas prior to applying
paint. Follow the manufacturer’s
directions on the container.
3. Cut the cotton about 1" larger than
the final print and iron the back
side of the fabric to the shiny side
of an 81⁄2" × 11" piece of freezer
paper. I have made the mistake
of ironing the inkAId side of the
prepared fabric to the freezer paper,
so watch out for this. Trim with a
sharp rotary cutter and iron again.
note: Ensuring a tight bond between
the fabric and freezer paper is important
for the smooth operation of the printer.
If not held firmly, the ink cartridge
carriage can yank the fabric. This
usually stops the printer.
“Steppin’ Out: Mary Janes” • 81⁄4" × 81⁄4" • Original photography digitally manipulated and printed on fabric. These thread paintings include 30–50 different colors of rayon thread.

“Sharon’s Boots” • 91⁄2" × 111⁄2" • “Cowboys riding the range never had boots like these. They are made for a woman who is not afraid of making a statement. My friend showed up wearing these and willingly allowed me to photograph them.”
The arT of Thread skeTching: free Thread drawing Techniques 23 Q u i lt i n g D A i lY. c o m
©interweave
the Art of threAD Sketching threAD DrAwing techniQueSQuilting Daily
4. Set the printer to thicker media or
envelope and print using the Matte
setting. While pigment inks are
preferable to dye inks, either may
be used. dye inks may fade.
5. remove the freezer-paper backing
and bond the printed image to the
heavy interfacing using fusible
web. The interfacing helps to
prevent the fabric from distorting
with so much stitching.
OpTiOn: Bond the image to canvas and
let it distort. Some people like this effect.
6. Wind several bobbins with a
neutral-colored thread so you will
not have to interrupt your rhythm
later, then lower the feed dogs, set
your stitch length to 0, and attach
a free-motion or darning foot.
7. Turn under the edges of your piece
about 1⁄4" and stitch over them,
unless you are planning to add
fabric borders later.
8. Print out a copy of your image so
you can see the details that may be
obscured as you cover the image
with thread. do some stitching
all over the surface and then
go back, building up additional
Digitally enhanced photo printed on inkAID-treated fabric and fused to interfacing.
The initial stitching.
Additional stitching has been added.
The finished thread painting.

The arT of Thread skeTching: free Thread drawing Techniques 24 Q u i lt i n g D A i lY. c o m
©interweave
the Art of threAD Sketching threAD DrAwing techniQueSQuilting Daily
layers of color. Usually I begin
“painting” smaller details before
filling in large areas. Iron the piece
occasionally to keep the work flat.
note: I prefer a narrow zigzag stitch,
placed close together at a 45-degree
angle. I like the way this gives a sketched
line effect. But you could use a straight
stitch or zigzag directly up and down.
Practice various options before beginning.
Your thread painting can cover the
surface completely and densely so
no background shows, or you might
like a more sketched effect of heavier
stitching in some areas and lighter
stitching in others.
I respond to the color and shapes as
I stitch. Once I start work I see more
color, more subtle tone, and I end up
using many more shades and tones
of threads than I generally anticipate.
Having a lot of thread choices is
necessary. In the leaf sampler I used
five reds ranging from orange to deep
maroon, five purples, five greens, and
four beige-to-brown colored spools of
thread.
9. To frame your finished stitchery,
cut a piece of foam core slightly
smaller than the work. Hand sew
the piece to the foam core from the
center out. The tiny stitches will
be invisible. Bond the foam core to
a canvas-covered stretcher. While
I often finish thread paintings this
way, they could instead be used
as details within quilts, inserts in
jackets, incorporated into handbags,
or whatever your imagination
conjures up. These small works
deserve a beautiful presentation.
carolwatkins.com
THOUGHTS abouT thread Rayon thread has a beautiful sheen, but cotton and poly-cotton threads are fine, too. I mix threads if I need a particular tone and do not have it in rayon. Sometimes I like to contrast a reflective rayon area with a flatter, less reflective area. So many choices are available! I do not use multicolor thread. It is beautiful, but I want to be in control of light and dark tonal areas. I create the blending by stitching and then going back into an area with more threads, overlaying lighter or darker tones or contrasting color. Painters take paint, mix various pigments to get lighter or darker tones, and brush the paint onto canvas, while we can create tonal changes by constantly changing threads and mixing them with stitching.
stitching TIPS• I use a Bernina® sewing machine and
run the bobbin thread through the eye in the finger of the bobbin case as recommended for buttonhole stitching. (A 1975 Bernina 830 is my preferred sewing machine for this work.) Since this process is entirely free motion, an embroidery machine is not useful.
• I reduce the upper tension very slightly. This keeps the bobbin thread from showing on the surface so I do not need to change bobbin thread colors as I work.
• Test your stitching on a scrap sample before starting on the printed image.
• Posture and relaxation are important when doing such intense work. Relax your shoulders, breathe freely, and have your arms and wrists in optimum position. Stop and roll your shoulders regularly or get up and move around for a few minutes.
“Abandoned” • 91⁄4" × 81⁄4" • Multiple colors of threads were used to achieve the depth and shading. • “Broken and boarded up, this window was photographed at a train yard.”