the de nitive guide to yii 1 - yiiframework.com filecontents contents i license ix 1 getting...
TRANSCRIPT
The Definitive Guide to Yii 1.0
Qiang Xue and Xiang Wei Zhuo
Copyright 2008-2009. All Rights Reserved.


Contents
Contents i
License ix
1 Getting Started 1
1.1 The Definitive Guide to Yii . . . . . . . . . . . . . . . . . . . . . . . . . . . 1
1.2 What is Yii . . . . . . . . . . . . . . . . . . . . . . . . . . . . . . . . . . . . 1
1.2.1 Requirements . . . . . . . . . . . . . . . . . . . . . . . . . . . . . . . 1
1.2.2 What is Yii Best for? . . . . . . . . . . . . . . . . . . . . . . . . . . 1
1.2.3 How is Yii Compared with Other Frameworks? . . . . . . . . . . . . 2
1.3 Installation . . . . . . . . . . . . . . . . . . . . . . . . . . . . . . . . . . . . 2
1.3.1 Requirements . . . . . . . . . . . . . . . . . . . . . . . . . . . . . . . 2
1.4 Creating First Yii Application . . . . . . . . . . . . . . . . . . . . . . . . . . 2
1.4.1 Connecting to Database . . . . . . . . . . . . . . . . . . . . . . . . . 7
1.4.2 Implementing CRUD Operations . . . . . . . . . . . . . . . . . . . . 8
2 Fundamentals 13
2.1 Model-View-Controller (MVC) . . . . . . . . . . . . . . . . . . . . . . . . . 13
2.1.1 A Typical Workflow . . . . . . . . . . . . . . . . . . . . . . . . . . . 14
2.2 Entry Script . . . . . . . . . . . . . . . . . . . . . . . . . . . . . . . . . . . . 15
2.2.1 Debug Mode . . . . . . . . . . . . . . . . . . . . . . . . . . . . . . . 15
2.3 Application . . . . . . . . . . . . . . . . . . . . . . . . . . . . . . . . . . . . 16

ii Contents
2.3.1 Application Configuration . . . . . . . . . . . . . . . . . . . . . . . . 16
2.3.2 Application Base Directory . . . . . . . . . . . . . . . . . . . . . . . 17
2.3.3 Application Component . . . . . . . . . . . . . . . . . . . . . . . . . 17
2.3.4 Core Application Components . . . . . . . . . . . . . . . . . . . . . 18
2.3.5 Application Lifecycles . . . . . . . . . . . . . . . . . . . . . . . . . . 19
2.4 Controller . . . . . . . . . . . . . . . . . . . . . . . . . . . . . . . . . . . . . 20
2.4.1 Route . . . . . . . . . . . . . . . . . . . . . . . . . . . . . . . . . . . 20
2.4.2 Controller Instantiation . . . . . . . . . . . . . . . . . . . . . . . . . 21
2.4.3 Action . . . . . . . . . . . . . . . . . . . . . . . . . . . . . . . . . . . 21
2.4.4 Filter . . . . . . . . . . . . . . . . . . . . . . . . . . . . . . . . . . . 22
2.5 Model . . . . . . . . . . . . . . . . . . . . . . . . . . . . . . . . . . . . . . . 24
2.6 View . . . . . . . . . . . . . . . . . . . . . . . . . . . . . . . . . . . . . . . . 25
2.6.1 Layout . . . . . . . . . . . . . . . . . . . . . . . . . . . . . . . . . . . 25
2.6.2 Widget . . . . . . . . . . . . . . . . . . . . . . . . . . . . . . . . . . 26
2.6.3 System View . . . . . . . . . . . . . . . . . . . . . . . . . . . . . . . 27
2.7 Component . . . . . . . . . . . . . . . . . . . . . . . . . . . . . . . . . . . . 27
2.7.1 Component Property . . . . . . . . . . . . . . . . . . . . . . . . . . . 27
2.7.2 Component Event . . . . . . . . . . . . . . . . . . . . . . . . . . . . 28
2.7.3 Component Behavior . . . . . . . . . . . . . . . . . . . . . . . . . . . 29
2.8 Module . . . . . . . . . . . . . . . . . . . . . . . . . . . . . . . . . . . . . . 30
2.8.1 Creating Module . . . . . . . . . . . . . . . . . . . . . . . . . . . . . 31
2.8.2 Using Module . . . . . . . . . . . . . . . . . . . . . . . . . . . . . . . 31
2.8.3 Nested Module . . . . . . . . . . . . . . . . . . . . . . . . . . . . . . 33
2.9 Path Alias and Namespace . . . . . . . . . . . . . . . . . . . . . . . . . . . 33
Contents iii
2.10 Conventions . . . . . . . . . . . . . . . . . . . . . . . . . . . . . . . . . . . . 34
2.10.1 URL . . . . . . . . . . . . . . . . . . . . . . . . . . . . . . . . . . . . 34
2.10.2 Code . . . . . . . . . . . . . . . . . . . . . . . . . . . . . . . . . . . . 35
2.10.3 Configuration . . . . . . . . . . . . . . . . . . . . . . . . . . . . . . . 35
2.10.4 File . . . . . . . . . . . . . . . . . . . . . . . . . . . . . . . . . . . . 35
2.10.5 Directory . . . . . . . . . . . . . . . . . . . . . . . . . . . . . . . . . 36
2.11 Development Workflow . . . . . . . . . . . . . . . . . . . . . . . . . . . . . . 37
3 Working with Forms 39
3.1 Working with Form . . . . . . . . . . . . . . . . . . . . . . . . . . . . . . . . 39
3.2 Creating Model . . . . . . . . . . . . . . . . . . . . . . . . . . . . . . . . . . 39
3.2.1 Defining Model Class . . . . . . . . . . . . . . . . . . . . . . . . . . . 40
3.2.2 Declaring Validation Rules . . . . . . . . . . . . . . . . . . . . . . . 40
3.2.3 Securing Attribute Assignments . . . . . . . . . . . . . . . . . . . . . 43
3.2.4 Triggering Validation . . . . . . . . . . . . . . . . . . . . . . . . . . . 45
3.2.5 Retrieving Validation Errors . . . . . . . . . . . . . . . . . . . . . . 45
3.2.6 Attribute Labels . . . . . . . . . . . . . . . . . . . . . . . . . . . . . 46
3.3 Creating Action . . . . . . . . . . . . . . . . . . . . . . . . . . . . . . . . . . 46
3.4 Creating Form . . . . . . . . . . . . . . . . . . . . . . . . . . . . . . . . . . 47
3.5 Collecting Tabular Input . . . . . . . . . . . . . . . . . . . . . . . . . . . . . 49
4 Working with Databases 51
4.1 Working with Database . . . . . . . . . . . . . . . . . . . . . . . . . . . . . 51
4.2 Data Access Objects (DAO) . . . . . . . . . . . . . . . . . . . . . . . . . . . 51
4.2.1 Establishing Database Connection . . . . . . . . . . . . . . . . . . . 52

iv Contents
4.2.2 Executing SQL Statements . . . . . . . . . . . . . . . . . . . . . . . 53
4.2.3 Fetching Query Results . . . . . . . . . . . . . . . . . . . . . . . . . 54
4.2.4 Using Transactions . . . . . . . . . . . . . . . . . . . . . . . . . . . . 54
4.2.5 Binding Parameters . . . . . . . . . . . . . . . . . . . . . . . . . . . 55
4.2.6 Binding Columns . . . . . . . . . . . . . . . . . . . . . . . . . . . . . 55
4.3 Active Record . . . . . . . . . . . . . . . . . . . . . . . . . . . . . . . . . . . 56
4.3.1 Establishing DB Connection . . . . . . . . . . . . . . . . . . . . . . . 57
4.3.2 Defining AR Class . . . . . . . . . . . . . . . . . . . . . . . . . . . . 58
4.3.3 Creating Record . . . . . . . . . . . . . . . . . . . . . . . . . . . . . 59
4.3.4 Reading Record . . . . . . . . . . . . . . . . . . . . . . . . . . . . . . 60
4.3.5 Updating Record . . . . . . . . . . . . . . . . . . . . . . . . . . . . . 62
4.3.6 Deleting Record . . . . . . . . . . . . . . . . . . . . . . . . . . . . . 63
4.3.7 Data Validation . . . . . . . . . . . . . . . . . . . . . . . . . . . . . . 63
4.3.8 Comparing Records . . . . . . . . . . . . . . . . . . . . . . . . . . . 64
4.3.9 Customization . . . . . . . . . . . . . . . . . . . . . . . . . . . . . . 64
4.3.10 Using Transaction with AR . . . . . . . . . . . . . . . . . . . . . . . 65
4.4 Relational Active Record . . . . . . . . . . . . . . . . . . . . . . . . . . . . 65
4.4.1 Declaring Relationship . . . . . . . . . . . . . . . . . . . . . . . . . . 66
4.4.2 Performing Relational Query . . . . . . . . . . . . . . . . . . . . . . 68
4.4.3 Relational Query Options . . . . . . . . . . . . . . . . . . . . . . . . 70
4.4.4 Dynamic Relational Query Options . . . . . . . . . . . . . . . . . . . 72
5 Caching 73
5.1 Caching . . . . . . . . . . . . . . . . . . . . . . . . . . . . . . . . . . . . . . 73
5.2 Data Caching . . . . . . . . . . . . . . . . . . . . . . . . . . . . . . . . . . . 74

Contents v
5.2.1 Cache Dependency . . . . . . . . . . . . . . . . . . . . . . . . . . . . 75
5.3 Fragment Caching . . . . . . . . . . . . . . . . . . . . . . . . . . . . . . . . 76
5.3.1 Caching Options . . . . . . . . . . . . . . . . . . . . . . . . . . . . . 77
5.3.2 Nested Caching . . . . . . . . . . . . . . . . . . . . . . . . . . . . . . 79
5.4 Page Caching . . . . . . . . . . . . . . . . . . . . . . . . . . . . . . . . . . . 79
5.5 Dynamic Content . . . . . . . . . . . . . . . . . . . . . . . . . . . . . . . . . 80
6 Extending Yii 83
6.1 Overview . . . . . . . . . . . . . . . . . . . . . . . . . . . . . . . . . . . . . 83
6.2 Using Extensions . . . . . . . . . . . . . . . . . . . . . . . . . . . . . . . . . 84
6.2.1 Application Component . . . . . . . . . . . . . . . . . . . . . . . . . 84
6.2.2 Widget . . . . . . . . . . . . . . . . . . . . . . . . . . . . . . . . . . 85
6.2.3 Action . . . . . . . . . . . . . . . . . . . . . . . . . . . . . . . . . . . 85
6.2.4 Filter . . . . . . . . . . . . . . . . . . . . . . . . . . . . . . . . . . . 85
6.2.5 Controller . . . . . . . . . . . . . . . . . . . . . . . . . . . . . . . . . 86
6.2.6 Validator . . . . . . . . . . . . . . . . . . . . . . . . . . . . . . . . . 86
6.2.7 Console Command . . . . . . . . . . . . . . . . . . . . . . . . . . . . 87
6.2.8 Module . . . . . . . . . . . . . . . . . . . . . . . . . . . . . . . . . . 88
6.2.9 Generic Component . . . . . . . . . . . . . . . . . . . . . . . . . . . 88
6.3 Creating Extensions . . . . . . . . . . . . . . . . . . . . . . . . . . . . . . . 88
6.3.1 Application Component . . . . . . . . . . . . . . . . . . . . . . . . . 89
6.3.2 Widget . . . . . . . . . . . . . . . . . . . . . . . . . . . . . . . . . . 89
6.3.3 Action . . . . . . . . . . . . . . . . . . . . . . . . . . . . . . . . . . . 90
6.3.4 Filter . . . . . . . . . . . . . . . . . . . . . . . . . . . . . . . . . . . 90
6.3.5 Controller . . . . . . . . . . . . . . . . . . . . . . . . . . . . . . . . . 91

vi Contents
6.3.6 Validator . . . . . . . . . . . . . . . . . . . . . . . . . . . . . . . . . 91
6.3.7 Console Command . . . . . . . . . . . . . . . . . . . . . . . . . . . . 91
6.3.8 Module . . . . . . . . . . . . . . . . . . . . . . . . . . . . . . . . . . 92
6.3.9 Generic Component . . . . . . . . . . . . . . . . . . . . . . . . . . . 92
6.4 Using 3rd-Party Libraries . . . . . . . . . . . . . . . . . . . . . . . . . . . . 92
7 Special Topics 95
7.1 URL Management . . . . . . . . . . . . . . . . . . . . . . . . . . . . . . . . 95
7.1.1 Creating URLs . . . . . . . . . . . . . . . . . . . . . . . . . . . . . . 95
7.1.2 User-friendly URLs . . . . . . . . . . . . . . . . . . . . . . . . . . . . 96
7.2 Authentication and Authorization . . . . . . . . . . . . . . . . . . . . . . . 99
7.2.1 Defining Identity Class . . . . . . . . . . . . . . . . . . . . . . . . . . 100
7.2.2 Login and Logout . . . . . . . . . . . . . . . . . . . . . . . . . . . . 101
7.2.3 Access Control Filter . . . . . . . . . . . . . . . . . . . . . . . . . . . 101
7.2.4 Role-Based Access Control . . . . . . . . . . . . . . . . . . . . . . . 105
7.3 Theme . . . . . . . . . . . . . . . . . . . . . . . . . . . . . . . . . . . . . . . 110
7.4 Logging . . . . . . . . . . . . . . . . . . . . . . . . . . . . . . . . . . . . . . 111
7.4.1 Message Logging . . . . . . . . . . . . . . . . . . . . . . . . . . . . . 111
7.4.2 Message Routing . . . . . . . . . . . . . . . . . . . . . . . . . . . . . 112
7.4.3 Performance Profiling . . . . . . . . . . . . . . . . . . . . . . . . . . 113
7.5 Error Handling . . . . . . . . . . . . . . . . . . . . . . . . . . . . . . . . . . 114
7.5.1 Raising Exceptions . . . . . . . . . . . . . . . . . . . . . . . . . . . . 114
7.5.2 Displaying Errors . . . . . . . . . . . . . . . . . . . . . . . . . . . . . 115
7.5.3 Message Logging . . . . . . . . . . . . . . . . . . . . . . . . . . . . . 116
7.6 Web Service . . . . . . . . . . . . . . . . . . . . . . . . . . . . . . . . . . . . 116

Contents vii
7.6.1 Defining Service Provider . . . . . . . . . . . . . . . . . . . . . . . . 116
7.6.2 Declaring Web Service Action . . . . . . . . . . . . . . . . . . . . . . 117
7.6.3 Consuming Web Service . . . . . . . . . . . . . . . . . . . . . . . . . 118
7.6.4 Data Types . . . . . . . . . . . . . . . . . . . . . . . . . . . . . . . . 118
7.6.5 Class Mapping . . . . . . . . . . . . . . . . . . . . . . . . . . . . . . 120
7.6.6 Intercepting Remote Method Invocation . . . . . . . . . . . . . . . . 120
7.7 Internationalization . . . . . . . . . . . . . . . . . . . . . . . . . . . . . . . . 120
7.7.1 Locale and Language . . . . . . . . . . . . . . . . . . . . . . . . . . . 121
7.7.2 Translation . . . . . . . . . . . . . . . . . . . . . . . . . . . . . . . . 122
7.7.3 Date and Time Formatting . . . . . . . . . . . . . . . . . . . . . . . 124
7.7.4 Number Formatting . . . . . . . . . . . . . . . . . . . . . . . . . . . 125
7.8 Using Alternative Template Syntax . . . . . . . . . . . . . . . . . . . . . . . 125
7.8.1 Using CPradoViewRenderer . . . . . . . . . . . . . . . . . . . . . . . . 126
7.9 Console Applications . . . . . . . . . . . . . . . . . . . . . . . . . . . . . . . 129
7.9.1 Using the yiic Tool . . . . . . . . . . . . . . . . . . . . . . . . . . . 130
7.10 Security . . . . . . . . . . . . . . . . . . . . . . . . . . . . . . . . . . . . . . 131
7.10.1 Cross-site Scripting Prevention . . . . . . . . . . . . . . . . . . . . . 131
7.10.2 Cross-site Request Forgery Prevention . . . . . . . . . . . . . . . . . 131
7.10.3 Cookie Attack Prevention . . . . . . . . . . . . . . . . . . . . . . . . 132
7.11 Performance Tuning . . . . . . . . . . . . . . . . . . . . . . . . . . . . . . . 133
7.11.1 Enabling APC Extension . . . . . . . . . . . . . . . . . . . . . . . . 133
7.11.2 Disabling Debug Mode . . . . . . . . . . . . . . . . . . . . . . . . . . 133
7.11.3 Using yiilite.php . . . . . . . . . . . . . . . . . . . . . . . . . . . . 134
7.11.4 Using Caching Techniques . . . . . . . . . . . . . . . . . . . . . . . . 134

viii Contents
7.11.5 Database Optimization . . . . . . . . . . . . . . . . . . . . . . . . . 134
7.11.6 Minimizing Script Files . . . . . . . . . . . . . . . . . . . . . . . . . 135

License of Yii
The Yii framework is free software. It is released under the terms of the following BSDLicense.
Copyright c©2008-2009 by Yii Software LLC. All rights reserved.
Redistribution and use in source and binary forms, with or without modification, arepermitted provided that the following conditions are met:
1. Redistributions of source code must retain the above copyright notice, this list ofconditions and the following disclaimer.
2. Redistributions in binary form must reproduce the above copyright notice, this list ofconditions and the following disclaimer in the documentation and/or other materialsprovided with the distribution.
3. Neither the name of Yii Software LLC nor the names of its contributors may beused to endorse or promote products derived from this software without specificprior written permission.
THIS SOFTWARE IS PROVIDED BY THE COPYRIGHT HOLDERS AND CONTRIBUTORS ”AS
IS” AND ANY EXPRESS OR IMPLIED WARRANTIES, INCLUDING, BUT NOT LIMITED TO, THE
IMPLIED WARRANTIES OF MERCHANTABILITY AND FITNESS FOR A PARTICULAR PUR-
POSE ARE DISCLAIMED. IN NO EVENT SHALL THE COPYRIGHT OWNER OR CONTRIBU-
TORS BE LIABLE FOR ANY DIRECT, INDIRECT, INCIDENTAL, SPECIAL, EXEMPLARY, OR
CONSEQUENTIAL DAMAGES (INCLUDING, BUT NOT LIMITED TO, PROCUREMENT OF SUB-
STITUTE GOODS OR SERVICES; LOSS OF USE, DATA, OR PROFITS; OR BUSINESS INTERRUP-
TION) HOWEVER CAUSED AND ON ANY THEORY OF LIABILITY, WHETHER IN CONTRACT,
STRICT LIABILITY, OR TORT (INCLUDING NEGLIGENCE OR OTHERWISE) ARISING IN ANY
WAY OUT OF THE USE OF THIS SOFTWARE, EVEN IF ADVISED OF THE POSSIBILITY OF
SUCH DAMAGE.

x Contents

Chapter 1
Getting Started
1.1 The Definitive Guide to Yii
This tutorial is released under the Terms of Yii Documentation.
All Rights Reserved.
2008-2009 copy; Yii Software LLC.
1.2 What is Yii
Yii is a high-performance component-based PHP framework for developing large-scale Webapplications. It enables maximum reusability in Web programming and can significantlyaccelerate the development process. The name Yii (pronounced as /i:/) stands for easy,efficient and extensible.
1.2.1 Requirements
To run an Yii-powered Web application, you need a Web server supporting PHP 5.1.0 orhigher.
For developers who want to use Yii, understanding object-oriented programming (OOP)is very helpful, because Yii is a pure OOP framework.
1.2.2 What is Yii Best for?
Yii is a generic Web programming framework that can be used for developing virtually allsorts of Web applications. Because it is light-weighted and equipped with sophisticatedcaching solutions, it is especially suitable for developing high-traffic applications, such asportals, forums, content management systems (CMS), e-commerce systems, etc.

2 1. Getting Started
1.2.3 How is Yii Compared with Other Frameworks?
Like most PHP frameworks, Yii is an MVC framework.
Yii excels over other PHP frameworks in that it is efficient, feature-rich and clearly-documented. Yii is carefully designed from the beginning to fit for serious Web applicationdevelopment. It is neither a byproduct of some project nor a conglomerate of third-partywork. It is the result of the authors’ rich experience of Web application development andthe investigation and reflection of the most popular Web programming frameworks andapplications.
1.3 Installation
Installation of Yii mainly involves the following two steps:
1. Download Yii Framework from yiiframework.com.
2. Unpack the Yii release file to a Web-accessible directory.
Tip: Yii does not need to be installed under a Web-accessible directory. An Yiiapplication has one entry script which is usually the only file that needs to beexposed to Web users. Other PHP scripts, including those from Yii, should beprotected from Web access since they may be exploited for hacking.
1.3.1 Requirements
After installing Yii, you may want to verify that your server satisfies all the requirementsof using Yii. You can do so by accessing the requirement checker script at the followingURL in a Web browser:
http://hostname/path/to/yii/requirements/index.php
The minimum requirement by Yii is that your Web server supports PHP 5.1.0 or above.Yii has been tested with Apache HTTP server on Windows and Linux operating systems.It may also run on other Web servers and platforms provided PHP 5 is supported.
1.4 Creating First Yii Application
To get an initial experience with Yii, we describe in this section how to create our firstYii application. We will use the powerful yiic tool which can be used to automate code

1.4 Creating First Yii Application 3
creation for certain tasks. For convenience, we assume that YiiRoot is the directory whereYii is installed, and WebRoot is the document root of our Web server.
Run yiic on the command line as follows:
% YiiRoot/framework/yiic webapp WebRoot/testdrive
Note: When running yiic on Mac OS, Linux or Unix, you may need to change thepermission of the yiic file so that it is executable. Alternatively, you may run thetool as follows,
% cd WebRoot/testdrive
% php YiiRoot/framework/yiic.php webapp WebRoot/testdrive
This will create a skeleton Yii application under the directory WebRoot/testdrive. Theapplication has a directory structure that is is needed by most Yii applications.
Without writing a single line of code, we can test drive our first Yii application by accessingthe following URL in a Web browser:
http://hostname/testdrive/index.php
As we can see, the application has three pages: the homepage, the contact page andthe login page. The homepage shows some information about the application as well asthe user login status, the contact page displays a contact form that users can fill in tosubmit their inquiries, and the login page allows users to be authenticated before accessingprivileged contents. See the following screenshots for more details.
The following diagram shows the directory structure of our application. Please see Con-ventions for detailed explanation about this structure.
testdrive/
index.php Web application entry script file
assets/ containing published resource files
css/ containing CSS files
images/ containing image files
themes/ containing application themes
protected/ containg protected application files
yiic yiic command line script
yiic.bat yiic command line script for Windows
commands/ containing customized ’yiic’ commands

4 1. Getting Started
Figure 1.1: Home page

1.4 Creating First Yii Application 5
Figure 1.2: Contact page

6 1. Getting Started
Figure 1.3: Contact page with input errors
Figure 1.4: Contact page with success

1.4 Creating First Yii Application 7
Figure 1.5: Login page
shell/ containing customized ’yiic shell’ commands
components/ containing reusable user components
MainMenu.php the ’MainMenu’ widget class
Identity.php the ’Identity’ class used for authentication
views/ containing view files for widgets
mainMenu.php the view file for ’MainMenu’ widget
config/ containing configuration files
console.php the console application configuration
main.php the Web application configuration
controllers/ containing controller class files
SiteController.php the default controller class
extensions/ containing third-party extensions
messages/ containing translated messages
models/ containing model class files
LoginForm.php the form model for ’login’ action
ContactForm.php the form model for ’contact’ action
runtime/ containing temporarily generated files
views/ containing controller view and layout files
layouts/ containing layout view files
main.php the default layout for all views
site/ containing view files for the ’site’ controller
contact.php the view for ’contact’ action
index.php the view for ’index’ action
login.php the view for ’login’ action
system/ containing system view files
1.4.1 Connecting to Database
Most Web applications are backed by databases. Our test-drive application is not anexception. To use a database, we first need to tell the application how to connect to it.

8 1. Getting Started
This is done by changing the application configuration file WebRoot/testdrive/protected/
config/main.php, as shown below:
return array(
......
’components’=>array(
......
’db’=>array(
’connectionString’=>’sqlite:protected/data/source.db’,
),
),
......
);
In the above, we add a db entry to components, which instructs the application to connectto the SQLite database WebRoot/testdrive/protected/data/source.db when needed.
Note: To use Yii’s database feature, we need to enable PHP PDO extension andthe driver-specific PDO extension. For the test-drive application, we would needthe php pdo and php pdo sqlite extensions to be turned on.
To this end, we need to prepare a SQLite database so that the above configuration canbe effective. Using some SQLite admin tool, we can create a database with the followingschema:
CREATE TABLE User (
id INTEGER NOT NULL PRIMARY KEY AUTOINCREMENT,
username VARCHAR(128) NOT NULL,
password VARCHAR(128) NOT NULL,
email VARCHAR(128) NOT NULL
);
For simplicity, we only create a single User table in our database. The SQLite databasefile is saved as WebRoot/testdrive/protected/data/source.db. Note that both the file andthe containing directory must be made writable by the Web server process, as required bySQLite.
1.4.2 Implementing CRUD Operations
Now is the fun part. We would like to implement the CRUD (create, read, update anddelete) operations for the User table we just created. This is also commonly needed inpractical applications.

1.4 Creating First Yii Application 9
Instead of taking trouble to write actual code, we would use the powerful yiic tool againto automatically generate the code for us. This process is also known as scaffolding. Opena command line window, and execute the commands listed as follows,
% cd WebRoot/testdrive
% protected/yiic shell
Yii Interactive Tool v1.0
Please type ’help’ for help. Type ’exit’ to quit.
>> model User
generate User.php
The ’User’ class has been successfully created in the following file:
D:\wwwroot\testdrive\protected\models\User.php
If you have a ’db’ database connection, you can test it now with:
$model=User::model()->find();
print_r($model);
>> crud User
generate UserController.php
generate create.php
mkdir D:/wwwroot/testdrive/protected/views/user
generate update.php
generate list.php
generate show.php
Crud ’user’ has been successfully created. You may access it via:
http://hostname/path/to/index.php?r=user
In the above, we use the yiic shell command to interact with our skeleton application.At the prompt, we execute two sub-commands: model User and crud User. The formergenerates a model class for the User table, while the latter reads the User model andgenerates the code needed the CRUD operations.
Note: You may encounter errors like ”...could not find driver”, even though therequirement checker shows you have already enabled PDO and the correspondingPDO driver. If this happens, you may try to run the yiic tool as follows,
% php -c path/to/php.ini protected/yiic.php shell
where path/to/php.ini represents the correct PHP ini file.
Let’s enjoy our work by browsing the following URL:
http://hostname/testdrive/index.php?r=user

10 1. Getting Started
This will display a list of user entries in the User table. Since our table is empty, nothingwill appear at the moment.
Click the New User link on the page. We will be brought to the login page if we have notlogged in before. After logged in, we are shown with an input form that allows us to adda new user entry. Complete the form and click on the Create button. If there is any inputerror, a nice error prompt will be shown which prevents us from saving the input. Backto the user list, we should see the newly added user appearing in the list.
Repeat the above steps to add more users. Notice that user list page will automaticallypaginate the user entries if there are too many to be displayed in one page.
If we login as an administrator using admin/admin, we can view the user admin page withthe following URL:
http://hostname/testdrive/index.php?r=user/admin
This will show us a nice table of user entries. We can click on the table header cells tosort the corresponding columns. And like the user list page, the admin page also performspagination when there are too many user entries to be displayed in one page.
All these nice features come without requiring us to write a single line of code!
Figure 1.6: User admin page

1.4 Creating First Yii Application 11
Figure 1.7: Create new user page

12 1. Getting Started

Chapter 2
Fundamentals
2.1 Model-View-Controller (MVC)
Yii implements the model-view-controller (MVC) design pattern which is widely adopted inWeb programming. MVC aims to separate business logic from user interface considerationsso that developers can more easily change each part without affecting the other. In MVC,the model represents the information (the data) and the business rules; the view containselements of the user interface such as text, form inputs; and the controller manages thecommunication between the model and the view.
Besides MVC, Yii also introduces a front-controller, called application, which representsthe execution context of request processing. Application resolves the user request anddispatches it to an appropriate controller for further handling.
The following diagram shows the static structure of an Yii application:
Figure 2.1: Static structure of Yii application

14 2. Fundamentals
2.1.1 A Typical Workflow
The following diagram shows a typical workflow of an Yii application when it is handlinga user request:
Figure 2.2: A typical workflow of Yii application
1. A user makes a request with the URL http://www.example.com/index.php?r=post/
show&id=1 and the Web server handles the request by executing the bootstrap scriptindex.php.
2. The bootstrap script creates an application instance and runs it.
3. The application obtains the detailed user request information from an applicationcomponent named request.
4. The application determines the requested controller and action with the help of anapplication component named urlManager. For this example, the controller is post
which refers to the PostController class; and the action is show whose actual meaningis determined by the controller.
5. The application creates an instance of the requested controller to further handle theuser request. The controller determines that the action show refers to a method

2.2 Entry Script 15
named actionShow in the controller class. It then creates and executes filters (e.g.access control, benchmarking) associated with this action. The action is executed ifit is allowed by the filters.
6. The action reads a Post model whose ID is 1 from the database.
7. The action renders a view named show with the Post model.
8. The view reads and displays the attributes of the Post model.
9. The view executes some widgets.
10. The view rendering result is embedded in a layout.
11. The action completes the view rendering and displays the result to the user.
2.2 Entry Script
Entry script is the bootstrap PHP script that handles user requests initially. It is the onlyPHP script that end users can directly request to execute.
In most cases, entry script of an Yii application contains the code that is as simple asfollows,
// remove the following line when in production mode
defined(’YII DEBUG’) or define(’YII DEBUG’,true);
// include Yii bootstrap file
require once(’path/to/yii/framework/yii.php’);
// create application instance and run
$configFile=’path/to/config/file.php’;
Yii::createWebApplication($configFile)->run();
The script first includes the Yii framework bootstrap file yii.php. It then creates a Webapplication instance with the specified configuration and runs it.
2.2.1 Debug Mode
An Yii application can run in either debug or production mode according to the constantvalue YII DEBUG. By default, this constant value is defined as false, meaning productionmode. To run in debug mode, define this constant as true before including the yii.php file.Running application in debug mode is less efficient because it keeps many internal logs.On the other hand, debug mode is also more helpful during development stage because itprovides richer debugging information when error occurs.

16 2. Fundamentals
2.3 Application
Application represents the execution context of request processing. Its main task is toresolve the user request and dispatch it to an appropriate controller for further processing.It also serves as the central place for keeping application-level configurations. For thisreason, application is also called front-controller.
Application is created as a singleton by the entry script. The application singleton can beaccessed at any place via Yii::app().
2.3.1 Application Configuration
By default, application is an instance of CWebApplication. To customize it, we normallyprovide a configuration file (or array) to initialize its property values when the applicationinstance is being created. An alternative way of customizing application is to extendCWebApplication.
The configuration is an array of key-value pairs. Each key represents the name of aproperty of the application instance, and each value the corresponding property’s initialvalue. For example, the following configuration configures the name and defaultControllerproperties of the application.
array(
’name’=>’Yii Framework’,
’defaultController’=>’site’,
)
We usually store the configuration in a separate PHP script (e.g. protected/config/main.
php). Inside the script, we return the configuration array as follows,
return array(...);
To apply the configuration, we pass the configuration file name as a parameter to theapplication’s constructor, or to Yii::createWebApplication() like the following, which isusually done in the entry script:
$app=Yii::createWebApplication($configFile);
2.3 Application 17
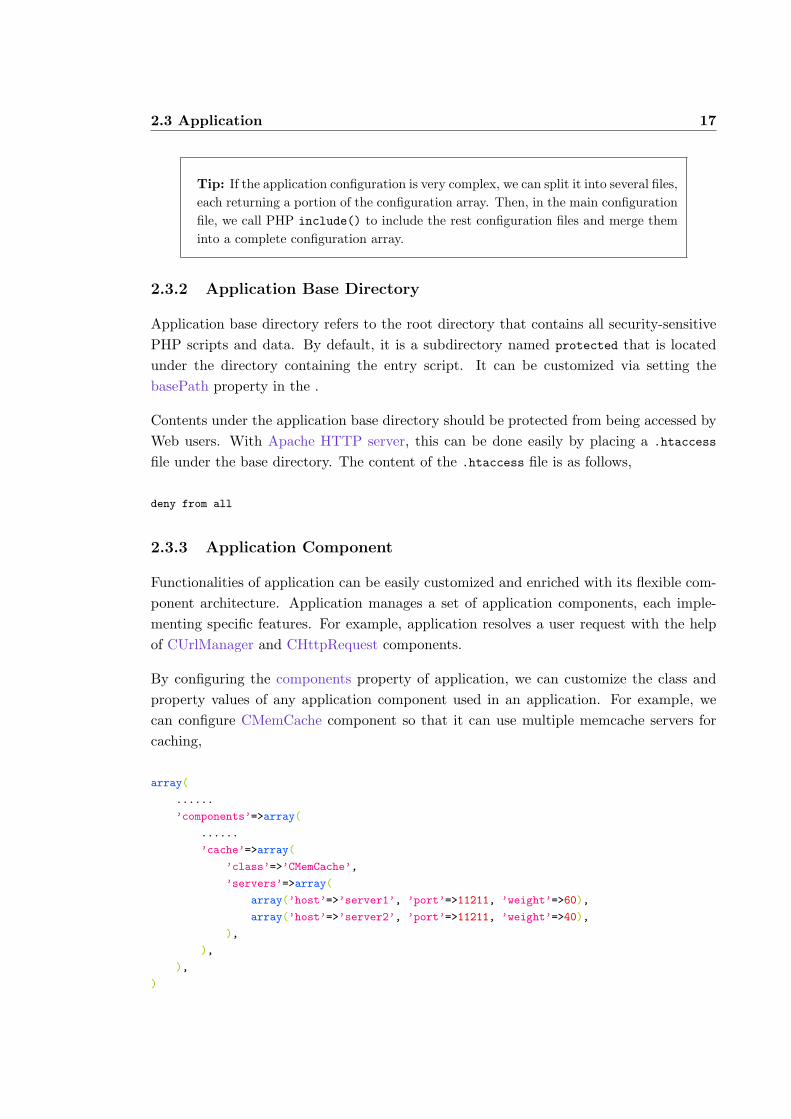
Tip: If the application configuration is very complex, we can split it into several files,each returning a portion of the configuration array. Then, in the main configurationfile, we call PHP include() to include the rest configuration files and merge theminto a complete configuration array.
2.3.2 Application Base Directory
Application base directory refers to the root directory that contains all security-sensitivePHP scripts and data. By default, it is a subdirectory named protected that is locatedunder the directory containing the entry script. It can be customized via setting thebasePath property in the .
Contents under the application base directory should be protected from being accessed byWeb users. With Apache HTTP server, this can be done easily by placing a .htaccess
file under the base directory. The content of the .htaccess file is as follows,
deny from all
2.3.3 Application Component
Functionalities of application can be easily customized and enriched with its flexible com-ponent architecture. Application manages a set of application components, each imple-menting specific features. For example, application resolves a user request with the helpof CUrlManager and CHttpRequest components.
By configuring the components property of application, we can customize the class andproperty values of any application component used in an application. For example, wecan configure CMemCache component so that it can use multiple memcache servers forcaching,
array(
......
’components’=>array(
......
’cache’=>array(
’class’=>’CMemCache’,
’servers’=>array(
array(’host’=>’server1’, ’port’=>11211, ’weight’=>60),
array(’host’=>’server2’, ’port’=>11211, ’weight’=>40),
),
),
),
)

18 2. Fundamentals
In the above, we add the cache element to the components array. The cache element statesthat the class of the component is CMemCache and its servers property should be initializedas such.
To access an application component, use Yii::app()->ComponentID, where ComponentID
refers to the ID of the component (e.g. Yii::app()->cache).
An application component may be disabled by setting enabled to be false in its configu-ration. Null is returned when we access a disabled component.
Tip: By default, application components are created on demand. This means anapplication component may not be created at all if it is not accessed during auser request. As a result, the overall performance may not be degraded even ifan application is configured with many components. Some application components(e.g. CLogRouter) may need to be created no matter they are accessed or not. Todo so, list their IDs in the preload property of the application.
2.3.4 Core Application Components
Yii predefines a set of core application components to provide features common amongWeb applications. For example, the request component is used to resolve user requestsand provide information such as URL, cookies. By configuring the properties of these corecomponents, we can change the default behaviors of Yii in nearly every aspect.
Below we list the core components that are pre-declared by CWebApplication.
• assetManager: CAssetManager - manages the publishing of private asset files.
• authManager: CAuthManager - manages role-based access control (RBAC).
• cache: CCache - provides data caching functionality. Note, you must specify theactual class (e.g. CMemCache, CDbCache). Otherwise, null will be returned whenyou access this component.
• clientScript: CClientScript - manages client scripts (javascripts and CSS).
• coreMessages: CPhpMessageSource - provides translated core messages used by Yiiframework.
• db: CDbConnection - provides the database connection. Note, you must configureits connectionString property in order to use this component.
• errorHandler: CErrorHandler - handles uncaught PHP errors and exceptions.

2.3 Application 19
• messages: CPhpMessageSource - provides translated messaged used by Yii applica-tion.
• request: CHttpRequest - provides information related with user requests.
• securityManager: CSecurityManager - provides security-related services, such ashashing, encryption.
• session: CHttpSession - provides session-related functionalities.
• statePersister: CStatePersister - provides global state persistence method.
• urlManager: CUrlManager - provides URL parsing and creation functionality.
• user: CWebUser - represents the identity information of the current user.
• themeManager: CThemeManager - manages themes.
2.3.5 Application Lifecycles
When handling a user request, an application will undergo the following lifecycles:
1. Set up class autoloader and error handling;
2. Register core application components;
3. Load application configuration;
4. Initialize application with CApplication::init()
• Load static application components;
5. Raise onBeginRequest event;
6. Process the user request:
• Resolve the user request;
• Create controller;
• Run controller;
7.Raise onEndRequest event;

20 2. Fundamentals
2.4 Controller
A controller is an instance of CController or its child class. It is created by applicationwhen the user requests for it. When a controller runs, it performs the requested actionwhich usually brings in the needed models and renders an appropriate view. An action,at its simplest form, is just a controller class method whose name starts with action.
A controller has a default action. When the user request does not specify which action toexecute, the default action will be executed. By default, the default action is named asindex. It can be changed by setting CController::defaultAction.
Below is the minimal code needed by a controller class. Since this controller does notdefine any action, requesting for it would throw an exception.
class SiteController extends CController
{}
2.4.1 Route
Controllers and actions are identified by IDs. Controller ID is in the format of path/
to/xyz which corresponds to the controller class file protected/controllers/path/to/
XyzController.php, where the token xyz should be replaced by actual names (e.g. post cor-responds to protected/controllers/PostController.php). Action ID is the action methodname without the action prefix. For example, if a controller class contains a method namedactionEdit, the ID of the corresponding action would be edit.
Note: Before version 1.0.3, the controller ID format is path.to.xyz instead ofpath/to/xyz.
Users request for a particular controller and action in terms of route. A route is formedby concatenating a controller ID and an action ID separated by a slash. For example, theroute post/edit refers to PostController and its edit action. And by default, the URLhttp://hostname/index.php?r=post/edit would request for this controller and action.
Note: By default, routes are case-sensitive. Since version 1.0.1, it is possible tomake routes case-insensitive by setting CUrlManager::caseSensitive to be false inthe application configuration. When in case-insensitive mode, make sure you followthe convention that directories containing controller class files are in lower case, andboth controller map and action map are using keys in lower case.

2.4 Controller 21
Since version 1.0.3, an application can contain modules. The route for a controller actioninside a module is in the format of moduleID/controllerID/actionID. For more details, seethe section about modules.
2.4.2 Controller Instantiation
A controller instance is created when CWebApplication handles an incoming request.Given the ID of the controller, the application will use the following rules to determinewhat the controller class is and where the class file is located.
• If CWebApplication::catchAllRequest is specified, a controller will be created basedon this property, and the user-specified controller ID will be ignored. This is mainlyused to put the application under maintenance mode and display a static noticepage.
• If the ID is found in CWebApplication::controllerMap, the corresponding controllerconfiguration will be used to create the controller instance.
• If the ID is in the format of ’path/to/xyz’, the controller class name is assumed tobe XyzController and the corresponding class file is protected/controllers/path/
to/XyzController.php. For example, a controller ID admin/user would be resolved asthe controller class UserController and the class file protected/controllers/admin/
UserController.php. If the class file does not exist, a 404 CHttpException will beraised.
In case when modules are used (available since version 1.0.3), the above process is slighlydifferent. In particular, the application will check if the ID refers to a controller insidea module, and if so, the module instance will be created first followed by the controllerinstance.
2.4.3 Action
As aforementioned, an action can be defined as a method whose name starts with theword action. A more advanced way is to define an action class and ask the controller toinstantiate it when requested. This allows actions to be reused and thus introduces morereusability.
To define a new action class, do the following:
class UpdateAction extends CAction
{
22 2. Fundamentals
public function run()
{// place the action logic here
}}
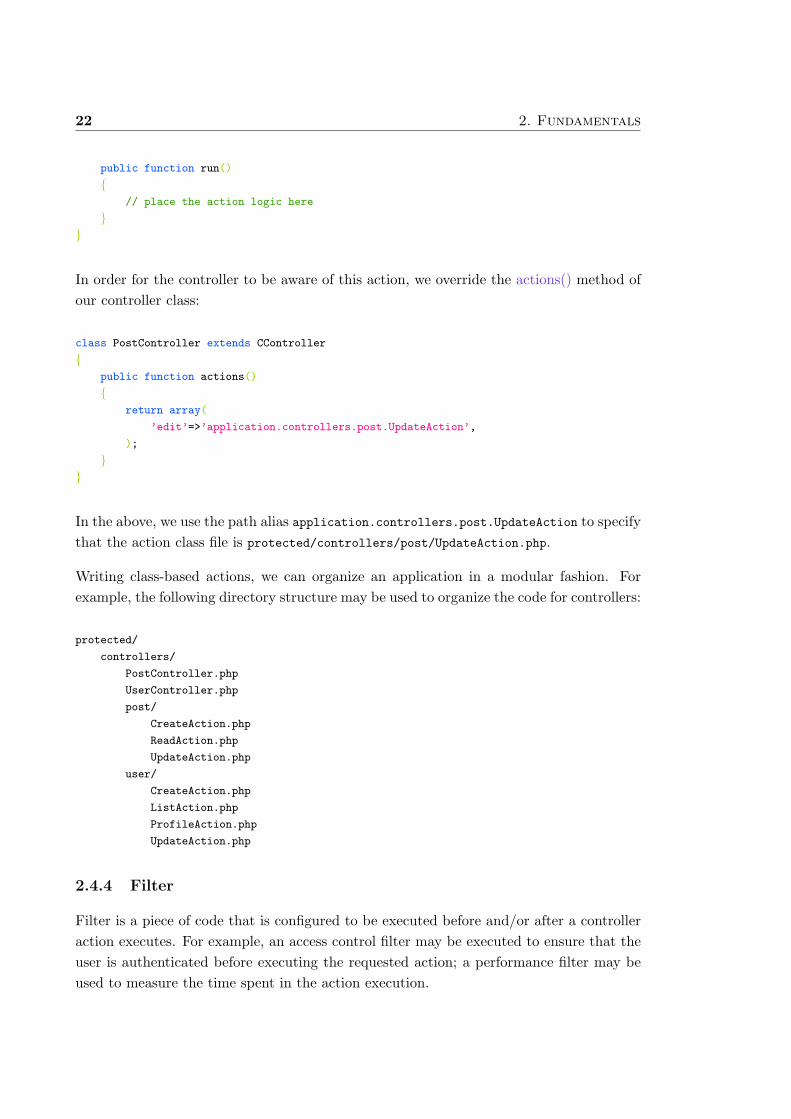
In order for the controller to be aware of this action, we override the actions() method ofour controller class:
class PostController extends CController
{public function actions()
{return array(
’edit’=>’application.controllers.post.UpdateAction’,
);
}}
In the above, we use the path alias application.controllers.post.UpdateAction to specifythat the action class file is protected/controllers/post/UpdateAction.php.
Writing class-based actions, we can organize an application in a modular fashion. Forexample, the following directory structure may be used to organize the code for controllers:
protected/
controllers/
PostController.php
UserController.php
post/
CreateAction.php
ReadAction.php
UpdateAction.php
user/
CreateAction.php
ListAction.php
ProfileAction.php
UpdateAction.php
2.4.4 Filter
Filter is a piece of code that is configured to be executed before and/or after a controlleraction executes. For example, an access control filter may be executed to ensure that theuser is authenticated before executing the requested action; a performance filter may beused to measure the time spent in the action execution.

2.4 Controller 23
An action can have multiple filters. The filters are executed in the order that they appearin the filter list. A filter can prevent the execution of the action and the rest of theunexecuted filters.
A filter can be defined as a controller class method. The method name must begin withfilter. For example, the existence of the filterAccessControl method defines a filternamed accessControl. The filter method must be of the signature:
public function filterAccessControl($filterChain)
{// call $filterChain->run() to continue filtering and action execution
}
where $filterChain is an instance of CFilterChain which represents the filter list associatedwith the requested action. Inside the filter method, we can call $filterChain->run() tocontinue filtering and action execution.
A filter can also be an instance of CFilter or its child class. The following code defines anew filter class:
class PerformanceFilter extends CFilter
{protected function preFilter($filterChain)
{// logic being applied before the action is executed
return true; // false if the action should not be executed
}
protected function postFilter($filterChain)
{// logic being applied after the action is executed
}}
To apply filters to actions, we need to override the CController::filters() method. Themethod should return an array of filter configurations. For example,
class PostController extends CController
{......
public function filters()
{return array(
’postOnly + edit, create’,
24 2. Fundamentals
array(
’application.filters.PerformanceFilter - edit, create’,
’unit’=>’second’,
),
);
}}
The above code specifies two filters: postOnly and PerformanceFilter. The postOnly fil-ter is method-based (the corresponding filter method is defined in CController already);while the PerformanceFilter filter is object-based. The path alias application.filters.
PerformanceFilter specifies that the filter class file is protected/filters/PerformanceFilter.We use an array to configure PerformanceFilter so that it may be used to initialize theproperty values of the filter object. Here the unit property of PerformanceFilter will beinitialized as ’second’.
Using the plus and the minus operators, we can specify which actions the filter should andshould not be applied to. In the above, the postOnly should be applied to the edit andcreate actions, while PerformanceFilter should be applied to all actions EXCEPT edit
and create. If neither plus nor minus appears in the filter configuration, the filter will beapplied to all actions.
2.5 Model
A model is an instance of CModel or its child class. Models are used to keep data andtheir relevant business rules.
A model represents a single data object. It could be a row in a database table or a formof user inputs. Each field of the data object is represented as an attribute of the model.The attribute has a label and can be validated against a set of rules.
Yii implements two kinds of models: form model and active record. They both extendfrom the same base class CModel.
A form model is an instance of CFormModel. Form model is used to keep data collectedfrom user inputs. Such data are often collected, used and then discarded. For example, ona login page, we can use a form model to represent the username and password informationthat are provided by an end user. For more details, please refer to Working with Form
Active Record (AR) is a design pattern used to abstract database access in an object-oriented fashion. Each AR object is an instance of CActiveRecord or its child class,representing a single row in a database table. The fields in the row are represented asproperties of the AR object. Details about AR can be found in Active Record.

2.6 View 25
2.6 View
A view is a PHP script consisting of mainly elements of user interface. It can contain PHPstatements, but it is recommended that these statements should not alter data models andshould remain relatively simple. For the spirit of separation of logic and presentation, largechunk of logic should be placed in controller or model instead of view.
A view has a name which is used to identify the view script file when rendering. Thename of a view is the same as the name of its view script file. For example, view edit
refers to a view script file named as edit.php. To render a view, call CController::render()with the name of the view. The method will look for the corresponding view file underthe directory protected/views/ControllerID.
Inside the view script, we can access the controller instance using $this. We can thus pull
in any property of the controller by evaluating $this->propertyName in the view.
We can also use the following push approach to pass data to the view:
$this->render(’edit’, array(
’var1’=>$value1,
’var2’=>$value2,
));
In the above, the render() method will extract the second array parameter into variables.As a result, in the view script we can access local variables $var1 and $var2.
2.6.1 Layout
Layout is a special view that is used to decorate views. It usually contains portions ofuser interface that are common among several views. For example, a layout may containheader and footer portions and embed the content view in between,
......header here......
<?php echo $content; ?>
......footer here......
where $content stores the rendering result of the content view.
Layout is implicitly applied when calling render(). By default, the view script protected/
views/layouts/main.php is used as the layout. This can be customized by changing eitherCWebApplication::layout or CController::layout. To render a view without applying anylayout, call renderPartial() instead.

26 2. Fundamentals
2.6.2 Widget
A widget is an instance of CWidget or its child class. It is a component mainly forpresentational purpose. Widgets are usually embedded in a view script to generate somecomplex yet self-contained user interface. For example, a calendar widget can be usedto render a complex calendar user interface. Widgets enable better reusability in userinterface.
To use a widget, do as follows in a view script:
<?php $this->beginWidget(’path.to.WidgetClass’); ?>
...body content that may be captured by the widget...
<?php $this->endWidget(); ?>
or
<?php $this->widget(’path.to.WidgetClass’); ?>
The latter is used when the widget does not need any body content.
Widgets can be configured to customize its behaviors. This is done by settings their initialproperty values when calling CBaseController::beginWidget or CBaseController::widget.For example, when using CMaskedTextField widget, we would like to specify the maskbeing used. We can do so by passing an array of those property initial values as fol-lows, where the array keys are property names and array values the initial values of thecorresponding widget properties:
<?php
$this->widget(’CMaskedTextField’,array(
’mask’=>’99/99/9999’
));
?>
To define a new widget, extend CWidget and override its init() and run() methods:
class MyWidget extends CWidget
{public function init()
{// this method is called by CController::beginWidget()
}

2.7 Component 27
public function run()
{// this method is called by CController::endWidget()
}}
Like a controller, a widget can also have its own view. By default, widget view files arelocated under the views subdirectory of the directory containing the widget class file.These views can be rendered by calling CWidget::render(), similar to that in controller.The only difference is that no layout will be applied to a widget view.
2.6.3 System View
System views refer to the views used by Yii to display error and logging information. Forexample, when a user requests for a non-existing controller or action, Yii will throw anexception explaining the error. Yii displays the exception using a specific system view.
The naming of system views follows some rules. Names like errorXXX refer to views fordisplaying CHttpException with error code XXX. For example, if CHttpException is raisedwith error code 404, the error404 view will be displayed.
Yii provides a set of default system views located under framework/views. They can becustomized by creating the same-named view files under protected/views/system.
2.7 Component
Yii applications are built upon components which are objects written to a specification.A component is an instance of CComponent or its derived class. Using a componentmainly involves accessing its properties and raising/handling its events. The base classCComponent specifies how to define properties and events.
2.7.1 Component Property
A component property is like an object’s public member variable. We can read its valueor assign a value to it. For example,
$width=$component->textWidth; // get the textWidth property
$component->enableCaching=true; // set the enableCaching property
To define a component property, we can simply declare a public member variable in thecomponent class. A more flexible way, however, is by defining getter and setter methodslike the following:

28 2. Fundamentals
public function getTextWidth()
{return $this-> textWidth;
}
public function setTextWidth($value)
{$this-> textWidth=$value;
}
The above code defines a writable property named textWidth (the name is case-insensitive).When reading the property, getTextWidth() is invoked and its returned value becomes theproperty value; Similarly, when writing the property, setTextWidth() is invoked. If thesetter method is not defined, the property would be read-only and writing it would throwan exception. Using getter and setter methods to define a property has the benefit thatadditional logic (e.g. performing validation, raising events) can be executed when readingand writing the property.
Note: There is a slight difference between a property defined via getter/settermethods and a class member variable. The name of the former is case-insensitivewhile the latter is case-sensitive.
2.7.2 Component Event
Component events are special properties that take methods (called event handlers) astheir values. Attaching (assigning) a method to an event will cause the method to beinvoked automatically at the places where the event is raised. Therefore, the behavior ofa component can be modified in a way that may not be foreseen during the developmentof the component.
A component event is defined by defining a method whose name starts with on. Likeproperty names defined via getter/setter methods, event names are case-insensitive. Thefollowing code defines an onClicked event:
public function onClicked($event)
{$this->raiseEvent(’onClicked’, $event);
}
where $event is an instance of CEvent or its child class representing the event parameter.
We can attach a method to this event as follows:

2.7 Component 29
$component->onClicked=$callback;
where $callback refers to a valid PHP callback. It can be a global function or a classmethod. If the latter, the callback must be given as an array: array($object,’methodName’).
The signature of an event handler must be as follows:
function methodName($event)
{......
}
where $event is the parameter describing the event (it originates from the raiseEvent()
call). The $event parameter is an instance of CEvent or its derived class. At the minimum,it contains the information about who raises the event.
If we call onClicked() now, the onClicked event will be raised (inside onClicked()), andthe attached event handler will be invoked automatically.
An event can be attached with multiple handlers. When the event is raised, the handlerswill be invoked in the order that they are attached to the event. If a handler decides toprevent the rest handlers from being invoked, it can set $event-¿handled to be true.
2.7.3 Component Behavior
Starting from version 1.0.2, a component has added support for mixin and can be attachedwith one or several behaviors. A behavior is an object whose methods can be ’inherited’by its attached component through the means of collecting functionality instead of spe-cialization (i.e., normal class inheritance). A component can be attached with severalbehaviors and thus achieve ’multiple inheritance’.
Behavior classes must implement the IBehavior interface. Most behaviors can extendfrom the CBehavior base class. If a behavior needs to be attached to a model, it may alsoextend from CModelBehavior or CActiveRecordBehavior which implements additionalfeatures specifc for models.
To use a behavior, it must be attached to a component first by calling the behavior’sattach() method. Then we can call a behavior method via the component:
// $name uniquely identifies the behavior in the component
$behavior->attach($name,$component);
// test() is a method of $behavior
$component->test();
30 2. Fundamentals
An attached behavior can be accessed like a normal property of the component. Forexample, if a behavior named tree is attached to a component, we can obtain the referenceto this behavior object using:
$behavior=$component->tree;
// equivalent to the following:
// $behavior=$component->asa(’tree’);
A behavior can be temporarily disabled so that its methods are not available via thecomponent. For example,
$component->disableBehavior($name);
// the following statement will throw an exception
$component->test();
$component->enableBehavior($name);
// it works now
$component->test();
It is possible that two behaviors attached to the same component have methods of thesame name. In this case, the method of the first attached behavior will take precedence.
When used together with , behaviors are even more powerful. A behavior, when beingattached to a component, can attach some of its methods to some events of the component.By doing so, the behavior gets a chance to observe or change the normal execution flowof the component.
2.8 Module
Note: Support for module has been available since version 1.0.3.
A module is a self-contained software unit that consists of models, views, controllers andother supporting components. In many aspects, a module resembles to an application.The main difference is that a module cannot be deployed alone and it must reside insideof an application. Users can access the controllers in a module like they do with normalapplication controllers.
Modules are useful in several scenarios. For a large-scale application, we may divide it intoseveral modules, each being developed and maintained separately. Some commonly usedfeatures, such as user management, comment management, may be developed in terms ofmodules so that they can be reused easily in future projects.

2.8 Module 31
2.8.1 Creating Module
A module is organized as a directory whose name serves as its unique ID. The structureof the module directory is similar to that of the application base directory. The followingshows the typical directory structure of a module named forum:
forum/
ForumModule.php the module class file
components/ containing reusable user components
views/ containing view files for widgets
controllers/ containing controller class files
DefaultController.php the default controller class file
extensions/ containing third-party extensions
models/ containing model class files
views/ containing controller view and layout files
layouts/ containing layout view files
default/ containing view files for DefaultController
index.php the index view file
A module must have a module class that extends from CWebModule. The class nameis determined using the expression ucfirst($id).’Module’, where $id refers to the mod-ule ID (or the module directory name). The module class serves as the central placefor storing information shared among the module code. For example, we can use CWeb-Module::params to store module parameters, and use CWebModule::components to shareapplication components at the module level.
Tip: We can use the yiic tool to create the basic skeleton of a new module. Forexample, to create the above forum module, we can execute the following commandsin a command line window:
% cd WebRoot/testdrive
% protected/yiic shell
Yii Interactive Tool v1.0
Please type ’help’ for help. Type ’exit’ to quit.
>> module forum
2.8.2 Using Module
To use a module, first place the module directory under modules of the application basedirectory. Then declare the module ID in the modules property of the application. Forexample, in order to use the above forum module, we can use the following applicationconfiguration:

32 2. Fundamentals
return array(
......
’modules’=>array(’forum’,...),
......
);
A module can also be configured with initial property values. The usage is very similarto configuring application components. For example, the forum module may have a prop-erty named postPerPage in its module class which can be configured in the applicationconfiguration as follows:
return array(
......
’modules’=>array(
’forum’=>array(
’postPerPage’=>20,
),
),
......
);
The module instance may be accessed via the module property of the currently activecontroller. Through the module instance, we can then access information that are sharedat the module level. For example, in order to access the above postPerPage information,we can use the following expression:
$postPerPage=Yii::app()->controller->module->postPerPage;
// or the following if $this refers to the controller instance
// $postPerPage=$this->module->postPerPage;
A controller action in a module can be accessed using the route moduleID/controllerID/
actionID. For example, assuming the above forum module has a controller named PostController,we can use the route forum/post/create to refer to the create action in this controller. Thecorresponding URL for this route would be http://www.example.com/index.php?r=forum/
post/create.
Tip: If a controller is in a sub-directory of controllers, we can still use theabove route format. For example, assuming PostController is under forum/
controllers/admin, we can refer to the create action using forum/admin/post/
create.

2.9 Path Alias and Namespace 33
2.8.3 Nested Module
Modules can be nested. That is, a module can contain another module. We call theformer parent module while the latter child module. Child modules must be placed underthe modules directory of the parent module. To access a controller action in a child module,we should use the route parentModuleID/childModuleID/controllerID/actionID.
2.9 Path Alias and Namespace
Yii uses path aliases extensively. A path alias is associated with a directory or file path.It is specified in dot syntax, similar to that of widely adopted namespace format:
RootAlias.path.to.target
where RootAlias is the alias of some existing directory. By calling YiiBase::setPathOfAlias(),we can define new path aliases.For convenience, Yii predefines the following root aliases:
• system: refers to the Yii framework directory;
• application: refers to the application’s base directory;
• webroot: refers to the directory containing the entry script file. This alias has beenavailable since version 1.0.3.
Additionally, if the application uses modules, a root alias is also predefined for each moduleID and refers to the base path of the corresponding module. This feature has been availablesince version 1.0.3.
By using YiiBase::getPathOfAlias(), an alias can be translated to its corresponding path.For example, system.web.CController would be translated as yii/framework/web/CController.
Using aliases, it is very convenient to import the definition of a class. For example, if wewant to include the definition of the CController class, we can call the following:
Yii::import(’system.web.CController’);
The import method differs from include and require in that it is more efficient. The classdefinition being imported is actually not included until it is referenced for the first time.Importing the same namespace multiple times is also much faster than include once andrequire once.
34 2. Fundamentals
Tip: When referring to a class defined by the Yii framework, we do not need toimport or include it. All core Yii classes are pre-imported.
We can also use the following syntax to import a whole directory so that the class filesunder the directory can be automatically included when needed.
Yii::import(’system.web.*’);
Besides import, aliases are also used in many other places to refer to classes. For example,an alias can be passed to Yii::createComponent() to create an instance of the correspondingclass, even if the class file was not included previously.
Do not confuse path alias with namespace. A namespace refers to a logical grouping ofsome class names so that they can be differentiated from other class names even if theirnames are the same, while path alias is used to refer to a class file or directory. Path aliasdoes not conflict with namespace.
Tip: Because PHP prior to 5.3.0 does not support namespace intrinsically, youcannot create instances of two classes who have the same name but with differentdefinitions. For this reason, all Yii framework classes are prefixed with a letter ’C’(meaning ’class’) so that they can be differentiated from user-defined classes. Itis recommended that the prefix ’C’ be reserved for Yii framework use only, anduser-defined classes be prefixed with other letters.
2.10 Conventions
Yii favors conventions over configurations. Follow the conventions and one can createsophisticated Yii applications without writing and managing complex configurations. Ofcourse, Yii can still be customized in nearly every aspect with configurations when needed.
Below we describe conventions that are recommended for Yii programming. For conve-nience, we assume that WebRoot is the directory that an Yii application is installed at.
2.10.1 URL
By default, Yii recognizes URLs with the following format:
http://hostname/index.php?r=ControllerID/ActionID

2.10 Conventions 35
The r GET variable refers to the route that can be resolved by Yii into controller andaction. If ActionID is omitted, the controller will take the default action (defined via CCon-troller::defaultAction); and if ControllerID is also omitted (or the r variable is absent), theapplication will use the default controller (defined via CWebApplication::defaultController).
With the help of CUrlManager, it is possible to create and recognize more SEO-friendlyURLs, such as http://hostname/ControllerID/ActionID.html. This feature is covered indetail in URL Management.
2.10.2 Code
Yii recommends naming variables, functions and class types in camel case which capitalizeseach word in the name and joins them without spaces. Variable and function namesshould have their first word all in lower-case, in order to differentiate from class names(e.g. $basePath, runController(), LinkPager). For private class member variables, it isrecommended to prefix their names with an underscore character (e.g. $ actionList).
Because namespace is not supported prior to PHP 5.3.0, it is recommended that classesbe named in some unique way to avoid name conflict with third-party classes. For thisreason, all Yii framework classes are prefixed with letter ”C”.
A special rule for controller class names is that they must be appended with the wordController. The controller ID is then defined as the class name with first letter in lowercase and the word Controller truncated. For example, the PageController class willhave the ID page. This rule makes the application more secure. It also makes the URLsrelated with controllers a bit cleaner (e.g. /index.php?r=page/index instead of /index.
php?r=PageController/index).
2.10.3 Configuration
A configuration is an array of key-value pairs. Each key represents the name of a prop-erty of the object to be configured, and each value the corresponding property’s initialvalue. For example, array(’name’=>’My application’, ’basePath’=>’./protected’) ini-tializes the name and basePath properties to their corresponding array values.
Any writable properties of an object can be configured. If not configured, the propertieswill take their default values. When configuring a property, it is worthwhile to read thecorresponding documentation so that the initial value can be given properly.
2.10.4 File
Conventions for naming and using files depend on their types.

36 2. Fundamentals
Class files should be named after the public class they contain. For example, the CCon-troller class is in the CController.php file. A public class is a class that may be used byany other classes. Each class file should contain at most one public class. Private classes(classes that are only used by a single public class) may reside in the same file with thepublic class.
View files should be named after the view name. For example, the index view is in theindex.php file. A view file is a PHP script file that contains HTML and PHP code mainlyfor presentational purpose.
Configuration files can be named arbitrarily. A configuration file is a PHP script whosesole purpose is to return an associative array representing the configuration.
2.10.5 Directory
Yii assumes a default set of directories used for various purposes. Each of them can becustomized if needed.
• WebRoot/protected: this is the application base directory holding all security-sensitivePHP scripts and data files. Yii has a default alias named application associatedwith this path. This directory and everything under should be protected from beingaccessed by Web users. It can be customized via CWebApplication::basePath.
• WebRoot/protected/runtime: this directory holds private temporary files generatedduring runtime of the application. This directory must be writable by Web serverprocess. It can be customized via CApplication::runtimePath.
• WebRoot/protected/extensions: this directory holds all third-party extensions. Itcan be customized via CApplication::extensionPath.
• WebRoot/protected/modules: this directory holds all application modules, each rep-resented as a subdirectory.
• WebRoot/protected/controllers: this directory holds all controller class files. It canbe customized via CWebApplication::controllerPath.
• WebRoot/protected/views: this directory holds all view files, including controllerviews, layout views and system views. It can be customized via CWebApplica-tion::viewPath.
• WebRoot/protected/views/ControllerID: this directory holds view files for a singlecontroller class. Here ControllerID stands for the ID of the controller. It can becustomized via CController::getViewPath.

2.11 Development Workflow 37
• WebRoot/protected/views/layouts: this directory holds all layout view files. It canbe customized via CWebApplication::layoutPath.
• WebRoot/protected/views/system: this directory holds all system view files. Systemviews are templates used in displaying exceptions and errors. It can be customizedvia CWebApplication::systemViewPath.
• WebRoot/assets: this directory holds published asset files. An asset file is a privatefile that may be published to become accessible to Web users. This directory must bewritable by Web server process. It can be customized via CAssetManager::basePath.
• WebRoot/themes: this directory holds various themes that can be applied to the appli-cation. Each subdirectory represents a single theme whose name is the subdirectoryname. It can be customized via CThemeManager::basePath.
2.11 Development Workflow
Having described the fundamental concepts of Yii, we show the common workflow fordeveloping a web application using Yii. The workflow assumes that we have done therequirement analysis as well as the necessary design analysis for the application.
1. Create the skeleton directory structure. The yiic tool described in Creating FirstYii Application can be used to speed up this step.
2. Configure the application. This is done by modifying the application configurationfile. This step may also require writing some application components (e.g. the usercomponent).
3. Create a model class for each type of data to be managed. Again, yiic can be usedto automatically generate the active record class for each interested database table.
4. Create a controller class for each type of user requests. How to classify user requestsdepends on the actual requirement. In general, if a model class needs to be accessedby users, it should have a corresponding controller class. The yiic tool can automatethis step, too.
5. Implement actions and their corresponding views. This is where the real work needsto be done.
6. Configure necessary action filters in controller classes.
7. Create themes if the theming feature is required.
8. Create translated messages if internationalization is required.

38 2. Fundamentals
9. Spot data and views that can be cached and apply appropriate caching techniques.
10. Final tune up and deployment.
For each of the above steps, test cases may need to be created and performed.

Chapter 3
Working with Forms
3.1 Working with Form
Collecting user data via HTML forms is one of the major tasks in Web application de-velopment. Besides designing forms, developers need to populate the form with existingdata or default values, validate user input, display appropriate error messages for invalidinput, and save the input to persistent storage. Yii greatly simplifies this workflow withits MVC architecture.
The following steps are typically needed when dealing with forms in Yii:
1. Create a model class representing the data fields to be collected;
2. Create a controller action with code that responds to form submission.
3. Create a form in the view script file associated with the controller action.
In the next subsections, we describe each of these steps in detail.
3.2 Creating Model
Before writing the HTML code needed by a form, we should decide what kind of data weare expecting from end users and what rules these data should comply with. A model classcan be used to record these information. A model, as defined in the Model subsection, isthe central place for keeping user inputs and validating them.
Depending on how we make use of the user input, we can create two types of model. Ifthe user input is collected, used and then discarded, we would create a form model; if theuser input is collected and saved into database, we would use an active record instead.Both types of model share the same base class CModel which defines the common interfaceneeded by form.

40 3. Working with Forms
Note: We are mainly using form models in the examples of this section. However,the same can also be applied to active record models.
3.2.1 Defining Model Class
Below we create a LoginForm model class used to collect user input on a login page. Becausethe login information is only used to authenticate the user and does not need to be saved,we create LoginForm as a form model.
class LoginForm extends CFormModel
{public $username;
public $password;
public $rememberMe=false;
}
Three attributes are declared in LoginForm: $username, $password and $rememberMe. Theyare used to keep the user-entered username and password, and the option whether theuser wants to remember his login. Because $rememberMe has a default value false, thecorresponding option when initially displayed in the login form will be unchecked.
Info: Instead of calling these member variables properties, we use the name at-tributes to differentiate them from normal properties. An attribute is a propertythat is mainly used to store data coming from user input or database.
3.2.2 Declaring Validation Rules
Once a user submits his inputs and the model gets populated, we need to make sure theinputs are valid before using them. This is done by performing validation of the inputsagainst a set of rules. We specify the validation rules in the rules() method which shouldreturn an array of rule configurations.
class LoginForm extends CFormModel
{public $username;
public $password;
public $rememberMe=false;
public function rules()
{

3.2 Creating Model 41
return array(
array(’username, password’, ’required’),
array(’password’, ’authenticate’),
);
}
public function authenticate($attribute,$params)
{if(!$this->hasErrors()) // we only want to authenticate when no input errors
{$identity=new UserIdentity($this->username,$this->password);
if($identity->authenticate())
{$duration=$this->rememberMe ? 3600*24*30 : 0; // 30 days
Yii::app()->user->login($identity,$duration);
}else
$this->addError(’password’,’Incorrect password.’);
}}
}
The above code specifies that username and password are both required, password shouldbe authenticated.
Each rule returned by rules() must be of the following format:
array(’AttributeList’, ’Validator’, ’on’=>’ScenarioList’, ...additional options)
where AttributeList is a string of comma-separated attribute names which need to bevalidated according to the rule; Validator specifies what kind of validation should beperformed; the on parameter is optional which specifies a list of scenarios where the ruleshould be applied; and additional options are name-value pairs which are used to initializethe corresponding validator’s property values.
There are three ways to specify Validator in a validation rule. First, Validator can bethe name of a method in the model class, like authenticate in the above example. Thevalidator method must be of the following signature:
/**
* @param string the name of the attribute to be validated
* @param array options specified in the validation rule
*/
public function ValidatorName($attribute,$params) { ... }

42 3. Working with Forms
Second, Validator can be the name of a validator class. When the rule is applied, aninstance of the validator class will be created to perform the actual validation. Theadditional options in the rule are used to initialize the instance’s attribute values. Avalidator class must extend from CValidator.
Note: When specifying rules for an active record model, we can use a specialoption named on. The option can be either ’insert’ or ’update’ so that the ruleis applied only when inserting or updating the record, respectively. If not set, therule would be applied in both cases when save() is called.
Third, Validator can be a predefined alias to a validator class. In the above example, thename required is the alias to CRequiredValidator which ensures the attribute value beingvalidated is not empty. Below is the complete list of predefined validator aliases:
• captcha: alias of CCaptchaValidator, ensuring the attribute is equal to the verifica-tion code displayed in a CAPTCHA.
• compare: alias of CCompareValidator, ensuring the attribute is equal to anotherattribute or constant.
• email: alias of CEmailValidator, ensuring the attribute is a valid email address.
• default: alias of CDefaultValueValidator, assigning a default value to the specifiedattributes.
• file: alias of CFileValidator, ensuring the attribute contains the name of an up-loaded file.
• filter: alias of CFilterValidator, transforming the attribute with a filter.
• in: alias of CRangeValidator, ensuring the data is among a pre-specified list ofvalues.
• length: alias of CStringValidator, ensuring the length of the data is within certainrange.
• match: alias of CRegularExpressionValidator, ensuring the data matches a regularexpression.
• numerical: alias of CNumberValidator, ensuring the data is a valid number.
• required: alias of CRequiredValidator, ensuring the attribute is not empty.
• type: alias of CTypeValidator, ensuring the attribute is of specific data type.

3.2 Creating Model 43
• unique: alias of CUniqueValidator, ensuring the data is unique in a database tablecolumn.
• url: alias of CUrlValidator, ensuring the data is a valid URL.
Below we list some examples of using the predefined validators:
// username is required
array(’username’, ’required’),
// username must be between 3 and 12 characters
array(’username’, ’length’, ’min’=>3, ’max’=>12),
// when in register scenario, password must match password2
array(’password’, ’compare’, ’compareAttribute’=>’password2’, ’on’=>’register’),
// when in login scenario, password must be authenticated
array(’password’, ’authenticate’, ’on’=>’login’),
3.2.3 Securing Attribute Assignments
Note: scenario-based attribute assignment has been available since version 1.0.2.
After a model instance is created, we often need to populate its attributes with the datasubmitted by end-users. This can be done conveniently using the following massive as-signment:
$model=new LoginForm;
if(isset($ POST[’LoginForm’]))
$model->setAttributes($ POST[’LoginForm’], ’login’);
The last statement is a massive assignment which assigns every entry in $ POST[’LoginForm’]
to the corresponding model attribute in the login scenario (specified as the second pa-rameter). It is equivalent to the following assignments:
foreach($ POST[’LoginForm’] as $name=>$value)
{if($name is a safe attribute)
$model->$name=$value;
}
The task of deciding whether a data entry is safe or not is based the return value of amethod named safeAttributes and the specified scenario. By default, the method returns

44 3. Working with Forms
all public member variables as safe attributes for CFormModel, while it returns all tablecolumns except the primary key as safe attributes for CActiveRecord. We may overridethis method to limit safe attributes according to scenarios. For example, a user modelmay contain many attributes, but in login scenario we only need to use username andpassword attributes. We can specify this limit as follows:
public function safeAttributes()
{return array(
parent::safeAttributes(),
’login’ => ’username, password’,
);
}
More accurately, the return value of the safeAttributes method should be of the followingstructure:
array(
// these attributes can be massively assigned in any scenario
// that is not explicitly specified below
’attr1, attr2, ...’,
*
// these attributes can be massively assigned only in scenario 1
’scenario1’ => ’attr2, attr3, ...’,
*
// these attributes can be massively assigned only in scenario 2
’scenario2’ => ’attr1, attr3, ...’,
)
If the model is not scenario-sensitive (i.e., it is only used in one scenario, or all scenariosshare the same set of safe attributes), the return value can be simplified as a single string:
’attr1, attr2, ...’
For data entries that are not safe, we need to assign them to the corresponding attributesusing individual assign statements, like the following:
$model->permission=’admin’;
$model->id=1;

3.2 Creating Model 45
3.2.4 Triggering Validation
Once a model is populated with user-submitted data, we can call CModel::validate() totrigger the data validation process. The method returns a value indicating whether thevalidation is successful or not. For CActiveRecord model, validation may also be auto-matically triggered when we call its CActiveRecord::save() method.
When we call CModel::validate(), we may specify a scenario parameter. Only the valida-tion rules that apply to the specified scenario will be executed. A validation rule appliesto a scenario if the on option of the rule is not set or contains the specified scenario name.If we do not specify the scenario when calling CModel::validate(), only those rules whoseon option is not set will be executed.
For example, we execute the following statement to perform the validation when registeringa user:
$model->validate(’register’);
We may declare the validation rules in the form model class as follows,
public function rules()
{return array(
array(’username, password’, ’required’),
array(’password repeat’, ’required’, ’on’=>’register’),
array(’password’, ’compare’, ’on’=>’register’),
);
}
As a result, the first rule will be applied in all scenarios, while the next two rules will onlybe applied in the register scenario.
Note: scenario-based validation has been available since version 1.0.1.
3.2.5 Retrieving Validation Errors
We can use CModel::hasErrors() to check if there is any validation error, and if yes, wecan use CModel::getErrors() to obtain the error messages. Both methods can be used forall attributes or an individual attribute.
46 3. Working with Forms
3.2.6 Attribute Labels
When designing a form, we often need to display a label for each input field. The labeltells a user what kind of information he is expected to enter into the field. Although wecan hardcode a label in a view, it would offer more flexibility and convenience if we specifyit in the corresponding model.
By default, CModel will simply return the name of an attribute as its label. This can becustomized by overriding the attributeLabels() method. As we will see in the followingsubsections, specifying labels in the model allows us to create a form more quickly andpowerful.
3.3 Creating Action
Once we have a model, we can start to write logic that is needed to manipulate the model.We place this logic inside a controller action. For the login form example, the followingcode is needed:
public function actionLogin()
{$form=new LoginForm;
if(isset($ POST[’LoginForm’]))
{// collects user input data
$form->attributes=$ POST[’LoginForm’];
// validates user input and redirect to previous page if validated
if($form->validate())
$this->redirect(Yii::app()->user->returnUrl);
}// displays the login form
$this->render(’login’,array(’user’=>$form));
}
In the above, we first create a LoginForm instance; if the request is a POST request(meaning the login form is submitted), we populate $form with the submitted data $
POST[’LoginForm’]; we then validate the input and if successful, redirect the user browserto the page that previously needed authentication. If the validation fails, or if the actionis initially accessed, we render the login view whose content is to be described in the nextsubsection.

3.4 Creating Form 47
Tip: In the login action, we use Yii::app()->user->returnUrl to get the URL ofthe page that previously needed authentication. The component Yii::app()->useris of type CWebUser (or its child class) which represents user session information(e.g. username, status). For more details, see Authentication and Authorization.
Let’s pay special attention to the following PHP statement that appears in the login
action:
$form->attributes=$ POST[’LoginForm’];
As we described in Securing Attribute Assignments, this line of code populates the modelwith the user submitted data. The attributes property is defined by CModel whichexpects an array of name-value pairs and assigns each value to the corresponding modelattribute. So if $ POST[’LoginForm’] gives us such an array, the above code would beequivalent to the following lengthy one (assuming every needed attribute is present in thearray):
$form->username=$ POST[’LoginForm’][’username’];
$form->password=$ POST[’LoginForm’][’password’];
$form->rememberMe=$ POST[’LoginForm’][’rememberMe’];
Note: In order to let $ POST[’LoginForm’] to give us an array instead of a string,we stick to a convention when naming input fields in the view. In particular, for aninput field corresponding to attribute a of model class C, we name it as C[a]. Forexample, we would use LoginForm[username] to name the input field correspondingto the username attribute.
The remaining task now is to create the login view which should contain an HTML formwith the needed input fields.
3.4 Creating Form
Writing the login view is straightforward. We start with a form tag whose action attributeshould be the URL of the login action described previously. We then insert labels andinput fields for the attributes declared in the LoginForm class. At the end we insert asubmit button which can be clicked by users to submit the form. All these can be donein pure HTML code.

48 3. Working with Forms
Yii provides a few helper classes to facilitate view composition. For example, to cre-ate a text input field, we can call CHtml::textField(); to create a drop-down list, callCHtml::dropDownList().
Info: One may wonder what is the benefit of using helpers if they require similaramount of code when compared with plain HTML code. The answer is that thehelpers can provide more than just HTML code. For example, the following codewould generate a text input field which can trigger form submission if its value ischanged by users.
CHtml::textField($name,$value,array(’submit’=>’’));
It would otherwise require writing clumsy JavaScript everywhere.
In the following, we use CHtml to create the login form. We assume that the variable$user represents LoginForm instance.
<div class="yiiForm">
<?php echo CHtml::form(); ?>
<?php echo CHtml::errorSummary($user); ?>
<div class="simple">
<?php echo CHtml::activeLabel($user,’username’); ?>
<?php echo CHtml::activeTextField($user,’username’); ?>
</div>
<div class="simple">
<?php echo CHtml::activeLabel($user,’password’); ?>
<?php echo CHtml::activePasswordField($user,’password’);
?>
</div>
<div class="action">
<?php echo CHtml::activeCheckBox($user,’rememberMe’); ?>
Remember me next time<br/>
<?php echo CHtml::submitButton(’Login’); ?>
</div>
</form>
</div><!-- yiiForm -->
The above code generates a more dynamic form. For example, CHtml::activeLabel()generates a label associated with the specified model attribute. If the attribute has an

3.5 Collecting Tabular Input 49
input error, the label’s CSS class will be changed to error, which changes the appearanceof the label with appropriate CSS styles. Similarly, CHtml::activeTextField() generates atext input field for the specified model attribute and changes its CSS class upon any inputerror.
If we use the CSS style file form.css provided by the yiic script, the generated form wouldbe like the following:
Figure 3.1: The login page
Figure 3.2: The login with error page
3.5 Collecting Tabular Input
Sometimes we want to collect user input in a batch mode. That is, the user can enterthe information for multiple model instances and submit them all at once. We call thistabular input because the input fields are often presented in an HTML table.
To work with tabular input, we first need to create or populate an array of model instances,depending on whether we are inserting or updating the data. We then retrieve the userinput data from the $ POST variable and assign it to each model. A slight difference fromsingle model input is that we retrieve the input data using $ POST[’ModelClass’][$i]
instead of $ POST[’ModelClass’].
public function actionBatchUpdate()
{// retrieve items to be updated in a batch mode

50 3. Working with Forms
// assuming each item is of model class ’Item’
$items=$this->getItemsToUpdate();
if(isset($ POST[’Item’]))
{$valid=true;
foreach($items as $i=>$item)
{if(isset($ POST[’Item’][$i]))
$item->attributes=$ POST[’Item’][$i];
$valid=$valid && $item->validate();
}if($valid) // all items are valid
// ...do something here
}// displays the view to collect tabular input
$this->render(’batchUpdate’,array(’items’=>$items));
}
Having the action ready, we need to work on the batchUpdate view to display the inputfields in an HTML table.
<div class="yiiForm">
<?php echo CHtml::form(); ?>
<table>
<tr><th>Name</th><th>Price</th><th>Count</th><th>Description</th></tr>
<?php foreach($items as $i=>$item): ?>
<tr>
<td><?php echo CHtml::activeTextField($item,"name[$i]"); ?></td>
<td><?php echo CHtml::activeTextField($item,"price[$i]"); ?></td>
<td><?php echo CHtml::activeTextField($item,"count[$i]"); ?></td>
<td><?php echo CHtml::activeTextArea($item,"description[$i]"); ?></td>
</tr>
<?php endforeach; ?>
</table>
<?php echo CHtml::submitButton(’Save’); ?>
</form>
</div><!-- yiiForm -->
Note in the above that we use "name[$i]" instead of "name" as the second parameter whencalling CHtml::activeTextField.
If there is anything validation error, the corresponding input fields will be highlightedautomatically, just like the single model input we described earlier on.

Chapter 4
Working with Databases
4.1 Working with Database
Yii provides powerful support for database programming. Built on top of the PHP DataObjects (PDO) extension, Yii Data Access Objects (DAO) enables accessing to differentdatabase management systems (DBMS) in a single uniform interface. Applications devel-oped using Yii DAO can be easily switched to use a different DBMS without the need tomodify the data accessing code. Yii Active Record (AR), implemented as a widely adoptedObject-Relational Mapping (ORM) approach, further simplifies database programming.Representing a table in terms of a class and a row an instance, Yii AR eliminates therepetitive task of writing those SQL statements that mainly deal with CRUD (create,read, update and delete) operations.
Although Yii DAO and AR can handle nearly all database-related tasks, you can still useyour own database libraries in your Yii application. As a matter of fact, Yii framework iscarefully designed to be used together with other third-party libraries.
4.2 Data Access Objects (DAO)
Data Access Objects (DAO) provides a generic API to access data stored in differentdatabase management systems (DBMS). As a result, the underlying DBMS can be changedto a different one without requiring change of the code which uses DAO to access the data.
Yii DAO is built on top of PHP Data Objects (PDO) which is an extension providingunified data access to many popular DBMS, such as MySQL, PostgreSQL. Therefore, touse Yii DAO, the PDO extension and the specific PDO database driver (e.g. PDO MYSQL)have to be installed.
Yii DAO mainly consists of the following four classes:
• CDbConnection: represents a connection to a database.

52 4. Working with Databases
• CDbCommand: represents an SQL statement to execute against a database.
• CDbDataReader: represents a forward-only stream of rows from a query result set.
• CDbTransaction: represents a DB transaction.
In the following, we introduce the usage of Yii DAO in different scenarios.
4.2.1 Establishing Database Connection
To establish a database connection, create a CDbConnection instance and activate it. Adata source name (DSN) is needed to specify the information required to connect to thedatabase. A username and password may also be needed to establish the connection. Anexception will be raised in case an error occurs during establishing the connection (e.g.bad DSN or invalid username/password).
$connection=new CDbConnection($dsn,$username,$password);
// establish connection. You may try...catch possible exceptions
$connection->active=true;
......
$connection->active=false; // close connection
The format of DSN depends on the PDO database driver in use. In general, a DSN consistsof the PDO driver name, followed by a colon, followed by the driver-specific connectionsyntax. See PDO documentation for complete information. Below is a list of commonlyused DSN formats:
• SQLite: sqlite:/path/to/dbfile
• MySQL: mysql:host=localhost;dbname=testdb
• PostgreSQL: pgsql:host=localhost;port=5432;dbname=testdb
Because CDbConnection extends from CApplicationComponent, we can also use it as anapplication component. To do so, configure in a db (or other name) application componentin the application configuration as follows,
array(
......
’components’=>array(
......
’db’=>array(

4.2 Data Access Objects (DAO) 53
’class’=>’CDbConnection’,
’connectionString’=>’mysql:host=localhost;dbname=testdb’,
’username’=>’root’,
’password’=>’password’,
),
),
)
We can then access the DB connection via Yii::app()->db which is already activated au-tomatically, unless we explictly configure CDbConnection::autoConnect to be false. Usingthis approach, the single DB connection can be shared in multiple places in our code.
4.2.2 Executing SQL Statements
Once a database connection is established, SQL statements can be executed using CDb-Command. One creates a CDbCommand instance by calling CDbConnection::createCommand()with the specified SQL statement:
$command=$connection->createCommand($sql);
// if needed, the SQL statement may be updated as follows:
// $command->text=$newSQL;
A SQL statement is executed via CDbCommand in one of the following two ways:
• execute(): performs a non-query SQL statement, such as INSERT, UPDATE and DELETE.If successful, it returns the number of rows that are affected by the execution.
• query(): performs an SQL statement that returns rows of data, such as SELECT.If successful, it returns a CDbDataReader instance from which one can traversethe resulting rows of data. For convenience, a set of queryXXX() methods are alsoimplemented which directly return the query results.
An exception will be raised if an error occurs during the execution of SQL statements.
$rowCount=$command->execute(); // execute the non-query SQL
$dataReader=$command->query(); // execute a query SQL
$rows=$command->queryAll(); // query and return all rows of result
$row=$command->queryRow(); // query and return the first row of result
$column=$command->queryColumn(); // query and return the first column of result
$value=$command->queryScalar(); // query and return the first field in the first row

54 4. Working with Databases
4.2.3 Fetching Query Results
After CDbCommand::query() generates the CDbDataReader instance, one can retrieverows of resulting data by calling CDbDataReader::read() repeatedly. One can also useCDbDataReader in PHP’s foreach language construct to retrieve row by row.
$dataReader=$command->query();
// calling read() repeatedly until it returns false
while(($row=$dataReader->read())!==false) { ... }// using foreach to traverse through every row of data
foreach($dataReader as $row) { ... }// retrieving all rows at once in a single array
$rows=$dataReader->readAll();
Note: Unlike query(), all queryXXX() methods return data directly. For example,queryRow() returns an array representing the first row of the querying result.
4.2.4 Using Transactions
When an application executes a few queries, each reading and/or writing information inthe database, it is important to be sure that the database is not left with only some ofthe queries carried out. A transaction, represented as a CDbTransaction instance in Yii,may be initiated in this case:
• Begin the transaction.
• Execute queries one by one. Any updates to the database are not visible to theoutside world.
• Commit the transaction. Updates become visible if the transaction is successful.
• If one of the queries fails, the entire transaction is rolled back.
The above workflow can be implemented using the following code:
$transaction=$connection->beginTransaction();
try
{$connection->createCommand($sql1)->execute();
$connection->createCommand($sql2)->execute();
//.... other SQL executions

4.2 Data Access Objects (DAO) 55
$transaction->commit();
}catch(Exception $e) // an exception is raised if a query fails will be raised
{$transaction->rollBack();
}
4.2.5 Binding Parameters
To avoid SQL injection attacks and to improve performance of executing repeatedly usedSQL statements, one can ”prepare” an SQL statement with optional parameter place-holders that are to be replaced with the actual parameters during the parameter bindingprocess.
The parameter placeholders can be either named (represented as unique tokens) or un-named (represented as question marks). Call CDbCommand::bindParam() or CDbCom-mand::bindValue() to replace these placeholders with the actual parameters. The param-eters do not need to be quoted: the underlying database driver does it for you. Parameterbinding must be done before the SQL statement is executed.
// an SQL with two placeholders ":username" and ":email"
$sql="INSERT INTO users(username, email) VALUES(:username,:email)";
$command=$connection->createCommand($sql);
// replace the placeholder ":username" with the actual username value
$command->bindParam(":username",$username,PDO::PARAM STR);
// replace the placeholder ":email" with the actual email value
$command->bindParam(":email",$email,PDO::PARAM STR);
$command->execute();
// insert another row with a new set of parameters
$command->bindParam(":username",$username2,PDO::PARAM STR);
$command->bindParam(":email",$email2,PDO::PARAM STR);
$command->execute();
The methods bindParam() and bindValue() are very similar. The only difference is thatthe former binds a parameter with a PHP variable reference while the latter with a value.For parameters that represent large block of data memory, the former is preferred forperformance consideration.
For more details about binding parameters, see the relevant PHP documentation.
4.2.6 Binding Columns
When fetching query results, one can also bind columns with PHP variables so that theyare automatically populated with the latest data each time a row is fetched.

56 4. Working with Databases
$sql="SELECT username, email FROM users";
$dataReader=$connection->createCommand($sql)->query();
// bind the 1st column (username) with the $username variable
$dataReader->bindColumn(1,$username);
// bind the 2nd column (email) with the $email variable
$dataReader->bindColumn(2,$email);
while($dataReader->read()!==false)
{// $username and $email contain the username and email in the current row
}
4.3 Active Record
Although Yii DAO can handle virtually any database-related task, chances are that wewould spend 90% of our time in writing some SQL statements which perform the commonCRUD (create, read, update and delete) operations. It is also difficult to maintain ourcode when they are mixed with SQL statements. To solve these problems, we can useActive Record.
Active Record (AR) is a popular Object-Relational Mapping (ORM) technique. Each ARclass represents a database table (or view) whose attributes are represented as the ARclass properties, and an AR instance represents a row in that table. Common CRUDoperations are implemented as AR methods. As a result, we can access our data in a moreobject-oriented way. For example, we can use the following code to insert a new row tothe Post table:
$post=new Post;
$post->title=’sample post’;
$post->content=’post body content’;
$post->save();
In the following we describe how to set up AR and use it to perform CRUD operations.We will show how to use AR to deal with database relationships in the next section. Forsimplicity, we use the following database table for our examples in this section.
CREATE TABLE Post (
id INTEGER NOT NULL PRIMARY KEY AUTOINCREMENT,
title VARCHAR(128) NOT NULL,
content TEXT NOT NULL,
createTime INTEGER NOT NULL
);

4.3 Active Record 57
Note: AR is not meant to solve all database-related tasks. It is best used formodeling database tables in PHP constructs and performing queries that do notinvolve complex SQLs. Yii DAO should be used for those complex scenarios.
4.3.1 Establishing DB Connection
AR relies on a DB connection to perform DB-related operations. By default, it assumesthat the db application component gives the needed CDbConnection instance which servesas the DB connection. The following application configuration shows an example:
return array(
’components’=>array(
’db’=>array(
’class’=>’system.db.CDbConnection’,
’connectionString’=>’sqlite:path/to/dbfile’,
// turn on schema caching to improve performance
// ’schemaCachingDuration’=>3600,
),
),
);
Tip: Because Active Record relies on the metadata about tables to determine thecolumn information, it takes time to read the metadata and analyze it. If the schemaof your database is less likely to be changed, you should turn on schema cachingby configuring the CDbConnection::schemaCachingDuration property to be a valuegreater than 0.
Support for AR is limited by DBMS. Currently, only the following DBMS are supported:
• MySQL 4.1 or later
• PostgreSQL 7.3 or later
• SQLite 2 and 3
If you want to use an application component other than db, or if you want to work withmultiple databases using AR, you should override CActiveRecord::getDbConnection().The CActiveRecord class is the base class for all AR classes.

58 4. Working with Databases
Tip: There are two ways to work with multiple databases in AR. If the schemas ofthe databases are different, you may create different base AR classes with differentimplementation of getDbConnection(). Otherwise, dynamically changing the staticvariable CActiveRecord::db is a better idea.
4.3.2 Defining AR Class
To access a database table, we first need to define an AR class by extending CActiveRecord.Each AR class represents a single database table, and an AR instance represents a rowin that table. The following example shows the minimal code needed for the AR classrepresenting the Post table.
class Post extends CActiveRecord
{public static function model($className= CLASS )
{return parent::model($className);
}}
Tip: Because AR classes are often referenced in many places, we can import thewhole directory containing the AR class, instead of including them one by one. Forexample, if all our AR class files are under protected/models, we can configure theapplication as follows:
return array(
’import’=>array(
’application.models.*’,
),
);
By default, the name of the AR class is the same as the database table name. Overridethe tableName() method if they are different. The model() method is declared as such forevery AR class (to be explained shortly).
Column values of a table row can be accessed as properties of the corresponding AR classinstance. For example, the following code sets the title column (attribute):
$post=new Post;
$post->title=’a sample post’;

4.3 Active Record 59
Although we never explicitly declare the title property in the Post class, we can stillaccess it in the above code. This is because title is a column in the Post table, andCActiveRecord makes it accessible as a property with the help of the PHP get() magicmethod. An exception will be thrown if we attempt to access a non-existing column inthe same way.
Info: For better readability, we suggest naming database tables and columns incamel case. In particular, table names are formed by capitalizing each word in thename and joining them without spaces; column names are similar to table namesexcept their first letter is in lower case. For example, we use Post to name the tablestoring posts; and we use createTime to name the table’s primary key column. Thismakes tables look more like class types and columns like variables. Note, however,using camel case may also bring you inconvenience for some DBMS, such as MySQL,as they may behave differently on different operation systems.
4.3.3 Creating Record
To insert a new row into a database table, we create a new instance of the correspondingAR class, set its properties associated with the table columns, and call the save() methodto finish the insertion.
$post=new Post;
$post->title=’sample post’;
$post->content=’content for the sample post’;
$post->createTime=time();
$post->save();
If the table’s primary key is auto-incremental, after the insertion the AR instance willcontain an updated primary key. In the above example, the id property will reflect theprimary key value of the newly inserted post, even though we never change it explicitly.
If a column is defined with some static default value (e.g. a string, a number) in thetable schema, the corresponding property in the AR instance will automatically has sucha value after the instance is created. One way to change this default value is by explicitlydeclaring the property in the AR class:
class Post extends CActiveRecord
{public $title=’please enter a title’;
......
}

60 4. Working with Databases
$post=new Post;
echo $post->title; // this would display: please enter a title
Starting from version 1.0.2, an attribute can be assigned a value of CDbExpression typebefore the record is saved (either insertion or updating) to the database. For example,in order to save a timestamp returned by the MySQL NOW() function, we can use thefollowing code:
$post=new Post;
$post->createTime=new CDbExpression(’NOW()’);
// $post->createTime=’NOW()’; will not work because
// ’NOW()’ will be treated as a string
$post->save();
4.3.4 Reading Record
To read data in a database table, we call one of the find methods as follows.
// find the first row satisfying the specified condition
$post=Post::model()->find($condition,$params);
// find the row with the specified primary key
$post=Post::model()->findByPk($postID,$condition,$params);
// find the row with the specified attribute values
$post=Post::model()->findByAttributes($attributes,$condition,$params);
// find the first row using the specified SQL statement
$post=Post::model()->findBySql($sql,$params);
In the above, we call the find method with Post::model(). Remember that the staticmethod model() is required for every AR class. The method returns an AR instance thatis used to access class-level methods (something similar to static class methods) in anobject context.
If the find method finds a row satisfying the query conditions, it will return a Post
instance whose properties contain the corresponding column values of the table row. Wecan then read the loaded values like we do with normal object properties, for example,echo $post->title;.
The find method will return null if nothing can be found in the database with the givenquery condition.
When calling find, we use $condition and $params to specify query conditions. Here$condition can be string representing the WHERE clause in a SQL statement, and $params

4.3 Active Record 61
is an array of parameters whose values should be bound to the placeholders in $condition.For example,
// find the row with postID=10
$post=Post::model()->find(’postID=:postID’, array(’:postID’=>10));
We can also use $condition to specify more complex query conditions. Instead of a string,we let $condition be a CDbCriteria instance, which allows us to specify conditions otherthan the WHERE clause. For example,
$criteria=new CDbCriteria;
$criteria->select=’title’; // only select the ’title’ column
$criteria->condition=’postID=:postID’;
$criteria->params=array(’:postID’=>10);
$post=Post::model()->find($criteria); // $params is not needed
Note, when using CDbCriteria as query condition, the $params parameter is no longerneeded since it can be specified in CDbCriteria, as shown above.
An alternative way to CDbCriteria is passing an array to the find method. The arraykeys and values correspond to the criteria’s property name and value, respectively. Theabove example can be rewritten as follows,
$post=Post::model()->find(array(
’select’=>’title’,
’condition’=>’postID=:postID’,
’params’=>array(’:postID’=>10),
));
Info: When a query condition is about matching some columns with the specifiedvalues, we can use findByAttributes(). We let the $attributes parameters be anarray of the values indexed by the column names. In some frameworks, this task canbe achieved by calling methods like findByNameAndTitle. Although this approachlooks attractive, it often causes confusion, conflict and issues like case-sensitivity ofcolumn names.
When multiple rows of data matching the specified query condition, we can bring them inall together using the following findAll methods, each of which has its counterpart find
method, as we already described.

62 4. Working with Databases
// find all rows satisfying the specified condition
$posts=Post::model()->findAll($condition,$params);
// find all rows with the specified primary keys
$posts=Post::model()->findAllByPk($postIDs,$condition,$params);
// find all rows with the specified attribute values
$posts=Post::model()->findAllByAttributes($attributes,$condition,$params);
// find all rows using the specified SQL statement
$posts=Post::model()->findAllBySql($sql,$params);
If nothing matches the query condition, findAll would return an empty array. This isdifferent from find who would return null if nothing is found.
Besides the find and findAll methods described above, the following methods are alsoprovided for convenience:
// get the number of rows satisfying the specified condition
$n=Post::model()->count($condition,$params);
// get the number of rows using the specified SQL statement
$n=Post::model()->countBySql($sql,$params);
// check if there is at least a row satisfying the specified condition
$exists=Post::model()->exists($condition,$params);
4.3.5 Updating Record
After an AR instance is populated with column values, we can change them and save themback to the database table.
$post=Post::model()->findByPk(10);
$post->title=’new post title’;
$post->save(); // save the change to database
As we can see, we use the same save() method to perform insertion and updating opera-tions. If an AR instance is created using the new operator, calling save() would insert anew row into the database table; if the AR instance is the result of some find or findAll
method call, calling save() would update the existing row in the table. In fact, we can useCActiveRecord::isNewRecord to tell if an AR instance is new or not.
It is also possible to update one or several rows in a database table without loading themfirst. AR provides the following convenient class-level methods for this purpose:
// update the rows matching the specified condition
Post::model()->updateAll($attributes,$condition,$params);
// update the rows matching the specified condition and primary key(s)

4.3 Active Record 63
Post::model()->updateByPk($pk,$attributes,$condition,$params);
// update counter columns in the rows satisfying the specified conditions
Post::model()->updateCounters($counters,$condition,$params);
In the above, $attributes is an array of column values indexed by column names; $countersis an array of incremental values indexed by column names; and $condition and $params
are as described in the previous subsection.
4.3.6 Deleting Record
We can also delete a row of data if an AR instance has been populated with this row.
$post=Post::model()->findByPk(10); // assuming there is a post whose ID is 10
$post->delete(); // delete the row from the database table
Note, after deletion, the AR instance remains unchanged, but the corresponding row inthe database table is already gone.
The following class-level methods are provided to delete rows without the need of loadingthem first:
// delete the rows matching the specified condition
Post::model()->deleteAll($condition,$params);
// delete the rows matching the specified condition and primary key(s)
Post::model()->deleteByPk($pk,$condition,$params);
4.3.7 Data Validation
When inserting or updating a row, we often need to check if the column values comply tocertain rules. This is especially important if the column values are provided by end users.In general, we should never trust anything coming from the client side.
AR performs data validation automatically when save() is being invoked. The validationis based on the rules specified by in the rules() method of the AR class. For more detailsabout how to specify validation rules, refer to the Declaring Validation Rules section.Below is the typical workflow needed by saving a record:
if($post->save())
{// data is valid and is successfully inserted/updated
}else

64 4. Working with Databases
{// data is invalid. call getErrors() to retrieve error messages
}
When the data for inserting or updating is submitted by end users in an HTML form, weneed to assign them to the corresponding AR properties. We can do so like the following:
$post->title=$ POST[’title’];
$post->content=$ POST[’content’];
$post->save();
If there are many columns, we would see a long list of such assignments. This can bealleviated by making use of the attributes property as shown below. More details can befound in the Securing Attribute Assignments section and the Creating Action section.
// assume $ POST[’Post’] is an array of column values indexed by column names
$post->attributes=$ POST[’Post’];
$post->save();
4.3.8 Comparing Records
Like table rows, AR instances are uniquely identified by their primary key values. There-fore, to compare two AR instances, we merely need to compare their primary key val-ues, assuming they belong to the same AR class. A simpler way is to call CActiveRe-cord::equals(), however.
Info: Unlike AR implementation in other frameworks, Yii supports composite pri-mary keys in its AR. A composite primary key consists of two or more columns.Correspondingly, the primary key value is represented as an array in Yii. TheprimaryKey property gives the primary key value of an AR instance.
4.3.9 Customization
CActiveRecord provides a few placeholder methods that can be overridden in child classesto customize its workflow.
• beforeValidate and afterValidate: these are invoked before and after validation isperformed.
• beforeSave and afterSave: these are invoked before and after saving an AR instance.

4.4 Relational Active Record 65
• beforeDelete and afterDelete: these are invoked before and after an AR instance isdeleted.
• afterConstruct: this is invoked for every AR instance created using the new operator.
• afterFind: this is invoked for every AR instance created as a result of query.
4.3.10 Using Transaction with AR
Every AR instance contains a property named dbConnection which is a CDbConnectioninstance. We thus can use the transaction feature provided by Yii DAO if it is desiredwhen working with AR:
$model=Post::model();
$transaction=$model->dbConnection->beginTransaction();
try
{// find and save are two steps which may be intervened by another request
// we therefore use a transaction to ensure consistency and integrity
$post=$model->findByPk(10);
$post->title=’new post title’;
$post->save();
$transaction->commit();
}catch(Exception $e)
{$transaction->rollBack();
}
4.4 Relational Active Record
We have already seen how to use Active Record (AR) to select data from a single databasetable. In this section, we describe how to use AR to join several related database tablesand bring back the joint data set.
In order to use relational AR, it is required that primary-foreign key relationships are welldefined between tables that need to be joined. AR relies on the metadata about theserelationships to determine how to join the tables.
Note: Starting from version 1.0.1, you can use relational AR even if you do notdefine any foreign key constraints in your database.
For simplicity, we will use the database schema shown in the following entity-relationship(ER) diagram to illustrate examples in this section.

66 4. Working with Databases
Figure 4.1: ER Diagram
Info: Support for foreign key contraints varies in different DBMS.
SQLite does not support foreign key constraints, but you can still declare the con-straints when creating tables. AR can exploit these declarations to correctly supportrelational queries.
MySQL supports foreign key constraints with InnoDB engine, but not with My-ISAM. It is thus recommended that you use InnoDB for your MySQL database.When using MyISAM, you may exploit the following trick so that you can performrelational queries using AR:
CREATE TABLE Foo
(
id INTEGER NOT NULL PRIMARY KEY
);
CREATE TABLE bar
(
id INTEGER NOT NULL PRIMARY KEY,
fooID INTEGER
COMMENT ’CONSTRAINT FOREIGN KEY (fooID) REFERENCES Foo(id)’
);
In the above, we use COMMENT keyword to describe the foreign key constraint whichcan be read by AR to recognize the described relationship.
4.4.1 Declaring Relationship
Before we use AR to perform relational query, we need to let AR know how one AR classis related with another.

4.4 Relational Active Record 67
Relationship between two AR classes is directly associated with the relationship betweenthe database tables represented by the AR classes. From database point of view, a rela-tionship between two tables A and B has three types: one-to-many (e.g. User and Post),one-to-one (e.g. User and Profile) and many-to-many (e.g. Category and Post). In AR,there are four types of relationships:
• BELONGS TO: if the relationship between table A and B is one-to-many, then B belongsto A (e.g. Post belongs to User);
• HAS MANY: if the relationship between table A and B is one-to-many, then A has manyB (e.g. User has many Post);
• HAS ONE: this is special case of HAS MANY where A has at most one B (e.g. User hasat most one Profile);
• MANY MANY: this corresponds to the many-to-many relationship in database. An as-sociative table is needed to break a many-to-many relationship into one-to-manyrelationships, as most DBMS do not support many-to-many relationship directly. Inour example database schema, the PostCategory serves for this purpose. In AR ter-minology, we can explain MANY MANY as the combination of BELONGS TO and HAS MANY.For example, Post belongs to many Category and Category has many Post.
Declaring relationship in AR involves overriding the relations() method of CActiveRecord.The method returns an array of relationship configurations. Each array element representsa single relationship with the following format:
’VarName’=>array(’RelationType’, ’ClassName’, ’ForeignKey’, ...additional options)
where VarName is the name of the relationship; RelationType specifies the type of therelationship, which can be one of the four constants: self::BELONGS TO, self::HAS ONE,self::HAS MANY and self::MANY MANY; ClassName is the name of the AR class related tothis AR class; and ForeignKey specifies the foreign key(s) involved in the relationship.Additional options can be specified at the end for each relationship (to be described later).
The following code shows how we declare the relationships for the User and Post classes.
class Post extends CActiveRecord
{public function relations()
{return array(

68 4. Working with Databases
’author’=>array(self::BELONGS TO, ’User’, ’authorID’),
’categories’=>array(self::MANY MANY, ’Category’, ’PostCategory(postID, categoryID)’),
);
}}
class User extends CActiveRecord
{public function relations()
{return array(
’posts’=>array(self::HAS MANY, ’Post’, ’authorID’),
’profile’=>array(self::HAS ONE, ’Profile’, ’ownerID’),
);
}}
Info: A foreign key may be composite, consisting of two or more columns. In thiscase, we should concatenate the names of the foreign key columns and separate themwith space or comma. For MANY MANY relationship type, the associative table namemust also be specified in the foreign key. For example, the categories relationshipin Post is specified with the foreign key PostCategory(postID, categoryID).
The declaration of relationships in an AR class implicitly adds a property to the class foreach relationship. After a relational query is performed, the corresponding property willbe populated with the related AR instance(s). For example, if $author represents a User
AR instance, we can use $author->posts to access its related Post instances.
4.4.2 Performing Relational Query
The simplest way of performing relational query is by reading a relational property ofan AR instance. If the property is not accessed previously, a relational query will beinitiated, which joins the two related tables and filters with the primary key of the currentAR instance. The query result will be saved to the property as instance(s) of the relatedAR class. This is known as the lazy loading approach, i.e., the relational query is performedonly when the related objects are initially accessed. The example below shows how to usethis approach:
// retrieve the post whose ID is 10
$post=Post::model()->findByPk(10);
// retrieve the post’s author: a relational query will be performed here
$author=$post->author;

4.4 Relational Active Record 69
Info: If there is no related instance for a relationship, the corresponding propertycould be either null or an empty array. For BELONGS TO and HAS ONE relationships,the result is null; for HAS MANY and MANY MANY, it is an empty array.
The lazy loading approach is very convenient to use, but it is not efficient in some scenarios.For example, if we want to access the author information for N posts, using the lazyapproach would involve executing N join queries. We should resort to the so-called eagerloading approach under this circumstance.
The eager loading approach retrieves the related AR instances together with the main ARinstance(s). This is accomplished by using the with() method together with one of thefind or findAll methods in AR. For example,
$posts=Post::model()->with(’author’)->findAll();
The above code will return an array of Post instances. Unlike the lazy approach, theauthor property in each Post instance is already populated with the related User instancebefore we access the property. Instead of executing a join query for each post, the eagerloading approach brings back all posts together with their authors in a single join query!
We can specify multiple relationship names in the with() method and the eager loadingapproach will bring them back all in one shot. For example, the following code will bringback posts together with their authors and categories:
$posts=Post::model()->with(’author’,’categories’)->findAll();
We can also do nested eager loading. Instead of a list of relationship names, we pass in ahierarchical representation of relationship names to the with() method, like the following,
$posts=Post::model()->with(
’author.profile’,
’author.posts’,
’categories’)->findAll();
The above example will bring back all posts together with their author and categories. Itwill also bring back each author’s profile and posts.
Note: The usage of the with() method has been changed since version 1.0.2. Pleaseread the corresponding API documentation carefully.

70 4. Working with Databases
The AR implementation in Yii is very efficient. When eager loading a hierarchy of relatedobjects involving N HAS MANY or MANY MANY relationships, it will take N+1 SQL queries toobtain the needed results. This means it needs to execute 3 SQL queries in the lastexample because of the posts and categories properties. Other frameworks take a moreradical approach by using only one SQL query. At first look, the radical approach seemsmore efficient because fewer queries are being parsed and executed by DBMS. It is in factimpractical in reality for two reasons. First, there are many repetitive data columns inthe result which takes extra time to transmit and process. Second, the number of rowsin the result set grows exponentially with the number of tables involved, which makes itsimply unmanageable as more relationships are involved.
Since version 1.0.2, you can also enforce the relational query to be done with only oneSQL query. Simply append a together() call after with(). For example,
$posts=Post::model()->with(
’author.profile’,
’author.posts’,
’categories’)->together()->findAll();
The above query will be done in one SQL query. Without calling together, this will needtwo SQL queries: one joins Post, User and Profile tables, and the other joins User andPost tables.
4.4.3 Relational Query Options
We mentioned that additional options can be specified in relationship declaration. Theseoptions, specified as name-value pairs, are used to customize the relational query. Theyare summarized as below.
• select: a list of columns to be selected for the related AR class. It defaults to ’*’,meaning all columns. Column names should be disambiguated using aliasToken ifthey appear in an expression (e.g. COUNT(??.name) AS nameCount).
• condition: the WHERE clause. It defaults to empty. Note, column references need tobe disambiguated using aliasToken (e.g. ??.id=10).
• params: the parameters to be bound to the generated SQL statement. This shouldbe given as an array of name-value pairs. This option has been available since version1.0.3.
• on: the ON clause. The condition specified here will be appended to the joiningcondition using the AND operator. This option has been available since version 1.0.2.

4.4 Relational Active Record 71
• order: the ORDER BY clause. It defaults to empty. Note, column references need tobe disambiguated using aliasToken (e.g. ??.age DESC).
• with: a list of child related objects that should be loaded together with this object.Note, this is only honored by lazy loading, not eager loading.
• joinType: type of join for this relationship. It defaults to LEFT OUTER JOIN.
• aliasToken: the column prefix placeholder. It will be replaced by the correspondingtable alias to disambiguate column references. It defaults to ’??.’.
• alias: the alias for the table associated with this relationship. This option hasbeen available since version 1.0.1. It defaults to null, meaning the table alias isautomatically generated. This is different from aliasToken in that the latter is justa placeholder and will be replaced by the actual table alias.
• together: whether the table associated with this relationship should be forced to join to-gether with the primary table. This option is only meaningful for HASMANY andMANYMANY relations.Ifthisoptionisnotsetorfalse, eachHASMANY orMANYMANY relationwillhavetheirownJOINstatementtoimproveperformance.Thisoptionhasbeenavailablesinceversion1.0.3.
In addition, the following options are available for certain relationships during lazy loading:
• group: the GROUP BY clause. It defaults to empty. Note, column references need to bedisambiguated using aliasToken (e.g. ??.age). This option only applies to HAS MANY
and MANY MANY relationships.
• having: the HAVING clause. It defaults to empty. Note, column references need to bedisambiguated using aliasToken (e.g. ??.age). This option only applies to HAS MANY
and MANY MANY relationships. Note: option has been available since version 1.0.1.
• limit: limit of the rows to be selected. This option does NOT apply to BELONGS TO
relation.
• offset: offset of the rows to be selected. This option does NOT apply to BELONGS TO
relation.
Below we modify the posts relationship declaration in the User by including some of theabove options:
class User extends CActiveRecord
{public function relations()
{return array(
’posts’=>array(self::HAS MANY, ’Post’, ’authorID’

72 4. Working with Databases
’order’=>’??.createTime DESC’,
’with’=>’categories’),
’profile’=>array(self::HAS ONE, ’Profile’, ’ownerID’),
);
}}
Now if we access $author->posts, we would obtain the author’s posts sorted according totheir creation time in descending order. Each post instance also has its categories loaded.
Info: When a column name appears in two or more tables being joined together, itneeds to be disambiguated. This is done by prefixing the column name with its tablename. For example, id becomes Team.id. In AR relational queries, however, wedo not have this freedom because the SQL statements are automatically generatedby AR which systematically gives each table an alias. Therefore, in order to avoidcolumn name conflict, we use a placeholder to indicate the existence of a columnwhich needs to be disambiguated. AR will replace the placeholder with a suitabletable alias and properly disambiguate the column.
4.4.4 Dynamic Relational Query Options
Starting from version 1.0.2, we can use dynamic relational query options in both with()and the with option. The dynamic options will overwrite existing options as specified inthe relations() method. For example, with the above User model, if we want to use eagerloading approach to bring back posts belonging to an author in ascending order (the order
option in the relation specification is descending order), we can do the following:
User::model()->with(array(
’posts’=>array(’order’=>’??.createTime DESC’),
’profile’,
))->findAll();

Chapter 5
Caching
5.1 Caching
Caching is a cheap and effective way to improve the performance of a Web application.By storing relatively static data in cache and serving it from cache when requested, wesave the time needed to generate the data.
Using cache in Yii mainly involves configuring and accessing a cache application com-ponent. The following application configuration specifies a cache component that usesmemcache with two cache servers.
array(
......
’components’=>array(
......
’cache’=>array(
’class’=>’system.caching.CMemCache’,
’servers’=>array(
array(’host’=>’server1’, ’port’=>11211, ’weight’=>60),
array(’host’=>’server2’, ’port’=>11211, ’weight’=>40),
),
),
),
);
When the application is running, the cache component can be accessed via Yii::app()->cache.
Yii provides various cache components that can store cached data in different medium.For example, the CMemCache component encapsulates the PHP memcache extension anduses memory as the medium of cache storage; the CApcCache component encapsulatesthe PHP APC extension; and the CDbCache component stores cached data in database.The following is a summary of the available cache components:
• CMemCache: uses PHP memcache extension.

74 5. Caching
• CApcCache: uses PHP APC extension.
• CXCache: uses PHP XCache extension. Note, this has been available since version1.0.1.
• CDbCache: uses a database table to store cached data. By default, it will createand use a SQLite3 database under the runtime directory. You can explicitly specifya database for it to use by setting its connectionID property.
Tip: Because all these cache components extend from the same base class CCache,one can switch to use a different type of cache without modifying the code that usescache.
Caching can be used at different levels. At the lowest level, we use cache to store a singlepiece of data, such as a variable, and we call this data caching. At the next level, we storein cache a page fragment which is the generated by a portion of a view script. And at thehighest level, we store a whole page in cache and serve it from cache as needed.
In the next few subsections, we elaborate how to use cache at these levels.
Note: By definition, cache is a volatile storage medium. It does not ensure theexistence of the cached data even if it does not expire. Therefore, do not use cacheas a persistent storage (e.g. do not use cache to store session data).
5.2 Data Caching
Data caching is about storing some PHP variable in cache and retrieving it later fromcache. For this purpose, the cache component base class CCache provides two methodsthat are used in most of the time: set() and get().
To store a variable $value in cache, we choose a unique ID and call set() to store it:
Yii::app()->cache->set($id, $value);
The cached data will remain in the cache forever unless it is removed because of somecaching policy (e.g. caching space is full and the oldest data are removed). To change thisbehavior, we can also supply an expiration parameter when calling set() so that the datawill be removed from the cache after a certain period of time:

5.2 Data Caching 75
// keep the value in cache for at most 30 seconds
Yii::app()->cache->set($id, $value, 30);
Later when we need to access this variable (in either the same or a different Web request),we call get() with the ID to retrieve it from cache. If the value returned is false, it meansthe value is not available in cache and we should regenerate it.
$value=Yii::app()->cache->get($id);
if($value===false)
{// regenerate $value because it is not found in cache
// and save it in cache for later use:
// Yii::app()->cache->set($id,$value);
}
When choosing the ID for a variable to be cached, make sure the ID is unique amongall other variables that may be cached in the application. It is NOT required that theID is unique across applications because the cache component is intelligent enough todifferentiate IDs for different applications.
To remove a cached value from cache, call delete(); and to remove everything from cache,call flush(). Be very careful when calling flush() because it also removes cached data thatare from other applications.
Tip: Because CCache implements ArrayAccess, a cache component can be usedliked an array. The followings are some examples:
$cache=Yii::app()->cache;
$cache[’var1’]=$value1; // equivalent to: $cache->set(’var1’,$value1);
$value2=$cache[’var2’]; // equivalent to: $value2=$cache->get(’var2’);
5.2.1 Cache Dependency
Besides expiration setting, cached data may also be invalidated according to some depen-dency changes. For example, if we are caching the content of some file and the file ischanged, we should invalidate the cached copy and read the latest content from the fileinstead of the cache.
We represent a dependency as an instance of CCacheDependency or its child class. Wepass the dependency instance along with the data to be cached when calling set().
// the value will expire in 30 seconds

76 5. Caching
// it may also be invalidated earlier if the dependent file is changed
Yii::app()->cache->set($id, $value, 30, new CFileCacheDependency(’FileName’));
Now if we retrieve $value from cache by calling get(), the dependency will be evaluatedand if it is changed, we will get a false value, indicating the data needs to be regenerated.
Below is a summary of the available cache dependencies:
• CFileCacheDependency: the dependency is changed if the file’s last modificationtime is changed.
• CDirectoryCacheDependency: the dependency is changed if any of the files underthe directory and its subdirectories is changed.
• CDbCacheDependency: the dependency is changed if the query result of the specifiedSQL statement is changed.
• CGlobalStateCacheDependency: the dependency is changed if the value of the spec-ified global state is changed. A global state is a variable that is persistent acrossmultiple requests and multiple sessions in an application. It is defined via CAppli-cation::setGlobalState().
• CChainedCacheDependency: the dependency is changed if any of the dependencieson the chain is changed.
5.3 Fragment Caching
Fragment caching refers to caching a fragment of a page. For example, if a page displaysa summary of yearly sale in a table, we can store this table in cache to eliminate the timeneeded to generate it for each request.
To use fragment caching, we call CController::beginCache() and CController::endCache()in a controller’s view script. The two methods mark the beginning and the end of the pagecontent that should be cached, respectively. Like data caching, we need an ID to identifythe fragment being cached.
...other HTML content...
<?php if($this->beginCache($id)) { ?>
...content to be cached...
<?php $this->endCache(); } ?>
...other HTML content...

5.3 Fragment Caching 77
In the above, if beginCache() returns false, the cached content will be automatically in-serted at the place; otherwise, the content inside the if-statement will be executed andbe cached when endCache() is invoked.
5.3.1 Caching Options
When calling beginCache(), we can supply an array as the second parameter consistingof caching options to customize the fragment caching. As a matter of fact, the begin-Cache() and endCache() methods are a convenient wrapper of the COutputCache widget.Therefore, the caching options can be initial values for any properties of COutputCache.
Duration
Perhaps the most commonly option is duration which specifies how long the content canremain valid in cache. It is similar to the expiration parameter of CCache::set(). Thefollowing code caches the content fragement for at most one hour:
...other HTML content...
<?php if($this->beginCache($id, array(’duration’=>3600))) { ?>
...content to be cached...
<?php $this->endCache(); } ?>
...other HTML content...
If we do not set the duration, it would default to 60, meaning the cached content will beinvalidated after 60 seconds.
Dependency
Like data caching, content fragment being cached can also have dependencies. For exam-ple, the content of a post being displayed depends on whether or not the post is modified.
To specify a dependency, we set the dependency option, which can be either an objectimplementing ICacheDependency or a configuration array that can be used to generatethe dependency object. The following code specifies the fragment content depends on thechange of lastModified column value:
...other HTML content...
<?php if($this->beginCache($id, array(’dependency’=>array(
’class’=>’system.caching.dependencies.CDbCacheDependency’,
’sql’=>’SELECT MAX(lastModified) FROM Post’)))) { ?>

78 5. Caching
...content to be cached...
<?php $this->endCache(); } ?>
...other HTML content...
Variation
Content being cached may be variated according to some parameters. For example, thepersonal profile may look differently to different users. To cache the profile content, wewould like the cached copy to be variated according to user IDs. This essentially meansthat we should use different IDs when calling beginCache().
Instead of asking developers to variate the IDs according to some scheme, COutputCacheis built-in with such a feature. Below is a summary.
• varyByRoute: by setting this option to true, the cached content will be variatedaccording to route. Therefore, each combination of the requested controller andaction will have a separate cached content.
• varyBySession: by setting this option to true, we can make the cached content tobe variated according to session IDs. Therefore, each user session may see differentcontent and they are all served from cache.
• varyByParam: by setting this option to an array of names, we can make the cachedcontent to be variated according to the values of the specified GET parameters. Forexample, if a page displays the content of a post according to the id GET parameter,we can specify varyByParam to be array(’id’) so that we can cache the content foreach post. Without such variation, we would only be able to cache a single post.
Request Types
Sometimes we want the fragment caching to be enabled only for certain types of request.For example, for a page displaying a form, we only want to cache the form when it isinitially requested (via GET request). Any subsequent display (via POST request) of theform should not be cached because the form may contain user input. To do so, we canspecify the requestTypes option:
...other HTML content...
<?php if($this->beginCache($id, array(’requestTypes’=>array(’GET’)))) { ?>
...content to be cached...
<?php $this->endCache(); } ?>
...other HTML content...

5.4 Page Caching 79
5.3.2 Nested Caching
Fragment caching can be nested. That is, a cached fragment is enclosed within a biggerfragment that is also cached. For example, the comments are cached in an inner fragmentcache, and they are cached together with the post content in an outer fragment cache.
...other HTML content...
<?php if($this->beginCache($id1)) { ?>
...outer content to be cached...
<?php if($this->beginCache($id2)) { ?>
...inner content to be cached...
<?php $this->endCache(); } ?>
...outer content to be cached...
<?php $this->endCache(); } ?>
...other HTML content...
Different caching options can be set to the nested caches. For example, the inner cacheand the outer cache in the above example can be set with different duration values. Whenthe data cached in the outer cache is invalidated, the inner cache may still provide validinner fragment. However, it is not true vice versa. If the outer cache contains valid data,it will always provide the cached copy, even though the content in the inner cache alreadyexpires.
5.4 Page Caching
Page caching refers to caching the content of a whole page. Page caching can occur atdifferent places. For example, by choosing an appropriate page header, the client browsermay cache the page being viewed for a limited time. The Web application itself can alsostore the page content in cache. In this subsection, we focus on this latter approach.
Page caching can be considered as a special case of fragment caching. Because the contentof a page is often generated by applying a layout to a view, it will not work if we simply callbeginCache() and endCache() in the layout. The reason is because the layout is appliedwithin the CController::render() method AFTER the content view is evaluated.
To cache a whole page, we should skip the execution of the action generating the pagecontent. We can use COutputCache as an action filter to accomplish this task. Thefollowing code shows how we configure the cache filter:
public function filters()
{return array(

80 5. Caching
array(
’system.web.widgets.COutputCache’,
’duration’=>100,
’varyByParam’=>array(’id’),
),
);
}
The above filter configuration would make the filter to be applied to all actions in thecontroller. We may limit it to one or a few actions only by using the plus operator. Moredetails can be found in filter.
Tip: We can use COutputCache as a filter because it extends from CFilterWidget,which means it is both a widget and a filter. In fact, the way a widget works isvery similar to a filter: a widget (filter) begins before any enclosed content (ac-tion) is evaluated, and the widget (filter) ends after the enclosed content (action) isevaluated.
5.5 Dynamic Content
When using fragment caching or page caching, we often encounter the situation where thewhole portion of the output is relatively static except at one or several places. For example,a help page may display static help information with the name of the user currently loggedin displayed at the top.
To solve this issue, we can variate the cache content according to the username, butthis would be a big waste of our precious cache space since most content are the sameexcept the username. We can also divide the page into several fragments and cache themindividually, but this complicates our view and makes our code very complex. A betterapproach is to use the dynamic content feature provided by CController.
A dynamic content means a fragment of output that should not be cached even if it isenclosed within a fragment cache. To make the content dynamic all the time, it has tobe generated every time even when the enclosing content is being served from cache. Forthis reason, we require that dynamic content be generated by some method or function.
We call CController::renderDynamic() to insert dynamic content at the desired place.
...other HTML content...
<?php if($this->beginCache($id)) { ?>
...fragment content to be cached...
<?php $this->renderDynamic($callback); ?>

5.5 Dynamic Content 81
...fragment content to be cached...
<?php $this->endCache(); } ?>
...other HTML content...
In the above, $callback refers to a valid PHP callback. It can be a string referring tothe name of a method in the current controller class or a global function. It can also bean array referring to a class method. Any additional parameters to renderDynamic() willbe passed to the callback. The callback should return the dynamic content instead ofdisplaying it.

82 5. Caching

Chapter 6
Extending Yii
6.1 Overview
Extending Yii is a common activity during development. For example, when you write anew controller, you extend Yii by inheriting its CController class; when you write a newwidget, you are extending CWidget or an existing widget class. If the extended code isdesigned to be reused by third-party developers, we call it an extension.
An extension usually serves for a single purpose. In Yii’s terms, it can be classified asfollows,
• application component
• widget
• controller
• action
• filter
• console command
• validator: a validator is a component class extending CValidator.
• helper: a helper is a class with only static methods. It is like global functions usingthe class name as their namespace.
• module: a module is a self-contained software unit that consists of models, views,controllers and other supporting components. In many aspects, a module resemblesto an application. The main difference is that a module is inside an application. Forexample, we could have a module that provides user management functionalities.

84 6. Extending Yii
An extension can also be a component that does not fall into any of the above categories.As a matter of fact, Yii is carefully designed such that nearly every piece of its code canbe extended and customized to fit for individual needs.
6.2 Using Extensions
Using an extension usually involves the following three steps:
1. Download the extension from Yii’s extension repository.
2. Unpack the extension under the extensions/xyz subdirectory of application basedirectory, where xyz is the name of the extension.
3. Import, configure and use the extension.
Each extension has a name that uniquely identifies it among all extensions. Given anextension named as xyz, we can always use the path alias application.extensions.xyz tolocate its base directory which contains all files of xyz.
Different extensions have different requirements about importing, configuration and usage.In the following, we summarize common usage scenarios about extensions, according totheir categorization described in the overview.
6.2.1 Application Component
To use an application component, we first need to change the application configuration byadding a new entry to its components property, like the following:
return array(
// ’preload’=>array(’xyz’,...),
’components’=>array(
’xyz’=>array(
’class’=>’application.extensions.xyz.XyzClass’,
’property1’=>’value1’,
’property2’=>’value2’,
),
// other component configurations
),
);
Then, we can access the component at any place using Yii::app()->xyz. The componentwill be lazily created (that is, created when it is accessed for the first time) unless we listit the preload property.

6.2 Using Extensions 85
6.2.2 Widget
Widgets are mainly used in views. Given a widget class XyzClass belonging to the xyz
extension, we can use it in a view as follows,
// widget that does not need body content
<?php $this->widget(’application.extensions.xyz.XyzClass’, array(
’property1’=>’value1’,
’property2’=>’value2’)); ?>
// widget that can contain body content
<?php $this->beginWidget(’application.extensions.xyz.XyzClass’, array(
’property1’=>’value1’,
’property2’=>’value2’)); ?>
...body content of the widget...
<?php $this->endWidget(); ?>
6.2.3 Action
Actions are used by a controller to respond specific user requests. Given an actionclass XyzClass belonging to the xyz extension, we can use it by overriding the CCon-troller::actions method in our controller class:
class TestController extends CController
{public function actions()
{return array(
’xyz’=>array(
’class’=>’application.extensions.xyz.XyzClass’,
’property1’=>’value1’,
’property2’=>’value2’,
),
// other actions
);
}}
Then, the action can be accessed via route test/xyz.
6.2.4 Filter
Filters are also used by a controller. Their mainly pre- and post-process the user re-quest when it is handled by an action. Given a filter class XyzClass belonging to the xyz

86 6. Extending Yii
extension, we can use it by overriding the CController::filters method in our controllerclass:
class TestController extends CController
{public function filters()
{return array(
array(
’application.extensions.xyz.XyzClass’,
’property1’=>’value1’,
’property2’=>’value2’,
),
// other filters
);
}}
In the above, we can use plus and minus operators in the first array element to applythe filter to limited actions only. For more details, please refer to the documentation ofCController.
6.2.5 Controller
A controller provides a set of actions that can be requested by users. In order to use acontroller extension, we need to configure the CWebApplication::controllerMap propertyin the application configuration:
return array(
’controllerMap’=>array(
’xyz’=>array(
’class’=>’application.extensions.xyz.XyzClass’,
’property1’=>’value1’,
’property2’=>’value2’,
),
// other controllers
),
);
Then, an action a in the controller can be accessed via route xyz/a.
6.2.6 Validator
A validator is mainly used in a model class (one that extends from either CFormModel orCActiveRecord). Given a validator class XyzClass belonging to the xyz extension, we can

6.2 Using Extensions 87
use it by overriding the CModel::rules method in our model class:
class MyModel extends CActiveRecord // or CFormModel
{public function rules()
{return array(
array(
’attr1, attr2’,
’application.extensions.xyz.XyzClass’,
’property1’=>’value1’,
’property2’=>’value2’,
),
// other validation rules
);
}}
6.2.7 Console Command
A console command extension usually enhances the yiic tool with an additional command.Given a console command XyzClass belonging to the xyz extension, we can use it byconfiguring the configuration for the console application:
return array(
’commandMap’=>array(
’xyz’=>array(
’class’=>’application.extensions.xyz.XyzClass’,
’property1’=>’value1’,
’property2’=>’value2’,
),
// other commands
),
);
Then, we can use the yiic tool is equipped with an additional command xyz.
Note: A console application usually uses a configuration file that is different fromthe one used by a Web application. If an application is created using yiic webapp
command, then the configuration file for the console application protected/yiic
is protected/config/console.php, while the configuration file for the Web appli-cation is protected/config/main.php.

88 6. Extending Yii
6.2.8 Module
Please refer to the section about modules on how to use a module.
6.2.9 Generic Component
To use a generic component, we first need to include its class file by using
Yii::import(’application.extensions.xyz.XyzClass’);
Then, we can either create an instance of the class, configure its properties, and call itsmethods. We may also extend it to create new child classes.
6.3 Creating Extensions
Because an extension is meant to be used by third-party developers, it takes some addi-tional efforts to create it. The followings are some general guidelines:
• An extension should be self-contained. That is, its external dependency should beminimal. It would be a headache for its users if an extension requires installation ofadditional packages, classes or resource files.
• Files belonging to an extension should be organized under the same directory whosename is the extension name
• Classes in an extension should be prefixed with some letter(s) to avoid namingconflict with classes in other extensions.
• An extension should come with detailed installation and API documentation. Thiswould reduce the time and effort needed by other developers when they use theextension.
• An extension should be using an appropriate license. If you want to make your ex-tension to be used by both open-source and closed-source projects, you may considerusing licenses such as BSD, MIT, etc., but not GPL as it requires its derived codeto be open-source as well.
In the following, we describe how to create a new extension, according to its categorizationas described in overview. These descriptions also apply when you are creating a componentmainly used in your own projects.

6.3 Creating Extensions 89
6.3.1 Application Component
An application component should implement the interface IApplicationComponent or ex-tend from CApplicationComponent. The main method needed to be implemented is IAp-plicationComponent::init in which the component performs some initialization work. Thismethod is invoked after the component is created and the initial property values (specifiedin application configuration) are applied.
By default, an application component is created and initialized only when it is accessed forthe first time during request handling. If an application component needs to be createdright after the application instance is created, it should require the user to list its ID inthe CApplication::preload property.
6.3.2 Widget
A widget should extend from CWidget or its child classes.
The easiest way of creating a new widget is extending an existing widget and overridingits methods or changing its default property values. For example, if you want to use anicer CSS style for CTabView, you could configure its CTabView::cssFile property whenusing the widget. You can also extend CTabView as follows so that you no longer need toconfigure the property when using the widget.
class MyTabView extends CTabView
{public function init()
{if($this->cssFile===null)
{$file=dirname( FILE ).DIRECTORY SEPARATOR.’tabview.css’;
$this->cssFile=Yii::app()->getAssetManager()->publish($file);
}parent::init();
}}
In the above, we override the CWidget::init method and assign to CTabView::cssFile theURL to our new default CSS style if the property is not set. We put the new CSS style fileunder the same directory containing the MyTabView class file so that they can be packagedas an extension. Because the CSS style file is not Web accessible, we need to publish asan asset.
To create a new widget from scratch, we mainly need to implement two methods: CWid-get::init and CWidget::run. The first method is called when we use $this->beginWidget to

90 6. Extending Yii
insert a widget in a view, and the second method is called when we call $this->endWidget.If we want to capture and process the content displayed between these two method invo-cations, we can start output buffering in CWidget::init and retrieve the buffered outputin CWidget::run for further processing.
A widget often involves including CSS, JavaScript or other resource files in the page thatuses the widget. We call these files assets because they stay together with the widgetclass file and are usually not accessible by Web users. In order to make these files Webaccessible, we need to publish them using CWebApplication::assetManager, as shown inthe above code snippet. Besides, if we want to include a CSS or JavaScript file in thecurrent page, we need to register it using CClientScript:
class MyWidget extends CWidget
{protected function registerClientScript()
{// ...publish CSS or JavaScript file here...
$cs=Yii::app()->clientScript;
$cs->registerCssFile($cssFile);
$cs->registerScriptFile($jsFile);
}}
A widget may also have its own view files. If so, create a directory named views under thedirectory containing the widget class file, and put all the view files there. In the widgetclass, in order to render a widget view, use $this->render(’ViewName’), which is similarto what we do in a controller.
6.3.3 Action
An action should extend from CAction or its child classes. The main method that needsto be implemented for an action is IAction::run.
6.3.4 Filter
A filter should extend from CFilter or its child classes. The main methods that need tobe implemented for a filter are CFilter::preFilter and CFilter::postFilter. The former isinvoked before the action is executed while the latter after.
class MyFilter extends CFilter
{protected function preFilter($filterChain)

6.3 Creating Extensions 91
{// logic being applied before the action is executed
return true; // false if the action should not be executed
}
protected function postFilter($filterChain)
{// logic being applied after the action is executed
}}
The parameter $filterChain is of type CFilterChain which contains information aboutthe action that is currently filtered.
6.3.5 Controller
A controller distributed as an extension should extend from CExtController, instead ofCController. The main reason is because CController assumes the controller view filesare located under application.views.ControllerID, while CExtController assumes theview files are located under the views directory which is a subdirectory of the directorycontaining the controller class file. Therefore, it is easier to redistribute the controllersince its view files are staying together with the controller class file.
6.3.6 Validator
A validator should extend from CValidator and implement its CValidator::validateAttributemethod.
class MyValidator extends CValidator
{protected function validateAttribute($model,$attribute)
{$value=$model->$attribute;
if($value has error)
$model->addError($attribute,$errorMessage);
}}
6.3.7 Console Command
A console command should extend from CConsoleCommand and implement its CConsoleCom-mand::run method. Optionally, we can override CConsoleCommand::getHelp to providesome nice help information about the command.

92 6. Extending Yii
class MyCommand extends CConsoleCommand
{public function run($args)
{// $args gives an array of the command-line arguments for this command
}
public function getHelp()
{return ’Usage: how to use this command’;
}}
6.3.8 Module
Please refer to the section about modules on how to create a module.
A general guideline for developing a module is that it should be self-contained. Resourcefiles (such as CSS, JavaScript, images) that are used by a module should be distributedtogether with the module. And the module should publish them so that they can beWeb-accessible.
6.3.9 Generic Component
Developing a generic component extension is like writing a class. Again, the componentshould also be self-contained so that it can be easily used by other developers.
6.4 Using 3rd-Party Libraries
Yii is carefully designed so that third-party libraries can be easily integrated to furtherextend Yii’s functionalities. When using third-party libraries in a project, developers oftenencounter issues about class naming and file inclusion. Because all Yii classes are prefixedwith letter C, it is less likely class naming issue would occur; and because Yii relies on SPLautoload to perform class file inclusion, it can play nicely with other libraries if they usethe same autoloading feature or PHP include path to include class files.
Below we use an example to illustrate how to use the Zend Search Lucene component fromthe Zend framework in an Yii application.
First, we extract the Zend framework release file to a directory under protected/vendors,assuming protected is the application base directory. Verify that the file protected/
vendors/Zend/Search/Lucene.php exists.
Second, at the beginning of a controller class file, insert the following lines:

6.4 Using 3rd-Party Libraries 93
Yii::import(’application.vendors.*’);
require once(’Zend/Search/Lucene.php’);
The above code includes the class file Lucene.php. Because we are using a relative path,we need to change the PHP include path so that the file can be located correctly. This isdone by calling Yii::import before require once.
Once the above set up is ready, we can use the Lucene class in a controller action, like thefollowing:
$lucene=new Zend Search Lucene($pathOfIndex);
$hits=$lucene->find(strtolower($keyword));

94 6. Extending Yii
Chapter 7
Special Topics
7.1 URL Management
Complete URL management for a Web application involves two aspects. First, when a userrequest comes in terms of a URL, the application needs to parse it into understandableparameters. Second, the application needs to provide a way of creating URLs so that thecreated URLs can be understood by the application. For an Yii application, these areaccomplished with the help of CUrlManager.
7.1.1 Creating URLs
Although URLs can be hardcoded in controller views, it is often more flexible to createthem dynamically:
$url=$this->createUrl($route,$params);
where $this refers to the controller instance; $route specifies the route of the request; and$params is a list of GET parameters to be appended to the URL.
By default, URLs created by createUrl is in the so-called get format. For example, given$route=’post/read’ and $params=array(’id’=>100), we would obtain the following URL:
/index.php?r=post/read&id=100
where parameters appear in the query string as a list of Name=Value concatenated with theampersand characters, and the r parameter specifies the request route. This URL formatis not very user-friendly because it requires several non-word characters.
We could make the above URL look cleaner and more self-explanatory by using the so-called path format which eliminates the query string and puts the GET parameters intothe path info part of URL:

96 7. Special Topics
/index.php/post/read/id/100
To change the URL format, we should configure the urlManager application componentso that createUrl can automatically switch to the new format and the application canproperly understand the new URLs:
array(
......
’components’=>array(
......
’urlManager’=>array(
’urlFormat’=>’path’,
),
),
);
Note that we do not need to specify the class of the urlManager component because it ispre-declared as CUrlManager in CWebApplication.
Tip: The URL generated by the createUrl method is a relative one. In order to getan absolute URL, we can prefix it with Yii::app()->hostInfo, or call createAb-soluteUrl.
7.1.2 User-friendly URLs
When path is used as the URL format, we can specify some URL rules to make our URLseven more user-friendly. For example, we can generate a URL as short as /post/100,instead of the lengthy /index.php/post/read/id/100. URL rules are used by CUrlManagerfor both URL creation and parsing purposes.
To specify URL rules, we need to configure the rules property of the urlManager applicationcomponent:
array(
......
’components’=>array(
......
’urlManager’=>array(
’urlFormat’=>’path’,
’rules’=>array(
’pattern1’=>’route1’,
’pattern2’=>’route2’,

7.1 URL Management 97
’pattern3’=>’route3’,
),
),
),
);
The rules are specified as an array of pattern-route pairs, each corresponding to a singlerule. The pattern of a rule must be a valid regular expression without delimiters andmodifiers. It is used to match the path info part of URLs. And the route should refer toa valid controller route.
A rule can be associated with a few GET parameters. These GET parameters appear inthe rule’s pattern as special tokens of the following format:
<ParamName:ParamPattern>
where ParamName specifies the name of a GET parameter, and the optional ParamPatternspecifies the regular expression that should be used to match the value of the GET pa-rameter. When creating a URL, these parameter tokens will be replaced with the corre-sponding parameter values; when parsing a URL, the corresponding GET parameters willbe populated with the parsed results.
Let’s use some examples to explain how URL rules work. We assume that our rule setconsists of three rules:
array(
’posts’=>’post/list’,
’post/<id:\d+>’=>’post/read’,’post/<year:\d{4}>/<title>’=>’post/read’,
)
• Calling $this->createUrl(’post/list’) generates /index.php/posts. The first ruleis applied.
• Calling $this->createUrl(’post/read’,array(’id’=>100)) generates /index.php/post/100. The second rule is applied.
• Calling $this->createUrl(’post/read’,array(’year’=>2008,’title’=>’a sample post’))
generates /index.php/post/2008/a%20sample%20post. The third rule is applied.
• Calling $this->createUrl(’post/read’) generates /index.php/post/read. None ofthe rules is applied.

98 7. Special Topics
In summary, when using createUrl to generate a URL, the route and the GET parameterspassed to the method are used to decide which URL rule to be applied. If every parameterassociated with a rule can be found in the GET parameters passed to createUrl, and ifthe route of the rule also matches the route parameter, the rule will be used to generatethe URL.
If the GET parameters passed to createUrl are more than those required by a rule, the addi-tional parameters will appear in the query string. For example, if we call $this->createUrl(’post/read’,array(’id’=>100,’year’=>2008)), we would obtain /index.php/post/100?year=2008.In order to make these additional parameters appear in the path info part, we should ap-pend /* to the rule. Therefore, with the rule post/<id:\d+>/*, we can obtain the URL as/index.php/post/100/year/2008.
As we mentioned, the other purpose of URL rules is to parse the requesting URLs. Nat-urally, this is an inverse process of URL creation. For example, when a user requests for/index.php/post/100, the second rule in the above example will apply, which resolves inthe route post/read and the GET parameter array(’id’=>100) (accessible via $ GET).
Note: Using URL rules will degrade application performance. This is because whenparsing the request URL, CUrlManager will attempt to match it with each rule untilone can be applied. Therefore, a high-traffic Web application should minimize itsuse of URL rules.
Hiding index.php
There is one more thing that we can do to further clean our URLs, i.e., hiding the entryscript index.php in the URL. This requires us to configure the Web server as well as theurlManager application component.
We first need to configure the Web server so that a URL without the entry script can stillbe handled by the entry script. For Apache HTTP server, this can be done by turningon the URL rewriting engine and specifying some rewriting rules. Both can be in a .
htaccess file that is placed under the directory containing the entry script. The followingis an example:
Options +FollowSymLinks
IndexIgnore */*
RewriteEngine on
# if a directory or a file exists, use it directly
RewriteCond %{REQUEST_FILENAME} !-f

7.2 Authentication and Authorization 99
RewriteCond %{REQUEST_FILENAME} !-d
# otherwise forward it to index.php
RewriteRule . index.php
We then configure the showScriptName property of the urlManager component to befalse.
Now if we call $this->createUrl(’post/read’,array(’id’=>100)), we would obtain theURL /post/100. More importantly, this URL can be properly recognized by our Webapplication.
Faking URL Suffix
We may also add some suffix to our URLs. For example, we can have /post/100.html
instead of /post/100. This makes it look more like a URL to a static Web page. To do so,simply configure the urlManager component by setting its urlSuffix property to the suffixyou like.
7.2 Authentication and Authorization
Authentication and authorization are required for a Web page that should be limited tocertain users. Authentication is about verifying whether someone is who he claims heis. It usually involves a username and a password, but may include any other methods ofdemonstrating identity, such as a smart card, fingerprints, etc. Authorization is finding outif the person, once identified (authenticated), is permitted to manipulate specific resources.This is usually determined by finding out if that person is of a particular role that hasaccess to the resources.
Yii has a built-in authentication/authorization (auth) framework which is easy to use andcan be customized for special needs.
The central piece in the Yii auth framework is a pre-declared user application componentwhich is an object implementing the IWebUser interface. The user component representsthe persistent identity information for the current user. We can access it at any placeusing Yii::app()->user.
Using the user component, we can check if a user is logged in or not via CWebUser::isGuest;we can login and logout a user; we can check if the user can perform specific operationsby calling CWebUser::checkAccess; and we can also obtain the unique identifier and otherpersistent identity information about the user.
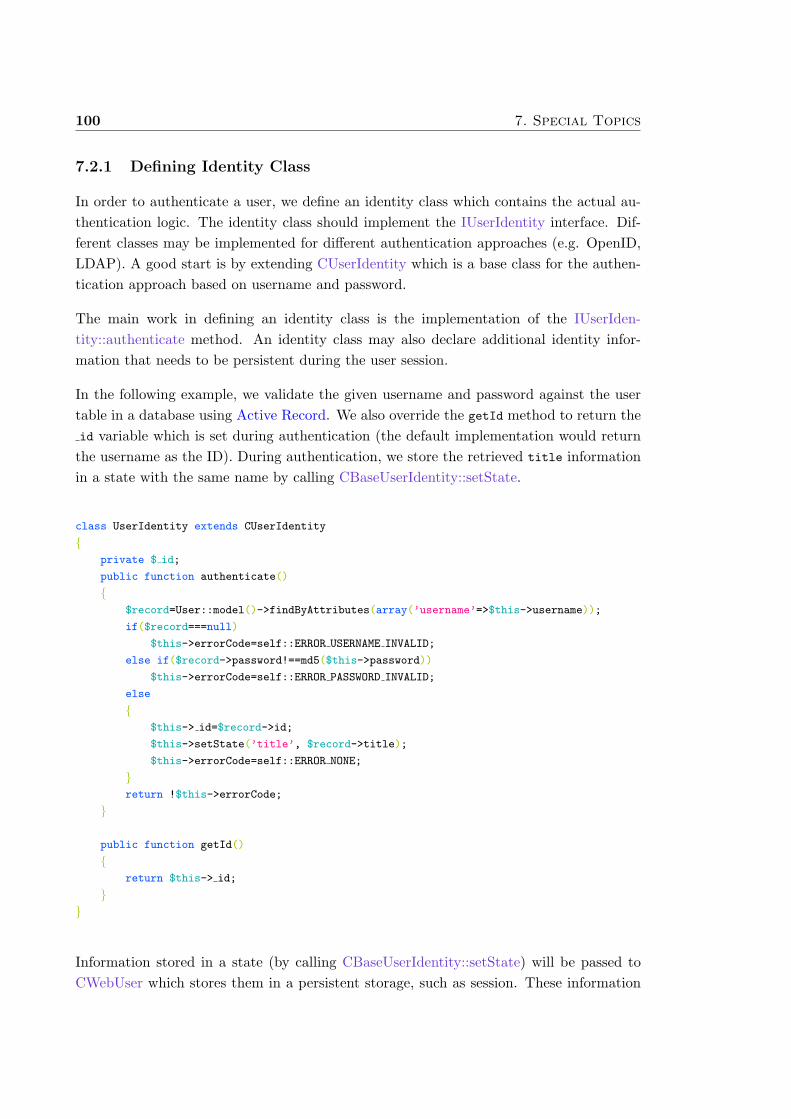
100 7. Special Topics
7.2.1 Defining Identity Class
In order to authenticate a user, we define an identity class which contains the actual au-thentication logic. The identity class should implement the IUserIdentity interface. Dif-ferent classes may be implemented for different authentication approaches (e.g. OpenID,LDAP). A good start is by extending CUserIdentity which is a base class for the authen-tication approach based on username and password.
The main work in defining an identity class is the implementation of the IUserIden-tity::authenticate method. An identity class may also declare additional identity infor-mation that needs to be persistent during the user session.
In the following example, we validate the given username and password against the usertable in a database using Active Record. We also override the getId method to return theid variable which is set during authentication (the default implementation would return
the username as the ID). During authentication, we store the retrieved title informationin a state with the same name by calling CBaseUserIdentity::setState.
class UserIdentity extends CUserIdentity
{private $ id;
public function authenticate()
{$record=User::model()->findByAttributes(array(’username’=>$this->username));
if($record===null)
$this->errorCode=self::ERROR USERNAME INVALID;
else if($record->password!==md5($this->password))
$this->errorCode=self::ERROR PASSWORD INVALID;
else
{$this-> id=$record->id;
$this->setState(’title’, $record->title);
$this->errorCode=self::ERROR NONE;
}return !$this->errorCode;
}
public function getId()
{return $this-> id;
}}
Information stored in a state (by calling CBaseUserIdentity::setState) will be passed toCWebUser which stores them in a persistent storage, such as session. These information
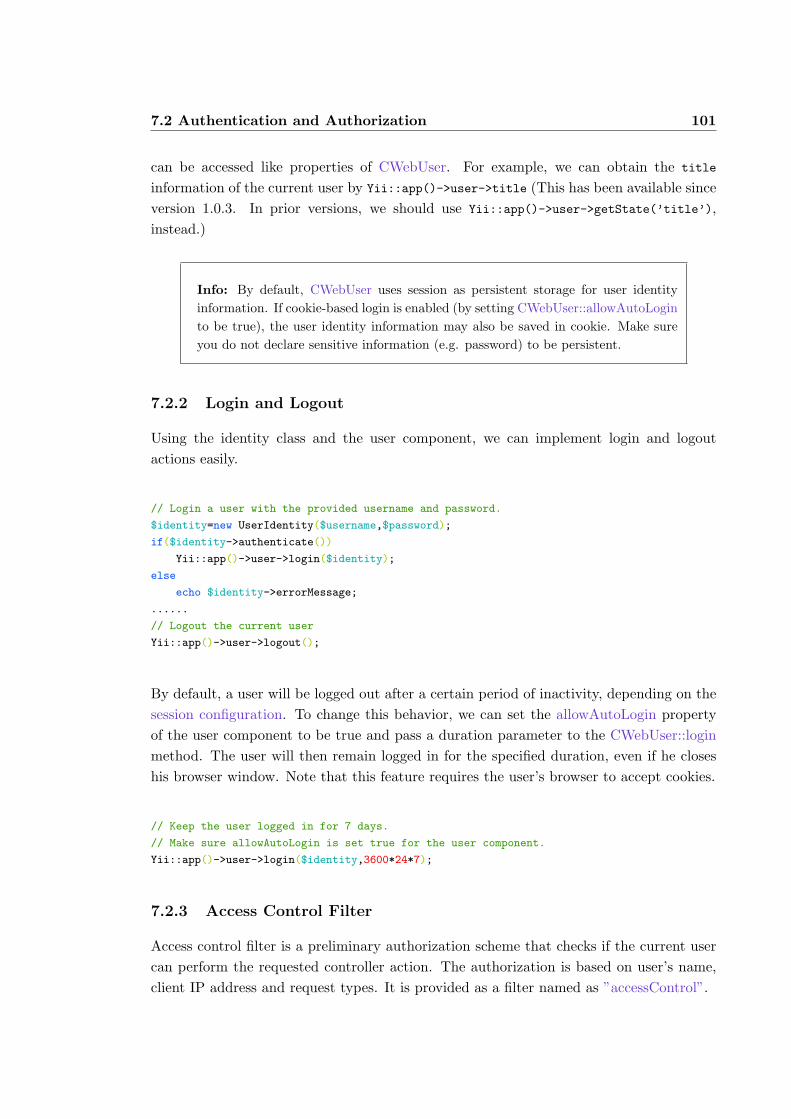
7.2 Authentication and Authorization 101
can be accessed like properties of CWebUser. For example, we can obtain the title
information of the current user by Yii::app()->user->title (This has been available sinceversion 1.0.3. In prior versions, we should use Yii::app()->user->getState(’title’),instead.)
Info: By default, CWebUser uses session as persistent storage for user identityinformation. If cookie-based login is enabled (by setting CWebUser::allowAutoLoginto be true), the user identity information may also be saved in cookie. Make sureyou do not declare sensitive information (e.g. password) to be persistent.
7.2.2 Login and Logout
Using the identity class and the user component, we can implement login and logoutactions easily.
// Login a user with the provided username and password.
$identity=new UserIdentity($username,$password);
if($identity->authenticate())
Yii::app()->user->login($identity);
else
echo $identity->errorMessage;
......
// Logout the current user
Yii::app()->user->logout();
By default, a user will be logged out after a certain period of inactivity, depending on thesession configuration. To change this behavior, we can set the allowAutoLogin propertyof the user component to be true and pass a duration parameter to the CWebUser::loginmethod. The user will then remain logged in for the specified duration, even if he closeshis browser window. Note that this feature requires the user’s browser to accept cookies.
// Keep the user logged in for 7 days.
// Make sure allowAutoLogin is set true for the user component.
Yii::app()->user->login($identity,3600*24*7);
7.2.3 Access Control Filter
Access control filter is a preliminary authorization scheme that checks if the current usercan perform the requested controller action. The authorization is based on user’s name,client IP address and request types. It is provided as a filter named as ”accessControl”.

102 7. Special Topics
Tip: Access control filter is sufficient for simple scenarios. For complex accesscontrol, you may use role-based access (RBAC) which is to be covered shortly.
To control the access to actions in a controller, we install the access control filter byoverriding CController::filters (see Filter for more details about installing filters).
class PostController extends CController
{......
public function filters()
{return array(
’accessControl’,
);
}}
In the above, we specify that the access control filter should be applied to every actionof PostController. The detailed authorization rules used by the filter are specified byoverriding CController::accessRules in the controller class.
class PostController extends CController
{......
public function accessRules()
{return array(
array(’deny’,
’actions’=>array(’create’, ’edit’),
’users’=>array(’?’),
),
array(’allow’,
’actions’=>array(’delete’),
’roles’=>array(’admin’),
),
array(’deny’,
’actions’=>array(’delete’),
’users’=>array(’*’),
),
);
}}
The above code specifies three rules, each represented as an array. The first element ofthe array is either ’allow’ or ’deny’ and the rest name-value pairs specify the pattern

7.2 Authentication and Authorization 103
parameters of the rule. These rules read: the create and edit actions cannot be executedby anonymous users; the delete action can be executed by users with admin role; and thedelete action cannot be executed by anyone.
The access rules are evaluated one by one in the order they are specified. The first rulethat matches the current pattern (e.g. username, roles, client IP, address) determines theauthorization result. If this rule is an allow rule, the action can be executed; if it is a deny
rule, the action cannot be executed; if none of the rules matches the context, the actioncan still be executed.
Tip: To ensure an action does not get executed under certain contexts, it is ben-eficial to always specify a matching-all deny rule at the end of rule set, like thefollowing:
return array(
// ... other rules...
// the following rule denies ’delete’ action for all contexts
array(’deny’,
’action’=>’delete’,
),
);
The reason for this rule is because if none of the rules matches a context, an actionwill be executed.
An access rule can match the following context parameters:
• actions: specifies which actions this rule matches.
• users: specifies which users this rule matches. The current user’s name is used formatching. Three special characters can be used here:
– *: any user, including both anonymous and authenticated users.
– ?: anonymous users.
– @: authenticated users.
• roles: specifies which roles that this rule matches. This makes use of the featureto be described in the next subsection. In particular, the rule is applied if CWe-bUser::checkAccess returns true for one of the roles. Note, you should mainly useroles in an allow rule because by definition, a role represents a permission to dosomething.
• ips: specifies which client IP addresses this rule matches.

104 7. Special Topics
• verbs: specifies which request types (e.g. GET, POST) this rule matches.
• expression: specifies a PHP expression whose value indicates whether this rulematches. In the expression, you can use variable $user which refers to Yii::app()->user.This option has been available since version 1.0.3.
Handling Authorization Result
When authorization fails, i.e., the user is not allowed to perform the specified action, oneof the following two scenarios may happen:
• If the user is not logged in and if the loginUrl property of the user component isconfigured to be the URL of the login page, the browser will be redirected to thatpage.
• Otherwise an HTTP exception will be displayed with error code 401.
When configuring the loginUrl property, one can provide a relative or absolute URL. Onecan also provide an array which will be used to generate a URL by calling CWebAppli-cation::createUrl. The first array element should specify the route to the login controlleraction, and the rest name-value pairs are GET parameters. For example,
array(
......
’components’=>array(
’user’=>array(
// this is actually the default value
’loginUrl’=>array(’site/login’),
),
),
)
If the browser is redirected to the login page and the login is successful, we may want toredirect the browser back to the page that caused the authorization failure. How do weknow the URL for that page? We can get this information from the returnUrl propertyof the user component. We can thus do the following to perform the redirection:
Yii::app()->request->redirect(Yii::app()->user->returnUrl);

7.2 Authentication and Authorization 105
7.2.4 Role-Based Access Control
Role-Based Access Control (RBAC) provides a simple yet powerful centralized accesscontrol. Please refer to the Wiki article for more details about comparing RBAC withother more traditional access control schemes.
Yii implements a hierarchical RBAC scheme via its authManager application component.In the following ,we first introduce the main concepts used in this scheme; we then describehow to define authorization data; at the end we show how to make use of the authorizationdata to perform access checking.
Overview
A fundamental concept in Yii’s RBAC is authorization item. An authorization item is apermission to do something (e.g. creating new blog posts, managing users). According toits granularity and targeted audience, authorization items can be classified as operations,tasks and roles. A role consists of tasks, a task consists of operations, and an operation isa permission that is atomic. For example, we can have a system with administrator rolewhich consists of post management task and user management task. The user management
task may consist of create user, update user and delete user operations. For moreflexibility, Yii also allows a role to consist of other roles or operations, a task to consist ofother tasks, and an operation to consist of other operations.
An authorization item is uniquely identified by its name.
An authorization item may be associated with a business rule. A business rule is a piece ofPHP code that will be executed when performing access checking with respect to the item.Only when the execution returns true, will the user be considered to have the permissionrepresented by the item. For example, when defining an operation updatePost, we wouldlike to add a business rule that checks if the user ID is the same as the post’s author IDso that only the author himself can have the permission to update a post.
Using authorization items, we can build up an authorization hierarchy. An item A is a par-ent of another item B in the hierarchy if A consists of B (or say A inherits the permission(s)represented by B). An item can have multiple child items, and it can also have multipeparent items. Therefore, an authorization hierarchy is a partial-order graph rather than atree. In this hierarchy, role items sit on top levels, operation items on bottom levels, whiletask items in between.
Once we have an authorization hierarchy, we can assign roles in this hierarchy to appli-cation users. A user, once assigned with a role, will have the permissions represented by

106 7. Special Topics
the role. For example, if we assign the administrator role to a user, he will have theadministrator permissions which include post management and user management (and thecorresponding operations such as create user).
Now the fun part starts. In a controller action, we want to check if the current user candelete the specified post. Using the RBAC hierarchy and assignment, this can be doneeasily as follows:
if(Yii::app()->user->checkAccess(’deletePost’))
{// delete the post
}
Configuring Authorization Manager
Before we set off to define an authorization hierarchy and perform access checking, weneed to configure the authManager application component. Yii provides two types ofauthorization managers: CPhpAuthManager and CDbAuthManager. The former uses aPHP script file to store authorization data, while the latter stores authorization data indatabase. When we configure the authManager application component, we need to specifywhich component class to use and what are the initial property values for the component.For example,
return array(
’components’=>array(
’db’=>array(
’class’=>’CDbConnection’,
’connectionString’=>’sqlite:path/to/file.db’,
),
’authManager’=>array(
’class’=>’CDbAuthManager’,
’connectionID’=>’db’,
),
),
);
We can then access the authManager application component using Yii::app()->authManager.
Defining Authorization Hierarchy
Defining authorization hierarchy involves three steps: defining authorization items, estab-lishing relationships between authorization items, and assigning roles to application users.
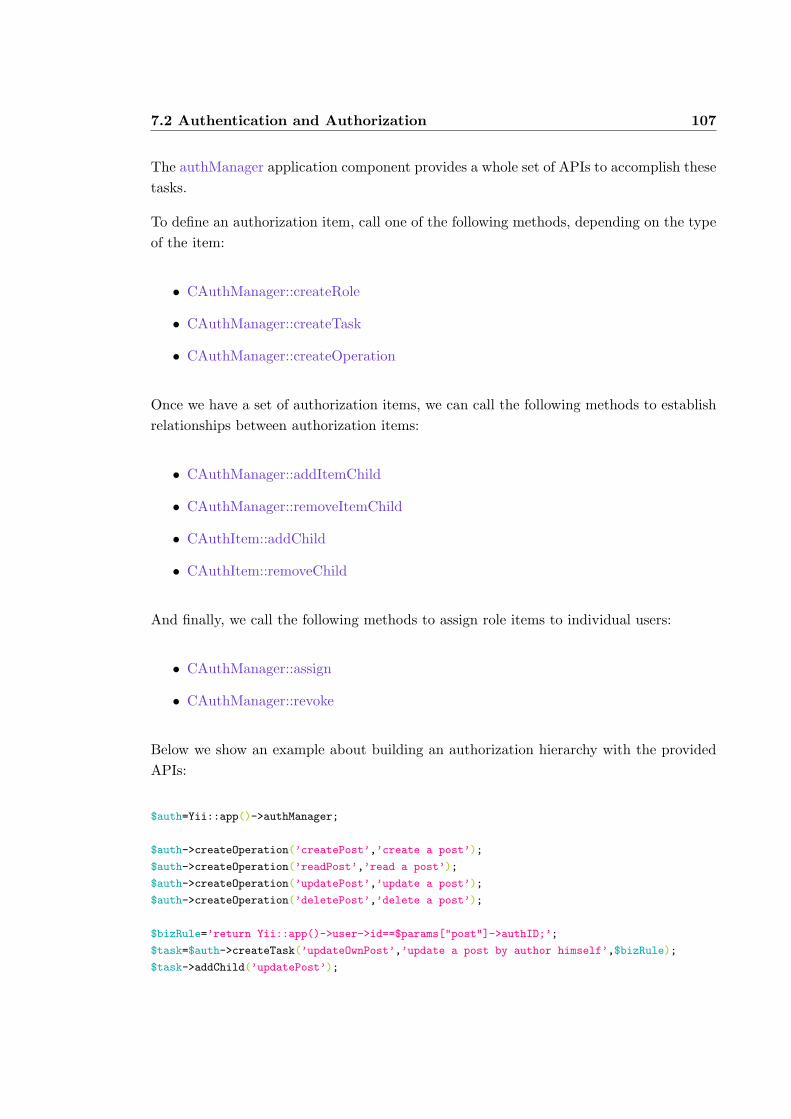
7.2 Authentication and Authorization 107
The authManager application component provides a whole set of APIs to accomplish thesetasks.
To define an authorization item, call one of the following methods, depending on the typeof the item:
• CAuthManager::createRole
• CAuthManager::createTask
• CAuthManager::createOperation
Once we have a set of authorization items, we can call the following methods to establishrelationships between authorization items:
• CAuthManager::addItemChild
• CAuthManager::removeItemChild
• CAuthItem::addChild
• CAuthItem::removeChild
And finally, we call the following methods to assign role items to individual users:
• CAuthManager::assign
• CAuthManager::revoke
Below we show an example about building an authorization hierarchy with the providedAPIs:
$auth=Yii::app()->authManager;
$auth->createOperation(’createPost’,’create a post’);
$auth->createOperation(’readPost’,’read a post’);
$auth->createOperation(’updatePost’,’update a post’);
$auth->createOperation(’deletePost’,’delete a post’);
$bizRule=’return Yii::app()->user->id==$params["post"]->authID;’;
$task=$auth->createTask(’updateOwnPost’,’update a post by author himself’,$bizRule);
$task->addChild(’updatePost’);

108 7. Special Topics
$role=$auth->createRole(’reader’);
$role->addChild(’readPost’);
$role=$auth->createRole(’author’);
$role->addChild(’reader’);
$role->addChild(’createPost’);
$role->addChild(’updateOwnPost’);
$role=$auth->createRole(’editor’);
$role->addChild(’reader’);
$role->addChild(’updatePost’);
$role=$auth->createRole(’admin’);
$role->addChild(’editor’);
$role->addChild(’author’);
$role->addChild(’deletePost’);
$auth->assign(’reader’,’readerA’);
$auth->assign(’author’,’authorB’);
$auth->assign(’editor’,’editorC’);
$auth->assign(’admin’,’adminD’);
Note that we associate a business rule with the updateOwnPost task. In the business rulewe simply check if the current user ID is the same as the specified post’s author ID. Thepost information in the $params array is supplied by developers when performing accesschecking.
Info: While the above example looks long and tedious, it is mainly for demonstrativepurpose. Developers usually need to develop some user interfaces so that end userscan use to establish an authorization hierarchy more intuitively.
Access Checking
To perform access checking, we first need to know the name of the authorization item.For example, to check if the current user can create a post, we would check if he has thepermission represented by the createPost operation. We then call CWebUser::checkAccessto perform the access checking:
if(Yii::app()->user->checkAccess(’createPost’))
{// create post
}

7.2 Authentication and Authorization 109
If the authorization rule is associated with a business rule which requires additional pa-rameters, we can pass them as well. For example, to check if a user can update a post, wewould do
$params=array(’post’=>$post);
if(Yii::app()->user->checkAccess(’updateOwnPost’,$params))
{// update post
}
Using Default Roles
Note: The default role feature has been available since version 1.0.3
Many Web applications need some very special roles that would be assigned to every ormost of the system users. For example, we may want to assign some privileges to allauthenticated users. It poses a lot of maintenance trouble if we explicitly specify andstore these role assignments. We can exploit default roles to solve this problem.
A default role is a role that is implicitly assigned to every user, including both au-thenticated and guest. We do not need to explicitly assign it to a user. When CWe-bUser::checkAccess, default roles will be checked first as if they are assigned to the user.
Default roles must be declared in the CAuthManager::defaultRoles property. For example,the following configuration declares two roles to be default roles: authenticated and guest.
return array(
’components’=>array(
’authManager’=>array(
’class’=>’CDbAuthManager’,
’defaultRoles’=>array(’authenticated’, ’guest’),
),
),
);
Because a default role is assigned to every user, it usually needs to be associated with abusiness rule that determines whether the role really applies to the user. For example, thefollowing code defines two roles, ”authenticated” and ”guest”, which effectively apply toauthenticated users and guest users, respectively.
$bizRule=’return !Yii::app()->user->isGuest;’;

110 7. Special Topics
$auth->createRole(’authenticated’,$bizRule);
$bizRule=’return Yii::app()->user->isGuest;’;
$auth->createRole(’guest’,$bizRule);
7.3 Theme
Theming is a systematic way of customizing the outlook of pages in a Web application.By applying a new theme, the overall appearance of a Web application can be changedinstantly and dramatically.
In Yii, each theme is represented as a directory consisting of view files, layout files, andrelevant resource files such as images, CSS files, JavaScript files, etc. The name of a themeis its directory name. All themes reside under the same directory WebRoot/themes. At anytime, only one theme can be active.
Tip: The default theme root directory WebRoot/themes can be configured to bea different one. Simply configure the basePath and the baseUrl properties of thethemeManager application component to be the desired ones.
To activate a theme, set the theme property of the Web application to be the name of thedesired theme. This can be done either in the application configuration or during runtimein controller actions.
Note: Theme name is case-sensitive. If you attempt to activate a theme that doesnot exist, Yii::app()->theme will return null.
Contents under a theme directory should be organized in the same way as those underthe application base path. For example, all view files must be located under views, layoutview files under views/layouts, and system view files under views/system. For example, ifwe want to replace the create view of PostController with a view in the classic theme,we should save the new view file as WebRoot/themes/classic/views/post/create.php.
For views belonging to controllers in a module, the corresponding themed view filesshould also be placed under the views directory. For example, if the aforementionedPostController is in a module named forum, we should save the create view file asWebRoot/themes/classic/views/forum/post/create.php. If the forum module is nested inanother module named support, then the view file should be WebRoot/themes/classic/
views/support/forum/post/create.php.
7.4 Logging 111
Note: Beause the views directory may contain security-sensitive data, it should beconfigured to prevent from being accessed by Web users.
When we call render or renderPartial to display a view, the corresponding view file as wellas the layout file will be looked for in the currently active theme. And if found, those fileswill be rendered. Otherwise, it falls back to the default location as specified by viewPathand layoutPath.
Tip: Inside a theme view, we often need to link other theme resource files. Forexample, we may want to show an image file under the theme’s images directory.Using the baseUrl property of the currently active theme, we can generate the URLfor the image as follows,
Yii::app()->theme->baseUrl . ’/images/FileName.gif’
7.4 Logging
Yii provides a flexible and extensible logging feature. Messages logged can be classifiedaccording to log levels and message categories. Using level and category filters, selectedmessages can be further routed to different destinations, such as files, emails, browserwindows, etc.
7.4.1 Message Logging
Messages can be logged by calling either Yii::log or Yii::trace. The difference betweenthese two methods is that the latter logs a message only when the application is in debugmode.
Yii::log($message, $level, $category);
Yii::trace($message, $category);
When logging a message, we need to specify its category and level. Category is a string inthe format of xxx.yyy.zzz which resembles to the path alias. For example, if a message islogged in CController, we may use the category system.web.CController. Message levelshould be one of the following values:
• trace: this is the level used by Yii::trace. It is for tracing the execution flow of theapplication during development.

112 7. Special Topics
• info: this is for logging general information.
• profile: this is for performance profile which is to be described shortly.
• warning: this is for warning messages.
• error: this is for fatal error messages.
7.4.2 Message Routing
Messages logged using Yii::log or Yii::trace are kept in memory. We usually need to displaythem in browser windows, or save them in some persistent storage such as files, emails.This is called message routing, i.e., sending messages to different destinations.
In Yii, message routing is managed by a CLogRouter application component. It manages aset of the so-called log routes. Each log route represents a single log destination. Messagessent along a log route can be filtered according to their levels and categories.
To use message routing, we need to install and preload a CLogRouter application compo-nent. We also need to configure its routes property with the log routes that we want. Thefollowing shows an example of the needed application configuration:
array(
......
’preload’=>array(’log’),
’components’=>array(
......
’log’=>array(
’class’=>’CLogRouter’,
’routes’=>array(
array(
’class’=>’CFileLogRoute’,
’levels’=>’trace, info’,
’categories’=>’system.*’,
),
array(
’class’=>’CEmailLogRoute’,
’levels’=>’error, warning’,
’email’=>’[email protected]’,
),
),
),
),
)
In the above example, we have two log routes. The first route is CFileLogRoute whichsaves messages in a file under the application runtime directory. Only messages whose

7.4 Logging 113
level is trace or info and whose category starts with system. are saved. The second routeis CEmailLogRoute which sends messages to the specified email addresses. Only messageswhose level is error or warning are sent.
The following log routes are available in Yii:
• CDbLogRoute: saves messages in a database table.
• CEmailLogRoute: sends messages to specified email addresses.
• CFileLogRoute: saves messages in a file under the application runtime directory.
• CWebLogRoute: displays messages at the end of the current Web page.
• CProfileLogRoute: displays profiling messages at the end of the current Web page.
Info: Message routing occurs at the end of the current request cycle when theonEndRequest event is raised. To explicitly terminate the processing of the currentrequest, call CApplication::end() instead of die() or exit(), because CApplica-tion::end() will raise the onEndRequest event so that the messages can be properlylogged.
Message Filtering
As we mentioned, messages can be filtered according to their levels and categories beforethey are sent long a log route. This is done by setting the levels and categories propertiesof the corresponding log route. Multiple levels or categories should be concatenated bycommas.
Because message categories are in the format of xxx.yyy.zzz, we may treat them as acategory hierarchy. In particular, we say xxx is the parent of xxx.yyy which is the parentof xxx.yyy.zzz. We can then use xxx.* to represent category xxx and all its child andgrandchild categories.
7.4.3 Performance Profiling
Performance profiling is a special type of message logging. Performance profiling can beused to measure the time needed for the specified code blocks and find out what theperformance bottleneck is.
To use performance profiling, we need to identify which code blocks need to be profiled.We mark the beginning and the end of each code block by inserting the following methods:

114 7. Special Topics
Yii::beginProfile(’blockID’);
...code block being profiled...
Yii::endProfile(’blockID’);
where blockID is an ID that uniquely identifies the code block.
Note, code blocks need to be nested properly. That is, a code block cannot intersect withanother. It must be either at a parallel level or be completely enclosed by the other codeblock.
To show profiling result, we need to install a CLogRouter application component witha CProfileLogRoute log route. This is the same as we do with normal message routing.The CProfileLogRoute route will display the performance results at the end of the currentpage.
7.5 Error Handling
Yii provides a complete error handling framework based on the PHP 5 exception mecha-nism. When the application is created to handle an incoming user request, it registers itshandleError method to handle PHP warnings and notices; and it registers its handleExcep-tion method to handle uncaught PHP exceptions. Consequently, if a PHP warning/noticeor an uncaught exception occurs during the application execution, one of the error handlerswill take over the control and start the necessary error handling procedure.
Tip: The registration of error handlers is done in the application’s constructor bycalling PHP functions set exception handler and set error handler. If you do notwant Yii to handle the errors and exceptions, you may define constant YII ENABLE
ERROR HANDLER and YII ENABLE EXCEPTION HANDLER to be false in the entry script.
By default, errorHandler (or exceptionHandler) will raise an onError event (or onExceptionevent). If the error (or exception) is not handled by any event handler, it will call for helpfrom the errorHandler application component.
7.5.1 Raising Exceptions
Raising exceptions in Yii is not different from raising a normal PHP exception. One usesthe following syntax to raise an exception when needed:
throw new ExceptionClass(’ExceptionMessage’);

7.5 Error Handling 115
Yii defines two exception classes: CException and CHttpException. The former is ageneric exception class, while the latter represents an exception that should be displayedto end users. The latter also carries a statusCode property representing an HTTP statuscode. The class of an exception determines how it should be displayed, as we will explainnext.
Tip: Raising a CHttpException exception is a simple way of reporting errors causedby user misoperation. For example, if the user provides an invalid post ID in theURL, we can simply do the following to show a 404 error (page not found):
// if post ID is invalid
throw new CHttpException(404,’The specified post cannot be found.’);
7.5.2 Displaying Errors
When an error is forwarded to the CErrorHandler application component, it chooses anappropriate view to display the error. If the error is meant to be displayed to end users,such as a CHttpException, it will use a view named errorXXX, where XXX stands for theHTTP status code (e.g. 400, 404, 500). If the error is an internal one and should only bedisplayed to developers, it will use a view named exception. In the latter case, completecall stack as well as the error line information will be displayed.
Info: When the application runs in production mode, all errors including thoseinternal ones will be displayed using view errorXXX. This is because the call stackof an error may contain sensitive information. In this case, developers should relyon the error logs to determine what is the real cause of an error.
CErrorHandler searches for the view file corresponding to a view in the following order:
1. WebRoot/themes/ThemeName/views/system: this is the system view directory under thecurrently active theme.
2. WebRoot/protected/views/system: this is the default system view directory for anapplication.
3. yii/framework/views: this is the standard system view directory provided by the Yiiframework.

116 7. Special Topics
Therefore, if we want to customize the error display, we can simply create error view filesunder the system view directory of our application or theme. Each view file is a normalPHP script consisting of mainly HTML code. For more details, please refer to the defaultview files under the framework’s view directory.
7.5.3 Message Logging
A message of level error will always be logged when an error occurs. If the error is causedby a PHP warning or notice, the message will be logged with category php; if the error iscaused by an uncaught exception, the category would be exception.ExceptionClassName
(for CHttpException its statusCode will also be appended to the category). One can thusexploit the logging feature to monitor errors happened during application execution.
7.6 Web Service
Web service is a software system designed to support interoperable machine-to-machineinteraction over a network. In the context of Web applications, it usually refers to a set ofAPIs that can be accessed over the Internet and executed on a remote system hosting therequested service. For example, a Flex-based client may invoke a function implementedon the server side running a PHP-based Web application. Web service relies on SOAP asits foundation layer of the communication protocol stack.
Yii provides CWebService and CWebServiceAction to simplify the work of implementingWeb service in a Web application. The APIs are grouped into classes, called serviceproviders. Yii will generate for each class a WSDL specification which describes whatAPIs are available and how they should be invoked by client. When an API is invoked bya client, Yii will instantiate the corresponding service provider and call the requested APIto fulfill the request.
Note: CWebService relies on the PHP SOAP extension. Make sure you haveenabled it before trying the examples displayed in this section.
7.6.1 Defining Service Provider
As we mentioned above, a service provider is a class defining the methods that can beremotely invoked. Yii relies on doc comment and class reflection to identify which methodscan be remotely invoked and what are their parameters and return value.
Let’s start with a simple stock quoting service. This service allows a client to request forthe quote of the specified stock. We define the service provider as follows. Note that we

7.6 Web Service 117
define the provider class StockController by extending CController. This is not required.We will explain why we do so shortly.
class StockController extends CController
{/**
* @param string the symbol of the stock
* @return float the stock price
* @soap
*/
public function getPrice($symbol)
{$prices=array(’IBM’=>100, ’GOOGLE’=>350);
return isset($prices[$symbol])?$prices[$symbol]:0;
//...return stock price for $symbol
}}
In the above, we declare the method getPrice to be a Web service API by marking it withthe tag @soap in its doc comment. We rely on doc comment to specify the data type ofthe input parameters and return value. Additional APIs can be declared in the similarway.
7.6.2 Declaring Web Service Action
Having defined the service provider, we need to make it available to clients. In particular,we want to create a controller action to expose the service. This can be done easily bydeclaring a CWebServiceAction action in a controller class. For our example, we will justput it in StockController.
class StockController extends CController
{public function actions()
{return array(
’quote’=>array(
’class’=>’CWebServiceAction’,
),
);
}
/**
* @param string the symbol of the stock
* @return float the stock price
* @soap

118 7. Special Topics
*/
public function getPrice($symbol)
{//...return stock price for $symbol
}}
That is all we need to create a Web service! If we try to access the action by URL http:
//hostname/path/to/index.php?r=stock/quote, we will see a lot of XML content which isactually the WSDL for the Web service we defined.
Tip: By default, CWebServiceAction assumes the current controller is the serviceprovider. That is why we define the getPrice method inside the StockController
class.
7.6.3 Consuming Web Service
To complete the example, let’s create a client to consume the Web service we just created.The example client is written in PHP, but it could be in other languages, such as Java,C#, Flex, etc.
$client=new SoapClient(’http://hostname/path/to/index.php?r=stock/quote’);
echo $client->getPrice(’GOOGLE’);
Run the above script in either Web or console mode, and we shall see 350 which is theprice for GOOGLE.
7.6.4 Data Types
When declaring class methods and properties to be remotely accessible, we need to specifythe data types of the input and output parameters. The following primitive data typescan be used:
• str/string: maps to xsd:string;
• int/integer: maps to xsd:int;
• float/double: maps to xsd:float;
• bool/boolean: maps to xsd:boolean;

7.6 Web Service 119
• date: maps to xsd:date;
• time: maps to xsd:time;
• datetime: maps to xsd:dateTime;
• array: maps to xsd:string;
• object: maps to xsd:struct;
• mixed: maps to xsd:anyType.
If a type is not any of the above primitive types, it is considered as a composite typeconsisting of properties. A composite type is represented in terms of a class, and itsproperties are the class’ public member variables marked with @soap in their doc comments.
We can also use array type by appending [] to the end of a primitive or composite type.This would specify an array of the specified type.
Below is an example defining the getPosts Web API which returns an array of Post objects.
class PostController extends CController
{/**
* @return Post[] a list of posts
* @soap
*/
public function getPosts()
{return Post::model()->findAll();
}}
class Post extends CActiveRecord
{/**
* @var integer post ID
* @soap
*/
public $id;
/**
* @var string post title
* @soap
*/
public $title;
}

120 7. Special Topics
7.6.5 Class Mapping
In order to receive parameters of composite type from client, an application needs todeclare the mapping from WSDL types to the corresponding PHP classes. This is doneby configuring the classMap property of CWebServiceAction.
class PostController extends CController
{public function actions()
{return array(
’service’=>array(
’class’=>’CWebServiceAction’,
’classMap’=>array(
’Post’=>’Post’, // or simply ’Post’
),
),
);
}......
}
7.6.6 Intercepting Remote Method Invocation
By implementing the IWebServiceProvider interface, a sevice provider can intercept re-mote method invocations. In IWebServiceProvider::beforeWebMethod, the provider mayretrieve the current CWebService instance and obtain the the name of the method cur-rently being requested via CWebService::methodName. It can return false if the remotemethod should not be invoked for some reason (e.g. unauthorized access).
7.7 Internationalization
Internationalization (I18N) refers to the process of designing a software application sothat it can be adapted to various languages and regions without engineering changes. ForWeb applications, this is of particular importance because the potential users may be fromworldwide.
Yii provides support for I18N in several aspects.
• It provides the locale data for each possible language and variant.
• It provides message and file translation service.
• It provides locale-dependent date and time formatting.

7.7 Internationalization 121
• It provides locale-dependent number formatting.
In the following subsections, we will elaborate each of the above aspects.
7.7.1 Locale and Language
Locale is a set of parameters that defines the user’s language, country and any specialvariant preferences that the user wants to see in their user interface. It is usually identifiedby an ID consisting of a language ID and a region ID. For example, the ID en US standsfor the locale of English and United States. For consistency, all locale IDs in Yii arecanonicalized to the format of LanguageID or LanguageID RegionID in lower case (e.g. en,en us).
Locale data is represented as a CLocale instance. It provides locale-dependent information,including currency symbols, number symbols, currency formats, number formats, date andtime formats, and date-related names. Since the language information is already implied inthe locale ID, it is not provided by CLocale. For the same reason, we often interchangeablyusing the term locale and language.
Given a locale ID, one can get the corresponding CLocale instance by CLocale::getInstance($localeID)
or CApplication::getLocale($localeID).
Info: Yii comes with locale data for nearly every language and region. The datais obtained from Common Locale Data Repository (CLDR). For each locale, only asubset of the CLDR data is provided as the original data contains much rarely usedinformation.
For an Yii application, we differentiate its target language from source language. Thetarget language is the language (locale) of the users that the application is targeted at,while the source language refers to the language (locale) that the application source filesare written in. Internationalization occurs only when the two languages are different.
One can configure target language in the application configuration, or change it dynami-cally before any internationalization occurs.
Tip: Sometimes, we may want to set the target language as the language preferredby a user (specified in user’s browser preference). To do so, we can retrieve the userpreferred language ID using CHttpRequest::preferredLanguage.

122 7. Special Topics
7.7.2 Translation
The most needed I18N feature is perhaps translation, including message translation andview translation. The former translates a text message to the desired language, while thelatter translates a whole file to the desired language.
A translation request consists of the object to be translated, the source language that theobject is in, and the target language that the object needs to be translated to. In Yii, thesource language is default to the application source language while the target languageis default to the application language. If the source and target languages are the same,translation will not occur.
Message Translation
Message translation is done by calling Yii::t(). The method translates the given messagefrom source language to target language.
When translating a message, its category has to be specified since a message may betranslated differently under different categories (contexts). The category yii is reservedfor messages used by the Yii framework core code.
Messages can contain parameter placeholders which will be replaced with the actual pa-rameter values when calling Yii::t(). For example, the following message translation re-quest would replace the {alias} placeholder in the original message with the actual aliasvalue.
Yii::t(’yii’, ’Path alias "{alias}" is redefined.’,
array(’{alias}’=>$alias))
Note: Messages to be translated must be constant strings. They should not containvariables that would change message content (e.g. "Invalid {$message} content.
"). Use parameter placeholders if a message needs to vary according to some pa-rameters.
Translated messages are stored in a repository called message source. A message source isrepresented as an instance of CMessageSource or its child class. When Yii::t() is invoked,it will look for the message in the message source and return its translated version if it isfound.
Yii comes with the following types of message sources. You may also extend CMessage-Source to create your own message source type.

7.7 Internationalization 123
• CPhpMessageSource: the message translations are stored as key-value pairs in aPHP array. The original message is the key and the translated message is the value.Each array represents the translations for a particular category of messages and isstored in a separate PHP script file whose name is the category name. The PHPtranslation files for the same language are stored under the same directory namedas the locale ID. And all these directories are located under the directory specifiedby basePath.
• CGettextMessageSource: the message translations are stored as GNU Gettext files.
• CDbMessageSource: the message translations are stored in database tables. Formore details, see the API documentation for CDbMessageSource.
A message source is loaded as an application component. Yii pre-declares an applicationcomponent named messages to store messages that are used in user application. By default,the type of this message source is CPhpMessageSource and the base path for storing thePHP translation files is protected/messages.
In summary, in order to use message translation, the following steps are needed:
1. Call Yii::t() at appropriate places;
2. Create PHP translation files as protected/messages/LocaleID/CategoryName.php. Eachfile simply returns an array of message translations. Note, this assumes you are usingthe default CPhpMessageSource to store the translated messages.
3. Configure CApplication::sourceLanguage and CApplication::language.
Tip: The yiic tool in Yii can be used to manage message translations when CPh-pMessageSource is used as the message source. Its message command can automat-ically extract messages to be translated from selected source files and merge themwith existing translations if necessary.
Since version 1.0.2, Yii has added the support for choice format. Choice format refers tochoosing a translated according to a given number value. For example, in English theword ’book’ may either take a singular form or a plural form depending on the number ofbooks, while in other languages, the word may not have different form (such as Chinese)or may have more complex plural form rules (such as Russian). Choice format solves thisproblem in a simple yet effective way.
To use choice format, a translated message must consist of a sequence of expression-message pairs separated by |, as shown below:

124 7. Special Topics
’expr1#message1|expr2#message2|expr3#message3’
where exprN refers to a valid PHP expression which evaluates to a boolean value indicatingwhether the corresponding message should be returned. Only the message correspondingto the first expression that evaluates to true will be returned. An expression can containa special variable named n (note, it is not $n) which will take the number value passed asthe first message parameter. For example, assuming a translated message is:
’n==1#one book|n>1#many books’
and we are passing a number value 2 in the message parameter array when calling Yii::t(),we would obtain many books as the final translated message.
As a shortcut notation, if an expression is a number, it will be treated as n==Number.Therefore, the above translated message can be also be written as:
’1#one book|n>1#many books’
File Translation
File translation is accomplished by calling CApplication::findLocalizedFile(). Given thepath of a file to be translated, the method will look for a file with the same name underthe LocaleID subdirectory. If found, the file path will be returned; otherwise, the originalfile path will be returned.
File translation is mainly used when rendering a view. When calling one of the rendermethods in a controller or widget, the view files will be translated automatically. Forexample, if the target language is zh cn while the source language is en us, rendering a viewnamed edit would resulting in searching for the view file protected/views/ControllerID/
zh cn/edit.php. If the file is found, this translated version will be used for rendering;otherwise, the file protected/views/ControllerID/edit.php will be rendered instead.
File translation may also be used for other purposes, for example, displaying a translatedimage or loading a locale-dependent data file.
7.7.3 Date and Time Formatting
Date and time are often in different formats in different countries or regions. The task ofdate and time formatting is thus to generate a date or time string that fits for the specifiedlocale. Yii provides CDateFormatter for this purpose.

7.8 Using Alternative Template Syntax 125
Each CDateFormatter instance is associated with a target locale. To get the format-ter associated with the target locale of the whole application, we can simply access thedateFormatter property of the application.
The CDateFormatter class mainly provides two methods to format a UNIX timestamp.
• format: this method formats the given UNIX timestamp into a string according toa customized pattern (e.g. $dateFormatter->format(’yyyy-MM-dd’,$timestamp)).
• formatDateTime: this method formats the given UNIX timestamp into a stringaccording to a pattern predefined in the target locale data (e.g. short format ofdate, long format of time).
7.7.4 Number Formatting
Like data and time, numbers may also be formatted differently in different countriesor regions. Number formatting includes decimal formatting, currency formatting andpercentage formatting. Yii provides CNumberFormatter for these tasks.
To get the number formatter associated with the target locale of the whole application,we can access the numberFormatter property of the application.
The following methods are provided by CNumberFormatter to format an integer or doublevalue.
• format: this method formats the given number into a string according to a cus-tomized pattern (e.g. $numberFormatter->format(’#,##0.00’,$number)).
• formatDecimal: this method formats the given number using the decimal patternpredefined in the target locale data.
• formatCurrency: this method formats the given number and currency code usingthe currency pattern predefined in the target locale data.
• formatPercentage: this method formats the given number using the percentage pat-tern predefined in the target locale data.
7.8 Using Alternative Template Syntax
Yii allows developers to use their own favorite template syntax (e.g. Prado, Smarty) towrite controller or widget views. This is achieved by writing and installing a viewRen-derer application component. The view renderer intercepts the invocations of CBaseCon-
126 7. Special Topics
troller::renderFile, compiles the view file with customized template syntax, and rendersthe compiling results.
Info: It is recommended to use customized template syntax only when writing viewsthat are less likely to be reused. Otherwise, people who are reusing the views wouldbe forced to use the same customized template syntax in their applications.
In the following, we introduce how to use CPradoViewRenderer, a view renderer thatallows developers to use the template syntax similar to that in Prado framework. Forpeople who want to develop their own view renderers, CPradoViewRenderer is a goodreference.
7.8.1 Using CPradoViewRenderer
To use CPradoViewRenderer, we just need to configure the application as follows:
return array(
’components’=>array(
......,
’viewRenderer’=>array(
’class’=>’CPradoViewRenderer’,
),
),
);
By default, CPradoViewRenderer will compile source view files and save the resultingPHP files under the runtime directory. Only when the source view files are changed, willthe PHP files be re-generated. Therefore, using CPradoViewRenderer incurs very littleperformance degradation.
Tip: While CPradoViewRenderer mainly introduces some new template tags tomake writing views easier and faster, you can still write PHP code as usual in thesource views.
In the following, we introduce the template tags that are supported by CPradoViewRen-derer.

7.8 Using Alternative Template Syntax 127
Short PHP Tags
Short PHP tags are shortcuts to writing PHP expressions and statements in a view. Theexpression tag <%= expression %> is translated into <?php echo expression ?>; while thestatement tag <% statement %> to <?php statement ?>. For example,
<%= CHtml::textField($name,’value’); %>
<% foreach($models as $model): %>
is translated into
<?php echo CHtml::textField($name,’value’); ?>
<?php foreach($models as $model): ?>
Component Tags
Component tags are used to insert a widget in a view. It uses the following syntax:
<com:WidgetClass property1=value1 property2=value2 ...>
// body content for the widget
</com:WidgetClass>
// a widget without body content
<com:WidgetClass property1=value1 property2=value2 .../>
where WidgetClass specifies the widget class name or class path alias, and property initialvalues can be either quoted strings or PHP expressions enclosed within a pair of curlybrackets. For example,
<com:CCaptcha captchaAction="captcha" showRefreshButton={false} />
would be translated as
<?php $this->widget(’CCaptcha’, array(
’captchaAction’=>’captcha’,
’showRefreshButton’=>false)); ?>
Note: The value for showRefreshButton is specified as {false} instead of "false"because the latter means a string instead of a boolean.

128 7. Special Topics
Cache Tags
Cache tags are shortcuts to using fragment caching. Its syntax is as follows,
<cache:fragmentID property1=value1 property2=value2 ...>
// content being cached
</cache:fragmentID >
where fragmentID should be an identifier that uniquely identifies the content being cached,and the property-value pairs are used to configure the fragment cache. For example,
<cache:profile duration={3600}>// user profile information here
</cache:profile >
would be translated as
<?php if($this->cache(’profile’, array(’duration’=>3600))): ?>
// user profile information here
<?php $this->endCache(); endif; ?>
Clip Tags
Like cache tags, clip tags are shortcuts to calling CBaseController::beginClip and CBaseC-ontroller::endClip in a view. The syntax is as follows,
<clip:clipID>
// content for this clip
</clip:clipID >
where clipID is an identifier that uniquely identifies the clip content. The clip tags willbe translated as
<?php $this->beginClip(’clipID’); ?>
// content for this clip
<?php $this->endClip(); ?>

7.9 Console Applications 129
Comment Tags
Comment tags are used to write view comments that should only be visible to developers.Comment tags will be stripped off when the view is displayed to end users. The syntaxfor comment tags is as follows,
<!---
view comments that will be stripped off
--->
7.9 Console Applications
Console applications are mainly used by a Web application to perform offline work, suchas code generation, search index compiling, email sending, etc. Yii provides a frameworkfor writing console applications in an object-oriented and systematic way.
Yii represents each console task in terms of a command, and a console application instanceis used to dispatch a command line request to an appropriate command. The applicationinstance is created in an entry script. To execute a console task, we simply run thecorresponding command on the command line as follows,
php entryScript.php CommandName Param0 Param1 ...
where CommandName refers to the command name which is case-insensitive, and Param0,Param1 and so on are parameters to be passed to the command instance.
The entry script for a console application is usually written like the following, similar tothat in a Web application,
defined(’YII DEBUG’) or define(’YII DEBUG’,true);
// include Yii bootstrap file
require once(’path/to/yii/framework/yii.php’);
// create application instance and run
$configFile=’path/to/config/file.php’;
Yii::createConsoleApplication($configFile)->run();
We then create command classes which should extend from CConsoleCommand. Eachcommand class should be named as its command name appended with Command. Forexample, to define an email command, we should write an EmailCommand class. All com-mand class files should be placed under the commands subdirectory of the application basedirectory.

130 7. Special Topics
Tip: By configuring CConsoleApplication::commandMap, one can also have com-mand classes in different naming conventions and located in different directories.
Writing a command class mainly involves implementing the CConsoleCommand::run method.Command line parameters are passed as an array to this method. Below is an example:
class EmailCommand extends CConsoleCommand
{public function run($args)
{$receiver=$args[0];
// send email to $receiver
}}
At any time in a command, we can access the console application instance via Yii::app().Like a Web application instance, console application can also be configured. For example,we can configure a db application component to access the database. The configurationis usually specified as a PHP file and passed to the constructor of the console applicationclass (or createConsoleApplication in the entry script).
7.9.1 Using the yiic Tool
We have used the yiic tool to create our first application. The yiic tool is in factimplemented as a console application whose entry script file is framework/yiic.php. Usingyiic, we can accomplish tasks such as creating a Web application skeleton, generating acontroller class or model class, generating code needed by CRUD operations, extractingmessages to be translated, etc.
We can enhance yiic by adding our own customized commands. To do so, we shouldstart with a skeleton application created using yiic webapp command, as described inCreating First Yii Application. The yiic webapp command will generate two files underthe protected directory: yiic and yiic.bat. They are the local version of the yiic toolcreated specifically for the Web application.
We can then create our own commands under the protected/commands directory. Runningthe local yiic tool, we will see that our own commands appearing together with thestandard ones. We can also create our own commands to be used when yiic shell isused. To do so, just drop our command class files under the protected/commands/shell
directory.

7.10 Security 131
7.10 Security
7.10.1 Cross-site Scripting Prevention
Cross-site scripting (also known as XSS) occurs when a web application gathers maliciousdata from a user. Often attackers will inject JavaScript, VBScript, ActiveX, HTML, orFlash into a vulnerable application to fool other application users and gather data fromthem. For example, a poorly design forum system may display user input in forum postswithout any checking. An attacker can then inject a piece of malicious JavaScript codeinto a post so that when other users read this post, the JavaScript runs unexpectedly ontheir computers.
One of the most important measures to prevent XSS attacks is to check user input beforedisplaying them. One can do HTML-encoding with the user input to achieve this goal.However, in some situations, HTML-encoding may not be preferable because it disablesall HTML tags.
Yii incorporates the work of HTMLPurifier and provides developers with a useful compo-nent called CHtmlPurifier that encapsulates HTMLPurifier. This component is capableof removing all malicious code with a thoroughly audited, secure yet permissive whitelistand making sure the filtered content is standard-compliant.
The CHtmlPurifier component can be used as either a widget or a filter. When used as awidget, CHtmlPurifier will purify contents displayed in its body in a view. For example,
<?php $this->beginWidget(’CHtmlPurifier’); ?>
...display user-entered content here...
<?php $this->endWidget(); ?>
7.10.2 Cross-site Request Forgery Prevention
Cross-Site Request Forgery (CSRF) attacks occur when a malicious web site causes a usersweb browser to perform an unwanted action on a trusted site. For example, a maliciousweb site has a page that contains an image tag whose src points to a banking site: http:
//bank.example/withdraw?transfer=10000&to=someone. If a user who has a login cookiefor the banking site happens to visit this malicous page, the action of transferring 10000dollars to someone will be executed. Contrary to cross-site, which exploits the trust a userhas for a particular site, CSRF exploits the trust that a site has for a particular user.
To prevent CSRF attacks, it is important to abide to the rule that GET requests shouldonly be allowed to retrieve data rather than modify any data on the server. And for POST
requests, they should include some random value which can be recognized by the serverto ensure the form is submitted from and the result is sent back to the same origin.

132 7. Special Topics
Yii implements a CSRF prevention scheme to help defeat POST-based attacks. It is basedon storing a random value in a cookie and comparing this value with the value submittedvia the POST request.
By default, the CSRF prevention is disabled. To enable it, configure the CHttpRequestapplication component in the application configuration as follows,
return array(
’components’=>array(
’request’=>array(
’enableCsrfValidation’=>true,
),
),
);
And to display a form, call CHtml::form instead of writing the HTML form tag directly.The CHtml::form method will embed the necessary random value in a hidden field so thatit can be submitted for CSRF validation.
7.10.3 Cookie Attack Prevention
Protecting cookies from being attacked is of extreme important, as session IDs are com-monly stored in cookies. If one gets hold of a session ID, he essentially owns all relevantsession information.
There are several countermeasures to prevent cookies from being attacked.
• An application can use SSL to create a secure communication channel and only passthe authentication cookie over an HTTPS connection. Attackers are thus unable todecipher the contents in the transferred cookies.
• Expire sessions appropriately, including all cookies and session tokens, to reduce thelikelihood of being attacked.
• Prevent cross-site scripting which causes arbitrary code to run in a user’s browserand expose his cookies.
• Validate cookie data and detect if they are altered.
Yii implements a cookie validation scheme that prevents cookies from being modified. Inparticular, it does HMAC check for the cookie values if cookie validation is enable.
Cookie validation is disabled by default. To enable it, configure the CHttpRequest appli-cation component in the application configuration as follows,
7.11 Performance Tuning 133
return array(
’components’=>array(
’request’=>array(
’enableCookieValidation’=>true,
),
),
);
To make use of the cookie validation scheme provided by Yii, we also need to access cookiesthrough the cookies collection, instead of directly trhough $ COOKIES:
// retrieve the cookie with the specified name
$cookie=Yii::app()->request->cookies[$name];
$value=$cookie->value;
......
// send a cookie
$cookie=new CHttpCookie($name,$value);
Yii::app()->request->cookies[$name]=$cookie;
7.11 Performance Tuning
Performance of Web applications is affected by many factors. Database access, file systemoperations, network bandwidth are all potential affecting factors. Yii has tried in everyaspect to reduce the performance impact caused by the framework. But still, there aremany places in the user application that can be improved to boost performance.
7.11.1 Enabling APC Extension
Enabling the PHP APC extension is perhaps the easiest way to improve the overall per-formance of an application. The extension caches and optimizes PHP intermediate codeand avoids the time spent in parsing PHP scripts for every incoming request.
7.11.2 Disabling Debug Mode
Disabling debug mode is another easy way to improve performance. An Yii applicationruns in debug mode if the constant YII DEBUG is defined as true. Debug mode is usefulduring development stage, but it would impact performance because some componentscause extra burden in debug mode. For example, the message logger may record additionaldebug information for every message being logged.

134 7. Special Topics
7.11.3 Using yiilite.php
When the PHP APC extension is enabled, we can replace yii.php with a different Yiibootstrap file named yiilite.php to further boost the performance of an Yii-poweredapplication.
The file yiilite.php comes with every Yii release. It is the result of merging some com-monly used Yii class files. Both comments and trace statements are stripped from themerged file. Therefore, using yiilite.php would reduce the number of files being includedand avoid execution of trace statements.
Note, using yiilite.php without APC may actually reduce performance, because yiilite.
php contains some classes that are not necessarily used in every request and would takeextra parsing time. It is also observed that using yiilite.php is slower with some serverconfigurations, even when APC is turned on. The best way to judge whether to useyiilite.php or not is to run a benchmark using the included hello world demo.
7.11.4 Using Caching Techniques
As described in the Caching section, Yii provides several caching solutions that may im-prove the performance of a Web application significantly. If the generation of some datatakes long time, we can use the data caching approach to reduce the data generation fre-quency; If a portion of page remains relatively static, we can use the fragment cachingapproach to reduce its rendering frequency; If a whole page remains relative static, we canuse the page caching approach to save the rendering cost for the whole page.
If the application is using Active Record, we should turn on the schema caching to savethe time of parsing database schema. This can be done by configuring the CDbConnec-tion::schemaCachingDuration property to be a value greater than 0.
Besides these application-level caching techniques, we can also use server-level cachingsolutions to boost the application performance. As a matter of fact, the APC caching wedescribed earlier belongs to this category. There are other server techniques, such as ZendOptimizer, eAccelerator, Squid, to name a few.
7.11.5 Database Optimization
Fetching data from database is often the main performance bottleneck in a Web applica-tion. Although using caching may alleviate the performance hit, it does not fully solvethe problem. When the database contains enormous data and the cached data is invalid,fetching the latest data could be prohibitively expensive without proper database andquery design.
7.11 Performance Tuning 135
Design index wisely in a database. Indexing can make SELECT queries much faster, but itmay slow down INSERT, UPDATE or DELETE queries.
For complex queries, it is recommended to create a database view for it instead of issuingthe queries inside the PHP code and asking DBMS to parse them repetitively.
Do not overuse Active Record. Although Active Record is good at modelling data in anOOP fashion, it actually degrades performance due to the fact that it needs to create oneor several objects to represent each row of query result. For data intensive applications,using DAO or database APIs at lower level could be a better choice.
Last but not least, use LIMIT in your SELECT queries. This avoids fetching overwhelmingdata from database and exhausting the memory allocated to PHP.
7.11.6 Minimizing Script Files
Complex pages often need to include many external JavaScript and CSS files. Becauseeach file would cause one extra round trip to the server and back, we should minimize thenumber of script files by merging them into fewer ones. We should also consider reducingthe size of each script file to reduce the network transmission time. There are many toolsaround to help on these two aspects.
For a page generated by Yii, chances are that some script files are rendered by componentsthat we do not want to modify (e.g. Yii core components, third-party components). Inorder to minimizing these script files, we need two steps.
Note: The scriptMap feature described in the following has been available sinceversion 1.0.3.
First, we declare the scripts to be minimized by configuring the scriptMap property of theclientScript application component. This can be done either in the application configura-tion or in code. For example,
$cs=Yii::app()->clientScript;
$cs->scriptMap=array(
’jquery.js’=>’/js/all.js’,
’jquery.ajaxqueue.js’=>’/js/all.js’,
’jquery.metadata.js’=>’/js/all.js’,
......
);
What the above code does is that it maps those JavaScript files to the URL /js/all.js.

136 7. Special Topics
If any of these JavaScript files need to be included by some components, Yii will includethe URL (once) instead of the individual script files.
Second, we need to use some tools to merge (and perhaps compress) the JavaScript filesinto a single one and save it as js/all.js.
The same trick also applies to CSS files.
We can also improve page loading speed with the help of Google AJAX Libraries API.For example, we can include jquery.js from Google servers instead of our own server. Todo so, we first configure the scriptMap as follows,
$cs=Yii::app()->clientScript;
$cs->scriptMap=array(
’jquery.js’=>false,
’jquery.ajaxqueue.js’=>false,
’jquery.metadata.js’=>false,
......
);
By mapping these script files to false, we prevent Yii from generating the code to includethese files. Instead, we write the following code in our pages to explicitly include the scriptfiles from Google,
<head>
<?php echo CGoogleApi::bootstrap(); ?>
<?php echo CHtml::script(
CGoogleApi::load(’jquery’,’1.3.2’) . "\n" .
CGoogleApi::load(’jquery.ajaxqueue.js’) . "\n" .
CGoogleApi::load(’jquery.metadata.js’)
); ?>
......
</head>