the official newsletter of the upper keys macintosh users ...ukmug.pbworks.com/f/mu 2014-04.pdf ·...
TRANSCRIPT
Macaholics UNANIMOUS Page 1
OUR NEXT MEETING:
Thursday, April 10, 2014 7pm at Key Largo Library
Community Room MM 101.4 Oceanside
The Wonders ofDropbox, and other
Cloud Storage Options. with JIM ALLEN
Jim is an enthusiastic and interesting presenter, and his talk will apply to Mac and PC users, so bring your PC friends! He has been a member of the Gold Coast Mac User Group for four years, joining shortly after converting from the Black-berry cult. Jim’s “AppTalk” is a regular feature of GCMUG meetings, and he talks about apps in his AppTalk blog:(http://gcmugapptalk.blogspot.com).
(Jim is an attorney practicing civildefense litigation in Miami.)
April 2014 Volume 22 Issue 05The Official Newsletter of the Upper Keys Macintosh Users Group
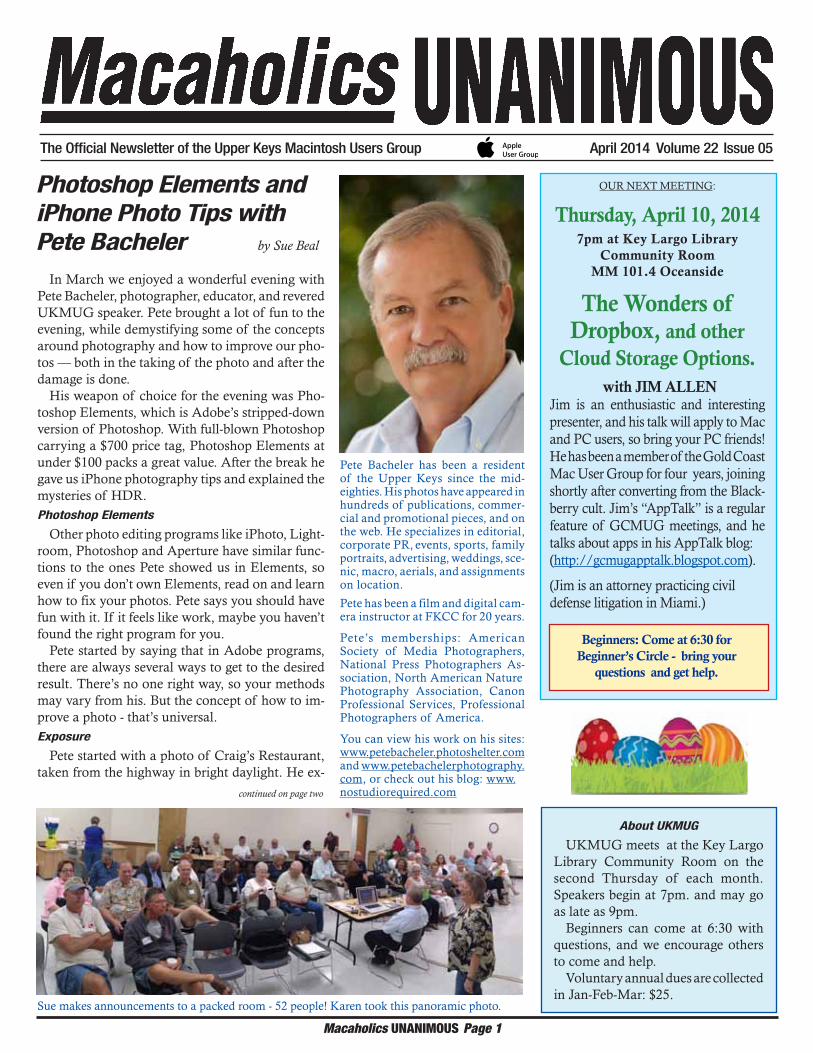
Photoshop Elements and iPhone Photo Tips with Pete Bacheler by Sue Beal
About UKMUG
UKMUG meets at the Key Largo Library Community Room on the second Thursday of each month. Speakers begin at 7pm. and may go as late as 9pm.
Beginners can come at 6:30 with questions, and we encourage others to come and help.
Voluntary annual dues are collected in Jan-Feb-Mar: $25.
Pete Bacheler has been a resident of the Upper Keys since the mid-eighties. His photos have appeared in hundreds of publications, commer-cial and promotional pieces, and on the web. He specializes in editorial, corporate PR, events, sports, family portraits, advertising, weddings, sce-nic, macro, aerials, and assignments on location.
Pete has been a film and digital cam-era instructor at FKCC for 20 years.
Pete’s memberships: American Society of Media Photographers, National Press Photographers As-sociation, North American NaturePhotography Association, Canon Professional Services, Professional Photographers of America.
You can view his work on his sites: www.petebacheler.photoshelter.com and www.petebachelerphotography.com, or check out his blog: www.nostudiorequired.comcontinued on page two
Beginners: Come at 6:30 for Beginner’s Circle - bring your
questions and get help.
In March we enjoyed a wonderful evening with Pete Bacheler, photographer, educator, and revered UKMUG speaker. Pete brought a lot of fun to the evening, while demystifying some of the concepts around photography and how to improve our pho-tos — both in the taking of the photo and after the damage is done.
His weapon of choice for the evening was Pho-toshop Elements, which is Adobe’s stripped-down version of Photoshop. With full-blown Photoshop carrying a $700 price tag, Photoshop Elements at under $100 packs a great value. After the break he gave us iPhone photography tips and explained the mysteries of HDR.Photoshop Elements
Other photo editing programs like iPhoto, Light-room, Photoshop and Aperture have similar func-tions to the ones Pete showed us in Elements, so even if you don’t own Elements, read on and learn how to fix your photos. Pete says you should have fun with it. If it feels like work, maybe you haven’t found the right program for you.
Pete started by saying that in Adobe programs, there are always several ways to get to the desired result. There’s no one right way, so your methods may vary from his. But the concept of how to im-prove a photo - that’s universal.Exposure
Pete started with a photo of Craig’s Restaurant, taken from the highway in bright daylight. He ex-
Sue makes announcements to a packed room - 52 people! Karen took this panoramic photo.
Macaholics UNANIMOUS Page 2
Photoshop Elements & iPhonecontinued from page one
continued on page three
Our door prize was this balloon sculpture of Texas Bluebonnets, made by twisted balloon artist Kathy Miller. She is available to make and deliver custom balloon creations for spe-cial occasions or can be hired on site to spice up an event, making balloons in costume, complete with schtick! 305-304-8861
Laura Heinrichs correctly answered the question posed by Kathy: What are the two ingredients in red-eye gravy? (Pan drippings and coffee.) What’s that have to do with Pho-toshop Elements? “Red-eye,” silly!!
Laura Heinrichs and Layne Franz before the meeting.
Anita Ellsner and Linda Swantek share an iPhone moment.
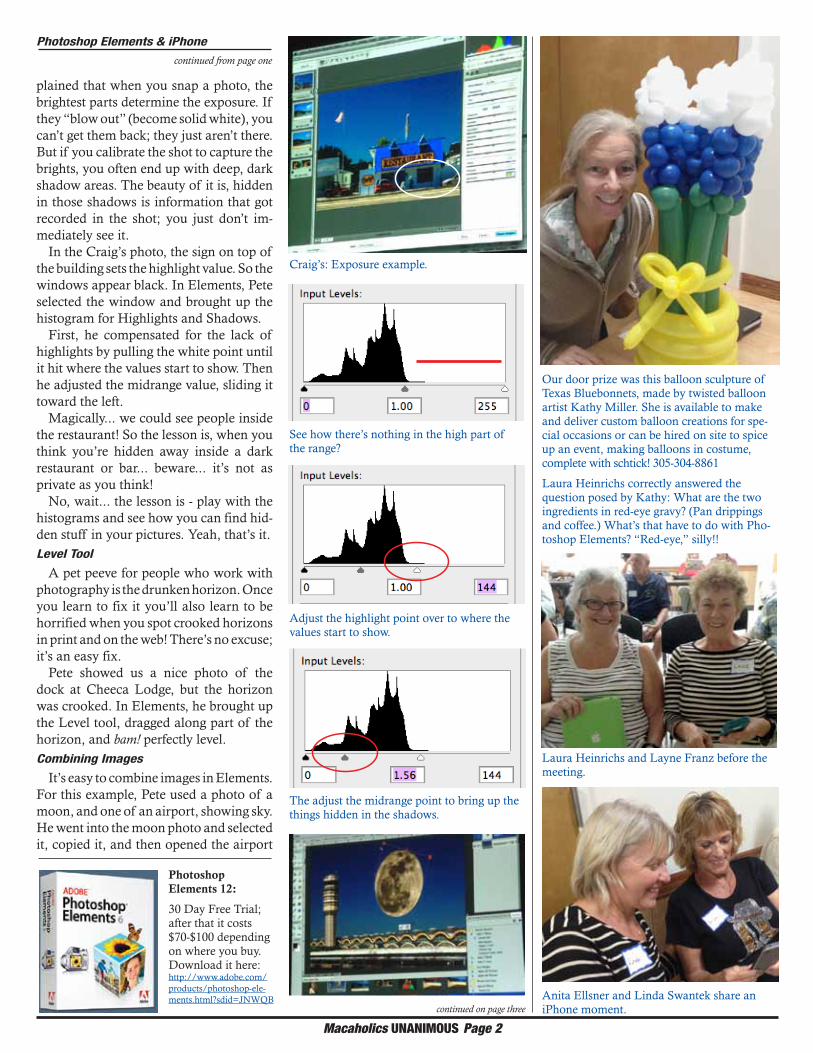
plained that when you snap a photo, the brightest parts determine the exposure. If they “blow out” (become solid white), you can’t get them back; they just aren’t there. But if you calibrate the shot to capture the brights, you often end up with deep, dark shadow areas. The beauty of it is, hidden in those shadows is information that got recorded in the shot; you just don’t im-mediately see it.
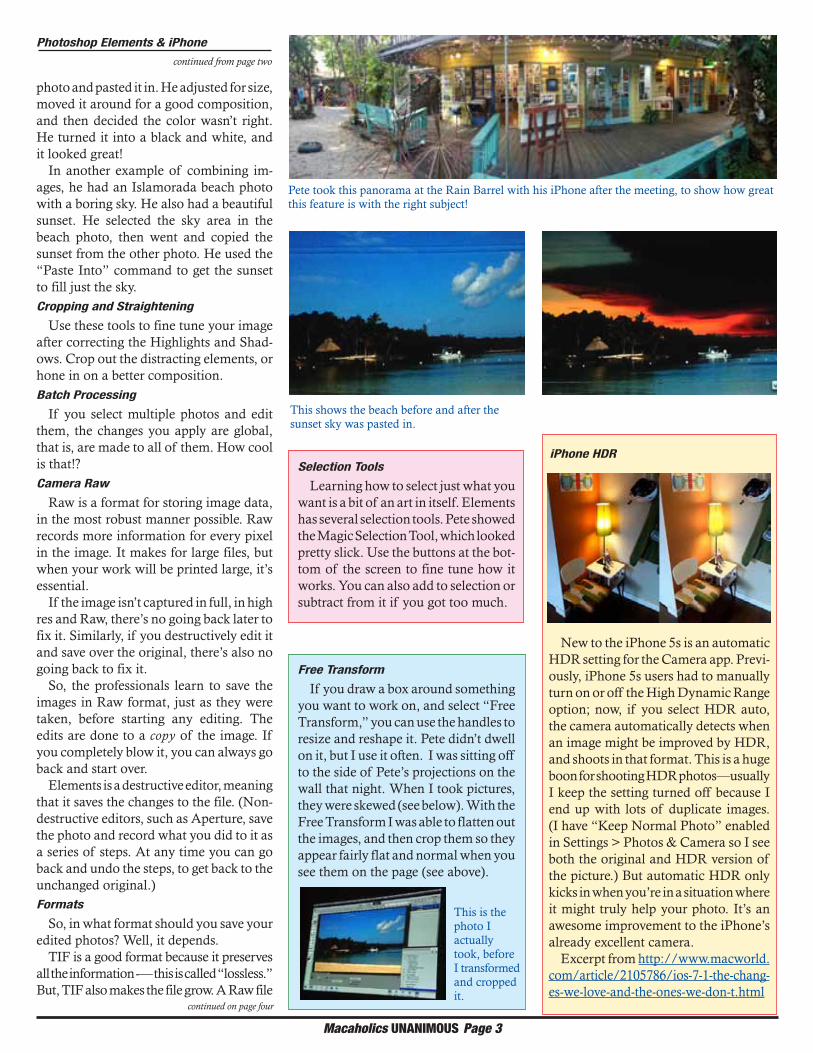
In the Craig’s photo, the sign on top of the building sets the highlight value. So the windows appear black. In Elements, Pete selected the window and brought up the histogram for Highlights and Shadows.
First, he compensated for the lack of highlights by pulling the white point until it hit where the values start to show. Then he adjusted the midrange value, sliding it toward the left.
Magically... we could see people inside the restaurant! So the lesson is, when you think you’re hidden away inside a dark restaurant or bar... beware... it’s not as private as you think!
No, wait... the lesson is - play with the histograms and see how you can find hid-den stuff in your pictures. Yeah, that’s it.Level Tool
A pet peeve for people who work with photography is the drunken horizon. Once you learn to fix it you’ll also learn to be horrified when you spot crooked horizons in print and on the web! There’s no excuse; it’s an easy fix.
Pete showed us a nice photo of the dock at Cheeca Lodge, but the horizon was crooked. In Elements, he brought up the Level tool, dragged along part of the horizon, and bam! perfectly level.Combining Images
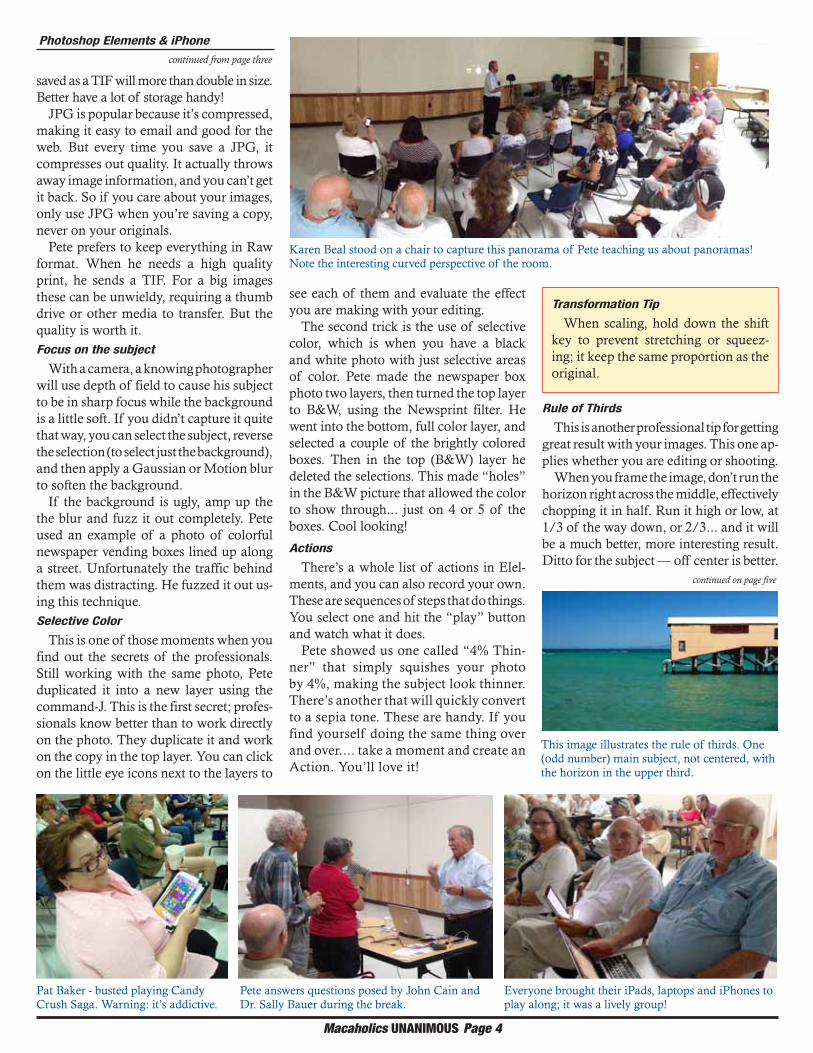
It’s easy to combine images in Elements. For this example, Pete used a photo of a moon, and one of an airport, showing sky. He went into the moon photo and selected it, copied it, and then opened the airport
Craig’s: Exposure example.
See how there’s nothing in the high part of the range?
Adjust the highlight point over to where the values start to show.
The adjust the midrange point to bring up the things hidden in the shadows.
Photoshop Elements 12:
30 Day Free Trial; after that it costs $70-$100 depending on where you buy. Download it here: http://www.adobe.com/products/photoshop-ele-ments.html?sdid=JNWQB
Macaholics UNANIMOUS Page 3
Photoshop Elements & iPhonecontinued from page two
continued on page four
Pete took this panorama at the Rain Barrel with his iPhone after the meeting, to show how great this feature is with the right subject!
New to the iPhone 5s is an automatic HDR setting for the Camera app. Previ-ously, iPhone 5s users had to manually turn on or off the High Dynamic Range option; now, if you select HDR auto, the camera automatically detects when an image might be improved by HDR, and shoots in that format. This is a huge boon for shooting HDR photos—usually I keep the setting turned off because I end up with lots of duplicate images. (I have “Keep Normal Photo” enabled in Settings > Photos & Camera so I see both the original and HDR version of the picture.) But automatic HDR only kicks in when you’re in a situation where it might truly help your photo. It’s an awesome improvement to the iPhone’s already excellent camera.
Excerpt from http://www.macworld.com/article/2105786/ios-7-1-the-chang-es-we-love-and-the-ones-we-don-t.html
iPhone HDR
photo and pasted it in. He adjusted for size, moved it around for a good composition, and then decided the color wasn’t right. He turned it into a black and white, and it looked great!
In another example of combining im-ages, he had an Islamorada beach photo with a boring sky. He also had a beautiful sunset. He selected the sky area in the beach photo, then went and copied the sunset from the other photo. He used the “Paste Into” command to get the sunset to fill just the sky. Cropping and Straightening
Use these tools to fine tune your image after correcting the Highlights and Shad-ows. Crop out the distracting elements, or hone in on a better composition.Batch Processing
If you select multiple photos and edit them, the changes you apply are global, that is, are made to all of them. How cool is that!?Camera Raw
Raw is a format for storing image data, in the most robust manner possible. Raw records more information for every pixel in the image. It makes for large files, but when your work will be printed large, it’s essential.
If the image isn’t captured in full, in high res and Raw, there’s no going back later to fix it. Similarly, if you destructively edit it and save over the original, there’s also no going back to fix it.
So, the professionals learn to save the images in Raw format, just as they were taken, before starting any editing. The edits are done to a copy of the image. If you completely blow it, you can always go back and start over.
Elements is a destructive editor, meaning that it saves the changes to the file. (Non-destructive editors, such as Aperture, save the photo and record what you did to it as a series of steps. At any time you can go back and undo the steps, to get back to the unchanged original.)Formats
So, in what format should you save your edited photos? Well, it depends.
TIF is a good format because it preserves all the information -— this is called “lossless.” But, TIF also makes the file grow. A Raw file
This shows the beach before and after the sunset sky was pasted in.
Selection Tools
Learning how to select just what you want is a bit of an art in itself. Elements has several selection tools. Pete showed the Magic Selection Tool, which looked pretty slick. Use the buttons at the bot-tom of the screen to fine tune how it works. You can also add to selection or subtract from it if you got too much.
Free Transform
If you draw a box around something you want to work on, and select “Free Transform,” you can use the handles to resize and reshape it. Pete didn’t dwell on it, but I use it often. I was sitting off to the side of Pete’s projections on the wall that night. When I took pictures, they were skewed (see below). With the Free Transform I was able to flatten out the images, and then crop them so they appear fairly flat and normal when you see them on the page (see above).
This is the photo I actually took, before I transformed and cropped it.
Macaholics UNANIMOUS Page 4
continued on page five
Photoshop Elements & iPhonecontinued from page three
Karen Beal stood on a chair to capture this panorama of Pete teaching us about panoramas! Note the interesting curved perspective of the room.
Pat Baker - busted playing Candy Crush Saga. Warning: it’s addictive.
Pete answers questions posed by John Cain and Dr. Sally Bauer during the break.
Everyone brought their iPads, laptops and iPhones to play along; it was a lively group!
saved as a TIF will more than double in size. Better have a lot of storage handy!
JPG is popular because it’s compressed, making it easy to email and good for the web. But every time you save a JPG, it compresses out quality. It actually throws away image information, and you can’t get it back. So if you care about your images, only use JPG when you’re saving a copy, never on your originals.
Pete prefers to keep everything in Raw format. When he needs a high quality print, he sends a TIF. For a big images these can be unwieldy, requiring a thumb drive or other media to transfer. But the quality is worth it.Focus on the subject
With a camera, a knowing photographer will use depth of field to cause his subject to be in sharp focus while the background is a little soft. If you didn’t capture it quite that way, you can select the subject, reverse the selection (to select just the background), and then apply a Gaussian or Motion blur to soften the background.
If the background is ugly, amp up the the blur and fuzz it out completely. Pete used an example of a photo of colorful newspaper vending boxes lined up along a street. Unfortunately the traffic behind them was distracting. He fuzzed it out us-ing this technique.Selective Color
This is one of those moments when you find out the secrets of the professionals. Still working with the same photo, Pete duplicated it into a new layer using the command-J. This is the first secret; profes-sionals know better than to work directly on the photo. They duplicate it and work on the copy in the top layer. You can click on the little eye icons next to the layers to
see each of them and evaluate the effect you are making with your editing.
The second trick is the use of selective color, which is when you have a black and white photo with just selective areas of color. Pete made the newspaper box photo two layers, then turned the top layer to B&W, using the Newsprint filter. He went into the bottom, full color layer, and selected a couple of the brightly colored boxes. Then in the top (B&W) layer he deleted the selections. This made “holes” in the B&W picture that allowed the color to show through... just on 4 or 5 of the boxes. Cool looking!
Actions
There’s a whole list of actions in Elel-ments, and you can also record your own. These are sequences of steps that do things. You select one and hit the “play” button and watch what it does.
Pete showed us one called “4% Thin-ner” that simply squishes your photo by 4%, making the subject look thinner. There’s another that will quickly convert to a sepia tone. These are handy. If you find yourself doing the same thing over and over.... take a moment and create an Action. You’ll love it!
Transformation Tip
When scaling, hold down the shift key to prevent stretching or squeez-ing; it keep the same proportion as the original.
Rule of Thirds
This is another professional tip for getting great result with your images. This one ap-plies whether you are editing or shooting.
When you frame the image, don’t run the horizon right across the middle, effectively chopping it in half. Run it high or low, at 1/3 of the way down, or 2/3... and it will be a much better, more interesting result. Ditto for the subject — off center is better.
This image illustrates the rule of thirds. One (odd number) main subject, not centered, with the horizon in the upper third.
Macaholics UNANIMOUS Page 5
Photoshop Elements & iPhonecontinued from page four
Learn More from Pete Bacheler
Pete teaches Digital Photography, Photoshop Elements and Photoshop at Florida Keys Community College’s Coral Shores campus.
They’re non-credit courses, which gives Pete leeway in where and how he conducts his classes. After a little background in the classroom, there are field trips to the beaches and other stunning Upper Keys locations, often accompanied by pauses for refreshment at their restaurants.
He likes to get at least 6 people enrolled for a class, because more students means more images to study and learn from, as well as more questions. Better for all!
Try to get 1, or 3 or 5 things of interest in your composition, as opposed to an even number.iPhone Photography
When you first open the camera, you see the grid. It’s very useful. If yours is turned off, turn it on under Settings > Photos and Camera > Camera- Grid.
The grid helps you take better pictures by putting that “Rule of Thirds” right in front of you.
See the gold box? That’s where your fo-cus and exposure are set. Position on your subject (Pete says don’t put them in the exact center of the Tic-Tac-
Tip for Photography in the Keys
Put a Polarizing filter on your camera lens for much better results with shoot-ing outdoors.
Toe board. Use the crosshairs to move it off-center.) Then tap once on the screen where you want the focus and exposure to be the best. The iPhone will adjust every-thing automatically for you; take the shot.More Composition Notes
Pete says, if you are shooting a moving object, like a boat or a runner, give them room to run into the photo — room out in front. He says no one cares where they’ve been!
People should look into the photo, look at the point of interest.The iPhone Flash
Pete says it’s only good for 7-8 feet.Shooting Tips
1. Rest your arm or hand on something stead to shoot; a steadier camera takes a better shot. (Unless you’re going for that “motion blur” look!)
2. You have a poor man’s “motor drive” built into the iPhone; just hold your finger on the shutter button and it will keep snapping pictures continuously. This is great if you are trying to capture your grandkid kicking that soccer ball. Capture the whole sequence, then throw out all but the perfect shot.
3. Take the picture. You can always throw it away if it isn’t what you were going for, but you can never recreate the moment.
4. When shooting animals, take a shot from afar, step closer, take another, step closer, again... etc. By the time you startle the subject you’ll have several shots in the camera.HDR = High Dynamic Range
The iPhone has HDR built in, if you chose to turn it on. What this does is take 3 shots when you click the button for one.
One is underexposed, one is right-on, and one is over-exposed. The camera then blends the 3 for the best possible image.
You have to hold the camera steady or the 3 shots won’t register correctly; it will show “ghosts” in the image. Don’t use a flash when shooting in HDR.
Shooting in HDR uses more space for storage because the camera saves the first image and the composite every time you shoot, so you want to use it sparingly.
If you are shooting into a dark area, that’s a good time to turn on HDR, it will help pull details out of the shadows. Also if your subjects are backlit, as long as they aren’t moving, HDR will help.Panoramas
This feature on the iPhone is a lot of fun, and you can see several panoramic shots in this newsletter. Try to hold the iPhone steady. It does not stitch the shots together; it takes one continuous shot. It provides you an arrow to follow to keep the camera level, and tells you if you are panning too fast or too slow.
We thank Pete for sharing his expansive knowledge and experience with us. I’m already looking forward to the next time!
Photo Apps
John Cain mentioned Camera Plus as a good app for splitting focus and expo-sure in the iPhone. It also has a built-in level for taking balanced shots as well as a text overlay feature that allows you to customize photos with personal notes.
Graham Thomas showed us, on his iPhone, Frontback.
This one shoots the photographer at the same times as it shoots the subject, using the two cam-eras built into the iPhone.
John Hammerstrom mentioned Groopic, which lets you take group pictures that also include the photog-rapher. In three steps, users take two photos with their iPhone, then mark the photographers in each one. Groopic then does its magic to automatically combine the incomplete pictures into one.
Mary Anne Roper mentioned Tourist Eraser - good for eliminating unwanted people etc. from backgrounds.
Macaholics UNANIMOUS Page 6
Shorter URLsby Jackie Harder
Do you know about https://bitly.com/and http://ow.ly/url/shorten-url as URL shorteners? If you’re in charge of writing something for others to read and it has links... check it out. Just plug in the giant page URL and shrink it. Either one are good, but I think more in the communications biz prefer bitly. I had used http://www.tinyurl.com but found bitly to be better. Ow.ly is Hootsuite’s URL shortener, but anyone can use it. (Hootsuite is the big social media scheduler out there.) Free, too.
Screen Capture on iPhoneWant to capture what’s in your iPhone
screen in iOS7? Here’s how:1. Navigate to the screen you want to
capture2. Press and release Sleep (top right button
of phone) and Home (round button center bottom) at the same time.
4. You will hear a camera-like shutter sound and see a “flash.”
5. Screenshot is in the camera roll.
Two Apps for Sharingsubmitted by Karen Beal
In today’s tech world, there is no reason to miss out on time with the grandkids (or your child if you are a traveling parent). You can use these apps to share good times.
A Story Before Bed appSharing story time has gone
digital. This service offers some free stuff, including three books to start you off and a ‘read it live’
feature on Google Hangout. Otherwise it charges $10 a month with a choice of 500 books.
Jigsaw Live appLooking for a family room
experience with a child or a novel idea to visit with a
distant friend? One jigsaw puzzle, two players on different devices. Endless fun across the table or across the ocean. Connect with a friend to put together a jigsaw in real time. Drag a piece on your screen and it moves simultaneously on your friend’s iPad. Talk through your devices while playing. Choose a picture they provide, a picture from your photo library, or snap a picture with your de-vice’s camera---then turn your choice into a jigsaw puzzle.
My Love Affair with iCalby Sue Beal
iCal makes me look good! I can come off as supremely organized, just because I have iCal in my pocket. Well, not my pocket exactly. I’m not mobile, and don’t use multiple devices... iCal has much to offer in that area but I’m not talking about that.
I’m talking about simple calendaring on my desktop.
My world is largely driven by email. Email is sort of my “to do” list. So I use iCal to email myself reminders of things I need to do.
Why email and not just a popup alert? Because I occasionally do actually leave the computer... and I might not be there to see the alert. I also might not have time, at the moment of the alert, to act on it... and then I could forget about it altogether. But an email will stay in my inbox until I trash it... and that serves as a great reminder.
So what kind of things does this help with?
Camera Apps Worth Checking Out
by Graham Thomas
Here’s a list from someone who uses them:
PhotoGrid Pro - collage editor
Burst Mode - high speed camera app
Fisheye4Free - tag and edit photos
Flipside - take pictures from both sides
Frontback - see page 5, orange box
Scene - shoot 3D images with iPhone
ProCamera - separate focus and exposure control for both photos and videos.
Timer! -be in your photo - you can set a countdown before taking the shot
XnBooth - fun photo booth effects
PhotoFusion - Merge your photos and get interesting results.
An A-Z guide toOS X Mavericks
from Karen Beal
A-M: http://blogs.computerworld.com/mac-os-x/23489/z-guide-os-x-mavericks-m
N-Z: http://blogs.computerworld.com/mac-os-x/23525/z-guide-os-x-mavericks-part-two-n-z
--Every Monday it reminds me to email a job to a certain client.
--Every 2nd and 4th Wednesday it re-minds me it’s e-recycle day in Key Largo.
--Twice a year it reminds me to tell the web guy to change the splash screen on a certain website.
--Annual reminders for birthdays are always useful.
--Every 2nd Thursday it reminds me of the UKMUG meeting.
In the desktop version of iCal there are more customizable methods for determin-ing a date. For example, the mobile App doesn’t give you the option of setting something up for the 2nd Thursday of the month, but on the desktop you have an option for “custom” and it’s under that.
So, now there’s no excuse for missing the UKMUG date, because I know you have iCal on your Mac! (And now you know all my secrets for staying organized.)
A Free App A Dayby Graham Thomas
Check out this site; it sends a daily free app link and often a second free or deeply discounted one as well: http://appgratis.com/
The Free App for March 19 was Fast Camera: Fast Camera takes hundreds of photos a minute. With speed and resolution controls as well as timer mode, you can create stop motion or time-lapse videos and GIFs, and select which photos to delete or save. Great for capturing fast-moving scenes (sport, kids, pets).Fast Camera normally costs $4.99
ALSO FROM GRAHAM: CNET has a video on smartphone cameras including a segment on making your own tripod mount: http://www.cnet.com/videos/how-to-take-incredible-pictures-with-your-phone/

Macaholics UNANIMOUS Page 7
More Great “Life Hacks” for your e-life.... from John & Bernie Cooper
Q: How do you carry earbuds so they don’t tangle but are still easy to access? I don’t want to bother winding them around a little spool.
A: This geeky cord-wrapping technique takes practice to get the hang of, but it’ll keep your cables tangle-free—and prevent the kinking that can shorten your earbuds’ life span.
1. With your left hand, hold the cable where it splits in two. With your right hand, grab just below the earbuds.
2. Using your left thumb and index finger, twist the cord forward; this will make the cable form a loop. Secure the result-ing coil with your right fingers.
This one is actually from Pete Bacheler. A quick and easy, inexpensive way to angle your laptop and give it some airflow to keep it cool - 2 rubber doorstops underneath!
3. Again using your left thumb and index finger, twist the cord backward this time. The cord will form another loop. Secure it with your right fingers.
4. Repeat steps 2 and 3 until most of the cord is coiled. Finish by threading the headphone jack through the loop twice, making sure not to crimp the wire.
The secret: rolling the cable between the left thumb and index finger, which causes the cord to form a natural loop. To unwind the cable, just untuck one end and give it a shake.from The Wall Street Journal

Macaholics UNANIMOUS Page 8
FREE CLASSESThe Apple Store at the Falls has free classes
every Saturday! They also have one-on-one
training, workshops and the Genius Bar. Call
or check the web for more info:
Apple Store at The Falls305-234-4565 8888 SW 136th StreetMiami, FL 33176 Mon-Sat:10-9:30pmSun: noon-7pm
http://www.apple.com/retail/thefalls
Come at6:30 for the
Beginners Circle:Bring your laptop
and your questions at 6:30, and for a half-hourprior to the main meeting
we'll have experienced folks available to help,
one on one, or in small groups.
Did you see that picture of you, taken at the last meeting?
http://ukmug.pbworks.com/
Color Copies • Large or Small OrdersRack Cards • Business Forms & Checks • Brochures
Business Cards • Letterhead • Envelopes
Signs and Banners • Multi-Part Forms • RX pads
Posters • Rubber Stamps • Graphic Design
305-664-1002 81933 Overseas Hwy., Islamorada
M U C l a s s i f i e d s
The Official Newsletter of the Upper Keys Macintosh Users Group August 1993 Volume 1, Issue 1
is the official newsletter of the
Upper Keys Mac Users GroupA nonprofit organization devoted to the use (and sometimes abuse) of the Macintosh computer. Sub-scriptions are free. Contents © 1993 - 2014 by the Upper Keys Macintosh Users Group except where noted. All other rights reserved.
219 Second St. • Key Largo FL 33037(305) 451-4601 • [email protected]
Share! Send us your stuff!
VISIT TODAY!http://ukmug.pbworks.com/
Post questions and requests for helpPost tips and tricks
Post your favorite linksCheck on upcoming meetings
Download our newsletters & more!
Monroe County Recycling Collection Center: MM 100.1
Oceanside (Magnolia St.) 453-0788
E-RECYCLING: 2nd & 4th Wed. every month, 10am - 2pm
E-waste: Monitors & Computers Batteries, Televisions, All Telephones& FAX Machines, Printers / Copiers,
DVD / VCR Players, Radios & Speakers, Discs & Cassettes
Also taking Hazardous Household Waste.
dummies.com is a great place for useful and brief
Mac Tips and Tricks! Check it out!
Barry Carter and Kathy Miller during Begin-ner’s Circle.
Got Stuff for Sale or Giveaway?
Need Something?
Email [email protected]
and I’ll post it here.
OUR LINKS ARE LIVE!If you haven’t figured it out yet, try it.
Click on any blue, underlined link in our Macaholics Unanimous newsletter and
it will take you to the web.