the rv refrigerator - - gmc eastern · pdf file3 continuous absorption cooling unit •...
TRANSCRIPT

1
The RV Refrigerator Rebuild or Replace?
• Leon Herschberger• National RV
Refrigeration
2
• How an RV Refrigerator Works
• Common Symptoms of a Bad Cooling Unit
• Replace or Rebuild
• Steps in Rebuilding
• Questions
Outline
3
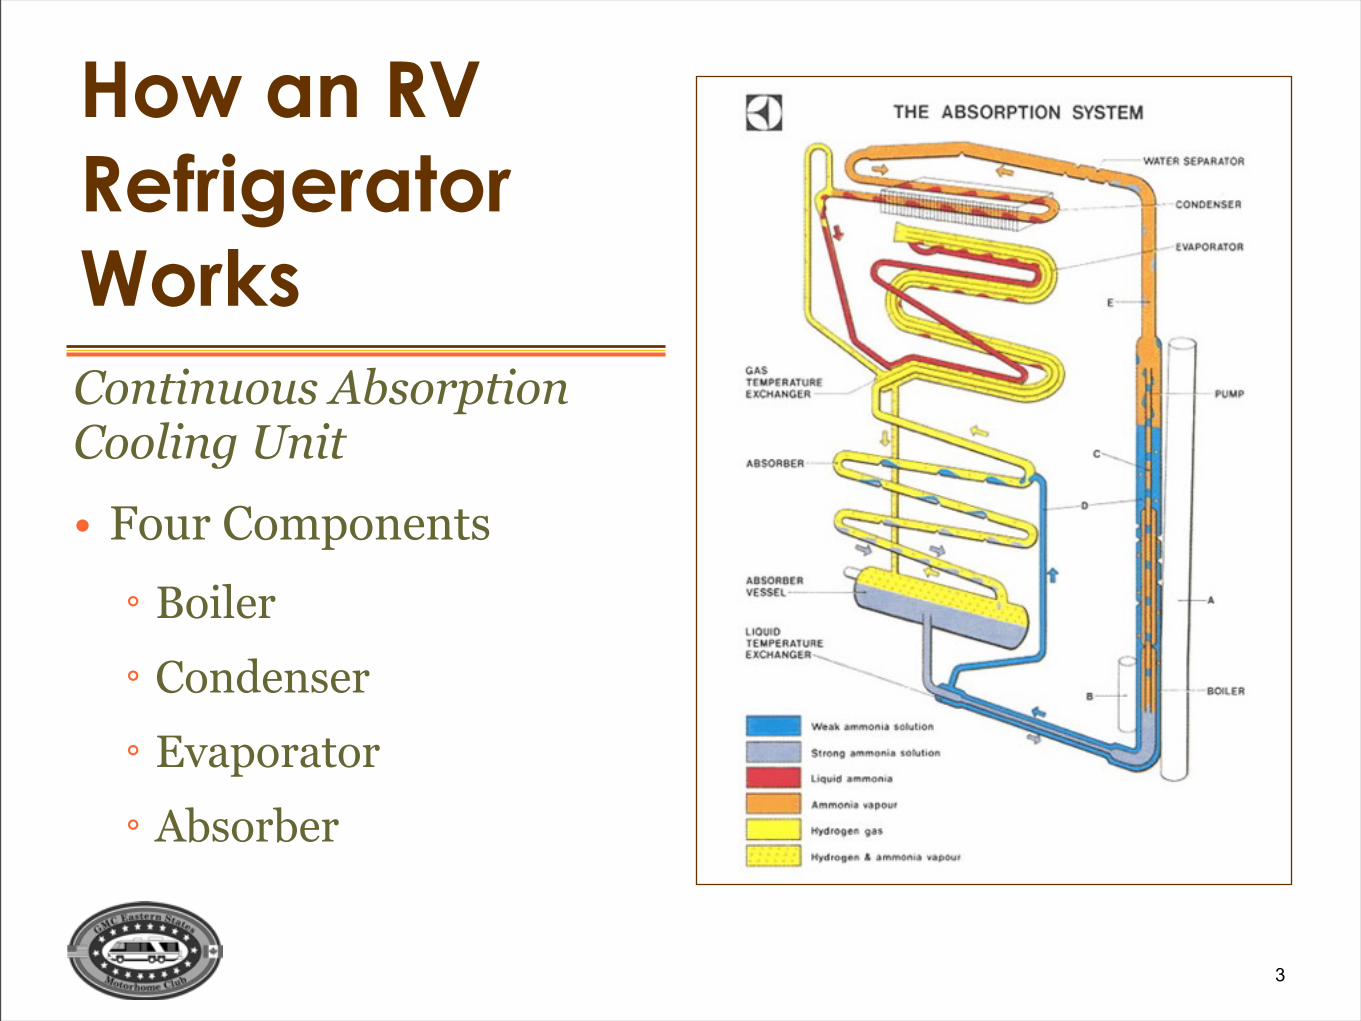
Continuous Absorption Cooling Unit
• Four Components
° Boiler
° Condenser
° Evaporator
° Absorber
How an RV RefrigeratorWorks

4
The Unit Charge
• Quantities of…
° Ammonia
° Water
° Hydrogen
• Pressure condenses ammonia at room temperature
How an RV RefrigeratorWorks
5
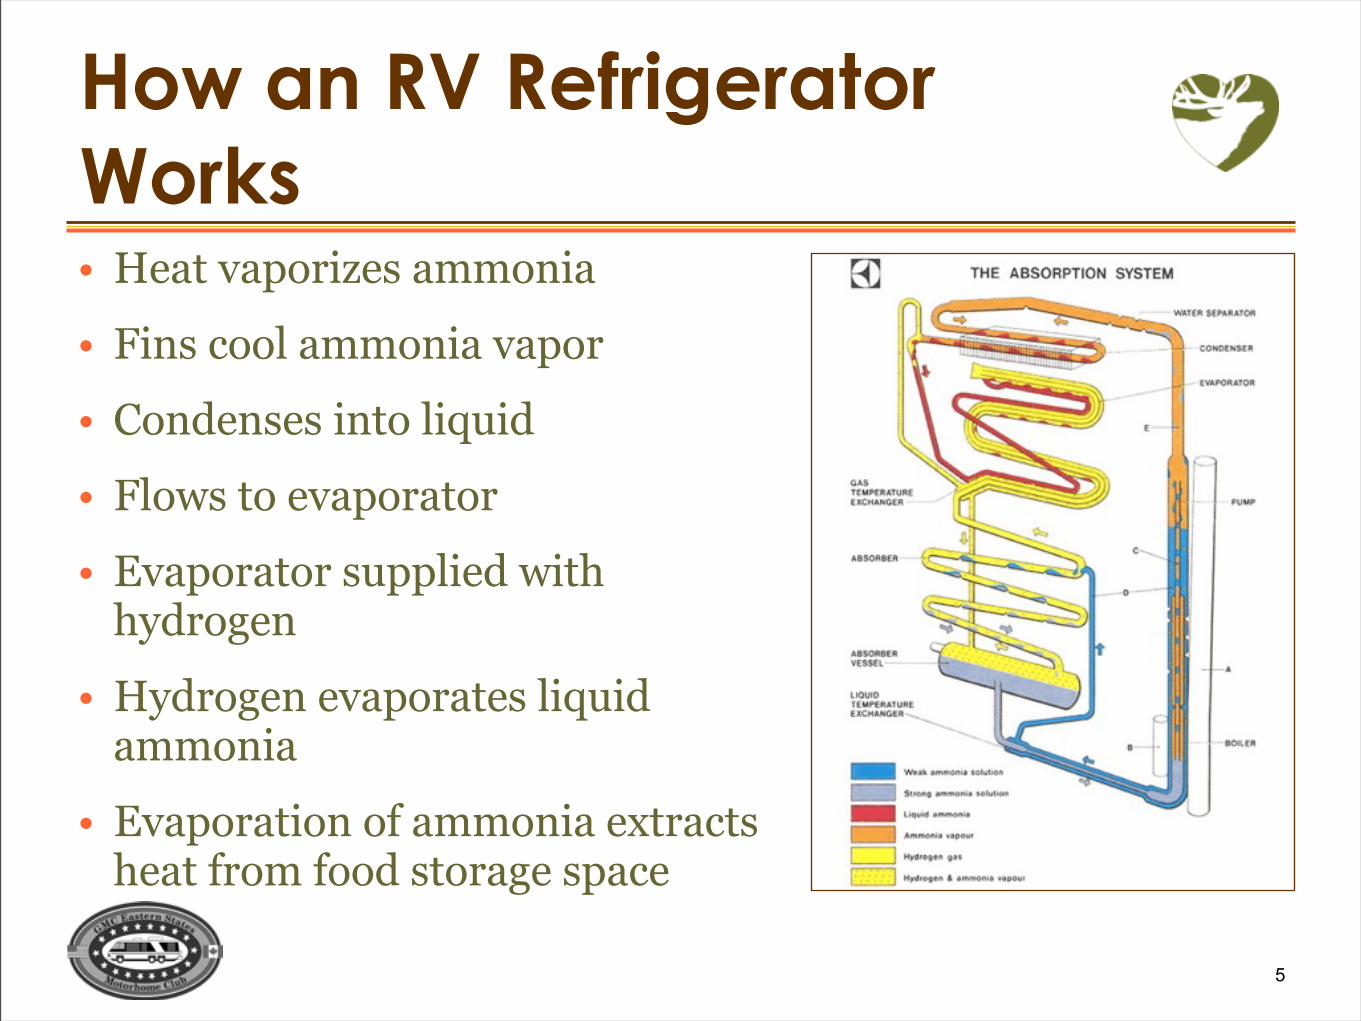
• Heat vaporizes ammonia
• Fins cool ammonia vapor
• Condenses into liquid
• Flows to evaporator
• Evaporator supplied with hydrogen
• Hydrogen evaporates liquid ammonia
• Evaporation of ammonia extracts heat from food storage space
How an RV RefrigeratorWorks
6
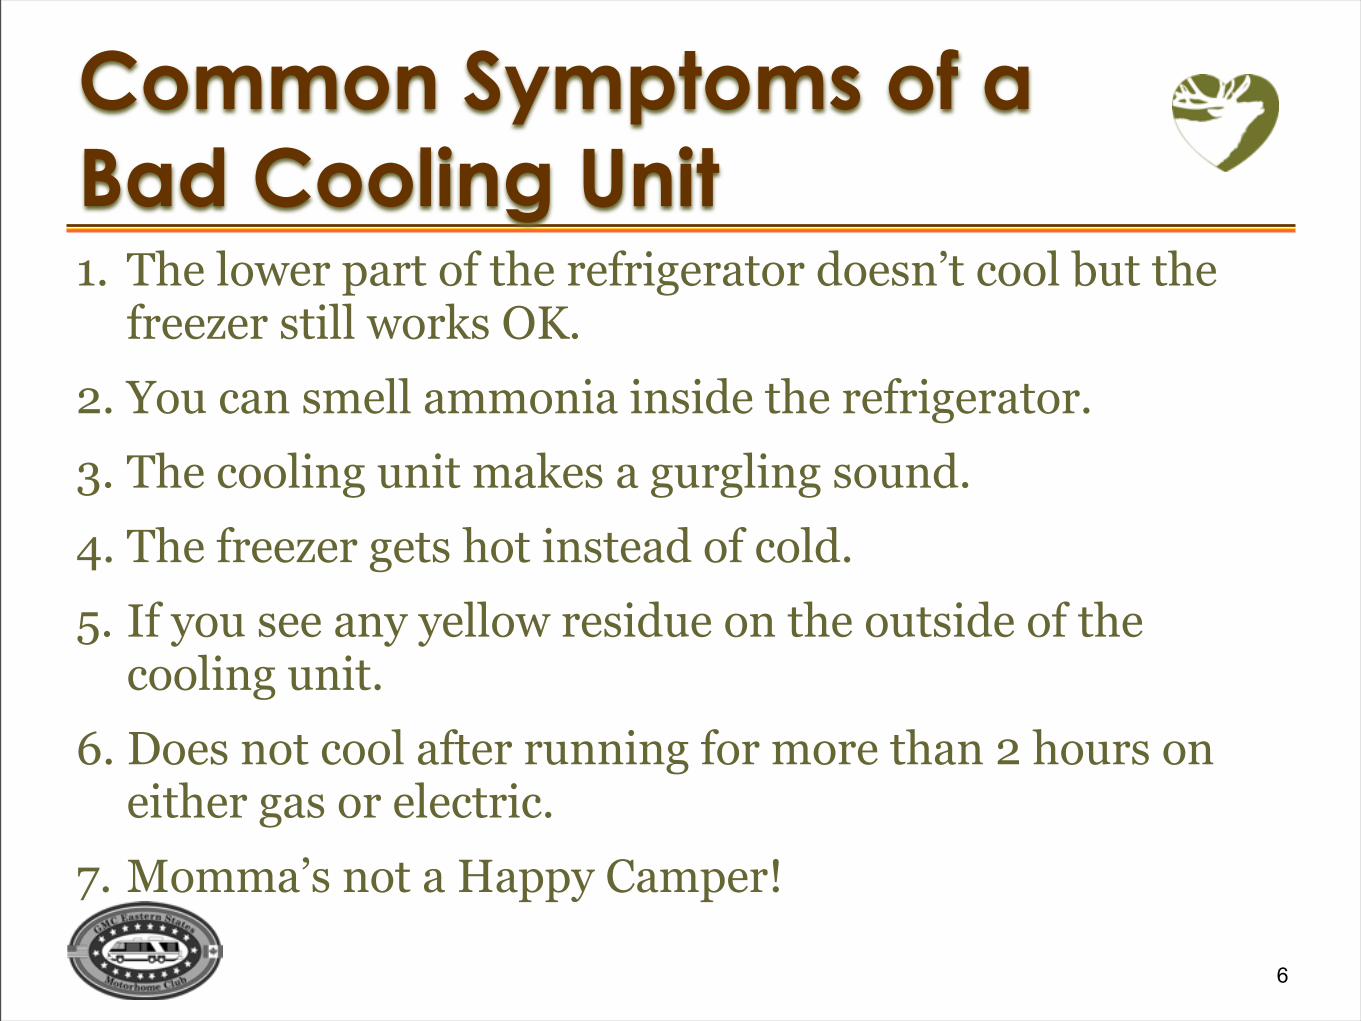
1. The lower part of the refrigerator doesn’t cool but the freezer still works OK.
2. You can smell ammonia inside the refrigerator.
3. The cooling unit makes a gurgling sound.
4. The freezer gets hot instead of cold.
5. If you see any yellow residue on the outside of the cooling unit.
6. Does not cool after running for more than 2 hours on either gas or electric.
7. Momma’s not a Happy Camper!
Common Symptoms of aBad Cooling Unit
7
• Normal unit lasts 15 years
• Performance – cools better than new
• Costs – new costs twice as much as re-built
• Some Bargains – do they work?
• Rebuild Cabinet – bargain may not fit
• Discontinued Brand – who supports
Replace or Rebuild??
8
• Costs half as much as new
• In and out in as little as 4 hours
• Performs better than when new
• All rebuilt cooling units are backed with 3 year warranty
Why Rebuild?
9
• Complete rebuild of a refrigerator consists of:
° Replacing the evaporator with all new tubing
° Complete flush
° Recharge.
What Is a Rebuilt Refrigerator

10
A complete rebuild of your refrigerator consists of a proven 16 step process of replacing the evaporator with all new tubing, followed by a complete flush and recharge.
Step 1: Assess the unit
Step 2: Cut off the stem
Step 3: Weld in a new port
Step 4: Remove foam to examine evaporator
Step 5: Determine damage
Step 6: Sandblast the cooling unit
Step 7: Cut out old evaporator
Step 8: Weld in new evaporator
Step 9: Bend & install new liquid line
Step 10: Reinforce braces and tack welds
Step 11: Flush clean, vacuum dry
Step 12: Charge
Step 13: Test for leak
Step 14: Paint
Step 15: Test for performance
Step 16: Install new foam pack
NRVR Rebuild Process
11
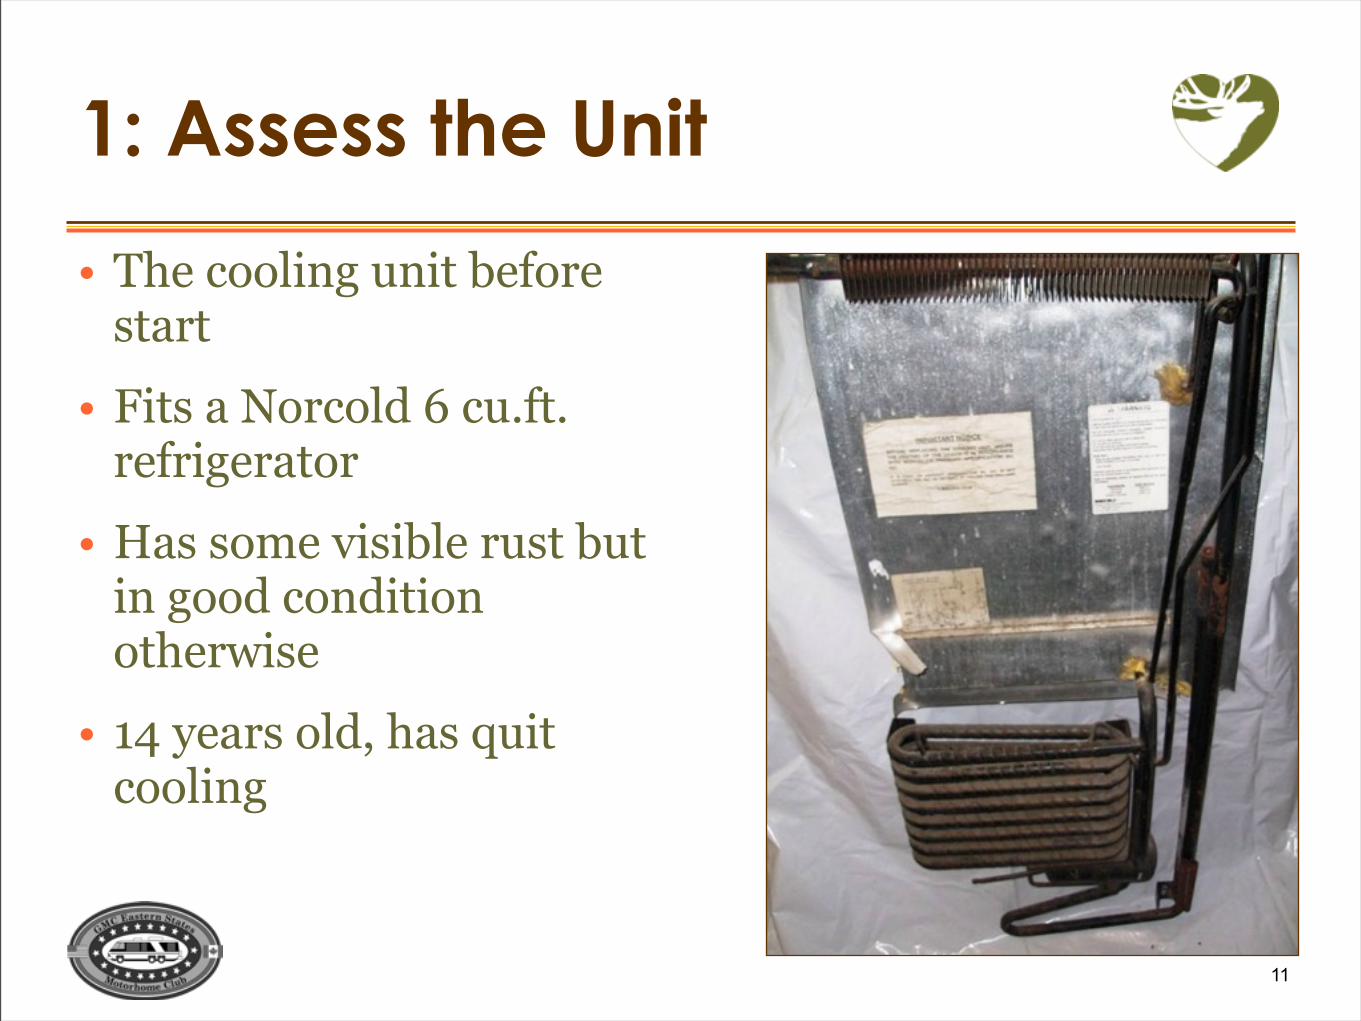
1: Assess the Unit
• The cooling unit before start
• Fits a Norcold 6 cu.ft. refrigerator
• Has some visible rust but in good condition otherwise
• 14 years old, has quit cooling
12
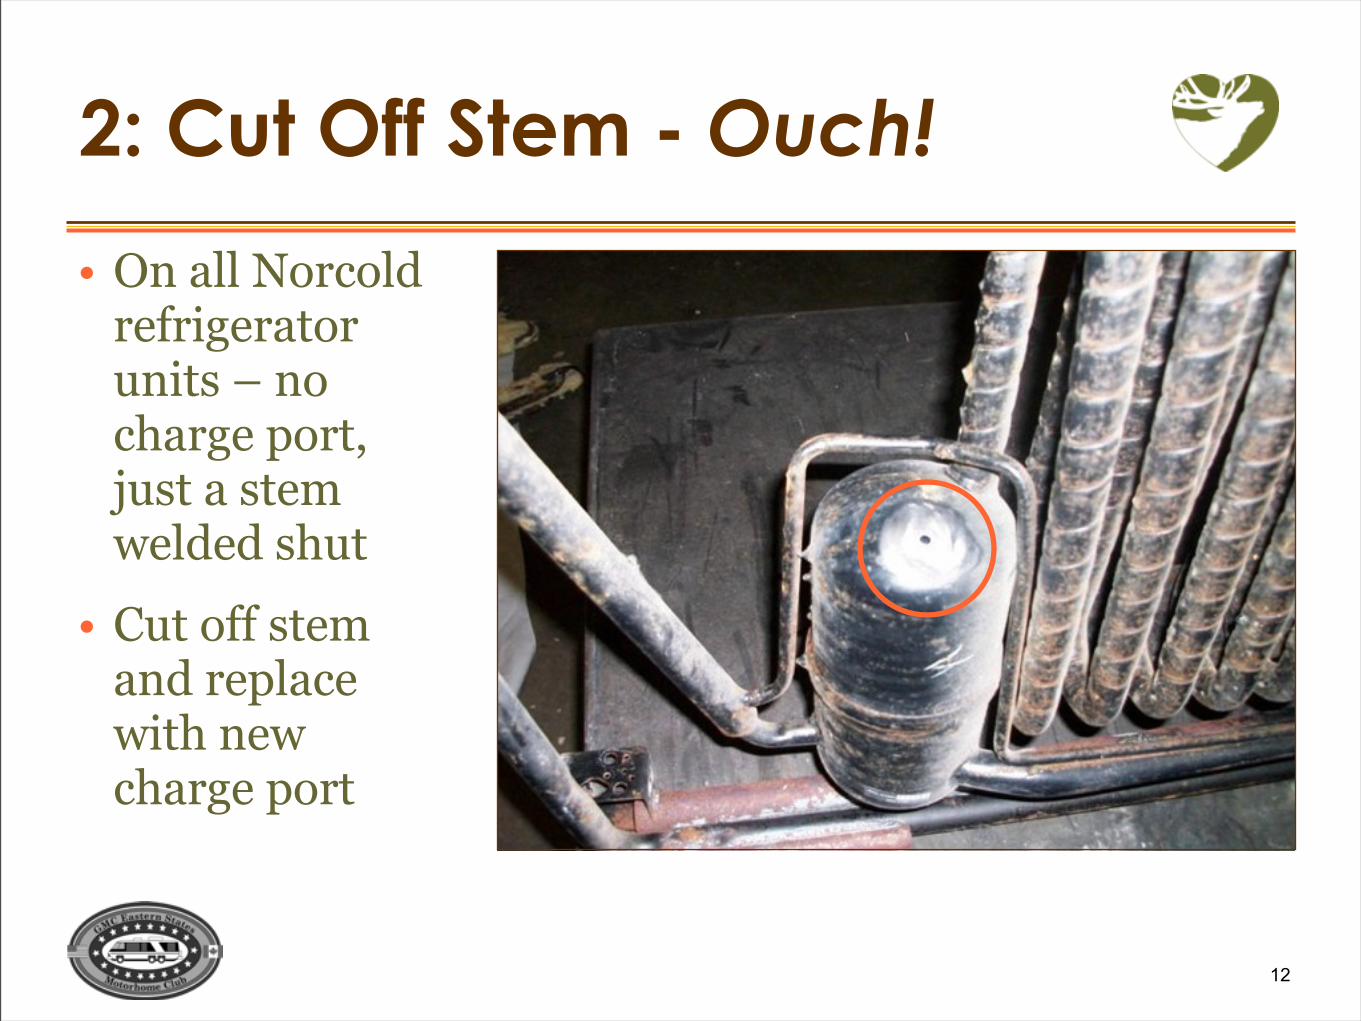
2: Cut Off Stem - Ouch!
• On all Norcold refrigerator units – no charge port, just a stem welded shut
• Cut off stem and replace with new charge port
13
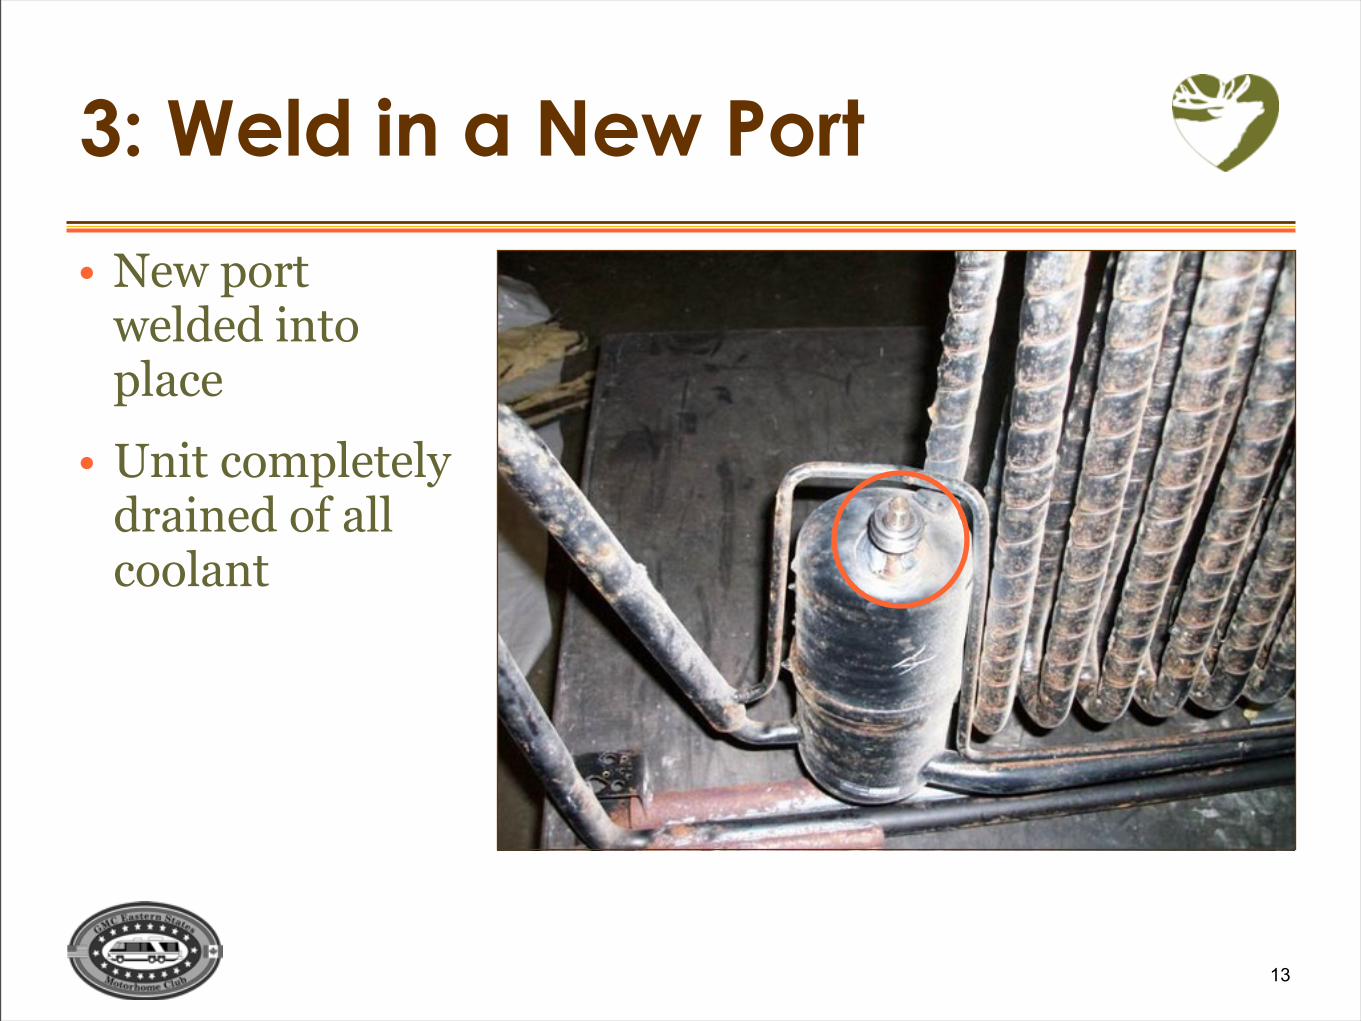
3: Weld in a New Port
• New port welded into place
• Unit completely drained of all coolant
14
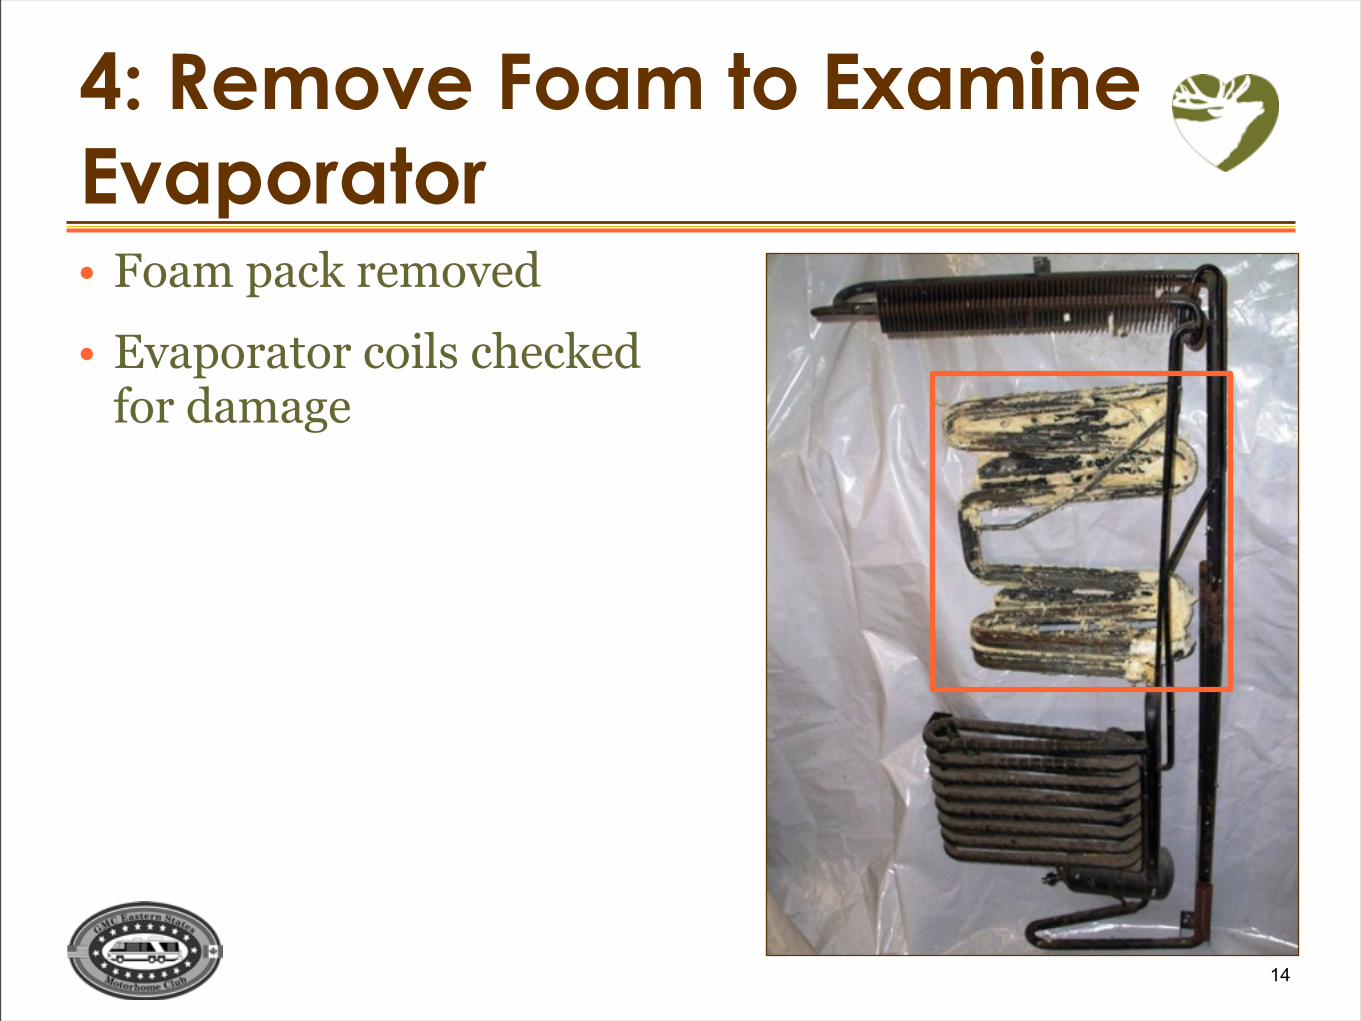
4: Remove Foam to Examine Evaporator• Foam pack removed
• Evaporator coils checked for damage
15
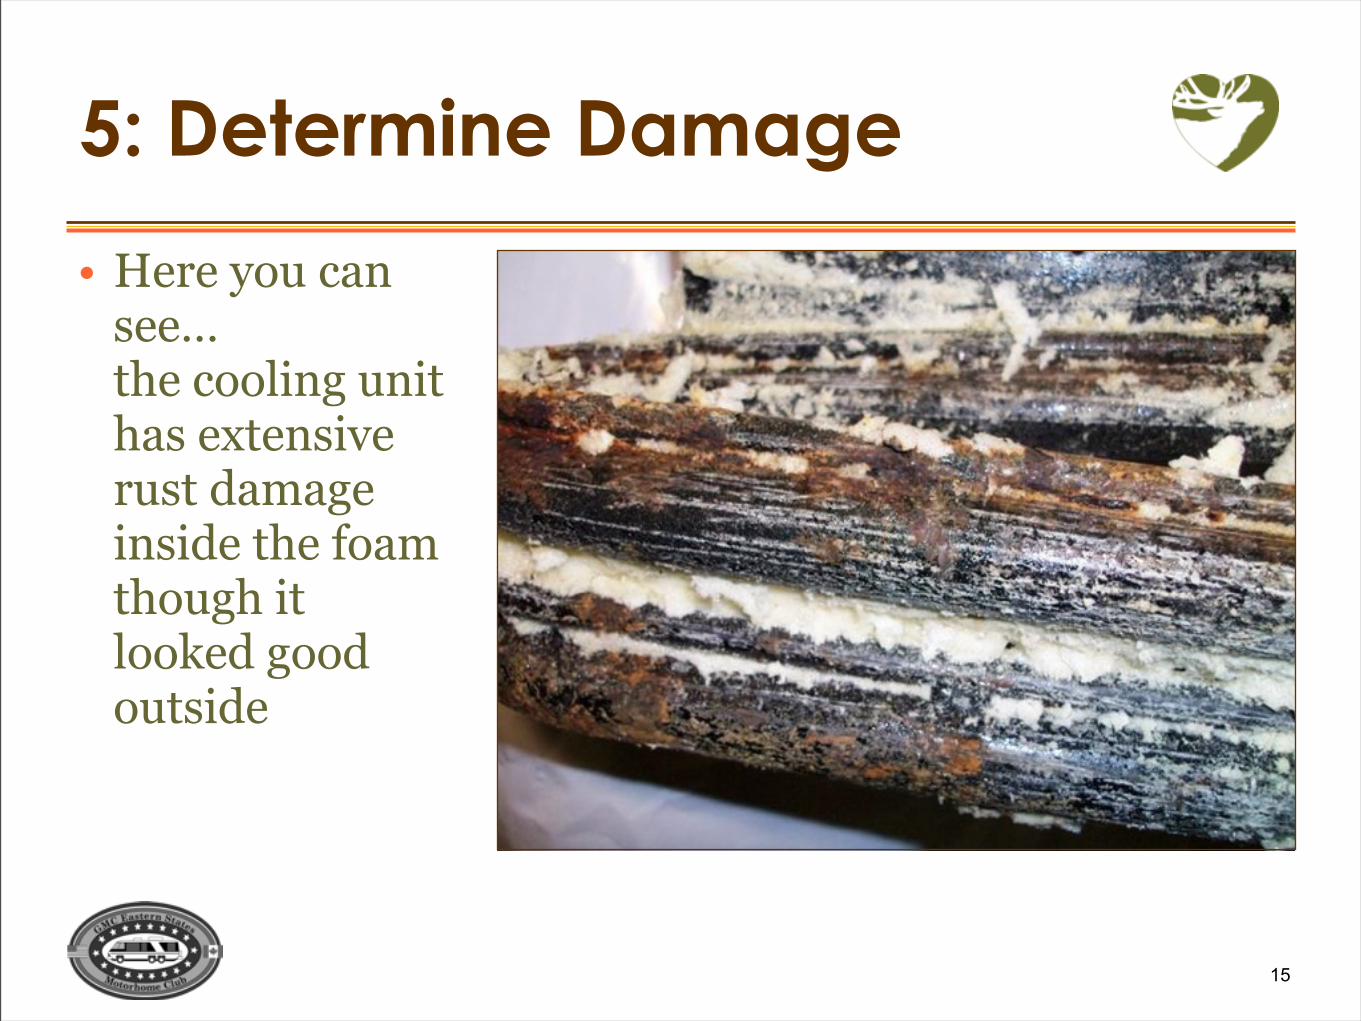
5: Determine Damage
• Here you can see…the cooling unit has extensive rust damage inside the foam though it looked good outside
16
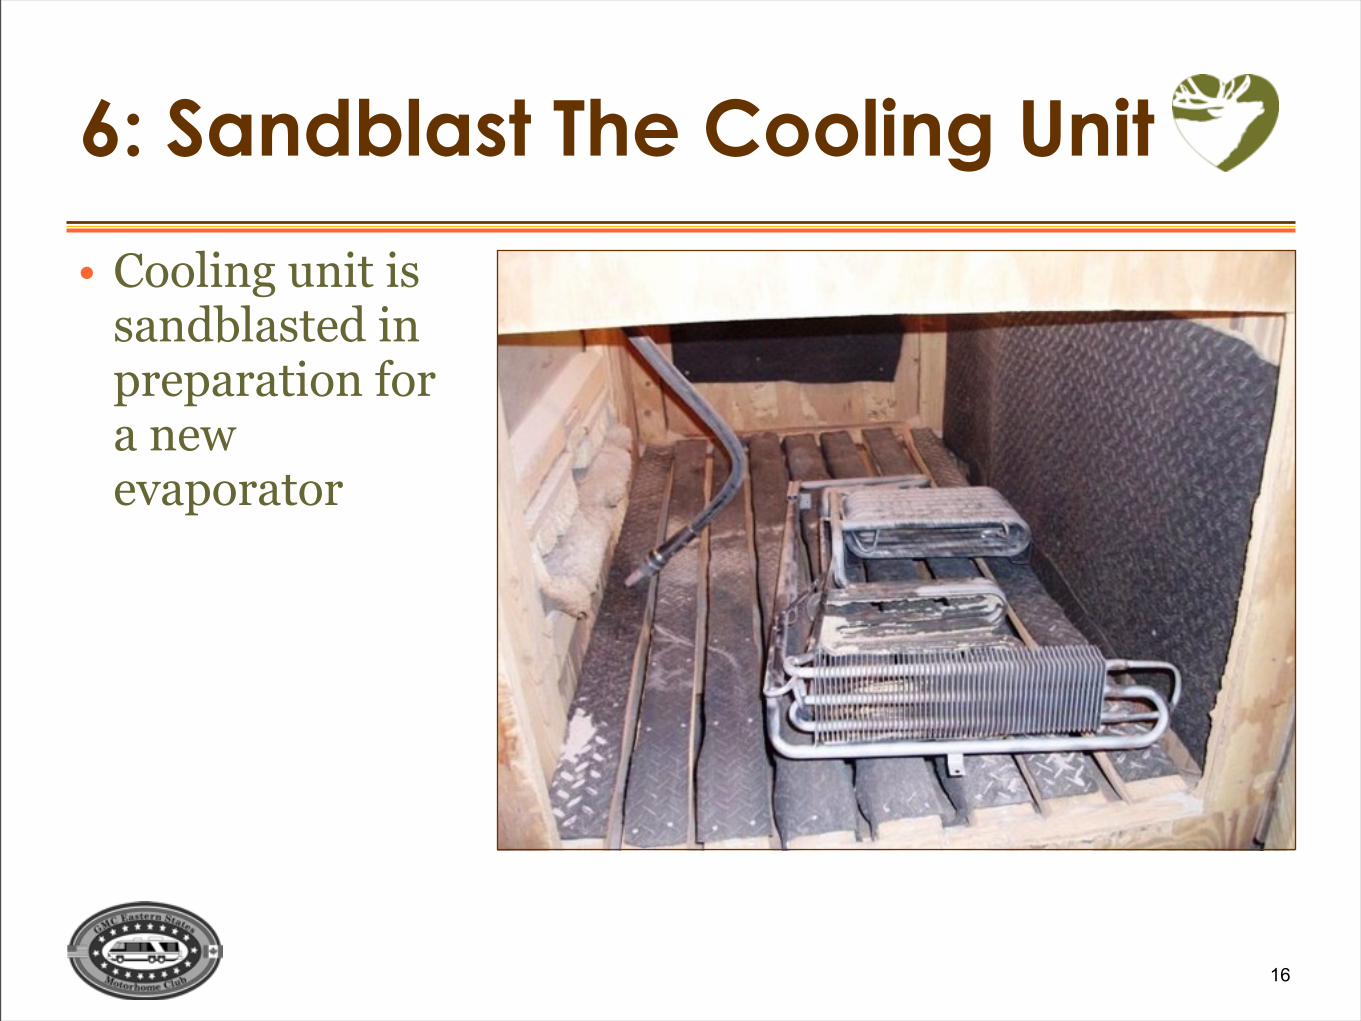
6: Sandblast The Cooling Unit
• Cooling unit is sandblasted in preparation for a new evaporator
17
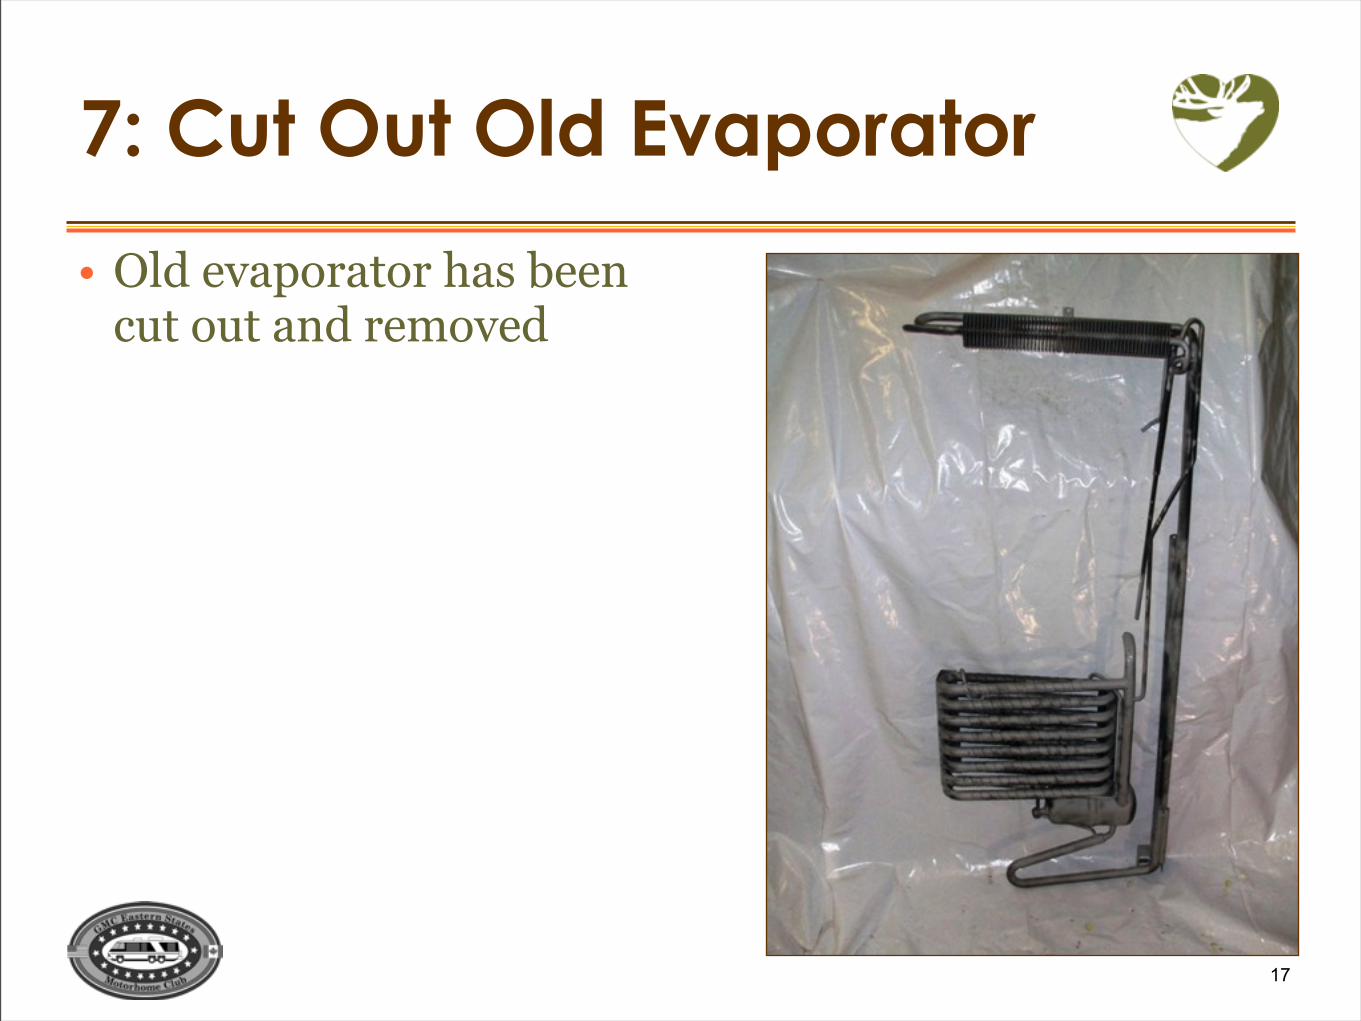
7: Cut Out Old Evaporator
• Old evaporator has been cut out and removed

18
Comparing Old and New Evaporator • Old and new
evaporator side by side
19
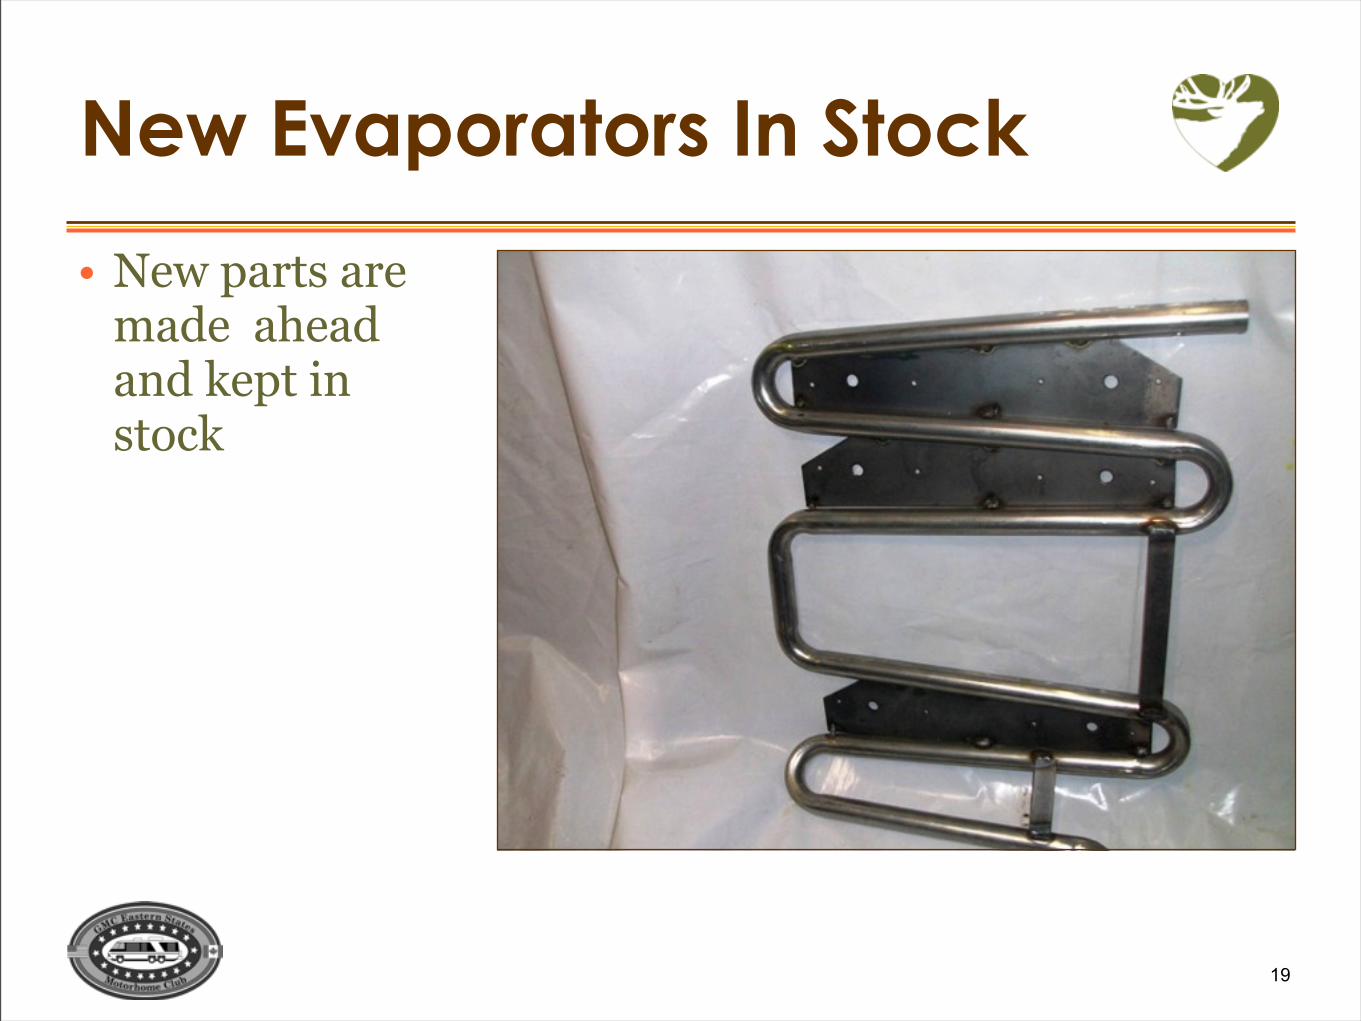
New Evaporators In Stock
• New parts are made ahead and kept in stock
20
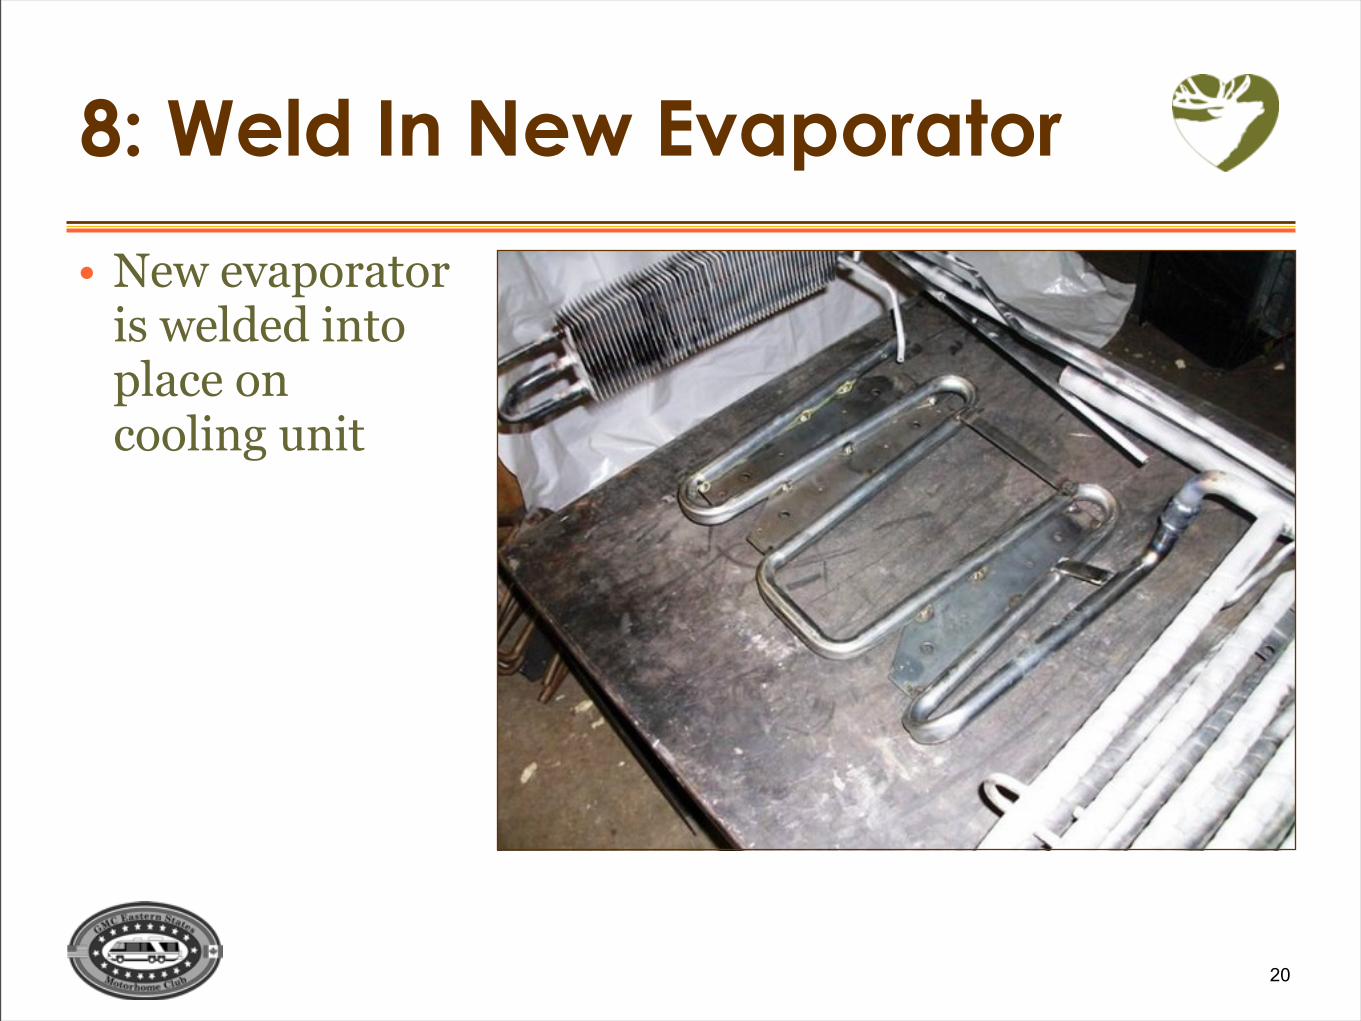
8: Weld In New Evaporator
• New evaporator is welded into place on cooling unit
21
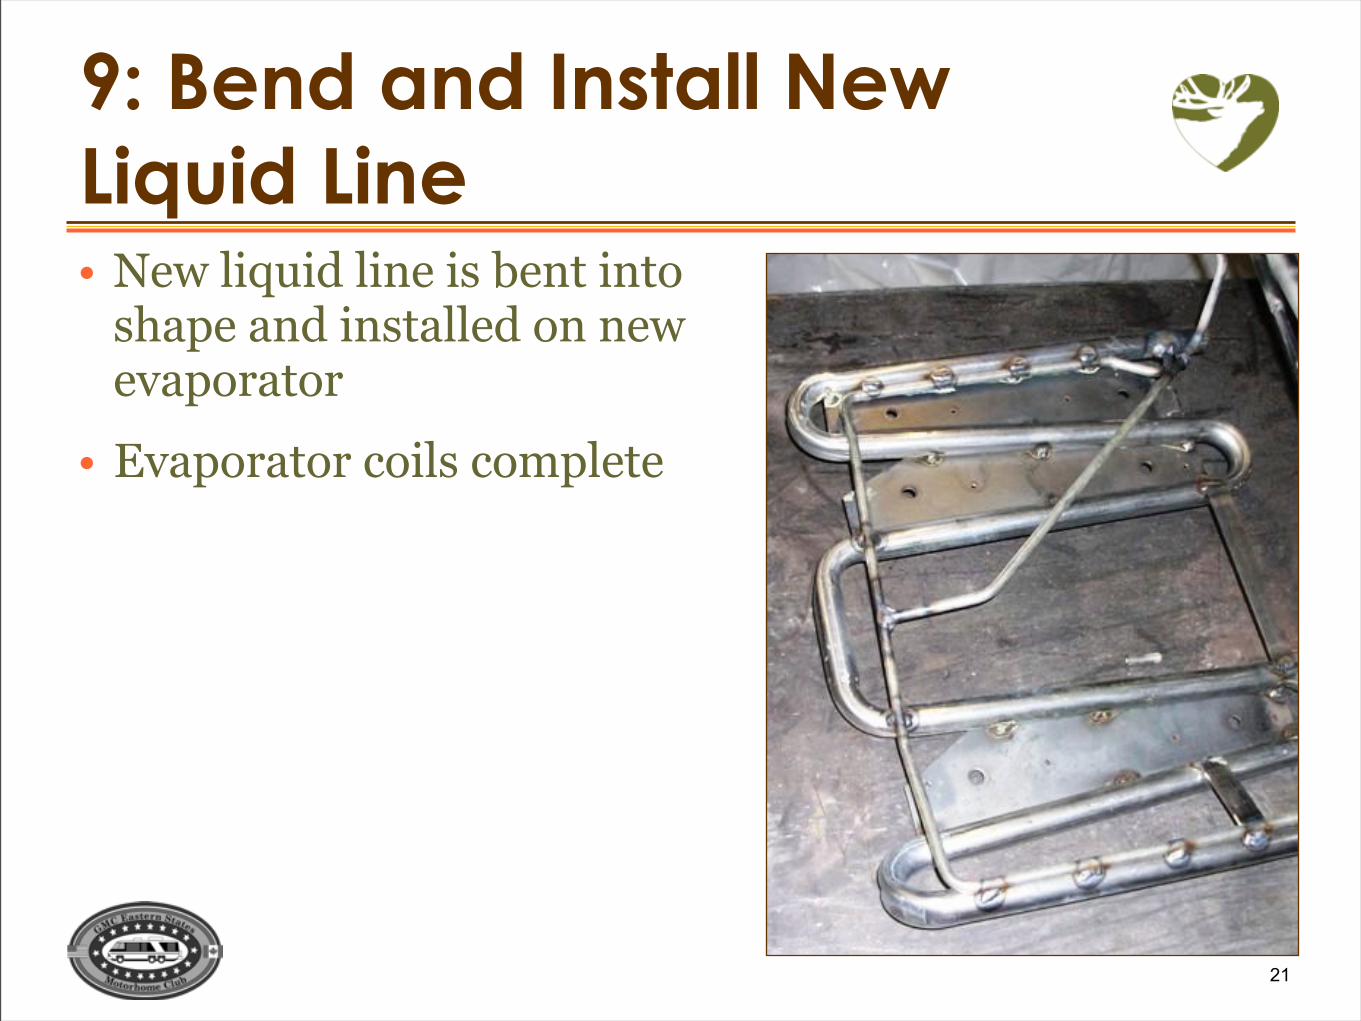
9: Bend and Install New Liquid Line• New liquid line is bent into
shape and installed on new evaporator
• Evaporator coils complete

22
10: Brace and Tack Welds
• Reinforce old tack welds and brace to insure unit is extra sturdy
23
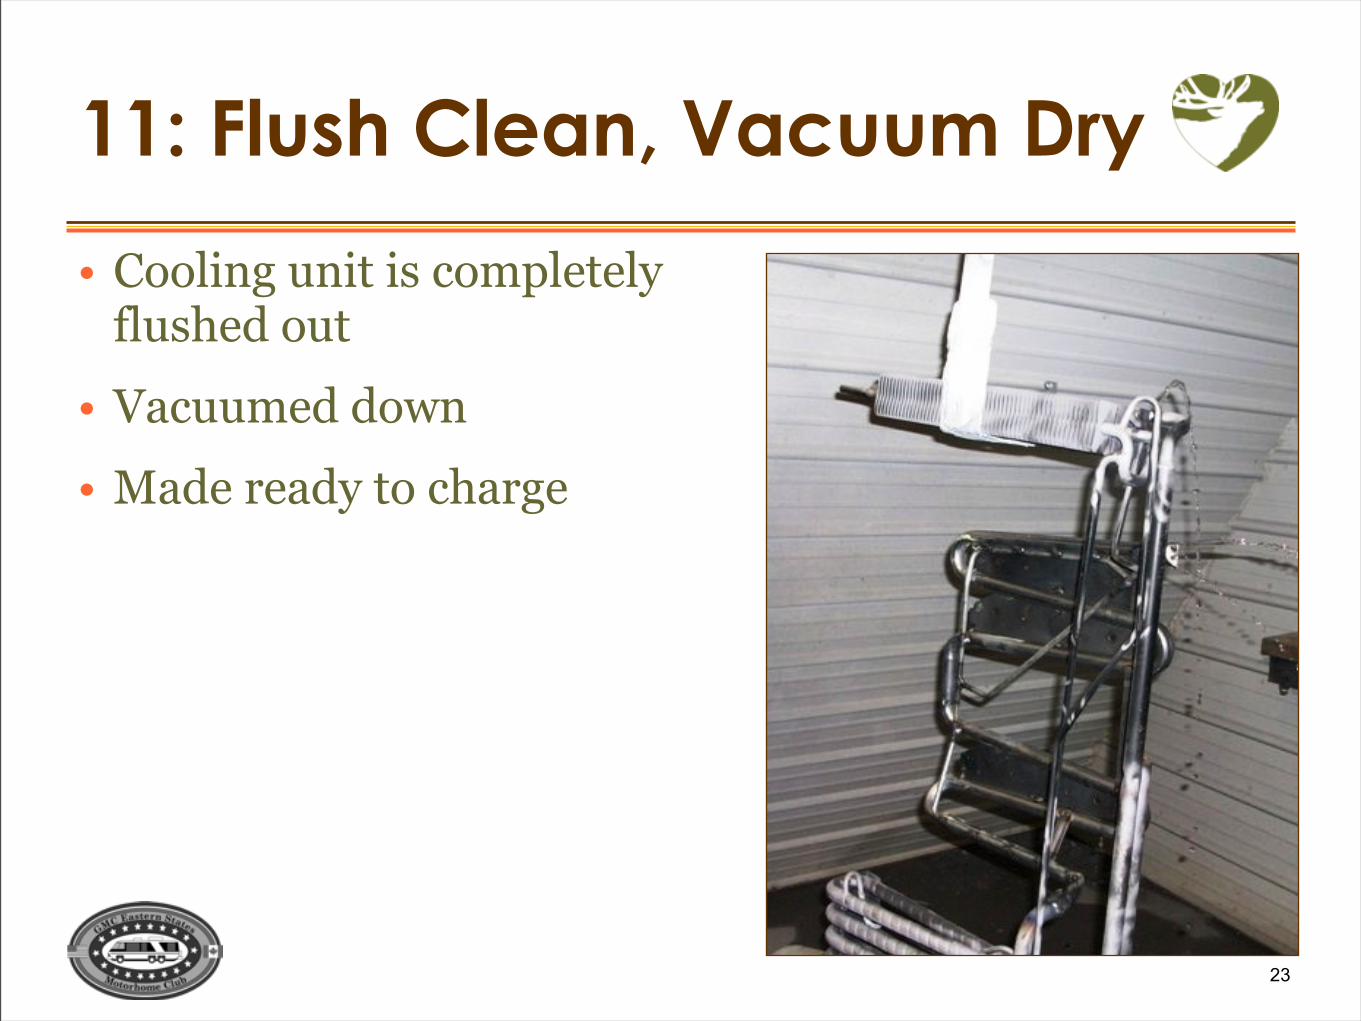
11: Flush Clean, Vacuum Dry
• Cooling unit is completely flushed out
• Vacuumed down
• Made ready to charge
24
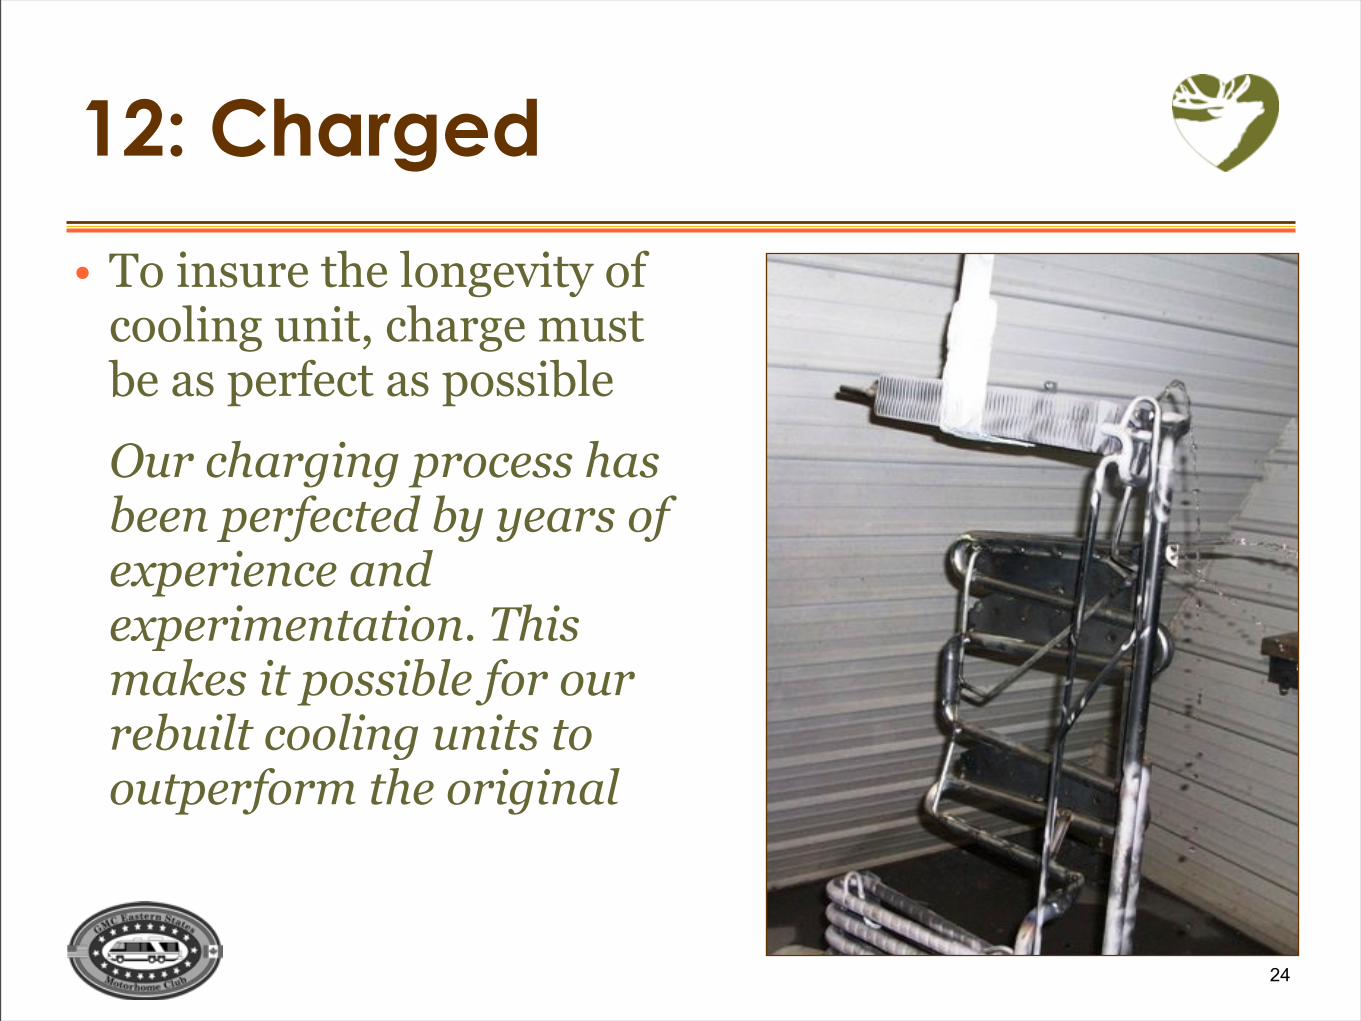
12: Charged
• To insure the longevity of cooling unit, charge must be as perfect as possible
Our charging process has been perfected by years of experience and experimentation. This makes it possible for our rebuilt cooling units to outperform the original
25
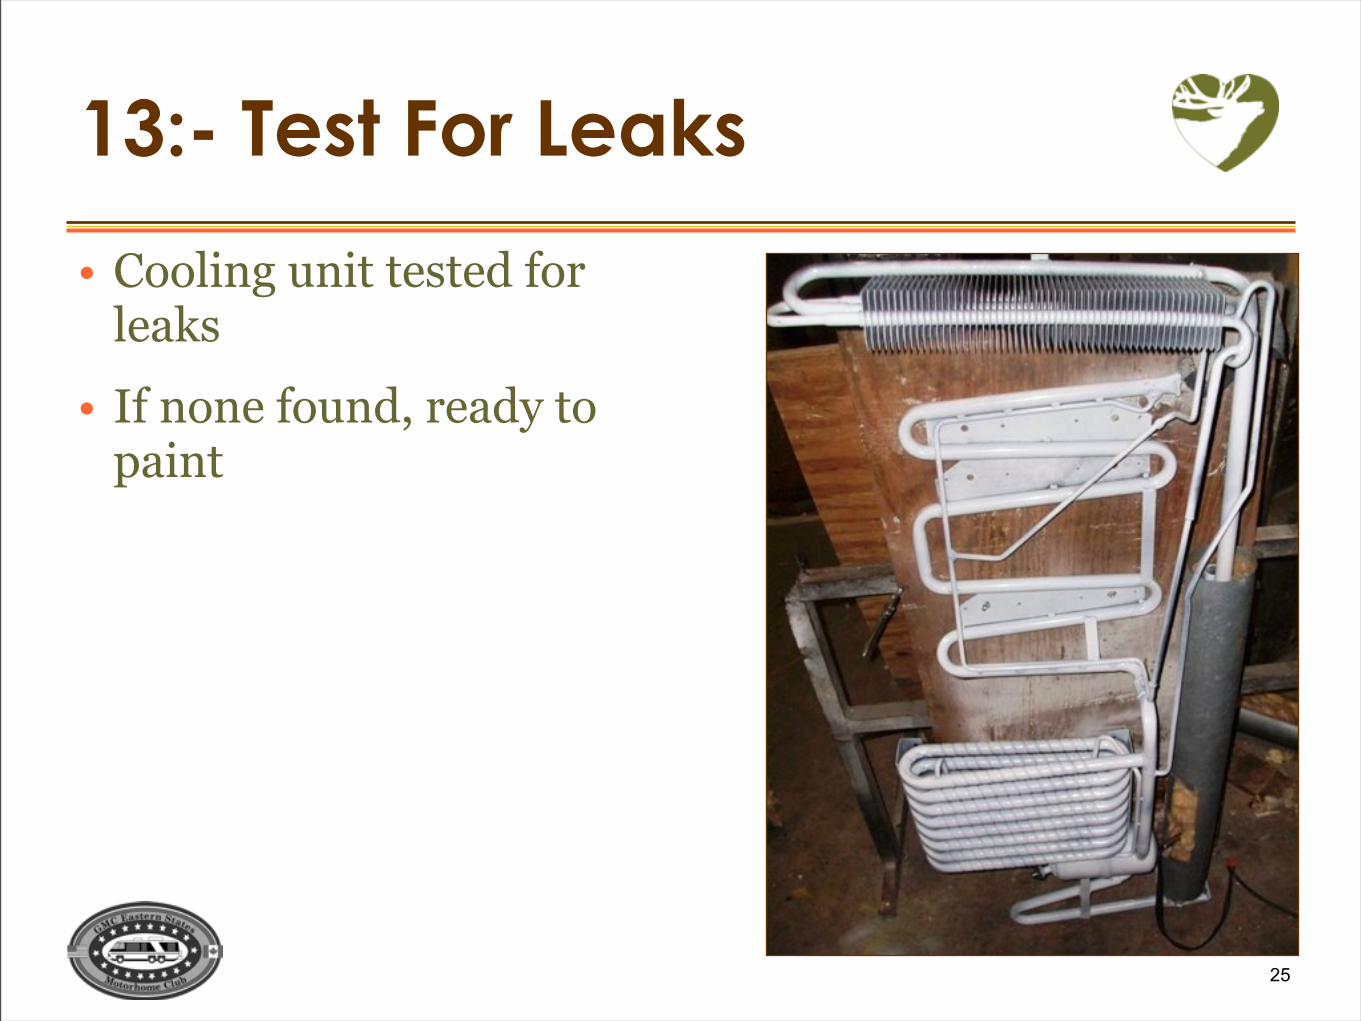
13:- Test For Leaks
• Cooling unit tested for leaks
• If none found, ready to paint

26
14: Paint
• Unit is painted white
27
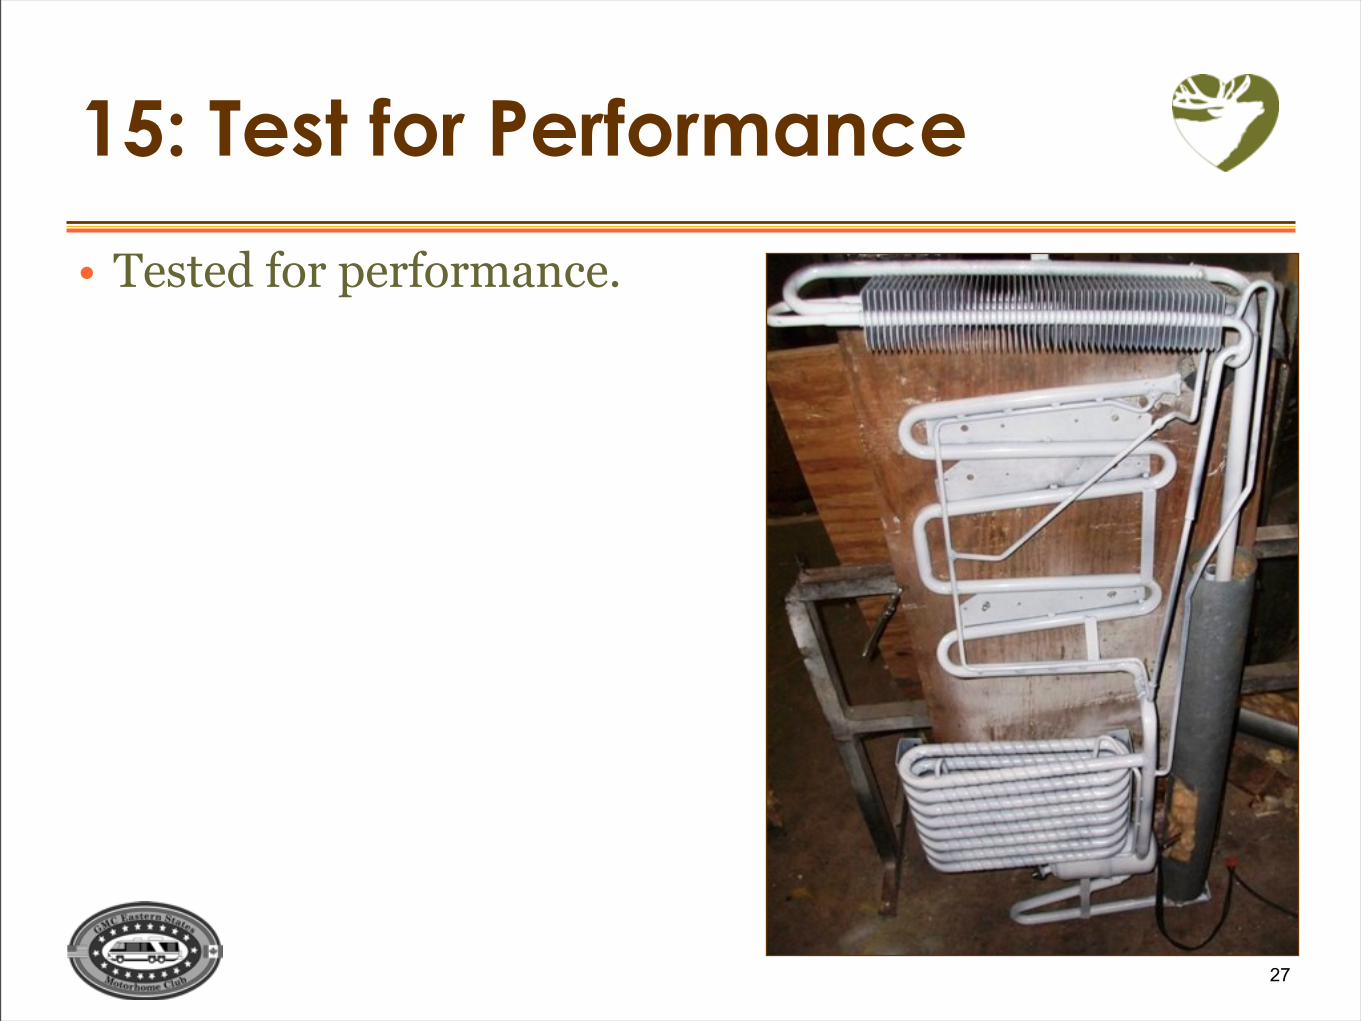
15: Test for Performance
• Tested for performance.
28
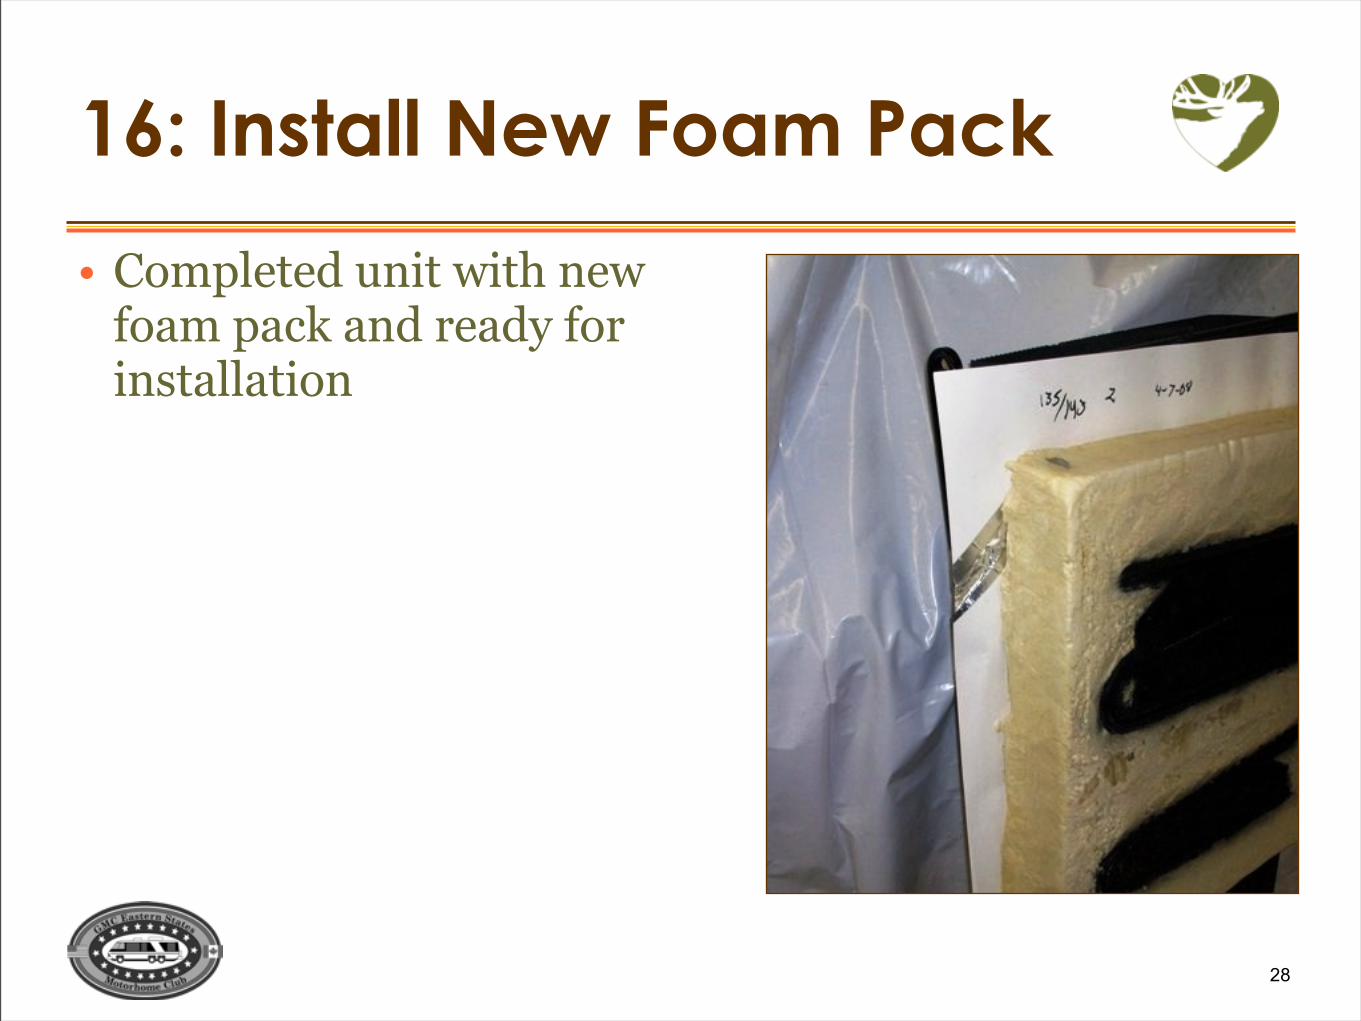
16: Install New Foam Pack
• Completed unit with new foam pack and ready for installation
29
National RV Refrigeration8015 N. 600 W.Shipshewana, IN 46565260-768-7059
Questions For Leon
www.fixyourfridge.com
30
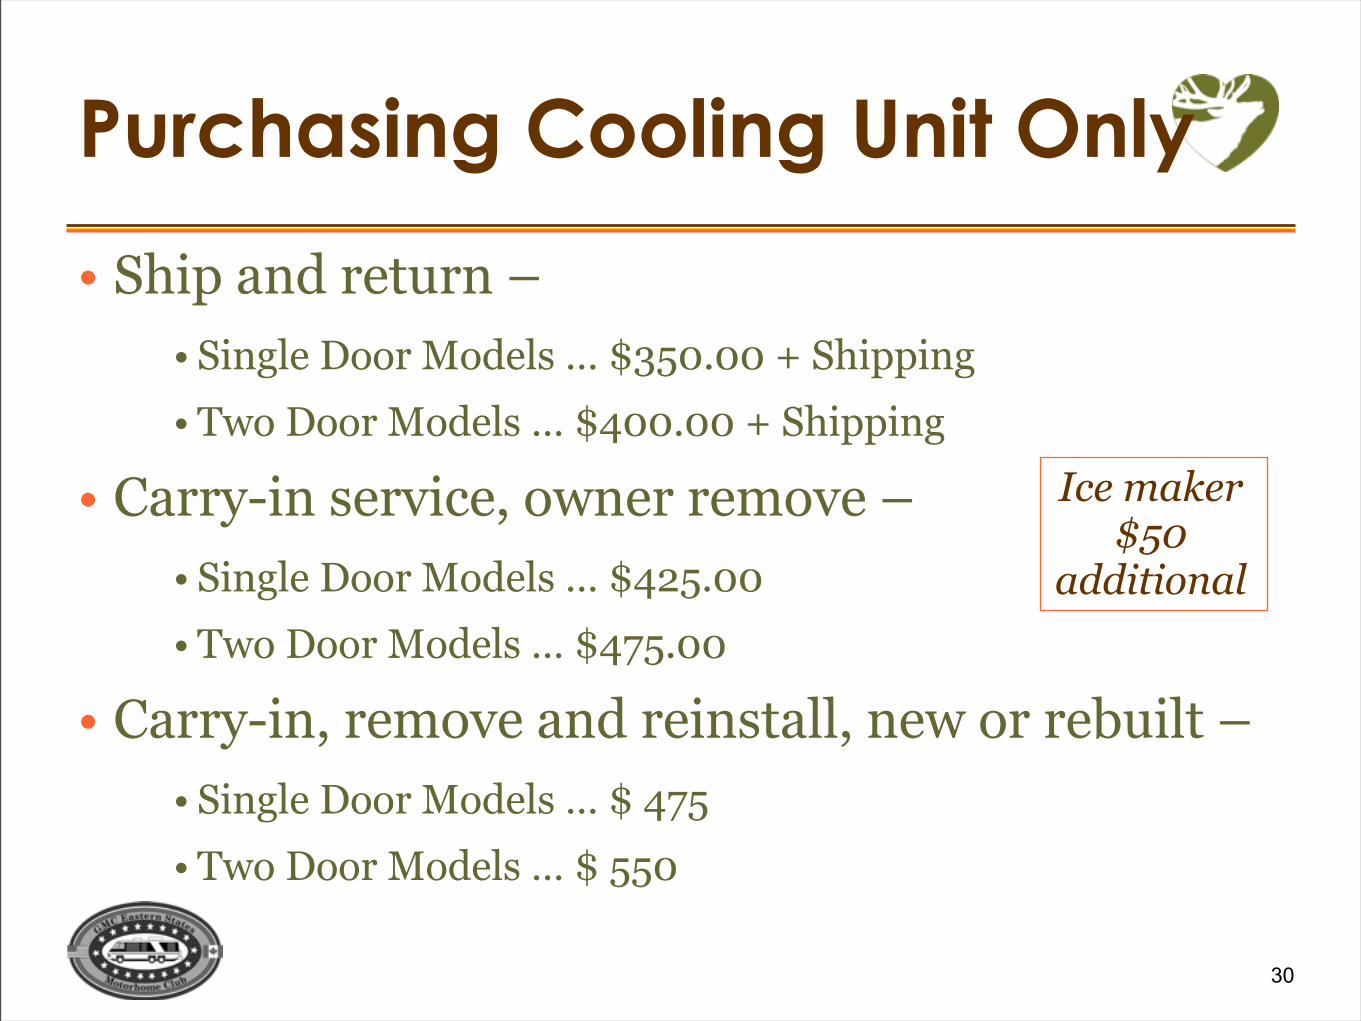
• Ship and return –• Single Door Models … $350.00 + Shipping
• Two Door Models … $400.00 + Shipping
• Carry-in service, owner remove –• Single Door Models … $425.00
• Two Door Models … $475.00
• Carry-in, remove and reinstall, new or rebuilt –• Single Door Models … $ 475
• Two Door Models … $ 550
Purchasing Cooling Unit Only
Ice maker $50
additional