the stephanie country mansion dollhouse assembly instruction by laser dollhouse designs
TRANSCRIPT
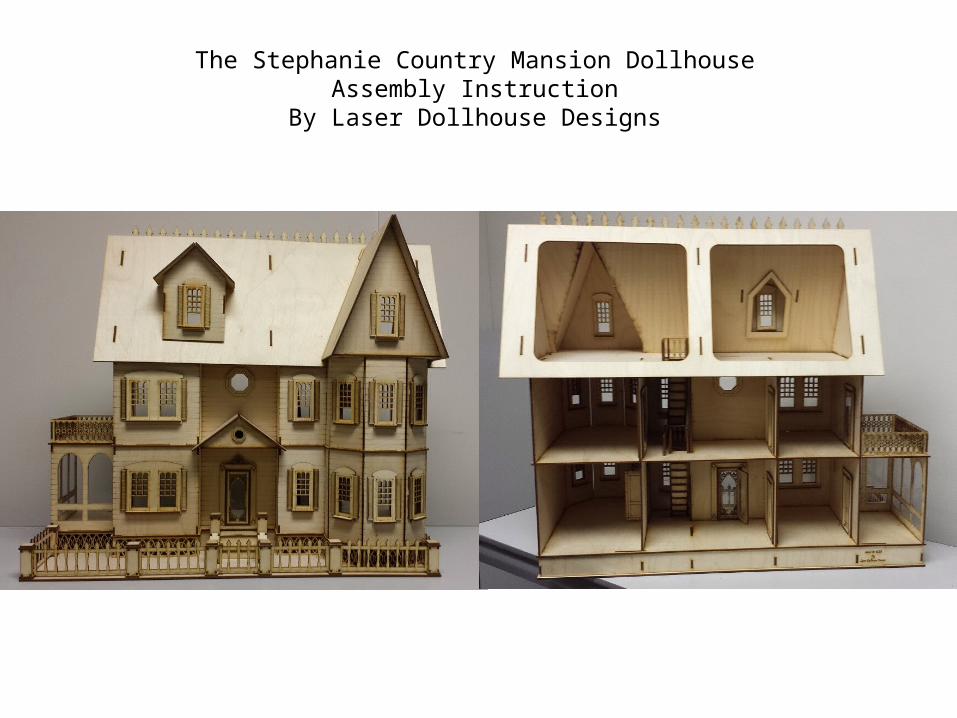
The Stephanie Country Mansion DollhouseAssembly Instruction
By Laser Dollhouse Designs
Note : Highly recommend dry assembly (NO GLUE) prior to actual assembly to familiarize with parts and locations.
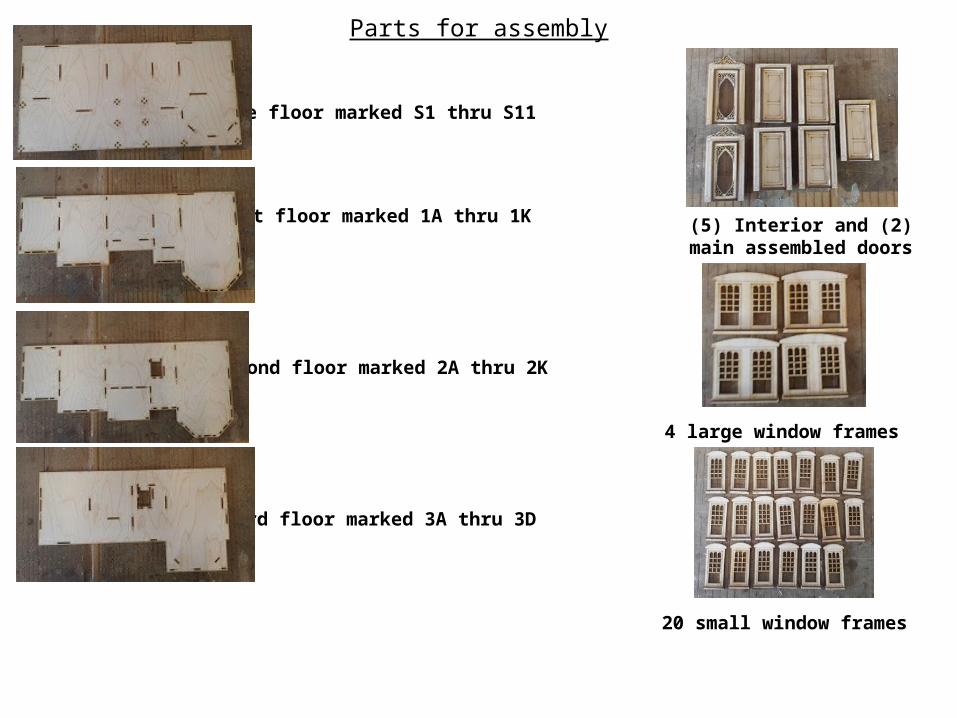
Parts for assembly
Base floor marked S1 thru S11
First floor marked 1A thru 1K
Second floor marked 2A thru 2K
(5) Interior and (2) main assembled doors
4 large window frames
Third floor marked 3A thru 3D
20 small window frames
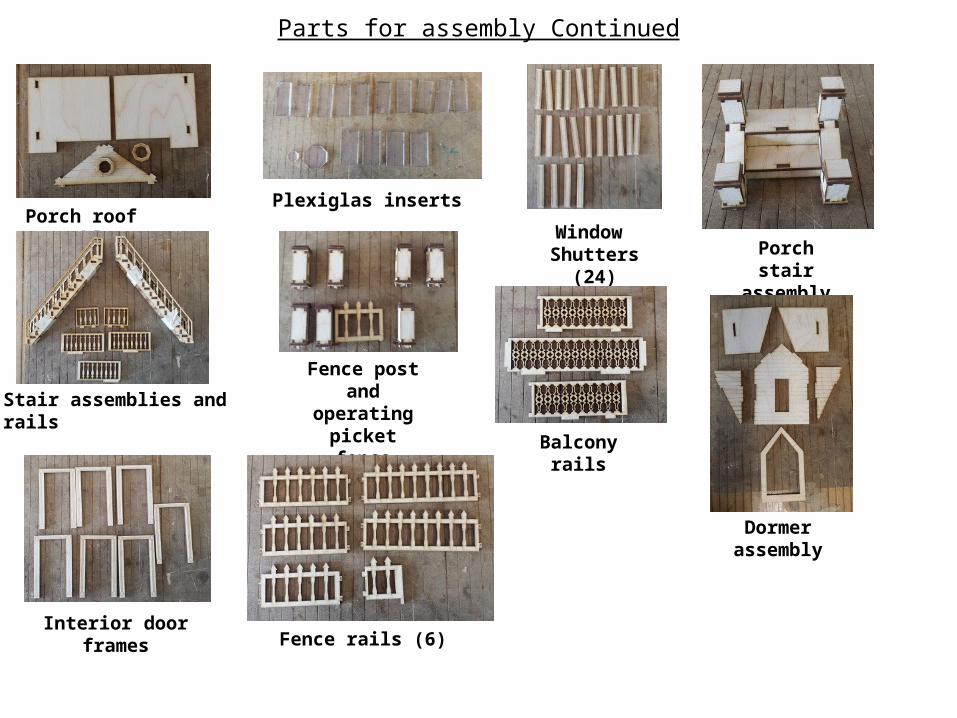
Parts for assembly Continued
Porch roof assembly
Stair assemblies and rails
Interior door frames
Plexiglas inserts
Window Shutters (24) Porch stair
assembly
Fence post and operating
picket fence
Balcony rails
Dormer assembly
Fence rails (6)

Parts for assembly Continued
Front main and rear main roof
Front roof
First floor walls marked 1A thru 1K
Second floor walls marked 2A thru 2K( There is NO 2B)
Octagon window frames
Base support parts marked S1 thru S11Roof running rail
3rd Floor walls marked 3A thru 3D
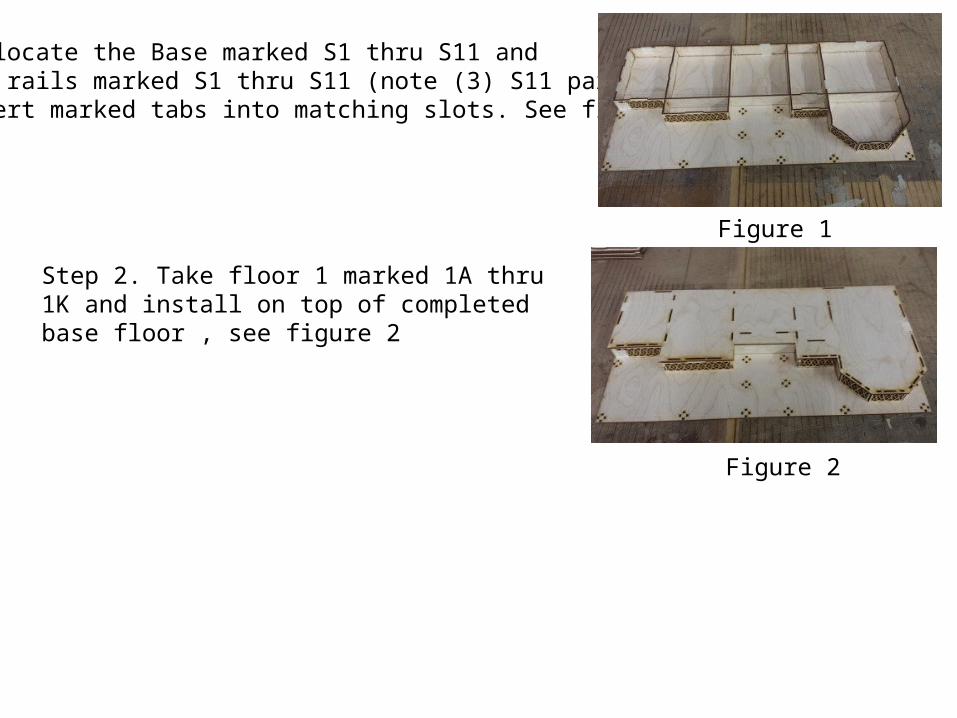
Step 1. locate the Base marked S1 thru S11 and support rails marked S1 thru S11 (note (3) S11 parts) and insert marked tabs into matching slots. See figure 1
Step 2. Take floor 1 marked 1A thru 1K and install on top of completed base floor , see figure 2
Figure 2
Figure 1
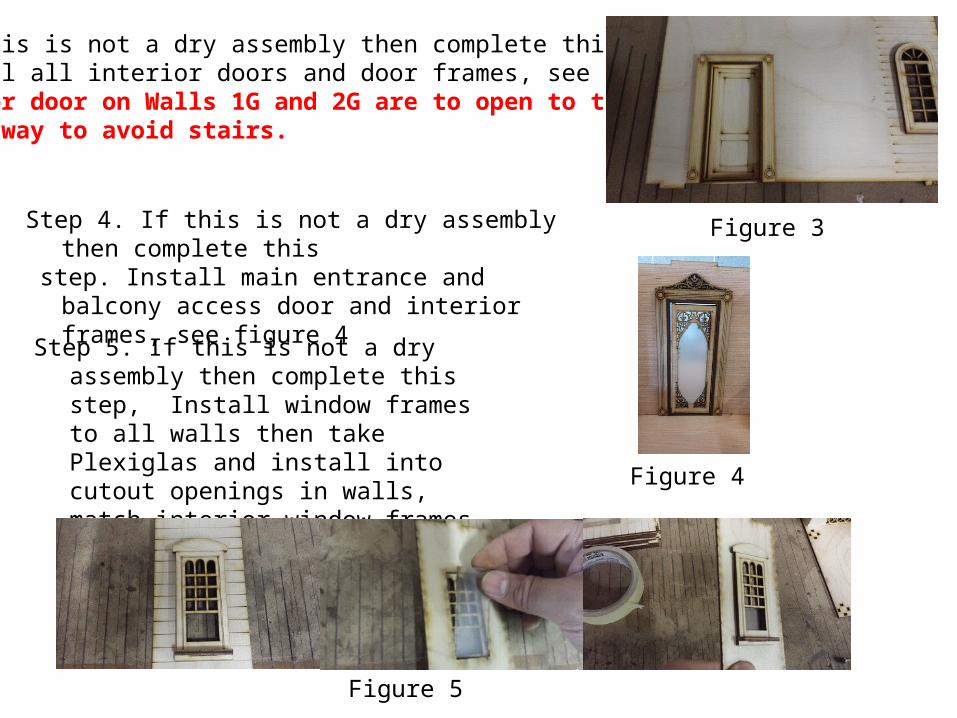
Step 3. If this is not a dry assembly then complete this step. Install all interior doors and door frames, see figure 3.Note: Interior door on Walls 1G and 2G are to open to theRoom NOT hallway to avoid stairs.
Figure 3Step 4. If this is not a dry assembly then complete this step. Install main entrance and balcony access door and
interior frames, see figure 4
Figure 4
Figure 5
Step 5. If this is not a dry assembly then complete this step, Install window frames to all walls then take Plexiglas and install into cutout openings in walls, match interior window frames by aligning with exterior frames, see figure 5.
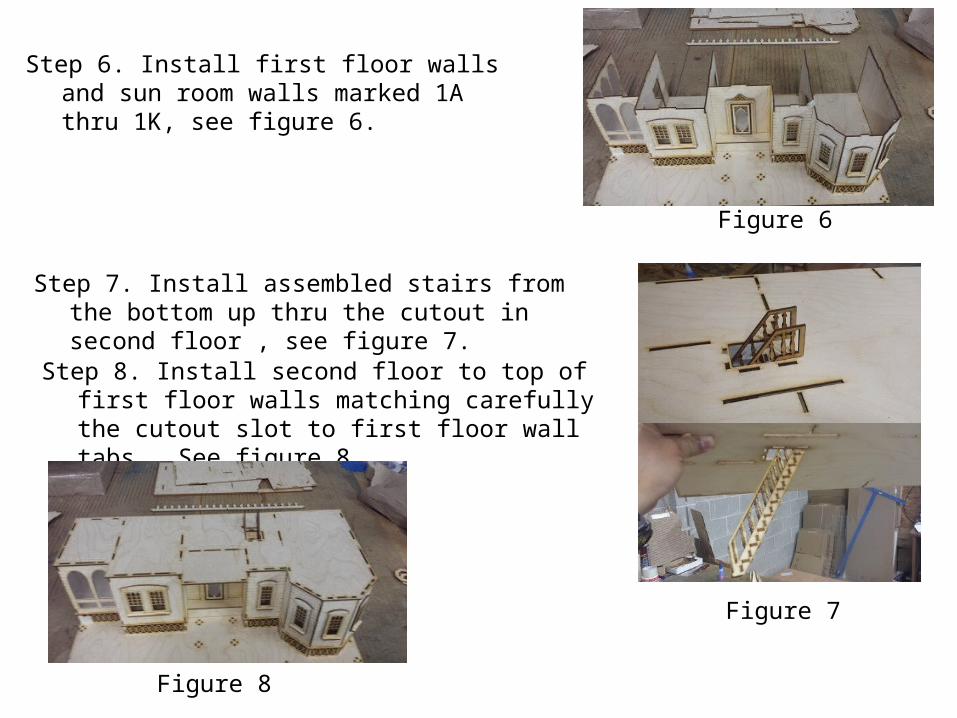
Step 6. Install first floor walls and sun room walls marked 1A thru 1K, see figure 6.
Figure 7
Figure 6
Figure 8
Step 7. Install assembled stairs from the bottom up thru the cutout in second floor , see figure 7.
Step 8. Install second floor to top of first floor walls matching carefully the cutout slot to first floor wall tabs, See figure 8.
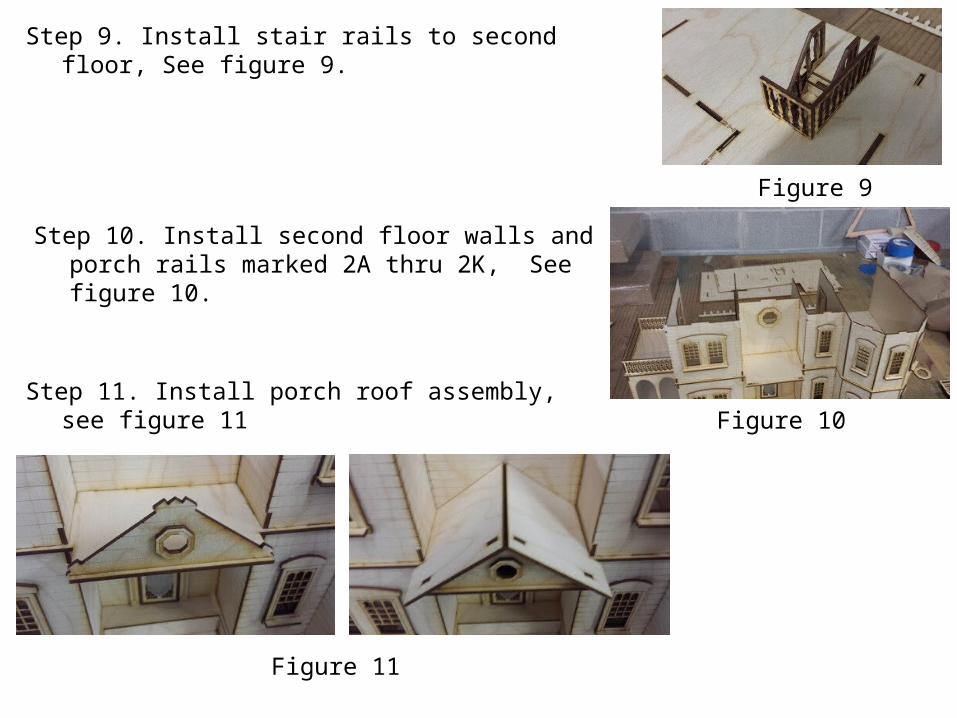
Step 9. Install stair rails to second floor, See figure 9.
Figure 9
Step 10. Install second floor walls and porch rails marked 2A thru 2K, See figure 10.
Figure 10
Figure 11
Step 11. Install porch roof assembly, see figure 11
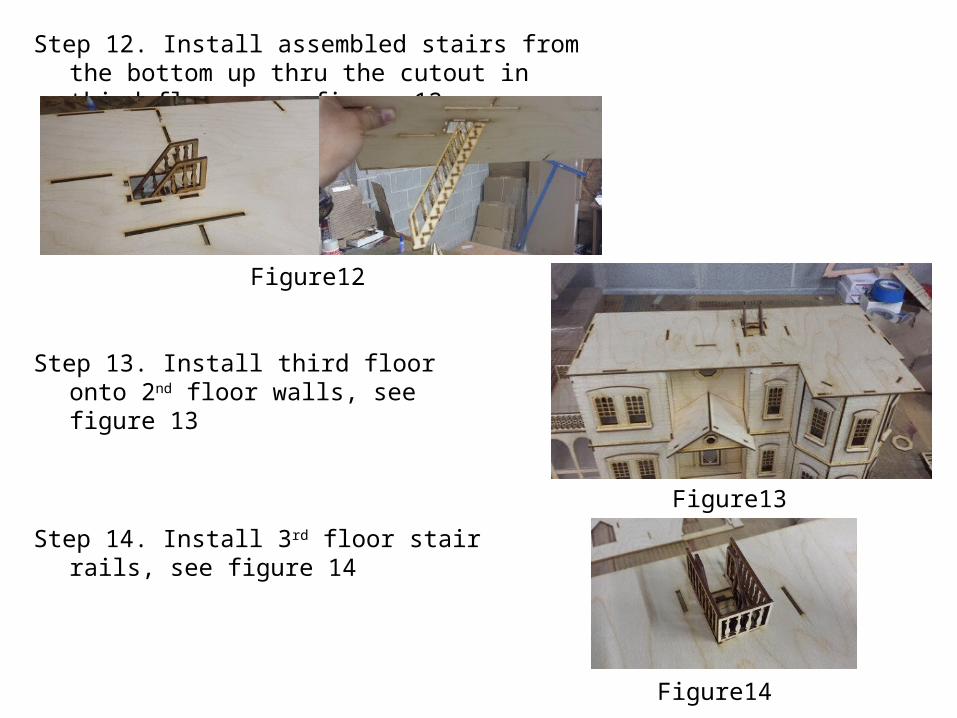
Figure12
Figure13
Step 13. Install third floor onto 2nd floor walls, see figure 13
Figure14
Step 14. Install 3rd floor stair rails, see figure 14
Step 12. Install assembled stairs from the bottom up thru the cutout in third floor, see figure 12.
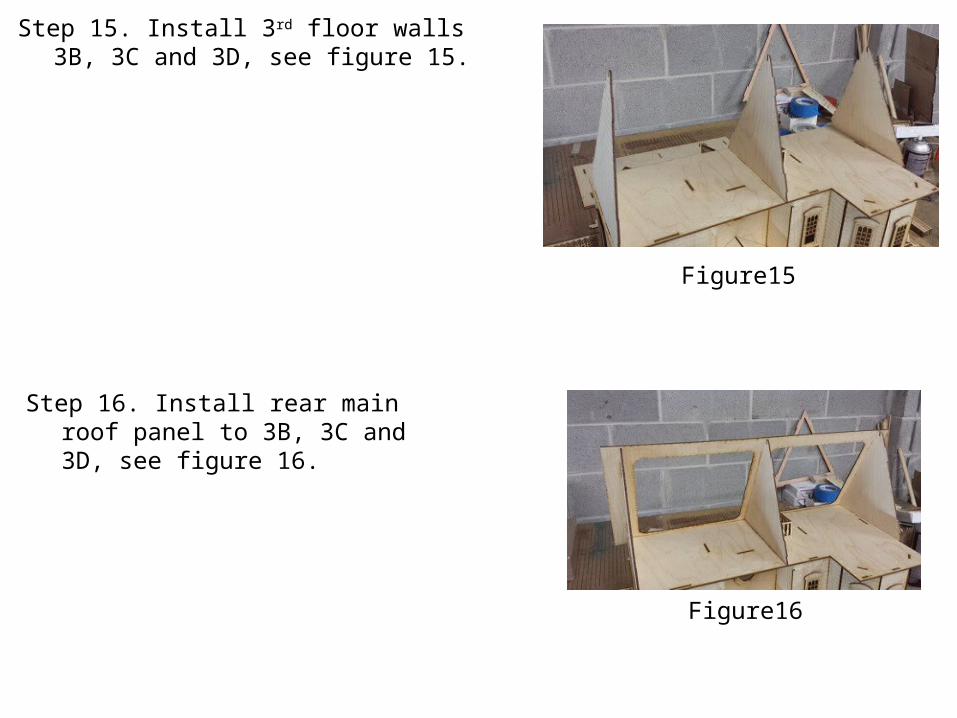
Step 15. Install 3rd floor walls 3B, 3C and 3D, see figure 15.
Figure15
Figure16
Step 16. Install rear main roof panel to 3B, 3C and 3D, see figure 16.

Step 19. Install 3rd floor wall 3A, see figure 19
Figure 18
Step 18. Install Front roof panel , see figure 18
Figure 19
Step 17. running roof trim to top of 3B, 3C and 3D, see figure 17.
Figure 17
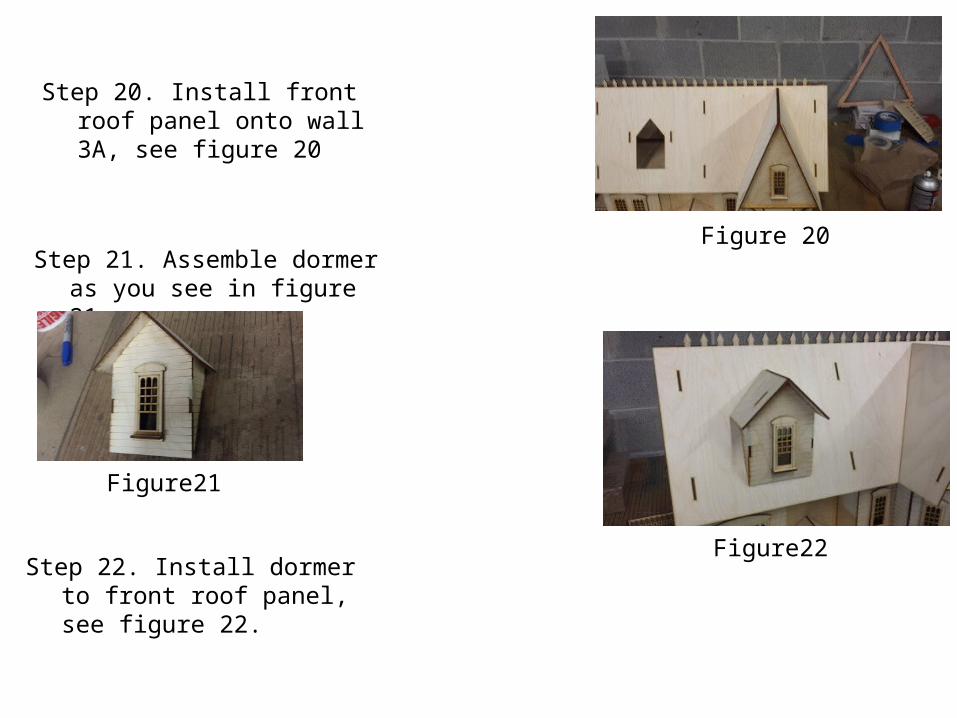
Step 21. Assemble dormer as you see in figure 21.
Step 22. Install dormer to front roof panel, see figure 22.
Figure22
Figure21
Figure 20
Step 20. Install front roof panel onto wall 3A, see figure 20
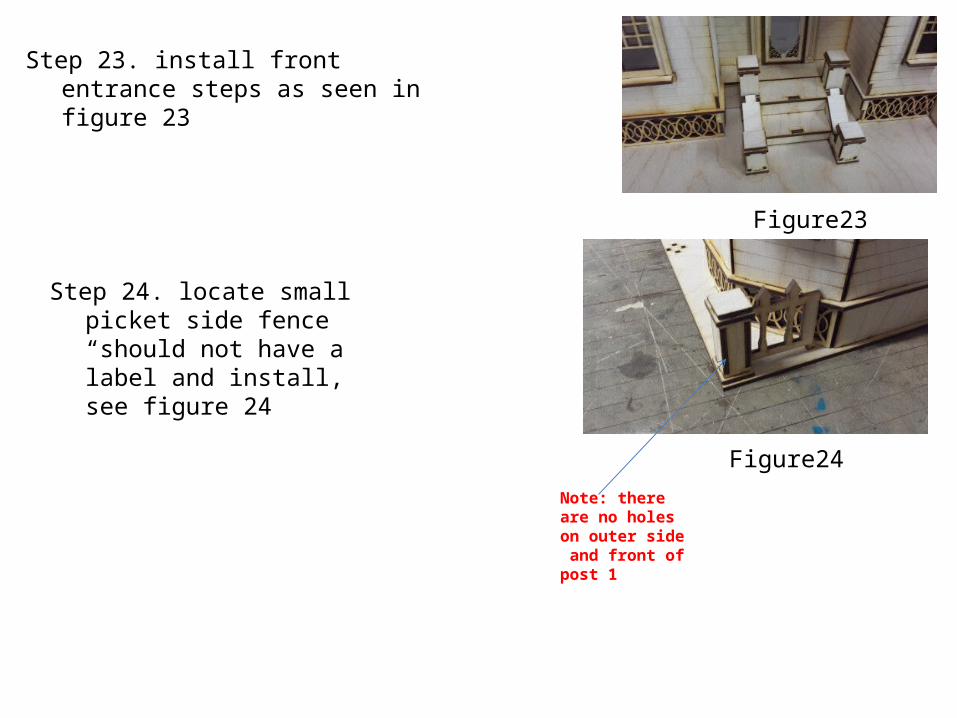
Figure23
Step 23. install front entrance steps as seen in figure 23
Figure24
Step 24. locate small picket side fence “should not have a label and install, see figure 24
Note: there are no holes on outer side and front of post 1
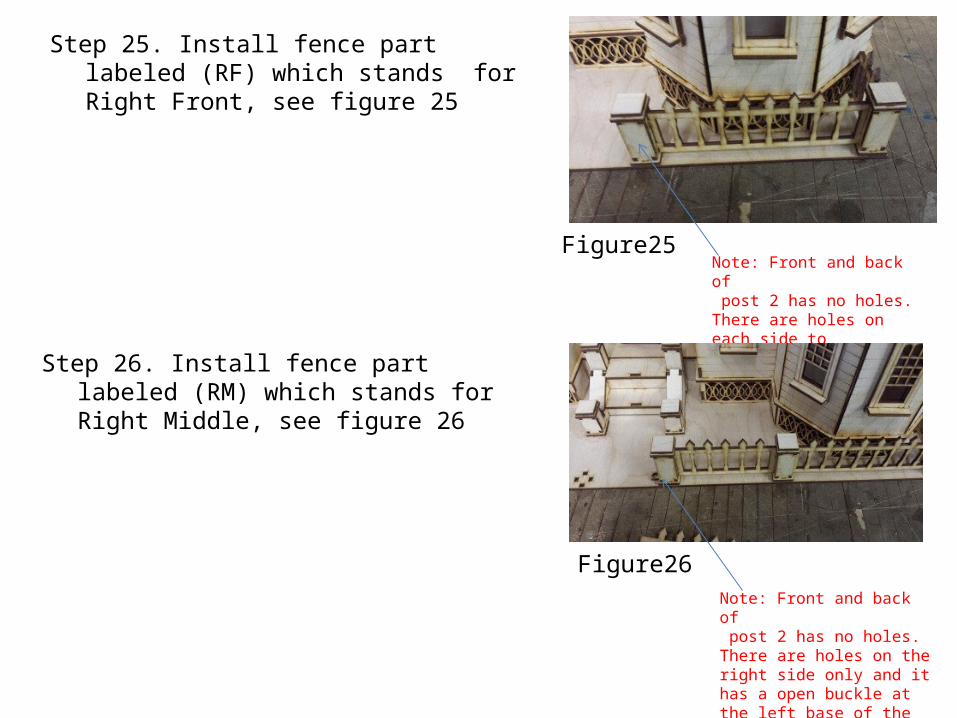
Step 25. Install fence part labeled (RF) which stands for Right Front, see figure 25
Step 26. Install fence part labeled (RM) which stands for Right Middle, see figure 26
Note: Front and back of post 2 has no holes.There are holes on each side to attach fence RF and RM.
Figure25
Figure26Note: Front and back of post 2 has no holes.There are holes on the right side only and it has a open buckle at the left base of the post to lock the operating fence.
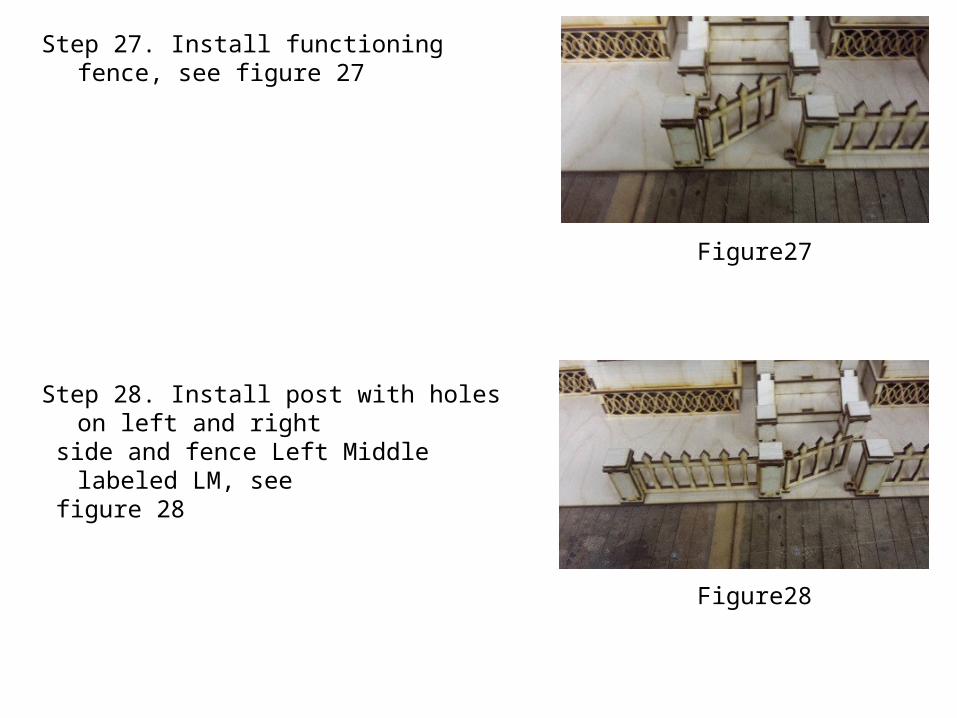
Step 27. Install functioning fence, see figure 27
Figure27
Figure28
Step 28. Install post with holes on left and right side and fence Left Middle labeled LM, see figure 28
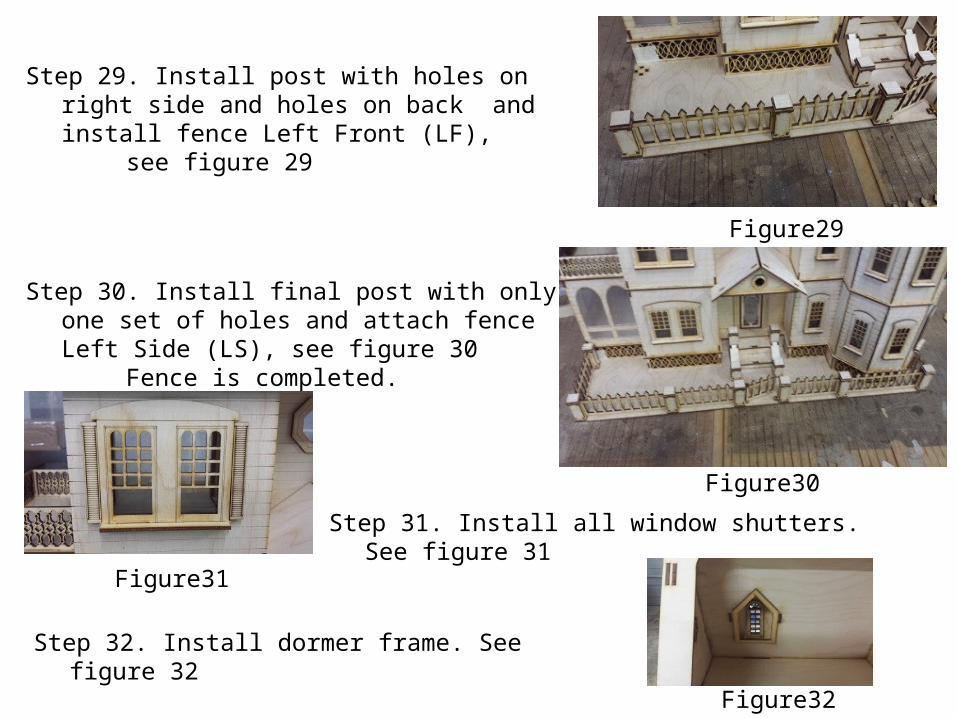
Step 29. Install post with holes on right side and holes on back and install fence Left Front (LF),
see figure 29
Figure29
Figure30
Step 30. Install final post with only one set of holes and attach fence Left Side (LS), see figure 30
Fence is completed.
Step 31. Install all window shutters. See figure 31
Figure31
Step 32. Install dormer frame. See figure 32
Figure32
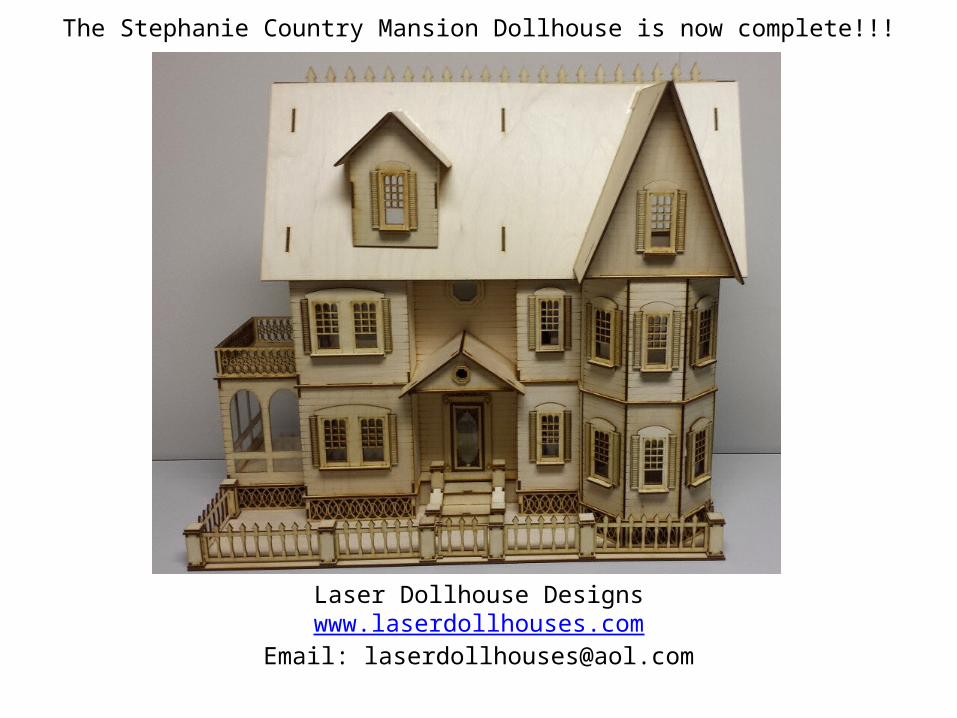
The Stephanie Country Mansion Dollhouse is now complete!!!
Laser Dollhouse Designs www.laserdollhouses.com
Email: [email protected]