the waste wise schools program learning to be waste … · the waste wise schools program is also...
TRANSCRIPT

�
Learning to be Waste Wise
The Waste Wise Schools Program
WormsDepartment of Environment and Conservation
Waste AuthorityGOVERNMENT OF
WESTERN AUSTRALIA

AcknowledgmentsWritten by
Wendy AspdenVanessa DowMeg GreenhillPatrick HamillEmma PointonJennifer Weston
Illustrations by Rod Waller
Designed by Su-Anne Lee, Spice Creative
Edited by Tania Hudson, Words Communications Consultancy
This guide was developed by the Waste Wise Schools Program which is managed by the Department of Environment and Conservation and funded by the Western Australian Landfill Levy through the Waste Authority and Wrigleys Corporation.
For more information about the program please contact:
The Waste Wise Schools ProgramDepartment of Environment and ConservationLocked Bag 104Bentley Delivery Centre, WA 6983
Phone: (08) 6467 5011Fax: (08) 6467 5532Email: [email protected]: www.wastewise.wa.gov.au
The Waste Wise Schools Program would like to thank the following teachers who provided valuable input during the development of this guide:
Janelle Cahoon, Yuluma Primary SchoolClaire De Mamiel, Ballajura Primary SchoolMike Hawke-Linsley, Poseidon Primary SchoolSheree Samsa, Churchlands Primary SchoolVeronica Morcom, Davallia Primary SchoolJasmine Watts, Glen Forrest Primary SchoolLee White, St Mary’s Anglican Girls School

ContentsLearning to be Waste Wise activity guide 1
Curriculum links 2
Introduction 4
How worms behave 9
Worm food investigations 11
Worms alive! 13
Worm rap 16
Grassy heads 18
House of worms 21
Enterprising worms 23
Worm workshop 25
Worm games 27

�
Learning to be Waste Wise activity guideIntroductionLearning to be Waste Wise is a series of curriculum-linked activity packs written for the Waste Wise Schools Program. Each booklet covers a different topic including a general introduction to waste, the 3Rs, worms and compost. The activities are designed to complement the school’s ongoing waste minimisation projects, and to support learning at every stage of a school’s Waste Wise journey. In turn, Waste Wise projects provide real life context to curriculum outcomes while directly involving students in their own learning.
By reinforcing Waste Wise principles through the curriculum in an engaging and practical way, teachers will find it easier to incorporate waste reduction practices in their school. In addition, the involvement of students and the modeling of positive behaviours, reinforces the environmental principles and curriculum outcomes.
The activities are meant to be fun and are designed to promote life-long learning, where students, teachers and the rest of the school community are empowered and enabled to take responsibility for their waste minimisation actions, while developing positive environmental values and promoting long term behaviour change.
Waste Wise and the curriculumWaste is a topic that fits easily into every learning area. As such, waste should be integrated into current curriculum rather than used as an ‘add on’. Each activity contains curriculum links and a summary of all learning areas and outcomes covered in this booklet is included as well. The Waste Wise Schools Program is also listed as a recognised opportunity to become involved in active citizenship in the scope and sequence for society and environment.
Values educationUnderlying the Waste Wise Schools Program is the core value of environmental responsibility. As students learn about environmental conservation and how to preserve its balance for the future, they also learn about Social and Civic Responsibility and their power to choose their way of life and the impact their choices make. Ultimately, the hope is that students feel empowered with their new knowledge and develop environmentally sound values and behaviours.
This bookletAll of the activities in this booklet have been designed to be hands-on and interactive. They can be completed individually or as a unit of work. Activities may also be extended through the ‘Going further’ ideas provided. Comprehensive background information is provided on each topic in the booklet introduction, while specific background information is provided with each activity as well.
DifferentiationEach activity has been developed for Middle Childhood but is easily differentiated for Early Childhood and Early Adolescence. On each activity, suggestions for simplifying an activity have been given in the ‘To simplify’ section and suggestions for making an activity more challenging are offered in ‘To challenge’.
Reduced paper useTo reduce paper use, the activities in this booklet have been designed to be ‘worksheet free’. Questions can be written on the board, overhead projector or interactive whiteboard and students should record answers in a notebook. If photocopying is necessary, consider having students work in groups with one set of directions or questions to share.

Curriculum links
Learning areaScience
The Arts
EnglishM
athematics
Learning area outcom
es
InvestigatingLife and living
Arts ideas
ReadingW
ritingM
easurement
Planning
Conducting
Processing
Evaluating
Interdependence of living things
Creating
Developing
Presenting
Interpreting
Use of texts
Contextual understandings
Devising
Processes and strategies
Understand units and directmeasure
How
worm
s behave
Worm
food investigations
Worm
s alive!
Worm
rap
Grassy heads
House of w
orms
Enterprising w
orms
Worm
workshop
Worm
games

Curriculum links
Learning areaTechnology and enterprise
Learning area outcomes
Technology processesSystem
s
Investigating
Devising
Producing
Evaluating
The nature of materials
The use and development of
systems
How
worm
s behave
Worm
food investigations
Worm
s alive!
Worm
rap
Grassy heads
House of w
orms
Enterprising worm
s
Worm
workshop
Worm
games

4
IntroductionWhy do we have worms?Worms are often considered to be little ‘soil farmers’ and by simply living, eating and reproducing they provide a wonderful service to plants and to us.
Worms eat a wide variety of items including old plant material and food scraps. Their castings are expelled into the soil and provide nutrients for plants. As the worms move through the soil, their tunnels enable air and water to filter into the ground while loosening up the soil for plant roots, allowing them to take up oxygen and water.
Vermiculture is the cultivating of worms for the purpose of breaking down waste. Worm farms contain composting worms that eat food scraps and turn them into high quality, natural liquid (worm wiz) and compost (castings) fertiliser for plants. Composting worms need a moist, high nutrient environment, and we create this environment for worm farming.
The purpose of a worm farm is to decrease the amount of organic waste that is normally put in your school’s rubbish bins and sent to landfill. Worm farms help us to ‘close the recycling loop’ because our organic waste is changed into fertiliser for our plants which then produce food for us to eat. The decomposition process is aerobic (with oxygen), and fewer greenhouse gases are produced than in anaerobic (without oxygen) decomposition.
Description and characteristics of wormsEarth worms are invertebrates, so they have no back bone. They belong to the phylum Annelida, which includes leeches and marine worms. Annelids are different from most other invertebrates because they have long cylindrical shaped bodies made up of many similar segments, and lack appendages, antennae and an obvious head.
In this phylum they are classified as class Oligochaeta. This group is made up of terrestrial earthworms and species that live in freshwater environments. There are many different species of earthworms. Some are just a few centimetres long while others can be up to two to three metres in length, such as the Australian native giant Gippsland earthworm. The earthworms we find in our gardens are often introduced species as our native earthworms are driven away when we clear native vegetation and disturb their habitat.
The earthworms that we use in worm farms are a different species to those we find in our garden. This is because worm farms need worms that eat and breed quickly to transform our waste scraps into worm castings efficiently. The best worms for the job are European worms as they are accustomed to soils high in nutrients and are able to eat and multiply faster than native earthworms. They spend most of their time eating and breeding in a small amount of space, while native earthworms are better equipped for burrowing and searching for food in our drier, nutrient poor soils.
Common European earthworms include the red wriggler (Lumbricus rubellis) and the tiger worm (Eisenia fetida). Another composting worm is the Indian blue (Perionyx excavatus) that comes from Asia.
The earthworm is blind, but sensitive to light. It has three to five hearts depending on the species and breathes through its skin which is a mucous membrane. We can identify its ‘head’ (anterior) end as it is the end closest to the clitellum, a band around the worm near the centre and commonly referred to as the saddle. It feeds by using its mouth or prostomium. It moves through the soil by contracting and expanding its muscles, and using its setae (bristles) to grip the soil.
“They are the intestines of the Earth”
Charles Darwin

5
Lifecycle of a wormEarthworms are hermaphrodites, as they have both male and female sexual organs. The method of reproduction varies between the different species. For tiger worms (common composting worms) two worms are required for reproduction. During mating, the two worms align their clitellums, cover themselves in sticky mucous and exchange sperm. The worms separate and each worm’s clitellum produces a thick mucous ring. As the worms wiggle backwards out of this ring, the egg is picked up and then fertilised by the stored sperm. Ultimately, the mucous ring forms a capsule around the fertilised egg and is deposited in the soil. The capsule will, on average, produce four baby worms and these can hatch after about two weeks in the right conditions.
Worm farming at school
Living conditions in a worm farmA worm farm is made from a container that has a drainage hole for water, and a lid that keeps out vermin but allows air in. It is normally filled with layers of castings, shredded paper or other types of bedding and composting worms. You can buy worm farm containers, make your own, or have one custom made. Some schools use old bathtubs, or construct worm farms out of old pallets, wood or corrugated sheet metal, but most use old fridges that have been safely degassed. Look at the ‘How to Build a Worm Farm’ information sheet to find out more.
Ideally worm farms should be situated in a cool, shady spot. Worms need cool, moist conditions and a temperature of 25-26 degrees Celsius is perfect. They also need a layer of bedding to live in which can include, castings, shredded paper, newspaper, cardboard, brown leaves and straw. As food scraps decompose, they will make the worm bedding more and more acidic, therefore it is a good idea to add some garden lime from time to time to maintain the pH as worms prefer a neutral environment.
Your worm farm should be as moist as a wrung out sponge. If there is too much water, the worms will drown, and if there is too little water, they can die. Every day a worm loses approximately 20 per cent of its body weight in moisture so it is important to keep the worm farm adequately moist (Murphy, 2005).
Fig. �: Worm anatomy
Fig. 2: Worm capsules Fig. 3: Adult worms Fig. 4: Worm clitellum

6
How many worms?Firstly, you will need enough worms to manage your organic waste. It is a good idea to conduct a waste audit to find out how much organic waste your school produces to work out the size and/or number of worm farms that you’ll need. For example a school of approximately 300 students would need a worm farm that could house between 23,000 to 46,000 worms with about a two square metre base. A composting system can also help to manage your organic waste and is perfect for composting orange peels and other items that should be left out of your worm farm.
Food worms eat – on the menuWorms like a variety of foods and will eat shredded, moist cardboard and paper scraps (avoid shiny magazines), coffee grounds, fruit and vegetable scraps, leaves, hair, vacuum cleaner dust and egg shells. The smaller the pieces of food, the easier it is for the worms to get through.
Food worms avoid – off the menuWorms will eat anything organic. However, in a small worm farm it is a good idea to omit certain foods such as citrus fruits, pineapples, onions and garlic. These foods can make the worm farm too acidic (pH less than 7) and the worms may even try to move out on account of the acidic pH. Other foods like meat and dairy can be smelly and attract mice, rats and wasps so it is best to avoid putting them in your worm farm.
How much food to feed the wormsUnder the right conditions worms can eat their own body weight in food every two to three days. To calculate how much food to feed the worms, record the weight of all your worms in the beginning when you set up your worm farm. Then calculate the proportion of paper scraps to fruit and vegetable scraps. About 20 per cent fruit and veggies and 80 per cent shredded paper and cardboard is recommended. Then observe their rate of consumption over a few weeks. If the original amount of food begins to disappear at a faster rate increase the food. However, avoid overfeeding. It is better to underfeed them than feed them too much.
Harvesting the castingsWorm castings and liquid fertiliser are highly nutritious organic foods for plants. They contain a wide variety of nutrients necessary for plant growth, beneficial microbes and improve the water retention of soil. Depending on the type of worm farm, there are a couple of ways to harvest the castings, either from the top or the bottom.
One way is to open the lid from the top, or remove the cover, of the worm farm and place the food and water at one end, covering it up again. Continue to do this over the time span of about two weeks. Most of the worms should slowly move toward the food source and allow you to harvest the castings from the section they have evacuated. If some worms still remain in this section, avoid removing them by uncovering the worm farm. The worms will move away from the light, burrowing down to allow you to gently remove the top layer of the castings in the area. If there are any remaining worms they will gradually move down.
Another technique is to harvest the castings from the bottom of the worm farm; this is only possible if there is a sliding panel installed, usually with custom built farms. This means the worms will not be disturbed (Murphy 2005).
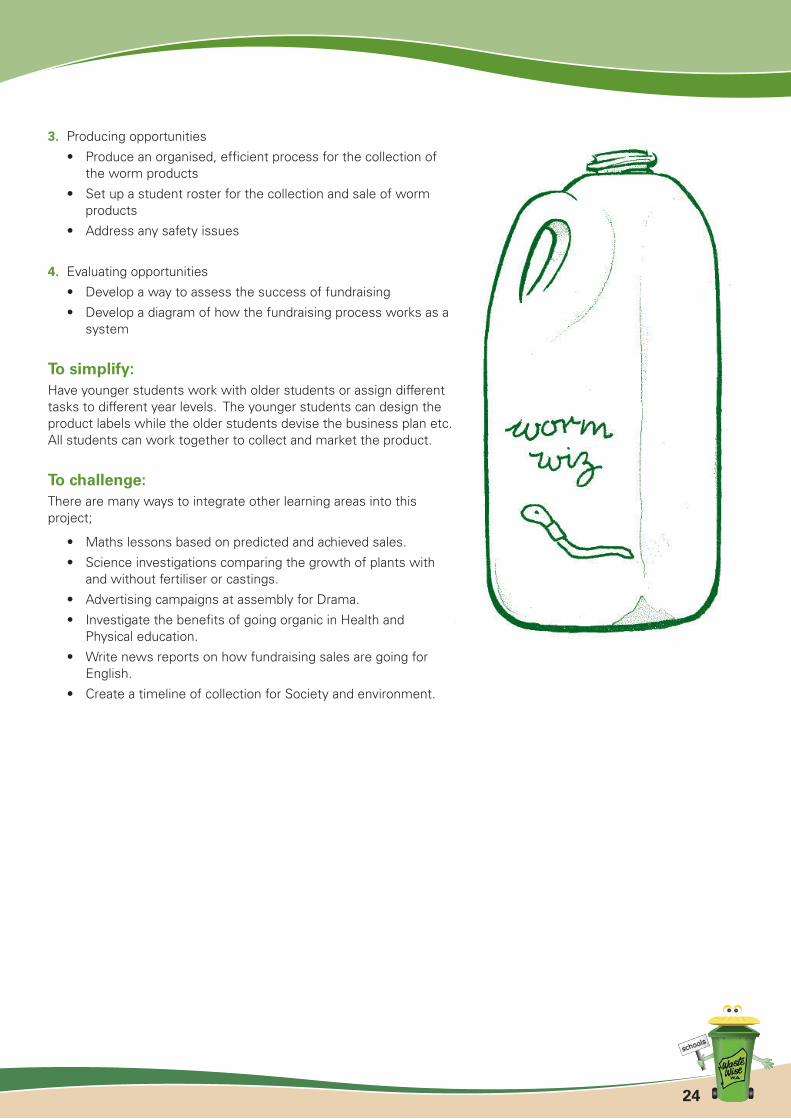
Harvesting the worm wizMany schools collect and bottle the liquid that filters out of the worm farm and sell it as a plant tonic for fundraising. Another technique is to make worm casting ‘tea’. This is made by soaking the harvested worm castings in water then filtering it. Avoid exposing worm wiz to light, as UV rays kill the good bacteria.
Another technique is to harvest the castings from the bottom of the worm farm; this is only possible if there is a sliding panel installed, usually with custom built farms. This means the worms will not be disturbed (Murphy 2005).

7
Trouble shootingThe worms are evacuating!• This means they aren’t comfortable and this could be for a number of reasons. The farm could be too wet/dry, too
hot or too acidic.
Too wet• The worms could drown. Add some shredded newspaper and cardboard to absorb the moisture and check that the
drainage is not blocked and that the farm is on a slant.
Too dry• Add a small amount of water, ideally the castings should have the moisture content of a wrung out sponge.
Too hot• Add cool water and allow it to drain out. Check that the worm farm is in the shade and has a temperature of
around 24 degrees Celsius.
• Freeze fruit and vegetable scraps and then allow them to defrost in the worm farm. Or freeze a plastic bottle of water and place the open bottle in the farm. As it melts, it adds water and cools everything down.
Too acidic
• Add a little garden lime (calcium carbonate) to reduce acidity.
Too compacted
• Harvest excess castings. Loosen up the remaining castings to aerate the worms bedding, mix in shredded newspaper and cardboard.
Bad smells• Check the food. Is it mouldy or too large to be consumed? Remove it or puree it.
• You’re feeding the worms too much. Only feed what they can get through in two to three days.
• The proportion of fruit and vegetables/organics could be too much: add more shredded paper and cardboard.
• Not enough oxygen. The lack of ventilation can cause the bacteria to become anaerobic, producing smelly methane. Check that the farm has air holes, and is not compacted.
• Add some garden lime (calcium carbonate) to reduce acidity and discourage flies.
Summer holidays• Set up a roster system for students, parents or teachers to maintain the worms.
• Stock up the worm farm fridge with shredded paper and cardboard and set up a drip irrigation system. They will lose mass over the holidays but they should survive.
• Sell the worms and buy a new stock in Term 1.
Key wordsAnnelida: the annelids, collectively called Annelida (from Latin annelus (little ring) are a large phylum of segmented worms with about 17,000 modern species including earthworms and leeches. Oligochaete: Oligochaeta, collectively , is a subclass in the biological phylum Annelida and includes various earthworms.
Clitellum: A clitellum is part of the reproductive system of an annelid (a worm with small rings or segments). The clitellum is a thick, saddle-like, ring found in the epidermis (skin) of the worm.
Segmented: The body is divided into successive segments, as in earthworms or lobsters.
Hermaphrodites: Organisms having both male and female reproductive organs.
Capsule: Formed from a mucous ring and containing the fertilised egg to be deposited in the soil. The capsule on average will produce four baby worms and these can hatch after about two weeks in the right conditions.

8
Worm farm: A bought or constructed home for worms put in place to convert organic matter into worm castings and worm wiz.
Worm wiz: A highly nutritious organic liquid plant food produced by the worms and collected from a worm farm.
Worm castings: A highly nutritious organic plant food produced by the worms and collected from a worm farm. Both worm wiz and castings contain a wide variety of nutrients necessary for plant growth and beneficial microbes. Castings also improve the water retention of soil.
Vermiculture: The raising and production of earthworms and their by-products.
Organic: This refers to the way agricultural products – including foods and fibers such as cotton – are grown and processed. The word “organic” on a label stands for a commitment to an agriculture which strives for a balance with nature, using methods and materials which are of low impact to the environment.
SourcesCSIRO, Insects and their allies fact sheet, viewed 21 January 2010www.ento.csiro.au/education/allies/annelida.html
Earth worm digest, S. Zorba Frankel (2008), Young persons guide to vermicomposting, viewed 21 January 2010 www.wormdigest.org/content/view/15/2/
KidCyber, Earthworms (2003), viewed21 January 2010 www.kidcyber.com.au
Murphy, D. (2005) ‘Organic growing with worms, a Handbook for a Better Environment’ Penguin Books Australia
Towards Zerowaste WA, Organics, worm farming brochures, viewed 21 January 2010www.zerowastewa.com.au/organics/resources/worm/
University of Illinois: Herman the worm, viewed 21 January 2010www.urbanext.uiuc.edu/worms/
Other resourcesMake your own worm farming brochure or posterwww.zerowastewa.com.au/communication/education/organic
For more information go to www.wastewise.wa.gov.au

9
How worms behaveAim:In this activity, students will use red tiger worms from the school worm farm to investigate how worms move around and react to various light conditions.
Curriculum links:Learning area Outcome Aspect
Science Investigating • Planning • Conducting • Processing
Life and Living • Interdependence of living things
Technology Technological processes • Devising and enterprise
Animal care:This is an observation activity using live worms. Students should be reminded that worms are live animals and should be handled with care. It is permissible to remove animals temporarily for short periods of observation but they must be returned to their habitat promptly (SAEC, 2005).
Background information:The earthworm is blind, but sensitive to light. It has three to five hearts depending on the species and breathes through its skin, which is a mucous membrane. We can identify its ‘head’ (anterior) end as it is the end closest to the clitellum, a band around the worm near the centre and commonly referred to as the saddle. It feeds by using its mouth or prostomium. It moves through the soil by contracting and expanding its muscles, and using its setae (bristles) to grip the soil.
Resources:• Worms
• Tray (the plastic desk drawers are perfect for this)
• Exercise book
• Worm castings
• Lamps
• Stopwatches or watches
• Magnifying glasses

�0
Activity:�. Set up the tray, with half covered with a thin layer of worm castings and half without. Place the exercise
book over half the tray and set up the bench lamp over the other half so that it is at least 30 centimetres away (so the worms don’t get hot). Gently place about 10 worms in the side of the tray with the lamp and give the worms some time to settle down (the reason for using only 10 worms is that they tend to bunch together rather than move around if there are a lot of them).
2. Turn on the light and observe the worms for 15 to 20 minutes. Record your observations of the worms’ behaviour. Do the worms head directly for the shelter of the castings? During the experiment, be sure to watch the worms carefully to make sure they aren’t drying out. If this is the case, then return them immediately to the worm farm.
NB: During the observations students should be encouraged to use a magnifying glass to closely observe worm mobility, body segmentation etc.
3. After completing the experiment, students should evaluate whether they think they gained enough evidence to demonstrate how worms respond to light. How could they improve the experiment and what further experiments can they complete to get further evidence?
To simplify:• Work as one group and record the results as a class on a smart-board or overhead projector.
• Use blocks to show how many worms there are on each side of the tray every three to five minutes.
To challenge:• Have students design an experiment to see how worms respond to heat, by placing the lamp closer to
the worms (being careful not to dry them out); to cold by putting icepacks under one side of the tray; to moisture by using saturated soil or dry soil etc.
• Design a worm farm for worms to reflect the conditions in which worms like to live.
Going further:Design a survival guide for worms. What conditions will they thrive in and what conditions will they try to avoid?

��
Worm food investigationsAim:Students will build a mini worm farm and investigate the factors that affect the rate which worms consume food.
Curriculum links:Learning area Outcome Aspect
Science Investigating • Planning • Conducting • Processing • Evaluating
Life and Living • Interdependence of living things
Technology Technological processes • Devising and enterprise • The nature of materials
Background information:Worms will eat anything organic eventually. However in small worm farms, it is a good idea to avoid certain foods. It is also good to remember that the smaller the pieces of food and the softer the food, the easier it is for the worms to get through.
On the menuWorms enjoy a variety of foods and will eat shredded, moist cardboard and paper scraps (avoid shiny magazines), coffee grounds, fruit and vegetable scraps, leaves, hair, vacuum cleaner dust and egg shells.
Off the menuIt is a good idea to omit certain foods such as citrus fruits, pineapples, onions and garlic. These foods can make the worm farm too acidic and the worms may even try to move out on account of the high pH. Other foods like meat and dairy can be smelly and attract mice, rats and wasps so it is best to avoid them as well.
Resources:• Four, two litre clear plastic drink bottles with the top cut off, per group of students (see diagram)
• Moist worm castings
• Water
• Composting worms
• Newspaper
• Large and small vegetable and fruit scraps (i.e. chopped vs. pureed)
• Hard and soft vegetable and fruit scraps (i.e. carrots vs. banana)

�2
Activity:�. Place approximately 5 centimetres of castings in each bottle and add a small handful of worms.
2. Add approximately 5 centimetres more castings.
3. Carefully dig a small hole right next to the side of the container and bury one type of food item in each bottle. Make sure that you can see the food through the side of the bottle and that the food is completely covered with castings.
4. Add a small amount of water to moisten the worm farm. Wrap the outside of the bottle with a piece of newspaper and place a damp newspaper ‘plug’ on top.
5. Check the worm farms every day and record observations. Observations should continue until all the food scraps have been converted into castings. The table below is an example of how students could record information. However, middle and upper primary students should be encouraged to produce their own recording tables.
6. Once the experiment is finished, return the worms to their regular home in the school worm farm.
Focus questions:
• Why do we have worm farms?
• What living conditions do worms like? Why?
• Which foods do worms eat more quickly?
o Large pieces of fruit and vegetables or small pieces?
o Hard foods or soft foods?
To simplify:Teach students why it’s important to chop food scraps for the worms. Build two mini worm farms and place large food scraps in one bottle and blended food scraps in the other. Observe every day and see which food the worms get through first.
To challengeConduct this activity as a controlled experiment. Use the same mass of food in each bottle and record your observations in a data table similar to the one above. Determine what type of food should be fed to the worms and how it should be prepared to optimise the amount of scraps that can be recycled in a school worm farm. This could mean looking at various ways to prepare the food. For example, pureeing, chopping, grating or leaving food items whole.
Going further:• Create a worm farm ‘How to Feed’ manual or an off/on the menu card or poster.• Imagine you own a worm restaurant and write a menu for the compost worms.
Food Day � Observations
Day 2 Day 3
Small pieces of fruit/vegetable
Large pieces of fruit/vegetable
Soft fruit/vegetable
Hard fruit/vegetable

�3
Worms alive!Aim:Students will build their own mini compost heaps and see first hand how organic material is broken down by decomposers and turned into compost.
Curriculum links:Learning area Outcome Aspect
Science Investigating • Conducting • Processing Data Life and Living • Interdependence of living things
Mathematics Measurement • Understand units and direct measure
Animal care:This is an observation activity using live worms. Students should be reminded that worms are live animals and should be handled with care. It is permissible to remove animals temporarily for short periods of observation but they must be returned to their habitat promptly (SAEC, 2005).
Background information:Earth worms are invertebrates, so they have no back bone. They belong to the phylum Annelida, which includes leeches and marine worms. Annelids are different from most other invertebrates because they have long cylindrical shaped bodies made up of many similar segments and lack appendages, antennae and an obvious head.
In this phylum they are classified as class Oligochaeta. This group is made up of terrestrial earthworms and species that live in freshwater environments. There are many different species of earthworms. Some are just a few centimetres long while others can be up to two to three metres in length such as the Australian native giant Gippsland earthworm. The earthworms we find in our gardens are often introduced species as our native earthworms are driven away when we clear native vegetation and disturb their habitat.
The earthworms that we use in worm farms are a different species to those we find in our garden. This is because worm farms need worms that eat and breed quickly to transform our waste scraps into worm castings efficiently. The best worms for the job are European worms as they are accustomed to soils high in nutrients and are able to eat and multiply faster than native earthworms. They spend most of their time eating and breeding in a small amount of space, while native earthworms are better equipped for burrowing and searching for food in our drier, nutrient poor soils.
Common European earthworms include the red wriggler (Lumbricus rubellis) and the tiger worm (Eisenia fetida). Another composting worm is the Indian blue (Perionyx excavatus) that comes from Asia.

�4
Resources:• Live worms (per student or pair)
• One wet paper towel (per student or pair)
• Torch
• Scales (fine)
• Rulers
• Magnifying glasses
• Science journal
• Pencil
Activity:�. Students will observe a live worm using a magnifying glass and then produce a scientific drawing.
2. If students have no prior knowledge of how to do a scientific drawing then this must be explained. When making scientific drawings, they must be clear, well labelled (head, tail, segments etc), and with as much detail as a simple observation will allow. It should also be titled and enclosed in a simple border using a ruler and pencil.
3. Provide a detailed drawing of a worm on an overhead projector in order for students to be able to identify (a) clitellum; (b) anus; (c) mouth; (d) segments. Providing the overhead to students may feel like you are giving them too much information, however the overhead will provide students with some ideas about where to begin.
4. Prior to distributing live worms, explain to students that the worms must be treated gently and touched as little as possible.
5. Distribute the worms to the students on a damp paper towel. Students first observe and then begin their scientific drawing and labelling of the worm.
6. Observation comments should be recorded separately to the drawing. On a separate piece of paper, record the weight, length and width of the worm, and general observations about the worm:
• Smell
• Colour
• Number of segments
• Can you find the worm’s head and tail?
• Does it have eyes, a nose, hair or mouth?
• Is there a difference between the top side of your earthworm and the bottom?
• How does the worm’s skin feel?
• Do you think the worm has a skeleton?
• Does the worm move and how so? Can the worm move backwards?
• Does the worm have any special features? Describe them.
7. When students have completed their scientific drawings and observations, allow a short period of time for class discussion on findings and return worms to the worm farm. Discuss the function of a worm eg: converting organic matter into castings. This is an excellent opportunity for students to look at and feel the castings.
NB: Scales may not be able to record the weight of one worm if they are not fine scales. Have students record the weight of 20 average sized worms and record the average weight of the worms. The observation comments should follow on from the drawing.

�5
To simplify:• If students have limited prior knowledge about worms, introduce the ‘Earthworm Big book’ so that
students can use this to list what they think they know about worms and what they would like to know about worms. This could be the first page in a worm journal.
• Instead of measuring the worm with a ruler, students can use 1cm blocks.
To challenge:For students in upper primary or for those needing a challenge, this would be a good opportunity to explore animal adaptations.
Adaptations are any behavioural or physical characteristics of an animal that help it survive in its environment. There are three main categories associated with animal characteristics: behaviours, body coverings and body parts. Any or all of these types of adaptations play a critical role in the survival of an animal. Have students do research on specific animal adaptations and apply their new found knowledge to the adaptations of the earthworm. Visit www.backyardnature.net/earthwrm.htm for details of worm adaptations.
Going further:• Compare and contrast the needs of humans and worms by
brainstorming or creating a diagram. This activity could lead onto a discussion about animal adaptations. For example, humans need arms and legs to move around – worms do not because they have long slender bodies ideal for moving through soil. Humans wear sunglasses to protect their eyes from the glare of the sun – worms do not because they spend most of their time underground in the dark and don’t have eyes!
• Start a term’s work on worms by introducing the worms through reading ‘A Diary of a Worm’ by Doreen Cronin then explaining students will be completing their own diary or journal of worm work in the term.
• Write a story on what it would be like if you woke up tomorrow as a worm.

�6
Worm rapAim:Students will demonstrate their knowledge of the characteristics of worms in a creative way by writing their own rap about worms.
Curriculum links:Learning area Outcome Aspect
English Writing • Processes and strategies • Devising Reading • Use of texts
The Arts Arts ideas • Creating • Developing • Presenting
Background information:There are many different species of earthworms. Some are just a few centimetres long while others can be up to two to three metres in length such as the Australian native giant Gippsland earthworm. Earthworms are invertebrates, so they have no back bone. They are also blind, but sensitive to light. Worms have three to five hearts depending on the species and breathe through their skin. They do not have legs, and rather move through the soil by contracting and expanding their muscles, and using setae (bristles) to grip the soil.
Resources:• Examples of worm literature (poems, plays stories) optional
• Worm rap! by Caroline Haviland, from Science and Children, January 1993 (www.iit.edu/~smile/bi9409.html)
Activity:�. Read ‘Worm rap!’ and have students to perform it to the rest of the class. Alternatively, do the same for
the Waste Wise worm rap below.mes at the top of the cards. The different types of cards are Shop Smart, Recycle, 3 R’s, and Compost. The object is to collect five cards of one type, which will describe a compost food web. For example, if you were dealt two cards from the Shop Smart suite, you may wish to collect all the cards from that suit.

�7
WORM RAP
Pleased to meet you, I’m a worm as you can see And I’m here today to tell you, about my family
We’ve got no eyes to see youBut we move away from light
And no ears to hear youBut your tremors give us fright
We’re nifty little crittersWe help the soil grow plantsTo help your growing bodies
Get good food in balance
We’ve got no legs or armsNot needed underground
‘cos we wriggle and make tunnelsAs we spread our charm around
Those green thumbed ones among you They know the good we doIf a soil’s got worms inside itIt grows more veg for you!
2. Students review their work on worms and write their own rap about worms or present the information that they have learnt in a creative form that they feel comfortable with.
3. The rap or a student’s work can be learnt for a whole school presentation informing the school on what they have learnt about worms.
To simplify:Other worm songs might be easier for students to sing and learn eg. The littlest worm, www.traditionalmusic.co.uk/childrens-songs/Littlest_Worm.htm (an echo song that can be sung to the tune of “My Highland Goat”!); ‘Wiggly Worm’ available on the Captain Cleanup CD (Waste Wise has a copy to lend); ‘Nobody Likes Me’; ‘the inch worm’; ‘A worm song’ by Billy B (Waste Wise has a copy to lend); ‘Earthworm’ song by Fay White (Waste Wise has a copy of this CD and song book to lend).
To challenge:• Write a worm Haiku
• Write and perform a worm play
• Read ‘Diary of a Worm’, see the website for English teaching ideas: www.readwritethink.org/lessons/lesson_view.asp?id=778 and have students write their own children’s book
Going further:• Perform your worm plays/raps/songs at assembly.
• Sew a worm character to make a puppet to perform with at assembly or a draught stopper (which can then be reused at home!) by filling it with sawdust or rice.

�8
Grassy headsAim:Students investigate the benefits of worm castings and worm wiz by making grassy heads from old stockings.
Curriculum links:Learning area Outcome Aspect
Science Investigating • Processing Data Life and Living • Interdependence of living things
The Arts Art ideas • Creating original ideas
Background information:Worm castings and liquid fertiliser are highly nutritious organic plant foods. They contain a wide variety of nutrients necessary for plant growth and beneficial microbes. Castings also improve the water retention of soil.
Resources:Adapt the variables according to what you would like to test.
• Six old stockings/knee highs per group
• Grass seeds, or other fast growing varieties such as wheat grass
• Six coffee cups or jars per group
• Worm wiz and plain water
• Worm castings and plain soil from the garden
• Elastic bands (optional)
• Decorations: buttons or squiggly eyes (optional)
Activity:Divide the class into groups and distribute stockings and jars to each group and label with the variables to be investigated. Each group needs to observe the effects of worm wiz and worm castings in comparison to water and local soil.
�. Hypothesis: discuss the experiment with the class, ask students to come up with a prediction/hypothesis about what will happen to the seeds if worm wiz and worm castings are added.
2. Using the feet of the stocking, place one tablespoon of grass seed in the toe section
3. To see the effects of worm wiz: add one cup of plain soil to both the ‘control’ and the ‘experimental’ stocking. Tie a knot and cut off any excess stocking. Leave a smallish ‘tail’ (Optional: Use the plastic bands to make ears and noses and paint on a face).

�9
4. Turn it upside down and place the ‘control’ stocking knot on a jar filled with water, with the ‘tail’ in the water and the ‘experimental’ soil-filled stocking on the jar of worm wiz (see image). Make sure the whole grassy head is moist with the same liquid that’s in the jar and that the ‘tail’ is immersed. The beneficial microbes in worm wiz can be harmed by light, so wrap the jar with newspaper.
5. To see the effects of castings, repeat the experiment by creating a grassy head ‘control’ with garden soil and an ‘experimental’ group with the castings.
6. Place all the grassy heads in a sunny spot. Make sure they don’t dry out.
7. Create an observation table and observe for a week.
Focus questions: • Which stocking head grows the ‘hair’ the fastest?
• Do worm wiz or worm castings make the ‘hair’ grow faster?
• What conclusions can you make about the effect of worm wiz and worm castings on plants?
• Why do we need worms in the soil?

20
Table �
To simplify:Conduct a very simple controlled experiment to test the benefits of worm castings. Make one grassy head with sand and one with a mixture of sand and castings. Place both grassy heads on jars filled with water. Compare.
To challenge:Have students test different concentrations of worm wiz. Is worm wiz more effective when it isn’t diluted? Is there an optimal dilution that should be used?
Control Experiment
1. Soil + water Potting soil + worm wiz2. Worm castings + water Worm castings + worm wiz
Observations
Grassy Head Day � Day 2 Day 3 Day 4 Day 51 Soil + water (control)
Soil + worm wiz2 Soil + water (control)
Castings + water

2�
House of wormsAim:Students will learn how to set up and care for a worm farm by researching worm farming techniques and then designing a worm farm for the school.
Curriculum links:Learning area Outcome Aspect
Science Investigating • Planning • Conducting • Processing • Evaluating
Life and Living • Interdependence of living things
Technology Technological processes • Devising and enterprise • The nature of materials
Maths Measurement • Understand units and direct measure
Background information:A worm farm is made from a container that has a drainage hole for water, and a lid that keeps out vermin but allows air in. It is normally filled with layers of worm castings, shredded paper or other types of bedding and composting worms. The size of your farm depends on how many students your school has and how much organic waste your school produces. You can buy worm farm containers or make your own. Some schools use old bathtubs, but most use old fridges that have been safely degassed. Worm farms can also be custom made and decorated.
Worms need cool, moist conditions and a temperature of 25-26 degrees Celsius is perfect. Worms need a layer of bedding to live in. Bedding materials include, castings, shredded paper, newspaper, cardboard, brown leaves and straw.
Your worm farm should be as moist as a wrung out sponge. If there is too much water the worms will drown and if there is too little water they can die. Every day a worm loses approximately 20 per cent of its body weight in moisture so it is important to keep the worm farm adequately moist.
Resources:• Waste Wise ‘Worms’ and ‘How to make a fridge worm farm’ fact sheets
• A container for the worm farm
• Shredded newspaper
• Composting worms
• Bucket
• Fruit and vegetable scraps
• Watering can or hose
22
Activity:�. Students research worms and worm farming using the worm fact sheet and other resources. Students
should determine:
• How worms can help reduce the amount of waste people throw away
• What worms need to survive
• Where to best locate a worm farm
• What worms should and shouldn’t be fed
• The uses of worm castings and worm ‘wiz’
2. Students apply their knowledge about worms and worm farming to find an ideal location on the school grounds on which to set up a worm farm and organise the necessary approval for setting up a worm farm in that area.
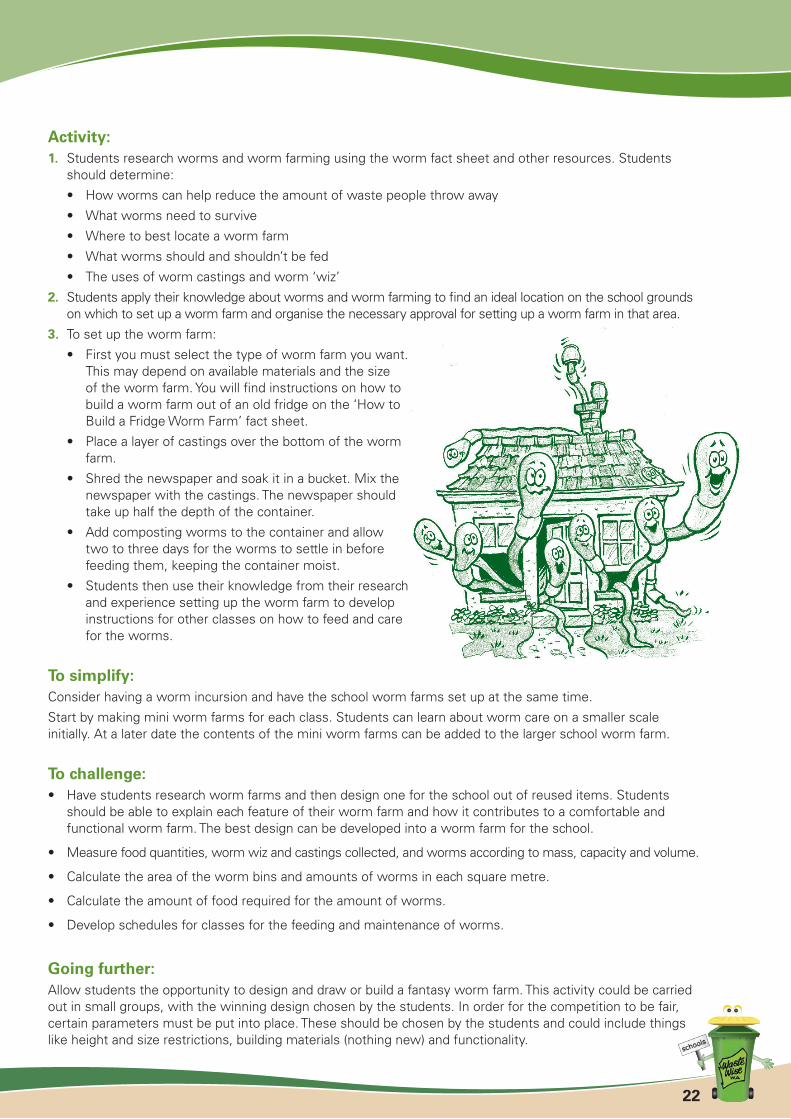
3. To set up the worm farm:
• First you must select the type of worm farm you want. This may depend on available materials and the size of the worm farm. You will find instructions on how to build a worm farm out of an old fridge on the ‘How to Build a Fridge Worm Farm’ fact sheet.
• Place a layer of castings over the bottom of the worm farm.
• Shred the newspaper and soak it in a bucket. Mix the newspaper with the castings. The newspaper should take up half the depth of the container.
• Add composting worms to the container and allow two to three days for the worms to settle in before feeding them, keeping the container moist.
• Students then use their knowledge from their research and experience setting up the worm farm to develop instructions for other classes on how to feed and care for the worms.
To simplify:Consider having a worm incursion and have the school worm farms set up at the same time.
Start by making mini worm farms for each class. Students can learn about worm care on a smaller scale initially. At a later date the contents of the mini worm farms can be added to the larger school worm farm.
To challenge:• Have students research worm farms and then design one for the school out of reused items. Students
should be able to explain each feature of their worm farm and how it contributes to a comfortable and functional worm farm. The best design can be developed into a worm farm for the school.
• Measure food quantities, worm wiz and castings collected, and worms according to mass, capacity and volume.
• Calculate the area of the worm bins and amounts of worms in each square metre.
• Calculate the amount of food required for the amount of worms.
• Develop schedules for classes for the feeding and maintenance of worms.
Going further:Allow students the opportunity to design and draw or build a fantasy worm farm. This activity could be carried out in small groups, with the winning design chosen by the students. In order for the competition to be fair, certain parameters must be put into place. These should be chosen by the students and could include things like height and size restrictions, building materials (nothing new) and functionality.

23
Enterprising wormsAim:Students will design a Waste Wise marketing plan for the school worm wiz, including collecting, packaging, labeling and selling their product to raise money for their school.
Curriculum links:Learning area Outcome Aspect
Technology and Systems • The use and development of systems Enterprise Technology processes • Investigating • Devising • Producing • Evaluating
Background information:Worm castings and liquid fertiliser produced in the school worm farms are highly nutritious organic plant foods. People pay a lot of money for fertilisers for their home gardens and are continuously looking for more sustainable ways to garden. Selling worm castings and worm wiz produced at school is a good enterprise introduction for students. It can provide funds to enable the school to expand the worm farm area into an organic recycling centre complete with garden beds full of healthy fruit and vegetables, grown on compost and fertilised by worm castings of course!
Resources:• Worm farm
• Empty clean one, two or three litre containers – soft drink and milk bottles work well
• Labels
Activity:�. Investigating opportunities
• Students research the benefits of using organic worm fertiliser on gardens
• Students investigate different advertising methods and labelling of products
• Students investigate different waste wise methods of packaging worm castings or worm wiz
2. Devising opportunities
• Devise a business plan for selling worm castings/worm wiz
• Devise how best to advertise the worm castings/worm wiz
• Devise a name and label for product
24
3. Producing opportunities
• Produce an organised, efficient process for the collection of the worm products
• Set up a student roster for the collection and sale of worm products
• Address any safety issues
4. Evaluating opportunities
• Develop a way to assess the success of fundraising
• Develop a diagram of how the fundraising process works as a system
To simplify:Have younger students work with older students or assign different tasks to different year levels. The younger students can design the product labels while the older students devise the business plan etc. All students can work together to collect and market the product.
To challenge:There are many ways to integrate other learning areas into this project;
• Maths lessons based on predicted and achieved sales.
• Science investigations comparing the growth of plants with and without fertiliser or castings.
• Advertising campaigns at assembly for Drama.
• Investigate the benefits of going organic in Health and Physical education.
• Write news reports on how fundraising sales are going for English.
• Create a timeline of collection for Society and environment.

25
Worm workshopAim:Students will learn how to facilitate workshops on vermiculture based on the RAFT concept of Role, Audience, Format, and Topic. Once knowledge and confidence of the topic has been reached, students will pass on to teachers, parents and the community what they have learned about worms.
Curriculum links:Learning Area Outcome Aspect
Technology and Systems • The use and development of systems Enterprise Technology processes • Investigating • Devising • Producing • Evaluating
Background information:Vermiculture is the cultivating of worms for the purpose of breaking down organic waste. Worm farms contain composting worms that will eat food scraps and turn them into high quality, natural liquid (worm wiz) and compost (castings) fertiliser for plants. Composting worms need a moist, high nutrient environment, and we create this environment for worm farming. The purpose of a worm farm is to decrease the amount of organic waste that is normally put in your school’s rubbish bins and sent to landfill.
As ecological sustainability becomes a focal point in schools, students can be empowered to act by educating fellow students and their community about this topic. Engaging students in the setting up and running of a worm farm at school is one example of how schools can be more ecologically sustainable. When students raise and care for worms in a school environment to reduce the amount of organic waste going to landfill, ultimately worm farming can become part of the school culture. Ideally, this project will coincide with the installation of a worm farm in your school and will be initiated by an upper primary class.
Resources:• Worm farm or farms
• Art supplies as needed
Activity:Once students are experts on worms, they can teach each other, teachers, parents and the community about vermiculture. This is based on the RAFT concept of Role, Audience, Format, and Topic.
�. In groups, students compile all their research on vermiculture and complete a CONCEPT MAP on vermiculture so that all ideas and information are presented.
2. Explain that small groups of students (three to five) are going to produce a product that is going to help educate the community about the Topic of vermiculture.

26
3. Students then:
• choose a Role. This is the perspective from which the product is presented. Will they present from the point of view of a worm, a food scrap, a student or a worm farmer?
• decide on the Audience at which the product is aimed, e.g. Year 1 class, teachers, parents etc.
• decide on the Format that the product will be in. Potential products can include an album, a ballet, a cartoon, a documentary, an essay, a fairy tale, a guidebook etc. Encourage students to be creative.
• consider narrowing down the Topic: this is where students concentrate on what part of vermiculture they are concentrating, e.g. Worm menu, how to set up a worm farm, troubleshooting problems. If this is going to be presented to the whole school then it could be coordinated so that all topics within vermiculture can be represented
To simplify:Assign students their Role, Audience, Format and Topic. Groups of students can be formed based upon student readiness and depending on the group, simpler or more complex projects can be assigned. Groups can also be formed by learning style and appropriate formats assigned to suit each group.
Going further:This project can be adapted to suit any sustainability project and would be a good way to produce work, displays or presentations for a sustainability fair at the school.

27
Worm gamesAim:These two games provide students with a fun way to demonstrate their knowledge of worms and to learn from one another. In order for students to play both games, a sound knowledge of worms is needed. It is therefore recommended that the ‘Worm games’ activities should follow all other lessons and activities on worms.
Curriculum links:Learning Area Outcome Aspect
The Arts Arts ideas • Interpreting
Mathematics Measurement • Understand units and direct measure
Background information:The purpose of a worm farm is to decrease the amount of organic waste that is normally put in your school’s rubbish bins and sent to landfill. Worm farms help us to ‘close the recycling loop’ because our organic waste is changed into fertiliser for our plants which then produce food for us to eat. Worms eat a wide variety of items including old plant material and food scraps. Their castings are expelled into the soil and provide nutrients for plants. As the worms move through the soil, their tunnels enable air and water to filter into the ground while loosening up the soil for plant roots, allowing them to take up oxygen and water.
Resources:For Worm Minefield:
• cardboard (recycled eg: cereal boxes) to make fact cards
• paper to make grids (the flip side of an already used piece of paper)
• a book large enough to prevent students from seeing each other’s grid
For Worms and Tunnels:
• recycled paper scraps
• cardboard and texters to create a game board
• counters – one per player
• dice – one per group
• worm farm facts
Activity:Worm Minefield:
�. Students work in pairs to create 20 fact cards about worms and waste, biology, living conditions and what worms eat or don’t eat in a small worm farm. This could be done in a previous lesson by researching in books or on the internet, and/or from the Waste Wise worm fact sheets and poster.
2. Each student draws a grid play board with 100 squares. Students should rule 10 vertical lines, and 10 horizontal lines. They then write 1 to 10 in each square on the top row and then, skipping the first square, write a-j down the first column (see illustration). This grid represents a worm farm.

28
3. Game instructions: (Similar to the game Battleship)
• Place a barrier between the students who sit facing each other so that neither student can see the other’s grid.
• Without showing their partner each student then places their worms in their grid. They have two adult worms (five squares long) and two baby worms (two squares long) to hide in their worm farm, running vertically or horizontally)
• To have a chance to guess the worm position, the students first have to answer a worm fact question. If the question is answered incorrectly or they do not know the answer, they must be told the correct answer so that they can answer it correctly next time. If the question is answered correctly, the student can then have one turn at ‘digging’ in the worm farm. They call out their guess by calling the reference for the grid, e.g. B7 etc. If they have guessed a square correctly the person whose worm was found has to say ‘hit’, and if not ‘miss’. The player marks the box on their game grid with an X if it is a miss, and a W, if it is a hit. Then it is the other players turn.
• The players continue until they have dug up a whole worm. When a worm is ‘dug up’, the player whose worm it is has to say ‘It’s your worm’. The other player then wins this worm as a point. The game continues until one player has unearthed all of the other player’s worms
Worm and Tunnels instructions (Like Snakes and Ladders):
�. Brainstorm the elements to a successful and unsuccessful worm farm on the board and have students compile a list of positive and negative worm care facts.
2. Using recycled cardboard or paper, have students design a game board with squares, worms, tunnels and a square of food scraps at the end (see illustration). At the bottom of the worms, have students write a positive worm care fact. At the top of the tunnels, have students write a negative worm care fact.
3. To play, students roll the die and advance their counter the respective number of places. If they land on a worm, they go up the worm to the next level. If they land on a tunnel, they go down to the lower level. The first student to reach the food scraps at the end of the game wins!
� 2 3 4 5 6 7 8 9 �0
A
B
C
D
E
F
G
H
I

29
To simplify:Worm Minefield:
• Work as a class to come up with the fact cards on worms. Make copies of the fact cards and distribute to all the students.
• Have students draw pictures of things that worms can and can’t eat. Have students show each other a drawing and respond yes or no to whether or not worms should be fed it. A correct response means a player can take a turn to guess where the worms are.
Worms and Tunnels:
• Instead of having written facts, use pictures of appropriate and inappropriate food items.
To challenge:Worm Minefield:
• Include cards with pictures of worm anatomy that students need to correctly identify before taking a turn.
Worms and Tunnels:
• Include questions that students must answer on the squares without a worm or a tunnel. If students get a question wrong, they advance to the closest tunnel and go wherever it takes them.
2010042