tinc manual · tun/tap device driver or other virtual network device drivers. without such a...
TRANSCRIPT

tinc ManualSetting up a Virtual Private Network with tinc
Ivo Timmermans and Guus Sliepen

This is the info manual for tinc version 1.0.35, a Virtual Private Network daemon.
Copyright c© 1998-2018 Ivo Timmermans, Guus Sliepen <[email protected]> and WesselDankers <[email protected]>.
Permission is granted to make and distribute verbatim copies of this manual provided thecopyright notice and this permission notice are preserved on all copies.
Permission is granted to copy and distribute modified versions of this manual under the con-ditions for verbatim copying, provided that the entire resulting derived work is distributedunder the terms of a permission notice identical to this one.

1
1 Introduction
Tinc is a Virtual Private Network (VPN) daemon that uses tunneling and encryption tocreate a secure private network between hosts on the Internet.
Because the tunnel appears to the IP level network code as a normal network device,there is no need to adapt any existing software. The encrypted tunnels allows VPN sites toshare information with each other over the Internet without exposing any information toothers.
This document is the manual for tinc. Included are chapters on how to configure yourcomputer to use tinc, as well as the configuration process of tinc itself.
1.1 Virtual Private Networks
A Virtual Private Network or VPN is a network that can only be accessed by a few electedcomputers that participate. This goal is achievable in more than just one way.
Private networks can consist of a single stand-alone Ethernet LAN. Or even two com-puters hooked up using a null-modem cable. In these cases, it is obvious that the networkis private, no one can access it from the outside. But if your computers are linked to theInternet, the network is not private anymore, unless one uses firewalls to block all privatetraffic. But then, there is no way to send private data to trusted computers on the otherend of the Internet.
This problem can be solved by using virtual networks. Virtual networks can live on topof other networks, but they use encapsulation to keep using their private address space sothey do not interfere with the Internet. Mostly, virtual networks appear like a single LAN,even though they can span the entire world. But virtual networks can’t be secured by usingfirewalls, because the traffic that flows through it has to go through the Internet, whereother people can look at it.
As is the case with either type of VPN, anybody could eavesdrop. Or worse, alter data.Hence it’s probably advisable to encrypt the data that flows over the network.
When one introduces encryption, we can form a true VPN. Other people may see en-crypted traffic, but if they don’t know how to decipher it (they need to know the key forthat), they cannot read the information that flows through the VPN. This is what tinc wasmade for.
1.2 tinc
I really don’t quite remember what got us started, but it must have been Guus’ idea. Hewrote a simple implementation (about 50 lines of C) that used the ethertap device thatLinux knows of since somewhere about kernel 2.1.60. It didn’t work immediately and heimproved it a bit. At this stage, the project was still simply called "vpnd".
Since then, a lot has changed—to say the least.
Tinc now supports encryption, it consists of a single daemon (tincd) for both the receivingand sending end, it has become largely runtime-configurable—in short, it has become a full-fledged professional package.
Tinc also allows more than two sites to connect to eachother and form a single VPN.Traditionally VPNs are created by making tunnels, which only have two endpoints. Larger

2 tinc Manual
VPNs with more sites are created by adding more tunnels. Tinc takes another approach:only endpoints are specified, the software itself will take care of creating the tunnels. Thisallows for easier configuration and improved scalability.
A lot can—and will be—changed. We have a number of things that we would like to seein the future releases of tinc. Not everything will be available in the near future. Our firstobjective is to make tinc work perfectly as it stands, and then add more advanced features.
Meanwhile, we’re always open-minded towards new ideas. And we’re available too.
1.3 Supported platforms
Tinc has been verified to work under Linux, FreeBSD, OpenBSD, NetBSD, Mac OS X(Darwin), Solaris, and Windows (both natively and in a Cygwin environment), with varioushardware architectures. These are some of the platforms that are supported by the universaltun/tap device driver or other virtual network device drivers. Without such a driver, tincwill most likely compile and run, but it will not be able to send or receive data packets.
For an up to date list of supported platforms, please check the list on our website:https://www.tinc-vpn.org/platforms/.
3
2 Preparations
This chapter contains information on how to prepare your system to support tinc.
2.1 Configuring the kernel
2.1.1 Configuration of Linux kernels
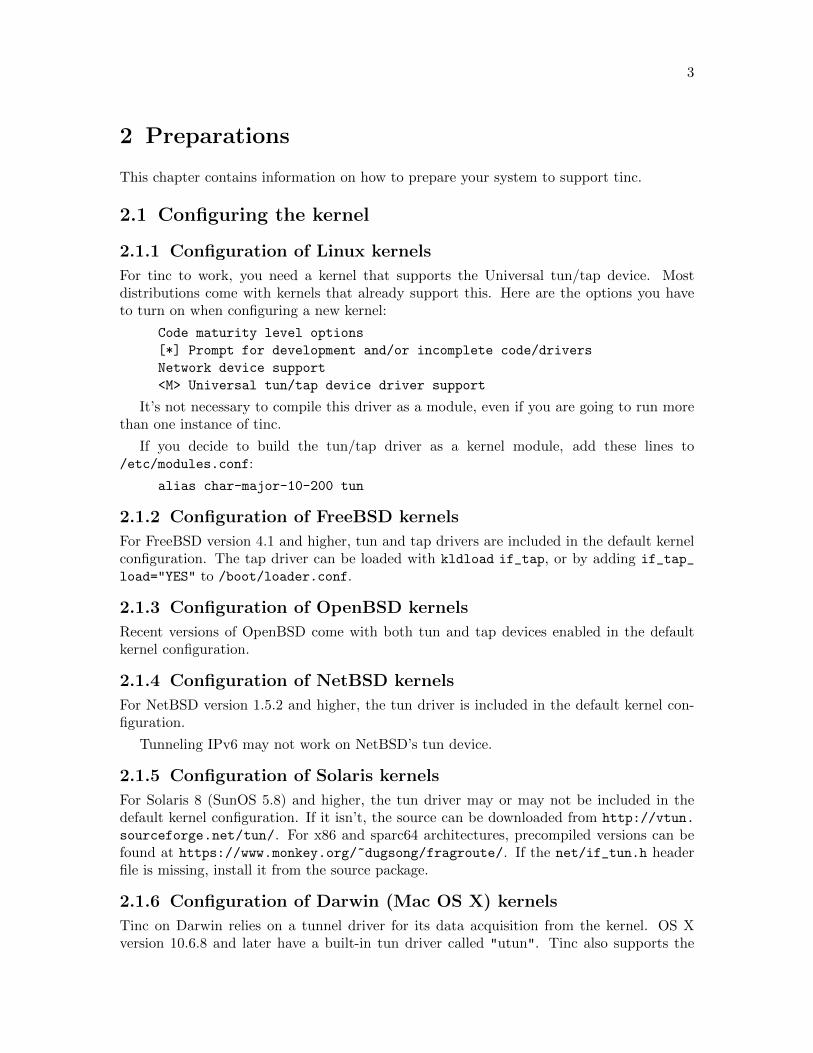
For tinc to work, you need a kernel that supports the Universal tun/tap device. Mostdistributions come with kernels that already support this. Here are the options you haveto turn on when configuring a new kernel:
Code maturity level options
[*] Prompt for development and/or incomplete code/drivers
Network device support
<M> Universal tun/tap device driver support
It’s not necessary to compile this driver as a module, even if you are going to run morethan one instance of tinc.
If you decide to build the tun/tap driver as a kernel module, add these lines to/etc/modules.conf:
alias char-major-10-200 tun
2.1.2 Configuration of FreeBSD kernels
For FreeBSD version 4.1 and higher, tun and tap drivers are included in the default kernelconfiguration. The tap driver can be loaded with kldload if_tap, or by adding if_tap_
load="YES" to /boot/loader.conf.
2.1.3 Configuration of OpenBSD kernels
Recent versions of OpenBSD come with both tun and tap devices enabled in the defaultkernel configuration.
2.1.4 Configuration of NetBSD kernels
For NetBSD version 1.5.2 and higher, the tun driver is included in the default kernel con-figuration.
Tunneling IPv6 may not work on NetBSD’s tun device.
2.1.5 Configuration of Solaris kernels
For Solaris 8 (SunOS 5.8) and higher, the tun driver may or may not be included in thedefault kernel configuration. If it isn’t, the source can be downloaded from http://vtun.
sourceforge.net/tun/. For x86 and sparc64 architectures, precompiled versions can befound at https://www.monkey.org/~dugsong/fragroute/. If the net/if_tun.h headerfile is missing, install it from the source package.
2.1.6 Configuration of Darwin (Mac OS X) kernels
Tinc on Darwin relies on a tunnel driver for its data acquisition from the kernel. OS Xversion 10.6.8 and later have a built-in tun driver called "utun". Tinc also supports the

4 tinc Manual
driver from http://tuntaposx.sourceforge.net/, which supports both tun and tap styledevices.
By default, tinc expects the tuntaposx driver to be installed. To use the utun driver, setadd Device = utunX to tinc.conf, where X is the desired number for the utun interface.You can also omit the number, in which case the first free number will be chosen.
2.1.7 Configuration of Windows
You will need to install the latest TAP-Win32 driver from OpenVPN. You can downloadit from https://openvpn.net/index.php/open-source/downloads.html. Using theNetwork Connections control panel, configure the TAP-Win32 network interface in the sameway as you would do from the tinc-up script, as explained in the rest of the documentation.
2.2 Libraries
Before you can configure or build tinc, you need to have the LibreSSL or OpenSSL, zliband lzo libraries installed on your system. If you try to configure tinc without having theminstalled, configure will give you an error message, and stop.
2.2.1 LibreSSL/OpenSSL
For all cryptography-related functions, tinc uses the functions provided by the LibreSSL orthe OpenSSL library.
If this library is not installed, you will get an error when configuring tinc for build.Support for running tinc with other cryptographic libraries installed may be added in thefuture.
You can use your operating system’s package manager to install this if available. Makesure you install the development AND runtime versions of this package.
If your operating system comes neither with LibreSSL or OpenSSL, you have to installone manually. It is recommended that you get the latest version of LibreSSL from http://
www.libressl.org/. Instructions on how to configure, build and install this package areincluded within the package. Please make sure you build development and runtime libraries(which is the default).
If you installed the LibreSSL or OpenSSL libraries from source, it may be necessary to letconfigure know where they are, by passing configure one of the –with-openssl-* parameters.Note that you even have to use –with-openssl-* if you are using LibreSSL.
--with-openssl=DIR LibreSSL/OpenSSL library and headers prefix
--with-openssl-include=DIR LibreSSL/OpenSSL headers directory
(Default is OPENSSL_DIR/include)
--with-openssl-lib=DIR LibreSSL/OpenSSL library directory
(Default is OPENSSL_DIR/lib)
License
The complete source code of tinc is covered by the GNU GPL version 2. Since the licenseunder which OpenSSL is distributed is not directly compatible with the terms of the GNUGPL https://www.openssl.org/support/faq.html#LEGAL2, we include an exemption tothe GPL (see also the file COPYING.README) to allow everyone to create a statically ordynamically linked executable:

Chapter 2: Preparations 5
This program is released under the GPL with the additional exemption thatcompiling, linking, and/or using OpenSSL is allowed. You may provide binarypackages linked to the OpenSSL libraries, provided that all other requirementsof the GPL are met.
Since the LZO library used by tinc is also covered by the GPL, we also present thefollowing exemption:
Hereby I grant a special exception to the tinc VPN project (https://www.tinc-vpn.org/) to link the LZO library with the OpenSSL library(https://www.openssl.org).
Markus F.X.J. Oberhumer
2.2.2 zlib
For the optional compression of UDP packets, tinc uses the functions provided by the zliblibrary.
If this library is not installed, you will get an error when running the configure script.You can either install the zlib library, or disable support for zlib compression by using the"–disable-zlib" option when running the configure script. Note that if you disable supportfor zlib, the resulting binary will not work correctly on VPNs where zlib compression isused.
You can use your operating system’s package manager to install this if available. Makesure you install the development AND runtime versions of this package.
If you have to install zlib manually, you can get the source code from https://zlib.
net/. Instructions on how to configure, build and install this package are included withinthe package. Please make sure you build development and runtime libraries (which is thedefault).
2.2.3 lzo
Another form of compression is offered using the LZO library.
If this library is not installed, you will get an error when running the configure script.You can either install the LZO library, or disable support for LZO compression by using the"–disable-lzo" option when running the configure script. Note that if you disable supportfor LZO, the resulting binary will not work correctly on VPNs where LZO compression isused.
You can use your operating system’s package manager to install this if available. Makesure you install the development AND runtime versions of this package.
If you have to install lzo manually, you can get the source code from https://www.
oberhumer.com/opensource/lzo/. Instructions on how to configure, build and installthis package are included within the package. Please make sure you build development andruntime libraries (which is the default).


7
3 Installation
If you use Debian, you may want to install one of the precompiled packages for your system.These packages are equipped with system startup scripts and sample configurations.
If you cannot use one of the precompiled packages, or you want to compile tinc foryourself, you can use the source. The source is distributed under the GNU General PublicLicense (GPL). Download the source from the download page (https://www.tinc-vpn.org/download/).
Tinc comes in a convenient autoconf/automake package, which you can just treat thesame as any other package. Which is just untar it, type ‘./configure’ and then ‘make’. Moredetailed instructions are in the file INSTALL, which is included in the source distribution.
3.1 Building and installing tinc
Detailed instructions on configuring the source, building tinc and installing tinc can befound in the file called INSTALL.
If you happen to have a binary package for tinc for your distribution, you can use thepackage management tools of that distribution to install tinc. The documentation thatcomes along with your distribution will tell you how to do that.
3.1.1 Darwin (Mac OS X) build environment
In order to build tinc on Darwin, you need to install Xcode from https://developer.
apple.com/xcode/. It might also help to install a recent version of Fink from http://
www.finkproject.org/.
You need to download and install LibreSSL (or OpenSSL) and LZO, either directly fromtheir websites (see Section 2.2 [Libraries], page 4) or using Fink.
3.1.2 Cygwin (Windows) build environment
If Cygwin hasn’t already been installed, install it directly from https://www.cygwin.com/
.
When tinc is compiled in a Cygwin environment, it can only be run in this environment,but all programs, including those started outside the Cygwin environment, will be able touse the VPN. It will also support all features.
3.1.3 MinGW (Windows) build environment
You will need to install the MinGW environment from http://www.mingw.org. You alsoneed to download and install LibreSSL (or OpenSSL) and LZO.
When tinc is compiled using MinGW it runs natively under Windows, it is not necessaryto keep MinGW installed.
When detaching, tinc will install itself as a service, which will be restarted automaticallyafter reboots.
3.2 System files
Before you can run tinc, you must make sure you have all the needed files on your system.

8 tinc Manual
3.2.1 Device files
Most operating systems nowadays come with the necessary device files by default, or theyhave a mechanism to create them on demand.
If you use Linux and do not have udev installed, you may need to create the followingdevice file if it does not exist:
mknod -m 600 /dev/net/tun c 10 200
3.2.2 Other files
/etc/networks
You may add a line to /etc/networks so that your VPN will get a symbolic name. Forexample:
myvpn 10.0.0.0
/etc/services
You may add this line to /etc/services. The effect is that you may supply a ‘tinc’ as avalid port number to some programs. The number 655 is registered with the IANA.
tinc 655/tcp TINC
tinc 655/udp TINC
# Ivo Timmermans <[email protected]>

9
4 Configuration
4.1 Configuration introduction
Before actually starting to configure tinc and editing files, make sure you have read thisentire section so you know what to expect. Then, make it clear to yourself how youwant to organize your VPN: What are the nodes (computers running tinc)? What IPaddresses/subnets do they have? What is the network mask of the entire VPN? Do youneed special firewall rules? Do you have to set up masquerading or forwarding rules? Doyou want to run tinc in router mode or switch mode? These questions can only be answeredby yourself, you will not find the answers in this documentation. Make sure you have anadequate understanding of networks in general. A good resource on networking is the LinuxNetwork Administrators Guide (http://www.tldp.org/LDP/nag2/).
If you have everything clearly pictured in your mind, proceed in the following order:First, generate the configuration files (tinc.conf, your host configuration file, tinc-up andperhaps tinc-down). Then generate the keypairs. Finally, distribute the host configurationfiles. These steps are described in the subsections below.
4.2 Multiple networks
In order to allow you to run more than one tinc daemon on one computer, for instance ifyour computer is part of more than one VPN, you can assign a netname to your VPN. Itis not required if you only run one tinc daemon, it doesn’t even have to be the same on allthe sites of your VPN, but it is recommended that you choose one anyway.
We will assume you use a netname throughout this document. This means that you calltincd with the -n argument, which will assign a netname to this daemon.
The effect of this is that the daemon will set its configuration root to/etc/tinc/netname/, where netname is your argument to the -n option. You’ll noticethat it appears in syslog as tinc.netname.
However, it is not strictly necessary that you call tinc with the -n option. In thiscase, the network name would just be empty, and it will be used as such. tinc nowlooks for files in /etc/tinc/, instead of /etc/tinc/netname/; the configuration file shouldbe /etc/tinc/tinc.conf, and the host configuration files are now expected to be in/etc/tinc/hosts/.
But it is highly recommended that you use this feature of tinc, because it will be somuch clearer whom your daemon talks to. Hence, we will assume that you use it.
4.3 How connections work
When tinc starts up, it parses the command-line options and then reads in the configurationfile tinc.conf. If it sees one or more ‘ConnectTo’ values pointing to other tinc daemons inthat file, it will try to connect to those other daemons. Whether this succeeds or not andwhether ‘ConnectTo’ is specified or not, tinc will listen for incoming connection from otherdaemons. If you did specify a ‘ConnectTo’ value and the other side is not responding, tincwill keep retrying. This means that once started, tinc will stay running until you tell itto stop, and failures to connect to other tinc daemons will not stop your tinc daemon for

10 tinc Manual
trying again later. This means you don’t have to intervene if there are temporary networkproblems.
There is no real distinction between a server and a client in tinc. If you wish, you canview a tinc daemon without a ‘ConnectTo’ value as a server, and one which does specifysuch a value as a client. It does not matter if two tinc daemons have a ‘ConnectTo’ valuepointing to each other however.
4.4 Configuration files
The actual configuration of the daemon is done in the file /etc/tinc/netname/tinc.confand at least one other file in the directory /etc/tinc/netname/hosts/.
An optional directory /etc/tinc/netname/conf.d can be added from which any .conffile will be read.
These file consists of comments (lines started with a #) or assignments in the form of
Variable = Value.
The variable names are case insensitive, and any spaces, tabs, newlines and carriagereturns are ignored. Note: it is not required that you put in the ‘=’ sign, but doing soimproves readability. If you leave it out, remember to replace it with at least one spacecharacter.
The server configuration is complemented with host specific configuration (see the nextsection). Although all host configuration options for the local node listed in this documentcan also be put in /etc/tinc/netname/tinc.conf, it is recommended to put host specificconfiguration options in the host configuration file, as this makes it easy to exchange withother nodes.
In this section all valid variables are listed in alphabetical order. The default value isgiven between parentheses, other comments are between square brackets.
4.4.1 Main configuration variables
AddressFamily = <ipv4|ipv6|any> (any)This option affects the address family of listening and outgoing sockets. If anyis selected, then depending on the operating system both IPv4 and IPv6 or justIPv6 listening sockets will be created.
BindToAddress = <address> [<port>] [experimental]If your computer has more than one IPv4 or IPv6 address, tinc will by defaultlisten on all of them for incoming connections. Multiple BindToAddress vari-ables may be specified, in which case listening sockets for each specified addressare made.
If no port is specified, the socket will be bound to the port specified by the Portoption, or to port 655 if neither is given. To only bind to a specific port butnot to a specific address, use "*" for the address.
This option may not work on all platforms.
BindToInterface = <interface> [experimental]If you have more than one network interface in your computer, tinc will bydefault listen on all of them for incoming connections. It is possible to bindtinc to a single interface like eth0 or ppp0 with this variable.
Chapter 4: Configuration 11
This option may not work on all platforms.
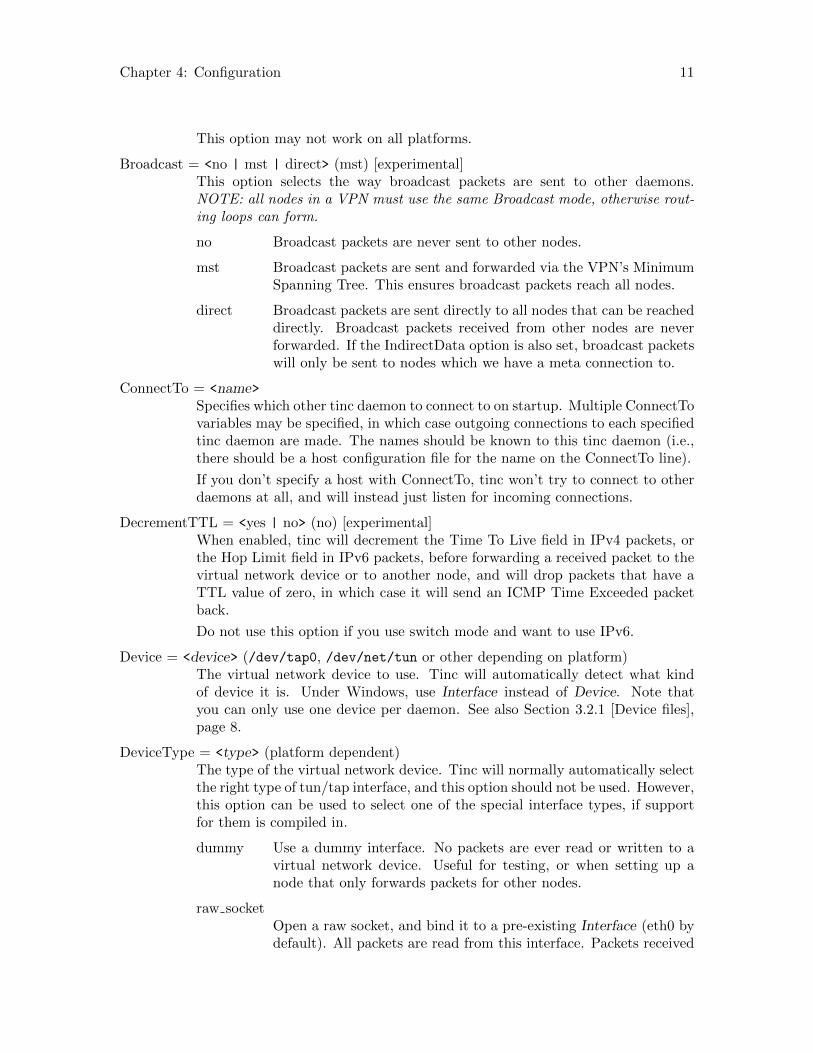
Broadcast = <no | mst | direct> (mst) [experimental]This option selects the way broadcast packets are sent to other daemons.NOTE: all nodes in a VPN must use the same Broadcast mode, otherwise rout-ing loops can form.
no Broadcast packets are never sent to other nodes.
mst Broadcast packets are sent and forwarded via the VPN’s MinimumSpanning Tree. This ensures broadcast packets reach all nodes.
direct Broadcast packets are sent directly to all nodes that can be reacheddirectly. Broadcast packets received from other nodes are neverforwarded. If the IndirectData option is also set, broadcast packetswill only be sent to nodes which we have a meta connection to.
ConnectTo = <name>Specifies which other tinc daemon to connect to on startup. Multiple ConnectTovariables may be specified, in which case outgoing connections to each specifiedtinc daemon are made. The names should be known to this tinc daemon (i.e.,there should be a host configuration file for the name on the ConnectTo line).
If you don’t specify a host with ConnectTo, tinc won’t try to connect to otherdaemons at all, and will instead just listen for incoming connections.
DecrementTTL = <yes | no> (no) [experimental]When enabled, tinc will decrement the Time To Live field in IPv4 packets, orthe Hop Limit field in IPv6 packets, before forwarding a received packet to thevirtual network device or to another node, and will drop packets that have aTTL value of zero, in which case it will send an ICMP Time Exceeded packetback.
Do not use this option if you use switch mode and want to use IPv6.
Device = <device> (/dev/tap0, /dev/net/tun or other depending on platform)The virtual network device to use. Tinc will automatically detect what kindof device it is. Under Windows, use Interface instead of Device. Note thatyou can only use one device per daemon. See also Section 3.2.1 [Device files],page 8.
DeviceType = <type> (platform dependent)The type of the virtual network device. Tinc will normally automatically selectthe right type of tun/tap interface, and this option should not be used. However,this option can be used to select one of the special interface types, if supportfor them is compiled in.
dummy Use a dummy interface. No packets are ever read or written to avirtual network device. Useful for testing, or when setting up anode that only forwards packets for other nodes.
raw socketOpen a raw socket, and bind it to a pre-existing Interface (eth0 bydefault). All packets are read from this interface. Packets received

12 tinc Manual
for the local node are written to the raw socket. However, at leaston Linux, the operating system does not process IP packets destinedfor the local host.
multicast Open a multicast UDP socket and bind it to the address and port(separated by spaces) and optionally a TTL value specified usingDevice. Packets are read from and written to this multicast socket.This can be used to connect to UML, QEMU or KVM instanceslistening on the same multicast address. Do NOT connect multipletinc daemons to the same multicast address, this will very likelycause routing loops. Also note that this can cause decrypted VPNpackets to be sent out on a real network if misconfigured.
uml (not compiled in by default)Create a UNIX socket with the filename specified by Device, or/var/run/netname.umlsocket if not specified. Tinc will wait fora User Mode Linux instance to connect to this socket.
vde (not compiled in by default)Uses the libvdeplug library to connect to a Virtual DistributedEthernet switch, using the UNIX socket specified by Device, or/var/run/vde.ctl if not specified.
Also, in case tinc does not seem to correctly interpret packets received from thevirtual network device, it can be used to change the way packets are interpreted:
tun (BSD and Linux)Set type to tun. Depending on the platform, this can either be withor without an address family header (see below).
tunnohead (BSD)Set type to tun without an address family header. Tinc will expectpackets read from the virtual network device to start with an IPheader. On some platforms IPv6 packets cannot be read from orwritten to the device in this mode.
tunifhead (BSD)Set type to tun with an address family header. Tinc will expectpackets read from the virtual network device to start with a fourbyte header containing the address family, followed by an IP header.This mode should support both IPv4 and IPv6 packets.
utun (OS X)Set type to utun. This is only supported on OS X version 10.6.8and higher, but doesn’t require the tuntaposx module. This modeshould support both IPv4 and IPv6 packets.
tap (BSD and Linux)Set type to tap. Tinc will expect packets read from the virtualnetwork device to start with an Ethernet header.

Chapter 4: Configuration 13
DirectOnly = <yes|no> (no) [experimental]When this option is enabled, packets that cannot be sent directly to the desti-nation node, but which would have to be forwarded by an intermediate node,are dropped instead. When combined with the IndirectData option, packets fornodes for which we do not have a meta connection with are also dropped.
Forwarding = <off|internal|kernel> (internal) [experimental]This option selects the way indirect packets are forwarded.
off Incoming packets that are not meant for the local node, but whichshould be forwarded to another node, are dropped.
internal Incoming packets that are meant for another node are forwardedby tinc internally.
This is the default mode, and unless you really know you needanother forwarding mode, don’t change it.
kernel Incoming packets are always sent to the TUN/TAP device, even ifthe packets are not for the local node. This is less efficient, butallows the kernel to apply its routing and firewall rules on them,and can also help debugging.
GraphDumpFile = <filename> [experimental]If this option is present, tinc will dump the current network graph to the filefilename every minute, unless there were no changes to the graph. The file isin a format that can be read by graphviz tools. If filename starts with a pipesymbol |, then the rest of the filename is interpreted as a shell command thatis executed, the graph is then sent to stdin.
Hostnames = <yes|no> (no)This option selects whether IP addresses (both real and on the VPN) shouldbe resolved. Since DNS lookups are blocking, it might affect tinc’s efficiency,even stopping the daemon for a few seconds every time it does a lookup if yourDNS server is not responding.
This does not affect resolving hostnames to IP addresses from the configurationfile, but whether hostnames should be resolved while logging.
IffOneQueue = <yes|no> (no) [experimental](Linux only) Set IFF ONE QUEUE flag on TUN/TAP devices.
Interface = <interface>Defines the name of the interface corresponding to the virtual network device.Depending on the operating system and the type of device this may or may notactually set the name of the interface. Under Windows, this variable is usedto select which network interface will be used. If you specified a Device, thisvariable is almost always already correctly set.
KeyExpire = <seconds> (3600)This option controls the time the encryption keys used to encrypt the data arevalid. It is common practice to change keys at regular intervals to make it evenharder for crackers, even though it is thought to be nearly impossible to cracka single key.

14 tinc Manual
LocalDiscovery = <yes | no> (no) [experimental]When enabled, tinc will try to detect peers that are on the same local net-work. This will allow direct communication using LAN addresses, even if bothpeers are behind a NAT and they only ConnectTo a third node outside theNAT, which normally would prevent the peers from learning each other’s LANaddress.
Currently, local discovery is implemented by sending broadcast packets to theLAN during path MTU discovery. This feature may not work in all possiblesituations.
MACExpire = <seconds> (600)This option controls the amount of time MAC addresses are kept before theyare removed. This only has effect when Mode is set to "switch".
MaxTimeout = <seconds> (900)This is the maximum delay before trying to reconnect to other tinc daemons.
Mode = <router|switch|hub> (router)This option selects the way packets are routed to other daemons.
router In this mode Subnet variables in the host configuration files willbe used to form a routing table. Only unicast packets of routableprotocols (IPv4 and IPv6) are supported in this mode.
This is the default mode, and unless you really know you needanother mode, don’t change it.
switch In this mode the MAC addresses of the packets on the VPN willbe used to dynamically create a routing table just like an Ethernetswitch does. Unicast, multicast and broadcast packets of everyprotocol that runs over Ethernet are supported in this mode at thecost of frequent broadcast ARP requests and routing table updates.
This mode is primarily useful if you want to bridge Ethernet seg-ments.
hub This mode is almost the same as the switch mode, but instead everypacket will be broadcast to the other daemons while no routingtable is managed.
Name = <name> [required]This is a symbolic name for this connection. The name must consist only ofalphanumeric and underscore characters (a-z, A-Z, 0-9 and ).
If Name starts with a $, then the contents of the environment variable thatfollows will be used. In that case, invalid characters will be converted to un-derscores. If Name is $HOST, but no such environment variable exist, thehostname will be read using the gethostname() system call.
PingInterval = <seconds> (60)The number of seconds of inactivity that tinc will wait before sending a probeto the other end.

Chapter 4: Configuration 15
PingTimeout = <seconds> (5)The number of seconds to wait for a response to pings or to allow meta connec-tions to block. If the other end doesn’t respond within this time, the connectionis terminated, and the others will be notified of this.
PriorityInheritance = <yes|no> (no) [experimental]When this option is enabled the value of the TOS field of tunneled IPv4 packetswill be inherited by the UDP packets that are sent out.
PrivateKey = <key> [obsolete]This is the RSA private key for tinc. However, for safety reasons it is advisedto store private keys of any kind in separate files. This prevents accidentaleavesdropping if you are editing the configuration file.
PrivateKeyFile = <path> (/etc/tinc/netname/rsa_key.priv)This is the full path name of the RSA private key file that was generated by‘tincd --generate-keys’. It must be a full path, not a relative directory.
ProcessPriority = <low|normal|high>When this option is used the priority of the tincd process will be adjusted.Increasing the priority may help to reduce latency and packet loss on the VPN.
Proxy = socks4 | socks5 | http | exec ... [experimental]Use a proxy when making outgoing connections. The following proxy types arecurrently supported:
socks4 <address> <port> [<username>]Connects to the proxy using the SOCKS version 4 protocol. Op-tionally, a username can be supplied which will be passed on to theproxy server.
socks5 <address> <port> [<username> <password>]Connect to the proxy using the SOCKS version 5 protocol. If ausername and password are given, basic username/password au-thentication will be used, otherwise no authentication will be used.
http <address> <port>Connects to the proxy and sends a HTTP CONNECT request.
exec <command>Executes the given command which should set up the outgoingconnection. The environment variables NAME, NODE, REMOTEADDRESand REMOTEPORT are available.
ReplayWindow = <bytes> (16)This is the size of the replay tracking window for each remote node, in bytes.The window is a bitfield which tracks 1 packet per bit, so for example the defaultsetting of 16 will track up to 128 packets in the window. In high bandwidthscenarios, setting this to a higher value can reduce packet loss from the inter-action of replay tracking with underlying real packet loss and/or reordering.Setting this to zero will disable replay tracking completely and pass all traffic,but leaves tinc vulnerable to replay-based attacks on your traffic.

16 tinc Manual
StrictSubnets = <yes|no> (no) [experimental]When this option is enabled tinc will only use Subnet statements which arepresent in the host config files in the local /etc/tinc/netname/hosts/ direc-tory. Subnets learned via connections to other nodes and which are not presentin the local host config files are ignored.
TunnelServer = <yes|no> (no) [experimental]When this option is enabled tinc will no longer forward information betweenother tinc daemons, and will only allow connections with nodes for which hostconfig files are present in the local /etc/tinc/netname/hosts/ directory. Set-ting this options also implicitly sets StrictSubnets.
UDPRcvBuf = <bytes> (OS default)Sets the socket receive buffer size for the UDP socket, in bytes. If unset, thedefault buffer size will be used by the operating system.
UDPSndBuf = <bytes> Pq OS defaultSets the socket send buffer size for the UDP socket, in bytes. If unset, thedefault buffer size will be used by the operating system.
4.4.2 Host configuration variables
Address = <IP address|hostname> [<port>] [recommended]This variable is only required if you want to connect to this host. It mustresolve to the external IP address where the host can be reached, not the onethat is internal to the VPN. If no port is specified, the default Port is used.Multiple Address variables can be specified, in which case each address will betried until a working connection has been established.
Cipher = <cipher> (aes-256-cbc)The symmetric cipher algorithm used to encrypt UDP packets. Any ciphersupported by LibreSSL or OpenSSL is recognized. Furthermore, specifying"none" will turn off packet encryption. It is best to use only those cipherswhich support CBC mode.
ClampMSS = <yes|no> (yes)This option specifies whether tinc should clamp the maximum segment size(MSS) of TCP packets to the path MTU. This helps in situations where ICMPFragmentation Needed or Packet too Big messages are dropped by firewalls.
Compression = <level> (0)This option sets the level of compression used for UDP packets. Possible valuesare 0 (off), 1 (fast zlib) and any integer up to 9 (best zlib), 10 (fast lzo) and 11(best lzo).
Digest = <digest> (sha256)The digest algorithm used to authenticate UDP packets. Any digest supportedby LibreSSL or OpenSSL is recognized. Furthermore, specifying "none" willturn off packet authentication.
IndirectData = <yes|no> (no)This option specifies whether other tinc daemons besides the one you specifiedwith ConnectTo can make a direct connection to you. This is especially useful

Chapter 4: Configuration 17
if you are behind a firewall and it is impossible to make a connection from theoutside to your tinc daemon. Otherwise, it is best to leave this option out orset it to no.
MACLength = <bytes> (4)The length of the message authentication code used to authenticate UDP pack-ets. Can be anything from 0 up to the length of the digest produced by thedigest algorithm.
PMTU = <mtu> (1514)This option controls the initial path MTU to this node.
PMTUDiscovery = <yes|no> (yes)When this option is enabled, tinc will try to discover the path MTU to thisnode. After the path MTU has been discovered, it will be enforced on theVPN.
Port = <port> (655)This is the port this tinc daemon listens on. You can use decimal portnumbersor symbolic names (as listed in /etc/services).
PublicKey = <key> [obsolete]This is the RSA public key for this host.
PublicKeyFile = <path> [obsolete]This is the full path name of the RSA public key file that was generated by‘tincd --generate-keys’. It must be a full path, not a relative directory.
From version 1.0pre4 on tinc will store the public key directly into the hostconfiguration file in PEM format, the above two options then are not necessary.Either the PEM format is used, or exactly one of the above two options mustbe specified in each host configuration file, if you want to be able to establish aconnection with that host.
Subnet = <address[/prefixlength[#weight]]>The subnet which this tinc daemon will serve. Tinc tries to look up which otherdaemon it should send a packet to by searching the appropriate subnet. If thepacket matches a subnet, it will be sent to the daemon who has this subnetin his host configuration file. Multiple subnet lines can be specified for eachdaemon.
Subnets can either be single MAC, IPv4 or IPv6 addresses, in which case asubnet consisting of only that single address is assumed, or they can be a IPv4or IPv6 network address with a prefixlength. For example, IPv4 subnets mustbe in a form like 192.168.1.0/24, where 192.168.1.0 is the network address and 24is the number of bits set in the netmask. Note that subnets like 192.168.1.1/24are invalid! Read a networking HOWTO/FAQ/guide if you don’t understandthis. IPv6 subnets are notated like fec0:0:0:1::/64. MAC addresses are notatedlike 0:1a:2b:3c:4d:5e.
Prefixlength is the number of bits set to 1 in the netmask part; for example:netmask 255.255.255.0 would become /24, 255.255.252.0 becomes /22. Thisconforms to standard CIDR notation as described in RFC1519 (https://www.ietf.org/rfc/rfc1519.txt)

18 tinc Manual
A Subnet can be given a weight to indicate its priority over identical Subnetsowned by different nodes. The default weight is 10. Lower values indicate higherpriority. Packets will be sent to the node with the highest priority, unless thatnode is not reachable, in which case the node with the next highest priority willbe tried, and so on.
TCPonly = <yes|no> (no) [deprecated]If this variable is set to yes, then the packets are tunnelled over a TCP con-nection instead of a UDP connection. This is especially useful for those whowant to run a tinc daemon from behind a masquerading firewall, or if UDPpacket routing is disabled somehow. Setting this options also implicitly setsIndirectData.
Since version 1.0.10, tinc will automatically detect whether communication viaUDP is possible or not.
4.4.3 Scripts
Apart from reading the server and host configuration files, tinc can also run scripts atcertain moments. Below is a list of filenames of scripts and a description of when they arerun. A script is only run if it exists and if it is executable.
Scripts are run synchronously; this means that tinc will temporarily stop processingpackets until the called script finishes executing. This guarantees that scripts will executein the exact same order as the events that trigger them. If you need to run commandsasynchronously, you have to ensure yourself that they are being run in the background.
Under Windows (not Cygwin), the scripts must have the extension .bat.
/etc/tinc/netname/tinc-up
This is the most important script. If it is present it will be executed right afterthe tinc daemon has been started and has connected to the virtual networkdevice. It should be used to set up the corresponding network interface, butcan also be used to start other things.
Under Windows you can use the Network Connections control panel instead ofcreating this script.
/etc/tinc/netname/tinc-down
This script is started right before the tinc daemon quits.
/etc/tinc/netname/hosts/host-up
This script is started when the tinc daemon with name host becomes reachable.
/etc/tinc/netname/hosts/host-down
This script is started when the tinc daemon with name host becomes unreach-able.
/etc/tinc/netname/host-up
This script is started when any host becomes reachable.
/etc/tinc/netname/host-down
This script is started when any host becomes unreachable.

Chapter 4: Configuration 19
/etc/tinc/netname/subnet-up
This script is started when a subnet becomes reachable. The Subnet and thenode it belongs to are passed in environment variables.
/etc/tinc/netname/subnet-down
This script is started when a subnet becomes unreachable.
The scripts are started without command line arguments, but can make use of certainenvironment variables. Under UNIX like operating systems the names of environmentvariables must be preceded by a $ in scripts. Under Windows, in .bat files, they have tobe put between % signs.
NETNAME If a netname was specified, this environment variable contains it.
NAME Contains the name of this tinc daemon.
DEVICE Contains the name of the virtual network device that tinc uses.
INTERFACE
Contains the name of the virtual network interface that tinc uses. This shouldbe used for commands like ifconfig.
NODE When a host becomes (un)reachable, this is set to its name. If a subnet becomes(un)reachable, this is set to the owner of that subnet.
REMOTEADDRESS
When a host becomes (un)reachable, this is set to its real address.
REMOTEPORT
When a host becomes (un)reachable, this is set to the port number it uses forcommunication with other tinc daemons.
SUBNET When a subnet becomes (un)reachable, this is set to the subnet.
WEIGHT When a subnet becomes (un)reachable, this is set to the subnet weight.
4.4.4 How to configure
Step 1. Creating the main configuration file
The main configuration file will be called /etc/tinc/netname/tinc.conf. Adapt the fol-lowing example to create a basic configuration file:
Name = yourname
Device = /dev/tap0
Then, if you know to which other tinc daemon(s) yours is going to connect, add ‘Con-nectTo’ values.
Step 2. Creating your host configuration file
If you added a line containing ‘Name = yourname’ in the main configuration file, you willneed to create a host configuration file /etc/tinc/netname/hosts/yourname. Adapt thefollowing example to create a host configuration file:
Address = your.real.hostname.org
Subnet = 192.168.1.0/24

20 tinc Manual
You can also use an IP address instead of a hostname. The ‘Subnet’ specifies the addressrange that is local for your part of the VPN only. If you have multiple address ranges youcan specify more than one ‘Subnet’. You might also need to add a ‘Port’ if you want yourtinc daemon to run on a different port number than the default (655).
4.5 Generating keypairs
Now that you have already created the main configuration file and your host configurationfile, you can easily create a public/private keypair by entering the following command:
tincd -n netname -K
Tinc will generate a public and a private key and ask you where to put them. Just pressenter to accept the defaults.
4.6 Network interfaces
Before tinc can start transmitting data over the tunnel, it must set up the virtual networkinterface.
First, decide which IP addresses you want to have associated with these devices, andwhat network mask they must have.
Tinc will open a virtual network device (/dev/tun, /dev/tap0 or similar), which willalso create a network interface called something like ‘tun0’, ‘tap0’. If you are using theLinux tun/tap driver, the network interface will by default have the same name as thenetname. Under Windows you can change the name of the network interface from theNetwork Connections control panel.
You can configure the network interface by putting ordinary ifconfig, route, andother commands to a script named /etc/tinc/netname/tinc-up. When tinc starts,this script will be executed. When tinc exits, it will execute the script named/etc/tinc/netname/tinc-down, but normally you don’t need to create that script.
An example tinc-up script:
#!/bin/sh
ifconfig $INTERFACE 192.168.1.1 netmask 255.255.0.0
This script gives the interface an IP address and a netmask. The kernel will also auto-matically add a route to this interface, so normally you don’t need to add route commandsto the tinc-up script. The kernel will also bring the interface up after this command. Thenetmask is the mask of the entire VPN network, not just your own subnet.
The exact syntax of the ifconfig and route commands differs from platform to platform.You can look up the commands for setting addresses and adding routes in Chapter 7 [Plat-form specific information], page 39, but it is best to consult the manpages of those utilitieson your platform.
4.7 Example configuration
Imagine the following situation. Branch A of our example ‘company’ wants to connect threebranch offices in B, C and D using the Internet. All four offices have a 24/7 connection tothe Internet.

Chapter 4: Configuration 21
A is going to serve as the center of the network. B and C will connect to A, and D willconnect to C. Each office will be assigned their own IP network, 10.x.0.0.
A: net 10.1.0.0 mask 255.255.0.0 gateway 10.1.54.1 internet IP 1.2.3.4
B: net 10.2.0.0 mask 255.255.0.0 gateway 10.2.1.12 internet IP 2.3.4.5
C: net 10.3.0.0 mask 255.255.0.0 gateway 10.3.69.254 internet IP 3.4.5.6
D: net 10.4.0.0 mask 255.255.0.0 gateway 10.4.3.32 internet IP 4.5.6.7
Here, “gateway” is the VPN IP address of the machine that is running the tincd, and“internet IP” is the IP address of the firewall, which does not need to run tincd, but it mustdo a port forwarding of TCP and UDP on port 655 (unless otherwise configured).
In this example, it is assumed that eth0 is the interface that points to the inner (physical)LAN of the office, although this could also be the same as the interface that leads to theInternet. The configuration of the real interface is also shown as a comment, to give you anidea of how these example host is set up. All branches use the netname ‘company’ for thisparticular VPN.
For Branch A
BranchA would be configured like this:
In /etc/tinc/company/tinc-up:
# Real interface of internal network:
# ifconfig eth0 10.1.54.1 netmask 255.255.0.0
ifconfig $INTERFACE 10.1.54.1 netmask 255.0.0.0
and in /etc/tinc/company/tinc.conf:
Name = BranchA
Device = /dev/tap0
On all hosts, /etc/tinc/company/hosts/BranchA contains:
Subnet = 10.1.0.0/16
Address = 1.2.3.4
-----BEGIN RSA PUBLIC KEY-----
...
-----END RSA PUBLIC KEY-----
Note that the IP addresses of eth0 and tap0 are the same. This is quite possible, if youmake sure that the netmasks of the interfaces are different. It is in fact recommended togive both real internal network interfaces and tap interfaces the same IP address, since thatwill make things a lot easier to remember and set up.
For Branch B
In /etc/tinc/company/tinc-up:
# Real interface of internal network:
# ifconfig eth0 10.2.43.8 netmask 255.255.0.0
ifconfig $INTERFACE 10.2.1.12 netmask 255.0.0.0

22 tinc Manual
and in /etc/tinc/company/tinc.conf:
Name = BranchB
ConnectTo = BranchA
Note here that the internal address (on eth0) doesn’t have to be the same as on the tap0device. Also, ConnectTo is given so that this node will always try to connect to BranchA.
On all hosts, in /etc/tinc/company/hosts/BranchB:
Subnet = 10.2.0.0/16
Address = 2.3.4.5
-----BEGIN RSA PUBLIC KEY-----
...
-----END RSA PUBLIC KEY-----
For Branch C
In /etc/tinc/company/tinc-up:
# Real interface of internal network:
# ifconfig eth0 10.3.69.254 netmask 255.255.0.0
ifconfig $INTERFACE 10.3.69.254 netmask 255.0.0.0
and in /etc/tinc/company/tinc.conf:
Name = BranchC
ConnectTo = BranchA
Device = /dev/tap1
C already has another daemon that runs on port 655, so they have to reserve anotherport for tinc. It knows the portnumber it has to listen on from it’s own host configurationfile.
On all hosts, in /etc/tinc/company/hosts/BranchC:
Address = 3.4.5.6
Subnet = 10.3.0.0/16
Port = 2000
-----BEGIN RSA PUBLIC KEY-----
...
-----END RSA PUBLIC KEY-----
For Branch D
In /etc/tinc/company/tinc-up:
# Real interface of internal network:
# ifconfig eth0 10.4.3.32 netmask 255.255.0.0
ifconfig $INTERFACE 10.4.3.32 netmask 255.0.0.0
and in /etc/tinc/company/tinc.conf:
Name = BranchD
ConnectTo = BranchC

Chapter 4: Configuration 23
Device = /dev/net/tun
D will be connecting to C, which has a tincd running for this network on port 2000. Itknows the port number from the host configuration file. Also note that since D uses thetun/tap driver, the network interface will not be called ‘tun’ or ‘tap0’ or something likethat, but will have the same name as netname.
On all hosts, in /etc/tinc/company/hosts/BranchD:
Subnet = 10.4.0.0/16
Address = 4.5.6.7
-----BEGIN RSA PUBLIC KEY-----
...
-----END RSA PUBLIC KEY-----
Key files
A, B, C and D all have generated a public/private keypair with the following command:
tincd -n company -K
The private key is stored in /etc/tinc/company/rsa_key.priv, the public key is putinto the host configuration file in the /etc/tinc/company/hosts/ directory. During keygeneration, tinc automatically guesses the right filenames based on the -n option and theName directive in the tinc.conf file (if it is available).
Starting
After each branch has finished configuration and they have distributed the host configurationfiles amongst them, they can start their tinc daemons. They don’t necessarily have to waitfor the other branches to have started their daemons, tinc will try connecting until they areavailable.


25
5 Running tinc
If everything else is done, you can start tinc by typing the following command:
tincd -n netname
Tinc will detach from the terminal and continue to run in the background like a gooddaemon. If there are any problems however you can try to increase the debug level andlook in the syslog to find out what the problems are.
5.1 Runtime options
Besides the settings in the configuration file, tinc also accepts some command line options.
-c, --config=path
Read configuration options from the directory path. The default is/etc/tinc/netname/.
-D, --no-detach
Don’t fork and detach. This will also disable the automatic restart mechanismfor fatal errors.
-d, --debug=level
Set debug level to level. The higher the debug level, the more gets logged.Everything goes via syslog.
-k, --kill[=signal]
Attempt to kill a running tincd (optionally with the specified signal instead ofSIGTERM) and exit. Use it in conjunction with the -n option to make sureyou kill the right tinc daemon. Under native Windows the optional argumentis ignored, the service will always be stopped and removed.
-n, --net=netname
Use configuration for net netname. This will let tinc read all configurationfiles from /etc/tinc/netname/. Specifying . for netname is the same as notspecifying any netname. See Section 4.2 [Multiple networks], page 9.
-K, --generate-keys[=bits]
Generate public/private keypair of bits length. If bits is not specified, 2048 isthe default. tinc will ask where you want to store the files, but will default tothe configuration directory (you can use the -c or -n option in combination with-K). After that, tinc will quit.
-o, --option=[HOST.]KEY=VALUE
Without specifying a HOST, this will set server configuration variable KEY toVALUE. If specified as HOST.KEY=VALUE, this will set the host configura-tion variable KEY of the host named HOST to VALUE. This option can beused more than once to specify multiple configuration variables.
-L, --mlock
Lock tinc into main memory. This will prevent sensitive data like shared privatekeys to be written to the system swap files/partitions.

26 tinc Manual
--logfile[=file]
Write log entries to a file instead of to the system logging facility. If file isomitted, the default is /var/log/tinc.netname.log.
--pidfile=file
Write PID to file instead of /var/run/tinc.netname.pid.
--bypass-security
Disables encryption and authentication. Only useful for debugging.
-R, --chroot
Change process root directory to the directory where the config file is located(/etc/tinc/netname/ as determined by -n/–net option or as given by -c/–config option), for added security. The chroot is performed after all the initial-ization is done, after writing pid files and opening network sockets.
This option is best used in combination with the -U/–user option describedbelow.
You will need to ensure the chroot environment contains all the files necessaryfor tinc to run correctly. Most importantly, for tinc to be able to resolve host-names inside the chroot environment, you must copy /etc/resolv.conf intothe chroot directory. If you want to be able to run scripts other than tinc-up
in the chroot, you must ensure the appropriate shell is also installed in thechroot, along with all its dependencies.
-U, --user=user
Switch to the given user after initialization, at the same time as chroot isperformed (see –chroot above). With this option tinc drops privileges, foradded security.
--help Display a short reminder of these runtime options and terminate.
--version
Output version information and exit.
5.2 Signals
You can also send the following signals to a running tincd process:
‘ALRM’ Forces tinc to try to connect to all uplinks immediately. Usually tinc attemptsto do this itself, but increases the time it waits between the attempts each timeit failed, and if tinc didn’t succeed to connect to an uplink the first time afterit started, it defaults to the maximum time of 15 minutes.
‘HUP’ Partially rereads configuration files. Connections to hosts whose host config fileare removed are closed. New outgoing connections specified in tinc.conf willbe made. If the –logfile option is used, this will also close and reopen the logfile, useful when log rotation is used.
‘INT’ Temporarily increases debug level to 5. Send this signal again to revert to theoriginal level.
‘USR1’ Dumps the connection list to syslog.

Chapter 5: Running tinc 27
‘USR2’ Dumps virtual network device statistics, all known nodes, edges and subnets tosyslog.
‘WINCH’ Purges all information remembered about unreachable nodes.
5.3 Debug levels
The tinc daemon can send a lot of messages to the syslog. The higher the debug level, themore messages it will log. Each level inherits all messages of the previous level:
‘0’ This will log a message indicating tinc has started along with a version number.It will also log any serious error.
‘1’ This will log all connections that are made with other tinc daemons.
‘2’ This will log status and error messages from scripts and other tinc daemons.
‘3’ This will log all requests that are exchanged with other tinc daemons. Theseinclude authentication, key exchange and connection list updates.
‘4’ This will log a copy of everything received on the meta socket.
‘5’ This will log all network traffic over the virtual private network.
5.4 Solving problems
If tinc starts without problems, but if the VPN doesn’t work, you will have to find thecause of the problem. The first thing to do is to start tinc with a high debug level in theforeground, so you can directly see everything tinc logs:
tincd -n netname -d5 -D
If tinc does not log any error messages, then you might want to check the followingthings:
• tinc-up script Does this script contain the right commands? Normally you must givethe interface the address of this host on the VPN, and the netmask must be big enoughso that the entire VPN is covered.
• Subnet Does the Subnet (or Subnets) in the host configuration file of this host matchthe portion of the VPN that belongs to this host?
• Firewalls and NATs Do you have a firewall or a NAT device (a masquerading firewall orperhaps an ADSL router that performs masquerading)? If so, check that it allows TCPand UDP traffic on port 655. If it masquerades and the host running tinc is behindit, make sure that it forwards TCP and UDP traffic to port 655 to the host runningtinc. You can add ‘TCPOnly = yes’ to your host config file to force tinc to only usea single TCP connection, this works through most firewalls and NATs. Since version1.0.10, tinc will automatically fall back to TCP if direct communication via UDP isnot possible.
5.5 Error messages
What follows is a list of the most common error messages you might find in the logs. Someof them will only be visible if the debug level is high enough.
‘Could not open /dev/tap0: No such device’• You forgot to ‘modprobe netlink dev’ or ‘modprobe ethertap’.

28 tinc Manual
• You forgot to compile ‘Netlink device emulation’ in the kernel.
‘Can’t write to /dev/net/tun: No such device’• You forgot to ‘modprobe tun’.
• You forgot to compile ‘Universal TUN/TAP driver’ in the kernel.
• The tun device is located somewhere else in /dev/.
‘Network address and prefix length do not match!’• The Subnet field must contain a network address, trailing bits should be
0.
• If you only want to use one IP address, set the netmask to /32.
‘Error reading RSA key file ‘rsa_key.priv’: No such file or directory’• You forgot to create a public/private keypair.
• Specify the complete pathname to the private key file with the‘PrivateKeyFile’ option.
‘Warning: insecure file permissions for RSA private key file ‘rsa_key.priv’!’• The private key file is readable by users other than root. Use chmod to
correct the file permissions.
‘Creating metasocket failed: Address family not supported’• By default tinc tries to create both IPv4 and IPv6 sockets. On some
platforms this might not be implemented. If the logs show ‘Ready’ lateron, then at least one metasocket was created, and you can ignore thismessage. You can add ‘AddressFamily = ipv4’ to tinc.conf to preventthis from happening.
‘Cannot route packet: unknown IPv4 destination 1.2.3.4’• You try to send traffic to a host on the VPN for which no Subnet is known.
• If it is a broadcast address (ending in .255), it probably is a samba serveror a Windows host sending broadcast packets. You can ignore it.
‘Cannot route packet: ARP request for unknown address 1.2.3.4’• You try to send traffic to a host on the VPN for which no Subnet is known.
‘Packet with destination 1.2.3.4 is looping back to us!’• Something is not configured right. Packets are being sent out to the vir-
tual network device, but according to the Subnet directives in your hostconfiguration file, those packets should go to your own host. Most commonmistake is that you have a Subnet line in your host configuration file witha prefix length which is just as large as the prefix of the virtual networkinterface. The latter should in almost all cases be larger. Rethink yourconfiguration. Note that you will only see this message if you specified adebug level of 5 or higher!
• Chances are that a ‘Subnet = ...’ line in the host configuration file of thistinc daemon is wrong. Change it to a subnet that is accepted locally byanother interface, or if that is not the case, try changing the prefix lengthinto /32.

Chapter 5: Running tinc 29
‘Node foo (1.2.3.4) is not reachable’• Node foo does not have a connection anymore, its tinc daemon is not
running or its connection to the Internet is broken.
‘Received UDP packet from unknown source 1.2.3.4 (port 12345)’• If you see this only sporadically, it is harmless and caused by a node sending
packets using an old key.
‘Got bad/bogus/unauthorized REQUEST from foo (1.2.3.4 port 12345)’• Node foo does not have the right public/private keypair. Generate new
keypairs and distribute them again.
• An attacker tries to gain access to your VPN.
• A network error caused corruption of metadata sent from foo.
5.6 Sending bug reports
If you really can’t find the cause of a problem, or if you suspect tinc is not working right,you can send us a bugreport, see Section 8.1 [Contact information], page 43. Be sure toinclude the following information in your bugreport:
• A clear description of what you are trying to achieve and what the problem is.
• What platform (operating system, version, hardware architecture) and which versionof tinc you use.
• If compiling tinc fails, a copy of config.log and the error messages you get.
• Otherwise, a copy of tinc.conf, tinc-up and all files in the hosts/ directory.
• The output of the commands ‘ifconfig -a’ and ‘route -n’ (or ‘netstat -rn’ if thatdoesn’t work).
• The output of any command that fails to work as it should (like ping or traceroute).


31
6 Technical information
6.1 The connection
Tinc is a daemon that takes VPN data and transmit that to another host computer overthe existing Internet infrastructure.
6.1.1 The UDP tunnel
The data itself is read from a character device file, the so-called virtual network device. Thisdevice is associated with a network interface. Any data sent to this interface can be readfrom the device, and any data written to the device gets sent from the interface. There aretwo possible types of virtual network devices: ‘tun’ style, which are point-to-point deviceswhich can only handle IPv4 and/or IPv6 packets, and ‘tap’ style, which are Ethernet devicesand handle complete Ethernet frames.
So when tinc reads an Ethernet frame from the device, it determines its type. Whentinc is in its default routing mode, it can handle IPv4 and IPv6 packets. Depending on theSubnet lines, it will send the packets off to their destination IP address. In the ‘switch’ and‘hub’ mode, tinc will use broadcasts and MAC address discovery to deduce the destinationof the packets. Since the latter modes only depend on the link layer information, anyprotocol that runs over Ethernet is supported (for instance IPX and Appletalk). However,only ‘tap’ style devices provide this information.
After the destination has been determined, the packet will be compressed (optionally),a sequence number will be added to the packet, the packet will then be encrypted and amessage authentication code will be appended.
When that is done, time has come to actually transport the packet to the destinationcomputer. We do this by sending the packet over an UDP connection to the destinationhost. This is called encapsulating, the VPN packet (though now encrypted) is encapsulatedin another IP datagram.
When the destination receives this packet, the same thing happens, only in reverse.So it checks the message authentication code, decrypts the contents of the UDP datagram,checks the sequence number and writes the decrypted information to its own virtual networkdevice.
If the virtual network device is a ‘tun’ device (a point-to-point tunnel), there is noproblem for the kernel to accept a packet. However, if it is a ‘tap’ device (this is the onlyavailable type on FreeBSD), the destination MAC address must match that of the virtualnetwork interface. If tinc is in its default routing mode, ARP does not work, so the correctdestination MAC can not be known by the sending host. Tinc solves this by letting thereceiving end detect the MAC address of its own virtual network interface and overwritingthe destination MAC address of the received packet.
In switch or hub modes ARP does work so the sender already knows the correct desti-nation MAC address. In those modes every interface should have a unique MAC address,so make sure they are not the same. Because switch and hub modes rely on MAC addressesto function correctly, these modes cannot be used on the following operating systems whichdon’t have a ‘tap’ style virtual network device: NetBSD, Darwin and Solaris.
32 tinc Manual
6.1.2 The meta-connection
Having only a UDP connection available is not enough. Though suitable for transmittingdata, we want to be able to reliably send other information, such as routing and session keyinformation to somebody.
TCP is a better alternative, because it already contains protection against informationbeing lost, unlike UDP.
So we establish two connections. One for the encrypted VPN data, and one for otherinformation, the meta-data. Hence, we call the second connection the meta-connection. Wecan now be sure that the meta-information doesn’t get lost on the way to another computer.
Like with any communication, we must have a protocol, so that everybody knows whateverything stands for, and how she should react. Because we have two connections, we alsohave two protocols. The protocol used for the UDP data is the “data-protocol,” the otherone is the “meta-protocol.”
The reason we don’t use TCP for both protocols is that UDP is much better for encap-sulation, even while it is less reliable. The real problem is that when TCP would be used toencapsulate a TCP stream that’s on the private network, for every packet sent there wouldbe three ACKs sent instead of just one. Furthermore, if there would be a timeout, bothTCP streams would sense the timeout, and both would start re-sending packets.
6.2 The meta-protocol
The meta protocol is used to tie all tinc daemons together, and exchange information aboutwhich tinc daemon serves which virtual subnet.
The meta protocol consists of requests that can be sent to the other side. Each requesthas a unique number and several parameters. All requests are represented in the standardASCII character set. It is possible to use tools such as telnet or netcat to connect to a tincdaemon started with the –bypass-security option and to read and write requests by hand,provided that one understands the numeric codes sent.
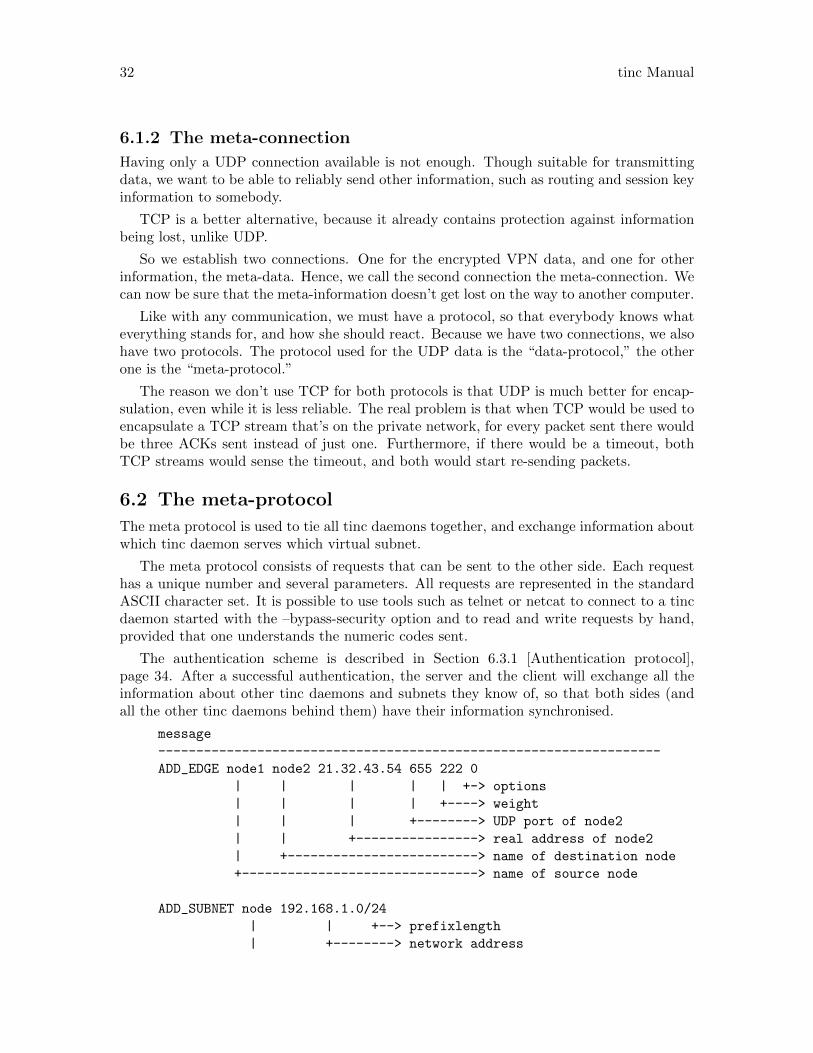
The authentication scheme is described in Section 6.3.1 [Authentication protocol],page 34. After a successful authentication, the server and the client will exchange all theinformation about other tinc daemons and subnets they know of, so that both sides (andall the other tinc daemons behind them) have their information synchronised.
message
------------------------------------------------------------------
ADD_EDGE node1 node2 21.32.43.54 655 222 0
| | | | | +-> options
| | | | +----> weight
| | | +--------> UDP port of node2
| | +----------------> real address of node2
| +-------------------------> name of destination node
+-------------------------------> name of source node
ADD_SUBNET node 192.168.1.0/24
| | +--> prefixlength
| +--------> network address

Chapter 6: Technical information 33
+------------------> owner of this subnet
------------------------------------------------------------------
The ADD EDGE messages are to inform other tinc daemons that a connection betweentwo nodes exist. The address of the destination node is available so that VPN packets canbe sent directly to that node.
The ADD SUBNET messages inform other tinc daemons that certain subnets belong tocertain nodes. tinc will use it to determine to which node a VPN packet has to be sent.
message
------------------------------------------------------------------
DEL_EDGE node1 node2
| +----> name of destination node
+----------> name of source node
DEL_SUBNET node 192.168.1.0/24
| | +--> prefixlength
| +--------> network address
+------------------> owner of this subnet
------------------------------------------------------------------
In case a connection between two daemons is closed or broken, DEL EDGE messagesare sent to inform the other daemons of that fact. Each daemon will calculate a new routeto the the daemons, or mark them unreachable if there isn’t any.
message
------------------------------------------------------------------
REQ_KEY origin destination
| +--> name of the tinc daemon it wants the key from
+----------> name of the daemon that wants the key
ANS_KEY origin destination 4ae0b0a82d6e0078 91 64 4
| | \______________/ | | +--> MAC length
| | | | +-----> digest algorithm
| | | +--------> cipher algorithm
| | +--> 128 bits key
| +--> name of the daemon that wants the key
+----------> name of the daemon that uses this key
KEY_CHANGED origin
+--> daemon that has changed it’s packet key
------------------------------------------------------------------
The keys used to encrypt VPN packets are not sent out directly. This is because it wouldgenerate a lot of traffic on VPNs with many daemons, and chances are that not every tincdaemon will ever send a packet to every other daemon. Instead, if a daemon needs a keyit sends a request for it via the meta connection of the nearest hop in the direction of thedestination.
daemon message
------------------------------------------------------------------

34 tinc Manual
origin PING
dest. PONG
------------------------------------------------------------------
There is also a mechanism to check if hosts are still alive. Since network failures or acrash can cause a daemon to be killed without properly shutting down the TCP connection,this is necessary to keep an up to date connection list. PINGs are sent at regular intervals,except when there is also some other traffic. A little bit of salt (random data) is addedwith each PING and PONG message, to make sure that long sequences of PING/PONGmessages without any other traffic won’t result in known plaintext.
This basically covers what is sent over the meta connection by tinc.
6.3 Security
Tinc got its name from “TINC,” short for There Is No Cabal ; the alleged Cabal was/is anorganisation that was said to keep an eye on the entire Internet. As this is exactly whatyou don’t want, we named the tinc project after TINC.
But in order to be “immune” to eavesdropping, you’ll have to encrypt your data. Becausetinc is a Secure VPN (SVPN) daemon, it does exactly that: encrypt. Tinc by default usesblowfish encryption with 128 bit keys in CBC mode, 32 bit sequence numbers and 4 bytelong message authentication codes to make sure eavesdroppers cannot get and cannot changeany information at all from the packets they can intercept. The encryption algorithm andmessage authentication algorithm can be changed in the configuration. The length of themessage authentication codes is also adjustable. The length of the key for the encryptionalgorithm is always the default length used by LibreSSL/OpenSSL.
6.3.1 Authentication protocol
A new scheme for authentication in tinc has been devised, which offers some improvementsover the protocol used in 1.0pre2 and 1.0pre3. Explanation is below.
daemon message
--------------------------------------------------------------------------
client <attempts connection>
server <accepts connection>
client ID client 12
| +---> version
+-------> name of tinc daemon
server ID server 12
| +---> version
+-------> name of tinc daemon
client META_KEY 5f0823a93e35b69e...7086ec7866ce582b
\_________________________________/
+-> RSAKEYLEN bits totally random string S1,
encrypted with server’s public RSA key

Chapter 6: Technical information 35
server META_KEY 6ab9c1640388f8f0...45d1a07f8a672630
\_________________________________/
+-> RSAKEYLEN bits totally random string S2,
encrypted with client’s public RSA key
From now on:
- the client will symmetrically encrypt outgoing traffic using S1
- the server will symmetrically encrypt outgoing traffic using S2
client CHALLENGE da02add1817c1920989ba6ae2a49cecbda0
\_________________________________/
+-> CHALLEN bits totally random string H1
server CHALLENGE 57fb4b2ccd70d6bb35a64c142f47e61d57f
\_________________________________/
+-> CHALLEN bits totally random string H2
client CHAL_REPLY 816a86
+-> 160 bits SHA1 of H2
server CHAL_REPLY 928ffe
+-> 160 bits SHA1 of H1
After the correct challenge replies are received, both ends have proved
their identity. Further information is exchanged.
client ACK 655 123 0
| | +-> options
| +----> estimated weight
+--------> listening port of client
server ACK 655 321 0
| | +-> options
| +----> estimated weight
+--------> listening port of server
--------------------------------------------------------------------------
This new scheme has several improvements, both in efficiency and security.
First of all, the server sends exactly the same kind of messages over the wire as theclient. The previous versions of tinc first authenticated the client, and then the server.This scheme even allows both sides to send their messages simultaneously, there is no needto wait for the other to send something first. This means that any calculations that need tobe done upon sending or receiving a message can also be done in parallel. This is especiallyimportant when doing RSA encryption/decryption. Given that these calculations are themain part of the CPU time spent for the authentication, speed is improved by a factor 2.

36 tinc Manual
Second, only one RSA encrypted message is sent instead of two. This reduces the amountof information attackers can see (and thus use for a cryptographic attack). It also improvesspeed by a factor two, making the total speedup a factor 4.
Third, and most important: The symmetric cipher keys are exchanged first, the challengeis done afterwards. In the previous authentication scheme, because a man-in-the-middlecould pass the challenge/chal reply phase (by just copying the messages between the tworeal tinc daemons), but no information was exchanged that was really needed to read therest of the messages, the challenge/chal reply phase was of no real use. The man-in-the-middle was only stopped by the fact that only after the ACK messages were encrypted withthe symmetric cipher. Potentially, it could even send it’s own symmetric key to the server(if it knew the server’s public key) and read some of the metadata the server would send it(it was impossible for the mitm to read actual network packets though). The new schemehowever prevents this.
This new scheme makes sure that first of all, symmetric keys are exchanged. The restof the messages are then encrypted with the symmetric cipher. Then, each side can onlyread received messages if they have their private key. The challenge is there to let the otherside know that the private key is really known, because a challenge reply can only be sentback if the challenge is decrypted correctly, and that can only be done with knowledge ofthe private key.
Fourth: the first thing that is sent via the symmetric cipher encrypted connection is atotally random string, so that there is no known plaintext (for an attacker) in the beginningof the encrypted stream.
6.3.2 Encryption of network packets
A data packet can only be sent if the encryption key is known to both parties, and the con-nection is activated. If the encryption key is not known, a request is sent to the destinationusing the meta connection to retrieve it. The packet is stored in a queue while waiting forthe key to arrive.
The UDP packet containing the network packet from the VPN has the following layout:
... | IP header | UDP header | seqno | VPN packet | MAC | UDP trailer
\___________________/\_____/
| |
V +---> digest algorithm
Encrypted with symmetric cipher
So, the entire VPN packet is encrypted using a symmetric cipher, including a 32 bitssequence number that is added in front of the actual VPN packet, to act as a unique IV foreach packet and to prevent replay attacks. A message authentication code is added to theUDP packet to prevent alteration of packets. By default the first 4 bytes of the digest areused for this, but this can be changed using the MACLength configuration variable.
6.3.3 Security issues
In August 2000, we discovered the existence of a security hole in all versions of tinc up toand including 1.0pre2. This had to do with the way we exchanged keys. Since then, wehave been working on a new authentication scheme to make tinc as secure as possible. Thecurrent version uses the LibreSSL or OpenSSL library and uses strong authentication withRSA keys.

37
On the 29th of December 2001, Jerome Etienne posted a security analysis of tinc 1.0pre4.Due to a lack of sequence numbers and a message authentication code for each packet, anattacker could possibly disrupt certain network services or launch a denial of service attackby replaying intercepted packets. The current version adds sequence numbers and messageauthentication codes to prevent such attacks.
On the 15th of September 2003, Peter Gutmann posted a security analysis of tinc 1.0.1.He argues that the 32 bit sequence number used by tinc is not a good IV, that tinc’s defaultlength of 4 bytes for the MAC is too short, and he doesn’t like tinc’s use of RSA duringauthentication. We do not know of a security hole in this version of tinc, but tinc’s securityis not as strong as TLS or IPsec. We will address these issues in tinc 2.0.
Cryptography is a hard thing to get right. We cannot make any guarantees. Time,review and feedback are the only things that can prove the security of any cryptographicproduct. If you wish to review tinc or give us feedback, you are stronly encouraged to doso.


39
7 Platform specific information
7.1 Interface configuration
When configuring an interface, one normally assigns it an address and a netmask. Theaddress uniquely identifies the host on the network attached to the interface. The netmask,combined with the address, forms a subnet. It is used to add a route to the routing tableinstructing the kernel to send all packets which fall into that subnet to that interface.Because all packets for the entire VPN should go to the virtual network interface used bytinc, the netmask should be such that it encompasses the entire VPN.
For IPv4 addresses:
Linux ifconfig interface address netmask netmaskLinux iproute2 ip addr add address/prefixlength dev interfaceFreeBSD ifconfig interface address netmask netmaskOpenBSD ifconfig interface address netmask netmaskNetBSD ifconfig interface address netmask netmaskSolaris ifconfig interface address netmask netmaskDarwin (Mac OS X) ifconfig interface address netmask netmaskWindows netsh interface ip set address interface static address netmask
For IPv6 addresses:
Linux ifconfig interface add address/prefixlengthFreeBSD ifconfig interface inet6 address prefixlen prefixlengthOpenBSD ifconfig interface inet6 address prefixlen prefixlengthNetBSD ifconfig interface inet6 address prefixlen prefixlengthSolaris ifconfig interface inet6 plumb up
ifconfig interface inet6 addif address addressDarwin (Mac OS X) ifconfig interface inet6 address prefixlen prefixlengthWindows netsh interface ipv6 add address interface static address/prefixlength
On Linux, it is possible to create a persistent tun/tap interface which will continue toexist even if tinc quit, although this is normally not required. It can be useful to set upa tun/tap interface owned by a non-root user, so tinc can be started without needing anyroot privileges at all.
Linux ip tuntap add dev interface mode tun|tap user username
7.2 Routes
In some cases it might be necessary to add more routes to the virtual network interface.There are two ways to indicate which interface a packet should go to, one is to use the nameof the interface itself, another way is to specify the (local) address that is assigned to thatinterface (local address). The former way is unambiguous and therefore preferable, but notall platforms support this.
Adding routes to IPv4 subnets:
Linux route add -net network address netmask netmask interfaceLinux iproute2 ip route add network address/prefixlength dev interfaceFreeBSD route add network address/prefixlength local address

40 tinc Manual
OpenBSD route add network address/prefixlength local addressNetBSD route add network address/prefixlength local addressSolaris route add network address/prefixlength local address -interfaceDarwin (Mac OS X) route add network address/prefixlength -interface interfaceWindows netsh routing ip add persistentroute network address netmask interface lo-
cal address
Adding routes to IPv6 subnets:
Linux route add -A inet6 network address/prefixlength interfaceLinux iproute2 ip route add network address/prefixlength dev interfaceFreeBSD route add -inet6 network address/prefixlength local addressOpenBSD route add -inet6 network address local address -prefixlen prefixlengthNetBSD route add -inet6 network address local address -prefixlen prefixlengthSolaris route add -inet6 network address/prefixlength local address -interfaceDarwin (Mac OS X) route add -inet6 network address/prefixlength -interface interfaceWindows netsh interface ipv6 add route network address/prefixlength interface
7.3 Automatically starting tinc
7.3.1 Linux
There are many Linux distributions, and historically, many of them had their own way ofstarting programs at boot time. Today, a number of major Linux distributions have chosento use systemd as their init system. Tinc ships with systemd service files that allow you tostart and stop tinc using systemd. There are two service files: tinc.service is used to glob-ally enable or disable all tinc daemons managed by systemd, and [email protected]
is used to enable or disable specific tinc daemons. So if one has created a tinc network withnetname foo, then you have to run the following two commands to ensure it is started atboot time:
systemctl enable tinc
systemctl enable tinc@foo
To start the tinc daemon immediately if it wasn’t already running, use the followingcommand:
systemctl start tinc@foo
You can also use ‘systemctl start tinc’, this will start all tinc daemons that are en-abled. You can stop and disable tinc networks in the same way.
If your system is not using systemd, then you have to look up your distribution’s way ofstarting tinc at boot time.
7.3.2 Windows
On Windows, if tinc is started without the -D or --no-detach option, it will automaticallyregister itself as a service that is started at boot time. When tinc is stopped using the -k
or --kill, it will also automatically unregister itself. Once tinc is registered as a service,it is also possible to stop and start tinc using the Windows Services Manager.

Chapter 7: Platform specific information 41
7.3.3 Other platforms
On platforms other than the ones mentioned in the earlier sections, you have to look upyour platform’s way of starting programs at boot time.


43
8 About us
8.1 Contact information
Tinc’s website is at https://www.tinc-vpn.org/, this server is located in the Netherlands.
We have an IRC channel on the FreeNode and OFTC IRC networks. Connect toirc.freenode.net (https://freenode.net/) or irc.oftc.net (https://www.oftc.net/)and join channel #tinc.
8.2 Authors
Ivo Timmermans (zarq)Guus Sliepen (guus) ([email protected])
We have received a lot of valuable input from users. With their help, tinc has becomethe flexible and robust tool that it is today. We have composed a list of contributions, inthe file called THANKS in the source distribution.


45
Concept Index
AACK . . . . . . . . . . . . . . . . . . . . . . . . . . . . . . . . . . . . . . . . . . 34ADD EDGE . . . . . . . . . . . . . . . . . . . . . . . . . . . . . . . . . . . 32ADD SUBNET . . . . . . . . . . . . . . . . . . . . . . . . . . . . . . . . 32Address . . . . . . . . . . . . . . . . . . . . . . . . . . . . . . . . . . . . . . . . 16AddressFamily . . . . . . . . . . . . . . . . . . . . . . . . . . . . . . . . . 10ANS KEY . . . . . . . . . . . . . . . . . . . . . . . . . . . . . . . . . . . . . 33authentication . . . . . . . . . . . . . . . . . . . . . . . . . . . . . . . . . 34
Bbinary package . . . . . . . . . . . . . . . . . . . . . . . . . . . . . . . . . . 7BindToAddress . . . . . . . . . . . . . . . . . . . . . . . . . . . . . . . . 10BindToInterface . . . . . . . . . . . . . . . . . . . . . . . . . . . . . . . . 10Broadcast . . . . . . . . . . . . . . . . . . . . . . . . . . . . . . . . . . . . . . 11
CCabal . . . . . . . . . . . . . . . . . . . . . . . . . . . . . . . . . . . . . . . . . . 34CHAL REPLY . . . . . . . . . . . . . . . . . . . . . . . . . . . . . . . . 34CHALLENGE . . . . . . . . . . . . . . . . . . . . . . . . . . . . . . . . . 34CIDR notation . . . . . . . . . . . . . . . . . . . . . . . . . . . . . . . . . 17Cipher . . . . . . . . . . . . . . . . . . . . . . . . . . . . . . . . . . . . . . . . . 16ClampMSS . . . . . . . . . . . . . . . . . . . . . . . . . . . . . . . . . . . . 16client . . . . . . . . . . . . . . . . . . . . . . . . . . . . . . . . . . . . . . . . . . 10command line . . . . . . . . . . . . . . . . . . . . . . . . . . . . . . . . . . 25Compression . . . . . . . . . . . . . . . . . . . . . . . . . . . . . . . . . . . 16connection . . . . . . . . . . . . . . . . . . . . . . . . . . . . . . . . . . . . . 31ConnectTo . . . . . . . . . . . . . . . . . . . . . . . . . . . . . . . . . . . . . 11
Ddaemon . . . . . . . . . . . . . . . . . . . . . . . . . . . . . . . . . . . . . . . . 25data-protocol . . . . . . . . . . . . . . . . . . . . . . . . . . . . . . . . . . 32debug level . . . . . . . . . . . . . . . . . . . . . . . . . . . . . . . . . . . . 25debug levels . . . . . . . . . . . . . . . . . . . . . . . . . . . . . . . . . . . . 27DecrementTTL . . . . . . . . . . . . . . . . . . . . . . . . . . . . . . . . 11DEL EDGE . . . . . . . . . . . . . . . . . . . . . . . . . . . . . . . . . . . 33DEL SUBNET . . . . . . . . . . . . . . . . . . . . . . . . . . . . . . . . 33Device . . . . . . . . . . . . . . . . . . . . . . . . . . . . . . . . . . . . . . . . . 11device files . . . . . . . . . . . . . . . . . . . . . . . . . . . . . . . . . . . . . . 8DeviceType . . . . . . . . . . . . . . . . . . . . . . . . . . . . . . . . . . . . 11DEVICE . . . . . . . . . . . . . . . . . . . . . . . . . . . . . . . . . . . . . . 19Digest . . . . . . . . . . . . . . . . . . . . . . . . . . . . . . . . . . . . . . . . . 16DirectOnly . . . . . . . . . . . . . . . . . . . . . . . . . . . . . . . . . . . . 13dummy . . . . . . . . . . . . . . . . . . . . . . . . . . . . . . . . . . . . . . . . 11
Eencapsulating . . . . . . . . . . . . . . . . . . . . . . . . . . . . . . . . . . 31encryption . . . . . . . . . . . . . . . . . . . . . . . . . . . . . . . . . . . . . 36environment variables . . . . . . . . . . . . . . . . . . . . . . . . . . 19example . . . . . . . . . . . . . . . . . . . . . . . . . . . . . . . . . . . . . . . 20exec . . . . . . . . . . . . . . . . . . . . . . . . . . . . . . . . . . . . . . . . . . . 15
FForwarding . . . . . . . . . . . . . . . . . . . . . . . . . . . . . . . . . . . . 13frame type . . . . . . . . . . . . . . . . . . . . . . . . . . . . . . . . . . . . . 31
GGraphDumpFile . . . . . . . . . . . . . . . . . . . . . . . . . . . . . . . 13
HHostnames . . . . . . . . . . . . . . . . . . . . . . . . . . . . . . . . . . . . . 13http . . . . . . . . . . . . . . . . . . . . . . . . . . . . . . . . . . . . . . . . . . . 15hub . . . . . . . . . . . . . . . . . . . . . . . . . . . . . . . . . . . . . . . . . . . . 14
IID . . . . . . . . . . . . . . . . . . . . . . . . . . . . . . . . . . . . . . . . . . . . . 34IffOneQueue . . . . . . . . . . . . . . . . . . . . . . . . . . . . . . . . . . . 13IndirectData . . . . . . . . . . . . . . . . . . . . . . . . . . . . . . . . . . . 16Interface . . . . . . . . . . . . . . . . . . . . . . . . . . . . . . . . . . . . . . . 13INTERFACE . . . . . . . . . . . . . . . . . . . . . . . . . . . . . . . . . . 19IRC . . . . . . . . . . . . . . . . . . . . . . . . . . . . . . . . . . . . . . . . . . . 43
Kkey generation . . . . . . . . . . . . . . . . . . . . . . . . . . . . . . . . . 20KEY CHANGED . . . . . . . . . . . . . . . . . . . . . . . . . . . . . . 33KeyExpire . . . . . . . . . . . . . . . . . . . . . . . . . . . . . . . . . . . . . 13
Llibraries . . . . . . . . . . . . . . . . . . . . . . . . . . . . . . . . . . . . . . . . . 4LibreSSL . . . . . . . . . . . . . . . . . . . . . . . . . . . . . . . . . . . . . . . 4license . . . . . . . . . . . . . . . . . . . . . . . . . . . . . . . . . . . . . . . . . . 4LocalDiscovery . . . . . . . . . . . . . . . . . . . . . . . . . . . . . . . . . 13lzo . . . . . . . . . . . . . . . . . . . . . . . . . . . . . . . . . . . . . . . . . . . . . . 5
MMACExpire . . . . . . . . . . . . . . . . . . . . . . . . . . . . . . . . . . . . 14MACLength . . . . . . . . . . . . . . . . . . . . . . . . . . . . . . . . . . . 17MaxTimeout . . . . . . . . . . . . . . . . . . . . . . . . . . . . . . . . . . . 14meta-protocol . . . . . . . . . . . . . . . . . . . . . . . . . . . . . . . . . . 32META KEY . . . . . . . . . . . . . . . . . . . . . . . . . . . . . . . . . . . 34Mode . . . . . . . . . . . . . . . . . . . . . . . . . . . . . . . . . . . . . . . . . . 14multicast . . . . . . . . . . . . . . . . . . . . . . . . . . . . . . . . . . . . . . 12multiple networks . . . . . . . . . . . . . . . . . . . . . . . . . . . . . . . 9

46 tinc Manual
NName . . . . . . . . . . . . . . . . . . . . . . . . . . . . . . . . . . . . . . . . . . 14
NAME . . . . . . . . . . . . . . . . . . . . . . . . . . . . . . . . . . . . . . . . 19
netmask . . . . . . . . . . . . . . . . . . . . . . . . . . . . . . . . . . . . . . . 20
netname . . . . . . . . . . . . . . . . . . . . . . . . . . . . . . . . . . . . . . . . 9
NETNAME . . . . . . . . . . . . . . . . . . . . . . . . . . . . . . . . . . . . 19
Network Administrators Guide . . . . . . . . . . . . . . . . . . 9
NODE . . . . . . . . . . . . . . . . . . . . . . . . . . . . . . . . . . . . . . . . . 19
OOpenSSL . . . . . . . . . . . . . . . . . . . . . . . . . . . . . . . . . . . . . . . 4
options . . . . . . . . . . . . . . . . . . . . . . . . . . . . . . . . . . . . . . . . 25
PPEM format . . . . . . . . . . . . . . . . . . . . . . . . . . . . . . . . . . . 17
PingInterval . . . . . . . . . . . . . . . . . . . . . . . . . . . . . . . . . . . 14
PingTimeout . . . . . . . . . . . . . . . . . . . . . . . . . . . . . . . . . . 14
PING . . . . . . . . . . . . . . . . . . . . . . . . . . . . . . . . . . . . . . . . . . 33
platforms . . . . . . . . . . . . . . . . . . . . . . . . . . . . . . . . . . . . . . . 2
PMTU . . . . . . . . . . . . . . . . . . . . . . . . . . . . . . . . . . . . . . . . 17
PMTUDiscovery . . . . . . . . . . . . . . . . . . . . . . . . . . . . . . . 17
PONG . . . . . . . . . . . . . . . . . . . . . . . . . . . . . . . . . . . . . . . . . 33
Port . . . . . . . . . . . . . . . . . . . . . . . . . . . . . . . . . . . . . . . . . . . 17
port numbers . . . . . . . . . . . . . . . . . . . . . . . . . . . . . . . . . . . 8
PriorityInheritance . . . . . . . . . . . . . . . . . . . . . . . . . . . . . 15
private . . . . . . . . . . . . . . . . . . . . . . . . . . . . . . . . . . . . . . . . . . 1
PrivateKey . . . . . . . . . . . . . . . . . . . . . . . . . . . . . . . . . . . . 15
PrivateKeyFile . . . . . . . . . . . . . . . . . . . . . . . . . . . . . . . . . 15
ProcessPriority . . . . . . . . . . . . . . . . . . . . . . . . . . . . . . . . 15
Proxy . . . . . . . . . . . . . . . . . . . . . . . . . . . . . . . . . . . . . . . . . . 15
PublicKey . . . . . . . . . . . . . . . . . . . . . . . . . . . . . . . . . . . . . 17
PublicKeyFile . . . . . . . . . . . . . . . . . . . . . . . . . . . . . . . . . 17
Rraw socket . . . . . . . . . . . . . . . . . . . . . . . . . . . . . . . . . . . . . 11
release . . . . . . . . . . . . . . . . . . . . . . . . . . . . . . . . . . . . . . . . . . 2
REMOTEADDRESS . . . . . . . . . . . . . . . . . . . . . . . . . . 19
REMOTEPORT . . . . . . . . . . . . . . . . . . . . . . . . . . . . . . . 19
ReplayWindow . . . . . . . . . . . . . . . . . . . . . . . . . . . . . . . . 15
REQ KEY . . . . . . . . . . . . . . . . . . . . . . . . . . . . . . . . . . . . . 33
requirements . . . . . . . . . . . . . . . . . . . . . . . . . . . . . . . . . . . . 4
router . . . . . . . . . . . . . . . . . . . . . . . . . . . . . . . . . . . . . . . . . 14
runtime options . . . . . . . . . . . . . . . . . . . . . . . . . . . . . . . . 25
Sscalability . . . . . . . . . . . . . . . . . . . . . . . . . . . . . . . . . . . . . . . 1scripts . . . . . . . . . . . . . . . . . . . . . . . . . . . . . . . . . . . . . . . . . 18server . . . . . . . . . . . . . . . . . . . . . . . . . . . . . . . . . . . . . . . . . . 10signals . . . . . . . . . . . . . . . . . . . . . . . . . . . . . . . . . . . . . . . . . 26socks4 . . . . . . . . . . . . . . . . . . . . . . . . . . . . . . . . . . . . . . . . . 15socks5 . . . . . . . . . . . . . . . . . . . . . . . . . . . . . . . . . . . . . . . . . 15StrictSubnets . . . . . . . . . . . . . . . . . . . . . . . . . . . . . . . . . . 15Subnet . . . . . . . . . . . . . . . . . . . . . . . . . . . . . . . . . . . . . . . . . 17Subnet weight . . . . . . . . . . . . . . . . . . . . . . . . . . . . . . . . . 17SUBNET . . . . . . . . . . . . . . . . . . . . . . . . . . . . . . . . . . . . . . 19SVPN . . . . . . . . . . . . . . . . . . . . . . . . . . . . . . . . . . . . . . . . . 34switch . . . . . . . . . . . . . . . . . . . . . . . . . . . . . . . . . . . . . . . . . 14systemd . . . . . . . . . . . . . . . . . . . . . . . . . . . . . . . . . . . . . . . 40
TTCP . . . . . . . . . . . . . . . . . . . . . . . . . . . . . . . . . . . . . . . . . . . 32TCPonly . . . . . . . . . . . . . . . . . . . . . . . . . . . . . . . . . . . . . . 18tinc . . . . . . . . . . . . . . . . . . . . . . . . . . . . . . . . . . . . . . . . . . . . . 1tinc-down . . . . . . . . . . . . . . . . . . . . . . . . . . . . . . . . . . . . . . 18tinc-up . . . . . . . . . . . . . . . . . . . . . . . . . . . . . . . . . . . . . 18, 20tincd . . . . . . . . . . . . . . . . . . . . . . . . . . . . . . . . . . . . . . . . . . . . 1TINC . . . . . . . . . . . . . . . . . . . . . . . . . . . . . . . . . . . . . . . . . . 34traditional VPNs . . . . . . . . . . . . . . . . . . . . . . . . . . . . . . . . 1tunifhead . . . . . . . . . . . . . . . . . . . . . . . . . . . . . . . . . . . . . . 12TunnelServer . . . . . . . . . . . . . . . . . . . . . . . . . . . . . . . . . . 16tunnohead . . . . . . . . . . . . . . . . . . . . . . . . . . . . . . . . . . . . . 12
UUDP . . . . . . . . . . . . . . . . . . . . . . . . . . . . . . . . . . . . . . . 31, 36UDPRcvBuf . . . . . . . . . . . . . . . . . . . . . . . . . . . . . . . . . . . 16UDPSndBuf . . . . . . . . . . . . . . . . . . . . . . . . . . . . . . . . . . . 16UML . . . . . . . . . . . . . . . . . . . . . . . . . . . . . . . . . . . . . . . . . . 12Universal tun/tap . . . . . . . . . . . . . . . . . . . . . . . . . . . . . . . 3utun . . . . . . . . . . . . . . . . . . . . . . . . . . . . . . . . . . . . . . . . . . . 12
VVDE . . . . . . . . . . . . . . . . . . . . . . . . . . . . . . . . . . . . . . . . . . 12virtual . . . . . . . . . . . . . . . . . . . . . . . . . . . . . . . . . . . . . . . . . . 1virtual network device . . . . . . . . . . . . . . . . . . . . . . . . . 31vpnd . . . . . . . . . . . . . . . . . . . . . . . . . . . . . . . . . . . . . . . . . . . . 1VPN . . . . . . . . . . . . . . . . . . . . . . . . . . . . . . . . . . . . . . . . . . . . 1
Wwebsite . . . . . . . . . . . . . . . . . . . . . . . . . . . . . . . . . . . . . . . . 43WEIGHT . . . . . . . . . . . . . . . . . . . . . . . . . . . . . . . . . . . . . . 19
Zzlib . . . . . . . . . . . . . . . . . . . . . . . . . . . . . . . . . . . . . . . . . . . . . 5

i
Table of Contents
1 Introduction . . . . . . . . . . . . . . . . . . . . . . . . . . . . . . . . . . . . . 11.1 Virtual Private Networks . . . . . . . . . . . . . . . . . . . . . . . . . . . . . . . . . . . . . . . 11.2 tinc . . . . . . . . . . . . . . . . . . . . . . . . . . . . . . . . . . . . . . . . . . . . . . . . . . . . . . . . . . . . 11.3 Supported platforms . . . . . . . . . . . . . . . . . . . . . . . . . . . . . . . . . . . . . . . . . . . . 2
2 Preparations . . . . . . . . . . . . . . . . . . . . . . . . . . . . . . . . . . . . . 32.1 Configuring the kernel . . . . . . . . . . . . . . . . . . . . . . . . . . . . . . . . . . . . . . . . . . 3
2.1.1 Configuration of Linux kernels . . . . . . . . . . . . . . . . . . . . . . . . . . . . . 32.1.2 Configuration of FreeBSD kernels . . . . . . . . . . . . . . . . . . . . . . . . . . 32.1.3 Configuration of OpenBSD kernels . . . . . . . . . . . . . . . . . . . . . . . . . 32.1.4 Configuration of NetBSD kernels . . . . . . . . . . . . . . . . . . . . . . . . . . . 32.1.5 Configuration of Solaris kernels . . . . . . . . . . . . . . . . . . . . . . . . . . . . 32.1.6 Configuration of Darwin (Mac OS X) kernels . . . . . . . . . . . . . . . 32.1.7 Configuration of Windows . . . . . . . . . . . . . . . . . . . . . . . . . . . . . . . . . 4
2.2 Libraries . . . . . . . . . . . . . . . . . . . . . . . . . . . . . . . . . . . . . . . . . . . . . . . . . . . . . . . 42.2.1 LibreSSL/OpenSSL . . . . . . . . . . . . . . . . . . . . . . . . . . . . . . . . . . . . . . . . 42.2.2 zlib . . . . . . . . . . . . . . . . . . . . . . . . . . . . . . . . . . . . . . . . . . . . . . . . . . . . . . . . 52.2.3 lzo . . . . . . . . . . . . . . . . . . . . . . . . . . . . . . . . . . . . . . . . . . . . . . . . . . . . . . . . 5
3 Installation . . . . . . . . . . . . . . . . . . . . . . . . . . . . . . . . . . . . . . . 73.1 Building and installing tinc . . . . . . . . . . . . . . . . . . . . . . . . . . . . . . . . . . . . . 7
3.1.1 Darwin (Mac OS X) build environment . . . . . . . . . . . . . . . . . . . . 73.1.2 Cygwin (Windows) build environment . . . . . . . . . . . . . . . . . . . . . . 73.1.3 MinGW (Windows) build environment . . . . . . . . . . . . . . . . . . . . . 7
3.2 System files . . . . . . . . . . . . . . . . . . . . . . . . . . . . . . . . . . . . . . . . . . . . . . . . . . . . 73.2.1 Device files . . . . . . . . . . . . . . . . . . . . . . . . . . . . . . . . . . . . . . . . . . . . . . . . 83.2.2 Other files . . . . . . . . . . . . . . . . . . . . . . . . . . . . . . . . . . . . . . . . . . . . . . . . . 8
4 Configuration . . . . . . . . . . . . . . . . . . . . . . . . . . . . . . . . . . . . 94.1 Configuration introduction . . . . . . . . . . . . . . . . . . . . . . . . . . . . . . . . . . . . . . 94.2 Multiple networks . . . . . . . . . . . . . . . . . . . . . . . . . . . . . . . . . . . . . . . . . . . . . . 94.3 How connections work . . . . . . . . . . . . . . . . . . . . . . . . . . . . . . . . . . . . . . . . . . 94.4 Configuration files . . . . . . . . . . . . . . . . . . . . . . . . . . . . . . . . . . . . . . . . . . . . . 10
4.4.1 Main configuration variables . . . . . . . . . . . . . . . . . . . . . . . . . . . . . . 104.4.2 Host configuration variables . . . . . . . . . . . . . . . . . . . . . . . . . . . . . . . 164.4.3 Scripts . . . . . . . . . . . . . . . . . . . . . . . . . . . . . . . . . . . . . . . . . . . . . . . . . . . 184.4.4 How to configure . . . . . . . . . . . . . . . . . . . . . . . . . . . . . . . . . . . . . . . . . 19
4.5 Generating keypairs . . . . . . . . . . . . . . . . . . . . . . . . . . . . . . . . . . . . . . . . . . . 204.6 Network interfaces . . . . . . . . . . . . . . . . . . . . . . . . . . . . . . . . . . . . . . . . . . . . . 204.7 Example configuration . . . . . . . . . . . . . . . . . . . . . . . . . . . . . . . . . . . . . . . . . 20

ii tinc Manual
5 Running tinc . . . . . . . . . . . . . . . . . . . . . . . . . . . . . . . . . . . 255.1 Runtime options . . . . . . . . . . . . . . . . . . . . . . . . . . . . . . . . . . . . . . . . . . . . . . . 255.2 Signals . . . . . . . . . . . . . . . . . . . . . . . . . . . . . . . . . . . . . . . . . . . . . . . . . . . . . . . . 265.3 Debug levels . . . . . . . . . . . . . . . . . . . . . . . . . . . . . . . . . . . . . . . . . . . . . . . . . . . 275.4 Solving problems . . . . . . . . . . . . . . . . . . . . . . . . . . . . . . . . . . . . . . . . . . . . . . 275.5 Error messages . . . . . . . . . . . . . . . . . . . . . . . . . . . . . . . . . . . . . . . . . . . . . . . . 275.6 Sending bug reports . . . . . . . . . . . . . . . . . . . . . . . . . . . . . . . . . . . . . . . . . . . 29
6 Technical information . . . . . . . . . . . . . . . . . . . . . . . . . . 316.1 The connection . . . . . . . . . . . . . . . . . . . . . . . . . . . . . . . . . . . . . . . . . . . . . . . . 31
6.1.1 The UDP tunnel . . . . . . . . . . . . . . . . . . . . . . . . . . . . . . . . . . . . . . . . . . 316.1.2 The meta-connection . . . . . . . . . . . . . . . . . . . . . . . . . . . . . . . . . . . . . 32
6.2 The meta-protocol . . . . . . . . . . . . . . . . . . . . . . . . . . . . . . . . . . . . . . . . . . . . . 326.3 Security . . . . . . . . . . . . . . . . . . . . . . . . . . . . . . . . . . . . . . . . . . . . . . . . . . . . . . . 34
6.3.1 Authentication protocol . . . . . . . . . . . . . . . . . . . . . . . . . . . . . . . . . . . 346.3.2 Encryption of network packets . . . . . . . . . . . . . . . . . . . . . . . . . . . . 366.3.3 Security issues . . . . . . . . . . . . . . . . . . . . . . . . . . . . . . . . . . . . . . . . . . . . 36
7 Platform specific information . . . . . . . . . . . . . . . . . 397.1 Interface configuration . . . . . . . . . . . . . . . . . . . . . . . . . . . . . . . . . . . . . . . . . 397.2 Routes . . . . . . . . . . . . . . . . . . . . . . . . . . . . . . . . . . . . . . . . . . . . . . . . . . . . . . . . 397.3 Automatically starting tinc . . . . . . . . . . . . . . . . . . . . . . . . . . . . . . . . . . . . 40
7.3.1 Linux . . . . . . . . . . . . . . . . . . . . . . . . . . . . . . . . . . . . . . . . . . . . . . . . . . . . 407.3.2 Windows . . . . . . . . . . . . . . . . . . . . . . . . . . . . . . . . . . . . . . . . . . . . . . . . . 407.3.3 Other platforms . . . . . . . . . . . . . . . . . . . . . . . . . . . . . . . . . . . . . . . . . . 41
8 About us . . . . . . . . . . . . . . . . . . . . . . . . . . . . . . . . . . . . . . . . 438.1 Contact information . . . . . . . . . . . . . . . . . . . . . . . . . . . . . . . . . . . . . . . . . . . 438.2 Authors . . . . . . . . . . . . . . . . . . . . . . . . . . . . . . . . . . . . . . . . . . . . . . . . . . . . . . . 43
Concept Index . . . . . . . . . . . . . . . . . . . . . . . . . . . . . . . . . . . . . 45