towards improved classroom …uphold.jsi.com/docs/resources/training/education/teacher...ministry of...
TRANSCRIPT
Ministry of Education and Sports
TOWARDS IMPROVED CLASSROOM INSTRUCTION: “COOPERATIVE LEARNING IN THE CLASSROOM”
—MODULE 1—
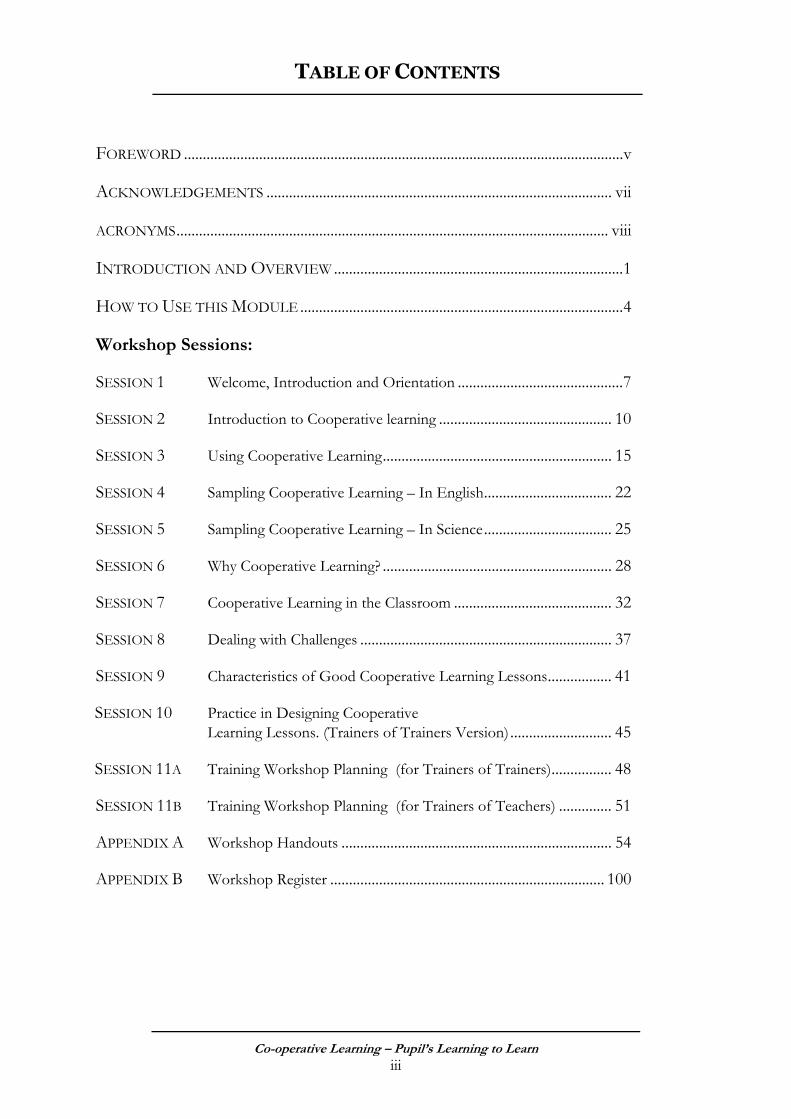
“P.7 Pupils of Arua Hill Primary School in a Cooperative group discussion- August, 2004”
This document serves as a Trainer’s Guide and a Participant’s Handbook for education managers and classroom teachers involved in the Teacher Effectiveness training cascade initiative. The module will equip trainers of trainers, trainers of teachers and classroom teachers with knowledge and skills required to use Cooperative Learning as a teaching approach that can maximize children’s learning experiences and improve the quality of teaching in Uganda primary school classrooms.
(4th Edition November 2007)
Financial support for this publication was provided by United States Agency for International Development (USAID) Cooperative Agreement number 617-A-00-02-00012-00. The views expressed in this document do not necessarily reflect those of USAID.

Co-operative Learning – Pupil’s Learning to Learn iii
TABLE OF CONTENTS
FOREWORD .....................................................................................................................v
ACKNOWLEDGEMENTS ............................................................................................ vii
ACRONYMS................................................................................................................... viii
INTRODUCTION AND OVERVIEW .............................................................................1
HOW TO USE THIS MODULE ......................................................................................4
Workshop Sessions:
SESSION 1 Welcome, Introduction and Orientation ............................................7
SESSION 2 Introduction to Cooperative learning .............................................. 10
SESSION 3 Using Cooperative Learning............................................................. 15
SESSION 4 Sampling Cooperative Learning – In English.................................. 22
SESSION 5 Sampling Cooperative Learning – In Science.................................. 25
SESSION 6 Why Cooperative Learning? ............................................................. 28
SESSION 7 Cooperative Learning in the Classroom .......................................... 32
SESSION 8 Dealing with Challenges ................................................................... 37
SESSION 9 Characteristics of Good Cooperative Learning Lessons................. 41
SESSION 10 Practice in Designing Cooperative Learning Lessons. (Trainers of Trainers Version)........................... 45
SESSION 11A Training Workshop Planning (for Trainers of Trainers)................ 48
SESSION 11B Training Workshop Planning (for Trainers of Teachers) .............. 51
APPENDIX A Workshop Handouts ........................................................................ 54
APPENDIX B Workshop Register ......................................................................... 100

Co-operative Learning – Pupil’s Learning to Learn iv
Co-operative Learning – Pupil’s Learning to Learn v
FOREWORD
Government of Uganda regards quality education as a Constitutional Right. Education is identified as an essential ingredient in poverty eradication and national development. Over the years Government realizing that “No quality of Education can be better than the quality of its teachers” has invested heavily on multiple strategies that enhance the instructional competences and practices of the teacher in the primary school Universal access to primary education has been achieved through education reforms under the Universal Primary Education programme. However, the quality of teaching and pupils’ learning achievement, and competences remain a big challenge in spite of the enormous efforts and resources. Crowded classroom, predominant teacher-centred methodology, and use of sanctions among others still impede the quality of education in Ugandan primary schools. Even though pupils’ proficiency in English language and numeracy have shown gradual improvement, the National Assessment of Progress in education (NAPE, 2007) reveals that literacy at P3 and P6 is 45.5% and 49% respectively while numeracy stands even lower 44.8% and 41.4% respectively. Instructional practices at school and classroom levels still are teacher- centered. Teacher support through mentoring, support supervision and motivation poses a big challenge to pedagogical practices as School based Continuous Professional Development programs(CPDs) are irregular.
With a focus on improving the effectiveness of classroom instruction and quality of pupils learning, achievements, this module, “Towards Improving Classroom Instruction: “Cooperative Learning In The Classroom” Module 1, has been designed to support education managers and supervisors so as to increase their professional effort in creating a positive change in Uganda’s schools and classrooms. Partnership among all stakeholders including parents, communities, teachers and pupils is considered a core business of School-Based Quality Reform. All this is geared towards positively impacting the quality of instruction at school and classroom level and more importantly the quality of pupils’ learning.
A Systems and activity –based approach to improving education quality that recognizes a Whole School or Whole System Approach has been adopted. This approach recognizes the power of working together in partnership among educators including Education Officers, School Heads, Teachers, and Centre Coordinating Tutors to achieve quality education.
The Teacher Effectiveness materials and training have been developed to support the Ministry of Education and Sports in its effort to ensure that participatory approaches are used by teachers in the classroom. The materials also enable teachers to use the few existing text books to the benefit of all the children in the classroom through small group work. It is designed to explore the collective participation of these partners in improving both instructional skills and support supervision and mentoring for quality instruction.
The first module in this series focuses on creating a good understanding of the Cooperative Learning approach of teaching. It is designed with lots of practical activities that combine the principles of Cooperative Learning with experiences in using some Cooperative Learning techniques. The sessions illustrate the components of the approach by using the Uganda Primary
Co-operative Learning – Pupil’s Learning to Learn vi
School Curriculum that the teachers are already familiar with in their teaching. The different activities also enable the trainees to reflect over what the actual learning scenarios illustrate and identify the attributes of the Cooperative Learning approach.
The challenge at hand remains to ensure that we promote the best practices cultivated through the Teachers Effectiveness strategy particularly the use of Cooperative Learning approach, so as to achieve the desired quality primary education.
Dr. J.G. Mbabazi
DIRECTOR OF EDUCATION
Co-operative Learning – Pupil’s Learning to Learn vii
ACKNOWLEDGEMENTS
This material was developed in collaboration with the Ministry of Education and Sports with funding from USAID through The Uganda Program for Human and Holistic Development (UPHOLD).
The Module was developed with the support and extensive input from the following institutions and individuals: Ministry of Education and Sports Kyambogo University Field test participants Mayuge District MoES’s Teacher Effectiveness working group Renuka Pillay, BEPS Patrick Bananuka, BEPS Margaret Nsereko Violet Mugisha Lawrence Chondo John Bwayo Joyce Othieno Patrick Okello Ginyakol The producers extend their great appreciation for the time and energy provided from all involved in the development of these materials. Authors Ernest Buckman David Weehre Florence Kabahamba Ameri Joshua Sentongo Lwanga (RIP) Flavia Kebirungi Bakundana Dorothy Aanyu Angura. Reviewed and Edited by Dorothy Aanyu Angura Elizabeth Nyivuru Jawoko Elizabeth Opit Seraphine Awacango Dorothy Birungi Alexandria Nabwire Kamanyire Format Design by Martin Pitman Formatting by Dorothy Aanyu Angura and Elizabeth Nyivuru Jawoko
Co-operative Learning – Pupil’s Learning to Learn viii
ACRONYMS
3PS Presentation, Practice and performance CC Coordinating Centers CCT Coordinating Center Tutor CL Cooperative Learning CPDs Continuous Professional Development programs CPTC Core Primary Teachers College DEO District Education Officer DIS District Inspector of Schools EO Education Officer HT Head teachers IS Inspector of Schools MOES Ministry of Education and Sports SST Social Studies STAD Student Teams Achievement Divisions TDMS Teacher Development Management Systems TE Teacher Effectiveness TGT Teams Games Tournaments TT Trainer of Trainers TTR Teacher trainers UPHOLD Uganda Program for Human and Holistic Development USAID United States Agency for International Development
Introduction and Overview
Co-operative Learning – Pupil’s Learning to Learn - 1 -
INTRODUCTION AND OVERVIEW
WELCOME! By opening this handbook you have taken an important step towards making your contribution to improving the quality of the teaching and learning practice in Uganda’s primary schools. As an educator, whether you are at the school, district, college levels or Ministry of Education and Sports, YOU make a huge difference in the quality of learning and the life of the Ugandan school children. This Handbook is designed to assist you in creating a positive change in Uganda’s schools with a focus on causing improvement in the effectiveness of classroom instruction and quality of pupils learning. To this effect, the initiative towards Teacher Effectiveness (TE) by employing Cooperative Learning (CL) is being promoted.
GUIDING PRINCIPLES
A focus on improving quality of classroom instruction and pupil performance The core business of any School-Based Quality Reform (SBQR) is to deliver quality education and to ensure that pupils reach their potential. The Teacher Effectiveness effort towards improved classroom instruction is designed to equip teachers, Head teachers and other education managers in the system with critical knowledge, attitudes and skills needed to improve the effectiveness of the teaching and learning practice with a focus of positively impacting the quality of instruction at school and classroom level and more importantly the quality of pupils’ learning. A Systems Approach The Teacher Effectiveness effort strives to improve quality through a Whole School Approach or Whole System Approach. This approach recognizes that it is only when all educators namely: education officers, school heads, teachers, Centre Coordinating Tutors (CCTs) and parents work together in partnership that school-based quality can be improved. The initiative towards Teacher Effectiveness is designed to explore the collective participation of these partners in improving both instructional skills and support supervision and mentoring for quality instruction. It is therefore the reason why the cascade training approach involves all the different cadres of trainers in the system to build a foundation for continuous peer support. It is also necessary to improve capacity at all levels of the system that support the school, especially the district and the Core Primary Teachers Colleges (CPTCs). The power of improving teacher effectiveness lies in the ability of the teacher support system being able to constantly provide the support related to the change being advocated for in a friendly and non threatening way. Activity-based Learning We believe that both children and adults learn most effectively through activity and practice and not through passive listening. The Teacher Effectiveness workshops are designed to maximize activity of participants and to engage them to relate the curriculum content expected to be delivered using Cooperative Learning with the process of delivering it. Cooperative Learning uses a cluster of instructional strategies that involve students working together to achieve common learning objectives through group activities that are structured and guided by the teacher and is particularly suited to provide child-centred learning in the over-crowded primary schools classrooms in Uganda.
Introduction and Overview
Co-operative Learning – Pupil’s Learning to Learn - 2 -
Our approach in the module: In this module we have attempted to combine the principles of Cooperative Learning with experiences in using some Cooperative Learning techniques. This means that instead of exploring the different attributes of the cooperative learning as a concept by sticking to content about CL, most of the session focus on illustrating the components of Cooperative Learning using the Ugandan Primary School Curriculum content that teachers are expected to use in the classroom. The activities in the module are designed to enable the trainees to reflect over what happened in the actual learning scenarios illustrated and identify the attributes of the Cooperative Learning approach used. It implies that while reflecting on the concept of Cooperative Learning the pros and cons of the approach it self get discussed and possible solutions identified and put in context as appropriate. WORKSHOP GOALS: 1. To equip Trainers of Trainers with skills that will enable them to train the next level of
trainers in the nature and use of the Cooperative Learning teaching method and to familiarize them with some ways of incorporating CL lessons in their teaching.
2. To equip trainers with knowledge of how to organize a training program for teachers that will:
a) Familiarize the participants with the CL teaching method. b) Provide the participants with the opportunity to experience the practice of
CL lessons. c) Equip and prepare them to support teachers to experiment with the method
in their classrooms. 3. To provide primary teachers with the knowledge and skills required to use the CL
method and with the motivation and tools needed to try the method on a limited basis. A. Common Training Objectives:
By the end of Training, the Trainers should be able to; • Describe the Cooperative Learning teaching method • Identify the required elements of the method. • List key procedures and steps required for successful implementation the CL
teaching method (organize classroom, select group members, introduce topic, monitor group activities)
• Identify the advantages of Cooperative Learning. • Identify and practice the use of the CL structures introduced • Identify the key elements of a learning activity that is appropriate for use with CL. • Design lesson plans that properly incorporate CL as teaching method. • Demonstrate valid use of CL with their trainees.
B. Training Objectives Exclusively for Trainers of Trainers. (Inspectors,
Education Officers, and Coordinating Center Tutors)
By the end of Training, the Trainers should be able to; • Briefly describe the training cascade and how it rolls out to the school level and
their role in it. • Design a comprehensive plan for a 3 – day training program.
Introduction and Overview
Co-operative Learning – Pupil’s Learning to Learn - 3 -
• Assess the degree to which the trainers of trainers, trainers of teachers simulate CL activities they choose to use in their trainings.
C. Training Objectives Exclusively for Trainers of Teachers:
At the end of Training, the Trainers should be able to; • Briefly describe the cascade training programmes and their role in it. • Design a school-based training program for primary teachers that will give the
participants the knowledge and skills needed to practice Cooperative Learning in the classroom.
• Assess the degree to which trained Primary Teachers successfully implement CL and provide appropriate assistance to teachers on a regular basis.
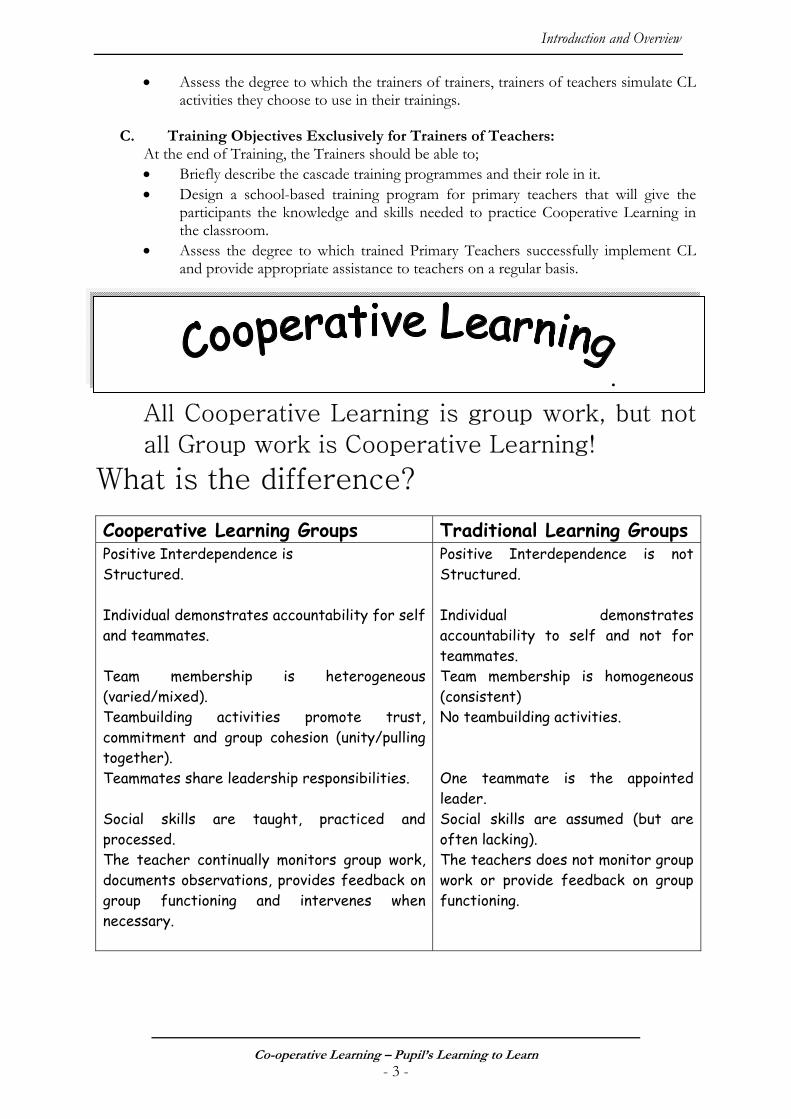
All Cooperative Learning is group work, but not
all Group work is Cooperative Learning!
What is the difference? Cooperative Learning Groups Traditional Learning Groups Positive Interdependence is Structured. Individual demonstrates accountability for self and teammates. Team membership is heterogeneous (varied/mixed). Teambuilding activities promote trust, commitment and group cohesion (unity/pulling together). Teammates share leadership responsibilities. Social skills are taught, practiced and processed. The teacher continually monitors group work, documents observations, provides feedback on group functioning and intervenes when necessary.
Positive Interdependence is not Structured. Individual demonstrates accountability to self and not for teammates. Team membership is homogeneous (consistent) No teambuilding activities. One teammate is the appointed leader. Social skills are assumed (but are often lacking). The teachers does not monitor group work or provide feedback on group functioning.
.
How to Use This Module
Co-operative Learning – Pupil’s Learning to Learn - 4 -
HOW TO USE THIS MODULE
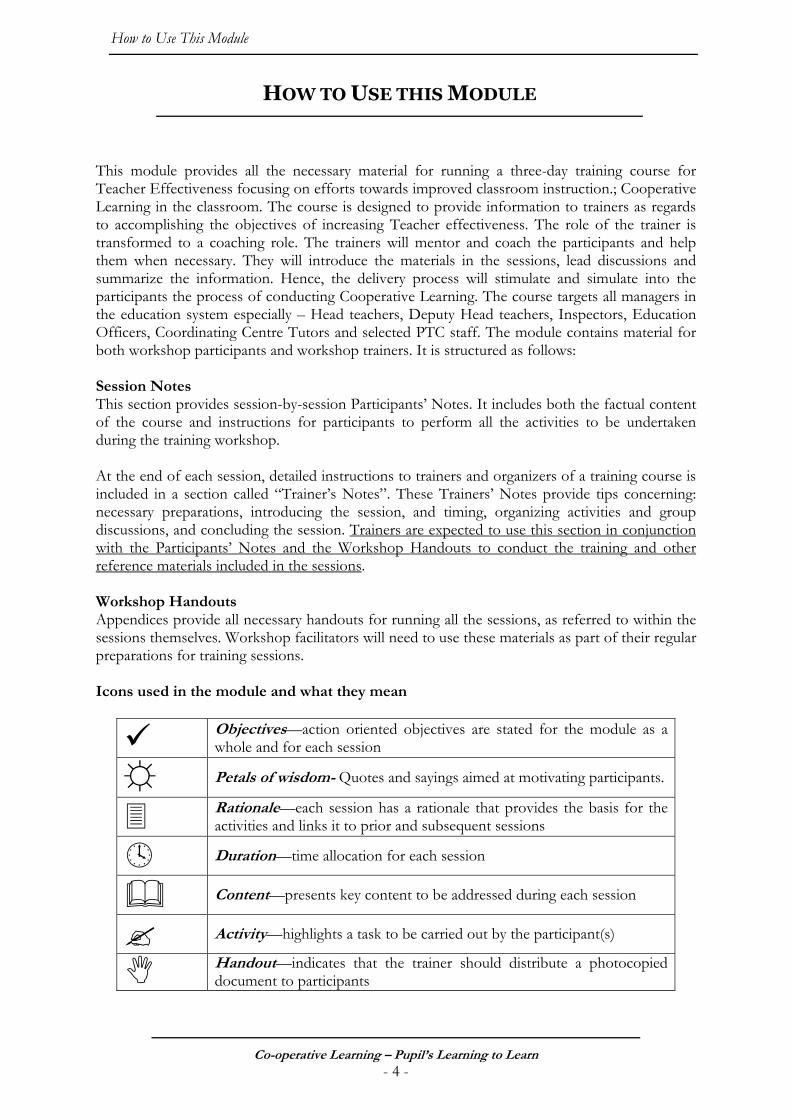
This module provides all the necessary material for running a three-day training course for Teacher Effectiveness focusing on efforts towards improved classroom instruction.; Cooperative Learning in the classroom. The course is designed to provide information to trainers as regards to accomplishing the objectives of increasing Teacher effectiveness. The role of the trainer is transformed to a coaching role. The trainers will mentor and coach the participants and help them when necessary. They will introduce the materials in the sessions, lead discussions and summarize the information. Hence, the delivery process will stimulate and simulate into the participants the process of conducting Cooperative Learning. The course targets all managers in the education system especially – Head teachers, Deputy Head teachers, Inspectors, Education Officers, Coordinating Centre Tutors and selected PTC staff. The module contains material for both workshop participants and workshop trainers. It is structured as follows: Session Notes This section provides session-by-session Participants’ Notes. It includes both the factual content of the course and instructions for participants to perform all the activities to be undertaken during the training workshop. At the end of each session, detailed instructions to trainers and organizers of a training course is included in a section called “Trainer’s Notes”. These Trainers’ Notes provide tips concerning: necessary preparations, introducing the session, and timing, organizing activities and group discussions, and concluding the session. Trainers are expected to use this section in conjunction with the Participants’ Notes and the Workshop Handouts to conduct the training and other reference materials included in the sessions. Workshop Handouts Appendices provide all necessary handouts for running all the sessions, as referred to within the sessions themselves. Workshop facilitators will need to use these materials as part of their regular preparations for training sessions. Icons used in the module and what they mean
Objectives—action oriented objectives are stated for the module as a whole and for each session
☼ Petals of wisdom- Quotes and sayings aimed at motivating participants.
Rationale—each session has a rationale that provides the basis for the activities and links it to prior and subsequent sessions
Duration—time allocation for each session
Content—presents key content to be addressed during each session
Activity—highlights a task to be carried out by the participant(s)
Handout—indicates that the trainer should distribute a photocopied document to participants
How to Use This Module
Co-operative Learning – Pupil’s Learning to Learn - 5 -
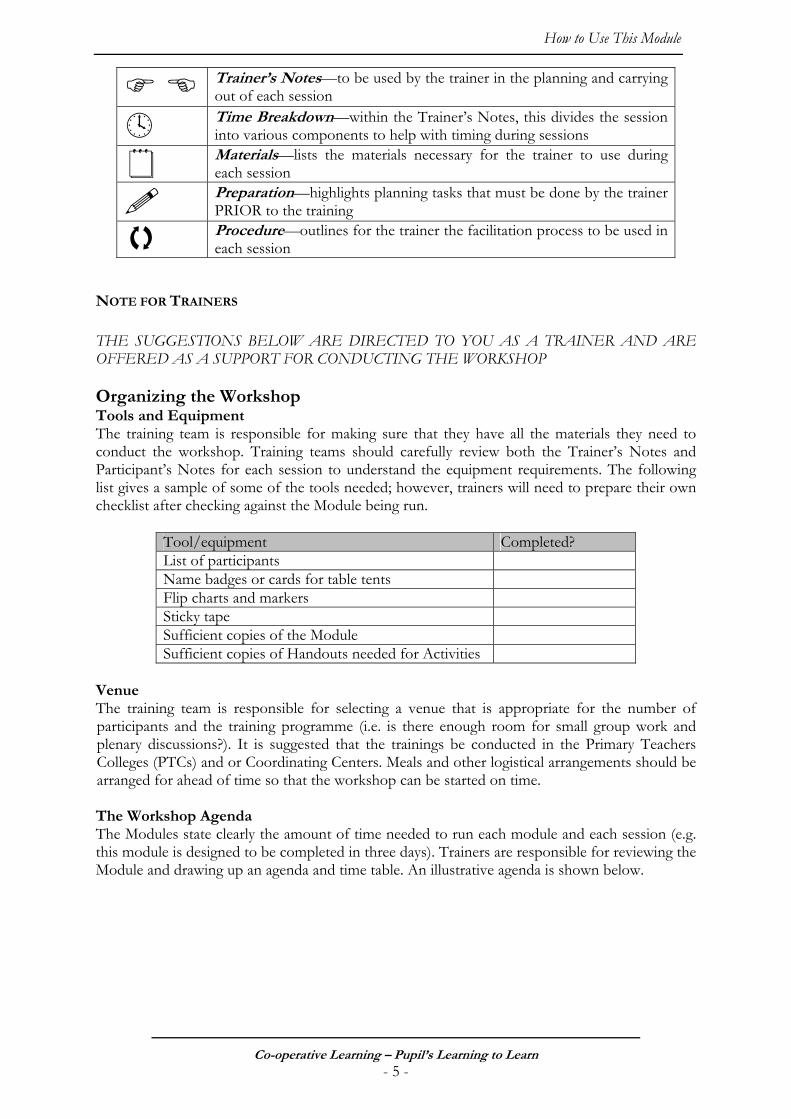
Trainer’s Notes—to be used by the trainer in the planning and carrying out of each session
Time Breakdown—within the Trainer’s Notes, this divides the session into various components to help with timing during sessions
Materials—lists the materials necessary for the trainer to use during each session
Preparation—highlights planning tasks that must be done by the trainer PRIOR to the training
Procedure—outlines for the trainer the facilitation process to be used in each session
NOTE FOR TRAINERS
THE SUGGESTIONS BELOW ARE DIRECTED TO YOU AS A TRAINER AND ARE OFFERED AS A SUPPORT FOR CONDUCTING THE WORKSHOP Organizing the Workshop Tools and Equipment The training team is responsible for making sure that they have all the materials they need to conduct the workshop. Training teams should carefully review both the Trainer’s Notes and Participant’s Notes for each session to understand the equipment requirements. The following list gives a sample of some of the tools needed; however, trainers will need to prepare their own checklist after checking against the Module being run.
Tool/equipment Completed? List of participants Name badges or cards for table tents Flip charts and markers Sticky tape Sufficient copies of the Module Sufficient copies of Handouts needed for Activities
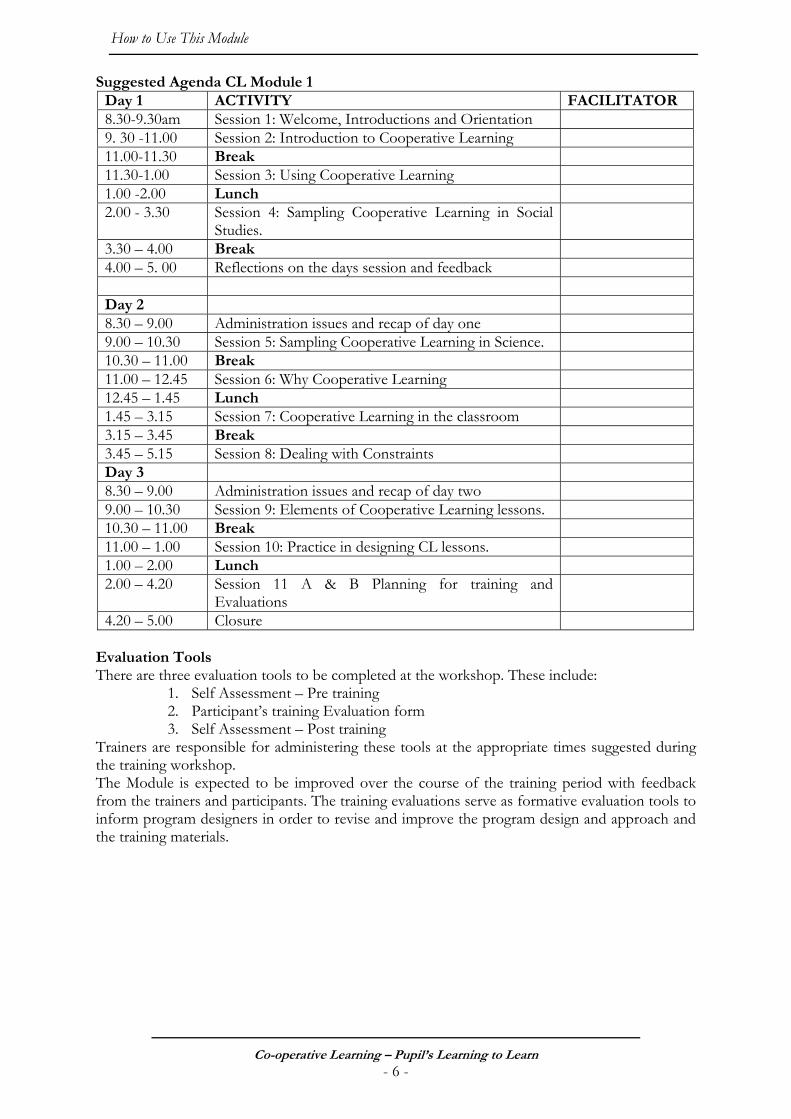
Venue The training team is responsible for selecting a venue that is appropriate for the number of participants and the training programme (i.e. is there enough room for small group work and plenary discussions?). It is suggested that the trainings be conducted in the Primary Teachers Colleges (PTCs) and or Coordinating Centers. Meals and other logistical arrangements should be arranged for ahead of time so that the workshop can be started on time. The Workshop Agenda The Modules state clearly the amount of time needed to run each module and each session (e.g. this module is designed to be completed in three days). Trainers are responsible for reviewing the Module and drawing up an agenda and time table. An illustrative agenda is shown below.
How to Use This Module
Co-operative Learning – Pupil’s Learning to Learn - 6 -
Suggested Agenda CL Module 1 Day 1 ACTIVITY FACILITATOR 8.30-9.30am Session 1: Welcome, Introductions and Orientation 9. 30 -11.00 Session 2: Introduction to Cooperative Learning 11.00-11.30 Break 11.30-1.00 Session 3: Using Cooperative Learning 1.00 -2.00 Lunch 2.00 - 3.30 Session 4: Sampling Cooperative Learning in Social
Studies.
3.30 – 4.00 Break 4.00 – 5. 00 Reflections on the days session and feedback Day 2 8.30 – 9.00 Administration issues and recap of day one 9.00 – 10.30 Session 5: Sampling Cooperative Learning in Science. 10.30 – 11.00 Break 11.00 – 12.45 Session 6: Why Cooperative Learning 12.45 – 1.45 Lunch 1.45 – 3.15 Session 7: Cooperative Learning in the classroom 3.15 – 3.45 Break 3.45 – 5.15 Session 8: Dealing with Constraints Day 3 8.30 – 9.00 Administration issues and recap of day two 9.00 – 10.30 Session 9: Elements of Cooperative Learning lessons. 10.30 – 11.00 Break 11.00 – 1.00 Session 10: Practice in designing CL lessons. 1.00 – 2.00 Lunch 2.00 – 4.20 Session 11 A & B Planning for training and
Evaluations
4.20 – 5.00 Closure Evaluation Tools There are three evaluation tools to be completed at the workshop. These include:
1. Self Assessment – Pre training 2. Participant’s training Evaluation form 3. Self Assessment – Post training
Trainers are responsible for administering these tools at the appropriate times suggested during the training workshop. The Module is expected to be improved over the course of the training period with feedback from the trainers and participants. The training evaluations serve as formative evaluation tools to inform program designers in order to revise and improve the program design and approach and the training materials.
Session 1: Welcome, Introductions and Orientation
Co-operative Learning – Pupil’s Learning to Learn - 7 -
SESSION 1: WELCOME, INTRODUCTIONS AND
ORIENTATION
☼ “Professional growth means… working together!” “Learn the art of learning and you are well on the way to achievement”- ‘Greenville Kleiser’
Objectives: By completing the activities of this session, participants should be able to:
• Identify other participants, including some of those they are meeting for the first time.
• Explain key administrative issues and procedures related to the workshop. • Identify ground rules/norms of behaviours for the workshop. • Discuss participants’ expectations for the workshop.
Duration: 1 hour
Content: In the opening minutes of the workshop, the training team has the opportunity to establish a positive and collaborative working environment. The rapport that is established during this time can be critical to the engagement of participants. Also, it is an appropriate time to discuss administrative matters and workshop ground rules. Finally, this session invites participants to share their expectations for the workshop.
PARTNER INTRODUCTIONS: 20 MINUTES
Ask participants to pair-up with someone they know little or nothing about, and to take 5 minutes to get to know each other, as they will need to introduce each other to the larger group, focusing on four things:
1. Their names 2. Designation and school 3. The most interesting experience that enabled them to learn 4. The greatest challenge they have met in their efforts to cause learning to occur
ADMINISTRATIVE MATTERS: 05 MINUTES Explain to participants the administrative arrangements for the workshop, including meals and lodging, travel costs and anything else that is appropriate.
WORKSHOP GROUND RULES: 10 MINUTES It is important that the training team together with the participants establish ground rules/workshop norms that should govern the rest of the workshop. Any ideas are acceptable but you might consider adding a few practical ones like:
1. Participants and trainers all have the responsibility of ensuring that sessions begin and end on time.
2. No smoking in the classroom. 3. Cell phones turned off or put to discreet/silent. 4. Speak out audibly when making a contribution or asking a question.
Session 1: Welcome, Introductions and Orientation
Co-operative Learning – Pupil’s Learning to Learn - 8 -
5. Respect the viewpoints of others. As rules are suggested, write them on a flip chart. Allow 5 to 10 minutes for this activity then take a vote to make the rules “official”. Display the rules in a prominent place in the room.
EXPECTATIONS 10: MINUTES Invite participants to carry out Activity 1.1 – Sharing Expectations.
Activity 1.1 – Sharing Expectations (10 minutes) It can be valuable for both participants and the trainer if participants share the expectations with which they arrive at a course. Spend 3 minutes reflecting on the following questions: • When you were invited to this course on initiatives ‘Towards Improved classroom
Instruction: Cooperative Learning in the classroom’ – how did you think you might benefit from the course?
• What impact might the things you learn in this workshop have on your practice and performance as an educator?
The trainer will assist you to share your ideas in a plenary session.
ORIENTATION:
THE CASCADE APPROACH: 15 MINUTES Explaining to the participants that they are part of a “cascade” that will be used to deliver training in their district to as many teachers as possible. In the cascade approach a small number of “national trainers” will be trained first. The national trainers will then train a group of trainers of trainers at the district level. Finally, the district level trainers will train school representatives that include the head teachers and the deputy or one very active teacher who will in turn deliver the training directly to the teachers in their schools.
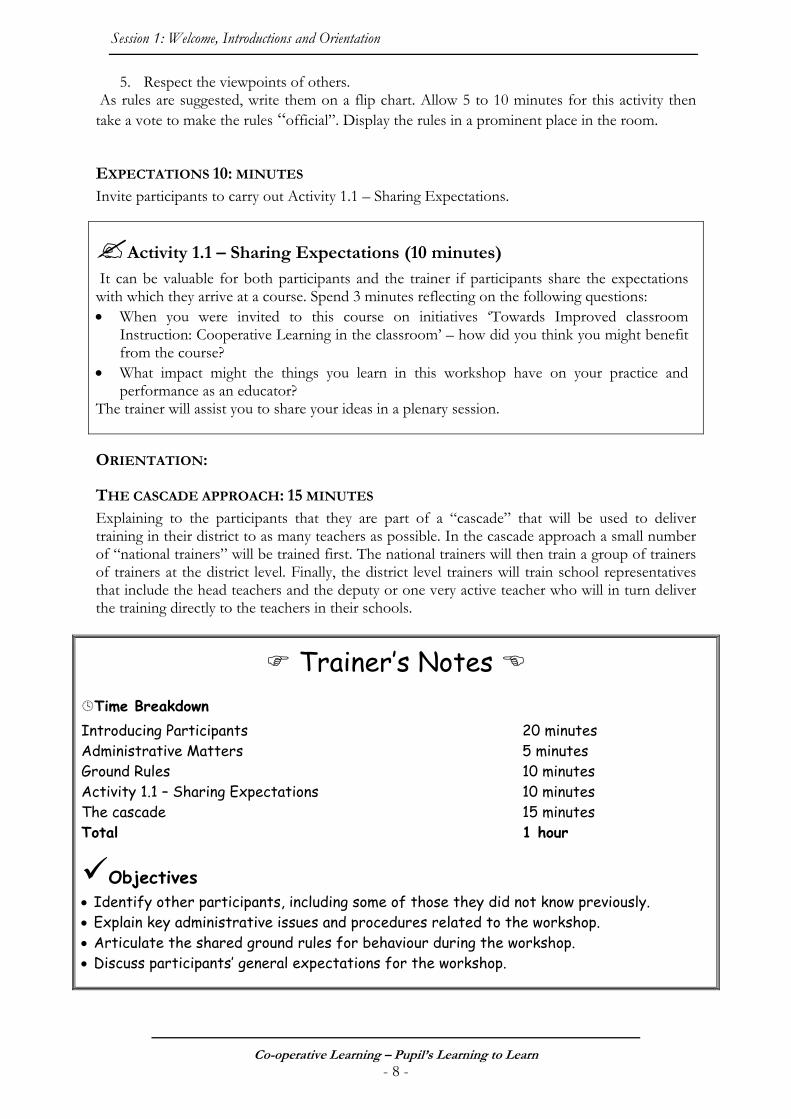
Trainer’s Notes Time Breakdown
Introducing Participants 20 minutes Administrative Matters 5 minutes Ground Rules 10 minutes Activity 1.1 – Sharing Expectations 10 minutes The cascade 15 minutes Total 1 hour
Objectives • Identify other participants, including some of those they did not know previously. • Explain key administrative issues and procedures related to the workshop. • Articulate the shared ground rules for behaviour during the workshop. • Discuss participants’ general expectations for the workshop.
Session 1: Welcome, Introductions and Orientation
Co-operative Learning – Pupil’s Learning to Learn - 9 -
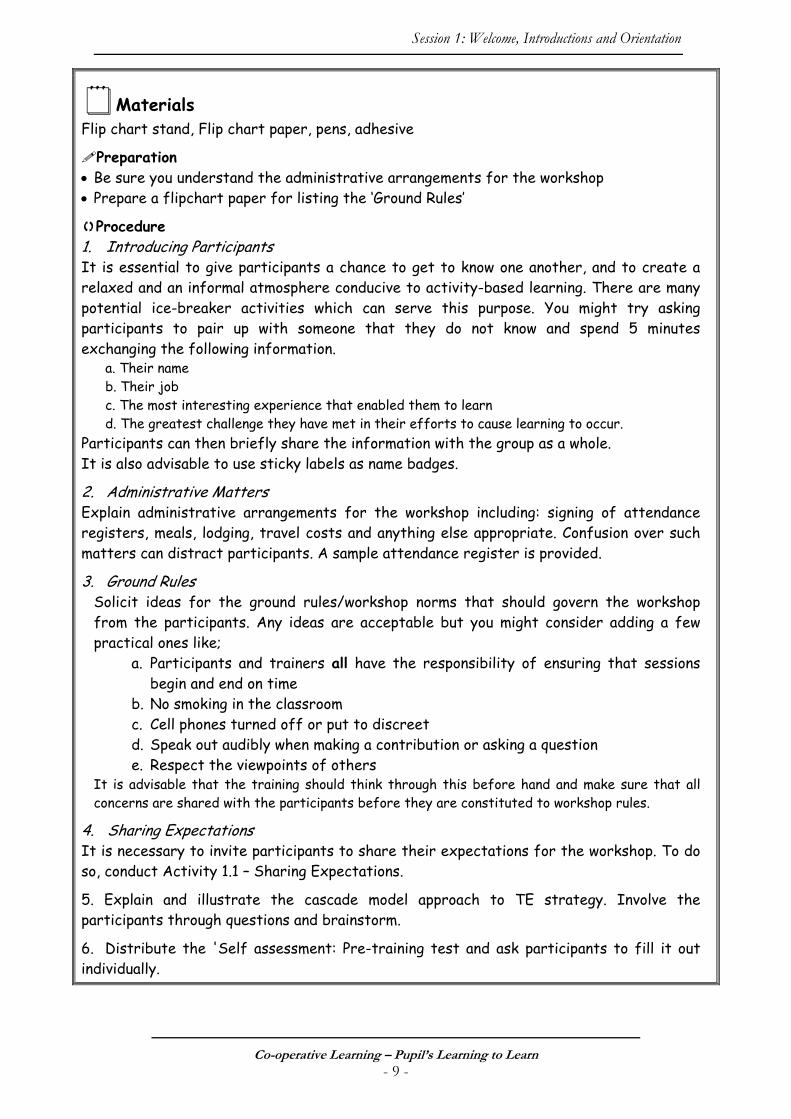
Materials Flip chart stand, Flip chart paper, pens, adhesive
Preparation • Be sure you understand the administrative arrangements for the workshop • Prepare a flipchart paper for listing the ‘Ground Rules’
Procedure 1. Introducing Participants It is essential to give participants a chance to get to know one another, and to create a relaxed and an informal atmosphere conducive to activity-based learning. There are many potential ice-breaker activities which can serve this purpose. You might try asking participants to pair up with someone that they do not know and spend 5 minutes exchanging the following information.
a. Their name b. Their job c. The most interesting experience that enabled them to learn d. The greatest challenge they have met in their efforts to cause learning to occur.
Participants can then briefly share the information with the group as a whole. It is also advisable to use sticky labels as name badges. 2. Administrative Matters Explain administrative arrangements for the workshop including: signing of attendance registers, meals, lodging, travel costs and anything else appropriate. Confusion over such matters can distract participants. A sample attendance register is provided. 3. Ground Rules
Solicit ideas for the ground rules/workshop norms that should govern the workshop from the participants. Any ideas are acceptable but you might consider adding a few practical ones like;
a. Participants and trainers all have the responsibility of ensuring that sessions begin and end on time
b. No smoking in the classroom c. Cell phones turned off or put to discreet d. Speak out audibly when making a contribution or asking a question e. Respect the viewpoints of others
It is advisable that the training should think through this before hand and make sure that all concerns are shared with the participants before they are constituted to workshop rules.
4. Sharing Expectations It is necessary to invite participants to share their expectations for the workshop. To do so, conduct Activity 1.1 – Sharing Expectations. 5. Explain and illustrate the cascade model approach to TE strategy. Involve the participants through questions and brainstorm. 6. Distribute the 'Self assessment: Pre-training test and ask participants to fill it out individually.
Session 2: Introduction to Cooperative Learning
Co-operative Learning – Pupil’s Learning to Learn - 10 -
SESSION 2: INTRODUCTION TO COOPERATIVE
LEARNING
☼ “Professional growth means… working together!” “Learn the art of learning and you are well on the way to achievement”- ‘Granville Kleiser’
Objectives: By completing the activities of this session, participants should be able to:
• Differentiate among types of learning; competitive, individualistic, and cooperative learning.
• Define and describe the five essential elements of cooperative learning.
Duration: 1½ hour
Rationale: 05 minutes This session will introduce the participants (trainer, head teacher or teacher) to the key components of Cooperative Learning. The participants will explore the elements of Cooperative Learning by living through the experience of a cooperative lesson while they learn more about the approach.
Content:
THE CONCEPT OF COOPERATIVE LEARNING All teaching approaches strive to enhance learning. Cooperative Learning as a teaching approach emphasizes the idea that learners should work together to learn and are responsible for their team-mates’ learning as well as their own. It is a teaching method that features learners working together cooperatively in small groups and focuses on teaching social skills as well as academic content. In addition Cooperative Learning focuses on the use of team goals and team success which can be achieved only if all members of the team learn the objectives being taught. It highlights that the learner’s task is not just to do some thing as a team, but to learn something as a team. Therefore in this session the participants will have to discuss the differences among the three types of learning namely; “Individualistic learning,” “Competitive learning”, and “Cooperative learning”. Since the situations are almost self-explanatory it should not take the participants long to decide which type of learning is represented by each of the situations described in Handout A ‘Types of Learning’ on page 54.
Activity 2.1- Identifying Cooperative Learning as an approach (15 minutes) 1. Individually read through Handout A (Types of Learning) page 54. The handout describes three situations. You will need to identify which is an example of competitive learning, individualistic learning and cooperative learning. 2. In a plenary discuss the differences among the three types of learning. Explore what the possible feelings learners taught in the different types of learning might feel.
Session 2: Introduction to Cooperative Learning
Co-operative Learning – Pupil’s Learning to Learn - 11 -
DISCUSSION POINTS It is important for us to be aware that a part from teaching curriculum content, to learners there are hidden messages that particular teaching styles, methods or approaches pass to the learners. Hence, each type of learning that has been discussed here can send the learner a hidden message as follows;
• In competitive learning the less confident learner can get the message: “I sink and you swim or you sink and I swim.”
• For some learners individualistic learning can carry with it the message: “I’m alone and there is nobody to help.” Point out that these messages are not necessarily bad and that some learners do very well with individualistic and competitive learning. The trick is to know who does well with which method and when to use them.
• In CL the message for many learners is: “we sink or swim together.” This message is comforting for many learners and encourages them to work together to maximize their own and their classmate’s learning.
Remember! That all methods work better with some learners than others but that CL has been shown to be effective with a wide range of pupils. The following part of the session will take you through an exercise that demonstrates CL and later a discussion on the reasons why it is an effective method of teaching.
Activity 2.2: Practicing group work and group roles (30 minutes) 1. Have the participants break into groups of five. Each group should identify: - a “leader” (who will moderate the discussion and keep it on-topic), - a “timekeeper” (who will keep track of time within which the group has to finish), - an “encourager” (who will ensure that everyone participates effectively), - a “reporter” (who will report the group’s findings to the whole class), and - an “explainer” (who will ensure that all members understand the group’s solutions to the
task to be done). 2. Using Handout B, (Survival in Lake Victoria) page 55, have the participants do the
following; a) Read the story individually. b) Rank the items on the list from most important to least important (1 for most important,
10 for least). c) Discuss the situation as a group and, decide on one ranking that everyone agrees to. d) Make a list of the reasons for the group’s choice of rankings. e) Think critically and note how some of the agreements were made and how you
individually felt while working on the given task with others. (You might need to share some of the feelings in relation to how they promote or inhibit learning).
3. Have the reporters present their group’s results to the rest of the participants. The report should include responses to (2.b) and (2.d) above
4. Hold a plenary and lead a discussion that reflects on the “Survival” exercise.
DISCUSSION POINTS: 10 MINUTES Focus the discussion on these questions:
• Could the individuals within the groups have achieved the goals of the exercise by working alone?
• What kind of skills did the participants use in doing this exercise?
Session 2: Introduction to Cooperative Learning
Co-operative Learning – Pupil’s Learning to Learn - 12 -
• Why was it important to have a group encourager? • Were there differences of opinion as to the rankings? • How did the group resolve the differences?
ELEMENTS OF COOPERATIVE LEARNING: Like any other teaching approach, Cooperative Learning has characteristics or attributes through which it can be identified or distinguished. The primary attribute of cooperative learning is learners interacting with each other in groups. The characteristic types of interactions that teachers should promote are as follows.
1. Positive interdependence - “We sink or swim together.” Success in good cooperative learning depends upon each learner doing some independent thinking and then contributing that thinking to the thought processes of the group. All individuals must succeed for the group to succeed.
2. Face to Face Positive Interaction - Success in an effective/productive cooperative learning activity depends upon group members interacting face to face with one another, promoting learning and success by sharing, encouraging, helping each other, and checking and testing each other for understanding.
3. Individual and Group Accountability - Each learner in the group must come to a
satisfactory level of understanding the social skills and academic content and should be able to demonstrate what s/he has learnt, and then build on that understanding to help the group succeed.
4. Use of Interpersonal Skills - Each learner must learn and practice the social skills required for teamwork such as leadership, trust, patience, respect, communication, listening to others, staying on task, and conflict management.
5. Evaluate Progress as a Group - Learners should discuss among themselves how well they are working together and achieving their individual and team goals as well as ways to proceed most effectively.
Activity 2.3 - Elements of Cooperative Learning (20 minutes)
Work in groups and use Handout C (Elements of Cooperative Learning) page 56. The handout describes each of the Elements of Cooperative Learning and gives examples to illustrate them. 1. Briefly discuss what is meant by each element. (Do this together as a whole class) 2. In five groups of the same size, each group should focus on one of the five elements and discuss the way(s) their assigned element was incorporated into the “Survival in Lake Victoria” activity. Then share each group’s results in a plenary discussion.
* Think about how important it is to always consider these elements in the teaching and learning process.
SUMMARY OF KEY POINTS: 10 MINUTES
• In CL the learners operate in small groups and the teacher assigns specific tasks to be done and roles to be assumed. The learners are required to achieve both individually and as a
Session 2: Introduction to Cooperative Learning
Co-operative Learning – Pupil’s Learning to Learn - 13 -
group. This environment is comforting for many learners and promotes learning of both content and social skills.
• Individualistic learning requires the learner to operate independently to learn what is required. This can be threatening to some learners.
• In competitive learning the learners operate independently and seek to perform better than their classmates. This can be intimidating to some learners.
• Cooperative learning should be designed to include five elements: 1. Positive Interdependence 2. Face to Face Interaction 3. Individual and Group Accountability 4. Use of Interpersonal Skills 5. Group Processing/Teamwork
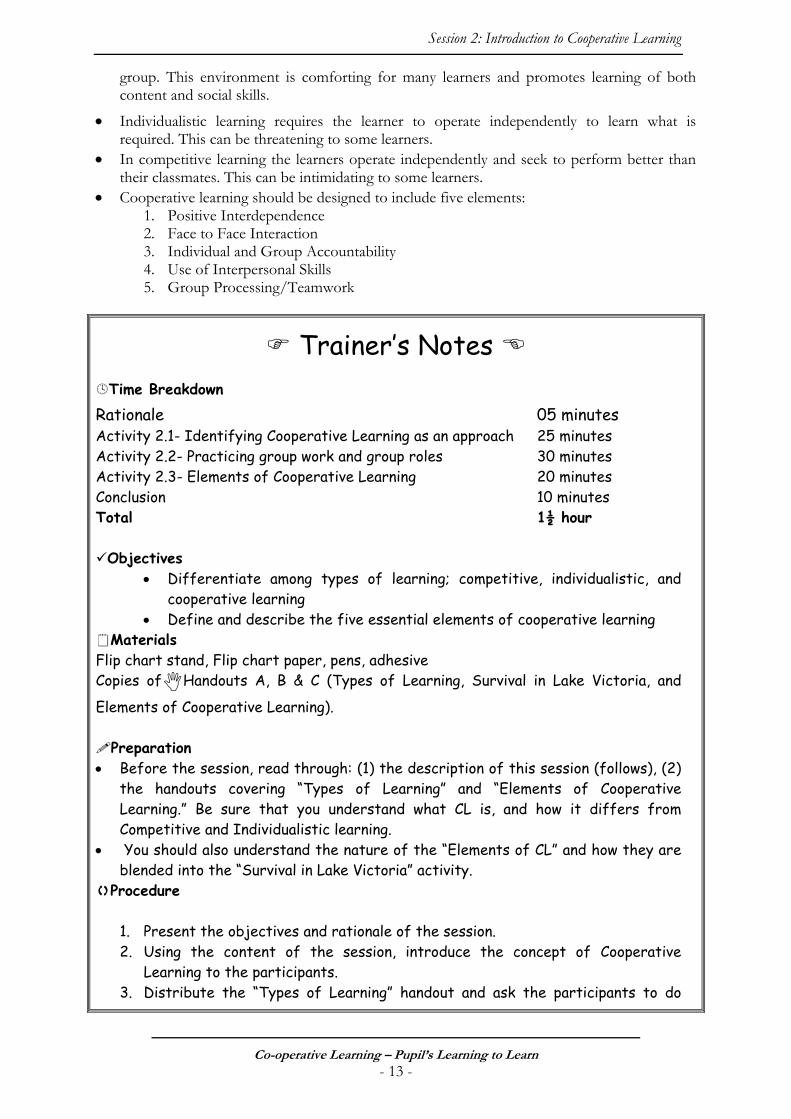
Trainer’s Notes Time Breakdown
Rationale 05 minutes Activity 2.1- Identifying Cooperative Learning as an approach 25 minutes Activity 2.2- Practicing group work and group roles 30 minutes Activity 2.3- Elements of Cooperative Learning 20 minutes Conclusion 10 minutes Total 1½ hour Objectives
• Differentiate among types of learning; competitive, individualistic, and cooperative learning
• Define and describe the five essential elements of cooperative learning Materials
Flip chart stand, Flip chart paper, pens, adhesive Copies of Handouts A, B & C (Types of Learning, Survival in Lake Victoria, and
Elements of Cooperative Learning).
Preparation • Before the session, read through: (1) the description of this session (follows), (2)
the handouts covering “Types of Learning” and “Elements of Cooperative Learning.” Be sure that you understand what CL is, and how it differs from Competitive and Individualistic learning.
• You should also understand the nature of the “Elements of CL” and how they are blended into the “Survival in Lake Victoria” activity.
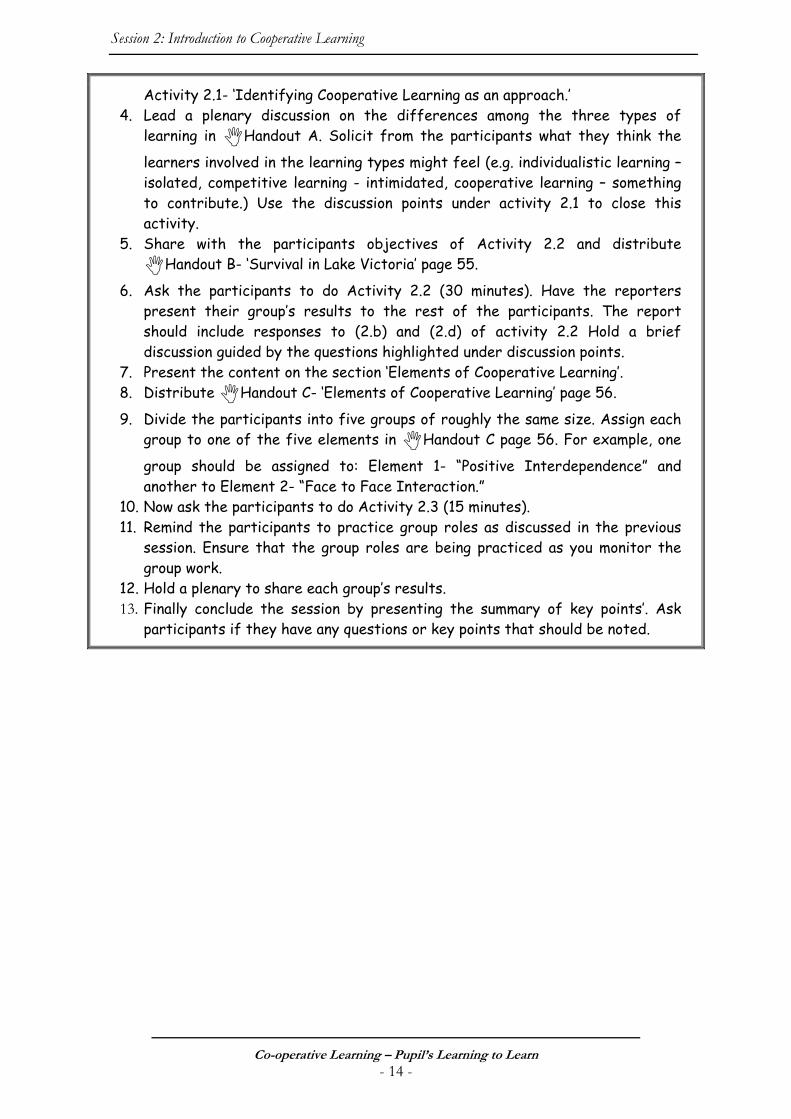
Procedure
1. Present the objectives and rationale of the session. 2. Using the content of the session, introduce the concept of Cooperative
Learning to the participants. 3. Distribute the “Types of Learning” handout and ask the participants to do
Session 2: Introduction to Cooperative Learning
Co-operative Learning – Pupil’s Learning to Learn - 14 -
Activity 2.1- ‘Identifying Cooperative Learning as an approach.’ 4. Lead a plenary discussion on the differences among the three types of
learning in Handout A. Solicit from the participants what they think the
learners involved in the learning types might feel (e.g. individualistic learning – isolated, competitive learning - intimidated, cooperative learning – something to contribute.) Use the discussion points under activity 2.1 to close this activity.
5. Share with the participants objectives of Activity 2.2 and distribute Handout B- ‘Survival in Lake Victoria’ page 55.
6. Ask the participants to do Activity 2.2 (30 minutes). Have the reporters present their group’s results to the rest of the participants. The report should include responses to (2.b) and (2.d) of activity 2.2 Hold a brief discussion guided by the questions highlighted under discussion points.
7. Present the content on the section ‘Elements of Cooperative Learning’. 8. Distribute Handout C- ‘Elements of Cooperative Learning’ page 56.
9. Divide the participants into five groups of roughly the same size. Assign each group to one of the five elements in Handout C page 56. For example, one
group should be assigned to: Element 1- “Positive Interdependence” and another to Element 2- “Face to Face Interaction.”
10. Now ask the participants to do Activity 2.3 (15 minutes). 11. Remind the participants to practice group roles as discussed in the previous
session. Ensure that the group roles are being practiced as you monitor the group work.
12. Hold a plenary to share each group’s results. 13. Finally conclude the session by presenting the summary of key points’. Ask
participants if they have any questions or key points that should be noted.
Session 3: Using Cooperative Learning
Co-operative Learning – Pupil’s Learning to Learn - 15 -
SESSION 3: USING COOPERATIVE LEARNING
☼ “The truly educated person is the one who has learned how to learn and how to change” (Carl Rogers – 1969)
Objectives: By completing the activities of this session, participants should be able to:
• Identify and describe the steps that teachers should carry out when employing CL. • Analyze a CL activity and describe the way in which the instructional steps and
elements of CL are illustrated. • Describe alternative ways of organizing learners to engage in Cooperative Learning.
Duration: 1½ hours
Rationale: 05 minutes The previous session explored the difference between Cooperative Learning and other types of learning and also discussed the essential elements of Cooperative Learning. This session will familiarise the participants with the steps that should be used when employing Cooperative Learning. It will also enable participants to analyse a CL activity and describe the ways in which the instructional steps and elements of CL are included. It will also enable participants to consider and identify alternative ways of organizing learners to engage in CL and other interactive approaches. The session will have two parts. Part one will explore a variety of activities that teachers normally carry out as they implement CL, while part two will focus on alternative ways of structuring CL.
Content:
USING COOPERATIVE LEARNING: Cooperative Learning helps you accomplish a number of important goals simultaneously. It helps you raise the achievement of all categories of students (gifted, high-achievers, average, slow- achievers and academically handicapped). Secondly, it helps you build positive relationships among learners; and thirdly it gives learners the experiences they need for healthy social, psychological, and cognitive development. However, above all this using Cooperative Learning entails working hard; being very active during the lesson and experiencing the joy of seeing your learners develop and become responsible individuals. Therefore, as with many other teaching approaches you must constantly practice, read, review, revise, learn more, initiate, improvise and keep moving forward. The following activity will help you experience a Cooperative Learning lesson. You should act both as a trainer and a learner in a CL lesson so as to experience the process and learn about the approach as well.
Session 3: Using Cooperative Learning
Co-operative Learning – Pupil’s Learning to Learn - 16 -
Activity 3.1- Experiencing a Cooperative Lesson (25 minutes) Participants will assume they are learners in a P.2 maths class and that the trainer is their teacher. You will also assume that;
a) As a P2 class you have been learning about rectangles. b) P2 can identify rectangles.
The trainer will teach the lesson as outlined in Handout D –The Rectangle lesson page 57 Your task is to identify differences between the lesson that you just completed and the way most teachers would probably teach the topic.
DISCUSSION POINTS: In reflecting on the rectangle lesson the participants should be able to identify and explain that it illustrates a number of characteristics of a CL lesson which include the following;
• Learners working together. • Learners cooperating and social skills as well as academic content are taught. • Learners having time to reflect on the task individually and deciding on their
contribution to the group. • Learners sharing their thoughts with others. • Learners coming to agreements and making concessions in light of their new
learning. • Learners developing and making collective decisions.
Research has shown that learner’s mastery of the content being taught is often better with CL. Also relate the discussion to the differences between individualistic, competitive, and CL.
STEPS IN USING COOPERATIVE LEARNING: There are many ways of conducting cooperative learning lessons but most involve five steps that teachers should follow. The steps are procedures that teachers should follow during any good CL lesson. Listed here in the order in which teachers normally carry them out. (Refer to Handout E – ‘Steps in using Cooperative Learning’ page 59 (for a detailed description of each step)
1. Explain the objective(s) to the learners. 2. Set up the work. 3. Define the task and how learners are to relate to each other. 4. Monitor. 5. Evaluate the learning and behaviour of individuals as well as groups.
It is now time for us to attempt to find out whether we can identify where the steps of Cooperative Learning were employed in ‘the rectangle lesson’.
Session 3: Using Cooperative Learning
Co-operative Learning – Pupil’s Learning to Learn - 17 -
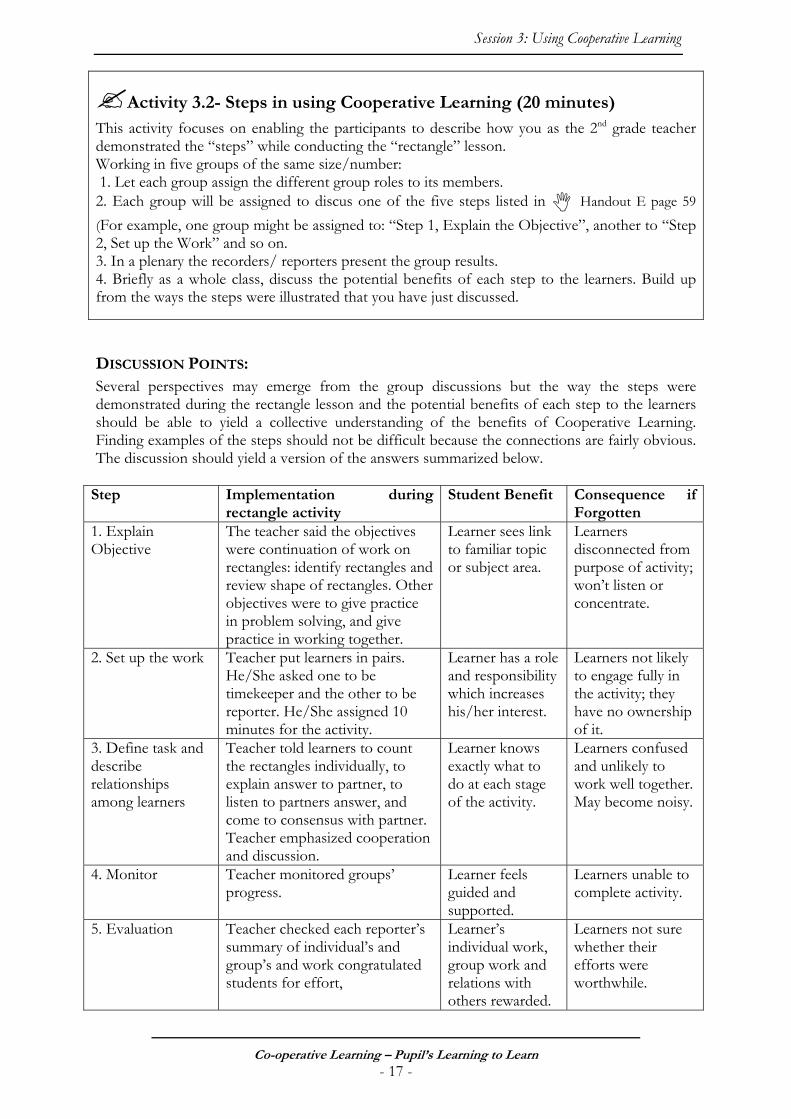
Activity 3.2- Steps in using Cooperative Learning (20 minutes) This activity focuses on enabling the participants to describe how you as the 2nd grade teacher demonstrated the “steps” while conducting the “rectangle” lesson. Working in five groups of the same size/number: 1. Let each group assign the different group roles to its members. 2. Each group will be assigned to discus one of the five steps listed in Handout E page 59
(For example, one group might be assigned to: “Step 1, Explain the Objective”, another to “Step 2, Set up the Work” and so on. 3. In a plenary the recorders/ reporters present the group results. 4. Briefly as a whole class, discuss the potential benefits of each step to the learners. Build up from the ways the steps were illustrated that you have just discussed.
DISCUSSION POINTS: Several perspectives may emerge from the group discussions but the way the steps were demonstrated during the rectangle lesson and the potential benefits of each step to the learners should be able to yield a collective understanding of the benefits of Cooperative Learning. Finding examples of the steps should not be difficult because the connections are fairly obvious. The discussion should yield a version of the answers summarized below.
Step Implementation during rectangle activity
Student Benefit Consequence if Forgotten
1. Explain Objective
The teacher said the objectives were continuation of work on rectangles: identify rectangles and review shape of rectangles. Other objectives were to give practice in problem solving, and give practice in working together.
Learner sees link to familiar topic or subject area.
Learners disconnected from purpose of activity; won’t listen or concentrate.
2. Set up the work Teacher put learners in pairs. He/She asked one to be timekeeper and the other to be reporter. He/She assigned 10 minutes for the activity.
Learner has a role and responsibility which increases his/her interest.
Learners not likely to engage fully in the activity; they have no ownership of it.
3. Define task and describe relationships among learners
Teacher told learners to count the rectangles individually, to explain answer to partner, to listen to partners answer, and come to consensus with partner. Teacher emphasized cooperation and discussion.
Learner knows exactly what to do at each stage of the activity.
Learners confused and unlikely to work well together. May become noisy.
4. Monitor Teacher monitored groups’ progress.
Learner feels guided and supported.
Learners unable to complete activity.
5. Evaluation Teacher checked each reporter’s summary of individual’s and group’s and work congratulated students for effort,
Learner’s individual work, group work and relations with others rewarded.
Learners not sure whether their efforts were worthwhile.
Session 3: Using Cooperative Learning
Co-operative Learning – Pupil’s Learning to Learn - 18 -
Activity 3.3- Identifying Elements of Cooperative Learning (15 minutes) This activity will enable the participants to reflect on how the elements of CL were employed in the rectangle lesson. 1. Review Handout C (Elements of Cooperative Learning) page 56 from, the previous
session. 2. In plenary discuss the ways in which the elements were demonstrated during the rectangle
lesson.
VARIETIES OF COOPERATIVE LEARNING: There are many ways to organize for cooperative learning. The procedure used in the lesson about rectangles was adapted from a model for CL called “Circles of Learning” in which learners are organized into small groups which operate more or less independently.
Activity 3.4- Varieties of Cooperative Learning (20 minutes) This activity will enable the participants to reflect on a variety of CL models that can be used in classroom instruction. 1. Study Handout F (Varieties of Cooperative Learning) page 60 and briefly as a whole
group discuss how the procedures work or the differences between them. 2. Working in six groups, assign one of the three techniques to two of the groups (e.g. two
groups will be assigned to the Student Team- Achievement Divisions (STAD) technique; two groups to Jigsaw One and two groups to Teams Games Tournament (TGT)). The discussions and reports should focus on three questions: a) What advantages does the method have? b) What are the limitations of the method? c) Can the method be used by Ugandan primary school teachers?
3. Again each group should assign the group roles to its members. (It is important to practise the group roles in every group activity that will be done during the training session).
4. In a plenary, each group reports back. For efficiency,, the reporters should not repeat comments that have been made in previous reports. (Note that this is a technique meant to keep every participant alert and attentive).
DISCUSSION POINTS: 05 MINUTES Your discussion point will likely include the following: a) Jigsaw
Advantages: - Large amount of content can be covered. - Learners are challenged to learn more about a particular task so as to
teach others. - Learners plan and explore various ways to deliver their facts to the
teammates and by so doing understand better. Limitation: - It may be challenging to provide adequate number of resources needed
by expert groups for study. b) Student Teams – Achievement Divisions (STAD)
Advantages: - Learners strive to teach others good mastery of the tasks at hand. - As individuals learners strive to do well for their groups hence
concentration and participation during group discussions.
Session 3: Using Cooperative Learning
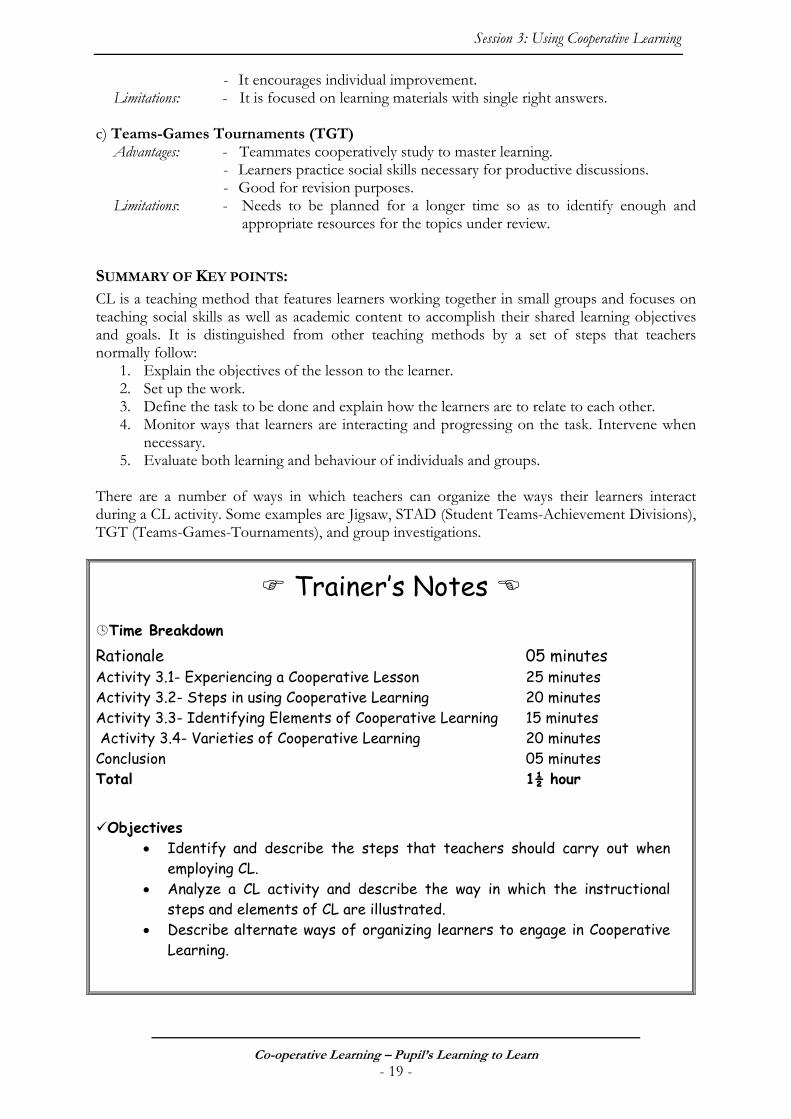
Co-operative Learning – Pupil’s Learning to Learn - 19 -
- It encourages individual improvement. Limitations: - It is focused on learning materials with single right answers.
c) Teams-Games Tournaments (TGT)
Advantages: - Teammates cooperatively study to master learning. - Learners practice social skills necessary for productive discussions. - Good for revision purposes.
Limitations: - Needs to be planned for a longer time so as to identify enough and appropriate resources for the topics under review.
SUMMARY OF KEY POINTS: CL is a teaching method that features learners working together in small groups and focuses on teaching social skills as well as academic content to accomplish their shared learning objectives and goals. It is distinguished from other teaching methods by a set of steps that teachers normally follow:
1. Explain the objectives of the lesson to the learner. 2. Set up the work. 3. Define the task to be done and explain how the learners are to relate to each other. 4. Monitor ways that learners are interacting and progressing on the task. Intervene when
necessary. 5. Evaluate both learning and behaviour of individuals and groups.
There are a number of ways in which teachers can organize the ways their learners interact during a CL activity. Some examples are Jigsaw, STAD (Student Teams-Achievement Divisions), TGT (Teams-Games-Tournaments), and group investigations.
Trainer’s Notes Time Breakdown
Rationale 05 minutes Activity 3.1- Experiencing a Cooperative Lesson 25 minutes Activity 3.2- Steps in using Cooperative Learning 20 minutes Activity 3.3- Identifying Elements of Cooperative Learning 15 minutes Activity 3.4- Varieties of Cooperative Learning 20 minutes Conclusion 05 minutes Total 1½ hour
Objectives
• Identify and describe the steps that teachers should carry out when employing CL.
• Analyze a CL activity and describe the way in which the instructional steps and elements of CL are illustrated.
• Describe alternate ways of organizing learners to engage in Cooperative Learning.
Session 3: Using Cooperative Learning
Co-operative Learning – Pupil’s Learning to Learn - 20 -
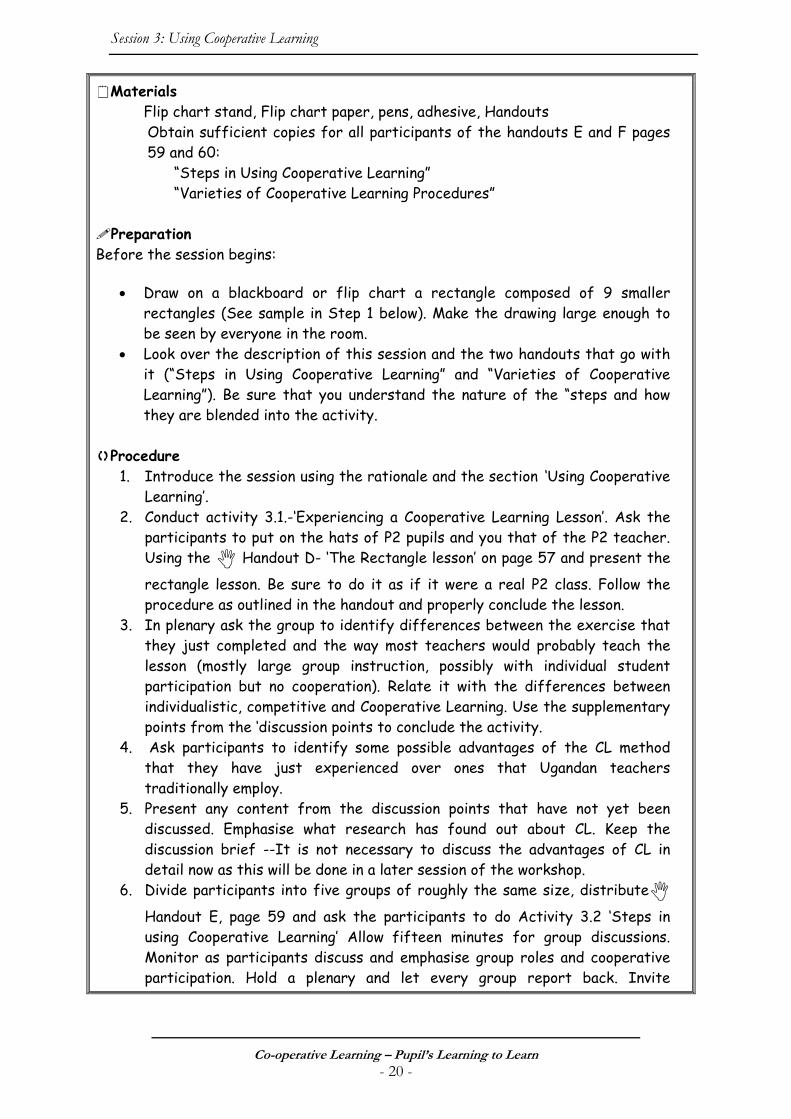
Materials Flip chart stand, Flip chart paper, pens, adhesive, Handouts
Obtain sufficient copies for all participants of the handouts E and F pages 59 and 60:
“Steps in Using Cooperative Learning” “Varieties of Cooperative Learning Procedures”
Preparation
Before the session begins:
• Draw on a blackboard or flip chart a rectangle composed of 9 smaller rectangles (See sample in Step 1 below). Make the drawing large enough to be seen by everyone in the room.
• Look over the description of this session and the two handouts that go with it (“Steps in Using Cooperative Learning” and “Varieties of Cooperative Learning”). Be sure that you understand the nature of the “steps and how they are blended into the activity.
Procedure
1. Introduce the session using the rationale and the section ‘Using Cooperative Learning’.
2. Conduct activity 3.1.-‘Experiencing a Cooperative Learning Lesson’. Ask the participants to put on the hats of P2 pupils and you that of the P2 teacher. Using the Handout D- ‘The Rectangle lesson’ on page 57 and present the
rectangle lesson. Be sure to do it as if it were a real P2 class. Follow the procedure as outlined in the handout and properly conclude the lesson.
3. In plenary ask the group to identify differences between the exercise that they just completed and the way most teachers would probably teach the lesson (mostly large group instruction, possibly with individual student participation but no cooperation). Relate it with the differences between individualistic, competitive and Cooperative Learning. Use the supplementary points from the ‘discussion points to conclude the activity.
4. Ask participants to identify some possible advantages of the CL method that they have just experienced over ones that Ugandan teachers traditionally employ.
5. Present any content from the discussion points that have not yet been discussed. Emphasise what research has found out about CL. Keep the discussion brief --It is not necessary to discuss the advantages of CL in detail now as this will be done in a later session of the workshop.
6. Divide participants into five groups of roughly the same size, distribute Handout E, page 59 and ask the participants to do Activity 3.2 ‘Steps in using Cooperative Learning’ Allow fifteen minutes for group discussions. Monitor as participants discuss and emphasise group roles and cooperative participation. Hold a plenary and let every group report back. Invite

Session 3: Using Cooperative Learning
Co-operative Learning – Pupil’s Learning to Learn - 21 -
comments by anyone on any report. Make special note if any group has been unable to find an example of their step within the activity.
7. Continue a discussion with the whole group to identify the way the steps were demonstrated during the rectangles lesson and the potential benefit of each step to the learners. List the responses on a flip chart and compare with the summary table in the discussion points. Be sure to highlight all the benefits and consequences if the steps are forgotten.
8. Ask participants to retrieve Handout C, - ‘Elements of CL’ page 56 and in
five minutes remind themselves of the content. Follow this up by asking the participants to do Activity 3.3 - Experiencing Elements of CL. This should take not more than 10 minutes.
9. Present the section ‘Varieties of Cooperative Learning’. 10. Distribute Handout F-‘Varieties of Cooperative Learning’, page 60 and
have the participants do Activity 3.4- ‘Varieties of Cooperative Learning’. This should be done in 15 minutes.
11. Summarize the session using the main points under the section ‘summary of key points.
12. Hold a plenary to share the group reports. Then use the points under the section discussion points to supplement the participant’s Presentations on Activity 3.4.
Session 4: Sampling Cooperative Learning – In English
Co-operative Learning – Pupil’s Learning to Learn - 22 -
SESSION 4: SAMPLING COOPERATIVE LEARNING –
IN ENGLISH
☼ “What children can do together today, they can do alone tomorrow” (Vygotsky-1965)
Objectives: By completing the activities of this session, participants should be able to:
• Experience another CL lesson using content from the national curriculum for the lower primary grades.
• Describe the way the steps and elements of CL are incorporated into the demonstration lesson.
• Describe the use of a “Jigsaw” in the lesson.
Duration: 1 hour
Rationale: 05 minutes This session will give participants another experience with CL, again with content for lower primary level. They will explore the “Jigsaw” structure which is one of the ways of structuring CL in the classroom. To do this a simulation lesson will again be used to allow participants experience the procedure of the Jigsaw.
Content:
USING THE COOPERATIVE ‘JIGSAW’ STRUCTURE: When a jigsaw is mentioned, the picture every one holds in mind is several pieces of a whole being put together to form the whole again. This description is exactly what the Cooperative Jigsaw structure illustrates. It is a commonly used and effective way to organize Cooperative Learning. It is characterized by teammates within a cooperative group or home group becoming experts in one aspect of a given task or topic of study. For instance; if a cooperative group is studying the topic of ‘Ethnic groups in Uganda- the Bantu,’ one teammate could become an expert on “the cultural practices of the Bantu” another expert on “their governance structure” another “their current issues”. Individual expertise can then be developed with ‘experts’ from other cooperative groups of the same sub- task. Together ‘expert’ partners study their sub-tasks and plan effective ways to teach important information when they return to their ‘cooperative’ or ‘home’ groups in which the teammates take turns teaching one another. The cooperative or home group goal is that all teammates master all aspects of the major topic. The challenge for the teacher is to provide adequate source of information and structure the activity such that the experts are able to learn more on the tasks assigned and in turn teach their home group members. It is indeed important to think through the timing vis-à-vis the content to be covered so that the learners are able to work as a whole class, groups and as individuals.
Session 4: Sampling Cooperative Learning – In English
Co-operative Learning – Pupil’s Learning to Learn - 23 -
Activity 4.1- Using the Cooperative ‘Jigsaw’ Structure (25 minutes) Participants will assume they are learners in a P.2 English class and that you the trainer is their teacher.(They will put off their trainer hats) The participants will work as a whole class part of the time but will also work in groups and as individuals. The trainer will present the English lesson as outlined in Handout G- ‘The English lesson’ page 62. After the lesson participants should put on their trainer hats and move on to do the next activity immediately.
Activity 4.2 – Relating the “Jigsaw” to the Steps and Elements of CL (20 minutes) Participants should get back to their roles as trainers. 1. In reflecting over the English lesson as a whole group discuss how the steps and the
elements of CL were included. (Refer to the Handouts C and E; “Steps in Using Cooperative Learning” and “Elements of Cooperative Learning” pages 56 and 59 respectively).
2. Highlight the use of the ‘home groups’ and ‘expert groups’ in the lesson. Also refer to the Handout F pages 60–61.
SUMMARY OF KEY POINTS: 10 MINUTES The participants experienced another CL activity that covered content extracted from the national primary syllabus. This time the target was early primary pupils.
• All the steps and elements of CL were included in the activity--that is what made it an example of CL.
• The sample lesson included a “jigsaw” which is a commonly used and effective way to organise cooperative learning. The use of two types of groups was illustrated in the lesson. The ‘Jigsaw’ structure of Cooperative Learning involves four stages;
a) Learners in the ‘home groups’ assigning themselves to sub-tasks.
b) Each member of the home group then re-groups to the ‘expert groups’ which are formed by members from other ‘home groups’ with the same sub-task.
c) The learners re-constitute themselves back to ‘home groups’ to teach their members what they learnt from the ‘expert groups’.
d) All groups share in plenary what has been learnt through presentations on the sub-task. (The presentations are made by any member of any group – this is one way of evaluating individual and group processing).
Session 4: Sampling Cooperative Learning – In English
Co-operative Learning – Pupil’s Learning to Learn - 24 -
Trainer’s Notes Time Breakdown
Rationale 05 minutes Activity 4.1 – Using the Cooperative ‘jigsaw’ structure 25 minutes Activity 4.2 - Relating the “Jigsaw” to the Steps and Elements of CL 20 minutes Conclusion 10 minutes Total 1 hour
Objectives • Experience another CL lesson this one using content from the national
curriculum for the lower primary grades. • Describe the way that the steps and elements of CL were incorporated into
the demonstration lesson. • Describe the use of a “Jigsaw” in the lesson.
Materials Flip chart stand, Flip chart paper, pens, adhesive in addition;
Get the following items ready. Sheets of paper/ slates. Pencils /markers Wall charts, word cards, picture cards, real objects e.g. Flag, book, table etc Copies of one or more of the following textbooks: 1. Fountain Thematic Curriculum Reading 2 Scheme Bk2, pp… 2. National Primary School Curriculum for Uganda, Teacher’s Guide P2 pp…
Preparation Before the session you need to: • Organise furniture in a circular format and get enough space for sitting in a
group. Where the furniture is not easily obtainable or organised, learners may sit on the ground.
Procedure 1. Introduce the session by presenting the rationale. 2. Present the content of the section ‘Using the Cooperative Jigsaw structure’. 3. Do Activity 4.1- ‘Using the Cooperative ‘jigsaw’ structure’ by presenting the
English lesson following the procedure provided in Handout G on page 62. 4. After concluding the English lesson ‘Benefits to neighbourhood from school’,
immediately move to Activity 4.2. Guide the participants to relate the “Jigsaw” to the Steps and Elements of CL’.
5. Conclude the session by presenting the points in the section- summary of key points.
Session 5: Sampling Cooperative Learning – In Science
Co-operative Learning – Pupil’s Learning to Learn - 25 -
SESSION 5: SAMPLING COOPERATIVE LEARNING –
IN SCIENCE
☼ “Whoever explains and elaborates learns.”
Objectives: By completing the activities of this session, participants should be able to:
• Experience another CL lesson using content included from the national curriculum for middle primary.
• Describe and identify the way in which the steps and elements of CL were incorporated
into the demonstration lesson.
Duration: 1 hour
Rationale: 05 minutes The previous session explored the use of the ‘Jigsaw’ structure of Cooperative Learning This was illustrated using the Ugandan primary school curriculum content. In this session participants will also explore yet another structure of Cooperative learning called ‘Learning Together’. The process will again involve a sample lesson using primary school curriculum content this time from the middle primary. It is important that as the process unfolds each of the participants should reflect on how to utilize the structure being learnt in his or her training or teaching.
Content:
USING THE LEARNING TOGETHER STRUCTURE OF COOPERATIVE LEARNING: Learning Together is characterized by teammates in small heterogeneous (varied/mixed) groups working cooperatively to accomplish mutual learning goals. (Johnson & Johnson). Together, teammates work on an academic task which often involves preparing a unified team product (such as one set of answers, one illustration, one experiment, one report, etc). By using the Learning Together structure, social skills needed for successful teamwork are directly taught, practiced, reinforced and processed. Ultimately to have the groups achieve the pre-established criteria for success, they mutually share the rewards of their accomplishments and they identify as a team with the success they make. This structure is typically based on the presence of the five elements of CL. (i.e., positive interdependence, individual accountability, face-face interaction, social skills and group processing). In the science lesson that will be simulated in this session the experience of the ‘learning together’ structure will be illustrated.
Session 5: Sampling Cooperative Learning – In Science
Co-operative Learning – Pupil’s Learning to Learn - 26 -
Activity 5.1- Using the ‘Learning Together’ structure in Science (25 minutes) Participants will assume they are learners in a P.4 science class and that you the trainer is their teacher. (They will put off their trainer hats) They will also assume that;
a) The topic is Volume of Irregular Objects. b) They will carry out the displacement experiment as any P4 class can.
The trainer will teach the science lesson making sure that it is done as if it were a real P4 class. Follow the procedure as outlined in Handout I “The Science Lesson - Displacement” (page 66) for the simulation and use Handout H (page 65) in the lesson. *How might you utilize ‘Learning Together in your training or teaching?
Note: Although specific directions may vary between different Learning together tasks, the basic elements of CL should be carefully incorporated into each ‘Learning Together’ experience.
Activity 5.2- How CL ‘Steps and Elements were reflected in the ‘Learning together’ Structure (25 minutes) Refer to the Handout E & C (‘Steps’ and the ‘Elements’ of CL) pages 59 and 56. Participants work in the same small groups they were in during the lesson. Allocate each group ‘one element’ and ‘one step’. Discuss how they were illustrated in the lesson. Ask each group to make a brief presentation and discuss as necessary.
SUMMARY OF KEY POINTS: 05 MINUTES The session illustrated the group roles very explicitly, e.g. the role of the materials or equipment manager. In CL, it is encouraged that learners are given opportunity to take charge of accomplishing tasks by making decisions on how the tasks should be done. It is important to provide all the necessary materials when such tasks are being planned for and to consider how user-friendly the materials are to the learners.
Trainer’s Notes
Time Breakdown Rationale 05 minutes Activity 5.1 – Using the ‘Learning Together’ structure in Science 25 minutes Activity 5.2 - How CL ‘steps and Elements were reflected in the
‘Learning Together’ Structure. 25 minutes Conclusion 5 minutes Total 1 hour
Objectives • Experience another CL lesson using content included from the national
curriculum for middle primary.
Session 5: Sampling Cooperative Learning – In Science
Co-operative Learning – Pupil’s Learning to Learn - 27 -
• Describe and identify the way in which the steps and elements of CL were incorporated into the demonstration lesson.
Materials Flip chart stand, Flip chart paper, pens, adhesive
• Copies of Handout H- “Procedure for Displacement Experiment” page 65.
• All materials for the demonstration lesson as indicated in the lesson procedure.
Preparation • Read over the procedure for Part 1 of this session (below) and the handout
entitled “Procedure for Displacement Experiment.” Be sure that you understand what is to be done and how the “Steps” and “Elements” of CL are built into the activity.
• Make 8 catch bottles by cutting off the tops of the water bottles. Make the cut just below the point where the bottle begins to narrow to the spout. After cutting, the opening at the top must be large enough for the largest stone to pass through. (You can use any other transparent containers like glasses if available).
• Place all the equipment in one place in the room that you designate as your “equipment area.” Cluster the items into 8 “kits.” Each kit should contain: 3 stones (one each—large, medium, and small), one catch bottle, and a piece of string about 15 cm long.
Procedure 1. Introduce the session by presenting the rationale and the content in the
section ‘Using the Learning Together structure of Cooperative learning’. 2. Following the procedure outlined in Handout I – ‘The Science Lesson on
Displacement’ page 66, teach the science lesson as you would do to a real P4 class.
3. When the lesson is concluded. Explain to the participants that the next activity will be reflecting over the lesson they have just experienced with an eye to identify how ‘Steps’ and ‘Elements’ of Cooperative Learning were illustrated.
4. In their same groups, allocate each group ‘one step’ and ‘one element’ of CL. 5. Ask the participants to retrieve their Handouts C & E pages 56 and 59.
They will need to use them in doing activity 5.2. 6. Ask the participants to do Activity 5.2 – ‘How CL ‘steps and Elements were
reflected in the ‘Learning Together’ Structure’. 7. Share each group’s presentation and discuss as necessary. 8. Finally, conclude the session by presenting the section ’Summary of key
points’.
Session 6: Why Cooperative Learning?
Co-operative Learning – Pupil’s Learning to Learn - 28 -
SESSION 6: WHY COOPERATIVE LEARNING?
☼ “Learning is maximized when it takes place within the context of support, encouragement, and assistance ….”
Objectives: By completing the activities of this session, participants should be able to:
• Identify some advantages of adopting cooperative learning as a teaching method. • Describe the advantages of using cooperative learning in terms of pupil’s achievement in
knowledge, social skills, self-confidence and motivation to learn.
Duration: 1 hour
Rationale: 05 minutes It is a common occurrence that introducing a relatively unfamiliar method of teaching meets resistance from a majority of teachers. They are not likely to adopt a new teaching method unless they are convinced that their learners will benefit from the change. This session will be devoted to identifying some advantages of using CL that might help to convince teachers to give CL a try. The following activity will enable the participants to explore possible implications of using CL in the real Ugandan primary classroom.
Activity 6.1- Reflecting on possible effects of CL in the classroom (15 minutes) 1. As an individual consider the likely effects of using the CL procedure as compared
with what would happen if a traditional method were used to present the same content. Consider these outcomes under the two methods. - How well the content would be learned? How much time would be consumed? - To what degree would the learners be motivated? Self confidence enhanced? - What effects on interpersonal skills are likely?
2. Share the reactions in a plenary.
DISCUSSION POINTS: 10 MINUTES More than likely, the conclusions will be that CL is probably at least as good as traditional methods for presenting content and that it is almost surely much better for motivating learners, increasing self confidence and developing social skills. One disadvantage of CL is that it often takes a longer time than traditional methods.
Session 6: Why Cooperative Learning?
Co-operative Learning – Pupil’s Learning to Learn - 29 -
OVERVIEW
PROMOTING PUPILS LEARNING AND DEVELOPMENT THROUGH CL: For every teaching approach the reasons or level at which it is known to facilitate pupils learning and increase the quality of life in the classroom, the easier it is for teachers to adopt and adapt to it. The more any teacher is able to reflect over a lesson and identify the existence of benefits for the learners the easier it is for that teacher to practically implement such a lesson. In the following exercise lesson scenarios will be shared and discussed to identify the likely benefits to the learners.
Activity 6.2- Ways to promote pupils learning and development through Cooperative Learning (25 minutes) Working in three groups, using the Handout J – “Task sheet-lesson scenarios” page 69 1. Each group leader should obtain manila or newsprint strips from the trainer. 2. Read through the task sheet scenario allocated to your group. 3. Identify ways in which the procedure included in the scenario is likely to promote pupil’s
learning and development. 4. Write each idea on one of the manila strips provided. 5. Each group displays the group’s manila strips and share your scenarios and list of potential
advantages with the rest of the groups. 6. Brainstorm on the advantages of CL as a whole class and together move the manila strips
around, to broadly group the advantages under three categories: - Promotion of student achievement in academic content and skill. - Promotion of self confidence and motivation. - Promotion of social skills.
DISCUSSION POINTS: Research now strongly supports the advantages of CL over competition and individualistic learning in a wide range of learning tasks. Consequently, it is strongly recommended that teachers adopt techniques and activities that enhance CL as a way of maximising pupils’ learning achievement, motivation and development of skills. A few of the advantages of CL are outlined in Handout K- ‘Advantages of Using Cooperative Learning’ page 70. For convenience, they have been clustered within three categories.
SUMMARY OF KEY POINTS: 15 MINUTES
• Cooperative Learning can provide better opportunities for pupils to learn than traditional methods.
• Social skills of pupils taught through CL are likely to be enhanced more than those of pupils taught traditionally.
• Pupils taught using CL tend to be more motivated to study than those taught by conventional methods. CL promotes self confidence among learners.
• Pupils taught using CL often learn more content, and can exhibit higher reasoning skills than those taught using the traditional methods.
Session 6: Why Cooperative Learning?
Co-operative Learning – Pupil’s Learning to Learn - 30 -
Trainer’s Notes
Time Breakdown Rationale 05 minutes Activity 6.1 - Reflecting on possible effects of CL in the classroom 15 minutes Activity 6.2 - Ways to promote pupils learning and development
through Cooperative Learning 25 minutes Conclusion 15 minutes Total 1 hour
Objectives • Identify some advantages of adopting cooperative learning as a teaching
method. • Describe the advantages of using cooperative learning in terms of pupil’s
achievement in knowledge, social skills, self-confidence and motivation to learn.
Materials Flip chart stand, Flip chart paper, pens, adhesive
• Copies of Handout J– ‘Task Sheet -lesson scenario’ page 69 and Handout K – ‘’Advantages of Using Cooperative Learning’ page 70 for each participant.
Preparation • Review the handouts entitled “Elements of Cooperative Learning” and “Steps in
using Cooperative Learning” and read over the rest of the plan for this session and the handouts that go with it. Be sure that you can identify CL lessons and the advantages of using CL.
• Prepare at least ten 4-inch-wide strips of (manila) paper or newsprint for each group.
Procedure 1. Present the rationale of the session and explain Activity 6.1 as an individual task. 2. Very quickly, remind the participants of the procedure used during the rectangle
lesson out lined below; • The 2nd graders were divided into pairs, were assigned a role, and were told to
work individually to determine the number of rectangles in the picture. • The partners then exchanged results and explanations as to why they made
their choices. • The pair discussed their results and reached an agreed-upon answer (may be
different from both or either member of the pair). • The teacher monitored the pairs’ deliberations offering help and
encouragement as needed.
Session 6: Why Cooperative Learning?
Co-operative Learning – Pupil’s Learning to Learn - 31 -
• Each pair then reported the two individual’s answers, and the collaborative answer to the whole class.
• The teacher discussed the reports, revealed the right answer and showed how it was obtained.
3. Ask the participants to do Activity 6.1- ‘Reflecting on possible effects of CL in the classroom’.
4. Conclude this activity by sharing with the participants the discussion points for activity 6.1.
5. Present the section ‘overview’ to introduce activity 6.2. 6. Ask the participants to do Activity 6.2- ‘Ways to promote pupils learning and
development.’ 7. Ask the participants to form three groups of about equal size. Have each group
identify a leader and a reporter. 8. Distribute Handout J – ‘Task sheet -lesson scenario’ page 69, to each group.
Also, supply manila strips and markers. 9. Tell the groups that they are to identify ways in which the procedure included in
the scenario is likely to promote pupil’s learning and development. Explain that they are to write each idea on one of the manila strips provided. Allow 10 minutes for discussion and completion of the task.
10. Circulate and monitor the group activity. Be sure that the groups understand what they are to do and that everyone stays on task.
11. After 10 minutes, call the entire class together and have the reporter for each group display the group’s manila strips to the board and present the group’s list of potential advantages to the rest of the class. Allow four minutes for each report.
12. Through a brain storm, add to the lists identified by the groups by moving the manila strips around, set the stage for broadly grouping the advantages under three categories;
- Promotion of student achievement in academic content and skill. - Promotion of self confidence and motivation. - Promotion of social skills.
13. Take note of any group that produced a very limited list of advantages and any that produced an inexhaustible list. Also note advantages that were mentioned by more than one group.
14. Finally summarize the session by presenting the concluding points in the section ‘Summary of key points’.
Session 7: Cooperative Learning in the Classroom
Co-operative Learning – Pupil’s Learning to Learn - 32 -
SESSION 7: COOPERATIVE LEARNING IN THE
CLASSROOM
☼ “What you do about what you don’t know is, in the final analysis what determines what you will ultimately know.” -Eleanor Duckworth 1987
Objectives: By completing the activities of this session, participants should be able to:
• Identify several subtasks within steps of CL and describe alternative ways of implementing each step.
Duration: 1½ hours
Rationale: 05 minutes This session will explore again the concepts learnt in Session 3 “Using Cooperative Learning”. It is also a follow-up to the activities that were experienced in sessions 5 and 6. Those activities introduced the steps in using CL and provided some experience with it while this session will look at the steps in more detail and deal with alternative ways to implement them.
Content: In session 3 the participants learned that there are five steps that teachers should follow when implementing CL. Each of the steps stipulates or describes what should be done during that time of the lesson. It does not however say how what is supposed to be done can be done.This session will explore a few tips and ways to carry out the different steps in using CL. For every method or approach we can not possibly say there is only one way to use it. There are bound to be variations especially because approaches or methods should be adaptable to meet the learning needs of different learners in different subject content and grade levels. When attempting to build the steps of CL into your lesson there are questions that one would naturally have to respond to. The answers to these questions in relation to the lesson being planned will enable any teacher to check whether his or her lesson includes all the steps expected in a CL lesson. One important issue to keep in mind as well is that, as much as the steps must be illustrated in the lesson so should the basic elements of Cooperative Learning. These basic elements of cooperative learning support effective group work and can be used as measures of success in your lesson. Considering both the ‘basic elements’ and ‘steps’ while constructing CL lessons increases the likelihood of achieving cooperative interaction and productive learning.
Activity 7.1 - Ways to carry out the CL Steps (25 minutes) 1. In groups the participants will consider ways to actually carry out each of the steps of CL.
Each group should begin work by allowing the individuals to reflect on the steps one at a time and list ways to implement each step. This should take about 10 minutes.
2. Compare your lists and agree upon a single list of procedures for the group. This should take 15 minutes.
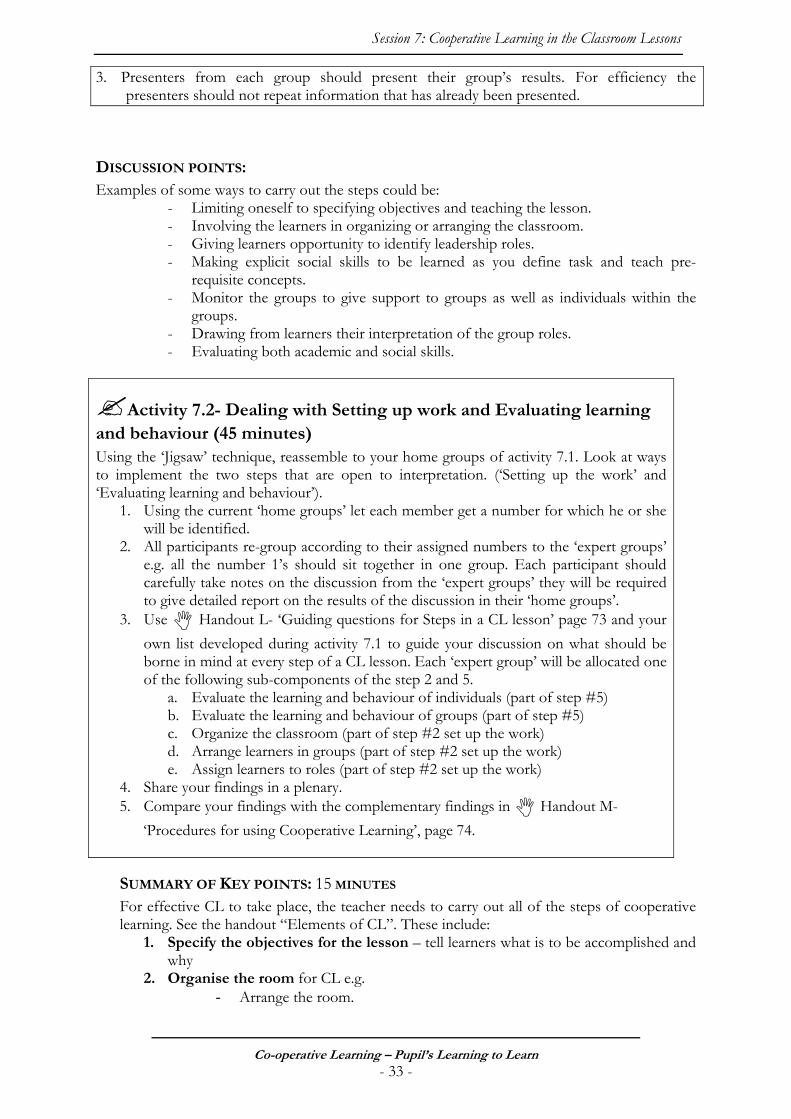
Session 7: Cooperative Learning in the Classroom Lessons
Co-operative Learning – Pupil’s Learning to Learn - 33 -
3. Presenters from each group should present their group’s results. For efficiency the presenters should not repeat information that has already been presented.
DISCUSSION POINTS: Examples of some ways to carry out the steps could be:
- Limiting oneself to specifying objectives and teaching the lesson. - Involving the learners in organizing or arranging the classroom. - Giving learners opportunity to identify leadership roles. - Making explicit social skills to be learned as you define task and teach pre-
requisite concepts. - Monitor the groups to give support to groups as well as individuals within the
groups. - Drawing from learners their interpretation of the group roles. - Evaluating both academic and social skills.
Activity 7.2- Dealing with Setting up work and Evaluating learning and behaviour (45 minutes) Using the ‘Jigsaw’ technique, reassemble to your home groups of activity 7.1. Look at ways to implement the two steps that are open to interpretation. (‘Setting up the work’ and ‘Evaluating learning and behaviour’).
1. Using the current ‘home groups’ let each member get a number for which he or she will be identified.
2. All participants re-group according to their assigned numbers to the ‘expert groups’ e.g. all the number 1’s should sit together in one group. Each participant should carefully take notes on the discussion from the ‘expert groups’ they will be required to give detailed report on the results of the discussion in their ‘home groups’.
3. Use Handout L- ‘Guiding questions for Steps in a CL lesson’ page 73 and your own list developed during activity 7.1 to guide your discussion on what should be borne in mind at every step of a CL lesson. Each ‘expert group’ will be allocated one of the following sub-components of the step 2 and 5.
a. Evaluate the learning and behaviour of individuals (part of step #5) b. Evaluate the learning and behaviour of groups (part of step #5) c. Organize the classroom (part of step #2 set up the work) d. Arrange learners in groups (part of step #2 set up the work) e. Assign learners to roles (part of step #2 set up the work)
4. Share your findings in a plenary. 5. Compare your findings with the complementary findings in Handout M-
‘Procedures for using Cooperative Learning’, page 74.
SUMMARY OF KEY POINTS: 15 MINUTES For effective CL to take place, the teacher needs to carry out all of the steps of cooperative learning. See the handout “Elements of CL”. These include:
1. Specify the objectives for the lesson – tell learners what is to be accomplished and why
2. Organise the room for CL e.g. - Arrange the room.
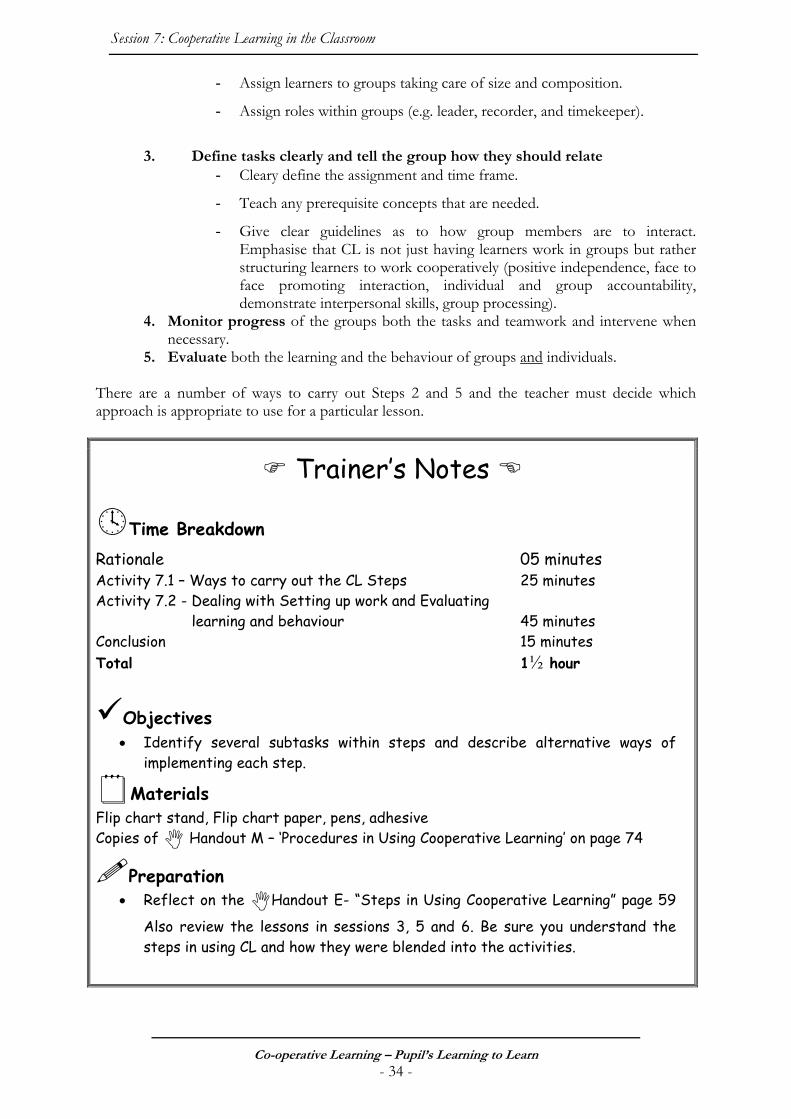
Session 7: Cooperative Learning in the Classroom
Co-operative Learning – Pupil’s Learning to Learn - 34 -
- Assign learners to groups taking care of size and composition.
- Assign roles within groups (e.g. leader, recorder, and timekeeper).
3. Define tasks clearly and tell the group how they should relate
- Cleary define the assignment and time frame.
- Teach any prerequisite concepts that are needed.
- Give clear guidelines as to how group members are to interact. Emphasise that CL is not just having learners work in groups but rather structuring learners to work cooperatively (positive independence, face to face promoting interaction, individual and group accountability, demonstrate interpersonal skills, group processing).
4. Monitor progress of the groups both the tasks and teamwork and intervene when necessary.
5. Evaluate both the learning and the behaviour of groups and individuals.
There are a number of ways to carry out Steps 2 and 5 and the teacher must decide which approach is appropriate to use for a particular lesson.
Trainer’s Notes
Time Breakdown Rationale 05 minutes Activity 7.1 – Ways to carry out the CL Steps 25 minutes Activity 7.2 - Dealing with Setting up work and Evaluating
learning and behaviour 45 minutes Conclusion 15 minutes Total 1½ hour
Objectives • Identify several subtasks within steps and describe alternative ways of
implementing each step.
Materials Flip chart stand, Flip chart paper, pens, adhesive Copies of Handout M – ‘Procedures in Using Cooperative Learning’ on page 74
Preparation • Reflect on the Handout E- “Steps in Using Cooperative Learning” page 59
Also review the lessons in sessions 3, 5 and 6. Be sure you understand the steps in using CL and how they were blended into the activities.
Session 7: Cooperative Learning in the Classroom Lessons
Co-operative Learning – Pupil’s Learning to Learn - 35 -
Read the Handout M - “Procedures in Using Cooperative Learning” page 74.
The content should be helpful in assisting the participants to find ways to implement the CL steps in the real classroom situations. Some of the information may also be helpful to you in arranging the classroom and in forming groups for this session.
• Prior to the session arrange the room to allow the participants to sit in groups. Make sure there is enough space between the groups to allow freedom of movement.
Procedure 1. As a first step, share with the participants the objectives of the session
which are: • Recall, examine and discuss the key steps in using CL. • Identify several subtasks within each step and describe alternate
ways of implementing each of them. 2. Present the rationale of the session and follow on with the content section. 3. Introduce the participants to Activity 7.1 – ‘Ways to carry out the CL Steps’. 4. Circulate while the groups are at work and monitor the action. Be sure that
the group understands what is to be done and that everyone is on task and participating. Remind the participants that the groups’ success depends on each individual’s contribution.
5. Have the presenter from each group report orally on their groups’ results. For efficiency the presenters should not repeat information that has already been presented.
6. From the presentations build consolidated lists of ways to implement each of the steps. Record these on a flipchart/blackboard. Point out that three of the five steps are fairly self-evident (explain the objectives, define the task, monitor) but that the remaining two steps (set up the work, evaluate learning and behaviour) are more difficult to interpret. Use the complementary point’s discussion points section to consolidate and conclude the activity.
7. Explain to the participants the focus of Activity 7.2 (Getting to the details of the 2 steps that are difficult to interpret. (set up the work, evaluate learning and behaviour)
8. 8. Ask participants to do Activity 7.2. Allocate each expert group a sub-task under number 3 for discussion. Guide them in practicing the ‘Jigsaw’ technique properly by getting them to re-group into ‘expert groups’ and back to home groups when they are ready to.
9. 9. When the ‘expert groups’ have been set up, distribute Handout L-
‘Guiding questions for each step in a CL lesson’ page 73 to all the groups and let them begin to work. Monitor and provide all the support expected of you as a trainer during a CL session. (Remember you are demonstrating the role of the teacher during a CL lesson) Remind the participants to also use the list developed during activity 7.1.
10. Ask the experts to go back to the home groups and give the groups time to
Session 7: Cooperative Learning in the Classroom
Co-operative Learning – Pupil’s Learning to Learn - 36 -
share with their teammates. 11. 11. Hold a plenary and share the results of the groups. This time select one
member of each home group at random to report on one of the procedures that were discussed. Invite comments from other groups or individuals.
12. Distribute Handout M- ‘Procedures in Using Cooperative Learning’ page
74. 13. Briefly explain to the content and ask participants to study the hand out and
compare its content with the results of the discussions that have taken place during this session.
14. Conclude the session by presenting the ‘Summary of key points’
Session 8: Dealing with Challenges
Co-operative Learning – Pupil’s Learning to Learn - 37 -
SESSION 8: DEALING WITH CHALLENGES
☼ “Chaotic action is preferable to orderly inaction.” Objectives:
By completing the activities of this session, participants should be able to: • Identify and discuss special challenges that a Uganda primary school teacher is likely to
face when implementing CL. • Identify and discuss alternative ways to carry out CL in large classes
Duration: 1½ hours
Rationale: 05 minutes The main objective of this session is to identify and discuss alternative ways to carry out Cooperative Learning within the circumstances of the Uganda primary school classroom. This session is closely linked to the previous one. The focus this time is to identify constraints in actual Ugandan classrooms that are likely to affect implementation of CL and come up with ways to overcome them.
Content: Challenges in introducing any new teaching approach is a healthy occurrence. It is expected that teachers while implementing Cooperative Learning will meet a variety of hurdles. This should not discourage the trying out the relatively new practices. Perfection can not be obtained after one trial. One will only be able to gain expertise through a progressive refinement procedure of a) teaching a CL lesson, b) assessing how well it went, c) reflecting on how cooperation could have been better structured and academic goals better achieved, and then d) teaching an improved CL learning lesson, e) assessing how well it went, and so forth. One would then gain experience in an incremental step-by-step manner. Hence, being aware of the possible challenges that teachers may meet while trying out CL, is one way to encourage practitioners to think through possible alternatives to reduce impact of the constraints.
Activity 8.1- Conditions and situations that make it difficult to implement CL in the classroom (30minutes) Working in eight groups of approximately the same size;
1. Discuss the question “What conditions and situations in Ugandan primary school classrooms are likely to make it difficult for teachers to implement CL?” and identify as many constraints as possible. Each group should focus on constraints that are specific to classrooms in Uganda. The recorders should write out all the constraints identified by the group. (15 minutes)
2. Share the various lists in a plenary. Together eliminate duplicate constraints and any that are not directly relevant to primary classrooms in Uganda.
Session 8: Dealing with Challenges
Co-operative Learning – Pupil’s Learning to Learn - 38 -
DISCUSSION POINTS: Some of the constraints listed will probably include:
• Overcrowding
• Access to instructional materials
• Lack of furniture
• Inflexibility of the curriculum
• Examination oriented expectations of parents and administrators.
• Negative attitudes of parents and administrators particularly resistance to change.
• Inadequate physical space (where there are no structures learners are taken outside
sometimes its very hot, it rains, noise, passers by).
WAYS TO COPE WITH THE CONSTRAINTS: Every teaching approach offers a wide range of options that can be employed in response to the constraints that may be encountered. It is important however to match the teaching skill being developed with the learners background so as to identify the appropriate remedy to counter the constraint. The specific objective of the second part of this session is to identify techniques that teachers can use to overcome the major constraints that may make it difficult to implement CL.
Activity 8.2 Ways to cope with the constraints (40 minutes) Working in the same groups, participants will do the following using the prioritised list of constraints that they have developed;
1. Each group should be assigned two constraints. 2. Identify techniques that a teacher might use to get round the constraints or adjust to it
while implementing CL. 3. Share in plenary the results of your discussion and contribute to a list of suggestions that
each of you can take back home as reference when you encounter the specific constraints while working with your teachers, colleagues or pupils.
SUMMARY OF KEY POINTS: 15 MINUTES Uganda primary school teachers will face many constraints as they try to implement CL. The participants in this session identified a number of them.
• Cooperative learning can be implemented within the constraints that affect Ugandan classrooms. In order to do so teachers need to understand the constraints that may hinder its implementation and their implications for the teaching / learning process and alternative ways of doing it given the real varying classroom contexts.
• Techniques that will help teachers use CL within the constraints that exist in Ugandan primary schools can be devised. Some of them were discussed during this session.
Session 8: Dealing with Challenges
Co-operative Learning – Pupil’s Learning to Learn - 39 -
Trainer’s Notes
Time Breakdown Rationale 05 minutes Activity 8.1 – Conditions and situations that make it
difficult to implement CL in the classroom. 30 minutes Activity 8.2- ‘Ways to cope with constraints 40 minutes Conclusion 15 minutes Total 1½ hour
Objectives • Identify and discuss special constraints that a Uganda primary school teacher
is likely to face when implementing CL. • Identify and discuss alternative ways to carry out CL in large classes.
Materials • Flip chart stand, Flip chart paper, pens, adhesive • Copies of Handout N - “Using CL in large classes” page 78 for each
participant.
Preparation • Reflect on issues discussed and learned during session 7. • Once again, read Handout E - “Steps in using CL” page 59. Make sure that
you understand it especially the activities that the teacher has to do at every stage during a CL lesson.
Procedure 1. Present the rationale of the session. 2. Using a brain storm solicit ideas from the participants and make a list of their
contributions on a flip chart or blackboard. 3. Write the following question on the chalkboard or flip chart“What conditions
and situations in Ugandan primary school classrooms are likely to make it difficult for teachers to implement CL?” Ask the participants to read, re-read and internalise it (2 minutes).
4. Ask the participants to do Activity 8.1. ‘Conditions and situations that make it difficult to implement CL in the classroom.’ As the groups do their work, move around, monitor the action and provide support where needed. Be sure that everyone stays on track and that group members work together. Each group presenter or recorder will make a presentation.
5. Hold a plenary and make one list of all the constraints identified by the participants on a flipchart or chalkboard. Together with the participants
Session 8: Dealing with Challenges
Co-operative Learning – Pupil’s Learning to Learn - 40 -
eliminate duplicate constraints and any that are not relevant to primary classrooms in Uganda. Use the suggestions given in the discussion points section as additions to the list if they are not mentioned by the participants.
6. Lead the participants to rank the constraints in order of importance and number them. Allow comments about the constraints from anyone.
7. Finally, scrutinize the tentative list of constraints with the group and come up with a final prioritised list of relevant constraints that teachers must deal with as they try to implement CL.
8. In the same groups ask participants to do activity 8.2 ‘Ways to cope with constraints’. Ask them to identify techniques that a teacher might use to get round the constraint or adjust to it while implementing CL. They have 30 minutes to complete their discussion. Monitor the group work. (Remember that you the trainer is setting an example of what the participants should do while the teachers or pupils are engaged in a group activity).
9. Each group will have their presenter share the results of their discussion with the whole class. List the suggested techniques on the board/flip chart. Invite comments or additions from other groups or individuals. Place special emphasis on the need for concrete suggestions that teachers could put to use in real classrooms. This should take about 15 minutes
10. When all groups have reported and a list prepared, give each participant a copy of Handout N- “Using Cooperative Learning in Large classes” page 78. Allow
them 10 minutes to read it and compare the content with the results of their group work. Ask for comments on the handout or any other reactions
11. Draw conclusions with regard to ways to help teachers to implement CL in Ugandan primary schools.
12. Finally, make a summary to the session using the points in the section
‘Summary key points’.
Session 9: Characteristics of Good Cooperative Learning Lessons
Co-operative Learning – Pupil’s Learning to Learn - 41 -
SESSION 9: CHARACTERISTICS OF GOOD
COOPERATIVE LEARNING LESSONS
☼ “For the things we have to learn before we can do them we learn by doing them”. – ‘Aristotle’
Objectives: By completing the activities of this session, participants should be able to:
• Describe the characteristics of a good CL lesson. • Distinguish between valid CL lessons and invalid ones. • Identify at least one valid format for a CL lesson.
Duration: 1½ hours
Rationale: 05 minutes Having learnt and experienced the elements, steps and even identified the constraints of CL in the previous sessions, this session will focus on exploring the characteristics of a good CL lesson plan. It will also provide an opportunity for participants to describe and understand a suggested format and procedure for designing a CL lesson. In addition it will provide practice in converting a traditional lesson into one that features CL.
Activity 9.1- Characteristics of a good CL Lesson (20 minutes)
Using Handout O – ‘The 3Ps’ page 84 and Handout S -‘Format for Cooperative lesson Planning’ page 89 while also referring to Handout E- ‘Steps in using Cooperative Learning’ page 59 used in session 3; 1. Participants individually study the CL version of the lesson in Handout T-‘Cooperative
Learning lesson Comparison’ page 90. As you read the Presentation, Performance, and Practice sections of the lesson, you should look for the 5 steps that characterize CL. If you have forgotten what the steps are, you may want to consult Handout E- ‘Steps in using Cooperative Learning’ page 59.
2. Briefly discuss as a whole class what changes have been made to the lesson to convert it to a CL lesson.
DISCUSSION POINTS: 15 MINUTES While the participants are comparing the lessons, point out the following;
• The objectives are specified for the student and the set-up is spelled out (e.g. who is playing what role and how long the activity will last).
• The task and relationship definitions are there (e.g. students will generate a list of passive sentences from the active ones and report back on them).
• The monitoring and evaluation components are included.
Session 9: Characteristics of Good Cooperative Learning Lessons
Co-operative Learning – Pupil’s Learning to Learn - 42 -
Be sure to ask them what changes had to be made in the traditional version in order to make it a good CL lesson.
Activity 9.2- Converting a traditional lesson into a good CL lesson (50 minutes) In three working groups, the different group members distribute group roles amongst them selves. 1. Individually each member reads through Handouts Q and R ‘Traditional Lesson Sample
Versions one and two’ pages 86 and 88. Make decisions on new presentation, practice, and performance sections that would include all the steps of CL. Then they break into groups.
2. As a group they come together to discuss and decide upon a consensus plan for converting the lessons such that the new versions include all of the steps of CL. As the group decides on a plan, each individual member should describe the new sections in writing in the space provided on the handout. The recorder should do the same on a flip chart. The new plan must explicitly account for: explaining the objectives, setting up the work, defining the task and relationships monitoring, and evaluation; and The “elements” of cooperative learning must be accounted for as well.
3. The reporters of each group share the summaries of the changes that have been made in the traditional plan and explain how the “steps” and “elements” are accounted for in the new version in a plenary.
4. Together critique each report in terms of the degree to which the authors were successful in blending the steps and elements into their product.
SUMMARY OF KEY POINTS:
• Good CL lessons must incorporate the elements and CL and the steps for using CL. • Converting a traditional lesson into a CL lesson involves adding the “elements” and
“steps” of cooperative learning. • The 3Ps provide a good basis for organizing CL lesson plans.
Session 9: Characteristics of Good Cooperative Learning Lessons
Co-operative Learning – Pupil’s Learning to Learn - 43 -
Trainer’s Notes
Time Breakdown Rationale 05 minutes Activity 9.1 – Characteristics of a good CL Lesson 20 minutes Activity 9.2 - Converting a traditional lesson into a good CL lesson 50 minutes Conclusion 15 minutes
Total 1 ½ hour
Objectives • Describe the characteristics of a good CL lesson. • Distinguish between valid CL lessons and invalid ones. • Identify at least one valid format for a CL lesson
Materials Flip chart stand, Flip chart paper, pens, adhesive
• Copies of Handouts T, O, P, Q and R pages 90, 84, 85, 86 and 88 for each
participant. • A flip chart with ‘Elements of CL’ and ‘Steps of CL’
Preparation Read through the trainer’s notes before hand.
Procedure 1. Introduce the session by presenting the rationale of the session. 2. Distribute Handout O - ‘The 3Ps’ on page 84 and give participants time to
study it. Briefly point out to the participants what each of the 3Ps stands for and what each entails. Reinforce the details on each P.
3. Using Handout S - ‘Format for Cooperative Learning Lesson Planning’ page
89. Go through the format with the participants noting especially the use of the 3 Ps for lesson organization. Emphasize the elements that should be included under each section of any plan (these are listed as questions to be answered in the hand out).
4. Conclude this part of the session by distributing Handout T – ‘Cooperative
Learning lesson Comparison’ page 90 and ask the participants to focus on the right hand column that is headed “Cooperative Learning Version.” Explain that this is an example of a plan that is organized according to the format which they have been discussing and that the plans they will produce later should be
Session 9: Characteristics of Good Cooperative Learning Lessons
Co-operative Learning – Pupil’s Learning to Learn - 44 -
similar to this one. 5. Ask the participants to do Activity 9.1 – ‘Characteristics of a good CL
Lesson’. 6. While the participants are comparing the lessons, point out the following;
• The objectives are specified for the student and the set-up is spelled out (e.g. who is playing what role and how long the activity will last).
• The task and relationship definitions are there (e.g. students will generate a list of passive sentences from the active ones and report back on them).
• The monitoring and evaluation components are included. • Be sure to ask them what changes had to be made in the traditional
version in order to introduce CL. 7. Get the participants into three groups. Distribute Handouts Q and R
‘Traditional Lesson Sample (version 1 and 2)’ pages 86 and 88. Then ask them to do Activity 9.2- ‘Converting a traditional lesson to a good CL lesson’. Monitor the groups’ work. Intervene where necessary and praise effective work and examples of good behaviour and teamwork.
8. Guide the participants to critique each report in terms of the degree to which the authors were successful in blending the steps and elements into their product.
9. Finally, summarize the session by presenting the summary of key points.
Session 10: Practice in Designing Cooperative Learning Lessons
Co-operative Learning – Pupil’s Learning to Learn - 45 -
SESSION 10: PRACTICE IN DESIGNING COOPERATIVE LEARNING LESSONS (TRAINERS OF TRAINERS VERSION)
☼ “Do not fail to be a novice in the beginning, because all doing comes from learning.” –‘Erskine Caldwell’ “If you don’t risk anything, you risk even more.”
Objectives: By completing the activities of this session, participants should be able to:
• Design a valid Cooperative Learning Lesson Plan. • Develop a collection of CL lessons that can guide teachers to use CL as part of their
teaching.
Duration: 1½ hour
Rationale: 05 minutes The previous session introduced a format for designing a cooperative learning lesson which the participants used in converting traditional lessons into cooperative learning ones. This session will now provide an opportunity for the participants to carry the process one step further by using the same format to design a cooperative learning lesson from scratch.
Activity 10.1 – Constructing Cooperative Learning Lessons (60 minutes)
1. Individually study Handout U- ‘Lesson Topics Part II’ page 92 and choose topics for which you will develop cooperative lessons.
2. After making your choices regroup your selves into three grade level groups. There should be a lower primary group (P1–P3), a middle primary group (P4, P5) and an upper primary group (P6, P7).
3. Using blank copies of the lesson format construct Cooperative Learning Lessons. Everyone must design his/her own lesson but the objective of the group should be to produce a cluster of the best lessons possible. Individuals are encouraged to consult and help each other but everyone should produce their own work.
4. After each participant has drafted a lesson, each participant should exchange their draft plans with a partner for informal critiquing. The critiquing should focus on the following questions; (10 minutes) (a) Is the draft lesson a good example of CL (does it include the steps and elements)?
If not, what is missing and what can be done about it? (b) Does the lesson cover the objectives for the topic? (c) Does the lesson address the teaching of social skill?
5. Individuals should retrieve their lessons and discuss the comments and findings given with their partners.
6. Each individual should reflect on the critique they received and make any changes that are indicated. You can consult with other group members.
7. Collect the final drafts. Participants should take a 5 minute break at this point. 8. All participants follow the same procedure to develop a second and a third CL lessons.
Session 10: Practice in Designing Cooperative Learning Lessons
Co-operative Learning – Pupil’s Learning to Learn - 46 -
SUMMARY OF KEY POINTS:
• Using a consistent format in designing CL lessons establishes continuity. One good format is organized around the 3P’s (see handout entitled “The 3Ps”).
• In designing a CL lesson, it is critical to include the essential elements and steps of CL. (see handouts entitled “Elements of Cooperative Learning” and “Steps in Using Cooperative Learning”)
• It is important to identify the social skill being promoted in every CL lesson.
Trainer’s Notes
Time Breakdown Rationale 05 minutes Activity 10.1 – Constructing Cooperative Learning lessons 60 minutes Conclusion 25 minutes Total 1½ hour
Objectives • Design a valid Cooperative Learning Lesson Plan. • Develop a collection of CL lessons that can guide teachers to use CL as part of
their teaching.
Materials • Flip chart stand/chalkboard, Flip chart paper, pens, adhesive, Paper for
writing.
Preparation • Arrange for enough copies of Handout U- ‘Lesson Topics Part II’ page 92
• Also have CL lesson worksheets (at least four per participant)
Procedure 1. Start the session by thanking participants for their attempts in converting
traditional lessons to CL lessons. Present the rationale of this session and direct the participant’s attention to Handout P –‘Cooperative Learning
Lesson Sample’ page 85 and Handout O - “The 3Ps” page 84 and allow 2 – 3
minutes for review. 2. Distribute Handout U- ‘Lesson Topics Part II’ page 92. Ask the
participants to choose a topic for their lesson from the lists provided. Highlight that the topics are extracted from the Uganda Primary School Curriculum and encompass all primary grades and a variety of subjects. Allow
Session 10: Practice in Designing Cooperative Learning Lessons
Co-operative Learning – Pupil’s Learning to Learn - 47 -
two or three minutes for choosing topics. 3. Organize the participants into three groups based on the grade level of the
topic they chose. There should be a lower primary group (P1–P3), a middle primary group (P4, P5) and an upper primary group (P6, P7). Ask each group to select a leader to keep the group’s discussions on track and orderly and a timekeeper to be sure that everyone finishes their work on time.
4. Distribute blank copies of the lesson format and explain that they should be used in preparing the final drafts of the lessons. Explain that everyone must design his/her own lesson but that the objective of the group should be to produce a cluster of the best lessons possible.
5. Monitor the group work and provide support to individuals who are having problems. Check especially whether the plans that are emerging really demonstrate CL (e.g. cover the elements and steps and cover the topics as well). Encourage participants who are having trouble to consult with those who are doing well. Praise good work and examples of the team working well together.
6. After each participant has developed the first lesson, exchange their draft plans with a partner for informal critiquing.
7. Ask each individual to reflect on the critique they received and make the changes that are necessary.
8. Ask participants to collect the final drafts. 9. Participants should take a 5 minute break at this point. 10. After the break, ask the participants to follow the same procedure to develop
a second and a third CL lessons. (Note: You will not need to go through procedure 9 and 10 when training the school representatives-Head teachers and deputies) 11. Lead a discussion on why it is important for teachers to learn to develop CL
lessons for their own use and how best to teach them to do so. 12. Finally conclude the session by presenting the section ‘summary of key points’.
Session 11A: Training Workshop Planning for Trainers of Trainers
Co-operative Learning – Pupil’s Learning to Learn - 48 -
SESSION 11A: TRAINING WORKSHOP PLANNING (FOR TRAINERS OF TRAINERS)
☼ The art of teaching is the art of assisting discovery” (Mark Van Doran) “Don’t just stand there do something!” “Ready. Fire. Aim.” (Begin sooner than later!)
Objectives: By completing the activities of this session, participants should be able to:
• Ascertain that they have a complete training package of sessions and handouts. • Discuss and identify possible plans for presenting a CL workshop. • Draft a training plan for the next training session.
Duration: 2 hours 20 minutes
Rationale: 05 minutes The final session provides the participants with an opportunity to reflect upon the activities and outcomes of the whole workshop. This will then lead to discussions on the possible plans to conduct their own CL workshop with special emphasis on ways to use the training materials that they have been given. Remember that ‘failing to plan is planning to fail’. This is becoming a common adage in society which highlights the fact that it is important to make plans for every activity one intends to do.
Activity 11.1a - Do I understand all the materials I have for the next training? (90 minutes) 1. Working in five or more small groups, select a leader who will lead the group to cross
check all the session descriptions and handouts. 2. Discuss the training materials session by session starting with session 2. As they
discuss each session the individuals should try to identify any problems that you might have in implementing it during your upcoming workshop and things you might do to make the job easier. Some particular questions that your groups might think about are; - Is the time estimate for the session realistic? Any adjustments in the order of
sessions? - Were any parts of the session ineffective? What can be done about it? - Did any ideas come out of this workshop that should be added to the materials for
the session? (E.g. in session 8, are there additional suggestions for ways to use CL in crowded classrooms). You should allocate about 10 minutes. Timekeepers are responsible for keeping the group on schedule.
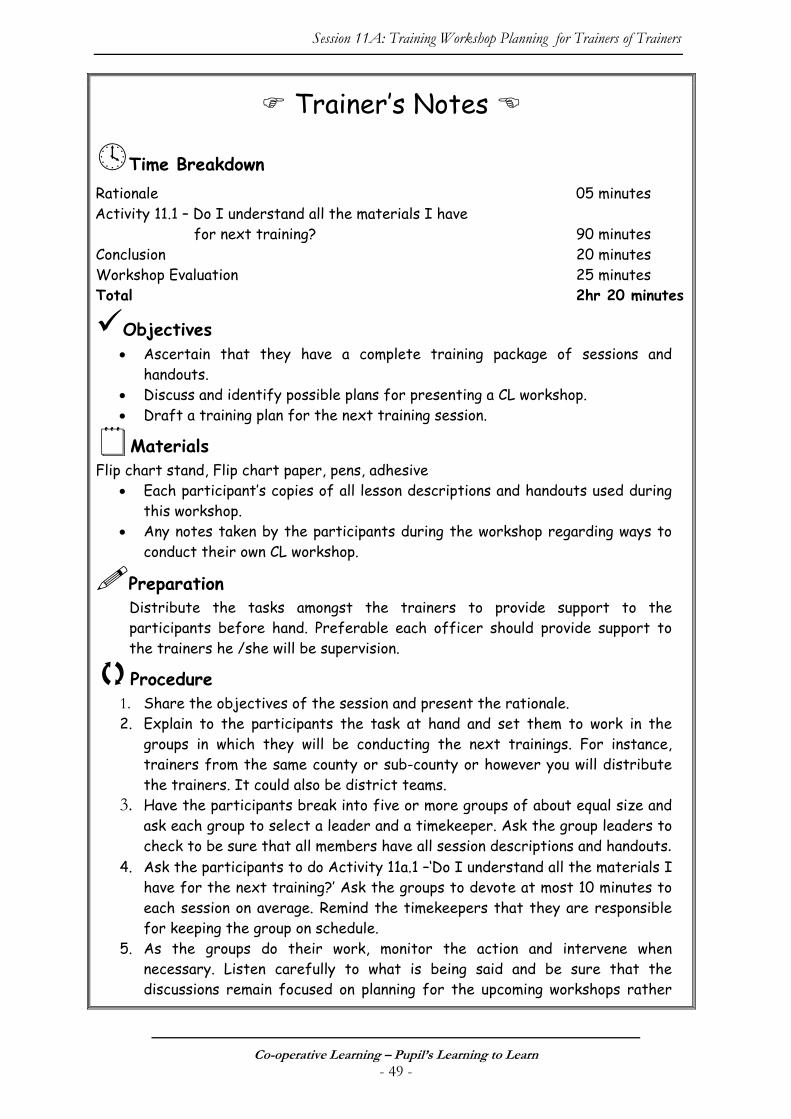
Session 11A: Training Workshop Planning for Trainers of Trainers
Co-operative Learning – Pupil’s Learning to Learn - 49 -
Trainer’s Notes
Time Breakdown Rationale 05 minutes Activity 11.1 – Do I understand all the materials I have
for next training? 90 minutes Conclusion 20 minutes Workshop Evaluation 25 minutes Total 2hr 20 minutes
Objectives • Ascertain that they have a complete training package of sessions and
handouts. • Discuss and identify possible plans for presenting a CL workshop. • Draft a training plan for the next training session.
Materials Flip chart stand, Flip chart paper, pens, adhesive
• Each participant’s copies of all lesson descriptions and handouts used during this workshop.
• Any notes taken by the participants during the workshop regarding ways to conduct their own CL workshop.
Preparation Distribute the tasks amongst the trainers to provide support to the participants before hand. Preferable each officer should provide support to the trainers he /she will be supervision.
Procedure 1. Share the objectives of the session and present the rationale. 2. Explain to the participants the task at hand and set them to work in the
groups in which they will be conducting the next trainings. For instance, trainers from the same county or sub-county or however you will distribute the trainers. It could also be district teams.
3. Have the participants break into five or more groups of about equal size and ask each group to select a leader and a timekeeper. Ask the group leaders to check to be sure that all members have all session descriptions and handouts.
4. Ask the participants to do Activity 11a.1 –‘Do I understand all the materials I have for the next training?’ Ask the groups to devote at most 10 minutes to each session on average. Remind the timekeepers that they are responsible for keeping the group on schedule.
5. As the groups do their work, monitor the action and intervene when necessary. Listen carefully to what is being said and be sure that the discussions remain focused on planning for the upcoming workshops rather
Session 11A: Training Workshop Planning for Trainers of Trainers
Co-operative Learning – Pupil’s Learning to Learn - 50 -
than becoming a general critique of the materials or the workshop. Also be sure that everyone in the group is participating. Take note of any especially interesting ideas that the entire group should hear about.
6. Hold a plenary session and ask if anyone wants to share any especially interesting ideas about conducting the upcoming workshops? List any responses on a flip chart and add any thoughts that you came to mind while you monitored the group work. Clear up any unanswered questions or add suggestions/tips of your own on to ways to conduct a CL workshop.
7. Finally, ask the participants to fill out the evaluation forms before closing. This should include the participants training form and the self assessment: Post-training.
8. You can turn the workshop over to the person responsible for the closing ceremony.
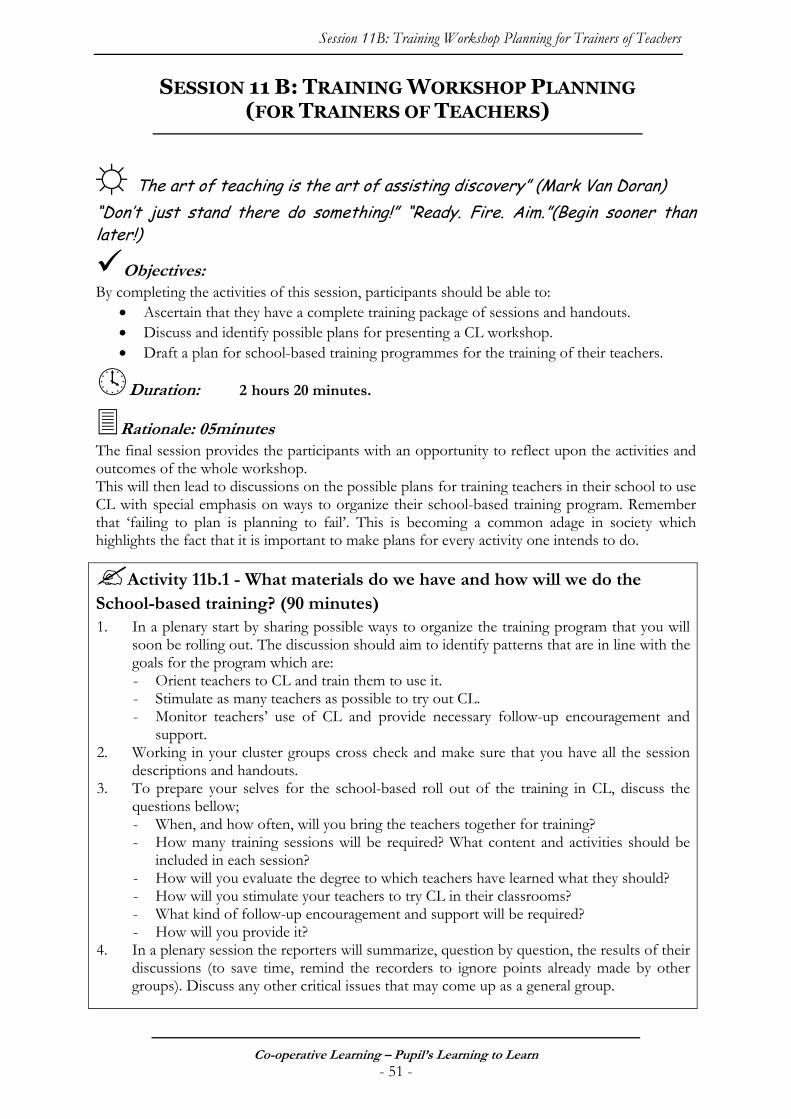
Session 11B: Training Workshop Planning for Trainers of Teachers
Co-operative Learning – Pupil’s Learning to Learn - 51 -
SESSION 11 B: TRAINING WORKSHOP PLANNING (FOR TRAINERS OF TEACHERS)
☼ The art of teaching is the art of assisting discovery” (Mark Van Doran) “Don’t just stand there do something!” “Ready. Fire. Aim.”(Begin sooner than later!)
Objectives: By completing the activities of this session, participants should be able to:
• Ascertain that they have a complete training package of sessions and handouts. • Discuss and identify possible plans for presenting a CL workshop. • Draft a plan for school-based training programmes for the training of their teachers.
Duration: 2 hours 20 minutes.
Rationale: 05minutes The final session provides the participants with an opportunity to reflect upon the activities and outcomes of the whole workshop. This will then lead to discussions on the possible plans for training teachers in their school to use CL with special emphasis on ways to organize their school-based training program. Remember that ‘failing to plan is planning to fail’. This is becoming a common adage in society which highlights the fact that it is important to make plans for every activity one intends to do.
Activity 11b.1 - What materials do we have and how will we do the School-based training? (90 minutes) 1. In a plenary start by sharing possible ways to organize the training program that you will
soon be rolling out. The discussion should aim to identify patterns that are in line with the goals for the program which are: - Orient teachers to CL and train them to use it. - Stimulate as many teachers as possible to try out CL. - Monitor teachers’ use of CL and provide necessary follow-up encouragement and
support. 2. Working in your cluster groups cross check and make sure that you have all the session
descriptions and handouts. 3. To prepare your selves for the school-based roll out of the training in CL, discuss the
questions bellow; - When, and how often, will you bring the teachers together for training? - How many training sessions will be required? What content and activities should be
included in each session? - How will you evaluate the degree to which teachers have learned what they should? - How will you stimulate your teachers to try CL in their classrooms? - What kind of follow-up encouragement and support will be required? - How will you provide it?
4. In a plenary session the reporters will summarize, question by question, the results of their discussions (to save time, remind the recorders to ignore points already made by other groups). Discuss any other critical issues that may come up as a general group.
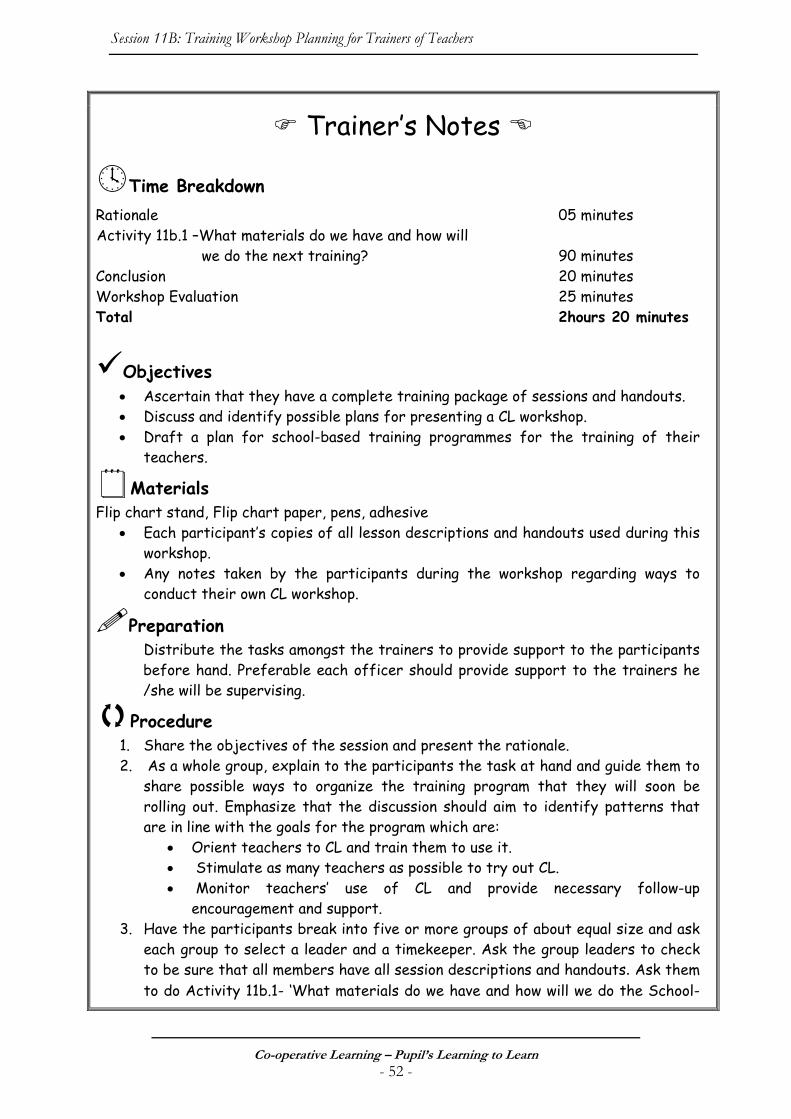
Session 11B: Training Workshop Planning for Trainers of Teachers
Co-operative Learning – Pupil’s Learning to Learn - 52 -
Trainer’s Notes
Time Breakdown Rationale 05 minutes Activity 11b.1 –What materials do we have and how will
we do the next training? 90 minutes Conclusion 20 minutes Workshop Evaluation 25 minutes Total 2hours 20 minutes
Objectives • Ascertain that they have a complete training package of sessions and handouts. • Discuss and identify possible plans for presenting a CL workshop. • Draft a plan for school-based training programmes for the training of their
teachers.
Materials Flip chart stand, Flip chart paper, pens, adhesive
• Each participant’s copies of all lesson descriptions and handouts used during this workshop.
• Any notes taken by the participants during the workshop regarding ways to conduct their own CL workshop.
Preparation Distribute the tasks amongst the trainers to provide support to the participants before hand. Preferable each officer should provide support to the trainers he /she will be supervising.
Procedure 1. Share the objectives of the session and present the rationale. 2. As a whole group, explain to the participants the task at hand and guide them to
share possible ways to organize the training program that they will soon be rolling out. Emphasize that the discussion should aim to identify patterns that are in line with the goals for the program which are:
• Orient teachers to CL and train them to use it. • Stimulate as many teachers as possible to try out CL. • Monitor teachers’ use of CL and provide necessary follow-up
encouragement and support. 3. Have the participants break into five or more groups of about equal size and ask
each group to select a leader and a timekeeper. Ask the group leaders to check to be sure that all members have all session descriptions and handouts. Ask them to do Activity 11b.1- ‘What materials do we have and how will we do the School-
Session 11B: Training Workshop Planning for Trainers of Teachers
Co-operative Learning – Pupil’s Learning to Learn - 53 -
based training?’ 4. Explain to the participants their task of discussing ways of planning the school-
based training. Write the following questions on a flip chart or chalkboard and emphasize that the discussion should be guided by the questions; a) When, and how often, will you bring the teachers together for training? b) How many training sessions will be required? What content and activities
should be included in each session? c) How will you evaluate the degree to which teachers have learned what they
should have? d) How will you stimulate your teachers to try CL in their classrooms? e) What kind of follow-up encouragement and support will be required? How will
you provide it? 5. As the groups do their work, monitor the action and intervene when necessary.
Listen carefully to what is being said and be sure that the discussions remain focused on planning for the school-based trainings and should be realistic to fit into the existing school routines rather than becoming a general critique of the materials or the workshop. Also be sure that everyone pair in the group is participating. Take note of any especially interesting ideas that the entire group should hear about.
6. Hold a plenary session and ask the reporters to summarize, question by question, the results of their discussions (to save time, remind the recorders to ignore points already made by other groups).
7. Spend a few minutes discussing the overall results. Try to reach some consensus as to effective ways to organize the school-based teacher training sessions.
8. Use any remaining time to clear up any unanswered questions or to add suggestions of your own as to ways to conduct a CL teacher training program.
9. Finally, ask the participants to fill out the evaluation forms. This should include the participants training form and the self assessment: Post-training test before closing.
10. You can turn the workshop over to the person responsible for the closing ceremony.
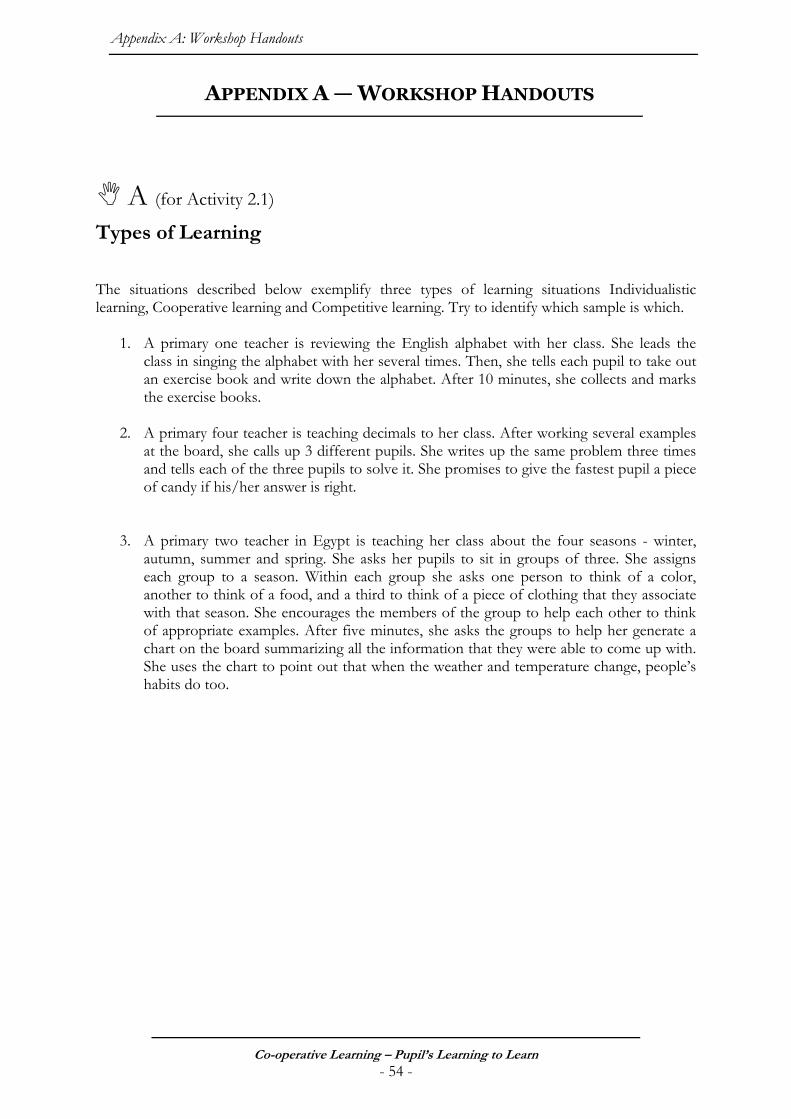
Appendix A: Workshop Handouts
Co-operative Learning – Pupil’s Learning to Learn - 54 -
APPENDIX A — WORKSHOP HANDOUTS
A (for Activity 2.1)
Types of Learning
The situations described below exemplify three types of learning situations Individualistic learning, Cooperative learning and Competitive learning. Try to identify which sample is which.
1. A primary one teacher is reviewing the English alphabet with her class. She leads the class in singing the alphabet with her several times. Then, she tells each pupil to take out an exercise book and write down the alphabet. After 10 minutes, she collects and marks the exercise books.
2. A primary four teacher is teaching decimals to her class. After working several examples
at the board, she calls up 3 different pupils. She writes up the same problem three times and tells each of the three pupils to solve it. She promises to give the fastest pupil a piece of candy if his/her answer is right.
3. A primary two teacher in Egypt is teaching her class about the four seasons - winter,
autumn, summer and spring. She asks her pupils to sit in groups of three. She assigns each group to a season. Within each group she asks one person to think of a color, another to think of a food, and a third to think of a piece of clothing that they associate with that season. She encourages the members of the group to help each other to think of appropriate examples. After five minutes, she asks the groups to help her generate a chart on the board summarizing all the information that they were able to come up with. She uses the chart to point out that when the weather and temperature change, people’s habits do too.
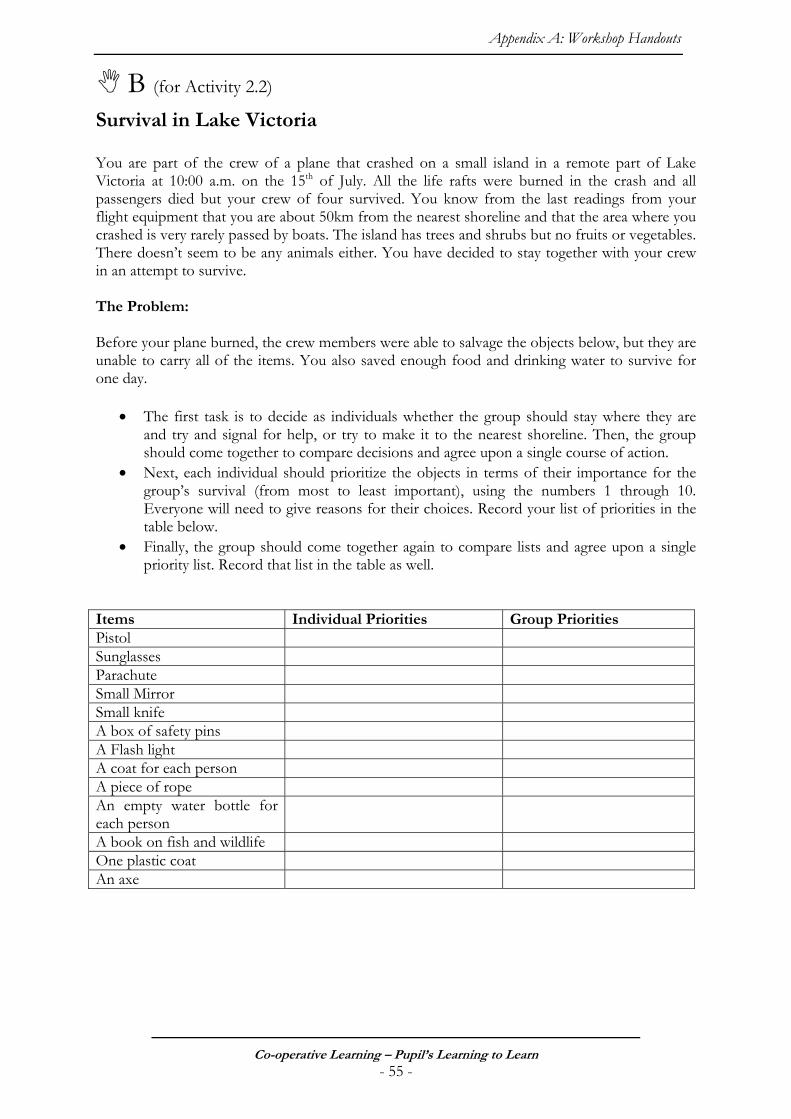
Appendix A: Workshop Handouts
Co-operative Learning – Pupil’s Learning to Learn - 55 -
B (for Activity 2.2)
Survival in Lake Victoria You are part of the crew of a plane that crashed on a small island in a remote part of Lake Victoria at 10:00 a.m. on the 15th of July. All the life rafts were burned in the crash and all passengers died but your crew of four survived. You know from the last readings from your flight equipment that you are about 50km from the nearest shoreline and that the area where you crashed is very rarely passed by boats. The island has trees and shrubs but no fruits or vegetables. There doesn’t seem to be any animals either. You have decided to stay together with your crew in an attempt to survive. The Problem: Before your plane burned, the crew members were able to salvage the objects below, but they are unable to carry all of the items. You also saved enough food and drinking water to survive for one day.
• The first task is to decide as individuals whether the group should stay where they are and try and signal for help, or try to make it to the nearest shoreline. Then, the group should come together to compare decisions and agree upon a single course of action.
• Next, each individual should prioritize the objects in terms of their importance for the group’s survival (from most to least important), using the numbers 1 through 10. Everyone will need to give reasons for their choices. Record your list of priorities in the table below.
• Finally, the group should come together again to compare lists and agree upon a single priority list. Record that list in the table as well.
Items Individual Priorities Group Priorities Pistol Sunglasses Parachute Small Mirror Small knife A box of safety pins A Flash light A coat for each person A piece of rope An empty water bottle for each person
A book on fish and wildlife One plastic coat An axe
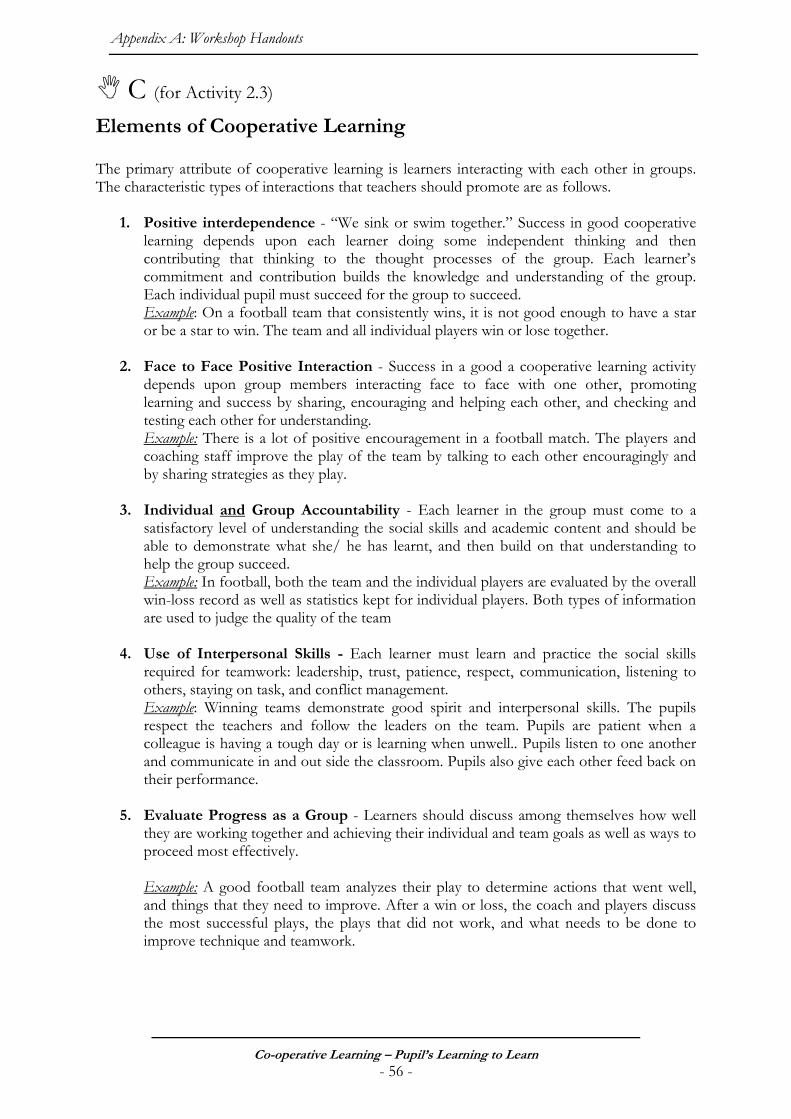
Appendix A: Workshop Handouts
Co-operative Learning – Pupil’s Learning to Learn - 56 -
C (for Activity 2.3)
Elements of Cooperative Learning The primary attribute of cooperative learning is learners interacting with each other in groups. The characteristic types of interactions that teachers should promote are as follows.
1. Positive interdependence - “We sink or swim together.” Success in good cooperative learning depends upon each learner doing some independent thinking and then contributing that thinking to the thought processes of the group. Each learner’s commitment and contribution builds the knowledge and understanding of the group. Each individual pupil must succeed for the group to succeed. Example: On a football team that consistently wins, it is not good enough to have a star or be a star to win. The team and all individual players win or lose together.
2. Face to Face Positive Interaction - Success in a good a cooperative learning activity depends upon group members interacting face to face with one other, promoting learning and success by sharing, encouraging and helping each other, and checking and testing each other for understanding. Example: There is a lot of positive encouragement in a football match. The players and coaching staff improve the play of the team by talking to each other encouragingly and by sharing strategies as they play.
3. Individual and Group Accountability - Each learner in the group must come to a
satisfactory level of understanding the social skills and academic content and should be able to demonstrate what she/ he has learnt, and then build on that understanding to help the group succeed. Example: In football, both the team and the individual players are evaluated by the overall win-loss record as well as statistics kept for individual players. Both types of information are used to judge the quality of the team
4. Use of Interpersonal Skills - Each learner must learn and practice the social skills required for teamwork: leadership, trust, patience, respect, communication, listening to others, staying on task, and conflict management. Example: Winning teams demonstrate good spirit and interpersonal skills. The pupils respect the teachers and follow the leaders on the team. Pupils are patient when a colleague is having a tough day or is learning when unwell.. Pupils listen to one another and communicate in and out side the classroom. Pupils also give each other feed back on their performance.
5. Evaluate Progress as a Group - Learners should discuss among themselves how well they are working together and achieving their individual and team goals as well as ways to proceed most effectively.
Example: A good football team analyzes their play to determine actions that went well, and things that they need to improve. After a win or loss, the coach and players discuss the most successful plays, the plays that did not work, and what needs to be done to improve technique and teamwork.
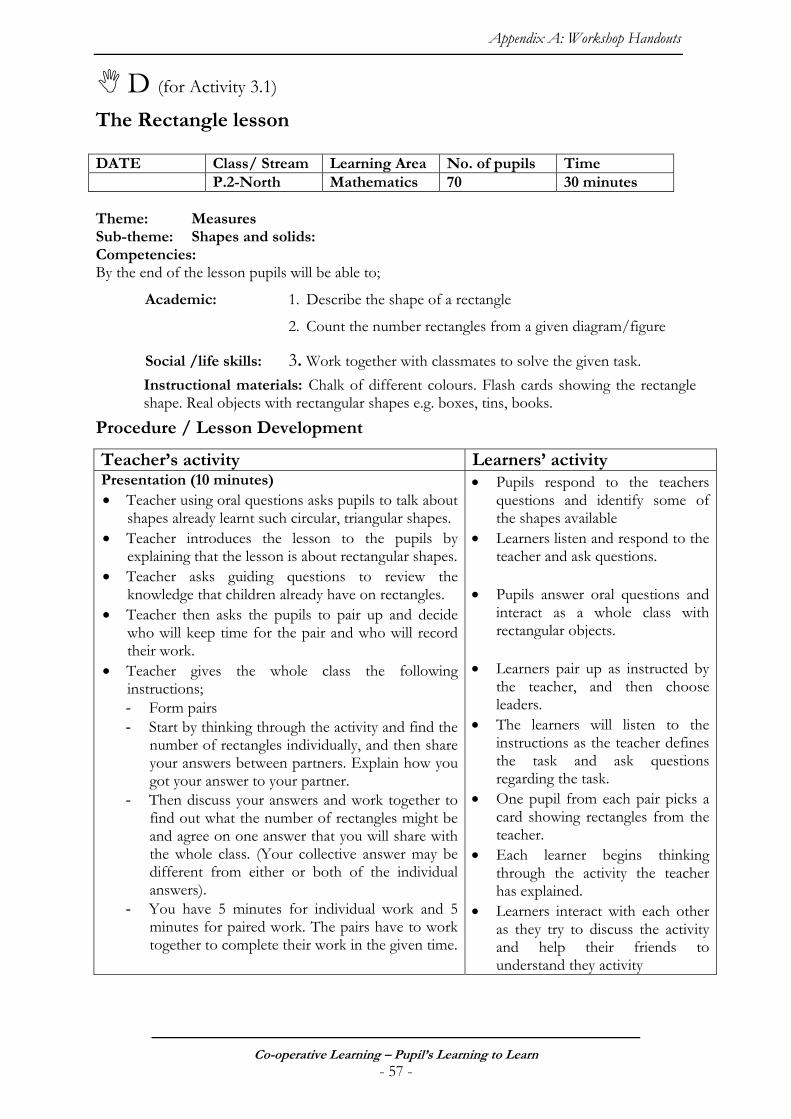
Appendix A: Workshop Handouts
Co-operative Learning – Pupil’s Learning to Learn - 57 -
D (for Activity 3.1)
The Rectangle lesson DATE Class/ Stream Learning Area No. of pupils Time P.2-North Mathematics 70 30 minutes Theme: Measures Sub-theme: Shapes and solids: Competencies: By the end of the lesson pupils will be able to;
Academic: 1. Describe the shape of a rectangle
2. Count the number rectangles from a given diagram/figure
Social /life skills: 3. Work together with classmates to solve the given task. Instructional materials: Chalk of different colours. Flash cards showing the rectangle shape. Real objects with rectangular shapes e.g. boxes, tins, books.
Procedure / Lesson Development
Teacher’s activity Learners’ activity Presentation (10 minutes) • Teacher using oral questions asks pupils to talk about
shapes already learnt such circular, triangular shapes. • Teacher introduces the lesson to the pupils by
explaining that the lesson is about rectangular shapes. • Teacher asks guiding questions to review the
knowledge that children already have on rectangles. • Teacher then asks the pupils to pair up and decide
who will keep time for the pair and who will record their work.
• Teacher gives the whole class the following instructions; - Form pairs - Start by thinking through the activity and find the
number of rectangles individually, and then share your answers between partners. Explain how you got your answer to your partner.
- Then discuss your answers and work together to find out what the number of rectangles might be and agree on one answer that you will share with the whole class. (Your collective answer may be different from either or both of the individual answers).
- You have 5 minutes for individual work and 5 minutes for paired work. The pairs have to work together to complete their work in the given time.
• Pupils respond to the teachers questions and identify some of the shapes available
• Learners listen and respond to the teacher and ask questions.
• Pupils answer oral questions and
interact as a whole class with rectangular objects.
• Learners pair up as instructed by
the teacher, and then choose leaders.
• The learners will listen to the instructions as the teacher defines the task and ask questions regarding the task.
• One pupil from each pair picks a card showing rectangles from the teacher.
• Each learner begins thinking through the activity the teacher has explained.
• Learners interact with each other as they try to discuss the activity and help their friends to understand they activity
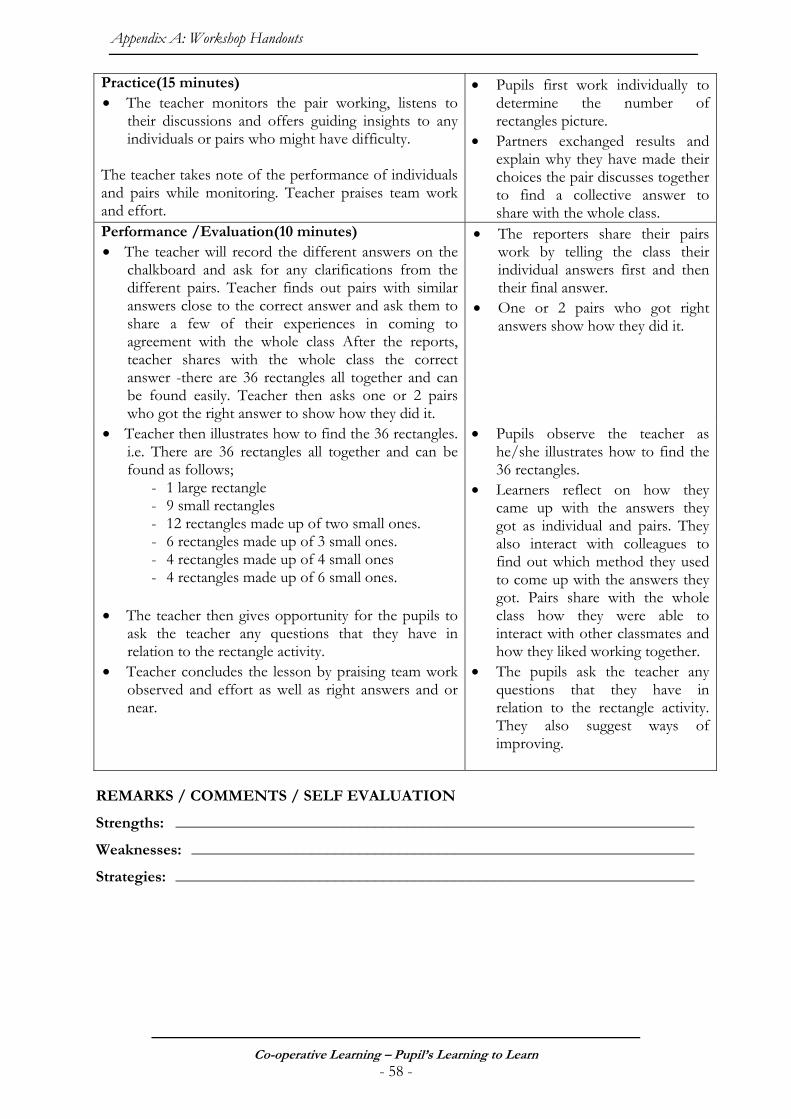
Appendix A: Workshop Handouts
Co-operative Learning – Pupil’s Learning to Learn - 58 -
Practice(15 minutes) • The teacher monitors the pair working, listens to
their discussions and offers guiding insights to any individuals or pairs who might have difficulty.
The teacher takes note of the performance of individuals and pairs while monitoring. Teacher praises team work and effort.
• Pupils first work individually to determine the number of rectangles picture.
• Partners exchanged results and explain why they have made their choices the pair discusses together to find a collective answer to share with the whole class.
Performance /Evaluation(10 minutes) • The teacher will record the different answers on the
chalkboard and ask for any clarifications from the different pairs. Teacher finds out pairs with similar answers close to the correct answer and ask them to share a few of their experiences in coming to agreement with the whole class After the reports, teacher shares with the whole class the correct answer -there are 36 rectangles all together and can be found easily. Teacher then asks one or 2 pairs who got the right answer to show how they did it.
• The reporters share their pairs work by telling the class their individual answers first and then their final answer.
• One or 2 pairs who got right answers show how they did it.
• Teacher then illustrates how to find the 36 rectangles. i.e. There are 36 rectangles all together and can be found as follows;
- 1 large rectangle - 9 small rectangles - 12 rectangles made up of two small ones. - 6 rectangles made up of 3 small ones. - 4 rectangles made up of 4 small ones - 4 rectangles made up of 6 small ones.
• The teacher then gives opportunity for the pupils to
ask the teacher any questions that they have in relation to the rectangle activity.
• Teacher concludes the lesson by praising team work observed and effort as well as right answers and or near.
• Pupils observe the teacher as he/she illustrates how to find the 36 rectangles.
• Learners reflect on how they came up with the answers they got as individual and pairs. They also interact with colleagues to find out which method they used to come up with the answers they got. Pairs share with the whole class how they were able to interact with other classmates and how they liked working together.
• The pupils ask the teacher any questions that they have in relation to the rectangle activity. They also suggest ways of improving.
REMARKS / COMMENTS / SELF EVALUATION
Strengths: _________________________________________________________________
Weaknesses: _______________________________________________________________
Strategies: _________________________________________________________________
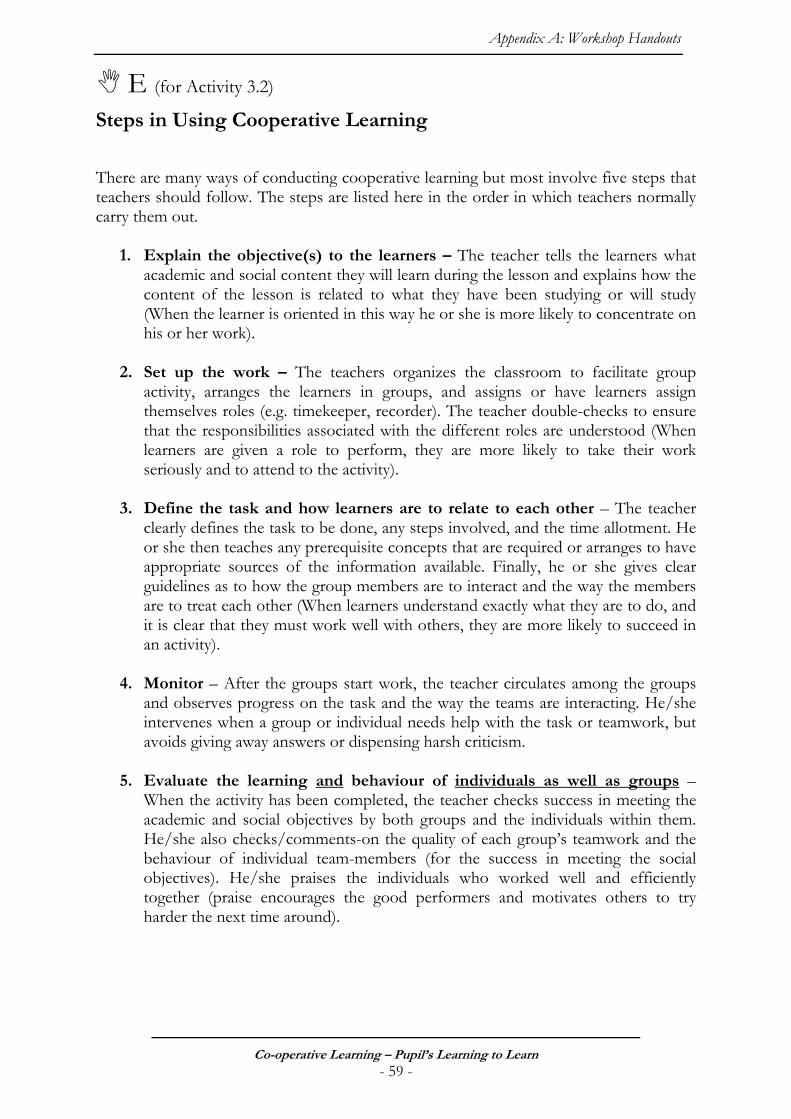
Appendix A: Workshop Handouts
Co-operative Learning – Pupil’s Learning to Learn - 59 -
E (for Activity 3.2)
Steps in Using Cooperative Learning
There are many ways of conducting cooperative learning but most involve five steps that teachers should follow. The steps are listed here in the order in which teachers normally carry them out.
1. Explain the objective(s) to the learners – The teacher tells the learners what academic and social content they will learn during the lesson and explains how the content of the lesson is related to what they have been studying or will study (When the learner is oriented in this way he or she is more likely to concentrate on his or her work).
2. Set up the work – The teachers organizes the classroom to facilitate group
activity, arranges the learners in groups, and assigns or have learners assign themselves roles (e.g. timekeeper, recorder). The teacher double-checks to ensure that the responsibilities associated with the different roles are understood (When learners are given a role to perform, they are more likely to take their work seriously and to attend to the activity).
3. Define the task and how learners are to relate to each other – The teacher
clearly defines the task to be done, any steps involved, and the time allotment. He or she then teaches any prerequisite concepts that are required or arranges to have appropriate sources of the information available. Finally, he or she gives clear guidelines as to how the group members are to interact and the way the members are to treat each other (When learners understand exactly what they are to do, and it is clear that they must work well with others, they are more likely to succeed in an activity).
4. Monitor – After the groups start work, the teacher circulates among the groups
and observes progress on the task and the way the teams are interacting. He/she intervenes when a group or individual needs help with the task or teamwork, but avoids giving away answers or dispensing harsh criticism.
5. Evaluate the learning and behaviour of individuals as well as groups –
When the activity has been completed, the teacher checks success in meeting the academic and social objectives by both groups and the individuals within them. He/she also checks/comments-on the quality of each group’s teamwork and the behaviour of individual team-members (for the success in meeting the social objectives). He/she praises the individuals who worked well and efficiently together (praise encourages the good performers and motivates others to try harder the next time around).
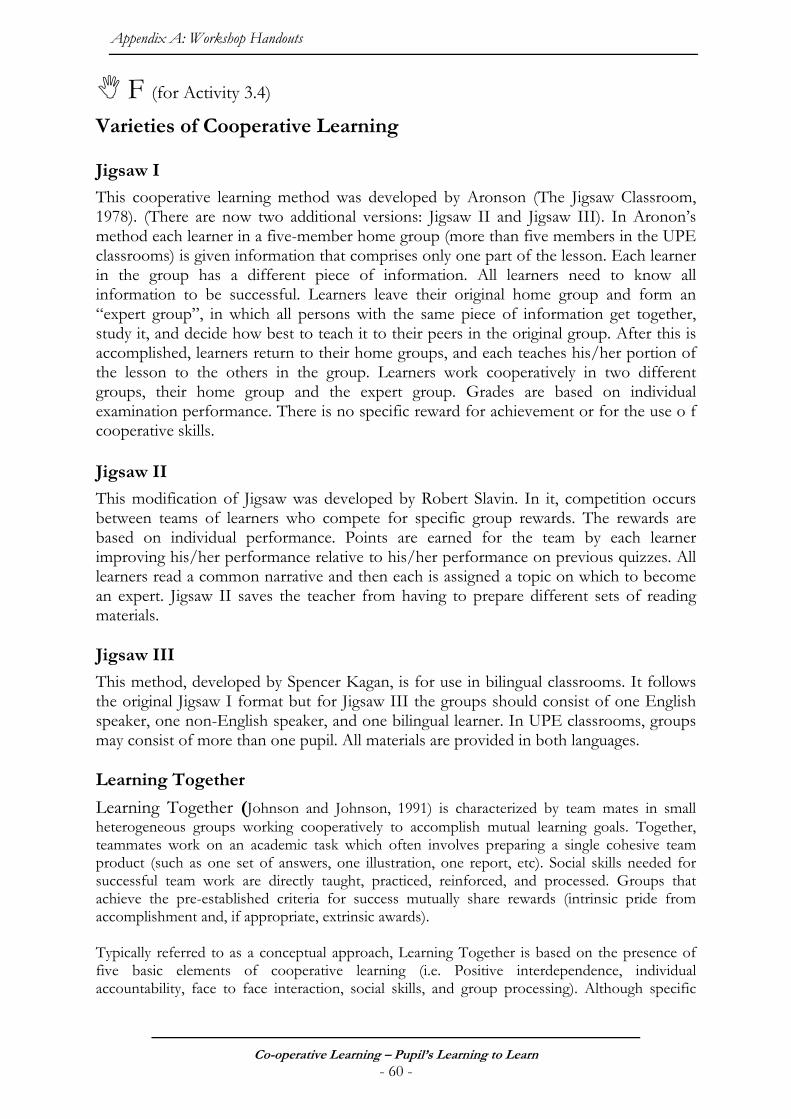
Appendix A: Workshop Handouts
Co-operative Learning – Pupil’s Learning to Learn - 60 -
F (for Activity 3.4)
Varieties of Cooperative Learning Jigsaw I
This cooperative learning method was developed by Aronson (The Jigsaw Classroom, 1978). (There are now two additional versions: Jigsaw II and Jigsaw III). In Aronon’s method each learner in a five-member home group (more than five members in the UPE classrooms) is given information that comprises only one part of the lesson. Each learner in the group has a different piece of information. All learners need to know all information to be successful. Learners leave their original home group and form an “expert group”, in which all persons with the same piece of information get together, study it, and decide how best to teach it to their peers in the original group. After this is accomplished, learners return to their home groups, and each teaches his/her portion of the lesson to the others in the group. Learners work cooperatively in two different groups, their home group and the expert group. Grades are based on individual examination performance. There is no specific reward for achievement or for the use o f cooperative skills. Jigsaw II
This modification of Jigsaw was developed by Robert Slavin. In it, competition occurs between teams of learners who compete for specific group rewards. The rewards are based on individual performance. Points are earned for the team by each learner improving his/her performance relative to his/her performance on previous quizzes. All learners read a common narrative and then each is assigned a topic on which to become an expert. Jigsaw II saves the teacher from having to prepare different sets of reading materials. Jigsaw III
This method, developed by Spencer Kagan, is for use in bilingual classrooms. It follows the original Jigsaw I format but for Jigsaw III the groups should consist of one English speaker, one non-English speaker, and one bilingual learner. In UPE classrooms, groups may consist of more than one pupil. All materials are provided in both languages. Learning Together
Learning Together (Johnson and Johnson, 1991) is characterized by team mates in small heterogeneous groups working cooperatively to accomplish mutual learning goals. Together, teammates work on an academic task which often involves preparing a single cohesive team product (such as one set of answers, one illustration, one report, etc). Social skills needed for successful team work are directly taught, practiced, reinforced, and processed. Groups that achieve the pre-established criteria for success mutually share rewards (intrinsic pride from accomplishment and, if appropriate, extrinsic awards). Typically referred to as a conceptual approach, Learning Together is based on the presence of five basic elements of cooperative learning (i.e. Positive interdependence, individual accountability, face to face interaction, social skills, and group processing). Although specific

Appendix A: Workshop Handouts
Co-operative Learning – Pupil’s Learning to Learn - 61 -
directions may vary between different Learning Together tasks, the basic elements of Corporative Learning are carefully incorporated into each learning together experience. Student Teams –Achievement - Divisions (STAD)
This method, developed by Robert Slavin, involves competition among groups. Learners are grouped heterogeneously by ability and gender etc. Learners learn materials in teams and take quizzes as individuals. Individual scores contribute to a group score. The points earned by the group are based on each learner’s improvement over previous quiz performance. Slavin considers this method appropriate for a variety of subjects, including science, if the focus is on learning material with a single right answer. Teams-Games-Tournaments (TGT)
Developed by DeVries and Slavin, this method involves the same use of heterogeneous teams (Cooperative Teams), instructional format, and worksheets, as does STAD. For the tournament, learners from different teams are placed in groups of three learners (or more for UPE classrooms) of comparable ability, where they cooperatively study to master learning, then individually apply their learning in a competitive game. Individuals will then move to homogeneous teams (Tournaments Teams) of equal ability. Typically the game is one in which learners take turns inn answering questions. Individuals win points for each question correctly answered. After the tournament, learners return to their cooperative teams with their individual scores. Each team calculates a Total Teams Score and winning teams are recognised. In TGT the academic game replaces quizzes. Although study teams stay together for six weeks, tournament content changes weekly. Slavin advises teachers against using tournament scores for individual quiz grades and suggests that quizzes be used as well as midterm and final examinations. He suggests that TGT can be used two to three days a week in science to learn basic concepts, with laboratory activities taking place on the other two days. It is also possible to alternate TGT with STAD on a weekly basis. Learners appear to enjoy the challenge of the tournaments and, because they compete with others of comparable ability, the competition is perceived to be fair.
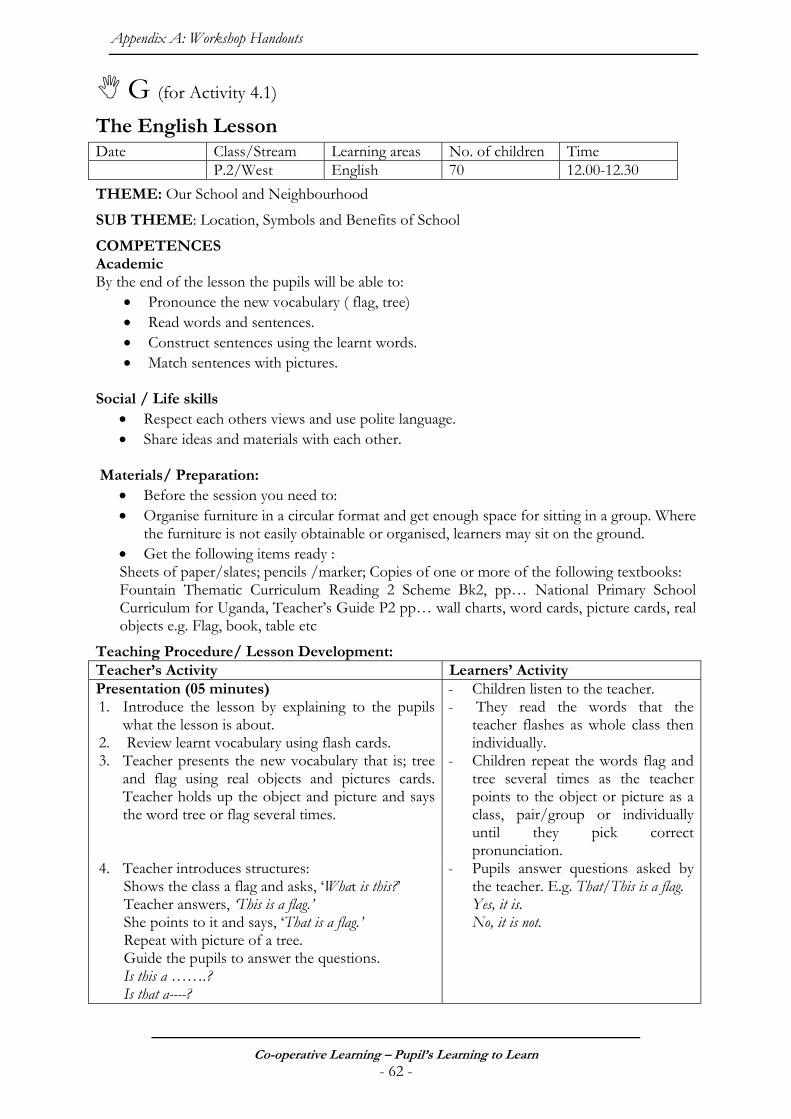
Appendix A: Workshop Handouts
Co-operative Learning – Pupil’s Learning to Learn - 62 -
G (for Activity 4.1)
The English Lesson Date Class/Stream Learning areas No. of children Time P.2/West English 70 12.00-12.30 THEME: Our School and Neighbourhood
SUB THEME: Location, Symbols and Benefits of School
COMPETENCES Academic By the end of the lesson the pupils will be able to:
• Pronounce the new vocabulary ( flag, tree) • Read words and sentences. • Construct sentences using the learnt words. • Match sentences with pictures.
Social / Life skills
• Respect each others views and use polite language. • Share ideas and materials with each other.
Materials/ Preparation:
• Before the session you need to: • Organise furniture in a circular format and get enough space for sitting in a group. Where
the furniture is not easily obtainable or organised, learners may sit on the ground. • Get the following items ready : Sheets of paper/slates; pencils /marker; Copies of one or more of the following textbooks: Fountain Thematic Curriculum Reading 2 Scheme Bk2, pp… National Primary School Curriculum for Uganda, Teacher’s Guide P2 pp… wall charts, word cards, picture cards, real objects e.g. Flag, book, table etc
Teaching Procedure/ Lesson Development: Teacher’s Activity Learners’ Activity Presentation (05 minutes) 1. Introduce the lesson by explaining to the pupils
what the lesson is about. 2. Review learnt vocabulary using flash cards. 3. Teacher presents the new vocabulary that is; tree
and flag using real objects and pictures cards. Teacher holds up the object and picture and says the word tree or flag several times.
- Children listen to the teacher. - They read the words that the
teacher flashes as whole class then individually.
- Children repeat the words flag and tree several times as the teacher points to the object or picture as a class, pair/group or individually until they pick correct pronunciation.
4. Teacher introduces structures: Shows the class a flag and asks, ‘What is this?’ Teacher answers, ‘This is a flag.’ She points to it and says, ‘That is a flag.’ Repeat with picture of a tree. Guide the pupils to answer the questions. Is this a …….? Is that a----?
- Pupils answer questions asked by the teacher. E.g. That/This is a flag. Yes, it is. No, it is not.
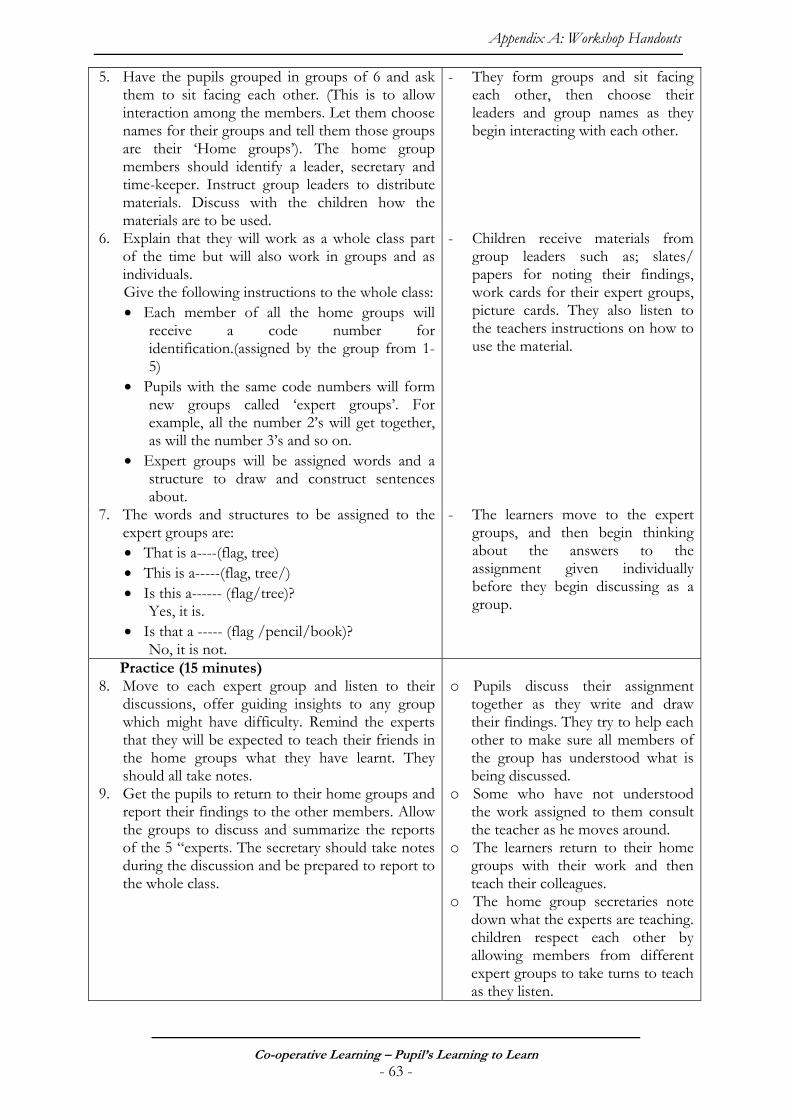
Appendix A: Workshop Handouts
Co-operative Learning – Pupil’s Learning to Learn - 63 -
5. Have the pupils grouped in groups of 6 and ask them to sit facing each other. (This is to allow interaction among the members. Let them choose names for their groups and tell them those groups are their ‘Home groups’). The home group members should identify a leader, secretary and time-keeper. Instruct group leaders to distribute materials. Discuss with the children how the materials are to be used.
- They form groups and sit facing each other, then choose their leaders and group names as they begin interacting with each other.
6. Explain that they will work as a whole class part of the time but will also work in groups and as individuals. Give the following instructions to the whole class: • Each member of all the home groups will
receive a code number for identification.(assigned by the group from 1-5)
• Pupils with the same code numbers will form new groups called ‘expert groups’. For example, all the number 2’s will get together, as will the number 3’s and so on.
• Expert groups will be assigned words and a structure to draw and construct sentences about.
- Children receive materials from group leaders such as; slates/ papers for noting their findings, work cards for their expert groups, picture cards. They also listen to the teachers instructions on how to use the material.
7. The words and structures to be assigned to the expert groups are: • That is a----(flag, tree) • This is a-----(flag, tree/) • Is this a------ (flag/tree)?
Yes, it is. • Is that a ----- (flag /pencil/book)?
No, it is not.
- The learners move to the expert groups, and then begin thinking about the answers to the assignment given individually before they begin discussing as a group.
Practice (15 minutes) 8. Move to each expert group and listen to their
discussions, offer guiding insights to any group which might have difficulty. Remind the experts that they will be expected to teach their friends in the home groups what they have learnt. They should all take notes.
9. Get the pupils to return to their home groups and report their findings to the other members. Allow the groups to discuss and summarize the reports of the 5 “experts. The secretary should take notes during the discussion and be prepared to report to the whole class.
o Pupils discuss their assignment
together as they write and draw their findings. They try to help each other to make sure all members of the group has understood what is being discussed.
o Some who have not understood the work assigned to them consult the teacher as he moves around.
o The learners return to their home groups with their work and then teach their colleagues.
o The home group secretaries note down what the experts are teaching. children respect each other by allowing members from different expert groups to take turns to teach as they listen.
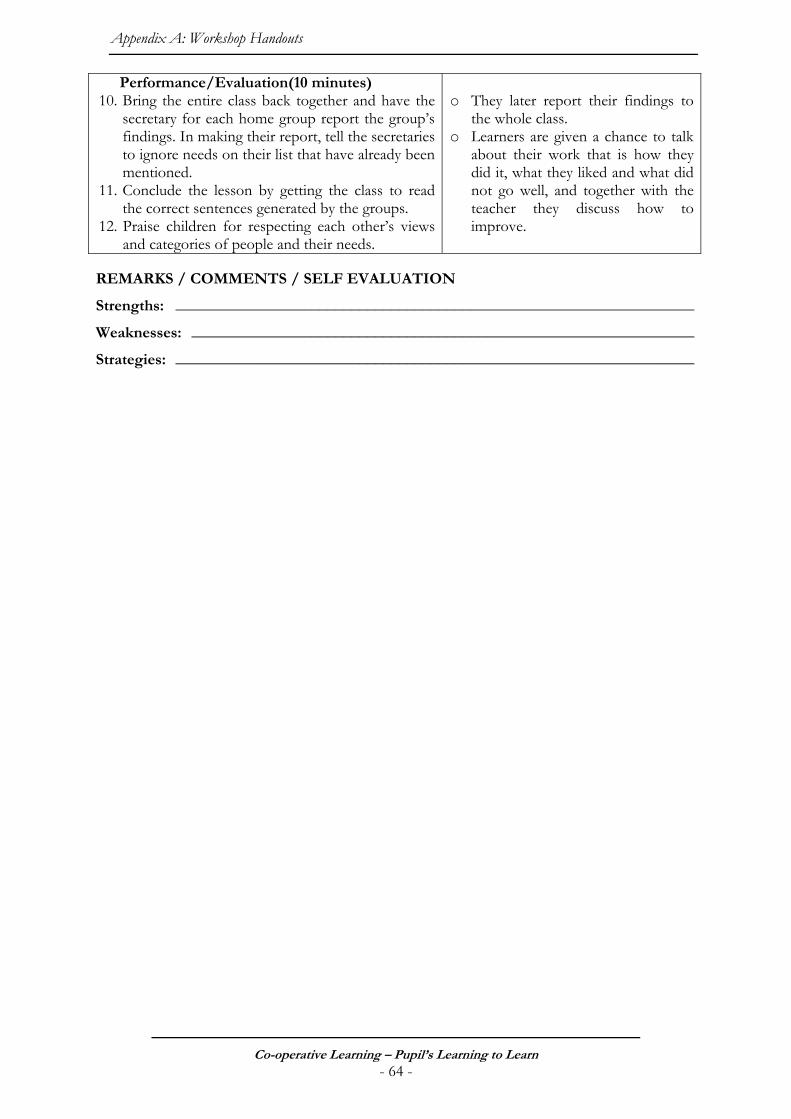
Appendix A: Workshop Handouts
Co-operative Learning – Pupil’s Learning to Learn - 64 -
Performance/Evaluation(10 minutes) 10. Bring the entire class back together and have the
secretary for each home group report the group’s findings. In making their report, tell the secretaries to ignore needs on their list that have already been mentioned.
11. Conclude the lesson by getting the class to read the correct sentences generated by the groups.
12. Praise children for respecting each other’s views and categories of people and their needs.
o They later report their findings to
the whole class. o Learners are given a chance to talk
about their work that is how they did it, what they liked and what did not go well, and together with the teacher they discuss how to improve.
REMARKS / COMMENTS / SELF EVALUATION
Strengths: _________________________________________________________________
Weaknesses: _______________________________________________________________
Strategies: _________________________________________________________________
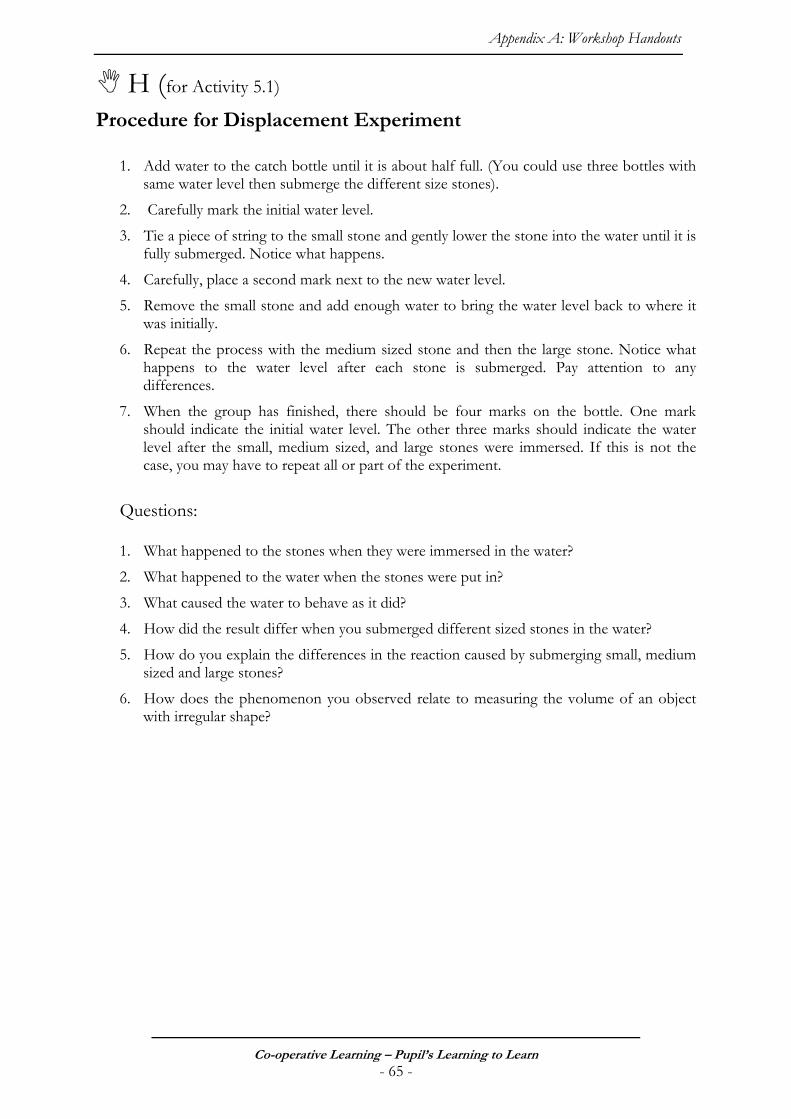
Appendix A: Workshop Handouts
Co-operative Learning – Pupil’s Learning to Learn - 65 -
H (for Activity 5.1)
Procedure for Displacement Experiment
1. Add water to the catch bottle until it is about half full. (You could use three bottles with same water level then submerge the different size stones).
2. Carefully mark the initial water level.
3. Tie a piece of string to the small stone and gently lower the stone into the water until it is fully submerged. Notice what happens.
4. Carefully, place a second mark next to the new water level.
5. Remove the small stone and add enough water to bring the water level back to where it was initially.
6. Repeat the process with the medium sized stone and then the large stone. Notice what happens to the water level after each stone is submerged. Pay attention to any differences.
7. When the group has finished, there should be four marks on the bottle. One mark should indicate the initial water level. The other three marks should indicate the water level after the small, medium sized, and large stones were immersed. If this is not the case, you may have to repeat all or part of the experiment.
Questions: 1. What happened to the stones when they were immersed in the water?
2. What happened to the water when the stones were put in?
3. What caused the water to behave as it did?
4. How did the result differ when you submerged different sized stones in the water?
5. How do you explain the differences in the reaction caused by submerging small, medium sized and large stones?
6. How does the phenomenon you observed relate to measuring the volume of an object with irregular shape?
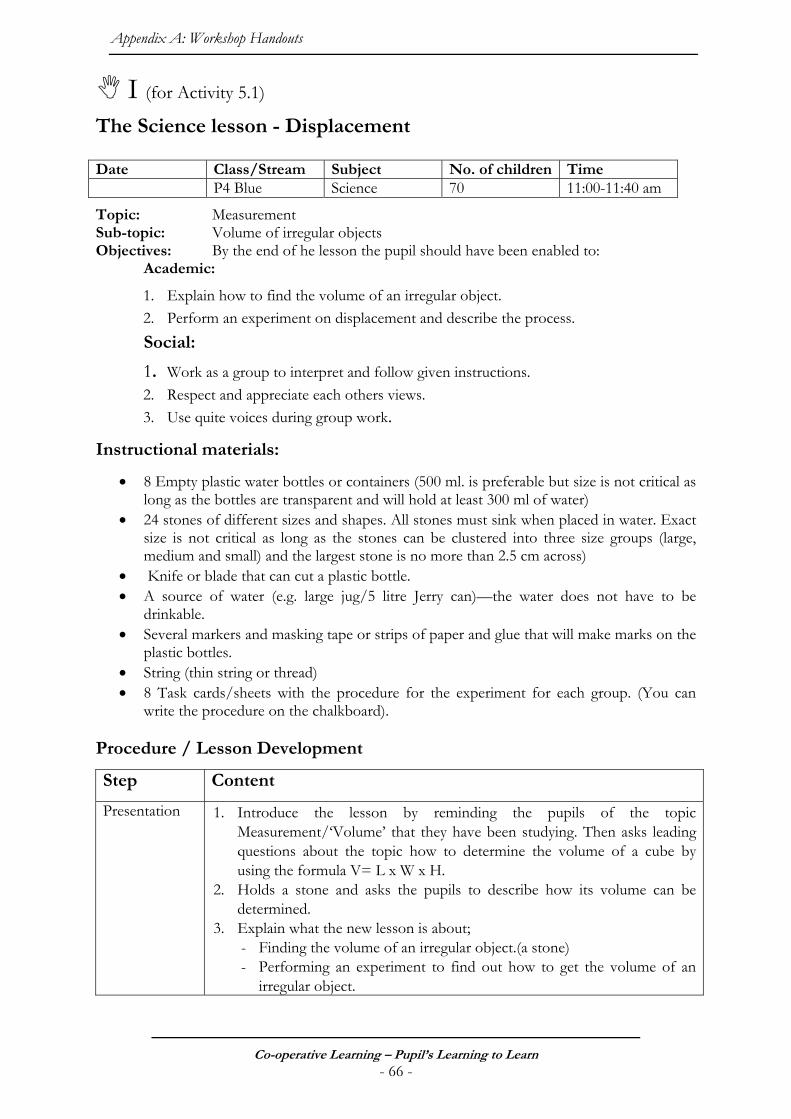
Appendix A: Workshop Handouts
Co-operative Learning – Pupil’s Learning to Learn - 66 -
I (for Activity 5.1)
The Science lesson - Displacement Date Class/Stream Subject No. of children Time P4 Blue Science 70 11:00-11:40 am
Topic: Measurement Sub-topic: Volume of irregular objects Objectives: By the end of he lesson the pupil should have been enabled to:
Academic:
1. Explain how to find the volume of an irregular object. 2. Perform an experiment on displacement and describe the process.
Social:
1. Work as a group to interpret and follow given instructions. 2. Respect and appreciate each others views. 3. Use quite voices during group work.
Instructional materials:
• 8 Empty plastic water bottles or containers (500 ml. is preferable but size is not critical as long as the bottles are transparent and will hold at least 300 ml of water)
• 24 stones of different sizes and shapes. All stones must sink when placed in water. Exact size is not critical as long as the stones can be clustered into three size groups (large, medium and small) and the largest stone is no more than 2.5 cm across)
• Knife or blade that can cut a plastic bottle. • A source of water (e.g. large jug/5 litre Jerry can)—the water does not have to be
drinkable. • Several markers and masking tape or strips of paper and glue that will make marks on the
plastic bottles. • String (thin string or thread) • 8 Task cards/sheets with the procedure for the experiment for each group. (You can
write the procedure on the chalkboard).
Procedure / Lesson Development
Step Content
Presentation 1. Introduce the lesson by reminding the pupils of the topic Measurement/‘Volume’ that they have been studying. Then asks leading questions about the topic how to determine the volume of a cube by using the formula V= L x W x H.
2. Holds a stone and asks the pupils to describe how its volume can be determined.
3. Explain what the new lesson is about; - Finding the volume of an irregular object.(a stone) - Performing an experiment to find out how to get the volume of an
irregular object.
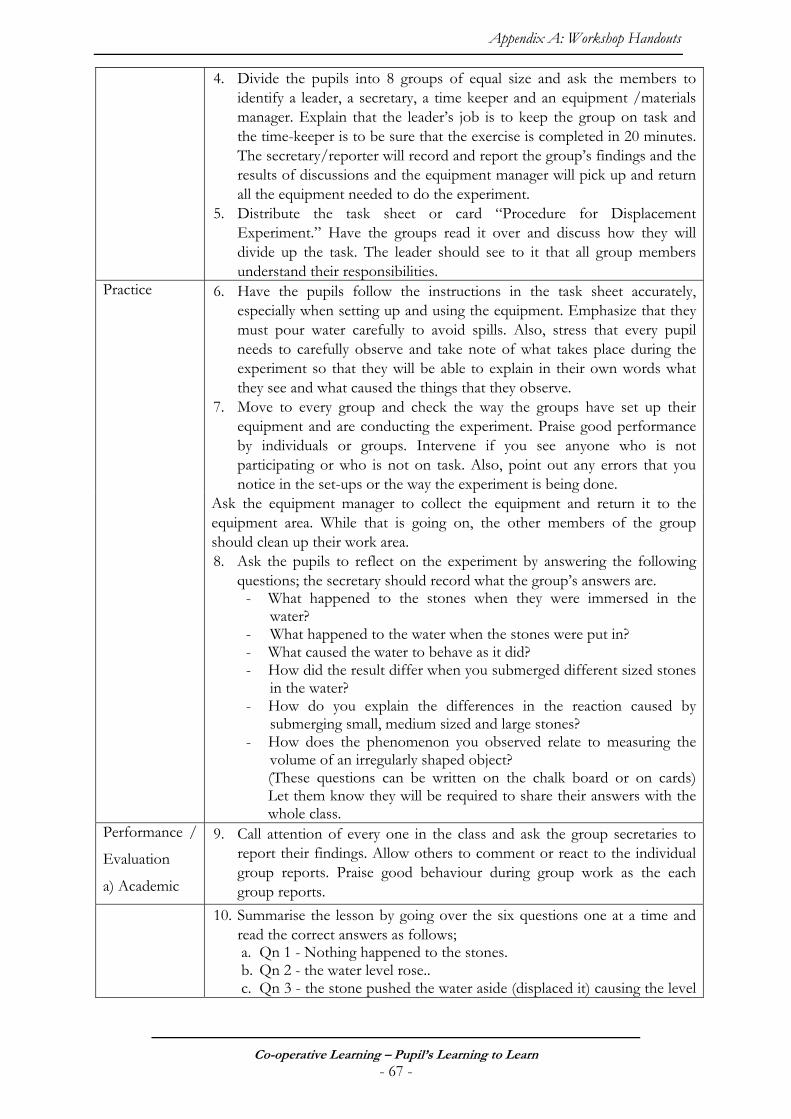
Appendix A: Workshop Handouts
Co-operative Learning – Pupil’s Learning to Learn - 67 -
4. Divide the pupils into 8 groups of equal size and ask the members to identify a leader, a secretary, a time keeper and an equipment /materials manager. Explain that the leader’s job is to keep the group on task and the time-keeper is to be sure that the exercise is completed in 20 minutes. The secretary/reporter will record and report the group’s findings and the results of discussions and the equipment manager will pick up and return all the equipment needed to do the experiment.
5. Distribute the task sheet or card “Procedure for Displacement Experiment.” Have the groups read it over and discuss how they will divide up the task. The leader should see to it that all group members understand their responsibilities.
6. Have the pupils follow the instructions in the task sheet accurately, especially when setting up and using the equipment. Emphasize that they must pour water carefully to avoid spills. Also, stress that every pupil needs to carefully observe and take note of what takes place during the experiment so that they will be able to explain in their own words what they see and what caused the things that they observe.
7. Move to every group and check the way the groups have set up their equipment and are conducting the experiment. Praise good performance by individuals or groups. Intervene if you see anyone who is not participating or who is not on task. Also, point out any errors that you notice in the set-ups or the way the experiment is being done.
Practice
Ask the equipment manager to collect the equipment and return it to the equipment area. While that is going on, the other members of the group should clean up their work area. 8. Ask the pupils to reflect on the experiment by answering the following
questions; the secretary should record what the group’s answers are. - What happened to the stones when they were immersed in the
water? - What happened to the water when the stones were put in? - What caused the water to behave as it did? - How did the result differ when you submerged different sized stones
in the water? - How do you explain the differences in the reaction caused by
submerging small, medium sized and large stones? - How does the phenomenon you observed relate to measuring the
volume of an irregularly shaped object? (These questions can be written on the chalk board or on cards) Let them know they will be required to share their answers with the whole class.
Performance /
Evaluation
a) Academic
9. Call attention of every one in the class and ask the group secretaries to report their findings. Allow others to comment or react to the individual group reports. Praise good behaviour during group work as the each group reports.
10. Summarise the lesson by going over the six questions one at a time and read the correct answers as follows; a. Qn 1 - Nothing happened to the stones. b. Qn 2 - the water level rose.. c. Qn 3 - the stone pushed the water aside (displaced it) causing the level
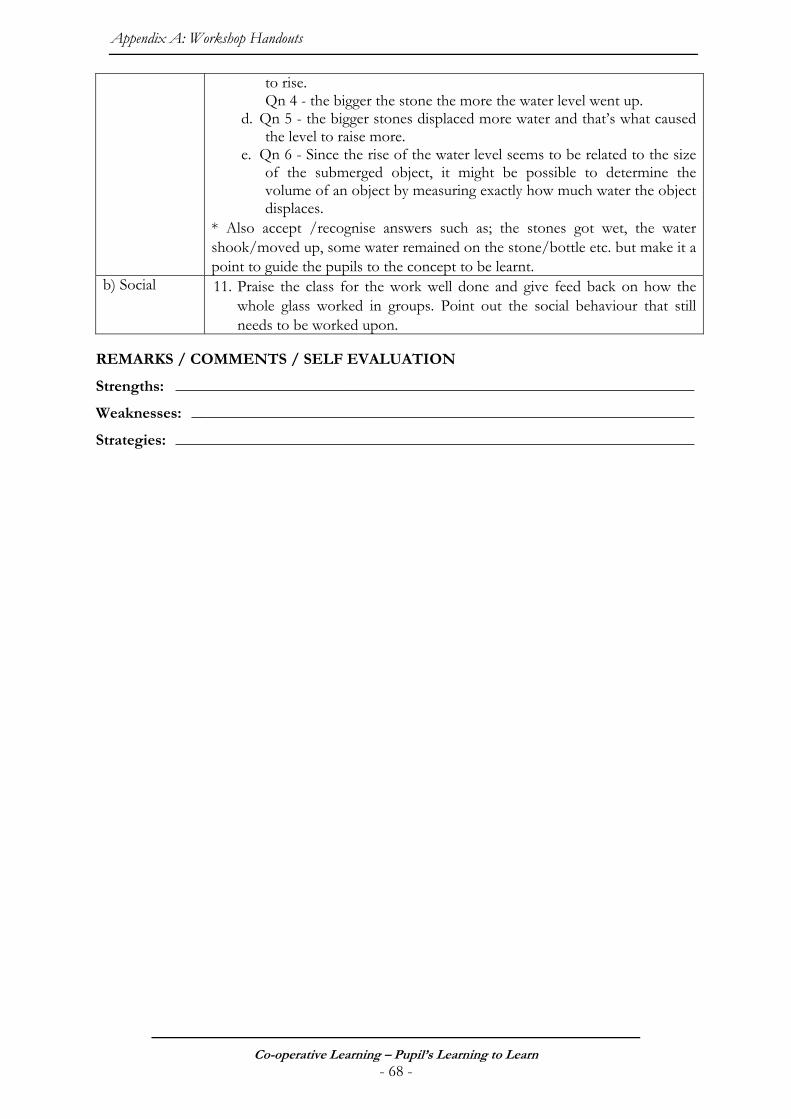
Appendix A: Workshop Handouts
Co-operative Learning – Pupil’s Learning to Learn - 68 -
to rise. Qn 4 - the bigger the stone the more the water level went up.
d. Qn 5 - the bigger stones displaced more water and that’s what caused the level to raise more.
e. Qn 6 - Since the rise of the water level seems to be related to the size of the submerged object, it might be possible to determine the volume of an object by measuring exactly how much water the object displaces.
* Also accept /recognise answers such as; the stones got wet, the water shook/moved up, some water remained on the stone/bottle etc. but make it a point to guide the pupils to the concept to be learnt.
b) Social 11. Praise the class for the work well done and give feed back on how the whole glass worked in groups. Point out the social behaviour that still needs to be worked upon.
REMARKS / COMMENTS / SELF EVALUATION
Strengths: _________________________________________________________________
Weaknesses: _______________________________________________________________
Strategies: _________________________________________________________________
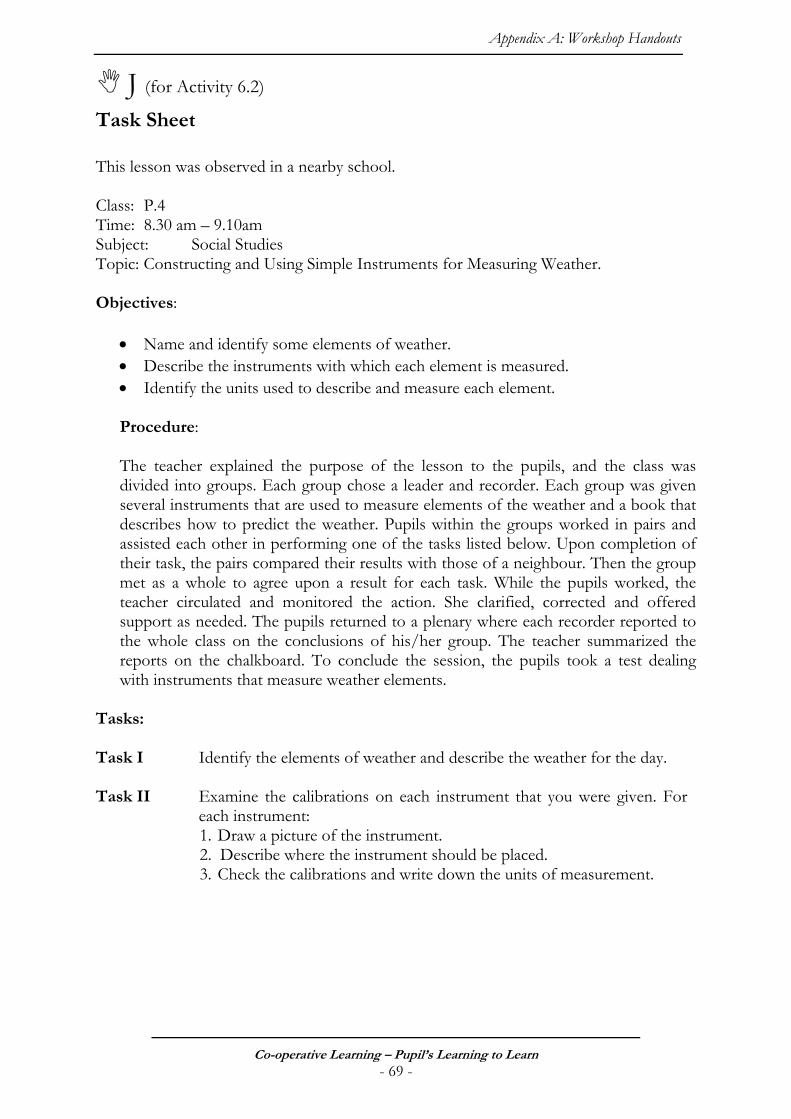
Appendix A: Workshop Handouts
Co-operative Learning – Pupil’s Learning to Learn - 69 -
J (for Activity 6.2)
Task Sheet This lesson was observed in a nearby school. Class: P.4 Time: 8.30 am – 9.10am Subject: Social Studies Topic: Constructing and Using Simple Instruments for Measuring Weather. Objectives:
• Name and identify some elements of weather. • Describe the instruments with which each element is measured. • Identify the units used to describe and measure each element. Procedure: The teacher explained the purpose of the lesson to the pupils, and the class was divided into groups. Each group chose a leader and recorder. Each group was given several instruments that are used to measure elements of the weather and a book that describes how to predict the weather. Pupils within the groups worked in pairs and assisted each other in performing one of the tasks listed below. Upon completion of their task, the pairs compared their results with those of a neighbour. Then the group met as a whole to agree upon a result for each task. While the pupils worked, the teacher circulated and monitored the action. She clarified, corrected and offered support as needed. The pupils returned to a plenary where each recorder reported to the whole class on the conclusions of his/her group. The teacher summarized the reports on the chalkboard. To conclude the session, the pupils took a test dealing with instruments that measure weather elements.
Tasks: Task I Identify the elements of weather and describe the weather for the day.
Task II Examine the calibrations on each instrument that you were given. For
each instrument: 1. Draw a picture of the instrument. 2. Describe where the instrument should be placed. 3. Check the calibrations and write down the units of measurement.
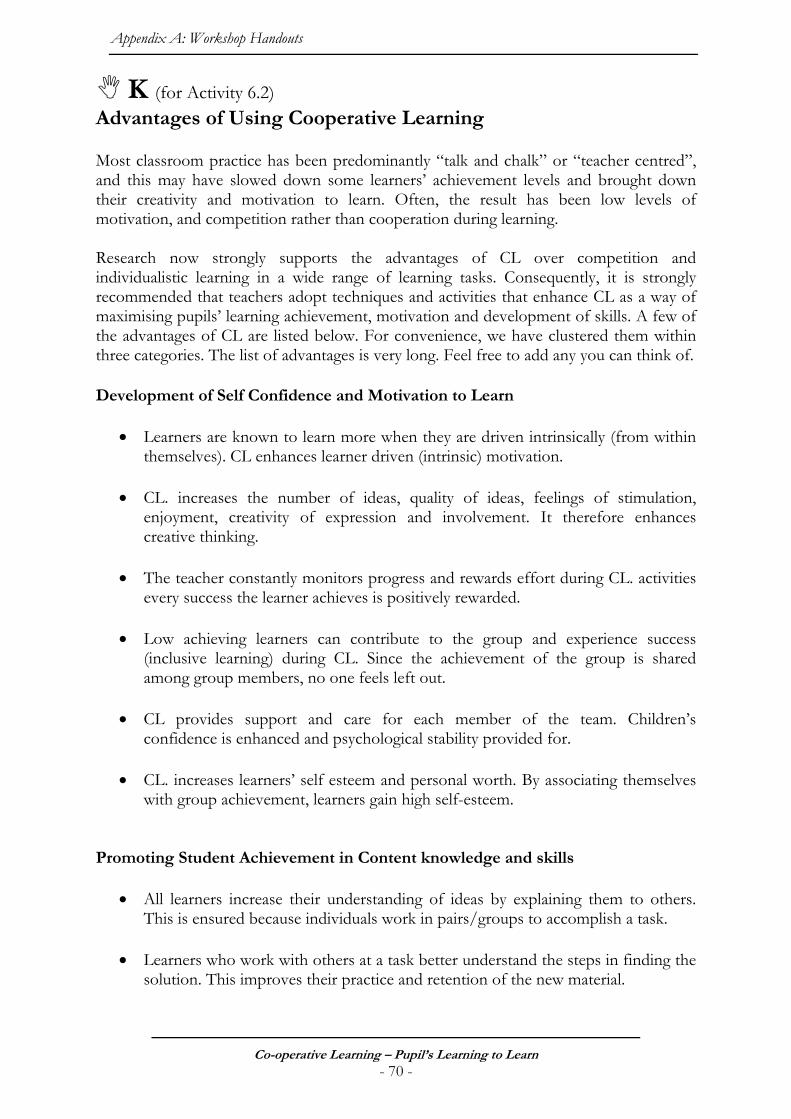
Appendix A: Workshop Handouts
Co-operative Learning – Pupil’s Learning to Learn - 70 -
K (for Activity 6.2) Advantages of Using Cooperative Learning Most classroom practice has been predominantly “talk and chalk” or “teacher centred”, and this may have slowed down some learners’ achievement levels and brought down their creativity and motivation to learn. Often, the result has been low levels of motivation, and competition rather than cooperation during learning. Research now strongly supports the advantages of CL over competition and individualistic learning in a wide range of learning tasks. Consequently, it is strongly recommended that teachers adopt techniques and activities that enhance CL as a way of maximising pupils’ learning achievement, motivation and development of skills. A few of the advantages of CL are listed below. For convenience, we have clustered them within three categories. The list of advantages is very long. Feel free to add any you can think of. Development of Self Confidence and Motivation to Learn
• Learners are known to learn more when they are driven intrinsically (from within themselves). CL enhances learner driven (intrinsic) motivation.
• CL. increases the number of ideas, quality of ideas, feelings of stimulation,
enjoyment, creativity of expression and involvement. It therefore enhances creative thinking.
• The teacher constantly monitors progress and rewards effort during CL. activities
every success the learner achieves is positively rewarded.
• Low achieving learners can contribute to the group and experience success (inclusive learning) during CL. Since the achievement of the group is shared among group members, no one feels left out.
• CL provides support and care for each member of the team. Children’s
confidence is enhanced and psychological stability provided for.
• CL. increases learners’ self esteem and personal worth. By associating themselves with group achievement, learners gain high self-esteem.
Promoting Student Achievement in Content knowledge and skills
• All learners increase their understanding of ideas by explaining them to others. This is ensured because individuals work in pairs/groups to accomplish a task.
• Learners who work with others at a task better understand the steps in finding the
solution. This improves their practice and retention of the new material.
Appendix A: Workshop Handouts
Co-operative Learning – Pupil’s Learning to Learn - 71 -
• Success associated with CL drives the learners to learn better. As a result of participating actively their achievement levels also rise.
• CL. allows for ongoing evaluation by learners and teachers both during and after
group activities. The process is a joint effort of the two parties and the reason for lack of progress is easily identified; and corrective measures can be instituted.
• The processes learners go through sharpen their intellect and new ideas are
generated by individuals and the whole group when they are at task. The urge to get the solution to the problem results in highlighting the level of reasoning (Metacognition).
• Active learning experience is provided through the activity. The ‘practice’ aspect
keeps learners alert throughout the task.
• The tasks presented pose a problem which must be solved. By continuing to search for answers, the pupils’ level of persistence and perseverance increases, and so does the level of concentration.
• The inability of some learners to perform well in some subjects, it argued, stems
from attitude especially coupled with fear. CL eliminates fear for many individuals and builds positive attitude.
Development of Social Skills
• Learners get to know and trust each other. The arrangement forces learners to work with each other and in so doing; the pupils gain a high level of companionship, trust, understanding and feeling for each other.
• Activities are structured such that every member of the group/pair has a role to
play. The skill of taking turns and playing roles is therefore developed.
• Learners are assigned to others to form pairs or work in groups. Each member is expected to work within their group. The social skill of identifying and belonging with a group is enhanced.
• CL encourages optimal use of resources. The learners use materials in
groups/pairs, so the skill of sharing is developed.
• Interpersonal skills must be mastered for each group to accomplish the tasks. Conflicts must be resolved constructively, disagreements are resolved amicably.
• In many groups learners come from different backgrounds. When they work in
teams as pairs/groups, the differences are narrowed and a positive relationship develops among them.
Appendix A: Workshop Handouts
Co-operative Learning – Pupil’s Learning to Learn - 72 -
• Working as a pair requires a contribution from both members. So does working in groups. Interdependence is enhanced since the results will be deemed a group product. In addition, individual accountability is improved.
• Learners get peer support and social support (as part of the learning team,
learners, accent and support each other to achieve success)
• CL develops learners’ communication skills because they must make use of voices, expression of ideas and feelings etc.
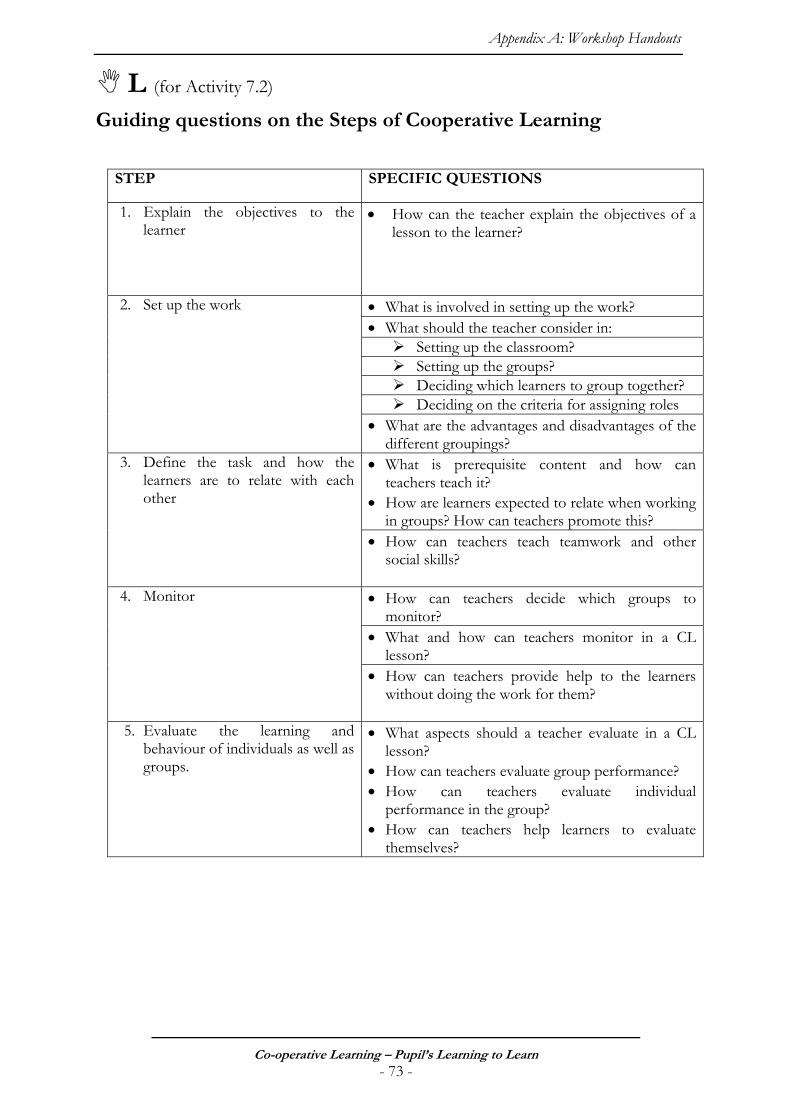
Appendix A: Workshop Handouts
Co-operative Learning – Pupil’s Learning to Learn - 73 -
L (for Activity 7.2)
Guiding questions on the Steps of Cooperative Learning
STEP SPECIFIC QUESTIONS
1. Explain the objectives to the learner
• How can the teacher explain the objectives of a lesson to the learner?
• What is involved in setting up the work? • What should the teacher consider in:
Setting up the classroom? Setting up the groups? Deciding which learners to group together? Deciding on the criteria for assigning roles
2. Set up the work
• What are the advantages and disadvantages of the different groupings?
• What is prerequisite content and how can teachers teach it?
• How are learners expected to relate when working in groups? How can teachers promote this?
3. Define the task and how the learners are to relate with each other
• How can teachers teach teamwork and other social skills?
• How can teachers decide which groups to
monitor? • What and how can teachers monitor in a CL
lesson?
4. Monitor
• How can teachers provide help to the learners without doing the work for them?
5. Evaluate the learning and
behaviour of individuals as well as groups.
• What aspects should a teacher evaluate in a CL lesson?
• How can teachers evaluate group performance? • How can teachers evaluate individual
performance in the group? • How can teachers help learners to evaluate
themselves?
Appendix A: Workshop Handouts
Co-operative Learning – Pupil’s Learning to Learn - 74 -
M (for Activity 7.2)
Procedures for Using Cooperative Learning
Before using CL a teacher must plan ways to prepare the learners to operate within the new way learning then follow the steps in using CL that were introduced during session 3. This handout describes some ideas that may make the process easier. Preparing the Learners The learners in our classes come from different backgrounds and have different learning experiences. Some learners might have experience with learning in groups and others may not. Some may enjoy working in group work while others may prefer working alone. So, before you start using CL you need to be aware of the learners’ preferences and aptitudes for working in groups and think about ways to help the reluctant ones by providing reassurances where needed. Implementing the Steps for Using Cooperative Learning In session 3 you learned that there are five steps that teachers should follow when implementing CL. The steps are repeated below along with a few tips as to ways to carry them out effectively.
1. Explain the objectives to the learners - Tell the learners what they are going to learn in the lesson and how its content is related to what they have been learning or will learn in the future to enable them concentrate on their work.
2. Set up the work – Before setting up the work the teacher has a number of things to think about e.g. organizing the classroom, deciding which learners to group together, and his/her basis for assigning roles.
a. Organizing the Classroom. Think in advance where the learners are going
to sit (on the floor, in circles, grouped around tables scattered around the room, outside the classroom?) and how the arrangement will be achieved (e.g. learners will move the tables?). These decisions will depend, in part, on the types of activities that will be involved in the lesson but may also be driven by the space available and the number of individual learners and groups that will be involved.
b. Grouping the Learners. Before grouping the learners, think very carefully about who should be in which group. Doing this will require reflecting on the individual needs of learners, resources, time and the nature of task.
Be sure the groupings will not create conflict, hostility or frustration to any of the members. Decide whether the groups are going to be permanent or whether there will be a need for change. Remember, different kinds of groups offer different kinds of interaction and learning so try to remain flexible. Here are some possible ways to proceed.
Appendix A: Workshop Handouts
Co-operative Learning – Pupil’s Learning to Learn - 75 -
Grouping by Ability This way of grouping caters for ability by putting the bright, average and slow learners in separate groups. The main advantage of this type of grouping is that learners of differing ability can work at appropriate paces. Another advantage is that it is easy to manage the class because the learners can be kept on task with appropriate work. One main disadvantage of grouping by ability is that the slower learners don’t get the opportunity to learn from the bright ones. Another disadvantage is that the slower learners can become labelled and stigmatized. With this in mind, it is wise to avoid using names for the groups like “bright” and “slow.” Though the learners will likely know the basis for the groups they are in, using names based on such things as colours can help avoid stigmatization. Letting the learners choose their own names is one way to avoid the problem. You can guide them to choose a name based on their favourite colours, birds, mountains animals or flowers.
Mixed Ability Groups This leads to groups of learners with differing levels of ability and proficiency. It provides the opportunity for learners to easily learn from one another because an assortment of talents and abilities are available. The slower learners are boosted by being helped and encouraged by the brighter ones but it is difficult to challenge the learner who is more apt. Parents of brighter learners may object to this form of grouping on the assumption that their offspring will be slowed down by having to help group-mates who are not as quick.
Friendship Grouping/Social Grouping In this approach, learners are free to choose who they want to work with. This arrangement encourages more active participation because learners are interacting with friends. However, grouping in this way may encourage chatting and learners spending less time on task.
Grouping by Interest This type of grouping is based what the learners want to do. The common interest of learners in a group often leads to a sharing of ideas and good social interaction. The main advantage is that learners do best what they choose to do rather than what the teacher chooses for them. The disadvantage is that learners may choose to work with a friend rather than a subject or activity.
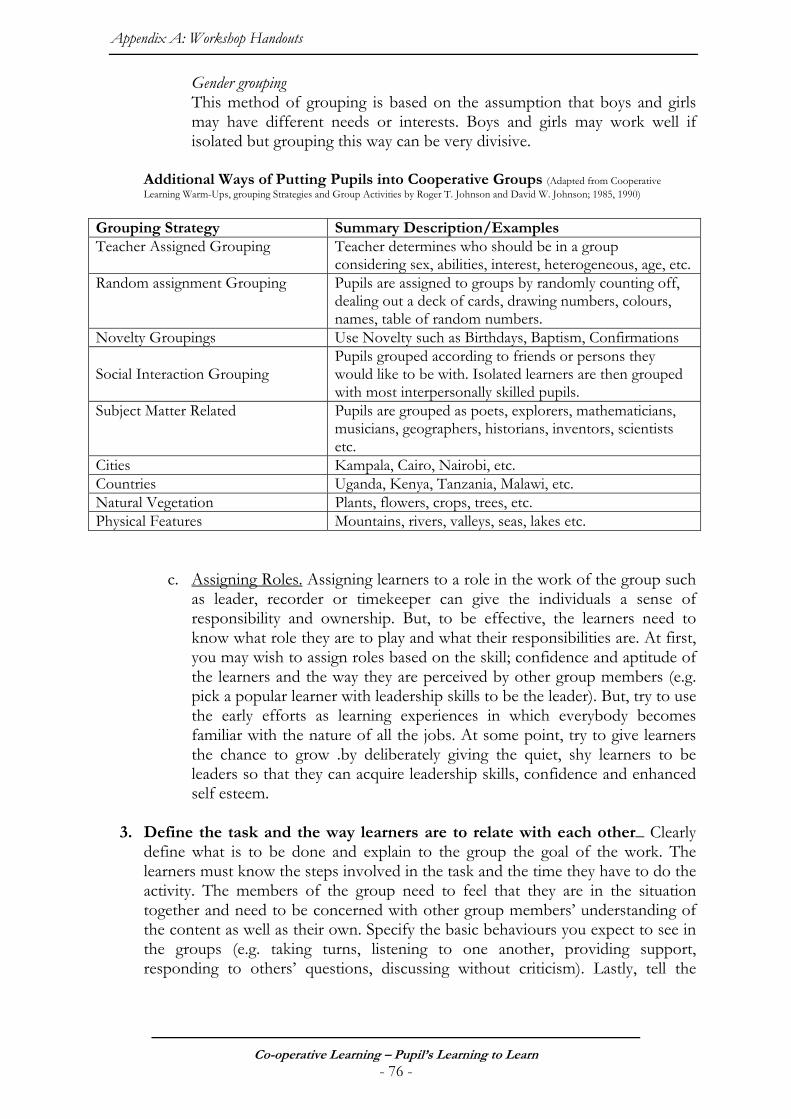
Appendix A: Workshop Handouts
Co-operative Learning – Pupil’s Learning to Learn - 76 -
Gender grouping This method of grouping is based on the assumption that boys and girls may have different needs or interests. Boys and girls may work well if isolated but grouping this way can be very divisive.
Additional Ways of Putting Pupils into Cooperative Groups (Adapted from Cooperative Learning Warm-Ups, grouping Strategies and Group Activities by Roger T. Johnson and David W. Johnson; 1985, 1990)
Grouping Strategy Summary Description/Examples Teacher Assigned Grouping Teacher determines who should be in a group
considering sex, abilities, interest, heterogeneous, age, etc.Random assignment Grouping Pupils are assigned to groups by randomly counting off,
dealing out a deck of cards, drawing numbers, colours, names, table of random numbers.
Novelty Groupings Use Novelty such as Birthdays, Baptism, Confirmations Social Interaction Grouping
Pupils grouped according to friends or persons they would like to be with. Isolated learners are then grouped with most interpersonally skilled pupils.
Subject Matter Related Pupils are grouped as poets, explorers, mathematicians, musicians, geographers, historians, inventors, scientists etc.
Cities Kampala, Cairo, Nairobi, etc. Countries Uganda, Kenya, Tanzania, Malawi, etc. Natural Vegetation Plants, flowers, crops, trees, etc. Physical Features Mountains, rivers, valleys, seas, lakes etc.
c. Assigning Roles. Assigning learners to a role in the work of the group such
as leader, recorder or timekeeper can give the individuals a sense of responsibility and ownership. But, to be effective, the learners need to know what role they are to play and what their responsibilities are. At first, you may wish to assign roles based on the skill; confidence and aptitude of the learners and the way they are perceived by other group members (e.g. pick a popular learner with leadership skills to be the leader). But, try to use the early efforts as learning experiences in which everybody becomes familiar with the nature of all the jobs. At some point, try to give learners the chance to grow .by deliberately giving the quiet, shy learners to be leaders so that they can acquire leadership skills, confidence and enhanced self esteem.
3. Define the task and the way learners are to relate with each other_ Clearly
define what is to be done and explain to the group the goal of the work. The learners must know the steps involved in the task and the time they have to do the activity. The members of the group need to feel that they are in the situation together and need to be concerned with other group members’ understanding of the content as well as their own. Specify the basic behaviours you expect to see in the groups (e.g. taking turns, listening to one another, providing support, responding to others’ questions, discussing without criticism). Lastly, tell the
Appendix A: Workshop Handouts
Co-operative Learning – Pupil’s Learning to Learn - 77 -
group how they are to report. Doing these things this will help the individuals and the group to understand exactly what they are to do and how they are to do it.
4. Monitor –
• Circulate among the active groups and monitor carefully how well they are functioning.
• Check to see if the learners are on-task academically and that they are interacting well. Jot down observations that will help you to provide feedback to the whole class later. Intervene whenever necessary.
• Provide assistance with the task by clarifying instructions, reviewing procedures, teaching task skills or asking and answering questions. Draw upon the skills and expertise of the group as much as possible. Teach collaborative skills if the group is not functioning properly. Find ways of turning problem solving back to group members. Doing so can increase individual commitment to the group and maximize learning
5. Evaluate the Learning and behaviour of individuals as well as groups-
Check the success of the individuals and the groups in meeting both the academic and the social objectives, when the learners have completed the task. One way that the teacher can check the progress of individuals is by administering tests individually. Another is to randomly select one group member to be quizzed on what has been done and learned. Evaluation of group performance can include judging the quality of group reports and directly observing the behaviour of the group (as part of monitoring). Having the learners reflect on what went well in the group and determining what could be improved the next time can be an effective process as well.
Appendix A: Workshop Handouts
Co-operative Learning – Pupil’s Learning to Learn - 78 -
N (for summarizing session 8)
Using Cooperative Learning In Large Classes Cooperative learning is always characterised by the presence of the elements and steps that you have become familiar with but you must make adjustments to cope with differing circumstances. This handout focuses on some ways that teachers in Uganda can implement CL within the constraints that they face in handling the large classes that characterize Ugandan primary schools. Review of Essential Tasks for CL:
Every teacher who proposes to use CL has many decisions to make and things to do some of the more important ones are listed below.
• Decide when to use CL. Timing? Content? • Organise the classroom for CL. • Establish criteria and procedures for forming groups. • Establish criteria and procedures for selecting and orienting group leaders. • Establish procedures for providing learners with any prerequisite knowledge or skills that
they lack. • Decide how to will explain to learners the academic tasks they are to do and the
cooperative methods they are to exhibit. • Decide ways to monitor the progress of the groups. • Determine ways to evaluate the achievement of individual learners and the collective
achievements of the group. The special problem for Ugandan primary teachers is that they must make the key decisions and do what is required within rather severe constraints. The biggest problem is finding ways to cope with the very large numbers of pupils in each class. The rest of this handout is devoted to some suggestions as to how to do this. 1. Solicit Volunteers:
One way to make it easier to cope with large classes is to get some help. Monitoring several small groups is less difficult when there are two or more people to share the work. To find this kind of help you can solicit volunteers. Concerned parents are a particularly rich source of volunteer help. When dealing with volunteers, it helps keep in mind that they are not likely to be trained teachers. You must be careful in making assignments and be clear as to what the person is expected to do. 2. Make small groups larger:
CL is often characterised by the use of small groups of 3-6 learners. However, in large classes using groups this small would result in large numbers of groups which in turn, would be difficult to manage. One way to simplify matters is to include larger numbers of learners in each small
Appendix A: Workshop Handouts
Co-operative Learning – Pupil’s Learning to Learn - 79 -
group. Doing so reduces the total number of groups and makes it easier for the teacher to monitor the action. Optimal group size for Ugandan classrooms is 8-10 pupils but even larger numbers of participants may be necessary. 3. Get help from your pupils
Cooperative learning enables pupils take responsibility for some of their own learning thus freeing up the teacher to deal with them individually or in small groups. One way to take full advantage of this bonus is to identify a few pupils who have leadership skills and train them to be small group leaders. If the training is well done it will create a cadre of “deputy teachers” who can ensure that the small group sessions go smoothly and take a lot of pressure off the teacher. A good basis for training group leaders is the handout for session 2 entitled “Elements of Cooperative Learning” which spells out the way that pupils should behave in small groups. Explain to the budding leaders what each element entails and give them some practice in putting the activity into practice. Then, when the trainees begin to actually serve as leaders, monitor their behaviour, commend and make corrections when necessary. One disadvantage to using specially trained group leaders is that the practice limits the number of pupils who get to be the leader. This can be a real limitation to a withdrawn learner who would really profit from the experience. You can overcome this problem by changing leaders periodically. 4. Divide the class in two
Another easier way to use CL with large classes is to divide the class into two sections and have one section work in groups, while the other works as a whole class. After a time, the two groups can be switched so that everyone experiences both types of instruction.
Dividing the class in this way simplifies the teacher’s management problems because the number of pupils operating in the CL environment is cut in half. On the other hand, doing this means that the teacher must plan two distinct lessons and keep an eye on two distinct sets of pupils. This requires teacher’s thorough planning and a lot of learning resources to keep the small groups learning effectively while the teacher deals with the large group.
You need to ensure that the overall environment is conducive to learning if you try this process. You must set up two different learning areas and supply plenty of instructional materials for learners to interact with. This provides time for the groups to collaborate effectively but gives the teacher the chance to monitor the activity while simultaneously keeping the large group productively busy. 5. Vary the way pupils interact
A. Try using a Jigsaw
Jigsaw is a commonly used procedure for organizing CL that features the formation of expert groups to discuss parts of a topic. You were briefly introduced to jigsaw in session 3 and experienced the process in Sessions 4 and 7. By using jigsaw in a large class a teacher is able to cover more content in each lesson.
Appendix A: Workshop Handouts
Co-operative Learning – Pupil’s Learning to Learn - 80 -
Here’s an example of using jigsaw to teach P.5 Social Studies.
Suppose the topic is: Uganda as an independent country and the subtopic is: Symbols of an independent nation. The subtopic could be further divided into four focus areas with different activities for each. If that were done, four different groups could be doing different activities at the same time. Here is an example of how the breakdown might be made. Activity One: Colours of the national flag 1. Name the colours of the Uganda national flag. 2. Discuss the meaning of those colours.
3. Illustrate the colours of the Uganda National Flag. Activity Two: The national anthem 1. Discuss the words of the anthem. 2. Discuss the significance of the anthem. 3. Talk about occasions when the anthem is sung. 4. Practice singing the anthem when standing on attention. Activity Three: Coat of Arms
1. Discuss the meaning of the pictures which make up the Uganda coat of arms. 2. Talk about some of the places where the coat of arms appears. Activity Four: Language 1. Identify the different languages spoken in Uganda. 2. Explain why English is Uganda’s official language. Now let us consider a way to organize the instruction using a jigsaw. Assume that you have a class of one hundred learners. One way to proceed would be to put the pupils into ten groups of ten learners each and give each learner a number from 1 to 10. Then, you might assign each group to one of the subtasks listed above. When the subtasks have been completed you would ask the pupils to regroup so that all number 1’s, 2’s, 3’s sit together and so on until you get to the 10’s. Call each of the new groups an “expert group”
In the expert groups, each learner will have previously studied a different topic so they all have information that the other members do not. Each member then shares his/her information with the others. Once the information has been shared, all members of each expert group must decide how best to teach everything they’ve learned to their peers back in the original (home) group. The learners then return to their home groups, where everyone teaches her/his portion of the topic to the others in the group. A big advantage of jig saw is that each learner has a real need to participate in their home group. This is because he/she must report to the expert group on what the home group did. The learners must pay attention in the expert groups as well because they are expected to teach what they have learned to their home group-mates.
Appendix A: Workshop Handouts
Co-operative Learning – Pupil’s Learning to Learn - 81 -
B. Try Brainstorming
Brainstorming is a technique in which groups try to generate as many ideas as possible. It can work in large classes because the groups can be as big as 10 – 12 learners each. Here’s one way of organizing for brainstorming. A good way to begin is to write the topic or problem on the chalkboard /flipchart/ manila sheet or strip and display it where learners can read, re-read or refer to it, for example, a teacher might write: “How can we control soil erosion on our school grounds?” When the topic or problem is understood, put the learners into groups and make the usual arrangements for CL (e.g. assign roles). Then, explain the brainstorm process and ask them to begin. Emphasize that the brainstorming session should be in two parts. 1. A creative part: During this stage the group tries to create as many ideas as possible. Learners should be encouraged to contribute any idea that comes to mind no one should question or criticize any idea brought forward. All ideas are accepted and recorded by the secretary. 2. Critical evaluation: During this stage the learners should be more critical. They should be encouraged to discuss all the ideas generated in part 1 and choose the ones that seem to be the most useful.
Here are some suggestions as to how to structure the discussion after the groups have completed their work. i. Bring the whole class back together and have each reporter list the ideas that were
generated by his/her group in order of priority. ii. Write the ranked ideas from all groups on the chalkboard / flipchart. iii. With the help of the class, choose the best ideas from the total list and rank them based on
usefulness. iv. Discuss each of the highly ranked ideas with the class.
C. Use Quality Circles
Quality circles work well in situations where there is a specific concern to be addressed e.g. inadequate classroom performance. It can also work with topics like HIV/AIDS, Health and Sanitation, Food and Nutrition – Keeping healthy, environmental conservation and degradation. Here are the steps that are normally followed in using this approach. i. Pose the general question or concern to the whole class and encourage the group members to offer comments or suggestions e.g. ways to improve the performance of the class. ii. Assign the pupils to groups on the basis of the suggestions made in the whole-class discussion. Have each group sit in a circle so that everyone can see everyone else. iii. Tell the learners to exchange ideas about their particular part of the topic (e.g. ways to improve the effectiveness of group work). iv. Have the groups report on their deliberations. (E.g. present suggestions as to how group-work could be improved) Discuss their comments/recommendations with them and explain which ones are feasible/not and why.
Appendix A: Workshop Handouts
Co-operative Learning – Pupil’s Learning to Learn - 82 -
D. Use Buzz Groups
Buzz groups are very good for generating ideas from learners. The groups are normally composed of about four learners, however, in large classes you could use buzz groups with ten learners or more. The processes for using buzz groups is to form the groups, then give them time to discuss the topic. Organize the discussion as you would for brainstorming. Impose a time limit but no other constraints. Normally, the group discussion is followed by a plenary session organised in the same way as a brainstorming session.
E. Group in Pairs: “Think – Pair – Share”
Working in pairs cuts the number of pupil units in half which makes things more manageable. Structure the discussion to stimulate the individuals to first think about the topic or problem themselves, then share their ideas with his/her partner. Where appropriate, emphasize compromise and collaboration. In this approach, learners should be given a question to answer individually. After each individual has got an answer, the pair creates a joint answer that both partners agree upon and can explain giving the reasoning behind their individuals and the pair’s answer. To promote individual accountability, the teacher can randomly call on participants to explain their answers. To save time, the teacher can sample a few pairs to report. Ask pairs with similar ideas to put up their hands to help your selection and reinforce ideas.
F. Use Informal Groups
These groups are less structured and exist for a shorter time. Learners are simply told to turn to a partner or group to discuss a topic or question. This technique is particularly useful when doing a demonstration. Once learners complete their discussion, the teacher can choose a person to report and perhaps stimulate a discussion.
G. Use Group Investigation
Group investigations involve individual groups carrying out projects. For example a group might tackle the problem of trying to build a bridge that will support fifty kilograms. Often the projects extend over some time and involve doing some of the work outside of school. Normally, learners doing projects are allowed to choose the group they join and therefore the topics they take on. The freedom to choose topics promotes satisfied learners which, in turn, help to reduce the burden of over-crowded classes. Providing support to groups rather than dealing with the whole class at a time simplifies management for the teacher as well. Here are some attributes of group investigations: i. Group investigations emphasize more learner choice and control than any other
cooperative method. Learners are involved in planning what to study and how to investigate.
Appendix A: Workshop Handouts
Co-operative Learning – Pupil’s Learning to Learn - 83 -
ii. In group investigations associations are formed on the basis of common interest in a particular aspect of a general topic. All group members help to plan how they will research the topic and how to divide the work among themselves. Each member carries out his/her own part of investigation.
iii. The group synthesizes and summarises the work and presents their findings to the class. The teacher needs to adopt an indirect style of leadership, acting as a resource person while providing direction and clarification as needed. The teacher’s task is to create a stimulating work environment. These are typical steps in using group investigations: • The teacher identifies the general topic. Through discussion, he/she helps the
learners to identify sub-topics.
• Learners work together to plan how they will carry out the investigation of their sub-topic or set of questions.
• Learners work on their investigations. In addition to helping learners plan and
locate resources, the teacher reviews with each group the activities that are planned for a certain class period.
a. Learners work together in their groups, analysing and evaluating the
information they have obtained.
b. Each group presents a summary or demonstration of the results of its investigation so that all learners gain a broad perspective of the general topic.
c. The teacher evaluates all reports, demonstrations, and presentations as well as
what individuals have learned. Learners provide feedback to groups.
Appendix A: Workshop Handouts
Co-operative Learning – Pupil’s Learning to Learn - 84 -
O (for Activity 9.1)
“The 3Ps” (Presentation, Practice, Performance)
The 3Ps stand for “Presentation, Practice and Performance”. The 3Ps spell out the stages to be reflected in the lesson plan to make a CL teacher is to be effective in the classroom. Let’s look at what each “P” entails; a) Presentation
This includes the way the teacher introduces the new content (knowledge, skill, and attitude) and is able to connect it to what the learner already knows. In CL, presentation normally involves explaining the objectives and setting up the work. It may also involve review and presenting prerequisite content.
b) Practice The learner interacts with the new content in the stage. In CL this usually involves defining the task to be done and the way learners are expected to interact with one another (including the “essential elements”). CL always involves placing the learners in small groups and encouraging them to work together to learn what is required. The teacher must manage the experiencing and sharing phase to the benefit of the individual learner, the small group and the class as a whole.
c) Performance
This is commonly referred to as the “evaluation phase.” The teacher receives feedback from the learners by focusing on the academic and social objectives set for the lesson. This could be in the form of concrete entities such as displays of articles, pieces of work or experiments with solutions or could be observations of social behaviour like teamwork. In CL both the individual and the group participates in the evaluation.
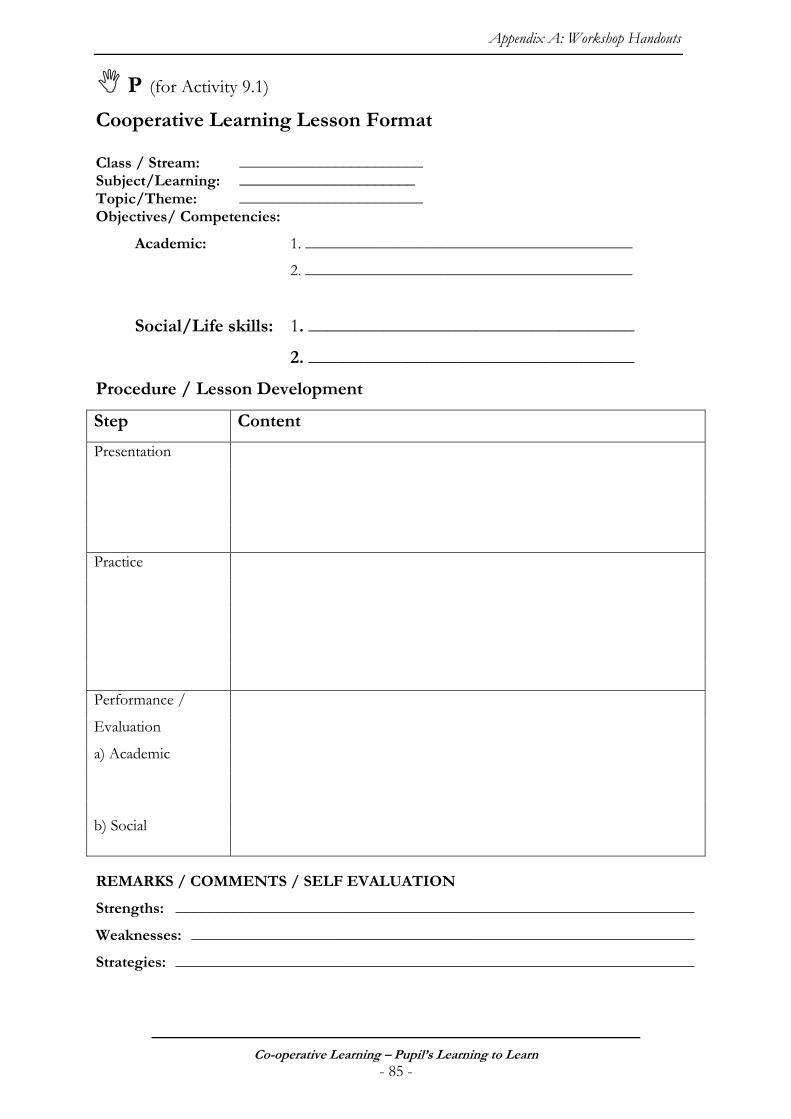
Appendix A: Workshop Handouts
Co-operative Learning – Pupil’s Learning to Learn - 85 -
P (for Activity 9.1)
Cooperative Learning Lesson Format Class / Stream: _______________________ Subject/Learning: ______________________ Topic/Theme: _______________________ Objectives/ Competencies:
Academic: 1. _________________________________________
2. _________________________________________
Social/Life skills: 1. ___________________________________
2. ___________________________________
Procedure / Lesson Development
Step Content
Presentation
Practice
Performance /
Evaluation
a) Academic
b) Social
REMARKS / COMMENTS / SELF EVALUATION
Strengths: _________________________________________________________________
Weaknesses: _______________________________________________________________
Strategies: _________________________________________________________________
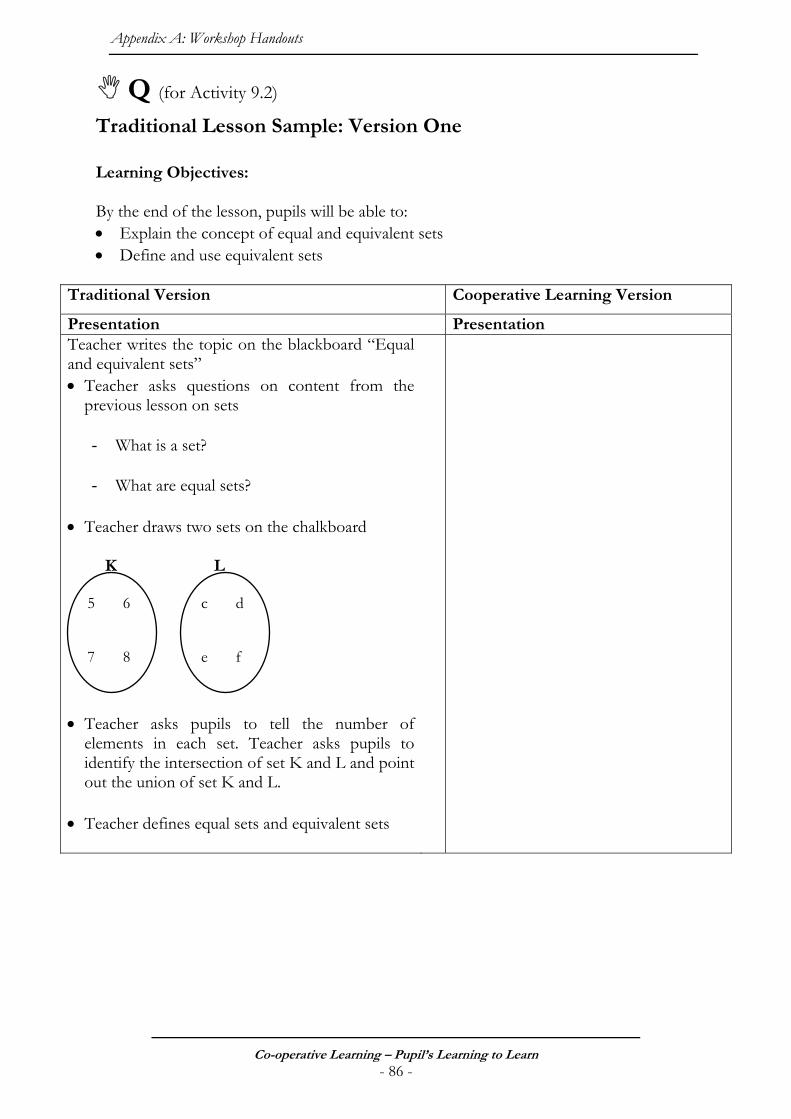
Appendix A: Workshop Handouts
Co-operative Learning – Pupil’s Learning to Learn - 86 -
Q (for Activity 9.2)
Traditional Lesson Sample: Version One Learning Objectives: By the end of the lesson, pupils will be able to: • Explain the concept of equal and equivalent sets • Define and use equivalent sets
Traditional Version Cooperative Learning Version
Presentation Presentation Teacher writes the topic on the blackboard “Equal and equivalent sets” • Teacher asks questions on content from the
previous lesson on sets
- What is a set? - What are equal sets?
• Teacher draws two sets on the chalkboard K L • Teacher asks pupils to tell the number of
elements in each set. Teacher asks pupils to identify the intersection of set K and L and point out the union of set K and L.
• Teacher defines equal sets and equivalent sets
5 6 7 8
c d e f
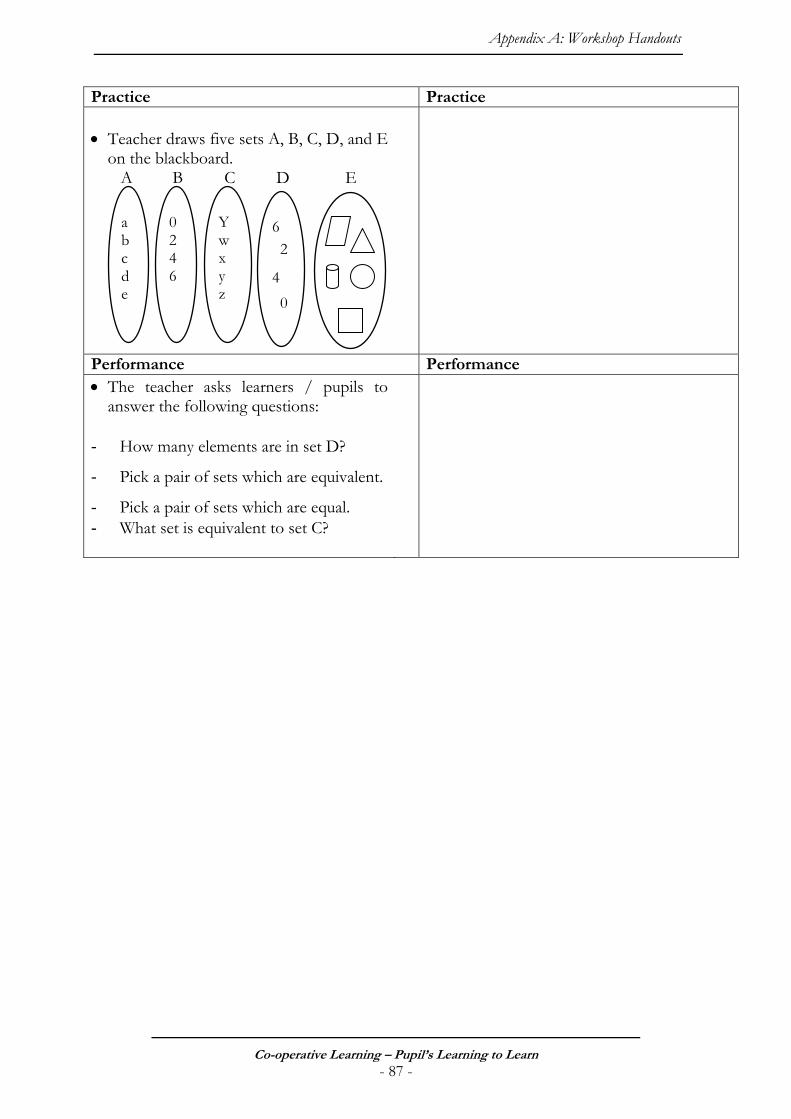
Appendix A: Workshop Handouts
Co-operative Learning – Pupil’s Learning to Learn - 87 -
Practice Practice • Teacher draws five sets A, B, C, D, and E
on the blackboard. A B C D E
Performance Performance • The teacher asks learners / pupils to
answer the following questions: - How many elements are in set D?
- Pick a pair of sets which are equivalent.
- Pick a pair of sets which are equal. - What set is equivalent to set C?
a b c d e
0246
Y w x y z
6
2
4
0
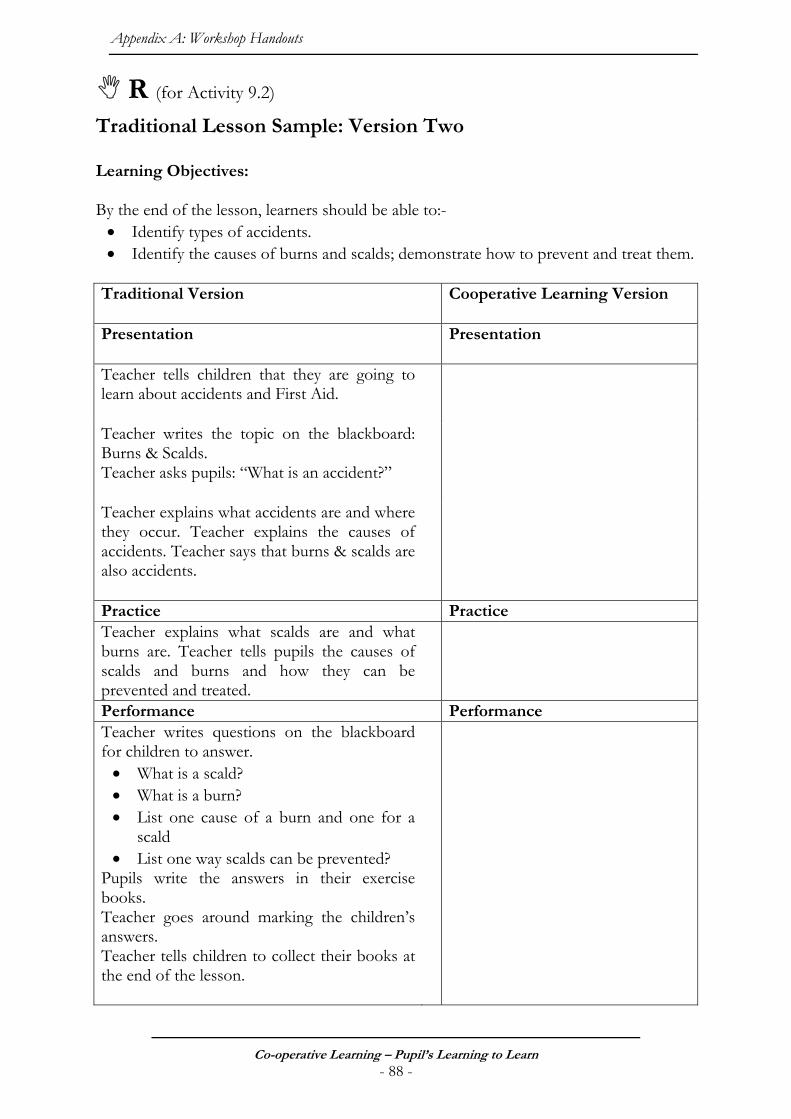
Appendix A: Workshop Handouts
Co-operative Learning – Pupil’s Learning to Learn - 88 -
R (for Activity 9.2)
Traditional Lesson Sample: Version Two Learning Objectives: By the end of the lesson, learners should be able to:- • Identify types of accidents. • Identify the causes of burns and scalds; demonstrate how to prevent and treat them.
Traditional Version
Cooperative Learning Version
Presentation
Presentation
Teacher tells children that they are going to learn about accidents and First Aid.
Teacher writes the topic on the blackboard: Burns & Scalds. Teacher asks pupils: “What is an accident?”
Teacher explains what accidents are and where they occur. Teacher explains the causes of accidents. Teacher says that burns & scalds are also accidents.
Practice Practice Teacher explains what scalds are and what burns are. Teacher tells pupils the causes of scalds and burns and how they can be prevented and treated.
Performance Performance Teacher writes questions on the blackboard for children to answer. • What is a scald? • What is a burn? • List one cause of a burn and one for a
scald • List one way scalds can be prevented?
Pupils write the answers in their exercise books. Teacher goes around marking the children’s answers. Teacher tells children to collect their books at the end of the lesson.
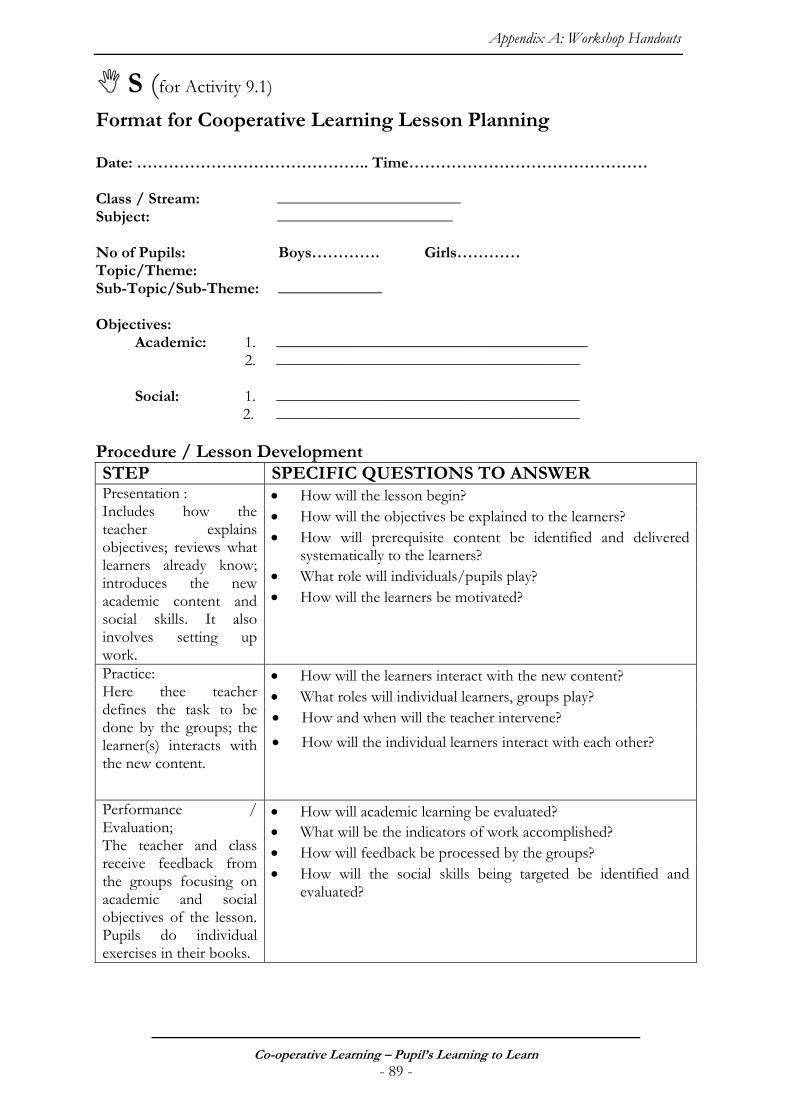
Appendix A: Workshop Handouts
Co-operative Learning – Pupil’s Learning to Learn - 89 -
S (for Activity 9.1)
Format for Cooperative Learning Lesson Planning Date: …………………………………….. Time……………………………………… Class / Stream: _______________________ Subject: ______________________ No of Pupils: Boys…………. Girls………… Topic/Theme: Sub-Topic/Sub-Theme: _____________ Objectives:
Academic: 1. _______________________________________ 2. ______________________________________
Social: 1. ______________________________________
2. ______________________________________ Procedure / Lesson Development STEP SPECIFIC QUESTIONS TO ANSWER
• How will the lesson begin? • How will the objectives be explained to the learners? • How will prerequisite content be identified and delivered
systematically to the learners? • What role will individuals/pupils play?
Presentation : Includes how the teacher explains objectives; reviews what learners already know; introduces the new academic content and social skills. It also involves setting up work.
• How will the learners be motivated?
• How will the learners interact with the new content? • What roles will individual learners, groups play? • How and when will the teacher intervene?
Practice: Here thee teacher defines the task to be done by the groups; the learner(s) interacts with the new content.
• How will the individual learners interact with each other?
• How will academic learning be evaluated? • What will be the indicators of work accomplished? • How will feedback be processed by the groups?
Performance / Evaluation; The teacher and class receive feedback from the groups focusing on academic and social objectives of the lesson. Pupils do individual exercises in their books.
• How will the social skills being targeted be identified and evaluated?
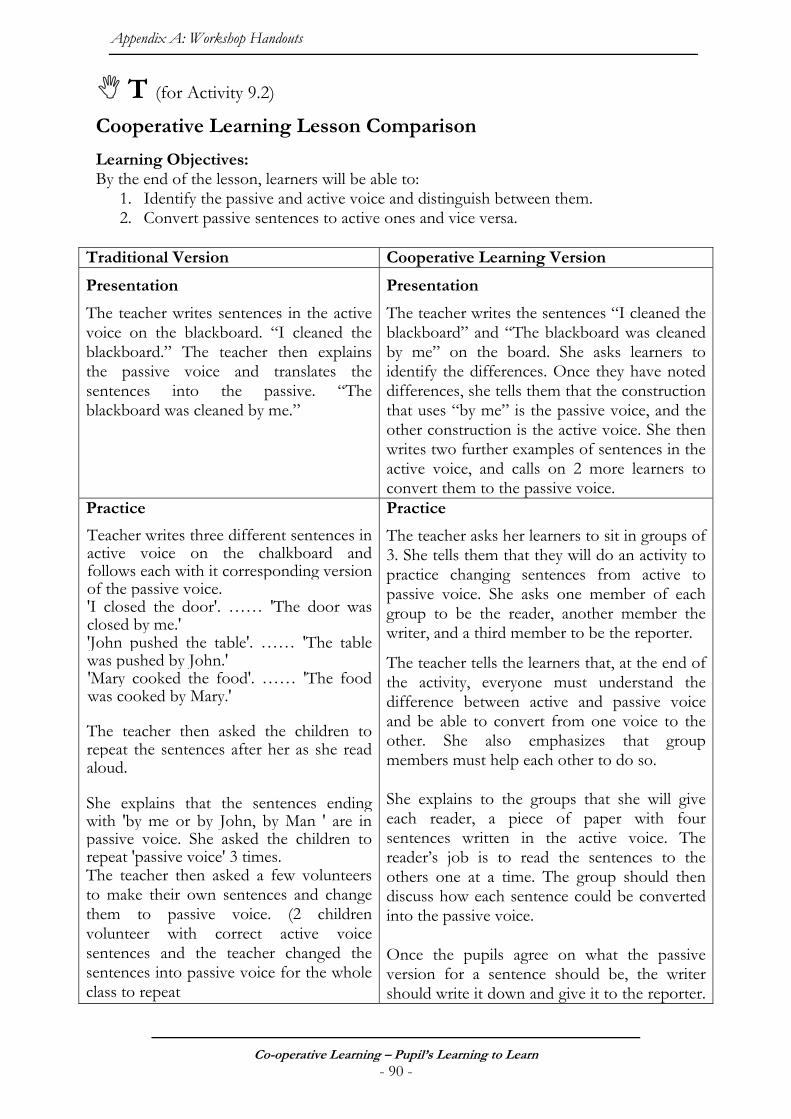
Appendix A: Workshop Handouts
Co-operative Learning – Pupil’s Learning to Learn - 90 -
T (for Activity 9.2)
Cooperative Learning Lesson Comparison Learning Objectives: By the end of the lesson, learners will be able to:
1. Identify the passive and active voice and distinguish between them. 2. Convert passive sentences to active ones and vice versa.
Traditional Version Cooperative Learning Version Presentation The teacher writes sentences in the active voice on the blackboard. “I cleaned the blackboard.” The teacher then explains the passive voice and translates the sentences into the passive. “The blackboard was cleaned by me.”
Presentation The teacher writes the sentences “I cleaned the blackboard” and “The blackboard was cleaned by me” on the board. She asks learners to identify the differences. Once they have noted differences, she tells them that the construction that uses “by me” is the passive voice, and the other construction is the active voice. She then writes two further examples of sentences in the active voice, and calls on 2 more learners to convert them to the passive voice.
Practice Teacher writes three different sentences in active voice on the chalkboard and follows each with it corresponding version of the passive voice. 'I closed the door'. …… 'The door was closed by me.' 'John pushed the table'. …… 'The table was pushed by John.' 'Mary cooked the food'. …… 'The food was cooked by Mary.'
The teacher then asked the children to repeat the sentences after her as she read aloud.
She explains that the sentences ending with 'by me or by John, by Man ' are in passive voice. She asked the children to repeat 'passive voice' 3 times. The teacher then asked a few volunteers to make their own sentences and change them to passive voice. (2 children volunteer with correct active voice sentences and the teacher changed the sentences into passive voice for the whole class to repeat
Practice
The teacher asks her learners to sit in groups of 3. She tells them that they will do an activity to practice changing sentences from active to passive voice. She asks one member of each group to be the reader, another member the writer, and a third member to be the reporter.
The teacher tells the learners that, at the end of the activity, everyone must understand the difference between active and passive voice and be able to convert from one voice to the other. She also emphasizes that group members must help each other to do so. She explains to the groups that she will give each reader, a piece of paper with four sentences written in the active voice. The reader’s job is to read the sentences to the others one at a time. The group should then discuss how each sentence could be converted into the passive voice. Once the pupils agree on what the passive version for a sentence should be, the writer should write it down and give it to the reporter.
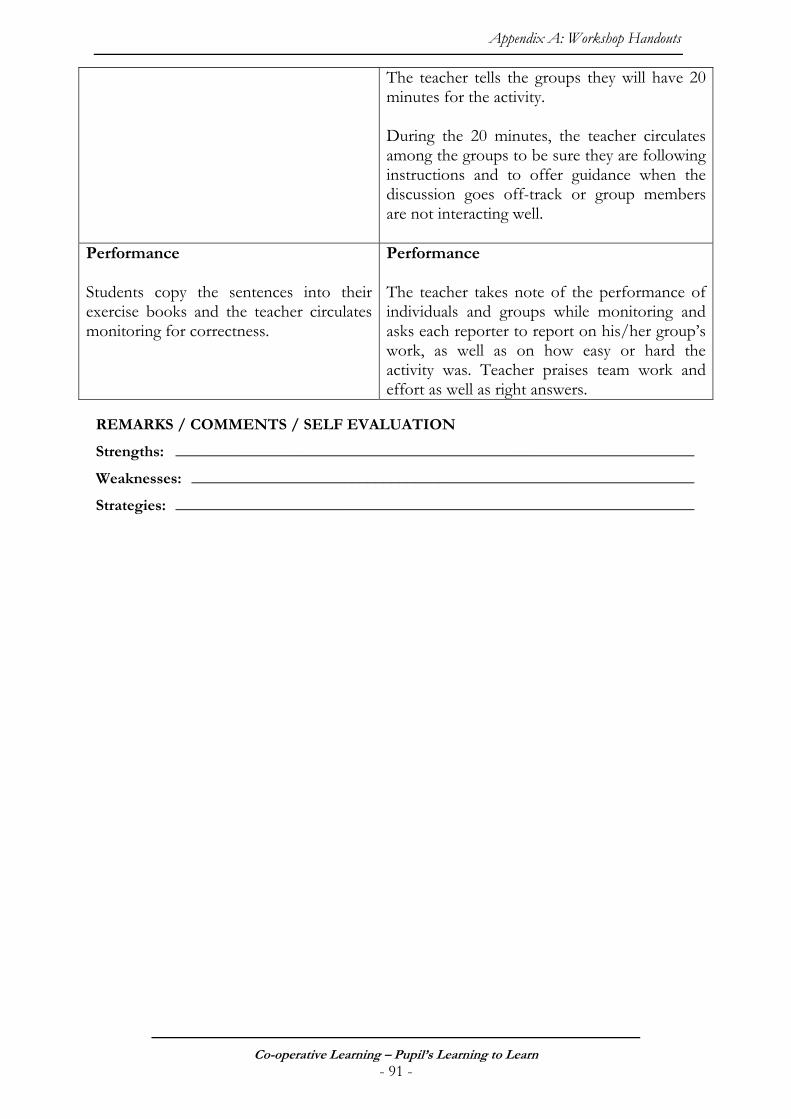
Appendix A: Workshop Handouts
Co-operative Learning – Pupil’s Learning to Learn - 91 -
The teacher tells the groups they will have 20 minutes for the activity. During the 20 minutes, the teacher circulates among the groups to be sure they are following instructions and to offer guidance when the discussion goes off-track or group members are not interacting well.
Performance Students copy the sentences into their exercise books and the teacher circulates monitoring for correctness.
Performance The teacher takes note of the performance of individuals and groups while monitoring and asks each reporter to report on his/her group’s work, as well as on how easy or hard the activity was. Teacher praises team work and effort as well as right answers.
REMARKS / COMMENTS / SELF EVALUATION
Strengths: _________________________________________________________________
Weaknesses: _______________________________________________________________
Strategies: _________________________________________________________________
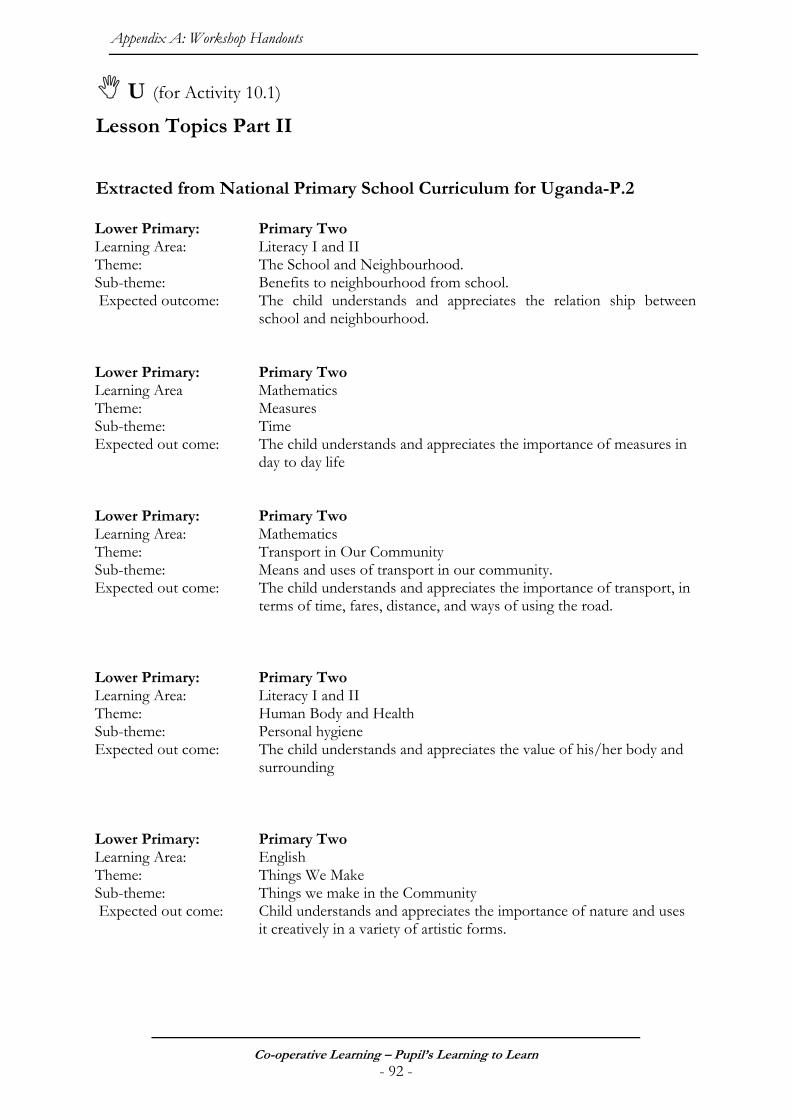
Appendix A: Workshop Handouts
Co-operative Learning – Pupil’s Learning to Learn - 92 -
U (for Activity 10.1)
Lesson Topics Part II Extracted from National Primary School Curriculum for Uganda-P.2 Lower Primary: Primary Two Learning Area: Literacy I and II Theme: The School and Neighbourhood. Sub-theme: Benefits to neighbourhood from school. Expected outcome: The child understands and appreciates the relation ship between
school and neighbourhood. Lower Primary: Primary Two Learning Area Mathematics Theme: Measures Sub-theme: Time Expected out come: The child understands and appreciates the importance of measures in
day to day life Lower Primary: Primary Two Learning Area: Mathematics Theme: Transport in Our Community Sub-theme: Means and uses of transport in our community. Expected out come: The child understands and appreciates the importance of transport, in
terms of time, fares, distance, and ways of using the road. Lower Primary: Primary Two Learning Area: Literacy I and II Theme: Human Body and Health Sub-theme: Personal hygiene Expected out come: The child understands and appreciates the value of his/her body and
surrounding Lower Primary: Primary Two Learning Area: English Theme: Things We Make Sub-theme: Things we make in the Community Expected out come: Child understands and appreciates the importance of nature and uses
it creatively in a variety of artistic forms.
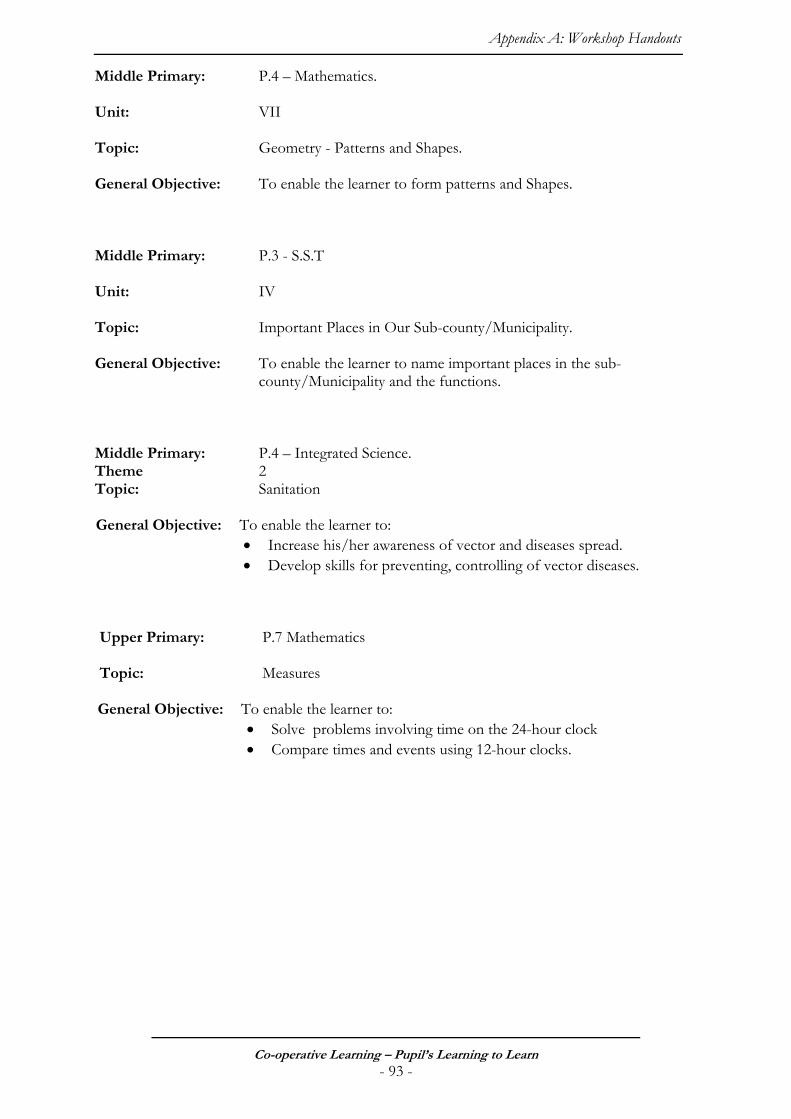
Appendix A: Workshop Handouts
Co-operative Learning – Pupil’s Learning to Learn - 93 -
Middle Primary: P.4 – Mathematics. Unit: VII Topic: Geometry - Patterns and Shapes. General Objective: To enable the learner to form patterns and Shapes. Middle Primary: P.3 - S.S.T Unit: IV Topic: Important Places in Our Sub-county/Municipality. General Objective: To enable the learner to name important places in the sub-
county/Municipality and the functions. Middle Primary: P.4 – Integrated Science. Theme 2 Topic: Sanitation General Objective: To enable the learner to:
• Increase his/her awareness of vector and diseases spread. • Develop skills for preventing, controlling of vector diseases.
Upper Primary: P.7 Mathematics Topic: Measures General Objective: To enable the learner to:
• Solve problems involving time on the 24-hour clock • Compare times and events using 12-hour clocks.
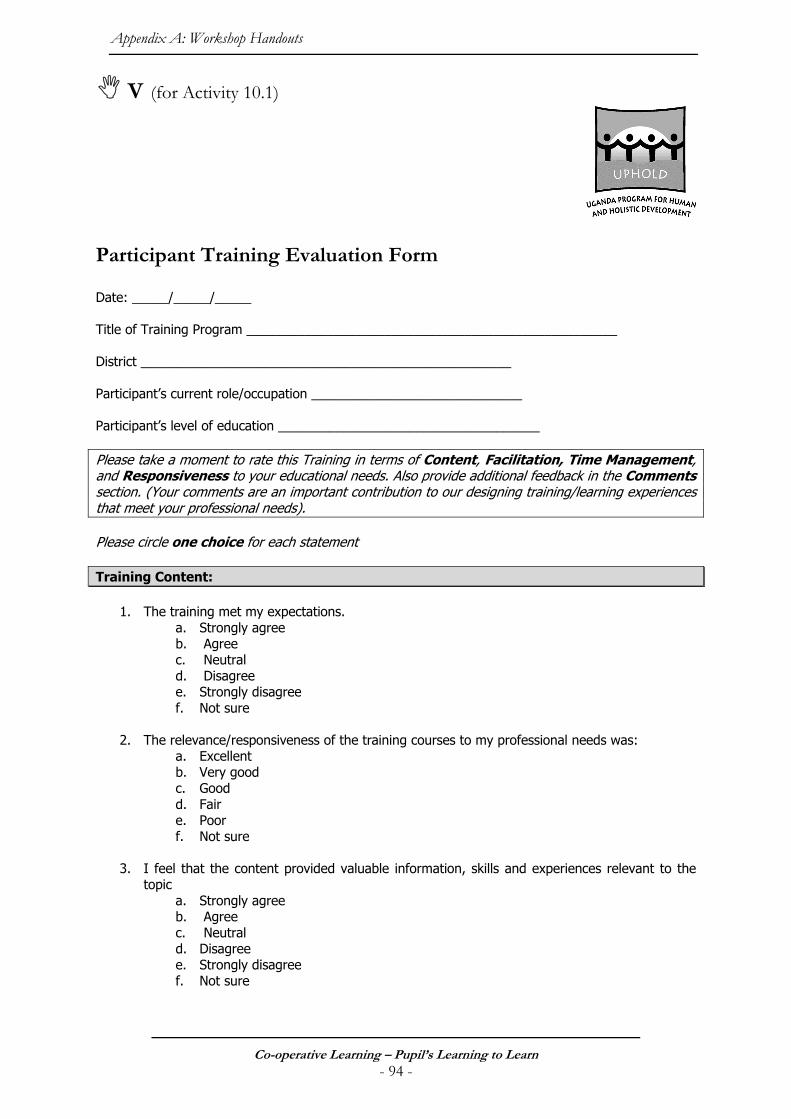
Appendix A: Workshop Handouts
Co-operative Learning – Pupil’s Learning to Learn - 94 -
V (for Activity 10.1)
Participant Training Evaluation Form Date: _____/_____/_____ Title of Training Program ___________________________________________________ District ___________________________________________________ Participant’s current role/occupation _____________________________ Participant’s level of education ____________________________________ Please take a moment to rate this Training in terms of Content, Facilitation, Time Management, and Responsiveness to your educational needs. Also provide additional feedback in the Comments section. (Your comments are an important contribution to our designing training/learning experiences that meet your professional needs). Please circle one choice for each statement Training Content:
1. The training met my expectations. a. Strongly agree b. Agree c. Neutral d. Disagree e. Strongly disagree f. Not sure
2. The relevance/responsiveness of the training courses to my professional needs was: a. Excellent b. Very good c. Good d. Fair e. Poor f. Not sure
3. I feel that the content provided valuable information, skills and experiences relevant to the topic
a. Strongly agree b. Agree c. Neutral d. Disagree e. Strongly disagree f. Not sure
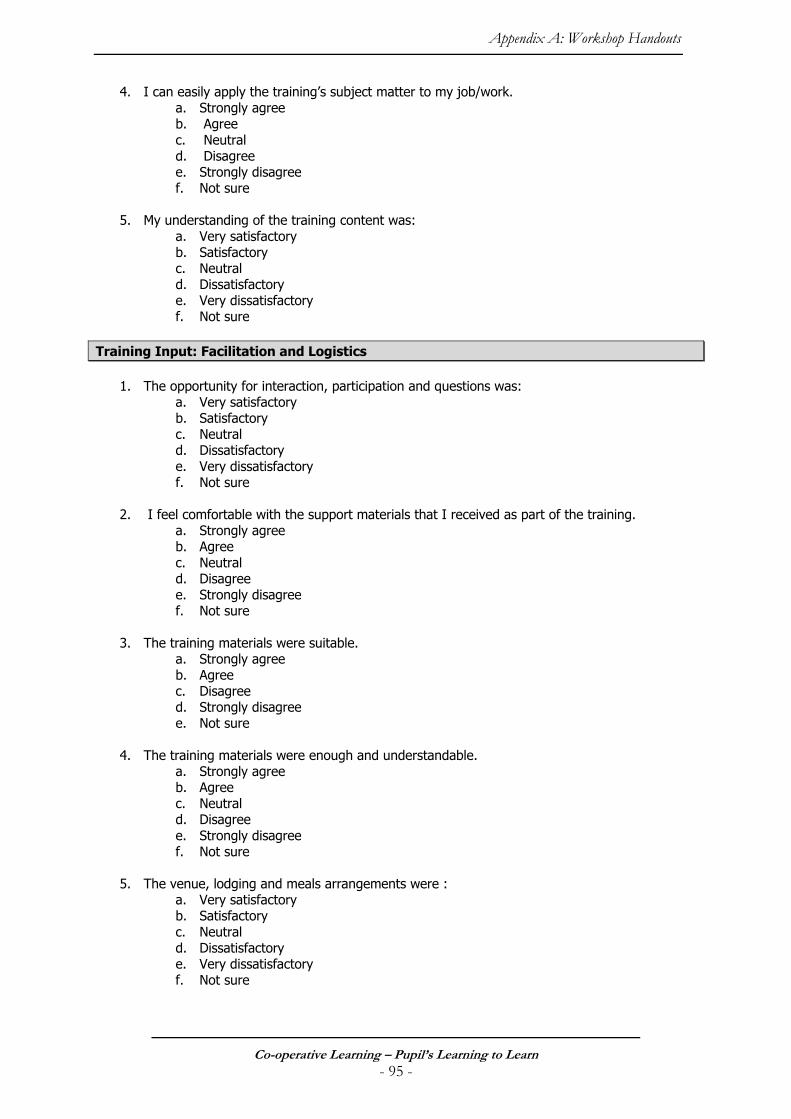
Appendix A: Workshop Handouts
Co-operative Learning – Pupil’s Learning to Learn - 95 -
4. I can easily apply the training’s subject matter to my job/work.
a. Strongly agree b. Agree c. Neutral d. Disagree e. Strongly disagree f. Not sure
5. My understanding of the training content was:
a. Very satisfactory b. Satisfactory c. Neutral d. Dissatisfactory e. Very dissatisfactory f. Not sure
Training Input: Facilitation and Logistics
1. The opportunity for interaction, participation and questions was: a. Very satisfactory b. Satisfactory c. Neutral d. Dissatisfactory e. Very dissatisfactory f. Not sure
2. I feel comfortable with the support materials that I received as part of the training.
a. Strongly agree b. Agree c. Neutral d. Disagree e. Strongly disagree f. Not sure
3. The training materials were suitable.
a. Strongly agree b. Agree c. Disagree d. Strongly disagree e. Not sure
4. The training materials were enough and understandable.
a. Strongly agree b. Agree c. Neutral d. Disagree e. Strongly disagree f. Not sure
5. The venue, lodging and meals arrangements were :
a. Very satisfactory b. Satisfactory c. Neutral d. Dissatisfactory e. Very dissatisfactory f. Not sure
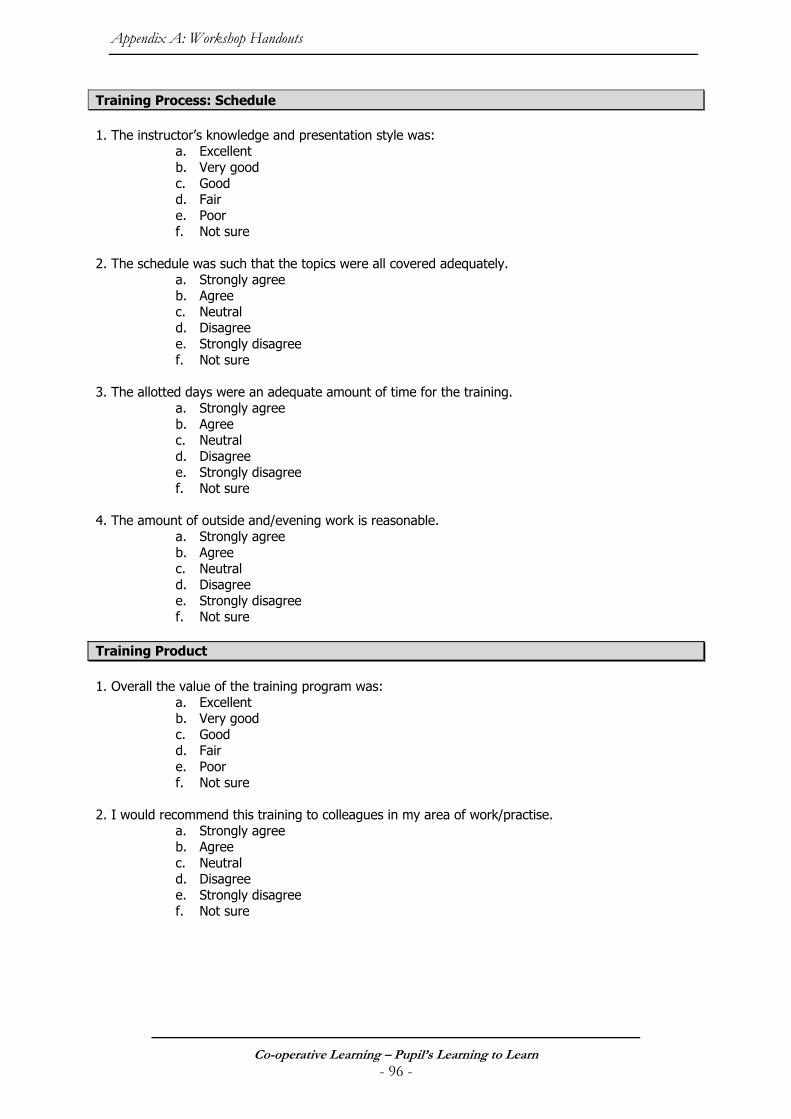
Appendix A: Workshop Handouts
Co-operative Learning – Pupil’s Learning to Learn - 96 -
Training Process: Schedule 1. The instructor’s knowledge and presentation style was:
a. Excellent b. Very good c. Good d. Fair e. Poor f. Not sure
2. The schedule was such that the topics were all covered adequately.
a. Strongly agree b. Agree c. Neutral d. Disagree e. Strongly disagree f. Not sure
3. The allotted days were an adequate amount of time for the training.
a. Strongly agree b. Agree c. Neutral d. Disagree e. Strongly disagree f. Not sure
4. The amount of outside and/evening work is reasonable.
a. Strongly agree b. Agree c. Neutral d. Disagree e. Strongly disagree f. Not sure
Training Product 1. Overall the value of the training program was:
a. Excellent b. Very good c. Good d. Fair e. Poor f. Not sure
2. I would recommend this training to colleagues in my area of work/practise. a. Strongly agree b. Agree c. Neutral d. Disagree e. Strongly disagree f. Not sure
Appendix A: Workshop Handouts
Co-operative Learning – Pupil’s Learning to Learn - 97 -
Further Comments: What parts of the training would you improve? __________________________________________________________________________________________________________________________________________________________________________________________________________________________________________ What should we do to improve the quality of this training? __________________________________________________________________________________________________________________________________________________________________________________________________________________________________________________________________________________________________________________________
Application of Training What will you do differently in your practice/service setting as a result of this training?
What additional training or support do you require to apply the training in the workplace?
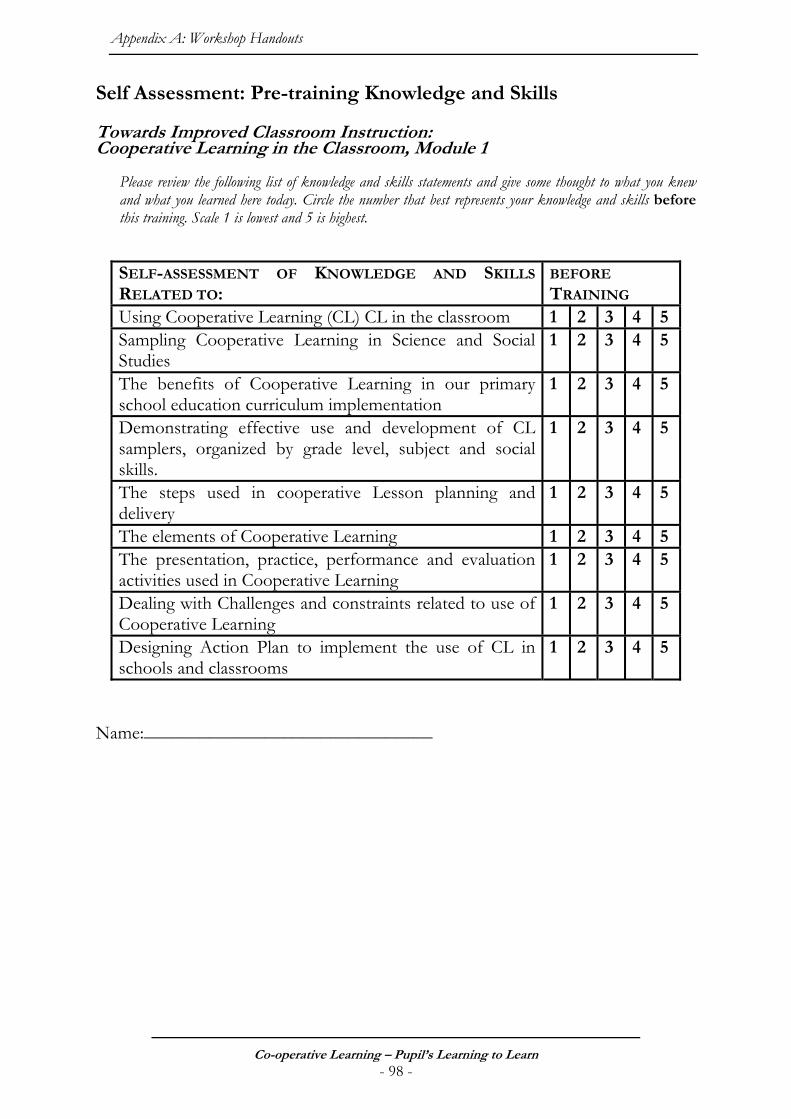
Appendix A: Workshop Handouts
Co-operative Learning – Pupil’s Learning to Learn - 98 -
Self Assessment: Pre-training Knowledge and Skills Towards Improved Classroom Instruction: Cooperative Learning in the Classroom, Module 1
Please review the following list of knowledge and skills statements and give some thought to what you knew and what you learned here today. Circle the number that best represents your knowledge and skills before this training. Scale 1 is lowest and 5 is highest.
SELF-ASSESSMENT OF KNOWLEDGE AND SKILLS
RELATED TO: BEFORE
TRAINING Using Cooperative Learning (CL) CL in the classroom 1 2 3 4 5Sampling Cooperative Learning in Science and Social Studies
1 2 3 4 5
The benefits of Cooperative Learning in our primary school education curriculum implementation
1 2 3 4 5
Demonstrating effective use and development of CL samplers, organized by grade level, subject and social skills.
1 2 3 4 5
The steps used in cooperative Lesson planning and delivery
1 2 3 4 5
The elements of Cooperative Learning 1 2 3 4 5The presentation, practice, performance and evaluation activities used in Cooperative Learning
1 2 3 4 5
Dealing with Challenges and constraints related to use of Cooperative Learning
1 2 3 4 5
Designing Action Plan to implement the use of CL in schools and classrooms
1 2 3 4 5
Name:_______________________________
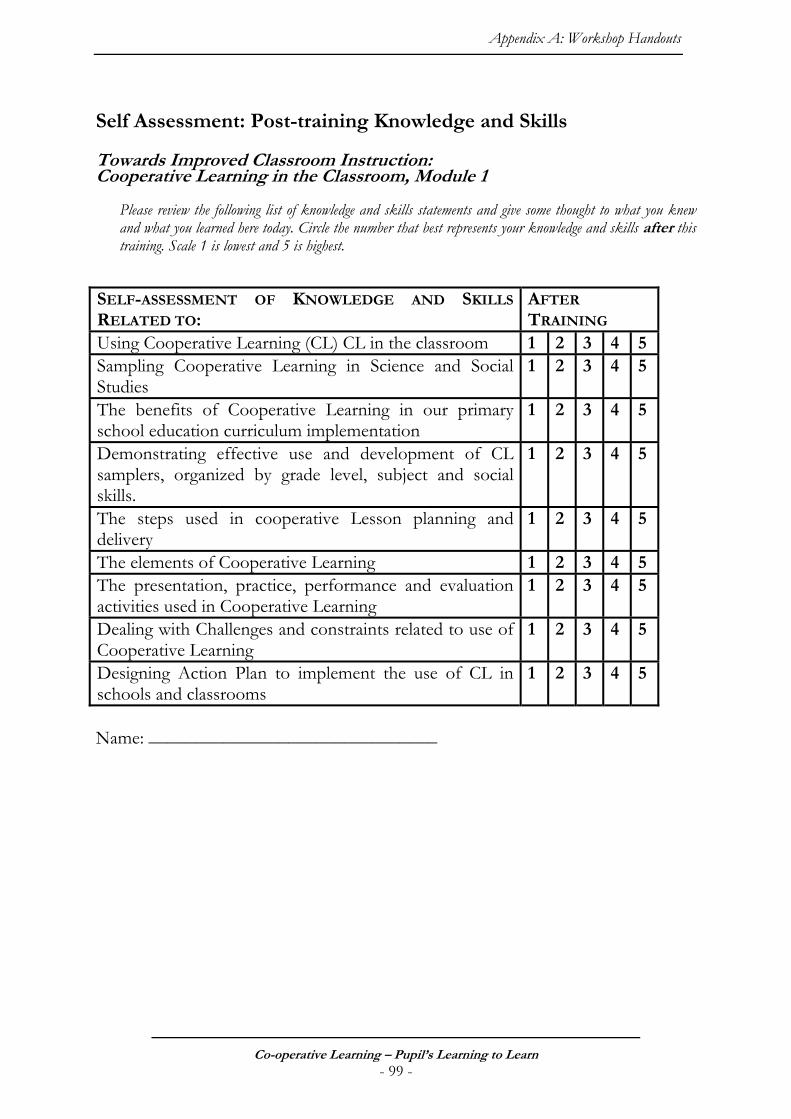
Appendix A: Workshop Handouts
Co-operative Learning – Pupil’s Learning to Learn - 99 -
Self Assessment: Post-training Knowledge and Skills Towards Improved Classroom Instruction: Cooperative Learning in the Classroom, Module 1
Please review the following list of knowledge and skills statements and give some thought to what you knew and what you learned here today. Circle the number that best represents your knowledge and skills after this training. Scale 1 is lowest and 5 is highest.
SELF-ASSESSMENT OF KNOWLEDGE AND SKILLS
RELATED TO: AFTER
TRAINING Using Cooperative Learning (CL) CL in the classroom 1 2 3 4 5 Sampling Cooperative Learning in Science and Social Studies
1 2 3 4 5
The benefits of Cooperative Learning in our primary school education curriculum implementation
1 2 3 4 5
Demonstrating effective use and development of CL samplers, organized by grade level, subject and social skills.
1 2 3 4 5
The steps used in cooperative Lesson planning and delivery
1 2 3 4 5
The elements of Cooperative Learning 1 2 3 4 5 The presentation, practice, performance and evaluation activities used in Cooperative Learning
1 2 3 4 5
Dealing with Challenges and constraints related to use of Cooperative Learning
1 2 3 4 5
Designing Action Plan to implement the use of CL in schools and classrooms
1 2 3 4 5
Name: _______________________________
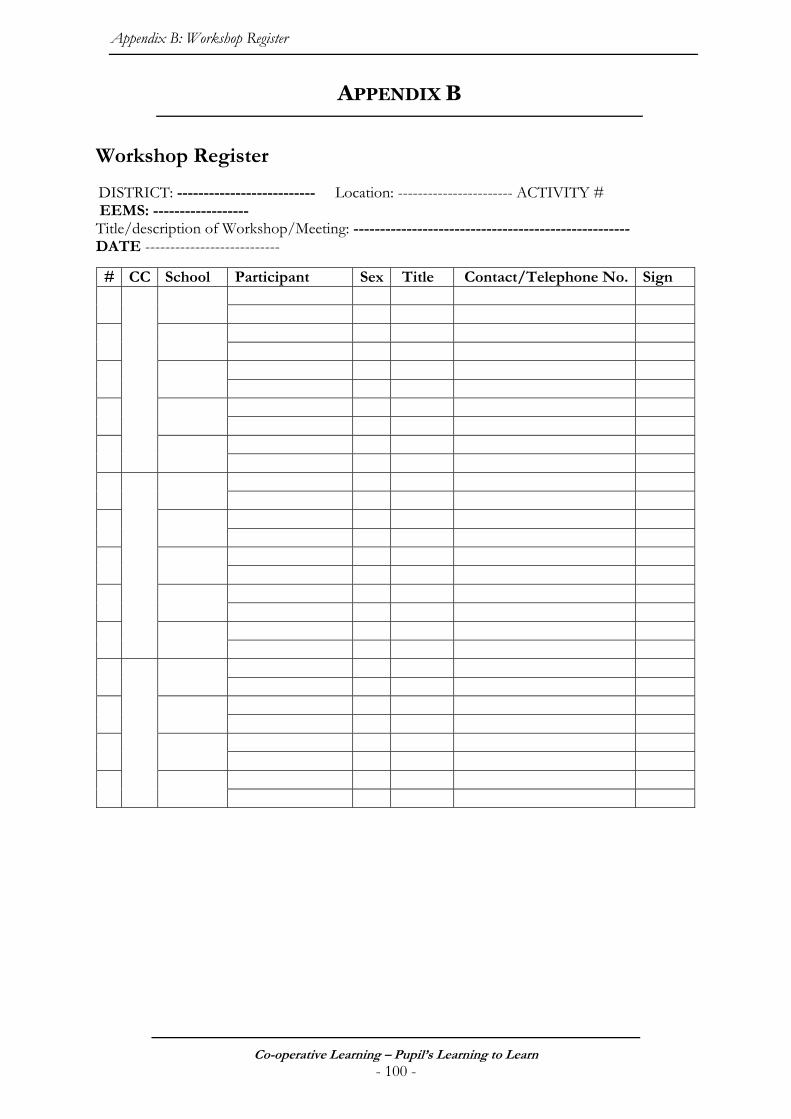
Appendix B: Workshop Register
Co-operative Learning – Pupil’s Learning to Learn - 100 -
APPENDIX B
Workshop Register
DISTRICT: -------------------------- Location: ----------------------- ACTIVITY # EEMS: ------------------ Title/description of Workshop/Meeting: ---------------------------------------------------- DATE ---------------------------
# CC School Participant Sex Title Contact/Telephone No. Sign