traffic 3.1 enhancing performance and functionality of traffic
TRANSCRIPT

����� �������� ����� ����
TRAFFIC 3.1 Enhancing Performance and Functionality of Traffic
Master’s Thesis
By: Alan Fehr Supervised by: Michela Pedroni Prof. Bertrand Meyer
Student Number: 01-908-682

2

Abstract
Since winter semester 2003, the members of the Chair of Software Engineering at ETH
Zurich take a novel approach to teaching introductory programming for their first semester
computer science students. The approach (called the Inverted Curriculum) heavily relies on
a software system - Traffic - which has been specially developed for this purpose. Traffic is a
library written in Eiffel which models life (in particular transportation) in a city. The aim of
this project was to enhance the performance, modeling and visualization capabilities of
Traffic.
3

4

1 Introduction 7 1.1 Traffic 7 1.2 Dependencies 8
1.2.1 EiffelMedia 8 1.2.2 Eiffel Wrapper Generator 8 1.2.3 EiffelStudio 9 1.2.4 Gobo Eiffel 9
2 Project Overview 10 2.1 Goals 10 2.2 Contributions 10
2.2.1 EiffelStudio 10 2.2.2 Traffic 10 2.2.3 EiffelMedia 11
3 Contribution Details 13 3.1 Fixing the Shortest Path 13 3.2 Enhancing the Shortest Path Facilities 14
3.2.1 Adding Traffic Stops 14 3.2.2 Calculating Paths 16 3.2.3 Changes to the Standard Shortest Path Algorithm 18
4 Measuring Performance 20 4.1 Performance Analysis Overview 20 4.2 Profiling Techniques 20
4.2.1 Manual Insertion 20 4.2.2 Compiler Insertion 20 4.2.3 Runtime Instrumentation 21 4.2.4 Runtime-Injection and other Advanced Techniques 22
4.3 Profiling Eiffel Programs 22 4.3.1 Timing 22 4.3.2 Memory 22
4.4 The EiffelStudio Profiler 24 4.4.1 Using External Profilers 24 4.4.2 The Eiffel Profiler 25
4.5 Enhancing the EiffelStudio Profiler 26 4.5.1 Limitations 27 4.5.2 The ActionTimer 27 4.5.3 Implementation 29 4.5.4 Possible Improvements for the ActionTimer 32
5 Enhancing Performance of Traffic 33 5.1 Performance Problems in Traffic 33
5.1.1 Profiling the City_3D Example 33 5.2 Enhancements 35 5.3 Possible Further Enhancements 39
6 Conclusion 42 7 References 44 Appendix A: EiffelMedia Documentation for Callbacks 46 Appendix B: Traffic Documentation 48
5

6

1 Introduction
Since winter semester 2003, the members of the Chair of Software Engineering at ETH
Zurich take a novel approach to teaching introductory programming for their first semester
computer science students. The approach (called the Inverted Curriculum, see [6]) heavily
relies on a software system - Traffic - which has been specially developed for this purpose.
Traffic is a library written in Eiffel which models life (in particular transportation) in a city.
The aim of this project was to enhance the performance, modeling and visualization
capabilities of Traffic.
1.1 Traffic
Traffic (see [19]) is a library designed solely for the purpose of teaching. The application
domain (transportation in a city) was chosen based on several criteria (see [9]) including the
students familiarity with it, the applicability of standard algorithms and data structures, and
also graphics and multimedia development. So far, Traffic provides facilities to simulate the
public transportation system of a city, buildings, passengers and 3D/2D visualization. It
consists of a library and several examples:
• City_3D is a 3D visualization of a city including buildings and transportation
infrastructure. The application can also calculate shortest paths through the city.
• City_Taxi is an application illustrating dispatching mechanisms on the basis of taxis,
which can be called by an agency or directly respond to events.
• City_Time visualizes travelers and trams moving according to simulated time.
• Flat_Hunt is an adaptation of a popular board-game. It allows players to hunt a
crooked real-estate agent on a 2D map using a limited number of tickets for public
transportation.
• Touch refers to several applications illustrating examples from Touch of Class, the
textbook for the introductory course ([7]).
The Traffic library consists of three main parts. The first part provides facilities for
modeling a city. The class TRAFFIC_MAP corresponds to a city model. It contains
instances of TRAFFIC_PLACE, TRAFFIC_LINE and TRAFFIC_ROAD. The second
part of the library visualizes the model; the most important classes are
7

TRAFFIC_3D_MAP_WIDGET and TRAFFIC_2D_MAP_WIDGET. They provide the
basis for displaying a map and handling the user input on the map. The third part of the
library consists of utility classes. They contain processors for XML input and an extension
of the base libraries including graph representations.
1.2 Dependencies
Traffic relies on several libraries described in the following. EiffelMedia is used mainly for
visualization, Gobo Eiffel for XML parsing and EiffelBase provides many data types.
Traffic can be compiled with EiffelStudio, which also provides libraries like EiffelBase.
1.2.1 EiffelMedia
EiffelMedia (see [11]) is an open-source multimedia library for Eiffel. It offers facilities for
2D and 3D graphics, networking, sound and much more. Traffic relies heavily on
EiffelMedia; the example applications inherit from EM_APPLICATION, which displays
descendants of EM_SCENE. Thus, all 3D examples contain a scene class, which inherits
from EM_SCENE through EM_COMPONENT_SCENE. Such a scene is built by
components; some are provided by EiffelMedia, which then usually contain widgets, others
are included in Traffic and inherit from an EiffelMedia component superclass like
EM_3D_COMPONENT. An example for such a component is
TRAFFIC_3D_MAP_WIDGET, which Traffic uses to display a 3D view of a city in
OpenGL. For 2D visualization Traffic uses the classes EM_DRAWABLE_SCENE and
EM_DRAWABLE. EM_DRAWABLE is a deferred class, which allows drawing on a 2D
surface.
Traffic also uses the event-handling mechanisms of EiffelMedia, be it for handling mouse-
clicks (EM_MOUSEBUTTON_EVENT) or key strokes (EM_KEY_BOARD_EVENT), or for
realizing an event-based communication style in applications (EM_EVENT_CHANNEL).
1.2.2 Eiffel Wrapper Generator
The Eiffel Wrapper Generator (EWG, see [12]) is a tool for generating Eiffel wrapper classes
for C libraries. EWG is useful if an Eiffel project uses large external C libraries. The Eiffel
programmer does not have to code the details of interaction with a C library, but can use
Eiffel classes that harness the functionality of the library. EWG is used by EiffelMedia to
generate wrappers for SDL and OpenGL.
8
1.2.3 EiffelStudio
EiffelStudio ([12]) is an integrated development environment for Eiffel distributed by
Eiffel Software. It is used in the introductory programming course and several other
courses at ETH. Originally a commercial product, it has recently been open-sourced. Now
programmers can modify it and contribute to the project.
Included with EiffelStudio is an extensive library featuring concurrency support, data types
and structures, reflection, operating system interfacing, and graphical user interfaces.
Traffic uses many of these facilities.
1.2.4 Gobo Eiffel
The Gobo Eiffel Project ([14]) is aimed at providing the Eiffel community with free and
portable Eiffel tools and libraries. It contains numerous libraries and helpful utilities
including an XML parser, data structures, a generic LALR(1) parser generator, and an
Eiffel project configuration tool called Gobo Eiffel Xace (gexace). Eiffel projects are typically
configured using ace files (see [4]). The downside of ace files is that they are not platform
independent. External dependencies typically have different names on different platforms
and certain classes may only be necessary for a given platform. In most cases, an ace file for
Linux will not work on Windows. Gexace provides a mechanism for platform and
compiler independent Eiffel projects. The configuration files have the extension .xace and
may contain platform specific options. Gexace converts these files into the configuration
files for the specific platform and compiler. Typically, a project using gexace will also use
geant (Gobo Eiffel Ant), which is a build environment for Eiffel. These tools are currently
used for many projects at ETH including Traffic and EiffelMedia.
9

2 Project Overview
2.1 Goals
The evaluation of the “Introduction to Programming” course names the slow performance
of Traffic as a major point of criticism. To face this problem, it is a stated goal of this
project to measurably increase the performance of Traffic. A tool for measuring
performance of Eiffel programs shall be given as a means of achieving this goal.
Furthermore, as time permits, the functionality and/or visualization of Traffic shall be
enhanced.
2.2 Contributions
2.2.1 EiffelStudio
• The tool for measuring performance was integrated into the EiffelStudio profiler.
The ActionTimer is described in section 4.5.
2.2.2 Traffic
• The performance enhancements and possible further enhancements are described
in chapter 5.
• Traffic now works with EiffelStudio 5.7
o EiffelStudio 5.6 does not check flat visibility (at least in assertions). A class
exporting an inherited feature without exporting a feature used in one of
the contracts went unnoticed. Several such classes came up in Traffic and
EiffelMedia because EiffelStudio 5.7 now checks flat visibility. The
visibility of the features used in the contracts has been adjusted to fix this
issue.
o As of version 5.7 EiffelStudio uses a new configuration file format with the
file ending “ecf”. The advantage over the original ace files is that they are
platform independent. Ace files are still supported as they can be converted
to ecf files. Currently, Traffic and EiffelMedia require the xace files to be
converted to ace files and then to ecf. It can be confusing to novices (and
others) why such conversions are necessary. To simplify the build
procedure, ecf files have been provided for the examples in Traffic and
EiffelMedia.
10

• When specifying platform independent paths it is common to use the forward slash
(“/”) as a delimiter. It is not the native delimiter for Windows, but is usually
converted correctly. The traffic examples used this convention, which lead to an
error on Windows. A class in the Gobo library compares the path delimiter for the
current platform with the characters in the path string. On Windows this was a
backslash (“\”), leading the path to be parsed incorrectly. The examples now build
the path dynamically using the delimiter of the current platform.
• Fixed the shortest path calculation (see section 3.1) and enhanced its functionality
(see section 3.2).
• A library like Traffic is seldom compiled in its entirety because Eiffel classes are
only compiled if they are referenced in the system being compiled. This lead to
several broken classes that were never used. These appeared when compiling the
Traffic library as a whole and where then removed.
2.2.3 EiffelMedia
• As part of the wrapper for a C library, EWG generates classes for callbacks (a
function pointer in C). If there is no name assigned to the type of such function
pointers, they are considered anonymous. Using anonymous callbacks in the Eiffel
code can be dangerous, because assigning a name to a function pointer of the same
type (anywhere in the project) will override the creation of the Eiffel class by
EWG. Any classes relying on these anonymous callback classes would then not
compile. Assigning and using names for the callbacks solved this issue (see
Appendix A: EiffelMedia Documentation for Callbacks).
• The latest CVS version of EiffelMedia did not compile with the Microsoft
compiler due to an incompatibility in the build script. This issue has been resolved.
• Instances of the class EM_EVENT_CHANNEL could produce a precondition
violation if the event handler changed their state. If the last feature called by the
event mechanism removed itself from the list, the cursor was put in an off
position and the subsequent call to forth caused an error. A conditional has been
added to avoid violating the precondition.
11

• Subsection 4.3.2 shows the detection of a potential memory leak. It has been
reported to the EiffelMedia developers.
• As the current version of EiffelMedia (0.9.0) is still under heavy construction and
not entirely stable, it was part of this work to produce a version (0.8.1) for the
“Introduction to Programming” course. Starting with the stable version (0.8.0) this
package includes the fixes and improvements described earlier. Furthermore, the
installation scripts for Windows were modified to set the necessary environment
variables for the entire computer as opposed to the current user.
12

3 Contribution Details
3.1 Fixing the Shortest Path
As stated earlier, Traffic has several example applications, one of which is called City_3D.
As the name hints, this application is a 3D visualization of a city, mainly the transport
facilities and the buildings. It also provides the facility to calculate the shortest way to get
from a starting point to an end point. One of the tasks of the project was to fix a flaw in
this feature.
Figure 1: Before Figure 2: After
The shortest path is the white line leading from the marked origin (green) to the
destination (blue). As can be seen, the path indicated in the prior version is clearly not the
shortest. The problem occurred in the code loading the place and line data from an xml
file. The order of the data processing was the issue. Following is an excerpt from a data file
representing the city of Zurich to illustrate the problem.
<places> <!-- ... (data omitted)--> <place name="Albisguetli"/> <place name="Letzigrund"/> <place name="Limmatplatz"/> <place name="Loewenplatz"/> <place name="Luegisland"/> <place name="Paradeplatz"/> <place name="Parkring"/> <place name="Pfingstweidstrasse"/> <place name="Seilbahn Rigiblick"/> <place name="Tierspital"/> </places> <line> <color red="255" green="205" blue="50"/> <line_section from="Laubegg" to="Uetlihof" direction="undirected"> <onroad id="71"/> <point x="325" y="1123"/> <point x="285" y="1163"/> </line_section> <line_section from="Uetlihof" to="Strassenverkehrsamt" direction="undirected"> <onroad id="72"/> <point x="285" y="1163"/> <point x="245" y="1203"/> </line_section>
13

<line_section from="Strassenverkehrsamt" to="Albisguetli" direction="undirected"> <onroad id="73"/> <point x="245" y="1203"/> <point x="200" y="1248"/> </line_section> </line>
Listing 1: XML file holding city information
The loader first processed the places assigning position (0, 0). Then, when reading a line
3.2 Enhancing the Shortest Path Facilities
’s standard algorithm. A typical traveler is
3.2.1 Adding Traffic Stops
a only one type of connection between two places, a
section, it handled the <line_section> node before processing the <point> nodes.
After reading the <point> nodes, the loader updated the positions of the involved
places. The length of the line section was calculated at the time of creation, before updating
the place position, which lead to incorrect lengths for the path calculation. To fix this, the
adapted loader recalculates the weights after processing all the nodes. An alternative
solution would be to process the <point> nodes first and assign the updated positions
before creating the line sections. The current solution is used because processing the nodes
in the same order they appear will make it easier to implement the loading using a SAX
parser (see 5.3).
Traffic calculates the shortest path using Dijkstra
usually not only interested in finding the shortest possible way to a destination, but also in
having a convenient trip. To reflect this, the shortest path facilities have been enhanced
with the possibility to calculate a path based on the smallest amount of changing means of
transportation1. The next section describes the changes which allow the standard algorithm
to calculate paths based on different criteria.
Origin lly, Traffic had
TRAFFIC_LINE_SECTION. The places represented nodes in the graph and a path
could take any connection leaving the place. Calculating the path with the minimum
number of switches is difficult with such a layout. Consider the node near the top left of
Figure 4 where the blue and green lines meet. The weight of the edges to the right depends
on which edge was taken to arrive at the current node. A more elegant solution is to add
1 Walking is in this case considered to be a means of switching transportation lines, not a means of transportation.
Otherwise there would always be the trivial answer: “Walk from A to B”.
14

connections between different lines and assign weights to these connections accordingly.
Figure 5 visualizes the new version of the graph. The update class diagram is shown in
Figure 6 which also includes the new concept of roads introduced by [2].
Figure 3: Line section
Figure 4: A graph in Traffic
Figure 5: Traffic graph with stops
A TRAFFIC_NODE is now the basic node contained in the graph. The deferred class
TRAFFIC_CONNECTION represents a basic edge. The interface of a line section still
gives the origin and destination as a place, but the actual implementation is a
TRAFFIC_STOP. A stop is the equivalent of a public transportation stop; it is the
location where a transport vehicle halts at a given place, to allow passengers to board or
deboard. Furthermore, it is a subclass of TRAFFIC_NODE and resides in the graph as a
node.
15

Figure 6: Updated class diagram for connections
3.2.2 Calculating Paths
The class TRAFFIC_MAP was formerly a descendant of LINKED_WEIGHTED_GRAPH.
Because several features needed to be overridden and TRAFFIC_MAP was already an
overloaded class, the graph has been moved to its own class (parts omitted):
class TRAFFIC_GRAPH inherit LINKED_WEIGHTED_GRAPH [TRAFFIC_NODE, TRAFFIC_CONNECTION] redefine writable, put_edge, prune_node, prune_edge_impl, make_multi_graph, enable_user_defined_weight_function end create {TRAFFIC_MAP} make_multi_graph feature {NONE} -- Creation make_multi_graph is -- Initialize `Current'. do Precursor shortest_path_mode := normal_distance enable_user_defined_weight_function (agent calculate_weight) end feature -- Basic operations put_edge (a_start_node, a_end_node: like item; a_label: TRAFFIC_CONNECTION; a_weight: REAL) is -- Put an edge in the graph and record weight. do total_weight := total_weight + a_label.length Precursor (a_start_node, a_end_node, a_label, a_weight) if a_label.origin = a_label.destination and then weight_function /=Void then internal_edges.last.enable_user_defined_weight_function (weight_function) end end
16

feature -- Status Setting enable_user_defined_weight_function (a_function: FUNCTION [ANY, TUPLE [WEIGHTED_EDGE [TRAFFIC_NODE, TRAFFIC_CONNECTION]], REAL_32]) is -- Use `a_function' to compute edge weight instead of stored value. local edge_list: like edges edge: like edge_item do weight_function := a_function from edge_list := edges edge_list.start until edge_list.after loop edge := edge_list.item if edge.label.origin = edge.label.destination then edge.enable_user_defined_weight_function (a_function) end edge_list.forth end end feature -- Removal prune_node (a_item: like item) is -- Remove `a_item’ and record weight. do -- ... (code removed) total_weight := total_weight - edge.label.length end feature {NONE} -- Implementation weight_function: FUNCTION [ANY, TUPLE [WEIGHTED_EDGE [TRAFFIC_NODE, TRAFFIC_CONNECTION]], REAL_32] -- Weight function, if Void, no weight function is used. calculate_weight (a_edge: WEIGHTED_EDGE [TRAFFIC_NODE,TRAFFIC_CONNECTION]):REAL is -- Calculate weight of `a_edge’ based on current status. -- Only used for "dummy" connections. local section: TRAFFIC_CONNECTION do inspect shortest_path_mode when normal_distance then Result := average_weight / 2 when minimal_switches then Result := total_weight else (create {EXCEPTIONS}).raise ("Unknown path mode in TRAFFIC_GRAPH!") end end shortest_path_mode: INTEGER total_weight: DOUBLE -- Total length of all TRAFFIC_CONNECTIONs added. -- Usually less then total weight of edges because "dummy" -- connections have a higher weight than their length. average_weight: DOUBLE is -- Average weight of an edge used for "dummy" connections -- between nodes of the same place. do if internal_eges.count /= 0 then Result := total_weight / internal_edges.count else Result := 0 end end end
Listing 2: Class TRAFFIC_GRAPH
17

The implementation of the library class WEIGHTED_GRAPH is slightly flawed in that
enable_user_defined_weight_functions only enables the function for the
edges already contained in the graph. Edges added later will rely on their stored weight and
not call the calculating function. To fix this, the feature
enable_user_defined_weight_functions has been redefined in
TRAFFIC_GRAPH. It notifies all edges to use the weight function and stores it, allowing
put_edge to apply it to all newly added edges. The calculating function is currently only
applied to connections between two nodes of the same place; these are used when the
means of transport changes. Calculation of a path with the smallest amount of switches
requires setting the weight to the sum of all edge weights2; the features for adding and
removing edges were redefined to calculate and store this sum. Figure 7: Example for
minimal switch algorithm shows a situation where the connecting edge (blue) needs a high
weight to force the shortest path algorithm to stay on the green line and not take the
shorter red connection.
Figure 7: Example for minimal switch algorithm
3.2.3 Changes to the Standard Shortest Path Algorithm
Calculating the regular shortest path, based solely on distance, requires the blue edge in
Figure 7 to be weighted with its length. The problem with such a weighting is that the
shortest path can suggest spurious and inconvenient switches of the means of
transportation. Note that this is not the same issue as the minimal amount of switches
problem. Figure 8 illustrates the problem.
2 In theory this is necessary, in practice a smaller weight will usually do.
18

Figure 8: Shortest path suggests spurious switches.
The shortest path algorithm suggests the path indicated by the dashed arrows, a seemingly
irrational choice. Numerically, it is the correct answer, but it is a rather clumsy answer to
the question how to get quickly from A to B. The remedy is to assign slightly higher
weights to the connections between different lines. Half the average edge-length worked
well for the zurich_big example and this solution is currently used.
19

4 Measuring Performance
4.1 Performance Analysis Overview
When enhancing the performance of a program, it is essential to know which parts of the
program to focus on. Relying on knowledge of the program to decide which parts to
optimize often leads to optimizing irrelevant sections of the code. The “80/20 rule” of
software performance states that 80% of the execution time of a program is spent in 20%
of the code3. Determining which parts of the program consume the most processing time
by inspecting the code is very difficult. It is much more convenient and accurate to use a
technique called profiling. Profiling is the investigation of a program’s behavior by collection
information as the program runs.
Time is not the only constraint to be measured but usually the most interesting one. It is
also useful to measure the memory consumption of a program. The following profiling
techniques apply to both sorts of profiling. An example for memory profiling is given in
subsection 4.3.2.
4.2 Profiling Techniques
Profiling is typically done by instrumenting the program code, that is, by adding instructions
which collect information about the runtimes. There are several ways of doing this:
4.2.1 Manual Insertion
The programmer manually adds explicit calls to the program to calculate runtimes. This is a
tedious and error-prone task and with the many profiling tools available today, there is no
reason to do manual profiling.
4.2.2 Compiler Insertion
The compiler instruments the code automatically during compilation. This implies a
separate compilation of the program in order to profile it. An example for profiling C and
C++ programs is the GNU C/C++ compiler gcc. To view the information a different tool
is needed, the corresponding GNU tool is called gprof. To profile a C program, it must
first be compiled using the -pg option. Then, the program must be executed in the same
manner it is normally used, which generates a profile information file called gmon.out.
3 There are many variations of this rule. Empirical studies place it closer to 90/10 and date back to [3].
20

gcc -pg main.c -lm -o main ./main gprof main gmon.out
gprof then generates a flat profile and a call graph:
Flat profile: % cumulative self self total time seconds seconds calls ns/call ns/call name 95.91 0.94 0.94 1000000 939.95 939.95 factorial 4.62 0.99 0.05 main Call graph: index % time self children called name <spontaneous> [1] 100.0 0.05 0.94 main [1] 0.94 0.00 1000000/1000000 factorial [2] ----------------------------------------------- 14000000 factorial [2] 0.94 0.00 1000000/1000000 main [1] [2] 95.4 0.94 0.00 1000000+14000000 factorial [2] 14000000 factorial [2] -----------------------------------------------
Listing 3: gprof output
The flat profile shows the time spent in the function itself compared to the time spent in
the called functions. The call graph lists the functions (rows with index [1] and [2]),
above the indexed line are the callers and below the callees of the given function. The
“called” column shows the number of recursive (signified by a “+”) and regular function
calls separately.
4.2.3 Runtime Instrumentation
The code is instrumented immediately before being executed. Programs which run on a
Virtual Machine (e.g. Java programs) are convenient for this task, but it is also possible to
do runtime instrumentation with fully compiled binary programs. This requires the
program to be executed by the profiling tool. Valgrind is an open-source tool for profiling
binary programs on Linux.
21

4.2.4 Runtime-Injection and other Advanced Techniques
More advanced techniques for timing programs without having to run them from the
profiling tool involve taking over the address space of a process (see [1]) and attaching to a
process via the Java Virtual Machine as the profiler included in Netbeans does ([15]).
4.3 Profiling Eiffel Programs
As there are several implementations of Eiffel, the techniques for profiling Eiffel programs
may vary. Because most of the current Eiffel compilers produce C code and EiffelStudio
contains an integrated profiler, the focus shall be on compilers producing C code in general
and EiffelStudio in particular.
4.3.1 Timing
As most Eiffel Compilers produce C code it is possible to use C profiling tools to time
such applications. However, with the feature names being translated to generated function
names, finding out the original features behind the C functions can be tedious. A more
efficient way is to use an Eiffel profiler; EiffelStudio includes a profiler and section 4.4
describes its use.
4.3.2 Memory
Valgrind is a general-use profiling tool which is very popular for memory profiling. It not
only measures memory consumption of a program but is also convenient for detecting
memory leaks. In general, a memory leak is a situation where a part of memory allocated by a
program becomes unreachable without being released. For languages like Eiffel, which
propose a garbage collector, the definition is slightly different. A garbage collector is a
mechanism which collects and frees memory which has become unreachable. As such, a
conventional memory leak becomes impossible, but another issue may arise. Unused
memory blocks can be forgotten by the developer and still be referenced by long-lived
objects. Because they are still referenced, the garbage collector cannot free them and they
will occupy memory until their referencing object becomes unreferenced. There are many
tools for monitoring memory consumption of Java programs and finding unreleased
objects therein.
There are currently no memory profilers available for Eiffel programs, which makes it
difficult to detect memory leaks of the second category (unused but still referenced
objects). However, many Eiffel programs interface with external code (written in C for
example) which can have memory leaks. In order to detect memory leaks in such
22

programs, they can be profiled using Valgrind. The following is an example of memory
profiling the Traffic application City_3D using EiffelStudio 5.7 and Valgrind on Linux.
1. It is convenient (if not essential) to add debugging symbols to the compiled file.
Without debugging symbols, it is very difficult to find out where the leak occurred.
This can be done by editing the file
$ISE_EIFFEL/studio/spec/$ISE_PLATFORM/include/config.sh and changing
the optimize option from “-O3” to “-g”. This is for the finalized version,
for the workbench version replace the wkoptimize option.
2. Compile the application using EiffelStudio.
3. Run the program using Valgrind choosing the full leak check and writing the
information to a log file:
valgrind --leak-check=full --log-file=city_3D.val ./city_3D
4. Alleyoop is a tool for visualizing the output of Valgrind. It allows loading a log file
created by Valgrind and displays the output shown in Figure 9.
23

Figure 9: Alleyoop displays Valgrind output
5. Using the information from the TRANSLAT file the following call graph can be
found for the highlighted item in Figure 9:
CITY_3D_APPLICATION.make (Fgafal1)
EM_APPLICATION.launch (Fgad_4j)
EM_COMPONENT_SCENE.initialize_scene (Ffqxhcv)
EM_COMPONENT_EVENT_QUEUE.process_events (Fafs13p)
EM_EVENT_CHANNEL.publish (Fahqwme)
EM_3D_COMPONENT.lazy_resize_surface (_FAacbz5a)
EM_BITMAP_FACTORY.create_empty_alpha_surface
(Fiftabn)
4.4 The EiffelStudio Profiler
4.4.1 Using External Profilers
The Profiler Wizard included in EiffelStudio has the option to display the results of an
external profiler. Using the -pg option for gcc for compilation will cause the executable to
create a gmon.out file when run. Unfortunately, the import option of the Profiler Wizard,
24

which should parse the file and translate the function names to feature names, does not
work in the current version.
4.4.2 The Eiffel Profiler
In order to profile an application with the EiffelStudio profiler, perform the following
steps:
1. Select the target option “profile” and recompile the project. For the profiler to
work it is necessary to “Freeze” the program (perform full C-compilation), which
can be achieved by pressing Ctrl-F7.
2. Run the application as in normal use.
3. Select “profiler” from the “Tools” menu and choose the compilation mode
(“workbench” or “finalized”). The location for the run-time information record
must be the specified path. If the program was moved and the file in a different
directory, it must be copied to the “W_code” or “F_Code” directory respectively.
4. Select suitable options and a query; for a beginning the preselected ones are fine.
Click “finish” and the following window (Figure 10) will appear:
Figure 10: EiffelStudio profiler window
25

Description:
• Calls: the number of times the feature was called. Features which override an
ancestor and contain a call to Precursor are currently counted twice.
• Self: the time spent in the feature not counting the time in the called features.
• Descendants: the time spent in the called features.
• Total: Self + Descendents.
• Percentage: the percentage of “Total” compared to the total execution time of the
application. Note: the calculated percentage is currently erroneous.
4.5 Enhancing the EiffelStudio Profiler
Measuring the performance of GUI applications is difficult. In order to measure the
reactivity of such an application, it is convenient to time actions. In this context, actions
mean reproducible user actions for which the application provides a perceivable result. To
enhance the reactivity, it is necessary to compare the response times to an action before
and after an optimization attempt. It is possible to profile only certain parts of a program
with the EiffelStudio profiler. To do this, the profiler can be stopped in the creation feature
of the root class and turned on for the code to be profiled. It is important to turn the
profiler back on before the program finishes, otherwise the profiling information will not
be written to a file.
-- In the creation feature of the root class: local ps: PROFILER_SETTING do create ps ps.stop_profiling -- Execution of program. ps.start_profiling -- Turn profiler on, otherwise info is lost. end -- ...
26

-- In the feature(s) to be profiled: Local ps: PROFILER_SETTING do create ps ps.start_profiling -- The code that needs to be profiled. ps.stop_profiling end
Listing 4: Using the EiffelStudio profiler on specific parts of a program
4.5.1 Limitations
While this feature is very useful there exists a problem. If more than one part of the code is
profiled, the profiler will not distinguish the two parts in the information shown. The
output is simply a list of features displaying the total number of calls and total timing
information. If a feature is called in more than one part under profiling, there is no way of
telling how many calls occurred in a given part. When an optimization attempt is suspected
to influence another action, knowing the performance changes for the separate actions is
essential. Actions may have different priorities regarding their performance. Optimizing a
certain action by 20% while slowing down a different action by 5% may be acceptable or
highly undesirable depending on these priorities. Without the possibility of timing actions
separately, such issues are cumbersome.
The second limitation of the EiffelStudio profiler refers to the comparison of the timing
information before and after optimization attempts. Currently, this must be done manually,
as the EiffelStudio provides no comparison tool, which makes it difficult to demonstrate
performance increases. To provide facilities for timing separate actions and comparing the
results of different runs the tool described in section 4.5.2 has been developed.
4.5.2 The ActionTimer
In order to enhance the profiling facilities of EiffelStudio, this work provides the possibility
to time actions. The ActionTimer allows timing and naming of specific actions and
comparing base runs to comparison runs. To time actions, the profiling option for the
target must be selected and the following code (Listing 5) added to the application:
-- In the creation feature of the root class: local at: ACTION_TIMER do create at at.application_start_setup
27

-- ... -- In the feature(s) calling the action(s) code: local at: ACTION_TIMER do create at at.start_action ("action_name") -- Provide a descriptive name. -- The code that needs to be profiled. at.stop_action en d
Listing 5: Using the ActionTimer
Typically, features which are used to handle mouse-clicks or other user interactions are
timed. After compiling and running the program, clicking on the Profiler item in the Tools
menu of EiffelStudio and selecting ActionTimer will start the tool. A file browser dialog
prompts for the directory where the program resides (per default, the “W_code” directory
of the project is selected). If there are action files in the directory, the actions will be
displayed:
Figure 11: ActionTimer output
Note that the program must be run twice for data to be viewed. The first run will create a
“.br” file while the second run creates a “.cr” file. The first run reflects the timing of the
unmodified program (“base run”). Then the user is expected to attempt an optimization,
after which the program is timed again to measure the changes (“comparison run”). In the
28

example above, the second action was successfully improved (albeit only by 5.5 %) while
the first action lost performance.
If there already exists a .br file with the name of the action, the ActionTimer will always
4.5.3 Implementation
ses and modifies the facilities of the EiffelStudio profiler, which reside
create a .cr file. To override this, the feature force_base_run can be called in the
source code, which will cause the .br file to be overwritten.
Runtime Code
The ActionTimer u
in the runtime code. Figure 12 shows a schematic overview of the runtime internals
concerning the profiler. The runtime code is augmenting code which is transparent to the
Eiffel programmer. It contains functions for garbage collection, routing calls, checking
conformance and similar low-level features.
Figure 12: EiffelStudio profiler internals
The code for the ActionTimer contains a new flag action_timing to indicate special
// Current solution:
timing as opposed to regular profiling. When an action ends the profile information is
written to a file as in regular profiling except that the filename is given by the action name.
In addition, the class table and profiling stack is freed and reinitialized. A more fine-grained
resetting as in Listing 6 would be preferable, as it would be a more elegant and also
efficient solution. All attempts in this direction failed with EiffelStudio reporting an
unlocalizable division-by-zero exception in the C code.
ht_free(class_table); prof_stack_free(); initprf();
29

// Preferable solution: for (i = 0; i < class_table->h_size; i++) { if (keys[i] != 0) { for (j = 0; j < f_values[i].htab->h_size; j++) { if (f_values[i].htab->h_keys[j] != 0) { features = (struct prof_info *) f_values[i].htab->h_values; features[j].all_total_time = 0; features[j].descendent_time = 0; features[j].number_of_calls = 0; } } } }
Listing 6: Resetting the profiler information
The class ACTION_ e user and the profiling system: TIMER is the interface between th
class ACTION_TIMER inherit PROFILING_SETTING export {NONE} all end feature -- Status setting application_start_setup is -- Call this function in the creation feature of your root class. do stop_profiling c_actions_setup end start_action(a_name: STRING) is -- Start profiling for an action specified by `a_name'. require name_not_empty: a_name /= Void and then a_name.count > 0 local ptr: ANY do -- Set the filename and start profiling. ptr := a_name.to_c c_set_filename ($ptr) start_profiling end stop_action is -- Stop current action. do c_stop_action (override_base_run) end force_base_run is -- Force stats to be written to name.br. do override_base_run := true end feature {NONE} -- Implementation c_set_filename(filename: POINTER) is -- Set name of output file. external "C use %"eif_option.h%"" alias "set_filename" end c_stop_action(override: BOOLEAN) is -- Stop current action. external "C use %"eif_option.h%"" alias "stop_action" end c_actions_setup is
30

-- Get the runtime ready for actions. external "C use %"eif_option.h%"" alias "actions_setup" end c_action_timing: INTEGER is -- Is ActionTimer on? external "C use %"eif_option.h%"" alias "action_timing" end override_base_run: BOOLEAN end
Listing 7: Class ACTION_TIMER
Comparison and GUI
Following is a descri ad, compare and display the ActionTimer
profiling information.
ption of the classes which lo
Figure 13: Class Diagram for the ActionTimer
PROFILE_CONVERTER (from EiffelStudio) fills in the class names into the data
produced by the profiler:
[2] 3.38 0.76 1 100.00 test2 from 18
AT_PROFILE_CONVERTER inherits these features but doesn’t write the information to
a file ON provides access to the
PROFILE_INFORMATION in a feature.
like PROFILE_C VERTER does. Instead, it
31

AT_TIMED_ACTION is the representation of an action. It has a name, stores the times of
the base and comparison runs and their profile information.
SHOW_ACTION_TIMERS is the main class; it displays the directory dialog for choosing
everal improvements:
ld require a large amount of change to the
uld require one
profiling stack per action and separate computations for each of them. If only the
•
nning time.
• Instead of having to change the program’s code to time the actions it would be
mework would intercept the mouse-click
and create an action on the fly to time the response action.
the location of the action timer files. It delegates the conversion of the files and passes the
list of actions to the ACTION_TIMER_WINDOW.
4.5.4 Possible Improvements for the ActionTimer
The ActionTimer, while already useful for finding and removing performance problems, it
is not at a production level yet and leaves room for s
• Allow actions to be nested. This wou
runtime code. One way to implement this would be to record times for every
action separately, which would cost more memory and time. It wo
total time for the actions is recorded (as opposed to the profiling information),
then the timing could be done in the Eiffel code without modifying the runtime. It
is however much more convenient to have the detailed profiling code in order to
find out which features are taking a lot of time.
Add support for statistical analysis. Because programs do not always run at the
same speed and because the profiler isn’t 100% accurate, it would be convenient to
run actions many times and compute the average ru
• Improve the GUI: allow the data to be sorted by columns, color the feature
column and make it pick-and-droppable.
convenient to have a framework to time the program. The user could hold a special
key while clicking the mouse and the fra
32

5 Enhancing Performance of Traffic
5.1 Performance Problems in Traffic
The performance of Traffic is rather slow, mostly for two reasons:
1. Checking runtime assertions takes a lot of time.
2. In certain parts of the code, slow algorithms are used.
Checking assertions (or contracts) can, in certain cases, be disabled for production code. The
problem with Traffic is that students are constantly modifying the code during their course
work. In this state assertions must remain enabled to show wrong uses of the library.
Optimizing assertions for performance is not an option. The goal of contracts is to express
the correct use of a class and not to perform quickly.
The second issue can be solved. Section 5.2 describes solutions for several performance
problems in Traffic.
5.1.1 Profiling the City_3D Example
Following is a table with data produced by the EiffelStudio profiler and a screenshot after
profiling City_3D in two different sessions. The information is sorted by the total time
column.
Function Calls Self Descendants Total
ds_table.DS_HASH_TABLE.forth 1822306 6.97 15.24 22.21
timer.EM_TIME.delay 610 15.8 0 15.8
ds_table.DS_HASH_TABLE.item_for_iteration 1822306 6.91 8.37 15.28
ds_table.DS_HASH_TABLE.cursor_forth 1822306 12.92 2.32 15.24
base.structures.table.HASH_TABLE.forth 492178 7.05 3.42 10.47
ds_table.DS_HASH_TABLE.cursor_item 1822306 7.31 1.06 8.37
ds_table.DS_HASH_TABLE.after 1824707 7.42 0.95 8.37
33

Figure 14: Profiler output for City_3D
Conclusions from the profiling information:
• CITY_3D_MAP_WIDGET.draw is called twice as many times as redraw from
CITY_3D_MAP_WIDGET and CITY_3D_SCENE. This turned out to be a false
alarm; it’s a bug in the profiler which has been mentioned in subsection 4.4.2: if a
feature calls Precursor, it gets counted twice.
• HASH_TABLE.forth and DS_HASH_TABLE.forth are called many times.
Hash tables are used by the representation classes for lines, roads and places to
store the representation of their respective objects. The draw feature iterates
through the hash table and calls draw on each object. Iterating through a hash table
is a rather expensive way of iterating and this is done every frame. This problem is
solved in the next section as Performance Problem 3.
34

5.2 Enhancements
Performance Problem 1
Location Example: City_Time
Description Figure 15: Travelers in City_Time
Figure 15 shows travelers in the example City_Time. The action caused by
the “Update Travelers” button took very long. The reason was that the 3D
representation of a traveler was loaded from an .obj file for every traveler.
Increasing the number of travelers by 10 and clicking “Update Travelers”
meant loading (and parsing) the file 10 times.
Solution
The new class TRAFFIC_3D_FAST_OBJECT_LOADER (see Listing 8)
caches the objects it loads from the files and uses a common OpenGL
display_list for objects of the same type.
Improvement Adding 40 passengers: 15% finalized mode, 93% workbench mode (see
Figure 16).
class TRAFFIC_3D_FAST_OBJECT_LOADER inherit TRAFFIC_3D_OBJECT_LOADER redefine make, make_with_color, compile, load_file, set_color, set_em_color end create make, make_with_color -- ...(code omitted)
35

feature -- Commands load_file(a_filename: STRING) is -- Check if file was already loaded. Assume files aren't changed -- during runtime. local itm: TUPLE[INTEGER, DOUBLE, DOUBLE, DOUBLE] do -- Using filename as a key may be risky if relative paths are used. -- The perfectly correct solution would be to always build the absolute -- path, which is a slight overkill. itm := obj_cache.item (a_filename) if itm /= Void then displaylist := itm.integer_item (1) object_width := itm.double_item (2) object_height := itm.double_item(3) object_depth := itm.double_item(4) unchanged := False else Precursor (a_filename) compile create itm itm.put_integer (displaylist, 1) itm.put_double (object_width, 2) itm.put_double (object_height, 3) itm.put_double (object_depth, 4) obj_cache.extend (itm, a_filename) end ignore_changed := True end feature {NONE} -- Implementation ignore_changed: BOOLEAN -- Should changes be ignored (used for caching)? compile is -- Check if file is in cache first. do if not ignore_changed then Precursor end end obj_cache: HASH_TABLE[TUPLE[INTEGER, DOUBLE, DOUBLE, DOUBLE], STRING] -- Cache for objects: filename, display_list, width, height, depth. set_color (a_r: REAL; a_g: REAL; a_b: REAL; a_a: REAL) is -- Redefined to set the `ignore_changed’ flag to false. do Precursor (a_r, a_g, a_b, a_a) ignore_changed := False end end
Listing 8: Class TRAFFIC_3D_FAST_OBJECT_LOADER
36

Figure 16: Performance increase for Problem 1
37

Performance Problem 2
Location Example: City_3D
Description
Figure 17: Selecting a place in City_3D
Selecting a place took a long time especially if the current map was large.
Figure 17 shows several places (black rectangles), one of which is selected
(green rectangle). The problem was that the bounding box4 of every place
was recalculated until the selected place was found. If the selected place is
at the beginning of the list, this results in only small delays. But if the place
is towards the end of the list, it takes a noticeable amount of time to
calculate all the bounding boxes.
Solution The updated class TRAFFIC_3D_PLACE_REPRESENTATION caches
the bounding boxes as opposed to recalculating them every time.
Improvement For places closer to the end of the list (200/270) the improvement is larger
than 90 % in the workbench mode (see Figure 18).
4 A bounding box is in general the convex hull of an object used for collision detection. In this case it is a rectangle which
makes collision detection fast.
38
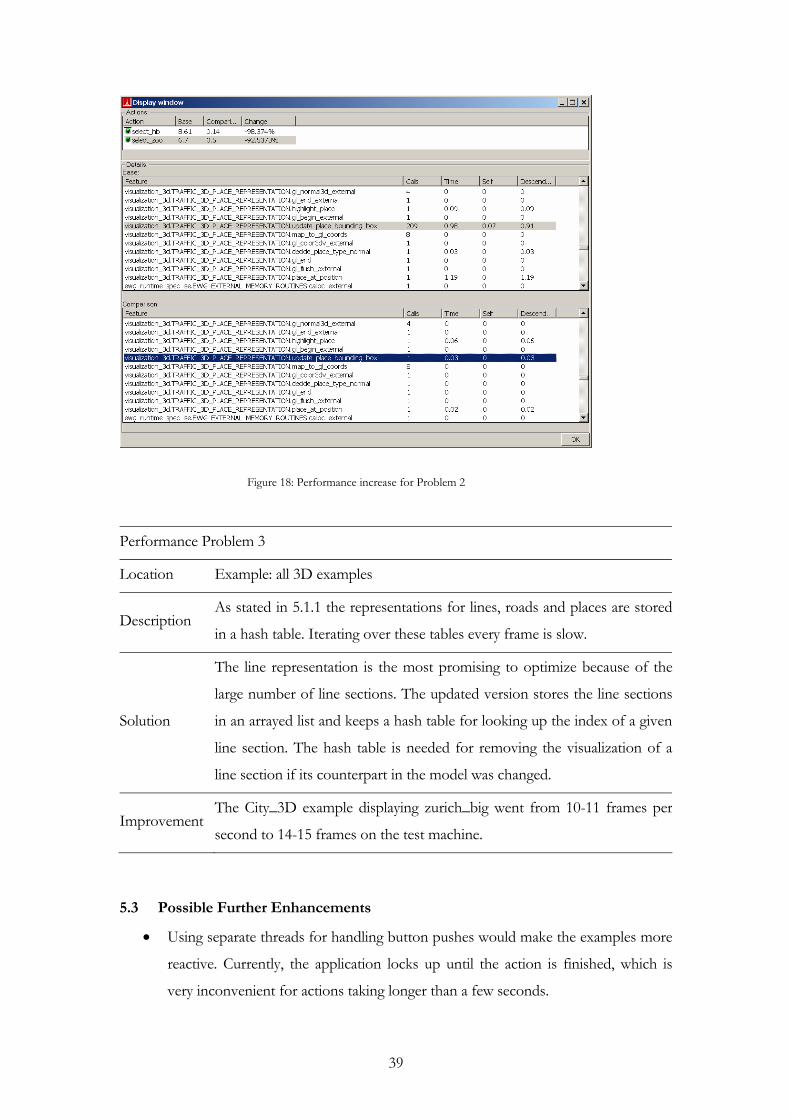
Figure 18: Performance increase for Problem 2
Performance Problem 3
Location Example: all 3D examples
Description As stated in 5.1.1 the representations for lines, roads and places are stored
in a hash table. Iterating over these tables every frame is slow.
Solution
The line representation is the most promising to optimize because of the
large number of line sections. The updated version stores the line sections
in an arrayed list and keeps a hash table for looking up the index of a given
line section. The hash table is needed for removing the visualization of a
line section if its counterpart in the model was changed.
Improvement The City_3D example displaying zurich_big went from 10-11 frames per
second to 14-15 frames on the test machine.
5.3 Possible Further Enhancements
• Using separate threads for handling button pushes would make the examples more
reactive. Currently, the application locks up until the action is finished, which is
very inconvenient for actions taking longer than a few seconds.
39

• TRAFFIC_3D_PLACE_REPRESENTATION.place_at_position
A logarithmic search over the places would be quicker than the current sequential
search. This implies partitioning the space and storing the places according to this
partitioning. As the bounding boxes are already assumed to be axis aligned and
non-intersecting5 this is quite easy. The bounding boxes need to be stored in a
quadtree, a tree whose nodes have four links. The links represent the relative
location of the other bounding boxes. Given our assumptions about the bounding
boxes, comparing the upper left corner of the bounding boxes leads to four
relations: above-left, above-right, below-left and below-right. Building the tree
would work as follows: compare the upper left corners and follow the
corresponding link until there is no other box there. Then insert the given
bounding box at the empty link. Finding the bounding box in which a point lies
works similar: compare the point to the current box and if it’s not inside, follow the
corresponding link and repeat.
• TRAFFIC_3D_MAP_WIDGET.add_buildings_randomly
This feature is rather slow because it uses the following algorithm:
calculate a random position pos compare pos with all line sections and buildings if there is no conflict insert a building at pos otherwise repeat the process
Because this is done for every building to be inserted, it can take a very long time if
the map is cluttered. The algorithm is not even guaranteed to terminate, the
random position could always conflict with another object. A better solution would
be to precalculate possible positions for buildings and when adding a building
randomly choose an unoccupied spot among them. This implies a maximum
number of buildings, but the City_3D example already has such a limit. Another
possibility would be to choose a random position and if a conflict exists, move
around the conflicting object in circles with increasing radius until a spot is found.
5 They are axis aligned because they are of type EM_ORTHOGONAL_RECTANGLE and non-intersecting because there is
currently no semantics for overlapping places.
40

The reason for not implementing one of these solutions is that the feature may be
discontinued in the near future.
• XML parsing is very slow. Currently, the Document Object Model (DOM) is used.
Using DOM implies parsing the entire file to build a tree representing the
document. In a second run, the nodes must be revisited to process the data. For
the xml files representing the cities in Traffic, this is unnecessary because the nodes
are processed sequentially. Processing the XML files in an event based manner
using the Simple API for XML (SAX) would be more efficient.
41
6 Conclusion
A tool for measuring performance of GUI applications – the ActionTimer – has been
provided. The ActionTimer overcomes limitations of the EiffelStudio profiler in this area
and can easily be integrated into EiffelStudio. Its utility has been demonstrated by timing
and speeding up several example applications of Traffic. These and other enhancements
have lead to a measurable performance increase in Traffic.
Apart from increasing performance, Traffic has been enhanced by remodeling the main
transportation classes to allow more flexible path searching options. An additional option
has been implemented, allowing the calculation of a path based on changing means of
transportation as little as possible.
42

Acknowledgements
I would like to thank my supervisor Michela Pedroni for her valuable input and the amount
of freedom she allowed me during this work. My thanks also go to Prof. Bertrand Meyer
for giving me the opportunity to complete my master’s thesis at his chair. Furthermore, I
thank Till Bay and Joseph Ruskiewicz for their help and feedback.
43

7 References
[1] Bruening, Derek L., Efficient, transparent, and comprehensive runtime code manipulation, PhD Thesis, Massachusetts Institute of Technology, 2004
[2] Croci, Michele, Traffic 3.1 – Introducing Roads, Semester Thesis, ETH Zurich, 2006
[3] Knuth, Donald E., An Empirical Study of FORTRAN Programs, in Software Practice and Experience 1 p. 105-133, 1971
[4] Meyer, Bertrand, Eiffel – The language, Prentice Hall 1992
[5] Meyer, Bertrand, Object-Oriented Software Construction, 2nd Edition, Prentice Hall, 1997
[6] Meyer, Bertrand, The Outside-In Method of Teaching Introductory Programming, in Perspective of System Informatics p. 66-78, Proceedings of fifth Andrei Ershov Memorial Conference, Akademgorodok, Novosibirsk, Springer-Verlag, 2003
[7] Meyer, Bertrand, Touch of Class, working edition available at: http://se.inf.ethz.ch/touch
[8] Pedroni, Michela, Teaching Introductory Programming with the Inverted Curriculum Approach, Diploma Thesis, ETH Zurich, available at: http://se.inf.ethz.ch/projects/michela_pedroni/Report.pdf, 2003
[9] Pedroni, Michela and Meyer Bertrand, The Inverted Curriculum in Practice in Proceedings of the 37th SIGCSE Technical Symposium on Computer Science Education p. 481-485, Houston, Texas, 2006
[10] Schreiner, Dave et al., OpenGL Programming Guide, 5th Edition, Addison-Wesley, 2006
[11] EiffelMedia, http://eiffelmedia.origo.ethz.ch
[12] EiffelStudio, http://www.eiffel.com/
[13] Eiffel Wrapper Generator, http://ewg.sourceforge.net
[14] Gobo Eiffel, http://www.gobo.com
[15] Netbeans, http://www.netbeans.org
[16] Simple API for XML (SAX), http://www.saxproject.org
[17] The GNU Compiler Collection, http://gcc.gnu.org/
[18] The GNU Profiler, http://www.cs.utah.edu/dept/old/texinfo/as/gprof_toc.html
[19] Traffic, http://se.inf.ethz.ch/traffic
[20] Valgrind Manual, http://valgrind.org
44

[21] World Wide Web Consortium, Document Object Model, http://www.w3.org/DOM
45

Appendix A: EiffelMedia Documentation for Callbacks
46

EWG Tips
INDEX >> ewg_tips >> Overview
EWG Tips
Overview
Since part of EiffelMedia is generated by EWG, it can happen that a class does not get generated on your system. Here is a description of how EWG wraps anonymous callbacks and what to do if you are missing such a class.
Anonymous callbacks
EWG creates an anonymous callback when the following code occurs:
extern DECLSPEC void SDLCALL Mix_HookMusicFinished(void (*music_finished)(void));
The interesting part is the parameter void (*music_finished)(void) which is a function pointer. In this case the classes VOID_VOID_ANONYMOUS_CALLBACK_CALLBACK and VOID_VOID_ANONYMOUS_CALLBACK_DISPATCHER are created. EWG doesn't know the name of the function pointer type and creates an anonymous class using the return value and the value of the arguments as name. This one class is generated for all anonymous callbacks of the same type.
Overriding typedefs
Als far as EWG is concerned, the callback mentioned above is only anonymous if there is no typedef for the same type of function pointer in the entire cpp.h file. The following definition will stop the ANONYMOUS classes from being created:
typedef void (* my_callback) (void);
Instead, classes MY_CALLBACK_CALLBACK and MY_CALLBACK_DISPATCHER will be created and any classes using VOID_VOID_ANONYMOUS_CALLBACK_CALLBACK or VOID_VOID_ANONYMOUS_CALLBACK_DISPATCHER will not compile. This happens regardless of where the typedefs and the function declaration using the function pointer occur. A typedef in GLU.h can stop an anonymous function pointer in SDL.h from creating the corresponding classes.
Don't use anonymous callbacks
As libraries used in EiffelMedia change, typedefs may be added and as a result the anonymous callback classes won't be generated anymore. If you must use a callback class do not use the anonymous callback but generate a named type instead. To cause such a class to be generated, add a corresponding typedef to the beginning of the em.h file. Use the return type and the types of the arguments as a name and prefix with em. For the void_void example the typedef looks as follows:
typedef void (*em_void_void_callback) (void);
This will cause the classes EM_VOID_VOID_CALLBACK_CALLBACK and EM_VOID_VOID_CALLBACK_DISPATCHER to be created which are safe to use in your code.
INDEX >> ewg_tips >> Overview
Copyright © 2003-2006, Till Bay mailto:[email protected] http://eiffelmedia.origo.ethz.ch Last Updated: 22 August 2006

Appendix B: Traffic Documentation
48

City3D User Guide
INDEX >> city3d user >> Overview
The City3D project implements a 3 dimensional visualization of a Traffic map file and adds some additional functionality.
This document is structured as follows:
● IntroductionWelcome to City3D!
● Mouse controlsShows the usage of City3D application.
INDEX >> city3d user >> Overview
Copyright © 2005, Michela Pedronimailto:[email protected]://wiki.se.inf.ethz.ch/traffic/index.php/Main_PageLast Updated: $Date: 2006-03-23 05:50:32 +0100 (Do, 23 Mrz 2006) $
City3D User Guide
INDEX >> city3d user >> introduction
Welcome to City3D!
The City3D application displays traffic lines as colored polygons on a plane, adds buildings and provides mouse and keyboard support such thatchanging the viewpoint (zooming, rotation, different centers) and interaction with the buildings is possible. Moreover it provides different light settings and visualizes shortest paths in the city.
INDEX >> city3d user >> introduction
Copyright © 2005, Michela Pedronimailto:[email protected]://wiki.se.inf.ethz.ch/traffic/index.php/Main_PageLast Updated: $Date: 2006-03-23 05:50:32 +0100 (Do, 23 Mrz 2006) $

Mouse and keyboard controls
INDEX >> city3d user >> mouse_controls
Mouse controls
i) Mouse wheel: Controls the zooming factor, whereas the position stays invariant. There are two different zooming speeds depending on the distance to the plane.
ii) Mouse click: Is used to mark stations on the map. The origin can be marked with the left mouse button, the destination with the right one. If the user clicks on an empty spot, the marked stations are revoked.
iii) Mouse dragging:
● Left mouse button: By dragging the mouse while pressing the left button one is able to translate the position of the map in the window, i.e. move the plane.
● Right mouse button: By dragging the mouse while pressing the right button one is able to rotate the map around the the origin.
iv) Keyboard:
● By pressing the up-/down- or left-/right- arrow keys the map will be rotated around the x- or y-axis respectively.
● By pressing the enter key the translation will be reset to its initial value. However, zoom as well as rotation are not affected.
Options
i) Choose the map to be loaded and load it.
ii) Zoom in and out.
iii) Change the number of buildings to be randomly displayed on the map: The number of buildings can be varied from 0 up to 4900.
iv) Make the buildings transparent in order to achieve a better overview.
v) Change lighting of the map: Initially, the scene is lit by a constant light coming down the y axis. However, this can be changed to a variable light that tries to imitate the effect of the sun.
vi) Show a coordinate system: This shows a coordinate system at the origin for better orientation.

vii) Highlight the traffic lines by drawing them with different height on the map, in order to achieve a better overview.
viii) The buildings can be hidden or shown by enabling/disabling the "show buildings" option.
ix) Show the shortest path between two marked stations and display it as a white line. The origin for the route is marked by clicking on the place with the left mouse button and the destination with the right mouse button.
x) Calculate the shortest path based changing the means of transportation as little as possible (Minimal Switches).
xi) Change the lighting as if the scene was lighted by a sun.
xii) Show the transportation lines instead of the roads.
xiii) When two stations are selected, a new button appears. If you press it, you can take a traffic line ride in a first-person perspective between the two marked stations.
i) Shows the name of the most recently marked building.
ii) Choose the XML file for building loading and load them.
iii) Load buildings along all traffic lines (expect railway).
iv) Delete all buildings.
v) Description of the shortest path.
top
INDEX >> city3d user >> mouse_controls
Copyright © 2005, Michela Pedronimailto:[email protected]://wiki.se.inf.ethz.ch/traffic/index.php/Main_PageLast Updated: $Date: 2006-03-24 14:36:41 +0100 (Fr, 24 Mrz 2006) $

City_Time User Guide
INDEX >> citytime user >> Overview
The City_Time project implements a 3 dimensional visualization of a Trafficmap file and adds time functionality.
This document is structured as follows:
● IntroductionWelcome to City_Time!
● Mouse controlsShows the usage of City_Time application.
INDEX >> citytime user >> Overview
Copyright © 2005, Michela Pedronimailto:[email protected]://wiki.se.inf.ethz.ch/traffic/index.php/Main_PageLast Updated: $Date: 2006-03-10 17:19:07 +0100 (Fr, 10 Mrz 2006) $
Introduction
INDEX >> citytime user >> introduction
Welcome to City_Time!
The City_Time application displays traffic lines as colored polygons on a plane, adds passengers on this plane randomly, trams on their respective lines and provides mouse and keyboard support such that changing the viewpoint (zooming, different centres) is possible (easily). Moreover it runs time in the model.
INDEX >> citytime user >> introduction
Copyright © 2005, Michela Pedronimailto:[email protected]://wiki.se.inf.ethz.ch/traffic/index.php/Main_PageLast Updated: $Date: 2006-03-26 20:19:52 +0200 (So, 26 Mrz 2006) $

Mouse and keyboard controls
INDEX >> citytime user >> mouse_controls
Mouse controls
i) Mouse wheel: Controls the zooming factor, whereas the position stays invariant. There are two different zooming speeds depending on the distance to the plane.
ii) Mouse click: Is used to mark stations on the map. The origin can be marked with the left mouse button, the destination with the right one. If the user clicks on an empty spot, the marked stations are revoked.
iii) Mouse dragging:
● Left mouse button: By dragging the mouse while pressing the left button one is able to translate the position of the map in the window, i.e. move the plane.
● Right mouse button: By dragging the mouse while pressing the right button one is able to rotate the map around the the origin.
iv) Keyboard:
● By pressing the up-/down- or left-/right- arrow keys the map will be rotated around the x- or y-axis respectively.
● By pressing the enter key the translation will be reset to its initial value. However, zoom as well as rotation aren't affected.
Optionsi) Start the time count. At the bottom of the toolbar you see the time going up. The trams (no changes possible) and the passengers start to move on the map. The simulated time is shown below and can vary from 5 to 60 minutes.
ii) Change the number of passengers to be displayed on the map: The number of passengers can be varied from 0 up to 1000. The passengers are randomly distributed.
top

INDEX >> citytime user >> mouse_controls
Copyright © 2005, Michela Pedronimailto:[email protected]://wiki.se.inf.ethz.ch/traffic/index.php/Main_PageLast Updated: $Date: 2006-03-10 17:19:07 +0100 (Fr, 10 Mrz 2006) $
Traffic Library Developer Guide
INDEX >> traffic library developer >> Overview
This section consists of a description of the intention and use of the Trafficlibrary with a description of each class and its simplified interface. The class overviews are sorted in alphabetic ascending order to be able to find a class description faster when knowing the name of it. For each class a short example of use will be added to show how it can be used. These examples can be found in the cluster test example.
This document describes how the Traffic library is structured and consists of the following parts:
Map representation
● OverviewGives an overview of the classes that are involved in the map representation part Traffic library
● ClassesDescribes each class of the map representation part Traffic library
Visualization
● OverviewGives an overview of the classes that are involved in the visualization part in the Traffic library
● ClassesDescribes each class of the visualization part Traffic library
Input
● OverviewGives an overview of the classes that are involved in the input part of Trafficlibrary
● ClassesDescribes each class of the input part Traffic library
INDEX >> traffic library developer >> Overview
Copyright © 2005, Michela Pedronimailto:[email protected]://wiki.se.inf.ethz.ch/traffic/index.php/Main_PageLast Updated: $Date: 2006-04-04 08:43:11 +0200 (Di, 04 Apr 2006) $
Traffic map overview
INDEX >> traffic library developer >> map_overview
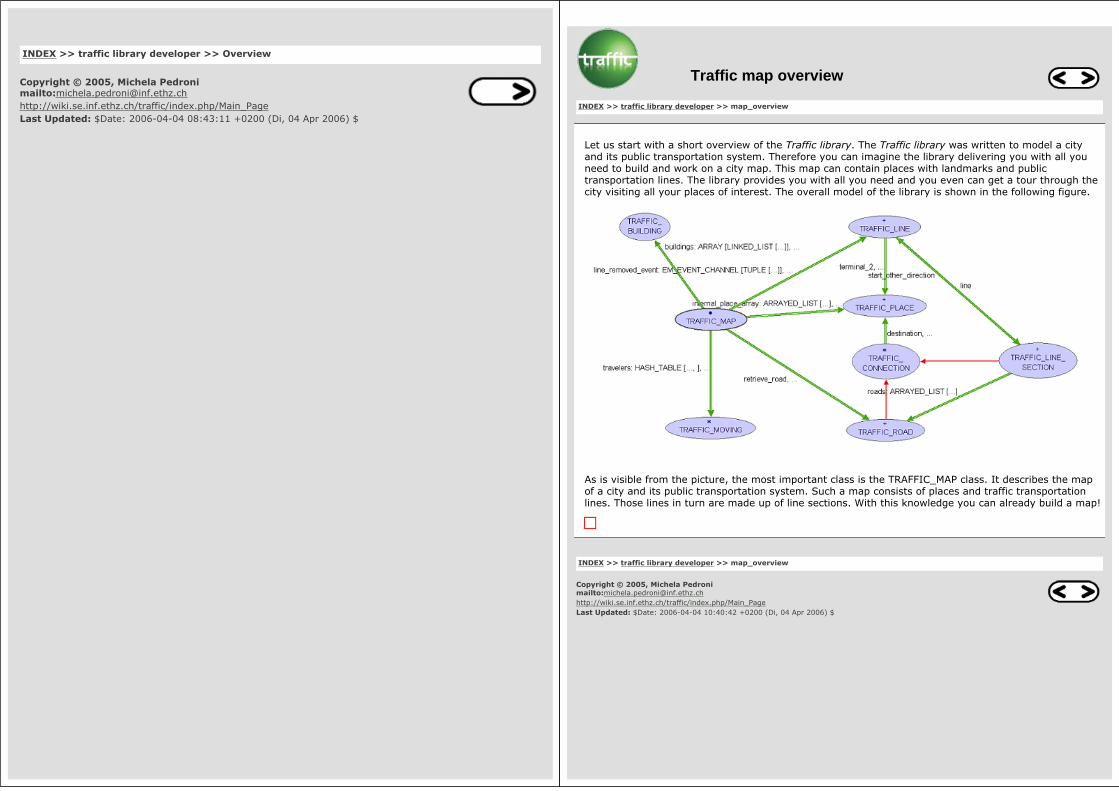
Let us start with a short overview of the Traffic library. The Traffic library was written to model a city and its public transportation system. Therefore you can imagine the library delivering you with all you need to build and work on a city map. This map can contain places with landmarks and public transportation lines. The library provides you with all you need and you even can get a tour through the city visiting all your places of interest. The overall model of the library is shown in the following figure.
As is visible from the picture, the most important class is the TRAFFIC_MAP class. It describes the map of a city and its public transportation system. Such a map consists of places and traffic transportation lines. Those lines in turn are made up of line sections. With this knowledge you can already build a map!
INDEX >> traffic library developer >> map_overview
Copyright © 2005, Michela Pedronimailto:[email protected]://wiki.se.inf.ethz.ch/traffic/index.php/Main_PageLast Updated: $Date: 2006-04-04 10:40:42 +0200 (Di, 04 Apr 2006) $

Traffic map classes
INDEX >> traffic library developer >> map_classes
In the following sections the classes will be described. The layout for each class is: Requirements, Description, Class overview. In the Requirements the name of classes you need to know in order to understand the class described is given. Description is a short description of what the class does. It is more detailed than just the class description that you find in the class header. The class overview provides you with a class diagram.
● TRAFFIC_BUILDING
● TRAFFIC_BUILDING_INFORMATION
● TRAFFIC_BUS
● TRAFFIC_COLOR
● TRAFFIC_CONNECTION
● TRAFFIC_DISPATCHER_TAXI
● TRAFFIC_DISPATCHER_TAXI_OFFICE
● TRAFFIC_EVENT_TAXI
● TRAFFIC_EVENT_TAXI_OFFICE
● TRAFFIC_GRAPH
● TRAFFIC_LINE
● TRAFFIC_LINE_SECTION
● TRAFFIC_LINE_SECTION_STATE
● TRAFFIC_LINE_SECTION_STATE_CONSTANTS
● TRAFFIC_LINE_VEHICLE
● TRAFFIC_MAP
● TRAFFIC_MAP_FACTORY
● TRAFFIC_MAP_LOADER
● TRAFFIC_MOVING
● TRAFFIC_PATH
● TRAFFIC_PATH_SECTION
● TRAFFIC_PASSENGER
● TRAFFIC_PLACE
● TRAFFIC_PLACE_INFORMATION
● TRAFFIC_ROAD
● TRAFFIC_ROUTE
● TRAFFIC_SIMPLE_LINE
● TRAFFIC_TAXI
● TRAFFIC_TIME
● TRAFFIC_TRAM
● TRAFFIC_TYPE
● TRAFFIC_TYPE_LINE
● TRAFFIC_TYPE_ROAD
● TRAFFIC_TYPE_FACTORY
● TRAFFIC_VEHICLE
● TRAFFIC_WAGON
TRAFFIC_BUILDING
Requirements:
TRAFFIC_BUILDING_INFORMATION
Description
The class TRAFFIC_BUILDING represents a building. A building is always a rectangle and is specified by its four corners (corner 1 is always the upper left, corner 2 the lower left, corner 3 the lower right and corner 4 the upper right one) and the three dimensions width, breadth and height. Furthermore, an angle (in range -70 to 70 degrees) can be specified by which the building is rotated.
A new building is created through the feature make, which needs the four corners of the building, its height and its name. The creation feature then calculates the width, the breadth and the center and sets the angle to zero.In case the angle has to be changed after creation, this can be done through set_angle.If the building has to be drawn, then it needs also a unique identification number which can be set through set_id.
The four corners can be accessed through the four features: corner1 (upper left corner), corner2 (lower left corner), corner3 (lower right corner) and corner4 (upper right corner), whereas the three dimensions can be accessed through the tree features: width, breadth and height. Finally, the angle can be accessed through angle
The class TRAFFIC_COLOR represents a RGB-Color. A RGB-Color is a color composed of the three additive components: red, green, blue. The three color parts can be accessed through the three features: red, green, blue. An important feature is is_valid_color_part which makes sure only valid integer values for the rgb-parts are used. The object is created through the make feature call which sets the color parts to the passed values. The individual color parts can be changed through the set_color commands. Make sure the value you want to change the color to is valid. For this the is_valid_color_part query can be used.
Class overview
top
TRAFFIC_CONNECTION
Requirements:
TRAFFIC_PLACE
Description
The deferred class TRAFFIC_CONNECTION represents a connection between two places. These links can be of type TRAFFIC_ROAD or of type TRAFFIC_LINE_SECTION. The connected places are called origin and destination and are accessible with the features origin and destination. The origin and destination places are the interface which should be used to work with connections. The implementation can be either a TRAFFIC_NODE or TRAFFIC_STOP depending on the type of instance. Furthermore, a connection has a list of polypoints, used to display the link on the map and to allow the moving of vehicles on the link.
The feature length returns a calculated length of the connection. To calculate the length the polypoints are used, and if no polypoints exists, the position of the origin and destination place are used to calculate a length. This length becomes especially important when starting to calculate routes on lines and even a whole map of lines.
Class overview
top
TRAFFIC_DISPATCHER_TAXI
Requirements:
TRAFFIC_TAXI, TRAFFIC_DISPATCHER_TAXI_OFFICE

Description
The class TRAFFIC_DISPATCHER_TAXI represents taxis that use client feature call communication.
This class effects the attribute office to use a TRAFFIC_DISPATCHER_TAXI_OFFICE. It effects the deferred feature take to use method call communication to inform the office about its state.
Class overview
top
TRAFFIC_DISPATCHER_TAXI_OFFICE
Requirements:
TRAFFIC_TAXI_OFFICE, TRAFFIC_DISPATCHER_TAXI
Description
The class TRAFFIC_DISPATCHER_TAXI_OFFICE represents taxi offices that clients and taxis communicate with by feature call.
Class overview
top
TRAFFIC_EVENT_TAXI
Requirements:
TRAFFIC_TAXI, TRAFFIC_EVENT_TAXI_OFFICE
Description
The class TRAFFIC_EVENT_TAXI represents taxis that use event based communication.
This class effects the attribute office to use a TRAFFIC_EVENT_TAXI_OFFICE. It effects the deferred feature take to use event based communication to inform the office about its state.
Class overview
top
TRAFFIC_EVENT_TAXI_OFFICE
Requirements:
TRAFFIC_TAXI_OFFICE TRAFFIC_DISPATCHER_TAXI
Description
The class TRAFFIC_EVENT_TAXI_OFFICE represents taxi offices that clients and taxis communicate with using events.
The TRAFFIC_EVENT_TAXI_OFFICE defines four events and subscribes itself to these events. The event request, which customers fire when a taxi is needed. The taxi_busy event, that taxis fire when they get busy. The taxi_available event, which taxis fire when they get available again and the reject_request event, that taxis fire when they reject to fulfill a request.
Class overview
top
TRAFFIC_GRAPH
Requirements:
None
Description
The class TRAFFIC_GRAPH holds the transportation lines and the places of a city in a graph. It calculates paths through the city. The class is intended to be used as an implementation detail of TRAFFIC_MAP and should not be used by other classes. To add more path finding variations (e.g. preferring trains), change the calculate_weight and depending on whether the function must be applied to all connections, change put_edge and enable_user_defined_weight_function.
Class overview
top
TRAFFIC_LINE
Requirements:
TRAFFIC_COLOR, TRAFFIC_PLACE, TRAFFIC_LINE_SECTION, TRAFFIC_TYPE
Description
The class TRAFFIC_LINE models a line of a public transportation system. Each line has a type, e.g. TRAFFIC_TYPE_BUS for a bus line, TRAFFIC_TYPE_RAIL for a rail line and so on. This type can be accessed through the feature type. In addition a line can have up to two directions. A line which only has one direction is also valid. Each direction has a terminal place.
A new line is created through the feature make. It takes as input the name of your new line and a traffic type. The features name, color,type, terminal_1 , terminal_2 can directly be called.
If you want to get the starting place of a direction of your line use the feature start_to_terminal. It takes as input either the place in terminal_1 or terminal_2. If you use just a place, make sure it is a terminal in a direction of the line. To make sure that a place is a terminal the is_terminal query can be used. The features one_direction_exists and other_direction_exists return true if one or other direction (depending on the feature you call) exists. Only if a direction exists there exists a terminal and a starting place.
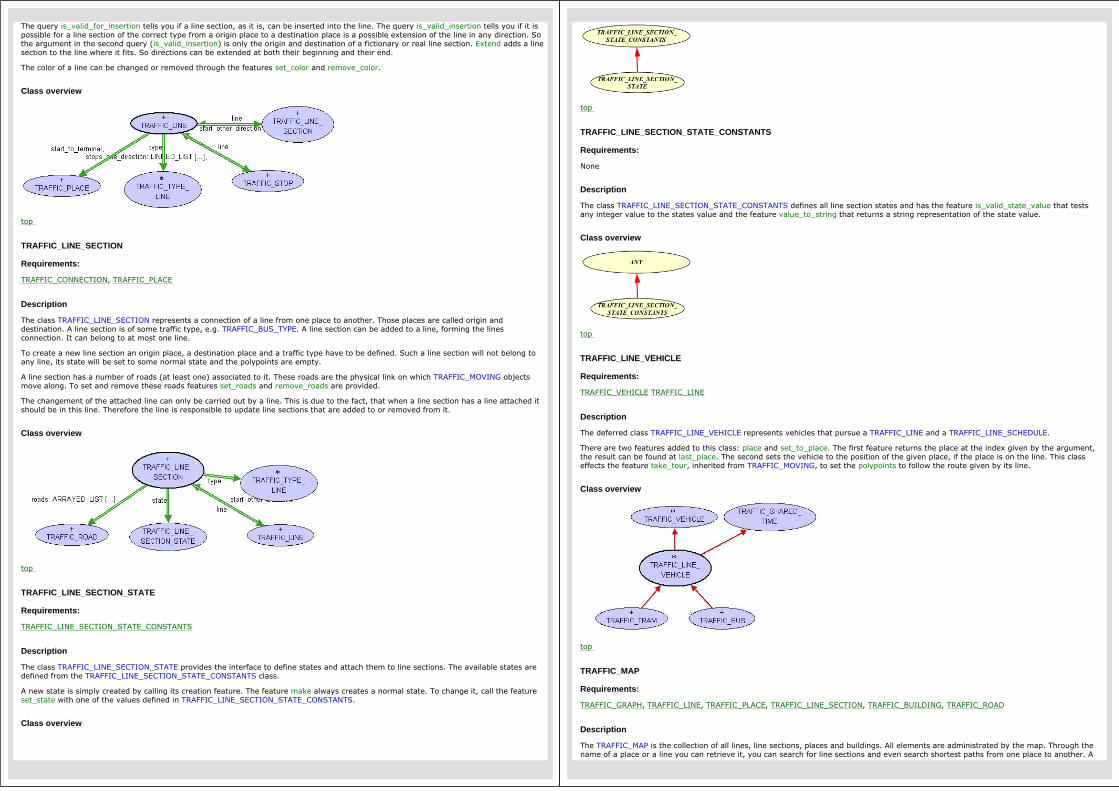
The query is_valid_for_insertion tells you if a line section, as it is, can be inserted into the line. The query is_valid_insertion tells you if it is possible for a line section of the correct type from a origin place to a destination place is a possible extension of the line in any direction. So the argument in the second query (is_valid_insertion) is only the origin and destination of a fictionary or real line section. Extend adds a line section to the line where it fits. So directions can be extended at both their beginning and their end.
The color of a line can be changed or removed through the features set_color and remove_color.
Class overview
top
TRAFFIC_LINE_SECTION
Requirements:
TRAFFIC_CONNECTION, TRAFFIC_PLACE
Description
The class TRAFFIC_LINE_SECTION represents a connection of a line from one place to another. Those places are called origin and destination. A line section is of some traffic type, e.g. TRAFFIC_BUS_TYPE. A line section can be added to a line, forming the lines connection. It can belong to at most one line.
To create a new line section an origin place, a destination place and a traffic type have to be defined. Such a line section will not belong to any line, its state will be set to some normal state and the polypoints are empty.
A line section has a number of roads (at least one) associated to it. These roads are the physical link on which TRAFFIC_MOVING objects move along. To set and remove these roads features set_roads and remove_roads are provided.
The changement of the attached line can only be carried out by a line. This is due to the fact, that when a line section has a line attached it should be in this line. Therefore the line is responsible to update line sections that are added to or removed from it.
Class overview
top
TRAFFIC_LINE_SECTION_STATE
Requirements:
TRAFFIC_LINE_SECTION_STATE_CONSTANTS
Description
The class TRAFFIC_LINE_SECTION_STATE provides the interface to define states and attach them to line sections. The available states are defined from the TRAFFIC_LINE_SECTION_STATE_CONSTANTS class.
A new state is simply created by calling its creation feature. The feature make always creates a normal state. To change it, call the feature set_state with one of the values defined in TRAFFIC_LINE_SECTION_STATE_CONSTANTS.
Class overview
top
TRAFFIC_LINE_SECTION_STATE_CONSTANTS
Requirements:
None
Description
The class TRAFFIC_LINE_SECTION_STATE_CONSTANTS defines all line section states and has the feature is_valid_state_value that tests any integer value to the states value and the feature value_to_string that returns a string representation of the state value.
Class overview
top
TRAFFIC_LINE_VEHICLE
Requirements:
TRAFFIC_VEHICLE TRAFFIC_LINE
Description
The deferred class TRAFFIC_LINE_VEHICLE represents vehicles that pursue a TRAFFIC_LINE and a TRAFFIC_LINE_SCHEDULE.
There are two features added to this class: place and set_to_place. The first feature returns the place at the index given by the argument, the result can be found at last_place. The second sets the vehicle to the position of the given place, if the place is on the line. This class effects the feature take_tour, inherited from TRAFFIC_MOVING, to set the polypoints to follow the route given by its line.
Class overview
top
TRAFFIC_MAP
Requirements:
TRAFFIC_GRAPH, TRAFFIC_LINE, TRAFFIC_PLACE, TRAFFIC_LINE_SECTION, TRAFFIC_BUILDING, TRAFFIC_ROAD
Description
The TRAFFIC_MAP is the collection of all lines, line sections, places and buildings. All elements are administrated by the map. Through the name of a place or a line you can retrieve it, you can search for line sections and even search shortest paths from one place to another. A

map has a name and can additionally have a description that gives more information on the purpose of the map.
The name and the description can be accessed through the features name and description. Additionally a place of a given name can be accessed through the feature place. For all the elements of the map there exist features to find out whether there is such an element (has_place, has_line and has_line_section). To add new elements to the map use the features add_place, add_line, add_line_section,add_road or add_building. Similar features are provided to remove elements from the map (e.g. delete_buildings and remove_road to remove buildings and roads respectively).
Class overview
top
TRAFFIC_MAP_FACTORY
Requirements:
TRAFFIC_LINE, TRAFFIC_PLACE, TRAFFIC_LINE_SECTION, TRAFFIC_SIMPLE_LINE, TRAFFIC_MAP, TRAFFIC_TYPE, TRAFFIC_TYPE_FACTORY,TRAFFIC_BUILDING, TRAFFIC_ROAD
Description
The TRAFFIC_MAP_FACTORY is used to create a map and its elements. The general principle is easy. Call the corresponding build feature. Test with the has-features if a valid object was created and access the last created object of a given element type with the correspondingquery.
Create a new factory by calling it's make feature. This creates a new, blank factory. With the reset feature you can reset a factory to create a new map and it's elements from scratch.
At first you possibly want to build a map to be able to insert the map elements afterwards. The build feature that builds a named map is called build_map. The query map returns the last created map. With the call to the query has_map you make sure a valid map exists. After a successful call to this feature it is safe to call map. To build a place there are two features: to build a standard place whose position is at the origin (0,0) you call build_place; to build a place with another position call build_place_with_position. The features has_place and placehave the same meaning as already mentioned generally. The building and accessing of a line section object works as with the otherelements. The build features may look a little bit complicated with a long list of arguments, but the definition of a line section is quite large. A line section has an origin and destination place and a type. Additionally it can have polypoints defining its appearance and a line it belongs to. Therefore all these arguments have to be given to the build features of the line section. The same observation is also valid for roads.
Class overview
top
TRAFFIC_MAP_LOADER
Requirements:
TRAFFIC_MAP, TRAFFIC_SHARED_HANDLER
Description
The class TRAFFIC_MAP_LOADER is used to load maps, specifed by its name.
A new instance of TRAFFIC_MAP_LOADER is create by calling make. It takes as input the name of the map to be loaded. The map is then loaded by load_map, which is either loaded from a dump file or, if this is not available or outdated, parsed from the specified XML file. If the map had to be parsed, a new dump is created, which can be used next time. Afterwards, the map can be access through map.
To detect changes in the XML file, a log file containing the XML file names and their timestamps is maintained.
Class overview
top
TRAFFIC_MOVING
Requirements:
None
Description
The deferred class TRAFFIC_MOVING represents any type of moving object on the map. The actual type is then given through a TRAFFIC_TYPE object.
The feature polypoints defines a list of coordinates where the moving object will go through. There are several attributes like traffic_typewhich represents the type of the moving, traffic_info could be used for information about the moving, speed on the map which is changed according to virtual_speed and time. The feature is_reiterating defines whether a moving stops when it arrives at its origin and is_traveling_back whether it is on its way back. There is the feature index which is a unique ID for each moving.
Using the feature move, the moving will move from its origin to its destination with the assigned speed. There are two helper features: set_coordinates and set_angle, where the first one sets the new origin and destination, the second one set the angle_x which is used to give the right direction. For movings with random directions the feature give_random_direction sets the destination to a random position on the map. This class has a deferred feature take_tour, which is required for the drawing in the 3D_TRAVELER_REPRESENTATION.
Class overview

top
TRAFFIC_PASSENGER
Requirements:
TRAFFIC_MOVING, TRAFFIC_VEHICLE
Description
The TRAFFIC_PASSENGER class defines objects that use means of transportation to travel.
This class defines features like current_vehicle, which defines the vehicle the passenger is traveling by. The feature intended_line defines the line the passenger itends to use next , and the features bording_stop and debording_stop determine where the passengers intends to board and deboard. The features board and deboard can be used to get into or to get out of a vehicle. The feature set_intended_line_infocan be used to set the information on the intendend_line, the bording_stop and the debording_stop.
Class overview
top
TRAFFIC_NODE
Requirements:
TRAFFIC_PLACE TRAFFIC_CONNECTION
Description
A TRAFFIC_NODE is part of a place's representation in the TRAFFIC_GRAPH.
Class overview
top
TRAFFIC_PATH
Requirements:
TRAFFIC_PATH_SECTION
Description
A TRAFFIC_PATH is a path from an origin to a destination. It is the result of a shortest path calculation and keeps track of the different means of transportation. It can be used to print a textual description of the trip.
Class overview
top
TRAFFIC_PATH_SECTION
Description
A TRAFFIC_PATH_SECTION is part of TRAFFIC_PATH. It has a common means of transport and consists of one or more connections. The total length can be accessed through length. The feature extend requires the given TRAFFIC_CONNECTION to either have the same line as the path section or have not be a line section. This can be checked with is_insertable.
top
TRAFFIC_PLACE
Requirements:
TRAFFIC_PLACE_INFORMATION
Description
The class TRAFFIC_PLACE represents a place in a city. It can have additional information like one ore more pictures and a description attached to it. Additionally it can have a position.
There exist two different ways to create a new place. The first way is to only define a name of the place, the position will be set to default (feature make). The second one is to also give its position to the creation feature (feature make).
The name, position and information can be accessed through the according features. The information can be Void, whereas the name and position should never be void. The information and position can also be changed during the lifetime of a place object.
Class overview
top
TRAFFIC_PLACE_INFORMATION
Requirements:
LINKED_LIST
Description

The class TRAFFIC_PLACE_INFORMATION is a collection of additional information for a place. This can be one or more pictures (path to the pictures) and a textual description.
A picture is added with the feature extend_picture and a description is added with the command set_description. To delete a picture you have to know its path and use the command remove_picture. To remove a description just call remove_description.
Class overview
top
TRAFFIC_ROAD
Requirements:
TRAFFIC_CONNECTIONTRAFFIC_PLACE
Description
The class TRAFFIC_ROAD represents a connection between two places. In general only a road can connect the same two places, whereas there can be more than one line sections between this two places. The road has an associated type, e.g. TRAFFIC_TRAM. Roads are displayed on the map and used for the moving of vehicles.
Each road has an associated id. Two roads with the same id cannot exists. The id is used to associate a particular road to one ore more line sections. To create a new road an origin place, a destination place, a traffic type and a direction have to be defined.
Class overview
top
TRAFFIC_ROUTE
Requirements:
TRAFFIC_PLACE, TRAFFIC_LINE_SECTION
Description
The class TRAFFIC_ROUTE calculates the shortest path for a set of places you want to visit on a given map. You can change the route by adding or removing places you want to visit with the features extend and remove.
After calculating a route through the feature calculate_shortest_path the places and used line sections that are on the route can be accessed through places_on_route and line_sections.
Class overview
top
TRAFFIC_SIMPLE_LINE
Requirements:
TRAFFIC_LINE
Description
TRAFFIC_SIMPLE_LINE is a line that always has a line section in both directions. So if you add a line section from place A to place B the line section from place B to place A will be added as well. As a result you get a symmetric line.
The only feature that differs from the features of class TRAFFIC_LINE is the creation feature that has an additional argument: the traffic map that the simple line (and consequently its line sections) is in.
Class overview
top
TRAFFIC_STOP
Requirements:
TRAFFIC_NODE
Description
The class TRAFFIC_STOP represents a special node in the TRAFFIC_GRAPH. is the equivalent of a public transportation stop; it is the location where a transport vehicle halts at a given place, to allow passengers to board or deboard.
The feature line is the TRAFFIC_LINE the stop belongs to.
Class overview
top
TRAFFIC_TAXI
Requirements:
TRAFFIC_VEHICLE
Description
The deferred class TRAFFIC_TAXI represents taxis working for a taxi office.
This class has a deferred attribute office and an attribute busy. It defines a deferred feature take that takes two parameters from_location and to_location and picks somebody up at from_location and brings him to to_location.
Class overview
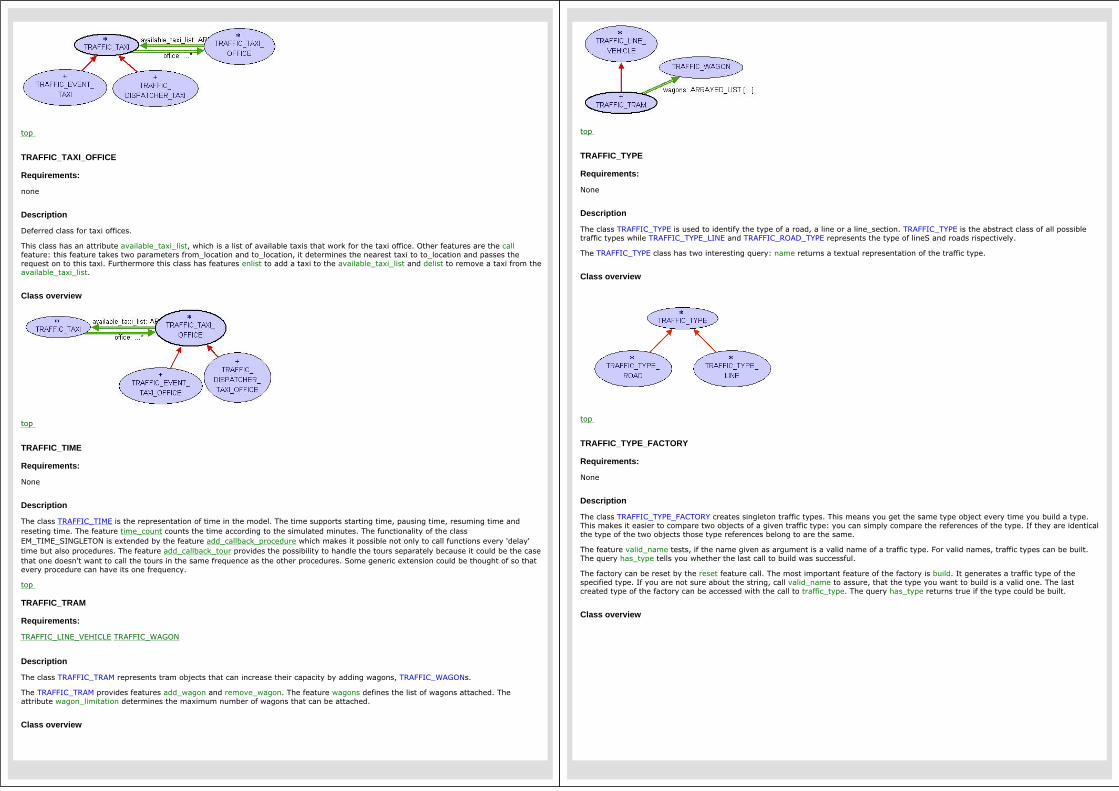
top
TRAFFIC_TAXI_OFFICE
Requirements:
none
Description
Deferred class for taxi offices.
This class has an attribute available_taxi_list, which is a list of available taxis that work for the taxi office. Other features are the callfeature: this feature takes two parameters from_location and to_location, it determines the nearest taxi to to_location and passes the request on to this taxi. Furthermore this class has features enlist to add a taxi to the available_taxi_list and delist to remove a taxi from the available_taxi_list.
Class overview
top
TRAFFIC_TIME
Requirements:
None
Description
The class TRAFFIC_TIME is the representation of time in the model. The time supports starting time, pausing time, resuming time and reseting time. The feature time_count counts the time according to the simulated minutes. The functionality of the class EM_TIME_SINGLETON is extended by the feature add_callback_procedure which makes it possible not only to call functions every 'delay' time but also procedures. The feature add_callback_tour provides the possibility to handle the tours separately because it could be the case that one doesn't want to call the tours in the same frequence as the other procedures. Some generic extension could be thought of so that every procedure can have its one frequency.
top
TRAFFIC_TRAM
Requirements:
TRAFFIC_LINE_VEHICLE TRAFFIC_WAGON
Description
The class TRAFFIC_TRAM represents tram objects that can increase their capacity by adding wagons, TRAFFIC_WAGONs.
The TRAFFIC_TRAM provides features add_wagon and remove_wagon. The feature wagons defines the list of wagons attached. The attribute wagon_limitation determines the maximum number of wagons that can be attached.
Class overview
top
TRAFFIC_TYPE
Requirements:
None
Description
The class TRAFFIC_TYPE is used to identify the type of a road, a line or a line_section. TRAFFIC_TYPE is the abstract class of all possible traffic types while TRAFFIC_TYPE_LINE and TRAFFIC_ROAD_TYPE represents the type of lineS and roads rispectively.
The TRAFFIC_TYPE class has two interesting query: name returns a textual representation of the traffic type.
Class overview
top
TRAFFIC_TYPE_FACTORY
Requirements:
None
Description
The class TRAFFIC_TYPE_FACTORY creates singleton traffic types. This means you get the same type object every time you build a type. This makes it easier to compare two objects of a given traffic type: you can simply compare the references of the type. If they are identical the type of the two objects those type references belong to are the same.
The feature valid_name tests, if the name given as argument is a valid name of a traffic type. For valid names, traffic types can be built. The query has_type tells you whether the last call to build was successful.
The factory can be reset by the reset feature call. The most important feature of the factory is build. It generates a traffic type of the specified type. If you are not sure about the string, call valid_name to assure, that the type you want to build is a valid one. The last created type of the factory can be accessed with the call to traffic_type. The query has_type returns true if the type could be built.
Class overview

top
TRAFFIC_TYPE_LINE
Requirements:
TRAFFIC_TYPE
Description
The class TRAFFIC_TYPE_LINE is used to identify the type of lines and line sections. Traffic line types are mainly used to make sure that only line sections of a given type can be added to a line of some type.
The TRAFFIC_TYPE_LINE class introduces an interesting query: is_allowed_type that check if one object of type TRAFFIC_LINE_VEHICLE is allowed to move on the given line.
Class overview
top
TRAFFIC_TYPE_ROAD
Requirements:
TRAFFIC_TYPE
Description
The deferred class TRAFFIC_TYPE_ROAD inherits from TRAFFIC_TYPE and is used to identify the type of a road. The type of the road is used to ensure that vehicles can drives only on right medium (and for example no bus drives on a railway and so on).
The TRAFFIC_TYPE_ROAD class introduces an interesting query: is_allowed_type that check if one object of type TRAFFIC_MOVING is allowed to travel on the given road.
Class overview
top
TRAFFIC_VEHICLE
Requirements:
TRAFFIC_MOVING
Description
The TRAFFIC_VEHICLE is a deferred class for objects that can be used to transport cargo or passengers.
This class defines a function capacity, to query the maximum load the vehicle is able to carry, an attribute current_load and features loadand unload.
Class overview
top
TRAFFIC_WAGON
Requirements:
none
Description
The class TRAFFIC_WAGON represents an object that can be attached to a vehicle to increase its capacity.
This class provides a feature capacity .
Class overview

top
INDEX >> traffic library developer >> map_classes
Copyright © 2005, Michela Pedronimailto:[email protected]://wiki.se.inf.ethz.ch/traffic/index.php/Main_PageLast Updated: $Date: 2006-07-28 15:16:15 +0200 (Fr, 28 Jul 2006) $
Traffic visualization overview
INDEX >> traffic library developer >> visualization_overview
This is an overview over the 3D visualization widgets which are used to represent a map
As everyone can see the main class is represented by the TRAFFIC_3D_MAP_WIDGET. There are some constants and functions which are used by all of the represented classes. These can all be found in the TRAFFIC_3D_CONSTANTS.
INDEX >> traffic library developer >> visualization_overview
Copyright © 2005, Michela Pedronimailto:[email protected]://wiki.se.inf.ethz.ch/traffic/index.php/Main_PageLast Updated: $Date: 2006-04-05 08:07:20 +0200 (Mi, 05 Apr 2006) $
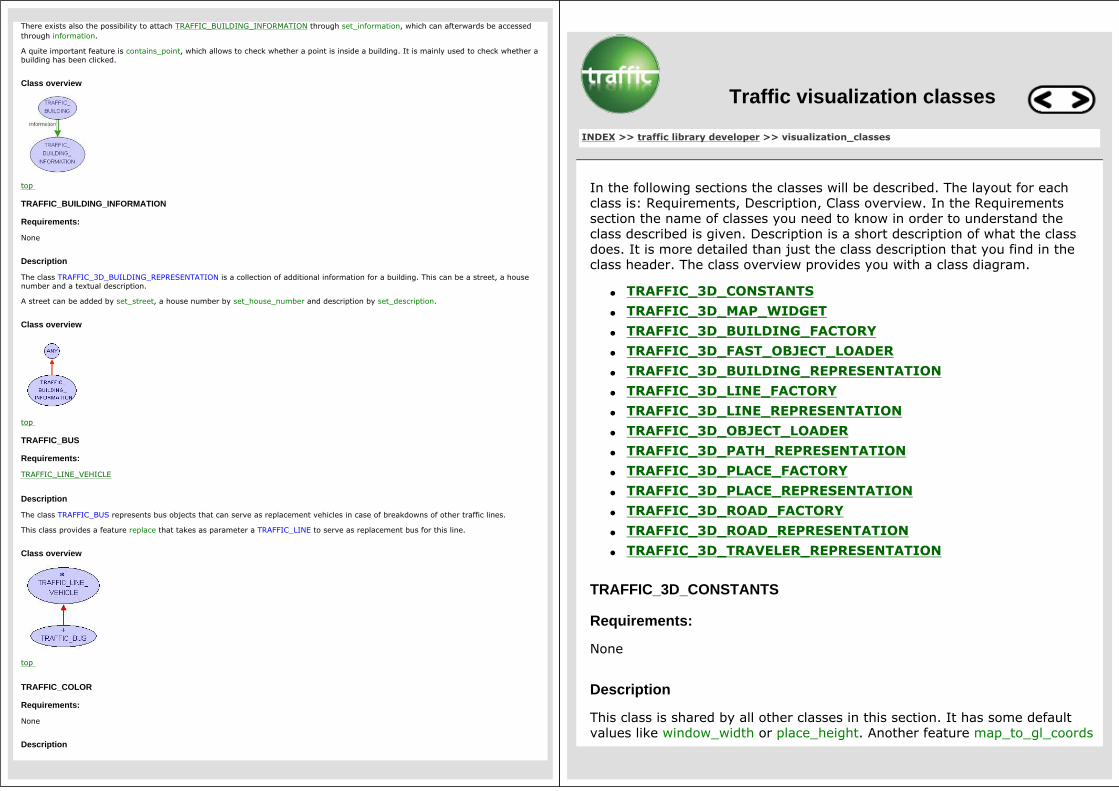
There exists also the possibility to attach TRAFFIC_BUILDING_INFORMATION through set_information, which can afterwards be accessed through information.
A quite important feature is contains_point, which allows to check whether a point is inside a building. It is mainly used to check whether a building has been clicked.
Class overview
top
TRAFFIC_BUILDING_INFORMATION
Requirements:
None
Description
The class TRAFFIC_3D_BUILDING_REPRESENTATION is a collection of additional information for a building. This can be a street, a house number and a textual description.
A street can be added by set_street, a house number by set_house_number and description by set_description.
Class overview
top
TRAFFIC_BUS
Requirements:
TRAFFIC_LINE_VEHICLE
Description
The class TRAFFIC_BUS represents bus objects that can serve as replacement vehicles in case of breakdowns of other traffic lines.
This class provides a feature replace that takes as parameter a TRAFFIC_LINE to serve as replacement bus for this line.
Class overview
top
TRAFFIC_COLOR
Requirements:
None
Description
Traffic visualization classes
INDEX >> traffic library developer >> visualization_classes
In the following sections the classes will be described. The layout for each class is: Requirements, Description, Class overview. In the Requirements section the name of classes you need to know in order to understand the class described is given. Description is a short description of what the class does. It is more detailed than just the class description that you find in the class header. The class overview provides you with a class diagram.
● TRAFFIC_3D_CONSTANTS
● TRAFFIC_3D_MAP_WIDGET
● TRAFFIC_3D_BUILDING_FACTORY
● TRAFFIC_3D_FAST_OBJECT_LOADER
● TRAFFIC_3D_BUILDING_REPRESENTATION
● TRAFFIC_3D_LINE_FACTORY
● TRAFFIC_3D_LINE_REPRESENTATION
● TRAFFIC_3D_OBJECT_LOADER
● TRAFFIC_3D_PATH_REPRESENTATION
● TRAFFIC_3D_PLACE_FACTORY
● TRAFFIC_3D_PLACE_REPRESENTATION
● TRAFFIC_3D_ROAD_FACTORY
● TRAFFIC_3D_ROAD_REPRESENTATION
● TRAFFIC_3D_TRAVELER_REPRESENTATION
TRAFFIC_3D_CONSTANTS
Requirements:
None
Description
This class is shared by all other classes in this section. It has some default values like window_width or place_height. Another feature map_to_gl_coords

can be found in this class. This feature translates given coordinates to coordinates according to the map.
Class overview
top
TRAFFIC_3D_MAP_WIDGET
Requirements:
EM_3D_COMPONENT TRAFFIC_3D_CONSTANTS
Description
The TRAFFIC_3D_MAP_WIDGET class is the main class in this cluster. As seen in the overview it contains all the representations of buildings, lines, places and travelers. It represents the whole map which can be plugged into an EM_3D_SCENE. It provides the feature draw that draws all the city elements onto the screen. The feature collision_polygons returns a list of polygons that allow to which is useful to search for a collision (e.g. used for placing buildings). The feature load_map is used to load from a file and create all the lines and places. There is a map dump which is loaded instead if there is such a map dump and this dump file is up to date.
There are three features to add buildings (add_building,add_buildings_randomly, add_buildings_along_lines) which either add one building, several randomly distributed buildings or several buildings along all traffic lines (expect railways). It is also possible to delete all the buildings with the feature delete_buildings.You can add a traveler through add_traveler. For all attributes there are corresponding setter methods.
It is also possible to get informed if a building is clicked. If a class needs this functionality, it has to subscribe to building_clicked_event.
Class overview
top
TRAFFIC_3D_BUILDING_FACTORY
Requirements:
None
Description
The class TRAFFIC_3D_BUILDING_FACTORY is a factory for the 3D objects which represent the buildings on the map. The interface is for each of the factories the same: With the features add_gauger and remove_gauger one can handle procedures for decisions. These procedures can then be called through the feature take_decision which calls the right gauger and saves the decision in the string decision. For creating a representation of the built object one can add specific procedures through the features add_building_type and remove them by calling remove_building_type. The last two features are specify_object which takes the right building type according to the decision and create_object which is inherited from EM_3D_OBJECT_FACTORY and returns the created object.
Class overview

top
TRAFFIC_3D_BUILDING_REPRESENTATION
Requirements:
TRAFFIC_BUILDING TRAFFIC_3D_CONSTANTS
Description
The class TRAFFIC_3D_BUILDING_REPRESENTATION is a container for all traffic building 3D objects. As expected there is a feature draw to draw all objects in the container.Buildings can be highlighted or un-highlighted by calling the features highlight_building or un_highlight_building. With the feature add_building a building can be added to the representation and delete_buildings deletes all the buildings from the representation.
Class overview
top
TRAFFIC_3D_LINE_FACTORY
Requirements:
EM_3D_OBJECT_FACTORY
Description
The class TRAFFIC_3D_LINE_FACTORY is a factory for the 3D objects which represent the lines on the map. The interface is for each of the factories the same: With the features add_gauger and remove_gauger one can handle procedures for decisions. These procedures can then be called through the feature take_decision which calls the right gauger and saves the decision in the string decision. For creating a representation of the built object one can add specific procedures through the features add_line_type and remove them by calling remove_line_type. The last two features are the feature specify_object which takes the right line type according to the decision and the feature create_object which is inherited from EM_3D_OBJECT_FACTORYand returns the created object.
Class overview
top
TRAFFIC_3D_FAST_OBJECT_LOADER
Requirements:
TRAFFIC_3D_OBJECT_LOADER
Description
This class is an optimized version of TRAFFIC_3D_OBJECT_LOADER. It caches

the loaded objects and returns object which have already been loaded directly instead of loading them from the file again.
Class overview
top
TRAFFIC_3D_LINE_REPRESENTATION
Requirements:
EM_3D_OBJECT TRAFFIC_3D_CONSTANTS
Description
The class TRAFFIC_3D_LINE_REPRESENTATION is a container for all traffic line 3D objects. As expected there is a feature draw to draw all objects in the container. Lines can be highlighted or un-highlighted by calling the features highlight_single_line, un_highlight_single_line and similar ones. With the feature add_lines all lines of a map can be added, but single lines can be added too.
Class overview
top
TRAFFIC_3D_OBJECT_LOADER
Requirements:
EM_OBJ_LOADER
Description
In principle this class is a factory as well. It is used to create ".obj" files. The feature set_em_color sets the color of a created object. The feature load_fileis used to load a new file, other than the original feature this feature closes it is opened files after use. The feature specify_object specifies the object according to the loaded file and the given color.
Class overview
top
TRAFFIC_3D_PATH_REPRESENTATION
Requirements:
EM_3D_OBJECT TRAFFIC_3D_CONSTANTS

Description
The class TRAFFIC_3D_PATH_REPRESENTATION is a container for all traffic path 3D objects. As expected there is a feature draw to draw all objects in the container. The class draws the shortest path for the City_3d example and can draw other paths as well.
Class overview
top
TRAFFIC_3D_PLACE_FACTORY
Requirements:
EM_3D_OBJECT_FACTORY
Description
The class TRAFFIC_3D_PLACE_FACTORY is a factory for the 3D objects which represent the places on the map. The interface is for each of the factories the same: With the features add_gauger and remove_gauger one can handle procedures for decisions. These procedures can then be called through the feature take_decision which calls the right gauger and saves the decision in the string decision. For creating a representation of the built object one can add specific procedures through the features add_place_type and remove them by calling remove_place_type. The last two features are the feature
specify_object which takes the right place type according to the decision and the feature create_object which is inherited from EM_3D_OBJECT_FACTORYand returns the created object.
Class overview
top
TRAFFIC_3D_PLACE_REPRESENTATION
Requirements:
TRAFFIC_3D_CONSTANTS
Description
The class supports the feature draw to draw all places. The feature highlight_place highlights a place. Through the feature add_places all places of a map are added to the container.
Class overview
top
TRAFFIC_3D_ROAD_FACTORY

Requirements:
EM_3D_OBJECT_FACTORY
Description
The class TRAFFIC_3D_ROAD_FACTORY is a factory for the 3D objects which represent the roads on the map. The interface is for each of the factories the same: with the features add_gauger and remove_gauger one can handle procedures for decisions. These procedures can then be called through the feature take_decision which calls the right gauger and saves the decision in the string decision. For creating a representation of the built object one can add specific procedures through the features add_road_type and remove them by calling remove_road_type. The last two features are the feature specify_object which takes the right road type according to the decision and the feature create_object which is inherited from EM_3D_OBJECT_FACTORYand returns the created object.
Class overview
top
TRAFFIC_3D_ROAD_REPRESENTATION
Requirements:
EM_3D_OBJECT TRAFFIC_3D_CONSTANTS
Description
The class TRAFFIC_3D_ROAD_REPRESENTATION is a container for all traffic road 3D objects. As expected there is a feature draw to draw all objects in the container. In the feature draw each type of road is associated to a particular representation on the map. At the moment these visualizations are simple, but in the future they can be improved to make the model more realistic.
Class overview
top
TRAFFIC_3D_TRAVELER_REPRESENTATION
Requirements:
TRAFFIC_3D_CONSTANTS
Description
Like all other containers the feature draw is also provided to draw all travelers. To add a traveler call add_traveler. As there are no travelers provided in the map you have to provide the TRAFFIC_MAP to add this traveler. The feature remove_traveler removes a walking traveler from the map, the feature remove_specific_traveler does the same by comparing the given traveler with all others in the container. If found it is removed. There is

a feature add_trams_per_line which adds the given number or maximal trams to each line.
Class overview
top
INDEX >> traffic library developer >> visualization_classes
Copyright © 2005, Michela Pedronimailto:[email protected]://wiki.se.inf.ethz.ch/traffic/index.php/Main_PageLast Updated: $Date: 2006-07-28 15:16:15 +0200 (Fr, 28 Jul 2006) $
Traffic input overview
INDEX >> traffic library developer >> input_overview
This is an overview over the input part, which is used to load from XML files
INDEX >> traffic library developer >> input_overview
Copyright © 2005, Michela Pedronimailto:[email protected]://wiki.se.inf.ethz.ch/traffic/index.php/Main_PageLast Updated: $Date: 2006-04-04 08:26:02 +0200 (Di, 04 Apr 2006) $

Traffic input classes
INDEX >> traffic library developer >> input_classes
In the following sections the classes for the map loading will be described. The layout for each class is: Requirements, Description, Class overview. In the Requirements section the name of classes you need to know in order to understand the class described is given. Description is a short description of what the class does. It is more detailed than just the class description that you find in the class header. The class overview provides you with a class diagram.
● TRAFFIC_BUILDING_PARSER
● TRAFFIC_BUILDING_NODE_PROCESSOR
● TRAFFIC_BUILDINGS_NODE_PROCESSOR
● TRAFFIC_ROADS_NODE_PROCESSOR
● TRAFFIC_ROAD_NODE_PROCESSOR
● TRAFFIC_ONROAD_NODE_PROCESSOR
TRAFFIC_BUILDING_PARSER
Requirements:
TRAFFIC_XML_INPUT_FILE_PARSER,TRAFFIC_NODE_PROCESSOR_REGISTRY,TRAFFIC_BUILDING_NODE_PROCESSOR,TRAFFIC_BUILDINGS_NODE_PROCESSOR
Description
This class is used for parsing an XML file that contains building information and for processing the received data so the buildings specified appear on the map.The XML file has to follow the following DTD structure:
<!ELEMENT buildings (building*)>
<!ELEMENT building EMPTY>
<!ATTLIST building name CDATA #REQUIRED x1 CDATA #REQUIRED y1 CDATA #REQUIRED x2 CDATA #REQUIRED y2 CDATA #REQUIRED height CDATA #REQUIRED angle CDATA #REQUIRED >
The building position is specifid by the upper left corner (x1,y1) and the bottom right corner (x2,y2) of the building. One has to be aware that the x-axis increases in the left direction and the y-axis increases in the up direction.
A new building parser is created through the feature make_with_map which needs a TRAFFIC_3D_MAP_WIDGET as input.
The file can then be added through the inherited feature set_file_name and parsed through (the also inherited) feature parse. If the parsing is completed successfully (checked has_error) processing can be started with process.The processing is based on the rules specified in TRAFFIC_BUILDING_NODE_PROCESSOR and TRAFFIC_BUILDINGS_NODE_PROCESSOR.
Class overview
top
TRAFFIC_BUILDING_PROCESSOR
Requirements:
TRAFFIC_NODE_PROCESSOR
Description

In this class is specified how TRAFFIC_BUILDING_PARSER has to process a building element. It has specified the element name (name) and the mandatory attributes (mandatory_Attributes).In the feature process is specified, what has to be done during processing. In the case of a building element, we only have to check whether the required attributes are supported and have proper type and afterwards create a new building.
Class overview
top
TRAFFIC_BUILDINGS_PROCESSOR
Requirements:
TRAFFIC_NODE_PROCESSOR
Description
In this class is specified how TRAFFIC_BUILDING_PARSER has to process a buildings element. It has specified the element name (name) and the mandatory attributes (mandatory_Attributes).In the feature process is specified, what has to be done during processing. In the case of a buildings element, we to process all subnodes.
Class overview
top
TRAFFIC_ROADS_NODE_PROCESSOR
Requirements:
TRAFFIC_NODE_PROCESSOR
Description
In this class is specified how to process a <roads> element. The XML for the element road has to follow the following DTD structure:
<!ELEMENT roads (road*)>
The details for the element <road> are specified belove. In the case of a <roads> element, we only have to process its subnodes using the feature process
Class overview
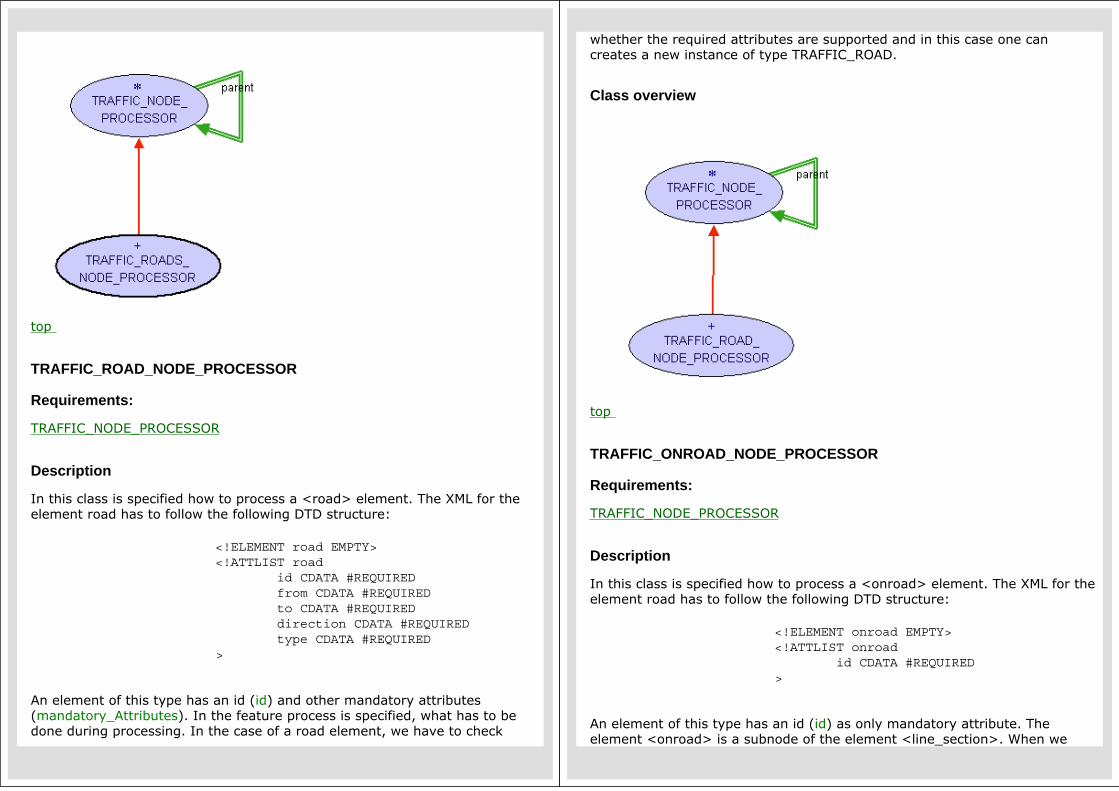
top
TRAFFIC_ROAD_NODE_PROCESSOR
Requirements:
TRAFFIC_NODE_PROCESSOR
Description
In this class is specified how to process a <road> element. The XML for the element road has to follow the following DTD structure:
<!ELEMENT road EMPTY> <!ATTLIST road id CDATA #REQUIRED from CDATA #REQUIRED to CDATA #REQUIRED direction CDATA #REQUIRED type CDATA #REQUIRED >
An element of this type has an id (id) and other mandatory attributes (mandatory_Attributes). In the feature process is specified, what has to be done during processing. In the case of a road element, we have to check
whether the required attributes are supported and in this case one can creates a new instance of type TRAFFIC_ROAD.
Class overview
top
TRAFFIC_ONROAD_NODE_PROCESSOR
Requirements:
TRAFFIC_NODE_PROCESSOR
Description
In this class is specified how to process a <onroad> element. The XML for the element road has to follow the following DTD structure:
<!ELEMENT onroad EMPTY> <!ATTLIST onroad id CDATA #REQUIRED >
An element of this type has an id (id) as only mandatory attribute. The element <onroad> is a subnode of the element <line_section>. When we

process one <onroad> node we we have first to check whether the required attribute is provided and then we can associate the road with the id we have just parsed with the corresponding line_section.
Class overview
top
INDEX >> traffic library developer >> input_classes
Copyright © 2005, Michela Pedronimailto:[email protected]://wiki.se.inf.ethz.ch/traffic/index.php/Main_PageLast Updated: $Date: 2006-07-27 11:19:44 +0200 (Do, 27 Jul 2006) $