training manual - c.r. laurence
TRANSCRIPT

Training Manual
T O L L F R E E 800.421.6144 www.CRLaurence.com
Copyright © 2010 CRLaurence
Training Manual
Table of ContentsSafety Instructions ...............................................................1
Product View ........................................................................2
How Does the System Work? .............................................3
Glass Identification ..............................................................4
Scratch Identification ...........................................................5
Getting Started ....................................................................7
Practicing Scratch Removal ...............................................11
Reading Progress .............................................................13
Common Problems ..........................................................14
Practice Scratch Removal Worksheet ................................14
How to Use the Scratch Removal System ........................15
Auto Glass .....................................................................15
Types of Auto Glass ....................................................16
Disk Sizes for Auto Glass ............................................16
Installed Auto Glass Preparation .................................17
Uninstalled Auto Glass Preparation .............................18
Auto Glass Cleanup ...................................................18
Flat Glass .......................................................................18
Types of Flat Glass ......................................................20
Disk Sizes for Flat Glass ..............................................20
Installed Flat Glass Preparation ...................................21
Uninstalled Flat Glass Preparation ...............................21
Flat Glass Cleanup ......................................................22
Specialty Glass ..............................................................22
Types of Specialty Glass ..............................................22
Disk Sizes for Specialty Glass ......................................22
Specialty Glass Preparation .........................................23
Specialty Glass Cleanup ..............................................23
Removing a Scratch ......................................................23
Temperature Chart .............................................................27
Maintenance .......................................................................28
Contamination Prevention ...........................................29
Correcting Contaminated Components ......................30
Troubleshooting .................................................................31
Warranty .............................................................................37
Re-Ordering Information ...................................................38
Safety InstructionsBasic precautions are to be observed when using an electrical machine, including the following:
• Read all instructions before using the scratch removal system.
• This machine has a polarized plug to reduce the risk of electric shock. Always connect to a polarized outlet, which has the left slot wider than the right. The plug fits in a polarized outlet only one way. If the plug does not fit the outlet, reverse the plug. If it still does not fit, contact a qualified electrician to install a proper outlet. Do not modify the polarized plug to fit a non-polarized outlet or extension cord. Unplug from the outlet when not in use and before performing maintenance.
To reduce the risk of fire, electric shock or injury:
• Always wear safety glasses, ear protection and a dust mask when polishing.
• Use of a Ground Fault Interrupter (GFI) is required in case of electricity coming in contact with water. To obtain a GFI, contact a local tool supplier.
• Do not leave polishing machine unattended when it is plugged in.
• Do not use polishing machine for any purpose other than described in this training manual.
• Use only included and/or recommended attachments with polishing machine.
• Do not use polishing machine with a damaged cord or plug.
• If polishing machine is not working correctly, has been dropped, damaged, or dropped into water, have it repaired by CRLaurence.
• Do not pull or carry polishing machine by cord, use cord as a handle, close a door on cord, or pull cord around sharp corners or edges. Keep cord away from heated surfaces.
• Do not unplug by pulling on cord of polishing machine. To unplug, grasp the plug, not the cord.
• Keep hair, loose clothing, fingers, and other body parts away from polishing machine openings and moving parts.
• Turn off all controls before plugging or unplugging polishing machine.
Save these instructions for future use.
1
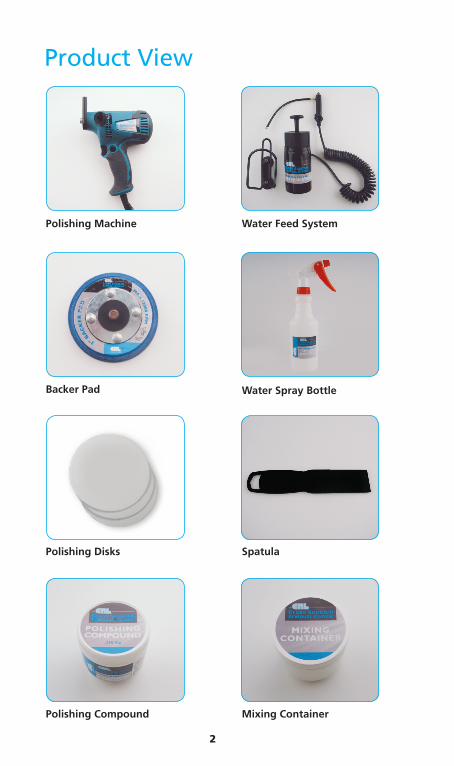
Product View
Polishing Disks
Polishing Compound
Polishing Machine Water Feed System
Backer Pad Water Spray Bottle
Spatula
Mixing Container
2
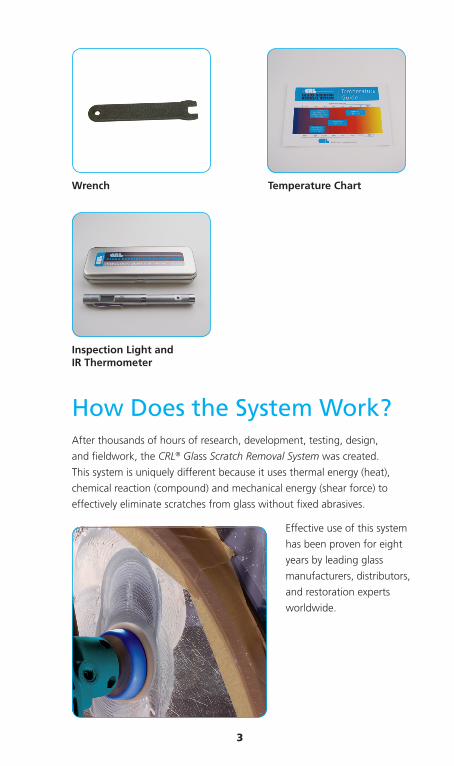
Temperature ChartWrench
Inspection Light and IR Thermometer
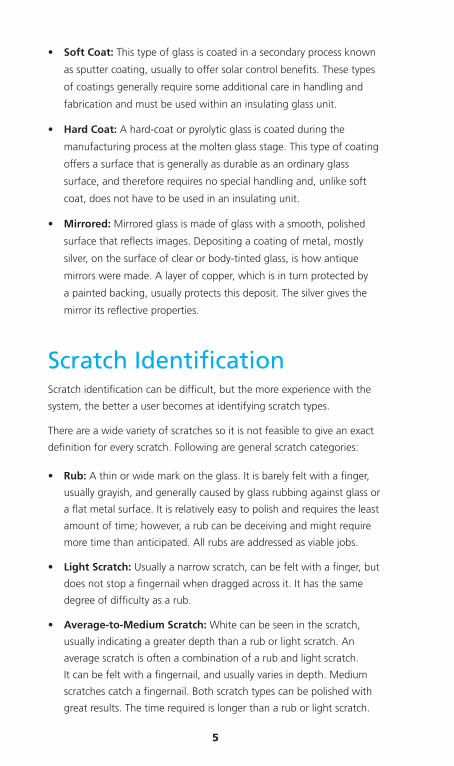
How Does the System Work?After thousands of hours of research, development, testing, design,
and fieldwork, the CRL® Glass Scratch Removal System was created.
This system is uniquely different because it uses thermal energy (heat),
chemical reaction (compound) and mechanical energy (shear force) to
effectively eliminate scratches from glass without fixed abrasives.
Effective use of this system
has been proven for eight
years by leading glass
manufacturers, distributors,
and restoration experts
worldwide.
3

Glass IdentificationIMPORTANT: If the glass type is not clear, and/or an ASI “bug” is
not printed in the corner of the glass, check with the manufacturer
or local building codes. It is crucial to identify the type of glass to
ensure the correct heat is applied during scratch removal according
to the temperature chart. (See Temperature Chart on page 27.)
Following are types of glass and examples:
• Laminated: Laminated glass is made up of two or more glass sheets
bonded together with an inner layer of plastic (PVB) or resin. In case
of breakage, the interior layer holds the fragments in place. This
glass is suited to areas where it is important to ensure the resistance
of the whole sheet after breakage such as: windshields, shop-fronts,
balconies, stair-railings or roof glazing.
• Annealed: Annealed or float glass, a term which comes from the
production method for this type of glass, is perfectly flat, clear glass.
When manufacturing this type of glass, the molten glass is “floated”
onto a bed of molten tin. During the float glass process, the hot glass
is gently cooled in the “annealing lehr,” which releases any internal
stresses from the glass to enable further processing. Ninety percent of
glass is manufactured this way.
• Tempered (Toughened): This type of glass is two or more times
stronger than annealed glass. When broken, it shatters into many
small fragments that prevent major injuries. Toughened glass is
produced by applying a special treatment to ordinary annealed glass
after it has been cut to size and finished. The treatment involves
heating the glass so that it begins to soften (about 620° C) and then
rapidly cooling it. This produces a glass that, if broken, breaks into
small pieces without sharp edges.
• Chemically Tempered (Chemically Hardened): Chemically
tempered glass is covered by a chemical solution, which produces
a higher mechanical resistance. This glass has similar properties to
thermal-treated glass. The product is not generally used for window
glass, but more commonly seen in industries where thin, strong glass
is needed.
4
• Soft Coat: This type of glass is coated in a secondary process known
as sputter coating, usually to offer solar control benefits. These types
of coatings generally require some additional care in handling and
fabrication and must be used within an insulating glass unit.
• Hard Coat: A hard-coat or pyrolytic glass is coated during the
manufacturing process at the molten glass stage. This type of coating
offers a surface that is generally as durable as an ordinary glass
surface, and therefore requires no special handling and, unlike soft
coat, does not have to be used in an insulating unit.
• Mirrored: Mirrored glass is made of glass with a smooth, polished
surface that reflects images. Depositing a coating of metal, mostly
silver, on the surface of clear or body-tinted glass, is how antique
mirrors were made. A layer of copper, which is in turn protected by
a painted backing, usually protects this deposit. The silver gives the
mirror its reflective properties.
Scratch IdentificationScratch identification can be difficult, but the more experience with the
system, the better a user becomes at identifying scratch types.
There are a wide variety of scratches so it is not feasible to give an exact
definition for every scratch. Following are general scratch categories:
• Rub: A thin or wide mark on the glass. It is barely felt with a finger,
usually grayish, and generally caused by glass rubbing against glass or
a flat metal surface. It is relatively easy to polish and requires the least
amount of time; however, a rub can be deceiving and might require
more time than anticipated. All rubs are addressed as viable jobs.
• Light Scratch: Usually a narrow scratch, can be felt with a finger, but
does not stop a fingernail when dragged across it. It has the same
degree of difficulty as a rub.
• Average-to-Medium Scratch: White can be seen in the scratch,
usually indicating a greater depth than a rub or light scratch. An
average scratch is often a combination of a rub and light scratch.
It can be felt with a fingernail, and usually varies in depth. Medium
scratches catch a fingernail. Both scratch types can be polished with
great results. The time required is longer than a rub or light scratch.
5
• Heavy-to-Deep Scratch: Easily identified, it is a cut into the glass.
It appears white, and upon close inspection, edges are rough or
scalloped. It stops a fingernail. This scratch type is normally found
where graffiti is carved into glass with carbide-tip tools, 80-grit or
coarser sandpaper, or dull or broken razor blades. It requires the most
time and effort, and although results are often good, returning the
surface to its original condition might be cost-prohibitive depending
on the replacement cost of the glass.
6

Getting Started
To assemble the polishing machine:
1. Verify the components against the enclosed parts list.
2. Fill the water bottle portion of the water feed system approximately
half full.
3. Insert the spray tip into the spray post.
Note: Contact CRLaurence immediately for missing components.
Spray tip inserted into
spray post
Insert spray tip into
the spray post
Note: Do not plug in the polishing machine until completely
assembled.
7

4. Insert the water feed syringe mount into the polishing machine.
Insert the syringe into the mount.
Insert syringe mount into
the polishing machine
Attach syringe to the
syringe mount
8
Tighten the lock screw

5. Determine the disk size per the glass and scratch type. (See Glass
Identification, Scratch Identification and How to Use the Scratch
Removal System beginning on page 4.)
6. Place the disk face down on a clean, flat surface to prevent
contamination.
Attach backer pad to
polishing disk
7. Center the backer pad onto the adhesive side of the disk and press
down firmly.
Backer pad
attached
to disk
Note: When mounting disks have been stored in a cool
environment, it is advisable to warm the backer pad and disk
to room temperature before attaching for better adhesion.
9

8. Optional: Attach the water feed extension if using a larger than
2" disk.
9. Screw the backer pad into the polishing machine and
hand-tighten.
IMPORTANT: Do not start the threads by hand and turn on the
polishing machine to finish insertion. It causes the backer pad to
get stuck in the machine.
10. Attach the water bottle holder to the belt clip or suction to
the glass.
11. Read and follow the steps in Practicing Scratch Removal on page 11.
Fully assembled
water feed system
Note: If using a Pressure-Sensitive Adhesive (PSA) disk in place
of Quick Fit Velcro, remove the backer pad from the carrying
case, and with a lint-free cloth, clean the surface of the backer
pad with denatured alcohol to remove oils or debris that
might affect the adhesion of the disk to the pad surface. Bend
the edge of the backer pad and disk back to securely adhere
them together. (Also do this with new backer pads, and when
attaching a new disk to the backer pad.)
10

Practicing Scratch RemovalIMPORTANT: It is required to use the following practice routine
before performing scratch removal at a job site.
To ensure success, the disk must be flat on the glass and moving
in a parallel direction with the scratch. Concentric circles of
compound appear on the glass, which is an indicator of good
progress.
This practice exercise helps identify scratches and severity, and therefore,
how long each type takes to remove on the job.
To practice scratch removal:
1. Obtain a piece of flat, annealed (window) glass at least
12" x 15".
2. Wearing a glove put three scratches in the glass within a 2-inch-wide
space, each 6-7 inches long, and increasing in severity.
• First Scratch: Use a dry scouring
pad, such as Scotch-Brite®,
normally used to clean pots and pans.
Fold it in half, and rub up and down
on the glass three-to-four times for
a length of 6-7 inches. This type of
scratch is commonly found
on flat and auto glass, and is similar
to light masonry or light razor
scratches on flat glass.
Circular compound
patterns on glass
Scouring pad scratch
11

• Third Scratch: Use a piece of
glass and hold it at a 45° angle so
that the corner of the glass can
scratch the target glass. Use heavy
pressure and drag the scratching
glass about 6-7 inches. This is
similar to glass-on-glass, ladder,
or tool scratches.
• Second Scratch: Use 220-300
grit sandpaper and repeat the
process for the first scratch.
This scratch is similar to heavier
masonry, stucco, sandpaper, or
razor scratches.
Sandpaper scratch
Glass-on-glass scratch
3. Read and follow the steps in How to Use the Scratch Removal System
on page 15.
4. Using the Practice Scratch Removal Worksheet (pages 40-41), make
notes about progress on each of the scratches after five minutes of
polishing, such as how long you have been working on it and how
much of the scratch has disappeared.
5. Continue polishing for several more five-minute sessions, taking more
notes, until all practice scratches have been worked. (Some types of
scratches can take 30 minutes or longer.)
Note: By this time, you should have a good idea of what the
system can do in a fixed time period on this type of glass
with different scratch types.
12

Note: Deep and narrow scratches are the most difficult.
“Rubs” are generally shallow and wide, and can be removed
more rapidly. Scratches with shattering along the edges, or
gouges, are not removable with the polishing system. Look at
them with a strong magnifier, if needed.
Note: Practice on easier scratches at first to learn the proper
techniques. After easier ones are mastered, move onto the
more difficult ones keeping in mind that time is money.
Reading ProgressPatience and technique determine the remaining time to finish scratch
removal. As a general guideline, the following show how to judge that
60-70% of a scratch has been removed:
• The scratch started as a solid line and is now a broken line.
• The scratch started as a solid line, no longer drags a fingernail, and
has little or no depth.
• The scratch is shorter at one or both ends.
Note: The disk gets impacted with compound and after 20
minutes becomes less efficient. Clean the disk roughly every
15-20 minutes and reload it.
13
Common ProblemsFollowing are common problems when removing scratches:
• Too much compound, which clogs the scratch and disk.
• Too much water, which wastes compound and prevents building
enough heat.
• Running the disk on edge, which will ruin the disk.
• Not building enough heat, which slows down progress.
• Building too much heat, which can “bake” the compound on the
glass, or break the glass.
• Misreading the scratch slows progress.
Practice Scratch Removal WorksheetSee Exhibit A in back of manual on pages 40-41.
14

How to Use the Scratch Removal SystemBefore removing a scratch, it is important to determine the type of glass
and scratch (see Glass Identification and Scratch Identification on pages
4-6). Based on these two factors, the disk size and required heat, per the
temperature chart, can be determined.
Auto GlassAutomotive glass is designed for an automobile, such as a windshield,
side, or rear glass. Wiper rubs, tree branches, ice scrapers, or handling
damage are the usual cause of auto glass damage.
Following are the supplies:
• 2" automotive paint grade masking tape—it is more durable than
regular masking tape.
IMPORTANT: Do not use duct tape. It is hard to clean up and might
take paint off a painted surface.
• A painter’s drop cloth or plastic sheeting.
• A reusable Scratch Dam is also available. It restricts splattering of
polishing compound outside the scratch area. It is easy to tape to the
glass and takes less time to set up and clean up than plastic sheeting.
To clean, just rinse off dry polishing compound with water.
Auto glass scratch repair
with Scratch Dam
15
• Compound does not stain but absorbs into porous materials unless
precautions are taken. Tape, or a Scratch Dam, eliminate extensive
cleanup after job completion.
• “Pits” in the windshield absorb compound, and do not polish out.
Types of Auto Glass
IMPORTANT: Make sure that the scratched auto glass does not
have before- or after-market tinting. If so, it might affect whether
or not the scratch can be removed using this system. If in question,
contact the glass dealer or manufacturer.
Following are types of auto glass, installed or uninstalled:
• Laminated – windshield
• Tempered – side, back or roof
Disk Sizes for Auto Glass
Disk size is determined by many factors, including type of scratch, scratch
depth and location, type of glass and the operator’s experience.
When working on auto windshields, it is important to avoid any distortion
that might be a distraction to the driver. This does limit the severity of the
damage that can be repaired, especially in the driver’s line of sight.
The smaller the disk diameter, the more aggressive the action will be.
Therefore, a larger diameter disk may be required in some instances. For
example, instead of using a 2" disk in the area directly in front of the
driver, a 4" or 6" disk may be a better choice.
Windshields are fabricated from annealed glass, which is softer
than tempered (hardened) glass such as that found in side and rear
Note: Side, back or roof auto glass is normally tempered but
sometimes laminated. If the glass type is not clear, and/or
an ASI “bug” is not printed in the corner of the glass, check
with the manufacturer or dealer.
16

windows. A larger diameter disk will be less likely to distort the glass. It
is important to note that it may also require more time to remove the
scratch when using a larger disk.
Some technicians find the 2" disk more difficult to use when first learning
the process. It is recommended that new technicians start with the 4" or
6" disk and move to the 2" after extensive practice.
For numerous very light scratches that can be removed quickly, a larger
diameter disk can be used to cover more surface area at once.
Installed Auto Glass Preparation
To prepare the work site for installed auto glass:
1. Stand on a step stool or ladder (for trucks), and place a drop cloth or
painter’s plastic over the auto doors and areas needing protection.
2. Wash the glass with glass cleaner, and remove any manufacturing
debris.
3. Identify the scratch type. (See Scratch Identification on page 5.)
4. Place painter’s plastic (1 mil) over the scratched area and cut a hole
with a 6" clearance around the work area.
– OR –
1. Form a “dam” with the sheeting by unfolding and taping it to the
glass, or form a “doughnut” with a moist towel, around the scratch
or scratches.
2. Read and follow the steps in Removing a Scratch on page 23.
Note: When operating the polishing machine, either drape
the power cord over a shoulder or through a rope clip
attached to a belt. It minimizes the chance of the power cord
scratching the finish of the automobile.
17
Uninstalled Auto Glass Preparation
To prepare the work site for uninstalled auto glass:
1. Place the glass on a rack or polishing station, making sure it is stable.
2. Wash the glass with glass cleaner.
3. Identify the scratch type. (See Scratch Identification on page 5.)
4. Form a “dam” with the sheeting by unfolding and taping it to the
glass around the scratch or scratches.
5. Read and follow the steps in Removing a Scratch on page 23.
Auto Glass Cleanup
To clean up after auto glass scratch removal:
1. Wash the glass in its entirety with glass cleaner.
2. De-mask the glass and unwrap the vehicle.
3. Clean the glass again.
4. Follow component maintenance recommendations.
(See Maintenance on page 28.)
Flat GlassFlat glass is architectural, such as residential or commercial windows and
doors. Ladders, window cleaning tools, sandpaper, stucco, masonry, or
handling are the usual causes of flat glass damage.
Following are the supplies:
• 2" automotive paint grade masking tape—it is more durable than
regular masking tape.
18
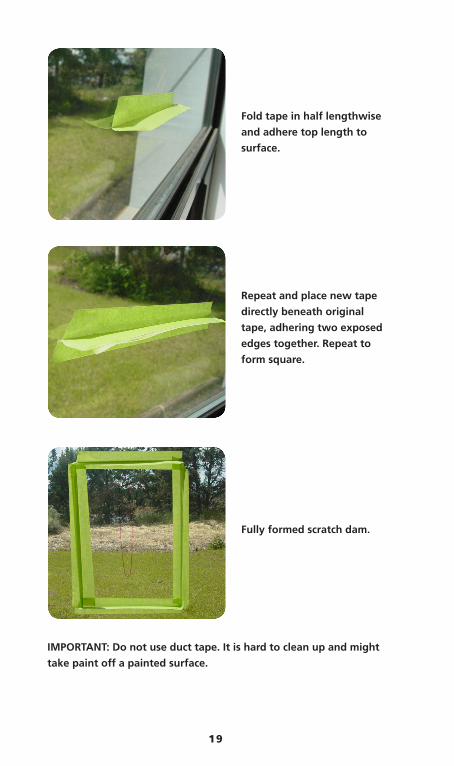
Fold tape in half lengthwise
and adhere top length to
surface.
Fully formed scratch dam.
Repeat and place new tape
directly beneath original
tape, adhering two exposed
edges together. Repeat to
form square.
IMPORTANT: Do not use duct tape. It is hard to clean up and might
take paint off a painted surface.
19
• A painter’s drop cloth or plastic sheeting.
• A reusable Scratch Dam is also available. It restricts splattering of
polishing compound outside the scratch area. It is easy to tape to the
glass and takes less time to set up and clean up than plastic sheeting.
To clean, just rinse off dry polishing compound with water.
• Extension cord
• Ladder
• Garbage can
• Lint-free paper towels
Types of Flat Glass
Following are types of flat glass:
• Laminated – safety or hurricane
• Tempered – door, windows or sliding door
• Annealed – normally any other type than laminated or tempered
Disk Sizes for Flat Glass
Use a 4" disk for most scratches on annealed or laminated glass.
Note: Compound does not stain but absorbs into porous
materials unless precautions are taken. Tape and plastic
sheeting, or a Scratch Dam, eliminate extensive cleanup after
job completion.
Note: If the glass type is not clear, and/or an ASI “bug” is not
printed in the corner of the glass, check with the manufacturer
or local building codes.
20

Installed Flat Glass Preparation
To prepare the work site for installed flat glass:
1. Wash the glass with glass cleaner.
2. Identify the scratch type. (See Scratch Identification on page 5.)
3. Form a “dam” with tape around the scratched area, keeping 6"
around the scratch itself.
IMPORTANT: When working indoors, be aware of items that might
be affected by spray, such as draperies, carpeting and furniture.
Cut a larger sized plastic piece, and use a drop cloth and/or
protective booties, to protect the homeowner’s belongings.
4. Read and follow the steps in Removing a Scratch on page 23.
Uninstalled Flat Glass Preparation
To prepare the work site for uninstalled flat glass:
1. Place the glass on a rack or polishing station, making sure it is stable.
2. Wash the glass with glass cleaner.
3. Identify the scratch type. (See Scratch Identification on page 5.)
4. Cut a large enough plastic sheet (4 mil) from the roll.
5. Form a “dam” with the sheeting by unfolding and taping it to the
glass around the scratch.
6. Read and follow the steps in Removing a Scratch on page 23.
Note: When constructing a dam for flat glass, build it
four-sided (see photo on page 19) to retain more compound.
When working on a horizontal surface, water collects on
the glass closest to the scratch so there is more potential
for spray to hit unwanted areas. Make sure that there is a
sufficient dam to protect the surrounding area.
21

Flat Glass Cleanup
To clean up after flat glass scratch removal:
1. Wash the glass in its entirety with glass cleaner.
2. Remove the dam.
3. Clean the glass again.
4. Follow component maintenance recommendations.
(See Maintenance on page 28.)
Specialty Glass Specialty glass is generally any other type than auto or flat. Cleaning
tools, door rubs or sharp objects are the usual cause of specialty glass
damage.
Types of Specialty Glass
Following are types of specialty glass:
• Curved – storefront
• Mirrored – mirror
• Heat-rated – fire-rated
• Tempered – shower door
• Iron-rich – 1" thick
Disk Sizes for Specialty Glass
Use a 2" disk for tempered or heat-treated glass, and a 4" disk for
mirrors. Otherwise, the correct disk size normally depends on the curve of
the glass. Contact CRLaurence for a recommendation.
Note: If the glass type is not clear, and/or an ASI “bug” is not printed in the corner of the glass, check with the manufacturer or local building codes.
22

Specialty Glass Preparation
To prepare the work site for specialty glass:
1. Wash the glass with glass cleaner.
2. Identify the scratch type. (See Scratch Identification on page 5.)
3. Cut a large enough plastic sheet from the roll.
4. Form a “dam” with the sheeting by unfolding and taping it to the
glass around the scratch.
5. Read and follow the steps in Removing a Scratch on page 23.
Specialty Glass Cleanup
See Flat Glass Cleanup on page 22.
Removing a ScratchWARNING: Always wear safety glasses and ear protection when
polishing.
The scratch removal system is designed to work with light pressure at
high Revolutions Per Minute (RPM). If there is a dramatic change in the
sound of the polishing machine, it is likely that excessive pressure is being
applied, and the process slows considerably. The weight of the polishing
machine, with about 20 pounds of pressure, is sufficient to polish out
scratches.
Note: Twenty pounds of pressure is not as heavy as it seems.
Note: Users who have worked with cerium oxide slurry with
a felt wheel must understand that this system is different.
Allow the compound and machine to do the work. It is not
designed to work with excessive pressure.
23
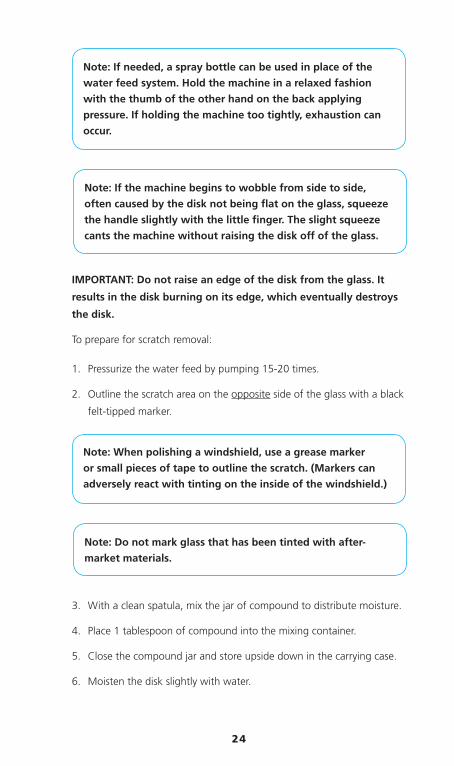
IMPORTANT: Do not raise an edge of the disk from the glass. It
results in the disk burning on its edge, which eventually destroys
the disk.
To prepare for scratch removal:
1. Pressurize the water feed by pumping 15-20 times.
2. Outline the scratch area on the opposite side of the glass with a black
felt-tipped marker.
3. With a clean spatula, mix the jar of compound to distribute moisture.
4. Place 1 tablespoon of compound into the mixing container.
5. Close the compound jar and store upside down in the carrying case.
6. Moisten the disk slightly with water.
Note: If needed, a spray bottle can be used in place of the
water feed system. Hold the machine in a relaxed fashion
with the thumb of the other hand on the back applying
pressure. If holding the machine too tightly, exhaustion can
occur.
Note: If the machine begins to wobble from side to side,
often caused by the disk not being flat on the glass, squeeze
the handle slightly with the little finger. The slight squeeze
cants the machine without raising the disk off of the glass.
Note: When polishing a windshield, use a grease marker
or small pieces of tape to outline the scratch. (Markers can
adversely react with tinting on the inside of the windshield.)
Note: Do not mark glass that has been tinted with after-
market materials.
24
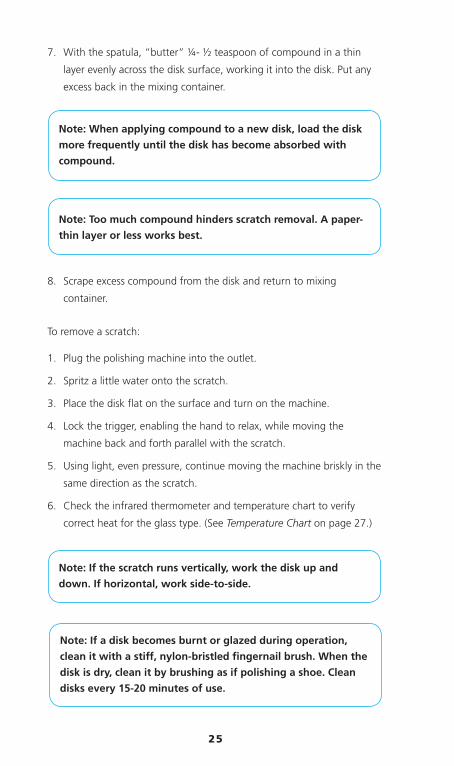
7. With the spatula, “butter” ¼- ½ teaspoon of compound in a thin
layer evenly across the disk surface, working it into the disk. Put any
excess back in the mixing container.
8. Scrape excess compound from the disk and return to mixing
container.
To remove a scratch:
1. Plug the polishing machine into the outlet.
2. Spritz a little water onto the scratch.
3. Place the disk flat on the surface and turn on the machine.
4. Lock the trigger, enabling the hand to relax, while moving the
machine back and forth parallel with the scratch.
5. Using light, even pressure, continue moving the machine briskly in the
same direction as the scratch.
6. Check the infrared thermometer and temperature chart to verify
correct heat for the glass type. (See Temperature Chart on page 27.)
Note: When applying compound to a new disk, load the disk
more frequently until the disk has become absorbed with
compound.
Note: Too much compound hinders scratch removal. A paper-
thin layer or less works best.
Note: If the scratch runs vertically, work the disk up and
down. If horizontal, work side-to-side.
Note: If a disk becomes burnt or glazed during operation,
clean it with a stiff, nylon-bristled fingernail brush. When the
disk is dry, clean it by brushing as if polishing a shoe. Clean
disks every 15-20 minutes of use.
25

Note: Replace disks immediately if they come off, are dropped
onto a dirty floor or the ground, or if signs of contamination
are prevalent when polishing. (See Contamination Prevention on page 29.)
7. Continue steps 5 and 6 until the scratch is removed.
8. Follow cleanup steps for the glass type. (See Auto Glass, Flat Glass or
Specialty Glass Cleanup on page 18 or 22.)
Note: The former scratched area is now less porous than the
rest of the glass. Polishing the entire surface creates better-
than-new uniformity; however, the system is not designed
to remove “pits”, which often trap compound. Since the
compound is hydrophilic, remove it using a soft brush and
water.
Note: If the motor speed bogs down, too much pressure is
being applied.
Note: When the compound clears out so the glass can be seen,
spritz it with water. For example, when working on a one-
foot scratch, pull the trigger on the water feed one complete
pull while spraying water from one end of the scratch to the
other.
Note: If additional compound does not release from the disk
when applying water to the glass, add more compound. To
do so, spread a small amount of compound from the mixing
container onto the disk and start polishing again.
26
Note: More compound does not mean faster results so apply
sparingly. Excessive compound is only sprayed away from the
scratch and results in waste and increased cleanup.
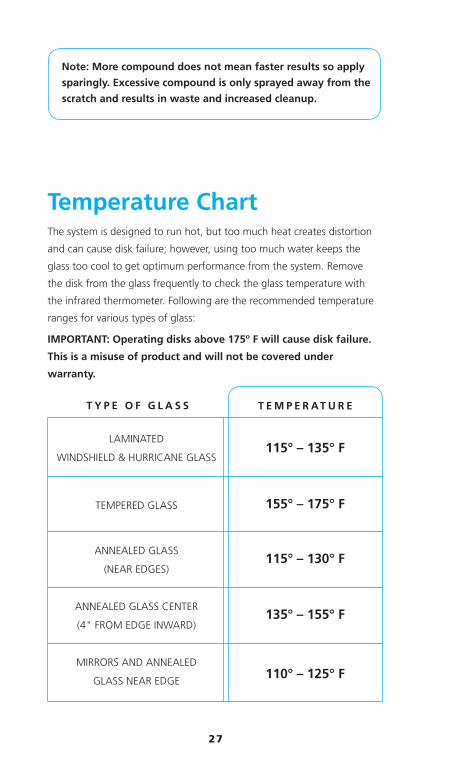
Temperature ChartThe system is designed to run hot, but too much heat creates distortion
and can cause disk failure; however, using too much water keeps the
glass too cool to get optimum performance from the system. Remove
the disk from the glass frequently to check the glass temperature with
the infrared thermometer. Following are the recommended temperature
ranges for various types of glass:
IMPORTANT: Operating disks above 175º F will cause disk failure.
This is a misuse of product and will not be covered under
warranty.
LAMINATED
WINDSHIELD & HURRICANE GLASS
TEMPERED GLASS
ANNEALED GLASS
(NEAR EDGES)
ANNEALED GLASS CENTER
(4" FROM EDGE INWARD)
MIRRORS AND ANNEALED
GLASS NEAR EDGE
T Y P E O F G L A S S T E M P E R AT U R E
115° – 135° F
155° – 175° F
115° – 130° F
135° – 155° F
110° – 125° F
27

MaintenanceWARNING: Always unplug the polishing machine before
performing maintenance.
To ensure the best performance from the polishing machine and its
components, follow these maintenance tasks after use and before
returning to the carrying case:
• Clean the polishing machine and cord with a damp cloth.
• Clean the disks with a nylon-bristled brush and store in plastic bags.
• Store disks at 50% relative humidity and 50-70º F to extend life of the
adhesive.
• Cover backer pads with attached disks with a plastic bag, or
remove from the machine and place in a plastic bag, to prevent
contamination.
• Close the jar of compound tightly and store upside down so moisture
seeps upward to the lid.
• Discard leftover compound from the mixing container and clean
thoroughly.
Note: Disks are to be changed after 15-20 hours of operation.
Note: The compound has an indefinite shelf life. It is common
for compound stored for an extended period to settle and
compress. If liquid is present, simply remix the liquid back into
the compound. If the compound becomes completely dry or
loses its paste-like consistency, add a small amount of water
and mix. Repeat this step as necessary to return compound to
its original, paste-like consistency.
Note: Always start a job with a clean mixing container to
avoid contamination.
28

• Empty the water bottle and water feed after relieving pressure, and
dry with a clean cloth.
• Clean the spatula with water and a clean cloth.
• Replace the machine brushes when needed.
• Replace thermometer batteries when needed.
Contamination PreventionWhen a disk is contaminated, circular swirls can be seen in the glass.
The swirl appears as a series of fine, “micro scratches” that are thin and
usually shallow. It normally results from carelessness in site preparation,
or in material use and storage, so it is important to be proactive, and
practice clean working habits.
Following are possible causes of contamination:
• Compound container is left open for an extended time period.
• Polishing machine is placed disk down on a contaminated surface.
• Spatula is left on a contaminated surface.
• Disk is left uncovered for an extended time period.
• Dust or dirt is blown onto the glass.
• Dust or dirt from hands or apron stick to the glass.
• Work site preparation is insufficient.
Note: Spray the disk thoroughly prior to use when left
unused for more than a few moments.
Note: When working outside, windblown debris can cause
contamination. If so, delay the job until conditions improve.
29

Correcting Contaminated ComponentsTo clean a contaminated disk:
1. Rinse it thoroughly to release the foreign particles.
2. Test the disk and compound on clean scrap glass to check for success.
To eliminate contaminated compound:
1. Throw the compound away.
2. Clean the mixing container.
3. Thoroughly rinse the disk.
4. Test the disk and compound on clean, scrap glass to check for
success.
Note: If not, replace the disk and thoroughly clean the work
area before starting again.
Note: The compound is organic, so it is biodegradable and
environmentally safe.
Note: If not, replace the disk and thoroughly clean the work
area.
30
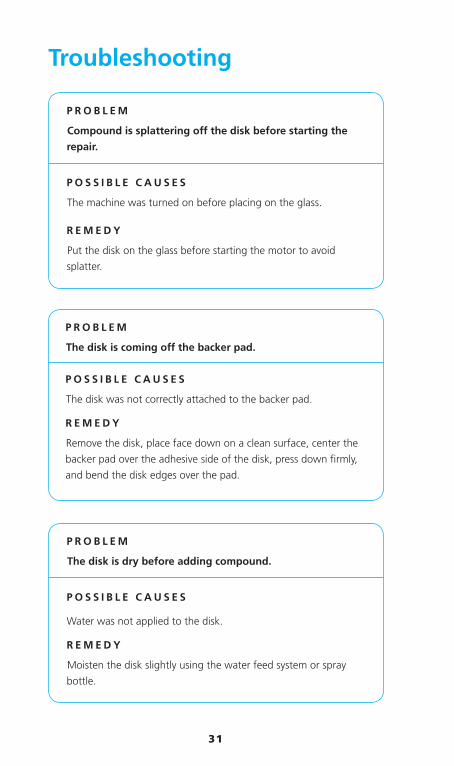
Troubleshooting
P R O B L E M
The disk is coming off the backer pad.
P O S S I B L E C A U S E S
The disk was not correctly attached to the backer pad.
R E M E D Y
Remove the disk, place face down on a clean surface, center the
backer pad over the adhesive side of the disk, press down firmly,
and bend the disk edges over the pad.
P R O B L E M
The disk is dry before adding compound.
P O S S I B L E C A U S E S
Water was not applied to the disk.
R E M E D Y
Moisten the disk slightly using the water feed system or spray
bottle.
P R O B L E M
Compound is splattering off the disk before starting the
repair.
P O S S I B L E C A U S E S
The machine was turned on before placing on the glass.
R E M E D Y
Put the disk on the glass before starting the motor to avoid
splatter.
31

P R O B L E M
The polishing compound is too thick.
P O S S I B L E C A U S E S
• Not enough water was added.
• Liquid has evaporated due to exposure and/or weather
conditions.
R E M E D Y
The compound is water-soluble so add water to thin it to a
toothpaste consistency.
P R O B L E M
There is too much compound on the disk.
P O S S I B L E C A U S E S
Too much compound was applied to the disk.
R E M E D Y
Using the edge of the spatula, wipe off all excess compound. It
takes very little to do the job; a paper-thin layer is plenty. (Too
much compound slows or stops repair progress.)
32
P R O B L E M
The backer pad is screwed into the polishing machine too
tightly.
P O S S I B L E C A U S E S
The backer pad was over-tightened into the machine.
R E M E D Y
Unscrew the backer pad, place back into the machine, and hand-
tighten only.
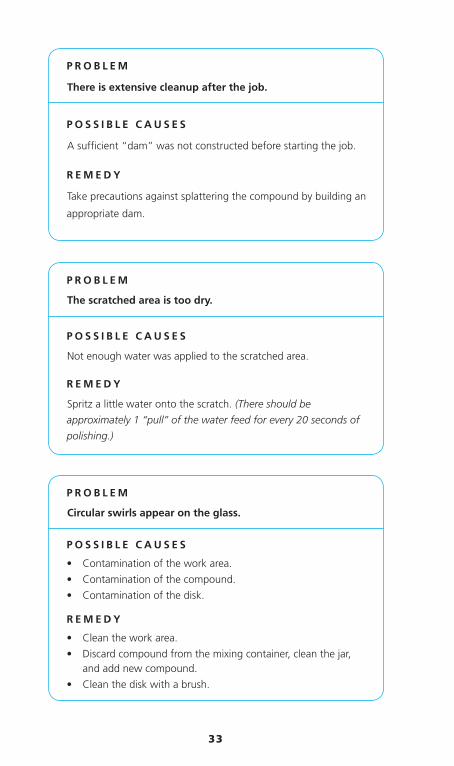
P R O B L E M
There is extensive cleanup after the job.
P O S S I B L E C A U S E S
A sufficient “dam” was not constructed before starting the job.
R E M E D Y
Take precautions against splattering the compound by building an
appropriate dam.
P R O B L E M
Circular swirls appear on the glass.
P O S S I B L E C A U S E S
• Contamination of the work area.
• Contamination of the compound.
• Contamination of the disk.
R E M E D Y
• Clean the work area.
• Discard compound from the mixing container, clean the jar, and add new compound.
• Clean the disk with a brush.
P R O B L E M
The scratched area is too dry.
P O S S I B L E C A U S E S
Not enough water was applied to the scratched area.
R E M E D Y
Spritz a little water onto the scratch. (There should be
approximately 1 “pull” of the water feed for every 20 seconds of
polishing.)
33

P R O B L E M
The backer pad is screwed into the polishing machine too
tightly.
P O S S I B L E C A U S E S
The backer pad was over-tightened into the machine.
R E M E D Y
Unscrew the backer pad, place back into the machine, and hand-
tighten only.
P R O B L E M
Jobs are taking longer than expected.
P O S S I B L E C A U S E S
• More practice is needed.
• It is cheaper to replace the glass than to repair it.
R E M E D Y
• Follow the practice routine to better understand the types of
scratches and the length of time for removal. Patience and
practice are keys to success.
• Recommend that the glass be replaced instead of repaired.
P R O B L E M
The disk is impacted with compound
P O S S I B L E C A U S E S
Too much compound has saturated the disk.
R E M E D Y
Clean the disk every 15-20 minutes.
34

P R O B L E M
The glass is too hot.
P O S S I B L E C A U S E S
Too much pressure is being applied to the glass. (Fingers should
be able to lie on the work area without burning them.)
R E M E D Y
• Remove the machine from the glass so it can cool down. Stop
and check the heat every few minutes.
• Clean the disk with a stiff-bristle nylon brush every
15-20 minutes.
P R O B L E M
The scratch is not disappearing right away.
P O S S I B L E C A U S E S
The polishing machine is not lying flat on the glass.
R E M E D Y
Build more heat by making sure that the disk is lying flat on the
glass.
P R O B L E M
There is too much compound in the mixing tub.
P O S S I B L E C A U S E S
More than a tablespoon was added to the mixing container.
R E M E D Y
Remove enough compound to leave approximately 1 tablespoon
of compound.
35
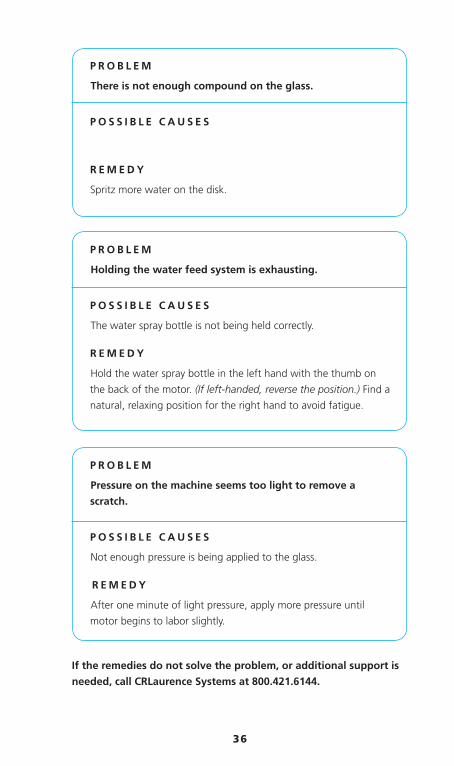
P R O B L E M
There is not enough compound on the glass.
P O S S I B L E C A U S E S
R E M E D Y
Spritz more water on the disk.
P R O B L E M
Holding the water feed system is exhausting.
P O S S I B L E C A U S E S
The water spray bottle is not being held correctly.
R E M E D Y
Hold the water spray bottle in the left hand with the thumb on
the back of the motor. (If left-handed, reverse the position.) Find a
natural, relaxing position for the right hand to avoid fatigue.
P R O B L E M
Pressure on the machine seems too light to remove a
scratch.
P O S S I B L E C A U S E S
Not enough pressure is being applied to the glass.
R E M E D Y
After one minute of light pressure, apply more pressure until
motor begins to labor slightly.
If the remedies do not solve the problem, or additional support is
needed, call CRLaurence Systems at 800.421.6144.
36

CRL® Glass Scratch Removal SystemLifetime Warranty
Thank you for your purchase of the CRL Scratch Removal System.
The items in the CRL Scratch Removal System are warranted for one year from the date of purchase to the original purchaser against defects in materials and workmanship. In the event of failure of this product to conform to this written warranty, please call C.R. Laurence Co., Inc. Glass and Glazing Technical Support at 800-421-6144, ext. 7720.
After going through the trouble-shooting procedures and determining that there is a defect, you will receive an RA#.
Carefully package the defective item from your CRL Scratch Removal System by itself, with no other items, and return it to the address listed below, freight prepaid, along with the following:
• Your name, business name, address and phone number • Your CRL Account Code • Your RA#
C.R. Laurence Co., Inc. 2503 E. Vernon Avenue Los Angeles, CA 90058-1897
We recommend that the package be insured against loss or in transit damage. We cannot be responsible for any loss due to shipping.
This warranty applies only to the original registered purchaser.
Damage to any item in your the CRL Scratch Removal System resulting from tampering, accident, abuse, negligence, unauthorized repairs or alterations, or other causes not related to problems with materials or workmanship are not covered in this warranty. This warranty does not cover normal wear. Use of polishing compounds or other products that are not provided by C.R. Laurence Co., Inc. for the CRL Scratch Removal System will void this warranty. Repairs made that are not covered under this warranty will be charged at regular factory prices.
C.R. Laurence Co., Inc. makes no other warranty of any kind whatever, expressed or implied, and all implied warranties of fitness for a particular purpose which exceeds the above mentioned obligation are hereby disclaimed by C.R. Laurence Co., Inc. and excluded from this warranty.
This warranty gives you specific legal rights and you may also have other rights that vary from state to state. The obligation of the warrantor is solely to repair or replace the product. The warrantor is not liable for any incidental or consequential damages due to any such alleged defect. Some states do not allow the exclusion or limitations of incidental or consequential damages, so the above limitations or exclusions may not apply to you.
Warranty
37
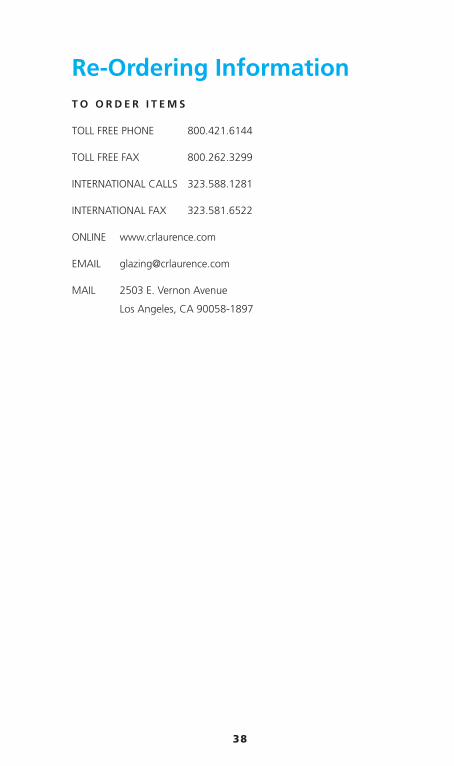
Re-Ordering InformationT O O R D E R I T E M S
TOLL FREE PHONE 800.421.6144
TOLL FREE FAX 800.262.3299
INTERNATIONAL CALLS 323.588.1281
INTERNATIONAL FAX 323.581.6522
ONLINE www.crlaurence.com
EMAIL [email protected]
MAIL 2503 E. Vernon Avenue
Los Angeles, CA 90058-1897
38

SRS1 Complete System Each
SRS1PC Polishing Compound Pack
SRSVPB2 2" (51mm) Velcro Backer Pad Each
SRSVPB3 3" (76mm) Velcro Backer Pad Each
SRSVPB4 4" (102mm) Velcro Backer Pad Each
SRSPSB6 6" (152mm) PSA Backer Pad Each
SRSVPD2 2" (51mm) Polishing Disk 3/Pack
SRSVPD3 3" (76mm) Polishing Disk 3/Pack
SRSVPD4 4" (102mm) Polishing Disk 3/Pack
SRSPSA6 6" (152mm) Polishing Disk 3/Pack
DESCRIPTION UNIT
39
Replacement Parts and Supplies
CAT. NO.

Exhibit A: Scratch Removal WorksheetPart 1
Record data to track scratch removal results.
A = Annealed T = Tempered
GLASSTYPE
SCRATCHSIZE
SCRATCH DEVICE
SCRATCHTYPE
DISKSIZE TEMP WATER
T 3/16" Scouring Pad Light 2" 160°
T 1/8" Glass Medium 3" 160° Medium
A 1/4" Sandpaper Heavy 3" 135° Less
5 E X A M P L E S5
40
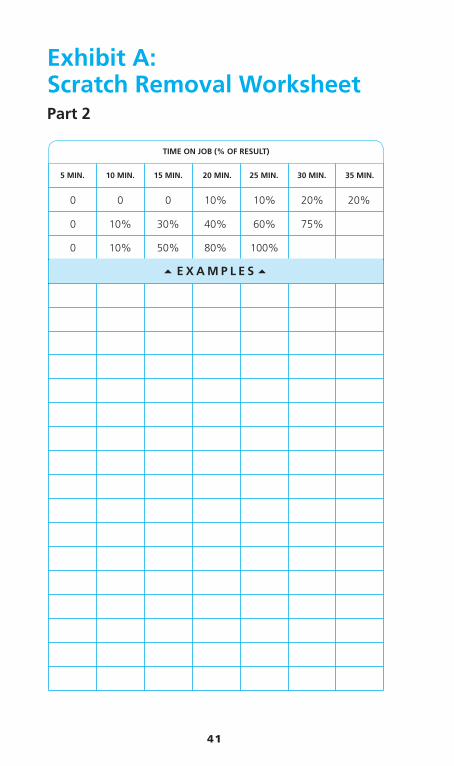
Exhibit A: Scratch Removal WorksheetPart 2
TIME ON JOB (% OF RESULT)
5 MIN. 10 MIN. 15 MIN. 20 MIN. 25 MIN. 30 MIN. 35 MIN.
0 0 0 10% 10% 20% 20%
0 10% 30% 40% 60% 75%
0 10% 50% 80% 100%
5 E X A M P L E S5
41

1 of 7
2 of 7
3 of 7

4 of 7
5 of 7
6 of 7
7 of 7