tremolow v1c - rullywow diy guitar pedal pcb store · rpd2 1m build tips & tricks: the rateled...
TRANSCRIPT
Page 1 of 5
TremOlow– v1C – Build Document
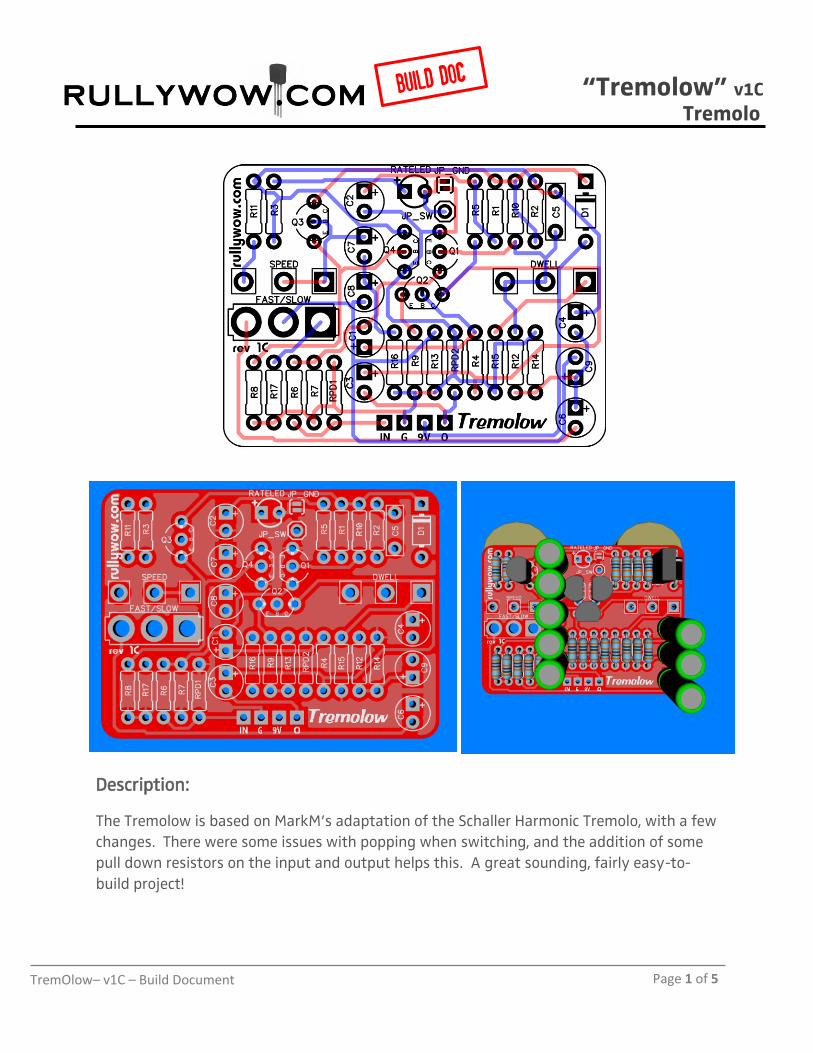
Description:
The Tremolow is based on MarkM’s adaptation of the Schaller Harmonic Tremolo, with a few
changes. There were some issues with popping when switching, and the addition of some
pull down resistors on the input and output helps this. A great sounding, fairly easy-to-
build project!
“Tremolow” v1C
Tremolo

Page 2 of 5
TremOlow– v1C – Build Document
Tremolow v1C Caps Resistors
C1 4u7 electro R1 2k2 C2 22uF electro R2 2k2 C3 4u7 electro R3 2k2 C4 10uF electro R4 470k C5 47n film R5 6k8 C6 4u7 electro R6 47k C7 22uF electro R7 47k C8 10uF electro R8 6k8 C9 22uF electro R9 2k2
Diode R10 330k D1 1n5817 R11 27k
Pots R12 47k DWELL 25kB R13 2k2 SPEED 1MB R14 2k2
Switch R15 15k FAST/SLOW SPDT R16 2k2
Transistors R17 220R Q1-Q4 2n5088 RPD1 1M RPD2 1M
Build Tips & Tricks:
The RATELED blinks in time to the LFO. To have it blink all the time when
powered, solder the JP_GND with a blob of solder. If you wish to switch the
rate LED on/off…don’t solder the jumper. Instead connect a switched ground
wire to JP_SW.
It is a good call to solder components from shortest height to tallest. In this
case, you should start with resistors, diodes, film caps, IC, and the electrolytic
caps last.
The RPD1 and RPD2 resistors are pull down resistors. They may not be
required, however it is recommended you add them if there is any popping
when switching.
The IN/G/9V/OUT pads are a direct match to Rullywow.com 3PDT and Optical
Bypass PCBs

Page 3 of 5
TremOlow– v1C – Build Document
All pots are 16mm Alpha PCB mount. It is a very good idea to drill holes in
your enclosure first, and mount the pots with the nuts BEFORE soldering the
pots to the PCB. This ensures you won’t put a lot of stress on the PCB.
Be sure to insulate the pots from shorting on the back of the PCB. There are
special pot covers or you may use tape or some other insulating material.
Before putting your creation into its enclosure, you should always test it! If it
doesn’t work outside the enclosure, it won’t work inside (I promise!)
Page 4 of 5
TremOlow– v1C – Build Document
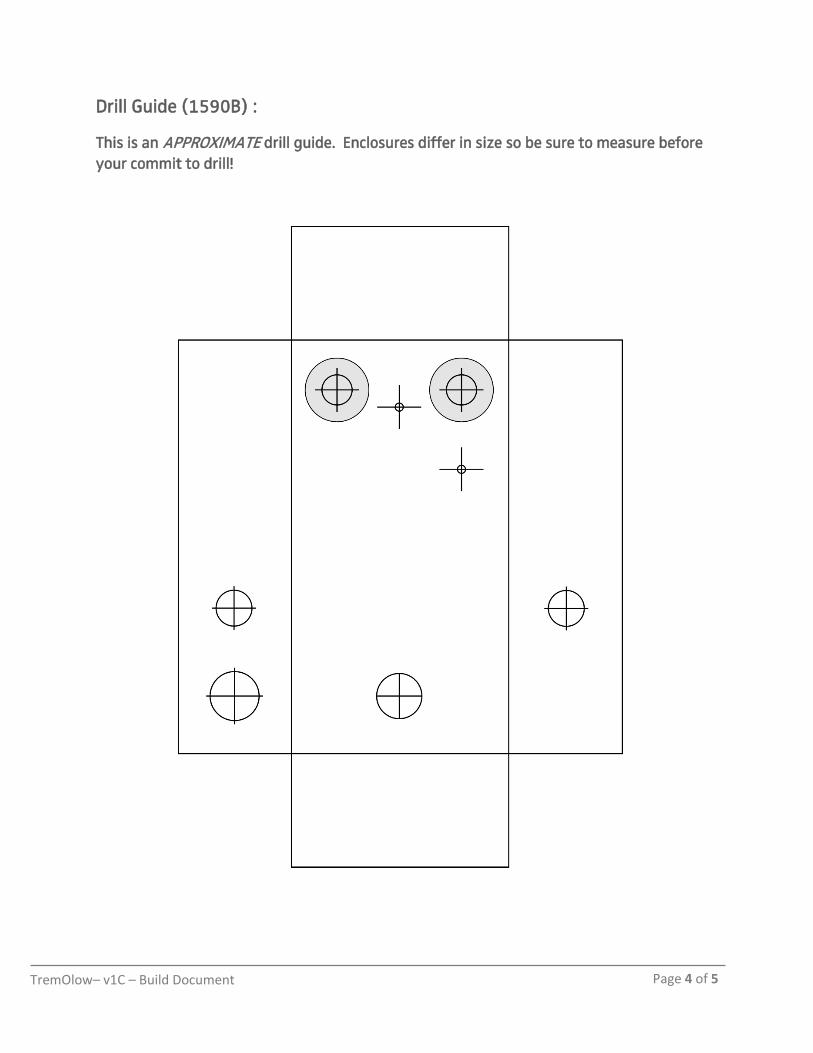
Drill Guide (1590B) :
This is an APPROXIMATE drill guide. Enclosures differ in size so be sure to measure before
your commit to drill!

Page 5 of 5
TremOlow– v1C – Build Document
PCB Dimensions = 1.9”w x 1.4”h
Terms of Use:
PCBs from www.rullywow.com are intended for DIY use and are not allowed for
commercial resale. It is OK to build (and sell) a few pedals for your friends,
bandmates, yourself (that is what the DIY guitar pedal community is all about!)