turningpoint mobile clicker basic powerpoint lecturer
TRANSCRIPT
1
TurningPoint Mobile clicker basic PowerPoint lecturer guidelines
Steps Links and information
Register and Download Software and setup TurningPoint Dashboard and ClickUP
1. Register with TurningPoint for a lecturer licence? (Please use your university email address)
https://info.participate.co.za/up20-tt-requestform/
2. Receive an e-mail from [email protected] with instructions to log in and create your username and password. Please check your SPAM folder if you do not receive the account registration e-mail within 24 hours after completing the registration form
If you cannot locate the email in your spam, you can proceed directly to https://instructor.turningtechnologies.eu/#/ and do the following:
• Click get started and type in your email address • Click on Create Account • A verification e-mail will be sent to your e-mail account • Locate e-mail and click on TurningPoint account verification • Complete account registration form • Select Europe/Africa/ Middle East / Russia region • You will now be able to sign into TurningPoint
3. Download the TurningPoint Desktop to my PC or MAC? Select the TurningPoint desktop version
https://www.turningtechnologies.com/downloads/turningpoint-desktop/ For more information about technical requirements for MAC
For more information about technical requirements for PC
2
Steps Links and information
4. Locate the TurningPoint icon on your desktop to access your TurningPoint Dashboard software
5. Click Continue
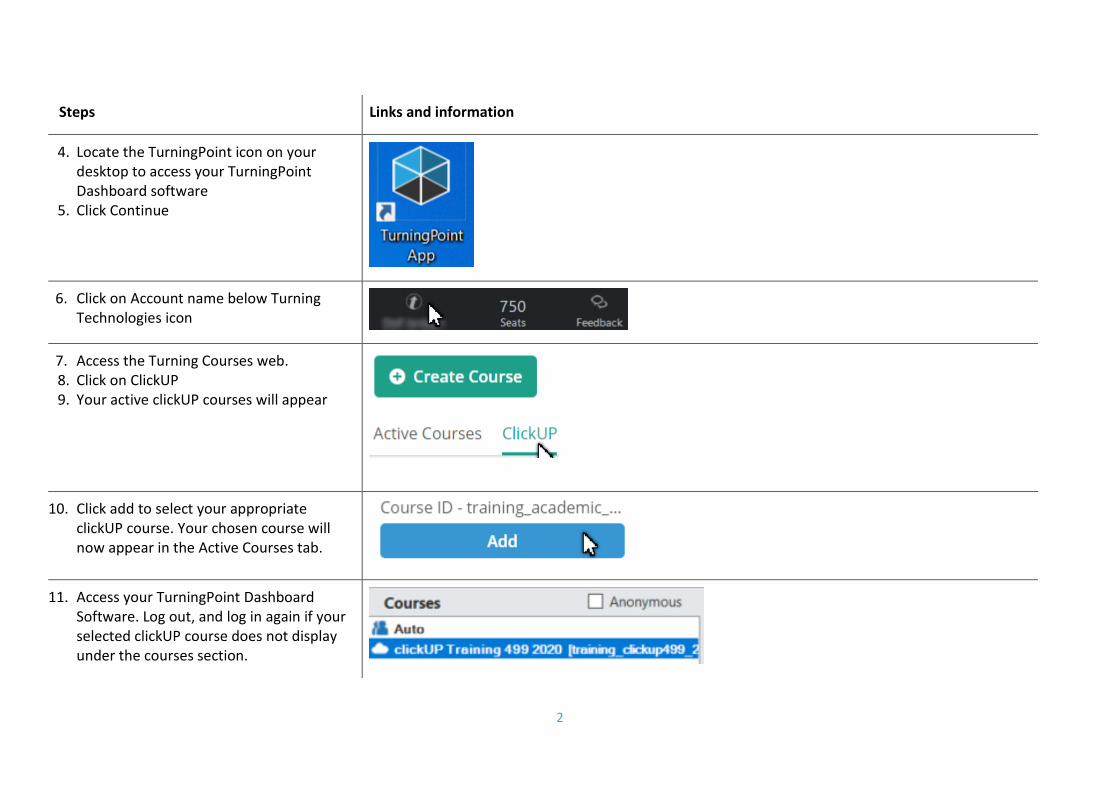
6. Click on Account name below Turning Technologies icon
7. Access the Turning Courses web. 8. Click on ClickUP 9. Your active clickUP courses will appear
10. Click add to select your appropriate clickUP course. Your chosen course will now appear in the Active Courses tab.
11. Access your TurningPoint Dashboard Software. Log out, and log in again if your selected clickUP course does not display under the courses section.
3
Steps Links and information
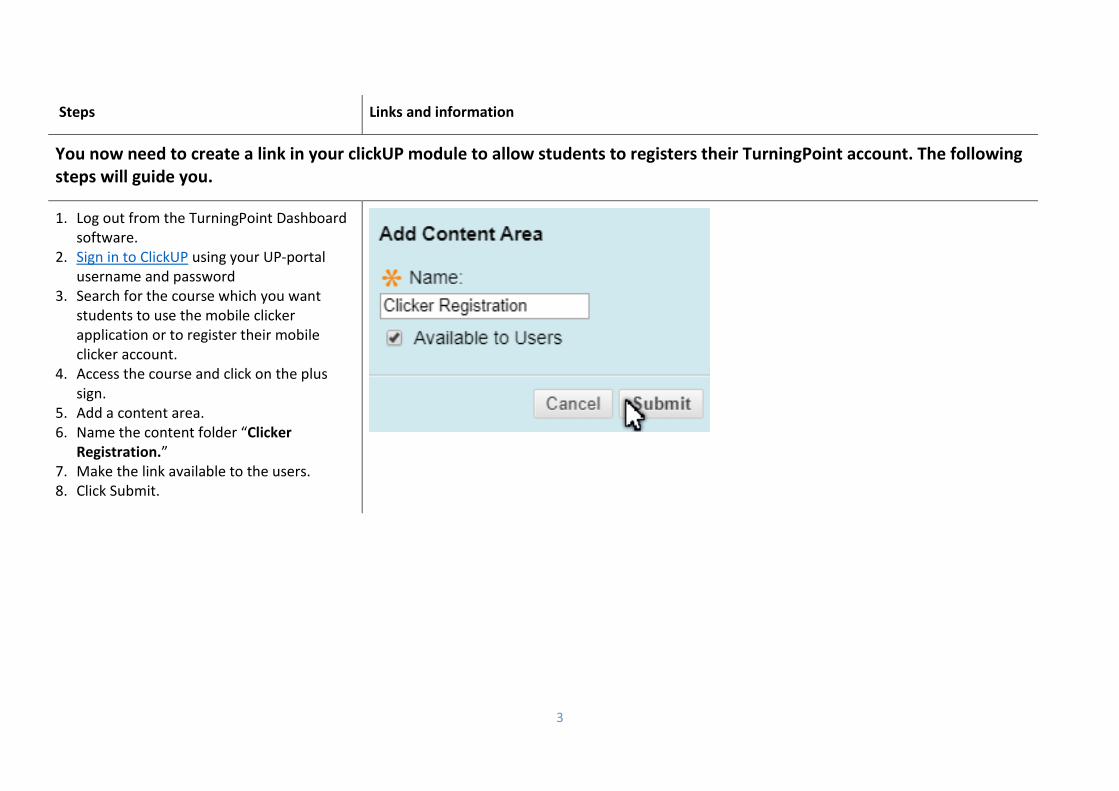
You now need to create a link in your clickUP module to allow students to registers their TurningPoint account. The following steps will guide you.
1. Log out from the TurningPoint Dashboard software.
2. Sign in to ClickUP using your UP-portal username and password
3. Search for the course which you want students to use the mobile clicker application or to register their mobile clicker account.
4. Access the course and click on the plus sign.
5. Add a content area. 6. Name the content folder “Clicker
Registration.” 7. Make the link available to the users. 8. Click Submit.
4
Steps Links and information
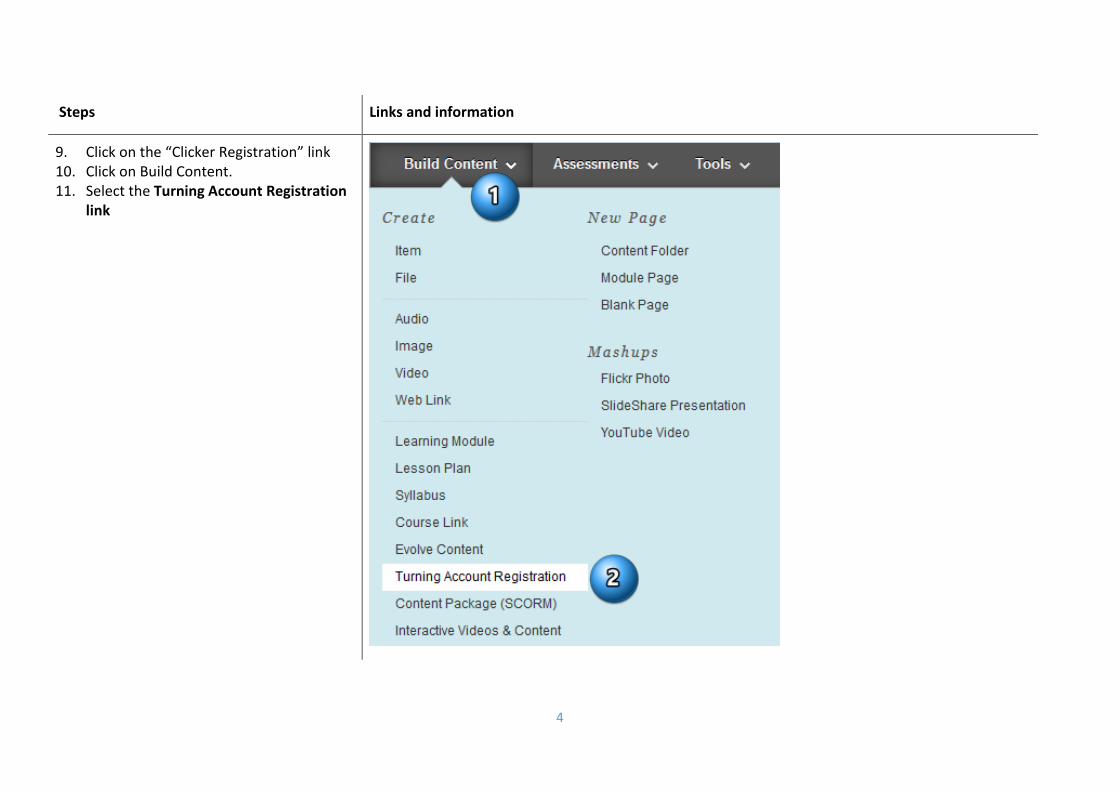
9. Click on the “Clicker Registration” link 10. Click on Build Content. 11. Select the Turning Account Registration
link
5
Steps Links and information
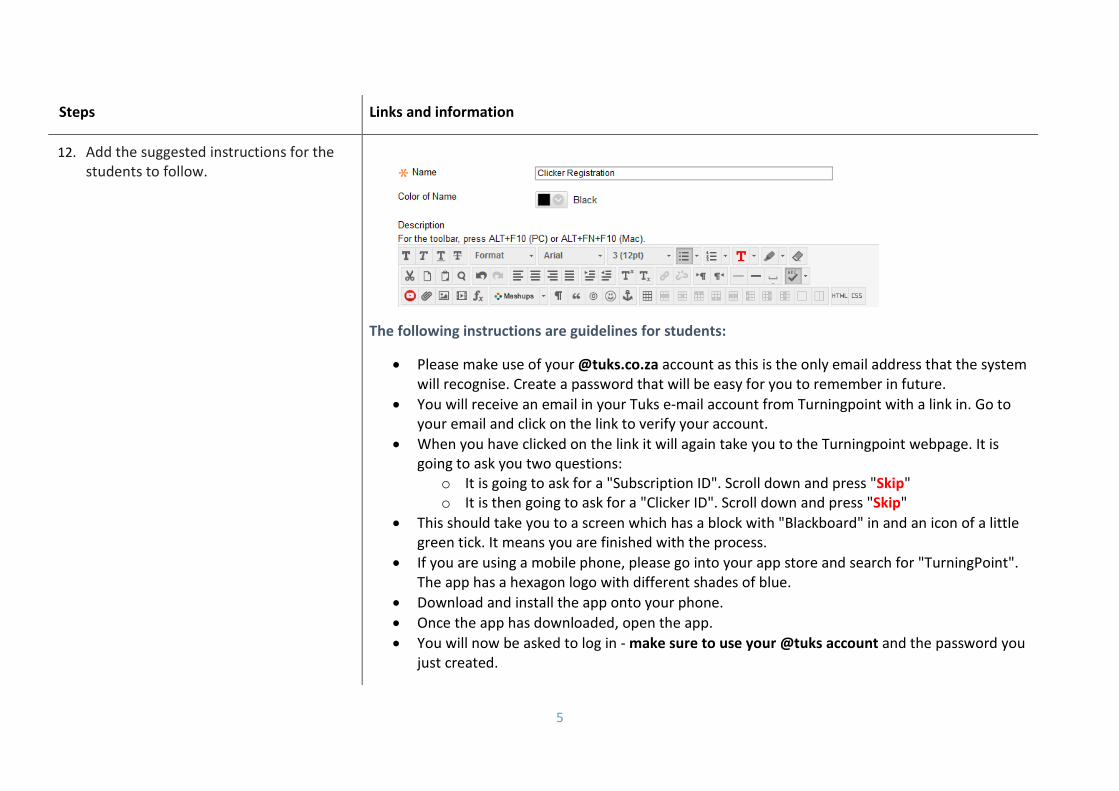
12. Add the suggested instructions for the students to follow.
The following instructions are guidelines for students:
• Please make use of your @tuks.co.za account as this is the only email address that the system will recognise. Create a password that will be easy for you to remember in future.
• You will receive an email in your Tuks e-mail account from Turningpoint with a link in. Go to your email and click on the link to verify your account.
• When you have clicked on the link it will again take you to the Turningpoint webpage. It is going to ask you two questions:
o It is going to ask for a "Subscription ID". Scroll down and press "Skip" o It is then going to ask for a "Clicker ID". Scroll down and press "Skip"
• This should take you to a screen which has a block with "Blackboard" in and an icon of a little green tick. It means you are finished with the process.
• If you are using a mobile phone, please go into your app store and search for "TurningPoint". The app has a hexagon logo with different shades of blue.
• Download and install the app onto your phone. • Once the app has downloaded, open the app. • You will now be asked to log in - make sure to use your @tuks account and the password you
just created.
6
Steps Links and information
Before class: Create a Session
Reserve or create a unique session ID A session ID is a unique Identifier to link students enrolled in your selected course with a specific session.
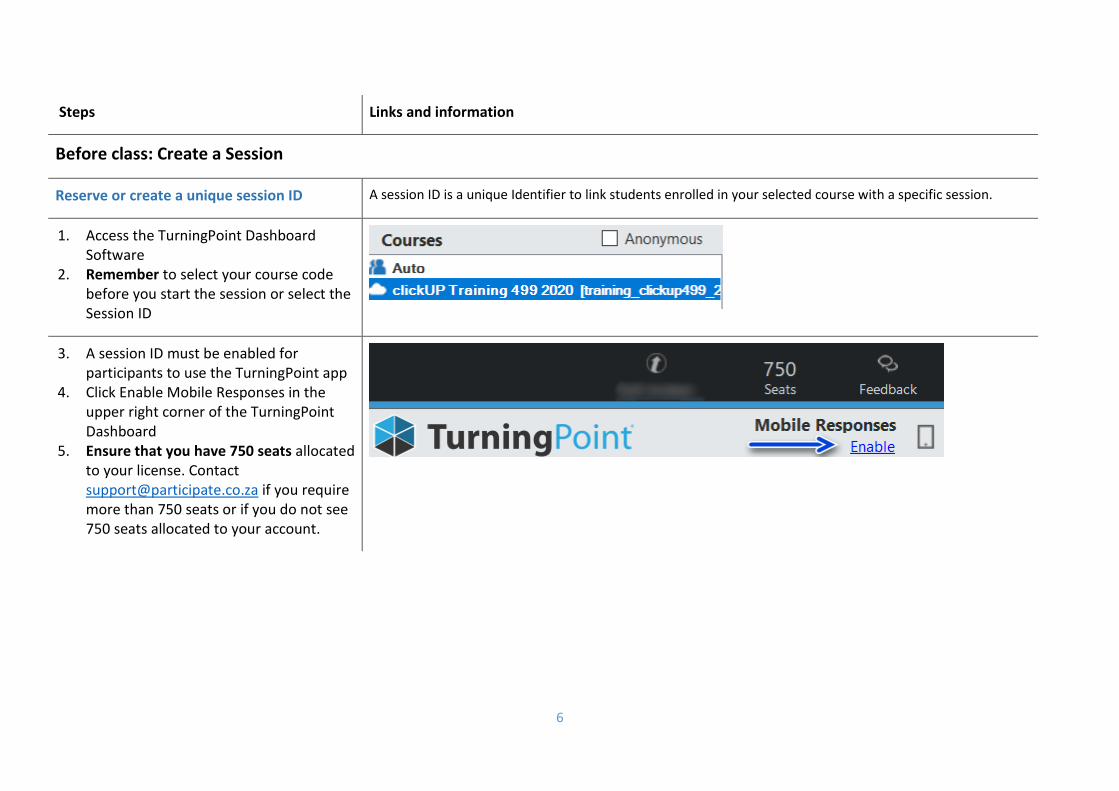
1. Access the TurningPoint Dashboard Software
2. Remember to select your course code before you start the session or select the Session ID
3. A session ID must be enabled for participants to use the TurningPoint app
4. Click Enable Mobile Responses in the upper right corner of the TurningPoint Dashboard
5. Ensure that you have 750 seats allocated to your license. Contact [email protected] if you require more than 750 seats or if you do not see 750 seats allocated to your account.
7
Steps Links and information
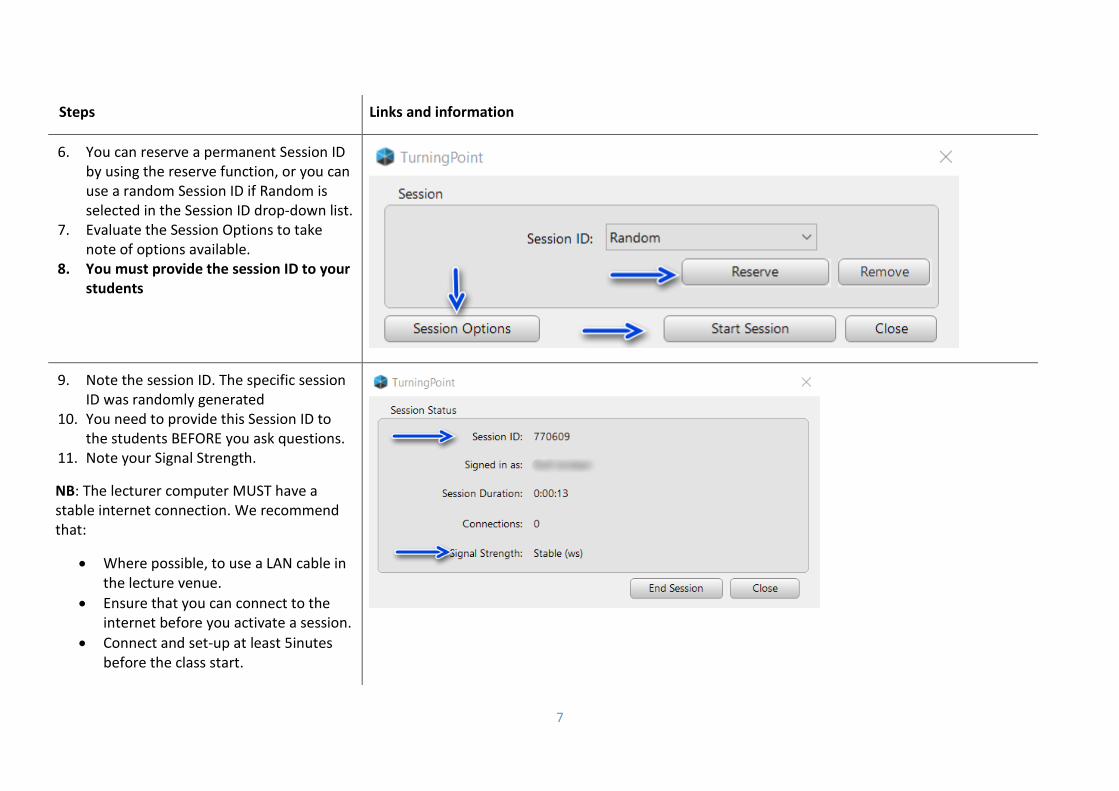
6. You can reserve a permanent Session ID by using the reserve function, or you can use a random Session ID if Random is selected in the Session ID drop-down list.
7. Evaluate the Session Options to take note of options available.
8. You must provide the session ID to your students
9. Note the session ID. The specific session ID was randomly generated
10. You need to provide this Session ID to the students BEFORE you ask questions.
11. Note your Signal Strength.
NB: The lecturer computer MUST have a stable internet connection. We recommend that:
• Where possible, to use a LAN cable in the lecture venue.
• Ensure that you can connect to the internet before you activate a session.
• Connect and set-up at least 5inutes before the class start.
8
Steps Links and information
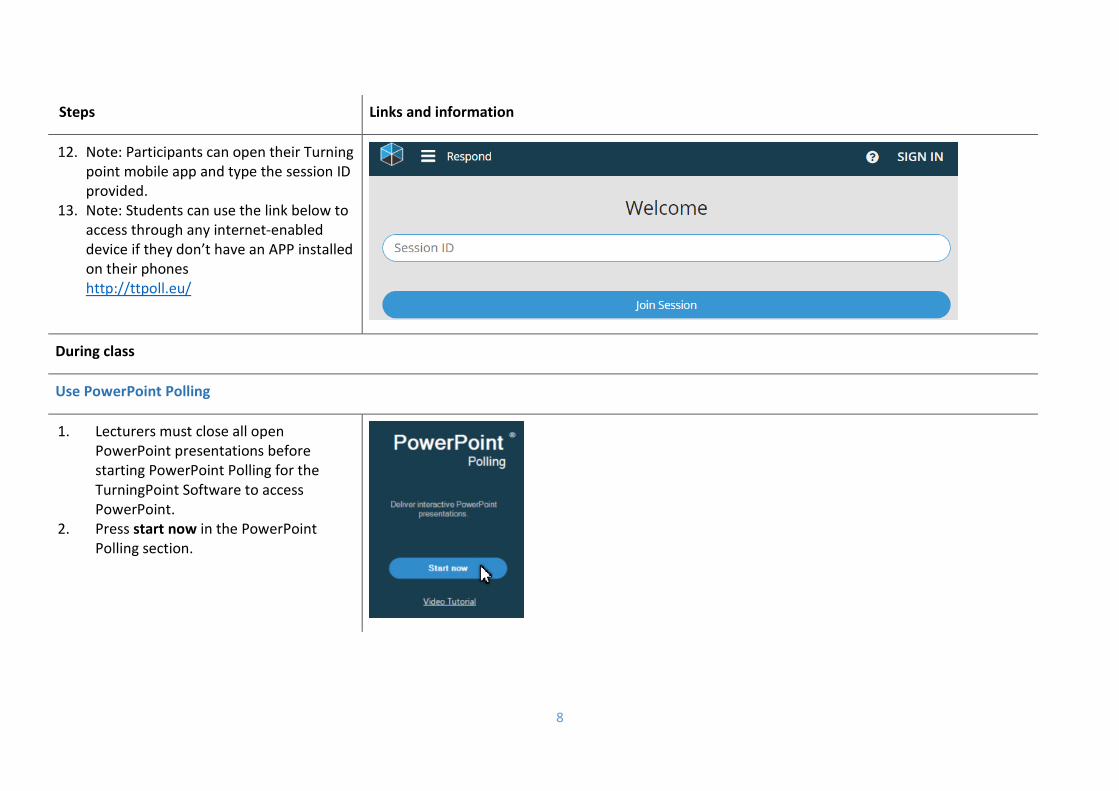
12. Note: Participants can open their Turning point mobile app and type the session ID provided.
13. Note: Students can use the link below to access through any internet-enabled device if they don’t have an APP installed on their phones http://ttpoll.eu/
During class
Use PowerPoint Polling
1. Lecturers must close all open PowerPoint presentations before starting PowerPoint Polling for the TurningPoint Software to access PowerPoint.
2. Press start now in the PowerPoint Polling section.
9
Steps Links and information
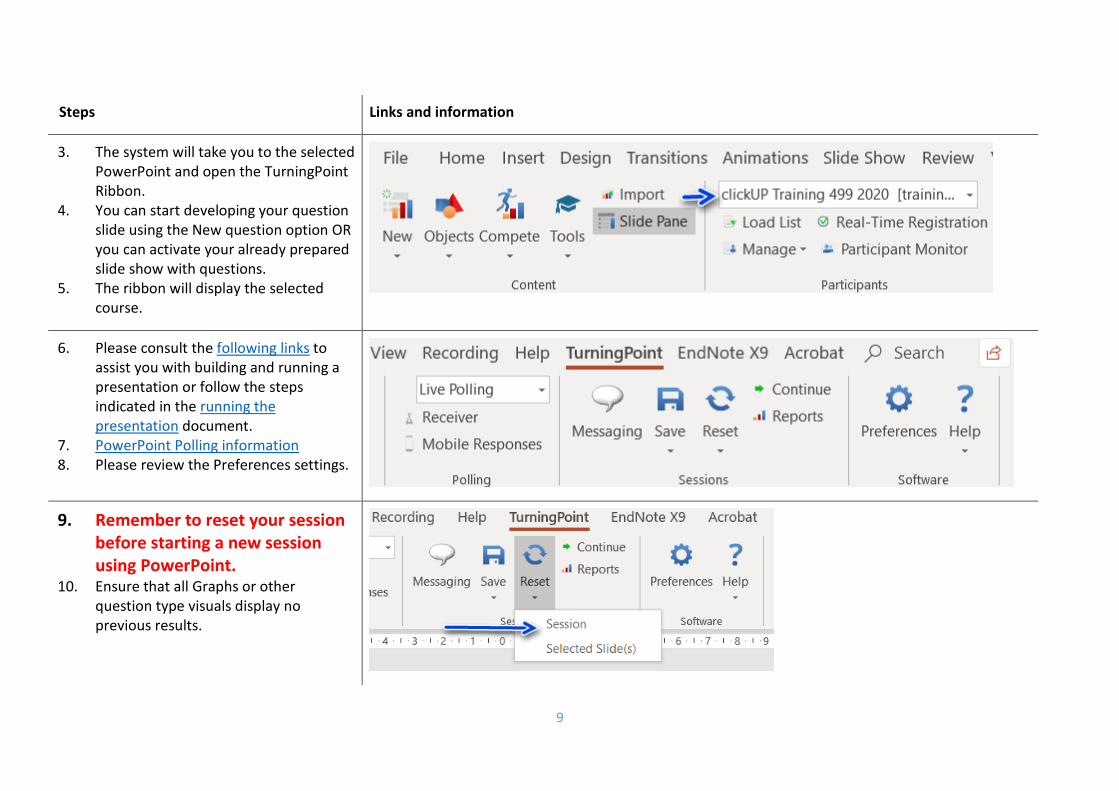
3. The system will take you to the selected PowerPoint and open the TurningPoint Ribbon.
4. You can start developing your question slide using the New question option OR you can activate your already prepared slide show with questions.
5. The ribbon will display the selected course.
6. Please consult the following links to assist you with building and running a presentation or follow the steps indicated in the running the presentation document.
7. PowerPoint Polling information 8. Please review the Preferences settings.
9. Remember to reset your session before starting a new session using PowerPoint.
10. Ensure that all Graphs or other question type visuals display no previous results.
10
Steps Links and information
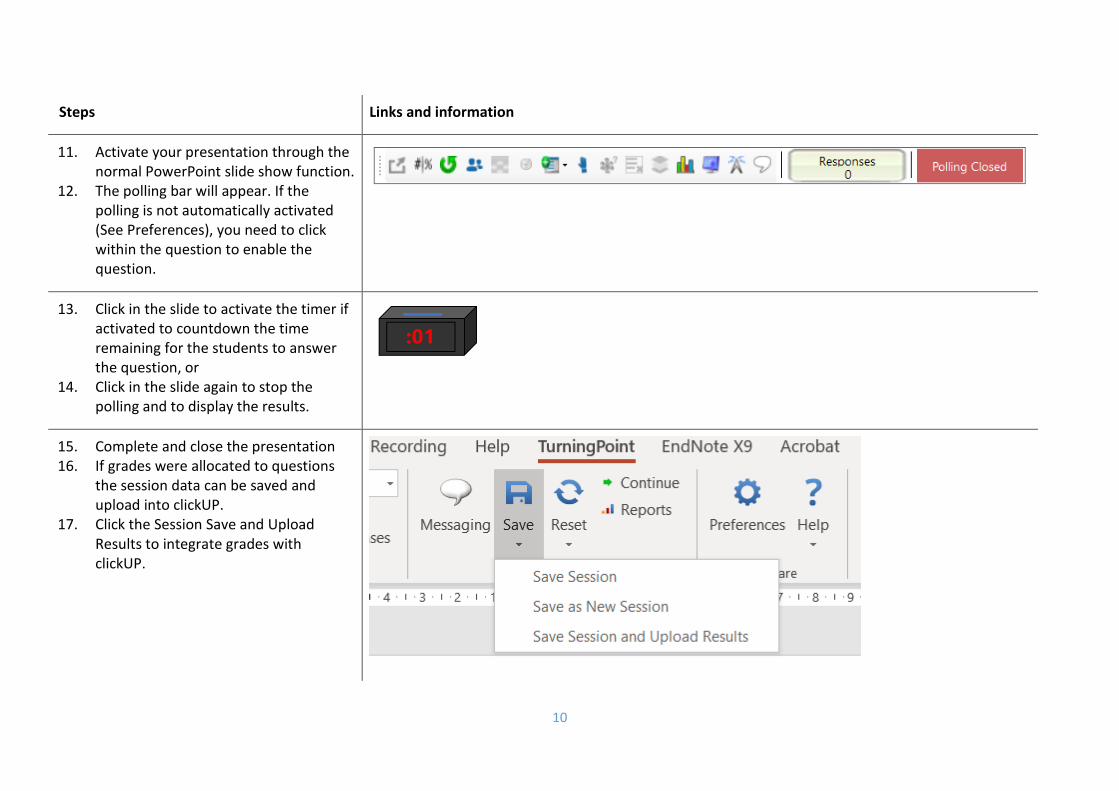
11. Activate your presentation through the normal PowerPoint slide show function.
12. The polling bar will appear. If the polling is not automatically activated (See Preferences), you need to click within the question to enable the question.
13. Click in the slide to activate the timer if activated to countdown the time remaining for the students to answer the question, or
14. Click in the slide again to stop the polling and to display the results.
15. Complete and close the presentation 16. If grades were allocated to questions
the session data can be saved and upload into clickUP.
17. Click the Session Save and Upload Results to integrate grades with clickUP.
11
Steps Links and information
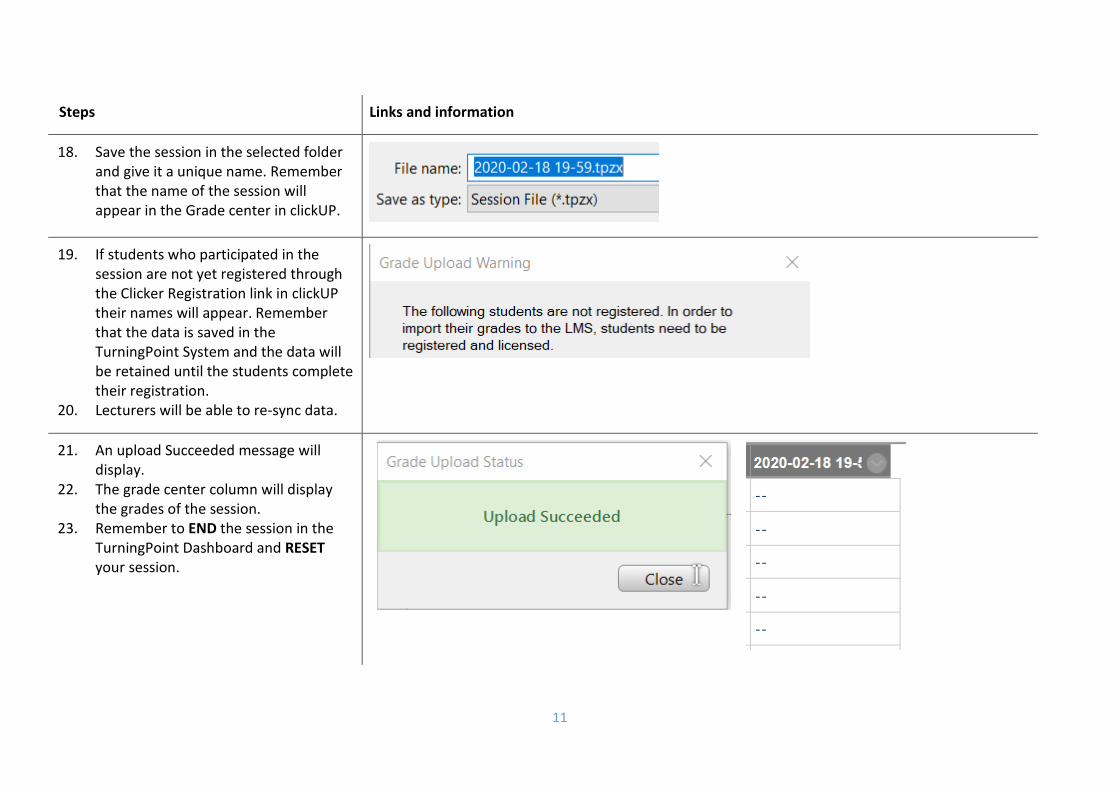
18. Save the session in the selected folder and give it a unique name. Remember that the name of the session will appear in the Grade center in clickUP.
19. If students who participated in the session are not yet registered through the Clicker Registration link in clickUP their names will appear. Remember that the data is saved in the TurningPoint System and the data will be retained until the students complete their registration.
20. Lecturers will be able to re-sync data.
21. An upload Succeeded message will display.
22. The grade center column will display the grades of the session.
23. Remember to END the session in the TurningPoint Dashboard and RESET your session.
12
Steps Links and information
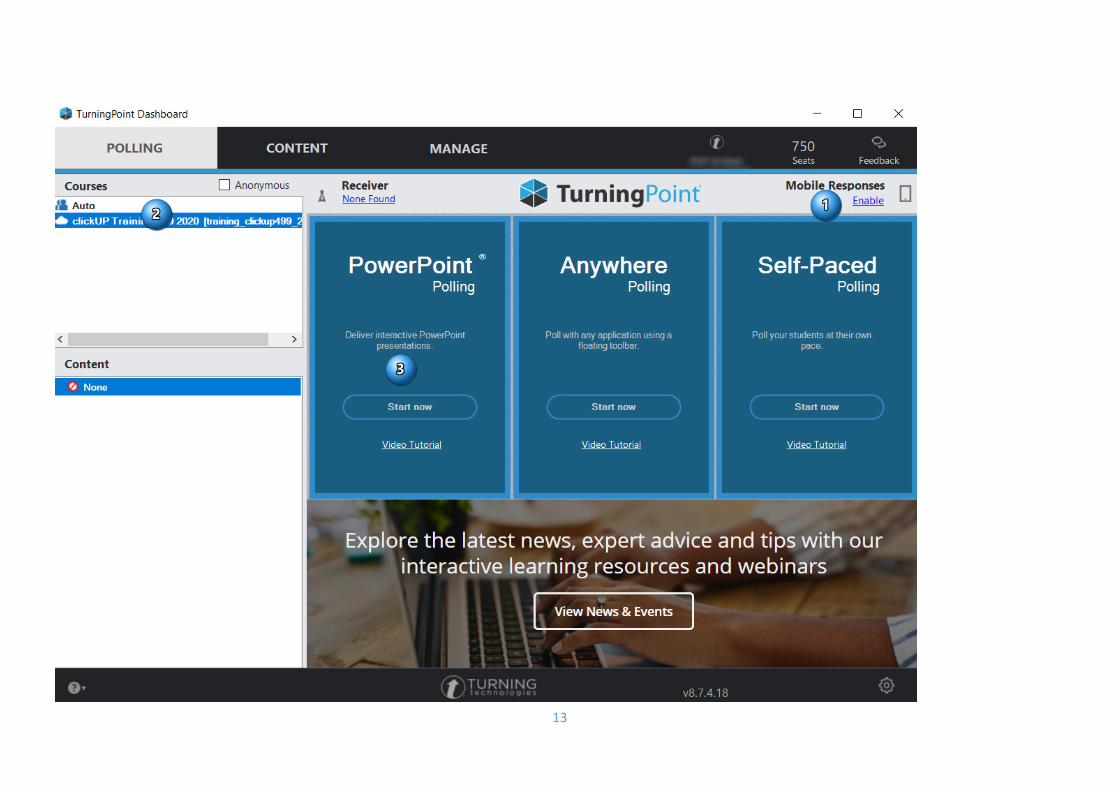
Summary of basic Turningpoint steps after registration and installation of software:
1. Open the TurningPoint Dashboard Software
2. Enable Mobile
3. Select session ID (Use reserved ID or random)
4. Select clickUP course (Use auto or select your course)
5. Open your PowerPoint lesson presentation
6. Reset Session on TurningPoint ribbon
7. Run Presentation in slideshow mode
8. Save Session on TurningPoint Ribbon
9. Save Presentation (Optional)
10.Generate reports (Optional)
Summary of basic steps in TurningPoint Dashboard software after clickUP courses have been selected
13

14
Steps Links and information
Summary of basic steps in TurningPoint PowerPoint Ribbon
Additional resources and advice
• Clicker help sites o UP Lecturers and student and FAQ content o TurningPoint Quick Start Guides and Videos for PC and MAC o TurningPoint Videos
• Anywhere polling: Add interactive questions anytime, anywhere • Give self-paced assessments • TurningPoint Mobile application
o Android User Guide o iOS User Guide o Browser User Guide o Technical Specifications
• User Guides • PowerPoint Polling

15
Steps Links and information