twelix artisan cookbook - kitchenaid …docs.kitchenaid.eu/_doc/cookbook_ka_twelix_artisa… ·...
TRANSCRIPT
TWELIX ARTISANCOOKBOOK
>Watch the ‘Making of’ video

PROFESSIONAL CUISINE WITH THE TWELIX ARTISAN OVEN BY KITCHENAID
At KitchenAid we work closely with true professionals, who
know every secret and nuance of the fascinating world of
haute cuisine, and who help us to develop every appliance.
We listen to advice from the world’s best and most creative
chefs, watch how they work and are inspired by their
techniques and tricks of the trade.
This insight helps us to create intelligent products that last
for years and inspire passionate gourmets by helping them
to express their creativity and achieve professional results in
the kitchen.
When designing this oven we worked side by side with the
chef Emanuele Scarello, whose standard of excellence has
earned him two Michelin stars. His input was invaluable when
developing the functions and exhaustively testing the oven,
while his creativity and professional experience helped us to
perfect recipes that sublimely showcase the potential of this
outstanding oven.
KitchenAid is delighted to offer you, our valued customers,
this unique gourmet guide with twenty-five exciting new
recipes. Each one invites you to discover the natural flavours
of Italy’s great gastronomic traditions, which are ingeniously
and stylishly interpreted and described with straightforward
instructions. What better way to start exploring the infinite
potential of your Twelix Artisan oven.
43
PROFESSIONAL CUISINE WITH THE TWELIX ARTISAN OVEN BY KITCHENAID
Important
Cooking times and temperatures offer a purely approximate
guideline and naturally vary depending on the quality of
the ingredients. They may be altered to suit your personal
preferences and tastes.
Unlike traditional convection cooking methods which require
the oven to be pre-heated, when using the Pure Steam or
Steam-Assisted cooking functions the ingredients are placed
in a cold oven.
The suggested quantities of water for some recipes cooked
with the Pure Steam cooking function are smaller than the
manufacturer’s standard quantities. This allows for quicker
cooking times for recipes that contain particularly delicate
ingredients. We recommend increasing the amount of water
if you wish to extend the cooking time.
65

RECIPES
BAKERY FUNCTIONS 89
Crunchy Crackers 91
Baguette 97
Ricotta, Saffron, Lardo,
and Coffee Focaccia 101
Bacon and Vegetable Quiche 107
PASTRY FUNCTIONS 111
Choux Buns with Extra-virgin Olive Oil 113
Almond Cake 117
Chocolate Biscuits with Chocolate Cream 121
Zabaglione and Strawberries Au Gratin 127
SPECIAL FUNCTIONS 131
Spiced Guanciale 133
Candied Fennel 137
ARTISAN STEAM FUNCTIONS 9
STEAM-ASSISTED COOKING 11
Caramelised Butternut Squash 13
Stuffed Breast of Guinea Fowl 17
Potatoes, Bacon and Rosemary 23
Fillet Steak with Vegetables and Ligurian Olives 29
Rump of Veal with Tuna Sauce 33
Free-range Chicken 37
Herb and Ricotta Omelette 41
Brown Bread 47
Corn Grissini (Breadsticks) 53
PURE STEAM COOKING 59
Clams with Tomatoes 61
Caramote Prawns and Courgettes 65
Squid Carbonara 69
Sea Bass with Myrtle 75
Russian Salad with Scampi 79
Egg and Asparagus 85
87

The Twelix Artisan oven offers the option of three
different cooking modes: convection, steam-assisted (a
combination of steam and convection) and pure steam.
The following recipes will guide you as you master
the Artisan Steam functions and start to enjoy mouth-
watering, professional results.
ARTISAN STEAM FUNCTIONS
9 10>
Recipes

Now, even less experienced cooks can create perfectly
cooked dishes every time. The Artisan oven features
four pre-programmed steam functions so you can select
different combinations of heat and steam to suit your
chosen recipe.
Meat, Poultry, Fish or Stuffed Vegetables: just select
your desired food group, add the recommended
amount of water and the oven suggests the ideal
temperature, producing just the right amount of steam
so your recipes are cooked to perfection.
If you are feeling imaginative and want to unleash
your culinary creativity, KitchenAid has designed the
Custom Steam function just for you. You can set the
temperature and choose the steam injection intensity to
satisfy whichever gastronomic needs and desires your
inner chef may have.
When cooking with the steam-assisted programme you
can make use of the entire oven space. Food is cooked
on a baking sheet or oven drip tray rather than on the
steam grid of the Artisan steam accessory.
STEAM-ASSISTED COOKING
1211 >
Recipes

Caramelised Butternut Squash
1413 >
Recipes
Ingredients (serves 4)
1 butternut squash
Butter
Salt
When cooked properly, all you need is a simple recipe to accentuate the natural fragrance, soft texture and sweet flavour of squash. An excellent ingredient for creams, gnocchi and cakes and delicious served on its own with yogurt and squash seeds.
Method
Cut the butternut squash lengthwise, brush with butter, and cook at 170°C.
COOKING INSTRUCTIONS: Select the Mid Custom Steam mode from the Artisan Steam functions and cook for 2 hours with 500 ml of water.
Caramelised Butternut Squash
1615 >
Recipes
>
Recipe

Stuffed Breast of Guinea Fowl
1817 >
Recipes Step by Step >
Video
>

Ingredients (serves 4)
4 half breasts of guinea fowl
200 g sausage
2 sprigs of thyme
(only the leaves)
50 g bread (without the crust)
2 sprigs of rosemary
Salt
Pepper
This fine-quality meat has a delightfully unique flavour that is heightened by a tasty, rustic sausage filling and the aromatic bouquet of thyme. An original dish for a special occasion that evokes the country life of yesteryear, while strong flavours show an appreciation of the intrinsic quality of each ingredient.
Method
Mix the sausage with the breadcrumbs and season with the thyme leaves, salt and pepper.Make a pocket in the guinea fowl breasts and fill with the sausage mixture. Next tie each breast with kitchen string and place on a baking sheet. Position the oven shelf at the second shelf position and place the baking sheet on the shelf.
COOKING INSTRUCTIONS: Select the Poultry mode from the Artisan Steam functions, and cook at 200°C for 20 minutes with 100 ml of water.
Stuffed Breast of Guinea Fowl
2019 >
Recipes Video
>>
Recipe Step by Step >

Stuffed Breast of Guinea Fowl
2221 >
Recipes Video
>
Step by Step >

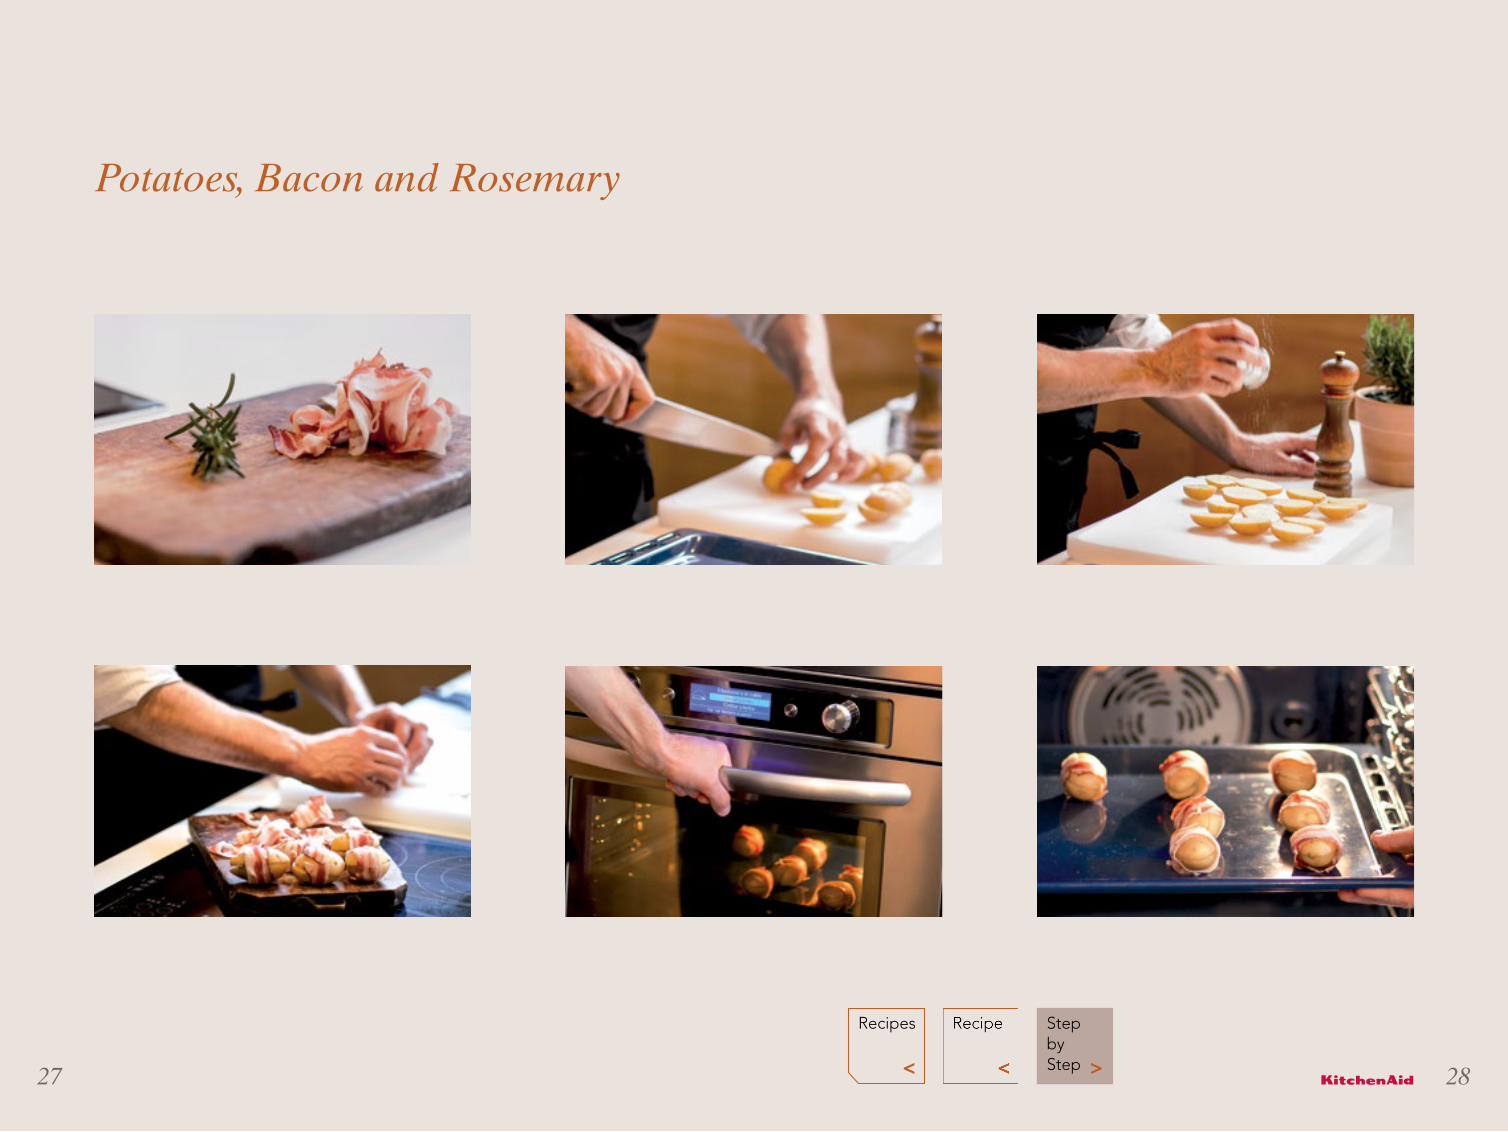
Potatoes, Bacon and Rosemary
2423 >
Recipes Step by Step >
Ingredients (serves 4)
12 small potatoes
12 sprigs of rosemary
24 slices of bacon
Salt and pepper
A key ingredient in cuisines worldwide, the potatoes in this recipe express a love of good, old-fashioned cooking, giving traditional flavours and fragrances a new twist and providing an unexpected thrill for your taste buds.
Method
Scrub and clean the potatoes well. Slice them in half and parboil in salted water for 2 minutes.Dry the potato halves, place them face up, and sprinkle with pepper, salt and rosemary. Sandwich each pair of halves together, and wrap a slice of bacon around each potato.
COOKING INSTRUCTIONS: Select the Stuffed Vegetables mode from the Artisan Steam functions, and cook at 170°C for about 20 minutes with 200 ml of water.
Potatoes, Bacon and Rosemary
2625 >
Recipes
>
Recipe Step by Step >
Potatoes, Bacon and Rosemary
2827 >
Recipes Step by Step >

Fillet Steak with Vegetables and Ligurian Olives
3029 >
Recipes

Ingredients (serves 4)
800 g fillet steak
1 red pepper
1 yellow pepper
1 aubergine
2 courgettes
1 fennel
4 small potatoes
Taggiasca olives to taste
Salt and pepper
Extra-virgin olive oil
Aromatic herbs
A first-choice cut of meat perfected by professional cooking, accompanied by the vibrant colours and flavours of freshly-grown produce and the tasty tang of Ligurian olives.
Method
Remove any sinew from the meat and season with salt, pepper, extra-virgin olive oil and aromatic herbs.
COOKING INSTRUCTIONS: If you prefer your meat slightly pink, set the oven using the Low Custom Steam function, and cook at 130°C for 8 minutes with 100 ml of water.
Carve the meat into slices of your preferred thickness and serve with the vegetables. Taggiasca olives add the finishing touch to this exquisite dish.
Fillet Steak with Vegetables and Ligurian Olives
3231 >
Recipes
>
Recipe

Rump of Veal with Tuna Sauce
3433 >
Recipes
Ingredients (serves 4)
For the tuna sauce100 g eggs
500 g peanut oil
Mustard
2 anchovies
Juice of ½ lemon
250 g tuna in oil
For the rump of veal1 600 g rump of veal
Salt and pepper to taste
Seed oil
This is a classic Italian dish. It immediately brings to mind warm summer colours and the carefree vibe of holidays when the sun never seems to set. The secret to perfecting this dish is using only the finest-quality ingredients, attention to detail and the seemingly incongruous yet hedonistic combination of meat and fish.
Method
Pour the eggs into the Artisan blender and add the lemon juice, anchovies, mustard and salt. Set the blender to high speed and start to add the peanut oil one drop at a time to make the mayonnaise. Lastly, add the tuna and mix together.
Season the veal with salt and pepper. Now sauté the veal with the oil in a pan over a high heat.
COOKING INSTRUCTIONS: If you prefer your meat slightly pink, set the oven by selecting the Meat mode from the Artisan Steam functions and cook at 160°C for 20 minutes with 20 ml of water.
Leave to cool and carve the meat into slices. Serve with the tuna sauce and garnish with capers.
Rump of Veal with Tuna Sauce
3635 >
Recipes
>
Recipe
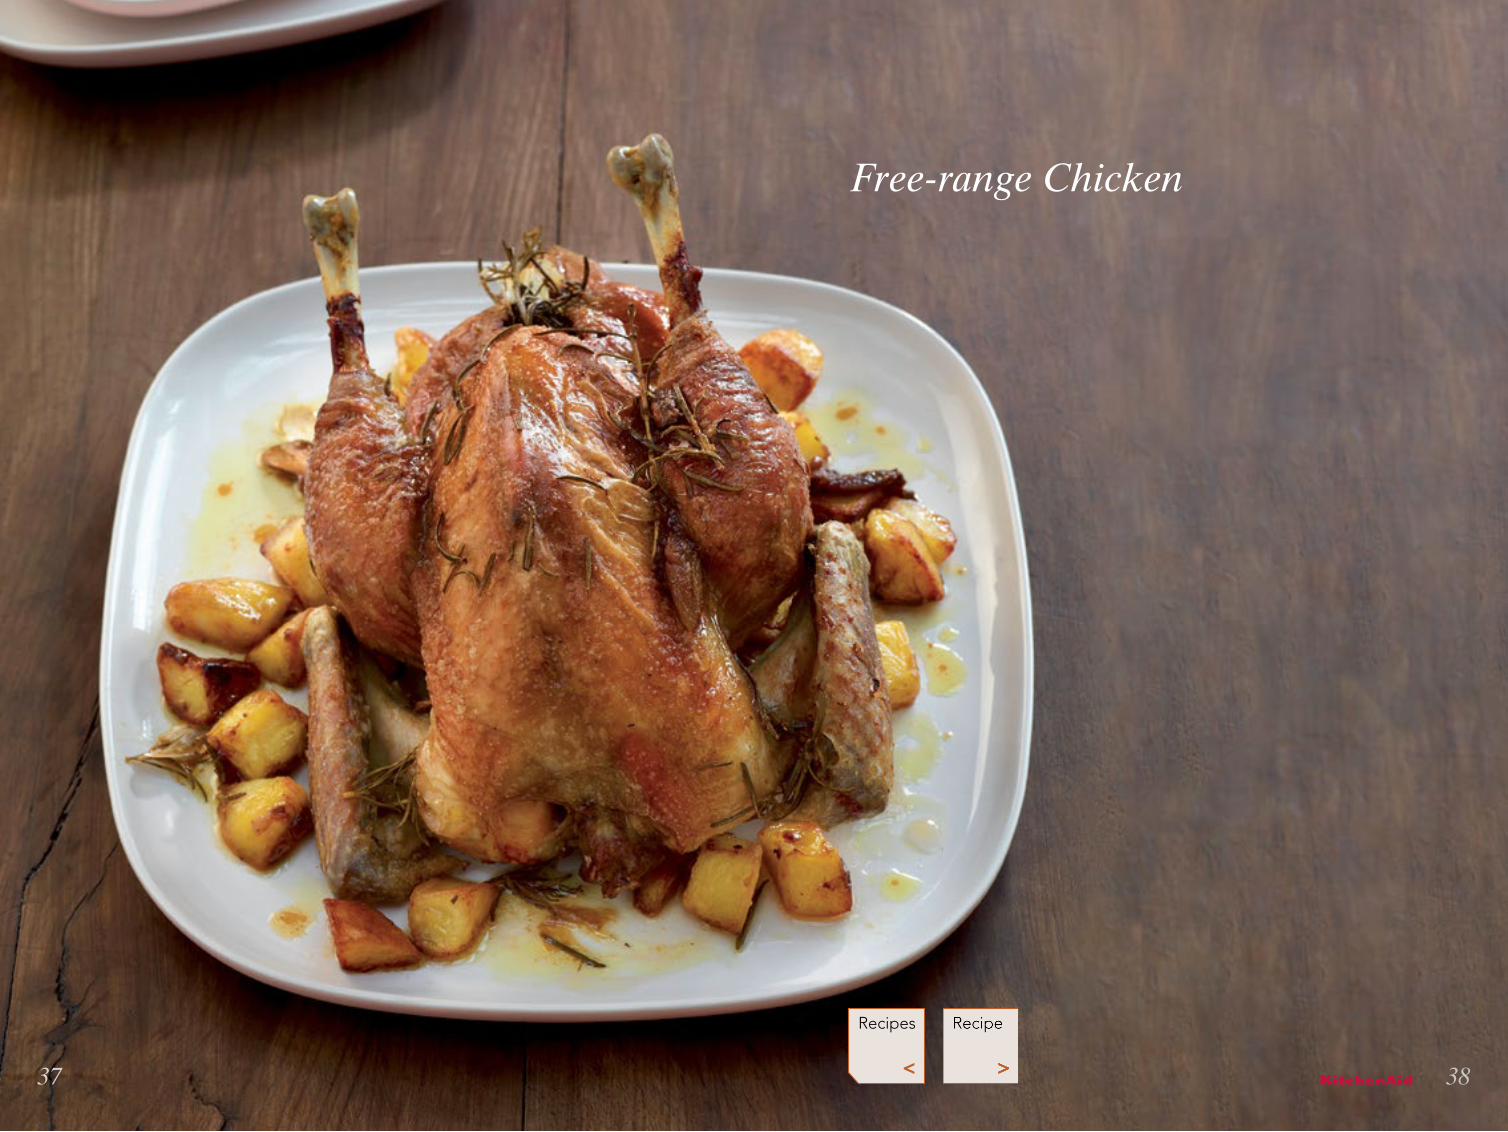
Free-range Chicken
3837 >
Recipes

Ingredients
1 1.5 kg (approx.) chicken
(preferably Poulet de Bresse)
Garlic
Extra-virgin olive oil
Rosemary
Thyme
Salt and black pepper to taste
Such a simple dish yet such a harmonious blend of fragrance and flavour. A heady bouquet of aromatic herbs mingled with the pungent aroma of garlic is all you need to recreate the ambience of Sunday lunches in the Italian countryside.
Method
Clean the chicken and remove the giblets and any remaining feathers. Place the chicken in a roasting tin and season with salt, pepper, extra-virgin olive oil, rosemary and a few unpeeled cloves of garlic. Leave the chicken in the fridge to marinate for a few hours.
Plug in the Artisan steam accessory without the glass lid.
COOKING INSTRUCTIONS: Place the drip tray in the oven. Select the Poultry mode from the Artisan Steam functions, and cook at 165°C for 2 hours with 500 ml of water.
Free-range Chicken
4039 >
Recipes
>
Recipe

Herb and Ricotta Omelette
4241 >
Recipes Step by Step >

The fresh, creamy flavour of ricotta paired with the sharp citrus tang of lemon rind in this light yet sumptuous omelette provides a perfectly balanced complement for the delicate aroma of wild herbs.
Method
Place all the ingredients in the blender and combine them until you have a smooth, creamy consistency. Leave to rest in the fridge preferably for 2 hours. Spread out the mixture on the oven’s drip tray. Plug in the Artisan steam accessory without the glass lid.
COOKING INSTRUCTIONS: Place the drip tray in the oven. Select the Low Custom Steam function, and cook at 130°C for 50 minutes with 150 ml of water.
Herb and Ricotta Omelette
Ingredients (serves 4)
300 g fresh ricotta
8 eggs
Rind of 1 lemon
Chilli pepper
150 g wild herbs
150 ml extra-virgin olive oil
100 g Grana Padano cheese
Salt to taste
Pepper
4443 >
Recipes
>
Recipe Step by Step >

Herb and Ricotta Omelette
4645 >
Recipes Step by Step >
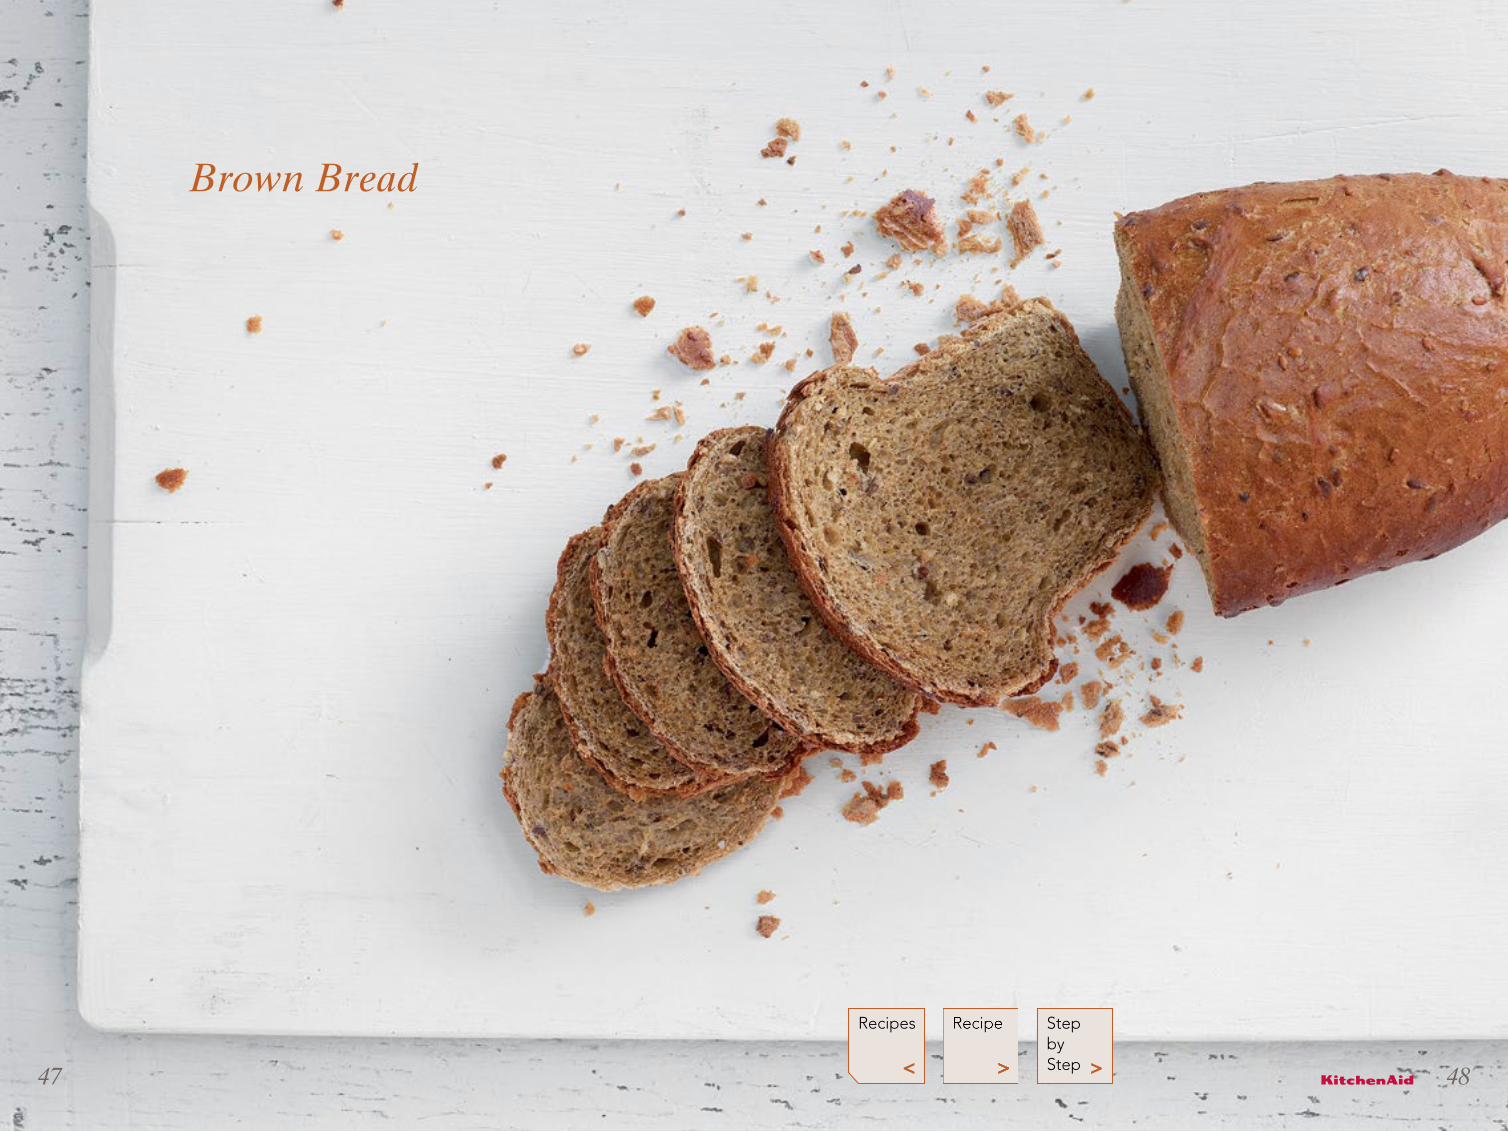
Brown Bread
4847 >
Recipes Step by Step >

Ingredients For two 20 cm loaf tins
500 g multi-grain flour
175 g water
40 g yogurt
20 g honey
1 g fresh yeast
1 teaspoon salt (12 g)
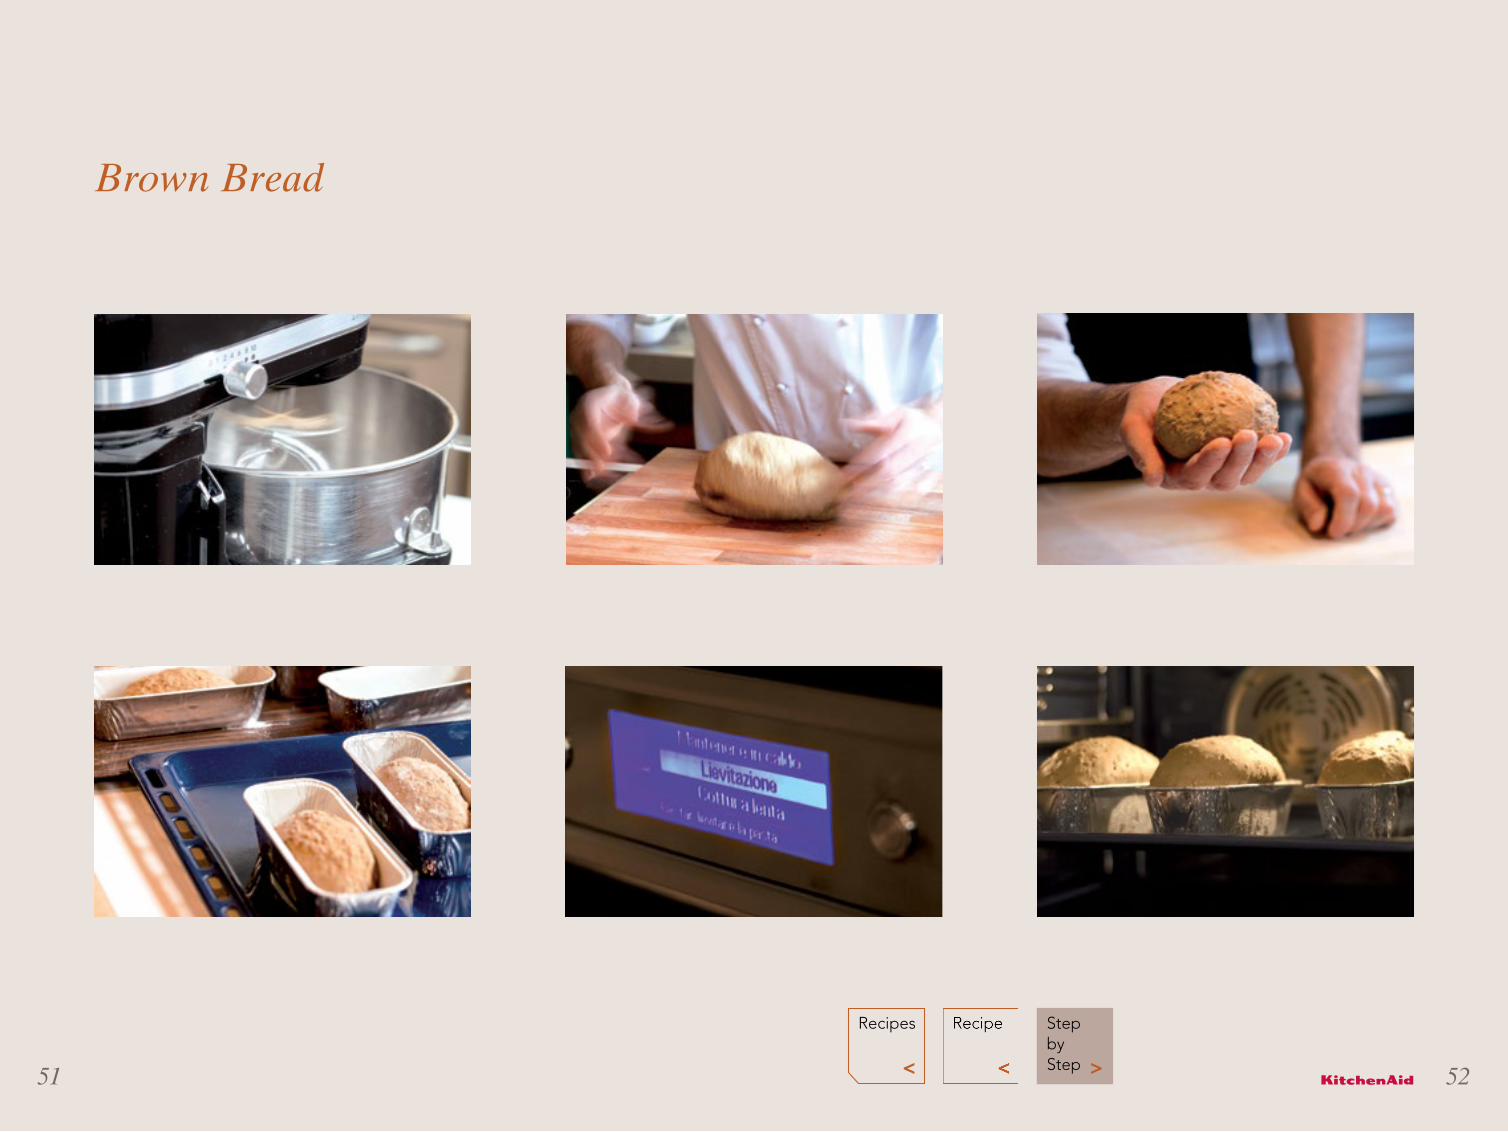
With its wholesome, homemade character, brown bread exudes a timeless appeal. It personifies the perfect blend of natural ingredients and a real understanding of the value of a healthy diet, evoking memories of happy times spent with family and friends.
Method
Mix all the ingredients together, adding the salt last and knead the dough.Leave the dough in the oven to prove until it has doubled in size (set the Rising mode from the Special Functions to 40°C). Now divide the dough in half, and pat each piece into shape and place in the loaf tins. Leave the dough to prove until it has doubled in size (select the Rising mode from the Special Functions and set to 40°C).
COOKING INSTRUCTIONS: Select the Mid Custom Steam function and cook at 180°C for 40 minutes with 200 ml of water.
Brown Bread
5049 >
Recipes
>
Recipe Step by Step >
Brown Bread
5251 >
Recipes Step by Step >

Corn Grissini (Breadsticks)
5453 >
Recipes Step by Step >
Ingredients
500 g soft wheat flour (type “00”)
100 g all-purpose flour (type “0”)
300 g water
150 g extra-virgin olive oil
25 g brewer’s yeast
1 teaspoon sugar
1 teaspoon salt
50 g corn flour
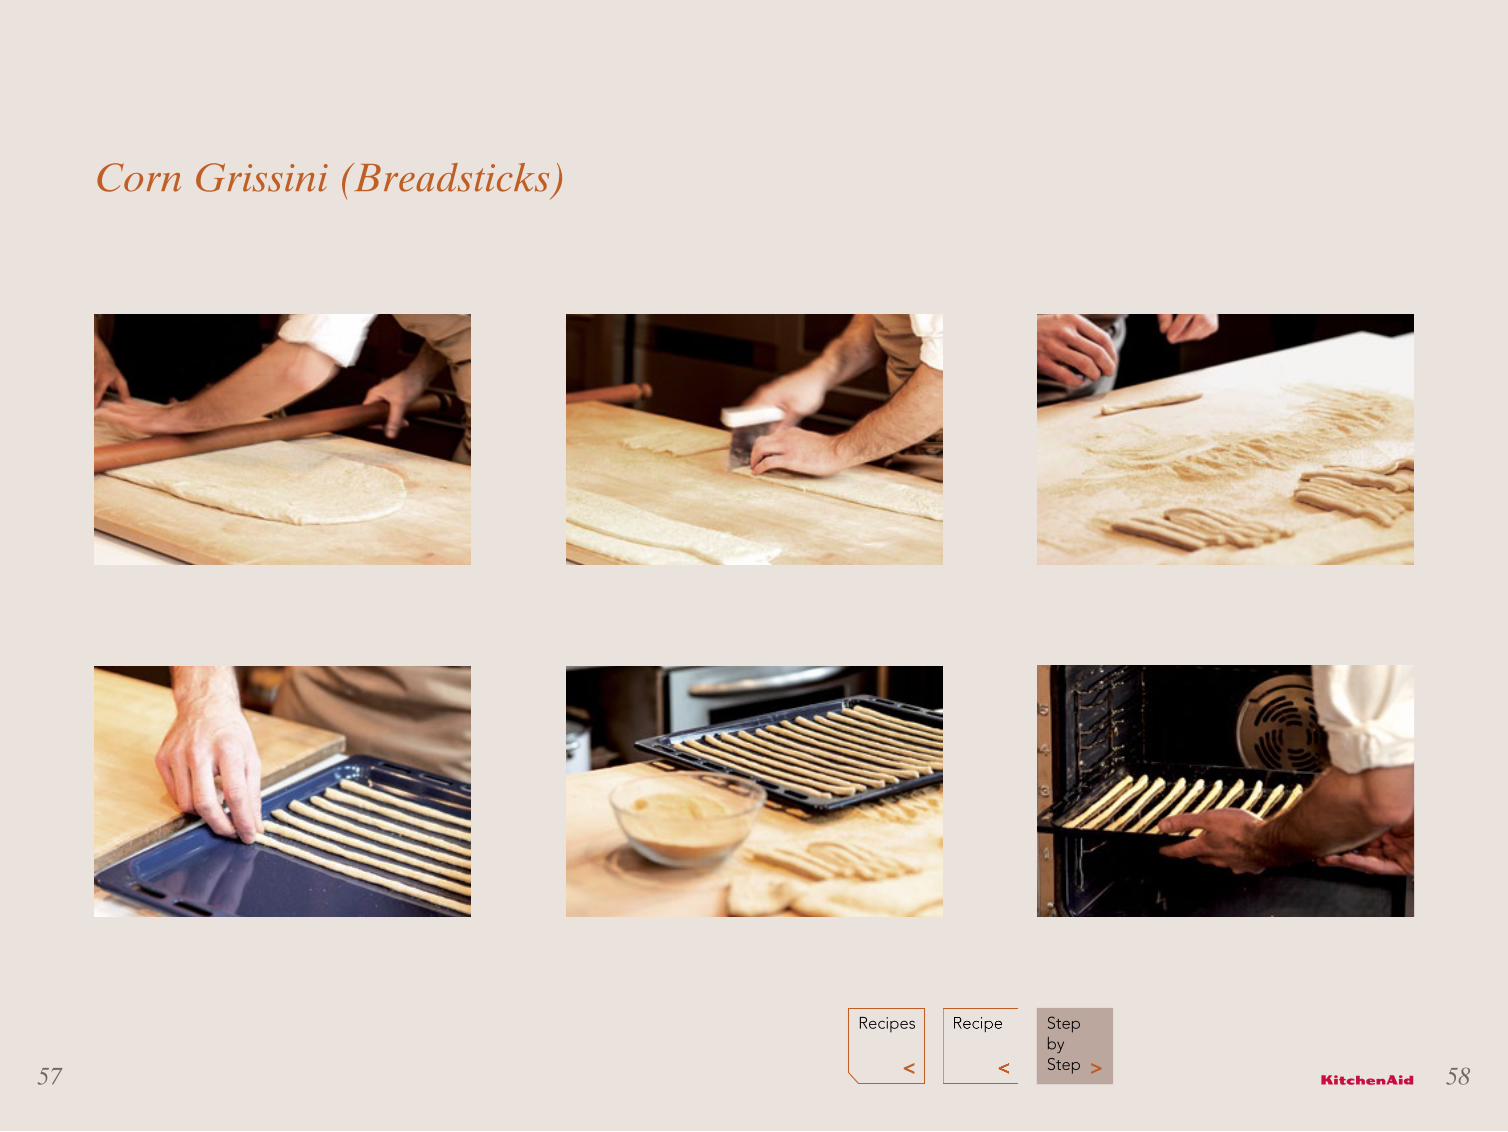
These are fun to make and offer a tasty alternative to bread. Ideal for Sunday brunch, aperitifs in the garden or a candle-lit meal by the pool.
Method
Place all the ingredients, except the salt, in the KitchenAid Artisan stand mixer and mix for 10 minutes using the dough hook until you have smooth, evenly mixed dough. Leave the dough to rest in the oven (select the Rising mode from the Special Functions and set to 40°C) until it has doubled in size. Now place the dough on a pastry board and dust it on both sides with the corn flour. Lightly roll the dough out with a rolling pin to a thickness of about 7 mm. Cut the dough into 10-12 cm strips and roll to form grissini that are 30 cm long. Place the grissini on the oven’s drip tray, which is protected by a Silpat baking mat or a sheet of greaseproof paper.Leave the grissini to rest in the oven (select the Rising mode from the Special Functions and set to 40°C) until they have doubled in size.
COOKING INSTRUCTIONS: Plug in the Artisan steam accessory. Select the Mid Custom Steam function, set the oven to 190°C and add 300 ml water.
Place the drip tray with the grissini in the oven and set the time to 10-12 minutes.
Corn Grissini (Breadsticks)
5655 >
Recipes
>
Recipe Step by Step >
Corn Grissini (Breadsticks)
5857 >
Recipes Step by Step >

KitchenAid has created a special steam accessory for
the Twelix Artisan oven. When you wish to use the
Pure Steam method, just place the steam accessory in
the oven cavity and arrange the food on the grill that
fits (please consult the instruction manual when using).
Now all you need to do is add the amount of water
required by the recipe, place the glass lid on the steam
accessory and select your desired Artisan Pure Steam
function from the menu.
The steam accessory fills with steam under the glass lid
and gently cooks your food (without ever exceeding
100°C) in a natural, healthy way that requires no added
oil or fat.
PURE STEAM COOKING
6059 >
Recipes

Clams with Tomatoes
6261 >
Recipes
-
Ingredients
2 kg fresh carpet-shell clams
(cleaned and scrubbed)
300 g grape tomatoes
Garlic
Black pepper
The irresistible fresh flavour of carpet-shell clams and the exquisite aroma of grape tomatoes, all steamed to perfection in one mouth-watering dish. This recipe may be simple but it certainly satisfies all five senses and reflects the wisdom of seafarers’ age-old culinary traditions.
Method
Clean the clams, peel the grape tomatoes and place everything on the steam grid of the Artisan steam accessory. Place the Artisan steam accessory in the oven and plug it in.
COOKING INSTRUCTIONS: Select the Pure Steam function, set the time to 12-15 minutes and add 1 litre of water.
Clams with Tomatoes
6463 >
Recipes
>
Recipe

Caramote Prawns and Courgettes
6665 >
Recipes
Ingredients (serves 4)
16 fresh caramote prawns
6 fresh courgettes
Salt and pepper
Extra-virgin olive oil
Treat your taste buds to mouth-watering bliss with sweet juicy prawns embraced by the refreshing flavour of succulently tender courgettes.
Preparation
Cut the courgettes into thin slices, sprinkle with salt and leave them to marinate for 20 minutes. Rinse to remove the salt and dry.Remove the shells from the tails and remove the veins from the prawns. Season with salt and pepper, and wrap the tails with the slices of courgette. Arrange them on the steam grid of the Artisan steam accessory and place in the oven.
COOKING INSTRUCTIONS: Select the Pure Steam function. To ensure the prawns remain really tender, we recommend cooking them for 6 minutes with 200 ml of water.
Caramote Prawns and Courgettes
6867 >
Recipes
>
Recipe

Squid Carbonara
7069 >
Recipes Step by Step >
Video
>

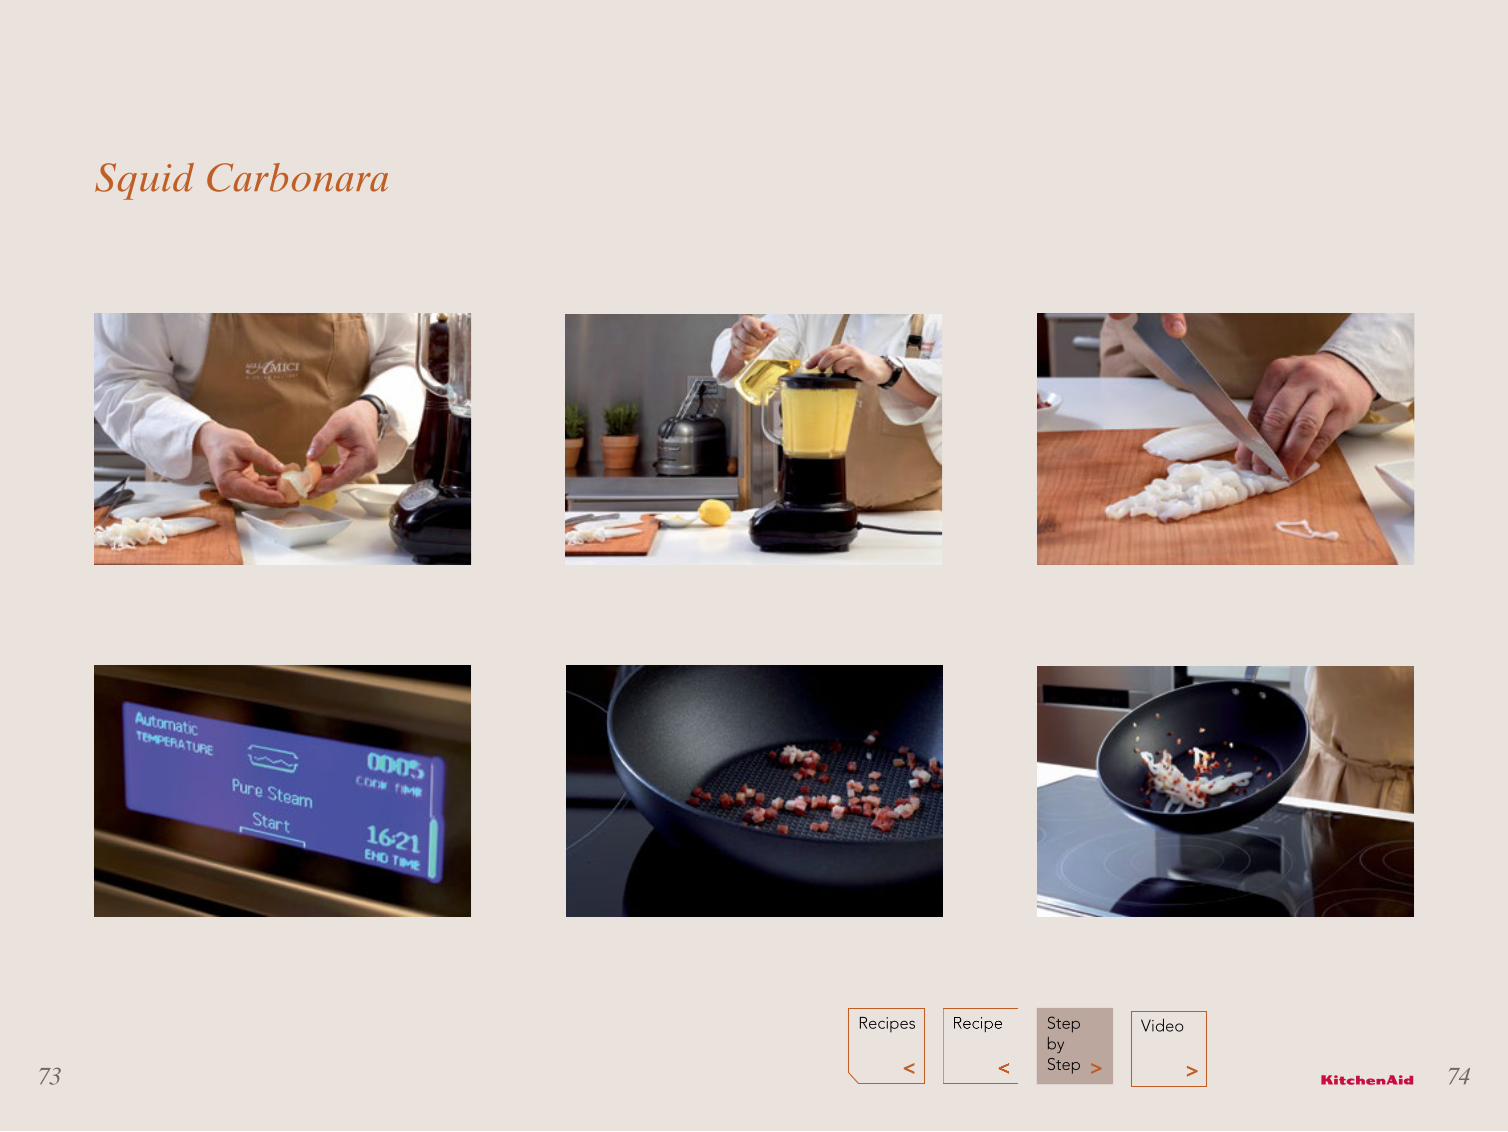
Ingredients (serves 4)
4 medium-sized fresh squid
Extra-virgin olive oil
100 g smoked pancetta
For the mayonnaise:2 eggs
300 g seed oil
Juice of ½ lemon
10 g mustard
A culinary eye-opener! Carbonara may be a traditional Italian dish, but this recipe features a very surprising twist by incorporating an original and even more tantalising combination of ingredients. An ingenious dish with a whole host of delectable nuances.
Method
Clean the squid and separate the heads from the tentacles (these can be used in other dishes).Arrange the squid heads on the steam grid of the Artisan steam accessory and place in the oven.
COOKING INSTRUCTIONS: Cover with the glass lid, select the Pure Steam function and cook for 5 minutes with 500 ml of water. Cool in water and ice.
Use the KitchenAid blender to make the mayonnaise in the traditional manner.Cut the squid into thin julienne strips, and cube the pancetta. Sauté the squid with the pancetta in a very hot pan, and then place on plates to create “spaghetti-style” mounds.Finish with a spoonful of mayonnaise.
Squid Carbonara
7271 >
Recipes Video
>>
Recipe Step by Step >
Squid Carbonara
7473 >
Recipes Video
>
Step by Step >

Sea Bass with Myrtle
7675 >
Recipes

Ingredients (serves 4)
1 wild sea bass (1 kg)
A few sprigs of myrtle
Salt and pepper
This recipe captures all the essence and flavour of a Mediterranean summer holiday. From the first taste, this delicious dish delights the taste buds, eliciting the pure pleasure of savouring Italy’s unbeatable cuisine.
Method
Clean the sea bass, remove the scales and the gut the fish. Fillet and carefully bone the bass. Next, divide each fillet lengthways in two.Lay the sprigs of myrtle on the steam grid of the Artisan steam accessory so that they almost cover it. Arrange the four portions of sea bass fillet on top of the myrtle. Place the Artisan steam accessory in the oven.
COOKING INSTRUCTIONS: Cover with the glass lid, start the Pure Steam function, and cook for 25 minutes with 500 ml of water.
Serve straight away, seasoning with salt and pepper to taste. Wonderful when accompanied by steamed vegetables and mayonnaise.
Sea Bass with Myrtle
7877 >
Recipes
>
Recipe

Russian Salad with Scampi
8079 >
Recipes Step by Step >
Video
>
Ingredients (serves 4)
2 carrots
100 g peas
1 large potato
12 fresh scampi
For the mayonnaise:2 eggs
300 g seed oil
Juice of ½ lemon
Salt and pepper
A new interpretation of an international culinary classic is always an ambitious idea. Each ingredient helps to transform this modern rendition into an elegant and sophisticated alternative, with scampi as the refined pièce de résistance.
Method
Clean and peel the carrots and potatoes and cut into small dice using the KitchenAid Artisan Food Processor.Arrange the vegetables (including the peas) on the steam grid of the Artisan steam accessory.Shell and remove the veins from the scampi and lay them on top of the vegetables. Now place the Artisan steam accessory in the oven.
COOKING INSTRUCTIONS: Cover with the glass lid and set the Pure Steam function to cook for 12 minutes with half a litre of water.Make the mayonnaise in the traditional manner.To serve, first place the vegetables on the plate, followed by the mayonnaise and finally the scampi.
Russian Salad with Scampi
8281 >
Recipes Video
>>
Recipe Step by Step >

Russian Salad with Scampi
8483 >
Recipes Video
>
Step by Step >

Egg and Asparagus
8685 >
Recipes

Ingredients (serves 4)
8 eggs (including the shells)
20 asparagus
Salt
Pepper
Extra-virgin olive oil
A colour extravaganza. This dish may appear simple but it is the quality of the ingredients and the cooking times that make all the difference. It represents another reminder of the need to take time out and enjoy the pleasures of life by savouring nature’s little treasures.
Method
Arrange the asparagus and the whole eggs (taking care not to break the shells) on the steam grid of the Artisan steam accessory and place in the oven.
COOKING INSTRUCTIONS: Cover with the glass lid, select Pure Steam and cook for 20 minutes with 1 litre of water. Remove from the oven. The eggs will now be soft boiled and ready to peel. Dish up the eggs together with the asparagus and season with salt and pepper and a drizzle of oil before serving.
Egg and Asparagus
8887 >
Recipes
>
Recipe

Bread is a symbolic, almost magical food.
The smell of freshly-baked bread evokes happy
memories and stirs powerful emotions.
With your new KitchenAid oven and its highly-
specialised functions, you can explore the right way
to prove dough and bake. Discover the satisfaction
of creating different types of bread, pizza, fabulous
focaccia and moreish grissini in the comfort of your
own kitchen.
Take the pleasure of cooking to new height, and make
your dining experience utterly unique.
BAKERY FUNCTIONS TAKING THE PLEASURE OF COOKING TO NEW HEIGHTS
9089 >
Recipes
Crunchy Crackers
9291 >
Recipes Step by Step >

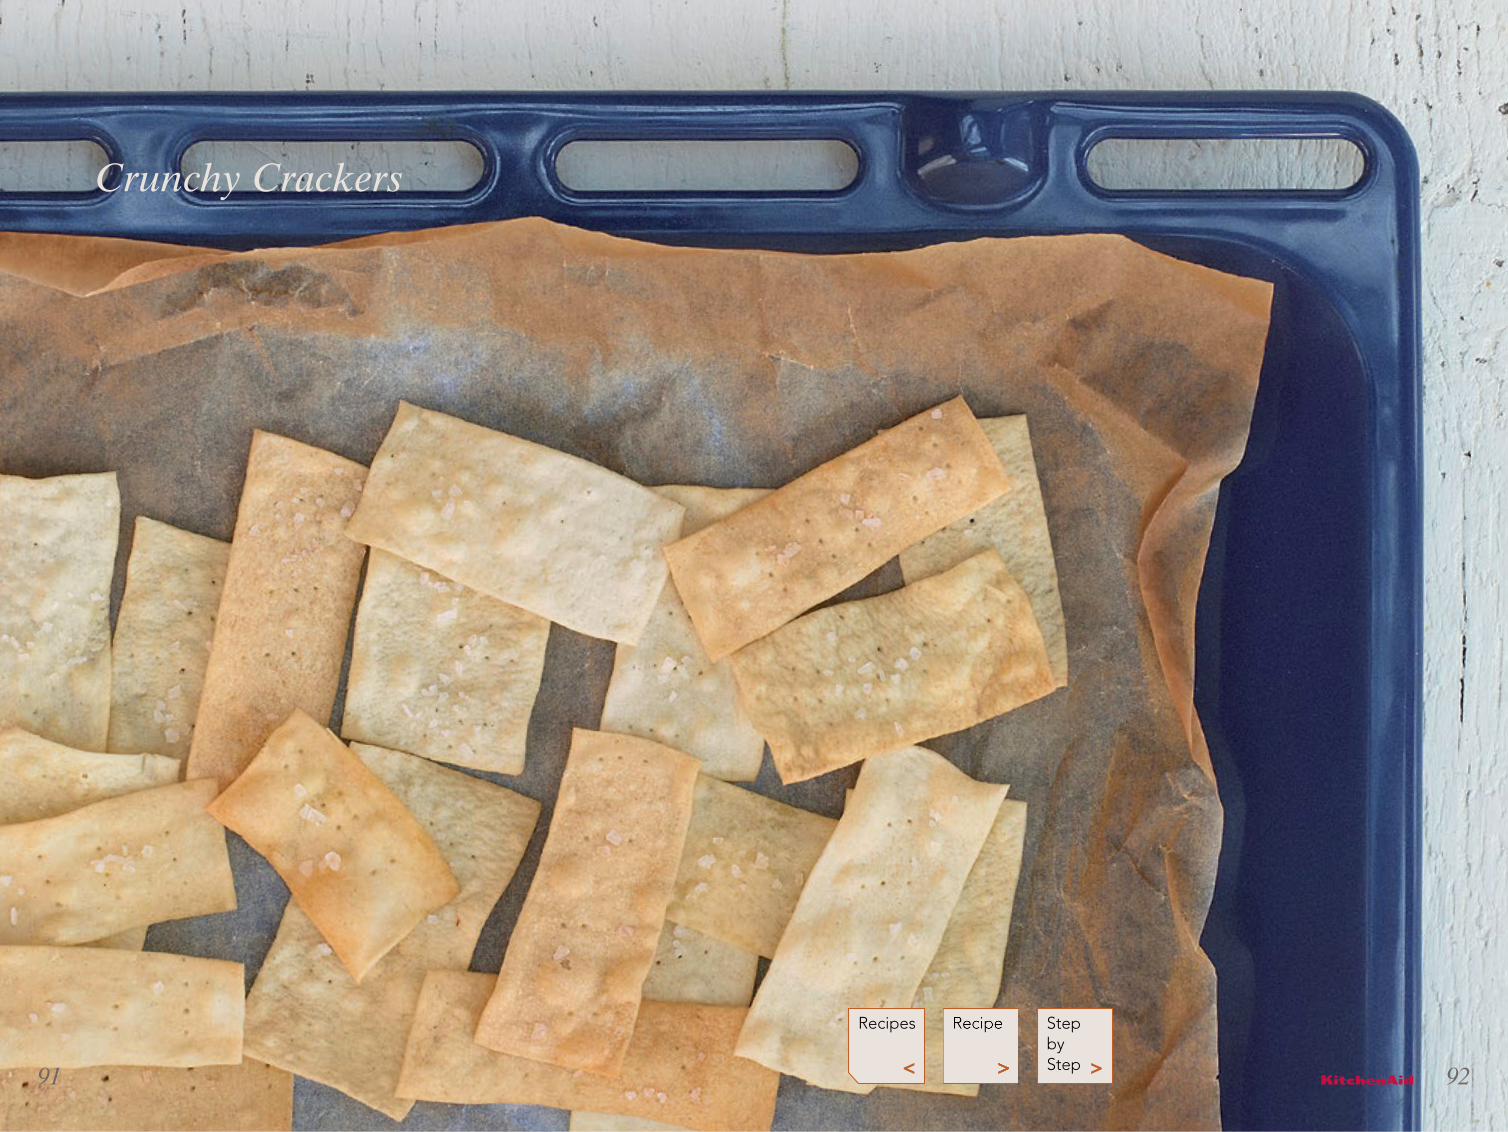
Ingredients
1 kg soft wheat flour (type “00”)
25 g yeast
500 g warm water
50 g lard
A pinch of salt
Oil
An alternative to bread for celebratory meals. This recipe reflects bygone days, when our grandmothers created epicurean magic with simple ingredients.
Method
Mix the flour, water and yeast together, adding the salt last, until you have a smooth, evenly mixed dough.
Leave the dough to rest in the oven (select the Rising mode from the Special Functions and set to 40°C) until it has doubled in size. Next roll it out into a thin sheet, and brush with the oil.
COOKING INSTRUCTIONS: Set the professional Bakery function to the Thin Pizza mode, and cook at 210°C for 3-4 minutes.
Crunchy Crackers
9493 >
Recipes
>
Recipe Step by Step >

Crunchy Crackers
9695 >
Recipes Step by Step >
Baguette
9897 >
Recipes

Ingredients
1 kg soft wheat flour (type “00”)
30 g brewer’s yeast
½ teaspoon sugar
350 ml water
2 teaspoons salt (20 g)
10 g lard
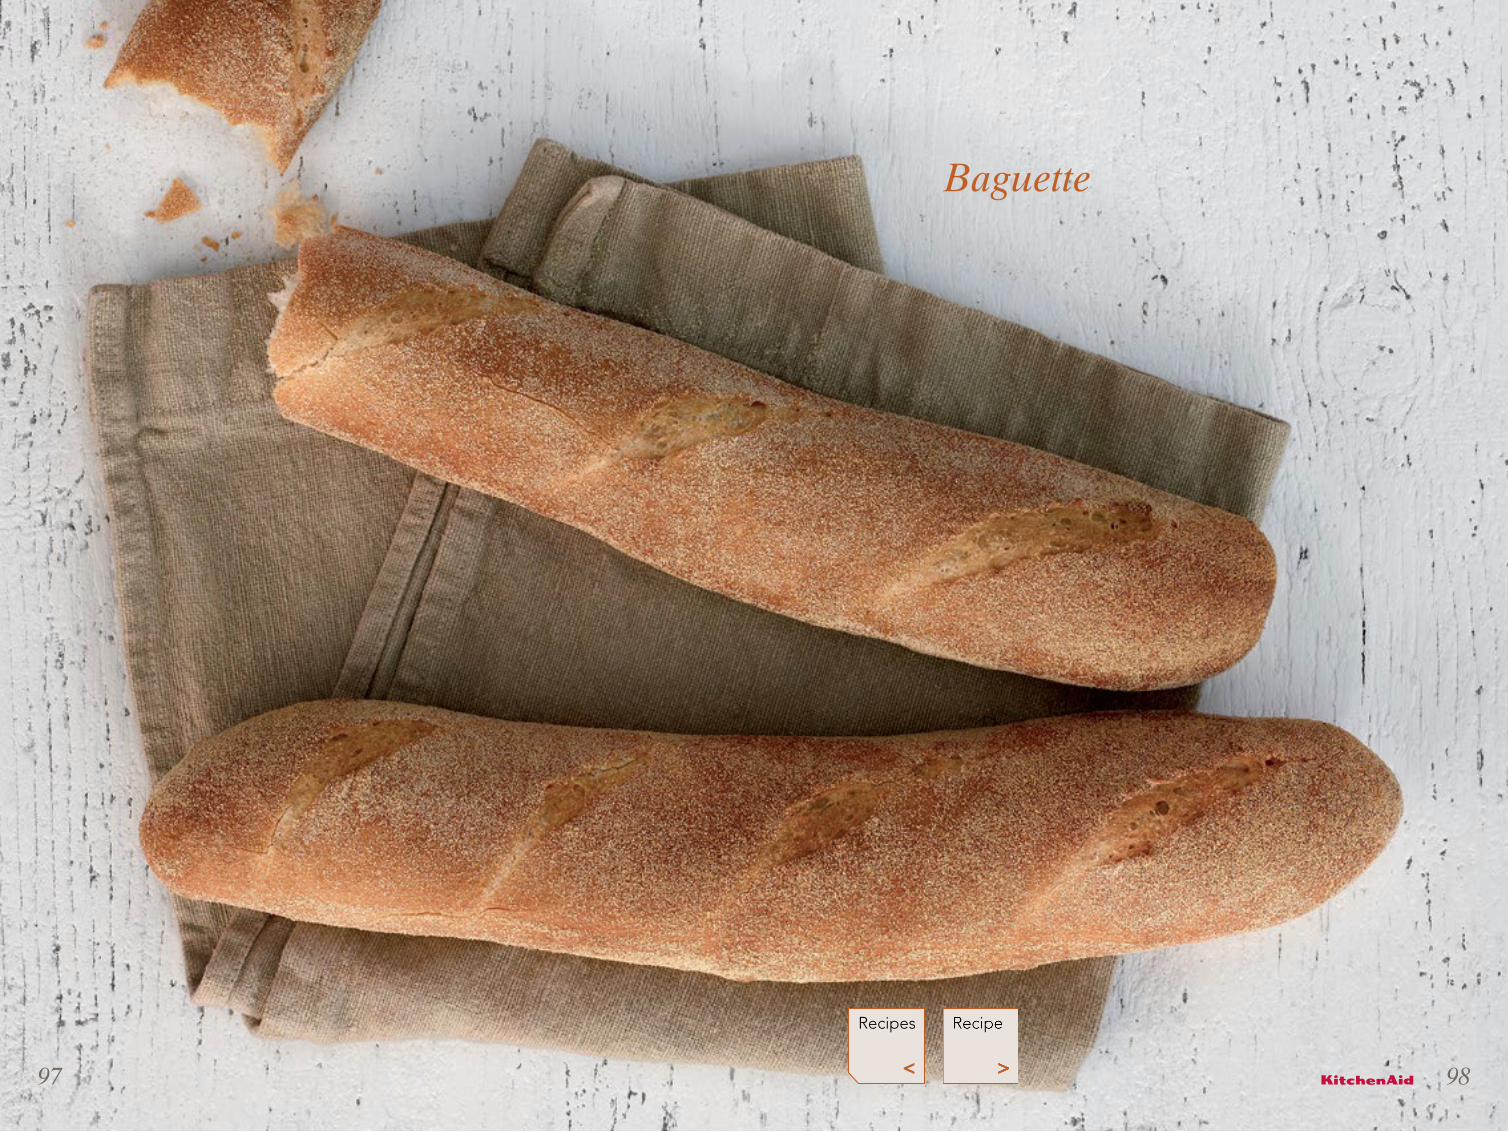
The tradition of homemade bread. The aroma of golden crusty loaves wafting from the oven. The satisfaction of creating a true masterpiece of essential simplicity.
Method
Make the dough using half the flour, half the water and all of the yeast. Leave the dough to rest until it doubles in size (it is best if made the evening before). Place in the Artisan food mixer, add the rest of the ingredients and mix for 5 minutes. Leave the dough to rest once again until it doubles in size.Next form four baguette shapes each weighing 350 g.Leave the dough to rest until it doubles in size (select the Rising mode from the Special Functions and set to 40°C). Remove the baguettes from the oven as soon as they have risen. Set the oven to bake the baguettes.
COOKING INSTRUCTIONS: Select the Baguette mode from the professional Bakery functions and cook at 200°C for 20 minutes. Place in the oven when the oven indicates it is up to temperature.
Baguette
10099 >
Recipes
>
Recipe

Ricotta, Saffron, Lardo and Coffee Focaccia
102101 >
Recipes Step by Step >
Video
>
This recipe features bold flavours and original pairings and is ideal for serving with aperitifs. The lard and milk create a soft focaccia with a perfect golden, crunchy base. The sweet saffron-scented ricotta and the rich, smooth flavour of the lardo add an edge of rustic authenticity. Coffee powder may be an unusual finishing touch yet its roasted aroma lends a sense of perfection to the entire creation.
Method
Mix all the focaccia ingredients together in the mixer until you have smooth, evenly mixed dough. As soon as it starts to wrap itself around the dough hook, remove the dough from the mixer and leave it to prove until it has doubled in size (select the Rising mode from the Special Functions and set to 40°C). Grease a baking sheet with extra-virgin olive oil. Roll out the dough, place on the baking sheet and put it back in the oven to prove until it has doubled in size.
COOKING INSTRUCTIONS: Set the professional Bakery function to the Traditional Bread mode, and cook at 190°C for 10-12 minutes. After it has been cooking for 5-6 minutes, take out the baking sheet and turn the focaccia over. Place back in the oven until it is done. Mix the ricotta and saffron together in the blender and add salt if necessary. Fill a piping bag with the mixture. Garnish the focaccia with the ricotta, followed by the lardo and then sprinkle with the coffee powder.
Ricotta, Saffron, Lardo and Coffee Focaccia
Ingredients
1 kg soft wheat flour (type “00”)
300 g water
300 g milk
100 g lard
2 teaspoons salt (20 g)
A pinch of sugar
40 g brewer’s yeast
Extra-virgin olive oil
For the topping:300 g fresh cow’s milk ricotta
A sachet of saffron
(to add colour to the ricotta)
20 slices of Italian lardo (or pork fat)
A pinch of coffee powder
104103 >
Recipes Video
>>
Recipe Step by Step >

Ricotta, Saffron, Lardo and Coffee Focaccia
106105 >
Recipes Video
>
Step by Step >

Bacon and Vegetable Quiche
108107 >
Recipes

Made with almond flour and corn starch, the shortcrust pastry base of this quiche is irresistibly crumbly with a delectable aroma, providing a splendid complement for the lusciously smooth flavour of the filling.
Method
Make the shortcrust pastry by mixing the eggs with the butter, which should first be softened to room temperature. Add the salt, followed by the flour, corn starch and Grana Padano cheese, and mix. Leave to rest in the fridge for 2 hours. Roll out the pastry to your preferred thickness (5 mm, if possible), place a sheet of greaseproof paper on the pastry and place some baking beads in the middle of the pastry case; this prevents the pastry from rising up as it bakes.
COOKING INSTRUCTIONS: Select the Savoury Pie mode from the professional Bakery functions and bake at 170°C for 13-15 minutes until it is cooked but not golden brown. Take the pastry case out of the oven. Remove the baking beads and the greaseproof paper and leave to cool. To make the filling use the KitchenAid cordless hand blender to mix all the ingredients together. Lastly, add the sautéed vegetables with extra-virgin olive oil and salt.
Pour the mixture into the middle of the pastry case and bake in the oven using the Savoury Pie mode from the professional Bakery functions at 170°C for about 18 minutes.
Bacon and Vegetable Quiche
Ingredients(Two 16 cm round cake tins)
For the pastry:250 g soft flour
25 g corn starch
1 egg
20 g egg yolks
30 g Grana Padano cheese
20 g almond flour
150 g butter
Salt to taste
For the filling:4 eggs
160 ml cream
60 g Grana Padano cheese
(aged 18 months)
200 g sautéed vegetables
50 g bacon
Aromatic herbs to taste
110109 >
Recipes
>
Recipe

There is an art to making pastries and cakes that
demands more technical precision than any other
culinary skill.
Your KitchenAid oven ensures precision performance
with functions specially developed to suit every cooking
method from proving to controlled baking.
Now you can make perfect shortcrust pastry, choux
pastry, loaf cakes and sponge cakes time after tim, and
create sublime sweets and desserts.
The reliability and precision of KitchenAid technology
will be with you every step of the way as you unleash
your passion and creativity in the kitchen
PASTRY FUNCTIONSCREATIVE FLAIR AND TECHNICAL PRECISION
112111 >
Recipes

Choux Buns with Extra-virgin Olive Oil
114113 >
Recipes

Ingredients (serves 4)
160 ml milk
180 ml water
150 ml extra-virgin olive oil
A pinch of salt
½ teaspoon caster sugar
180 g flour
5 eggs
Made with olive oil instead of butter, these light, airy choux buns offer a Mediterranean interpretation of a classic recipe. Perfect with either a savoury or sweet filling, they can be served as a starter or dessert accompanied by appetising sauces or smooth, fluffy creams.
Method
Place the milk, oil and water in a saucepan and mix together. Bring to the boil, adding the salt and sugar. Next add the flour – all in one go – and beat the mixture vigorously. Cook for about 3 minutes. Pour the mixture into the KitchenAid Artisan Stand Mixer and whisk at medium speed (4-5). Add the eggs one at a time and beat until you have a smooth, glossy paste. Place the mixture in a piping bag and create the classic choux buns.
COOKING INSTRUCTIONS: Select the Pâte à Choux mode from the professional Pastry functions and cook at 160°C for 15 minutes.
Choux Buns with Extra-virgin Olive Oil
116115 >
Recipes
>
Recipe

Almond Cake
118117 >
Recipes

Ingredients
440 g icing sugar
175 g soft wheat flour (type “00”)
175 g almond flour
Salt to taste
½ teaspoon baking powder
12 egg whites
230 g soft butter
Rind of 2 oranges
Rosemary
The orange rind adds a fragrant hint of citrus fruit while the almond flour makes this cake beautifully moist and dense so it simply melts in your mouth. Take time out to relax in the afternoon with a slice of almond cake and a nice hot cup of tea.
Method
Mix all the ingredients together and leave to rest overnight. Grease and flour two 16 cm tins and pour the mixture into the tins.
COOKING INSTRUCTIONS: Select the Plum Cake mode from the professional Pastry functions. Set the temperature to 180°C and bake for about 15 minutes. If a cocktail stick inserted in the middle comes out clean, the cake is done.
As the cake is made with almond flour and no egg yolks, it will be splendidly soft and slightly moist.
Almond Cake
120119 >
Recipes
>
Recipe

Chocolate Biscuits with Chocolate Cream
122121 >
Recipes Step by Step >
Video
>
Ingredients
For the biscuits:110 g butter
35 g sugar
90 g demerara sugar
20 g desiccated coconut
1 teaspoon baking powder
125 g soft wheat flour (type “00”)
110 g dark chocolate
Salt to taste
For the chocolate cream:250 g milk
5 g isinglass
425 g milk chocolate
30 g cocoa butter
50 g cream
Enjoy the timeless indulgence of chocolate with this decadent combination.
Method
BISCUITS Mix the butter together with the white sugar and the demerara sugar in the stand mixer using the flat beater. Melt the chocolate in the microwave and pour it slowly over the butter. Next, sieve in the flour and the salt and mix well. Cut the biscuits into whatever shape you wish. COOKING INSTRUCTIONS: Select the Short Pastry mode from the professional Pastry functions, and bake at 160°C for 12 minutes.
CREAMMelt the chocolate in the microwave.Soften the isinglass in cold water and then drain.Bring the milk to the boil, remove from the heat and mix in the isinglass. Pour the milk over the chocolate a little at a time, and mix until you have a perfectly glossy emulsion. Blend in the cream all in one go.
Leave the mixture to rest in the fridge for 12 hours. Spread the chocolate cream on the biscuits and serve with soft fruit.
Chocolate Biscuits with Chocolate Cream
124123 >
Recipes Video
>>
Recipe Step by Step >

Chocolate Biscuits with Chocolate Cream
126125 >
Recipes Video
>
Step by Step >
Zabaglione and Strawberries Au Gratin
128127 >
Recipes
Ingredients (serves 4)
8 egg yolks
100 g sugar
250 g sweet dessert wine (muscatel)
100 g strawberries
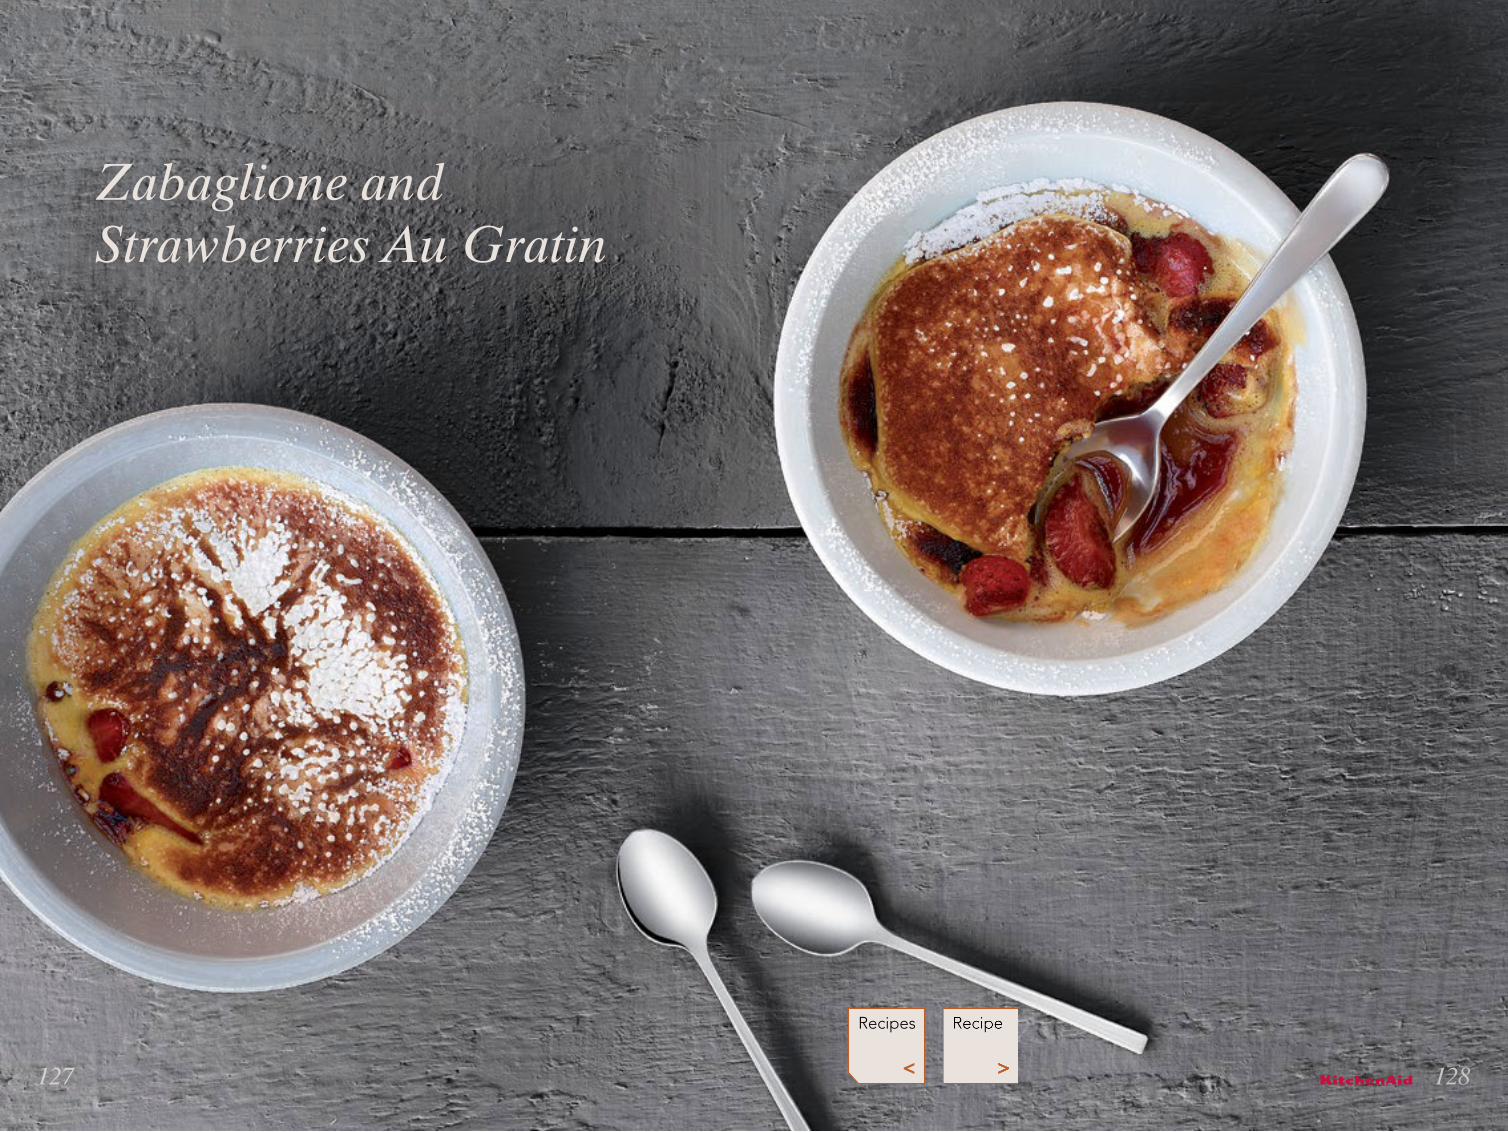
Rich, smooth zabaglione and sweet-scented, juicy strawberries all in one seductive dish.
Method
Over a bain-marie, beat the egg yolks with the sugar and the dessert wine for about 15 minutes, until you have a dense, compact mixture. You should be able to “write” on the cream with the whisk).
Divide the zabaglione out into dishes or bowls and arrange the finely sliced strawberries over the top
COOKING INSTRUCTIONS: Select the medium Tweli-Grill function and cook for 2 minutes or until the surface is golden brown.
Serve straight away and dust with icing sugar if you wish.
Zabaglione and Strawberries Au Gratin
130129 >
Recipes
>
Recipe
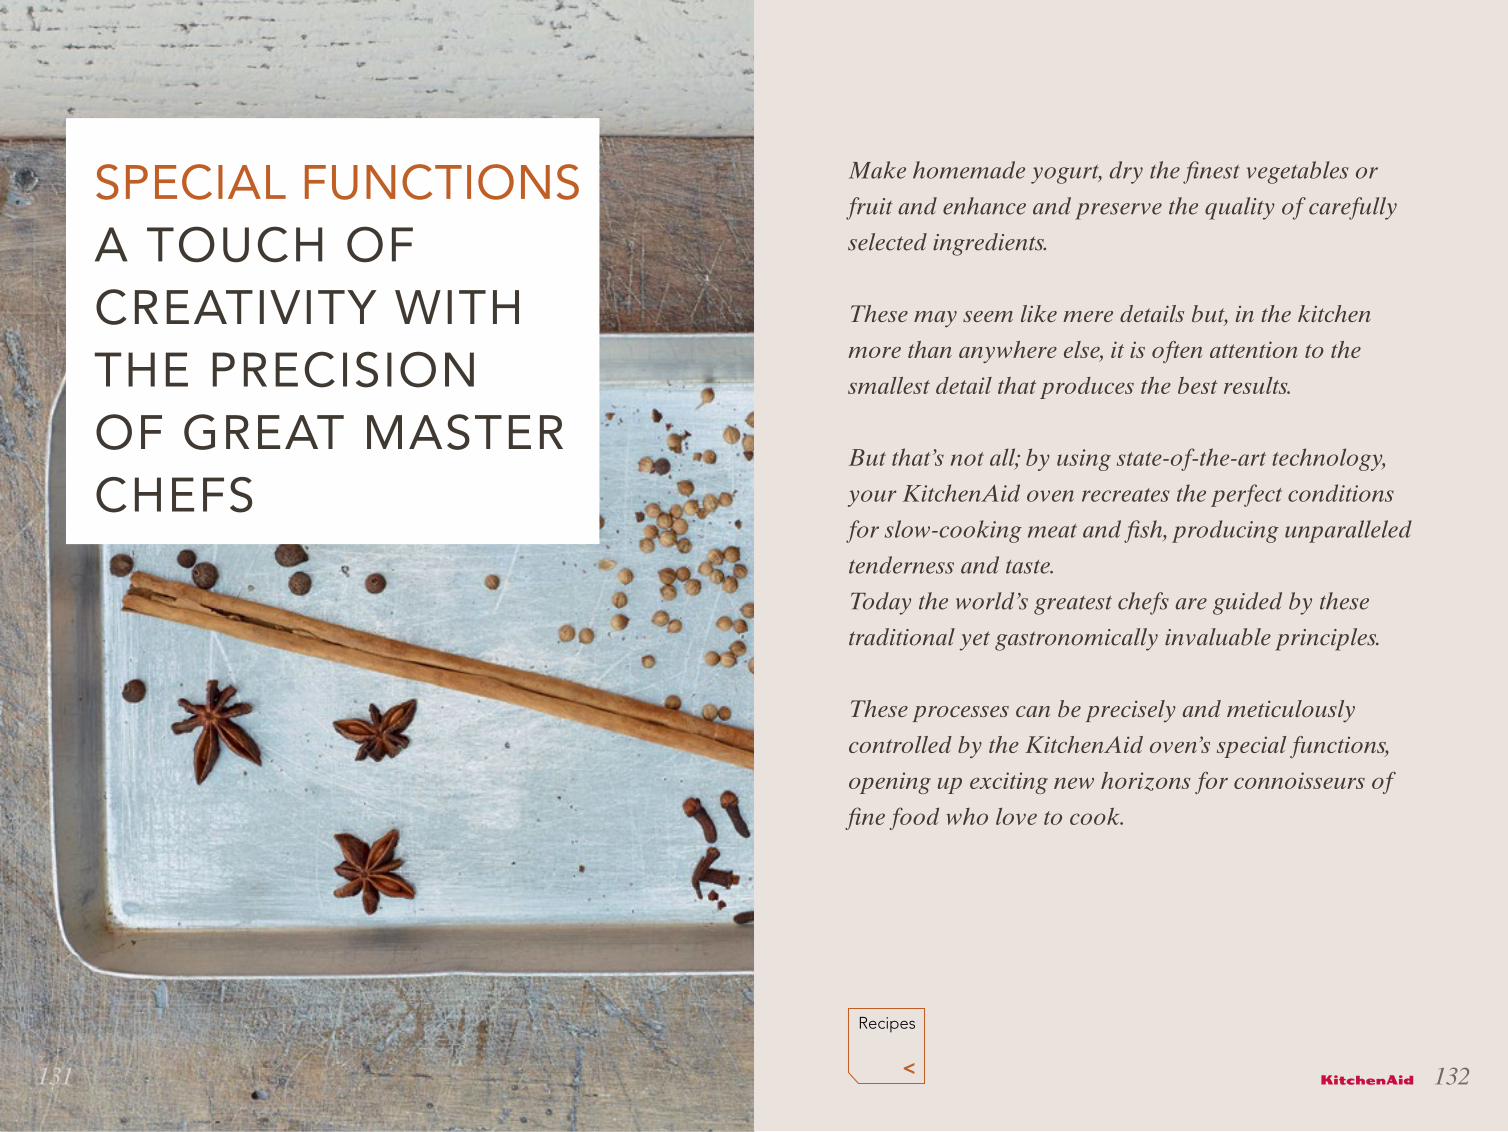
Make homemade yogurt, dry the finest vegetables or
fruit and enhance and preserve the quality of carefully
selected ingredients.
These may seem like mere details but, in the kitchen
more than anywhere else, it is often attention to the
smallest detail that produces the best results.
But that’s not all; by using state-of-the-art technology,
your KitchenAid oven recreates the perfect conditions
for slow-cooking meat and fish, producing unparalleled
tenderness and taste.
Today the world’s greatest chefs are guided by these
traditional yet gastronomically invaluable principles.
These processes can be precisely and meticulously
controlled by the KitchenAid oven’s special functions,
opening up exciting new horizons for connoisseurs of
fine food who love to cook.
SPECIAL FUNCTIONS A TOUCH OF CREATIVITY WITH THE PRECISION OF GREAT MASTER CHEFS
132131 >
Recipes

Spiced Guanciale
134133 >
Recipes

Star anise, coriander, cinnamon, cloves... the balmy, intoxicating aroma of this mix of spices is contrasted with a few sharper notes to emphasise the pork’s full, rich flavour. A dish this divine takes quite a while to cook so you need to be patient. However, your patience will be rewarded with an extravaganza of incredible flavours.
Method
Season the pork cheeks with salt and pepper. Sauté the meat in a pan over a high heat. Next, arrange the meat in a deep ovenproof casserole dish and lower the heat. Add the spices, half an onion chopped into small pieces, celery and carrots.Add the white wine and, once it has evaporated, cover with the vegetable stock. Put the lid on the dish and place in the oven.
COOKING INSTRUCTIONS: Select the Slow Cooking Meat function and cook at 90°C for 8 hours. Next boil the cooking juices and reduce by half to create a delicious sauce. Carve the pork cheeks into slices, pour the reduced sauce over the meat and serve.
Spiced Guanciale
Ingredients (serves 4)
4 pork cheeks
Salt
Pepper
Spices (star anise, coriander,
cinnamon, cloves)
Celery, carrots, onion.
30 g white wine
Vegetable stock
136135 >
Recipes
>
Recipe

Candied Fennel
138137 >
Recipes

Ingredients
3 fennel
For the syrup:750 g water
500 g sugar
Now for something slightly different... finely sliced fragrant fennel dipped in a sugar syrup and dried until the slices are irresistibly crisp and crunchy. Excellent as a snack or a striking garnish for sweet or savoury dishes, such as baccalà mantecato (Venetian creamy whipped cod) or butter and anchovy canapés.
Method
Finely slice the fennel to just less than one millimetre thick.Boil the sugar in the water for 3 minutes until it forms a syrup that can be poured over the slices of fennel.
When the syrup has cooled, dry the fennel and arrange the slices on the drying grill. The grill should be protected with a sheet of greaseproof paper or a Silpat baking mat to prevent the caramelised sugar from sticking the fennel to the grill.
COOKING INSTRUCTIONS: Select the Drying mode from the special functions, and cook for 6/8 hours.
Candied Fennel
140139 >
Recipes
>
Recipe

® KitchenAid is a registered commercial trademark of KitchenAid, U.S.A.
© 2011. All exclusive rights reserved.
Photo: Francesco Majo
Art Direction: Carlo Magnoli (MMG)