underhood installation instructions visible fasteners word - underhood installation instructions...
TRANSCRIPT
Underhood Bowtie Installation Instructions
Page | 1
Time needed for this job is about ½ hour, after you have your tools with you at the car. If it takes you longer do not worry. Take
your time, and work at a comfortable pace. Please completely read these instructions prior to beginning. It will only take you a
few minutes to read. Do not skip any of the steps.
Tools needed: Please gather all tools prior to beginning installation.
1. One Paint marker or some method to mark location of bolt holes on the hood liner.
2. One 7/32 Allen wrench to tighten screws with.
3. One exacto knife to cut small X’s in liner at screw hole locations.
4. 9/16 Open end wrench, or socket to tighten nylon lock nuts.
5. Flat head screwdriver, for removing hood liner retainers
6. Gloves to protect your hands.
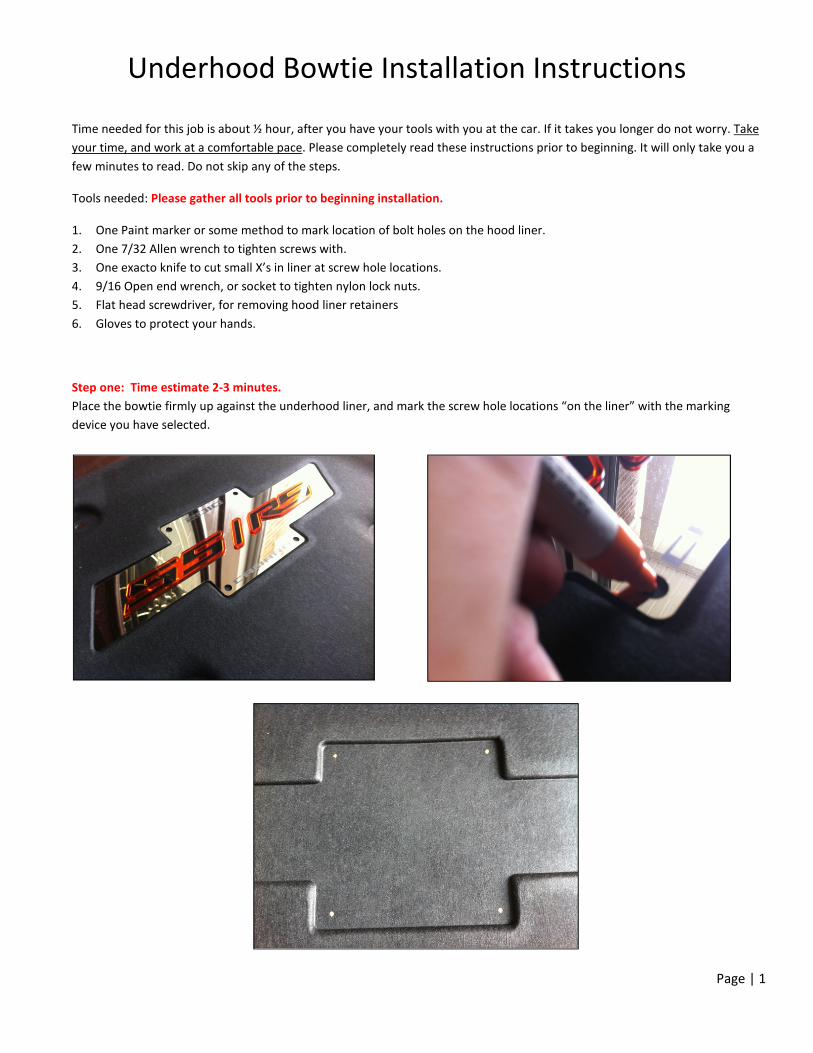
Step one: Time estimate 2-3 minutes.
Place the bowtie firmly up against the underhood liner, and mark the screw hole locations “on the liner” with the marking
device you have selected.

Underhood Bowtie Installation Instructions
Page | 2
Step Two: Time estimate 5-7 minutes.
Take your exacto knife and cut (4) “X” patterns in the hood insulation, where you placed the screw location marks from step
number one. Make sure these “X” cuts are large enough for the screws to go through.
The purpose of the “X” cut is to avoid making an actual hole in your liner. They will also help hold the screws in place, while you
are starting the nylon lock nuts.
Step Three: Time estimtate 10 minutes.
Remove the (8) eight hood liner retainers from the hood liner. You will get better results by removing it completely.
Using the screwdriver, only loosen the retainers. Then use your finger to grasp the retainer, and slowly, but firmly pull it out. Do
not bend the retainers; pull them out in a straight motion. They will be reused, when you are finished.

Underhood Bowtie Installation Instructions
Page | 3
Step Four: Time estimate 10 minutes.
Gather together all of the hardware we supplied to you.
4 Chrome Plated Allen Screws: 4 Nylon Lock Nuts: 4 Washers:
The assembly method is:
1. Place the screws through the holes on the front of the bowtie, and throught the “X’s” in the liner.
2. Then place a washer first, and a nylon locknut last from the backside of the insulation, onto each screw.
3. Hold the screw stationary, and tighten the nuts until tight. This will eliminate the screw from rotating on the surface of the
bowtie. Do not overtighten, or the washers can dig into the liner.

Underhood Bowtie Installation Instructions
Page | 4
Step Five: Time estimate 5 minutes.
Align hood liner back up to underside of the hoods, and reinsert retainers. Do not bend them. Press straight in to the holes until
firmly seated.
You are finished, Congratulations!!