underwater photographyunderwater photography · underwater photographyunderwater photography a web...
TRANSCRIPT
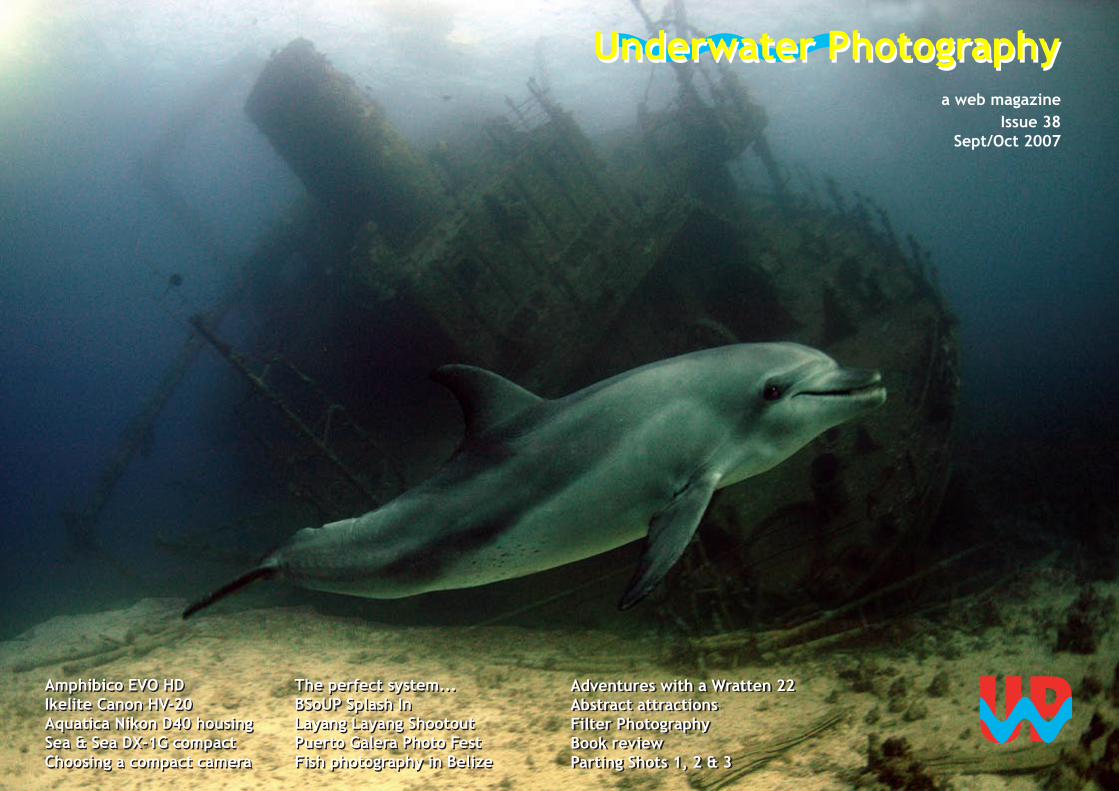
Amphibico EVO HDIkelite Canon HV-20Aquatica Nikon D40 housingSea & Sea DX-1G compactChoosing a compact camera
Underwater PhotographyUnderwater Photographya web magazine
Issue 38 Sept/Oct 2007
Amphibico EVO HDIkelite Canon HV-20Aquatica Nikon D40 housingSea & Sea DX-1G compactChoosing a compact camera
The perfect system... BSoUP Splash InLayang Layang ShootoutPuerto Galera Photo FestFish photography in Belize
The perfect system... BSoUP Splash InLayang Layang ShootoutPuerto Galera Photo FestFish photography in Belize
Adventures with a Wratten 22Abstract attractions Filter PhotographyBook reviewParting Shots 1, 2 & 3
Adventures with a Wratten 22Abstract attractions Filter PhotographyBook reviewParting Shots 1, 2 & 3

Join now as Charter memver and you will be part of our quest for discoveries and a partner in the conservation of our ocean planet. You will be eminently recognised for sharing our vision with your name inserted in all future editions of Ocean Geographic and in the web domain of Ocean Geographic Society.
Membership Benefits:Four issues - Ocean Geographic JournalFree pass to the World Festival of Underwater Pictures - Antibes Free Master pass to ‘Celebrate the Sea Festival’Ocean Geographic Limited edition print - (Dec 2008)Membership to OneOcean Alliance Frequent Diver program - 1000 bonus pointsAustralia and Singapore A/S$50 per yearCharter Member International: USD88 (airmail) or Classic One year subscription for Ocean Geographic - USD 68 (airmail)www.OceanGeographic.org : www.OGSociety.org
Ocean Geographic is a high quality photographic journal that features the finest arts and images of the sea. Each edition of Ocean Geographic is a visual adventure of discoveries, exploration and dives into provoking issues that guarantee to inform, inspire and invigorate. The board of editors and senior contributors are comprised of Michael AW, David DOUBILET, Dr Gerry ALLEN, Doug PERRINE, Dr Carden WALLACE, Emory KRISTOF, Stan WATERMAN, Dr Alex MUSTARD, Jennifer HAYES, Christopher LEE, WYLAND and Amos NACHOUM.
‘Ocean Geographic’ - its wonderful! Fabulous imagery, reproduction and features - pure class! I’m still enjoying it!
Gemma Webster, Competition OfficerShell Wildlife Photographer of the Year, The Natural History Museum, UK
38/3www.uwpmag.com
Underwater PhotographyA web magazine
Sept/Oct 2007
Underwater PhotographyContents
5 News & Travel15 New Products
22 BSoUP Splash In
24 Puerto Galera
27 Layang Layang
Underwater Photography2001 - 2007 © PR Productions
Publisher/Editor Peter Rowlandswww.pr-productions.co.uk
29 Compact choice
by Michael Wicks
32 Perfect system
by Don Silcock
36 Belize fish
by Gearoid Lane
42 Wratten 22 trials
by Paul R. Carre
47 Abstract
by Mark Webster
52 Shooting filters
by Alex Mustard
60 Book review by Peter Rowlands
62 Parting Shots
Cover shot byRalph Mortimore

www.urprofilters.comClick on the link below to go to the Tech-Talk Newsletter
38/�www.uwpmag.com
News, Travel & Events
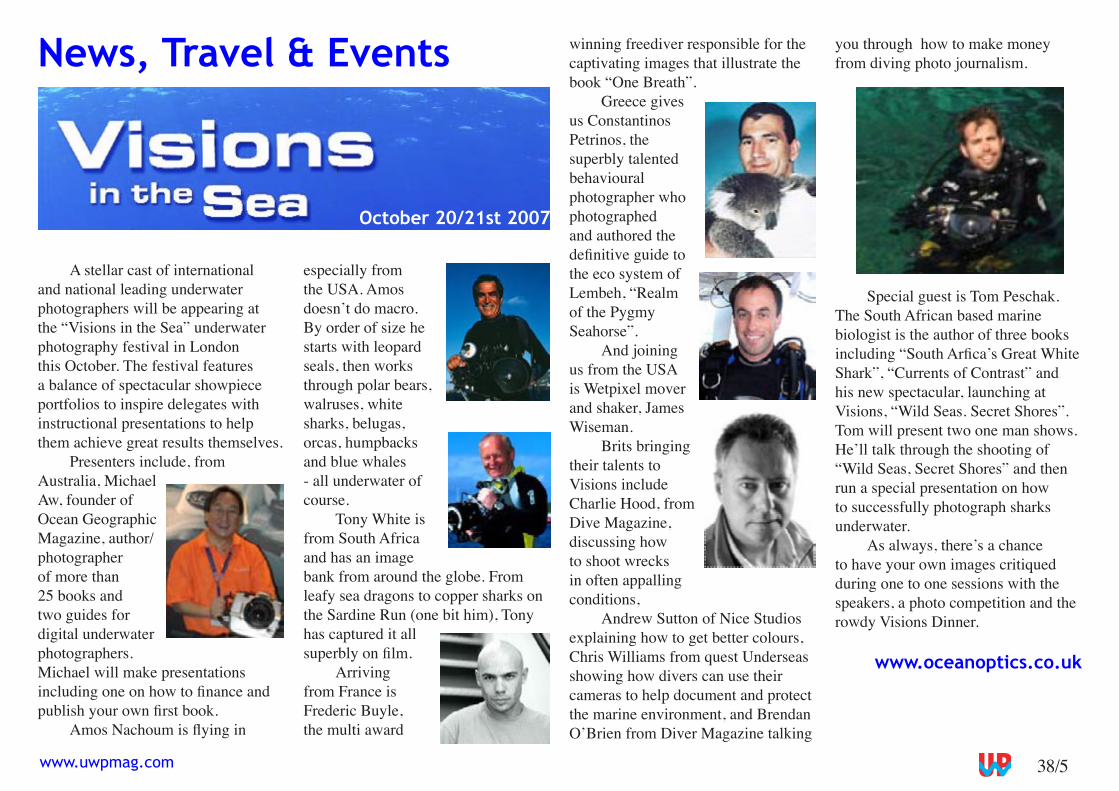
A stellar cast of international and national leading underwater photographers will be appearing at the “Visions in the Sea” underwater photography festival in London this October. The festival features a balance of spectacular showpiece portfolios to inspire delegates with instructional presentations to help them achieve great results themselves.
Presenters include, from Australia, Michael Aw, founder of Ocean Geographic Magazine, author/photographer of more than 2� books and two guides for digital underwater photographers. Michael will make presentations including one on how to finance and publish your own first book.
Amos Nachoum is flying in
especially from the USA. Amos doesn’t do macro. By order of size he starts with leopard seals, then works through polar bears, walruses, white sharks, belugas, orcas, humpbacks and blue whales - all underwater of course.
Tony White is from South Africa and has an image bank from around the globe. From leafy sea dragons to copper sharks on the Sardine Run (one bit him), Tony has captured it all superbly on film.
Arriving from France is Frederic Buyle, the multi award
October 20/21st 2007London
winning freediver responsible for the captivating images that illustrate the book “One Breath”.
Greece gives us Constantinos Petrinos, the superbly talented behavioural photographer who photographed and authored the definitive guide to the eco system of Lembeh, “Realm of the Pygmy Seahorse”.
And joining us from the USA is Wetpixel mover and shaker, James Wiseman.
Brits bringing their talents to Visions include Charlie Hood, from Dive Magazine, discussing how to shoot wrecks in often appalling conditions,
Andrew Sutton of Nice Studios explaining how to get better colours, Chris Williams from quest Underseas showing how divers can use their cameras to help document and protect the marine environment, and Brendan O’Brien from Diver Magazine talking
you through how to make money from diving photo journalism.
Special guest is Tom Peschak. The South African based marine biologist is the author of three books including “South Arfica’s Great White Shark”, “Currents of Contrast” and his new spectacular, launching at Visions, “Wild Seas. Secret Shores”. Tom will present two one man shows. He’ll talk through the shooting of “Wild Seas, Secret Shores” and then run a special presentation on how to successfully photograph sharks underwater.
As always, there’s a chance to have your own images critiqued during one to one sessions with the speakers, a photo competition and the rowdy Visions Dinner.
www.oceanoptics.co.uk
38/� www.uwpmag.com
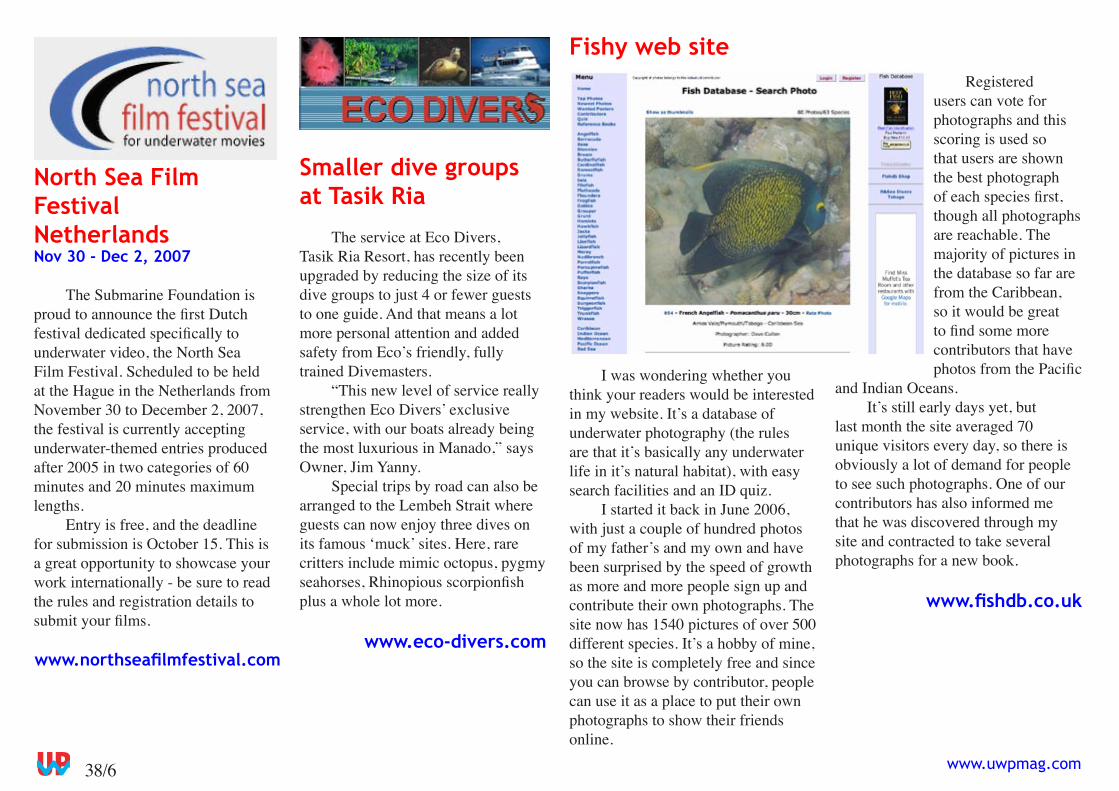
Fishy web site
I was wondering whether you think your readers would be interested in my website. It’s a database of underwater photography (the rules are that it’s basically any underwater life in it’s natural habitat), with easy search facilities and an ID quiz.
I started it back in June 200�, with just a couple of hundred photos of my father’s and my own and have been surprised by the speed of growth as more and more people sign up and contribute their own photographs. The site now has 1�40 pictures of over �00 different species. It’s a hobby of mine, so the site is completely free and since you can browse by contributor, people can use it as a place to put their own photographs to show their friends online.
Registered users can vote for photographs and this scoring is used so that users are shown the best photograph of each species first, though all photographs are reachable. The majority of pictures in the database so far are from the Caribbean, so it would be great to find some more contributors that have photos from the Pacific
and Indian Oceans. It’s still early days yet, but
last month the site averaged 70 unique visitors every day, so there is obviously a lot of demand for people to see such photographs. One of our contributors has also informed me that he was discovered through my site and contracted to take several photographs for a new book.
www.fishdb.co.uk
Smaller dive groups at Tasik Ria
The service at Eco Divers, Tasik Ria Resort, has recently been upgraded by reducing the size of its dive groups to just 4 or fewer guests to one guide. And that means a lot more personal attention and added safety from Eco’s friendly, fully trained Divemasters.
“This new level of service really strengthen Eco Divers’ exclusive service, with our boats already being the most luxurious in Manado,” says Owner, Jim Yanny.
Special trips by road can also be arranged to the Lembeh Strait where guests can now enjoy three dives on its famous ‘muck’ sites. Here, rare critters include mimic octopus, pygmy seahorses, Rhinopious scorpionfish plus a whole lot more.
www.eco-divers.com
North Sea Film Festival NetherlandsNov 30 - Dec 2, 2007
The Submarine Foundation is proud to announce the first Dutch festival dedicated specifically to underwater video, the North Sea Film Festival. Scheduled to be held at the Hague in the Netherlands from November 30 to December 2, 2007, the festival is currently accepting underwater-themed entries produced after 200� in two categories of �0 minutes and 20 minutes maximum lengths.
Entry is free, and the deadline for submission is October 1�. This is a great opportunity to showcase your work internationally - be sure to read the rules and registration details to submit your films.
www.northseafilmfestival.com
38/7www.uwpmag.com
U p c o m i n g I n t e r n a t i o n a l P h o t o & V i d e o C o m p e t i t i o n s
East Midlands Underwater PhotographersTony WhiteTuesday October 16th
Tuesday October 1�th sees the first meeting of the East Midlands Underwater Photographers (EMUP). This is a new group which will meet monthly at Stoney Cove in Leicestershire.
Each month we will have an experienced, acclaimed and distinguished invited talker. Our first will be Tony White, who will explain his transition from topside photographer to world-renown underwater photographer. In addition members will be invited to submit photographs into a lighthearted monthly competition, which is then judged on the evening by our invited speaker.
With the advent of digital photography, the number of divers with cameras has greatly increased in the last few years. We aim to offer advice and share knowledge to get the most out of this expensive kit; many people do not know that a few simple
alterations of settings and a couple of simple rules underwater can transform anyone’s photographs.
At EMUP we aim to promote underwater photography for all abilities and aim to give talks of interest not only to those interested in underwater photography but non-photographers, topside widelife photographers and even non-divers.
This is a great opportunity for us in the East Midlands, where nearby diving and photographic opportunities are in short supply to get together to share ideas and experience. The catchment area within 1 hour of Stoney Cove is a considerable diving population, all of whom would have to travel to London for BSoUP, Manchester for the NUPG and Bristol for the BUPG. We will also put on video evenings, so it is not exclusively for stills photography.
The evening will begin at 7:30pm downstairs in Nemo Bar, Stoney Cove’s very own pub. There will be a small charge each month based on numbers attending and sponsorship obtained, further details of this charge will be provided nearer the time. For more information on EMUP and details of future meetings please visit
www.emup.org.uk
Sept 1 DigiDiver International Photo Contest (USA)
Sept 10 Just Dive 2007 Photo Contest (USA)
Sept 15 Antibes “World Festival of Underwater Pictures” (France)
Sept 15SanDisk Red Sea 2007 Eilat (Israel)
Sept 212007 LAUPS International Competition (USA)
Oct 12Sea 2007 Competition (USA)
Oct 15North Sea Film Festival (The Netherlands)
Oct 31PADI & Outdoor Photographer Aquatic Inspirations Digital Photo Contest (USA)
38/8 www.uwpmag.com
The 4�th annual LAUPS International Underwater Photo Competition is now open for entries. The deadline is Friday, September 21st.
Highlights of new rules in 2007 are:
No slides. This year we are taking only prints and digital files for still entries. Digital entries should be at least 1400x10�0 pixels.
We’ve added a “behavior” category.
Our old category “West Coast Cold Water” has been expanded
Photography Jobs Finder launches to provide the photography industry with its first dedicated recruitment website for job seekers and employers.
In a recent survey of 78 people working within the photography field 59 stated they had experienced problems when searching online for work and found it a time consuming process.
Responding to this survey the Photography Jobs Finder website (http://www.photographyjobsfinder.com) has been launched. Providing an online recruitment service dedicated to employers and jobs seekers from the photography industry, its purpose is to streamline the task of job searching.
Alex Hamer, creator of Photography Jobs Finder, says, “Being a photographer I have always
found it a laborious task when searching for work. Jobs are often scattered over many websites and there is not one dedicated location for the photography industry to visit. With Photography Jobs Finder I am trying to solve these problems and make all our lives easier!”
Photography Jobs Finder already advertises a number of jobs, ranging from freelance photography to picture editors. As well as this it provides job seekers with the ability to build their CV online for potential employers to search from and view.
Photographers can now sign up free to a weekly jobs bulletin delivered straight to their inboxes.
www.photographyjobsfinder.com
Photography Recruitment Website
11th Open FotosubIsla de El Hierro22nd - 28th October 2007
Open Fotosub Isla de El Hierro is organised by the island Government, CABILDO INSULAR DE EL HIERRO and sponsored by several private or public entities with the aim of presenting the underwater of El Hierro and its natural environment.
The competition will take place over three days. Competition timetable, including collection and delivery of memory cards will be fixed by the organization and given to each participant with all the
documentation. Each competition dive won’t last no more than �0 minutes.
www.openfotosub.com
to world- wide temperate water, including the Great Lakes and northern Europe.
We’re looking forward to seeing some great images from all you die- hard cold water divers.
Prints must be mounted. In previous years we have been soft on this rule, but unmounted prints are difficult to display and unfair to those who put in the time to follow the rules.
Rules and entry forms are available at our website.
www.laups.org
LAUPS Photo Competition
38/9www.uwpmag.com
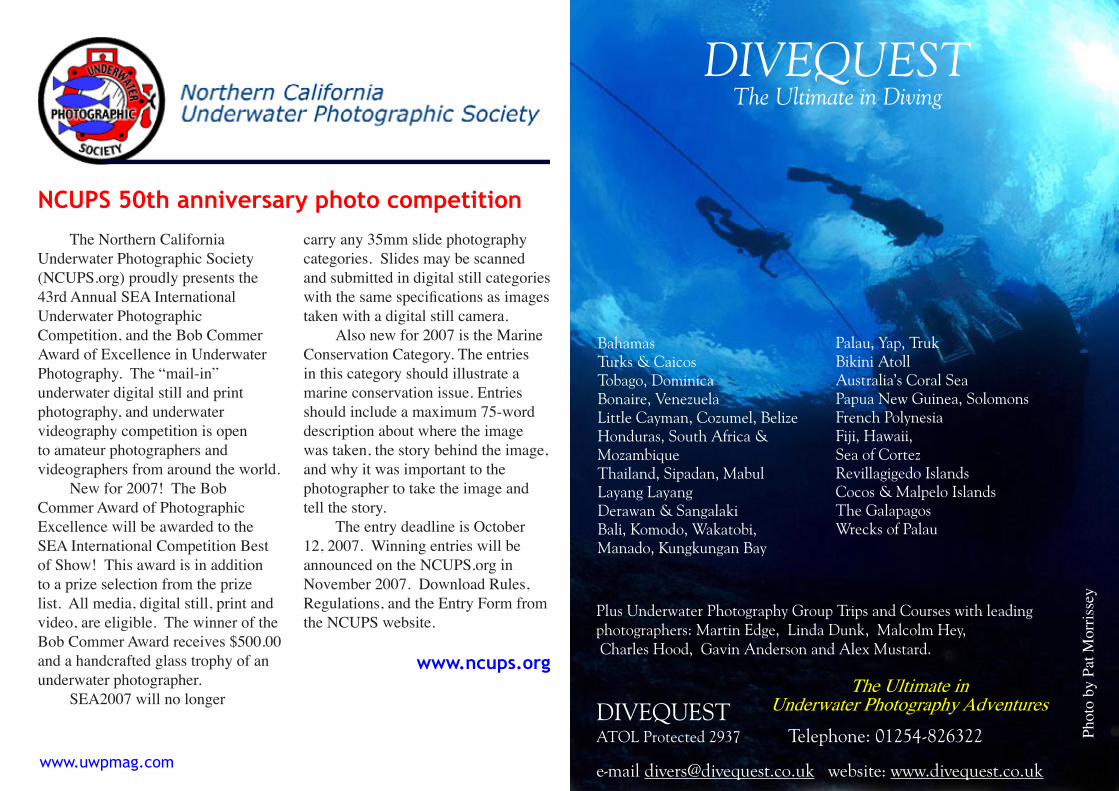
Plus Underwater Photography Group Trips and Courses with leading photographers: Martin Edge, Linda Dunk, Malcolm Hey, Charles Hood, Gavin Anderson and Alex Mustard.
DIVEQUEST ATOL Protected 2937 Telephone: 01254-826322
e-mail [email protected] website: www.divequest.co.uk
The Ultimate in Underwater Photography Adventures
Phot
o by
Pat
Mor
risse
y
DIVEQUESTThe Ultimate in Diving
BahamasTurks & CaicosTobago, DominicaBonaire, VenezuelaLittle Cayman, Cozumel, BelizeHonduras, South Africa & MozambiqueThailand, Sipadan, MabulLayang LayangDerawan & SangalakiBali, Komodo, Wakatobi,Manado, Kungkungan Bay
Palau, Yap, TrukBikini AtollAustralia’s Coral SeaPapua New Guinea, SolomonsFrench PolynesiaFiji, Hawaii, Sea of CortezRevillagigedo IslandsCocos & Malpelo Islands The GalapagosWrecks of Palau
The Northern California Underwater Photographic Society (NCUPS.org) proudly presents the 43rd Annual SEA International Underwater Photographic Competition, and the Bob Commer Award of Excellence in Underwater Photography. The “mail-in” underwater digital still and print photography, and underwater videography competition is open to amateur photographers and videographers from around the world.
New for 2007! The Bob Commer Award of Photographic Excellence will be awarded to the SEA International Competition Best of Show! This award is in addition to a prize selection from the prize list. All media, digital still, print and video, are eligible. The winner of the Bob Commer Award receives $�00.00 and a handcrafted glass trophy of an underwater photographer.
SEA2007 will no longer
carry any 3�mm slide photography categories. Slides may be scanned and submitted in digital still categories with the same specifications as images taken with a digital still camera.
Also new for 2007 is the Marine Conservation Category. The entries in this category should illustrate a marine conservation issue. Entries should include a maximum 7�-word description about where the image was taken, the story behind the image, and why it was important to the photographer to take the image and tell the story.
The entry deadline is October 12, 2007. Winning entries will be announced on the NCUPS.org in November 2007. Download Rules, Regulations, and the Entry Form from the NCUPS website.
www.ncups.org
NCUPS 50th anniversary photo competition
38/10 www.uwpmag.com
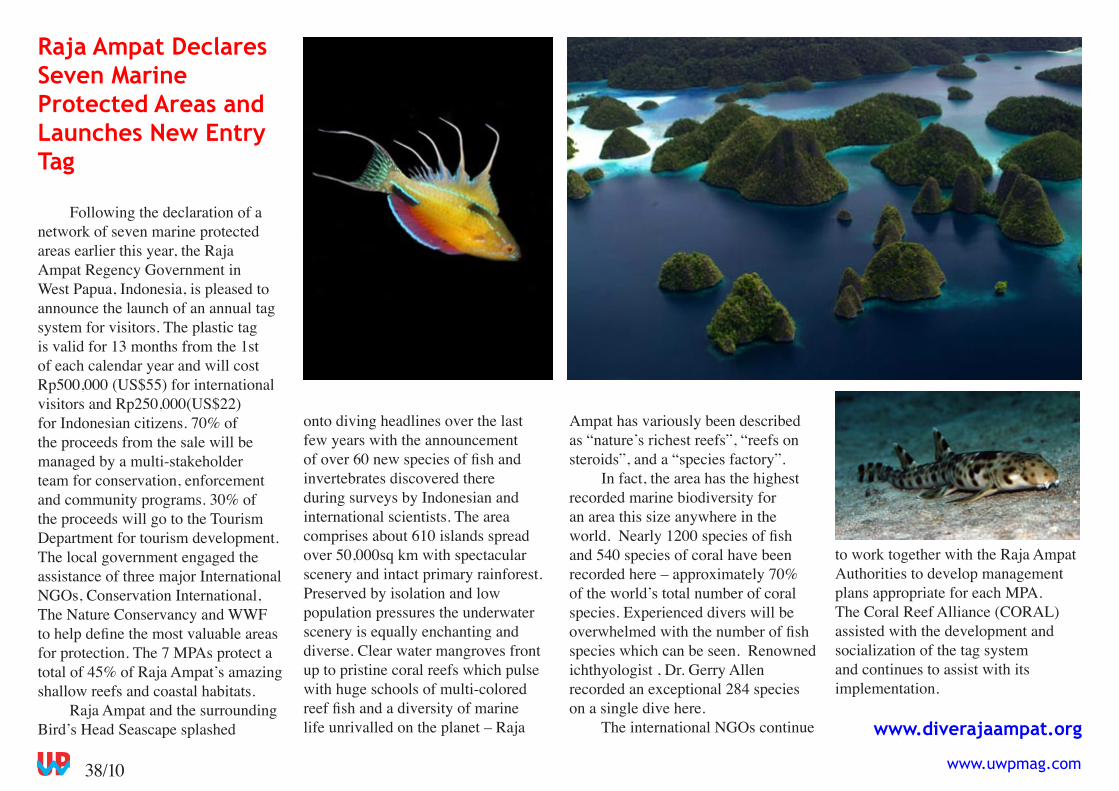
Raja Ampat Declares Seven Marine Protected Areas and Launches New Entry Tag
Following the declaration of a network of seven marine protected areas earlier this year, the Raja Ampat Regency Government in West Papua, Indonesia, is pleased to announce the launch of an annual tag system for visitors. The plastic tag is valid for 13 months from the 1st of each calendar year and will cost Rp�00,000 (US$��) for international visitors and Rp2�0,000(US$22) for Indonesian citizens. 70% of the proceeds from the sale will be managed by a multi-stakeholder team for conservation, enforcement and community programs. 30% of the proceeds will go to the Tourism Department for tourism development. The local government engaged the assistance of three major International NGOs, Conservation International, The Nature Conservancy and WWF to help define the most valuable areas for protection. The 7 MPAs protect a total of 4�% of Raja Ampat’s amazing shallow reefs and coastal habitats.
Raja Ampat and the surrounding Bird’s Head Seascape splashed
onto diving headlines over the last few years with the announcement of over 60 new species of fish and invertebrates discovered there during surveys by Indonesian and international scientists. The area comprises about �10 islands spread over �0,000sq km with spectacular scenery and intact primary rainforest. Preserved by isolation and low population pressures the underwater scenery is equally enchanting and diverse. Clear water mangroves front up to pristine coral reefs which pulse with huge schools of multi-colored reef fish and a diversity of marine life unrivalled on the planet – Raja
to work together with the Raja Ampat Authorities to develop management plans appropriate for each MPA. The Coral Reef Alliance (CORAL) assisted with the development and socialization of the tag system and continues to assist with its implementation.
www.diverajaampat.org
Ampat has variously been described as “nature’s richest reefs”, “reefs on steroids”, and a “species factory”.
In fact, the area has the highest recorded marine biodiversity for an area this size anywhere in the world. Nearly 1200 species of fish and �40 species of coral have been recorded here – approximately 70% of the world’s total number of coral species. Experienced divers will be overwhelmed with the number of fish species which can be seen. Renowned ichthyologist , Dr. Gerry Allen recorded an exceptional 284 species on a single dive here.
The international NGOs continue
eco-divers.com
Tasik Ria Resort & SpaManado
Kungkungan Bay ResortLembeh Strait
OCEANODYSSEY 2007Digital photo Shoot-out
(in association with Asian Diver Magazine)
26 Nov - 5 DecNorth Sulawesi, Indonesia
Check out www.eco-divers.com/ocean-odysseyto find out how you can be a part of this exciting event!
UWP 146x210_ocean 2 14/5/07 12:49 pm Page 1
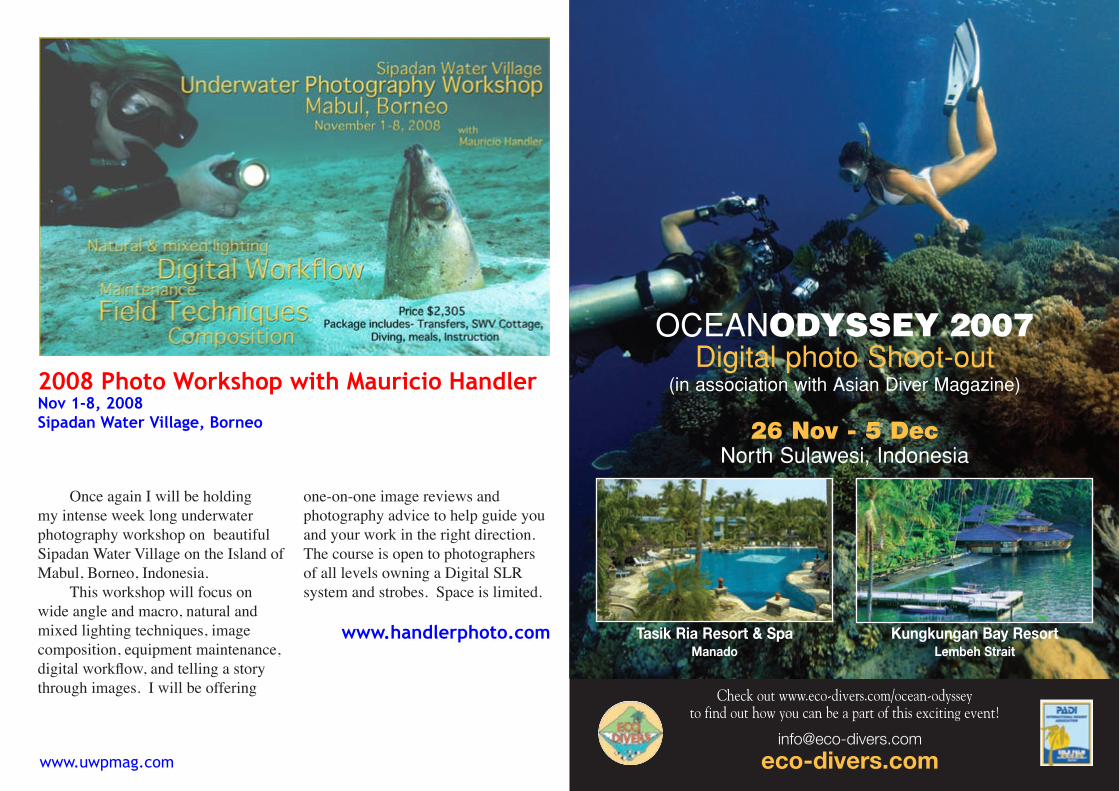
Once again I will be holding my intense week long underwater photography workshop on beautiful Sipadan Water Village on the Island of Mabul, Borneo, Indonesia.
This workshop will focus on wide angle and macro, natural and mixed lighting techniques, image composition, equipment maintenance, digital workflow, and telling a story through images. I will be offering
one-on-one image reviews and photography advice to help guide you and your work in the right direction. The course is open to photographers of all levels owning a Digital SLR system and strobes. Space is limited.
www.handlerphoto.com
2008 Photo Workshop with Mauricio Handler Nov 1-8, 2008 Sipadan Water Village, Borneo
38/12 www.uwpmag.com
Underwater photographers from all over the world has begun to send their photos to the “Images of the world” category, (Deadline for receiving entries: September 1�, 2007 ) Participants for the Eilat’s Shoot-Out who will registered before October 1� will receive a free 4 Gigabyte Compact Flash or an SD flash card in Eilat.
SanDisk Red Sea 2007 World of Images Underwater is open to both amateur and professional photographers, shooting with film or digital cameras.
The competition will be opened on November 12-17, 2007, the 3rd year in a row. This year several new categories has been added, such as: Humor, Ecology & Nature care, Wrecks, Video Clip and a special category for beginners.
This year a new category of Video Clip has been added, that will be recorded and edited during the Eilat competition. The keynote guest of the contest will be Christian Patron - the Titanic Cinematographer.
The competition’s prizes are sponsored by several international organizations, and this year’s prizes has reached the total amount of 80,000$. Among the sponsors there are tourism organization, such as: Paupa New Guinea tourism organizations, Palau, Cocos Islands and the Red Sea, International companies and associations like SanDisk, Padi, Oceanic Products, Seacam, Subal, Quicksoft, and Olimpus, who’ll contribute their products as a part of the prizes, given this year’s competition.
The Competition’s main events will take place at Isrotel Ambassador hotel, located at Eilat’s Coral Beach, close to the Underwater Nature Reserve & Observatory.
The competition’s website is available in 9 different languages, with full details, rules and registering forms.
www.sandiskredsea.com
38/13www.uwpmag.com
Divesafari Santorini
A new concept in exploring the natural beauty of the seas is available in the Greek island of Santorini.
A divesafari is a full one or two day charter to remote and unique locations. A divesafari can be combined with a barbeque on a remote beach and a sleep-over at small hotels or campsites of remote islands.
Choosing a location will depend on your interests and preference. We can explore new wall or reef dives.
We can dive wrecks or one of the underwater volcanos around Santorini.
We tailor from four hour to multiple day yacht charter adventures within a 100 mile radius of Santorini island, in the Aegean Sea.
We will take you to locations of unique natural beauty and entertain both divers and non-divers to the highest standard of comfort and luxury.
We offer the opportunity to do a number of sports and activities or indeed to just relax and do very little.
Reef, wall and wreck diving, Explore underwater caverns and caves, Snorkel and freedive, Underwater photography, Underwater cinematography and finding crystal clear waters to enjoy swimming
Sunbathe in the privacy of our luxury motoryacht
We can arrange additional services such as watersking, inflatable towing or use of underwater scooters. We can also arrange for a great variety of activities off the boat including horseriding, sailing, jetskiing, hiking, cayaking, waterskiing and paragliding.
When you book with our staff or agents we will provide you with a number of suggestions. We will then endeavour to tailor the best package to suit your needs.
www.divesafari.eu
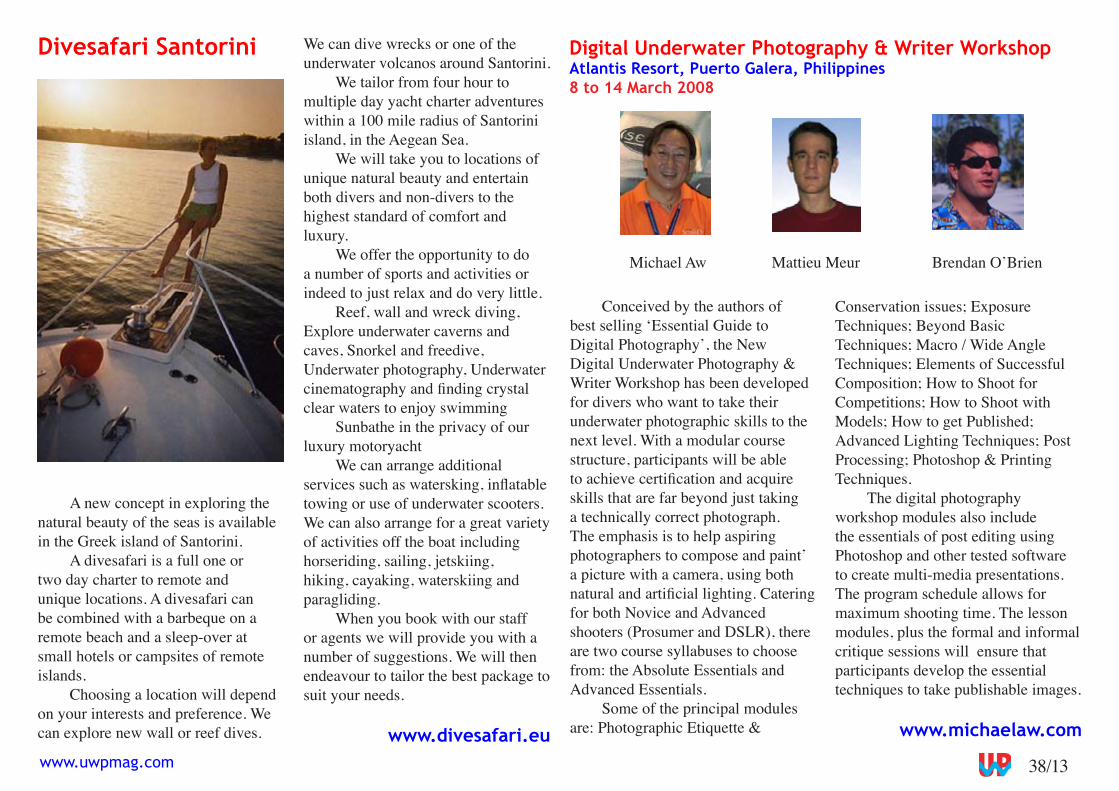
Digital Underwater Photography & Writer WorkshopAtlantis Resort, Puerto Galera, Philippines8 to 14 March 2008
Conceived by the authors of best selling ‘Essential Guide to Digital Photography’, the New Digital Underwater Photography & Writer Workshop has been developed for divers who want to take their underwater photographic skills to the next level. With a modular course structure, participants will be able to achieve certification and acquire skills that are far beyond just taking a technically correct photograph. The emphasis is to help aspiring photographers to compose and paint’ a picture with a camera, using both natural and artificial lighting. Catering for both Novice and Advanced shooters (Prosumer and DSLR), there are two course syllabuses to choose from: the Absolute Essentials and Advanced Essentials.
Some of the principal modules are: Photographic Etiquette &
Conservation issues; Exposure Techniques; Beyond Basic Techniques; Macro / Wide Angle Techniques; Elements of Successful Composition; How to Shoot for Competitions; How to Shoot with Models; How to get Published; Advanced Lighting Techniques; Post Processing; Photoshop & Printing Techniques.
The digital photography workshop modules also include the essentials of post editing using Photoshop and other tested software to create multi-media presentations. The program schedule allows for maximum shooting time. The lesson modules, plus the formal and informal critique sessions will ensure that participants develop the essential techniques to take publishable images.
www.michaelaw.com
Michael Aw Mattieu Meur Brendan O’Brien
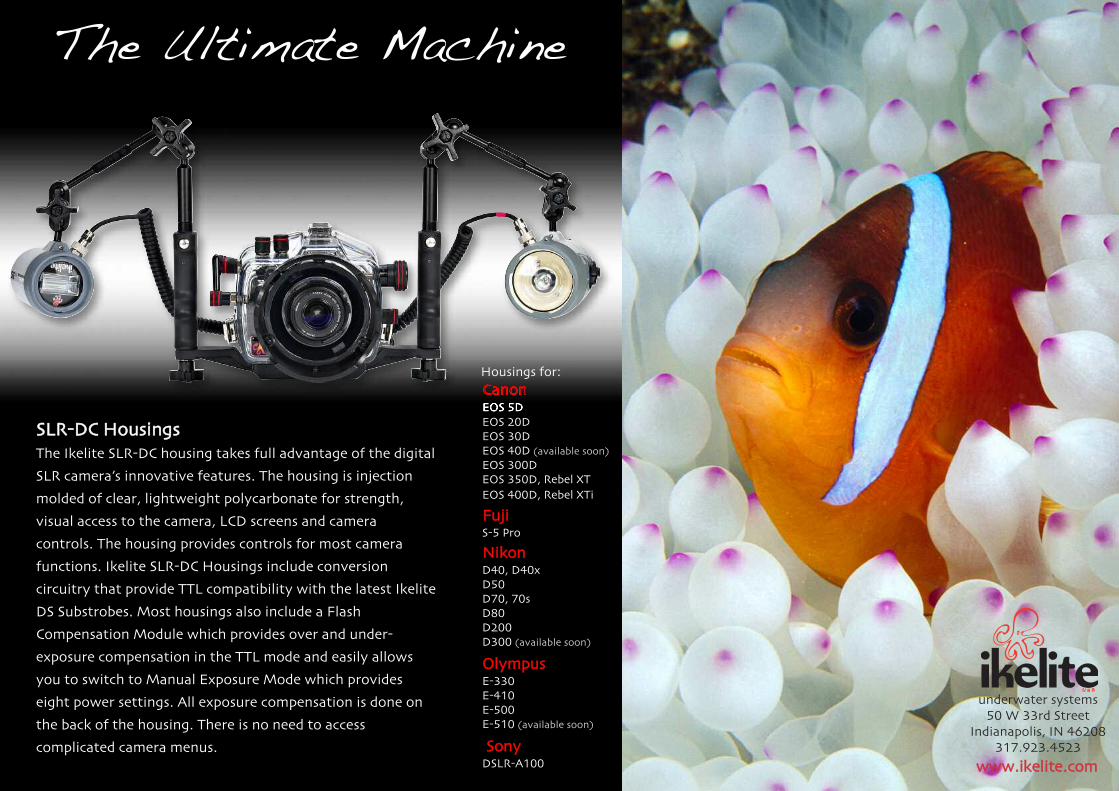
The Ultimate Machine
CCaannoonnEOS 5DEOS 20DEOS 30DEOS 40D (available soon)EOS 300DEOS 350D, Rebel XTEOS 400D, Rebel XTi
FFuujjiiS-5 Pro
NNiikkoonnD40, D40xD50D70, 70sD80D200D300 (available soon)
OOllyymmppuussE-330E-410E-500E-510 (available soon)
SSoonnyyDSLR-A100
SSLLRR--DDCC HHoouussiinnggssThe Ikelite SLR-DC housing takes full advantage of the digitalSLR camera’s innovative features. The housing is injectionmolded of clear, lightweight polycarbonate for strength,visual access to the camera, LCD screens and cameracontrols. The housing provides controls for most camerafunctions. Ikelite SLR-DC Housings include conversioncircuitry that provide TTL compatibility with the latest IkeliteDS Substrobes. Most housings also include a FlashCompensation Module which provides over and under-exposure compensation in the TTL mode and easily allowsyou to switch to Manual Exposure Mode which provideseight power settings. All exposure compensation is done onthe back of the housing. There is no need to accesscomplicated camera menus.
underwater systems50 W 33rd Street
Indianapolis, IN 46208317.923.4523
wwwwww..iikkeelliittee..ccoomm
Housings for:
38/1�www.uwpmag.com
New Products
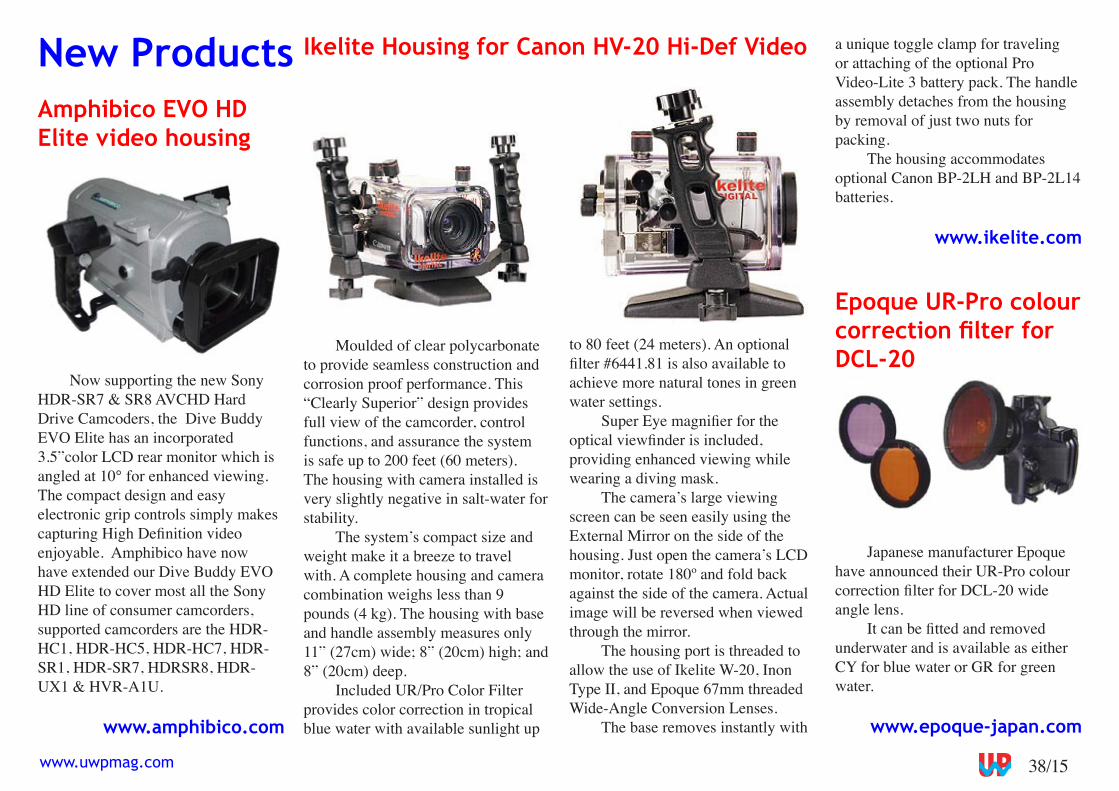
Moulded of clear polycarbonate to provide seamless construction and corrosion proof performance. This “Clearly Superior” design provides full view of the camcorder, control functions, and assurance the system is safe up to 200 feet (�0 meters). The housing with camera installed is very slightly negative in salt-water for stability.
The system’s compact size and weight make it a breeze to travel with. A complete housing and camera combination weighs less than 9 pounds (4 kg). The housing with base and handle assembly measures only 11” (27cm) wide; 8” (20cm) high; and 8” (20cm) deep.
Included UR/Pro Color Filter provides color correction in tropical blue water with available sunlight up
Ikelite Housing for Canon HV-20 Hi-Def Video a unique toggle clamp for traveling or attaching of the optional Pro Video-Lite 3 battery pack. The handle assembly detaches from the housing by removal of just two nuts for packing.
The housing accommodates optional Canon BP-2LH and BP-2L14 batteries.
www.ikelite.com
to 80 feet (24 meters). An optional filter #6441.81 is also available to achieve more natural tones in green water settings.
Super Eye magnifier for the optical viewfinder is included, providing enhanced viewing while wearing a diving mask.
The camera’s large viewing screen can be seen easily using the External Mirror on the side of the housing. Just open the camera’s LCD monitor, rotate 180º and fold back against the side of the camera. Actual image will be reversed when viewed through the mirror.
The housing port is threaded to allow the use of Ikelite W-20, Inon Type II, and Epoque �7mm threaded Wide-Angle Conversion Lenses.
The base removes instantly with
Amphibico EVO HD Elite video housing
Now supporting the new Sony HDR-SR7 & SR8 AVCHD Hard Drive Camcoders, the Dive Buddy EVO Elite has an incorporated 3.�”color LCD rear monitor which is angled at 10° for enhanced viewing. The compact design and easy electronic grip controls simply makes capturing High Definition video enjoyable. Amphibico have now have extended our Dive Buddy EVO HD Elite to cover most all the Sony HD line of consumer camcorders, supported camcorders are the HDR-HC1, HDR-HC�, HDR-HC7, HDR-SR1, HDR-SR7, HDRSR8, HDR-UX1 & HVR-A1U.
www.amphibico.com
Epoque UR-Pro colour correction filter for DCL-20
Japanese manufacturer Epoque have announced their UR-Pro colour correction filter for DCL-20 wide angle lens.
It can be fitted and removed underwater and is available as either CY for blue water or GR for green water.
www.epoque-japan.com
38/1� www.uwpmag.com
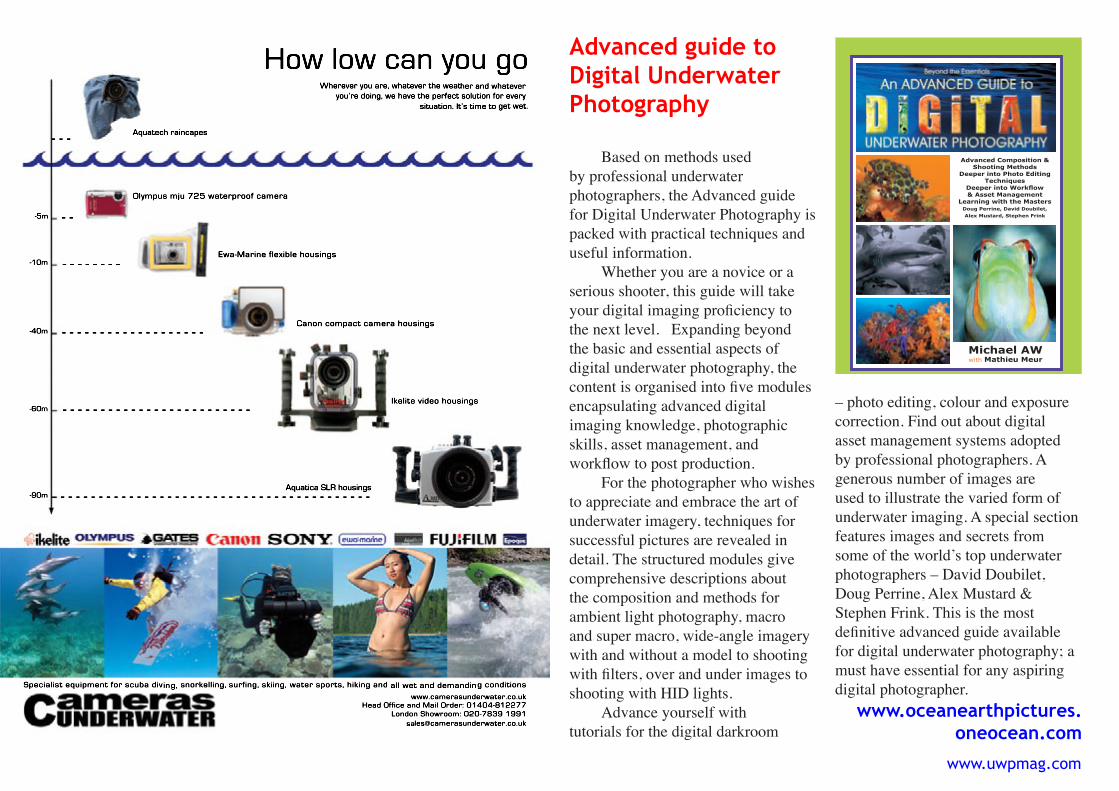
Based on methods used by professional underwater photographers, the Advanced guide for Digital Underwater Photography is packed with practical techniques and useful information.
Whether you are a novice or a serious shooter, this guide will take your digital imaging proficiency to the next level. Expanding beyond the basic and essential aspects of digital underwater photography, the content is organised into five modules encapsulating advanced digital imaging knowledge, photographic skills, asset management, and workflow to post production.
For the photographer who wishes to appreciate and embrace the art of underwater imagery, techniques for successful pictures are revealed in detail. The structured modules give comprehensive descriptions about the composition and methods for ambient light photography, macro and super macro, wide-angle imagery with and without a model to shooting with filters, over and under images to shooting with HID lights.
Advance yourself with tutorials for the digital darkroom
– photo editing, colour and exposure correction. Find out about digital asset management systems adopted by professional photographers. A generous number of images are used to illustrate the varied form of underwater imaging. A special section features images and secrets from some of the world’s top underwater photographers – David Doubilet, Doug Perrine, Alex Mustard & Stephen Frink. This is the most definitive advanced guide available for digital underwater photography; a must have essential for any aspiring digital photographer.
www.oceanearthpictures.oneocean.com
Advanced guide to Digital Underwater Photography
This guide takes you far beyond the essentials of digital underwater photography. For the serious shooter who wish to appreciate and embrace the art of underwater imagery, photographic techniques of successful pictures are reviewed in detail. The modules are structured to give comprehensive descriptions about the composition and techniques for ambient light photography, macro and super macro, wide-angle imagery with and without a model to shooting with lters and with HID lights.
Extend yourself with tutorials for the digital darkroom – photo editing, colour and exposure correction this guide also includes information on digital asset management systems adopted by professional photographers. A generous number of images are used to illustrate the varied aspect of underwater imaging. To date, this is the most de nitive advanced guide available for digital underwater photography.
Building on his Essential Guide to Digital Underwater Photography, Michael delves into advanced photoshop techniques, digital work ow set-up and more. A special section features images and secrets from some of the best underwater photographers in the world. A must have guide for any aspiring digital photographer. Christopher Lee, Editor Emeritus, Ocean Geographic
AnADVANCED GUIDE TO
Michael AWwith Mathieu Meur
Advanced Composition & Shooting Methods
Deeper into Photo Editing Techniques
Deeper into Work ow & Asset Management
Learning with the MastersDoug Perrine, David Doubilet, Alex Mustard, Stephen Frink
AN
AD
VA
NC
ED
GU
IDE
TO
DIG
ITA
L U
ND
ER
WA
TER
PH
OTO
GR
AP
HY
Mic
hael A
W w
ith M
ath
ieu
Meu
r
D:RS07-082(A) BK229006 POS RRED 175#(AT_Mac5)TITLE: An Essential Guide To Digital Underwater PhotograpyTrim Size: 303 x 210MM
ADV COVER_NEW.ok.indd 1 8/2/07 21:41:02
38/17www.uwpmag.com
www.heinrichsweikamp.com
info
@h
einrich
sweik
amp
.com
with your new digital camera!
Use your existing analog strobe
The HeinrichsWeikamp Digital Adapter.
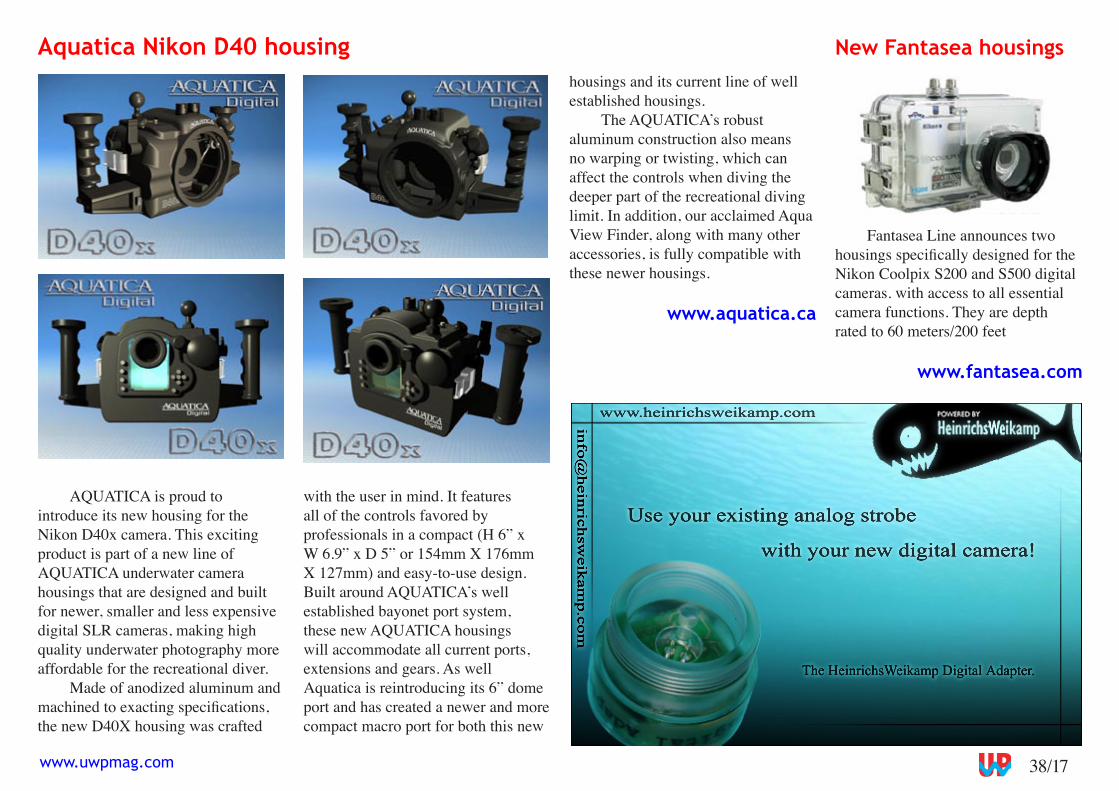
AQUATICA is proud to introduce its new housing for the Nikon D40x camera. This exciting product is part of a new line of AQUATICA underwater camera housings that are designed and built for newer, smaller and less expensive digital SLR cameras, making high quality underwater photography more affordable for the recreational diver.
Made of anodized aluminum and machined to exacting specifications, the new D40X housing was crafted
Aquatica Nikon D40 housing
with the user in mind. It features all of the controls favored by professionals in a compact (H �” x W 6.9” x D 5” or 154mm X 176mm X 127mm) and easy-to-use design. Built around AQUATICA’s well established bayonet port system, these new AQUATICA housings will accommodate all current ports, extensions and gears. As well Aquatica is reintroducing its �” dome port and has created a newer and more compact macro port for both this new
housings and its current line of well established housings.
The AQUATICA’s robust aluminum construction also means no warping or twisting, which can affect the controls when diving the deeper part of the recreational diving limit. In addition, our acclaimed Aqua View Finder, along with many other accessories, is fully compatible with these newer housings.
www.aquatica.ca
New Fantasea housings
Fantasea Line announces two housings specifically designed for the Nikon Coolpix S200 and S�00 digital cameras. with access to all essential camera functions. They are depth rated to �0 meters/200 feet
www.fantasea.com
38/18 www.uwpmag.com
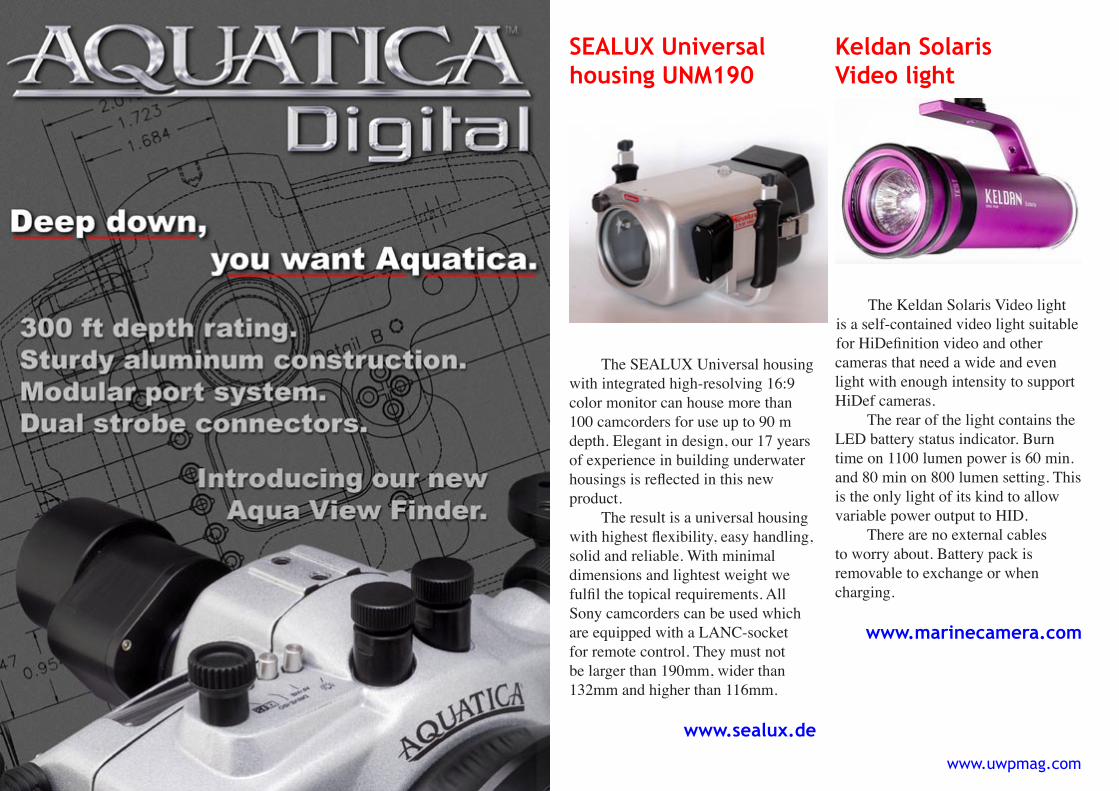
SEALUX Universal housing UNM190
The SEALUX Universal housing with integrated high-resolving 16:9 color monitor can house more than 100 camcorders for use up to 90 m depth. Elegant in design, our 17 years of experience in building underwater housings is reflected in this new product.
The result is a universal housing with highest flexibility, easy handling, solid and reliable. With minimal dimensions and lightest weight we fulfil the topical requirements. All Sony camcorders can be used which are equipped with a LANC-socket for remote control. They must not be larger than 190mm, wider than 132mm and higher than 11�mm.
www.sealux.de
Keldan Solaris Video light
The Keldan Solaris Video light is a self-contained video light suitable for HiDefinition video and other cameras that need a wide and even light with enough intensity to support HiDef cameras.
The rear of the light contains the LED battery status indicator. Burn time on 1100 lumen power is �0 min. and 80 min on 800 lumen setting. This is the only light of its kind to allow variable power output to HID.
There are no external cables to worry about. Battery pack is removable to exchange or when charging.
www.marinecamera.com
38/19www.uwpmag.com
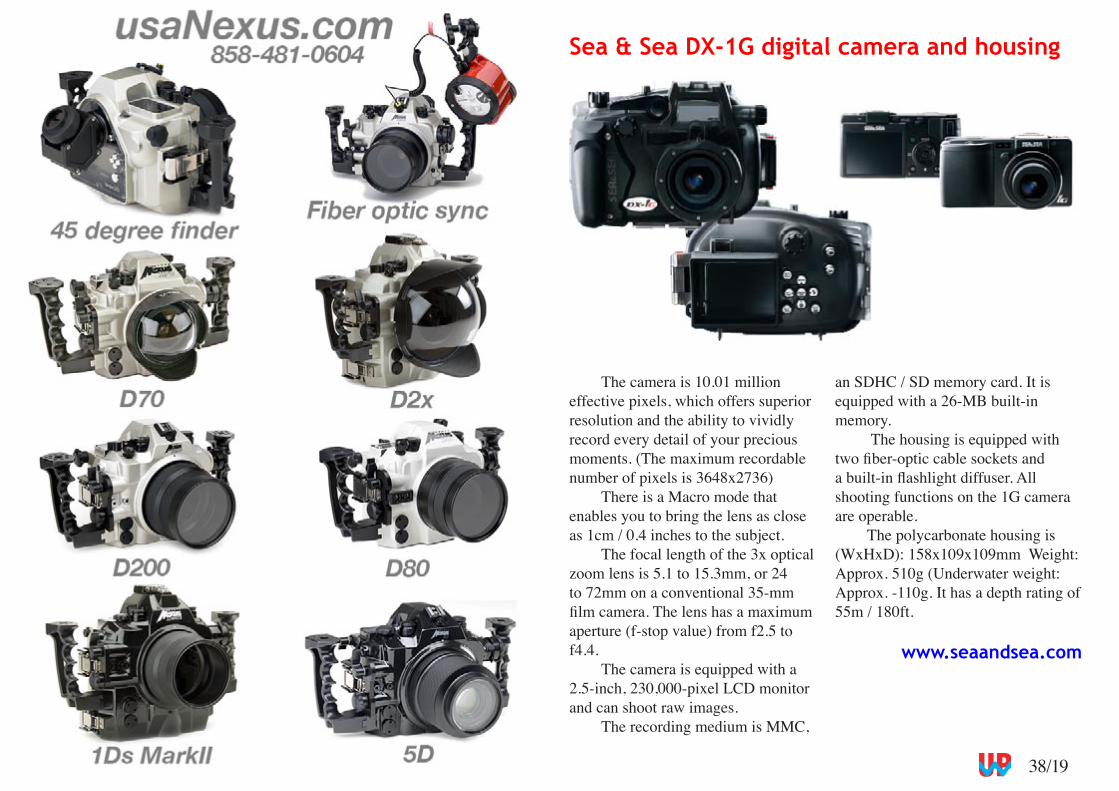
The camera is 10.01 million effective pixels, which offers superior resolution and the ability to vividly record every detail of your precious moments. (The maximum recordable number of pixels is 3�48x273�)
There is a Macro mode that enables you to bring the lens as close as 1cm / 0.4 inches to the subject.
The focal length of the 3x optical zoom lens is �.1 to 1�.3mm, or 24 to 72mm on a conventional 3�-mm film camera. The lens has a maximum aperture (f-stop value) from f2.� to f4.4.
The camera is equipped with a 2.�-inch, 230,000-pixel LCD monitor and can shoot raw images.
The recording medium is MMC,
an SDHC / SD memory card. It is equipped with a 2�-MB built-in memory.
The housing is equipped with two fiber-optic cable sockets and a built-in flashlight diffuser. All shooting functions on the 1G camera are operable.
The polycarbonate housing is (WxHxD): 158x109x109mm Weight: Approx. �10g (Underwater weight: Approx. -110g. It has a depth rating of ��m / 180ft.
www.seaandsea.com
Sea & Sea DX-1G digital camera and housing
38/20 www.uwpmag.com
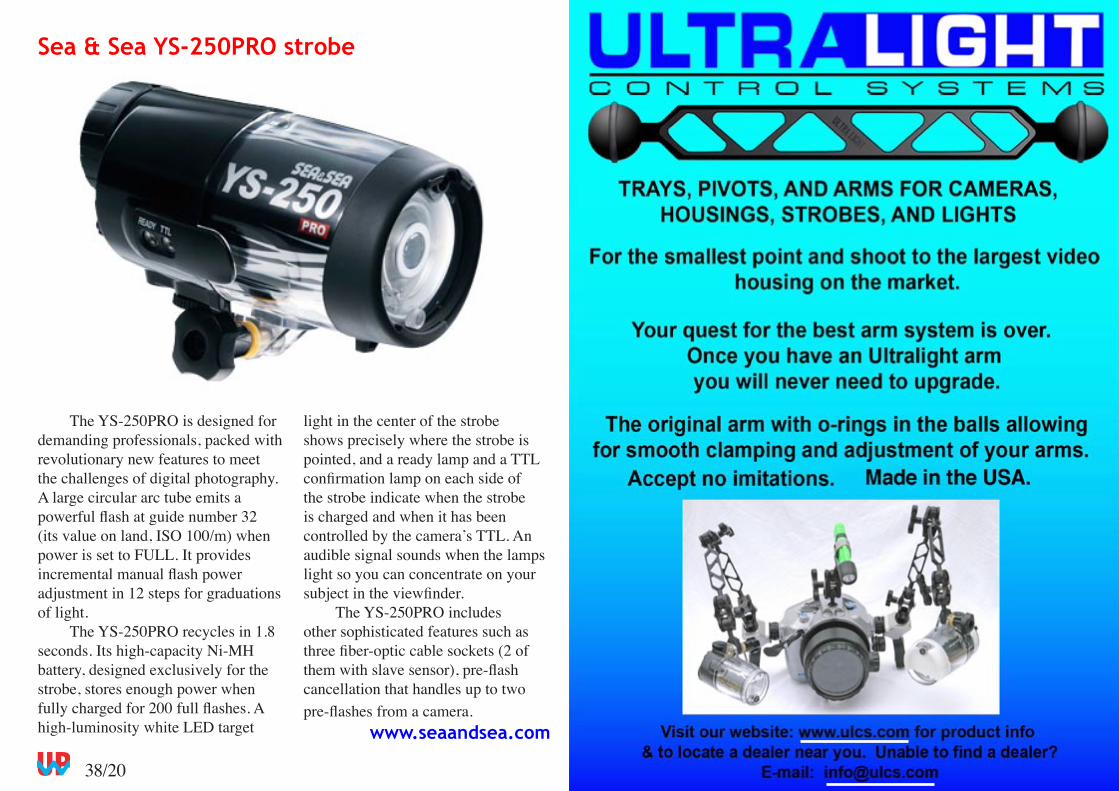
The YS-2�0PRO is designed for demanding professionals, packed with revolutionary new features to meet the challenges of digital photography. A large circular arc tube emits a powerful flash at guide number 32 (its value on land, ISO 100/m) when power is set to FULL. It provides incremental manual flash power adjustment in 12 steps for graduations of light.
The YS-2�0PRO recycles in 1.8 seconds. Its high-capacity Ni-MH battery, designed exclusively for the strobe, stores enough power when fully charged for 200 full flashes. A high-luminosity white LED target
light in the center of the strobe shows precisely where the strobe is pointed, and a ready lamp and a TTL confirmation lamp on each side of the strobe indicate when the strobe is charged and when it has been controlled by the camera’s TTL. An audible signal sounds when the lamps light so you can concentrate on your subject in the viewfinder.
The YS-2�0PRO includes other sophisticated features such as three fiber-optic cable sockets (2 of them with slave sensor), pre-flash cancellation that handles up to two pre-flashes from a camera.
www.seaandsea.com
Sea & Sea YS-250PRO strobe
38/21www.uwpmag.com http://www.digideep.com
join the contest and win a funkyt-shirt!!!
2.700 underwater imaging products - photo & video5.200 enthusiastic underwater photographers600 news, articles, reviews and travel reports 5.000 images in our weekly photo contest ...growing every month!
Your online resource to more than
the online directory for digital underwater-imaging equipment. c o mD I G I D E E P
ReefPhoto Subal dome port cover
ReefPhoto from Florida have produced an improved version of the Subal dome port cover.
The soft neoprene cover is held in place using the zoom and front dial control knobs.
www.reefphoto.com
10Bar filters
The odd oval shape of the G7 camera housing makes fitting a filter almost impossible but 10Bar have used their CNC machine to produce a red filter especially for the WP-DC1 housing.
www.10bar.com
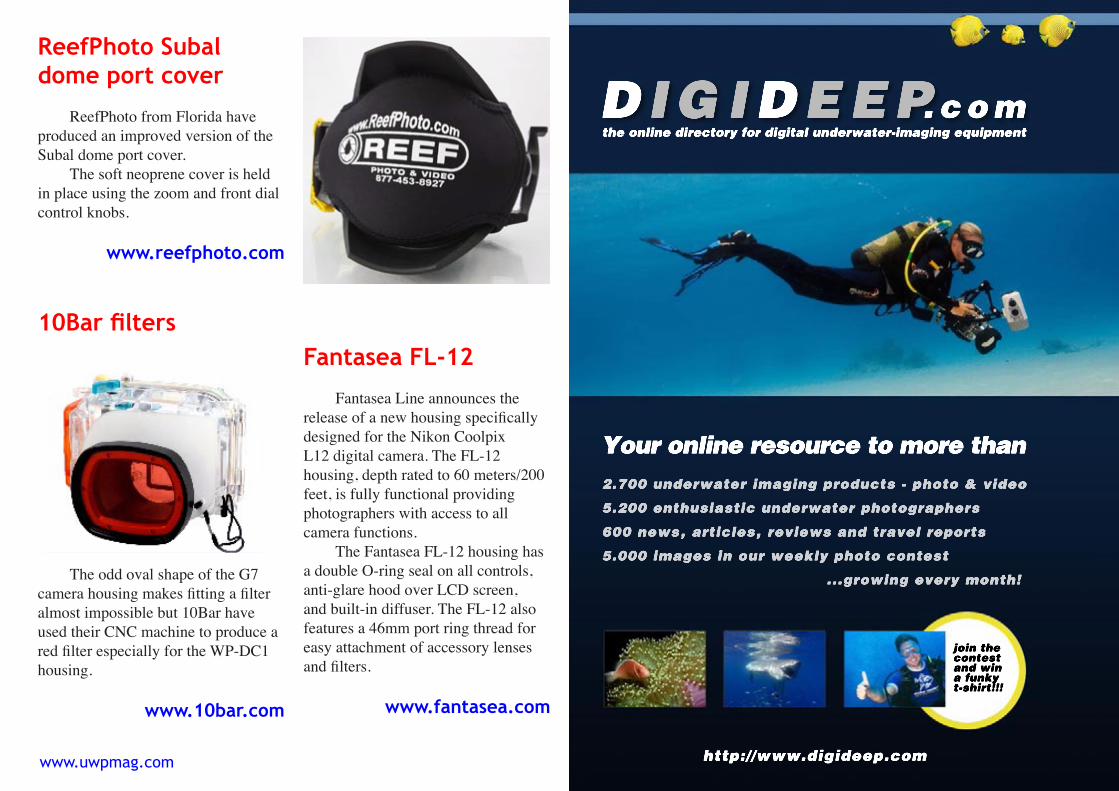
Fantasea FL-12
Fantasea Line announces the release of a new housing specifically designed for the Nikon Coolpix L12 digital camera. The FL-12 housing, depth rated to �0 meters/200 feet, is fully functional providing photographers with access to all camera functions.
The Fantasea FL-12 housing has a double O-ring seal on all controls, anti-glare hood over LCD screen, and built-in diffuser. The FL-12 also features a 4�mm port ring thread for easy attachment of accessory lenses and filters.
www.fantasea.com
38/22 www.uwpmag.com
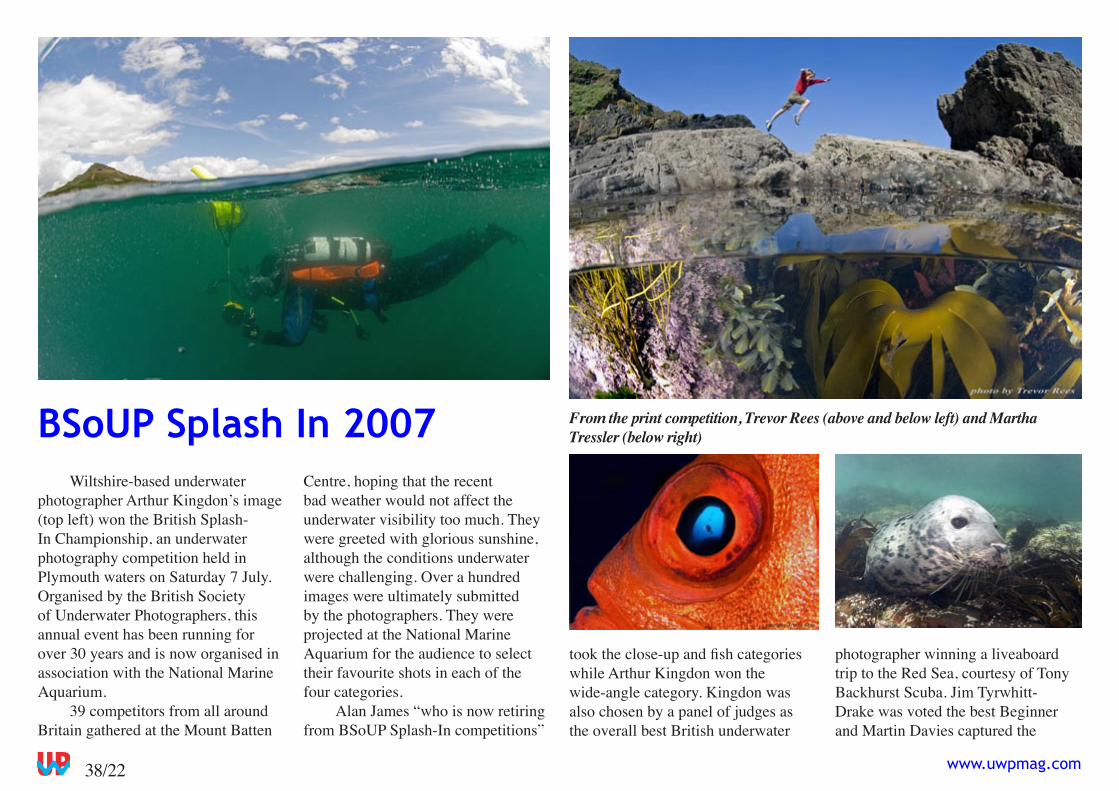
Wiltshire-based underwater photographer Arthur Kingdon’s image (top left) won the British Splash-In Championship, an underwater photography competition held in Plymouth waters on Saturday 7 July. Organised by the British Society of Underwater Photographers, this annual event has been running for over 30 years and is now organised in association with the National Marine Aquarium.
39 competitors from all around Britain gathered at the Mount Batten
BSoUP Splash In 2007Centre, hoping that the recent bad weather would not affect the underwater visibility too much. They were greeted with glorious sunshine, although the conditions underwater were challenging. Over a hundred images were ultimately submitted by the photographers. They were projected at the National Marine Aquarium for the audience to select their favourite shots in each of the four categories.
Alan James “who is now retiring from BSoUP Splash-In competitions”
took the close-up and fish categories while Arthur Kingdon won the wide-angle category. Kingdon was also chosen by a panel of judges as the overall best British underwater
photographer winning a liveaboard trip to the Red Sea, courtesy of Tony Backhurst Scuba. Jim Tyrwhitt-Drake was voted the best Beginner and Martin Davies captured the
From the print competition, Trevor Rees (above and below left) and Martha Tressler (below right)
38/23www.uwpmag.com
Humorous/Creative category.After the awards ceremony,
award-winning photographer James commented: “ Having attended so many enjoyable and successful BSoUP Splash In competitions, I feel that it is time to move over and to offer my assistance to the organisers of this excellent event”.
This year”s panel of judges consisted of Kelvin Boot, Director of the National Marine Aquarium, BBC newsman and celebrated underwater film-maker John McIntyre, and veteran UK underwater photographer
Peter Rowlands, the editor of online Underwater Photography Magazine.
Said Martha Tressler, chair of BSoUP: The pictures produced by this competition impress me every year. Striking images were created by competitors ranging from experienced photographers with high-end SLR cameras to beginners with small digital compacts. The venue provided by the National Marine Aquarium was a fantastic setting for the evening event”
www.bsoup.org
Alan James shot of a flat worm won the Close Up category
Although I have found that even in dull conditions most digital cameras I use underwater have very good auto-focus there have been odd times when a small focusing light would aid the camera in being able to focus-lock much faster. I notice this most when diving around caves, shaded ledges and wrecks where the very low ambient light makes the camera’s auto focus system hunting for focus-lock.
Now I have seen some ‘monster’ lights being used by underwater photographers, some are as big (or bigger) as the camera housing itself! I own an Underwater Kinetics HID Light Cannon 100, which is fantastic night diving light. So not being one to waste money on un-necessary u/w camera equipment (at least when the wife is watching anyway). I figured that the Light Cannon should make a great focusing light - particularly since I already owned one!
My conclusion was pretty easy to report..... Sadly it is far too bright and too big (and clumsy) for use as a focusing light (which it was never designed to be). The biggest problem is its brightness! Even with the diffuser fitted this light showed hot spots in the final image, and I am sure I saw one particular nudibranch squinting when I got a bit too close; also every fish in sight disappeared as soon as www.top-teks.co.uk
38/24 www.uwpmag.com
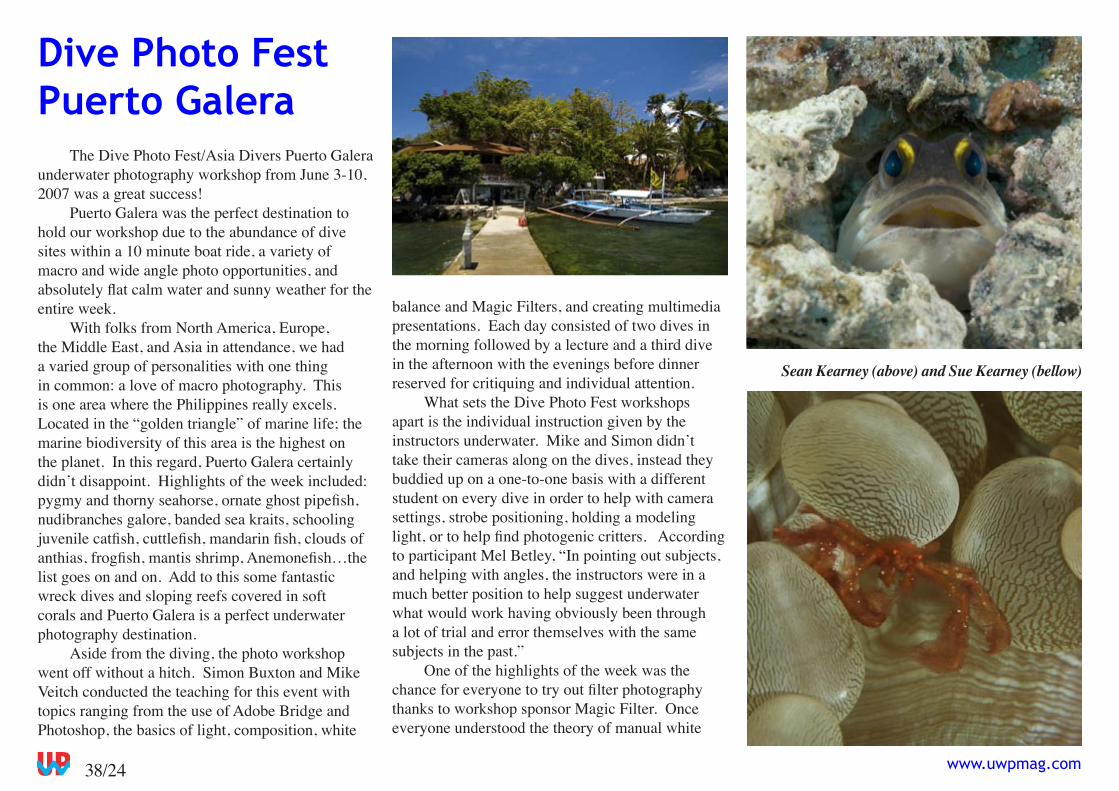
The Dive Photo Fest/Asia Divers Puerto Galera underwater photography workshop from June 3-10, 2007 was a great success!
Puerto Galera was the perfect destination to hold our workshop due to the abundance of dive sites within a 10 minute boat ride, a variety of macro and wide angle photo opportunities, and absolutely flat calm water and sunny weather for the entire week.
With folks from North America, Europe, the Middle East, and Asia in attendance, we had a varied group of personalities with one thing in common: a love of macro photography. This is one area where the Philippines really excels. Located in the “golden triangle” of marine life; the marine biodiversity of this area is the highest on the planet. In this regard, Puerto Galera certainly didn’t disappoint. Highlights of the week included: pygmy and thorny seahorse, ornate ghost pipefish, nudibranches galore, banded sea kraits, schooling juvenile catfish, cuttlefish, mandarin fish, clouds of anthias, frogfish, mantis shrimp, Anemonefish…the list goes on and on. Add to this some fantastic wreck dives and sloping reefs covered in soft corals and Puerto Galera is a perfect underwater photography destination.
Aside from the diving, the photo workshop went off without a hitch. Simon Buxton and Mike Veitch conducted the teaching for this event with topics ranging from the use of Adobe Bridge and Photoshop, the basics of light, composition, white
balance and Magic Filters, and creating multimedia presentations. Each day consisted of two dives in the morning followed by a lecture and a third dive in the afternoon with the evenings before dinner reserved for critiquing and individual attention.
What sets the Dive Photo Fest workshops apart is the individual instruction given by the instructors underwater. Mike and Simon didn’t take their cameras along on the dives, instead they buddied up on a one-to-one basis with a different student on every dive in order to help with camera settings, strobe positioning, holding a modeling light, or to help find photogenic critters. According to participant Mel Betley, “In pointing out subjects, and helping with angles, the instructors were in a much better position to help suggest underwater what would work having obviously been through a lot of trial and error themselves with the same subjects in the past.”
One of the highlights of the week was the chance for everyone to try out filter photography thanks to workshop sponsor Magic Filter. Once everyone understood the theory of manual white
Dive Photo FestPuerto Galera
Sean Kearney (above) and Sue Kearney (bellow)
38/2�www.uwpmag.com
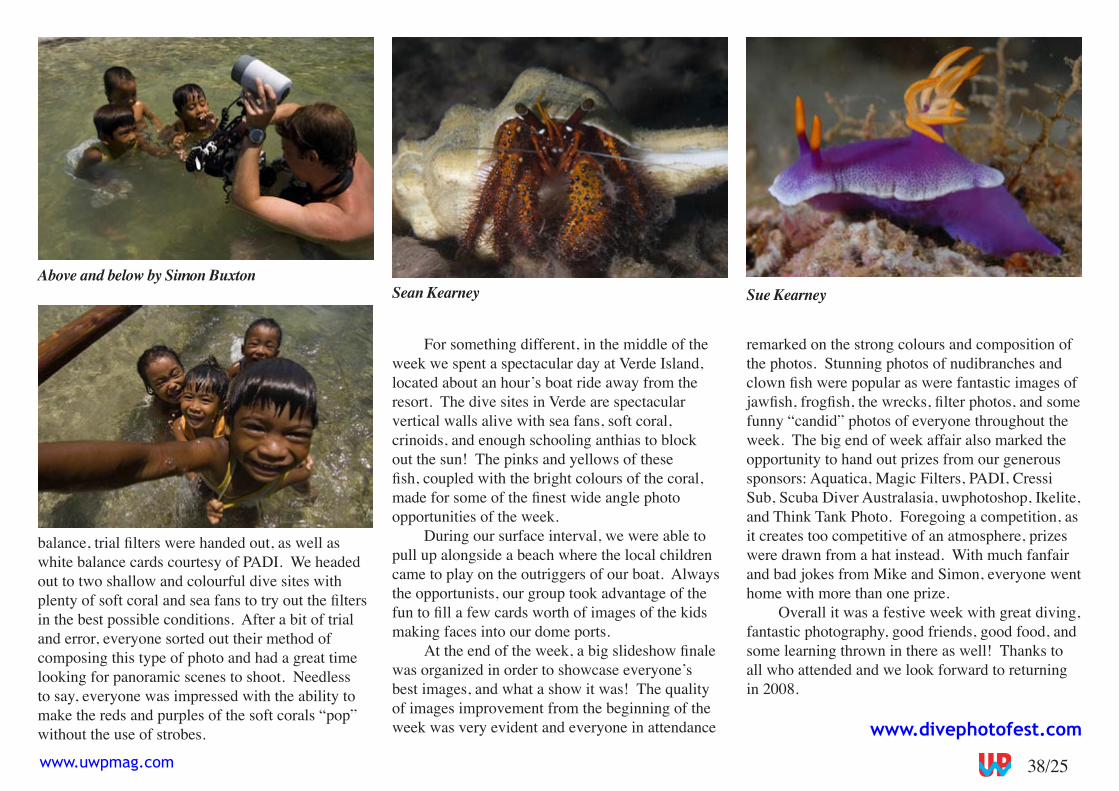
balance, trial filters were handed out, as well as white balance cards courtesy of PADI. We headed out to two shallow and colourful dive sites with plenty of soft coral and sea fans to try out the filters in the best possible conditions. After a bit of trial and error, everyone sorted out their method of composing this type of photo and had a great time looking for panoramic scenes to shoot. Needless to say, everyone was impressed with the ability to make the reds and purples of the soft corals “pop” without the use of strobes.
For something different, in the middle of the week we spent a spectacular day at Verde Island, located about an hour’s boat ride away from the resort. The dive sites in Verde are spectacular vertical walls alive with sea fans, soft coral, crinoids, and enough schooling anthias to block out the sun! The pinks and yellows of these fish, coupled with the bright colours of the coral, made for some of the finest wide angle photo opportunities of the week.
During our surface interval, we were able to pull up alongside a beach where the local children came to play on the outriggers of our boat. Always the opportunists, our group took advantage of the fun to fill a few cards worth of images of the kids making faces into our dome ports.
At the end of the week, a big slideshow finale was organized in order to showcase everyone’s best images, and what a show it was! The quality of images improvement from the beginning of the week was very evident and everyone in attendance
remarked on the strong colours and composition of the photos. Stunning photos of nudibranches and clown fish were popular as were fantastic images of jawfish, frogfish, the wrecks, filter photos, and some funny “candid” photos of everyone throughout the week. The big end of week affair also marked the opportunity to hand out prizes from our generous sponsors: Aquatica, Magic Filters, PADI, Cressi Sub, Scuba Diver Australasia, uwphotoshop, Ikelite, and Think Tank Photo. Foregoing a competition, as it creates too competitive of an atmosphere, prizes were drawn from a hat instead. With much fanfair and bad jokes from Mike and Simon, everyone went home with more than one prize.
Overall it was a festive week with great diving, fantastic photography, good friends, good food, and some learning thrown in there as well! Thanks to all who attended and we look forward to returning in 2008.
www.divephotofest.com
Above and below by Simon BuxtonSean Kearney Sue Kearney
38/2� www.uwpmag.com
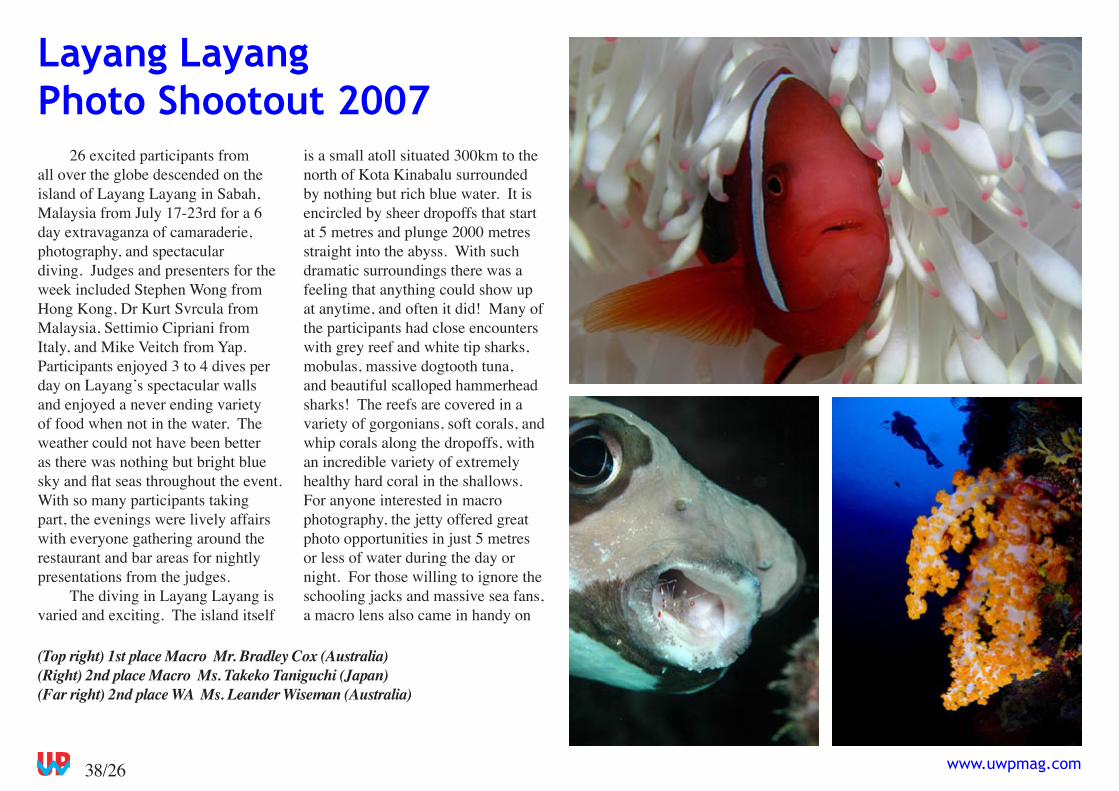
2� excited participants from all over the globe descended on the island of Layang Layang in Sabah, Malaysia from July 17-23rd for a � day extravaganza of camaraderie, photography, and spectacular diving. Judges and presenters for the week included Stephen Wong from Hong Kong, Dr Kurt Svrcula from Malaysia, Settimio Cipriani from Italy, and Mike Veitch from Yap. Participants enjoyed 3 to 4 dives per day on Layang’s spectacular walls and enjoyed a never ending variety of food when not in the water. The weather could not have been better as there was nothing but bright blue sky and flat seas throughout the event. With so many participants taking part, the evenings were lively affairs with everyone gathering around the restaurant and bar areas for nightly presentations from the judges.
The diving in Layang Layang is varied and exciting. The island itself
is a small atoll situated 300km to the north of Kota Kinabalu surrounded by nothing but rich blue water. It is encircled by sheer dropoffs that start at � metres and plunge 2000 metres straight into the abyss. With such dramatic surroundings there was a feeling that anything could show up at anytime, and often it did! Many of the participants had close encounters with grey reef and white tip sharks, mobulas, massive dogtooth tuna, and beautiful scalloped hammerhead sharks! The reefs are covered in a variety of gorgonians, soft corals, and whip corals along the dropoffs, with an incredible variety of extremely healthy hard coral in the shallows. For anyone interested in macro photography, the jetty offered great photo opportunities in just � metres or less of water during the day or night. For those willing to ignore the schooling jacks and massive sea fans, a macro lens also came in handy on
Layang Layang Photo Shootout 2007
(Top right) 1st place Macro Mr. Bradley Cox (Australia)(Right) 2nd place Macro Ms. Takeko Taniguchi (Japan) (Far right) 2nd place WA Ms. Leander Wiseman (Australia)
38/27www.uwpmag.com
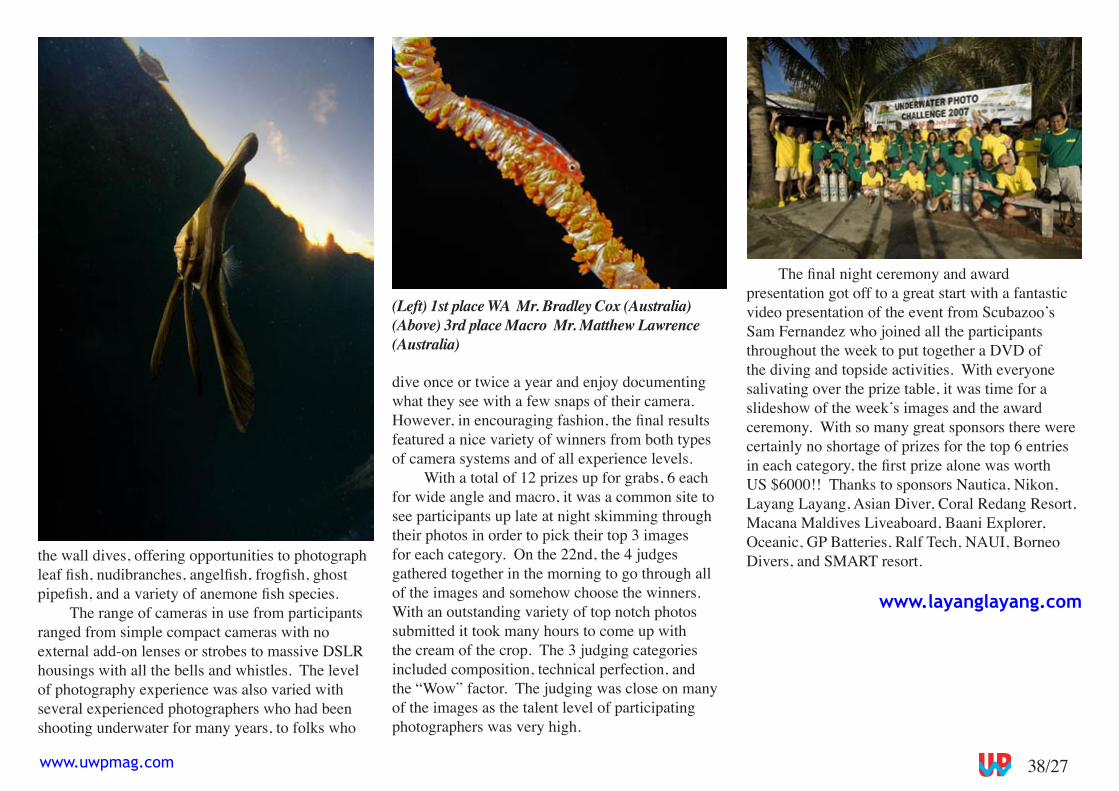
the wall dives, offering opportunities to photograph leaf fish, nudibranches, angelfish, frogfish, ghost pipefish, and a variety of anemone fish species.
The range of cameras in use from participants ranged from simple compact cameras with no external add-on lenses or strobes to massive DSLR housings with all the bells and whistles. The level of photography experience was also varied with several experienced photographers who had been shooting underwater for many years, to folks who
dive once or twice a year and enjoy documenting what they see with a few snaps of their camera. However, in encouraging fashion, the final results featured a nice variety of winners from both types of camera systems and of all experience levels.
With a total of 12 prizes up for grabs, � each for wide angle and macro, it was a common site to see participants up late at night skimming through their photos in order to pick their top 3 images for each category. On the 22nd, the 4 judges gathered together in the morning to go through all of the images and somehow choose the winners. With an outstanding variety of top notch photos submitted it took many hours to come up with the cream of the crop. The 3 judging categories included composition, technical perfection, and the “Wow” factor. The judging was close on many of the images as the talent level of participating photographers was very high.
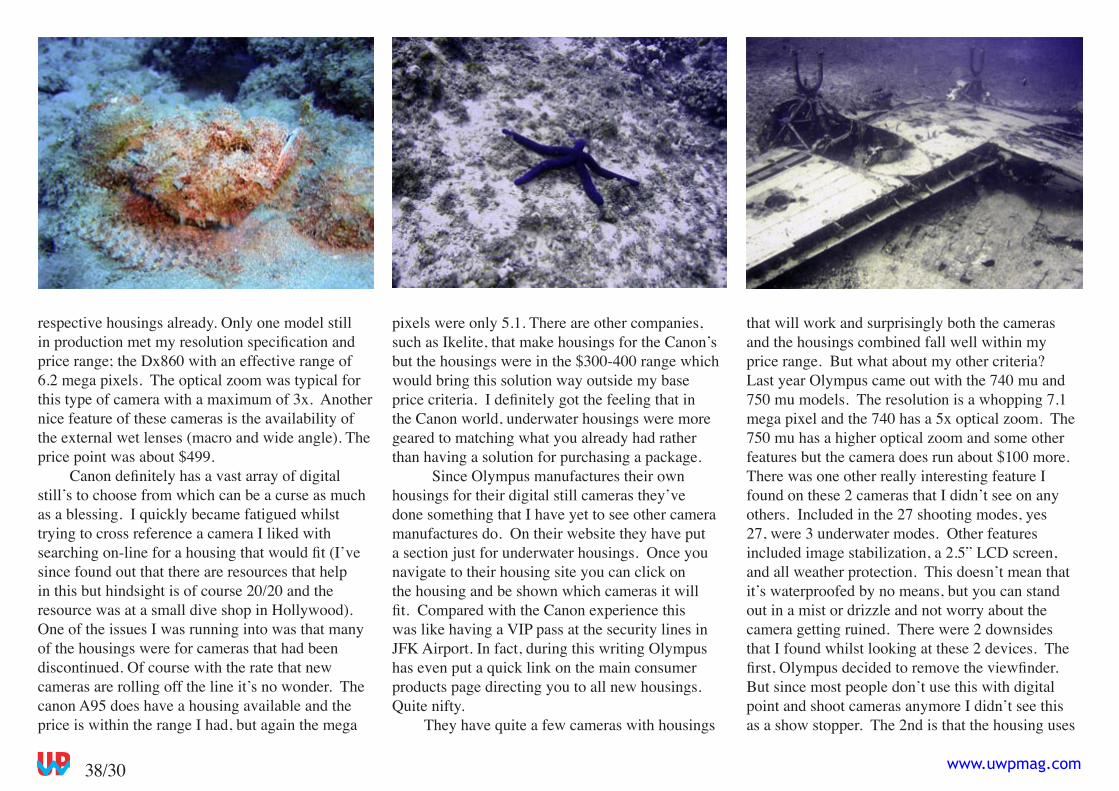
The final night ceremony and award presentation got off to a great start with a fantastic video presentation of the event from Scubazoo’s Sam Fernandez who joined all the participants throughout the week to put together a DVD of the diving and topside activities. With everyone salivating over the prize table, it was time for a slideshow of the week’s images and the award ceremony. With so many great sponsors there were certainly no shortage of prizes for the top � entries in each category, the first prize alone was worth US $�000!! Thanks to sponsors Nautica, Nikon, Layang Layang, Asian Diver, Coral Redang Resort, Macana Maldives Liveaboard, Baani Explorer, Oceanic, GP Batteries, Ralf Tech, NAUI, Borneo Divers, and SMART resort.
www.layanglayang.com
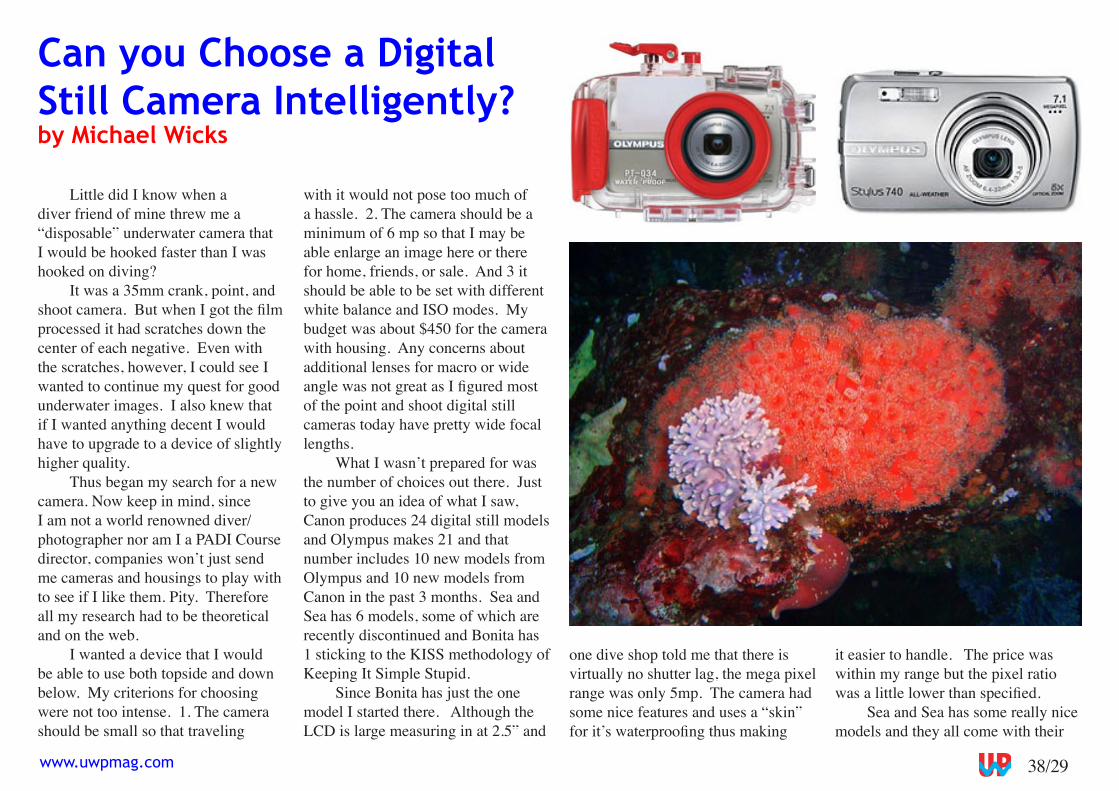
(Left) 1st place WA Mr. Bradley Cox (Australia)(Above) 3rd place Macro Mr. Matthew Lawrence (Australia)

Often fished but rarely dived, Connemara loughs are bog diving territory at its best.
Sliding into brackish water riddled by a seasonal downpour might not be everybody’s idea of a week-end in the Wild West...but for the frustrated winter diver that I am, there is sometimes nothing like the peaty waters of Connemara.
Lough diving in Connemaraby Jerome Hingrat
Ocean Optics 7 Bush House Arcade, Bush HouseStrand, London, WC2B 4PA
Tel 020 7240 8193 Fax 020 7240 7938
Nexus. The Best Value Aluminium Housing For Your D200
* Professional level specification
*Alloy for durability
* Lightweight for travelling
* Includes genuine viewfinder magnifier
* Two strobe outlets
* Specialist split level and super macro ports available
Introductory price £2200 inc 45 degree viewfinder
38/29www.uwpmag.com
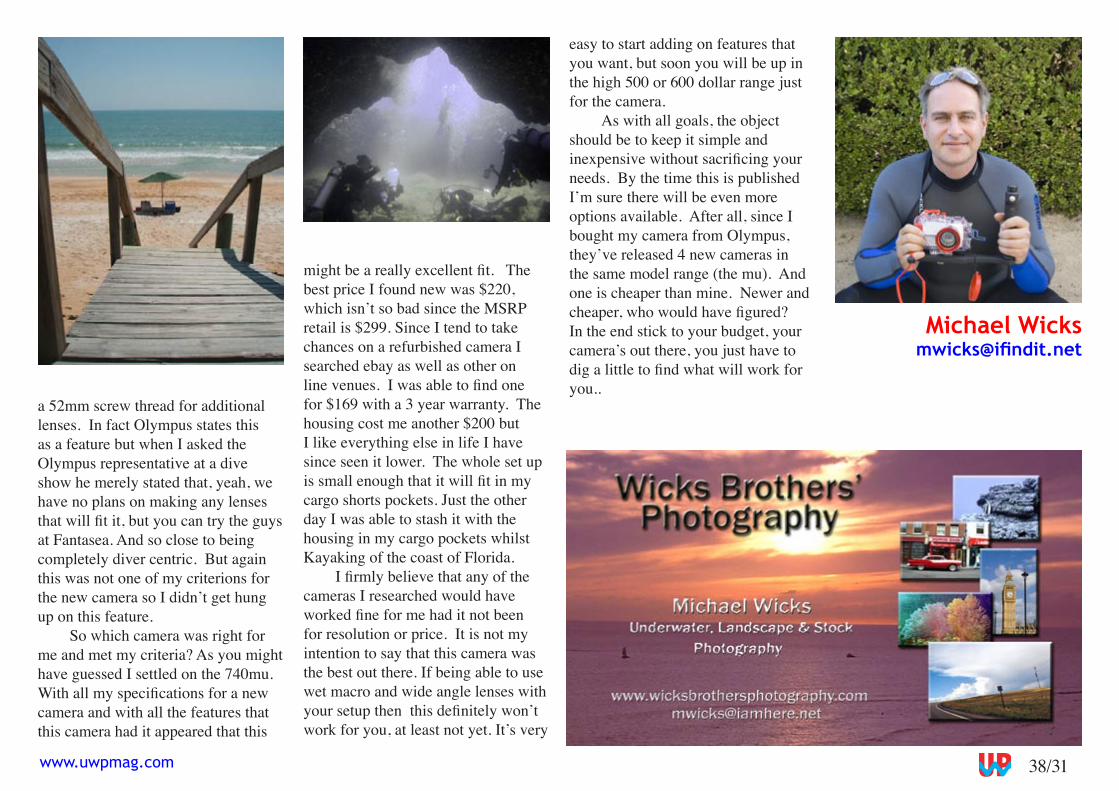
Little did I know when a diver friend of mine threw me a “disposable” underwater camera that I would be hooked faster than I was hooked on diving?
It was a 3�mm crank, point, and shoot camera. But when I got the film processed it had scratches down the center of each negative. Even with the scratches, however, I could see I wanted to continue my quest for good underwater images. I also knew that if I wanted anything decent I would have to upgrade to a device of slightly higher quality.
Thus began my search for a new camera. Now keep in mind, since I am not a world renowned diver/photographer nor am I a PADI Course director, companies won’t just send me cameras and housings to play with to see if I like them. Pity. Therefore all my research had to be theoretical and on the web.
I wanted a device that I would be able to use both topside and down below. My criterions for choosing were not too intense. 1. The camera should be small so that traveling
with it would not pose too much of a hassle. 2. The camera should be a minimum of � mp so that I may be able enlarge an image here or there for home, friends, or sale. And 3 it should be able to be set with different white balance and ISO modes. My budget was about $4�0 for the camera with housing. Any concerns about additional lenses for macro or wide angle was not great as I figured most of the point and shoot digital still cameras today have pretty wide focal lengths.
What I wasn’t prepared for was the number of choices out there. Just to give you an idea of what I saw, Canon produces 24 digital still models and Olympus makes 21 and that number includes 10 new models from Olympus and 10 new models from Canon in the past 3 months. Sea and Sea has � models, some of which are recently discontinued and Bonita has 1 sticking to the KISS methodology of Keeping It Simple Stupid.
Since Bonita has just the one model I started there. Although the LCD is large measuring in at 2.�” and
one dive shop told me that there is virtually no shutter lag, the mega pixel range was only �mp. The camera had some nice features and uses a “skin” for it’s waterproofing thus making
it easier to handle. The price was within my range but the pixel ratio was a little lower than specified.
Sea and Sea has some really nice models and they all come with their
Can you Choose a Digital Still Camera Intelligently?by Michael Wicks
38/30 www.uwpmag.com
respective housings already. Only one model still in production met my resolution specification and price range; the Dx8�0 with an effective range of �.2 mega pixels. The optical zoom was typical for this type of camera with a maximum of 3x. Another nice feature of these cameras is the availability of the external wet lenses (macro and wide angle). The price point was about $499.
Canon definitely has a vast array of digital still’s to choose from which can be a curse as much as a blessing. I quickly became fatigued whilst trying to cross reference a camera I liked with searching on-line for a housing that would fit (I’ve since found out that there are resources that help in this but hindsight is of course 20/20 and the resource was at a small dive shop in Hollywood). One of the issues I was running into was that many of the housings were for cameras that had been discontinued. Of course with the rate that new cameras are rolling off the line it’s no wonder. The canon A95 does have a housing available and the price is within the range I had, but again the mega
pixels were only �.1. There are other companies, such as Ikelite, that make housings for the Canon’s but the housings were in the $300-400 range which would bring this solution way outside my base price criteria. I definitely got the feeling that in the Canon world, underwater housings were more geared to matching what you already had rather than having a solution for purchasing a package.
Since Olympus manufactures their own housings for their digital still cameras they’ve done something that I have yet to see other camera manufactures do. On their website they have put a section just for underwater housings. Once you navigate to their housing site you can click on the housing and be shown which cameras it will fit. Compared with the Canon experience this was like having a VIP pass at the security lines in JFK Airport. In fact, during this writing Olympus has even put a quick link on the main consumer products page directing you to all new housings. Quite nifty.
They have quite a few cameras with housings
that will work and surprisingly both the cameras and the housings combined fall well within my price range. But what about my other criteria? Last year Olympus came out with the 740 mu and 7�0 mu models. The resolution is a whopping 7.1 mega pixel and the 740 has a �x optical zoom. The 7�0 mu has a higher optical zoom and some other features but the camera does run about $100 more. There was one other really interesting feature I found on these 2 cameras that I didn’t see on any others. Included in the 27 shooting modes, yes 27, were 3 underwater modes. Other features included image stabilization, a 2.�” LCD screen, and all weather protection. This doesn’t mean that it’s waterproofed by no means, but you can stand out in a mist or drizzle and not worry about the camera getting ruined. There were 2 downsides that I found whilst looking at these 2 devices. The first, Olympus decided to remove the viewfinder. But since most people don’t use this with digital point and shoot cameras anymore I didn’t see this as a show stopper. The 2nd is that the housing uses
38/31www.uwpmag.com
a �2mm screw thread for additional lenses. In fact Olympus states this as a feature but when I asked the Olympus representative at a dive show he merely stated that, yeah, we have no plans on making any lenses that will fit it, but you can try the guys at Fantasea. And so close to being completely diver centric. But again this was not one of my criterions for the new camera so I didn’t get hung up on this feature.
So which camera was right for me and met my criteria? As you might have guessed I settled on the 740mu. With all my specifications for a new camera and with all the features that this camera had it appeared that this
might be a really excellent fit. The best price I found new was $220, which isn’t so bad since the MSRP retail is $299. Since I tend to take chances on a refurbished camera I searched ebay as well as other on line venues. I was able to find one for $169 with a 3 year warranty. The housing cost me another $200 but I like everything else in life I have since seen it lower. The whole set up is small enough that it will fit in my cargo shorts pockets. Just the other day I was able to stash it with the housing in my cargo pockets whilst Kayaking of the coast of Florida.
I firmly believe that any of the cameras I researched would have worked fine for me had it not been for resolution or price. It is not my intention to say that this camera was the best out there. If being able to use wet macro and wide angle lenses with your setup then this definitely won’t work for you, at least not yet. It’s very
easy to start adding on features that you want, but soon you will be up in the high �00 or �00 dollar range just for the camera.
As with all goals, the object should be to keep it simple and inexpensive without sacrificing your needs. By the time this is published I’m sure there will be even more options available. After all, since I bought my camera from Olympus, they’ve released 4 new cameras in the same model range (the mu). And one is cheaper than mine. Newer and cheaper, who would have figured? In the end stick to your budget, your camera’s out there, you just have to dig a little to find what will work for you..
Michael [email protected]

38/32 www.uwpmag.com
In September 200� I came back from a trip to Raja Ampat in Indonesia convinced that I had reached the boundaries of what my current camera, the Nikon D100, could do and was seriously thinking of an upgrade. At that point in time the D2X was available if you could afford it….and the D200 appeared to be finally not too far away.
My next trip was to Bali that Xmas and a good (and VERY trusting friend) offered to loan me his D2X and Subal housing! After coyly hesitating for at least two nanoseconds I gratefully accepted the offer on the standard proviso that if I flooded it, I owned it….
I have to say that I was amazed at the difference between the two cameras and very pleased with my results in Bali. So I began seriously contemplating upgrading to the D2X until I sat back and did the math. Back then I had two D100’s and two Subal housings, one rig bought brand new and the other bought second-hand from another friend who had decided to upgrade to the D2X & Seacam housing.
Taking two camera rigs, strobes and all the associated stuff on a diving trip is an expensive business these days and I had decided that for my next upgrade I would go with a single housing and two bodies. Two D2X bodies and the Subal housing to match my existing ports is a LOT of money and at the end of the day I just could not justify spending that much on what is still a hobby for me.
So I decided to sell my D100’s & housings before the D200 released and use my back-up F100 & housing whilst I waited for Nikon & Subal to get their acts together. I was pretty lucky with the camera as Sea Optics, the Australian agent for Subal are also a Nikon dealer and not only did they get me one of first D200 bodies to come into the country, but also one of the highly sort after 18-200 VR zooms in January 200�.
However, it was May 200� before I actually got my hands on my new Subal housing complete with the GS viewfinder and June by the time I got it underwater in PNG.
Whilst I was going through this upgrade I decided that it was time to
take a long hard look at all my gear and find the optimum set-up that would give me everything I needed on a dive trip, but minimized what I took with me.
The objective of this article is to explain how I came up with what I now consider to be the “perfect rig” – well for me anyway….and for now!
The Camera: Overall, both for land and underwater, I cannot really fault the D200 – it is an exceptional camera that took prosumer DSLR’s into the second generation of technology.
Much has been written elsewhere
about the functions & features of the D200 so I am just going to mention the two key things that have made a huge difference to the quality of my images.
First the sensor in the D200, which is CCD technology compared to the CMOS sensor in the D2X, and apparently made by Sony with Nikon engineering input. None of which really matters that much to me, but the results are clearly far superior to the D100 in terms of quality of the image and improved dynamic range. The smaller pixels in the D200 sensor @ �.0� microns, compared to the 7.80
The Perfect System...well for now anyway…By Don Silcock
38/33www.uwpmag.com
microns in the D100, produce tremendous detail in the finished image and although the dynamic range of both cameras are roughly the same overall at about 8 stops, the results from the D200 sensor are significantly better.
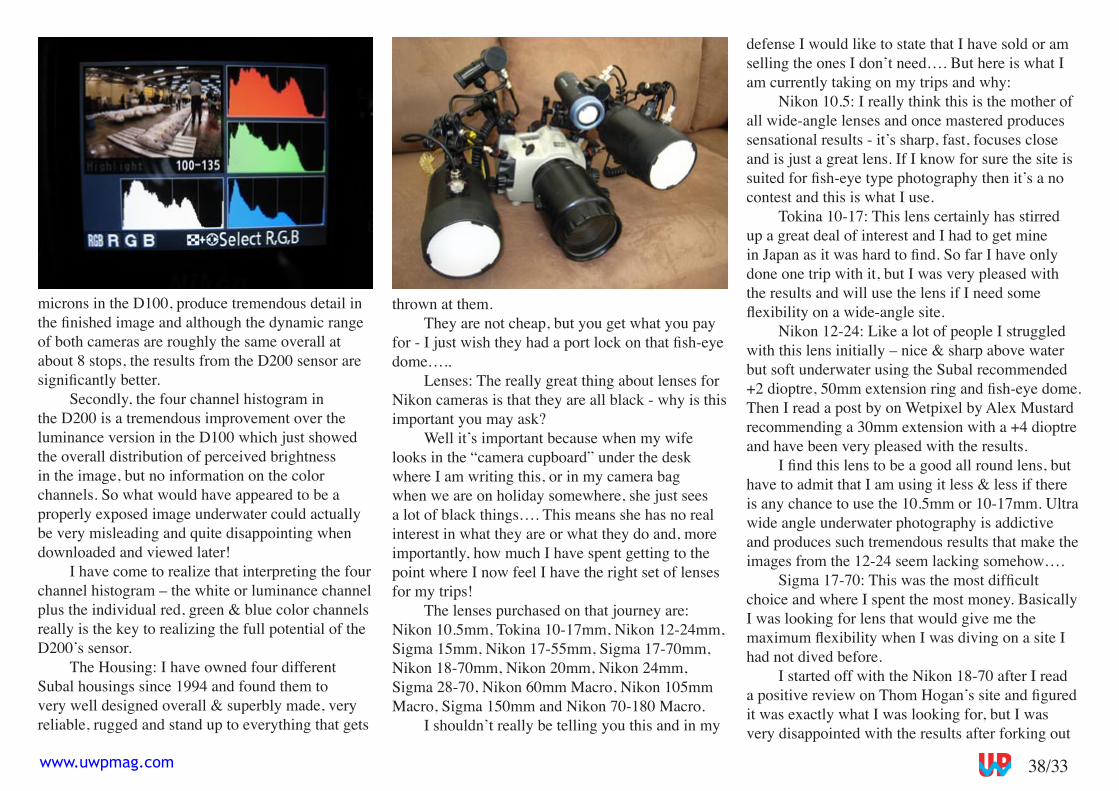
Secondly, the four channel histogram in the D200 is a tremendous improvement over the luminance version in the D100 which just showed the overall distribution of perceived brightness in the image, but no information on the color channels. So what would have appeared to be a properly exposed image underwater could actually be very misleading and quite disappointing when downloaded and viewed later!
I have come to realize that interpreting the four channel histogram – the white or luminance channel plus the individual red, green & blue color channels really is the key to realizing the full potential of the D200’s sensor.
The Housing: I have owned four different Subal housings since 1994 and found them to very well designed overall & superbly made, very reliable, rugged and stand up to everything that gets
thrown at them.They are not cheap, but you get what you pay
for - I just wish they had a port lock on that fish-eye dome…..
Lenses: The really great thing about lenses for Nikon cameras is that they are all black - why is this important you may ask?
Well it’s important because when my wife looks in the “camera cupboard” under the desk where I am writing this, or in my camera bag when we are on holiday somewhere, she just sees a lot of black things…. This means she has no real interest in what they are or what they do and, more importantly, how much I have spent getting to the point where I now feel I have the right set of lenses for my trips!
The lenses purchased on that journey are: Nikon 10.�mm, Tokina 10-17mm, Nikon 12-24mm, Sigma 1�mm, Nikon 17-��mm, Sigma 17-70mm, Nikon 18-70mm, Nikon 20mm, Nikon 24mm, Sigma 28-70, Nikon �0mm Macro, Nikon 10�mm Macro, Sigma 1�0mm and Nikon 70-180 Macro.
I shouldn’t really be telling you this and in my
defense I would like to state that I have sold or am selling the ones I don’t need…. But here is what I am currently taking on my trips and why:
Nikon 10.�: I really think this is the mother of all wide-angle lenses and once mastered produces sensational results - it’s sharp, fast, focuses close and is just a great lens. If I know for sure the site is suited for fish-eye type photography then it’s a no contest and this is what I use.
Tokina 10-17: This lens certainly has stirred up a great deal of interest and I had to get mine in Japan as it was hard to find. So far I have only done one trip with it, but I was very pleased with the results and will use the lens if I need some flexibility on a wide-angle site.
Nikon 12-24: Like a lot of people I struggled with this lens initially – nice & sharp above water but soft underwater using the Subal recommended +2 dioptre, 50mm extension ring and fish-eye dome. Then I read a post by on Wetpixel by Alex Mustard recommending a 30mm extension with a +4 dioptre and have been very pleased with the results.
I find this lens to be a good all round lens, but have to admit that I am using it less & less if there is any chance to use the 10.�mm or 10-17mm. Ultra wide angle underwater photography is addictive and produces such tremendous results that make the images from the 12-24 seem lacking somehow….
Sigma 17-70: This was the most difficult choice and where I spent the most money. Basically I was looking for lens that would give me the maximum flexibility when I was diving on a site I had not dived before.
I started off with the Nikon 18-70 after I read a positive review on Thom Hogan’s site and figured it was exactly what I was looking for, but I was very disappointed with the results after forking out
38/34 www.uwpmag.com
a premium to buy it (kit lenses are not cheap when sold separately…) and the extension ring.
Then I went for the Sigma 28-70mm 2.8 zoom after discussing it with Alex Mustard. This is a nice lens, very fast & sharp but I really wanted something wider.
Then I bit the bullet and bought the Nikon 17-��mm and initially I was blown away by the quality of the lens, particularly when used on land – it really is a premium lens and worth the money. However when used underwater, often in conditions where the visibility is not that good, its inability to focus less than 14” and zoom range become quite frustrating.
So I eventually bought the Sigma 17-70 and although I have only used it on one trip, I used it a lot and was very pleased with the results. It’s sharp, fast, focuses close and offers tremendous flexibility on the same dive plus its great value for money.
Nikon 70-180: I first saw this lens being used by Roger Steene, the godfather of Aussie underwater photographers, on a trip to PNG about four years ago. He swore by it, but I know only
one other person currently using it and he was on the same PNG trip and bought it as soon as he got home!
No longer made by Nikon, I bought my lens new on Ebay from a dealer in Hong Kong and found the Subal port with another dealer in Singapore courtesy of the Subal flea market site.
I find the lens to offer fantastic macro flexibility and it’s my standard macro lens. It has to be said that it’s not the fastest lens in the world, but what it loses in auto focus speed it makes up in sharpness and tremendous flexibility.
Nikon 18-200: I don’t use this lens underwater, but when I am on a trip it’s always mounted on my spare D200 body and available for interesting land shots. I find the lens to be a great general purpose lens that is both sharp and quick.
Strobes: I subscribe to the bigger is better school of thought when it comes to artificial light underwater - powerful strobes are a must in my opinion, both for wide-angle and macro.
The key is having the power available to light the entire subject when you need it and being able
to adjust the power quickly to adjust the lighting without disrupting your “workflow” underwater. Taking photographs underwater is never easy as there are so many variables but the application of artificial light, combined with the four channel histogram feedback telling you how effective that application is, makes the difference between a good image and a great image!
Also, I am not very good at Photoshop and prefer to get my images as good as I can in the camera and then use Rawshooter Premium to just tweak them, so my priority underwater is to get a good four channel histogram and the right strobes are the key to this in my opinion.
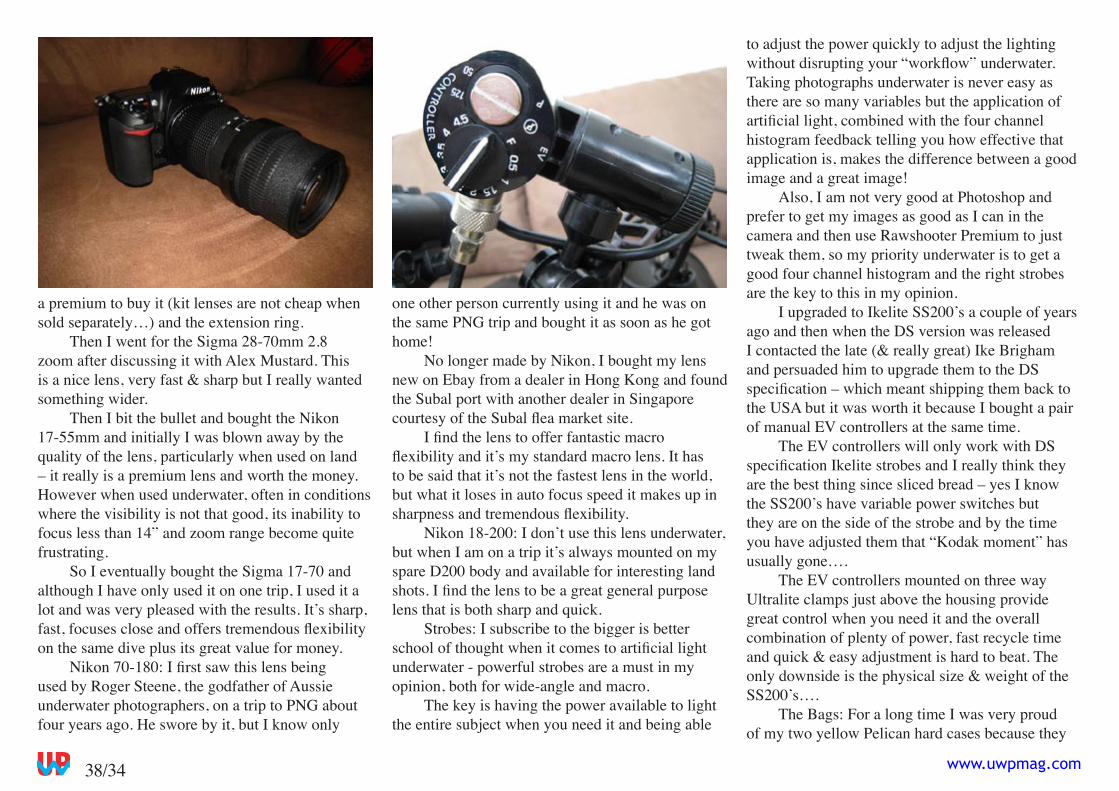
I upgraded to Ikelite SS200’s a couple of years ago and then when the DS version was released I contacted the late (& really great) Ike Brigham and persuaded him to upgrade them to the DS specification – which meant shipping them back to the USA but it was worth it because I bought a pair of manual EV controllers at the same time.
The EV controllers will only work with DS specification Ikelite strobes and I really think they are the best thing since sliced bread – yes I know the SS200’s have variable power switches but they are on the side of the strobe and by the time you have adjusted them that “Kodak moment” has usually gone….
The EV controllers mounted on three way Ultralite clamps just above the housing provide great control when you need it and the overall combination of plenty of power, fast recycle time and quick & easy adjustment is hard to beat. The only downside is the physical size & weight of the SS200’s….
The Bags: For a long time I was very proud of my two yellow Pelican hard cases because they

38/3�www.uwpmag.com
were tough and looked kind of macho. But with the airlines trying to gouge every cent out of their passengers these days I reached the conclusion that they had become a liability - not only are they heavy at nearly 7kg without anything in them, so you are paying excess baggage for the bag itself, but they stand out like a sore thumb almost demanding to be stolen.
So I looked around for the right combination of carry-on luggage that would allow me to take all my gear on board and just check in my dive gear & clothes etc. It seems every underwater photographer has a different opinion about the best way to take
their gear with them, but here is what works for me.I use two carry-on bags, both of which are
within the standard airline size limits of 22” in length, 14” wide and 9” high. The first is a small “roll-on” suitcase that is just big enough to take the Subal housing & 70-180 port, plus the two Ikelite strobes and various bits & pieces like strobe cables. I assemble one D200 body and the 70-180 lens inside the housing & port to save space.
The second bag is a Lowepro Photo Trekker Classic backpack which takes the other body, all the lenses, my laptop and passport & wallet.
Most airlines have a weight limit of 7kg for
carry-on baggage and one bag, although I have never seen the one bag rule enforced, last Xmas on my way to Bali, via Melbourne, security was enforcing the weight limit as passengers went into the departure area. I was forced to check in one bag and opted for the small suitcase as I figured it was well packed with everything in bubble wrap and I was not going to check in all those lenses…. It arrived safely with no damage to any of the contents.
Generally though, the key appears to be keep the backpack on your shoulder when checking in, completely ignore the pain and then nonchalantly point to the roll-on suitcase when asked “do you have any carry-on baggage sir?”
Conclusion: In the “good old days” of film you could buy a new system and confidently expect to have it at least five years. Today the cycle is three years at the very most, unless you decide your current system still does everything you need and you will skip a generation of technology. My opinion is that the advances in each new generation of technology justify the cost and whilst I can afford to pay the cost I will continue to upgrade.
Once that decision is made, it’s a question of managing the life cycle of your system. Selling your current system before the next generation of technology is available is the best way to maximize the price you will get and with my D100’s I got half price by doing that. I got half the cost of the brand new system back after 2.� years of ownership and the same price as I paid for the second-hand system after 1 year of ownership.
Don Silcockwww.indopacificimages.com
38/3� www.uwpmag.com
Fish portraits from Belizeby Gearóid Lane
As an avid reader of UwP, I’m always amazed by the high standard of photography achieved by the regular contributors, and left embarrassed by my own totally amateur efforts. Busy with a day-job and a non-diving family, I usually get one chance a year to dust off the camera, with fingers and toes crossed for good visibility and photogenic beasties. So it was that, a few weeks ago, I hit the road for the annual pilgrimage with a group of friends.
This year’s destination was Belize, for a week’s liveaboard on board Peter Hughes’ luxurious Sun Dancer II. Belize (formerly British Honduras until it was given its independence in 1964) is located on the Yucatan Peninsula with Mexico to the north and Guatemala to the west and south, not forgetting the all-important Caribbean Sea to the East. With the land area of Wales and the population of Nottingham, it’s not a number one must visit destination for the land-based traveller. Offshore it’s a different story with the world’s second largest barrier reef at about 18� miles long.
The expedition to Belize had an added source of excitement – a new
camera! Having worked for many years with my trusted Nikonos V, I’d been waiting for the right moment to go digital – looking for the camera with a low enough price tag and high enough quality for the infrequent perfectionist. For me, the launch of the Nikon D200 signalled that the moment had come. I’ve housed it inside a Sea & Sea DXD200 and re-used my Sea & Sea strobes. On a few test dives in Dorset, I found the kit really comfortable to work with – but how would it bear up on the real deal, five dives a day in the big blue?
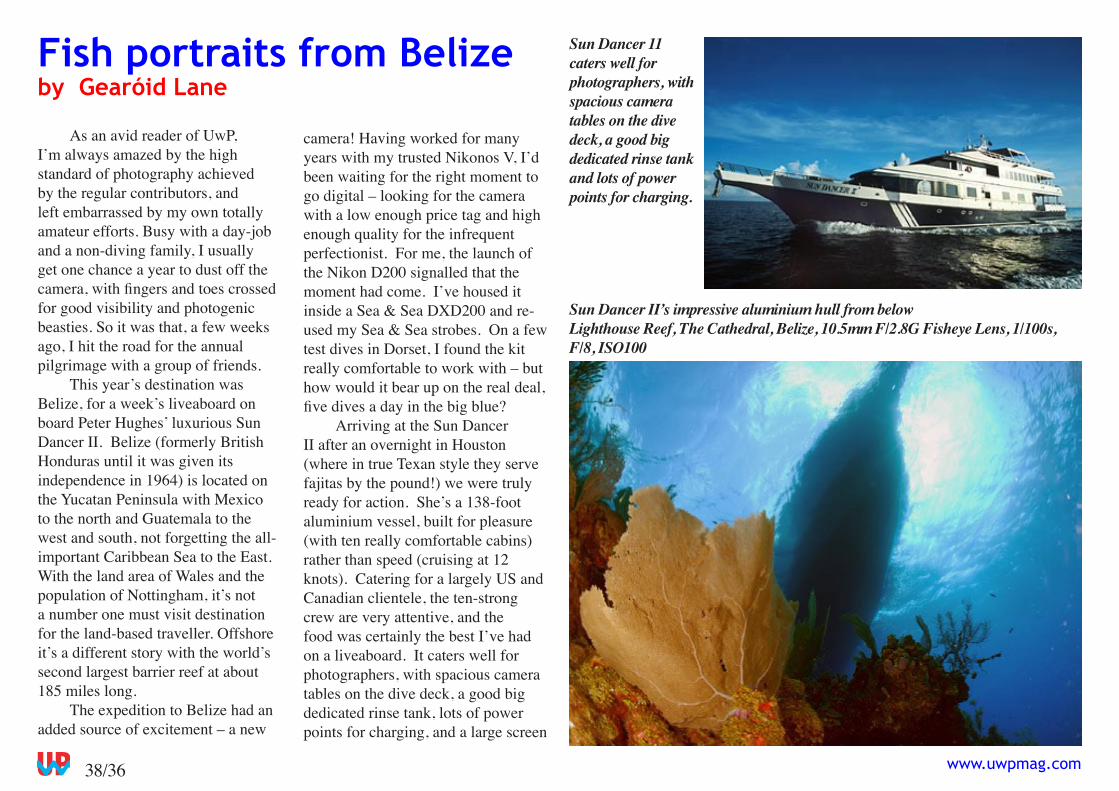
Arriving at the Sun Dancer II after an overnight in Houston (where in true Texan style they serve fajitas by the pound!) we were truly ready for action. She’s a 138-foot aluminium vessel, built for pleasure (with ten really comfortable cabins) rather than speed (cruising at 12 knots). Catering for a largely US and Canadian clientele, the ten-strong crew are very attentive, and the food was certainly the best I’ve had on a liveaboard. It caters well for photographers, with spacious camera tables on the dive deck, a good big dedicated rinse tank, lots of power points for charging, and a large screen
Sun Dancer II’s impressive aluminium hull from belowLighthouse Reef, The Cathedral, Belize, 10.5mm F/2.8G Fisheye Lens, 1/100s, F/8, ISO100
Sun Dancer 11 caters well for photographers, with spacious camera tables on the dive deck, a good big dedicated rinse tank and lots of power points for charging.
38/37www.uwpmag.com
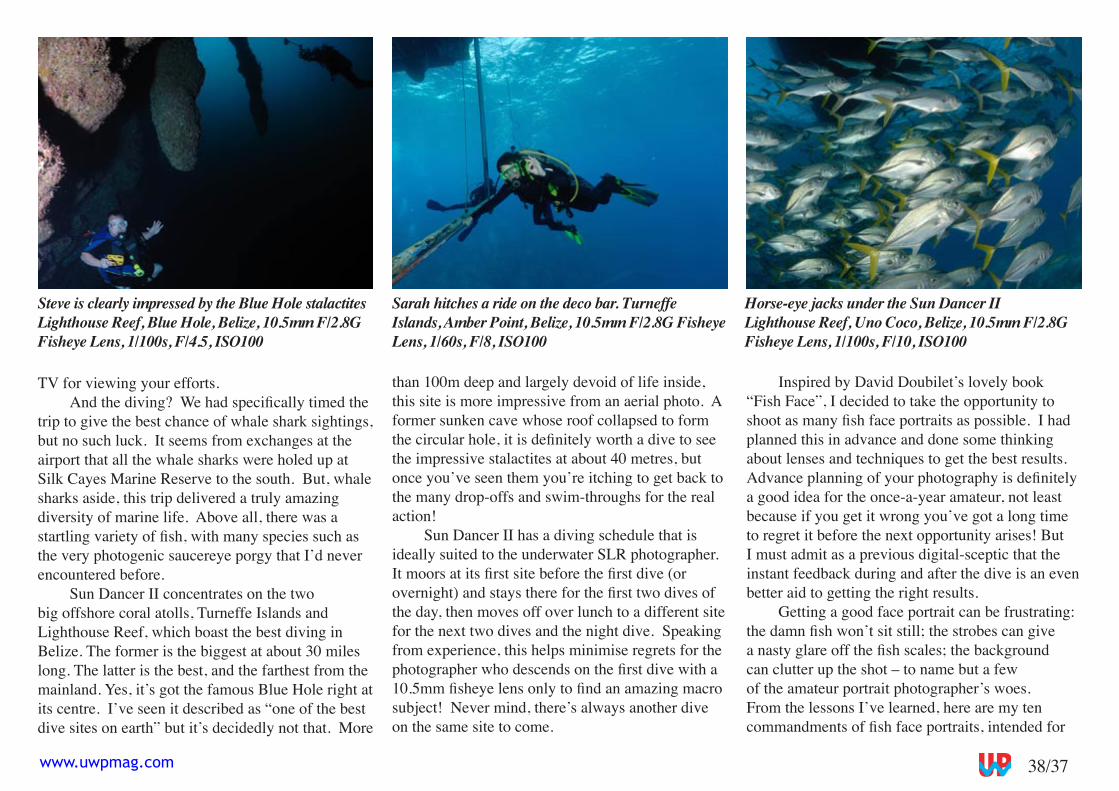
TV for viewing your efforts.And the diving? We had specifically timed the
trip to give the best chance of whale shark sightings, but no such luck. It seems from exchanges at the airport that all the whale sharks were holed up at Silk Cayes Marine Reserve to the south. But, whale sharks aside, this trip delivered a truly amazing diversity of marine life. Above all, there was a startling variety of fish, with many species such as the very photogenic saucereye porgy that I’d never encountered before.
Sun Dancer II concentrates on the two big offshore coral atolls, Turneffe Islands and Lighthouse Reef, which boast the best diving in Belize. The former is the biggest at about 30 miles long. The latter is the best, and the farthest from the mainland. Yes, it’s got the famous Blue Hole right at its centre. I’ve seen it described as “one of the best dive sites on earth” but it’s decidedly not that. More
than 100m deep and largely devoid of life inside, this site is more impressive from an aerial photo. A former sunken cave whose roof collapsed to form the circular hole, it is definitely worth a dive to see the impressive stalactites at about 40 metres, but once you’ve seen them you’re itching to get back to the many drop-offs and swim-throughs for the real action!
Sun Dancer II has a diving schedule that is ideally suited to the underwater SLR photographer. It moors at its first site before the first dive (or overnight) and stays there for the first two dives of the day, then moves off over lunch to a different site for the next two dives and the night dive. Speaking from experience, this helps minimise regrets for the photographer who descends on the first dive with a 10.5mm fisheye lens only to find an amazing macro subject! Never mind, there’s always another dive on the same site to come.
Inspired by David Doubilet’s lovely book “Fish Face”, I decided to take the opportunity to shoot as many fish face portraits as possible. I had planned this in advance and done some thinking about lenses and techniques to get the best results. Advance planning of your photography is definitely a good idea for the once-a-year amateur, not least because if you get it wrong you’ve got a long time to regret it before the next opportunity arises! But I must admit as a previous digital-sceptic that the instant feedback during and after the dive is an even better aid to getting the right results.
Getting a good face portrait can be frustrating: the damn fish won’t sit still; the strobes can give a nasty glare off the fish scales; the background can clutter up the shot – to name but a few of the amateur portrait photographer’s woes. From the lessons I’ve learned, here are my ten commandments of fish face portraits, intended for
Steve is clearly impressed by the Blue Hole stalactitesLighthouse Reef, Blue Hole, Belize, 10.5mm F/2.8G Fisheye Lens, 1/100s, F/4.5, ISO100
Horse-eye jacks under the Sun Dancer IILighthouse Reef, Uno Coco, Belize, 10.5mm F/2.8G Fisheye Lens, 1/100s, F/10, ISO100
Sarah hitches a ride on the deco bar. Turneffe Islands, Amber Point, Belize, 10.5mm F/2.8G Fisheye Lens, 1/60s, F/8, ISO100
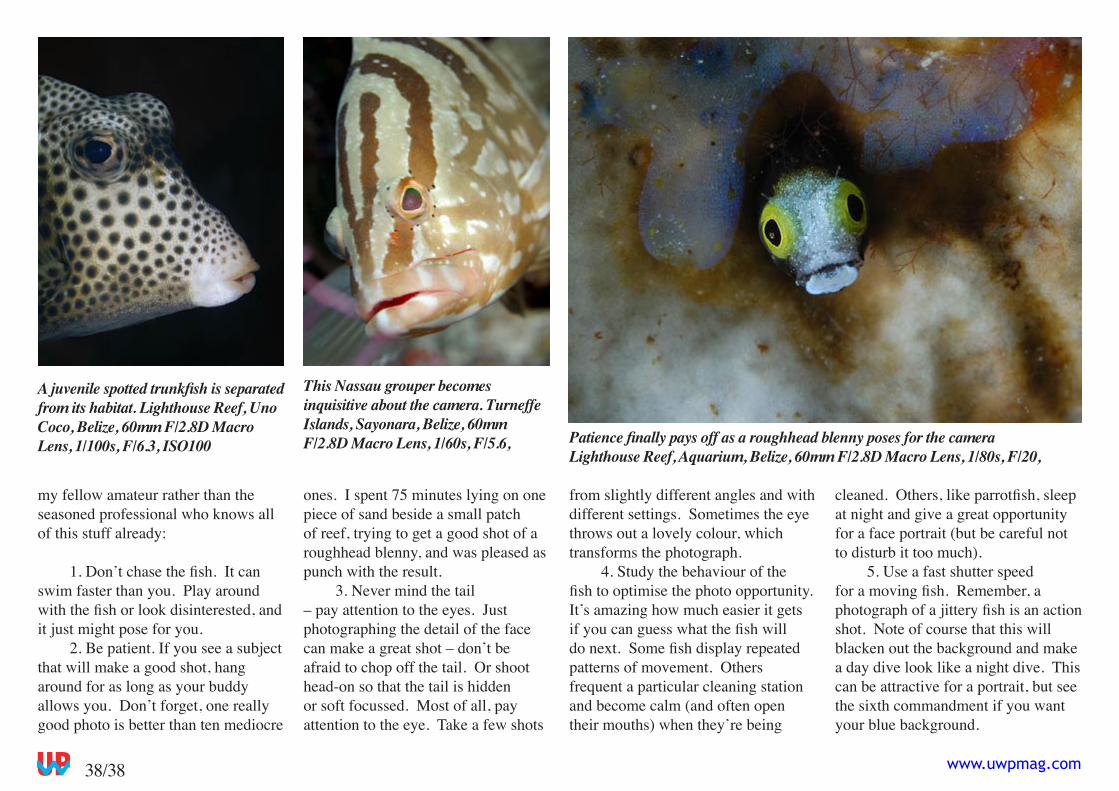
38/38 www.uwpmag.com
my fellow amateur rather than the seasoned professional who knows all of this stuff already:
1. Don’t chase the fish. It can swim faster than you. Play around with the fish or look disinterested, and it just might pose for you.
2. Be patient. If you see a subject that will make a good shot, hang around for as long as your buddy allows you. Don’t forget, one really good photo is better than ten mediocre
ones. I spent 7� minutes lying on one piece of sand beside a small patch of reef, trying to get a good shot of a roughhead blenny, and was pleased as punch with the result.
3. Never mind the tail – pay attention to the eyes. Just photographing the detail of the face can make a great shot – don’t be afraid to chop off the tail. Or shoot head-on so that the tail is hidden or soft focussed. Most of all, pay attention to the eye. Take a few shots
from slightly different angles and with different settings. Sometimes the eye throws out a lovely colour, which transforms the photograph.
4. Study the behaviour of the fish to optimise the photo opportunity. It’s amazing how much easier it gets if you can guess what the fish will do next. Some fish display repeated patterns of movement. Others frequent a particular cleaning station and become calm (and often open their mouths) when they’re being
cleaned. Others, like parrotfish, sleep at night and give a great opportunity for a face portrait (but be careful not to disturb it too much).
�. Use a fast shutter speed for a moving fish. Remember, a photograph of a jittery fish is an action shot. Note of course that this will blacken out the background and make a day dive look like a night dive. This can be attractive for a portrait, but see the sixth commandment if you want your blue background.
A juvenile spotted trunkfish is separated from its habitat. Lighthouse Reef, Uno Coco, Belize, 60mm F/2.8D Macro Lens, 1/100s, F/6.3, ISO100
This Nassau grouper becomes inquisitive about the camera. Turneffe Islands, Sayonara, Belize, 60mm F/2.8D Macro Lens, 1/60s, F/5.6, Patience finally pays off as a roughhead blenny poses for the camera
Lighthouse Reef, Aquarium, Belize, 60mm F/2.8D Macro Lens, 1/80s, F/20,
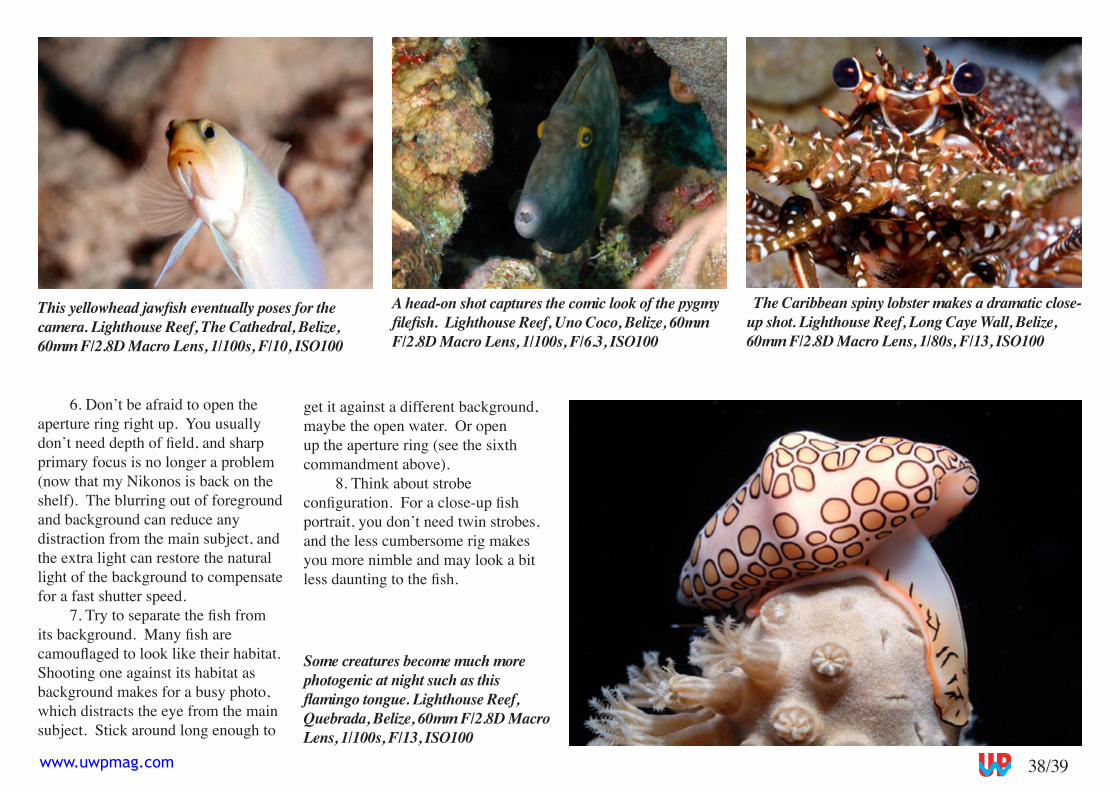
38/39www.uwpmag.com
�. Don’t be afraid to open the aperture ring right up. You usually don’t need depth of field, and sharp primary focus is no longer a problem (now that my Nikonos is back on the shelf). The blurring out of foreground and background can reduce any distraction from the main subject, and the extra light can restore the natural light of the background to compensate for a fast shutter speed.
7. Try to separate the fish from its background. Many fish are camouflaged to look like their habitat. Shooting one against its habitat as background makes for a busy photo, which distracts the eye from the main subject. Stick around long enough to
get it against a different background, maybe the open water. Or open up the aperture ring (see the sixth commandment above).
8. Think about strobe configuration. For a close-up fish portrait, you don’t need twin strobes, and the less cumbersome rig makes you more nimble and may look a bit less daunting to the fish.
This yellowhead jawfish eventually poses for the camera. Lighthouse Reef, The Cathedral, Belize, 60mm F/2.8D Macro Lens, 1/100s, F/10, ISO100
A head-on shot captures the comic look of the pygmy filefish. Lighthouse Reef, Uno Coco, Belize, 60mm F/2.8D Macro Lens, 1/100s, F/6.3, ISO100
The Caribbean spiny lobster makes a dramatic close-up shot. Lighthouse Reef, Long Caye Wall, Belize, 60mm F/2.8D Macro Lens, 1/80s, F/13, ISO100
Some creatures become much more photogenic at night such as this flamingo tongue. Lighthouse Reef, Quebrada, Belize, 60mm F/2.8D Macro Lens, 1/100s, F/13, ISO100
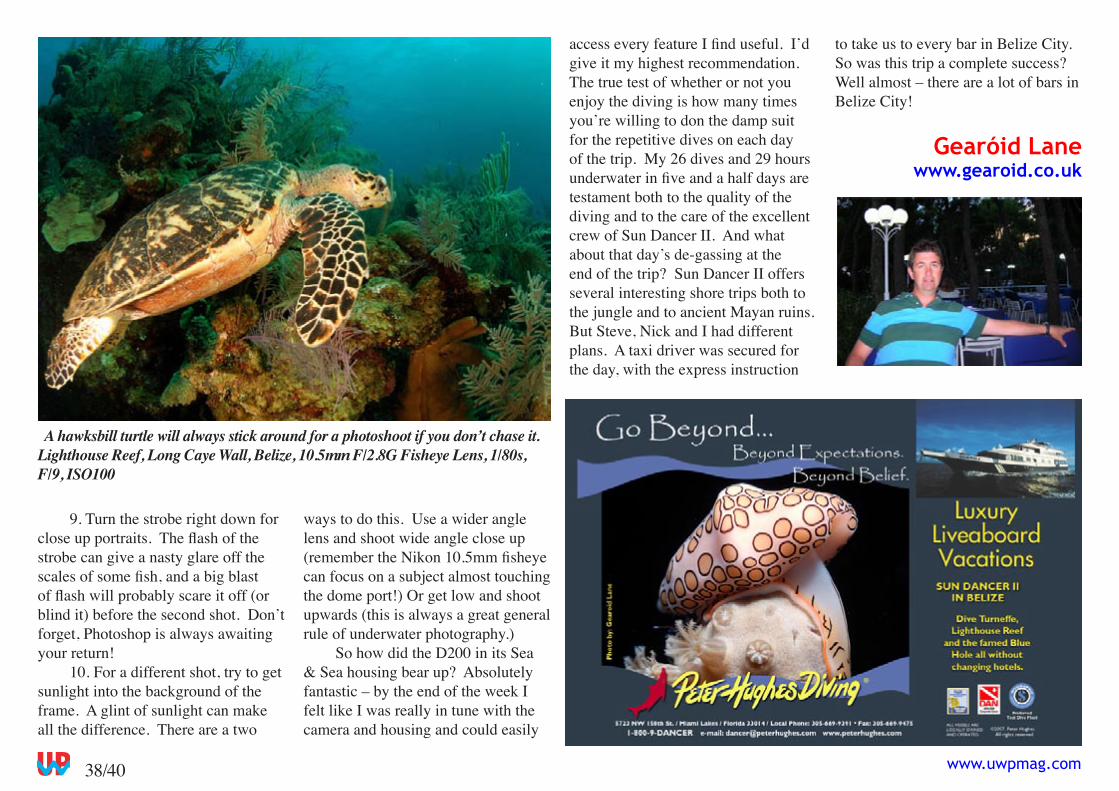
38/40 www.uwpmag.com
9. Turn the strobe right down for close up portraits. The flash of the strobe can give a nasty glare off the scales of some fish, and a big blast of flash will probably scare it off (or blind it) before the second shot. Don’t forget, Photoshop is always awaiting your return!
10. For a different shot, try to get sunlight into the background of the frame. A glint of sunlight can make all the difference. There are a two
ways to do this. Use a wider angle lens and shoot wide angle close up (remember the Nikon 10.5mm fisheye can focus on a subject almost touching the dome port!) Or get low and shoot upwards (this is always a great general rule of underwater photography.)
So how did the D200 in its Sea & Sea housing bear up? Absolutely fantastic – by the end of the week I felt like I was really in tune with the camera and housing and could easily
access every feature I find useful. I’d give it my highest recommendation. The true test of whether or not you enjoy the diving is how many times you’re willing to don the damp suit for the repetitive dives on each day of the trip. My 26 dives and 29 hours underwater in five and a half days are testament both to the quality of the diving and to the care of the excellent crew of Sun Dancer II. And what about that day’s de-gassing at the end of the trip? Sun Dancer II offers several interesting shore trips both to the jungle and to ancient Mayan ruins. But Steve, Nick and I had different plans. A taxi driver was secured for the day, with the express instruction
A hawksbill turtle will always stick around for a photoshoot if you don’t chase it. Lighthouse Reef, Long Caye Wall, Belize, 10.5mm F/2.8G Fisheye Lens, 1/80s, F/9, ISO100
to take us to every bar in Belize City. So was this trip a complete success? Well almost – there are a lot of bars in Belize City!
Gearóid Lanewww.gearoid.co.uk
We’ve got you covered!
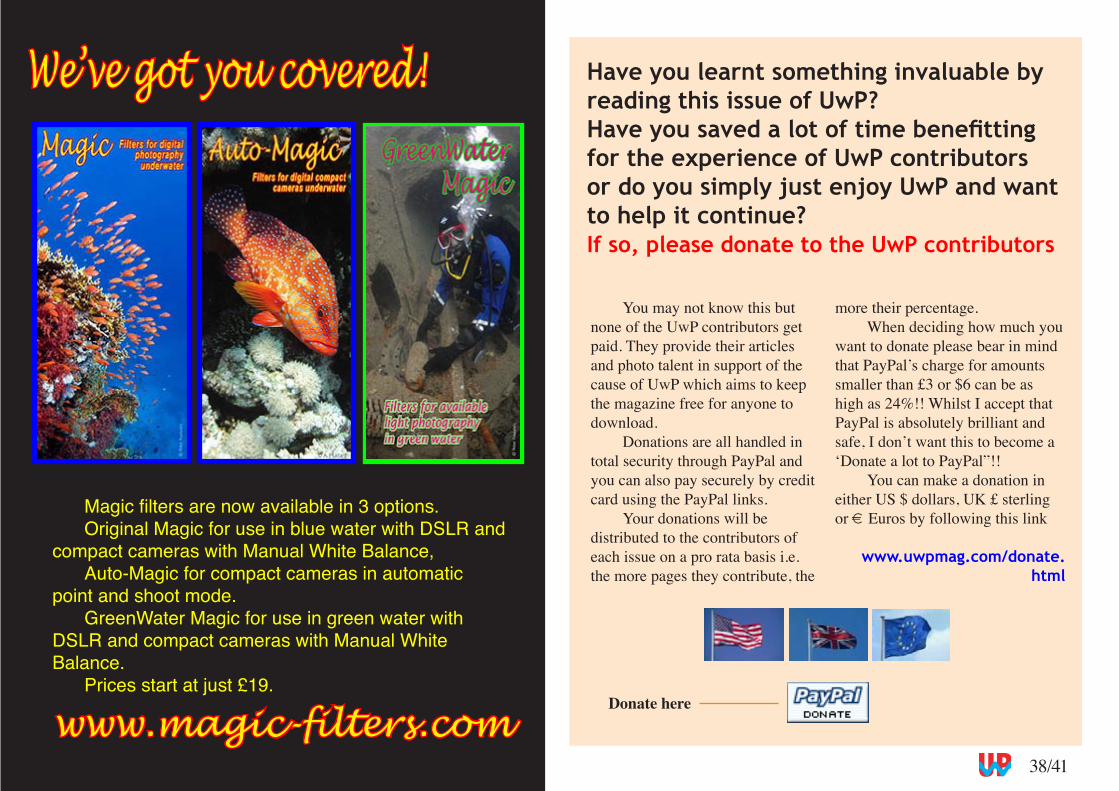
38/41www.uwpmag.com
We’ve got you covered!
www.magic-filters.com
Magic filters are now available in 3 options.Original Magic for use in blue water with DSLR and
compact cameras with Manual White Balance, Auto-Magic for compact cameras in automatic
point and shoot mode.GreenWater Magic for use in green water with
DSLR and compact cameras with Manual White Balance.
Prices start at just £19.
You may not know this but none of the UwP contributors get paid. They provide their articles and photo talent in support of the cause of UwP which aims to keep the magazine free for anyone to download.
Donations are all handled in total security through PayPal and you can also pay securely by credit card using the PayPal links.
Your donations will be distributed to the contributors of each issue on a pro rata basis i.e. the more pages they contribute, the
more their percentage.When deciding how much you
want to donate please bear in mind that PayPal’s charge for amounts smaller than £3 or $� can be as high as 24%!! Whilst I accept that PayPal is absolutely brilliant and safe, I don’t want this to become a ‘Donate a lot to PayPal”!!
You can make a donation in either US $ dollars, UK £ sterling or € Euros by following this link
www.uwpmag.com/donate.html
Have you learnt something invaluable by reading this issue of UwP? Have you saved a lot of time benefitting for the experience of UwP contributors or do you simply just enjoy UwP and want to help it continue?If so, please donate to the UwP contributors
Donate here
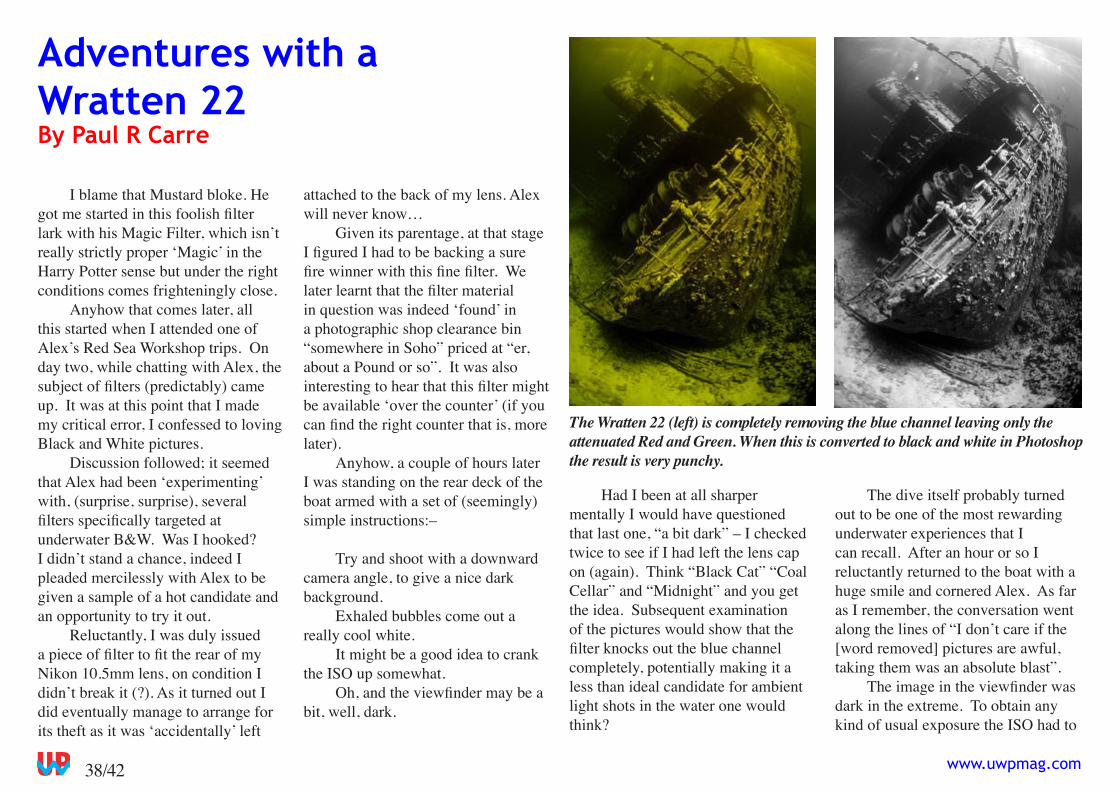
38/42 www.uwpmag.com
I blame that Mustard bloke. He got me started in this foolish filter lark with his Magic Filter, which isn’t really strictly proper ‘Magic’ in the Harry Potter sense but under the right conditions comes frighteningly close.
Anyhow that comes later, all this started when I attended one of Alex’s Red Sea Workshop trips. On day two, while chatting with Alex, the subject of filters (predictably) came up. It was at this point that I made my critical error, I confessed to loving Black and White pictures.
Discussion followed; it seemed that Alex had been ‘experimenting’ with, (surprise, surprise), several filters specifically targeted at underwater B&W. Was I hooked? I didn’t stand a chance, indeed I pleaded mercilessly with Alex to be given a sample of a hot candidate and an opportunity to try it out.
Reluctantly, I was duly issued a piece of filter to fit the rear of my Nikon 10.�mm lens, on condition I didn’t break it (?). As it turned out I did eventually manage to arrange for its theft as it was ‘accidentally’ left
attached to the back of my lens. Alex will never know…
Given its parentage, at that stage I figured I had to be backing a sure fire winner with this fine filter. We later learnt that the filter material in question was indeed ‘found’ in a photographic shop clearance bin “somewhere in Soho” priced at “er, about a Pound or so”. It was also interesting to hear that this filter might be available ‘over the counter’ (if you can find the right counter that is, more later).
Anyhow, a couple of hours later I was standing on the rear deck of the boat armed with a set of (seemingly) simple instructions:–
Try and shoot with a downward camera angle, to give a nice dark background.
Exhaled bubbles come out a really cool white.
It might be a good idea to crank the ISO up somewhat.
Oh, and the viewfinder may be a bit, well, dark.
Had I been at all sharper mentally I would have questioned that last one, “a bit dark” – I checked twice to see if I had left the lens cap on (again). Think “Black Cat” “Coal Cellar” and “Midnight” and you get the idea. Subsequent examination of the pictures would show that the filter knocks out the blue channel completely, potentially making it a less than ideal candidate for ambient light shots in the water one would think?
The dive itself probably turned out to be one of the most rewarding underwater experiences that I can recall. After an hour or so I reluctantly returned to the boat with a huge smile and cornered Alex. As far as I remember, the conversation went along the lines of “I don’t care if the [word removed] pictures are awful, taking them was an absolute blast”.
The image in the viewfinder was dark in the extreme. To obtain any kind of usual exposure the ISO had to
Adventures with a Wratten 22By Paul R Carre
The Wratten 22 (left) is completely removing the blue channel leaving only the attenuated Red and Green. When this is converted to black and white in Photoshop the result is very punchy.
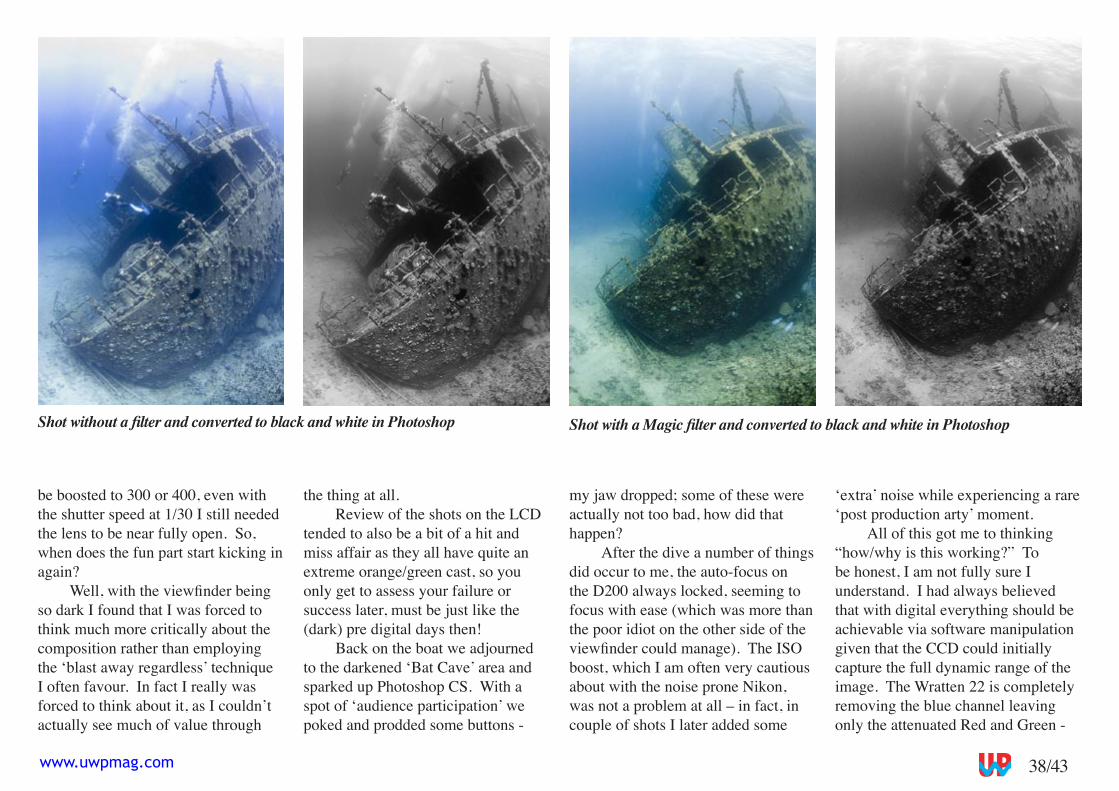
38/43www.uwpmag.com
be boosted to 300 or 400, even with the shutter speed at 1/30 I still needed the lens to be near fully open. So, when does the fun part start kicking in again?
Well, with the viewfinder being so dark I found that I was forced to think much more critically about the composition rather than employing the ‘blast away regardless’ technique I often favour. In fact I really was forced to think about it, as I couldn’t actually see much of value through
the thing at all. Review of the shots on the LCD
tended to also be a bit of a hit and miss affair as they all have quite an extreme orange/green cast, so you only get to assess your failure or success later, must be just like the (dark) pre digital days then!
Back on the boat we adjourned to the darkened ‘Bat Cave’ area and sparked up Photoshop CS. With a spot of ‘audience participation’ we poked and prodded some buttons -
my jaw dropped; some of these were actually not too bad, how did that happen?
After the dive a number of things did occur to me, the auto-focus on the D200 always locked, seeming to focus with ease (which was more than the poor idiot on the other side of the viewfinder could manage). The ISO boost, which I am often very cautious about with the noise prone Nikon, was not a problem at all – in fact, in couple of shots I later added some
‘extra’ noise while experiencing a rare ‘post production arty’ moment.
All of this got me to thinking “how/why is this working?” To be honest, I am not fully sure I understand. I had always believed that with digital everything should be achievable via software manipulation given that the CCD could initially capture the full dynamic range of the image. The Wratten 22 is completely removing the blue channel leaving only the attenuated Red and Green -
Shot without a filter and converted to black and white in Photoshop Shot with a Magic filter and converted to black and white in Photoshop
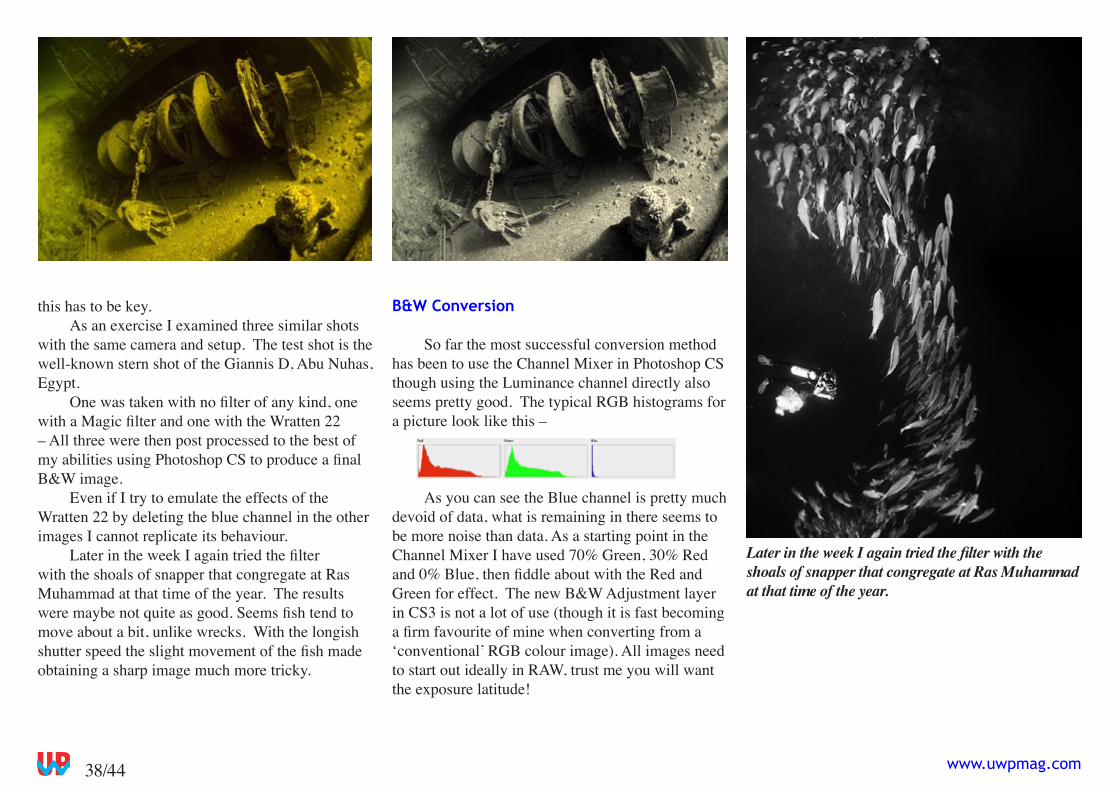
38/44 www.uwpmag.com
this has to be key.As an exercise I examined three similar shots
with the same camera and setup. The test shot is the well-known stern shot of the Giannis D, Abu Nuhas, Egypt.
One was taken with no filter of any kind, one with a Magic filter and one with the Wratten 22 – All three were then post processed to the best of my abilities using Photoshop CS to produce a final B&W image.
Even if I try to emulate the effects of the Wratten 22 by deleting the blue channel in the other images I cannot replicate its behaviour.
Later in the week I again tried the filter with the shoals of snapper that congregate at Ras Muhammad at that time of the year. The results were maybe not quite as good. Seems fish tend to move about a bit, unlike wrecks. With the longish shutter speed the slight movement of the fish made obtaining a sharp image much more tricky.
B&W Conversion
So far the most successful conversion method has been to use the Channel Mixer in Photoshop CS though using the Luminance channel directly also seems pretty good. The typical RGB histograms for a picture look like this –
As you can see the Blue channel is pretty much devoid of data, what is remaining in there seems to be more noise than data. As a starting point in the Channel Mixer I have used 70% Green, 30% Red and 0% Blue, then fiddle about with the Red and Green for effect. The new B&W Adjustment layer in CS3 is not a lot of use (though it is fast becoming a firm favourite of mine when converting from a ‘conventional’ RGB colour image). All images need to start out ideally in RAW, trust me you will want the exposure latitude!
Later in the week I again tried the filter with the shoals of snapper that congregate at Ras Muhammad at that time of the year.
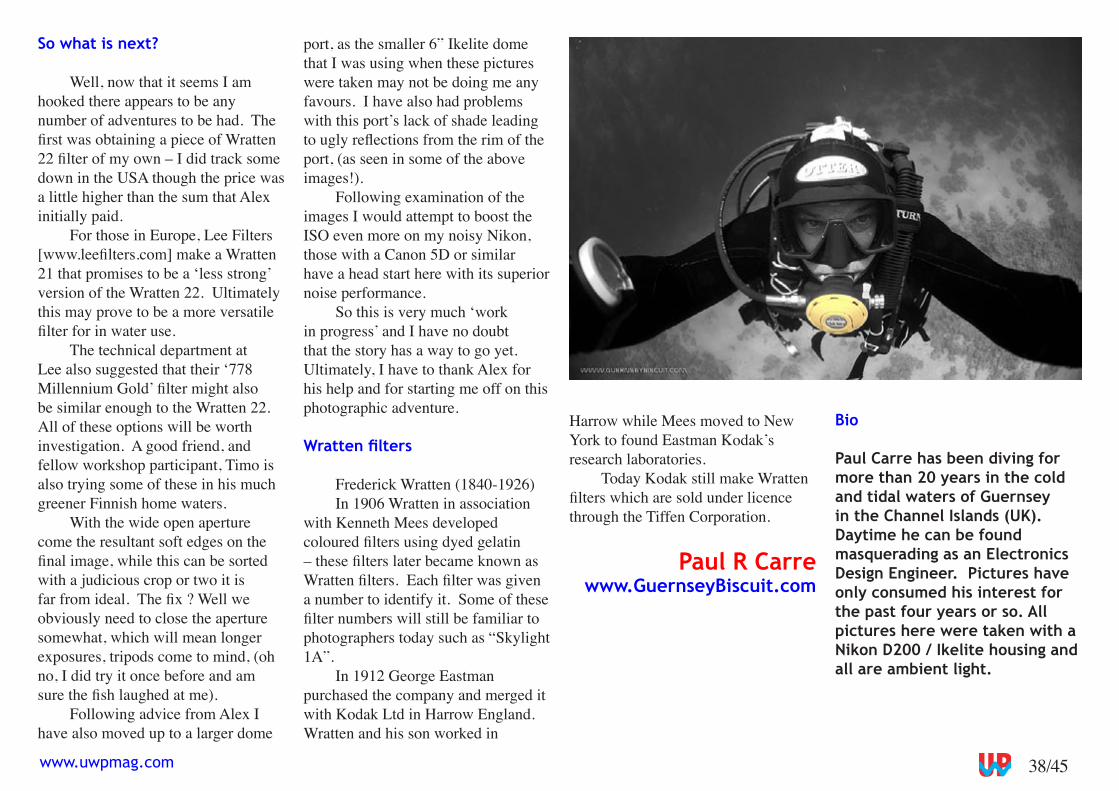
38/4�www.uwpmag.com
So what is next?
Well, now that it seems I am hooked there appears to be any number of adventures to be had. The first was obtaining a piece of Wratten 22 filter of my own – I did track some down in the USA though the price was a little higher than the sum that Alex initially paid.
For those in Europe, Lee Filters [www.leefilters.com] make a Wratten 21 that promises to be a ‘less strong’ version of the Wratten 22. Ultimately this may prove to be a more versatile filter for in water use.
The technical department at Lee also suggested that their ‘778 Millennium Gold’ filter might also be similar enough to the Wratten 22. All of these options will be worth investigation. A good friend, and fellow workshop participant, Timo is also trying some of these in his much greener Finnish home waters.
With the wide open aperture come the resultant soft edges on the final image, while this can be sorted with a judicious crop or two it is far from ideal. The fix ? Well we obviously need to close the aperture somewhat, which will mean longer exposures, tripods come to mind, (oh no, I did try it once before and am sure the fish laughed at me).
Following advice from Alex I have also moved up to a larger dome
port, as the smaller �” Ikelite dome that I was using when these pictures were taken may not be doing me any favours. I have also had problems with this port’s lack of shade leading to ugly reflections from the rim of the port, (as seen in some of the above images!).
Following examination of the images I would attempt to boost the ISO even more on my noisy Nikon, those with a Canon �D or similar have a head start here with its superior noise performance.
So this is very much ‘work in progress’ and I have no doubt that the story has a way to go yet. Ultimately, I have to thank Alex for his help and for starting me off on this photographic adventure.
Wratten filters
Frederick Wratten (1840-1926) In 1906 Wratten in association
with Kenneth Mees developed coloured filters using dyed gelatin – these filters later became known as Wratten filters. Each filter was given a number to identify it. Some of these filter numbers will still be familiar to photographers today such as “Skylight 1A”.
In 1912 George Eastman purchased the company and merged it with Kodak Ltd in Harrow England. Wratten and his son worked in
Harrow while Mees moved to New York to found Eastman Kodak’s research laboratories.
Today Kodak still make Wratten filters which are sold under licence through the Tiffen Corporation.
Paul R Carrewww.GuernseyBiscuit.com
Bio
Paul Carre has been diving for more than 20 years in the cold and tidal waters of Guernsey in the Channel Islands (UK). Daytime he can be found masquerading as an Electronics Design Engineer. Pictures have only consumed his interest for the past four years or so. All pictures here were taken with a Nikon D200 / Ikelite housing and all are ambient light.
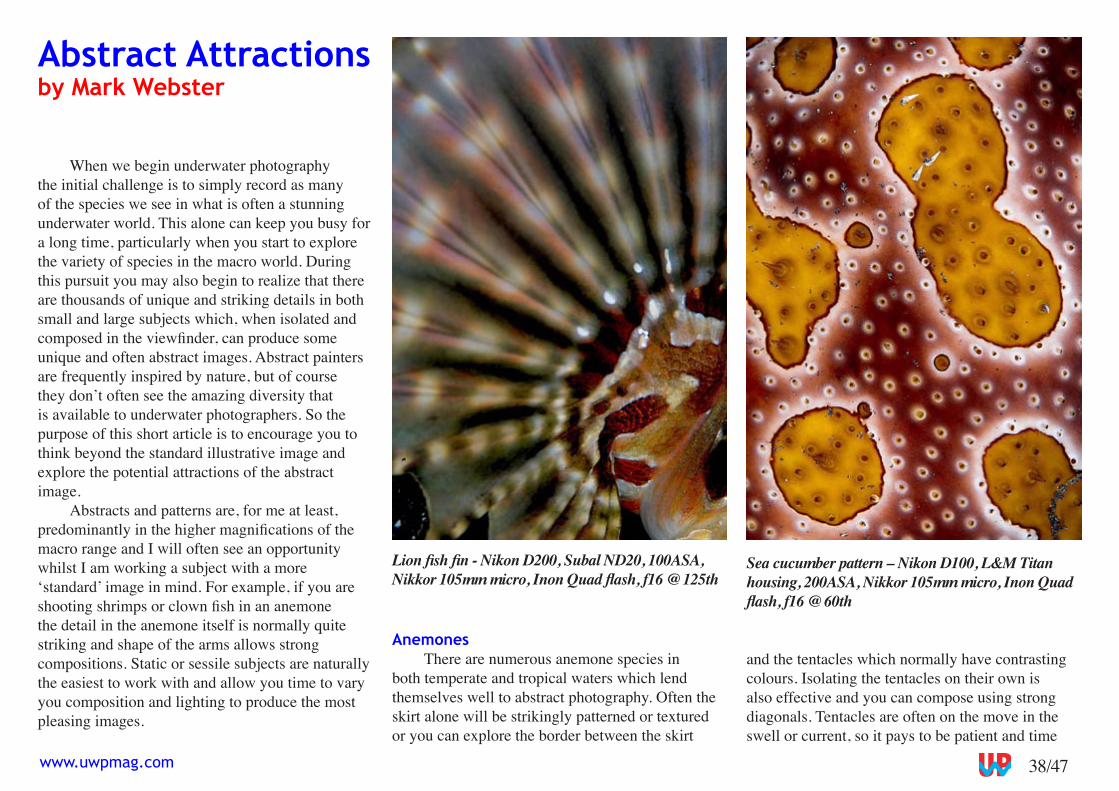
38/47www.uwpmag.com
When we begin underwater photography the initial challenge is to simply record as many of the species we see in what is often a stunning underwater world. This alone can keep you busy for a long time, particularly when you start to explore the variety of species in the macro world. During this pursuit you may also begin to realize that there are thousands of unique and striking details in both small and large subjects which, when isolated and composed in the viewfinder, can produce some unique and often abstract images. Abstract painters are frequently inspired by nature, but of course they don’t often see the amazing diversity that is available to underwater photographers. So the purpose of this short article is to encourage you to think beyond the standard illustrative image and explore the potential attractions of the abstract image.
Abstracts and patterns are, for me at least, predominantly in the higher magnifications of the macro range and I will often see an opportunity whilst I am working a subject with a more ‘standard’ image in mind. For example, if you are shooting shrimps or clown fish in an anemone the detail in the anemone itself is normally quite striking and shape of the arms allows strong compositions. Static or sessile subjects are naturally the easiest to work with and allow you time to vary you composition and lighting to produce the most pleasing images.
Abstract Attractionsby Mark Webster
Sea cucumber pattern – Nikon D100, L&M Titan housing, 200ASA, Nikkor 105mm micro, Inon Quad flash, f16 @ 60th
Lion fish fin - Nikon D200, Subal ND20, 100ASA, Nikkor 105mm micro, Inon Quad flash, f16 @ 125th
Anemones There are numerous anemone species in
both temperate and tropical waters which lend themselves well to abstract photography. Often the skirt alone will be strikingly patterned or textured or you can explore the border between the skirt
and the tentacles which normally have contrasting colours. Isolating the tentacles on their own is also effective and you can compose using strong diagonals. Tentacles are often on the move in the swell or current, so it pays to be patient and time
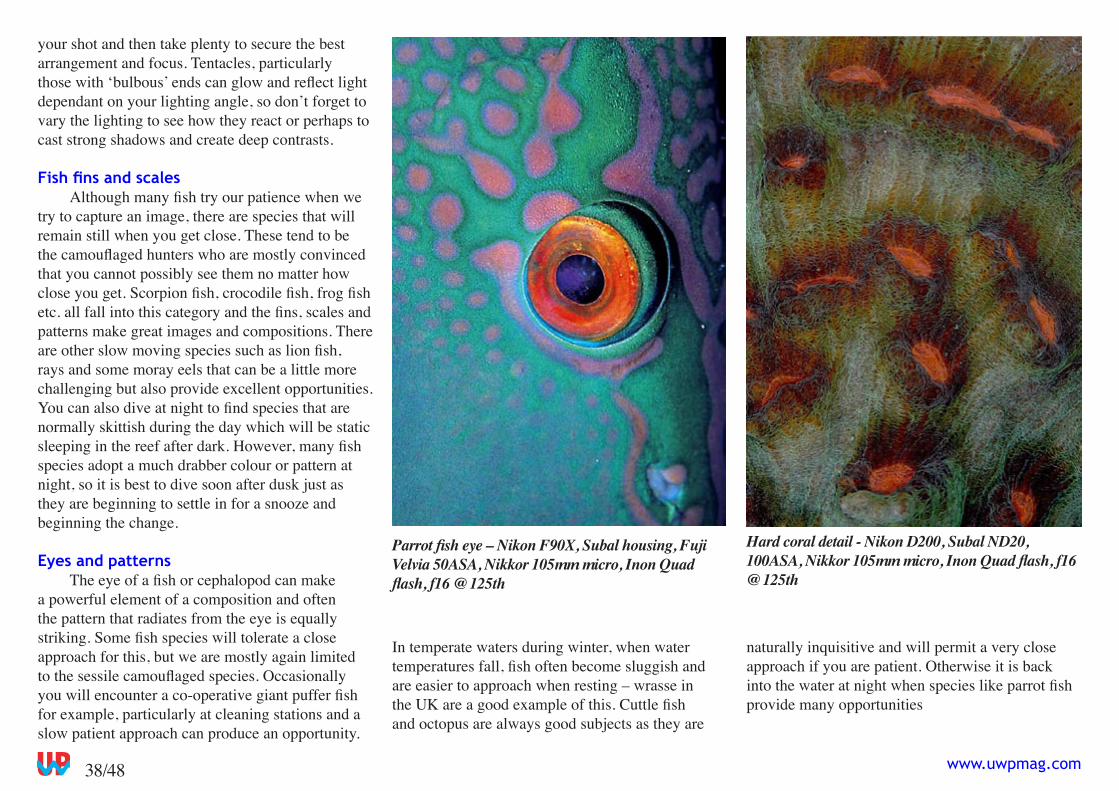
38/48 www.uwpmag.com
your shot and then take plenty to secure the best arrangement and focus. Tentacles, particularly those with ‘bulbous’ ends can glow and reflect light dependant on your lighting angle, so don’t forget to vary the lighting to see how they react or perhaps to cast strong shadows and create deep contrasts.
Fish fins and scales Although many fish try our patience when we
try to capture an image, there are species that will remain still when you get close. These tend to be the camouflaged hunters who are mostly convinced that you cannot possibly see them no matter how close you get. Scorpion fish, crocodile fish, frog fish etc. all fall into this category and the fins, scales and patterns make great images and compositions. There are other slow moving species such as lion fish, rays and some moray eels that can be a little more challenging but also provide excellent opportunities. You can also dive at night to find species that are normally skittish during the day which will be static sleeping in the reef after dark. However, many fish species adopt a much drabber colour or pattern at night, so it is best to dive soon after dusk just as they are beginning to settle in for a snooze and beginning the change.
Eyes and patterns The eye of a fish or cephalopod can make
a powerful element of a composition and often the pattern that radiates from the eye is equally striking. Some fish species will tolerate a close approach for this, but we are mostly again limited to the sessile camouflaged species. Occasionally you will encounter a co-operative giant puffer fish for example, particularly at cleaning stations and a slow patient approach can produce an opportunity.
In temperate waters during winter, when water temperatures fall, fish often become sluggish and are easier to approach when resting – wrasse in the UK are a good example of this. Cuttle fish and octopus are always good subjects as they are
naturally inquisitive and will permit a very close approach if you are patient. Otherwise it is back into the water at night when species like parrot fish provide many opportunities
Parrot fish eye – Nikon F90X, Subal housing, Fuji Velvia 50ASA, Nikkor 105mm micro, Inon Quad flash, f16 @ 125th
Hard coral detail - Nikon D200, Subal ND20, 100ASA, Nikkor 105mm micro, Inon Quad flash, f16 @ 125th
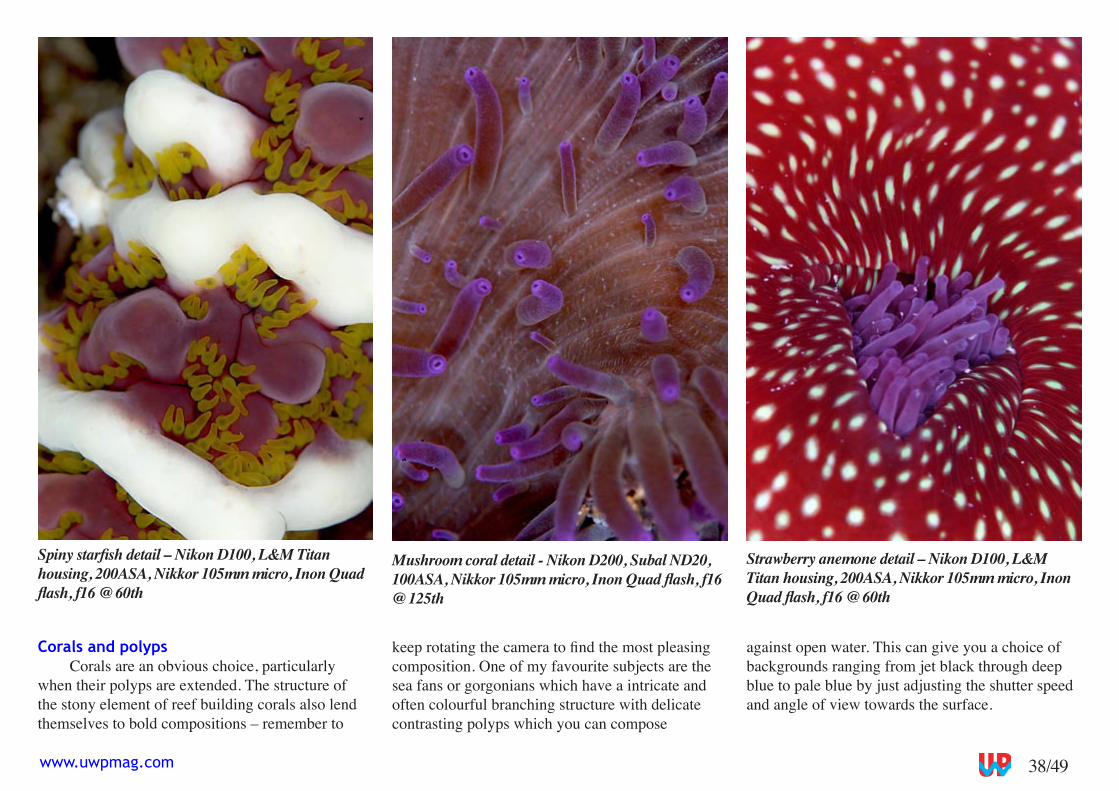
38/49www.uwpmag.com
Corals and polypsCorals are an obvious choice, particularly
when their polyps are extended. The structure of the stony element of reef building corals also lend themselves to bold compositions – remember to
keep rotating the camera to find the most pleasing composition. One of my favourite subjects are the sea fans or gorgonians which have a intricate and often colourful branching structure with delicate contrasting polyps which you can compose
against open water. This can give you a choice of backgrounds ranging from jet black through deep blue to pale blue by just adjusting the shutter speed and angle of view towards the surface.
Spiny starfish detail – Nikon D100, L&M Titan housing, 200ASA, Nikkor 105mm micro, Inon Quad flash, f16 @ 60th
Mushroom coral detail - Nikon D200, Subal ND20, 100ASA, Nikkor 105mm micro, Inon Quad flash, f16 @ 125th
Strawberry anemone detail – Nikon D100, L&M Titan housing, 200ASA, Nikkor 105mm micro, Inon Quad flash, f16 @ 60th
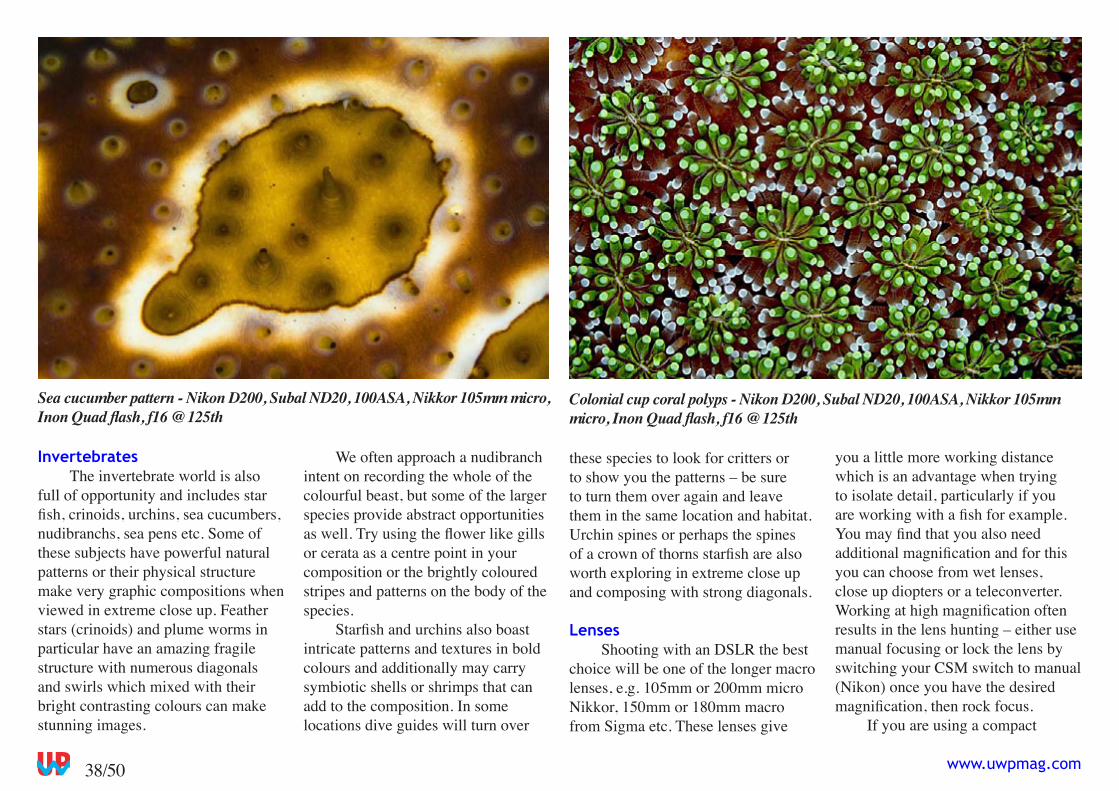
38/�0 www.uwpmag.com
InvertebratesThe invertebrate world is also
full of opportunity and includes star fish, crinoids, urchins, sea cucumbers, nudibranchs, sea pens etc. Some of these subjects have powerful natural patterns or their physical structure make very graphic compositions when viewed in extreme close up. Feather stars (crinoids) and plume worms in particular have an amazing fragile structure with numerous diagonals and swirls which mixed with their bright contrasting colours can make stunning images.
We often approach a nudibranch intent on recording the whole of the colourful beast, but some of the larger species provide abstract opportunities as well. Try using the flower like gills or cerata as a centre point in your composition or the brightly coloured stripes and patterns on the body of the species.
Starfish and urchins also boast intricate patterns and textures in bold colours and additionally may carry symbiotic shells or shrimps that can add to the composition. In some locations dive guides will turn over
these species to look for critters or to show you the patterns – be sure to turn them over again and leave them in the same location and habitat. Urchin spines or perhaps the spines of a crown of thorns starfish are also worth exploring in extreme close up and composing with strong diagonals.
LensesShooting with an DSLR the best
choice will be one of the longer macro lenses, e.g. 10�mm or 200mm micro Nikkor, 1�0mm or 180mm macro from Sigma etc. These lenses give
you a little more working distance which is an advantage when trying to isolate detail, particularly if you are working with a fish for example. You may find that you also need additional magnification and for this you can choose from wet lenses, close up diopters or a teleconverter. Working at high magnification often results in the lens hunting – either use manual focusing or lock the lens by switching your CSM switch to manual (Nikon) once you have the desired magnification, then rock focus.
If you are using a compact
Sea cucumber pattern - Nikon D200, Subal ND20, 100ASA, Nikkor 105mm micro, Inon Quad flash, f16 @ 125th
Colonial cup coral polyps - Nikon D200, Subal ND20, 100ASA, Nikkor 105mm micro, Inon Quad flash, f16 @ 125th
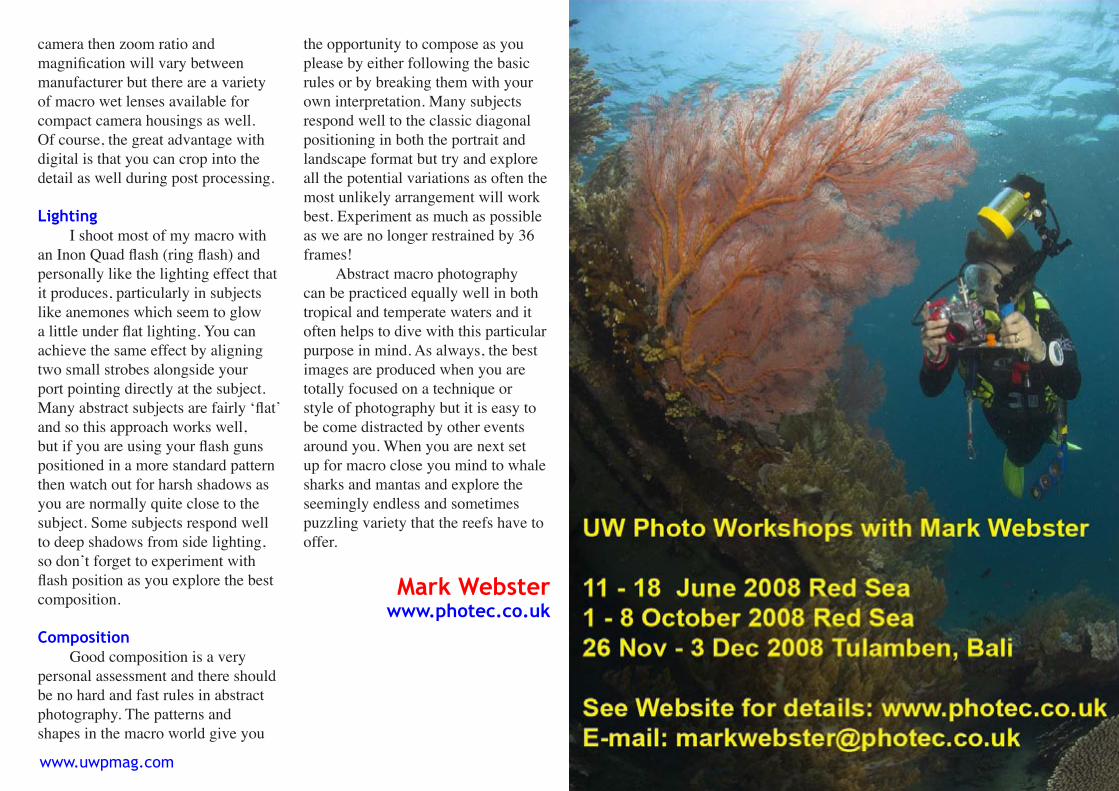
38/�1www.uwpmag.com
camera then zoom ratio and magnification will vary between manufacturer but there are a variety of macro wet lenses available for compact camera housings as well. Of course, the great advantage with digital is that you can crop into the detail as well during post processing.
Lighting
I shoot most of my macro with an Inon Quad flash (ring flash) and personally like the lighting effect that it produces, particularly in subjects like anemones which seem to glow a little under flat lighting. You can achieve the same effect by aligning two small strobes alongside your port pointing directly at the subject. Many abstract subjects are fairly ‘flat’ and so this approach works well, but if you are using your flash guns positioned in a more standard pattern then watch out for harsh shadows as you are normally quite close to the subject. Some subjects respond well to deep shadows from side lighting, so don’t forget to experiment with flash position as you explore the best composition.
CompositionGood composition is a very
personal assessment and there should be no hard and fast rules in abstract photography. The patterns and shapes in the macro world give you
the opportunity to compose as you please by either following the basic rules or by breaking them with your own interpretation. Many subjects respond well to the classic diagonal positioning in both the portrait and landscape format but try and explore all the potential variations as often the most unlikely arrangement will work best. Experiment as much as possible as we are no longer restrained by 3� frames!
Abstract macro photography can be practiced equally well in both tropical and temperate waters and it often helps to dive with this particular purpose in mind. As always, the best images are produced when you are totally focused on a technique or style of photography but it is easy to be come distracted by other events around you. When you are next set up for macro close you mind to whale sharks and mantas and explore the seemingly endless and sometimes puzzling variety that the reefs have to offer.
Mark Websterwww.photec.co.uk
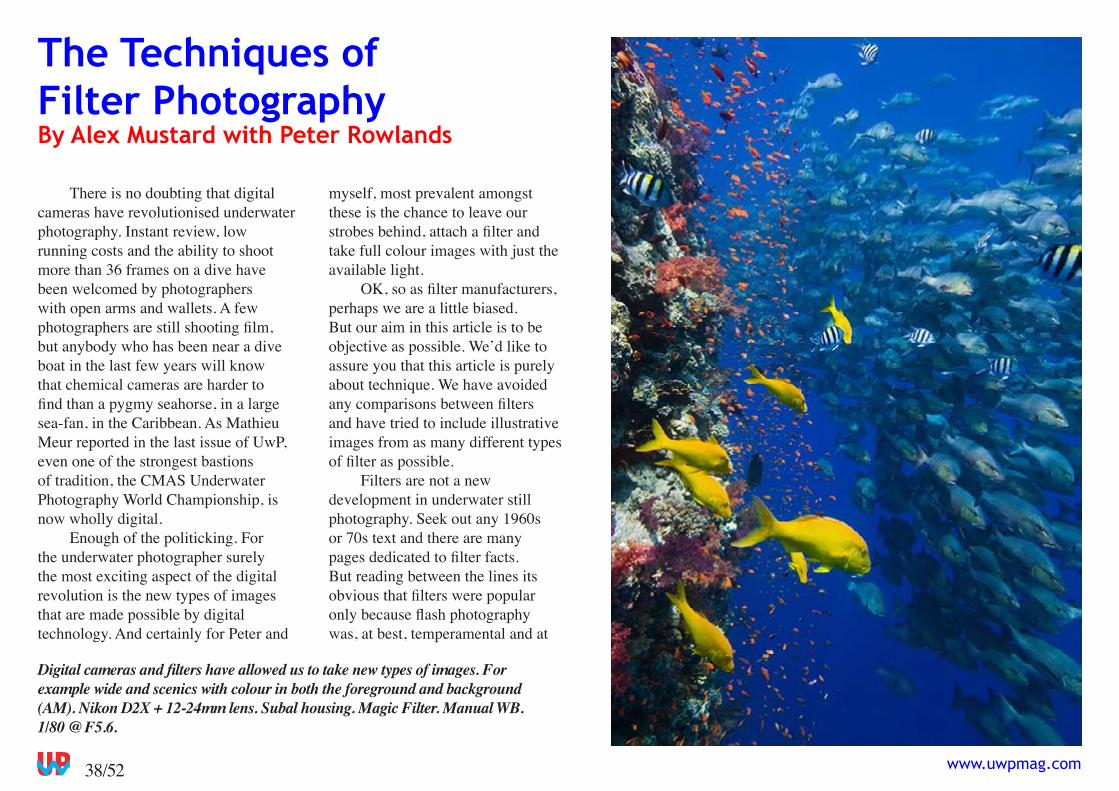
38/�2 www.uwpmag.com
There is no doubting that digital cameras have revolutionised underwater photography. Instant review, low running costs and the ability to shoot more than 3� frames on a dive have been welcomed by photographers with open arms and wallets. A few photographers are still shooting film, but anybody who has been near a dive boat in the last few years will know that chemical cameras are harder to find than a pygmy seahorse, in a large sea-fan, in the Caribbean. As Mathieu Meur reported in the last issue of UwP, even one of the strongest bastions of tradition, the CMAS Underwater Photography World Championship, is now wholly digital.
Enough of the politicking. For the underwater photographer surely the most exciting aspect of the digital revolution is the new types of images that are made possible by digital technology. And certainly for Peter and
myself, most prevalent amongst these is the chance to leave our strobes behind, attach a filter and take full colour images with just the available light.
OK, so as filter manufacturers, perhaps we are a little biased. But our aim in this article is to be objective as possible. We’d like to assure you that this article is purely about technique. We have avoided any comparisons between filters and have tried to include illustrative images from as many different types of filter as possible.
Filters are not a new development in underwater still photography. Seek out any 1960s or 70s text and there are many pages dedicated to filter facts. But reading between the lines its obvious that filters were popular only because flash photography was, at best, temperamental and at
The Techniques of Filter PhotographyBy Alex Mustard with Peter Rowlands
Digital cameras and filters have allowed us to take new types of images. For example wide and scenics with colour in both the foreground and background (AM). Nikon D2X + 12-24mm lens. Subal housing. Magic Filter. Manual WB. 1/80 @ F5.6.
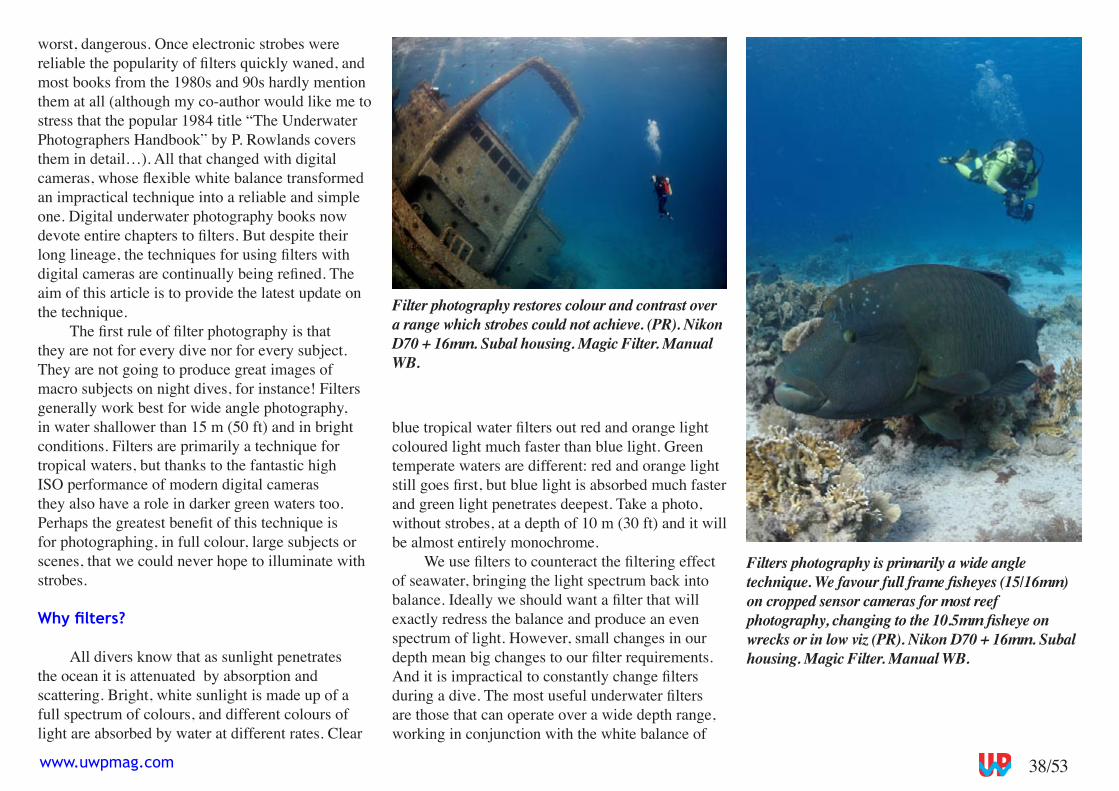
38/�3www.uwpmag.com
worst, dangerous. Once electronic strobes were reliable the popularity of filters quickly waned, and most books from the 1980s and 90s hardly mention them at all (although my co-author would like me to stress that the popular 1984 title “The Underwater Photographers Handbook” by P. Rowlands covers them in detail…). All that changed with digital cameras, whose flexible white balance transformed an impractical technique into a reliable and simple one. Digital underwater photography books now devote entire chapters to filters. But despite their long lineage, the techniques for using filters with digital cameras are continually being refined. The aim of this article is to provide the latest update on the technique.
The first rule of filter photography is that they are not for every dive nor for every subject. They are not going to produce great images of macro subjects on night dives, for instance! Filters generally work best for wide angle photography, in water shallower than 1� m (�0 ft) and in bright conditions. Filters are primarily a technique for tropical waters, but thanks to the fantastic high ISO performance of modern digital cameras they also have a role in darker green waters too. Perhaps the greatest benefit of this technique is for photographing, in full colour, large subjects or scenes, that we could never hope to illuminate with strobes.
Why filters?
All divers know that as sunlight penetrates the ocean it is attenuated by absorption and scattering. Bright, white sunlight is made up of a full spectrum of colours, and different colours of light are absorbed by water at different rates. Clear
blue tropical water filters out red and orange light coloured light much faster than blue light. Green temperate waters are different: red and orange light still goes first, but blue light is absorbed much faster and green light penetrates deepest. Take a photo, without strobes, at a depth of 10 m (30 ft) and it will be almost entirely monochrome.
We use filters to counteract the filtering effect of seawater, bringing the light spectrum back into balance. Ideally we should want a filter that will exactly redress the balance and produce an even spectrum of light. However, small changes in our depth mean big changes to our filter requirements. And it is impractical to constantly change filters during a dive. The most useful underwater filters are those that can operate over a wide depth range, working in conjunction with the white balance of
Filters photography is primarily a wide angle technique. We favour full frame fisheyes (15/16mm) on cropped sensor cameras for most reef photography, changing to the 10.5mm fisheye on wrecks or in low viz (PR). Nikon D70 + 16mm. Subal housing. Magic Filter. Manual WB.
Filter photography restores colour and contrast over a range which strobes could not achieve. (PR). Nikon D70 + 16mm. Subal housing. Magic Filter. Manual WB.
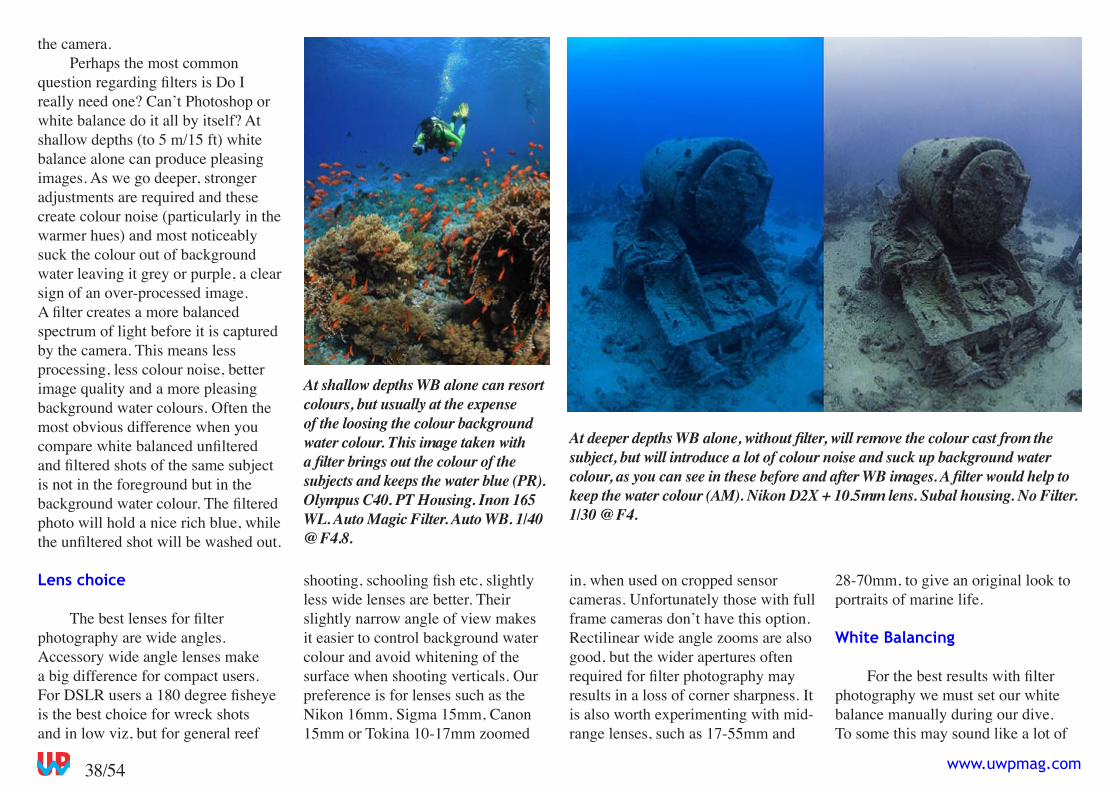
38/�4 www.uwpmag.com
the camera. Perhaps the most common
question regarding filters is Do I really need one? Can’t Photoshop or white balance do it all by itself? At shallow depths (to � m/1� ft) white balance alone can produce pleasing images. As we go deeper, stronger adjustments are required and these create colour noise (particularly in the warmer hues) and most noticeably suck the colour out of background water leaving it grey or purple, a clear sign of an over-processed image. A filter creates a more balanced spectrum of light before it is captured by the camera. This means less processing, less colour noise, better image quality and a more pleasing background water colours. Often the most obvious difference when you compare white balanced unfiltered and filtered shots of the same subject is not in the foreground but in the background water colour. The filtered photo will hold a nice rich blue, while the unfiltered shot will be washed out.
Lens choice
The best lenses for filter photography are wide angles. Accessory wide angle lenses make a big difference for compact users. For DSLR users a 180 degree fisheye is the best choice for wreck shots and in low viz, but for general reef
shooting, schooling fish etc, slightly less wide lenses are better. Their slightly narrow angle of view makes it easier to control background water colour and avoid whitening of the surface when shooting verticals. Our preference is for lenses such as the Nikon 1�mm, Sigma 1�mm, Canon 1�mm or Tokina 10-17mm zoomed
in, when used on cropped sensor cameras. Unfortunately those with full frame cameras don’t have this option. Rectilinear wide angle zooms are also good, but the wider apertures often required for filter photography may results in a loss of corner sharpness. It is also worth experimenting with mid-range lenses, such as 17-��mm and
At shallow depths WB alone can resort colours, but usually at the expense of the loosing the colour background water colour. This image taken with a filter brings out the colour of the subjects and keeps the water blue (PR). Olympus C40. PT Housing. Inon 165 WL. Auto Magic Filter. Auto WB. 1/40 @ F4.8.
At deeper depths WB alone, without filter, will remove the colour cast from the subject, but will introduce a lot of colour noise and suck up background water colour, as you can see in these before and after WB images. A filter would help to keep the water colour (AM). Nikon D2X + 10.5mm lens. Subal housing. No Filter. 1/30 @ F4.
28-70mm, to give an original look to portraits of marine life.
White Balancing
For the best results with filter photography we must set our white balance manually during our dive. To some this may sound like a lot of
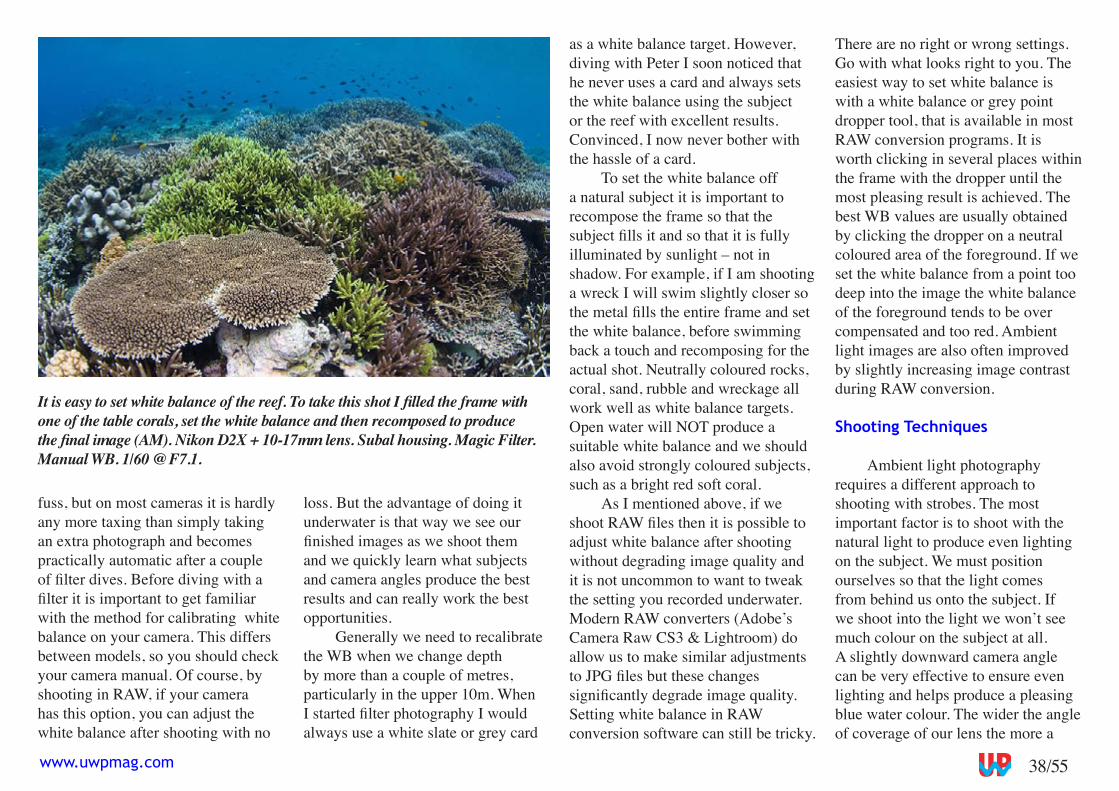
38/��www.uwpmag.com
fuss, but on most cameras it is hardly any more taxing than simply taking an extra photograph and becomes practically automatic after a couple of filter dives. Before diving with a filter it is important to get familiar with the method for calibrating white balance on your camera. This differs between models, so you should check your camera manual. Of course, by shooting in RAW, if your camera has this option, you can adjust the white balance after shooting with no
loss. But the advantage of doing it underwater is that way we see our finished images as we shoot them and we quickly learn what subjects and camera angles produce the best results and can really work the best opportunities.
Generally we need to recalibrate the WB when we change depth by more than a couple of metres, particularly in the upper 10m. When I started filter photography I would always use a white slate or grey card
as a white balance target. However, diving with Peter I soon noticed that he never uses a card and always sets the white balance using the subject or the reef with excellent results. Convinced, I now never bother with the hassle of a card.
To set the white balance off a natural subject it is important to recompose the frame so that the subject fills it and so that it is fully illuminated by sunlight – not in shadow. For example, if I am shooting a wreck I will swim slightly closer so the metal fills the entire frame and set the white balance, before swimming back a touch and recomposing for the actual shot. Neutrally coloured rocks, coral, sand, rubble and wreckage all work well as white balance targets. Open water will NOT produce a suitable white balance and we should also avoid strongly coloured subjects, such as a bright red soft coral.
As I mentioned above, if we shoot RAW files then it is possible to adjust white balance after shooting without degrading image quality and it is not uncommon to want to tweak the setting you recorded underwater. Modern RAW converters (Adobe’s Camera Raw CS3 & Lightroom) do allow us to make similar adjustments to JPG files but these changes significantly degrade image quality. Setting white balance in RAW conversion software can still be tricky.
There are no right or wrong settings. Go with what looks right to you. The easiest way to set white balance is with a white balance or grey point dropper tool, that is available in most RAW conversion programs. It is worth clicking in several places within the frame with the dropper until the most pleasing result is achieved. The best WB values are usually obtained by clicking the dropper on a neutral coloured area of the foreground. If we set the white balance from a point too deep into the image the white balance of the foreground tends to be over compensated and too red. Ambient light images are also often improved by slightly increasing image contrast during RAW conversion.
Shooting Techniques
Ambient light photography requires a different approach to shooting with strobes. The most important factor is to shoot with the natural light to produce even lighting on the subject. We must position ourselves so that the light comes from behind us onto the subject. If we shoot into the light we won’t see much colour on the subject at all. A slightly downward camera angle can be very effective to ensure even lighting and helps produce a pleasing blue water colour. The wider the angle of coverage of our lens the more a
It is easy to set white balance of the reef. To take this shot I filled the frame with one of the table corals, set the white balance and then recomposed to produce the final image (AM). Nikon D2X + 10-17mm lens. Subal housing. Magic Filter. Manual WB. 1/60 @ F7.1.
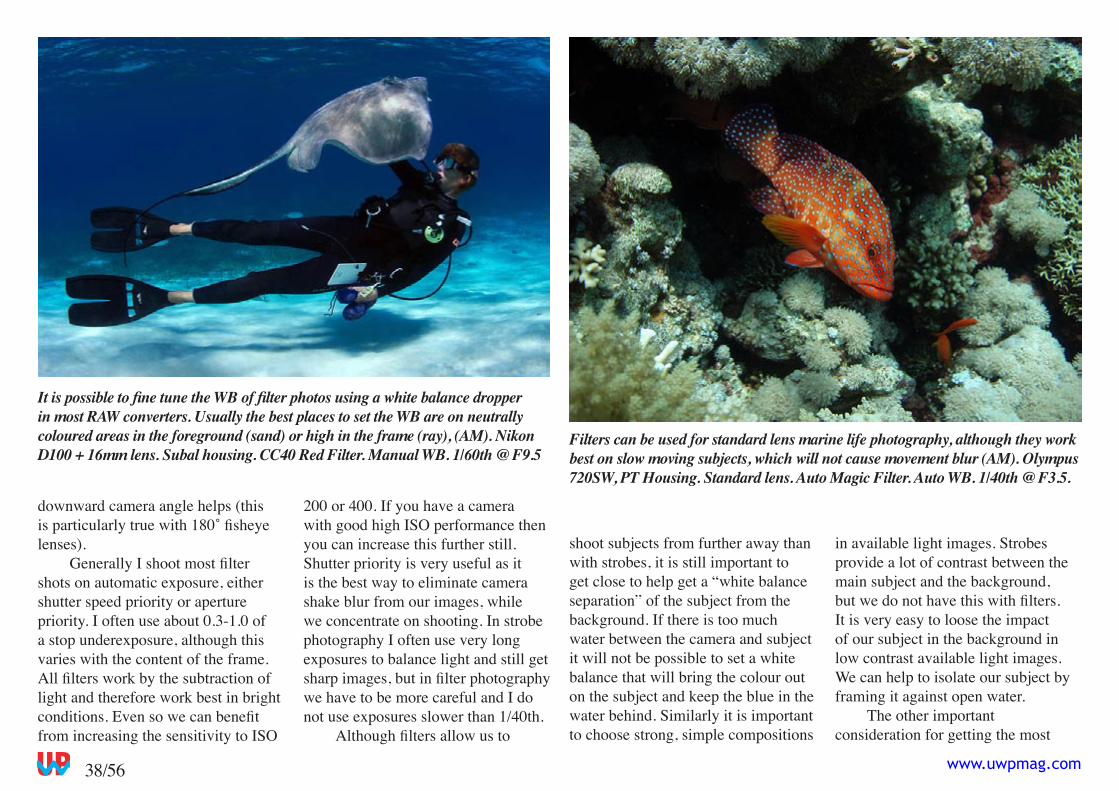
38/�� www.uwpmag.com
downward camera angle helps (this is particularly true with 180˚ fisheye lenses).
Generally I shoot most filter shots on automatic exposure, either shutter speed priority or aperture priority. I often use about 0.3-1.0 of a stop underexposure, although this varies with the content of the frame. All filters work by the subtraction of light and therefore work best in bright conditions. Even so we can benefit from increasing the sensitivity to ISO
200 or 400. If you have a camera with good high ISO performance then you can increase this further still. Shutter priority is very useful as it is the best way to eliminate camera shake blur from our images, while we concentrate on shooting. In strobe photography I often use very long exposures to balance light and still get sharp images, but in filter photography we have to be more careful and I do not use exposures slower than 1/40th.
Although filters allow us to
shoot subjects from further away than with strobes, it is still important to get close to help get a “white balance separation” of the subject from the background. If there is too much water between the camera and subject it will not be possible to set a white balance that will bring the colour out on the subject and keep the blue in the water behind. Similarly it is important to choose strong, simple compositions
in available light images. Strobes provide a lot of contrast between the main subject and the background, but we do not have this with filters. It is very easy to loose the impact of our subject in the background in low contrast available light images. We can help to isolate our subject by framing it against open water.
The other important consideration for getting the most
Filters can be used for standard lens marine life photography, although they work best on slow moving subjects, which will not cause movement blur (AM). Olympus 720SW, PT Housing. Standard lens. Auto Magic Filter. Auto WB. 1/40th @ F3.5.
It is possible to fine tune the WB of filter photos using a white balance dropper in most RAW converters. Usually the best places to set the WB are on neutrally coloured areas in the foreground (sand) or high in the frame (ray), (AM). Nikon D100 + 16mm lens. Subal housing. CC40 Red Filter. Manual WB. 1/60th @ F9.5
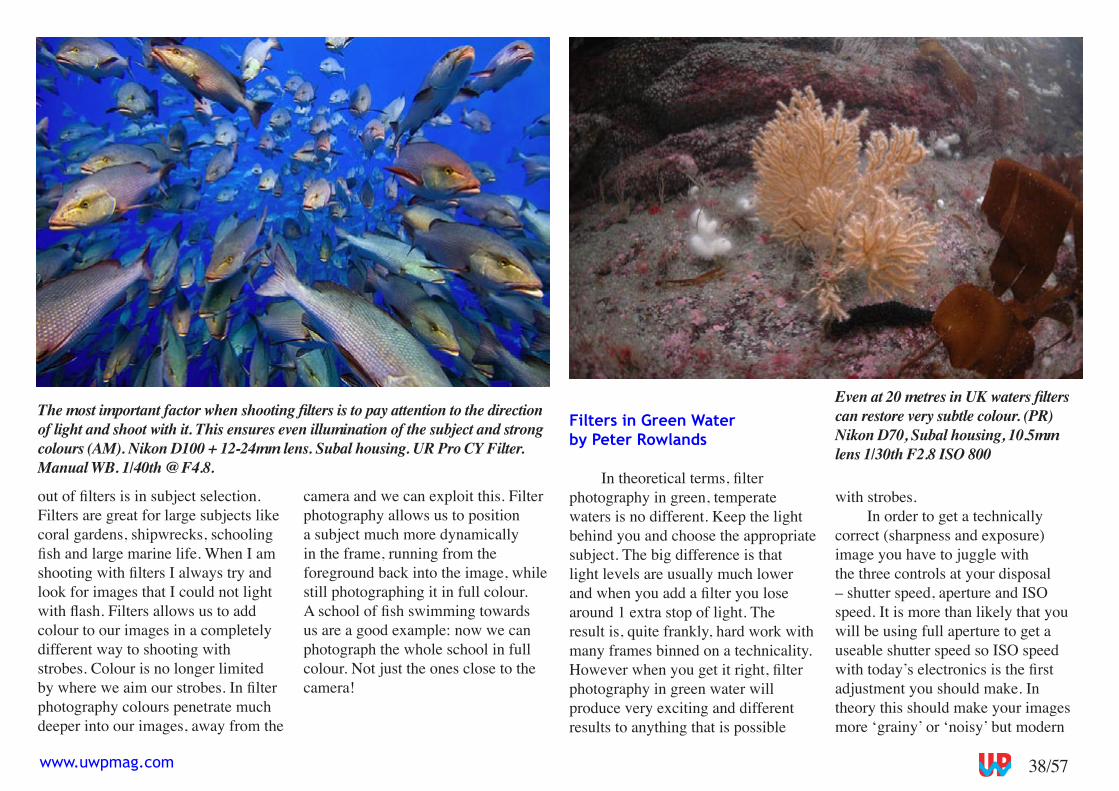
38/�7www.uwpmag.com
out of filters is in subject selection. Filters are great for large subjects like coral gardens, shipwrecks, schooling fish and large marine life. When I am shooting with filters I always try and look for images that I could not light with flash. Filters allows us to add colour to our images in a completely different way to shooting with strobes. Colour is no longer limited by where we aim our strobes. In filter photography colours penetrate much deeper into our images, away from the
camera and we can exploit this. Filter photography allows us to position a subject much more dynamically in the frame, running from the foreground back into the image, while still photographing it in full colour. A school of fish swimming towards us are a good example: now we can photograph the whole school in full colour. Not just the ones close to the camera!
Filters in Green Waterby Peter Rowlands
In theoretical terms, filter photography in green, temperate waters is no different. Keep the light behind you and choose the appropriate subject. The big difference is that light levels are usually much lower and when you add a filter you lose around 1 extra stop of light. The result is, quite frankly, hard work with many frames binned on a technicality. However when you get it right, filter photography in green water will produce very exciting and different results to anything that is possible
The most important factor when shooting filters is to pay attention to the direction of light and shoot with it. This ensures even illumination of the subject and strong colours (AM). Nikon D100 + 12-24mm lens. Subal housing. UR Pro CY Filter. Manual WB. 1/40th @ F4.8.
Even at 20 metres in UK waters filters can restore very subtle colour. (PR) Nikon D70, Subal housing, 10.5mm lens 1/30th F2.8 ISO 800
with strobes. In order to get a technically
correct (sharpness and exposure) image you have to juggle with the three controls at your disposal – shutter speed, aperture and ISO speed. It is more than likely that you will be using full aperture to get a useable shutter speed so ISO speed with today’s electronics is the first adjustment you should make. In theory this should make your images more ‘grainy’ or ‘noisy’ but modern
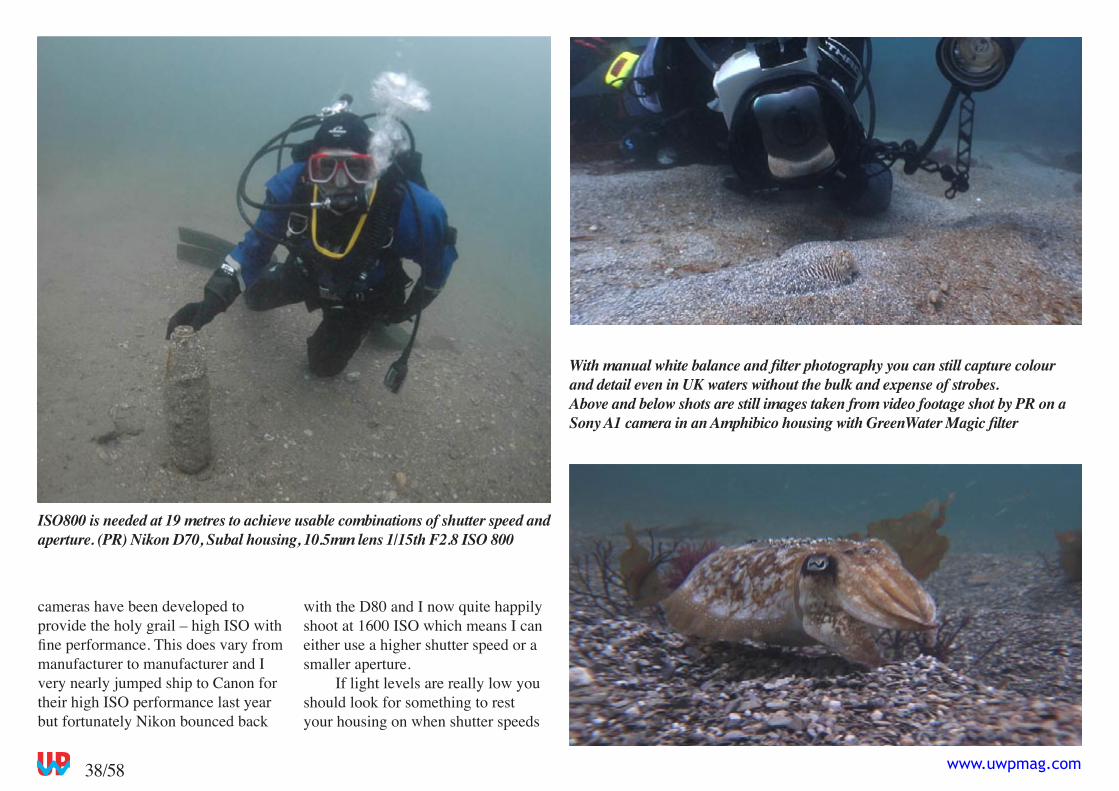
38/�8 www.uwpmag.com
cameras have been developed to provide the holy grail – high ISO with fine performance. This does vary from manufacturer to manufacturer and I very nearly jumped ship to Canon for their high ISO performance last year but fortunately Nikon bounced back
with the D80 and I now quite happily shoot at 1�00 ISO which means I can either use a higher shutter speed or a smaller aperture.
If light levels are really low you should look for something to rest your housing on when shutter speeds
ISO800 is needed at 19 metres to achieve usable combinations of shutter speed and aperture. (PR) Nikon D70, Subal housing, 10.5mm lens 1/15th F2.8 ISO 800
With manual white balance and filter photography you can still capture colour and detail even in UK waters without the bulk and expense of strobes.Above and below shots are still images taken from video footage shot by PR on a Sony A1 camera in an Amphibico housing with GreenWater Magic filter

38/59www.uwpmag.com
You may not know this but none of the UwP contributors get paid. They provide their articles and photo talent in support of the cause of UwP which aims to keep the magazine free for anyone to download.
Donations are all handled in total security through PayPal and you can also pay securely by credit card using the PayPal links.
Your donations will be distributed to the contributors of each issue on a pro rata basis i.e. the more pages they contribute, the
more their percentage.When deciding how much you
want to donate please bear in mind that PayPal’s charge for amounts smaller than £3 or $� can be as high as 24%!! Whilst I accept that PayPal is absolutely brilliant and safe, I don’t want this to become a ‘Donate a lot to PayPal”!!
You can make a donation in either US $ dollars, UK £ sterling or € Euros by following this link
www.uwpmag.com/donate.html
Have you learnt something invaluable by reading this issue of UwP? Have you saved a lot of time benefitting for the experience of UwP contributors or do you simply just enjoy UwP and want to help it continue?If so, please donate to the UwP contributors
Donate here
If you are really keen to experiment with this approach, I suggest using a strong blue filter, such as a 38A and be prepared for a lot of trial and error and an narrow working depth range. Such a filter would be useful on a torch, if you plan to have a diver carrying one in your image.
Conclusion
Filters are not a technique for every dive. We need bright and sunny conditions and appealing subject matter in comparatively shallow water. But when conditions are favourable they allow us to cast off the excess baggage of flash photography. The real promise of this technique is the very different lighting that can be achieved in our shots, allowing us to capture shots that we just could not produce before digital cameras.
Alex Mustardwww.amustard.com
slower than 1/30th are needed. Taking this to the extreme you might even consider taking a tripod down with you.
Green water photography has always been a challenge and whilst filters do not make the challenge any easier, the results are very much worth the effort.
Now back to Alex.
Can I Use Strobes?
One of the most common questions that comes up with filter photography is “Can I use strobes?”. It seems that some underwater photographers feel naked without their electronic lighting. Theoretically, it is possible to filter the strobe light so that it balances with the in situ illumination, but in practise this is impractical because the required filtration for the strobe will change with depth. It is a common misconception that strobe filters simply need to be opposite (complimentary filters) to the lens filter. This will not work because it does not take into consideration the effect of white balance. The correct complimentary strobe filter actually has to be the opposite of the combined effect of the lens filter and the WB adjustment made by the camera. And of course this varies considerably with depth.
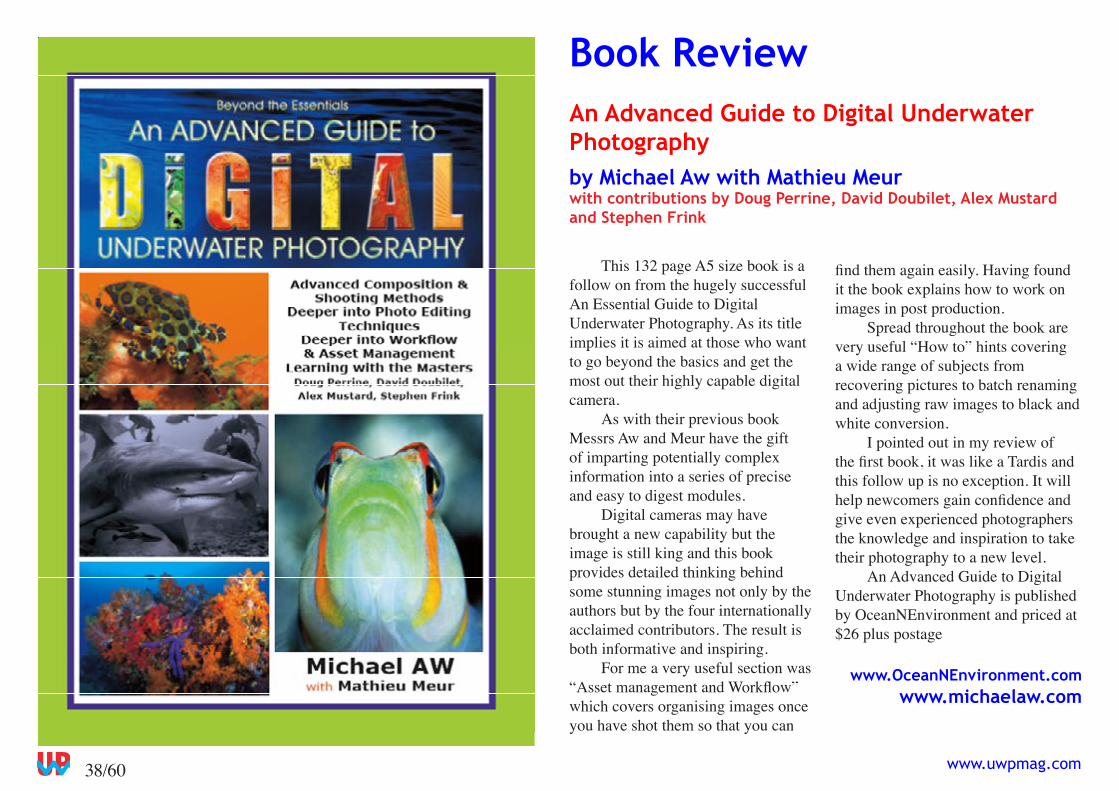
38/�0 www.uwpmag.com
Book ReviewAn Advanced Guide to Digital Underwater Photographyby Michael Aw with Mathieu Meurwith contributions by Doug Perrine, David Doubilet, Alex Mustard and Stephen Frink
This 132 page A� size book is a follow on from the hugely successful An Essential Guide to Digital Underwater Photography. As its title implies it is aimed at those who want to go beyond the basics and get the most out their highly capable digital camera.
As with their previous book Messrs Aw and Meur have the gift of imparting potentially complex information into a series of precise and easy to digest modules.
Digital cameras may have brought a new capability but the image is still king and this book provides detailed thinking behind some stunning images not only by the authors but by the four internationally acclaimed contributors. The result is both informative and inspiring.
For me a very useful section was “Asset management and Workflow” which covers organising images once you have shot them so that you can
find them again easily. Having found it the book explains how to work on images in post production.
Spread throughout the book are very useful “How to” hints covering a wide range of subjects from recovering pictures to batch renaming and adjusting raw images to black and white conversion.
I pointed out in my review of the first book, it was like a Tardis and this follow up is no exception. It will help newcomers gain confidence and give even experienced photographers the knowledge and inspiration to take their photography to a new level.
An Advanced Guide to Digital Underwater Photography is published by OceanNEnvironment and priced at $2� plus postage
www.OceanNEnvironment.com www.michaelaw.com
38/�1www.uwpmag.com
Guidelines for contributorsThe response to UwP has been nothing short of fantastic. We are looking for interesting, well illustrated articles about underwater
photography. We are looking for work from existing names but would also like to discover some of the new talent out there and that could be you! UwP is the perfect pubication for you to increase your profile in the underwater photography community.
The type of articles we’re looking for fall into five main categories:
Uw photo techniques - Balanced light, composition, etcLocations - Photo friendly dive sites, countries or liveaboardsSubjects - Anything from whale sharks to nudibranchs in full detail Equipment reviews - Detailed appraisals of the latest equipmentPersonalities - Interviews/features about leading underwater photographers
If you have an idea for an article, contact me first before putting pen to paper.
How to submit articles
To keep UwP simple and financially viable, we can only accept submissions by e mail and they need to be done in the following way:1. The text should be saved as a TEXT file and attached to the e mail2. Images must be attached to the e mail and they need to be 144dpi Size - Maximum length 1�cm i.e. horizontal pictures would be 1� cm wide and verticals would be 1�cm.File type - Save your image as a JPG file and set the compression to “Medium” quality. This should result in images no larger than about 120k which can be transmitted quickly. If we want larger sizes we will contact you.3. Captions - Each and every image MUST have full photographic details including camera, housing, lens, lighting, film, aperture, shutter speed and exposure mode. These must also be copied and pasted into the body of the e mail.
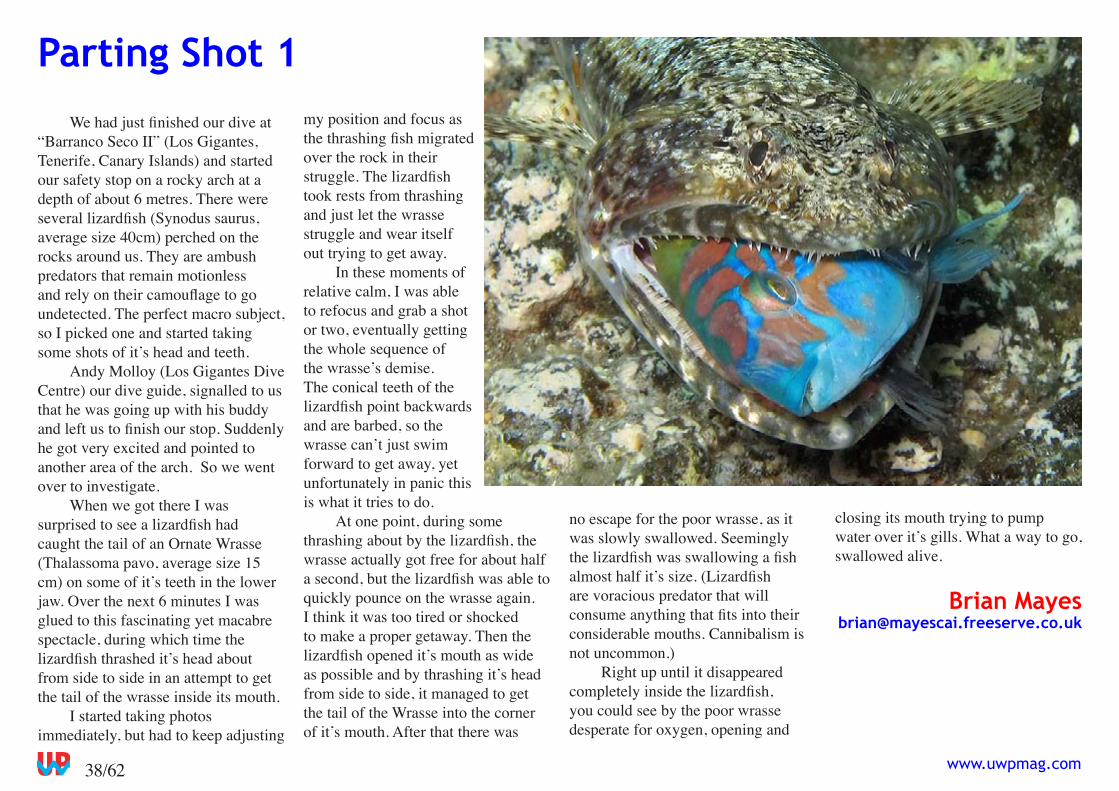
38/�2 www.uwpmag.com
We had just finished our dive at “Barranco Seco II” (Los Gigantes, Tenerife, Canary Islands) and started our safety stop on a rocky arch at a depth of about � metres. There were several lizardfish (Synodus saurus, average size 40cm) perched on the rocks around us. They are ambush predators that remain motionless and rely on their camouflage to go undetected. The perfect macro subject, so I picked one and started taking some shots of it’s head and teeth.
Andy Molloy (Los Gigantes Dive Centre) our dive guide, signalled to us that he was going up with his buddy and left us to finish our stop. Suddenly he got very excited and pointed to another area of the arch. So we went over to investigate.
When we got there I was surprised to see a lizardfish had caught the tail of an Ornate Wrasse (Thalassoma pavo, average size 1� cm) on some of it’s teeth in the lower jaw. Over the next � minutes I was glued to this fascinating yet macabre spectacle, during which time the lizardfish thrashed it’s head about from side to side in an attempt to get the tail of the wrasse inside its mouth.
I started taking photos immediately, but had to keep adjusting
Parting Shot 1my position and focus as the thrashing fish migrated over the rock in their struggle. The lizardfish took rests from thrashing and just let the wrasse struggle and wear itself out trying to get away.
In these moments of relative calm, I was able to refocus and grab a shot or two, eventually getting the whole sequence of the wrasse’s demise. The conical teeth of the lizardfish point backwards and are barbed, so the wrasse can’t just swim forward to get away, yet unfortunately in panic this is what it tries to do.
At one point, during some thrashing about by the lizardfish, the wrasse actually got free for about half a second, but the lizardfish was able to quickly pounce on the wrasse again. I think it was too tired or shocked to make a proper getaway. Then the lizardfish opened it’s mouth as wide as possible and by thrashing it’s head from side to side, it managed to get the tail of the Wrasse into the corner of it’s mouth. After that there was
no escape for the poor wrasse, as it was slowly swallowed. Seemingly the lizardfish was swallowing a fish almost half it’s size. (Lizardfish are voracious predator that will consume anything that fits into their considerable mouths. Cannibalism is not uncommon.)
Right up until it disappeared completely inside the lizardfish, you could see by the poor wrasse desperate for oxygen, opening and
closing its mouth trying to pump water over it’s gills. What a way to go, swallowed alive.
Brian [email protected]
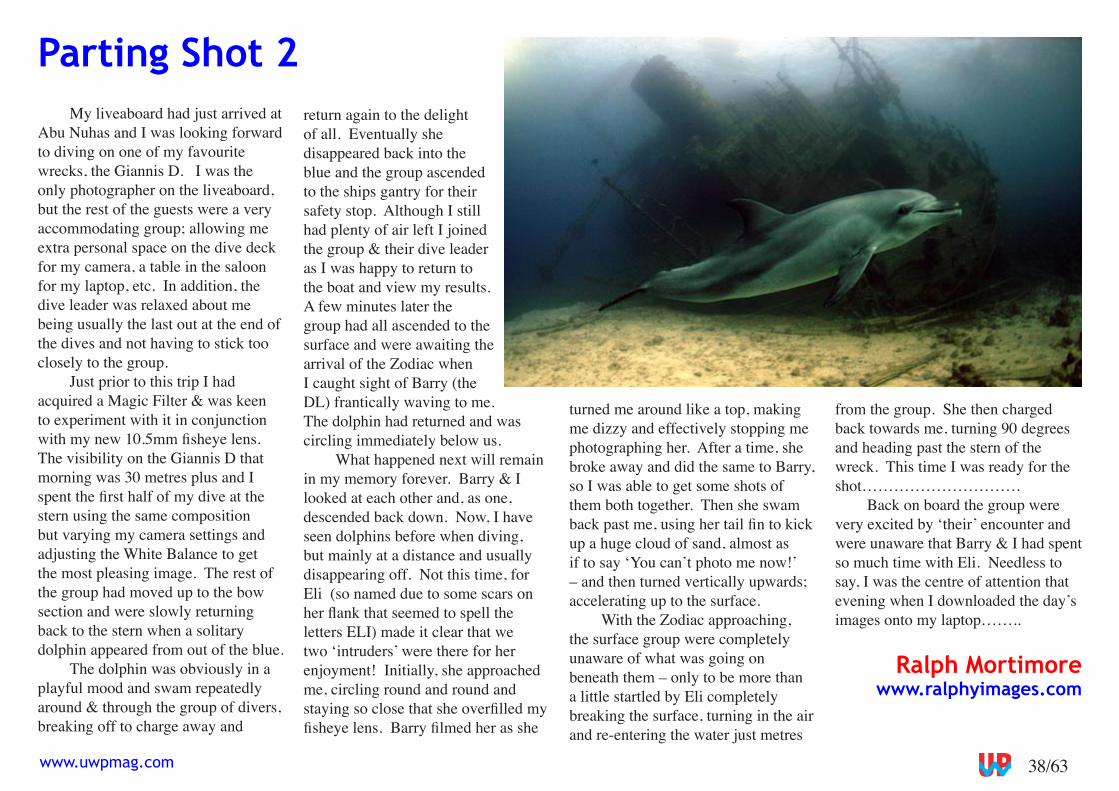
38/�3www.uwpmag.com
Parting Shot 2My liveaboard had just arrived at
Abu Nuhas and I was looking forward to diving on one of my favourite wrecks, the Giannis D. I was the only photographer on the liveaboard, but the rest of the guests were a very accommodating group; allowing me extra personal space on the dive deck for my camera, a table in the saloon for my laptop, etc. In addition, the dive leader was relaxed about me being usually the last out at the end of the dives and not having to stick too closely to the group.
Just prior to this trip I had acquired a Magic Filter & was keen to experiment with it in conjunction with my new 10.5mm fisheye lens. The visibility on the Giannis D that morning was 30 metres plus and I spent the first half of my dive at the stern using the same composition but varying my camera settings and adjusting the White Balance to get the most pleasing image. The rest of the group had moved up to the bow section and were slowly returning back to the stern when a solitary dolphin appeared from out of the blue.
The dolphin was obviously in a playful mood and swam repeatedly around & through the group of divers, breaking off to charge away and
return again to the delight of all. Eventually she disappeared back into the blue and the group ascended to the ships gantry for their safety stop. Although I still had plenty of air left I joined the group & their dive leader as I was happy to return to the boat and view my results. A few minutes later the group had all ascended to the surface and were awaiting the arrival of the Zodiac when I caught sight of Barry (the DL) frantically waving to me. The dolphin had returned and was circling immediately below us.
What happened next will remain in my memory forever. Barry & I looked at each other and, as one, descended back down. Now, I have seen dolphins before when diving, but mainly at a distance and usually disappearing off. Not this time, for Eli (so named due to some scars on her flank that seemed to spell the letters ELI) made it clear that we two ‘intruders’ were there for her enjoyment! Initially, she approached me, circling round and round and staying so close that she overfilled my fisheye lens. Barry filmed her as she
turned me around like a top, making me dizzy and effectively stopping me photographing her. After a time, she broke away and did the same to Barry, so I was able to get some shots of them both together. Then she swam back past me, using her tail fin to kick up a huge cloud of sand, almost as if to say ‘You can’t photo me now!’ – and then turned vertically upwards; accelerating up to the surface.
With the Zodiac approaching, the surface group were completely unaware of what was going on beneath them – only to be more than a little startled by Eli completely breaking the surface, turning in the air and re-entering the water just metres
from the group. She then charged back towards me, turning 90 degrees and heading past the stern of the wreck. This time I was ready for the shot…………………………
Back on board the group were very excited by ‘their’ encounter and were unaware that Barry & I had spent so much time with Eli. Needless to say, I was the centre of attention that evening when I downloaded the day’s images onto my laptop……..
Ralph Mortimorewww.ralphyimages.com
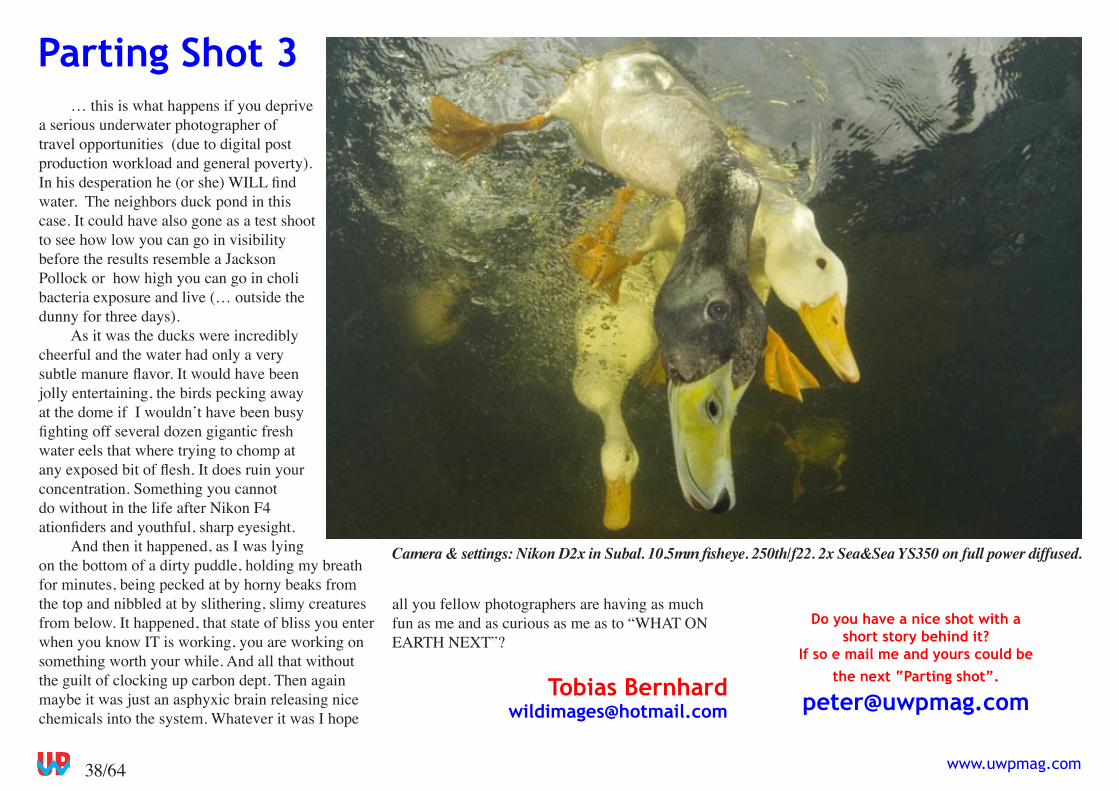
38/�4 www.uwpmag.com
Parting Shot 3… this is what happens if you deprive
a serious underwater photographer of travel opportunities (due to digital post production workload and general poverty). In his desperation he (or she) WILL find water. The neighbors duck pond in this case. It could have also gone as a test shoot to see how low you can go in visibility before the results resemble a Jackson Pollock or how high you can go in choli bacteria exposure and live (… outside the dunny for three days).
As it was the ducks were incredibly cheerful and the water had only a very subtle manure flavor. It would have been jolly entertaining, the birds pecking away at the dome if I wouldn’t have been busy fighting off several dozen gigantic fresh water eels that where trying to chomp at any exposed bit of flesh. It does ruin your concentration. Something you cannot do without in the life after Nikon F4 ationfiders and youthful, sharp eyesight.
And then it happened, as I was lying on the bottom of a dirty puddle, holding my breath for minutes, being pecked at by horny beaks from the top and nibbled at by slithering, slimy creatures from below. It happened, that state of bliss you enter when you know IT is working, you are working on something worth your while. And all that without the guilt of clocking up carbon dept. Then again maybe it was just an asphyxic brain releasing nice chemicals into the system. Whatever it was I hope
all you fellow photographers are having as much fun as me and as curious as me as to “WHAT ON EARTH NEXT”?
Tobias [email protected]
Camera & settings: Nikon D2x in Subal. 10.5mm fisheye. 250th/f22. 2x Sea&Sea YS350 on full power diffused.
Do you have a nice shot with a short story behind it?
If so e mail me and yours could be the next “Parting shot”.