unit 1: fitness for sport & exercise student workbook btec ... · 1 unit 1: fitness for sport...
TRANSCRIPT

1
Unit 1: Fitness for Sport & Exercise
Student workbook
BTEC First Diploma in Sport
Student Name

2
WEEK 1
Components of Physical Fitness (A.1)
Aerobic endurance
Add definition
Identify alternate names
What is involved in the CV system?
What is the CV system responsible for?
Muscular endurance
Add definition

3
Flexibility
Add definition
Speed
Add definition
Identify the three different types
of speed

4
Muscular Strength
Add definition
Body Composition
Add definition

5
Components of Skill Related Fitness (A.2)
Agility
Add definition
Co-ordination
Add definition

6
Balance
Add definition of the two types
Power
Add definition

7
Reaction Time
Add definition
Reasons fitness components are important for successful sports participation (A.3)
Chose four sports and for each sport describe the three most important components of physical
fitness
1
2
3
4

8
WEEK 2
Exercise intensity and how it is determined (A.4) (PRACTICAL & THEORY)
The Training Pyramid Training in this zone
100% MHR
95% MHR
85% MHR
60% MHR
Resting HR
Speed Zone
Anaerobic zone
Aerobic zone

9
Calculation of maximum Heart Rate (HR)
Age predicted Maximum HR
Max HR= 220 – Age
Please work out your Maximum Heart Rate
Calculation of Heart Rate (HR) Training Zones
The aerobic zone
= 60-85% of MHR
The anaerobic zone
= 85-95% MHR
The speed zone
= 95-100% MHR
Heart Rate Training Zones
Please work out your age predicted heart rate training zones
220- Age = Max HR
X 0.6 = 60%
X 0.7 = 70%
X 0.8 = 80%
X 0.9 = 90%
60%
220- age = ___________
x 0.6 =
70%
x 0.7 =
80%
x 0.8 =
85%
x 0.85 =

10
The Borg Rating of Perceived Exertion (RPE scale)
6 20% effort
7 30% effort Very, very light intensity
8 40% effort
9 50% effort Very light intensity
10 55% effort
11 60% effort Fairly light intensity
12 65% effort
13 70% effort Somewhat hard intensity
14 75% effort
15 80% effort Hard intensity
16 85% effort
17 90% effort Very hard intensity
18 95% effort
19 100% effort Very, very hard intensity
20 Exhaustion
Suggest a sporting activity that may be appropriate at each stage of the scale.
The suggested following relationship between HR training zones and the BORG scale:
RPE x 10 = HR.
e.g. at 14 on the RPE (BORG scale) this would be the equivalent to 140bpm.

11
WEEK 3
Principles of Training (A5)
Describe the FITT principles.
F
I
T
T
List 3 ways that the intensity of exercise can be increased
1
2
3
12
How can fitness levels be improved using FITT principles?
Write a training session for an athlete of your choice using the FITT principles

13
Additional Principles of Training (A6)
Describe the additional principles of training.
Progressive Overload
Specificity
Individual differences
Adaptation
Reversibility
Variation
Rest and recovery
14
A warm up includes the following 3 phases:
Pulse raising
Stretching
Joint mobilization
A cool down includes the following 3 phases:
Pulse lowering
Static stretching
Developmental
stretching

15
Flexibility Training- describe the stretches you performed
Static Stretching
PNF Stretching
Ballistic Stretching
16
WEEK 6
Fitness Training Methods (B1, B2, B3) - Aerobic Endurance and strength training
(PRACTICAL & THEORY)
Aerobic Endurance Training
Define aerobic endurance:
Endurance training takes part mainly in the aerobic training zone (60-80% MHR).
The work to rest ratio should be 3:1-
E.g. if you exercise for 30 minutes you would rest for 10 minutes.
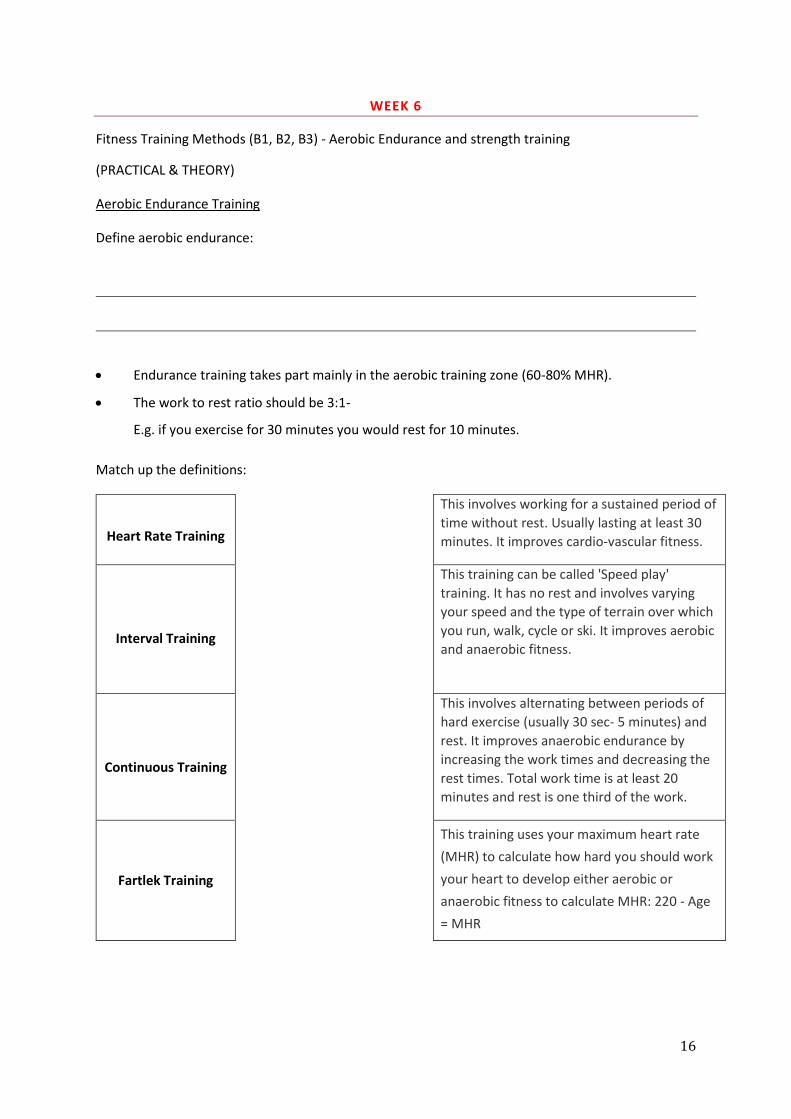
Match up the definitions:
Heart Rate Training
This involves working for a sustained period of
time without rest. Usually lasting at least 30
minutes. It improves cardio-vascular fitness.
Interval Training
This training can be called 'Speed play'
training. It has no rest and involves varying
your speed and the type of terrain over which
you run, walk, cycle or ski. It improves aerobic
and anaerobic fitness.
Continuous Training
This involves alternating between periods of
hard exercise (usually 30 sec- 5 minutes) and
rest. It improves anaerobic endurance by
increasing the work times and decreasing the
rest times. Total work time is at least 20
minutes and rest is one third of the work.
Fartlek Training
This training uses your maximum heart rate
(MHR) to calculate how hard you should work
your heart to develop either aerobic or
anaerobic fitness to calculate MHR: 220 - Age
= MHR

17
Free weights
An effective way to improve muscular strength and endurance.
Encourages the body to develop core strength as the weight is unstable compared to
resistance machines.
Good techniques vital to prevent injury.
Ensure you work through a full range of motion (ROM).
Use a ‘spotter’ when necessary.
1 lift is called 1 ‘repetition’ or ‘rep’.
One repetition maximum (1RM) is the most a person can lift in 1 rep.
The number of repetitions completed without rest is called a ‘set’.
Rest in between sessions in order to aid recovery- 2 days between sessions will allow
muscles to fully recover.
Strength training Low reps and high
resistance
90% 1RM 1-6 reps Producing movement
against high resistance
Muscular
endurance
training
High reps and low
resistance
50-60% 1RM 12-20 reps Repetitive movements
of muscle/ muscle
group
Power training Medium reps and
medium load
75% 1 RM 12 reps Movements in close
succession
Consider the order of exercises performed- compound exercises before isolation exercises.
If you train regularly- you could complete body part splits (training a different body part
each session e.g. legs, back).
If you train less regularly- you should alternate exercises between upper and lower body
(e.g. chest and legs) and/ or between push and pull exercises (chest press and seated row).
Name and complete the following exercises

18
Leg exercises
Back exercise
Chest
exercises
Shoulder
exercises

19
Arm exercises
How many reps of these exercises would you complete if you were working on strength training?
What exercises could you complete for a strength training session to help you achieve your goals?
Who would benefit from strength training?
Complete the table and identify 3 athletes that may benefit from this & reasons why.
Strength- free weights

20
WEEK 7
Fitness Training Methods (B1, B2, B3) - Speed, muscular endurance and power training
(PRACTICAL & THEORY)
Speed training
Speed training is a method of training that develops a person’s speed over short distances.
It is very high intensity training and so work periods should be short (up to about 15
seconds) and frequently interspersed with lots of short rest periods. (like interval training)
Work to rest ratio should be 1:6-
E.g. work for 15 seconds and 90 seconds rest.
Identify the training methods below and complete the training sessions:
Ho
llow
Sp
rin
ts
Similar to interval training
broken up by a ‘hollow’
period of either rest or
lower level work.
Session:
50m Sprint (6-7 sec)
50m Jog (25 sec)
50m Sprint (6-7 sec)
50m Walk (30 sec)
50m Sprint (6-7 sec)
150m walk (90 seconds)
Repeated 5 times before a 10 minute rest.
Acc
eler
atio
n s
pri
nts
A form of anaerobic
training where running
speed is increased from
jogging to striding and
finally to sprinting at
maximum speed. Each
change usually takes
place after 50m and rest
periods of jogging or
walking are between
each sprint. Can start
from a static, rolling or
sport specific starting
point
Session:
Face away from finish line on ‘go’ turn and sprint to line
Lie face down on ‘go’ stand and run toward finish line
Jog to first cone, stride to second cone, sprint to third cone

21
Inte
rval
tra
inin
g Can be used to develop
speed. Work periods
should be short and close
to maximal speed and
recovery periods should
be longer.
Session:
6 x 50m sprints with 40 seconds rest
Circuit training
A series of arranged exercises arranged in order.
It can be used to develop strength, power, muscular endurance, agility, aerobic endurance in
a limited time period.
Involves 6-10 different exercises called stations one after another- perform each exercise for
a time and then move onto the next station after a timed rest.
When all the exercises are finished you have completed one circuit.
You can perform more than one circuit in a session.
To ensure overload is achieved:
Reduce target times to complete number of repetitions
Reducing rest times between exercises
Increase exercise resistance
Increase repetitions
Increase stations
Increase circuits
Who would benefit from muscular endurance training?
Complete the table and identify 3 athletes that may benefit from this & reasons why.
Muscular endurance-
circuit training

22
Complete the following circuit- exercising for 45 seconds and resting for 15 seconds.
The key point to remember when designing a circuit is not to exercise the same body part in consecutive exercises- alternate body parts.

23
Plyometric Training
This type of training is designed to improve strength and explosive power.
It involves performing a jumping or throwing type of exercises where the performer moves
quickly.
It involves an eccentric muscle action which lengthens the muscles followed quickly by a
concentric action which shortens the muscle and produces more power.
Think about when you stretch an elastic band- the further you stretch the band the more
powerfully it contracts back.
Exercises may include jumping, hopping, skipping, incline press ups, drop jumps, hurdles and
lunging.
You are more likely to suffer DOMS (Delayed onset of muscular soreness from plyometric
training).
Complete the following plyometric exercises- 30 seconds on each exercise.
1
Squ
at ju
mp
s
3
Spe
ed
ska
ter
2
Hu
rdle
jum
ps
4
Swit
ch ju
mp
lun
ges

24
5
Bal
l sla
ms
7
Lad
der
jum
ps
6
Be
nch
jum
ps
8
Pre
ss u
ps
9 Hill
clim
ber
1
0
Bu
rpee
s
Who would benefit from power training?
Complete the table and identify 3 athletes that may benefit from this & reasons why.
Power- plyometrics

25
WEEKS 9-12
Fitness Testing Methods (C.1) Importance of fitness testing to performer and coach (C.2) Requirements for administration of fitness test (C.3) Interpreting Results (C4)
(PRACTICAL & THEORY)
Considerations prior to conducting a fitness test
What do you need to check regarding equipment?
Why is it important to gain written informed consent?
Choosing and carrying out fitness tests
You need to establish which components are important for the individual and what the
purpose of each test is so that they are appropriate.
Consider the cost, practicality as well as the advantages and disadvantages of each test
Follow the test protocol and ensure that you record the results and compare these to the
normative data- this helps to identify strengths and areas for improvement.
Reliability- can the test be repeated in the same way and give the same result.
Validity- whether the test measures what it is supposed to test.
Practicality- whether the tests are realistic and convenient to perform

26
SIT AND REACH TEST
What is tested: Static flexibility of hamstrings and lower back muscles
Equipment needed: Sit and reach box or a box and measuring tape
Purpose of test: To test the flexibility of the hamstrings and Erector Spinae muscles
Procedure & Measurement:
Warm the client up for 5 minutes using CV exercise and modified hurdlers hamstring stretch
The test should be done with shoes off and in non- restrictive clothing
The client sits with legs together and straight, and with feet flat against the sit and reach box.
Client places one hand on top of the other and leans forward from the hips as far as possible reaching along the top of the box- hold position for 2 seconds.
Record the furthest point the client reaches
Perform the test three times and record the best measurement. Notes: Doing this test with cold muscles may result in muscle strain. Ensure
knees not bent!
Expected level Male footballer Male gymnast
Regional 7-10cm 10-12cm
National 9-13cm 13-17 cm
International/
Professional >15cm >18cm
Male Female
Average 16-19 year old 7-10cm 7-11cm
(Barsby et al, 2013)

27
AEROBIC ENDURANCE- MULTISTAGE FITNESS TEST (BLEEP TEST)
What is tested: VO2 max- aerobic fitness level
Equipment needed: Stereo; bleep test CD; cones, tape measure
Purpose of test: To estimate VO2 max (maximal oxygen uptake) by
administering a progressive shuttle run test.
Procedure & Measurement:
Measure a distance of 20 metres and mark with two cones.
Perform a short 5 minute cardiovascular warm up
Start the CD, the participants will run 20 metres to the furthest cone when the first 3 bleeps sound.
When the bleep sounds on the CD the participant turns around to run back. You must reach the other line on or before the bleep.
The participants continue to run between the cones and the time between the bleeps becomes shorter- hence the participants need to run faster to reach the cones.
If the participant fails to get to the other end before the bleep on 3 consecutive occasions then they are out (2 chances).
Record the level at which the participant stopped the test.
Compare to norm tables.
Work out your VO2max using the table.
Notes: As this is a maximal test, certain precautions should be taken. Participants
should have no apparent health problems. A qualified First Aider should be
present during the test.
Expected level Female footballer Female gymnast
Regional Level 9 Level 8
National Level 10 Level 9
International/
Professional Level 12+ Level 10
(Barsby et al, 2013)

28
Male
Age Excellent Above
Average Average
Below
Average Poor
14 - 16 L12 S7 L11 S2 L8 S9 L7 S1 < L6 S6
17 - 20 L12 S12 L11 S6 L9 S2 L7 S6 < L7 S3
21 - 30 L12 S12 L11 S7 L9 S3 L7 S8 < L7 S5
Female
Age Excellent Above
Average Average
Below
Average Poor
14 - 16 L10 S9 L9 S1 L6 S7 L5 S1 < L4 S7
17 - 20 L10 S11 L9 S3 L6 S8 L5 S2 < L4 S9
21 - 30 L10 S8 L9 S2 L6 S6 L5 S1 < L4 S9
(Davis, 2010)
The following table of predicted maximum oxygen uptake values (VO2 Max) for the Multistage Fitness Test continues over the next few pages and was introduced by the Department of Physical Education & Sports Science Loughborough University, 1987.
Level Shuttle VO2 Max Level Shuttle VO2 Max Level Shuttle VO2 Max
4 2 26.8 5 2 30.2 6 2 33.6
4 4 27.6 5 4 31 6 4 34.3
4 6 28.3 5 6 31.8 6 6 35
4 9 29.5 5 9 32.9 6 8 35.7
6 10 36.4
Level Shuttle VO2 Max Level Shuttle VO2 Max Level Shuttle VO2 Max
7 2 37.1 8 2 40.5 9 2 43.9
7 4 37.8 8 4 41.1 9 4 44.5
7 6 38.5 8 6 41.8 9 6 45.2
7 8 39.2 8 8 42.4 9 8 45.8
7 10 39.9 8 11 43.3 9 11 46.8
Level Shuttle VO2 Max Level Shuttle VO2 Max Level Shuttle VO2 Max
10 2 47.4 11 2 50.8 12 2 54.3
10 4 48 11 4 51.4 12 4 54.8
10 6 48.7 11 6 51.9 12 6 55.4
10 8 49.3 11 8 52.5 12 8 56
10 11 50.2 11 10 53.1 12 10 56.5
12 12 57.1

29
Level Shuttle VO2 Max Level Shuttle VO2 Max Level Shuttle
VO2 Max
13 2 57.6 14 2 61.1 15 2 64.6
13 4 58.2 14 4 61.7 15 4 65.1
13 6 58.7 14 6 62.2 15 6 65.6
13 8 59.3 14 8 62.7 15 8 66.2
13 10 59.8 14 10 63.2 15 10 66.7
13 13 60.6 14 13 64 15 13 67.5
Level Shuttle VO2 Max Level Shuttle
VO2 Max Level Shuttle VO2 Max
16 2 68 17 2 71.4 18 2 74.8
16 4 68.5 17 4 71.9 18 4 75.3
16 6 69 17 6 72.4 18 6 75.8
16 8 69.5 17 8 72.9 18 8 76.2
16 10 69.9 17 10 73.4 18 10 76.7
16 12 70.5 17 12 73.9 18 12 77.2
16 14 70.9 17 14 74.4 18 15 77.9
Level Shuttle VO2 Max Level Shuttle VO2 Max Level Shuttle VO2 Max
19 2 78.3 20 2 81.8 21 2 85.2
19 4 78.8 20 4 82.2 21 4 85.6
19 6 79.2 20 6 82.6 21 6 86.1
19 8 79.7 20 8 83 21 8 86.5
19 10 80.2 20 10 83.5 21 10 86.9
19 12 80.6 20 12 83.9 21 12 87.4
19 15 81.3 20 14 84.3 21 14 87.8
(http//:www.brianmac.com) 20 16 84.8 21 16 88.2
Interpreting maximum oxygen uptake results
Category Males (ml/O2/kg/min-1) Females
(ml/O2/kg/min-1)
Extremely high 70+ 60+
Very High 63-69 54-59
High 57-62 49-53
Above average 52-56 44-48
Average 44-51 35-43
(BTEC Level 3 Sport and Exercise Science, 2010)

30
AEROBIC ENDURANCE- FORESTRY STEP TEST
What is tested: Cardio-respiratory efficiency- how heart rate increases with steady
state exercise
Equipment needed: Step/ bench- 33cm for females and 40cm for males;
metronome, stopwatch; heart rate monitor
Purpose of test: To determine cardio-respiratory endurance- how heart rate
increases with steady state exercise.
Procedure & Measurement:
Participant steps up and down on a bench/ step for five minutes.
Participant steps up and down in time with in time with the beat of
a metronome set at 90bpm (approximately 22.5 steps per minute).
Ensure feet are wholly on the bench each time. Participant is
allowed to change lead leg.
At the end of five minutes participant sits on bench. Locate pulse
and start counting within 10 seconds of completion.
Record pulse over one minute.
Compare to VO2max tables- use your age , post exercise heart rate
and body weight to calculate maximal aerobic power using the
tables.
Refer to norm chart for your age.

31
VO2max table- Forestry Non- adjusted Aerobic Fitness Values (ml/kg/ min) for Women
Pulse count HR (bpm) Maximal Oxygen Consumption (VO2max)
45 180 29 29 29
44 176 30 30 30 30 30
43 172 31 31 31 31 31 31
42 168 32 32 32 32 32 32 32 32 32 32
41 164 33 33 33 33 33 33 33 33 33 33
41 160 34 34 34 34 34 34 34 34 34 34
39 156 35 35 35 35 35 35 35 35 35 35
39 152 36 36 36 36 36 36 36 36 36 36
37 148 37 37 37 37 37 37 37 37 37 37
36 144 37 38 38 38 38 38 38 38 38 38 38
35 140 38 38 39 39 39 39 39 39 39 39 39 39
34 136 39 39 40 40 40 40 40 40 40 40 40 40
33 132 40 40 41 41 41 41 41 41 41 41 41 41
32 128 41 41 42 42 42 42 42 42 42 42 42 42
31 124 42 42 43 43 43 43 43 43 43 43 43 43
30 120 43 43 44 44 44 44 44 44 44 44 44 44
29 116 44 44 45 45 45 45 45 45 45 45 45 45
28 112 45 45 46 46 46 46 47 47 47 47 47 47
27 108 46 46 47 48 48 49 49 49 49 49
26 104 47 48 49 50 50 51 51 51 51
25 100 49 50 51 52 52 53 53
24 96 51 52 53 54 54 55
23 92 53 54 55 56 56 57
Weight (lb) 80 90 100 110 120 130 140 150 160 170 180 190
Weight (kg) 36.4 40.9 45.4 50 54.5 59.1 63.5 68.2 72.7 77.3 81.8 86.4
From B.J. Sharkey, Physiology of Fitness, Table B.2, p.259, 1984, Copyright © 1984 Human Kinetics Publishers, champaign, IL.

32
VO2max tables- Forestry Non- adjusted Aerobic Fitness Values (ml/kg/ min) for Men
Pulse count
Maximal Oxygen Consumption (VO2max)
45 33 33 33 33 33 32 32 32 32 32 32 32 32
44 34 34 34 34 33 33 33 33 33 33 33 33 33
43 35 35 35 34 34 34 34 34 34 34 34 34 34
42 36 36 35 35 35 35 35 35 35 35 34 34 34
41 36 36 36 36 36 36 36 36 36 36 35 35 35
41 37 37 37 37 37 37 37 35 35 35 35 35 35
39 38 38 38 38 38 38 38 38 38 38 37 37 37
39 39 39 39 39 39 39 39 39 39 39 38 38 38
37 41 40 40 40 40 40 40 40 40 40 39 39 39
36 42 42 41 41 41 41 41 41 41 41 41 40 40
35 43 43 42 42 42 42 42 42 42 42 42 42 41
34 44 44 43 43 43 43 43 43 43 43 43 43 43
33 46 45 45 45 45 45 44 44 44 44 44 44 44
32 47 47 46 46 46 46 46 46 46 46 46 46 46
31 48 48 48 47 47 47 47 47 47 47 47 47 47
30 50 49 49 49 48 48 48 48 48 48 48 48 48
29 52 51 51 51 50 50 50 50 50 50 50 50 50
28 53 53 53 53 52 52 52 52 51 51 51 51 51
27 55 55 55 54 54 54 54 54 54 53 53 53 52
26 57 57 56 56 56 56 56 56 56 55 55 54 54
25 59 59 58 58 58 58 58 58 58 56 56 55 55
24 60 60 60 60 60 60 60 59 59 58 58 57
23 62 62 61 61 61 61 61 60 60 60 59
22 64 64 63 63 63 63 62 62 61 61
21 66 66 65 65 65 64 64 64 62
20 68 68 67 67 67 67 66 66 65
Weight (lb) 120 130 140 150 160 170 180 190 200 210 220 230 240
Weight (kg) 54.5 59.1 63.6 66.2 72.7 77.3 81.8 86.4 91 95.4 100 104.5 109

33
Normative tables for age and gender.
Maximum Oxygen consumption (ml/kg/min)
Male Female
Age 15 20 15 20
Superior 57+ 56+ 54+ 53+
Excellent 56-52 55-51 53-49 52-45
Very good 51-47 50-46 48-44 47-43
Good 46-42 45-41 43-39 42-38
Fair 41-37 40-36 38-34 37-33
Poor 36-32 35-31 33-29 32-28
Very poor <32 <31 <31 <28
(Barsby et al, 2013)
SPEED- 35 METRE SPRINT
What is tested: Speed
Equipment needed: Cones; stopwatch, flat running surface (ideally a running track), tape measure.
Purpose of test: To test speed.
Procedure & Measurement:
Perform a full warm up prior to the test- cardiovascular and stretches for all major muscle groups.
Measure out the 35 metres and mark with cones
The participant will line up on the start line, in a standing start position.
The starter will shout ‘GO’ and the participant will sprint to the end as quickly as possible.
Time the run and record the time.
This run should be repeated after 30 second recovery whilst walking back to the start.
An average of the two runs taken.
Relate the times to the normative table.

34
TIME (SECS) FOR 35m SPRINT
Rating Males Females
Excellent <4.8 <5.30
Good 4.8- 5.09 5.30- 5.59
Average 5.10- 5.29 5.60- 5.89
Below average 5.30- 5.60 5.90- 6.20
Poor > 5.60 >6.20
(Arkinstall et al. 2010)
PUSH UP TEST
What is tested: Muscular endurance of pectoral and triceps muscles
Equipment needed: Mat, stop watch and partner
Purpose of test: To test local muscular endurance in the pectoral and triceps muscles
Procedure & Measurement:
For men the Push Up Test is conducted as follows:
Lie on the mat, hands slightly wider than shoulder width apart & fully extend the arms - see Figure 1
Lower the body until the chest is 2cm off the floor, maintaining a straight back - see Figure 2
Return to the starting position with the arms fully extended - see Figure 1
The push up action is to be continuous with no rest Record the total number of successful push ups
Figure 1
Figure 2
For women the Push Up Test is conducted as follows:
Lie on the mat, hands shoulder width apart, bent knee position & fully extend the arms - see Figure 3
Lower the upper body until the elbows reach 90° - see Figure 4 Return to the starting position with the arms fully extended - see
Figure 3 The push up action is to be continuous with no rest Record the total number of successful push ups
Figure 3
Figure 4

35
MALES- Age Excellent Very good Good Fair Needs
improvement
15-19 39> 29-38 23-28 18-22 <17
FEMALES- Age Excellent Very good Good Fair Needs
improvement
15-19 >33 25-32 18-24 Dec-17 <11
(The Canadian Physical Activity, Fitness & Lifestyle Approach: CSEP-Health & Fitness Program’s
Health-Related Appraisal and Counseling Strategy, 2010)
SIT UP TEST
What is tested: Muscular endurance of abdominal muscles
Equipment needed: Mat, stop watch and partner
Purpose of test: To measure local muscular endurance in abdominal muscles
Procedure & Measurement:
Participant lies on mat on their back, knees bent, feet flat on the floor and arms folded across the body.
Your feet may be held by a partner if required though needs to by noted down in results section.
On the command of go the participant raises to a 90 degree angle and perform a sit ups.
They return back to the start position with their head touching the floor. That will be one repetition.
The participant repeats this for 1 minute.
Count number of successful sit ups.
Consult normative table.
Notes: This test is not recommended for those with lower back problems. Those with no apparent back problem should be careful not to perform this exercise too quickly and risk hurting the lower back.
Age Excellent Above
average Average
Below average
Low
Males 16-19 >30 26-30 20-25 17-19 <17
Females 17-19 >25 21-25 15-20 Sep-14 <9

36
Illinois agility test
What is tested: Agility
Equipment needed: Grip dynamometer
Purpose of test: To measure grip strength, which is a recognised indicator of overall muscular strength
Procedure & Measurement:
Ensure to warm up prior to test The course is set up the course as detailed in the diagram below Lie face down on the floor at the “Start” cone On the command “GO” jump up to your feet and negotiate the
course around the cones following the red line route shown in the diagram to the finish
An assistant stops will use a stop watch to time and record the time when you pass the “Finish” cone
Notes: Ensure participant moves around the cones.
Gender Excellent Above Average Average Below Average Poor
Male <15.2 secs 15.2 - 16.1 secs 16.2 - 18.1 secs 18.2 - 19.3 secs >19.3 secs
Female <17.0 secs 17.0 - 17.9 secs 18.0 - 21.7 secs 21.8 - 23.0 secs >23.0 secs
(Davis, 2010)

37
VERTICAL POWER- VERTICAL JUMP
What is tested: Anaerobic power of the quadriceps muscles
Equipment needed: Takei jump metre
Purpose of test: To measure the power of the legs
Procedure & Measurement:
The athlete chalks the end of his/her finger tips
The athlete stands side on to the wall, keeping both feet remaining on the ground, reaches up as high as possible with one hand and marks the wall with the tips of the fingers (M1- standing reach)
The athlete from a static position jumps as high as possible and marks the wall with the chalk on his fingers (M2)
The assistant measures and records the distance between M1 and M2 (D)
The athlete repeats the test 3 times
The best of the three attempts is plotted on the Lewis nomogram
on line ‘D’.
Weigh yourself and record your weight in kilograms on the
nomogram on line ‘W’
Use a ruler and a sharp pencil to join up the two plots- this will
cross the ‘P’ line- this is your power measured in kg/s.
Gender Excellent Above
Average Average
Below Average
Poor
Male >65cm 50 - 65cm 40 - 49cm 30 - 39cm <30cm
Female >58cm 47 - 58cm 36 - 46cm 26 - 35cm <26cm
(Davis, 2010)

38
VERTICAL POWER- VERTICAL JUMP
What is tested: Anaerobic power of the quadriceps muscles
Equipment needed: Takei jump metre
Purpose of test: To measure the power of the legs
Procedure & Measurement:
Place the rubber plate on the floor and hold the Takei Jump meter in your hand.
Place the Takei Jump meter around your waist
Turn the pulley to take the slack out of the rope
Press ON/C to start the test
Jump as high as possible and repeat the test 3 times
Your score is the best of three attempts
Age Male Female Age Male Female Age Male Female
10 34.9 32.8 30 55.5 38.1 50 44.5 29.7
11 39.0 36.6 31 54.8 37.4 51 44.0 29.0
12 43.2 38.5 32 54.0 37.4 52 43.0 28.5
13 49.2 41.3 33 53.5 37.1 53 42.6 28.2
14 54.7 42.5 34 53.1 36.5 54 42.3 27.8
15 57.5 42.9 35 52.8 25.9 55 41.6 27.4
16 60.2 43.2 36 52.4 36.1 56 40.6 26.8
17 61.6 43.7 37 51.5 35.5 57 40.1 26.4
18 60.6 42.9 38 51.1 35.1 58 39.5 25.9
19 60.2 42.3 39 51.0 35.0 59 38.5 25.1
20 59.9 41.8 40 50.4 34.6 60 37.5 24.0
21 58.6 41.0 41 49.9 34.1 61 36.5 23.6
22 58.1 40.2 42 48.6 33.7 62 35.5 23.6
23 58.3 40.2 43 48.8 33.3 63 34.5 23.2
24 58.2 39.7 44 48.0 32.7 64 33.5 23.0
25 57.8 39.7 45 47.6 32.2 65 32.7 22.3
26 57.5 39.2 46 46.7 31.8 66 31.9 21.3
27 56.7 39.1 47 46.0 31.2 67 30.8 20.5
28 56.8 38.8 48 45.8 30.7 68 30.0 20.0
29 56.2 38.5 49 45.2 30.4 69 29.0 19.5
70 28.0 18.5

39
GRIP STRENGTH DYNAMOMETER
What is tested: Muscular strength- forearm
Equipment needed: Grip dynamometer
Purpose of test: To measure grip strength, which is a recognised indicator of overall muscular strength
Procedure & Measurement:
Switch on dynamometer.
Adjust grip to comfortable position, to fit size of hand
Hold dynamometer by side and squeeze as hard as you can for 5 seconds, without moving your arm and breathing out as you do so.
Repeat test with other hand.
Repeat 3 times on each side, there should be 1 minute rest between trials.
Record three readings and choose the highest to refer to normative data chart.
Notes: It is important to breathe out with the exertion of this test.
Gender Excellent Good Average Fair Poor
Male >56 51-56 45-50 39-44 <39
Female >36 31-36 25-30 19-24 <19
(Davis, 2010)

40
BODY COMPOSITION- SUM OF SKINFOLDS
What is tested: Subcutaneous adipose tissue (predicts percentage of body fat)
Equipment needed: Skinfold calipers; marker
Purpose of test: Skinfold measurements give an indication of body composition- body fat percentage. It is the most commonly used field test for this component of fitness, but needs practice!
Procedure & Measurement:
Ensure client is comfortable with procedure.
Take the measurements on the RIGHT side of the body with subject standing upright and muscles relaxed.
Mark each skinfold point with a pen
Grasp the skin with the thumb and finger 1 cm above the marked site and pull the fat away from the muscle
Place the calipers perpendicular (at right angles to) to the fold at the marked point and with the dial facing upwards
Maintain the grasp while reading the caliper.
Allow the calipers to settle for one or two seconds before reading and read the dial to the nearest 5.5mm and record the result.
Allow skin to settle and repeat- take a minimum of 2 measurements per site (3 is best).
Add up the total of the four skinfold site measurements.
Calculate body fat percentage using the table**. Notes: Open the calipers before you remove from the skin.
You can take the best of three for increased reliability. Take measurements at all sites, record results. Take a sum of the Skin folds and refer to norm tables for results.
Desirable Body fat ranges:
Rating Male Female
16 – 29 14 – 18% 22 – 25%
Area Description of Site
Triceps A vertical grasp, taken halfway between the shoulder and the elbow on the centre
line of back of the arm.
Biceps A vertical grasp, taken 1cm above the site for the triceps on the front of the arm.
Subscapular A diagonal fold, at a 45 degree angle, taken 2cm below the lowest point of the
shoulder blade.
Suprailiac A diagonal fold, taken just above the iliac crest (hip bone), directly below the front of
the shoulder.

41
BODY MASS INDEX B.M.I.
What is tested: Assessment of body composition- body fat
Equipment needed: Height measure or tape measure; weighing scales
Purpose of test: To get an indication of physical dimension
Procedure: Height – stand with heels against wall, with bare feet, eyes looking
straight ahead.
Weight – Stand on scales in minimal clothing, ensuring scales are set
to zero and standing on a hard, even surface.
Measurement: Height - Measure in metres.
Weight – Measure in kilograms.
Calculate Body Mass Index with the following equation:
BMI = WEIGHT (Kg)
(HEIGHT x HEIGHT) (m)
Relate your score to the normative tables.
Notes: BMI is a common way of indicating whether a client is obese-
though does not actually measure body composition.
Work out your body mass index (BMI) Example
Write your calculations here:
Your weight in kilograms
(Height in metres x height in metres)
61.6 kg____ 1.74m x 1.74m
61.6 2.89
= BMI 19
3.
2.
1..

42
NORMATIVE TABLE FOR BMI
BMI Classification Associated risk
<18.5 Underweight Increasing health risk
18.5– 24.9 Normal weight (grade 0) Lowest health risk
25-29.9 Overweight Medium risk
30-34.9 Obesity (grade I) Gradually Increasing
35-39.9 Obesity (grade II) Health risk with
40+ Extremely obese (grade III) Gradually increasing BMI
(ACSM’s Guidelines for Exercise Testing and Prescription, 201
BODY COMPOSITION- BIOELECTRICAL IMPEDANCE (BIA)
What is tested: Subcutaneous adipose tissue (body fat)
Equipment needed: Body Stat Monitor
Purpose of test: To give an indication of body composition. Though not as accurate
as the skin fold measurement as it is easier to implement and is less
intrusive to the participant.
Procedure:
The subject should not have exercised or taken a sauna within 8 hours of the test.
The subject should refrain from alcohol intake for 12 hours prior to the study.
The subject's height and weight should be accurately measured and recorded.
The subject should lie quietly during the entire test.
The individual must lay flat on the floor with their arms not
touching their sides and their legs not touching one another.
The electrode sites may need to be cleaned with alcohol, particularly if the skin is dry or covered with lotion.
Electrodes are placed, two on the RIGHT hand and two on the
RIGHT foot. *See diagram below*
Information regarding the individual in relation to their height,
weight and activity levels is inputted into the monitor.
Within a few seconds the readings are sent through to the
monitor display screen to be recorded.

43
Measurement: The theory is that muscle will conduct the electricity (due to water
content), while fat will resist the path of the electricity.
Therefore the more electricity that comes out of the body, the more
muscle a person has.
(http://www-rohan.sdsu.edu/~ens304l/bia.htm)
ADVANTAGES & DISADVANTAGES
Test Advantages Disadvantages
Sit and reach test
MSFT
Forestry step test
35m sprint test

44
Push up test
Sit up test
Illinois agility test
Vertical jump- 1
Vertical jump-2
Grip strength
Body composition-
skinfolds
Body composition-
BMI/ BIA