unit 13: data import and export - agiloft, inc. · 2016-10-10 · data import unit overview • in...
TRANSCRIPT
Unit 13: Data Import and Export
Questions Covered
• How do we import large amounts of data into the system?
• From which file types can we import data?
• Is there a way to automatically import or export data to and from the system?
2

Data Import Unit Overview
• In this unit we will learn the various data import and export options.
• We will learn how to perform an import and an export of data using Excel.
• We will learn about the import action and the export action.
You will need Excel 2007 or later (or other software which can open/save files in the .xls/.xlsx file type).
3
Importing Data into Agiloft
• Data is easily imported into Agiloft from:
Standard ASCII
Excel
XML
SalesForce.com
Agiloft (KB backup format)
In this unit, we will only be importing and exporting data from Excel sources, and an attached file .zip folder.
• Prior to importing, it is a good idea to ensure your data matches valid choice field values, and that team and group names, etc., are accurate. The system may handle new/unexpected values in a undesirable way, particularly in the case of linked fields.
4
The Import Wizard
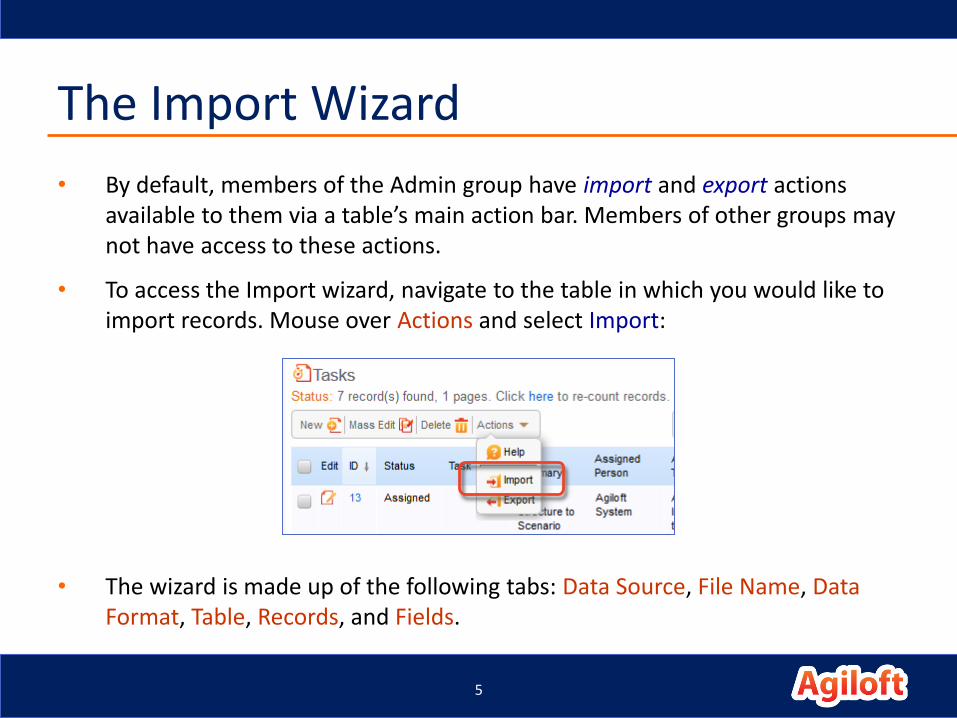
• By default, members of the Admin group have import and export actions available to them via a table’s main action bar. Members of other groups may not have access to these actions.
• To access the Import wizard, navigate to the table in which you would like to import records. Mouse over Actions and select Import:
• The wizard is made up of the following tabs: Data Source, File Name, Data Format, Table, Records, and Fields.
5
Tabs of the Data Import Wizard
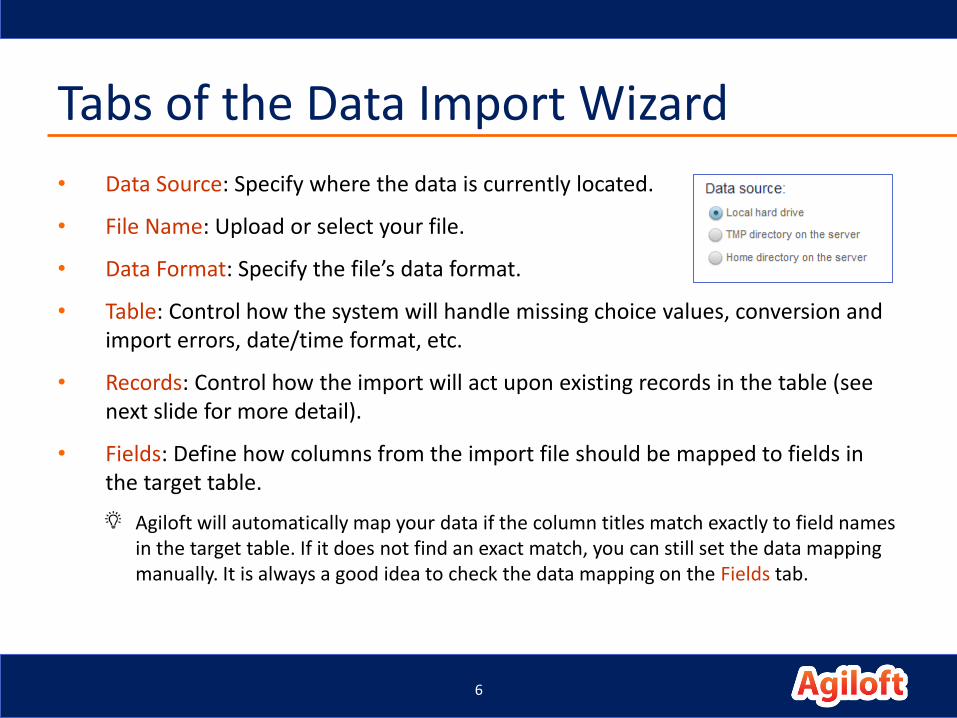
• Data Source: Specify where the data is currently located.
• File Name: Upload or select your file.
• Data Format: Specify the file’s data format.
• Table: Control how the system will handle missing choice values, conversion and import errors, date/time format, etc.
• Records: Control how the import will act upon existing records in the table (see next slide for more detail).
• Fields: Define how columns from the import file should be mapped to fields in the target table.
Agiloft will automatically map your data if the column titles match exactly to field names in the target table. If it does not find an exact match, you can still set the data mapping manually. It is always a good idea to check the data mapping on the Fields tab.
6
Acting on Existing Records
• The option we select on the Records tab regarding how the import will act on existing records is an important one and changes the way the system handles the import.
Append new records: Adds new records only, without affecting existing records.
Replace matching records: If a match is found, current Agiloft records will be overwritten and completely replaced by the data contained in the import file.
Skip matching records: If a match is found, the import action will skip that record and ignore the data contained in the import file for that record, leaving the Agiloft record unchanged.
Update imported fields only in matching records: If a match is not found, the import will ignore the data contained in the import for non-matching records and no data will be copied to Agiloft. If a match is found, the import action will update the record with the data contained in the import file, leaving any fields not contained in the import file unchanged.
Delete all records before importing: The system will delete all existing records prior to the import.
7
Acting on Existing Records (continued)
• If you choose one of the options marked with an asterisk *, it is important to provide a field that will identify a matching record. Otherwise the system will add records for all values in your spreadsheet.
Append new records
Replace matching records *
Skip matching records *
Update imported fields only in matching records *
Delete all records before importing
• It is also important to specify how to handle rows in your data that do not have matching values in the table into which you are importing.
8
Order Matters
• As our hands-on exercise, we will be importing contract records into the system.
• When importing data, it is important to do so sequentially, as fields from one table are often linked in from other tables.
As a rule of thumb, import to background tables first, followed by process tables. More specifically, import data into the tables other tables will pull data from before importing the data into tables with linked field sets.
• Although our end goal in this case is to import contract records, we will import data into tables in the following order:
Companies table
External Users table
Locations table
Contracts table (excluding attached files)
Contracts table (attached files only)
9
Import Companies
• Locate the file TrainingImport.xlsx made available in this unit. Download the file and save it to your desktop (or somewhere on your hard drive).
• Navigate to the Companies table.
• On the action bar select Actions > Import to open the Import wizard.
• On the Data Source tab, select Local hard drive as the source of the data to be imported.
• On the File Name tab, click Browse, select the file TrainingImport.xlsx and then click Upload.
Practice
10
Import Companies (continued)
• On the Data Format tab, select Excel spreadsheet.
• On the Table tab, ensure the Sheet selected is Companies and that the Tabledrop-down also displays Companies. Leave the remaining options with their default values.
• On the Records tab, select the option Append new records.
• On the Fields tab, ensure that the column titles from the spreadsheet are mapping to the correct field in the Contracts table.
• Click Finish.
• After the import completes, return to the Companies table and review some of the newly created records.
• Next, we will repeat the process for the External Users, Locations, and Contracts tables, holding off on importing attached files.
Practice
11
Import External Users
• Next we will import external users. Navigate to the External Users table (a sub-table of People), then select Actions > Import.
• Repeat the steps for importing from TrainingImport.xlsx, with the following modifications:
On the Table tab, ensure the Sheet selected is External Users and that the Table drop-down also displays External Users.
When importing data into a sub-table, you can initiate the import process from the parent table or any of its sub-tables. In any case, you must specify the sub-table on the Table tab of the Import wizard for the data to map correctly.
On the Fields tab, remember to check that the column titles from the spreadsheet are mapping to the correct field in the External Users table.
Click Finish.
Practice
12

Import Locations and Contracts
• Continue importing data in the Locations table, followed by Contracts.
• See if you can complete the import process on your own. If you get stuck, refer to the previous slides.
On the Table tab, ensure the correct Sheet is selected.
On the Fields tab, remember to check that the column titles are mapping to the correct fields.
Practice
13
Importing Attached Files
• Importing attached files is slightly different than importing records.
• This is because the system must upload each of the files, rather than simply set the value of a field.
• The process will be outlined in detail in the following hands-on exercise.
• In brief, we will create:
A simple import file (.xlsx or .csv) , with one column for a unique identifier and another column for the attached file names.
A folder named “files” which contains all of the files we wish to upload.
The folder must be labeled “files” and must be in lower case for the import to function.
• Next we will zip those two items and then select the zip file on the File Name tab of the Import wizard.
• The remainder of the process is the same, but can be more time consuming as the system must upload each of the files.
14
Importing Attached Files (continued)
• Download the file import.zip made available at the beginning of this unit.
• Save it to your desktop and unzip the file. The zip folder contains the following:
ContractFilesImport.xlsx
Files folder containing:
agreement-draft.docx
goods-and-services-contract.docx
NDA-OlHampton.docx
software-license-contract.pdf
• Open the spreadsheet ContractFilesImport.xlsx and review the contents. It is set up with a unique identifier column (in this case we are using the ID field, but could have used any field which is marked as unique within the Contracts table) and a column with the exact name of the files we wish to import.
• In your Training KB, locate the four contracts referenced in the Contract Title column. Update the ID column of the spreadsheet with the appropriate values and save it.
• Next, use a zip tool to re-zip the files folder and ContractFilesImport.xlsx and save the resulting file on your hard drive.
Practice
15

Importing Attached Files (continued)
• From this point, use the normal process to import the records:
Navigate to Contracts > Actions > Import.
On the Data Source tab, select Local hard drive.
On the File Name tab, browse for and select import.zip (or other name you chose).
On the Data Format tab, select Excel spreadsheet.
On the Records tab, select the option Update imported fields only in matching records.
Under Match records, select the ID field.
Under Duplicates, select use all records.
On the Fields tab, ensure the data is mapped to the correct fields, and click Finish.
Hint: We want to populate the Contract Files field.
When completed, view or edit the updated contract records to confirm that the files were added.
Practice
16
Data Import Tips
• On the Fields tab, we can identify invalid data prior to clicking Finish by clicking the Testbutton first.
• On the Table tab, we have the option to create missing choice fields upon import. If you are importing data into a choice field, your data may contain values which do not exist as a valid choices for the field within Agiloft. By selecting this option, the system can create the missing choices if you wish.
This is a good reason to clean the import first, as selecting this option will create new choices for any variations, including misspelled words.
• On the Records tab, it is important to pay close attention to the option defining how the import will act upon existing records. You do not want to overwrite when you mean to append.
• In our hands-on exercise, we were provided with the spreadsheet files to use for the import. An easy way to get a blank template of all of the fields you need is to perform an export of a single record in the desired table and select the necessary fields.
• We will be covering exports later in this unit.
17
Import Action
• An import action is used to automate imports and updates from other systems. For instance, a company might hold user information in a separate system and want to keep it in sync with Agiloft users; a nightly export of changes can be automatically imported using an import action to update the user records in Agiloft with new field values.
• An import file is initially mapped to fields in Agiloft, a file location and name are identified, and then the import runs at the specified time and interval.
• While we will not set up an import action here, the tabs of the Import Action wizard are essentially the same as the tabs of the Import wizard we have just seen.
• There are three main differences:
The file name is included in the Data Source tab.
An additional data source option to import from a URL.
No data source options to import from your local hard drive.
18
Export Data from Agiloft
• The reciprocal process to importing data is exporting data.
• Exports are useful for updating external systems with data from Agiloft, providing regularly scheduled snapshots of the system at a given time, or keeping your Outlook contacts up to date.
• Data is easily exported from Agiloft to the following file types:
Text
Excel (.xls or .xlsx)
XML
19
Tabs of the Data Export Wizard
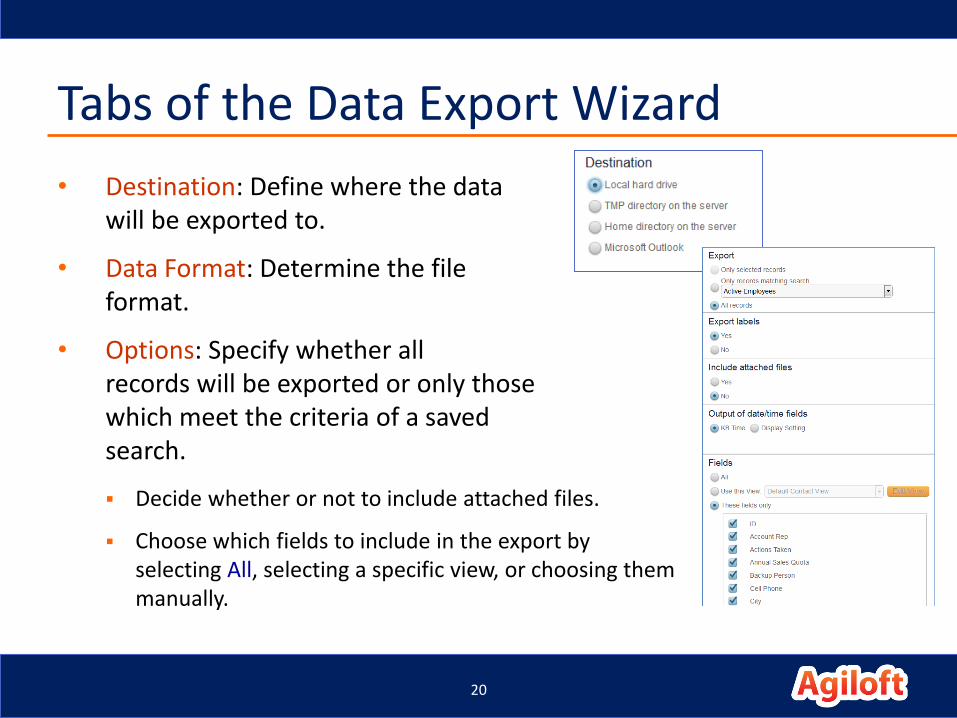
• Destination: Define where the data will be exported to.
• Data Format: Determine the file format.
• Options: Specify whether all records will be exported or only those which meet the criteria of a saved search.
Decide whether or not to include attached files.
Choose which fields to include in the export by selecting All, selecting a specific view, or choosing them manually.
20
Exporting Data
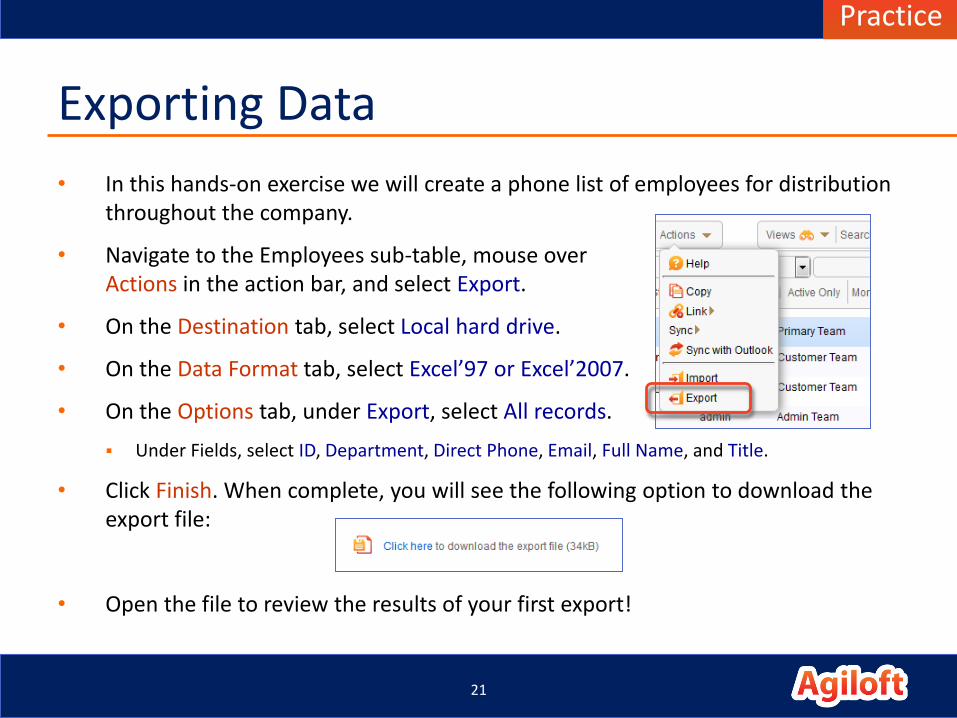
• In this hands-on exercise we will create a phone list of employees for distribution throughout the company.
• Navigate to the Employees sub-table, mouse over Actions in the action bar, and select Export.
• On the Destination tab, select Local hard drive.
• On the Data Format tab, select Excel’97 or Excel’2007.
• On the Options tab, under Export, select All records.
Under Fields, select ID, Department, Direct Phone, Email, Full Name, and Title.
• Click Finish. When complete, you will see the following option to download the export file:
• Open the file to review the results of your first export!
Practice
21

Export Action
• In an export action type you define a table, fields, data format, and file location to run an automatic export. The action creates the file and stores it in the specified location.
• The export file can include attached files from the exported records (from the Optionstab).
• Once stored, the export file can be automatically imported into another system.
• File types include Excel 2003 or 2007, ASCII, and XML. If files are attached, a zip file is created.
• Like the import action, we will not create an export action in this training. However, the tabs of the Export Action wizard are basically the same as the Export wizard with the following differences:
On the Destination tab, you cannot select Local hard drive, but you can now export to a URL.
You must export all records.
You may determine the file name with either hard-coded text or a formula using variables.
22
Data Import and Export Overview
• In this unit we have learned how to import and export data into and out of the system using Excel files.
• We have learned the different options available for importing and exporting, including how to include import and export actions as a part of time-based rules.
• We have imported data into several tables and learned how to import attached files.
23