unit 6 iot physical servers, cloud offerings & iot case ... · •wamp is a routed protocol,...
TRANSCRIPT

Unit 6IoT Physical Servers, Cloud
Offerings & IoT Case StudiesBy
Mahesh R. Sanghavi

Content
• Introduction to Cloud Storage Models
• Communication API
• WAMP: AutoBahn for IoT
• Xively Cloud for IoT
• Python Web Application Framework: Djanjo
• Amazon Web Services for IoT
• SkyNet IoT Messaging Platform.
• Case Studies: • Home Intrusion Detection, • Weather Monitoring System, • Air Pollution Monitoring, • Smart Irrigation.

Introduction to Cloud Storage Models
• Popular Models are• Amazon Web Service (AWS)
• Xively Cloud (PAAS)

Communication API
• Cloud Models are relied on Communication API
• Communication API facilitate data transfer, control information transfer from application to cloud, one service to another
• It also exist in the form of Communication Protocols
• It supports RPC, PUBSUB and WAMP
• Eg. Popular API is RESTful API (communication in cloud model)
• Django web framework is used to implement Communication API

WAMP: AutoBahn for IoT
• WAMP : Web Application Messaging Protocol• Mainly used in cloud storage model for IoT & other messaging services• WAMP is a routed protocol, with all components connecting to a WAMP Router,
where the WAMP Router performs message routing between the component• It is protocol for Web Socket (PUBSUB based protocol) : uses RPC Messaging Pattern• Some Important Key Terminologies
• Transport• Session• Clients (Publisher & Subscriber)• Router• Broker• Dealer• Application Code

WAMP for IoT
• Web Application Messaging Protocol (WAMP) is a sub-protocol of WebSocketwhich provides publish–subscribe and remote procedure call (RPC) messaging patterns.
Bahga & Madisetti, © 2015Book website: http://www.internet-of-things-book.com

WAMP – Concepts
• Transport: Transport is a channel that connects two peers.
• Session: Session is a conversation between two peers that runs over a transport.
• Client: Clients are peers that can have one or more roles.
• In the publish–subscribe model, the Client can have the following roles:
– Publisher: Publisher publishes events (including payload) to the topic maintained by the Broker.
– Subscriber: Subscriber subscribes to the topics and receives the events including the payload.
• In the RPC model, the Client can have the following roles:
– Caller: Caller issues calls to the remote procedures along with call arguments.
– Callee: Callee executes the procedures to which the calls are issued by the Caller and returns the results to the Caller.
• Router: Routers are peers that perform generic call and event routing.
• In the publish–subscribe model, the Router has the role of a Broker.
– Broker: Broker acts as a Router and routes messages published to a topic to all the subscribers subscribed to the topic.
• In the RPC model, the Router has the role of a Dealer.
– Dealer: Dealer acts a router and routes RPC calls from the Caller to the Callee and routes results from the Callee to the Caller.
• Application code: Application code runs on the Clients (Publisher, Subscriber, Callee or Caller).
Bahga & Madisetti, © 2015Book website: http://www.internet-of-things-book.com

Xively Cloud Services™
Commercial Platform as a Service for the Internet of Things
• Supports hundreds of platforms, millions of
gateways and billions of smart devices
• Comprehensive and secure infrastructure
services
• Online development tools and dev center
• Best of breed approach
Built on LogMeIn’s Gravity platform connecting
255+ m devices for 55+ m users

Xively …Contd…
• Xively is an IoT Cloud Platform
• It is an enterprise platform for building, managing, and deriving business value from connected products.
• It also provides the cloud base API with an SDK
• It supports platforms and technologies like Android, Arduino, C etc.
• Xively is a PaaS (Platform as a Service) which exposes its service via RESTful API
• It supports messaging service based on MQTT

Case Study: “Smart Plant System“ [3]

Details
• This IoT project uses Arduino Uno and a set of sensors:
• DHT11: Temperature and humidity sensor
• TEMT6000: Light intensity sensor
• YL-38 + YL-69: Soil moisture sensor
• We want to send all values read from these sensors to Xively and create a dashboard so we can monitor these parameters.
• Code : Download

Results by Xively

Amazon EC2 (Elastic Compute Cloud) Python Example
• Boto is a Python package that provides interfaces to Amazon Web Services (AWS)
#Python program for launching an EC2 instanceimport boto.ec2from time import sleepACCESS_KEY="<enter access key>"SECRET_KEY="<enter secret key>"
REGION="us-east-1"AMI_ID = "ami-d0f89fb9"EC2_KEY_HANDLE = "<enter key handle>"INSTANCE_TYPE="t1.micro"SECGROUP_HANDLE="default"
conn = boto.ec2.connect_to_region(REGION, aws_access_key_id=ACCESS_KEY, aws_secret_access_key=SECRET_KEY)
reservation = conn.run_instances(image_id=AMI_ID, key_name=EC2_KEY_HANDLE,instance_type=INSTANCE_TYPE, security_groups = [ SECGROUP_HANDLE, ] )
• In this example, a connection to EC2 service is first established by calling the boto.ec2.connect_to_region function.
• The EC2 region, AWS access key and AWS secret key are passed to this function. After connecting to EC2 , a new instance is launched using the conn.run_instances function.
• The AMI-ID, instance type, EC2 key handle and security group are passed to this function.
Bahga & Madisetti, © 2015Book website: http://www.internet-of-things-book.com
Amazon AutoScaling – Python Example
#Python program for creating an AutoScaling group (code excerpt)import boto.ec2.autoscale:print "Connecting to Autoscaling Service"conn = boto.ec2.autoscale.connect_to_region(REGION,
aws_access_key_id=ACCESS_KEY,aws_secret_access_key=SECRET_KEY)
print "Creating launch configuration"
lc = LaunchConfiguration(name='My-Launch-Config-2',image_id=AMI_ID,
key_name=EC2_KEY_HANDLE,
instance_type=INSTANCE_TYPE,security_groups = [
SECGROUP_HANDLE, ])conn.create_launch_configuration(lc)
print "Creating auto-scaling group"
ag = AutoScalingGroup(group_name='My-Group', availability_zones=['us-east-1b'],launch_config=lc, min_size=1, max_size=2,connection=conn)
conn.create_auto_scaling_group(ag)
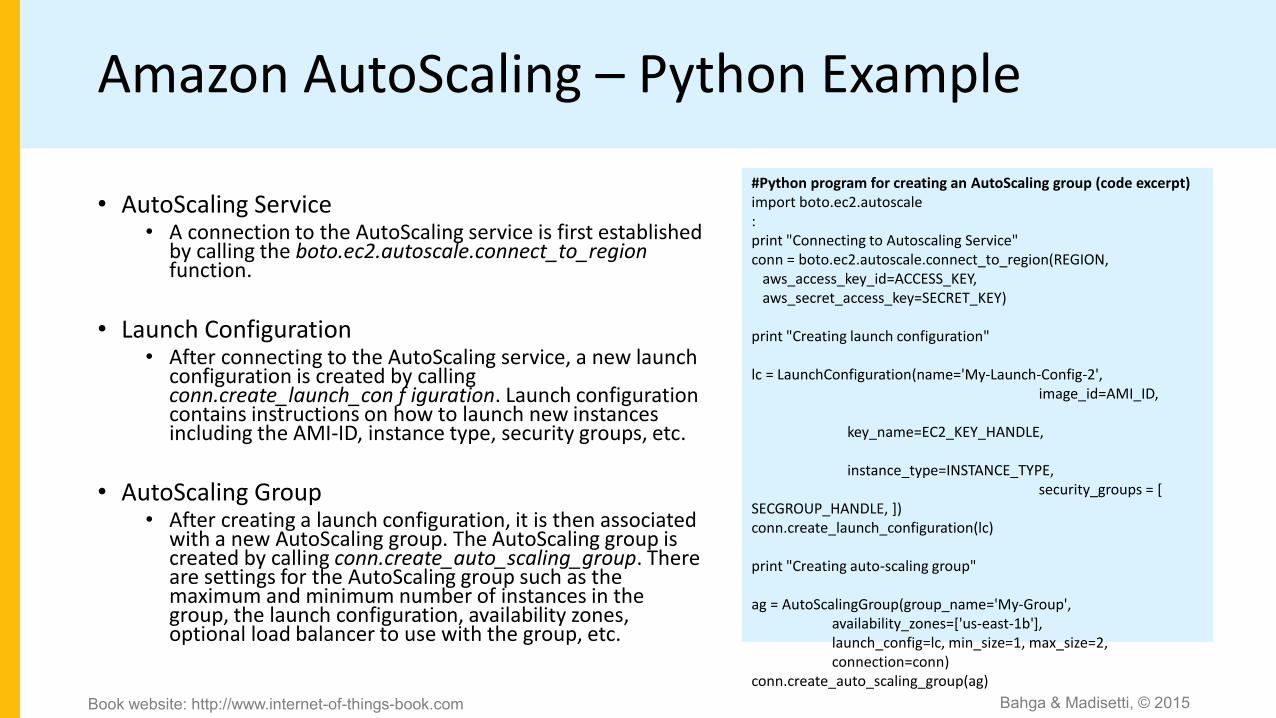
• AutoScaling Service • A connection to the AutoScaling service is first established
by calling the boto.ec2.autoscale.connect_to_region function.
• Launch Configuration• After connecting to the AutoScaling service, a new launch
configuration is created by calling conn.create_launch_con f iguration. Launch configuration contains instructions on how to launch new instances including the AMI-ID, instance type, security groups, etc.
• AutoScaling Group• After creating a launch configuration, it is then associated
with a new AutoScaling group. The AutoScaling group is created by calling conn.create_auto_scaling_group. There are settings for the AutoScaling group such as the maximum and minimum number of instances in the group, the launch configuration, availability zones, optional load balancer to use with the group, etc.
Bahga & Madisetti, © 2015Book website: http://www.internet-of-things-book.com

Amazon AutoScaling – Python Example
#Creating AutoScaling policies
scale_up_policy = ScalingPolicy(name='scale_up',
adjustment_type='ChangeInCapacity',
as_name='My-Group',
scaling_adjustment=1,
cooldown=180)
scale_down_policy = ScalingPolicy(name='scale_down',
adjustment_type='ChangeInCapacity',as_name='My-Group',
scaling_adjustment=-1,
cooldown=180)
conn.create_scaling_policy(scale_up_policy)conn.create_scaling_policy(scale_down_policy)
• AutoScaling Policies• After creating an AutoScaling group, the policies for
scaling up and scaling down are defined.
• In this example, a scale up policy with adjustment type ChangeInCapacity and scaling_ad justment = 1 is defined.
• Similarly, a scale down policy with adjustment type ChangeInCapacity and scaling_ad justment = −1 is defined.
Bahga & Madisetti, © 2015Book website: http://www.internet-of-things-book.com

Amazon AutoScaling – Python Example
#Connecting to CloudWatchcloudwatch = boto.ec2.cloudwatch.connect_to_region(REGION,
aws_access_key_id=ACCESS_KEY,aws_secret_access_key=SECRET_KEY)
alarm_dimensions = {"AutoScalingGroupName": 'My-Group'}
#Creating scale-up alarmscale_up_alarm = MetricAlarm(
name='scale_up_on_cpu', namespace='AWS/EC2',metric='CPUUtilization', statistic='Average',comparison='>', threshold='70',period='60', evaluation_periods=2,alarm_actions=[scale_up_policy.policy_arn],dimensions=alarm_dimensions)
cloudwatch.create_alarm(scale_up_alarm)
#Creating scale-down alarmscale_down_alarm = MetricAlarm(
name='scale_down_on_cpu', namespace='AWS/EC2',metric='CPUUtilization', statistic='Average',comparison='<', threshold='40',period='60', evaluation_periods=2,alarm_actions=[scale_down_policy.policy_arn],dimensions=alarm_dimensions)
cloudwatch.create_alarm(scale_down_alarm)
• CloudWatch Alarms• With the scaling policies defined, the next step is to
create Amazon CloudWatch alarms that trigger these policies.
• The scale up alarm is defined using the CPUUtilizationmetric with the Average statistic and threshold greater 70% for a period of 60 sec. The scale up policy created previously is associated with this alarm. This alarm is triggered when the average CPU utilization of the instances in the group becomes greater than 70% for more than 60 seconds.
• The scale down alarm is defined in a similar manner with a threshold less than 50%.
Bahga & Madisetti, © 2015Book website: http://www.internet-of-things-book.com

Amazon S3 (Simple Storage Service)Python Example
# Python program for uploading a file to an S3 bucketimport boto.s3
conn = boto.connect_s3(aws_access_key_id='<enter>',aws_secret_access_key='<enter>')
def percent_cb(complete, total):print ('.')
def upload_to_s3_bucket_path(bucketname, path, filename):mybucket = conn.get_bucket(bucketname)fullkeyname=os.path.join(path,filename)key = mybucket.new_key(fullkeyname)key.set_contents_from_filename(filename, cb=percent_cb,
num_cb=10)
• In this example, a connection to the S3 service is first established by calling the boto.connect_s3 function.
• The upload_to_s3_bucket_path function uploads the file to the S3 bucket specified at the specified path.
Bahga & Madisetti, © 2015Book website: http://www.internet-of-things-book.com

Amazon RDS (Relational Database Service)Python Example
#Python program for launching an RDS instance (excerpt)import boto.rds
ACCESS_KEY="<enter>"SECRET_KEY="<enter>"REGION="us-east-1"INSTANCE_TYPE="db.t1.micro"ID = "MySQL-db-instance-3"USERNAME = 'root'PASSWORD = 'password'DB_PORT = 3306DB_SIZE = 5DB_ENGINE = 'MySQL5.1'DB_NAME = 'mytestdb'SECGROUP_HANDLE="default"
#Connecting to RDSconn = boto.rds.connect_to_region(REGION,
aws_access_key_id=ACCESS_KEY,aws_secret_access_key=SECRET_KEY)
#Creating an RDS instancedb = conn.create_dbinstance(ID, DB_SIZE, INSTANCE_TYPE, USERNAME, PASSWORD, port=DB_PORT, engine=DB_ENGINE, db_name=DB_NAME, security_groups = [ SECGROUP_HANDLE, ] )
• In this example, a connection to the RDS service is first established by calling the boto.rds.connect_to_region function.
• The RDS region, AWS access key and AWS secret key are passed to this function.
• After connecting to the RDS service, the conn.create_dbinstance function is called to launch a new RDS instance.
• The input parameters to this function include the instance ID, database size, instance type, database username, database password, database port, database engine (e.g., MySQL5.1), database name, security groups, etc.
Bahga & Madisetti, © 2015Book website: http://www.internet-of-things-book.com

Amazon DynamoDB –Non Relational DatabasesPython Example
# Python program for creating a DynamoDB table (excerpt)import boto.dynamodb
ACCESS_KEY="<enter>"SECRET_KEY="<enter>"REGION="us-east-1"
#Connecting to DynamoDBconn = boto.dynamodb.connect_to_region(REGION,
aws_access_key_id=ACCESS_KEY,aws_secret_access_key=SECRET_KEY)
table_schema = conn.create_schema(hash_key_name='msgid',hash_key_proto_value=str,range_key_name='date',range_key_proto_value=str
)
#Creating table with schematable = conn.create_table(
name='my-test-table',schema=table_schema,read_units=1,write_units=1
)
• In this example, a connection to the DynamoDBservice is first established by calling boto.dynamodb.connect_to_region.
• After connecting to the DynamoDB service, a schema for the new table is created by calling conn.create_schema.
• The schema includes the hash key and range key names and types.
• A DynamoDB table is then created by calling the conn.create_table function with the table schema, read units and write units as input parameters.
Bahga & Madisetti, © 2015Book website: http://www.internet-of-things-book.com

Python Packages of Interest
• JSON• JavaScript Object Notation (JSON) is an easy to read and write data-interchange format. JSON is used as an alternative to XML
and is easy for machines to parse and generate. JSON is built on two structures: a collection of name–value pairs (e.g., a Python dictionary) and ordered lists of values (e.g., a Python list).
• XML• XML (Extensible Markup Language) is a data format for structured document interchange. The Python minidom library provides
a minimal implementation of the Document Object Model interface and has an API similar to that in other languages.
• HTTPLib & URLLib• HTTPLib2 and URLLib2 are Python libraries used in network/internet programming.
• SMTPLib• Simple Mail Transfer Protocol (SMTP) is a protocol which handles sending email and routing email between mail servers. The
Python SMTPLib module provides an SMTP client session object that can be used to send email.
• NumPy• NumPy is a package for scientific computing in Python. NumPy provides support for large multi-dimensional arrays and
matrices.
• Scikit-learn• Scikit-learn is an open source machine learning library for Python that provides implementations of various machine learning
algorithms for classification, clustering, regression and dimension reduction problems.
Bahga & Madisetti, © 2015Book website: http://www.internet-of-things-book.com

Python Web Application Framework – Django
• Django is an open source web application framework for developing web applications in Python.
• A web application framework in general is a collection of solutions, packages and best practices that allows development of web applications and dynamic websites.
• Django is based on the Model–Template–View architecture and provides separation of the data model from the business rules and the user interface.
• Django provides a unified API to a database backend.
• Thus, web applications built with Django can work with different databases without requiring any code changes.
• With this flexibility in web application design combined with the powerful capabilities of the Python language and the Python ecosystem, Django is best suited for cloud applications.
• Django consists of an object-relational mapper, a web templating system and a regular-expression-based URL dispatcher.
Bahga & Madisetti, © 2015Book website: http://www.internet-of-things-book.com

Django Architecture
• Django uses a Model–Template–View (MTV) framework.
• Model• The model acts as a definition of some stored data and handles the interactions with the database. In a web
application, the data can be stored in a relational database, non-relational database, an XML file, etc. A Django model is a Python class that outlines the variables and methods for a particular type of data.
• Template• In a typical Django web application, the template is simply an HTML page with a few extra placeholders. Django’s
template language can be used to create various forms of text files (XML, email, CSS, Javascript, CSV, etc.).
• View• The view ties the model to the template. The view is where you write the code that actually generates the web pages.
View determines what data is to be displayed, retrieves the data from the database and passes the data to the template.
Bahga & Madisetti, © 2015Book website: http://www.internet-of-things-book.com
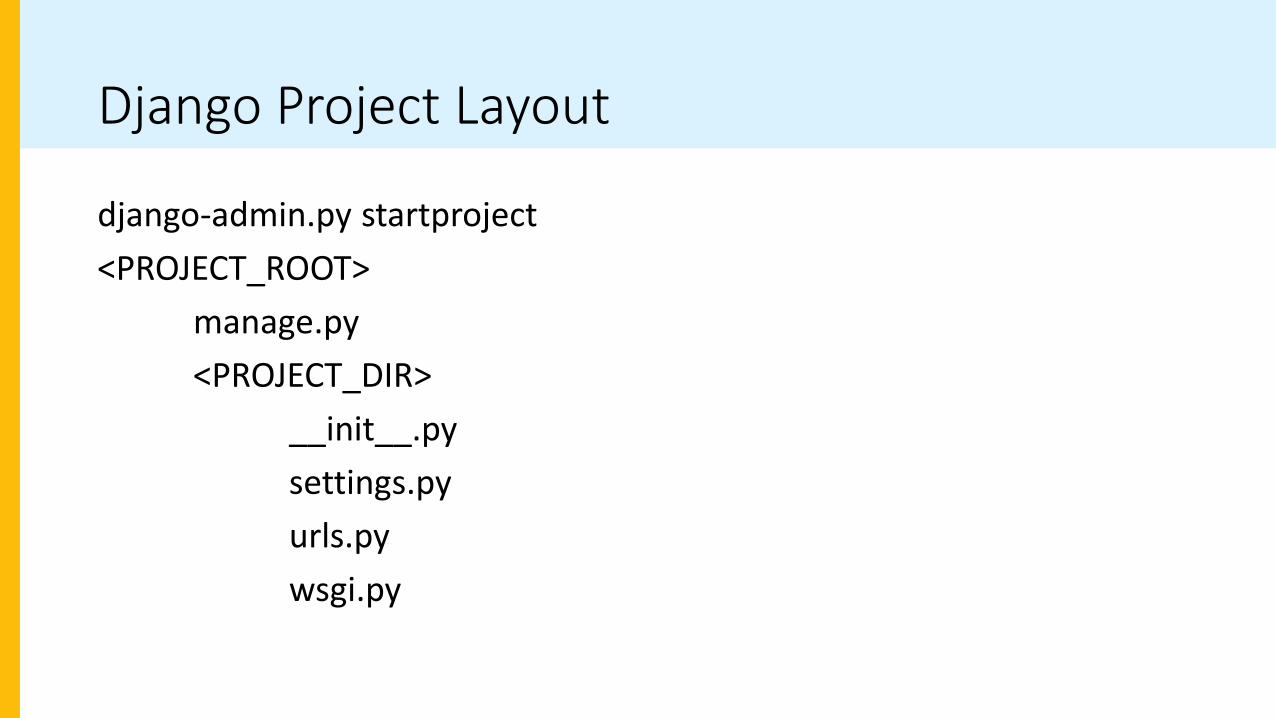
Django Project Layout
django-admin.py startproject
<PROJECT_ROOT>
manage.py
<PROJECT_DIR>
__init__.py
settings.py
urls.py
wsgi.py

settings.py
• Defines settings used by a Django application
• Referenced by wsgi.py to bootstrap the project loading
• Techniques for managing dev vs prod settings:• Create settings-dev.py and settings-prod.py and use symlink to link settings.py
to the correct settings
• Factor out common settings into base-settings.py and import. Use conditionals to load correct settings based on DEBUG or other setting

Sample Settings…DEBUG = TrueTEMPLATE_DEBUG = TrueALLOWED_HOSTS = []# Application definitionINSTALLED_APPS = (
'django.contrib.admin','django.contrib.auth','django.contrib.contenttypes','django.contrib.sessions','django.contrib.messages','django.contrib.staticfiles',
)

Django Apps
• Reusable modules
• django-admin.py startapp <app_name>
• Creates stub layout:<APP_ROOT>
admin.pymodels.pytemplates (directory)tests.pyviews.pyurls.py

Django Models
• Defined in models.py
• Typically inherit from django.db.models.Model
Example Model:
from django.db import models
class TestModel(models.Model):
name = models.CharField(max_length = 20)
age = models.IntegerField()

Models (cont’d)
• Default is to set NOT NULL on all fields. Override by adding null = True to field definition:
name = models.CharField(max_length=20, null = True)
• Relationships defined through special field types:
models.OneToOneField(model)
models.ForeignKey(model)
models.ManyToManyField(model)

Models (cont’)
• Need Nulls in a Boolean Field? Use models.NullBooleanField()
• Set Default value with “default”:
count = models.IntegerField(default = 0)
• Use a inner Meta class to define additional options, especially useful for abstract classes:
class TestModel(models.Model):
class Meta:
abstract = True

Model Methods
• model.save(self, *args, **kwargs)
• model.delete(self, *args, **kwargs)
• model.get_absolute_url(self)
• model.__str__(self) [Python 3]model.__unicode__(self) [Python 2]
• Override with super(MODEL, self).save(*args, **kwargs)

Activating a Model
• Add the app to INSTALLED_APPS in settings.py
• Run manage.py validate
• Run manage.py syncdb
• Migrations • Write custom script or manually handle migrations
• Use South

Selecting Objects
• Models include a default manager called objects
• Manager methods allow selecting all or some instancesQuestion.objects.all()Question.objects.get(pk = 1)
Use try block, throws DoesNotExist exception if no matchQuestion.objects.filter(created_date__lt = ‘2014-01-01’)
• Returns QuerySet
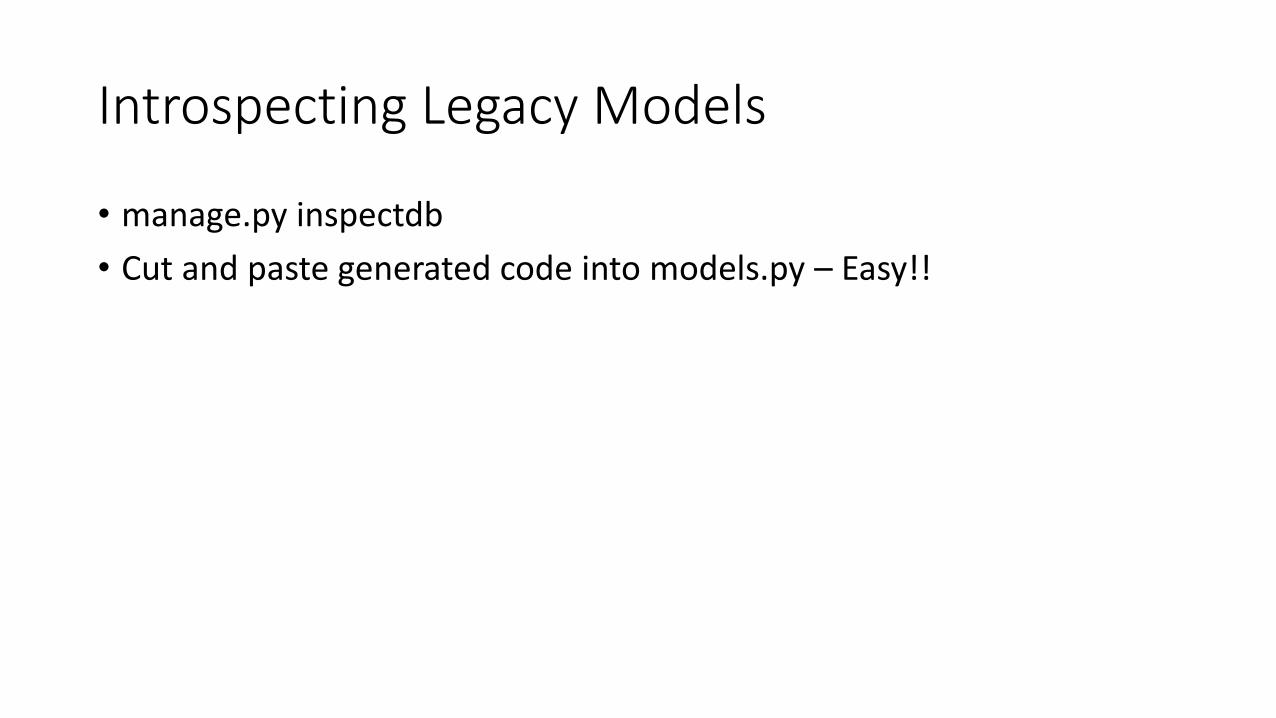
Introspecting Legacy Models
• manage.py inspectdb
• Cut and paste generated code into models.py – Easy!!

Full Sample
from django.db import modelsfrom datetime import datetimeclass TimestampedModel(models.Model):
created_datetime = models.DateTimeField()updated_datetime = models.DateTimeField()
def save(self, *args, **kwargs):if self.id is None:
self.created_datetime = datetime.now()updated_datetime = datetime.now()super(TimestampedModel,self).save(*args, **kwargs)
class Meta:abstract = True

Full Sample (cont’d)
class Question(TimestampedModel):question_text = models.CharField(max_length = 200)
def __str__(self):return self.question_text

Function vs. Class Views
• Django allows two styles of views – functions or class based views
• Functions – take a request object as the first parameter and must return a response object
• Class based views – allow CRUD operations with minimal code. Can inherit from multiple generic view classes (i.e. Mixins)

Sample – Viewing a List of Questions
• Function based:
from .models import Questionfrom django.shortcuts import render_to_response
def question_list(request):questions = Question.objects.all()return render_to_response(‘question_list.html’, {
‘questions’:questions})
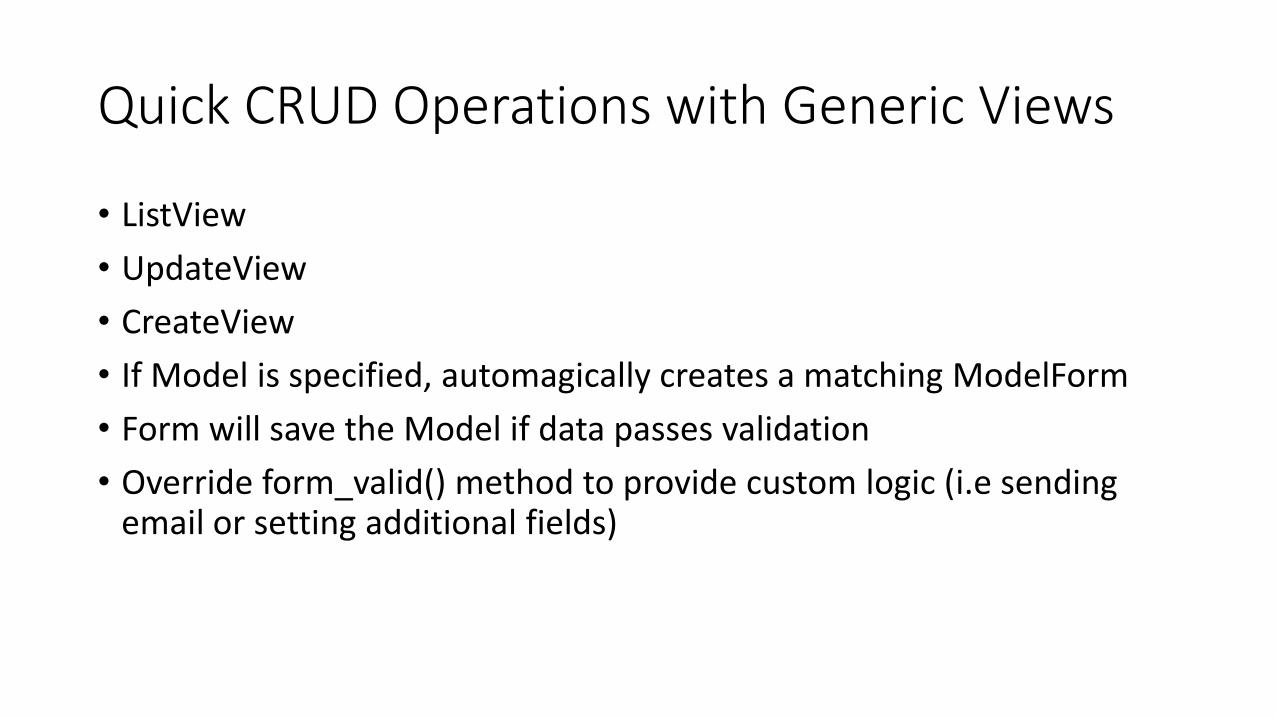
Quick CRUD Operations with Generic Views
• ListView
• UpdateView
• CreateView
• If Model is specified, automagically creates a matching ModelForm
• Form will save the Model if data passes validation
• Override form_valid() method to provide custom logic (i.e sending email or setting additional fields)

Sample – As Class Based View
from .models import Questionfrom django.views.generic import ListView
class QuestionList(ListView):model = Questioncontext_object_name = ‘questions’

Django Templates
• Very simple syntax:
variables = {{variable_name}}
template tags = {%tag%}
• Flexible – can be used to render html, text, csv, email, you name it!
• Dot notation – template engine attempts to resolve by looking for matching attributes, hashes and methods

Question List Template<!doctype html><html lang=en><head><meta charset=utf-8><title>List of Questions</title></head><body>{%if questions%}<ul>{%for q in questions%}<li>{{q.question_text}}</li>{%endfor%}</ul>{%else%}<p>No questions have been defined</p>{%endif%}</body></html>

urls.py
• Defines routes to send urls to various views
• Can use regular expressions
• Extract parameters from a url and pass to the view as a named parameter:
r(‘^question/(?P<question_id>\d+)/$’,’views.question_detail’)
• Extensible – urls.py can include additional url files from apps:r(‘^question/’,include(question.urls))

Hooking up the Question List
from django.conf.urls import patterns, url, include
urlpatterns = patterns(‘’,
(r’^questions/$’,’views.QuestionList’)
)
OR:
from django.conf.urls import patternsfrom views import QuestionListView
urlpatterns = patterns(‘’,(r’^questions/$’,’views.QuestionList.as_view())
)

Forms in Django
• django.forms provides a class to build HTML forms and validation. Example:
from django import forms
class EditQuestionForm(forms.Form):question_text = forms.CharField(max_length = 200)
• Often redundant when creating forms that work on a single model

ModelForms
• Automatically generate a form from a model.
• Handles saving a bound model
• Can specify fields to be included or excluded in the form
• Sample:
from django.forms import ModelFormfrom .models import Question
class QuestionForm(ModelForm):class Meta:
model = Questionfields = [‘question_text’]

Using a ModelForm
• Create an instance of an empty form:form = QuestionForm()
• Create a form to update an existing instance of a model:question = Question.objects.get(pk = 1)form = QuestionForm(instance = question)
• Pass the form into the template and use the form methods to render the form:
form.as_pform.as_ulform.<field_name>form.<field_name>.errors

Request & Response
• Request object encapsulate the request and provide access to a number of attributes and methods for accessing cookies, sessions, the logged in user object, meta data (i.e environment variables),
• Response objects are returned to the browser. Can set content type, content length, response does not have to return HTML or a rendered template
• Special response types allow for common functionality:
HttpResponeRedirectHttp404HttpStreamingResponse

Django Extras
• CRSF Middleware – enabled by default. Include template tag in all forms:{%csrf_token%}
• Authentication
• Caching
• Sessions
• Messages
• Logging

Authentication
• Django’s out of the box Auth system uses database authentication.
• Changed extensively in Django 1.6 to allow custom User objects.
• AUTHENTICATION_BACKENDS setting in settings.py allows overriding how User objects are authenticated
• If using the Authentication middleware and context_processors the current user is available to code as request.user and {{user}} is defined in all templates

Auth Decorators
• Live in django.contrib.auth.decorators
• login_required@login_requireddef function_view(request):….
• user_passes_test (can be used with lambda functions for real power) –
@user_passes_test(lambda u: u.is_staff)def function_view(request):…
• has_perms – test for user permissions

Decorating CBVs
• Decorator is applied to the dispatch method
• Must be converted to a method_decorator – use django.utils.decorators.method_decorator function:
class MyView(ListView):
@method_decorator(login_required)def dispatch(self, *args, **kwargs):
super(MyView,self).dispatch(*args, **kwargs)

Custom Auth Backend for the Bubble

Sending Email
• django.core.mail includes functions and classes for handling email
• Set EMAIL_HOST in settings.py to outgoing mailserver
• Import send_mail for simple mail:send_mail(subject, message, from, to_emails)
• Use django.template.render_to_string to format a message using a template
• Use EmailMultiAlternatives to create a text message and attach a html version as well.

Resources
• Python – http://www.python.org
• Django – http://www.djangoproject.com
• Python Packages – https://pypi.python.org
• Django Packages – https://www.djangopackages.com

References
• [1] http://wamp-proto.org/static/rfc/draft-oberstet-hybi-crossbar-wamp.html
• [2] http://www.internet-of-things-book.com
• [3] https://dzone.com/articles/how-to-use-xively-platform-in-iot-project