unit lesson plan: shelter
TRANSCRIPT

namErica Wissman, Erica Reichard, Caitlin Smith Names blocked on purpose by Lin Lin
December 3, 2009
EDU 378-Cultural Universal Unit Lesson Plan
Unit Lesson Plan: Shelter Lesson 1: What is a Shelter? Is it a Necessity to Live?
Lesson 2: What Makes a Shelter a Home?
Lesson 3: How Has Shelter Changed Over Time? (History, Time, Continuity, and Change) Cait Smith Lesson 4: How to Build a House & How Much Do They Cost? (Economics) Erica Reichard
Lesson 5: Under Privileged People Lack of Shelter
Lesson 6: Government Involvement (Civics, Citizenship, & Government)
Lesson 7: Why Do People Switch and Change Their Shelters?
Lesson 8: Shelters in Different Parts of The World (Geography) Erica Wissman
Lesson 9: Shelters in The Future
Lesson 10: Build Your Own Shelter!

EDU 378: The Social and Academic Curriculum I:
Cultural Universal Unit: LESSON 8
Name: Erica Wissman
Date of Lesson: November 21, 2009 Time: 10am-11am
Lengths of Lesson: 90 minutes
Curriculum Area: Social Studies
Content Area: Cultural Universal
Title of Lesson: Shelter
Age/Grade Level: Grade 3
1. Learning Objectives
Students will be able to understand how people around the world adapt, through
shelters, the physical conditions in the place that they live
Students will be able to recognize the different shelter constructions in different
regions across the continents
Students will be able to understand the development of shelter and the cultural
aspects that go along with it.
2. Assessment
(a) Learning outcomes of previous lesson related to this topic:
Refer to Unit Lesson Plan: Previous lessons 1-7 will thoroughly introduce
Shelters Around The World
Students will already understand the aspects of a shelter such as what it is, how
shelters have changed over time and economic factors that contribute to the
design of the shelter.
(b) Focus of assessment in this lesson
Students can define shelter and be able to recognize different types of shelters as
shelters.
Students will be able to understand why people live in different shelters
Students can explain why people live in different shelters and what factors
contribute to that.
(c) Method of assessment used in this lesson (attached)
Assessment 1: exemplified through completed student charts on the different
types of shelter across the world.
Assessment 2: Students interest in question asking during and after the story read

Assessment 3: Students completed journal entry of colored picture and paragraph
about there favorite type of shelter
Assessment 4: Presentation to the Class of their favorite type of shelter
(d) Differentiation (of expected outcomes)
Visual learners can learn this lesson through visiting the WebQuest to attain information.
Auditory learners may have their partners read to them if they have difficulty comprehending
the given information on the WebQuest. Tactile learners will be the most difficult to tackle.
In this specific lesson the only hands on task they will be doing is writing the information for
each shelter down. Also they will place where they think the region of their shelter is on the
map. There is not much tactile other than that but in the last lesson of the unit, tactile
learners can really utilize this when they build their own shelter.
As far as the disadvantaged student, I will have easier expectations. They will not have to fill
out the entire chart of the shelters around the world. I will make sure that they understand
and realize of the different shelters around the world however by reading the information to
them and having them point out the characteristics of that shelter. The Journal activity can
be modified by having them simply just draw a picture of their favorite shelter around the
world and then just verbally tell you about it rather than writing a paragraph. Students who
have social disabilities will not have to present.
3. New York State Learning Standards
Social Studies Standard 2: World History
Students will use a variety of intellectual skills to demonstrate their understanding
of major ideas, eras, themes, developments, and turning points in world history and
examine the broad sweep of history from a variety of perspectives.
Key Ideas: The study of world history requires an understanding of world cultures
and civilizations, including an analysis of important ideas, social and cultural
values, beliefs, and traditions. This study also examines the human condition and
the connections and interations of people across time and space and the ways
different people view the same event or issue from a variety of perspectives.
Performance Indicator: study about different world cultures and civilizations
focusing on their accomplishments, contributions, values, beliefs, and traditions.
Social Studies Standard 3: Geography
Students will use a variety of intellectual skills to demonstrate their understanding
of the geography of the interdependent world in which we live—local, national,

and global—including the distribution of people, places, and environments over
the Earth’s surface.
Key Idea: Geography can be divided into six essential elements which can be used
to analyze important historic, geographic, economic, and environmental questions
and issues. These six elements, include: the world in spatial terms, places and
regions, physical settings, human systems, environment and society, and the use of
geography.
Performance Indicator: investigate how people depend on and modify the physical
environment.
English Language Arts Standard 2: Language for Literary Response and
Expression
Key Idea: Students will read and listen to oral, written, and electronically produced
texts and performances from American and world literature; relate texts and
performances to their own lives; and develop an understanding of the diverse
social, historical, and cultural dimensions the texts and performances represent. As
speakers and writers, students will use oral and written language that follows the
accepted conventions of the English language for self-expression and artistic
creation
4. Materials
Computer
WebQuest
Shelters Across The World Chard (attached)
Rubric (Attached)
Book
Colored Pencils/Markers/Crayons
Pen or Pencil
5. Lesson Process
(a) Introduction 5 minutes
Introduction to Shelters Across The World will begin by me introducing the topic of
shelters across the world by telling the students that not all shelters are the same around the
world. I will then provide them with the WebQuest Website where we will then go to the
computers to log on and go there. The rest of the lesson will be through student-centered inquiry
on their own.
Web site: http://sites.google.com/site/sheltersaroundtheworld/home

(b) Learning procedures relating to objectives 85 minutes
Shelter is a form of protection, which helps people survive in the world. The reason we
live in shelters is to shield us from harm such as extreme weather conditions like wind,
snow, and rain, as well as protection from animals. Also, we use shelters to store our
possessions and typically we grow as a family in our shelters. Without shelter, survival
would be difficult.
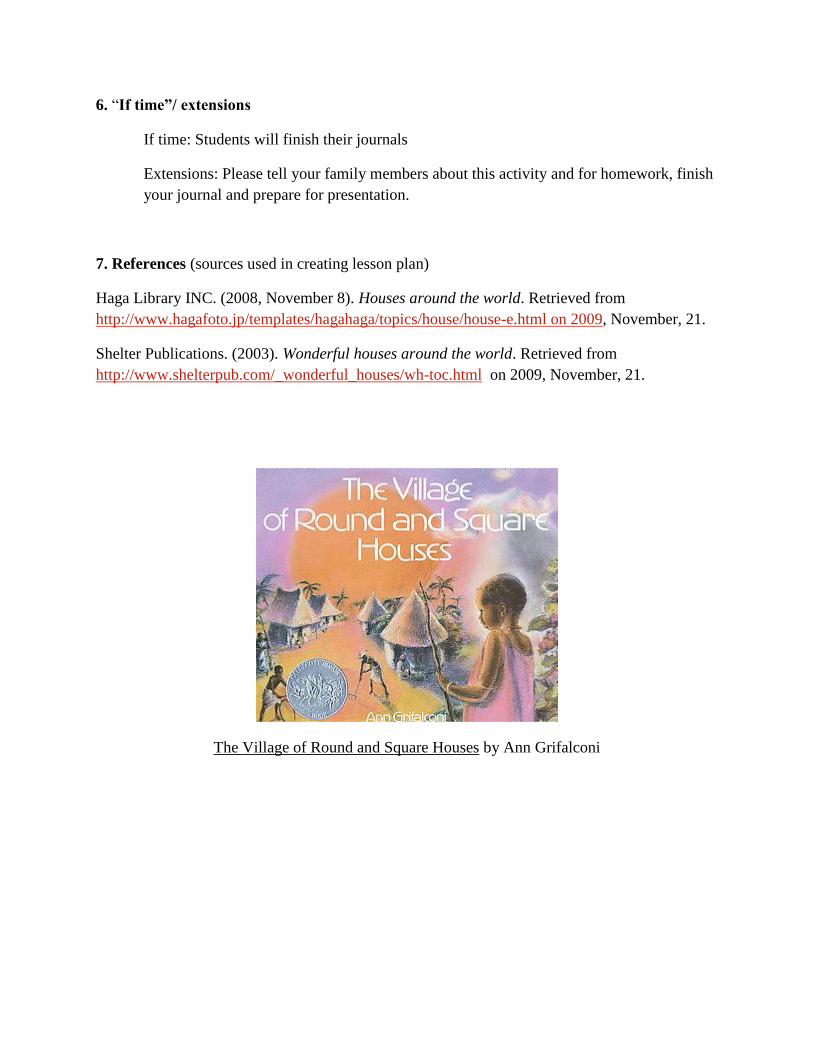
First, I will read a book ―The Village of Round and Square Houses‖ by Ann Grifalconi to
the students. We will talk about why people live in different types of shelters and I will
answer any of the questions the students may have.
Next, this WebQuest will explore the different types of shelters around the world and
why they appear as they do. Students will work with a partner to explore the websites
that I have provided found on The Process page to fill out a chart about the different
shelters across the continents. I handed this chart out in class but if students cannot find
it, they can find it attached below to print another one. They may also look in our
National Geographic Collection to see if they can find any images or information about
shelters around the world.
After partners finish filling out the chart, each of them will receive 5 small post-it notes.
On these post-it notes, they will need to write the top 5 shelters you found most
interesting by writing the location of that shelter and then find it on the map with your
partner. They will stick your post-it note to the map, if you cannot find it, please go back
onto the computer and go to www.google.com. Next, type in the name of where the
shelter is and click on the MAPS tab. If students zoom out, they will be able to see what
region the shelter is located in. If they still cannot figure out what region their shelter is
in, you may ask me for help.
Lastly, students will choose a shelter around the world that they found most interesting
and will draw it in their journal. After students draw and color this picture, they will
write information about the shelter that they learned through this WebQuest. If they do
not finish on day of lesson, they may take it home to finish it for homework.
Tomorrow, the partners will present their favorite type of shelter that they learned about
it and give us all the information about it
(c) Conclusion 10 minutes/Checking for understanding
Wrap-Up conclusion page on WebQuest will be read by all students
Students will present their favorite world shelter to the class
6. ―If time”/ extensions
If time: Students will finish their journals
Extensions: Please tell your family members about this activity and for homework, finish
your journal and prepare for presentation.
7. References (sources used in creating lesson plan)
Haga Library INC. (2008, November 8). Houses around the world. Retrieved from
http://www.hagafoto.jp/templates/hagahaga/topics/house/house-e.html on 2009, November, 21.
Shelter Publications. (2003). Wonderful houses around the world. Retrieved from
http://www.shelterpub.com/_wonderful_houses/wh-toc.html on 2009, November, 21.
The Village of Round and Square Houses by Ann Grifalconi

EDU 378: The Social and Academic Curriculum I:
Cultural Universal Unit: LESSON 3
Name: Caitlin Smith
Date of Lesson: 12/1/09
Length of Lesson: 35 minutes
Curriculum Area: Social Studies
Content Area: History, Time, Continuity and Change
Title of Lesson: “How Has Shelter Changed Over Time?”
Age/Grade Level: Third Grade
1) Learning Objectives:
1) Students will be able to identify that shelters have changed over time in America.
2) Students will understand the reasons behind the changes in shelter throughout history.
2) Assessment:
(a) Prior to this lesson, students will have knowledge about the definition of shelter and why it
is a necessity to live.
(b) Focus of assessment in this lesson:
Students will have a group discussion about the changes in shelter over time.
(c) Method of Assessment:

The method of assessment will be both formal and informal.
Students will take a quiz on some basic concepts about shelter
The students will be assessed on their ability to discuss the changes in the different types
of housing and the students will also be assessed based on their journal entries of what
type of housing that they would like to live in and what they feel that shelters in the
future will look like.
(d) Differentiation:
For students with poor fine motor skills, they will be able to use the computers in the classroom
in order to type up their journal entries so that they can be read. Students can also Google images
of houses and modify them on the computer while doing their journal entry.
For students with visual impairment: They can sit towards the front of the classroom and they
can have the photos of the houses handed to them so that they can have the pictures right in their
line of vision. Magnifying glasses can also be provided depending on the degree of impairment
and/or the quality of the picture.
For students with hearing impairment: The student can sit next to the teacher so that they will
be able to clearly hear. All of the students talking can be instructed to speak slowly, clearly and a
little louder. The teacher could also wear a microphone that could connect to an earpiece for the
student or to a speaker in the classroom.
3. New York State Learning Standards:
Standard 1- History of the United States and New York
Students will use a variety of intellectual skills to demonstrate their understanding of
major ideas, eras, themes, developments, and turning points in the history of the United
States and New York.
Key Idea 2: Important ideas, social and cultural values, beliefs, and traditions from New
York State and United States history illustrate the connections and interactions of people
and events across time and from a variety of perspectives.
Performance Indicators--Students will distinguish between near and distant past and
interpret simple timelines
4. Materials:

*Students involvement.
*For the activity: Enough for each student-
popsicle sticks, cardboard rolls, pebbles, and play dough (for the extend project)
crayons/markers/colored pencils
glue (for the extend project)
plain white paper
scissors
5. Lesson Process:
(a) Introduction (10 minutes)
The introduction will take approximately ten minutes.
Students will all gather together on the reading rug, while the teacher sits in a chair. The
students would have been previously asked to bring in pictures of their homes. The
teacher would give an introduction stating that shelters have changed over time and what
shelters have looked like have also changed over time. The teacher would then say that
some students may live in older homes and some students may live in newer homes. Even
in the past 100 years the look of shelters has changed. The students will, one at a time,
hold up their pictures of their houses. As a group the students will decide if they think the
house is a newly made house or if they feel that the house looked like it was made a
while ago. (The students, when evaluating the pictures will be the ones who will
determine the time lapse of what is new and what it means to be built a while ago).
(b) Learning Procedures (20 minutes)
This section will take approximately twenty minutes.
After the class discussion to access prior knowledge about what it means to make a
shelter a home and when the students think that they can decide if a house is newly made
or was made further in the past I would talk to the students about the way that shelter has
changed over time.
The way that I would address the changes in shelter over times is I would first ask the
students what type of shelter Native Americans lived in. The students will say that Native
Americas lived in tepees. We would discuss the reasons why people would live in
shelters such as tepees. We would talk about how tepees are the type of shelter that
supports the hunting and gathering lifestyle. Next, we would talk about life in the south.
How in the past most of the homes were very large, mansion-type homes on plantations
due to the fact that most people long ago had slaves in order to produce the goods needed
for income. Finally, we would talk about homes of the past in the North. Many people
were trying to live the urban lifestyle in order to make money so many people lived in
small, apartment types homes in the cities in order to have a job. We can talk about how
now many of the larger homes of the south are no longer spread apart due to the fact that
there are no more plantations and we would talk about how in the north homes are more
spread out also. In the north the jobs are no longer all focused towards industrial work
and so people were able to move to more suburban areas with bigger houses and more

land. I will show the students a timeline of different types of home from the past to the
present day.
(c) Conclusion(5 minutes)
We will wrap up the discussion by having a review of the reasons why people lived in the
homes that they lived in long ago verses why they are able to live in the types of homes
that they live in currently.
Students will take a quiz on the information.
6. If Time Extension:
If there is extra time, ask the students to go back to their desks. Have the students open up their
notebooks to the house that they drew of what they feel that a house in the future would look
like. The students will now be able to create these future homes out of any supplies of their
choice. The students could use the available Popsicle sticks, cardboard rolls, pebbles, play
dough. The students would also write a sentence or two on an index card about the reasons why
they feel that a home in the future would look this way.

EDU 378: The Social and Academic Curriculum I:
Social Studies Lesson Plan: LESSON 4
Name: Erica Reichard
Date of Lesson: TBA
Time: TBA
Lengths of Lesson: 1 hour 30 minutes
Curriculum Area: Social Studies
Content Area: Shelter
Title of Lesson: Building a House- How to and How Much?
Age/Grade Level: 3rd
grade/ 7 to 9 yrs old
Differentiation of activity is to be provided throughout the lesson plan to ensure that
children’s individual learning needs are met.
2. Learning Objectives
Students will be able to teach the sequence of constructing a building.
Students will be able to teach standard construction names for materials in the
home.
Students will be able to understand different materials that are used in building.
Students will obtain knowledge of the increasing cost of homes.
2. Assessment
(a) Learning outcomes of previous lesson related to this topic:
Movable verse non-movable items in the house
The components of a house or the parts of a house such as doors and windows
The teacher will ask children to name different rooms in the house and tell what was built
in (non-movable) and what was bought (movable items). Explain the preparation. This
exercise will help students remember or notice what part of the house had to be
constructed and what was brought in.
(b) Focus of assessment in this lesson
At the end of the lesson the learner will demonstrate an understanding of the process of
building a house by naming materials and general steps in constructing a building.

Process sequence:
Readying the site
Building the foundation
Erecting the walls
Putting on the roof
Selecting pictures of items used in building,
Examples- pipes, wires, lumber, nails, shingles, etc
Students will be able to determine how much a house costs based on the features of the
house and will be.
(c) Method of assessment used in this lesson
Assessment will be made by how well the students act out their skit from the book The
Three Little Pigs. Students will be assessed by their ability to match words with
materials and their ability to sequence the steps in building a house.
(d) Differentiation (of expected outcomes)
Students with visual disadvantages and auditory disadvantages are addressed through
teaching interaction, explanations, and demonstrations. Students with tactile
disadvantages will be able to hold the different supplies that are used to build a house.
3. New York State Learning Standards
Standard: 4- Economics
Key ideas: Economics requires the development and application of the skills needed to
make informed and well–reasoned economic decisions in daily and national life.
Performance indicator: Collect economic information from newspapers
Make hypotheses about economic issues and problems
4. Materials
Chalk
Story, "The Three Little Pigs"
Heavy cardboard for pictures
Cut out people and tools from previous lesson.
Wall area for developmental instructional display

Building Materials
wood, pipe, wire, nails
paintbrushes (smaller ones can be used at easel)
plastic tools or commercially purchased child-size
tool set (include trowels, screwdrivers, wrenches, pliers, etc.)
blocks, Styrofoam, wooden, or purchased cardboard "bricks"
Styrofoam with Velcro glued on for constructing plastic connecting blocks, such as
Legos, Bristle Blocks, Constructs, etc.
nuts and bolts
scrap pegboard
task cards and pattern page designs children can copy
Tinkertoys
wooden logs such as Lincoln Logs
plastic pipe pieces and connectors
safety goggles (can be made from 6-pack rings), hard hat,
heavy gloves, etc.
toy construction vehicles
old house plans or blueprints
simplified plans to use for patterns
puzzles
sandpaper
sequential order pictures of buildings
5. Lesson Process
(a) Introduction (30 minutes)
The teacher will read the story of The Three Little Pigs and have the children act out the
story. Explain that for the next several days they will learn construction, exactly how a
house is built. The teacher will explain the term "construction" using pictures and
examples of how they "construct" projects for art.
(b) Learning procedures relating to objectives (80 minutes)
The teacher will: Show different building materials such as brick, pieces of wood or
lumber, wire, nails, pipe, several shingles, etc. Relate materials to tools used and show
pictures of how they are used. Have children name and discuss each item. Correct invalid
concepts. Write names for materials or have written on word cards. After reinforcing
allow children to match words with materials. Read story Building a House by Bryon
Barton. Discuss the sequence of building.

Bulldozer clears space.
Foundation poured.
Walls are put up.
The roof is built.
Install fireplace.
Plumbing is put in.
Wiring for electricity is installed.
Doors and windows are put in.
Inside and outside are painted.
Show YouTube video on how to build a house
(http://www.youtube.com/watch?v=HH1rvr54nzU). Have students retell the story.
Develop an instructional display board using each step in the above building process.
Allow the children to add people and materials. Have children assemble blocks using
designs from laminated sheets printed with simple small block patterns. Discuss each
material, where it goes, and what it does in a house. Have children name areas in the
classroom where these materials can be found. Discuss safety around electricity, wires,
plumbing, nails, etc. Have students determine sequential order by numbering pictures.
Next introduce to students how much a house costs by comparing the cost of a
house when Abraham Lincoln was alive and how much a house costs now. Show the
students pictures of current houses. These can be obtained by the students and teacher as
they bring in pictures of their own home or pictures from magazines and newspapers.
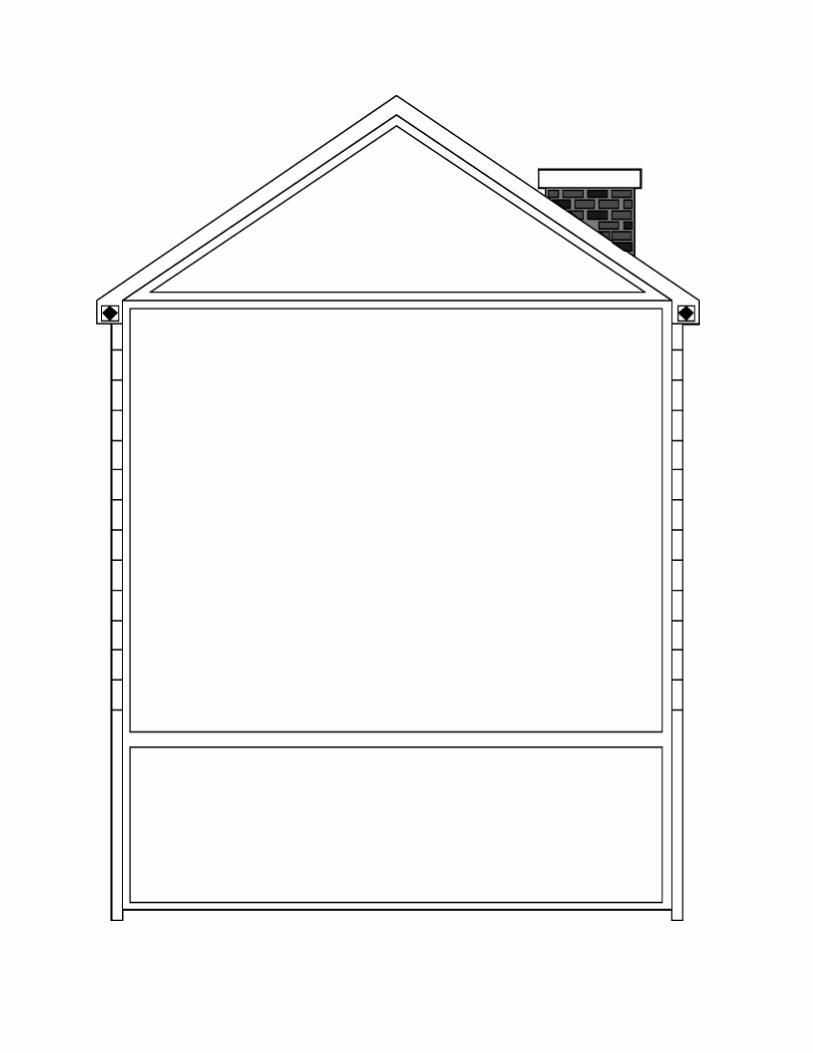
After looking at the current houses, the teacher will display the Lincoln house and ask the
following questions:
How many chimneys are on the houses? Do all houses have a design around the
roof? (The Lincolns’ roof has brackets and dentils [the decorative band around the top of
the house]). How many windows do the Lincolns have in the front of their house? How
are the windows aligned? Why do you think the Lincolns had a fence? (The Lincolns and
most families’ houses had fences around their homes to keep animals out.) Why do
houses today have fences? Draw a line down the center of the Lincoln house. This
divides into two equal sides. Can houses today be divided into two equal sides? Are the
windows of your house lined up top and bottom like the Lincoln house? Have the
students each draw a picture of a house. The selling price of the Lincoln house was
$1,500. Tell the students to look through newspapers and find the different costs of
houses. Have students discuss with the class the different costs that they found. How
much do you think a home like the Lincolns’ would cost today? Hand out an outline of a
house and have the children finish drawing or constructing the house. After they finish
the construction of the house have the students figure out a listing price of the house and
have them explain why it would be that price based upon the features they displayed on
the house.
(c) Conclusion (20 minutes)

The students will write (dictate) and illustrate a story telling what they learned about the
building process. If possible, schedule a carpenter, electrician, painter, etc. to come in for
the class to meet.
6. ―If time”/ extensions
The students that complete their constructions early can complete a puzzle at their desk
(reinforces the concept of construction), build a house using cardboard pieces, logs, or
various blocks, or make edible house from peanut butter and crackers. If the lesson is
taught during Christmas time the students can build a gingerbread house as an extension.
7. References
Johnson, L. (2000, April 28). Building a house. Retrieved from
http://www.contractor.edu/buildhouselp/buildhouselp.html
Kinzer, B. (2001, March 12). Teaching museum collections. Retrieved from
http://www.nps.gov/liho/forteachers/upload/TMC%20Lincoln%20Home.pdf

Abraham Lincolns House

Building a House by: Byron Barton
The Three Little Pigs