untitled f2flowres
DESCRIPTION
LowRES for quick viewTRANSCRIPT

Geoffery Phung638956

Natural Pattern
Castor Oil Plant Is a species of plant from the spurge family. They generally have leaves that spans widely from its center. Because of this unique properties of the leaves, I have choosen the Castor Leaf as the base natural pattern for my lantern design.
Closing into the leaf, it reveals that the leaf itself have some kind of a repetitive patterns, which help me in planning the ideas to develop my lantern.

Symmetry:Step 1: Divide by 9
Step 2:Draw straight lines along the dividing as such:
The line is approximately 1cm long andend with an “x”
Movement:Step 1:Draw a center circle with radius of 1.5cmStep 2:Divide by 8
BalanceStep 1:Basic Shape:
Step 2:Starting from the center, offset basic shape 1cm appart.
Step 3:Increase the size of basic shape by approxi-mately 10% each time offset out.
Step 4:Rotate the basic shape approximately 40o at the center and repeat step 1 to 4 unitl metting the first basic shape.
Breaking Down
Using the Kadinsky way of Analysing Drawings, which aims to investi-gate the structural relationships amongs objects following a series of stages. I’ve created my analytical drawings including symmetrical, movement and balance.

Growth
Using the knowledge gained from Phillip Ball reading, I then try to break down the patterns of the Castor Bean Leaf. Turned out that the patterns follows quite a sim-ple process.
A kite shape is form from the center of the leaf, it is then rotate equally at approx-imately 40o (This is various across the leave, but generally it is around 40o to 50o) until it returns to the first kite shape. The veins of the leaf then goes around inside the kite shape.Combining the work from the Kadinsky analytical drawing and Phillip Ball’s break down process, I tried to make paper models of the pattern and play around with its shape. Although the result being generated provide a similar overall shape, it feels somewhat more complex than the models above, which enables some sort of patterns (shadow) being project out as light is shinning through.

The recipe of the paper model1 section of the model consists a kite and two arrow shapes which is larger than another.The kite:Step 1:Cut a strip of paper that is 12cm long and 1.5cm thick.Step 2:Fold the strip into a kite shape that is 2.5cm long on each side.Step 3:Glue the remaining part inside of the kite shape.
The arrows:Step 1: Cut a strip of paper that is 18cm long and 1.5 cm thickStep 2:Fold the strip of paper in half, three times.Step 3:Unfold the strip, but notice how there are now lines on the paper.Step 4:Follow to fold those lines until the arrow shape is made like in fig-ure 7 (Left 2).Step 5:To make the bigger arrow, simply repeat Step 1 to 4 except that the strip is longer by 4 cm each time the arrow gets larger.Step 6: Attach all pieces together using glue.

FormForm was found the be the hardest of all during the process, as it has a lot of requirements. However, the hold back was that I was not open minded to any other inspirations when I found the overall form that I wanted to achieve, which is taken from the bridge design by Michael van Telgen. With this idea in mind, I’ve created quite a few models on Rhino, which turned out to be not only too hard to make as paper (since the patterns always turned out to have curves) but also quite cliche looking.The pictures on the right hand side are showing some of the different approaches I’ve done with this concept, using Panel-ling tool to assist me with putting the pattern onto the curves of model.

Further DevelopementSeeing myself stucking with the Michael van Telgen concept, I pushed myself to do more research on things that is more related to the Castor Bean Leaf, such that the model will hopefully have more harmony. I then found myslef with astonishing from different parts from the Castor Bean Plant which could potentially help me with my overall form.Starting from the bean...
I decided to try out this truit shape that the Castor plant can pro-vide. The shape not only provide a simple overall shape but also inspire me in the way how its texture can be form to make both the patterns and the shape harmonic with each other. In addition, I found that the placement of the bean and its fruit is fairly interesting which made me comes up with the following lantern shape. However, when it comes to digitising, I found myself to be stucking again as the shape is very complex, and I thought that patterns can hardly achieve in this form as it is not linked to the first few ideas I had in the earlier weeks.

The FruitI noticed that the castor fruits grow in a way that they create a big chunk. With this idea in mind and my aim to have the lantern project the pattern on the castor bean leaf, I think that it can be achieve by having each fruit bear a small section of the overall patterns and when combined, they will project the whole. This idea also drawn me back the first modules, where I created my pattern model, which is the pat-tern that I wanted my larntern to show.
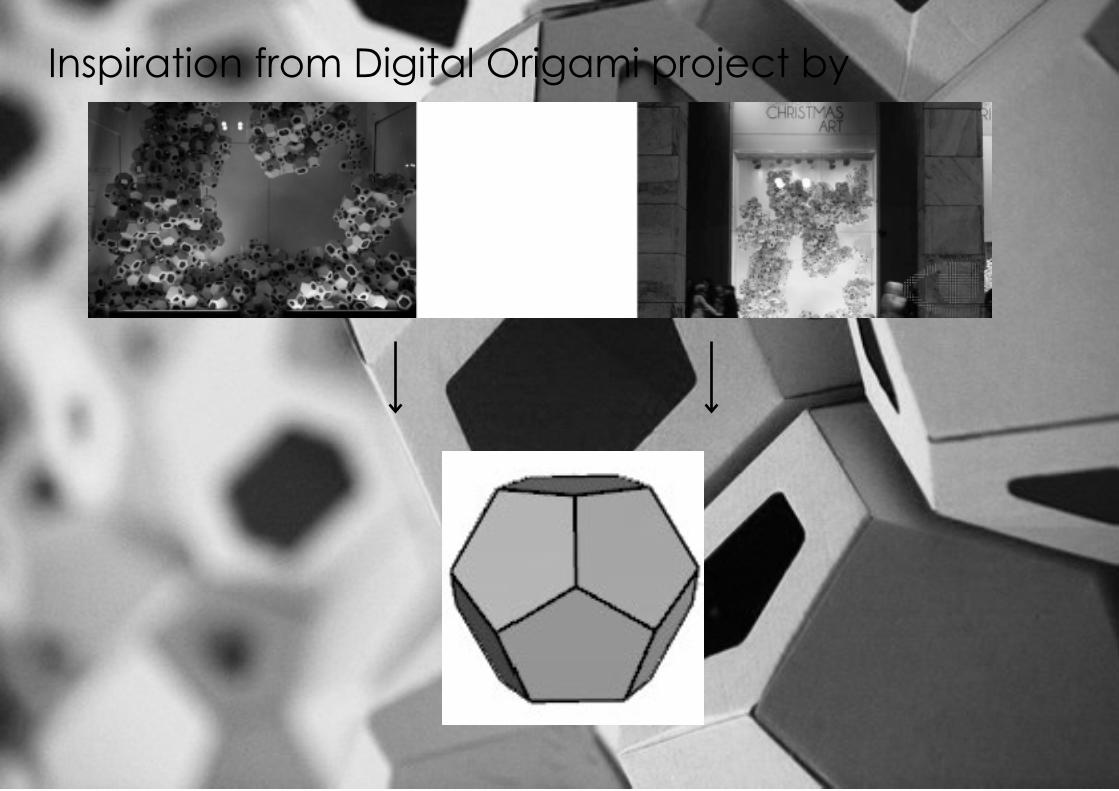
Inspiration from Digital Origami project by

The Digital Origami project was a true inspiration that helps me to continue with my Castor Fruit concept for the overall form. I used the idea of joining Dodecahedroms together such that it resemsbles the way the fruit grows on the plant.
The digital model

Cutting
The following pictures are the pages that were sent to Fablab for curring, the last page (right bottom corner) is cut with black ivory. Relatively to the picture on the previous page, smallest triangles = blue; small = pink; normal size = green; big triangles = red; blank = grey; 1 flower = cyan(3rd page, bottom left); black with pattern = yellow.

AssembleThe image demonstrate how the dodecahedrons are placed together. The reason why the bottom bit of my lantern is made using black ivory is because it is there to emphasizes the natural pattern of my design. Using black card not only help in distinguish the main and the sub-patterns, it also provide a better lighting ef-fect as white card tends to have some sort of transparency effect when the LED light is turned on.
The flower dodecahedron is there, because I wanted to connects my patterns together to form an overall big one, that flower in the center is a combination of kite shapes which were developed earlier with Phillip Ball exercise, allowing me to have a link that joins all of my black patterns together. As the second level is not entirely covered with dodecahedrons, two of the faces will be left blank, I initially wanted to have patterns on this dodecahedron as well but I though it would be best if it were to be covered so that people won’t see the mess of my lighting system inside.
On the picture on the left hand side, the brown dodecahedron represents the place which I wanted to hold my lantern, it is inten-tionally left covered with no patterns on for holding purpose.
Triangles were used to make patterns across the lantern because it is one of the basic element that was developed earlier at the start of the subject. However, in this case, I used triangles because they generates sharpness to the light showing out. which resem-bles the “fur” on the Castor fruit. Furthermore, it should be noticed that the triangle patterns seems to be bigger and bigger as it reaches to the bottom of the lantern (the black ivory). This is be-cause I wanted the lantern to have some sort of movement which is related to the analytical drawings I did earlier. This idea is also used in the patterns on the black ivory where the leaf patterns are also growing as it reaches the edges of the dodecahedrons.

Model makingThe model making took quite long since PVA glue was used, however, the time was reduced extensively by using paper clips to hold onto the glued tabs. Some of the joints sec-tions are noticable due to the thickness of the tabs but this is something that cannot be avoid which I’ve learned from my first model, as making smaller tabs or make one side without tabs would make the model really weak and start to fall apart every time it is being held up.A difficulty I found in asembling the model is that is is very fragile, if I were to hold it too tight, the dodecahedron could completely deform.It also noticable that there are gaps betwen some of the shapes, this is not an error in making, it is the way the shapes are meant to be when they are joined together, which is why I still leave the patterns on the dodecahedrons instead of cutting them or covering them up.A thing that I learnt form making my first model was that I have to put the lighting system along as I build the lantern, which is why wires can be seen in these pictures, as the lights are also put in as I build the lantern.One of the most “head pulling” problem is that the pow-er supply (consist or 3 AAs) were quite heavy which could cause a lot of problems when being put on. However, I’ve found a spot which is right below where I am holding to put the power supply, which not only convienient when it is needed but also doesn’t create too much force to the oth-er elements of the lantern.
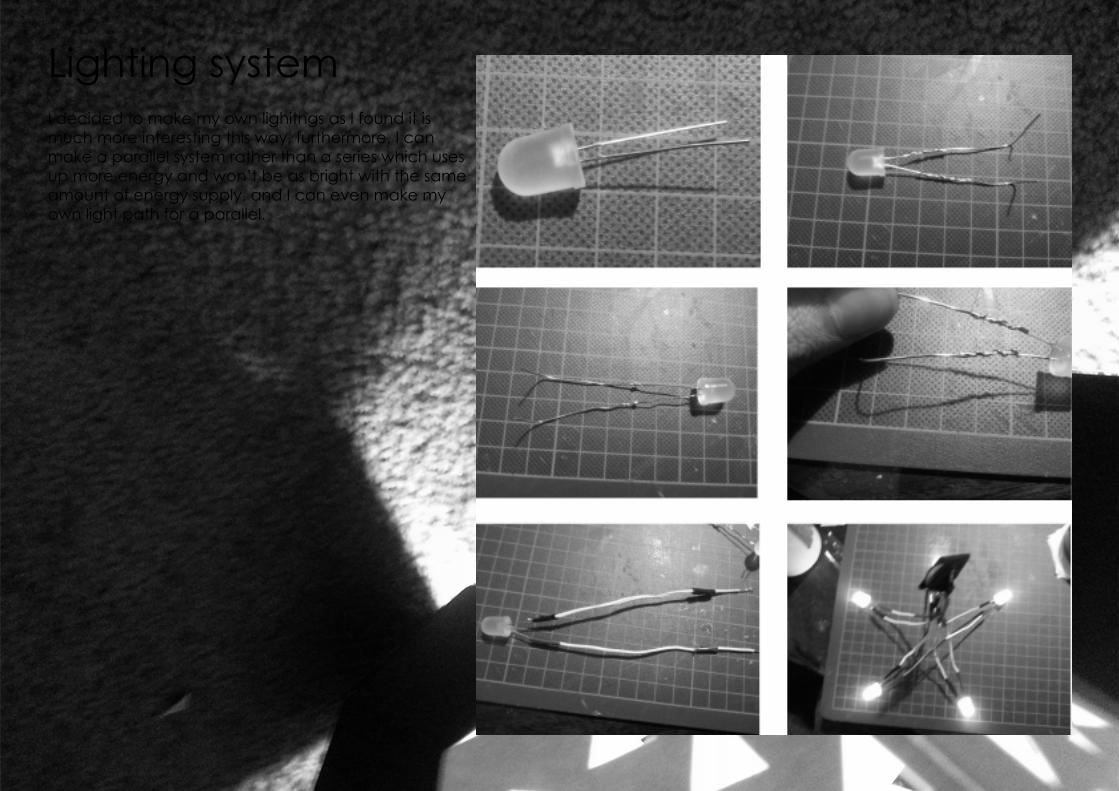
Lighting systemI decided to make my own lighitngs as I found it is much more interesting this way, furthermore, I can make a parallel system rather than a series which uses up more energy and won’t be as bright with the same amount of energy supply, and I can even make my own light path for a parallel.

Holding One important aspect of designing a lantern is considering about holding the lantern. Since my lantern is designed with 17 dodeca-hedrons joining together, I descided to make one of them as my handle such that the lantern does not have many different parts, which makes it looks like one solid piece when the dodecahe-drons were being put together. In addition, by having a dodeca-hedron as the handle, it also allows me to cover up the power source with my arm when holding the lantern, as well as covering my messy lighting system inside the lantern.

The final model

Final WordsI found myself learning a lot from making this lantern, especially about Rhino. Rhino is an exceptional tool that brought my imagi-nations to life. To be honest, the tool was so open to imagination such that even objects that do not work in real life form could be projected on the computer screen, and this has created quite a large trouble for me in designing the lantern. However, overall, it was all an exciting experience that brought me to this stage of designing.
CNC cutting was another astonishing experience that I have learnt from making lantern. The way the machine works reduced a sig-nificant amount of time and effort that I meant to put into making the lantern (especially the small patterns on the dodecahedron) and I am glad that after few fails in cutting and putting together the pieces I finally get the possibilities that the machine brings.
Overall, I am quite happy with the fact that I made my own lighting system because not only that I made a parallel lighting system that requires a small amount of energy to run for a long period of time, brightly; it also allows me to have my patterns projected out to the background, and make my lantern stands out.