upgrading system center 2012 service manager sp1 to system center 2012 … · 01/11/2013 ·...
TRANSCRIPT

Upgrading System Center 2012 – Service Manager SP1 to System Center 2012 R2
Microsoft Corporation
Published: November 1, 2013
Authors
John Downing, Bill Anderson, Manoj Parvathaneni, Srikanth Ranganathan, and Travis Wright
Applies to
Service Manager in Microsoft System Center 2012 R2
Feedback
Send suggestions and comments about this document to [email protected].
Copyright
This document is provided "as-is". Information and views expressed in this document, including
URL and other Internet website references, may change without notice.
Some examples depicted herein are provided for illustration only and are fictitious. No real
association or connection is intended or should be inferred.
This document does not provide you with any legal rights to any intellectual property in any
Microsoft product. You may copy and use this document for your internal, reference purposes.
You may modify this document for your internal, reference purposes.
© 2013 Microsoft Corporation. All rights reserved.
Microsoft, ActiveX, Active Directory, Bing, Internet Explorer, MSDN, SharePoint, Silverlight,
SQL Server, Visual Basic, Visual Studio, Windows, Windows Intune, Windows PowerShell,
Windows Server, and Windows Vista are trademarks of the Microsoft group of companies. All
other trademarks are property of their respective owners.
Revision History
Release Date Changes
October 17, 2013 Original release of this guide.
November 1, 2013 Minor updates to this guide.
Contents
Upgrading System Center 2012 - Service Manager SP1 to System Center 2012 R2 .................... 5
Upgrade topics ............................................................................................................................. 5
Downloadable documentation ...................................................................................................... 6
Upgrade Planning for System Center 2012 R2 - Service Manager ................................................ 6
Evaluation and Select versions .................................................................................................... 6
Installation location ....................................................................................................................... 7
Language support ........................................................................................................................ 7
Hardware requirements for Service Manager in System Center 2012 R2................................... 7
Software requirements for Service Manager in System Center 2012 R2 .................................... 7
Testing the upgrade ..................................................................................................................... 8
Upgrade order and timing ............................................................................................................ 8
Operations Manager compatibility................................................................................................ 8
System Center Operations Manager 2007 R2 ......................................................................... 8
System Center 2012 – Operations Manager and System Center 2012 R2 Operations
Manager ................................................................................................................................ 9
Database impacts......................................................................................................................... 9
Backing up Service Manager before upgrading ........................................................................... 9
Registering with the Service Manager data warehouse ............................................................ 10
Encryption keys .......................................................................................................................... 10
Authoring Tool workflows ........................................................................................................... 10
Upgrading the R2 Self-Service Portal............................................................................................ 11
Service Manager Connectors ........................................................................................................ 12
Remote SQL Server Reporting Services ....................................................................................... 12
Setting Up a Service Manager 2012 Lab Environment with Production Data ............................... 13
How to Install an Additional Management Server in the Production Service Manager Management
Group ......................................................................................................................................... 14
How to Copy the Workflow Assembly Files ................................................................................... 16
How to Disable Service Manager Connectors in the Production Environment ............................. 16
How to Disable Email Notifications in the Production Environment ............................................. 17
How to Stop Service Manager Services on the Secondary Management Server ......................... 17
How to Back Up the Production Service Manager Database ........................................................ 18
How to Enable Service Manager Connectors in the Production Environment .............................. 19
How to Enable Email Notifications in the Production Environment ............................................... 19
How to Restore the Service Manager Database in the Lab Environment ..................................... 20
How to Prepare the Service Manager Database in the Lab Environment..................................... 21
How to Start Service Manager Services on the Secondary Management Server ........................ 24
How to Promote a Secondary Management Server in a Lab Environment................................... 25
How to Enable the Connectors in the Lab Environment ............................................................... 26
How to Install a New Data Warehouse Server in the Lab Environment ........................................ 26
How to Register the Data Warehouse Server in the Lab Environment ......................................... 28
Determine when the deployment is complete ............................................................................ 30
Upgrade to System Center 2012 R2 - Service Manager ............................................................... 31
How to Prepare Service Manager 2012 SP1 for Upgrade to R2 ................................................... 32
How to Upgrade to System Center 2012 R2 - Service Manager .................................................. 33
Data warehouse management server ........................................................................................ 33
Service Manager management server ....................................................................................... 34
Service Manager Console .......................................................................................................... 35
After Upgrading to System Center 2012 R2 - Service Manager ................................................... 36
Restart the Data Access Service service and Service Manager workflows on the data
warehouse management server ............................................................................................. 36
Restart data warehouse jobs ..................................................................................................... 37
Stop and then start SQL Server Reporting Services ................................................................. 38
Prepare for chargeback reports ................................................................................................. 38
Failed Upgrade in System Center 2012 R2 - Service Manager .................................................... 39
Failure occurs during the prerequisite check ............................................................................. 40
Failure occurs during predicted checks ..................................................................................... 40
Failure occurs in an unpredictable manner before permanent changes are made to a
management server ................................................................................................................ 41
Failure occurs in an unpredictable manner after permanent changes are made to a
management server ................................................................................................................ 41
Failure occurs in an unpredictable manner after permanent changes are made to a database 41
Upgrade fails because Management Configuration service startup times out .......................... 41
How to Work Around Configuration Service Startup Issues .......................................................... 42
5
Upgrading System Center 2012 - Service Manager SP1 to System Center 2012 R2
This guide will show you how to upgrade from Service Manager in Microsoft System Center 2012
Service Pack 1 (SP1) to Service Manager in System Center 2012 R2.
If you are planning to upgrade two or more System Center products, you must first
consult the guide Upgrade Sequencing for System Center 2012 R2. The order in which
you perform product upgrades is important. Failure to follow the correct upgrade
sequence might result in product failure for which no recovery options exist. The affected
System Center products are:
1. Orchestrator
2. Service Manager
3. Data Protection Manager (DPM)
4. Operations Manager
5. Configuration Manager
6. Virtual Machine Manager
7. App Controller
You can only upgrade to Service Manager in System Center 2012 R2 from Service Manager in
System Center 2012 SP1 (version 7.5.2905.0).
This guide assumes that you are performing an upgrade to Service Manager in System
Center 2012 R2. For information about installing System Center 2012 – Service Manager
on a computer where no previous version of Service Manager exists, see Deploying
System Center 2012 – Service Manager.
Upgrade topics Upgrade Planning for System Center 2012 R2 - Service Manager
Describes factors that you must consider before you start the Service Manager upgrade.
Setting Up a Service Manager 2012 Lab Environment with Production Data
Describes how to set up Service Manager in a lab environment by using production data.
Upgrade to System Center 2012 R2 - Service Manager
Describes the steps that you must take to upgrade System Center 2012 to System Center
2012 SP1.
After Upgrading to System Center 2012 R2 - Service Manager
Describes the steps that you must take after you have applied the Service Manager upgrade.
Warning
Important
6
Failed Upgrade in System Center 2012 R2 - Service Manager
Describes the steps that you can take if an upgrade fails.
Downloadable documentation You can download a copy of this technical documentation from the Microsoft Download Center.
Always use the TechNet library for the most up-to-date information.
Upgrade Planning for System Center 2012 R2 - Service Manager
This guide outlines the procedures that are necessary to upgrade to Service Manager in System
Center 2012 R2.
An in-place upgrade from Service Manager in System Center 2012 Service Pack 1 (SP1) to
Service Manager in System Center 2012 R2 is supported. An in-place upgrade is an upgrade of
all Service Manager parts on the same hardware. Other approaches, such as side-by-side
upgrades or rolling upgrades, are not supported.
Upgrading to Service Manager in System Center 2012 R2 requires preparation. We recommend
that you install Service Manager in a lab environment and then replicate your production
databases into the lab. You can then perform an upgrade of the new installation in the lab. After
you confirm that the upgrade in the lab environment is successful, you can perform the same
upgrade to Service Manager SP1 in the production environment.
Evaluation and Select versions The release of Service Manager in System Center 2012 SP1 was available in two versions:
Evaluation and Select. Service Manager in System Center 2012 R2 is available in the same
versions. The following upgrade paths are supported to Service Manager in System Center 2012
R2.
Current version Upgraded version Status
Service Manager in System
Center 2012 SP1 Evaluation
Service Manager in System
Center 2012 R2 Evaluation
Evaluation period remains
unchanged (180 days)
Service Manager in System
Center 2012 SP1 Select
Service Manager in System
Center 2012 R2 Select
Licensed
Note
7
Upgrading from an Evaluation version of Service Manager in System Center 2012 SP1 to
an Evaluation version of Service Manager in System Center 2012 R2 does not extend the
180-day evaluation period.
Installation location The default folder for installing Service Manager, Service Manager SP1, and Service Manager in
System Center 2012 R2 is \Program Files\Microsoft System Center\Service Manager 2012.
However, when you perform the upgrade to Service Manager in System Center 2012 R2, the
software is installed in the folder that Service Manager previously used. If System Center Service
Manager 2010 was previously upgraded to Service Manager in System Center 2012 SP1, the
folder might be \Program Files\Microsoft System Center\Service Manager 2010.
Language support This release of Service Manager SP1 represents an ongoing progression of support for various
languages. In System Center Service Manager 2010, you used the Latin1_General_100_CI_AS
collation for the Turkish language. Service Manager, Service Manager SP1, and Service Manager
in System Center 2012 R2 support the Turkish_100_CI_AS collation. However, if you upgraded
previously from System Center Service Manager 2010 to System Center 2012 –
Service Manager, the collation that was used for the Turkish language
(Latin1_General_100_CI_AS) was carried forward to System Center 2012 – Service Manager
and will be carried forward again when you upgrade to Service Manager in System Center 2012
R2.
Hardware requirements for Service Manager in System Center 2012 R2 Service Manager in System Center 2012 R2 will function on the same hardware that you used for
System Center 2012 – Service Manager SP1.
Hardware requirements for Service Manager in System Center 2012 R2 are fully documented in
Hardware Requirements for System Center 2012 - Service Manager.
Software requirements for Service Manager in System Center 2012 R2 To upgrade to Service Manager in System Center 2012 R2, you must first apply Cumulative
Update 2 for System Center 2012 – Service Manager SP1.
Service Manager in System Center 2012 R2 has the same software requirements for the Service
Manager console that System Center Service Manager 2010 SP1 has. In addition, the Service
Manager console can now be installed on computers that are running the Windows Server® 2012
R2 operating system.
8
The Service Manager and data warehouse management servers, along with the Self-Service
Portal, are supported with Windows Server 2012 R2.
Software requirements for Service Manager in System Center 2012 R2 are fully documented in
Software Requirements for System Center 2012 – Service Manager.
Testing the upgrade We recommend that you test the upgrade to Service Manager in System Center 2012 R2 in a lab
environment.
Upgrade order and timing The order of your upgrades is important. Perform the upgrades by using the following steps:
1. Back up your databases and your management packs. See the topics "Backing Up Service
Manager Databases" and "Backing Up Unsealed Management Packs in Service Manager" in
the Disaster Recovery Guide for System Center 2012 – Service Manager.
2. Upgrade the data warehouse management server. You must stop the data warehouse jobs,
and you will not be able to start them again until after you have completed the upgrade.
3. After the upgrade to the data warehouse management server is complete, upgrade the initial
Service Manager management server. If you created more than one Service Manager
management server, the initial Service Manager management server is the first one that you
created.
4. Upgrade the Service Manager consoles and any additional Service Manager management
servers.
5. Restart the data warehouse jobs.
6. Deploy the new Self-Service Portal.
The timing of your upgrades is also important. After you upgrade your data warehouse
management server, you must both upgrade the Service Manager management server and
deploy the new Self-Service Portal. After you upgrade your initial Service Manager management
server, you must be prepared to upgrade your Service Manager console or Service Manager
consoles, additional Service Manager management servers, and the Self-Service Portal at the
same time.
Operations Manager compatibility This section describes the compatibility between System Center Operations Manager 2007 R2,
System Center 2012 – Operations Manager, and Service Manager in System Center 2012 R2.
System Center Operations Manager 2007 R2
Operations Manager 2007 R2 agents must be removed from the Service Manager and data
warehouse management servers before you attempt an upgrade. Service Manager in System
Center 2012 R2 includes a System Center 2012 R2 Operations Manager agent, and it is
9
automatically installed when you upgrade. After Service Manager Setup finishes, you must
manually configure the agent to communicate with the Operations Manager management server.
To validate that the Operations Manager agent was installed, open Control Panel and verify that
the agent is present. To manually configure the Operations Manager agent, see Configuring
Agents.
You can upgrade Service Manager servers in the presence of an Operations Manager 2007 R2
console.
System Center 2012 – Operations Manager and System Center 2012 R2 Operations Manager
System Center 2012 – Operations Manager agents were not supported with
System Center 2012 – Service Manager. However, the agent that Service Manager automatically
installs in System Center 2012 R2 is compatible with System Center 2012 – Operations Manager,
System Center 2012 – Operations Manager SP1, and System Center 2012 R2 Operations
Manager. After Service Manager Setup finishes, you must manually configure the agent to
communicate with the Operations Manager management server.
To validate that the Operations Manager agent was installed, open Control Panel and verify that
the agent is present. To manually configure the Operations Manager agent, see Configuring
Agents.
You can upgrade Service Manager servers in the presence of a System Center 2012 –
Operations Manager console.
Database impacts In Service Manager in System Center 2012 R2, you have the option to install Operations
Manager and Configuration Manager data marts. Selecting this option will require additional
space on the hard disk drive for the two databases, in addition to associated file groups and log
files.
Backing up Service Manager before upgrading Before you start any upgrade, we recommend that you back up your Service Manager and data
warehouse databases and the encryption key. If you have already backed up your databases and
encryption key, you can continue to run the upgrade. Otherwise, review the backup procedures in
the Disaster Recovery Guide for System Center 2012 – Service Manager before you continue the
upgrade.
10
Registering with the Service Manager data warehouse If you have installed a data warehouse management server in your environment, as part of the
upgrade process, you must be able to view the status of the data warehouse jobs. You cannot
perform this task until you register with the Service Manager data warehouse. If the Data
Warehouse button is not visible in the Service Manager console, complete the procedure in
"Registering with the Service Manager Data Warehouse to Enable Reporting" in the Deployment
Guide for System Center 2012 – Service Manager.
Encryption keys When you have finished running Setup to either install or upgrade to Service Manager in System
Center 2012 R2, you are prompted to open the Encryption Key Backup or Restore Wizard. If you
have previously backed up the encryption keys, no additional action is required. If you never
backed up the encryption keys, use the Encryption Key Backup or Restore Wizard to back up the
encryption keys on the Service Manager management servers.
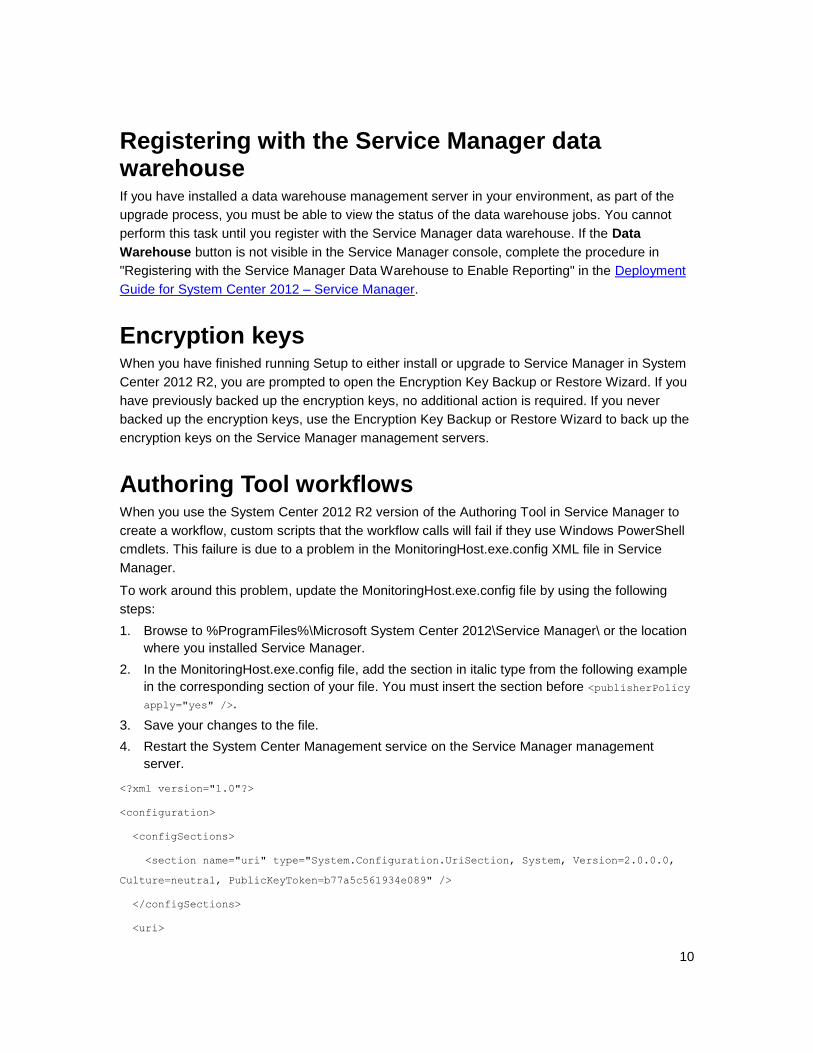
Authoring Tool workflows When you use the System Center 2012 R2 version of the Authoring Tool in Service Manager to
create a workflow, custom scripts that the workflow calls will fail if they use Windows PowerShell
cmdlets. This failure is due to a problem in the MonitoringHost.exe.config XML file in Service
Manager.
To work around this problem, update the MonitoringHost.exe.config file by using the following
steps:
1. Browse to %ProgramFiles%\Microsoft System Center 2012\Service Manager\ or the location
where you installed Service Manager.
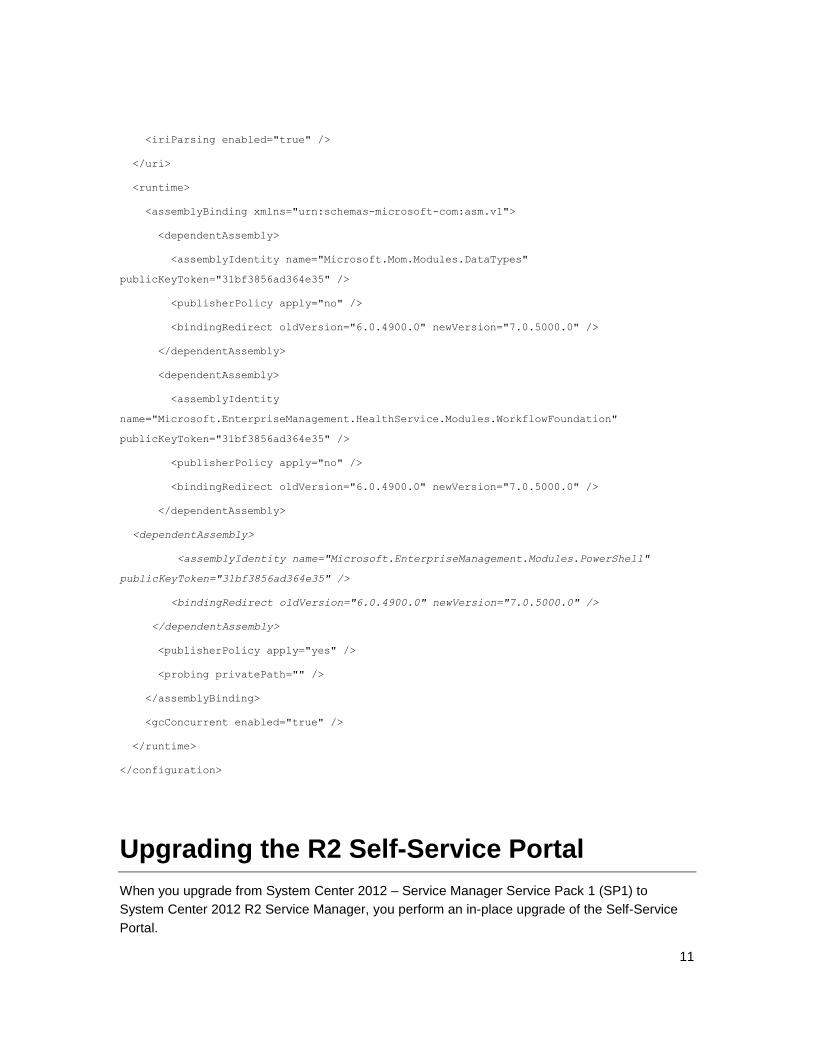
2. In the MonitoringHost.exe.config file, add the section in italic type from the following example
in the corresponding section of your file. You must insert the section before <publisherPolicy
apply="yes" />.
3. Save your changes to the file.
4. Restart the System Center Management service on the Service Manager management
server.
<?xml version="1.0"?>
<configuration>
<configSections>
<section name="uri" type="System.Configuration.UriSection, System, Version=2.0.0.0,
Culture=neutral, PublicKeyToken=b77a5c561934e089" />
</configSections>
<uri>
11
<iriParsing enabled="true" />
</uri>
<runtime>
<assemblyBinding xmlns="urn:schemas-microsoft-com:asm.v1">
<dependentAssembly>
<assemblyIdentity name="Microsoft.Mom.Modules.DataTypes"
publicKeyToken="31bf3856ad364e35" />
<publisherPolicy apply="no" />
<bindingRedirect oldVersion="6.0.4900.0" newVersion="7.0.5000.0" />
</dependentAssembly>
<dependentAssembly>
<assemblyIdentity
name="Microsoft.EnterpriseManagement.HealthService.Modules.WorkflowFoundation"
publicKeyToken="31bf3856ad364e35" />
<publisherPolicy apply="no" />
<bindingRedirect oldVersion="6.0.4900.0" newVersion="7.0.5000.0" />
</dependentAssembly>
<dependentAssembly>
<assemblyIdentity name="Microsoft.EnterpriseManagement.Modules.PowerShell"
publicKeyToken="31bf3856ad364e35" />
<bindingRedirect oldVersion="6.0.4900.0" newVersion="7.0.5000.0" />
</dependentAssembly>
<publisherPolicy apply="yes" />
<probing privatePath="" />
</assemblyBinding>
<gcConcurrent enabled="true" />
</runtime>
</configuration>
Upgrading the R2 Self-Service Portal
When you upgrade from System Center 2012 – Service Manager Service Pack 1 (SP1) to
System Center 2012 R2 Service Manager, you perform an in-place upgrade of the Self-Service
Portal.
12
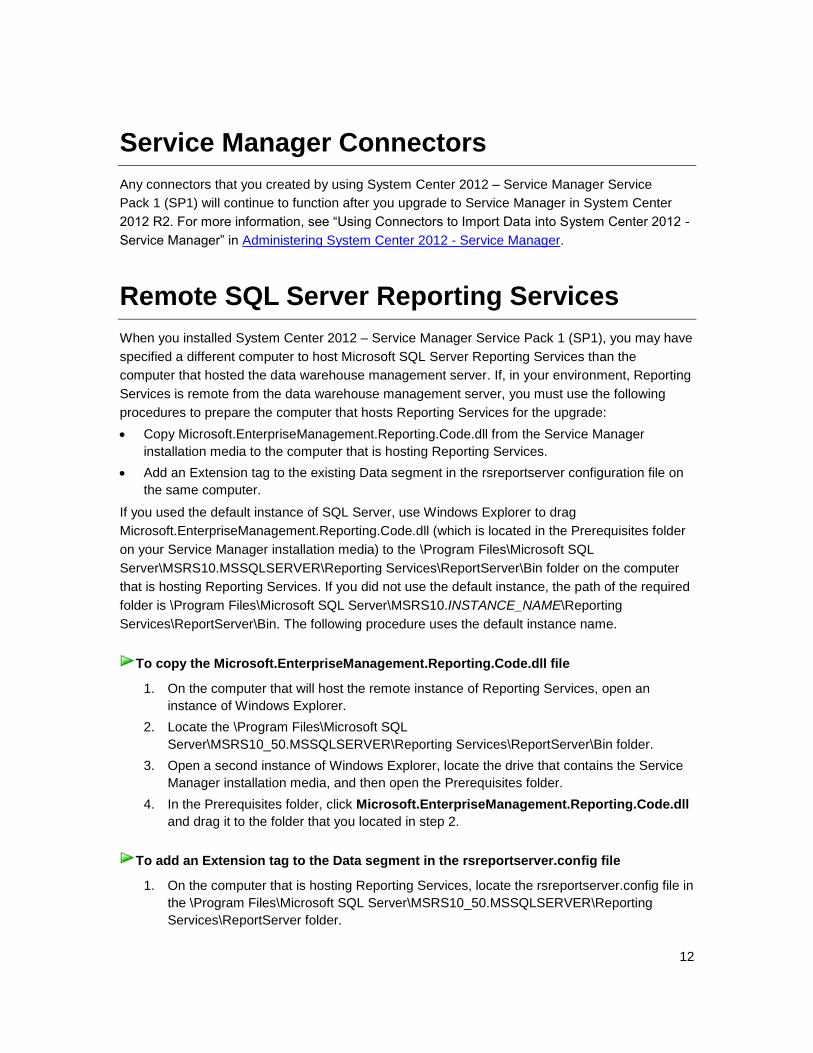
Service Manager Connectors
Any connectors that you created by using System Center 2012 – Service Manager Service
Pack 1 (SP1) will continue to function after you upgrade to Service Manager in System Center
2012 R2. For more information, see “Using Connectors to Import Data into System Center 2012 -
Service Manager” in Administering System Center 2012 - Service Manager.
Remote SQL Server Reporting Services
When you installed System Center 2012 – Service Manager Service Pack 1 (SP1), you may have
specified a different computer to host Microsoft SQL Server Reporting Services than the
computer that hosted the data warehouse management server. If, in your environment, Reporting
Services is remote from the data warehouse management server, you must use the following
procedures to prepare the computer that hosts Reporting Services for the upgrade:
Copy Microsoft.EnterpriseManagement.Reporting.Code.dll from the Service Manager
installation media to the computer that is hosting Reporting Services.
Add an Extension tag to the existing Data segment in the rsreportserver configuration file on
the same computer.
If you used the default instance of SQL Server, use Windows Explorer to drag
Microsoft.EnterpriseManagement.Reporting.Code.dll (which is located in the Prerequisites folder
on your Service Manager installation media) to the \Program Files\Microsoft SQL
Server\MSRS10.MSSQLSERVER\Reporting Services\ReportServer\Bin folder on the computer
that is hosting Reporting Services. If you did not use the default instance, the path of the required
folder is \Program Files\Microsoft SQL Server\MSRS10.INSTANCE_NAME\Reporting
Services\ReportServer\Bin. The following procedure uses the default instance name.
1. On the computer that will host the remote instance of Reporting Services, open an
instance of Windows Explorer.
2. Locate the \Program Files\Microsoft SQL
Server\MSRS10_50.MSSQLSERVER\Reporting Services\ReportServer\Bin folder.
3. Open a second instance of Windows Explorer, locate the drive that contains the Service
Manager installation media, and then open the Prerequisites folder.
4. In the Prerequisites folder, click Microsoft.EnterpriseManagement.Reporting.Code.dll
and drag it to the folder that you located in step 2.
1. On the computer that is hosting Reporting Services, locate the rsreportserver.config file in
the \Program Files\Microsoft SQL Server\MSRS10_50.MSSQLSERVER\Reporting
Services\ReportServer folder.
To copy the Microsoft.EnterpriseManagement.Reporting.Code.dll file
To add an Extension tag to the Data segment in the rsreportserver.config file
13
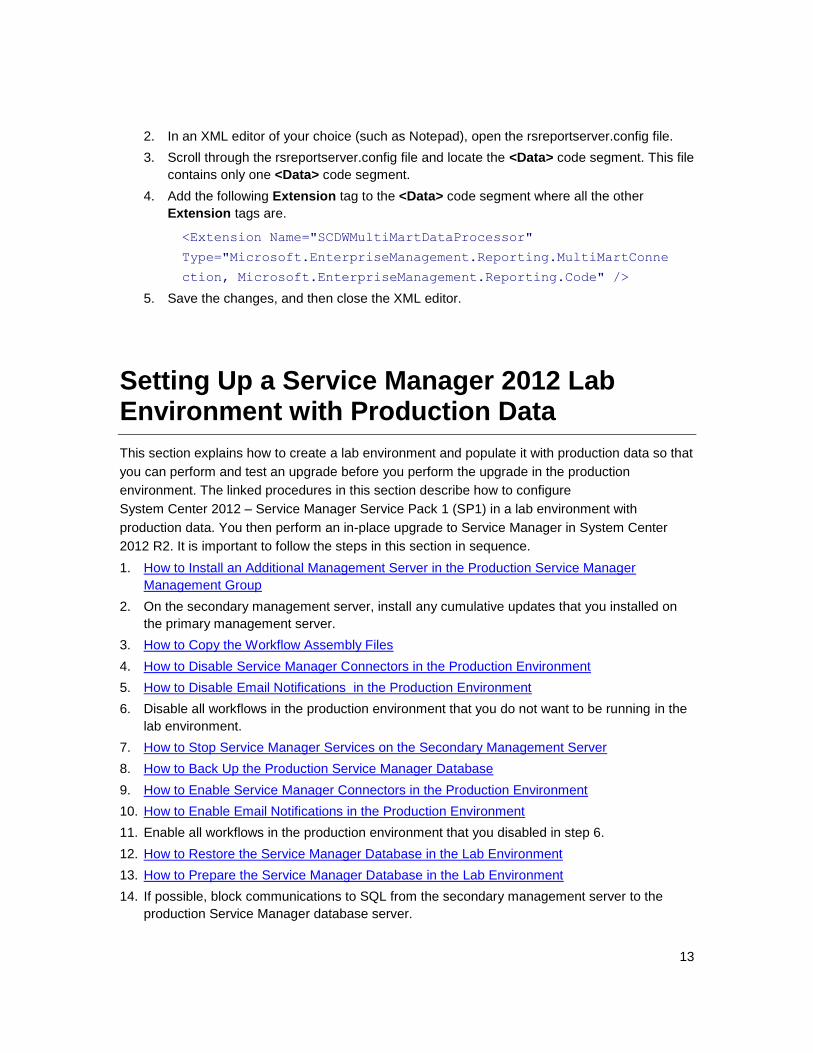
2. In an XML editor of your choice (such as Notepad), open the rsreportserver.config file.
3. Scroll through the rsreportserver.config file and locate the <Data> code segment. This file
contains only one <Data> code segment.
4. Add the following Extension tag to the <Data> code segment where all the other
Extension tags are.
<Extension Name="SCDWMultiMartDataProcessor"
Type="Microsoft.EnterpriseManagement.Reporting.MultiMartConne
ction, Microsoft.EnterpriseManagement.Reporting.Code" />
5. Save the changes, and then close the XML editor.
Setting Up a Service Manager 2012 Lab Environment with Production Data
This section explains how to create a lab environment and populate it with production data so that
you can perform and test an upgrade before you perform the upgrade in the production
environment. The linked procedures in this section describe how to configure
System Center 2012 – Service Manager Service Pack 1 (SP1) in a lab environment with
production data. You then perform an in-place upgrade to Service Manager in System Center
2012 R2. It is important to follow the steps in this section in sequence.
1. How to Install an Additional Management Server in the Production Service Manager
Management Group
2. On the secondary management server, install any cumulative updates that you installed on
the primary management server.
3. How to Copy the Workflow Assembly Files
4. How to Disable Service Manager Connectors in the Production Environment
5. How to Disable Email Notifications in the Production Environment
6. Disable all workflows in the production environment that you do not want to be running in the
lab environment.
7. How to Stop Service Manager Services on the Secondary Management Server
8. How to Back Up the Production Service Manager Database
9. How to Enable Service Manager Connectors in the Production Environment
10. How to Enable Email Notifications in the Production Environment
11. Enable all workflows in the production environment that you disabled in step 6.
12. How to Restore the Service Manager Database in the Lab Environment
13. How to Prepare the Service Manager Database in the Lab Environment
14. If possible, block communications to SQL from the secondary management server to the
production Service Manager database server.
14
15. How to Start Service Manager Services on the Secondary Management Server
16. Verify that the lab environment works. Try to start the console on the secondary management
server and determine whether you can connect to the console. Confirm that data warehouse
and reporting do not appear.
17. How to Promote a Secondary Management Server in a Lab Environment
18. How to Enable the Connectors in the Lab Environment
Do not enable or delete the System Center Operations Manager alert connector in
the lab environment. This will cause the alert connector in the production
environment to fail.
19. If you want to test the email notification and incoming email functionality, use a separate
Simple Mail Transfer Protocol (SMTP) instance to send email messages to eliminate flooding
the inboxes of users with test email. To test the incoming email feature, you can point to a
test share and drop the eml files into this share when you are ready to test.
20. How to Install a New Data Warehouse Server in the Lab Environment
21. How to Register the Data Warehouse Server in the Lab Environment
22. Back up this lab environment. For example, back up the database and encryption keys and
the virtual machine snapshots. This gives you the ability to recover if the upgrade fails.
23. Attempt the in-place upgrade of Service Manager in System Center 2012 R2.
24. Test everything. Document any discrepancies and fixes. Send feedback through the
Microsoft Connect website.
How to Install an Additional Management Server in the Production Service Manager Management Group
The following procedure describes how to install an additional management server. You must
deploy the initial Service Manager management server and Service Manager database before
you can deploy an additional management server.
To install an additional Service Manager management server, you must be a member of
the Service Manager Administrators user role.
When you install a secondary management server, Service Manager resets data retention
settings. Before you install a secondary management server, note the data retention settings.
After you install the additional management server, adjust the data retention settings to their
original values.
Note
Tip
To install an additional management server
15
1. By using an account that has administrator rights and that is also a member of the
Service Manager Management group administrators, log on to the computer that will host
the additional Service Manager management server.
2. In the System Center 2012 R2 Service Manager installation media, double-click
Setup.exe.
3. On the Microsoft System Center 2012 R2 Service Manager page, click Install a
Service Manager Management server.
4. On the Product registration page, type information in the boxes. In the Product key
boxes, type the product key that you received with Service Manager, or alternatively,
select Install as an evaluation edition (180 day trial)?. Read the Microsoft Software
License Terms, and, if applicable, click I have read, understood, and agree with the
terms of the license agreement, and then click Next.
5. On the Installation location page, verify that sufficient free disk space is available, and
then click Next. If necessary, click Browse to change the location where the additional
Service Manager management server will be installed.
6. On the System check results page, make sure that the prerequisite check passed or at
least passed with warnings, and then click Next.
If the prerequisite check determines that the Microsoft Report Viewer Redistributable has
not been installed, click Install Microsoft Report Viewer Redistributable. After the
Microsoft Report Viewer Redistributable 2008 (KB971119) Setup wizard finishes, click
Check prerequisites again.
7. On the Configure the Service Manager Database page, in the Database server box,
type the name of the computer that hosts the Service Manager database that you used
for your initial Service Manager management server (for example, Computer 2), and
then press the Tab key. When the name of the instance appears in the SQL Server
instance box, click Use an existing database.
8. Click the Database list, select the database name for the Service Manager database (the
default name is ServiceManager), and then click Next.
9. On the Configure the Service Manager Management group page, verify that the boxes
for management group name and management group administrators have been
populated. Click Next.
10. On the Configure the Account for Service Manager Services page, click Domain
account, specify the user name (for example, SM_Acct), password, and domain for the
account, and then click Test Credentials. After you receive a The credentials were
accepted message, click Next.
Note
The user name and password that you provide here must be the same ones that
you used for the Service Manager account on the data warehouse management
server.
11. On the Help improve System Center page, indicate your preference for participation for
both the Customer Experience Improvement Program and Error Reporting. Optionally,
click Tell me more about the program, and then click Next.
16
12. On the Use Microsoft Update to help keep your computer secure and up-to-date
page, indicate your preference for using Microsoft Update to check for Service Manager
updates, and then click Next.
13. On the Installation summary page, click Install.
14. On the Setup completed successfully page, we recommend that you leave Open the
Encryption Backup or Restore Wizard selected, and then click Close.
How to Copy the Workflow Assembly Files
Use the following procedure to copy the workflow assembly files from the Service Manager
installation folder on the primary management server to the secondary management server that
you created in the previous procedure.
1. On the computer that is running the Service Manager Primary Server role, browse to the
Service Manager installation folder (for example, C:\Program Files\Microsoft System
Center 2012\Service Manager) and copy the workflow files (*workflow*.dll).
2. On the computer that is running the Service Manager secondary server, browse to the
Service Manager installation folder (for example, C:\Program Files\Microsoft System
Center 2012\Service Manager) and paste the copied workflow files into this folder. You
should overwrite any existing files.
Note
You must place the workflow assembly files in the Service Manager installation
folder. This is an important step if you want to test the custom workflows that
depend on workflow assembly files. Failure to copy these files would lead to
failed custom workflows in the lab environment.
How to Disable Service Manager Connectors in the Production Environment
Use the following procedure to disable the Service Manager connectors in the production
environment.
1. In the Service Manager console, click Administration.
2. In the Administration pane, expand Administration, and then click Connectors.
To copy the workflow assembly files
To disable a connector
17
3. In the Connectors pane, select the connector that you want to disable.
4. In the Tasks pane, under the connector name, click Disable.
5. In the Disable Connector dialog box, click OK.
How to Disable Email Notifications in the Production Environment
Use the following procedure to disable outgoing and incoming email notifications in the production
environment.
1. In the Service Manager console, click Administration.
2. In the Administration pane, expand Notifications, and then click Channels.
3. In the Channels pane, click E-Mail Notification Channel.
4. In the Tasks pane, under E-Mail Notification Channel, click Properties to open the
Configure E-Mail Notification Channel dialog box.
5. Clear the Enable e-mail notifications check box.
1. In the Service Manager console, click Administration.
2. In the Administration pane, expand Administration, and then click Settings.
3. In the Settings pane, double-click Incident Settings.
4. In the Incident Settings dialog box, click Incoming E-mail.
5. Clear the Turn on incoming e-mails processing check box, and then click OK.
How to Stop Service Manager Services on the Secondary Management Server
Use the following procedure to stop the Service Manager services.
1. In the Run dialog box, in the Open box, type services.msc, and then click OK.
2. In the Services window, in the Services (Local) pane, locate the following services and
for each one, click Stop:
To disable outgoing email notifications
To disable incoming email notifications
To stop the Service Manager services
18
a. System Center Data Access Service
b. System Center Management
c. System Center Management Configuration
3. Open Windows Explorer.
4. Locate the folder \Program Files\Microsoft System Center 2012\Service Manager.
5. Delete the Health Service State folder and all of its contents.
How to Back Up the Production Service Manager Database
Use the following procedure to back up the production Service Manager database in Microsoft
SQL Server 2008 R2. Steps might differ for Microsoft SQL Server 2012.
1. After you connect to the appropriate instance of the Microsoft SQL Server Database
Engine, in Object Explorer, click the server name to expand the server tree.
2. Expand Databases, and depending on the database, either select a user database or
expand System Databases and select a system database.
3. Right-click the database, point to Tasks, and then click Back Up. The Back Up
Database dialog box appears.
4. In the Database list, verify the database name. You can optionally select a different
database from the list.
5. You can perform a database backup for any recovery model (FULL, BULK_LOGGED, or
SIMPLE).
6. In the Backup type list, select Full.
Note
After you create a full database backup, you can create a differential database
backup. For more information, see Create a Differential Database Backup (SQL
Server).
7. Optionally, you can select Copy Only Backup to create a copy-only backup. A copy-only
backup is a SQL Server backup that is independent of the sequence of conventional SQL
Server backups. For more information, see Copy-Only Backups (SQL Server).
Note
When the Differential option is selected, you cannot create a copy-only backup.
8. For Backup component, click Database.
9. Either accept the default name that is suggested in the Name box for the backup set, or
enter a different name for the backup set.
To back up the Service Manager database
19
10. Optionally, in the Description box, enter a description of the backup set.
11. Specify when the backup set will expire and when it can be overwritten without explicitly
skipping verification of the expiration data.
Note
For more information about backup expiration dates, see BACKUP (Transact-
SQL).
12. Choose the type of backup destination by clicking Disk or Tape. To select the paths of up
to 64 disk or tape drives that contain a single media set, click Add. The selected paths
appear in the Backup to list.
13. To view or select the advanced options, in the Select a page pane, click Options.
14. Select an Overwrite Media option by clicking either Back up to the existing media set
or Back up to a new media set, and erase all existing backup sets.
15. In the Reliability section, select either Verify backup when finished or Perform
checksum before writing to media, and then optionally select Continue on checksum
error. For more information, see Possible Media Errors During Backup and Restore (SQL
Server).
How to Enable Service Manager Connectors in the Production Environment
Use the following procedure to enable the Service Manager connectors in the production
environment.
1. In the Service Manager console, click Administration.
2. In the Administration pane, expand Administration, and then click Connectors.
3. In the Connectors pane, select the connector that you want to enable.
4. In the Tasks pane, under the connector name, click Enable.
How to Enable Email Notifications in the Production Environment
Use the following procedure to enable outgoing and incoming email notifications in the production
environment.
To enable a connector
20
1. In the Service Manager console, click Administration.
2. In the Administration pane, expand Notifications, and then click Channels.
3. In the Channels pane, click E-Mail Notification Channel.
4. In the Tasks pane, under E-Mail Notification Channel, click Properties to open the
Configure E-Mail Notification Channel dialog box.
5. Select the Enable e-mail notifications check box.
1. In the Service Manager console, click Administration.
2. In the Administration pane, expand Administration, and then click Settings.
3. In the Settings pane, double-click Incident Settings.
4. In the Incident Settings dialog box, click Incoming E-mail.
5. Select the Turn on incoming e-mails processing check box, and then click OK.
How to Restore the Service Manager Database in the Lab Environment
Use the following procedure to restore the production Service Manager database by using
Microsoft SQL Server 2008 R2. Steps might differ for Microsoft SQL Server 2012.
1. After you connect to the appropriate instance of the SQL Server Database Engine, in
Object Explorer, click the server name to expand the server tree.
2. Expand Databases, and depending on the database, either select a user database or
expand System Databases and select a system database.
3. Right-click the database, point to Tasks, and then click Restore. The Back Up Database
dialog box appears.
4. Click Database, which opens the Restore Database dialog box.
5. On the General page, the name of the restoring database appears in the To database
list. To create a new database, enter its name in the list.
6. In the To a point in time box, either retain the default (Most recent possible) or select a
specific date and time by clicking the Browse button to open the Point in Time Restore
dialog box. For more information, see How to: Restore to a Point in Time (SQL Server
Management Studio).
7. To specify the source and location of the backup sets to restore, click either From
To enable outgoing email notifications
To enable incoming email notifications
To restore the Service Manager database
21
database or From device.
8. In the Select the backup sets to restore grid, select the backups to restore. For more
information, see Restore Database (General Page).
9. To view or select the advanced options, in the Select a page pane, click Options.
10. In the Restore options pane, in the following list of options, select the one that is most
appropriate for your situation:
Overwrite the existing database
Preserve the replication settings
Prompt before restoring each backup
Restrict access to the restored database
For more information, see Restore Database (Options Page).
11. Optionally, you can restore the database to a new location by specifying a new restore
destination for each file in Restore the database files as. For more information, see
Restore Database (Options Page).
12. In the Recovery state pane, in the following list of options, select the one that is most
appropriate for your environment:
Leave the database ready to use by rolling back the uncommitted transactions.
Additional transaction logs cannot be restored. (RESTORE WITH RECOVERY)
Note
Select this option only if you are restoring all of the necessary backups at this
time.
Leave the database non-operational, and do not roll back the uncommitted
transactions. Additional transaction logs can be restored. (RESTORE WITH
NORECOVERY)
Leave the database in read-only mode. Undo uncommitted transactions, but
save the undo actions in a standby file so that recovery effects can be reverted.
(RESTORE WITH STANDBY)
For more information, see Restore Database (Options Page).
How to Prepare the Service Manager Database in the Lab Environment
Use the following procedure to prepare the Service Manager database in the lab environment.
Perform this procedure on the computer that is hosting the Service Manager database that the
secondary management server (the management server in your lab environment) is using.
To configure the database
22
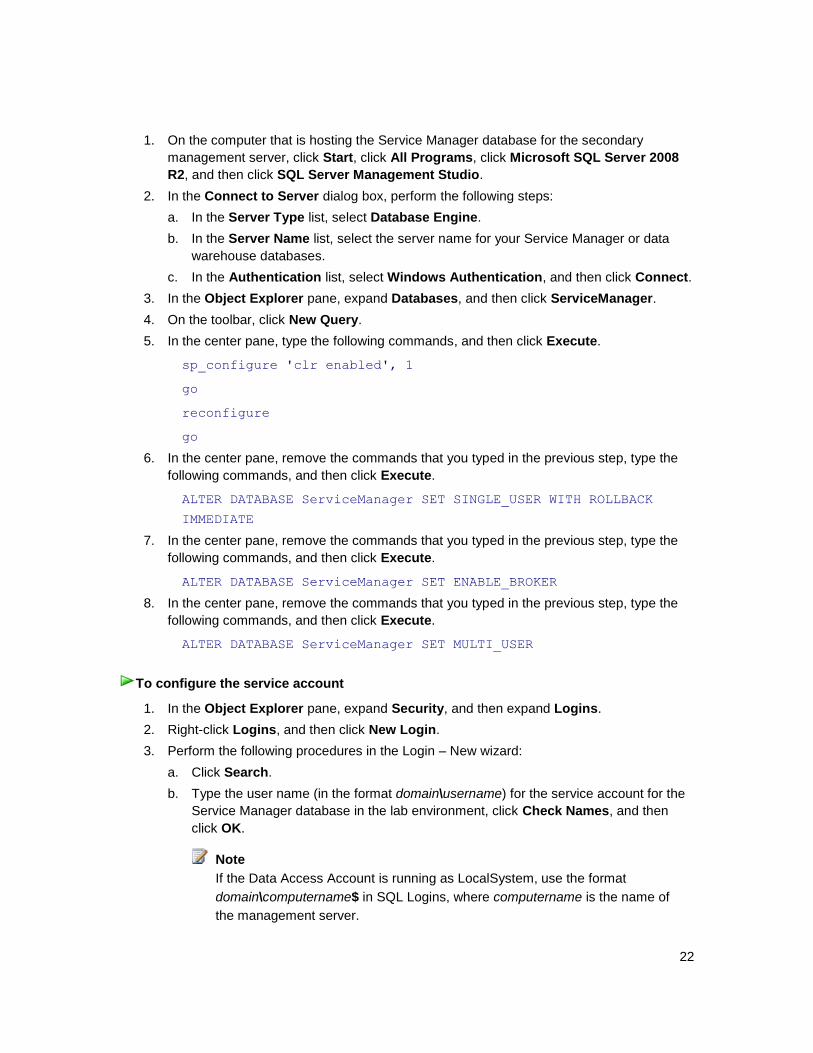
1. On the computer that is hosting the Service Manager database for the secondary
management server, click Start, click All Programs, click Microsoft SQL Server 2008
R2, and then click SQL Server Management Studio.
2. In the Connect to Server dialog box, perform the following steps:
a. In the Server Type list, select Database Engine.
b. In the Server Name list, select the server name for your Service Manager or data
warehouse databases.
c. In the Authentication list, select Windows Authentication, and then click Connect.
3. In the Object Explorer pane, expand Databases, and then click ServiceManager.
4. On the toolbar, click New Query.
5. In the center pane, type the following commands, and then click Execute.
sp_configure 'clr enabled', 1
go
reconfigure
go
6. In the center pane, remove the commands that you typed in the previous step, type the
following commands, and then click Execute.
ALTER DATABASE ServiceManager SET SINGLE_USER WITH ROLLBACK
IMMEDIATE
7. In the center pane, remove the commands that you typed in the previous step, type the
following commands, and then click Execute.
ALTER DATABASE ServiceManager SET ENABLE_BROKER
8. In the center pane, remove the commands that you typed in the previous step, type the
following commands, and then click Execute.
ALTER DATABASE ServiceManager SET MULTI_USER
1. In the Object Explorer pane, expand Security, and then expand Logins.
2. Right-click Logins, and then click New Login.
3. Perform the following procedures in the Login – New wizard:
a. Click Search.
b. Type the user name (in the format domain\username) for the service account for the
Service Manager database in the lab environment, click Check Names, and then
click OK.
Note
If the Data Access Account is running as LocalSystem, use the format
domain\computername$ in SQL Logins, where computername is the name of
the management server.
To configure the service account
23
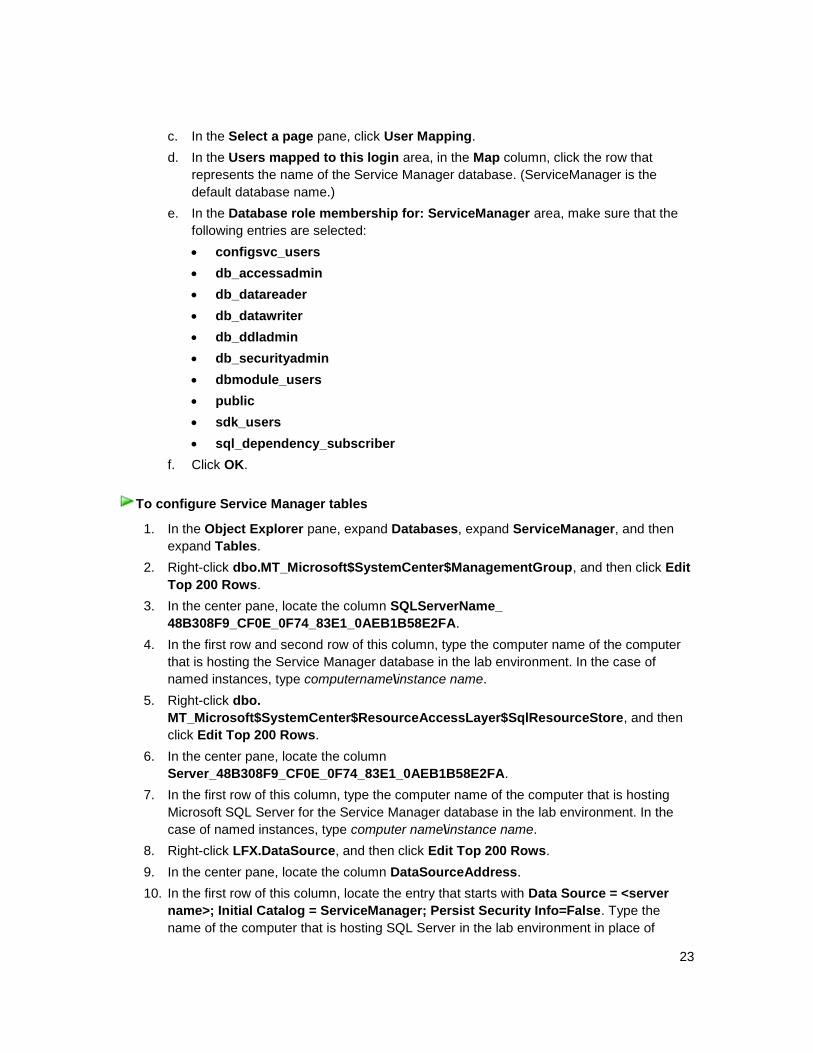
c. In the Select a page pane, click User Mapping.
d. In the Users mapped to this login area, in the Map column, click the row that
represents the name of the Service Manager database. (ServiceManager is the
default database name.)
e. In the Database role membership for: ServiceManager area, make sure that the
following entries are selected:
configsvc_users
db_accessadmin
db_datareader
db_datawriter
db_ddladmin
db_securityadmin
dbmodule_users
public
sdk_users
sql_dependency_subscriber
f. Click OK.
1. In the Object Explorer pane, expand Databases, expand ServiceManager, and then
expand Tables.
2. Right-click dbo.MT_Microsoft$SystemCenter$ManagementGroup, and then click Edit
Top 200 Rows.
3. In the center pane, locate the column SQLServerName_
48B308F9_CF0E_0F74_83E1_0AEB1B58E2FA.
4. In the first row and second row of this column, type the computer name of the computer
that is hosting the Service Manager database in the lab environment. In the case of
named instances, type computername\instance name.
5. Right-click dbo.
MT_Microsoft$SystemCenter$ResourceAccessLayer$SqlResourceStore, and then
click Edit Top 200 Rows.
6. In the center pane, locate the column
Server_48B308F9_CF0E_0F74_83E1_0AEB1B58E2FA.
7. In the first row of this column, type the computer name of the computer that is hosting
Microsoft SQL Server for the Service Manager database in the lab environment. In the
case of named instances, type computer name\instance name.
8. Right-click LFX.DataSource, and then click Edit Top 200 Rows.
9. In the center pane, locate the column DataSourceAddress.
10. In the first row of this column, locate the entry that starts with Data Source = <server
name>; Initial Catalog = ServiceManager; Persist Security Info=False. Type the
name of the computer that is hosting SQL Server in the lab environment in place of
To configure Service Manager tables

24
<server name>.
11. Right-click dbo.
MT_Microsoft$SystemCenter$ResourceAccessLayer$SdkResourceStore, and then
click Edit Top 200 Rows.
12. In the center pane, locate the column
Server_48B308F9_CF0E_0F74_83E1_0AEB1B58E2FA.
13. In all of the rows in this column, type the name of the computer that is hosting the Service
Manager management server in the lab environment.
14. Right-click
[dbo].[MT_Microsoft$SystemCenter$ResourceAccessLayer$CmdbResourceStore],
and then click Edit Top 200 Rows.
15. In all rows, update the column Server_48B308F9_CF0E_0F74_83E1_0AEB1B58E2FA,
and then type the name of the computer that is running SQL Server and hosting the
Service Manager database in the lab environment.
16. On the toolbar, click New Query.
17. In the center pane, type the following command, and then click Execute.
Delete from
dbo.MT_Microsoft$SystemCenter$ResourceAccessLayer$DwSdkResour
ceStore
18. Close Microsoft SQL Server Management Studio.
How to Start Service Manager Services on the Secondary Management Server
Use the following procedure to start the Service Manager services.
1. On the Windows desktop, click Start, and then click Run.
2. In the Run dialog box, in the Open box, type services.msc, and then click OK.
3. In the Services window, in the Services (Local) pane, locate the following services and
for each one, click Start:
System Center Data Access Service
System Center Management
System Center Management Configuration
To start Service Manager services
25
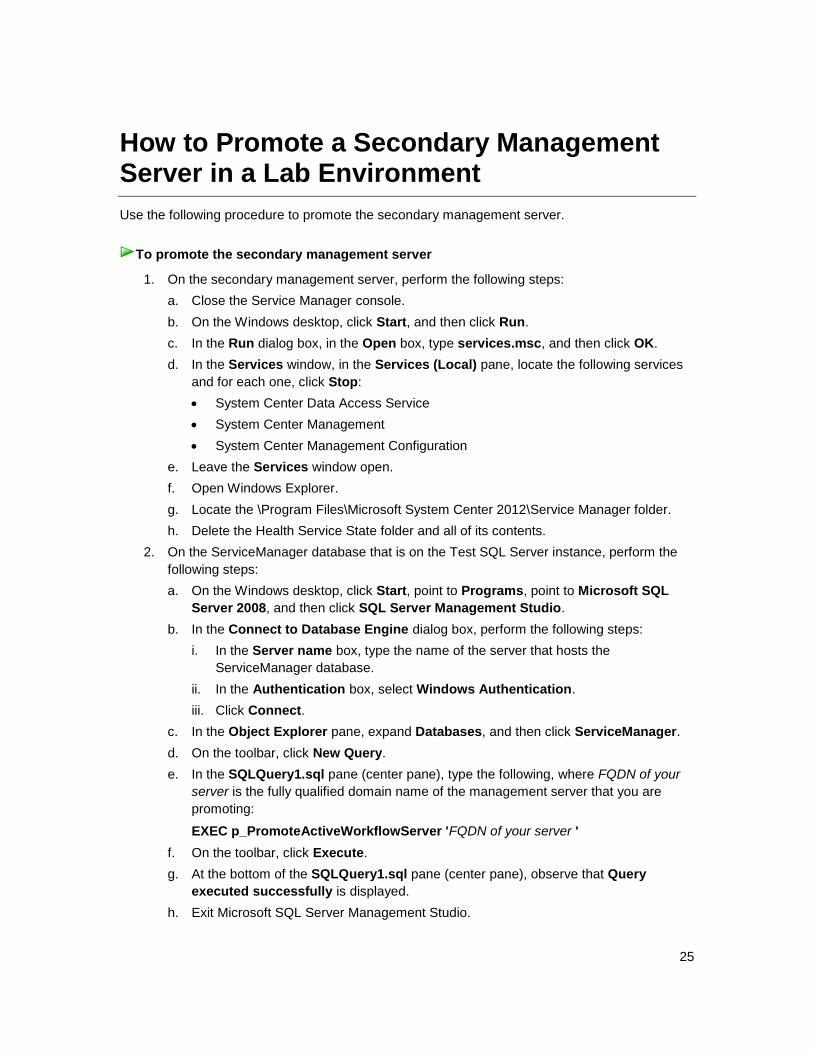
How to Promote a Secondary Management Server in a Lab Environment
Use the following procedure to promote the secondary management server.
1. On the secondary management server, perform the following steps:
a. Close the Service Manager console.
b. On the Windows desktop, click Start, and then click Run.
c. In the Run dialog box, in the Open box, type services.msc, and then click OK.
d. In the Services window, in the Services (Local) pane, locate the following services
and for each one, click Stop:
System Center Data Access Service
System Center Management
System Center Management Configuration
e. Leave the Services window open.
f. Open Windows Explorer.
g. Locate the \Program Files\Microsoft System Center 2012\Service Manager folder.
h. Delete the Health Service State folder and all of its contents.
2. On the ServiceManager database that is on the Test SQL Server instance, perform the
following steps:
a. On the Windows desktop, click Start, point to Programs, point to Microsoft SQL
Server 2008, and then click SQL Server Management Studio.
b. In the Connect to Database Engine dialog box, perform the following steps:
i. In the Server name box, type the name of the server that hosts the
ServiceManager database.
ii. In the Authentication box, select Windows Authentication.
iii. Click Connect.
c. In the Object Explorer pane, expand Databases, and then click ServiceManager.
d. On the toolbar, click New Query.
e. In the SQLQuery1.sql pane (center pane), type the following, where FQDN of your
server is the fully qualified domain name of the management server that you are
promoting:
EXEC p_PromoteActiveWorkflowServer 'FQDN of your server '
f. On the toolbar, click Execute.
g. At the bottom of the SQLQuery1.sql pane (center pane), observe that Query
executed successfully is displayed.
h. Exit Microsoft SQL Server Management Studio.
To promote the secondary management server
26
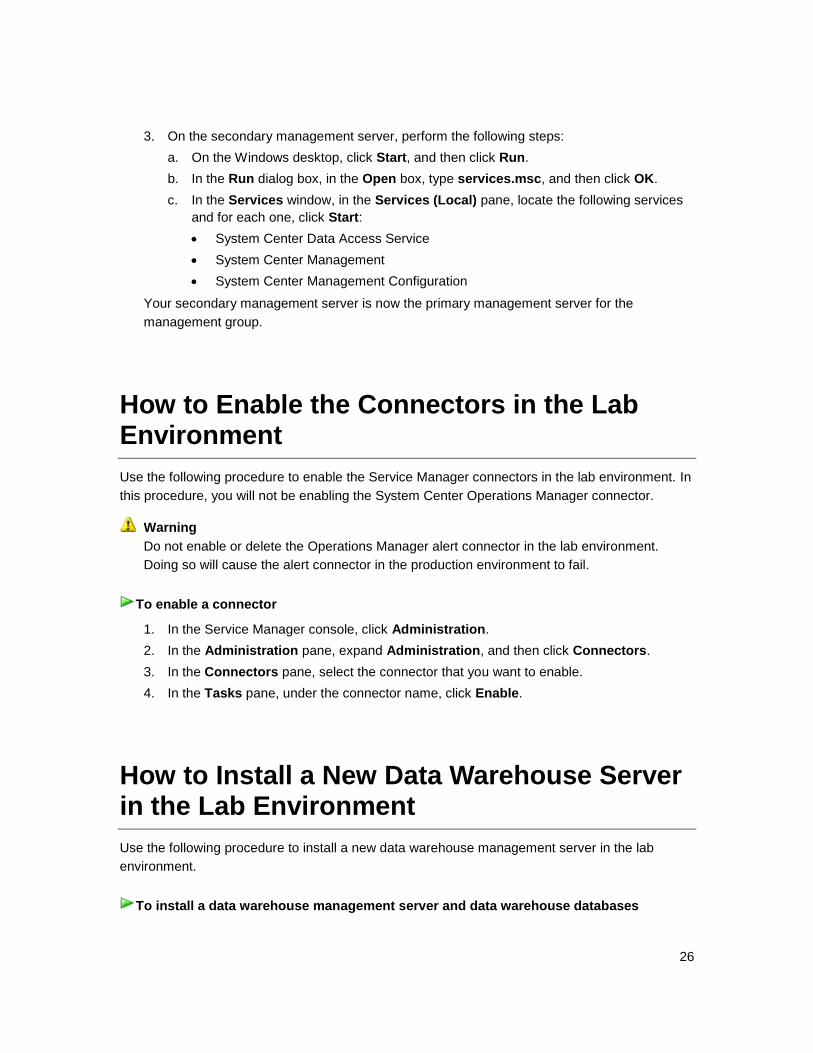
3. On the secondary management server, perform the following steps:
a. On the Windows desktop, click Start, and then click Run.
b. In the Run dialog box, in the Open box, type services.msc, and then click OK.
c. In the Services window, in the Services (Local) pane, locate the following services
and for each one, click Start:
System Center Data Access Service
System Center Management
System Center Management Configuration
Your secondary management server is now the primary management server for the
management group.
How to Enable the Connectors in the Lab Environment
Use the following procedure to enable the Service Manager connectors in the lab environment. In
this procedure, you will not be enabling the System Center Operations Manager connector.
Do not enable or delete the Operations Manager alert connector in the lab environment.
Doing so will cause the alert connector in the production environment to fail.
1. In the Service Manager console, click Administration.
2. In the Administration pane, expand Administration, and then click Connectors.
3. In the Connectors pane, select the connector that you want to enable.
4. In the Tasks pane, under the connector name, click Enable.
How to Install a New Data Warehouse Server in the Lab Environment
Use the following procedure to install a new data warehouse management server in the lab
environment.
Warning
To enable a connector
To install a data warehouse management server and data warehouse databases
27
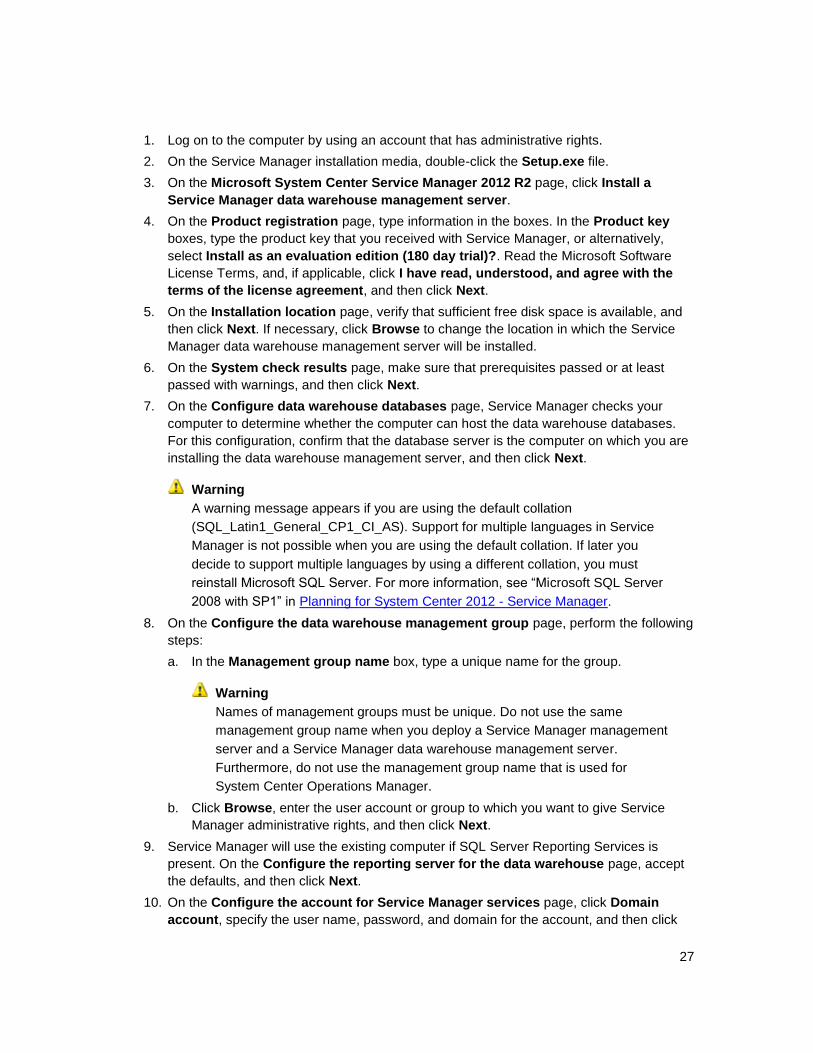
1. Log on to the computer by using an account that has administrative rights.
2. On the Service Manager installation media, double-click the Setup.exe file.
3. On the Microsoft System Center Service Manager 2012 R2 page, click Install a
Service Manager data warehouse management server.
4. On the Product registration page, type information in the boxes. In the Product key
boxes, type the product key that you received with Service Manager, or alternatively,
select Install as an evaluation edition (180 day trial)?. Read the Microsoft Software
License Terms, and, if applicable, click I have read, understood, and agree with the
terms of the license agreement, and then click Next.
5. On the Installation location page, verify that sufficient free disk space is available, and
then click Next. If necessary, click Browse to change the location in which the Service
Manager data warehouse management server will be installed.
6. On the System check results page, make sure that prerequisites passed or at least
passed with warnings, and then click Next.
7. On the Configure data warehouse databases page, Service Manager checks your
computer to determine whether the computer can host the data warehouse databases.
For this configuration, confirm that the database server is the computer on which you are
installing the data warehouse management server, and then click Next.
Warning
A warning message appears if you are using the default collation
(SQL_Latin1_General_CP1_CI_AS). Support for multiple languages in Service
Manager is not possible when you are using the default collation. If later you
decide to support multiple languages by using a different collation, you must
reinstall Microsoft SQL Server. For more information, see “Microsoft SQL Server
2008 with SP1” in Planning for System Center 2012 - Service Manager.
8. On the Configure the data warehouse management group page, perform the following
steps:
a. In the Management group name box, type a unique name for the group.
Warning
Names of management groups must be unique. Do not use the same
management group name when you deploy a Service Manager management
server and a Service Manager data warehouse management server.
Furthermore, do not use the management group name that is used for
System Center Operations Manager.
b. Click Browse, enter the user account or group to which you want to give Service
Manager administrative rights, and then click Next.
9. Service Manager will use the existing computer if SQL Server Reporting Services is
present. On the Configure the reporting server for the data warehouse page, accept
the defaults, and then click Next.
10. On the Configure the account for Service Manager services page, click Domain
account, specify the user name, password, and domain for the account, and then click

28
Test Credentials. After you receive a The credentials were accepted message, click
Next.
11. On the Configure the reporting account page, specify the user name, password, and
domain for the account, and then click Test Credentials. After you receive a The
credentials were accepted message, click Next.
12. On the Help improve System Center page, indicate your preference for participation in
the Customer Experience Improvement Program and in Error Reporting. Optionally, click
Tell me more about the program, and then click Next.
13. On the Use Microsoft Update to help keep your computer secure and up-to-date
page, indicate your preference for using Microsoft Update to check for Service Manager
updates, and then click Next.
14. On the Installation summary page, click Install.
1. On the computer that is hosting the data warehouse management server (the server on
which you ran Setup), run services.msc, and verify that the following services have been
installed:
System Center Data Access Service
System Center Management
System Center Management configuration
2. On the computer that is hosting the data warehouse databases, click Start, point to
Programs, point to Microsoft SQL Server 2008, and then click SQL Server
Management Studio.
3. In the Connect to Server dialog box, select the following:
a. In the Server Type list, select Database Engine.
b. In the Server Name list, select the server and instance for your Service Manager
data warehouse database. For example, select Computer 4.
c. In the Authentication list, select Windows Authentication, and then click Connect.
4. In the Object Explorer pane, expand Databases.
5. Verify that the DWDataMart, DWRepository, and DWStagingAndConfig databases are
listed.
How to Register the Data Warehouse Server in the Lab Environment
Use the following procedure to register the newly installed data warehouse server with the lab
Service Manager environment.
To validate the installation of a data warehouse management server

29
1. Log on to the computer that hosts the Service Manager console. Use an account that is a
member of the Service Manager and data warehouse management administrators group.
2. In the Service Manager console, click Administration.
3. In the Administration pane, expand Administration.
4. In the Administration view, in the Register with Service Manager’s Data Warehouse
area, click Register with Service Manager Data Warehouse.
5. In the Data Warehouse Registration wizard, on the Before You Begin page, click Next.
6. On the Data Warehouse page, in the Server name box, type the fully qualified domain
name of the computer that is hosting the data warehouse management server, and then
click Test Connection. If the test is successful, click Next.
7. On the Credentials page, you can accept the default entry in the Run as account list,
and then click Next, or you can enter credentials from a user or group of your own
choosing.
Important
The account that you specify will be assigned administrative credentials on the
Service Manager management server and granted Read permission on the
Service Manager database. You can specify different credentials from other
Service Manager management groups when you are registering with the data
warehouse.
8. On the Summary page, click Create.
9. On the Completion page, when The data warehouse registration succeeded appears,
click Close.
10. A dialog box states that the report deployment process has not finished. In the System
Center Service Manager dialog box, click OK.
11. In a few minutes, after you close the Data Warehouse Registration wizard, the Data
Warehouse button appears in the Service Manager console. In the Service Manager
console, click the arrow at the lower-right corner of the Service Manager console buttons,
and then click Show More Buttons.
You can use a Windows PowerShell command to complete this task. For information about
how to use Windows PowerShell to register Service Manager management groups with the
data warehouse, see Add-SCDWMgmtGroup
(http://go.microsoft.com/fwlink/?LinkId=203096).
1. On the computer that is hosting the data warehouse management server, start Windows
PowerShell by using administrative credentials.
2. At the Windows PowerShell command prompt, type the following commands, and then
press Enter.
Set-ExecutionPolicy RemoteSigned
To register a data warehouse
To validate the data warehouse registration process
30
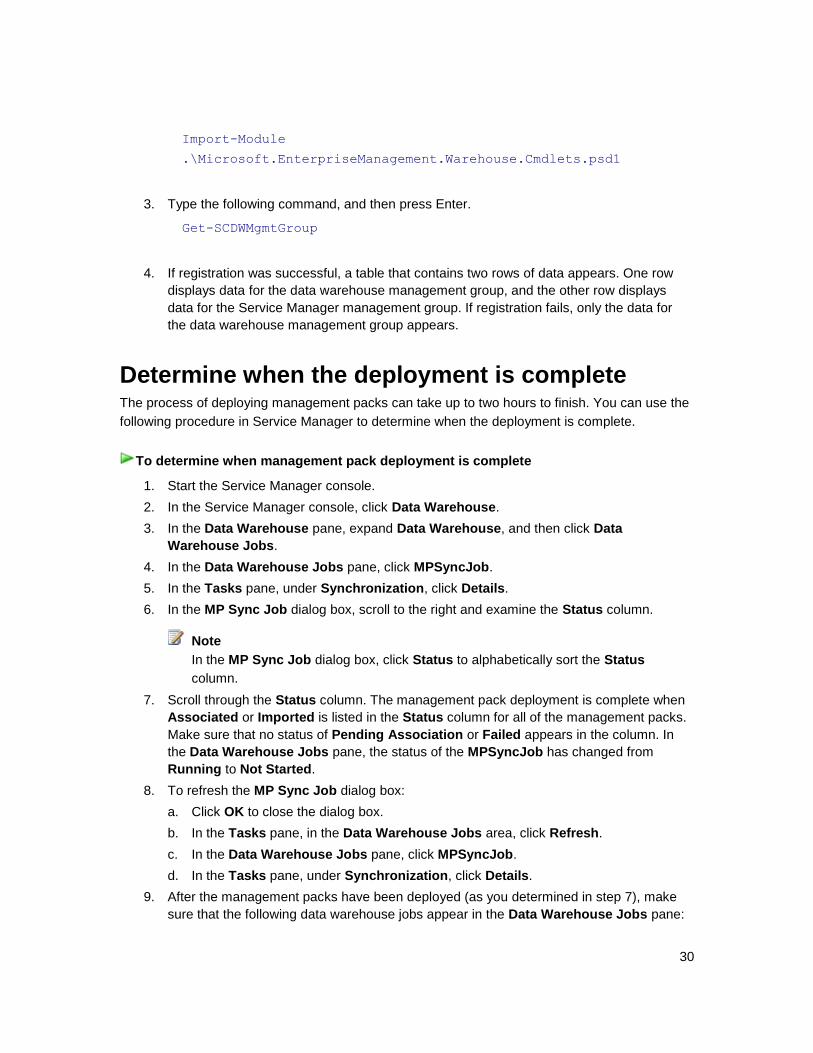
Import-Module
.\Microsoft.EnterpriseManagement.Warehouse.Cmdlets.psd1
3. Type the following command, and then press Enter.
Get-SCDWMgmtGroup
4. If registration was successful, a table that contains two rows of data appears. One row
displays data for the data warehouse management group, and the other row displays
data for the Service Manager management group. If registration fails, only the data for
the data warehouse management group appears.
Determine when the deployment is complete The process of deploying management packs can take up to two hours to finish. You can use the
following procedure in Service Manager to determine when the deployment is complete.
1. Start the Service Manager console.
2. In the Service Manager console, click Data Warehouse.
3. In the Data Warehouse pane, expand Data Warehouse, and then click Data
Warehouse Jobs.
4. In the Data Warehouse Jobs pane, click MPSyncJob.
5. In the Tasks pane, under Synchronization, click Details.
6. In the MP Sync Job dialog box, scroll to the right and examine the Status column.
Note
In the MP Sync Job dialog box, click Status to alphabetically sort the Status
column.
7. Scroll through the Status column. The management pack deployment is complete when
Associated or Imported is listed in the Status column for all of the management packs.
Make sure that no status of Pending Association or Failed appears in the column. In
the Data Warehouse Jobs pane, the status of the MPSyncJob has changed from
Running to Not Started.
8. To refresh the MP Sync Job dialog box:
a. Click OK to close the dialog box.
b. In the Tasks pane, in the Data Warehouse Jobs area, click Refresh.
c. In the Data Warehouse Jobs pane, click MPSyncJob.
d. In the Tasks pane, under Synchronization, click Details.
9. After the management packs have been deployed (as you determined in step 7), make
sure that the following data warehouse jobs appear in the Data Warehouse Jobs pane:
To determine when management pack deployment is complete
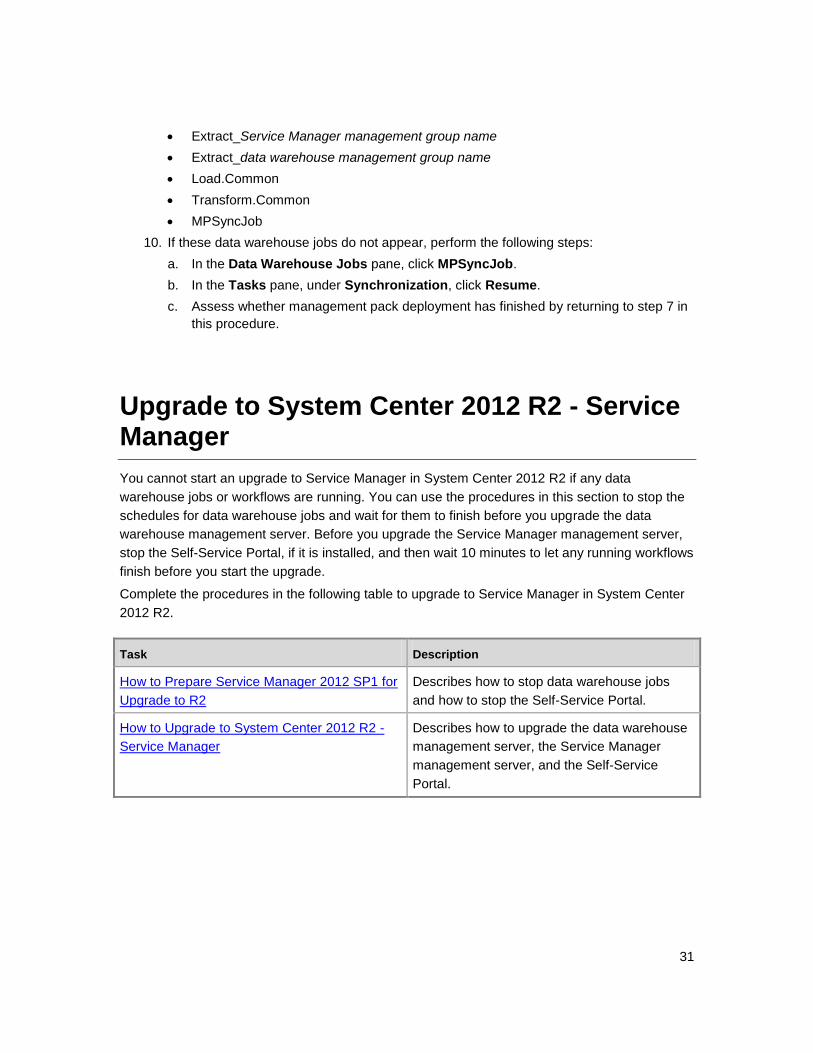
31
Extract_Service Manager management group name
Extract_data warehouse management group name
Load.Common
Transform.Common
MPSyncJob
10. If these data warehouse jobs do not appear, perform the following steps:
a. In the Data Warehouse Jobs pane, click MPSyncJob.
b. In the Tasks pane, under Synchronization, click Resume.
c. Assess whether management pack deployment has finished by returning to step 7 in
this procedure.
Upgrade to System Center 2012 R2 - Service Manager
You cannot start an upgrade to Service Manager in System Center 2012 R2 if any data
warehouse jobs or workflows are running. You can use the procedures in this section to stop the
schedules for data warehouse jobs and wait for them to finish before you upgrade the data
warehouse management server. Before you upgrade the Service Manager management server,
stop the Self-Service Portal, if it is installed, and then wait 10 minutes to let any running workflows
finish before you start the upgrade.
Complete the procedures in the following table to upgrade to Service Manager in System Center
2012 R2.
Task Description
How to Prepare Service Manager 2012 SP1 for
Upgrade to R2
Describes how to stop data warehouse jobs
and how to stop the Self-Service Portal.
How to Upgrade to System Center 2012 R2 -
Service Manager
Describes how to upgrade the data warehouse
management server, the Service Manager
management server, and the Self-Service
Portal.
32
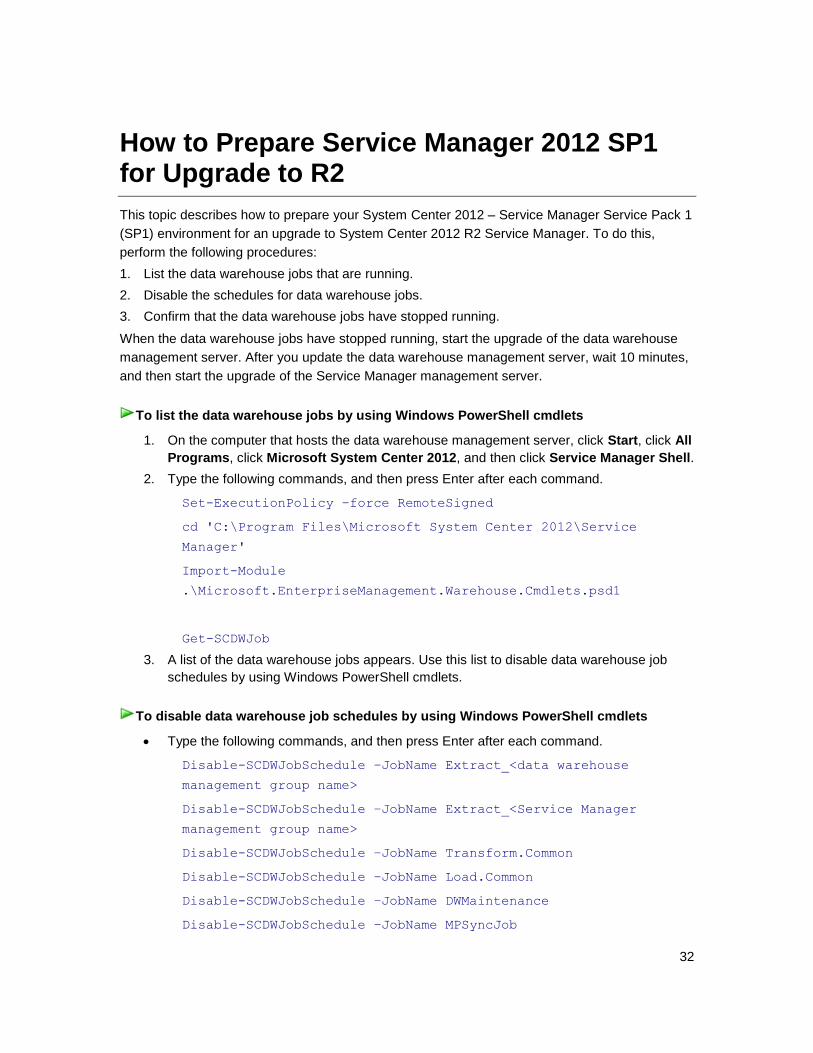
How to Prepare Service Manager 2012 SP1 for Upgrade to R2
This topic describes how to prepare your System Center 2012 – Service Manager Service Pack 1
(SP1) environment for an upgrade to System Center 2012 R2 Service Manager. To do this,
perform the following procedures:
1. List the data warehouse jobs that are running.
2. Disable the schedules for data warehouse jobs.
3. Confirm that the data warehouse jobs have stopped running.
When the data warehouse jobs have stopped running, start the upgrade of the data warehouse
management server. After you update the data warehouse management server, wait 10 minutes,
and then start the upgrade of the Service Manager management server.
1. On the computer that hosts the data warehouse management server, click Start, click All
Programs, click Microsoft System Center 2012, and then click Service Manager Shell.
2. Type the following commands, and then press Enter after each command.
Set-ExecutionPolicy –force RemoteSigned
cd 'C:\Program Files\Microsoft System Center 2012\Service
Manager'
Import-Module
.\Microsoft.EnterpriseManagement.Warehouse.Cmdlets.psd1
Get-SCDWJob
3. A list of the data warehouse jobs appears. Use this list to disable data warehouse job
schedules by using Windows PowerShell cmdlets.
Type the following commands, and then press Enter after each command.
Disable-SCDWJobSchedule –JobName Extract_<data warehouse
management group name>
Disable-SCDWJobSchedule –JobName Extract_<Service Manager
management group name>
Disable-SCDWJobSchedule –JobName Transform.Common
Disable-SCDWJobSchedule –JobName Load.Common
Disable-SCDWJobSchedule –JobName DWMaintenance
Disable-SCDWJobSchedule –JobName MPSyncJob
To list the data warehouse jobs by using Windows PowerShell cmdlets
To disable data warehouse job schedules by using Windows PowerShell cmdlets
33
Start-SCDWJob –JobName MPSyncJob
The last command to start the MPSyncJob will enable the extraction, transformation, and
loading (ETL) jobs to run to completion. After that, because all the schedules have been
disabled, the jobs will stop. To close the Windows PowerShell window, type exit.
1. In the Service Manager console, click Data Warehouse.
2. In the Data Warehouse pane, expand Data Warehouse, and then click Data
Warehouse Jobs.
3. In the Data Warehouse Jobs pane, observe the Status column for each data
warehouse job. When the status for each job is listed as Not Started, proceed to the next
procedure to stop the Self-Service Portal. If no Self-Service Portal exists in your
environment, you can start the upgrade process as described in How to Upgrade to
System Center 2012 R2 - Service Manager.
How to Upgrade to System Center 2012 R2 - Service Manager
You can use the following procedures to upgrade your System Center 2012 Service Pack 1 (SP1)
- Service Manager environment to Service Manager in System Center 2012 R2. These
procedures include steps for upgrading the data warehouse management server, the Service
Manager management server, and the Service Manager console. If you use the chargeback
feature, ensure that use the “To prepare for chargeback” procedure to prepare your Service
Manager management server.
Data warehouse management server Use the following procedure to upgrade the data warehouse management server.
Make sure that you have stopped the data warehouse jobs before you continue. For
more information, see How to Prepare Service Manager 2012 SP1 for Upgrade to R2.
1. Log on to the computer that will host the data warehouse management server by using
an account that is a member of the Administrators group. This account must also be a
local administrator.
2. On the Service Manager installation media, double-click the Setup.exe file to start the
Service Manager Setup Wizard.
To confirm that the data warehouse jobs have stopped running
Important
To upgrade the data warehouse management server
34
3. On the Microsoft System Center 2012 R2 page, click Upgrade Service Manager data
warehouse management server.
4. On the Prepare for upgrade page, select the two items that indicate that you have read
the appropriate sections in the System Center 2012 – Service Manager Upgrade Guide,
and then click Next.
5. On the Product registration page, type the appropriate information in the boxes. Read
the Microsoft Software License Terms, and, if applicable, click I have read, understood,
and agree with the terms of the license agreement, and then click Next.
6. On the System check results page, ensure that the prerequisite check passed or at
least passed with warnings, and then click Next.
7. On the Configure Analysis Service for OLAP cubes page, in the Database server
box, type the computer name of the server that will host the Microsoft SQL Server
Analysis Services database, and then press the Tab key. When Default appears in the
SQL Server instance box, click Next.
Important
If you are installing Analysis Services on a computer other than the computer that
hosts the data warehouse management server and a firewall exists in your
environment, you must make sure that the proper firewall ports are opened. For
more information, see Port Assignments for System Center 2012 - Service
Manager.
8. On the Configure Analysis Services credential page, specify the user name,
password, and domain for the account, and then click Test Credentials. After you
receive a message that says that the credentials were accepted, click Next.
9. On the Help improve System Center page, indicate your preference for participation in
the Customer Experience Improvement Program and in Error Reporting. Optionally, click
Tell me more about the program, and then click Next.
10. On the Use Microsoft Update to help keep your computer secure and up-to-date
page, indicate your preference for using Microsoft Update to check for Service Manager
updates, and then click Next.
11. On the Configuration Summary page, if the information that appears is accurate, click
Install.
12. On the The upgrade was completed successfully page, if you have already backed up
the encryption key, clear the Open the Encryption Backup or Restore Wizard check
box, and then click Close.
Service Manager management server Use the following procedures to upgrade the Service Manager management server and prepare it
for chargeback.
1. Log on to the computer that will host the Service Manager management server by using
To upgrade the Service Manager management server
35
an account that is a member of the Administrators group.
2. On the Service Manager installation media, double-click the Setup.exe file to start the
Service Manager Setup Wizard.
3. On the Microsoft System Center 2012 R2 page, click Upgrade Service Manager
management server.
4. On the Prepare for upgrade page, select the two items that indicate that you have read
the appropriate sections in the System Center 2012 – Service Manager Upgrade Guide,
and then click Next.
5. On the Product registration page, type the appropriate information in the boxes. Read
the Microsoft Software License Terms, and, if applicable, click I have read, understood,
and agree with the terms of the license agreement, and then click Next.
6. On the System check results page, ensure that the prerequisite check passed or at
least passed with warnings, and then click Next.
7. On the Configuration Summary page, if the information that appears is accurate, click
Install.
8. On the The upgrade was completed successfully page, if you have already backed up
the encryption key, clear the Open the Encryption Backup or Restore Wizard check
box, and then click Close.
1. On the server running System Center 2012 R2 Virtual Machine Manager, copy the
following management packs from their installed location, by default
InstallationDrive:\Program Files\Microsoft System Center 2012 R2\Virtual Machine
Manager\ManagementPacks to a folder on the server running the Service Manager
management server.
Microsoft.SystemCenter.VirtualMachineManager.PRO.Library (3.2.7510.0)
Microsoft.SystemCenter.VirtualMachineManager.PRO.V2.Library (3.2.7510.0)
Microsoft.SystemCenter.VirtualMachineManager.Pro.2008.Library (3.2.7510.0)
Microsoft.SystemCenter.VirtualMachineManager.Library (3.2.7510.0)
Microsoft.SystemCenter.VirtualMachineManager.2012.Discovery (3.2.7510.0)
2. Start the Service Manager console and navigate to Administration, Management
Packs.
3. Import the management packs that you copied to the Service Manager management
server.
Service Manager Console Use the following procedure to upgrade the Service Manager console.
1. Log on to the computer that will host the Service Manager console by using an account
To prepare for chargeback
To upgrade the Service Manager Console
36
that is a member of the Administrators group.
2. On the Service Manager installation media, double-click the Setup.exe file to start the
Service Manager Setup Wizard.
3. On the Microsoft System Center 2012 R2 page, click Upgrade Service Manager
console.
4. On the Prepare for upgrade page, select the two items that indicate that you have read
the appropriate sections in the System Center 2012 – Service Manager Upgrade Guide,
and then click Next.
5. On the Product registration page, read the Microsoft Software License Terms, and, if
applicable, click I have read, understood, and agree with the terms of the license
agreement, and then click Next.
6. On the System check results page, ensure that the prerequisite check passed or at
least passed with warnings, and then click Next.
7. On the Configuration Summary page, if the information that appears is accurate, click
Install.
8. On The upgrade was completed successfully page, click Close.
After Upgrading to System Center 2012 R2 - Service Manager
This topic describes the actions you need to take after you upgrade to System Center 2012 R2
Service Manager, including the following sections:
1. How to restart the System Center Data Access Service service if it fails to start after
upgrading
2. How to start the Service Manager workflows and restart the data warehouse jobs
3. How to stop and then start Microsoft SQL Server Reporting Services after an upgrade
4. How to prepare for chargeback reports after upgrading
Restart the Data Access Service service and Service Manager workflows on the data warehouse management server If necessary, use the following procedures to restart the service and workflows.
1. On the computer that hosts the data warehouse management server, on the Windows
desktop, click Start, and then click Run.
To restart the Data Access Service service
37
2. In the Run dialog box, in Open, type services.msc, and then click OK.
3. In the Services window, in the Services (Local) pane, right-click System Center Data
Access Service, and then click Start.
1. On the computer that hosts the Service Manager management server, on the Windows
desktop, click Start, and then click Run.
2. In the Run dialog box, in Open, type services.msc, and then click OK.
3. In the Services window, in the Services (Local) pane, right-click System Center
Management, and then click Start.
Restart data warehouse jobs After you upgrade the data warehouse management server, you might need to restart the data
warehouse (extraction, transformation, and loading [ETL]) jobs. You can use the following
procedure to restart the data warehouse jobs. In this procedure, you enable data warehouse job
schedules by using Windows PowerShell® cmdlets.
1. On the computer that hosts the data warehouse management server, click Start, point to
Programs, point to Accessories, click Windows PowerShell, right-click Windows
PowerShell, and then click Run as administrator.
2. Type the following commands, and then press Enter after each command.
Note
The following command examples assume that Service Manager was installed in
its default location on the C: drive. If necessary, change directories to the location
where you installed Service Manager.
cd 'C:\Program Files\Microsoft System Center 2012\Service
Manager'
import-module
$PWD/Microsoft.EnterpriseManagement.Warehouse.Cmdlets.psd1
Get-SCDWJob
Enable-SCDWJobSchedule –JobName Extract_<data warehouse
management group name>
Enable-SCDWJobSchedule –JobName Extract_<Service Manager
management group name>
Enable-SCDWJobSchedule –JobName Transform.Common
Enable-SCDWJobSchedule –JobName Load.Common
Enable-SCDWJobSchedule –JobName DWMaintenance
To start Service Manager workflows
To restart data warehouse jobs

38
Enable-SCDWJobSchedule –JobName MPSyncJob
Start-SCDWJob –JobName MPSyncJob
The last command, Start-SCDWJob – JobName MPSyncJob, enables the ETL jobs to
run.
Stop and then start SQL Server Reporting Services After you perform an upgrade to Service Manager in System Center 2012 R2, use the following
procedure to stop and then start SQL Server Reporting Services.
1. On the computer that hosts SQL Server Reporting Services, on the Windows desktop,
click Start, and then click Run.
2. In the Run dialog box, type services.msc, and then click OK.
3. In the Services window, in the Services (Local) pane, right-click SQL Server Reporting
Services, and then click Stop.
4. In the Services window, in the Services (Local) pane, right-click SQL Server Reporting
Services, and then click Start.
Prepare for chargeback reports When you try to use chargeback after you have upgraded to Service Manager, your Operations
Manager CI connector might stop synchronizing new Virtual Machine Manager objects, such as
VMM clouds, if the VMM Server was upgraded to System Center 2012 R2 Virtual Machine
Manager. This occurs because Service Manager does not have the correct version of the VMM
management packs.
Additionally, installing chargeback report files to the System Center 2012 R2 Operations Manager
management server might fail after you upgrade System Center 2012 R2 Service Manager
because the Dependencies folder does not contain the required management pack files.
Use the following procedures to prepare for chargeback reports.
1. On the server running System Center 2012 R2 Virtual Machine Manager, copy the
following management packs from their installed location, by default
InstallationDrive:\Program Files\Microsoft System Center 2012 R2\Virtual Machine
Manager\ManagementPacks, to a folder on the server running the Service Manager
management server.
Microsoft.SystemCenter.VirtualMachineManager.PRO.Library
Microsoft.SystemCenter.VirtualMachineManager.PRO.V2.Library
To stop and then start SQL Server Reporting Services
To prepare Service Manager for chargeback reports
39
Microsoft.SystemCenter.VirtualMachineManager.Pro.2008.Library
Microsoft.SystemCenter.VirtualMachineManager.Library
Microsoft.SystemCenter.VirtualMachineManager.2012.Discovery
2. Start the Service Manager console and navigate to Administration, Management
Packs.
3. Import the management packs that you copied to the Service Manager management
server.
1. On the server running System Center 2012 R2 Virtual Machine Manager, copy the
following management packs from their installed location, by default
InstallationDrive:\Program Files\Microsoft System Center 2012 R2\Virtual Machine
Manager\ManagementPacks, to a folder on the Operations Manager management
server.
Microsoft.SystemCenter.VirtualMachineManager.PRO.Library
Microsoft.SystemCenter.VirtualMachineManager.PRO.V2.Library
Microsoft.SystemCenter.VirtualMachineManager.Pro.2008.Library
Microsoft.SystemCenter.VirtualMachineManager.Library
Microsoft.SystemCenter.VirtualMachineManager.2012.Discovery
2. Start the Operations Manager console and navigate to Administration, Management
Packs.
3. Import the management packs that you copied to the Service Manager management
server and then in the Online Catalog Connection dialog box, click Yes to search the
catalog for dependencies that might not be available locally.
Failed Upgrade in System Center 2012 R2 - Service Manager
An upgrade to Service Manager in System Center 2012 R2 might not finish successfully. The
steps that you take to recover from a failed upgrade depend on the phase of the upgrade in which
the failure occurs:
Failure occurs during the prerequisite check.
Failure occurs during predicted checks.
Failure occurs in an unpredictable manner before permanent changes are made to a
management server.
Failure occurs in an unpredictable manner after permanent changes are made to a
management server.
Failure occurs in an unpredictable manner after permanent changes are made to a database.
To prepare Operations Manager for chargeback reports
40
The upgrade might also fail because startup of the System Center Management Configuration
service times out.
Failure occurs during the prerequisite check Before the installation of Service Manager in System Center 2012 R2 begins, the system
conducts a prerequisite check for certain requirements. If the system finds a condition in which
Service Manager in System Center 2012 R2 will continue to function, you receive a warning.
Warnings are identified with an exclamation point (!) in a yellow triangle. Conditions that the
system has identified as a warning will not prevent you from installing Service Manager.
If the system finds a condition that is an absolute requirement, a failure indication appears.
Failure indications are identified with an X in a red circle.
If either a warning or a failure indication appears, you can either cancel the installation and make
the necessary changes, or make the appropriate changes and then click Check prerequisites
again and continue with the installation. You must correct all failure conditions before the
installation or upgrade can proceed.
Failure occurs during predicted checks After you correct any failures that the system identified during the prerequisite check, you can
click Next on the Prerequisites page of the wizard to start the upgrade or installation of Service
Manager. The system checks for the following conditions during the installation or upgrade
process:
The data warehouse database that you specified exists.
The computer running Microsoft SQL Server that you specified is not running Microsoft
SQL Server 2008 Service Pack 1 (SP1), SQL Server 2008 Service Pack 2 (SP2), or
SQL Server 2008 R2.
The hard disk drive that you specified for a database has at least 1 gigabyte (GB) of free
space.
The System Center Data Access Service service can log on with the set of credentials that
you supplied.
The System Center Management Configuration service can log on with the set of credentials
that you supplied.
There is enough free disk space to install the upgraded files.
Setup can access the file location for the Service Manager installation.
If failures occur during these types of checks, you can make the appropriate changes. For
example, you can specify a hard disk location that has sufficient space, and then on the Warning
page, click Retry to continue the installation.
41
Failure occurs in an unpredictable manner before permanent changes are made to a management server If an error occurs before permanent changes are made to the Service Manager management
server or data warehouse management server—for example, before changes are made to the
Structured Query Language (SQL) database or before management packs are imported—the
error message that appears includes a Retry button. In this situation, you can correct the issue
and then retry the installation or upgrade.
Failure occurs in an unpredictable manner after permanent changes are made to a management server If an error occurs after permanent changes are made to the Service Manager management
server or data warehouse management server—for example, after changes are made to the SQL
database or after management packs are imported—the error message that appears does not
include a Retry button. In this situation, you must reinstall the original version of the affected
management server.
In any case, you need the backup of the encryption key. For the Service Manager management
server, the encryption key is available only if you made a backup before you started the upgrade.
For more information, see How to Back Up the Encryption Key in Service Manager.
Failure occurs in an unpredictable manner after permanent changes are made to a database If an error occurs after permanent changes have been made to a database—for example, after
management packs are imported or any other time that data is written into the database—the
error message that appears does not include a Retry button.
At this point, your only option is to click Close and begin a disaster recovery process to restore
the database. This recovery is possible only if you backed up the database before you started the
upgrade process. For more information, see Backing Up Service Manager Databases.
Upgrade fails because Management Configuration service startup times out On some computers, Service Manager Setup fails and rolls back if it cannot start the System
Center Management Configuration service in a timely fashion. If this problem occurs, you might
see the following entries in the installation log.
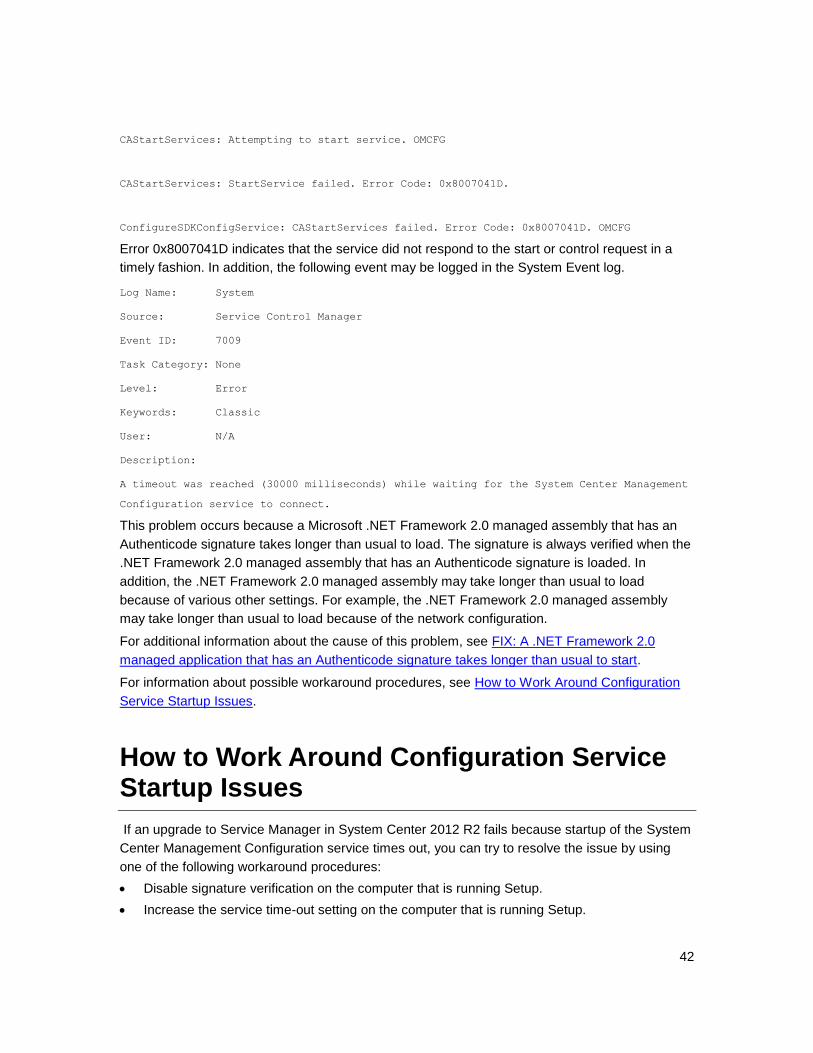
42
CAStartServices: Attempting to start service. OMCFG
CAStartServices: StartService failed. Error Code: 0x8007041D.
ConfigureSDKConfigService: CAStartServices failed. Error Code: 0x8007041D. OMCFG
Error 0x8007041D indicates that the service did not respond to the start or control request in a
timely fashion. In addition, the following event may be logged in the System Event log.
Log Name: System
Source: Service Control Manager
Event ID: 7009
Task Category: None
Level: Error
Keywords: Classic
User: N/A
Description:
A timeout was reached (30000 milliseconds) while waiting for the System Center Management
Configuration service to connect.
This problem occurs because a Microsoft .NET Framework 2.0 managed assembly that has an
Authenticode signature takes longer than usual to load. The signature is always verified when the
.NET Framework 2.0 managed assembly that has an Authenticode signature is loaded. In
addition, the .NET Framework 2.0 managed assembly may take longer than usual to load
because of various other settings. For example, the .NET Framework 2.0 managed assembly
may take longer than usual to load because of the network configuration.
For additional information about the cause of this problem, see FIX: A .NET Framework 2.0
managed application that has an Authenticode signature takes longer than usual to start.
For information about possible workaround procedures, see How to Work Around Configuration
Service Startup Issues.
How to Work Around Configuration Service Startup Issues
If an upgrade to Service Manager in System Center 2012 R2 fails because startup of the System
Center Management Configuration service times out, you can try to resolve the issue by using
one of the following workaround procedures:
Disable signature verification on the computer that is running Setup.
Increase the service time-out setting on the computer that is running Setup.
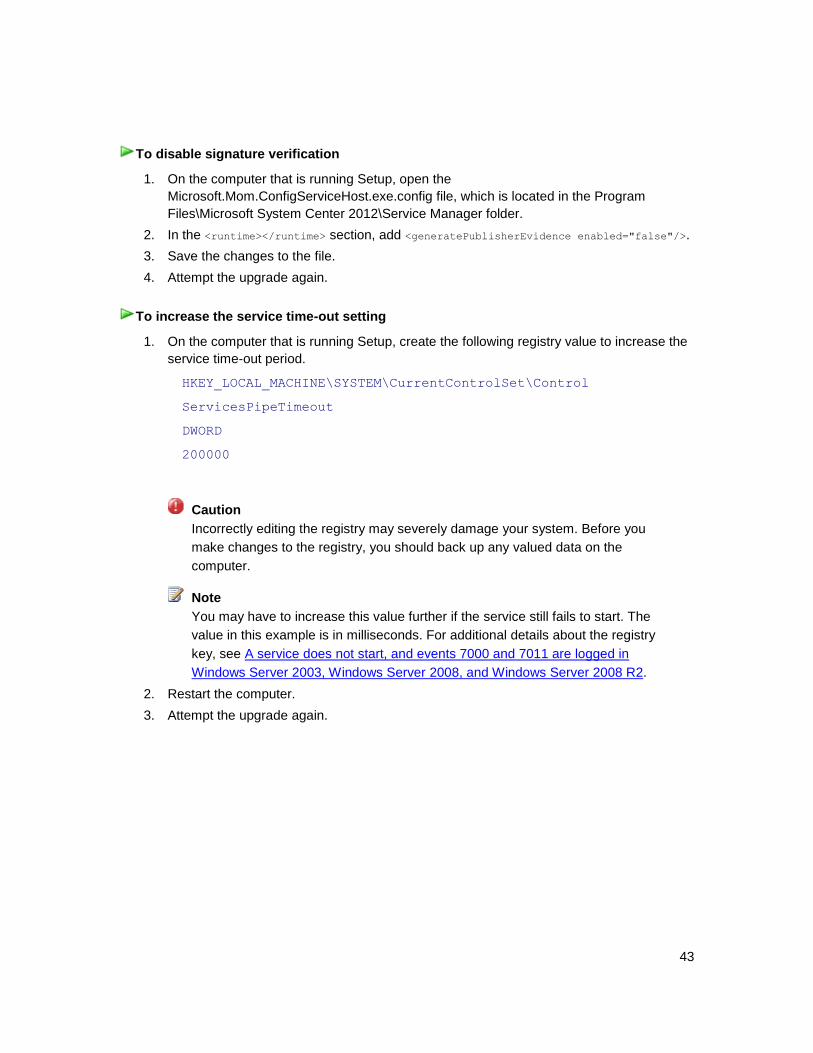
43
1. On the computer that is running Setup, open the
Microsoft.Mom.ConfigServiceHost.exe.config file, which is located in the Program
Files\Microsoft System Center 2012\Service Manager folder.
2. In the <runtime></runtime> section, add <generatePublisherEvidence enabled="false"/>.
3. Save the changes to the file.
4. Attempt the upgrade again.
1. On the computer that is running Setup, create the following registry value to increase the
service time-out period.
HKEY_LOCAL_MACHINE\SYSTEM\CurrentControlSet\Control
ServicesPipeTimeout
DWORD
200000
Caution
Incorrectly editing the registry may severely damage your system. Before you
make changes to the registry, you should back up any valued data on the
computer.
Note
You may have to increase this value further if the service still fails to start. The
value in this example is in milliseconds. For additional details about the registry
key, see A service does not start, and events 7000 and 7011 are logged in
Windows Server 2003, Windows Server 2008, and Windows Server 2008 R2.
2. Restart the computer.
3. Attempt the upgrade again.
To disable signature verification
To increase the service time-out setting