user guide - concord...
TRANSCRIPT

Concord Technologies101 Stewart Street, Suite 1000Seattle, WA, 98101, USA Call Us: +1 206-441-3346Fax: +1 206-441-7965concordfax.com
FAX ONLINE ADMINISTRATORUSER GUIDE

Fax Online Administrator User Guide | concordfax.com | [email protected] | +1 (206)-441-3346 2
Contents
Publication Notice ..................................................................................... 3Version ..................................................................................................... 3Concord Fax Online .................................................................................. 4Concord Web Portal .................................................................................. 5 Login ............................................................................................ 5Dashboard ................................................................................................ 6 Fax Number Inventory .................................................................. 8 Adding Fax Number Inventory ...................................................... 9Settings ....................................................................................................11 Account Hierarchy .......................................................................11 Account Settings (Company & Department Levels) .....................12 Inbound Fax Preferences .............................................. 13 Coverpage Preferences ..................................................14 Notification Preferences ................................................ 16 Fax Delivery Notifications ............................................. 16 Welcome Messages .......................................................17 Date & Time Display Preferences .................................. 18 Department-Level Settings ........................................... 19 Adding a Department .................................................... 20 Deleting a Department .................................................. 21 Managing a Department ................................................ 21 Account Settings (User Level) .................................................... 22 Adding a User ............................................................... 22 Deleting a User ............................................................. 24 Managing a User ........................................................... 25 Temporarily Suspending a User .................................... 25 Fax Online Administrator Settings .............................................. 26 Administrator Rights ..................................................... 29 Number Porting .......................................................................... 32 Initiating a New Port Request ........................................ 32 Tracking a Current Port ................................................. 36Reports ................................................................................................... 39 Outbound Activity ...................................................................... 39 Resending a Fax from the Concord Web Portal ............ 40 Inbound Activity ......................................................................... 42 Requeue a Received Fax from the Concord Web Portal ...................................................... 42 Accounting ................................................................................. 43Appendix A – Fax Error Code Descriptions ............................................. 44Getting Help ............................................................................................ 46About Concord ........................................................................................ 47

Fax Online Administrator User Guide | concordfax.com | [email protected] | +1 (206)-441-3346 3
PUBLICATION NOTICE
The contents of this publication and the specifications of this application are subject to change without notice.
Concord reserves the right to make changes without notice to this publication, Concord software, and services, and shall not be responsible for any damages, consequential or otherwise, caused by reliance on the materials presented herein, including typographical errors.
This is the first edition of this publication.
VERSION
2.0.1 (2014)
Fax Online Administrator User Guide | concordfax.com | [email protected] | +1 (206)-441-3346 4
CONCORD FAX ONLINE
Concord Fax Online is a business-class fax service that provides hosted fax capabilities with unparalleled reliability, security, and speed. As a Fax Online administrator, you will have access to the Concord Web Portal, a web-based
application allowing you to create and completely manage Fax Online users, as well as access activity reports for all of your inbound and outbound fax traffic.
Fax Online administrators are typically established and authorized upon the initial creation of your Fax Online account. If you do not have administrative credentials, please contact Concord Premium Support ([email protected]) and they will work with your organization’s main, business contact in order to provision administrative credentials for you.
Additional administrators can be created by anyone with Company-level administrative access. Administrators are also able to create, “Departments”, or sub-groups within your Company account, and authorize new administrators with access restricted to a designated Department. ◆
Fax Online Administrator User Guide | concordfax.com | [email protected] | +1 (206)-441-3346 5
CONCORD WEB PORTAL
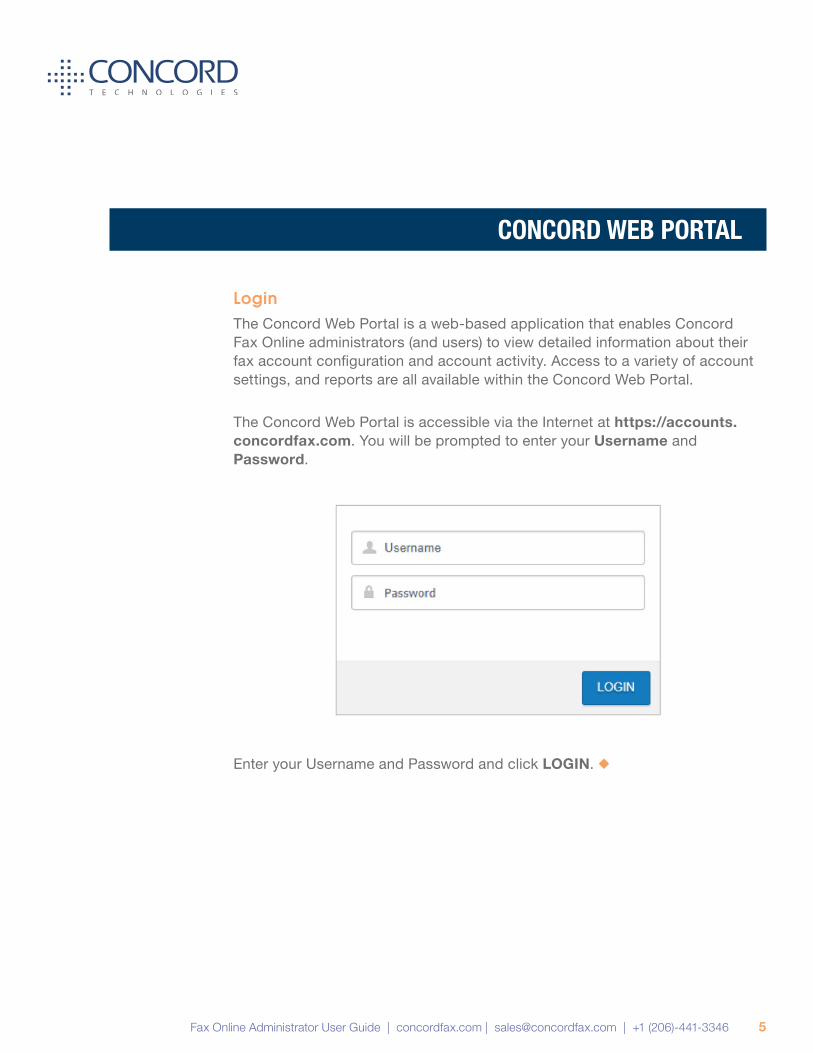
LoginThe Concord Web Portal is a web-based application that enables Concord Fax Online administrators (and users) to view detailed information about their fax account configuration and account activity. Access to a variety of account settings, and reports are all available within the Concord Web Portal.
The Concord Web Portal is accessible via the Internet at https://accounts.concordfax.com. You will be prompted to enter your Username and Password.
Enter your Username and Password and click LOGIN. ◆

Fax Online Administrator User Guide | concordfax.com | [email protected] | +1 (206)-441-3346 6
DASHBOARD
The home screen of the Concord Web Portal consists of a “Dashboard” overview of your Company-level account. A graph of inbound and outbound pages is displayed in the top left portion of the home screen. Outbound traffic is noted in green; inbound
traffic is noted in orange.
Note that you are able to set date ranges within the filter at the top left of the graph:
By clicking on the Settings icon ( ), you are able to further modify your filter settings by Hour, Day, and Month.

Fax Online Administrator User Guide | concordfax.com | [email protected] | +1 (206)-441-3346 7
In the lower left portion of the Dashboard, you will see a map of your outbound Top Destinations.
Note that you are able to use the +/- “Zoom” feature to view particular geographic locations. By clicking on the icon, you are able to see a general overview of your outbound activity:
To the right of the map, you will see these destinations listed as Top Areas.

Fax Online Administrator User Guide | concordfax.com | [email protected] | +1 (206)-441-3346 8
Fax Number InventoryIn the top right portion of the Dashboard, you will see the Fax Pool Overview: an overview of your Unassigned, Assigned, and Pending fax number inventory, broken down by Fax Pool Location. By default, your inventory is sorted alpha-numerically by Fax Pool Location. You may also sort the columns by the other values by clicking on Unassigned, Assigned, and Pending, respectively:
By clicking on any of the numeric values, you are able to see a list of all inventory in each of the Unassigned, Assigned, and Pending fax pools:

Fax Online Administrator User Guide | concordfax.com | [email protected] | +1 (206)-441-3346 9
Adding Fax Number InventoryAs a Fax Online Administrator, you are able to order additional inventory directly through the Concord Web Portal. To obtain additional inventory, click the Request Fax Pool button below the Fax Pool Overview.
By selecting the Country of the desired inventory location, you will be prompted to select information from drop-down menus to select your desired inventory. By selecting “United States”, or “Canada”, you will be prompted to select the State or Province of your desired inventory. For other countries, the inventory areas should be listed directly under the “Country”.
After you have selected the “State”, a list of all available area codes will be populated (often accompanied by the city associated with them). After selecting the desired area code and city, a drop-down of available fax numbers will be listed.

Fax Online Administrator User Guide | concordfax.com | [email protected] | +1 (206)-441-3346 10
Select the numbers that you wish to add and click, Add Pool. You may de-select a number after clicking on the “x” to the right of the fax number.*
Note that there is a maximum inventory threshold established by your organization’s main point-of-contact. If you exceed this limit, a warning pop-up will be displayed. Your inventory threshold can be increased/decreased by Concord Premium Support ([email protected]). ◆

Fax Online Administrator User Guide | concordfax.com | [email protected] | +1 (206)-441-3346 11
SETTINGS
To access the account settings for your Company, Department, User, and Administrator accounts, select, Settings in the menu bar.
Account HierarchyYour Concord Fax Online account is set up in the following hierarchical order: Company/Department/User. Additionally, there is the option to add a Department within a Department. Default account settings can be set at each of these hierarchical levels. Settings made at the most granular level will ultimately be followed (i.e., settings made directly at the User level will override settings made at the Department or Company levels). To see an overview of your Concord Fax Online hierarchy, click the Settings icon ( ) in the menu bar, and select Account Administration.
For demonstration purposes, “Concord Portal Demonstration” is the name of the “Company” level. Beneath the Company level, there are three Departments: “Finance”, “Human Resources”, and “Operations”. You are able to further see individual end users within each Department by clicking on any of the Departments. Below the Departments, you will see a list of authorized Fax Online administrators.

Fax Online Administrator User Guide | concordfax.com | [email protected] | +1 (206)-441-3346 12
Account Settings (Company & Department Levels)To view the Fax Online settings at the Company level, right click on your company name, and a drop down will appear, listing Company Details, Add Department, Add User Account, and Add Administrator.
Select Company Details to view the settings. Four (4) tabbed settings will appear on the right-hand side of your screen:

Fax Online Administrator User Guide | concordfax.com | [email protected] | +1 (206)-441-3346 13
Inbound Fax Preferences
The first tab, Fax, concerns the default settings for inbound fax messages.
By default, inbound messages are sent as PDF files. Inbound messages may also be received in the following file formats:
• TIF (.tif)
• XPS (.xps)
• TIF-HiRes (High-Resolution TIF File)
• TIF-Fax (standard TIF with “.fax” extension)
To change the default file type, select the desired file type and click Save on the top left-hand side of the menu bar.
There are three additional settings that you may wish to set as defaults:
• Fax Page Separation. Multiple-page faxes will be separated into separate, single-page files.

Fax Online Administrator User Guide | concordfax.com | [email protected] | +1 (206)-441-3346 14
• Require SPF Record. Requires SPF (Sender Policy Framework) record.
• Add Metadata. Triggers additional XML file to be added to email, containing event data specific to the received fax.
By default, none of these options are enabled. To enable any of these options, check the appropriate box and click Save on the top left-hand side of the menu bar.
Note that default settings are only applied to newly created users, according to the hierarchy. Changing default behaviors will not “push” changes to users at lower hierarchical levels. To push settings from the Company level to other Departments and Users, contact Concord Premium Support.
Coverpage Preferences
The second tab concerns Coverpage preferences.
The first drop-down allows you to select the default coverpage. By default, the generic, “Concord Default” coverpage is available for your use. You also have the ability to upload a coverpage of your own creation. Additionally, Concord can design and upload for you for a nominal fee. For more information on custom coverpage creation, please contact Concord Premium Support.

Fax Online Administrator User Guide | concordfax.com | [email protected] | +1 (206)-441-3346 15
To restrict coverpages to only those coverpages directly owned by the hierarchical level, select the option, Only my cover(s).
To select a new default coverpage, choose the desired coverpage from the drop-down menu and click Save on the top left-hand side of the menu bar.
On the bottom of the Coverpage tab, you will see four options for different default coverpage behaviors:
To have a coverpage be included for every outbound fax, select Automatic Coverpages.
To prevent outbound faxes from being included, select No Coverpages.
To have the option to include a coverpage when a command token is included in the subject line of your email-to-fax (E2F) submission, select On Demand Coverpages.
To include a coverpage when text is entered into the body of your email-to-fax (E2F) submission, select With Body Text.
To make any changes to default coverpage behavior check the appropriate box and click Save on the top left-hand side of the menu bar.

Fax Online Administrator User Guide | concordfax.com | [email protected] | +1 (206)-441-3346 16
Notification Preferences
The third tab, Notifications, concerns the email notification message behavior for outbound faxes, and welcome messages for newly created users.
Fax Delivery Notifications
By default, the notification behavior is that the sender will receive one email notification message for the initial fax request (Success or Failure), and one email notification message for the final delivery (Success or Failure). You may choose which notifications your users will receive, but it is Concord’s recommendation that by default, all notifications are enabled.
• �Email�to�Fax�Initial�Notification�(Success) – This notification message confirms that the email-to-fax request has been successfully submitted to the Concord platform, and that Concord will attempt to deliver the fax shortly.
• �Email�to�Fax�Initial�Notification�(Failure) – This notification message confirms that the email-to-fax request has failed to be successfully submitted to the Concord platform. Further, an error, or reason is supplied in order for the sender to take the proper corrective action and resubmit the request.

Fax Online Administrator User Guide | concordfax.com | [email protected] | +1 (206)-441-3346 17
• �Email�to�Fax�Delivery�Notification�(Success)�- This notification message confirms that the email-to-fax request has been successfully delivered to the designated recipient.
• �Email�to�Fax�Delivery�Notification�(Failure) – This notification message confirms that the email-to-fax request has failed to be successfully delivered to the designated recipient. Further, an error, or reason is supplied (e.g. “No Answer”, “Not a Fax Machine”).
To see a complete list of Fax Error Messages, please see the Error Code list in the appendix.
Welcome Messages
Upon creation of a new user, a Welcome Message can be sent to their associated email address. There are three options regarding the sending of these Welcome Messages:
• No Welcome Message – No message is automatically sent to User.
• Welcome Message – A Welcome Message is sent containing general account information.
• Welcome Message with Credentials - A Welcome Message is sent containing general account information. The password is automatically reset at the time the Welcome Message is generated.
By default, the No Welcome Message option is selected.
If you modify any of the default notifications provided to the User/sender, remember to click Save on the top left-hand side of the menu bar.

Fax Online Administrator User Guide | concordfax.com | [email protected] | +1 (206)-441-3346 18
Date & Time Display Preferences
The fourth tab, Date, concerns the date and time formatting for newly created users. Date and Time information are reflected on the fax header of sent pages, as well as referenced in activity reports for sent and received fax traffic.
The first drop-down menu designates the time zone which you wish associated, by default, for the Company hierarchical level.
The second drop-down menu designates the Month/Day/Year format. An example of the format is also displayed after each option.
The third drop-down menu designates the Hour/Minute format.
If you make any changes to the default date and time formatting settings, remember to click Save on the top left-hand side of the menu bar.

Fax Online Administrator User Guide | concordfax.com | [email protected] | +1 (206)-441-3346 19
Department-Level Settings
The default settings for Departments are managed in an identical manner to the Company-level default settings discussed in the previous section.
As account settings follow the behavior designated at the most granular hierarchical level, settings made at Department levels override setting established at the Company level.
To manage settings at the Department level, right click on the individual Department you wish to modify, and select Department Details from the drop-down menu.
For demonstration purposes, the Department, “Human Resources” is selected. To the right of the screen you will see the same tabbed section that is displayed when viewing Company-level preferences:
Modify the Department-level changes that you wish to set, always remembering to click Save on the top left-hand side of the menu bar.
Fax Online Administrator User Guide | concordfax.com | [email protected] | +1 (206)-441-3346 20
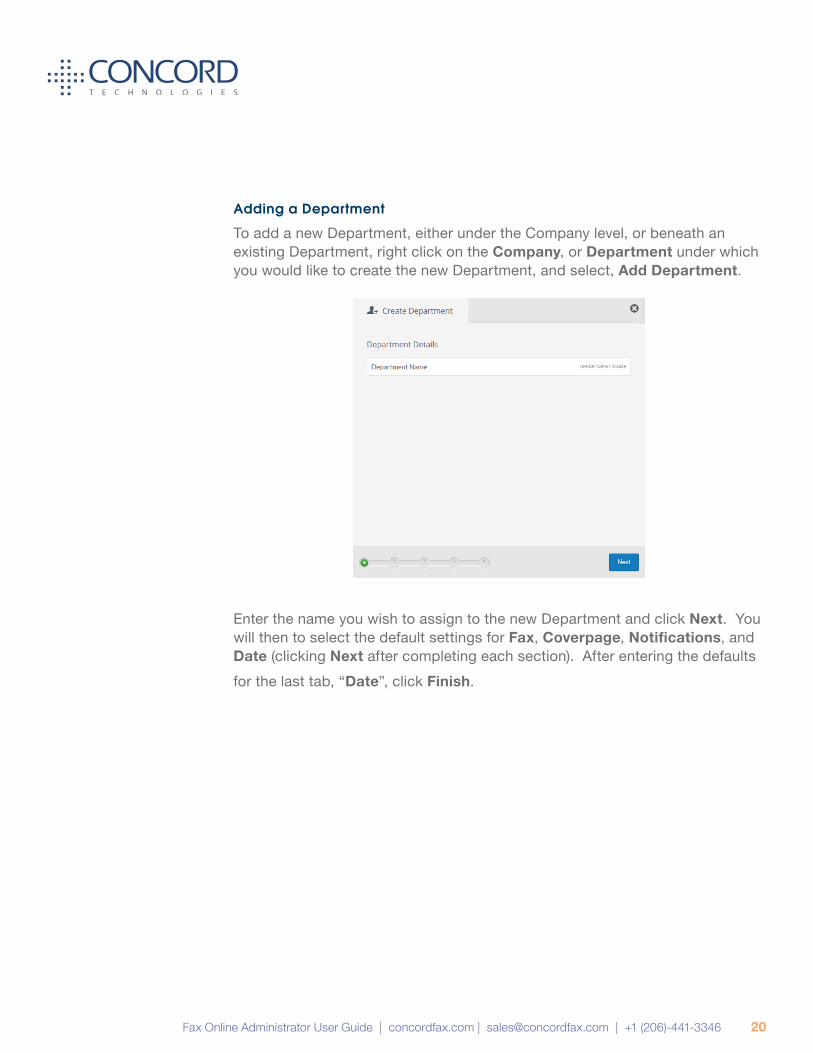
Adding a Department
To add a new Department, either under the Company level, or beneath an existing Department, right click on the Company, or Department under which you would like to create the new Department, and select, Add Department.
Enter the name you wish to assign to the new Department and click Next. You will then to select the default settings for Fax, Coverpage, Notifications, and Date (clicking Next after completing each section). After entering the defaults for the last tab, “Date”, click Finish.

Fax Online Administrator User Guide | concordfax.com | [email protected] | +1 (206)-441-3346 21
Deleting a Department
To delete a Department, right click on the Department you wish to delete, and select Delete Department from the drop-down menu. A warning message will be displayed, which must be acknowledged (by clicking OK) before the Department is deleted:
Note that you are not able to delete a Department that has active Users. You will first need to cancel all Users within the Department before cancelling it.
Managing a Department
Department default settings can be modified after their initial creation. To modify the settings of an existing Department, simply right click on the Department you wish to manage, and click Department Details. You will then have the option to edit all of the options that you designated during the initial creation of the Department and have them apply to any associated User created after the change is made.
Note that changes at any hierarchical level are not retroactive. To push changes from the Company/Department to Department/User levels, please contact Concord Premium Support ([email protected]).

Fax Online Administrator User Guide | concordfax.com | [email protected] | +1 (206)-441-3346 22
Account Settings (User Level)
Adding a User
To add a new User, right click on the Department in which it will reside, and click Add User Account. You may also elect to add a new User directly under your Company level.
You are guided through a series of prompts. Enter information at each prompt and click Next. Some fields are optional; required fields will be noted.
1. First / Last Name (Required)
2. Contact Details (Optional)
a. Address 1
b. Address 2
c. City
d. Country
e. State
f. Zip / Postal
g. Phone
3. Custom Fields
a. Custom 1
b. Custom 2
c. Custom 3
d. Custom 4

Fax Online Administrator User Guide | concordfax.com | [email protected] | +1 (206)-441-3346 23
4. Fax Settings (if no inbound fax number is required, select “No Fax Number Required” and an outbound-only license will be generated for you.
a. Choose Fax Number
b. Sending email address
c. Receiving email address
d. Inbound Fax Message File Type
i. Fax Page Separation
ii. Require SPF Record
iii. Add Metadata
5. Coverpage Preferences
6. Notification Preferences
7. Date Format Preferences
When complete, click Finish!

Fax Online Administrator User Guide | concordfax.com | [email protected] | +1 (206)-441-3346 24
Deleting a User
To delete an existing User, right click on the User you wish to delete and select Delete User Account.
A warning message will appear.
Click OK to delete the User.

Fax Online Administrator User Guide | concordfax.com | [email protected] | +1 (206)-441-3346 25
Managing a User
User settings can also be modified after their initial creation. To modify the settings of an existing User, simply right click on the User you wish to manage, and click User Account Details:
You will then have the option to edit all of the options that you designated during the initial creation of the User.
Temporarily Suspending a User
To temporarily suspend, or “lock” a user and prevent them from sending and receiving faxes, right click on the User you wish to suspend, and click Lock User. The following warning message will be displayed:
Click OK to suspend User from sending and receiving faxes (User will remain in locked status until an authorized Fax Online Administrator unlocks the account).
Locked accounts are noted by a red “lock” icon in the overview portion:

Fax Online Administrator User Guide | concordfax.com | [email protected] | +1 (206)-441-3346 26
To “unlock” the User, right click on the locked user and select Unlock User Account.
Fax Online Administrator SettingsConcord Premium Support will provision your initial Fax Online Administrator (with Company-level access). Subsequent Administrators can then be created within the Concord Web Portal by this Administrator. It is important to note that a Company-level administrator can make changes to other Company-level administrators, Department-level administrators, as well as change account settings at the Company, Department, and User levels. It is also possible to restrict administrative rights to a new or existing administrator.
Administrators are noted in the overview of the Account Administration section of the Concord Web Portal, noted by a special icon (human silhouette), differentiating it from Departments and Users.

Fax Online Administrator User Guide | concordfax.com | [email protected] | +1 (206)-441-3346 27
At the bottom portion of the hierarchical overview, all Fax Online Administrators are listed:
To create a new Administrator, right click on the Company (for a Company-level administrator) or Department (for Department-level administrator), and select Add Administrator:

Fax Online Administrator User Guide | concordfax.com | [email protected] | +1 (206)-441-3346 28
You will then be prompted to complete a series of required fields, recording relevant information concerning the new Administrator:
Note that passwords must contain at least one (1) alpha character, one (1) number, and one of the following symbols: - ! @ # $ % & * ( ) _ + = ; ? < > : ”
Click Next.
Fax Online Administrator User Guide | concordfax.com | [email protected] | +1 (206)-441-3346 29
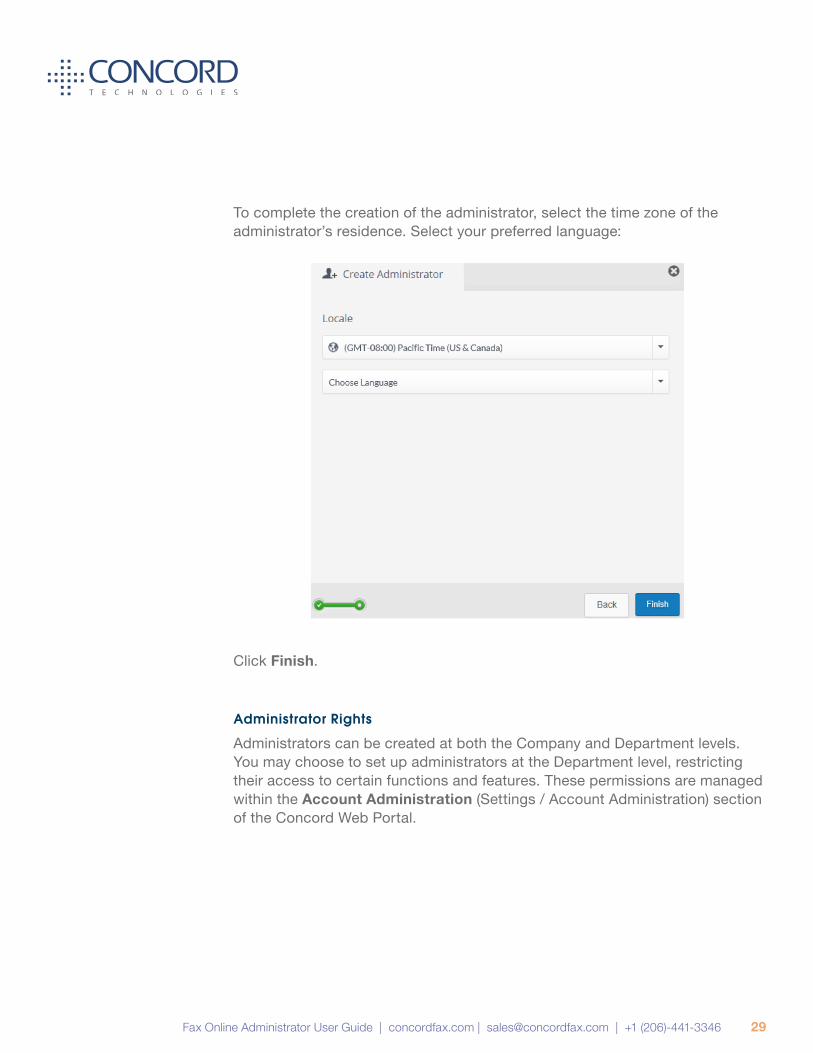
To complete the creation of the administrator, select the time zone of the administrator’s residence. Select your preferred language:
Click Finish.
Administrator Rights
Administrators can be created at both the Company and Department levels. You may choose to set up administrators at the Department level, restricting their access to certain functions and features. These permissions are managed within the Account Administration (Settings / Account Administration) section of the Concord Web Portal.

Fax Online Administrator User Guide | concordfax.com | [email protected] | +1 (206)-441-3346 30
To manage the permissions of an Administrator, right click on the Administrator that you wish to manage, and select Administrator Details.
The Administrator Details page has two tabs. The first tab has name and contact information for the Administrator, as well as the level at which they have administrative privileges, as well as their time zone and language preferences.
From the menu bar, click on Rights (the second tab). A list of Administrator Rights is then listed, with check boxes. Select, or de-select the Rights that you want the Administrator to have and click Save.
The following Rights can be controlled:
• Can Access Fax Pool Management
» Can Access Add Inventory
• Can Access Settings
» Can Access Company Settings
» Can Access Add Department
» Can Access Department Settings
» Can Manage Administrators
» Can Access Receiving Options

Fax Online Administrator User Guide | concordfax.com | [email protected] | +1 (206)-441-3346 31
» Can Access Sending Options
» Can Access Add User Account
» Can Access Create FaxLync
» Can Access Bulk Create Users
» Can Access User Account Settings
• Can Access Reports
» Can Access Outbound Activity
» Can Access Inbound Activity
» Can Access Accounting
» Can Access Outbound Fax Image
• Can Access Change Password (Self)
Note that by de-selecting one of the main categories, the list of associated permissions is automatically de-selected. You may add individual Rights back to the Administrator, as desired.
Click Save on the top left-hand side of the menu bar.

Fax Online Administrator User Guide | concordfax.com | [email protected] | +1 (206)-441-3346 32
Number PortingConcord Fax Online customers may retain their pre-existing, published, or otherwise established fax numbers by porting their fax numbers to a new carrier servicing Concord’s inbound network.
Note that unless the porting of numbers is expected to be an ongoing activity, you may elect to arrange the number porting directly with Concord Premium Support ([email protected]).
Administrators may initiate new and manage existing port requests in the Number Porting section of the Customer Web Portal (Settings/Number Porting).
Initiating a New Port Request
Click on the icon to “+New Port Request”, on the left-side of the screen:
Fax Online Administrator User Guide | concordfax.com | [email protected] | +1 (206)-441-3346 33
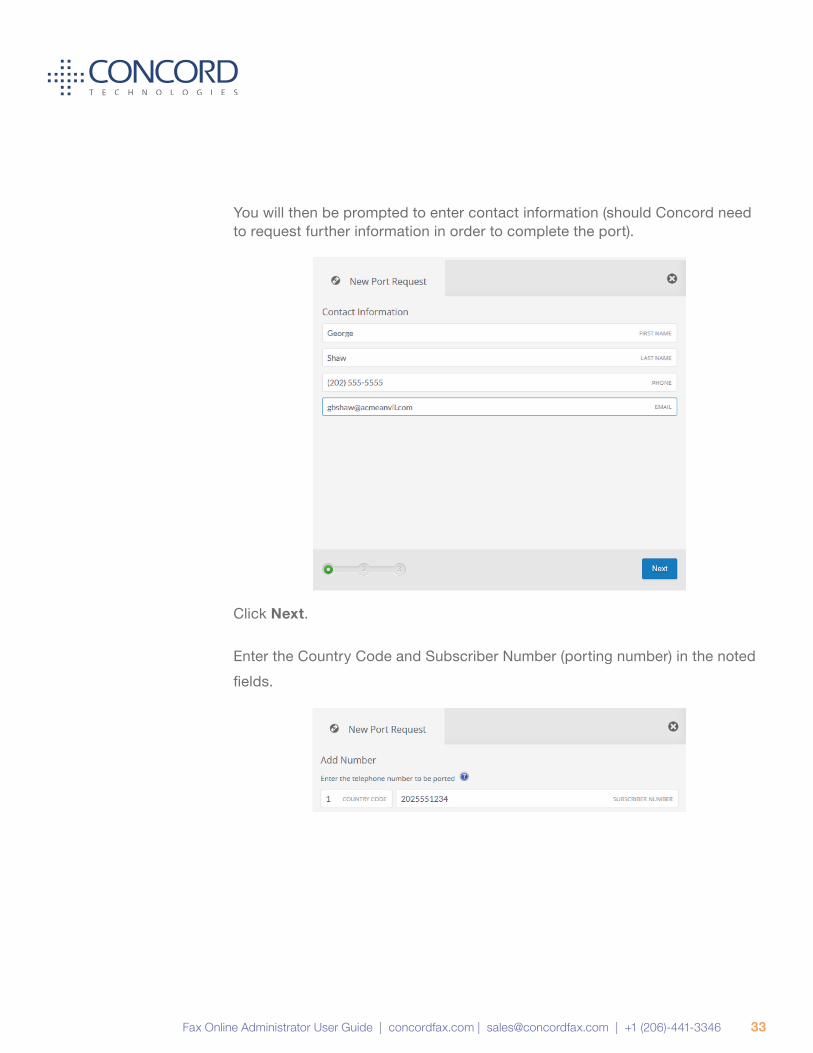
You will then be prompted to enter contact information (should Concord need to request further information in order to complete the port).
Click Next.
Enter the Country Code and Subscriber Number (porting number) in the noted fields.

Fax Online Administrator User Guide | concordfax.com | [email protected] | +1 (206)-441-3346 34
Enter the Billing Telephone Number* in the noted field. If the Billing Telephone Number is the same number that is porting, check the appropriate box.
*A note on the Billing Telephone Number, or BTN - Each phone or fax number is assigned a BTN by the carrier. It shares the same 10-digit formatting as a phone number (area code + 7-digit local number). The BTN may not be obvious, or self-evident, and should always be confirmed by the losing carrier. The losing carrier will provide the user with a Customer Service Record, or CSR. The Customer Service Record includes the BTN, the registered name of the company or organization, and the service address of the porting number. Telephone privacy and security policies prevent anyone but the owner of the number from obtaining the Billing Telephone Number.
Click on + New Service Address* to add the service address associated with the porting number.
*Note that the service address may differ from the billing address. Your carrier will be able to confirm the Service Address of the porting number. Again, this information is contained in the Customer Service Record.
If the Billing Telephone Number, Name, or Address information does not match the information contained in the Customer Service Record (CSR), the port can be rejected by the losing carrier. To prevent unnecessary rejections and delays, Concord asks that you include a CSR with every port request.

Fax Online Administrator User Guide | concordfax.com | [email protected] | +1 (206)-441-3346 35
After entering the Name and Address information, click Next. A summary of your request will be displayed. Confirm that all of the request information is correct. If there are special instructions that you would like to include with your request, include them before clicking Finish.
You will then receive a pop-up confirming that your port request has been successfully submitted to Concord.
Note that a tracking number will be provided for future reference.
You will now need to attach a valid Letter-of-Authorization and current Customer Service Record. Concord cannot port your number(s) without this documentation!

Fax Online Administrator User Guide | concordfax.com | [email protected] | +1 (206)-441-3346 36
To add files to your port request, click on the icon. You will now see three (3) tabs on the right-hand side of the Web Portal:
Click on Files to upload the necessary documents.
If you would like to leave a note for the Concord porting team, click on the Notes tab. Progress notes and updates from the Concord porting team will also be displayed in this section.
Tracking a Current Port
By clicking on Number Porting under the Settings menu option, a list of current ports will be displayed.
You are able to see an expanded view of the details of the port, by clicking on . You are able to make changes to this information, however, once your port is in process, you will need to contact Concord Premium Support if any of the changes need to be communicated to the losing or winning carriers (e.g., a new address, BTN, etc.).
By clicking on the Notes tab, you are able to read update notes left by the Concord porting team, as well as leave notes for Concord in order to assist with the porting process. You are also able to attach additional documents by clicking on the Files tab.
The ID (second column) lists the tracking ID assigned by Concord.
The Business Name (third column) lists the name of the company associated with the port.
Fax Online Administrator User Guide | concordfax.com | [email protected] | +1 (206)-441-3346 37
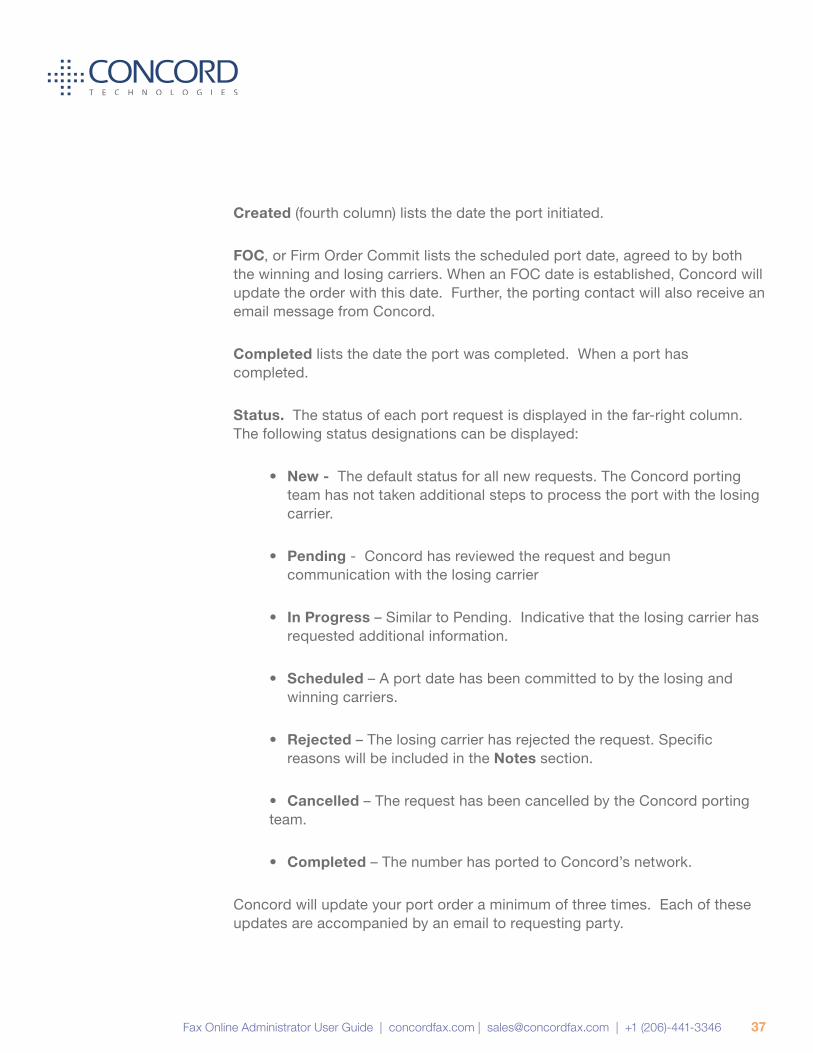
Created (fourth column) lists the date the port initiated.
FOC, or Firm Order Commit lists the scheduled port date, agreed to by both the winning and losing carriers. When an FOC date is established, Concord will update the order with this date. Further, the porting contact will also receive an email message from Concord.
Completed lists the date the port was completed. When a port has completed.
Status. The status of each port request is displayed in the far-right column. The following status designations can be displayed:
• New - The default status for all new requests. The Concord porting team has not taken additional steps to process the port with the losing carrier.
• Pending - Concord has reviewed the request and begun communication with the losing carrier
• In Progress – Similar to Pending. Indicative that the losing carrier has requested additional information.
• Scheduled – A port date has been committed to by the losing and winning carriers.
• Rejected – The losing carrier has rejected the request. Specific reasons will be included in the Notes section.
• Cancelled – The request has been cancelled by the Concord porting team.
• Completed – The number has ported to Concord’s network.
Concord will update your port order a minimum of three times. Each of these updates are accompanied by an email to requesting party.

Fax Online Administrator User Guide | concordfax.com | [email protected] | +1 (206)-441-3346 38
1. Concord will update requesting party with an estimated port date upon submission of the request to the losing carrier. Provided all information contained in the Letter-of-Authorization and Customer Service Record agree with the information on record with the losing carrier, this estimated date will most likely be confirmed.
2. Concord will update requesting party when the port date has been confirmed and committed to by the losing and winning carriers.
3. Concord will updated requesting party when the port has successfully completed. Each port is tested by Concord, confirming that inbound traffic is routing through the Concord network.
In the event your carrier has rejected the port request, Concord will update the status of the request in the Web Portal, as well as send an email to the requesting party indicating the required action necessary to proceed with porting the number.
Most ports complete within ten (10) business days. Note that if there is any rejection, the resubmission process essentially starts at the beginning. To avoid delays, always ensure that the information contained in the LOA and CSR is correct, confirming it with the losing carrier. ◆

Fax Online Administrator User Guide | concordfax.com | [email protected] | +1 (206)-441-3346 39
REPORTS
To access the reports regarding inbound and outbound traffic, click on Reports on the top menu bar.
From there, you will have the choice of three options:
• Outbound Activity
• Inbound Activity
• Accounting
Select the option you wish to access.
Outbound ActivityBy selecting Outbound Activity, you are able review outbound activity.
First, select the Date Range for the time period that you are interested in viewing. You may further refine your search by selecting a variety of filters (such as by Department, associated email address, Account ID, etc.). You are able to further apply a second layer of filtering by “Status” of the Outbound Activity (e.g., Success, Failed, In Progress). You are also able to select the number of records you would like to see on each page, by selecting different values under Row Count (10, 15, 20, 50, 100, 250, and 500).

Fax Online Administrator User Guide | concordfax.com | [email protected] | +1 (206)-441-3346 40
When you have refined your search options to your desired values, click Search. All outbound fax activity within your selected ranges and filters will be returned.
For job details, click on the Details icon in the left column of the list of fax jobs. The list of Activity Details is extensive, including information on the sender and recipient, as well as transmission data of the outbound fax.
Resending a Fax from the Concord Web Portal
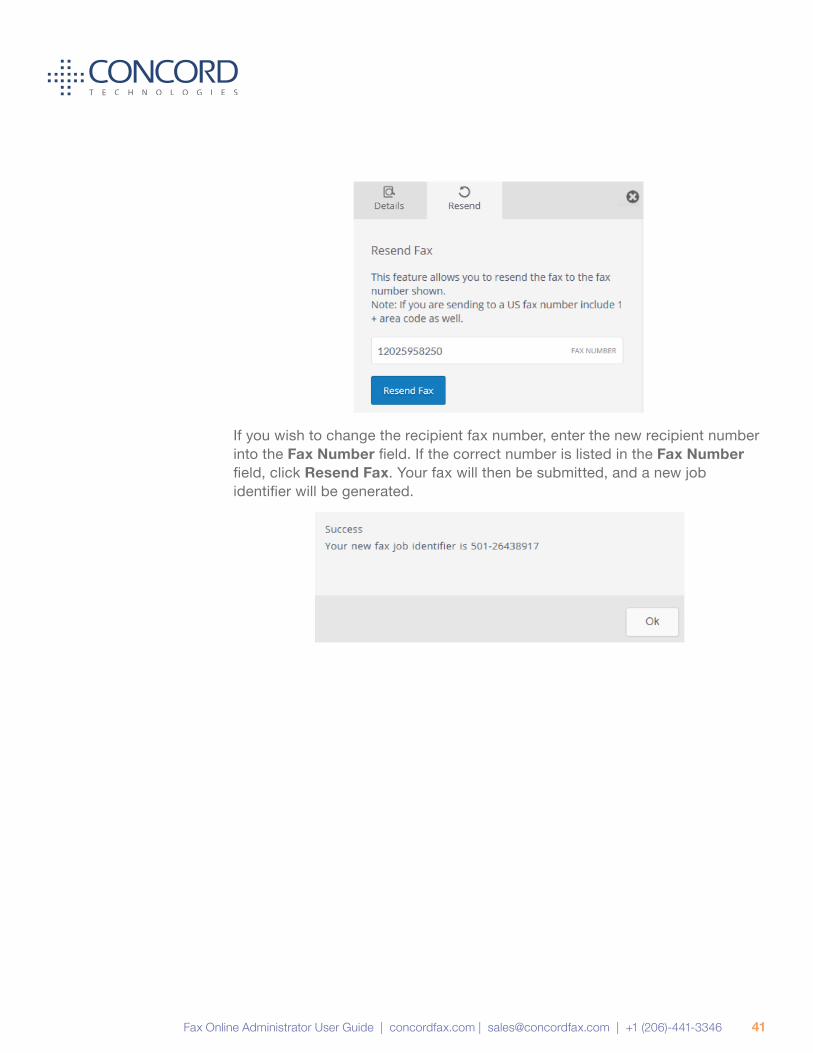
From the second tab of the Activity Details page, you will see the option to resend the fax. Click Resend.
You will now have the option to change the recipient fax number. By default, the original recipient fax number will be pre-populated.
Fax Online Administrator User Guide | concordfax.com | [email protected] | +1 (206)-441-3346 41
If you wish to change the recipient fax number, enter the new recipient number into the Fax Number field. If the correct number is listed in the Fax Number field, click Resend Fax. Your fax will then be submitted, and a new job identifier will be generated.

Fax Online Administrator User Guide | concordfax.com | [email protected] | +1 (206)-441-3346 42
Inbound ActivityBy selecting inbound Activity, you are able review inbound activity.
First, select the Date Range for the time period that you are interested in viewing. You may further refine your search by selecting a variety of filters (e.g., Department, Fax Number, etc.). You are also able to select the number of records you would like to see on each page, by selecting different values under Row Count (10, 15, 20, 50, 100, 250, and 500).
When you have refined your search options to your desired values, click Search. All outbound fax activity within your selected ranges and filters will be returned.
For job details, click on the Details icon in the left column of the list of fax jobs. The list of Activity Details includes information regarding the Caller ID of the sender (Caller), the Call Station Identifier (Fax Number), as well as the number of pages and duration of the transmission.
Requeue a Received Fax from the Concord Web Portal
From the Activity Details page, you will have the ability to requeue inbound faxes to the authorized forwarding address(es) associated with the recipient.
From the second tab of the Activity Details page, you will see the option to resubmit the fax. Click Resubmit.
You will then see the following message wich you must OK in order for the fax to be requeued
Click Requeue Fax.

Fax Online Administrator User Guide | concordfax.com | [email protected] | +1 (206)-441-3346 43
AccountingAfter Outbound Activity and Inbound Activity, you will see the option for Accounting. Click on Accounting to generate and review Call Detail Records, or “CDR”s. CDRs contain detail of all inbound and outbound activity. CDR information is available for a period of six (6) months. Should you need to retain CDR information for a longer period of time, you will need to store Call Detail Records locally.
Call Detail Records are generated only in months where there is either inbound or outbound activity. Records are generated at the conclusion of each calendar month. Should you need CDR information before the end of the month, you may generate Call Detail Records for the current month and a file will be generated for each day of the current month.
Call Detail Records are formatted as comma separated, “.csv” files. They can be sorted by column and used to reconcile usage and costs for different Departments and Users. While CDRs contain event information, actual billing information (charges for sent pages, etc.) are not included in the file. ◆

Fax Online Administrator User Guide | concordfax.com | [email protected] | +1 (206)-441-3346 44
APPENDIX A – FAX ERROR CODE DESCRIPTIONSError Message Error Description
Busy “Busy” Indicates that the called number (phone line) is already in use or engaged.
No Answer
“No Answer” indicates that the line was not picked up (answered) by a fax machine or
person before timing out. The timeout is sufficient to ensure at a minimum of 5-8 standard
rings, which is actually duration of 55 seconds.
Not a Fax
Machine
“Not a fax machine” indicates that a fax device has failed to answer the call. Specifically,
fax tones or the fax signal from a remote machine has not been detected. This may for a
number of reasons including but not limited to, a wrong number, a machine not configured
to automatically answer, or a device that has stopped answering because it is out of paper
or has a paper jam.
Voice Answer “Voice Answer” indicates that either a person or voicemail message answered the call.
Fast Busy
“Fast Busy” indicates that there was no available path to the attempted fax number. This
normally indicates that the destination is currently overloaded, or that there is an outage
with the specific number or in the area attempted such as that due to a fibre cut. This can
also be caused by severe weather conditions in the area of the destination. In most cases
Fast Busy conditions are temporary, please verify the fax number you’re trying to reach is
valid and if so please try again later.
Sit-Tone /
Operator Msg
“Sit-Tone / Operator Msg” indicates that the call was intercepted by the special situation
information tones followed by an operator message; examples include “The number you
have dialed is disconnected or is no longer in service. Please check the listing and try
your call again.”, “The number you have dialed has been changed…the new number
is…XXX-XXX-XXXX”, “All circuits are currently busy, please try your call again later”.
“Operator Msg” indicates the same issue however the special situation information tones
were not detected.

Fax Online Administrator User Guide | concordfax.com | [email protected] | +1 (206)-441-3346 45
Error Message Error Description
Negotiation
Failed
“Negotiation Failed” indicates the call was answered by a fax device but during the initial
training phase of the call, communication between the fax transmitter and the receiving
fax device failed or the two devices could not agree on the parameters to be used for the
call. This often indicates a phone line quality issue and may occur at the beginning of the
fax transmission, or, during the fax transmission between pages on a multi-page fax.
Transmission
Failed
“Transmission Failed“ indicates the receiving fax machine has answered and connected
but the fax was not able to be fully and successfully transmitted. This can be caused by
line quality issues, fax device issues, the sharing of phone line with other devices such as
credit card processing terminals. Temporary conditions such as severe weather conditions
in the destination area can also cause transmissions failures.
Exceeded ECM
Retransmit
“Exceeded ECM Retransmit” indicates the call was answered by a fax device and
connected using ECM or Error Correction Mode. Due to poor line quality or a poor
connection for that specific call attempt the transmission of the fax required an excessive
amount of data to be retransmitted to the receiving device to get acknowledgment of
successful reception of the fax, the call was aborted to allow a retry or new attempt to
get a better connection and to ensure the call duration did not ensure excessive overtime
charges.
Job Cancelled“Job Cancelled” indicates that the job or recipient number was cancelled or the set time for
delivery expired.
General Error
“General Error” indicates that another uncommon error not listed above has occurred
resulting in the failure to transmit your fax. Please retry the fax job or recipient again.
If you get the same error again please contact Concord customer service for further
assistance and investigation.

Fax Online Administrator User Guide | concordfax.com | [email protected] | +1 (206)-441-3346 46
GETTING HELP
Concord Technologies Customer ServiceCustomer service hours are Monday–Friday from 8:00 AM to 5:00 PM (Pacific Time).
• Telephone: +1 (206) 441-3346 or 1-800-792-0329
For support, in writing, please either fax or e-mail your question to the number or address below and a representative will respond within one business day:
• Fax: +1 (206) 441-7965 or 1-800-301-0329
• Email: [email protected].
You can contact Concord Technologies Customer Service to:
• Inquire about billing and charges.
• Change your current account information. All account changes are subject to the appropriate credit approval.
We recommend that you visit our web site at www.concordfax.com for frequently asked questions regarding our services.

Fax Online Administrator User Guide | concordfax.com | [email protected] | +1 (206)-441-3346 47
About Concord
Concord is the premier provider of integrated fax solutions for business. Its advanced network architecture provides near unlimited capacity, unmatched reliability and advanced security features. Concord Fax supports a comprehensive range of service
offerings, including versatile Web Services that facilitate integration with any corporate software application.
Concord customers enjoy all the benefits of feature-rich fax communications without the cost, effort, and maintenance issues associated with conventional fax systems and alternative fax technologies. This is achieved by platform-independent integration of fax and email, which in turn adds value to existing IT infrastructure and maximizes return on IT investments. Our network architecture is flexible enough to accommodate internal corporate policies (features such as specific fax cover pages or file formats) or to ensure compliance with internal and external industry requirements. Concord’s secure fax delivery system is fully compliant with the Gramm-Leach Bliley Act (GLB).
Leadership Through TechnologySince its inception in 1996, Concord has lead the industry with innovative solutions that push the edge of what is possible. Today, Concord is spearheading the industry with its fully redundant, SIP/T38 enabled network. Based on a pair of fully redundant data centers located in Seattle, WA and Chicago, IL, Concord provides full fax functionality even in the case of regional catastrophic events. Concord’s revolutionary data center failover technology provides real-time failover for both inbound and outbound communications. The former, a product of significant capital investment, represents a technological breakthrough in the industry by enabling the rerouting of fax traffic in the blink of an eye. This results in exceptional business continuity and reliability. ◆
101 Stewart Street, Suite 1000
Seattle, Washington 98101 USA
www.concordfax.com
E-mail: [email protected]
Corporate Sales:
Toll Free: 1 888 271 0653
USA: (+1) 206 486 6955
Germany: (+49) 89 1250373530