using oracle time management using oracle time management audience for this guide this guide is a...
TRANSCRIPT

UsingOracle TimeManagement
Release 11.iA77086-01

Using Oracle Time Management ™, Release 11.i (A77086-01)
Copyright © Oracle Corporation 1999
Primary Author: Joycelyn Smith.Contributing Authors: Linda Fillmore, Laura McGrady, Mary Goldiner
This document was prepared to assist the customer in the use of Oracle Time Management. Its contents maynot be used for any other purpose without written permission. The material contained herein is suppliedwithout representation or warranty of any kind including any implied warranties or merchantability. OracleCorporation assumes no responsibility and shall have no liability of any kind from the supply or use of thisdocument and the material it contains. Oracle Corporation has no liability except for the cost of the LicenseFee and in no event shall it be liable from consequential damages.
This publication could include technical inaccuracies or typographical errors. Changes are periodically madeto the information herein; these changes will be incorporated in new editions of the publication.
These are licensed materials for internal and customer use only, all rights reserved, including the right tophotocopy, reproduce, translate, or make other reproductions of this document or any part thereof.
All other products or company names are used for identification purposes only, and may be trademarks oftheir respective owners.

Table of Contents iii
Contents
Preface Preface .................................................................................................................ixAudience For This Guide.............................................................................. xHow This Guide is Organized ....................................................................xiOther Information Sources ........................................................................xiiiAbout Oracle................................................................................................xviThank You .................................................................................................. xvii
Chapter 1 Introduction......................................................................................................1-1 Time and Attendance Management .........................................................1-2
HRMS and Oracle Time Management InitialSetup..............................................................................................................1-4
Oracle Time Management and HRMSWorkflow ...........................................................................................................1-5 Logging on to Oracle Time Management ................................................1-6
Dated Information..................................................................................1-7 Setting Your Effective Date...................................................................1-7
Release 11.i Considerations........................................................................1-8 Expiring Tables and Policies ................................................................1-8 Eliminating Batch Time Entry Procedures .........................................1-9

Using Oracle Time Managementiv
Chapter 2 Oracle Time Management Elements ...........................................................2-1 Oracle Time Management Element DataSetup..............................................................................................................2-2 Entering a Oracle Time ManagementEarning Category ........................................................................................2-3 Setting Up Elements...............................................................................2-4 Entering Element Time Information ...................................................2-6 Entering and Element Link...................................................................2-8
Chapter3 Table Setup and Maintenance ......................................................................3-1 Oracle Time Management Tables..............................................................3-2 Table Processes .......................................................................................3-2 Planning Table Information ..................................................................3-3 Table Hierarchy ......................................................................................3-3 Setting Up Holiday Calendars...................................................................3-4 Setting Up Shifts ..........................................................................................3-9 Setting Up Work Plans..............................................................................3-13 Setting Up Rotation Plans.........................................................................3-17 Setting Up Project Accounts.....................................................................3-22 Setting Up Variances.................................................................................3-25 Setting Up Earning Groups......................................................................3-28
Chapter 4 Policy Setup ......................................................................................................4-1 Oracle Time Management Policies ..........................................................4-2 Policy Processes ......................................................................................4-3 Planning Policy Information.................................................................4-3 Policy Hierarchy .....................................................................................4-3 Setting Up Hour Deduction Policies ........................................................4-4 Setting Up Shift Differential Policies ........................................................4-9 Setting Up Premium Eligibility Policies.................................................4-14 Setting Up Premium Interaction Policies ...............................................4-19 Planning Premium Interaction Policies .................................................4-20 Setting Up Earning Policies......................................................................4-25

Table of Contents v
Chapter 5 Policy and People Assignment .....................................................................5-1 Oracle Time Management Form Links....................................................5-2
Entering Further Assignment Information .............................................5-3Entering Additional Organization Information .....................................5-4
Chapter 6 Oracle Time Management Reports ..............................................................6-1 Oracle Time Management Online Reports ..............................................6-2
Submitting and Reviewing Reports ....................................................6-5
Chapter 7 Time Entry Procedures ...................................................................................7-1 Timecard Autogeneration ..........................................................................7-2 Setting Up Batches in Batch Element Entry.............................................7-7 Entering Timecards .....................................................................................7-8 Validating Timecards................................................................................7-12 Submitting Timecards to Payroll.............................................................7-16
Chapter 8 Retro Adjustment Procedures .......................................................................8-1 Updating a Timecard for Retro Adjustments..........................................8-2 Validating Retro Adjusted Timecards......................................................8-3 Transferring Retro Adjusted Timecards to BEE......................................8-4 Submitting Retro Adjusted Timecard toElement Entries .................................................................................................8-5 Project Accounting Retro............................................................................8-6

Using Oracle Time Managementvi

vii
Reader’s Comment Form
Using Oracle Time Management ™ (A77086-01)
Oracle Corporation welcomes your comments and suggestions on the quality and usefulness of thispublication. Your input is an important part of the information we use for revision.
• Did you find any errors?
• Is the information clearly presented?
• Do you need more information? If so, where?
• Are the examples correct? Do you need more examples?
• What features did you like most about this manual? What did you like least about it?
If you find any errors or have any other suggestions for improvement, please indicate the topic,chapter, and page number below:
Please send your comments to:
Oracle Applications Documentation ManagerOracle Corporation500 Oracle ParkwayRedwood Shores, CA 94065Phone: (415) 506-7000 Fax: (415) 506-7200
If you would like a reply, please give your name, address, and telephone number below:
Thank you for helping us improve our documentation.

viii

Preface ix
Preface
elcome to Release 11.i of Using Oracle Time Management.
This guide contains the information you need to set up timeand attendance tables. It describes in detail time keepingprocedures, and provides you with helpful tips on using themanual effectively.
This preface explains the organization of the guide, andintroduces other useful sources of information.
W

x Using Oracle Time Management
Audience For This Guide
This guide is a complete source of information aboutusing Oracle Time Management. It containsoverviews and task and reference information for:
• Oracle HRMS users• payroll managers and staff• financial managers and others involved in
financial management and control• implementation teams and consultants• Oracle HRMS system administrators
Note: The information in this guide is also availableonline in the Help system. Choose the Help icon onthe toolbar from any window in the system to Helptopics relevant to that window.

Preface xi
How This Guide is Organized
Introduction
Chapter 1 illustrates initial setup and workflow,introduces basic logon procedures to Oracle TimeManagement, and provides instructions on handlingdated information.
Oracle Time Management Elements
Chapter 2 provides examples of the forms used todefine elements for time entry earnings needed byOracle Time Management .
Table Setup and Maintenance
Chapter 3 presents step-by-step instructions forsetting up and maintaining the time and attendancetables.
Policy Setup
Chapter 4 describes setup of the policy tables, whichhelp determine hierarchy and rates for paycalculation.
Policy and People Assignment
Chapter 5 provides detailed examples of assigningthe appropriate tables and policies to earning policiesand people.

xii Using Oracle Time Management
Oracle Time Management Reports
Chapter 6 describes how to submit online reports,verify report data, and provides a brief description ofthe reports that can be generated from Oracle TimeManagement.
Time Entry Procedures
Chapter 7 details timecard entry and exception dataentry, and describes the process for autogenerating,validating, approving, and managing time data.
Retro Adjustment Procedures
Chapter 8 details the Retro Time Adjustmentprocedures as well as the Retro Transfer to ProjectAccounting.

Preface xiii
Other Information Sources
There are additional information sources, includingother documentation, training and support servicesavailable to you. You may use these additionalinformation sources to increase your knowledge andunderstanding of Oracle Time Management. We atOracle Corporation want to make these products easyfor you and your staff to understand and use.
Oracle Applications User’s Guide
This book tells you everything you need to knowabout entering data, querying, running reports, andother basic features of Oracle applications.
Oracle HRMS Implementation Guide
This guide includes modular implementationflowcharts and checklists to assist with our projectplanning. It contains a summary of the sequence ofrecommended steps for implementing Oracle HRMS.The Oracle Human Resources and Oracle PayrollUser’s Guides contains full instructions for eachimplementation step.
Oracle HRMS Technical Reference Manual

xiv Using Oracle Time Management
This manual contains database diagrams and adescription of Oracle HRMS database tables, forms,reports, and programs. This information helps youconvert data from your existing applications,integrate Oracle HRMS with other non-Oracleapplications, and write custom reports.
Oracle Time Management Technical Reference Manual
This manual provides information for understandingthe underlying structure and processing of OracleTime Management. It includes information forconverting and integrating existing applications withOracle Time Management and writing customreports for Oracle Time Management.
Oracle Time Management Implementation Guide
This guide provides information you need tosuccessfully implement Oracle Time Management inyour specific hardware and operating systemsoftware environment.
TrainingWe offer a complete set of formal training courses tohelp you and your staff fully understand Oracle TimeManagement and quickly reach full productivity. Weorganize these courses into functional learning paths,so you take only those courses appropriate to yourjob.
You have a choice of educational environments. Youcan attend courses at any one of our many EducationCenters, or you can arrange for our trainers to teach

Preface xv
at your facility. In addition, Oracle trainingprofessionals can tailor standard courses or developcustom courses to meet your needs. For example,you may want to include information on your owninternal procedures as part of a training course usingthe system.
SupportFrom on-site support to central support, our team ofexperienced professional continually provides youwith whatever help and information you need tokeep Oracle Time Management working for you.This team includes your Technical Representative,Account Manager, and Oracle’s largest staff ofconsultants and support specialists with experiencein Time Management, Oracle database managementand your particular hardware and softwareenvironment.

xvi Using Oracle Time Management
About OracleOracle develops and markets an integrated line ofsoftware products for information management,applications development, decision support, andoffice automation. Its family of applications productsincludes financial, manufacturing, human resourceand Time management applications.
Oracle products are available for mainframes,minicomputers, and personal computers, andpersonal digital assistants. This allows organizationsto integrate different computers, different operatingsystems, different networks, and even differentdatabase management systems, into a single, unifiedinformation resource.
Oracle offers its products, along with relatedconsulting, education, and support services, in mostcountries around the world. Oracle is the world’slargest supplier of database management softwareand services.

Preface xvii
Thank YouThanks for using Oracle Time Management and thisUser’s guide.
We appreciate your comments and feedback. At theend of this guide is a Reader’s Comment Form. Weinvite you to use this form to explain what you like ordislike about Oracle Time Management or this guide.Mail your comments to the following address or callus directly at (650) 506-7000.
Oracle Application DocumentationManagerOracle Corporation500 Oracle ParkwayRedwood Shores, CA 94065USA

xviii Using Oracle Time Management

Introduction 1 - 1
Introduction
racle Human Resource Management Systems is the familyname for an integrated group of applications that support
the management of people. Oracle Time Management integrateswith HRMS and supports the management of personnel timeand attendance. This chapter introduces you to accessing OracleTime Management and describes key components and specialfeatures of the system.
O
CHAPTER
1

1- 2 Using Oracle Time Management
Time and Attendance Management
Oracle Time Management provides a central point for collecting, editing,balancing, and managing time and attendance data prior to submittingto Batch Element Entry for processing. It also automatically generates(autogens) time transactions based on specified criteria. Detailed historyrecords are maintained so that reports may reflect current time andattendance information for any point in time.
Time Collection
Acquiring time and attendance information is the first stage in theOracle Time Management process. Presently, time and attendance datacan be entered directly into Oracle Time Management . However, OracleTime Management also provides acceptance of time and attendance datafrom various input sources, including time clocks.
Table and Policy Setup
To edit, balance, validate and approve time data requires that the tablesin Oracle Time Management be properly set up to reflect yourcompany’s holiday calendars, earning codes and policies, shift and shiftdifferential policies, work and rotation plans, premium eligibility andinteraction.

Introduction 1 - 3
Exception Management
If exceptions to regular work schedules exist, they can be handledthrough exception data entry.
Variances
Oracle Time Management allows the setup of ranges in earnings,locations, and organizations, so that this information can be used tonotify users that the maximum number of hours have been reached.
Project Accounting
Projects can be tracked by hours or dollars, which will allow a managerto request reports on data for a particular period, or for a range of datesto use in projections and forecasting.

1- 4 Using Oracle Time Management
HRMS and Oracle Time Management Initial Setup
Before time is entered or received, the system has to be set up for timeand attendance management. The following flowchart illustrates theprogression of steps necessary to setting up in HRMS and Oracle TimeManagement .

Introduction 1 - 5
Oracle Time Management and HRMS Workflow
After the system has been set up, the time management process beginswith time entry and ends with batches of timecard informationsubmitted to Batch Element Entry (BEE), Oracle Project Accounting, andGeneral Ledger.
The flowchart below illustrates the entire workflow.

1- 6 Using Oracle Time Management
Logging on to Oracle Time Management
When you open Oracle applications, you must log on with a role thatgives you access to the Oracle Time Management forms. This setup isdone by your system administrator. The illustration below shows theOracle Time Management menu items. Note that the Navigator title bar
displays that the Oracle Time Management Manager responsibility isselected.

Introduction 1 - 7
Dated Information
The information in Oracle Time Management regarding your holidaycalendars, work and rotation plans, project accounting, shift differentialpolicies, and premium eligibility policies, etc. is dated information. Alldated information has From and To dates, that is, dates from and towhich it is in effect in your organization. For example, when defining aholiday calendar, you enter a date from which it starts. To close it down,you give it an end date when you no longer need that particularcalendar.
Setting Your Effective Date
Effective dating is an Oracle function, and when you log onto Oracle andthen to Oracle Time Management , your effective date is always today’sdate. To view information current at another date, or to make past—dated or future—dated changes, you need to change your effective date.
To set your effective date:
1. Save any outstanding information you have entered or changed,then choose the Alter Effective Date icon from the Toolbar. The AlterEffective Date window opens.

1- 8 Using Oracle Time Management
2. Enter a new effective date and choose OK.
If your current window is a primary window (one called directly fromthe Navigator), your new effective date remains in place until you resetit or exit Oracle. If your current window is not a primary window, yournew effective date only applies while you are working in the currentwindow and any windows subsidiary to it. When you return to aprimary window, your effective date is reset to its previous value. Solong as your effective date remains different from today’s date, it isdisplayed in the title bar of every window.
Release 11.i Considerations
Within this release of Oracle Time Management , the following twofunctions deserve special considerations:
• The dependencies upon Oracle US Payroll were eliminated. OracleHR is the only prerequisite for Oracle Time Management.

Introduction 1 - 9
• Oracle Time Management is now supported by Batch Element Entry(BEE). This mechanism replaces PayMix and is used to transfer timeaccounting data.
Expiring Tables and Policies
Follow the procedures in this manual for expiring tables and policies.DateTrack cannot be used for future dating Oracle Time Managementforms. Future dates should be entered manually.
Eliminating Batch Time Entry Procedures
HRMS allows you to enter timecards through a batch process. However,Oracle Time Management is a complete time accounting system thatutilizes this same form for validation. For example, absences entered onthe Absence Attendance Detail form will not be automatically recordedin Oracle Time Management or sent to BEE. These exceptions must beentered on the appropriate timecards.

1- 10 Using Oracle Time Management

Oracle Time Management Elements 2 – 1
Oracle Time Management Elements
lements are essential compensation and benefit components thatrepresent earning types, benefits such as pension plans,
absences, expense reimbursements, and even tangible items given toa person, such as a computer. While elements may have alreadybeen generated or created, it is necessary for all elements which willbe needed in Oracle Time Management to be defined.
This chapter includes the steps for defining the Oracle TimeManagement data required and the forms used in creating that data.
For detail information on entering elements, input values, andbalance feeds, see the Managing Compensation and Benefits UsingOracle HRMS.
E
CHAPTER
2
2 - 2 Using Oracle Time Management
Oracle Time Management Element Data Setup
Before an element can be used within Oracle Time Management, it must
1. Have the Earning Category defined on the QuickCodes Oracle TimeManagement table HXT_EARNING_CATEGORY.
2. Have previously been defined as an Element in Oracle HRMS.
3. Have been updated with the appropriate input values.
4. Have been entered as an element on the Element Time Informationform.
5. Have been linked to the appropriate data on the Link form.

Oracle Time Management Elements 2 – 3
Entering a Oracle Time Management Earning Category
All elements must be assigned to an earning category. The categorymust be entered and enabled on the HXT_EARNING_CATEGORYQuickCode form prior to being entered. The illustration below showsthat the following HXT_EARNING CATEGORY Quick Codes have beenestablished and the check box enabled.

2 - 4 Using Oracle Time Management
Setting Up Elements
Oracle Time Management requires that all hour-related elements becreated so that the time entry elements may be sent to Batch ElementEntry.
In order to successfully create the elements for use in the Oracle TimeManagement system you must create the element utilizing the ElementDescription form.

Oracle Time Management Elements 2 – 5
Once the Element data has been entered, you must establish the inputvalues. The data below illustrates what input values are required. Fordetail information regarding Input values, refer to the Oracle Payroll U.S.User’s Guide.
Hours with Units = Hours in Decimal Format (2 places), Sequence = 1User Enterable and Database Item checked.
Pay Value with Units = Money, Sequence = 1 and Database Itemchecked.
Multiple (if applicable, usually for overtime, shifts and premiums) withthe Units = Number, Sequence = 2, User Enterable and Database Itemchecked.
Rate with Units = Number, Sequence = 3, with User Enterable andDatabase Item checked.
Rate Code with Units = Character, Sequence = 4, with User Enterable andDatabase Item checked.
Jurisdiction with Units = Character, Sequence = 5, with User Enterablechecked, Formula = Jurisdiction_Validation and Warning or Error =Error.
Deduction Processing with Unit = Character, Sequence = 6, with Requiredfield and User Enterable checked, Default = All Deductions, Lookup =US_DEDUCTION_PROCESSING
Separate Check with Unit = Character, Sequence = 7, with Required andUser Enterable checked, Default = NO, Lookup = YES_NO.
Once the element is created you must navigate to the Element TimeInformation selection and complete the Additional Element Informationsection of the window.

2 - 6 Using Oracle Time Management
Entering Element Time Information
Once the Element Time Information window is displayed, the elementshould be queried by entering the Element Name in the Element Name field.
Once the query is returned, the user should tab to the Additional ElementInformation portion of the form and select the appropriate Earning Categoryfrom the List of Values. This is a required field and must be entered in orderto use this element in Oracle Time Management.
Depending upon the Earning category selected, the remaining fields shouldbe completed by selecting the appropriate data from the List of Values. (Forexample, if the element is an overtime pay element, the Factor/Multipleshould be entered). The Premium Type determines whether the premiumwill be calculated as a rate per hour, a fixed rate per day or afactor/multiple. The Premium Type determines how the next segment,Premium Amount, is entered.
Processing Order, indicates the order in which the element will be processedusing the Premium Interaction Policy.

Oracle Time Management Elements 2 – 7
To enter the Element Time Information:
1. Open the Element Time Information window.
2. Query the Element Name.
3. Enter the appropriate Earning Category from the List of Values.
4. Select Absence Reason (if applicable) from the List of Values.
5. Enter the appropriate Absence Points (if applicable).
6. Select the Premium Type from the List of Values (if applicable).
7. Enter the appropriate Premium Amount (if applicable).
8. Enter the appropriate Processing Order. This field is required onlywhen a Premium Interaction Policy applies to this element. It isrecommended that the number be a whole number with incrementsof at least 10 between elements.
9. Select the appropriate Expenditure Type from the List of Values.

2 - 8 Using Oracle Time Management
Entering an Element Link
Element links determine which persons or groups of persons are eligiblefor elements. For example, if the certain elements are only allowed for aspecific payroll, that payroll can be selected on the Payroll field in theEligibility Criteria region of the Element Link form.
The entry for Oracle Time Management can be minimal becauseeligibility can be determined by the Premium Eligibility and Earningpolicies. However, even if a premium exists on the Premium EligibilityPolicy, a person will not receive it if is not linked on the Element Linkform.
Enter all element links to complete the element entry process.
Once the element entry process is completed, the Oracle TimeManagement tables and policies necessary for time entry can be set up.

Table Set-up and Maintenance 3 - 1
Table Setup and Maintenance
his chapter presents a detailed description of the setup of thetables essential to timekeeping.
T
CHAPTER
3

3 - 2 Using Oracle Time Management
Oracle Time Management Tables
Oracle Time Management tables provide the capability of setting up andmaintaining time-related information essential to the time entry process.For example, the Holiday Calendar allows the system to recognize paid(and unpaid) holidays. However, for a person to be paid for a holiday:
• The Holiday Calendar must be created and maintained.
• The Holiday Calendar must be assigned to an Earning Policy.
• The Earning Policy must be assigned to the person.
• Manual or automatic time entry must be created for the personduring a pay period containing the holiday.
• Time entry information must be sent to Batch Element Entry.
While this manual follows these steps through completion, this sectionfocuses on the setup of the Holiday Calendar and similar tables, which isthe first step in the process.

Table Set-up and Maintenance 3 - 3
Table Processes
Step-by-step instructions are given for the following table processes:
• table creation
• table maintenance (adding or changing data)
• table assignment to a person or an earning policy
• table review
• table expiration (removing table from use after a specific effectivedate).
Planning Table Information
Prior to table setup, or any Oracle Time Management entry, an inventoryof your time information needs must be assessed, and preliminary tablesshould be laid out for review to ensure all areas have been provided forand also to avoid duplication. The planning of all Oracle TimeManagement setups is an implementation issue and should beaddressed at that time. See the Oracle Time Management ImplementationGuide for specific instructions.

3 - 4 Using Oracle Time Management
Table Hierarchy
The menu items on the Navigator are not necessarily in the order thattables may be set up. While table order setup is irrelevant for mosttables, it is essential that the Shift table, be set up before either the WorkPlan or Rotation Plan can be set up. The setup information is thereforepresented accordingly.
Setting Up Holiday Calendars
Holiday calendars are used
• as a reference tool to determine paid and unpaid holidays. This tableis the only area in the system to record this information.
• to automatically generate (autogenerate) a detail time entry line itemwith the correct number of hours.
• to validate hours taken are correct. Manual time entries are edited todetermine if the day worked is a valid holiday; whether the day hasactually been charged as a holiday; and if the number of hoursentered are correct according to the assigned Holiday Calendar.

Table Set-up and Maintenance 3 - 5
Creating a Holiday Calendar
Use the Holiday Calendar window to create a holiday calendar.
To create a Holiday Calendar:
1. Enter name of the calendar in the Name field.
2. Enter an accurate short description of calendar in Description field.
3. Select the Holiday Pay Earning Type from the List of Values.
4. Select Organization from the List of Values. This field is optional.
5. Tab through the Effective Dates block to the Holiday Days block.
6. Enter the first holiday in the Name field.
7. Enter the holiday date in the Holiday Date field. The date enteredshould be the observed date; for example, if Independence Day isactually July 4th on a Thursday, but management has decided toobserve it on Friday, then July 5th is the date that should be entered.
8. Enter number of hours associated with the holiday. The number ofhours entered should correspond to the number of paid hours, ifapplicable. Enter zero if the holiday is an unpaid holiday.
9. Enter the remaining holidays.
10. Save the data.
11. Close the window or create another holiday.

3 - 6 Using Oracle Time Management
Adding a New Holiday to a Holiday Calendar
Use the Holiday Calendar window to add a new holiday to an existingholiday calendar.
To add a new holiday to an existing calendar:
1. Query to find the holiday calendar to which you wish to add a newholiday.
2. Place cursor in the first blank row (or select Edit/New Record fromaction bar to insert new line).
3. Enter new holiday in the Name field.
4. Enter new holiday date in the Holiday Date field.
5. Enter number of hours associated with holiday. If you autogeneratetimecards, the number of hours entered here will be the number ofhours generated. You may wish to enter unpaid holidays forreference purposes; enter zero in this field.
6. Save the data.
7. Close the form.

Table Set-up and Maintenance 3 - 7
Assigning a Holiday Calendar to an Earning Policy
A holiday calendar can not be assigned directly to a person. However, aholiday calendar can be assigned to an earning policy, which is thenassigned to a person.
To assign a Holiday Calendar to an earning policy:
1. Select Earning Policy from the Navigator menu.
2. Query to find the holiday calendar to which you wish to assign to anearning policy.
3. Cursor to the Holiday Calendar field on the Earning Policy form andselect the appropriate Holiday Calendar from the List of Values.
4. Close the Earning Policy form.
Expiring a Holiday Calendar
Use the Holiday Calendar form to expire an existing holiday calendar.
Note: Do not delete a Holiday Calendar unless you wish the recordremoved from the system.
To expire a Holiday Calendar:
1. Query to find the holiday calendar you wish to expire.
2. Place cursor in the To field in the Effective Dates block and enter theappropriate end date.
3. Save the data.
4. Close the form.

3 - 8 Using Oracle Time Management
Viewing an Expired Holiday Calendar
Use the Holiday Calendar window to view an expired holiday calendar.
To view an Expired Holiday Calendar:
1. Change the effective date to beginning date of period you areinterested in viewing prior to calendar end date.
2. Query to find the expired holiday calendar you wish to view. Thesystem brings up the calendar record with effective dates of Fromyour beginning date entered to expired date.
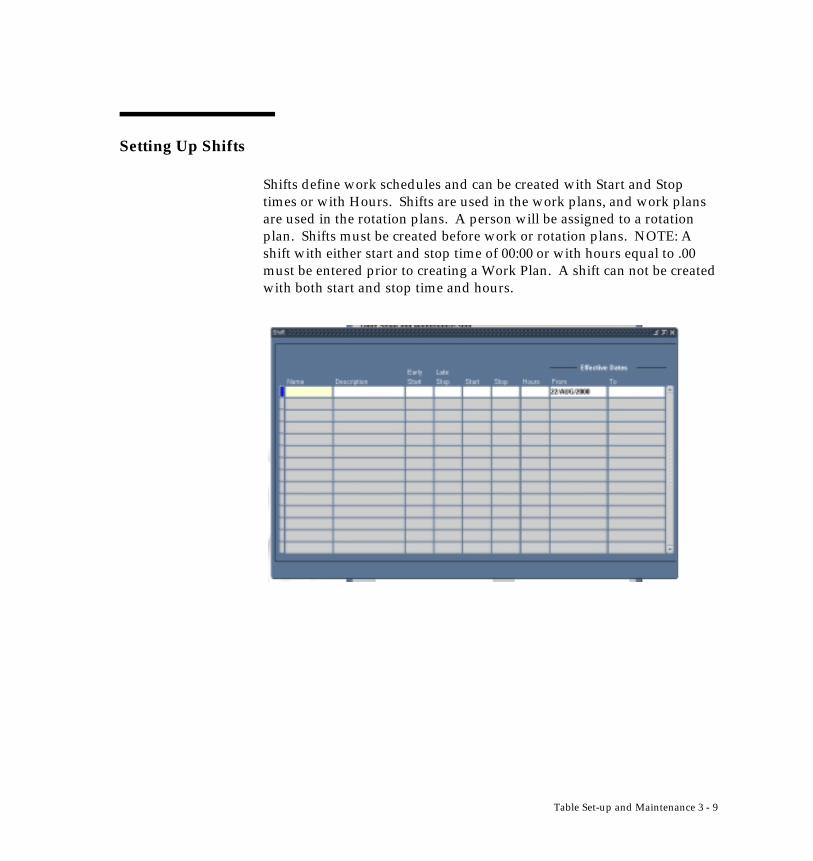
Table Set-up and Maintenance 3 - 9
Setting Up Shifts
Shifts define work schedules and can be created with Start and Stoptimes or with Hours. Shifts are used in the work plans, and work plansare used in the rotation plans. A person will be assigned to a rotationplan. Shifts must be created before work or rotation plans. NOTE: Ashift with either start and stop time of 00:00 or with hours equal to .00must be entered prior to creating a Work Plan. A shift can not be createdwith both start and stop time and hours.

3 - 10 Using Oracle Time Management
Creating an Off Shift
An Off shift must be created prior to establishing a Work Plan. Use theShift window to create an off shift.
To create an off shift:
1. Enter a name, such as “Off,” in the name field.
2. Enter a description of the Off shift in the Description field.
3. Leave the Early Start and Late Stop fields blank.
4. Enter either 00:00 in the Start and Stop fields, or enter .00 in theHours field. Either entry will indicate a non-work day.
5. After the Off shift is created you may enter all remaining shifts.

Table Set-up and Maintenance 3 - 11
Creating or Adding Shifts
Use the Shift window to create or add shifts.
To create or add shifts:
1. Enter a short, definitive name for the shift.
2. Enter a concise description for the shift.
3. OPTIONAL: Enter the Early Start and Late Stop of the shift ifdesired. The Early Start and Late Stop become crucial to thosesituations where people clock in and clock out. The Early Start andLate Stop times recognize that there is a period prior and after theshift start and stop times that is needed to allow all people workingthat shift to clock in and clock out. Therefore, no additional time isgenerated for people who clock in and clock out during theseperiods. However, if a person clocks in before the Early Start time,then that person’s hours generated will be based on clock in time,and if a person clocks out after the Late Stop time, then that person’shours generated will be based on clock out time.
4. Enter the start time for the shift in a 24-hour clock format in the Startfield.
5. Enter the stop time for the shift in a 24-hour clock format in the Stopfield.
6. OR enter hours (the length of the shift)
7. Continue steps 1 through 6 to add all desired shifts.
8. Save the data.

3 - 12 Using Oracle Time Management
Expiring a Shift
Use the Shift window to expire a shift.
Note: Do not delete a Shift unless you wish the record removed fromthe system.
To expire a Shift:
1. Query to find the shift you wish to expire.
2. Place cursor in the To field in the Effective Dates block and enter theappropriate end date.
3. Save the data.
Viewing an Expired Shift
Use the Shift window to view an expired shift.
To view an Expired Shift:
1. Change the effective date to beginning date of period you areinterested in viewing prior to calendar end date.
2. Start and run a query. The system then brings up the shift record.

Table Set-up and Maintenance 3 - 13
Setting Up Work Plans
Work Plans identify applicable shifts for each of the seven days of theweek. Work Plans are used
• in the autogeneration of hours for each person.
• by Rotation Plans. All rotation plans are made up of at least onework plan.
• for the calculation of Day Premiums and Shift DifferentialOverrides.

3 - 14 Using Oracle Time Management
Creating a Work Plan
Use the Work Plan window to create a Work plan.
To create a work plan:
1. Enter name of Work plan in the Name field.
2. Enter a meaningful description of work plan in Description field.
3. Enter the first day of the work week in the Start Day field.
4. Tab through the Effective Dates block to the Name field in the WorkShifts block.
5. Select the appropriate shift. The Early Start, Late Stop, Start and Stoptimes or hours display according to the shift selected.
6. Continue selecting all needed shifts.
7. Select a value for the Day Premium field, if and only if yourcompany pays a premium to those persons who work on their days“off”. Select the type of premium that will apply to this particularday on this particular shift.
8. If your company pays a premium for those who have worked hoursother than their regular shift, select the appropriate earning type forthe Shift Diff Override field.
9. Save the data.

Table Set-up and Maintenance 3 - 15
Assigning a Work Plan to a Rotation Plan
Use the Rotation Plan window to assign a work plan to a rotation plan.
To assign a Work Plan to a Rotation Plan:
1. Query to find the rotation plan you wish to assign work plans.
2. Tab to the Rotation Plan region and select the appropriate work planfrom the List of Values. Continue to select all desired work plans.
3. Save the data.
Expiring a Work Plan
Use the Work Plan window to expire an existing work plan.
Note: Do not delete a Work Plan unless you wish the recordpermanently removed from the system. Also, do not delete a Work Planif it is assigned to a rotation plan.
To expire a Work Plan:
1. Query to find the work plan you wish to expire.
2. Place cursor in the To field in the Effective Dates block and enter theappropriate end date.
3. Save the data.

3 - 16 Using Oracle Time Management
Viewing an Expired Work Plan
Use the Work Plan window to view an expired work plan.
To view an Expired Work Plan:
1. Change the effective date to beginning date of period you areinterested in viewing prior to calendar end date.
2. Query to find the expired work plan you wish to view. The systemthen brings up the work plan record.

Table Set-up and Maintenance 3 - 17
Setting Up Rotation Plans
Rotation Plans indicate the dates upon which a person moves from onework plan to another. All people are assigned to a rotation plan, even ifthat rotation plan only has one work plan on it.
Rotation plans are also used in the autogeneration of hours and thecalculation of Day and Shift Differential Override premiums.

3 - 18 Using Oracle Time Management
Creating a Rotation Plan
Use the Rotation Plan window to create a Rotation Plan.
To create a Rotation Plan:
1. Enter name of Rotation Plan in the Name field.
2. Enter a concise description of Rotation Plan in Description field.
3. Tab through the Effective Dates block to the Name field in theRotation Plan block.
4. Select the appropriate work plan. If only one work plan is selected,that work plan stays in effect indefinitely.
5. Enter the Start Date of the work plan in the Start Date Field. This isthe date in which the employee should start Working this WorkPlan.
6. Continue selecting all needed work plans.
7. Save the data.

Table Set-up and Maintenance 3 - 19
Assigning a Rotation Plan to a Person
Use the Assignment Time Information window to assign a Rotation Planto a person.
To assign a Rotation Plan to a Person:
1. Select Assignment Time Information from the Navigator list.
2. Query to find the person to whom you wish to assign a rotation planby entering either the Assignment Number or Full Name.
3. The system will return the Assignment Number and Full Name fromthe data queried.
4. Tab to the Additional Assignment Information portion of thewindow.
5. Tab to the Rotation Plan field.
6. Select the appropriate Rotation Plan from the List of Values.
7. Save the data.

3 - 20 Using Oracle Time Management
Removing an Assignment between a Rotation Plan and a Person
Use the Assignment Time Information Window to remove theassignment between a Rotation Plan and a Person.
Note: When you remove the assignment from one specific RotationPlan, you must assign the person to another Rotation Plan.
To remove the assignment between a Rotation Plan and a Person:
1. Select Assignment Time Information from the Navigator list.
2. Query to find the person whose rotation plan assignment you wishto remove.
3. Select the new Rotation Plan from the List of Values.
4. Save the data.

Table Set-up and Maintenance 3 - 21
Expiring a Rotation Plan
Use the Rotation Plan window to expire an existing Rotation Plan.
Note: Do not delete a Rotation Plan unless you wish the record removedpermanently from the system. Deleting a rotation plan prevents an audittrail.
To expire a Rotation Plan:
1. Select Rotation Plan from the Navigator list.
2. Query to find the rotation plan you wish to expire.
3. Place cursor in the To field in the Effective Dates block and enter theappropriate end date.
4. Save the data.
Viewing an Expired Rotation Plan
Use the Rotation plan window to view an expired rotation plan.
To view an Expired Rotation Plan:
1. Change the effective date to beginning date of period you areinterested in viewing prior to calendar end date.
2. The system then brings up the rotation plan record.

3 - 22 Using Oracle Time Management
Setting Up Oracle Time Management Projects
Project Accounting allows you to input time and/or dollar estimates fortasks and work orders. Projects can then be tracked by hours or bydollars. Project tracking is done through reports.
This form applies to only manually input time and not autogeneratedtime entries.

Table Set-up and Maintenance 3 - 23
Creating a Project
Use the Project Accounting window to create a project.
To create a project:
1. Enter the name of the project in Project field.
2. Enter a brief description of project in Description field.
3. Enter the number for the project in the Project/Work Order Numberfield.
4. Select the organization associated with the project from the List ofValues
5. Tab to the Tasks portion of the window.
6. Enter each task for the project on a separate line; enter descriptionand estimate respectively.
7. In the Units field select HOURS or DOLLARS from the list of values.
8. Save the data.

3 - 24 Using Oracle Time Management
Expiring a Project
Use the Project Accounting form to expire a project.
Note: Do not delete a Project unless you wish the record removed fromthe system.
To expire a project:
1. Query to find the project you wish to expire.
2. Place cursor in the To field in the Effective Dates block and enter theappropriate end date.
3. Save the data.
Viewing an Expired Project
Use the Project Accounting window to view an expired project account.
To view an Expired Project:
1. Change the effective date to beginning date of period you areinterested in viewing prior to calendar end date.
2. Query to find the expired project you wish to view. The system thenbrings up the project record.

Table Set-up and Maintenance 3 - 25
Setting Up Variances
Variance tables define average, high, and low levels of hours per period,by organizations, location, or earnings. This information can be used tonotify users that the changes in the expected number of earnings hourshave been reached.

3 - 26 Using Oracle Time Management
Creating a Variance
Use the Variance window to create a Variance.
To create a Variance:
1. Select appropriate list item for Period field from the List of Values.
2. Select appropriate Type from the drop-down list. If Earnings isselected as the Type, a report may be requested to display earningsafter all data has been transferred to Batch Element Entry.
3. Select appropriate Earning Type from the List of Values.
4. Enter the highest number of base hours allowed for the Earning Typeand Period in the High field.
5. Enter the average number of base hours allowed for the EarningType and Period in the Average field.
6. Enter the lowest number of base hours allowed for the Earning Typeand Period in the Low field.
7. Save the data.

Table Set-up and Maintenance 3 - 27
Expiring a Variance
Use the Variance window to delete an existing variance.
Note: Do not delete a Variance unless you wish the record removedfrom the system.
To expire a Variance:
1. Query to find the variance you wish to expire.
2. Place cursor in the To field in the Effective Dates block and enter theappropriate end date.
3. Save the data.
Viewing an Expired Variance
Use the Variance window to view an expired variance.
To view an Expired Variance:
1. Change the effective date to beginning date of period you areinterested in viewing prior to calendar end date.
2. Query to find the expired variance you wish to view. The systemthen brings up the variance record.

3 - 28 Using Oracle Time Management
Setting Up Earning Groups
The Earning Group table allows earnings to be grouped together forreporting purposes and to identify those Earning Types you want toinclude in the accumulation of hours to be used in calculating weeklyovertime caps on the Earning Policy.

Table Set-up and Maintenance 3 - 29
Creating an Earning Group
Use the Earning Group window to create an earning group.
To create an Earning Group:
1. Enter name of earning group in the Name field.
2. Enter an accurate short description of earning group in Descriptionfield.
3. Tab through the Effective Dates block to the Earning Types block.
4. Select Earning Type from the List of Values.
5. Continue selecting all earning types required.
6. Save the data.

3 - 30 Using Oracle Time Management
Expiring an Earning Group
Use the Earning Group window to expire an earning group.
Note: Do not delete an Earning Group unless you wish the recordremoved from the system.
To expire an Earning Group:
1. Query to find the Earning Group you wish to expire.
2. Place cursor in the To field in the Effective Dates block and enter theappropriate end date.
3. Save the data.
Viewing an Expired Earning Group
Use the Earning Group window to view an expired earning group.
To view an Expired Earning Group:
1. Change the effective date to beginning date of period you areinterested in viewing prior to calendar end date.
2. Query to find the expired earning group you wish to view. Thesystem then brings up the earning group record.

Policy Setup 4 –1
Policy Setup
his chapter presents a detailed description of policy setup foreach of the five timekeeping policies available in the Oracle Time
Management system: Hour Deduction, Shift Differential, PremiumEligibility, Premium Interaction, and Earning.
T
CHAPTER
4
4 - 2 Using Oracle Time Management
Oracle Time Management Policies
Within Oracle Time Management, policies allow you to set up the rulesgoverning time entry, autogeneration, and how time information iscalculated. For example, if a person clocks in and out over a 9 hourperiod, he would get paid for the entire time unless, he has an HourDeduction Policy that subtracts a 1/2 hour meal, and two 15 minutebreaks from his time. With the attached Hour Deduction Policy, theemployee would have only worked a standard 8-hour day.
The Shift Differential Policy sets up any premiums or differentials paidas a result of people working different shifts. However, as mentionedearlier, it can be overridden on the Work Plan or timecard.
The Premium Eligibility and Premium Interaction policies work togetherwhen several premiums are indicated on the Premium InteractionPolicy. They must first be included on the Premium Eligibility Policy.
In the previous section, you learned how to create and maintain aHoliday Calendar, the next step, assigning the Holiday Calendar to theEarning Policy, points to the central importance of the Earning Policy tothe timekeeping process. Since the Earning Policy is assigned to aperson, it is an index that contains all the time calculation rules that willbe applied to that individual.
This section focuses on setting up all policies that end in assigning themand the Holiday Calendar to the Earning Policy.

Policy Setup 4 –3
Policy Processes
Step-by-step instructions are given for the following policy processes:
• policy creation
• policy maintenance (adding or changing data)
• policy assignment to a person or an earning policy
• policy review
• policy expiration (removing policy from use after a specific effectivedate).
Planning Policy Information
Prior to policy setup, or any Oracle Time Management entry, aninventory of your time information needs must be assessed, andpreliminary policies should be laid out for review to ensure all areashave been provided for and also to avoid duplication. The planning ofall Oracle Time Management setups is an implementation issue andshould be addressed at that time. See the Oracle Time ManagementImplementation Guide for specific instructions.
Policy Hierarchy
The menu items on the Navigator are not necessarily in the order thatpolicies may be set up. While policy order setup is irrelevant for mostpolicies, it is essential that all policies be set up before the Earning Policycan be set up. The setup information is therefore presented accordingly.

4 - 4 Using Oracle Time Management
Setting Up Hour Deduction Policies
If your company automatically deducts time for a meal and breaks,create hour deduction policies to define these rules. These policiesnormally apply to clock in/clock out setups or when the total hours forthe day are included on the timecard. The Hour Deduction policy is nota required entry unless deemed necessary by specific companyrequirements. The Hour Deduction policy is assigned to an employeeand is not attached to any other policies or tables within the Oracle TimeManagement system.

Policy Setup 4 –5
Creating an Hour Deduction Policy
Use the Hour Deduction Policy window to create an Hour DeductionPolicy.
To create an Hour Deduction Policy:
1. Enter name of hour deduction policy in the Name field.
2. Enter a concise description of the hour deduction policy in theDescription field.
3. Tab through the Effective Dates block to the Hour Deduction Rulesblock.
4. Select the appropriate list item for the Name field.
5. Enter the amount of time to be deducted for the item listed in theName field. For example, it is common to deduct 15 minutes forbreaks; therefore, if BREAK is the name field, enter .25 in the Hoursfield.
6. Enter the number of hours that are to elapse before the deduction istaken in the Time Period field. For example, it is common to deduct15 minutes for breaks after 4 hours worked, and 30 minutes for lunchafter 8 hours are worked; therefore, 4 hours would be entered for theTime Period for BREAK, and 8 hours would be entered for the TimePeriod for the MEAL.
7. Continue entering on additional rows in the Hour Deduction Rulesblock as needed.
8. Save the data.

4 - 6 Using Oracle Time Management
Assigning an Hour Deduction Policy to a Person
Use the Assignment Time Information window to assign an HourDeduction Policy to a person.
To assign an Hour Deduction Policy to a Person:
1. Select the Assignment Time Information item from the Navigator.
2. Query the employee you wish to assign and Hour Deduction Policy.
3. Tab to the Hour Deduction field and select the appropriate HourDeduction Policy from the List of Values.
4. Save the data.
Removing an Assignment between an Hour Deduction Policy and a Person
Use the Assignment Time Information window to remove an assignmentbetween an Hour Deduction Policy and a person.
To remove an assignment between an Hour Deduction Policy and aperson:
1. Select the Assignment Time Information item from the Navigator.
2. Query the person to whom you wish to assign an Hour DeductionPolicy.
3. Select another Hour Deduction Policy from the List of values.
4. Save the data.

Policy Setup 4 –7
Expiring an Hour Deduction Policy
Use the Hour Deduction Policy window to expire an Hour Deductionpolicy.
Note: Do not delete an Hour Deduction Policy unless you wish therecord removed from the system.
To expire an Hour Deduction Policy:
1. Query to find the Hour Deduction Policy you wish to expire.
2. Place cursor in the To field in the Effective Dates block and enter theappropriate end date.
3. Save the data.
Viewing an Expired Hour Deduction Policy
Use the Hour Deduction Policy window to view an expired HourDeduction policy.
To view an Expired Hour Deduction Policy:
1. Change the effective date to beginning date of period you areinterested in viewing prior to calendar end date.
2. Query to find the expired Hour Deduction Policy you wish to view.The system then brings up the Hour Deduction Policy record.

4 - 8 Using Oracle Time Management
Setting Up Shift Differential Policies
The shift differential policy identifies the shift differential start and stoptime, and the earnings type to be used for the shift differential premium.If a person works during the shift, he would be eligible to receive thatshift differential premium.

Policy Setup 4 –9
Creating a Shift Differential Policy
Use the Shift Differential Policy window to create a shift differentialpolicy.
To create a Shift Differential Policy:
1. Enter the name of shift differential policy in the Name field.
2. Enter a concise description of the shift differential policy in theDescription field.
3. Tab through the Effective Dates block to the Shift Differential Rulesblock.
4. Enter name of the shift differential rule in the Name field.
5. Enter start time of the shift differential in the Start field.
6. Enter stop time of the shift differential in the Stop field.
7. Enter ending time that the original shift is to be carried over in theCarryover field, only if your company’s policy is that a personreceives the shift differential for the shift he began work in throughthe carryover stop time, regardless of whether he worked into thenext shift. Otherwise, tab to the next field.
8. Select the Premium Earning Type for the shift differential. Thispremium must also be on the person’s Premium Eligibility Policy.
9. Save the data.

4 - 10 Using Oracle Time Management
Assigning a Shift Differential Policy to a Person
Use the Assignment Time Information window to assign a ShiftDifferential policy to a person.
To assign a Shift Differential policy to a person:
1. Select the Assignment Time Information item from the Navigator.
2. Query the employee you wish to assign a Shift Differential Policy.
3. Select the appropriate Shift Differential Policy from the List ofValues.
4. Save the data.
Removing an Assignment between a Shift Differential Policy and a Person
Use the Assignment Time Information window to remove an assignmentbetween a Shift Differential Policy and a person.
To remove an assignment between a Shift Differential Policy and aperson:
1. Select the Assignment Time Information item from the Navigator.
2. Query to find the person to whom you wish to remove the ShiftDifferential Policy.
3. Select the new Shift Differential Policy or delete the current policy.
4. Save the data.

Policy Setup 4 –11
Expiring a Shift Differential Policy
Use the Shift Differential Policy window to expire a Shift Differentialpolicy.
Note: Do not delete a Shift Differential Policy unless you wish therecord removed from the system.
To expire a Shift Differential Policy:
1. Query to find the Shift Differential Policy you wish to expire.
2. Place cursor in the To field in the Effective Dates block and enter theappropriate end date.
3. Save the data.
Viewing an Expired Shift Differential Policy
Use the Shift Differential Policy window to view an expired ShiftDifferential Policy.
To view an expired Shift Differential Policy:
1. Change the effective date to beginning date of period you areinterested in viewing prior to calendar end date.
2. Query to find the expired Shift Differential Policy you wish to view.The system then brings up the Shift Differential Policy record.

4 - 12 Using Oracle Time Management
Setting Up Premium Eligibility Policies
A premium eligibility policy lists the authorized premiums associatedwith each Base hours type on the premium eligibility policy. Althoughthe policies define premiums a person is eligible for, this does not implythey will automatically receive them. Eligibility is based on time ranges,actual time worked, and applicable pay rules.

Policy Setup 4 –13
Planning A Premium Eligibility Policy
For all premiums and absence earning types your company pays, youmust define at least one Premium Eligibility Policy. While a PremiumEligibility Policy is assigned to an Earning Policy, which is then assignedto a person, to avoid duplication and to assign premiums that areappropriate for specific sets of people, plan out logical groupings. Forexample, people can be grouped by shifts, job functions, work plans, etc.,and the appropriate premiums and base hour types can be associatedwith each group.
The following matrix illustrates one example that would require at leastthree Premium Eligibility Policies:
People Group Base Hours Type AuthorizedPremiums
Welders Regular
Overtime_1.5
Welding Premium
Danger Pay
Fork Lift Drivers Regular Work Hard Premium
Truck Drivers Holiday Pay Holiday Premium
Since the example shows job function as the logical grouping, allpremiums associated with each group should be included so that theymay be assigned to one policy.
In Chapter 2, you learned that setting up informational elements andelement links in the first stage in the Oracle Time Management process.If a person is not linked (via Element Link) to the authorized premiumslisted on his Premium Eligibility Policy, he will not receive thatpremium. Therefore, it is essential in the planning stages to ensure theproper links have been made for any premiums that will be authorizedon each policy.

4 - 14 Using Oracle Time Management
Creating a Premium Eligibility Policy
Use the Premium Eligibility Policy window to create a premiumeligibility policy.
To create a Premium Eligibility Policy:
1. Enter the name of the premium eligibility policy in the Name field.
2. Enter an accurate short description of the premium eligibility policyin the Description field.
3. Tab through the Effective Dates block to the Base Hours Type block.
4. Select Base Hours Type from the List of Values.
5. Cursor to the Premium Eligibility Rules block.
6. Select the appropriate Authorized Premium.
7. Continue selecting all the authorized premiums that apply.
8. If multiple Base Hours type are required, save the data and cursorback tot he Base Hours Type field. Using the arrow down key, enterthe next Base Hours Type and continue with steps 4-7.
9. Save data.

Policy Setup 4 –15
Assigning a Premium Eligibility Policy to an Earning Policy
A Premium Eligibility Policy can not be assigned directly to a person. Itmust be assigned to an earning policy, which is then assigned to aperson.
To assign a Premium Eligibility Policy to an Earning Policy:
1. Select the Earning Policy form from the Navigator list.
2. Query to find the Earning Policy to which you wish to assign thePremium Eligibility Policy.
3. Cursor to the Premium Eligibility field on the Earning Policywindow and select the appropriate Premium Eligibility policy fromthe List of Values.
4. Save the data.
Expiring a Premium Eligibility Policy
Use the Premium Eligibility window to expire an existing PremiumEligibility policy.
Note: In Oracle Time Management do not delete a Premium Eligibilitypolicy unless you wish the record removed from the system.
To expire a Premium Eligibility Policy:
1. Query to find the Premium Eligibility Policy to which you wish toexpire.
2. Place cursor in the To field in the Effective Dates block and enter theappropriate end date.
3. Save the data.

4 - 16 Using Oracle Time Management
Viewing an Expired Premium Eligibility Policy
Use the Premium Eligibility Policy window to view an expired PremiumEligibility policy.
To view an expired Premium Eligibility Policy:
1. Change the effective date to beginning date of period you areinterested in viewing prior to calendar end date.
2. Query to find the expired premium eligibility policy you wish toview. The system brings up the premium eligibility policy recordwith effective dates of From your beginning date entered to expireddate.

Policy Setup 4 –17
Setting Up Premium Interaction Policies
While the Premium Eligibility Policy determines which premiums aperson may be eligible for, it is the Premium Interaction Policy that iskey to determining how authorized premiums for a specific premiumeligibility policy relate to each other, i.e. order of premium calculation.

4 - 18 Using Oracle Time Management
Planning A Premium Interaction Policy
If you have more than one Authorized Premium per Base Hours Type ona Premium Eligibility Policy, and one premium is to be used as a base foranother, you must create a Premium Interaction Policy to indicate thatone is to be applied to another
Premium Eligibility policies are linked to Premium Interaction policiesby way of assigning them both to the same Earning Policy.
If your premiums interact with each other (i.e., are to be applied to eachother rather than directly to a base hour type), you will need to ensurethat you have properly selected the appropriate processing order foreach one. For example, if you have two premiums that you pay onovertime pay such as second and third shift differential premium.
To illustrate:
Overtime Pay = processing order of 40
Second Shift Premium = processing order of 20
Person’s Hourly Rate = $10
Overtime Pay = factor/multiple of 1.5
Second Shift Premium = fixed rate per hour $ .40
Third Shift Premium = fixed rate per hour $ .40
When the employee works overtime and receives either the Second orThird Shift Premium at $ .40 an hour, the employee will actually receivea rate of $ .60 per hour ($ .40 x 1.5 = $ .60)

Policy Setup 4 –19
Creating a Premium Interaction Policy
Use the Premium Interaction Policy window to create a premiumInteraction policy.
To create a Premium Interaction Policy:
1. Enter the name of the premium interaction policy in the Name field.
2. Enter an accurate short description of the premium interaction policyin the Description field.
3. Tab through the Effective Dates block to the Base Hours Type block.
4. Select Premium Hours Type from the List of Values.
5. Cursor to the Premium Interaction Rules block.
6. Select the appropriate Authorized Premium.
7. Continue selecting all the authorized premiums that apply.
8. If multiple Premium Hours Types are to interact with variousAuthorized Premiums, save the data and enter another Premium byusing the arrow down key to create a new line.
9. Continue entering all data following steps 4-8.
10. Save data.

4 - 20 Using Oracle Time Management
Assigning a Premium Interaction Policy to an Earning Policy
A Premium Interaction Policy can not be assigned directly to a person. Itis assigned to an Earning Policy, which is then assigned to a Person.
To assign a Premium Interaction Policy to an Earning Policy:
1. Query to find the Earning Policy to which you wish to assign thePremium Interaction Policy.
2. Cursor to the Premium Interaction field on the Earning Policy formand select the appropriate Premium Interaction policy from the Listof Values.
3. Save the data.
Expiring a Premium Interaction Policy
Use the Premium Interaction window to expire an existing PremiumInteraction policy.
Note: Within Oracle Time Management, do not delete a PremiumInteraction policy unless you wish the record removed from the system.
To expire a Premium Interaction Policy:
1. Query to find the Premium Interaction Policy you wish to expire.
2. Place cursor in the To field in the Effective Dates block and enter theappropriate end date.
3. Save the data.

Policy Setup 4 –21
Viewing an Expired Premium Interaction Policy
Use the Premium Interaction Policy window to view an expiredPremium Interaction policy.
To view an expired Premium Interaction Policy:
1. Change the effective date to the beginning date of the period you areinterested in viewing prior to premium Interaction policy end date.
2. Query to find the expired premium interaction policy you wish toview. The system brings up the premium Interaction policy recordwith effective dates of From your beginning date entered to expireddate.

4 - 22 Using Oracle Time Management
Setting Up Earning Policies
Each Earning Policy is a grouping of rules and a holiday calendar that isassigned to each person. The earning policy identifies the daily/weeklybase and overtime rules, the holiday calendar, and the premium policiesto be used in calculating pay. You must define an earning policy foreach set of rules.

Policy Setup 4 –23
Creating an Earning Policy
Use the Earning Policy form to create an earning policy.
To create an Earning Policy:
1. Enter the name of the earning policy in the Name field.
2. Enter an accurate short description of the earning policy inDescription field.
3. Select Type from the List of Values.
NOTE: Select DAILY if you only need to define rules based on aday. For example, if you want overtime paid for all hours worked ina day in excess of 8, then you would select DAILY.
Select WEEKLY if you only need to define rules based on a week.For example, if you only pay overtime for hours in a week in excessof 40, you would select WEEKLY.
Select SPECIAL if you are defining rules that are based on acombination of a day, and/or week, and/or a consecutive days’basis. For example, if you pay overtime for hours in excess of 8 in aday AND 40 in a week, you would select SPECIAL. If you aresubject to a double time rule (i.e., if a person has worked more than12 hours in a day, all hours over 12 are paid at double time overtime,and if a person worked 7 days straight, then the 7th day is paid asdouble time overtime), you would select SPECIAL.
4. Tab through the Effective Dates block to the Holiday Day Calendarfield.
5. Select Holiday Calendar from the List of Values.
6. Select the appropriate Earnings included to meet OVT cap, ifapplicable.
7. Select the appropriate Premium Eligibility Policy, if applicable.

4 - 24 Using Oracle Time Management
8. Select the appropriate Premium Interaction Policy, if applicable.
9. Enter the appropriate Minimum T/C Interval, if applicable. Forexample, if the minimum time card interval is 15, then time entryhours will be automatically rounded up/down to 15 minuteincrements. The interval begins at the beginning of an hour, so thisexample would mean that input and/or generated hours would be24:00, 24:15, 24:30, 24:45, 01:00, 01:15, etc.
10. Enter the amount in the Round Up At field, if applicable. If theminimum timecard interval is 15 and the roundup at is 8, then timeclocked at 24:07 would be rounded down to 24:00, but a time clockedat 24:08 would be rounded up to 24:15. These would be the hoursand increments that would be sent to Element Entries and retainedin the database.
11. Tab to the Daily/Weekly Base and Overtime Rules block. Enter therules in the following order. Daily, Weekly, and Special if all areapplicable. An entry of HOL is also required. Again, if the TYPE ofpolicy specified was Daily, then the only required entry within theDaily/Weekly Base and Overtime Rules block would be DAY andHOL. If you selected a TYPE of Weekly, then the only required entrywould be WKL and HOL. If you selected a TYPE of Special, then therequired entries would be DAY, WKL, and HOL.
12. Enter all applicable rules.
13. Save the data.

Policy Setup 4 –25
Assigning an Earning Policy to a Person
Use the Assignment Time Information window to assign an earningpolicy to a person.
To assign an earning policy to a person:
1. Select the Assignment Time Information item from the Navigatorlist.
2. Query to find the person to whom you wish to assign an EarningPolicy.
3. Select the appropriate the Earning Policy from the List of Values.
4. Save the data.
Removing a Assignment between an Earning Policy and a Person
Use the Assignment Time Information window to remove an assignmentbetween an Earning Policy and a person. Note: When you remove theassignment from one Earning Policy you must assign to another.
To remove an assignment between an Earning Policy and a person:
1. Select the Assignment Time Information item from the Navigator.
2. Query to find the person whose Earning Policy you wish to change.
3. Select the new Earning Policy from the List of Values.
4. Save the data.

4 - 26 Using Oracle Time Management
Expiring an Earning Policy
Use the Earning Policy window to expire an earning policy.
Note: In Oracle Time Management do not delete an Earning Policyunless you wish the record removed from the system.
To expire an Earning Policy:
1. Select Earning Policy from the Navigator list.
2. Query to find the earning policy you wish to expire.
3. Place cursor in the To field in the Effective Dates block and enter theappropriate end date.
4. Save the data.
Viewing an Expired Earning Policy
Use the Earning Policy window to view an expired earning policy.
To view an Expired Earning Policy:
1. Change the effective date to beginning date of period you areinterested in viewing prior to calendar end date.
2. Query to find the expired earning policy you wish to view. Thesystem then brings up the Earning Policy record.

Oracle Time Management Reports 5 - 1
Policy and People Assignment
he previous chapter illustrated how the Earning Policy is akey component in assigning the rules that will be used in the
calculation of time and, eventually, pay. This chapter furtherexplores how Oracle Time Management tables and policies arelinked together to provide the proper assignments for eachperson.
T
CHAPTER
5

5 - 2 Using Oracle Time Management
Oracle Time Management Form Links
The table below lists the Direct (D) links between an Oracle TimeManagement table or policy and the form it is assigned to. For example,the Holiday Calendar is assigned to the Earning Policy, and the EarningPolicy is assigned to the Assignment Time Information window.
FORM ASSIGN-MENTTIMEINFO
OTMEARNING
POLICY
OTMWORKPLAN
OTMROTATIO
NPLAN
TABLESHOLIDAYCALENDAR
D
WORK PLAN DROTATION PLAN DSHIFT DPROJECTACCOUNTINGVARIANCEEARNING GROUP DPOLICIESEARNING POLICY DHOUR DEDUCTION DSHIFTDIFFERENTIAL
D
PREMIUMELIGIBILITY
D
PREMIUMINTERACTION
D

Oracle Time Management Reports 5 - 3
Entering Assignment Time Information
To access the Assignment Time Information window for entry:
1. Select the Assignment Time Information item from the Navigator.
2. Place the cursor in the Autogen Hours YN field and select Yes toautogenerate this person’s timecard or No not to autogenerate thisperson’s timecard.
3. Select the applicable Rotation Plan from the List of Values for thisperson.
4. Select the appropriate Earning Policy from the List of Values.
5. If the person has an applicable Shift Differential Policy, select it fromthe List of Values.
6. Select any applicable Hour Deduction policy from the List of Values.
7. Save the data.

5 - 4 Using Oracle Time Management
Entering Additional Organization Information
To access the Additional Organization Information window:
1. Query on the Organization you are interested in.
2. Select the Others push button and the Additional OrganizationInformation window will display.
3. Select Time Management Information from the list box and selectOK.
4. Click in the field, and the Time Management Information windowwill display.
5. Select the appropriate Timecard Approver from the List of Values.
6. Timecard Approver entry has the following hierarchy; 1) Nameentered in Supervisor field on Person window overrides all othernames and is the only one to display in the List of Values. 2) Nameentered on the Organizational level populates the List of Values ifand only if no name has been entered on the Supervisor field. 3) If

Oracle Time Management Reports 5 - 5
no name is entered on one of these windows, the List of Values isempty.
7. Press the OK push-button to close the window.
8. Save the data.

5 - 6 Using Oracle Time Management

Oracle Time Management Reports 6 - 1
Oracle Time Management Reports
nce tables and policies have been set up, online reports maybe run to display table and policy information.
Reports can also be run during the timecard entry process.This chapter describes the online reports available anddetails the process of submitting them, reviewing themonline, and printing hard copies.
O
CHAPTER
6

6 - 2 Using Oracle Time Management
Oracle Time Management Online Reports
The table below lists all the reports available in this release, and a briefdescription of each. These reports can be submitted through theProcesses and Reports heading on the Navigator.
REPORT TITLE REPORT DESCRIPTION
Organization VarianceCalc
Lists all organizations andtheir variances per each payperiod
Location VarianceCalculation
Lists all locations and theirvariances per each pay period
Earning VarianceCalculation
Lists all organizations andtheir variances per each payperiod
Earning Policy TableListing
Lists all earning policiesentered on the Earning Policywindow
Hour Deduction PlcyTbl List
Lists all hour deductionpolicies entered on the HourDeduction window
Shift Diff. Pol. TableListing
Lists all shift differentialpolicies entered on the ShiftDifferential window.
Premium Elg PolicyTbl Lst
Lists all premium eligibilitypolicies entered on thePremium Eligibility window

Oracle Time Management Reports 6 - 3
REPORT TITLE REPORT DESCRIPTION
Prem. Interaction PlcyTbl Lst
Lists all premium interactionpolicies entered on thePremium Interaction window
Holiday Calendar TableReport
Lists all holiday calendarsentered on the HolidayCalendar window
Work Plan Table Listing Lists all the work plansentered on the Work Planwindow
Rotation Plan TableListing
Lists all the rotation plansentered on the Rotation Planwindow
Shift Table Listing Lists all the shifts entered onthe Shift window
Project AccountingTable List
Lists all the projects enteredon the Project Accountingwindow
Variance Table Listing List all the variances enteredon the Variance window
Earning Group TableListing
Lists all the earning groupsentered on the Earning Groupwindow
Total Table Entries Lists totals for each of thetables above (HXT957A —HXT957G).
Person/AssignmentTable List
Lists employees, theirassignments, and theirassignment effective dates
Actual and Rounded Lists actual time entered on

6 - 4 Using Oracle Time Management
REPORT TITLE REPORT DESCRIPTIONTime Punch Timecard form and rounded
time based on Round Up Atentered on Earning Policy.
Periodic Late Clock-InReport
Lists late clock in time byemployee and calculates totalhours the employee was late.
Missing TimecardReport
Lists missing timecards byemployee.
Manual and AutogenReport
Lists separately manuallyentered timecards, timecardsin error, and all timecardsavailable for payroll and timeperiod.

Oracle Time Management Reports 6 - 5
Submitting Reports
To submit a report from the Processes and Reports form.
To submit reports:
1. Select the Processes and Reports heading from the Navigator.
2. Select Submit Requests from the Navigator.
3. Select the Single Request Radio Button and depress OK.
4. Select the report from the List of Values.
5. Depending on the report, you may need to enter the correctparameters for the correct Period Type, Start Date, End Date.
6. Press Submit Request to start running the concurrent process.
7. Once the Request is complete, (status will indicate Completed) youmay view the report.
8. To review the report click on the View Output button.
9. The Report window will display.
10. After review, close the Report Form.

6 - 6 Using Oracle Time Management

Oracle Time Management Reports 6 - 7
Figure 7 - 1Manual and Autogen Report

6 - 8 Using Oracle Time Management

Time Entry Procedures 7 – 1
Time Entry Procedures
his chapter presents a detailed description of time entryprocedures from timecard autogeneration, to setting up a batch
before manual time entry ,to manual time entry, and throughsubmitting timecard batches to Element Entries. Time entry requiresa thorough knowledge of batch processing procedures in HRMS aswell as a complete prior setup of the tables, and policies in OracleTime Management.
Also explained within this Chapter is the process for TransferringProject and Task Information to the Project Accounting Interface.
T
CHAPTER
7

7 - 2 Using Oracle Time Management
Timecard Autogeneration
Timecard autogeneration should occur at the beginning of a Pay cycle.Use the Submit Requests window to autogenerate timecards.
To autogenerate timecards:
1. Select Processes and Reports the Submit Request from the Navigator.
2. Select the Single Request Radio Button and click OK.
3. Select Automatic Timecard Generation from the List of values for theRequest Name.
4. Select the Payroll you wish to process from the List of Values.
5. Select the Time Period you wish to process from the List of Values.
6. Enter a Batch Reference if desired.
7. Depress OK and the Parameters window will close.
8. Submit the process by pressing the Submit Request button and closethe form or choose another payroll and time period to process.

Time Entry Procedures 7 – 3
Verifying Autogenerated Timecards
Use the Concurrent Requests Summary window to verify timecardautogeneration completed successfully.
Note: If autogeneration stays in a Pending status for an excessiveamount of time (for several minutes), contact your technical supportstaff to ensure that Concurrent Manager is running.
To verify timecards have autogenerated:
1. Review your job(s) listed on the Concurrent Request Summarywindow list; verify Phase field displays Completed and Status fielddisplays Normal. Note: If the Phase field displays Completed andthe Status field displays Error, errors exist on your timecards, whichmust be corrected.
2. Close the form.
Viewing Autogenerated Timecards
Use the Timecard window to view autogenerated timecards.
To view autogenerated timecards:
1. Open the Timecard window.
2. Query the Period End date and the Payroll in which you wish toview. The system brings up all records for that Payroll period andPayroll.
3. Check the Source Field (Autogen) timecards have beenautogenerated.
4. If timecards are in Error, the Timecard Status field will display an“E” for each Timecard in Error.

7 - 4 Using Oracle Time Management
Correcting Autogenerated Timecards
Use the Timecard window to correct autogenerated timecards.
To correct autogenerated timecards:
1. Start a query in the Timecard window.
2. Query the Period End Date and Payroll in which you wish to correcttimecards. The system brings up all records for that Payroll andPeriod End Date.
3. Check the Timecard Status field for an E (Error). Each Timecardwith status E (Error) requires correction.
4. Cursor through each timecard of the pay period autogeneratedlooking for status E.
5. Verify the time entry data for each timecard in Error and make theappropriate changes.
6. Save the data.

Time Entry Procedures 7 – 5
Displaying Errors
There are two other sources for reviewing and discovering timecarderrors: the Show Errors push button on the Timecard and the onlinereport — Manual and Autogen Report. The Show Errors push buttonwill display the error for that specific time card, and the Manual andAutogen report displays errors by Payroll and Pay Period selected in theparameters.
The Time Entry Error window is pictured below. To view this form,select if from the Navigator menu OR press the Show Errors button onthe Timecard window.

7 - 6 Using Oracle Time Management
Setting Up Batches in Batch Element Entry (BEE)
Use the Batch Header window to create batches for manual time entry.
Note: Batches must be predefined before timecards can be manuallyentered.
To create batches in Batch Element Entry:
1. Select Batch Element Entry from the Navigator under the MassInformation ExChange branch.
2. Enter a name in the Batch Name field. This field is user defined.
3. Enter a Source in the Source field. This field is user defined and isoptional.
4. Enter a Reference in the Reference field. This field is user definedand is optional.
5. Verify Batch Status radio button is set to Unprocessed.
6. Save data.

Time Entry Procedures 7 – 7
Entering Timecards
Use the Timecard window to enter timecards.
Note: Batches must be defined in Batch Element Entry for all manuallyentered timecards.
To manually enter a timecard:
1. Select desired Payroll from the List of Values.
2. Select the Period End Date from the List of Values.
3. Select the Batch Name from the List of Values.
4. Select the Employee number from the List of Values. The systemwill populate the Full Name field when you make this selection.
5. OPTIONAL: Select the name of the person approving the timecard inthe Approver field. If a name is selected in this field, the DateApproved field populates with a date and time stamp.
6. Enter the Total Number of Hours that will be entered on thetimecard. This field must be entered.
7. The Effective From and To fields display only fields. With the twofields, users can track changes made to a timecard. The datesdisplayed will give the indication of what dates should be used inDate Tracking to view the changes made to the timecard.
8. Place the cursor in the first Date Worked field.

7 - 8 Using Oracle Time Management
9. Enter the first date worked or select it from the List of Values. Thesystem populates the DOW field with appropriate day of the week.
10. If multiple assignments exist, select the Assignment number of theemployee from the List of Values. Otherwise, the system willautomatically populate the assignment number.
11. Enter the number of hours the employee worked on that day, ORyou may elect to enter the time IN and time Out fields. If In and Outtimes are entered the system will populate the number of hours baseupon the entry. In and Out time must be entered in a 24-Clockformat.
12. If you wish to override the default Hours Type, or enter an absenceyou may select the Hours Type from the List of Values.
13. To override the employees assigned Earning Policy tab to theEarning Policy field, and select the override Earning Policy from theList of values. If no override Earning Policy is selected, this field willdisplay the assigned Earning Policy.
14. Place cursor in the Additional Information (Summary) block, tab toeach field you desire to enter information in and enter the following:
a) Amount – Enter the value for the override amount.
b) Hourly Rate – Enter the values for the override HourlyRate.
c) Reason - Enter reason for absence or overtime from theList of Values. This field is informational only and willnot be passed to Batch Element Entry.
d) Cost Center - Enter cost center applicable for thistransaction from the List of Values.

Time Entry Procedures 7 – 9
e) Project – Enter the Project applicable for this transactionfrom the List of Values. If utilizing the Oracle ProjectAccounting, the applicable Oracle Projects will beavailable from the List of Values. Otherwise, choose theapplicable OTM Project Information.
f) Task - Enter name of this task from the List of Values. Ifutilizing the Oracle Project Accounting, a task can not beentered without first entering a Project.
g) Location - Enter the location worked from the List ofValues. This is an override location.
h) Shift - Enter the shift this task applies to from the List ofValues. This is an override shift.
i) Comments - Enter additional comments for this line item.Select Edit--Edit Field from the action bar to enter yourcomments in the Editor.
j) Multiple - Enter the value for the override multiple.
k) Tax Rule - Enter the applicable Tax Rule.
l) Separate Check--Click on this field to request a separatecheck for this transaction.
m) Wage Code – Future Use

7 - 10 Using Oracle Time Management
15. Save the data.
16. Close the window or press the New Record icon to enter the nexttimecard.

Time Entry Procedures 7 – 11
Timecard Exception Entry
After timecard have been autogenerated, it may be necessary to performException Entry. Again, because timecards have been autogenerated,the exception entry is usually very minimal.
Examples of exception entry may be PTO, Sick, and Vacation time. Anemployee may have worked overtime hours and this information wouldneed to be entered as an exception.
You enter exceptions as you would manually enter other timecards.Because you are entering exceptions, it becomes even more important toenter as much relevant information as you can in the AdditionalInformation blocks.
To Enter Exception Entry:
1. Query the timecard using the Payroll, Period End Date and/or theEmployee Number.
2. Enter the required exception entry on the timecard.
3. Save the data.

7 - 12 Using Oracle Time Management
Approving Timecards
Use the Timecard window to approve timecards. Note: Timecardapproval is only required if it is a rule of your company.
To approve timecards:
1. Query the timecard(s) you wish to approve.
2. Place the cursor in the Approver field and select the approver namefrom the List of Values. The system populates the Date Approvedfield with the current date and time stamp once approver is selected.
3. Save the data.
Validating Timecards For BEE
Validating timecards requires submitting and monitoring a concurrentjob in Oracle Time Management . When the job is submitted, thetimecards are validated for accuracy. Use the Submit Requests windowto run The Validate timecards before transferring timecards to BatchElement Entry.
To validate timecards:
1. Select Processes and Reports then Submit Request from theNavigator.
2. Select the Single Request Radio Button and Depress OK.
3. Tab to the Request Name field and select Validate for BEE from theList of Values. The Parameters window displays.

Time Entry Procedures 7 – 13
4. Select the Starting Batch Name from the List of Values. This is thebatch that you wish to validate.
5. If desired, select the Ending Batch name from the List of Values.This option allows you to validate multiple batches within one job.This field is optional.
6. If desired, select the Batch Reference from the List of Values. Thisfield is optional.
7. Press OK to close the parameters window.
8. Click on Submit Request to start the Validate for BEE process.

7 - 14 Using Oracle Time Management
Transferring Timecards to BEE
Transferring the timecards to Batch Element Entry requires submittingand monitoring a batch job in Oracle Time Management . When the jobis submitted, the validated timecards are transferred to the BatchElement Entry. Use the Submit Requests window to run the Transfer toBEE.
To transfer timecards:
1. Select Processes and Reports and Submit Request from theNavigator.
2. Select the Single Request Radio Button and depress OK.
3. Tab to the Request Name field and select Transfer to BEE from theList of Values. The Parameters window displays.
4. Enter the Process Date in the Process Date field. This date is thesame as the Period End Date for the Batch of Timecard beingtransferred.
5. Select the Starting Batch Name from the List of Values. This is thebatch that you wish to validate.
6. If desired, select the Ending Batch Name and the Batch Referencefrom the List of Values. These fields are optional.
7. Press OK to save the data and close the parameters window.
8. Click on Submit Request to start the Transfer process.
Reviewing Validated/Transferred Timecards
Use the Batch Element Entry window to view Validated and Transferredtimecards. Note: Check the batch job on the Concurrent RequestsSummary window to verify job completed with a Normal Status.

Time Entry Procedures 7 – 15
To review validated/transferred timecards:
1. Select Mass Information Exchange from the Navigator.
2. Select Batch Element Entry from the expanded branch.
3. Query the batch you wish to review. The system will return therequested data.
4. Press the Lines button to view the detail data from the requestedbatch.
5. The Batch Lines window is displayed detailing the entries in thebatch.
6. Close the window after the viewing.

7 - 16 Using Oracle Time Management
Submitting Timecards to Element Entries
Submitting timecards to Element Entries is the last step in the cycle ofvalidating timecards, sending them to Element Entries. Use the BatchElement Entry window to process time entry to Element Entries.
To submit timecards to Element Entries:
1. Select Batch Element Entry from the Navigator.
2. Query the Batch you wish to transfer to Element Entries.
3. Depress the Process button on Batch Header window.
4. The Process Batch window will display.
5. Select the Transfer radio button and depress Start.
6. The Process Request message will display indicating your processwas successfully submitted.
7. Close the Process Request message window.
8. Batch Header window will repopulate indicating the Batch Status asTransferred.
9. Close the form.

Time Entry Procedures 7 – 17
Transferring to Project Accounting
Oracle Time Management allows you to track information by projectsand tasks that are established in the Oracle Project Accountingapplication. Time records may be associated with any of the project andtask codes within Project Accounting.
After the project and task information has been entered on the timecard,the Project Accounting Application Programming Interface (API) forTransaction Control is called to validate the project and task information.
The actual transfer of timecard data to Project Accounting will beperformed using stored procedures and the Oracle ApplicationsConcurrent Manager.
The Transfer to Project Accounting process is designed to run after theTransfer to BEE process within the Oracle Time Management system.The process is designed to run on the same cycle as the Element Entrycycle, (i.e. weekly, bi-weekly, etc.).
To transfer timecard/project data to Project Accounting:
1. Select Processes and Reports and Submit Process from the Navigator.
2. Select the Single Request Radio Button and depress OK.
3. Tab to the Request Name field and select Transfer to ProjectAccounting from the List of Values.
4. Enter the Payroll Name and Time Period from the List of Values.
5. Click Submit Request. The Transfer to Project Accounting processtransfers the Project Information to the Project Accounting InterfaceTable.

7 - 18 Using Oracle Time Management

Retro Adjustment Procedures 8 - 1
Retro AdjustmentProcedures
his chapter presents a detailed description of RetroAdjustments time entry procedures to include the DateTrack capabilities for these adjustments. Also covered inthis chapter are the procedures for submitting the RetroAdjustments to Element Entries, and Retro Adjustments toProject Accounting.
Retro Adjustments can be made to timecard once a timecardhas been transferred to Element Entries and payment hasbeen made. Note: Oracle Time Management does notsupport Retro Pay Adjustments, but does allow RetroAdjustments.
While this chapter takes you step-by-step into RetroAdjustment Time entry procedures, details descriptions ofall the timecard fields can be found in Chapter 7 of thismanual.
T
CHAPTER
8

8 - 2 Using Oracle Time Management
Updating A Timecard for Retro Adjustment
Use either Timecard window to make retro adjustments to a timecard.
Note: Only timecards that have been previously transferred to BatchElement Entry (BEE), or Element Entries are available for the RetroAdjustment. The batch status cannot be in a Hold Status.
1. Start a query in the Timecard window.
2. Place the cursor in the Employee No field; enter the employeenumber for the person whose timecard you wish to correct andexecute the query. The system will bring up the first timecard forthis employee. Page through the timecard until the timecard for theapplicable period end date comes into focus.
3. Make the necessary changes to the timecard (i.e. adding anadditional 2 hours worked, changing a day worked to a vacationday, etc.).
4. The “Choose An Option” dialog will appear indicating an Update isin process.
5. Update the Total Hours field to indicate the changes made.Otherwise the system will populate a message indicating that theHours are out of balance.
6. Save the changes.
7. Tab to the “Additional Information” block for the line item(s)changed and note the Retro Batch ID number. There will only be oneRetro Batch ID created even if multiple changes are made to thetimecard. This number will be the batch number required whenvalidating the timecard and transferring the timecard to BatchElement Entry, and Element Entries.

Retro Adjustment Procedures 8 - 3
Validating Retro Adjusted Timecards
Validating the retro adjustments made on timecards requires submittingand monitoring a batch job within Oracle Time Management. When thejob is submitted, the retro rows (updated rows) only , are validated foraccuracy. Use the Submit Requests window to run the Validate for BEE(retro) job before transferring timecards to Batch Element Entry.
To validate retro timecards:
1. Select Processes and Reports and then Submit Request from theNavigator.
2. Select the Single Request Radio Button and depress OK.
3. Tab to the Request Name field and select Validate for BEE (retro)from the List of Values. The Parameters pop-up displays.
4. Select the Payroll Name for the Retro Batch from the List of Values.Enter the Process date which will be the Pay Period End Date for thepayroll in which the Retro is being processed.
5. Enter the Retro Batch Number you wish to Validate. You may enterthe Batch Reference. However, this field is optional.
6. Press Submit Request to start the Retro Validation.

8 - 4 Using Oracle Time Management
Transferring Retro Adjusted Timecards To BEE
Transferring the retro adjusted timecards to Batch Element Entryrequires submitting and monitoring a batch job in Oracle TimeManagement . Use the Submit Requests window to run the Transfer toBEE.
To transfer timecards:
1. Select Processes and Reports and then Submit Request from theNavigator.
2. Select the Single Request Radio Button and depress OK.
3. Tab to the Request Name field and select Transfer to BEE (retro)from the List of Values. The Parameters window displays.
4. Enter the Process Date in the Process Date field. This date is thesame as the Period End Date for the Batch of Timecard beingtransferred.
5. Select the Retro Batch Name from the List of Values. This is the retrobatch that you wish to validate.
6. If desired, select the Batch Reference. This field is optional.
7. Press OK to save the data and close the parameters window.
8. Click on Submit Request to start the Transfer process.
Submitting Retro Adjusted Timecards To Element Entries
Submitting retro adjusted timecards to Element Entries is the last step inthe cycle of validating timecards, sending them to Element Entries. Usethe Batch Element Entry window to process time entry to ElementEntries.

Retro Adjustment Procedures 8 - 5
To submit timecards to Element Entries:
1. Select Batch Element Entry from the Navigator.
2. Query the Retro Batch you wish to transfer to Element Entries.
3. Depress the Process button on Batch Header window.
4. The Process Batch window will display.
5. Select the Transfer radio button and depress Start.
6. The Process Request message will display indicating your processwas successfully submitted.
7. Close the Process Request message window.
8. Batch Header window will repopulate indicating the Batch Status asTransferred.

8 - 6 Using Oracle Time Management
Project Accounting Retro
There is a separate process to transfer Retro Adjustment records toProject Accounting. You can run the Transfer to Project Accounting(retro) process after you make retro adjustments on the timecard. Thisprocess transfers the information to the Project Accounting Interfacetable. The Transfer to Project Accounting (retro) should be processedafter the Validated for BEE (retro) and Transfer to Bee (retro) processeshave been completed. This process looks for any summary timecardrecords that have any changed project related information (such asproject, task, number of hours, and hours type). The process thendetermines the difference between the original record, and the currentrecord, and sends the necessary transactions to Project Accounting.
To Transfer Retro Timecard changes to Project Accounting (retro):
1. Select Processes and Reports and then Submit Request from theNavigator.
2. Select Single Request Radio button and depress OK.
3. Tab to the Request Name field and select Transfer to ProjectAccounting (retro) from the List of Values.
4. Enter the Payroll Name and Time Period and depress OK.
5. Click the Submit push button. The Transfer to Project Accounting(retro) process transfers the necessary Project information to theProject Accounting Interface Table.

Glossary - 1
Glossary
AAbsence Types Categories of
absence, such as medical leave orvacation leave, that you define foruse in absence windows.
Assignment An employee’sassignment identifies his or her roleand payroll within a Business Group.The assignment is made up of anumber of assignment components.Of these, organization is mandatory,and payroll is a required componentfor payment purposes.
Assignment Number A number thatuniquely identifies an employee’sassignment. An employee withmultiple assignments has multipleassignment numbers.
Assignment Set A grouping ofemployees and/or applicants thatyou define for running QuickPaintreports and processing payrolls. Seealso: QuickPaint Report
Assignment Status For employees,used to track their permanent ortemporary departures from yourenterprise, and to control theremuneration they receive. Forapplicants, used to track the progressof their applications.
Autogeneration Automatic productionof timecards or calculation of pay byHRMS based on work plans orschedules
BBenefit Any part of an employee’s
remuneration package that is notpay. Vacation time, employer–paidmedical insurance and stock optionsare all examples of benefits. See also:Elements.
Block The largest subordinate unit ofa window, containing informationfor a specific business function orentity. Every window consists of atleast one block. Blocks contain fieldsand, optionally, regions. They aredelineated by a bevelled edge. Youmust save your entries in one blockbefore navigating to the next. Seealso: Region, Field.
Business Group The highestlevel organization in the OracleHRMS system. A Business Groupmay correspond to the whole of yourenterprise or to a major groupingsuch as a subsidiary or operatingdivision. Each Business Group mustcorrespond to a separateimplementation of Oracle HRMS.
CCalendars In Oracle Human
Resources you define calendars thatdetermine the start and end dates forbudgetary years, quarters, andperiods. For each calendar you selecta basic period type.

Glossary - 2
Carryover The amount of hoursincluded a in shift differential Policythat the employee will receivepayment.
Compensation The pay and benefitsyou give to employees, includingwages or salary, bonuses, healthinsurance and vacation time. Seealso: Elements.
DDateTrack When you change your
effective date (either to past orfuture), DateTrack enables you toenter information that takes effect onyour new effective date, and toreview information as of the newdate. See also: Effective Date.
Day Premium A premium paid foremployees who work on theirscheduled days off.
EEarly Start A period prior to the shift
start time that is needed to allowemployees working that shift to clockin. Therefore, no additional time isgenerated for people who clock induring this period.
Early Stop A period after the shift starttime that is needed to allowemployees working that shift to clockout. Therefore, no additional time isgenerated for people who clock outduring this period.
Earning Group A collection of earningtypes used for reporting purposesand/or included in the accumulationof hours to be used in calculatingweekly caps.
Earning Policy A grouping of rulesand a holiday calendar that is linked toeach person. These rules defineholidays, premiums, overtime hours,generation rules, time entry rules (hourincrements), rounding rules, and rulesfor processing premiums if more thanone premium is applicable.
Effective Date The date for which youare entering and viewing information.You set your effective date in the AlterEffective Date window. See also:DateTrack
Elements Components in thecalculation of employee pay. Eachelement represents a compensationor benefit type, such as salary, wages,stock purchase plans, and pensioncontributions.
Element Entry The record controllingan employee’s receipt of an element,including the period of time forwhich the employee receives theelement and its value. See also:Recurring Elements, NonrecurringElements.
Element Link The association of anelement to one or more componentsof an employee assignment. The linkestablishes employee eligibility for

Glossary - 3
that element. Employees whoseassignment components match thecomponents of the link are eligiblefor the element. See also: StandardLink.
Element Set A group of elements thatyou define to process in a payrollrun, or to control access tocompensation information from acustomized form, or for distributingcosts.
FField A view or entry area in a zone
where you enter, view, update, ordelete information. See also: Form,Zone, Region.
Form A predefined grouping offunctions, called from a menu anddisplayed, if necessary, on severalwindows. Forms have blocks,regions and fields as theircomponents.
HHierarchy An organization or position
structure showing reporting lines orother relationships. You can usehierarchies for reporting and forcontrolling access to Oracle HRMSinformation.
Hour Deduction Policy Definition ofrules regarding a company’sapproach to deleting time for mealsand breaks in the calculation of pay.
NNonrecurring Elements Elements
that process for one payroll periodonly unless you make a new entry for
an employee. See also: RecurringElements.
OOrganization A required component
of employee assignments. You candefine as many organizations as youwant within your Business Group.Organizations can be internal, suchas departments, or external, such asrecruitment agencies. You canstructure your organizations intoorganizational hierarchies forreporting purposes and for systemaccess control.
PPayroll A group of employees that
Oracle Payroll processes togetherwith the same processing frequency,for example, weekly, monthly orbimonthly. Within a BusinessGroup, you can set up as manypayrolls as you need.
Period Type A time division in abudgetary calendar, such as week,month, or quarter.
Position A specific role withinthe Business Group derived from anorganization and a job. For example,you may have a position of ShippingClerk associated with theorganization Shipping and the jobClerk.
Premium Monetary rewardapplied in the calculation of pay thatis over and above the regularlyscheduled pay.

Glossary - 4
Premium Eligibility PolicyDefinition for all premiums that
a company pays that are based onhours.
Premium Interaction PolicyDefinition of the rules
regarding the relationships ofpremiums in the calculation of thepay and the order in which they areprocessed.
QQuickPaint Report A method of
reporting on employee and applicantassignment information. You canselect items of information, paintthem on a report layout, addexplanatory text, and save the reportdefinition to run whenever you want.See also: Assignment Set.
RRecurring Elements Elements that
process regularly at a predefinedfrequency. Recurring element entriesexist from the time you create themuntil you delete them, or theemployee ceases to be eligible for theelement. Recurring elements canhave standard links. See also:Nonrecurring Elements, Standard Link.
Region A collection of logicallyrelated fields in a zone, marked offfrom other fields by dotted lines thatspan the zone. See also: Form, Zone,Field.
Report An online or printedinformation summary derived from
Oracle Time Management records orprocesses.
Responsibility A level of authority inan application. Each responsibilitylets you access a specific set of OracleApplications forms, menus, reports,and data to fulfill your business role.Several users can share aresponsibility, and a single user canhave multiple responsibilities. Seealso: Security Profile, User ProfileOptions.
Rotation Plan Defined work plan thatvaries on a set schedule. This planindicates when a person is to movefrom one work plan to another.
SSecurity Profile Security profiles
control access to organizations,positions and employee andapplicant records within the BusinessGroup. System administrators usethem in defining users’responsibilities. See also:Responsibility, User Profile Options.
Shift Definition of daily workschedule, which is used in the setupof work plans.
Shift Differential PolicyDefinition of rules for paying a
premium on each or certain shifts.
Standard Link Recurring elementswith standard links have theirelements entries automatically

Glossary - 5
created for all employees whoseassignment components match thelink. See also: Element Link, RecurringElements.
UUser Profile Options Features that
allow system administrators andusers to tailor Oracle HRMS to theirexact requirements. See also:Responsibility, Security Profile.
VVariance Definition of acompany’s average, high, and lowmaximum and minimum hours perperiod by organization, location orearnings. Deviations from theseamounts can be reported.
WWork Plan Definition of the
applicable shift for each of the sevendays in a work week.
Work Structures Thefundamental definitions oforganizations, jobs, positions, grades,payrolls and other employee groupswithin your enterprise that providethe framework for defining the workassignments of your employees.

Glossary - 6

Index - 1
Index
AAutogeneration
timecard, 7 - 2
BBatches, PayMIX, 7 - 7
EEarning Group
setting up, 3 -27
Earning Policy
setting up, 4 - 25
Elements
setting up, 2 - 1 to 2 - 15
HHoliday Calendar
setting up, 3 - 4
Hour Deduction Policy
setting up, 4 - 4
OOracle Time Management
description, 1 -1 to 1 - 3
initial setup, 1 - 3
logging onto, 1 - 5
manual summary, v
workflow, 1 - 4
PPremium Eligibility
setting up, 4 - 14
Premium Interaction
setting up, 4 - 19
Project Accounts
setting up, 3 - 21
RReports
Oracle Time Management
online, 6 - 1 to 6 - 5
Rotation Plan
setting up, 3 - 16
SShift Differential Policy
setting up, 4 - 9
Shifts
setting up, 3 - 9
VVariance
setting up, 3 - 24
Validation
timecards, 7 - 12
WWork plans
setting up, 3 - 12


Index - 2 Oracle Time Management Application User’s Guide