using protect my ministry
TRANSCRIPT

Updated: 07/11/2011 ©2011 Shelby Systems, Inc. All Rights Reserved
Other brand and product names are trademarks or registered trademarks of the respective holders.
How To

Using Protect My Ministry
Page 2
Background Check functionality has been added to the Shelby Systems suite of applications. This allows you to
submit a Background Check request to a third-party agency and receive the data back for the subject of the
request. Your credit card will be charged on a per use basis.
Overview of the process:
1. Set up security giving access to the PMM option in Shelby software.
2. Register your organization with PMM.
3. Register users with PMM.
4. Acquire a consent form from the individual to be checked.
5. Submit Request to PMM.
6. View Results.
7. Use the BCRUN profile to find people whose background check needs to be updated.
Contact Information: If you have questions before registering with PMM, please contact a Shelby sales
representative at (800) 877-0222 or e-mail [email protected]. Questions after registering with PMM should
be directed to [email protected].

Using Protect My Ministry
Page 3
1. Navigate to the Shelby Systems User Security screen and assign security level rights to all users. NOTE:
For details on how to assign security rights in Shelby Systems, please read the Security section in the
General Operating Instructions help files. Payroll, Membership, and GlobaFILE use the rights under the
GlobaFILE module. Any user with any rights to PMM can register PMM users.
Explanation of Security Levels:
Organization Setup: This person has full access to all screens related to PMM and background
checks. That includes signing the organization up with Protect My Ministry, Registering users,
Requesting checks, and Reviewing results.
Request Background Check: This person can only register themselves for PMM and request
background checks on behalf of an administrator or pastor. They cannot view any results. This
would generally be your administrative secretaries, assistants, etc.
Review Background Check: This person can register themselves for PMM, request background
checks, and review the results. A person with the "Request Background Check" security level would
have to list a person with the "Review Background Check" security level as a reviewer before
submitting a request.
2. To register your organization, first navigate to the name list scroll screen of Payroll, Membership, or
GlobaFILE (the Membership screen is shown below). With any name selected, click the Protect My
Ministry icon showing on the toolbar at the top, just to the left of the Help question mark icon.

Using Protect My Ministry
Page 4
If you have security permission to update the Organization Setup, you will see the screen below. If you
wish to verify the pricing or read the FAQ for Protect My Ministry, click the Pricing/FAQ button.
Otherwise, follow the steps outlined on the screen. You will need to complete the Sign Up section
before anything can happen. After clicking the Sign Up button, you will be taken to PMM's Shelby-
specific site to complete your organization signup on the web.
After you complete the Organization Setup, you will receive an e-mail from PMM in approximately 24
hours containing your PMM Organization Information credentials. Shelby Systems will also receive a
confirmation e-mail so that we will have a record of it. When you receive the credentials, enter them
on the Protect My Ministry window, under Step 2 Save PMM Organization Information. This is only
done one time. After you click the Save button, you will never need to re-enter them.

Using Protect My Ministry
Page 5
3. Once the organization is signed up and saved, then the Register Users tab will display. If the user that
is signed in has Organization Setup rights, then all PMM users will appear in the Full Name pull down,
and that person can register everyone else. If the user who is signed in has no Organization Setup
rights, the user can only register himself or herself.
Once you complete the Register Users fields and click the Register User button, you will be shown the
following web page:
Close the browser window as instructed.
Repeat the registration for each user who should be allowed to request background checks.
NOTE: If you are NOT ready to run an actual background check at this time, simply click the Exit button
at the bottom of the Protect My Ministry window to close the window and return to the name list.
Using Protect My Ministry
Page 6
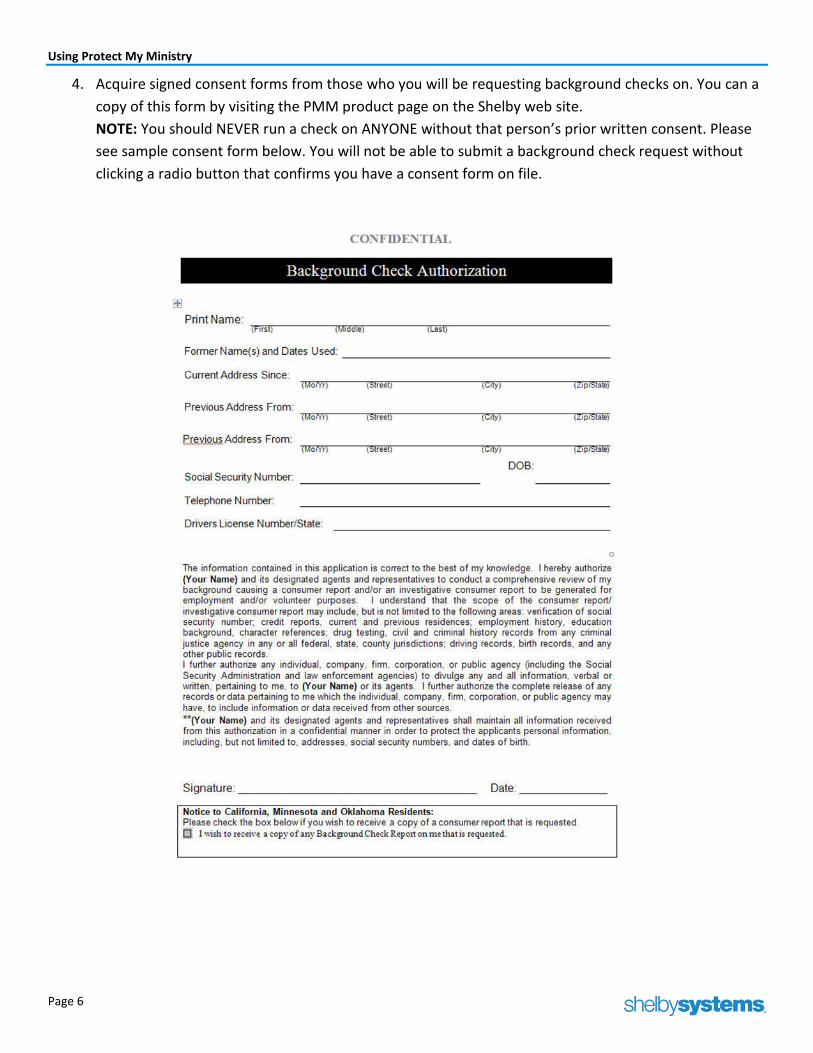
4. Acquire signed consent forms from those who you will be requesting background checks on. You can a
copy of this form by visiting the PMM product page on the Shelby web site.
NOTE: You should NEVER run a check on ANYONE without that person’s prior written consent. Please
see sample consent form below. You will not be able to submit a background check request without
clicking a radio button that confirms you have a consent form on file.

Using Protect My Ministry
Page 7
5. To begin the request process, navigate to the Payroll, Membership, or GlobaFILE name list scroll
screen. Click the name of the person about whom you want to run the background check to select it.
The name should be highlighted in blue. Then click the Protect My Ministry icon on the toobar.
In-GlobaFILE or Membership: In Payroll:
The Request Background Check tab will display if you are a registered PMM user.
Confirm that you are running the check on the correct person by reviewing the top line: “Background
Check Request for: xxx.”
If you want other users to be able to review the background check results, choose up to three names
from the drop-down options. If the person running the check does not have review rights, he or she
must choose at least one alternate reviewer before the Submit Request button will be active.
You must always intentionally change the Background Request Consent form confirmation option to
“Yes” before the Submit Request button will be active. This is to prevent accidental requests for people
without a consent form.

Using Protect My Ministry
Page 8
Once you click the Submit Request button, you will be taken to the following screen. The individual for
whom you are requesting the check's information will automatically be populated on the page via
pass-through data from Shelby Payroll, Membership, or GlobaFILE. You will need to confirm all
information and make sure that all required fields are filled in. After you confirm and complete any
missing information, click the Proceed button.
After clicking the Proceed button, you will choose which reports or package of reports you wish to run
for the individual. Once you have selected the desired reports, click the Next button. Your organization
can choose which checks to run.

Using Protect My Ministry
Page 9
NOTE: Basic (National & SSN) and Plus (same as basic plus 1 court search) packages are offered at a
discount.
A Summary of what you are ordering will display. Now, click the Submit button.
6. When the background check is complete, the designated reviewer at your organization will receive an
e-mail stating that the results for this individual are ready to be viewed. To view the results, log into
Shelby Systems v.5 and navigate to Payroll, Membership, or GlobaFILE. Select the individual on the
scroll screen whose results are ready and click the PMM button on the tool bar.

Using Protect My Ministry
Page 10
The screen shown below will display. It confirms the individual’s results you will be reviewing and that
they are being taken to an outside web page.
NOTE: If the user who is logged in does not have either Organizational Setup or Reviewer rights, the
Review Check Results tab will be grayed out. Since Shelby Systems information is passed through to
PMM's site, they would never be able to view the results (because they don't have rights).
After you click the View Results button, you will be taken to the individual's results on a secure
external web page. You can see an example of the window that will open (below). You can then do
whatever you choose with the results. Keep them out on the web, copy and paste them somewhere
else, etc. It is up to your organization as to how you save these results.

Using Protect My Ministry
Page 11
NOTE: For best results, make sure that Internet Explorer is set as your default browser. Results may be
unpredictable with other browsers.
Using Protect My Ministry
Page 12
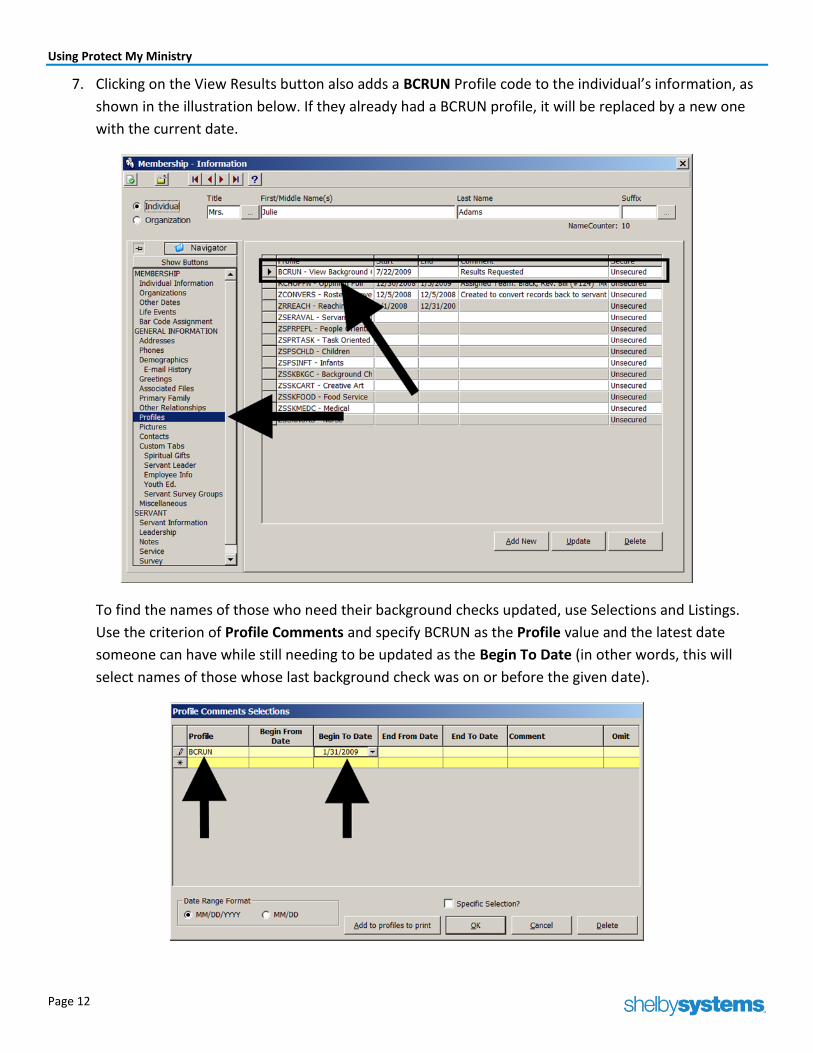
7. Clicking on the View Results button also adds a BCRUN Profile code to the individual’s information, as
shown in the illustration below. If they already had a BCRUN profile, it will be replaced by a new one
with the current date.
To find the names of those who need their background checks updated, use Selections and Listings.
Use the criterion of Profile Comments and specify BCRUN as the Profile value and the latest date
someone can have while still needing to be updated as the Begin To Date (in other words, this will
select names of those whose last background check was on or before the given date).