vehicle inspection guide - stadium managers · pdf filehow to use this guide 2 purpose vehicle...
TRANSCRIPT

Vehicle Inspection GuideSeptember 2012
HomelandSecurity

Credits
All photographs, images, drawings, and other graphical material provided by the Technical Support Working Group (TSWG) for the Office for Bombing Prevention, Department of Homeland Security (DHS), unless otherwise noted.Cover photo: (left) Provided by DHS Office for Bombing Prevention, (right) U.S. Navy photo by Mass Communication Specialist 3rd Class David A. Brandenburg.

How to Use This Guide
1
Security Warning
This document is to be controlled, stored, handled, transmitted, distributed, and disposed of in accordance with Department of Homeland Security (DHS) policy. This information should be disseminated only to personnel on a “need-to-know” basis. This guide is intended for use by local, state, federal, and private sector security partners as a reference for training and operations by emergency personnel in preparing for and responding to acts of terrorism.
Warning

How to Use This Guide
2Purpose
Vehicle Inspection Guide Purpose
The purpose of this document, developed by the Technical Support Working Group (TSWG) for the Office for Bombing Prevention, DHS, is to provide guidelines to personnel assigned the responsibility of assessing and inspecting incoming traffic for the presence of explosive threats. The information herein is not all inclusive and should be applied in conjunction with previous training, experience, and standard procedures and policies. Be aware that each case presents its own unique circumstances. In all cases, use common sense and do not conduct any operations that would place personnel, equipment, or facilities at risk.
This book presents a comprehensive overview of methods to detect vehicle borne IEDs. Not all methods will be appropriate for use in all situations. Leaders, managers, and legal counsel should work together to ensure that these methods are employed in a manner consistent with legal requirements, the current threat level, and the facility’s security policy.

3
How to Use This Book
This book is divided into tabbed color-coded sections; the tabs separate sections and the colors correspond to the type of information and/or different vehicle types. Each tabbed vehicle section has a Quick Review that covers the “Hot Spots” (likely hiding places) and “Inspection Indicators” that may call for increased attention. Following each Quick Review is a detailed description of how to conduct a thorough inspection. Supplemental reference information and guidance are provided at the end of the book, including a reference section that provides amplifying information on Example Concealments, Explosive Materials, and Homemade Explosives, as well as bomb threat standoff guidelines.Also available as a supplement to this guide is a video (see inside back cover for more information).
How to Use This Book

4
• Secure the vehicle with an appropriate perimeter.• Isolate the vehicle and deny entry. • Notify your chain of command and response teams.
In the event a potential threat device is discovered: SIN
Emergency Response GuidelinesEmergency Response

5
Quick Review Reference
Table of Contents
Security Warning ...........................................................................................................................................1Vehicle Inspection Guide Purpose .................................................................................................................2How to Use This Book ..................................................................................................................................3Emergency Response Guidelines ..................................................................................................................4Safety and Security Guidelines .....................................................................................................................7Dos and Don’ts ..............................................................................................................................................9Indicator – Definition ..................................................................................................................................10Interview Guidelines ...................................................................................................................................12 Detailed Interviewing Guidelines ...........................................................................................................15Passenger Vehicles .......................................................................................................................................27........................ 40 General ....................................................................................................................................................27........................ 40 Cargo – Automobiles ..............................................................................................................................30........................ 46 Cargo – Pickup Truck .............................................................................................................................32........................ 47 Cargo – Flat Panel Vans ..........................................................................................................................34........................ 48 Cargo – Minivan .....................................................................................................................................36........................ 48 Cargo – SUVs .........................................................................................................................................38........................ 48Tractors/Trailers and Tankers ......................................................................................................................50........................ 66 Non-Sleeper Day Tractors .......................................................................................................................50........................ 66 Interstate Sleeper Tractors .......................................................................................................................52........................ 66 Trailer Undercarriages ............................................................................................................................54........................ 72
Hot Liquid Asphalt Tanker ......................................................................................................................56........................ 74 Closed Hopper Vessel .............................................................................................................................58........................ 75 Gasoline Trailer .......................................................................................................................................60........................ 77
Table of Contents
6
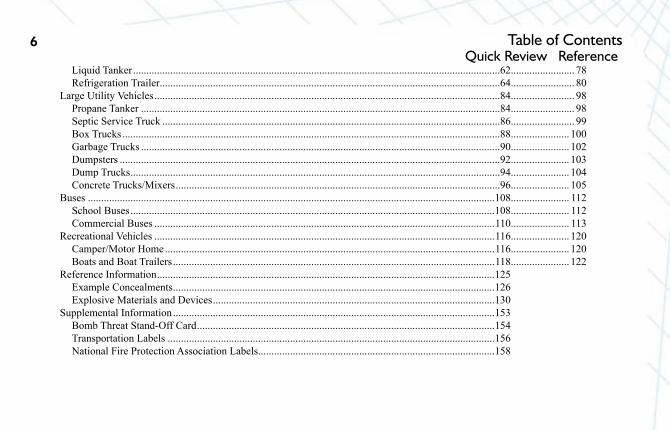
Liquid Tanker ..........................................................................................................................................62........................ 78 Refrigeration Trailer ................................................................................................................................64........................ 80
Large Utility Vehicles ..................................................................................................................................84........................ 98 Propane Tanker .......................................................................................................................................84........................ 98 Septic Service Truck ...............................................................................................................................86........................ 99 Box Trucks ..............................................................................................................................................88...................... 100 Garbage Trucks .......................................................................................................................................90...................... 102 Dumpsters ...............................................................................................................................................92...................... 103 Dump Trucks ...........................................................................................................................................94...................... 104 Concrete Trucks/Mixers ..........................................................................................................................96...................... 105Buses .........................................................................................................................................................108...................... 112 School Buses .........................................................................................................................................108...................... 112 Commercial Buses ................................................................................................................................110...................... 113Recreational Vehicles ................................................................................................................................116...................... 120 Camper/Motor Home ............................................................................................................................116...................... 120 Boats and Boat Trailers .........................................................................................................................118...................... 122Reference Information ...............................................................................................................................125 Example Concealments .........................................................................................................................126 Explosive Materials and Devices ..........................................................................................................130 Supplemental Information .........................................................................................................................153 Bomb Threat Stand-Off Card ................................................................................................................154 Transportation Labels ...........................................................................................................................156 National Fire Protection Association Labels .........................................................................................158
Quick Review Reference Table of Contents

7 Safety and Security
Safety and Security Guidelines•Donotwearjewelryorother“dangling”itemsthat
can become snagged on a vehicle. •Wearbrightlycoloredvestsorhatssoyoucanbeseen
easily by the vehicle drivers.•Alwayspositionyourselfsothatyouarehighlyvisible
to traffic with good approach sight distance. •Beawareofescaperoutesand/orareasthatcanshield
you from a blast in case of emergency, and always face oncoming traffic.
•Beawareofmovingequipmentintheinspectionareas.
•Alwaysestablisheyecontactwiththedriverbeforeapproaching the vehicle.
•Ensurethattheengineisoffandtheparkingbrakeisset prior to inspecting a vehicle.
•Donotsmellairfromatire.Iftheaircontainedwithin is contaminated, it may cause harm.
•Usecautionwheninspectingengines,exhausts,refrigeration coils, auxiliary heaters, and other components. They may be hot. Gloves can be worn for extra protection.
•Donotreachthroughornearcoolingfanblades.Cooling fans can turn on even though the engine is not running.
•Ensurechockblocksareusedwherenecessary.•Donotsmokewhileinspecting.Combustible
vapors may exist around vehicles.•Donotsupportyourselfonadjustableload
support poles in cargo areas.•Seeksupervisoryassistanceifyouareunsure
of how a specific vehicle functions or of the potential risks involved with a cargo.
•Useateamapproachtoinspect,ifpossible.

8
•Alwaysdesignateanarea(withinsightofinspectionteam if possible) where the driver and passengers are to remain at all times.
•Thedrivershouldbeaskedtoplacethekeysonthedash. This will secure all mechanical movement of the vehicle and shut down power.
•Thedrivershouldopenallinterior/exteriordoors,hood, trunk, compartments, etc.
•Nevergetinapositionwhereyoucanpossiblybelocked in a container.
•Ifthereisonlyonesecurityofficerpresent,askthedriver and any passengers to move to a position where they can be kept within view of the security officer.
Safety and Security
Safety and Security Guidelines (cont.)•Thevalueofusingadetectiondogshouldbe
assessed by the facility. If no canine support is available, the security officer will perform a walk-around inspection of the vehicle using a mirror with a creeper and a flashlight.
•Inspectionsshouldbedoneinatimelyandefficient manner, which does not detract from the overall quality or safety of the process. The time it takes to conduct a vehicle inspection will vary based on the level of inspection required and the size of the vehicle.
•Stayalertforsecondarydevices!•Nevertouchormoveasuspiciousitem.

9
Dos and Don’tsDo:•Presentaprofessionalandpositiveimage.•Beassertiveinquestioninganindividualand
inspecting a vehicle.•Beawareofthecurrentsituationandknow:
– Specific threats to your company/facility– National Terrorism Advisory System threat alerts– Available local support (bomb squad, etc.)
•Establishasystematicandthoroughinspectiontechnique to ensure no areas are missed or efforts duplicated.
•Maintainculturalawareness.
Don’t:•Donotletyourguarddown.•Donotinspectavehiclewhilethemotoris
running.•Donotallowyourselftogetintoavulnerable
situation with respect to the vehicle occupants.•Donotperformsearchactivitiesthatviolatelegal
limits or exceed the scope of your authority.•Donotoverlookitemsinplainsight.Theseare
often the most overlooked.•Donottouchormovediscoveredobjectsof
concern.
Dos and Don’ts

10 Definition Indicator
Definition – Indicator
An indicator is an item, occurrence, condition, or situation that suggests the presence of illicit material, such as explosive materials and devices, or other illegal or prohibited items.

Interview
11
Vehicle Inspection Guide (VIG)
September 2012

Interview
12
Quick Reference Interviewing GuidelinesInterview Purpose: to gather information about an individual that may indicate a threat situation. Information is gathered from the interview by:•Observingtheperson’sbehavior•Observingthevehicleforphysicalabnormalities•Questioningthedriver/passenger•Reading/recognizingdeception,stressmannerisms,
and the “fight or flight” mechanism•Knowledgeoflocaldriver’sbehavioralcuesandtypical
documents carried•Notingthepresenceofconsistentodors
Background information required of the interviewer: •Knowledgeoflocalortypicaltraffictypes•Knowledgeofvehicletypes•Knowledgederivedfromdriver/vehicledocuments•Knowledgeofexistingintelligenceandpatterns
Typical Documentation to CheckAsk to see the following items as they pertain to your situation:
•Vehicleregistration•Vehicleinsurancecard•Driver’slicense•Medicalinsurancecard(C)•Logbook(C)•Manifest(C)•Shippingpapers(billoflading)(C)•Itinerary(C)•Tachygraph(paperdiskthatautomatically
records vehicle use and schedule—required for all E.U. countries)
(C)=CommercialVehiclesOnly

13
•Whereareyougoing?•Whatisthenameandpositionofthepersonyouare
tosee?•Whatisyourcargo?•Wheredidyoucomefrom?•Bywhomareyouemployed?•Whereisyourplaceofwork?•Doyouownthevehicle?Ifnot,whoownsit?How
longhaveyouknowntheownerofthevehicle?Isitarental?
•Wheredoestheownerlive?•Doyoudrivethisvehiclemostofthetime?•Howlongdoyouexpecttobeinthefacility?•Wouldyoubeawareofanycontrabandinthevehicle?•Hasthevehiclebeenworkedon/repairedrecently?If
yes,whatwasrepairedandwhere?•Additionalquestionsspecifictothevehicletype.•Howlonghaveyoubeenemployedbythepresent
employer?(C)
•Didyouobservethisvehiclebeingloaded?(C)•MayIseeyourlogbook?(C)
(C)=CommercialVehiclesOnly
Interview
Typical questions to obtain driver knowledge specific to the vehicle type:

14 InterviewIndicators from Interview
Driver and Documentation:• Driverinappropriatelydressedorgroomedforvehicle
type• Driverdoesnothavecommercialdriver’slicense• Driver’sstorydoesnotmatchdocumentation• Documentationisincompleteordoesnotmakesense• Driverdoesnotknowhisorherpurposeand/or
destination or documentation• Purposeoftripdoesnotmakeeconomicsense• Driverandpassenger(s)donotappeartobeonthe
same mission• Driverdoesnotknowhowtooperatetruckor
equipment• Presenceorlackofsignificantodors(operator
clothing odors should be consistent with cargo)• Driverdoesnothavelogbook(C)• Driverdoesnothavetachagraphdisksforprevious24
hours (E.U. only)
(C)=CommercialVehiclesOnly
Driver Flight or Fight* Behavioral Cues: • Yawning• Obviousshaking• Refusingtomake/keepeyecontact• Profusesweating• Haironarmsstandingonend• Wipinghands• Patting/soothing/massaging
any area of body• Tuggingatclothing• Armscannotstaystill• Constantlymoving/inabilitytostaystill• Shakyvoice/stuttering• Doesnotanswerthequestion,respondswith
unrelated information• Deepsighs• Answersquestionwithaquestion• Rapidmovementofthecarotidartery
* See page 20 concerning flight or fight mechanism.

15 Interview
Detailed Interviewing GuidelinesThe vehicle inspection interview process gathers information on the vehicle driver and passengers (if any). How this process is conducted will determine the probability of identifying the presence of illicit material, such as explosive materials and devices, or other contraband, such as illegal or prohibited items. Remember that the interview process is not an exact science. An innocent driver could exhibit physical indicators, while a guilty person may have no physical indicators. Do not overcomplicate the interview. Ask all pertinent questions, make an assessment, confer with the other inspectors, and then hold or release the vehicle. Avoid the use of slang; speak slowly; be precise in your meaning. Drivers for whom English is a second language may have difficulty in understanding you. Someone may deliberately interpret your question literally, in order to avoid answering your questions.
Conducting the InterviewBe aware of the cultural customs in your area. This may affect the person’s manner toward you, particularly with different genders. Separate the behavior that is cultural from that which is stress-related.

16 InterviewGuidelines for Interviewing
•Doesthedriverappearknowledgeableregardinghisvehicle?
•Whatarethetypicaltypesofpassengersforthistypeofvehicle?
•Whattypeofpersondoyounormallyencounteratyourstationatthisparticulartime?
•Howdoestheaveragepersonofthisageandsocialstatus dress when entering the facility for a particular purpose?
•Whatisthenormalamountandconditionofthecargoofthevehicle?
•Whatisthenormaltypeofvehicleenteringthefacilityatthistimeofday?
•Whatarethemostcommonreasonsgivenforaspecifictypeofvehicletobeenteringthefacility?
•Whatarethetypicaltypesofvehiclesdrivenbypersons of this particular age group, dress, occupation, andsocialstatus?
•Whatvehicletypeshavebeenidentifiedaspotentialthreatsinthelatestintelligencebriefings?
•Dotheidentificationdocumentsmatchthepersonyouareinterviewing?
•Whatworkgroupsarescheduledatwhattimesthroughouttheday?
•Whatarethetypicalmeansoftransportationforeachworkgroup?
Make an initial observation of the vehicle/driver entering the inspection area.
Observe the vehicle entering the facility. Does any area catch your eye as being out of the ordinary?

17 Interview
Examples to Look For
•Visiblefingerprintsorsmudgesaroundthe– front bumper– head lamps– fenderwells
•Licenseplateisclean,butthevehicleisdirty•Tiresarelow,toocleanforthevehicle,ordonot
match•Vehiclelooksoverlyheavyineitherthefrontorthe
rear•Driverappearsunfamiliarwiththeclutch,brakes,or
other details of operating the vehicle•Unusualsignsofillness,fatigue,orinjury
•Occupantsfailto“fit”thevehicle– Sloppy appearing person in a neat automobile– Neatly dressed person in a messy or very dirty
vehicle– Bearing, attitude, or “feel” of the driver is
inconsistent with expectations– Number of occupants is atypical– Inconsistencies in stories– Occupants appear to be tense, overly friendly,
too casual—any emotion out of the ordinary
Check vehicle markings. All U.S. commercial vehicles are required by law to display vehicle markings. The markings should include either a U.S. DOT number (six digits or, if preceded by a “0,” seven digits) or an MC number (six digits or less). All commercial vehicles must have a U.S. DOT number. “For hire” vehicles must display an MC number or an old ICC number (six digits or less). “For hire” vehicles may or may not display their U.S. DOT numbers.

18
•Obtainvehicle documents from the driver– Commercial driver’s license– Insurance card– Logbook (U.S.) or tachagraph (E.U.)– Daily itinerary– Hazardous materials signage (as required)– Interstate inspection tags–Doesthedriverpossessproofofownership?
If not, is the vehicle rented, leased, or borrowed?Whydidthedriverrentthevehicle?
– Does the mileage on the rental agreement indicatetravelinexcessofdeclareditinerary?
•Obtainacargo manifest, shipping papers, or bill of lading from the driver– Does the driver know what he or she is
hauling?–Whoisthepointofcontactforthedelivery?
Interview
Vehicle markings may be found on:•Doors•Sideofsleepercompartment•Sidesteps•Fueltanks
During the interview:•Obtainidentification documents from the driver
and occupants– Do the photo, age, and description match the
person(s)infrontofyou?– Do the names on the identification suggest a
relationshipotherthanthatstated?– Does an unexplained abnormally large age
difference exist between driver and vehicle occupants?
– Are the occupants from an address far removed geographically?

19 Interview
•Relaxant questions relate to direct involvement of the subject and are designed to elicit a physiological reaction from the guilty What is the purpose of your visit? What are you carrying? Are you carrying any explosive devices?
•Control questions are designed to evoke a known lie, a probable lie, or an emotional response and are used as a gauge to determine truth or deception regarding the relevant question Have you ever smuggled anything? Have you ever had explosive or any other illegal
devices in your possession?
•Symptomatic questions are used to determine whether an outside influence is bothering the subject Is something wrong? Are you nervous about something? Are you worried that your vehicle will be
inspected?
•Neutral questions should not cause the subject any concern and are designed to give some indication of the individual’s physiological norm What is your name? Where do you live? How long has your trip been?
Questions to AskThere are four types of questions you can use to elicit responses from the individual you are interviewing. They are relaxant, control, symptomatic, and neutral questions.

20 Interview
•Ifnecessary,havethedriverexitthevehicleandaskhim/her to open any baggage, container, or vehicle. Do not lead the way— follow the driver. The driver should open all compartments or baggage unless he/she is physically unable to do so.
•Observethepersonopeningthecompartment(s)andbaggage–Isthepersonfamiliarwiththevehicle?–Doesthepersonhesitateorappearnervous?– Do the person’s hands shake while opening the
compartment?–Dotheperson’seyesdartbackandforth?
Stress is an uncontrollable instinct. The manifestations of stress are initiated instinctively. This means that when a threat to a person’s well being is perceived, an automatic, uncontrollable animal instinct occurs. Physical and psychological changes occur immediately, produced by the autonomic nervous system present in all animals. The common term for this process is the “fight or flight” mechanism. Upon the realization of an impending threat to one’s well being, the body automatically prepares to fight or flee the danger.
During the Interview (cont.)

21 Interview
Look for a shift in attitude toward the inspector. In the course of an inspection, the individual may inadvertently tip off the inspector to the presence of a threat item. Sometimes, the inspector will initially be responded to politely, only to encounter hostility and verbal abuse later in the inspection period. Conversely, an inspector may be met with hostility, but later the individual may become sedate and compliant as clues to illegal activity are discovered.
Be careful. In your past experiences, you may have formed opinions about what is suspicious and what is not. Studies of police officers suggest that those who were the most confident in their ability to detect deception were actually the worst at knowing when a subject was lying. It is essential that you rely on strong and immediate evidence, using gut instinct along with knowledge of the following signals of deception to decide when to dig deeper.
Keep a Professional Appearance: There are several ways you can choose to see a person, and the same appliesforhowanotherpersonseesyou.Youcanstrongly affect the outcome of your interview by being well-groomed and neatly dressed. Avoid wearing unnecessary jewelry. When the screener presents himself as someone who is confident and professional, those with something to hide will think twice about attempting to come through.
How people perceive you strongly affects how people will react to being searched or questioned. How you conduct the interviewing, as well as how you act and dress, affects how both you and subject perceive the situation. If the person you are interviewing sees you as being a good interviewer, this will strongly affect your ability to spot trouble.
If you show that you are a competent, reasonable, and trustworthy person, truthful people will feel relaxed around you, and deceptive people will feel very uncomfortable.
During the Interview (cont.)

22
•Turningredorblushing•Turningwhiteorpale•Obviousshaking•Avertingeyes,refusingeyecontact•Dartingeyes•Movingeyes•Excessiveblinking•Evasiveeyesorlookingatthefloor•Dilatingpupils(especiallyduringrelevantquestions)•Closingeyes•Squinting•Frowning,consternation•Lookingbug-eyed•Coveringtheeyes•Rubbingortouchingthenose•Smoothing,twisting,orgroomingthemustache•Tuggingtheears•Coveringtheears
•Pattingthecheek(smoothingandreassuringgestures)
•Groomingorsmoothingthehair•Yawning•Lickingthelips•Bitingorchewingthelips•Twistingthemouth•Coveringthemouth•Protectingthroatareawiththehands•Swallowingrepeatedly/excessively•Pulsatingbloodvesselsinheadorneck•Sweatingprofuselywhentheenvironment,dress,
or activity does not warrant it•Exhibitinggoosebumps•Neckorarmhairsstandingonend•Fidgeting/nervoushands•Playingwithfingernails•Toyingwithjewelry
Symptoms of Stress
Interview
23 Interview
•Rubbinghandsorfingerstogether•Wipinghands•Patting/smoothing/stroking/massaginganyareaofthe
body (reassuring gestures)•Tappingthechest•Scratchingrepeatedly•Tuggingatclothingoranyareaofthebody•Hidingthehands•Pointingaway(misdirectiongesture)•Continuallypickinglint•Movingarms•Foldingarmsacrosschest•Lockingontoanything,leaning/grasping/holdingany
physical thing
•Movingrapidlyortensely•Displayingexaggeratedmovements•Appearingrestless•Tappingfoot•Movingfeet•Restlessshiftingofweightfromonefoottothe
other•Placingthehandsinsidethegroinarea(protective
reassuring gesture)•Legcrossing/uncrossing•Sittingonedgeofseat(preparingforflight)
Symptoms of Stress (cont.)

24 Interview
•Inabilitytoanswer•Reluctancetoanswer•Answeringaquestionwithaquestion•Repeatingyourquestionoraskingyoutorepeatthe
question•Continuallyaskingyoutoclarifythequestion•Shakingvoice•Stuttering•Voicecracking•Hesitantspeech•Notansweringthequestion.Respondswithunrelated
information (rehearsed answers)•Oralclickingsound(drymouth)
•Deepsighing•Repeatedlyclearingthroat•Yawning•Grindingteeth•Attemptingtoinfluencethequestionerbyusing
words or qualifications such as:– “Honestly”– “Truthfully”– “Believe me”– “To tell the truth”– “To be perfectly frank”– “I swear”– “May God strike me dead”– “I wouldn’t lie to you.”
Symptoms of Stress (cont.)

25 Interview
Cultural AnomaliesIt is important to remember that other cultures may have ingrained mannerisms that seem odd compared to your own. It is essential to distinguish odd or conspicuous behavior from that which is culturally based. The following are examples of behavior that can easily be interpreted as an indicator of guilt or as strange behavior rather than as a cultural norm.
Eye Contact•InsomeAsian,PuertoRican,WestIndian,and
African American cultures, some consider it proper to avoid direct eye contact. Some Native Americans may avoid eye contact with elders as a sign of respect.
•ForsomeindividualsfromBritish,EasternEuropean,and Jewish cultures, and for Canadians and Americans of European descent, direct eye contact is considered normal in a conversation, part of being truthful, honest, and open.
Whereas individuals who expect direct and frequent eye contact might see avoiding eye contact as a sign of deception, those who expect little or no eye contact might see looking directly as disrespectful and glaring.

26 Interview
Summoning and PointingSummoning someone by curling the index finger with the palm upward is considered rude in some parts of the world and will result in a negative attitude toward the screener.
Pointing with the index finger can also be considered rude; if it is necessary to point, do so with the whole hand.
Expected Personal SpaceThe amount of space between people that feels comfortable to a person when having a conversation varies with culture. If a person is acclimated and accustomed to standing farther away when having a conversation, he or she might be offended, be angered, or feel like the closer-standing person is trying to be intimidating. Likewise, if a person comes from a culture where two people generally stand very close together when speaking, then a person who stands farther away might seem cold and distant.

Passenger Vehicles
27 Passenger Vehicles
Quick Reference Passenger Vehicle Inspection
General•Anythingunusualinfactory-builtcompartments•Neworshinyboltsand/orscrews•Unusualscratches,possiblymadebyscrewdrivers,
wrenches, or similar tools•Signsoftampering,suchasbrokenpartsorbentsheet
metal•Areasandcomponentscleanerordirtierthan
surrounding areas•Wireandtapestoredinvehicle•Neworbrokenwelds•Unusualfingerprintsofgreaseand/oroilinotherwise
clean areas•Freshbodywork(freshfiberglassing,freshpaint,etc.)•Freshundercoating,particularlyonoldervehicles•Newcaulkingfoundbysmellortouch•Novehicleidentificationnumber•Falsecompartmentsthatarenotpartofvehicledesign
Exterior Rear•Taillightsnotworking•Noaccesstorearbumpercavity
Exterior Front•Headlightsnotworking•Frontgrillmodifiedorhasfalse
compartment•Noaccesstofrontbumpercavity
Passenger Vehicles
28
Quick Reference Passenger Vehicle Inspection (cont.)
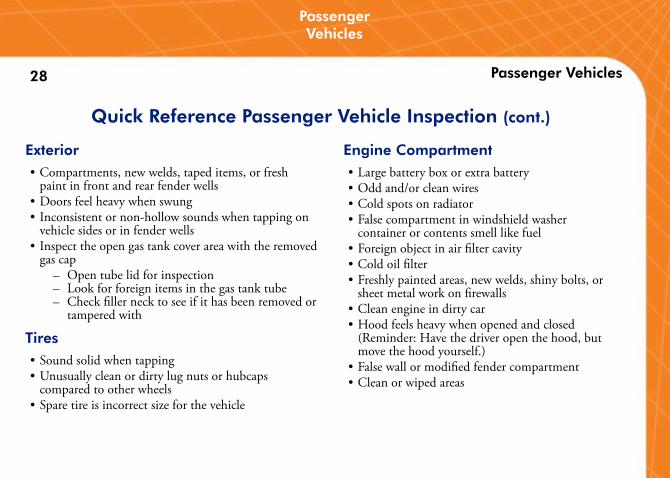
Exterior•Compartments,newwelds,tapeditems,orfresh
paint in front and rear fender wells•Doorsfeelheavywhenswung•Inconsistentornon-hollowsoundswhentappingon
vehicle sides or in fender wells•Inspecttheopengastankcoverareawiththeremoved
gas cap – Open tube lid for inspection– Look for foreign items in the gas tank tube– Check filler neck to see if it has been removed or
tampered with
Tires•Soundsolidwhentapping•Unusuallycleanordirtylugnutsorhubcaps
compared to other wheels•Sparetireisincorrectsizeforthevehicle
Engine Compartment•Largebatteryboxorextrabattery•Oddand/orcleanwires•Coldspotsonradiator•Falsecompartmentinwindshieldwasher
container or contents smell like fuel•Foreignobjectinairfiltercavity•Coldoilfilter•Freshlypaintedareas,newwelds,shinybolts,or
sheet metal work on firewalls•Cleanengineindirtycar•Hoodfeelsheavywhenopenedandclosed
(Reminder: Have the driver open the hood, but move the hood yourself.)
•Falsewallormodifiedfendercompartment•Cleanorwipedareas
Passenger Vehicles

29
Inside the Vehicle•Dashboard
– Electrical components function or LEDs are on when vehicle power is off
– New, damaged, or scratched screws– Plugged air vents– Broken or missing blower
•Factorybuilt-incompartmentsthatareconcealedfrom view
•Unusuallumpsorbulgesinfrontand/orrearseats•Rigidfrontand/orrearseats•Falseormodifiedceiling•Unusuallythickfloor•Stresscracksinwindshield(notrockchips)
Under the Vehicle•Unusualorinconsistentsoundswhentappingon
fuel tank•Newframewelds•Itemstapedorattachedtoframe•Coldoilpan•Coldorunusualmuffler(vehiclemaybeloud)•Signsofrecentinstallationofcomponentssuch
asfueltank,muffler,etc.(Askdriveraboutdetailsof repair.)
•Sparegascans(couldindicatethevehicle’sgastank has been reduced to accommodate a hidden compartment)
Exterior Compartments•Factorybuilt-in,concealedfromview•After-markettype,unusualforvehicle•Concealedtype,unusualforvehicle
Passenger Vehicles

30Passenger Vehicles
Dashboard
SeatsTrunk
Trunk Lid
Fenders
Gas Tank
DoorsFloorboards
UndercarriageTires
Bumper
False Ceiling
Hood and EngineCompartment
Hot Spots
31
Indicators in Cargo Area of Automobiles
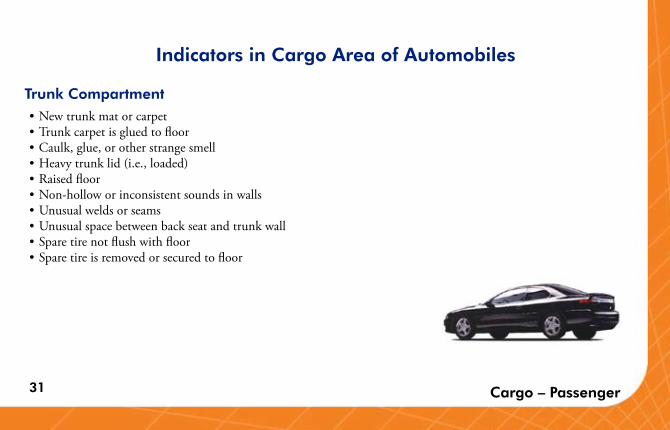
Trunk Compartment•Newtrunkmatorcarpet•Trunkcarpetisgluedtofloor•Caulk,glue,orotherstrangesmell•Heavytrunklid(i.e.,loaded)•Raisedfloor•Non-holloworinconsistentsoundsinwalls•Unusualweldsorseams•Unusualspacebetweenbackseatandtrunkwall•Sparetirenotflushwithfloor•Sparetireisremovedorsecuredtofloor
Cargo – Passenger

32
Hot Spots
Gas Tank
Doors
UndercarriageTires
Bumper
Hood and EngineCompartment
Dashboard
False Ceiling Seats and Floor
Bed
Tailgate
Pickup Trucks

33
Indicators in Cargo Area of Pickup Trucks
Tailgate•Heavytailgate•Freshpaintorbodyfiller/fiberglass•Inconsistentornon-hollowsoundswhentapped
Bed•Inconsistentornon-hollowsoundswhentapped•Freshpaintorbodyfiller/fiberglass•Unusuallythickfloor•Unusualweldand/orseams•Anycaulking•Unusualdistancebetweencabandbed•Bedraisedwithmaterialbetweenframe
Cargo Area•Freshpaintorbodyfiller/fiberglass•Inconsistentornon-hollowsoundsinwalls
when tapped•Thickfloor•Falseceiling•Caulk,glue,orotherstrangesmell
Cargo – Pickup Trucks

34
Hot Spots
Flat Panel Vans
Seats
Caulking or Strange Smell
False Ceiling
Dashboard
TiresDoors
Thick Floor
UndercarriageBumper
Gas TankFenders
Hood and EngineCompartment
Fresh Paintor Body Filler
HeavyRearDoor
35 Flat Panel Vans
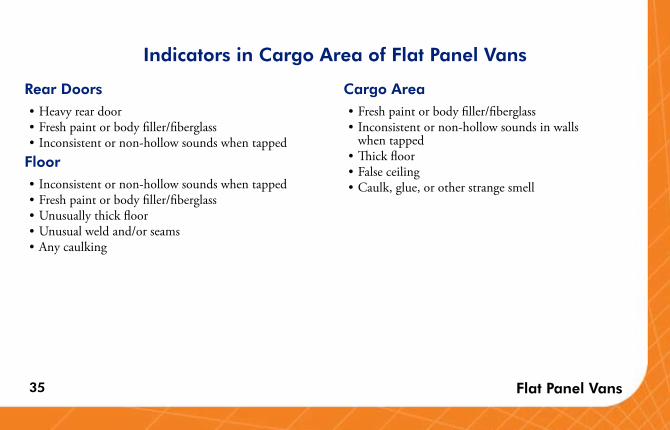
Indicators in Cargo Area of Flat Panel Vans
Rear Doors•Heavyreardoor•Freshpaintorbodyfiller/fiberglass•Inconsistentornon-hollowsoundswhentapped
Floor•Inconsistentornon-hollowsoundswhentapped•Freshpaintorbodyfiller/fiberglass•Unusuallythickfloor•Unusualweldand/orseams•Anycaulking
Cargo Area•Freshpaintorbodyfiller/fiberglass•Inconsistentornon-hollowsoundsinwalls
when tapped•Thickfloor•Falseceiling•Caulk,glue,orotherstrangesmell

36
Hot SpotsMinivans
Seats
False Ceiling
Dashboard
TiresDoors
Thick Floor UndercarriageBumper
Gas Tank
Fenders
Hood and EngineCompartment
Caulking or Strange Smell
Fresh Paintor Body Filler
HeavyRearDoor

37
Indicators in Cargo Area of Minivans
Minivans
Rear and Side Doors•Heavyreardoor•Freshpaintorbodyfiller/fiberglass•Inconsistentornon-hollowsoundswhentapped
Floor•Inconsistentornon-hollowsoundswhentapped•Factorybuilt-incomponentsthatareconcealedfrom
view•Freshpaintorbodyfiller/fiberglass•Unusuallythickfloor•Unusualweldand/orseams•Anycaulking
Cabin Area•Freshpaintorbodyfiller/fiberglass•Inconsistentornon-hollowsoundsinwalls
when tapped•Thickfloor•Falseceiling•Caulk,glue,orotherstrangesmell

38
Hot SpotsSUVs
Bumper
UndercarriageTires
Thick FloorDoors
Gas Tank
Fenders
HeavyTailgate
False Ceiling
SeatsDashboard
Hood and EngineCompartment
Built-in ComponentsConcealed from View

39
Indicators in Cargo Area of SUVs
SUVs
Rear Door•Heavytailgate•Freshpaintorbodyfiller/fiberglass•Inconsistentornon-hollowsoundswhentapped
Floor•Inconsistentornon-hollowsoundswhentapped•Factorybuilt-incomponentsthatareconcealedfrom
view•Freshpaintorbodyfiller/fiberglass•Unusuallythickfloor•Unusualweldand/orseams•Anycaulking
Cabin Area•Freshpaintorbodyfiller/fiberglass•Inconsistentornon-hollowsoundsinwalls
when tapped•Thickfloor•Falseceiling•Caulk,glue,orotherstrangesmell

40 Passenger Vehicles
Detailed Passenger Vehicle InspectionsGeneral•Factory built compartments. These compartments
can be excellent areas for hiding items.•New or shiny bolts and/or screws. New or shiny
bolts and/or screws indicate that something in that area has been altered, modified, or moved. A scratched bolt or screw indicates removal and reinsertion.
•Unusual scratches or other signs of tampering, that indicate that the area possibly has been modified and the repair or replacement was completed sloppily. Examine sheet metal for scratches and small dents.
•Unusually clean or dirty components in all areas. Clean components in an otherwise dirty area indicate that these items are new or recently repaired or modified. The driver or owner of the vehicle should be able to explain why new or clean components are in the vehicle. Be especially aware of clean or new wiring, which can be directly connected to an explosive device.
•Examine any spools or remnants of electrical wire, tape, or similar items. These materials are widely used in making vehicle bombs, and may indicate that some type of device was constructed in the vehicle.
•New or broken welds. A common technique in hiding items in “deep concealment” is to cover them with metal welded to the vehicle. Sometimes, existing welds are broken and rewelded to hide devices.
•Use your sense of smell. Be aware of the smell of caulking, glue, or any other unusual materials. Caulking, glue, and some other materials indicate that something has recently been modified or repaired. The driver should be able to identify any recent repairs.
•Be aware of unusual dirty or greasy fingerprints on exterior surfaces. Residue from a dirty hand or smudge left on an excessively dirty area can indicate tampering.

41
Exterior•Headlight/taillight wires. The wiring for the lights
can be used to connect an electrical source to a detonator.
•Pay particular attention to any fresh body work. A close inspection of the body will reveal new body work. A typical way to hide devices is to create a false compartment in a section of the body. This false compartment is then covered with fiberglass, paint, undercoating, etc. (Be aware that in parts of Europe the undercoating is the consistency of grease.)
•Feel or look at the back of the bumpers for a false compartment. The bumper should not be overly thick.
•Visually inspect the area between the front grill and the radiator. This area can be used to hold an explosive device. Electrical power from headlight wires is readily available.
Exterior Surfaces
•Look at the fenders for an unusually thick or wide area. False compartments can be integrated into the fenders, especially in the areas above the tires. Look for fresh bodywork and undercoating.
•Swing the doors. (Have the driver initially open the doors.) Be aware of the feel of a normal door. If the door feels heavy when swung, then something may be hidden inside. The door cavity is an excellent place for hiding materials. Inspection holes are also found on the edge of the door by the latch. Remove the rubber plug to inspect the inside of the door. Rolling down a window is another way to search a vehicle’s doors for concealed material.
•Tap on the bodywork along the side of the vehicle using your hand or a small rubber mallet. (Do not damage the vehicle.) Listen to the sounds. The length of the vehicle should sound hollow. If the sounds are inconsistent, there may be a change in density caused by material hidden inside the door(s).

42 Exterior Surfaces
Tires•Tap on the tires. The tires should have a hollow or
ringing sound. Any tire that sounds solid or does not sound hollow should be considered suspicious.
•Unusually clean or dirty lug nuts. Clean lug nuts indicate that the tires have been off the vehicle recently. Unusually dirty lug nuts indicate the possibility that someone may be attempting to hide a recent removal of the tire.
Engine Compartment•Battery box. Some vehicles have large battery
boxes that may hold a smaller battery and have enough volume to act as a cavity for explosive materials.
•Look for odd or additional wires running from the vehicle’s battery. The battery is an excellent source of power for a detonator, and the vehicle wiring provides an easy way to connect the battery to the detonator.
•Be suspicious of more than one spare tire or an extra rack/mount. This could be used for the concealment of an explosive device or explosive materials.
•Feel the radiator for cold spots, if possible. The radiator temperature should feel consistent over the whole surface. Cold spots in the radiator or its hoses indicate that it is not functioning and could be a hiding area.
Use a cavity detector if possible. It is the best tool for checking within hollow voids such as body panels and tires.

43 Engine Compartment
•Inspect the windshield washer container for a false compartment or signs of tampering. This container could contain a significant amount of explosive material. Ensure that the windshield washer hose is properly hooked up to the system. Open the container and examine the contents. This container could also be a false fuel tank. If so, the fuel tank may contain something other than fuel. In this case, follow up by inspecting the fuel tank.
•Inspect the air cleaner for foreign items. On most vehicles, the air filter cover is easily removed. The engine can run with a partially blocked air filter, so this area can hold a significant amount of explosive.
•Feel the oil filter to ensure that it is warm or hot. The oil filter can be modified, and the resulting cavity is large enough to hold a grenade or a few pounds of explosive materials. The oil filter can hold foreign materials while the engine is running properly.
•Inspect the firewall for any signs of modification or tampering. Especially look for signs of sheet metal work indicating the possibility of something hidden behind the firewall. Also look for new welds and new or shiny screws.

44 Interior
Inside the Vehicle•Look closely at the dash for new, damaged, or
scratched screws. Behind the dash is a factory-built cavity. To get access, the dash has to be removed. Removing and reinserting the screws can cause damage. A smuggler may decide to use new screws instead of reinstalling the old/damaged ones.
•Look for plugged vents on the dash. The vents are a primary location for hiding.
•Glove box. Be aware of the typical look and depth of a glove box. Be suspicious of any glove box that looks small and/or shallow. A false compartment could be present.
•Seats, especially the rear seat, for unusual bumps or bulges. If bumps and/or bulges are present, find out why they exist.
•Roof liner for bulges, rips, and/or repairs indicating possible concealment of an explosive device or explosive materials.
•Look at the floor for anything that appears to be modified. Remove floor mats if necessary. Typically, if anything is hidden in the floor, the floor will appear overly thick. Look for fresh welds or seams.
•Look for packages, containers, travel bags, and devices that seem out of place. An explosive device will not necessarily be hidden in the vehicle. It may be hidden in a cardboard box on or under the seat.
•Look for possible indicators that the driver has been doing surveillance work. Items like cameras, video recorders, maps, or diagrams of buildings, and terrorist-related propaganda or “how to” manuals.
Inside the vehicle, take a moment to observe everything within view. Pay attention to packages/devices (e.g., alarm clocks, iron or PVC pipe) that look out of place. Objects in plain sight are often overlooked.

45
Under the Vehicle
•Be sure all connections are properly made (e.g., the gas tank filler tube runs from the fill port to the tank, the exhaust pipe runs from the manifoldtothemuffler,wiresareconnected).
•Use a rubber or brass mallet to tap the fuel tank. The tank should not sound hollow, and the sounds should be consistent all along the bottom of the tank. The fuel tank is commonly used for hiding large items.
•Look for anything taped or attached to the frame. Nothing should be taped to the frame.
•Feel the oil pan on the bottom of the engine. It should feel hot or warm to the touch. If it has a cold spot, then it may contains a false compartment. Even if the oil pan contains a false compartment the engine could continue to operate properly.
Underneath
Use a flashlight and mirror with a creeper (if possible) to carefully inspect under the vehicle.
•Check the windshield for stress cracks. A stress crack can be identified by the absence of an impact crater normally caused by a flying stone. A stress crack may indicate that the windshield was removed. When the windshield is removed, access can be gained to the area below the top of the dash, which can be used as a hiding area. Look closely at the dash area for indications of something hidden, such as scratches on the top-front of the dash.

46
•Be suspicious of signs of recently installed hardware such as a new muffler or fuel tank. The driver should be able to explain any repairs or modifications to the vehicle.
• Look for fresh undercoating or paint, which may indicate that something is hidden.
Cargo Area of Automobiles•Look for any new items in the trunk such as
carpeting or mats. This indicates something has been changed recently.
•Move the trunk lid up and down. (Have the driver open the trunk for you.) Notice whether the trunk lid feels heavy, or if it will not stay up. A heavy trunk lid indicates that something may be hidden in it.
•Look for an unusually high or unusually thick trunk floor. A false floor can be used to hide items below it.
Cargo Area

47
•Tap on the walls of the trunk to check for false compartments. Note the sounds. The sounds should be hollow. Any solid sounds indicate that something may be behind the wall and should be further investigated.
•Check the area behind the rear seat. This is an area where a false wall could be constructed.
•Look at the spare tire area. If the spare tire is not flush with the floor surface or does not look correctly installed, look for a false bottom to the tire well.
Cargo Area of Pickup Trucks•Check the weight of the tailgate by lifting it. If it
feels heavy, something may be inside.•Look for fresh bodywork on the walls of the bed,
the bed floor, and the tailgate. A close inspection will reveal new bodywork of fiberglass and paint. This work can be an attempt to hide a false compartment.
•Visually inspect the thickness of the floor from the rear with the tailgate down, if possible.
•Tap on the walls and bed of the cargo area to check for false compartments. Note the sounds. The sounds should be hollow. Any solid sounds indicate that something may be in the walls and should be further investigated.
•Look around the bed area for unusual welds or seams. These could indicate a hidden compartment.
•Inspect any cross-bed or job site tool boxes. Check for false bottoms and hidden wall space. If box or any containers are locked, have the driver open to gain access.
Cargo Area

48
Cargo Area of Vans/SUVs•Tap on the walls and bed of the cargo area to
check for false compartments. The walls and bed should sound hollow. Any solid sounds indicate that something may be in the walls and should be further investigated.
•Look around the floor area, under the mat if necessary, for unusual welds or seams. Any of these could be there to hide a loaded false compartment.
•Ifequipped,check the seat “stow-and-go” compartments (seat stowage compartment in the floor).
•Check roof rack after-market storage compartment.
Cargo Area
The primary locations for hiding explosives in the cargo area are the walls of the bed, the tailgate, and in and under the floor.

Tractors/Trailersand Tankers
49
This page left blank intentionally.

Tractors/Trailersand Tankers
50
Hot SpotsNon-Sleeper Day Tractors
False Ceiling
BumperTires
InteriorExhaust Stack
Engine Compartment
Fuel and Air Tanks
Chassis
Fifth Wheel Area

51
Indicators in Non-Sleeper Day Tractors
Non-Sleeper Day Tractors
Inside the Vehicle•Odorshouldbeconsistentwithcargo•Dashboard
– New, damaged, or scratched screws – Plugged vents
•Modificationstofactory-installedorafter-marketcompartments
•Freshwiringandelectricaltape•Container(s)thatcontainfuel,possiblyindicatingthe
main fuel tank(s) is carrying something other than fuel
•Interiorsurfaces(firewall,ceilings,doors,bulkheads)are tampered with or modified
•Unusuallumpsorbulgesintheseats•Rips,bulges,andrepairsinroofliner•Heavydoors•Freshweldsorseamsinfloor•Unusuallycleanordirtycabarea
•Totalabsenceofpersonalitemsortravelbags•Packagesanddevicesthatlookoutofplace
Under the Vehicle•Boxed-insectionsoftheframe•Itemstapedorattachedtoframe•Coldoilpan•Thickfloor•Signsofrecentinstallationofcomponents
(Ask driver about repairs.)•Freshundercoatingorpaint•Spareitemsortanksthathavenoobvioususe

52 Interstate Sleeper Tractor Interior
Hot Spots
Thick Wallsor Ceiling
UnusuallyHeavy
Mattress
UnusuallyClean or Dirty
Cabin Area
CompartmentsUnder Mattress
Modified Ceilings

53 Interstate Sleeper Tractor
Inside the Vehicle•Odorshouldbeconsistentwithcargo•Dashboard
– New, damaged, or scratched screws – Plugged vents
•Modificationstofactory-installedor after-market compartments
•Freshwiringandelectricaltape•Container(s)thatcontainfuel,possiblyindicatingthe
main fuel tank(s) is carrying something other than fuel
•Interiorsurfaces(firewall,ceilings,doors,bulkheads)are tampered with or modified
•Unusuallumpsorbulgesintheseats•Rips,bulges,andrepairsinroofliner•Heavydoors•Freshweldsorseamsinfloor•Unusuallycleanordirtycabarea•Totalabsenceofpersonalitemsortravelbags•Packagesanddevicesthatlookoutofplace
•Sleeperarea – Modified speaker cavities – Strangely clean or dirty areas – Caulk, glue, or other strange odor – Unusual items in compartment under
mattress – Unusually heavy mattresses – Unusually thick walls or ceiling
Under the Vehicle•Boxed-insectionsoftheframe•Itemstapedorattachedtoframe•Coldoilpan•Thickfloor•Signsofrecentinstallationofcomponents
(Ask driver about repairs)•Freshundercoatingorpaint•Spareitemsortanksthathavenoobvioususe

54 Trailer Undercarriage
Hot Spots
Fifth Wheel Area
ChassisAir Tank
Tires
Floor

55
Indicators from General Inspection of Tractor/Trailer Undercarriage
Trailer Undercarriage•Naturalcompartmentsinfifthwheelareaarefilledor
welded shut•Trailerdeckingorfloorshowsignsofmodificationor
tampering•Newweldsonstructure•Neworunusualplatesonstructure(typically,there
would be no boxed-in areas on the trailer frame)•Newtires(typicallytrailershaveretreadorveryworn
tires) •Insidetiresaresmallerthanoutsidetires•Strangeornewtanks•Noairinairtankbyreartrailerwheels
Trailer Undercarriage

56 Hot Liquid Asphalt Tanker
Hot Spots
HazMatsignage
TiresOdorUndercarriageKingpin Area
Walls Temperature GaugeInside Tank

57
Indicators from Inspection of Hot Liquid Asphalt Tanker
Focus heavily on the interview and carefully review documents such as insurance card, bill of lading, medical card, log book, and driver’s license when inspecting this vehicle.
Indicators include:
•Tankersurface,especiallybottomsurface,isuniformlycool to touch from front to rear
•Dischargevalvesandsupportingequipmentshowsigns of rust and corrosion indicating lack of usage
•Temperaturegaugeisnotbetween300°and500°F(150°and260°C)
•Supportequipment,suchasdischargehosesandadapters, is missing
Note: The tank, in most cases, cannot be physically inspected.
Caution: Do not open either the tank or any discharge valves.
Hot Liquid Asphalt Tanker
•Recentsheetmetalworkonexterior(Ask driver about repairs)
•Inabilityofthedrivertoidentifypointofcontact•Inabilityofthedrivertooperateordescribefunc-
tion of all valves, levers, etc.•LackofproperHAZMATsignageandcopyof
HAZMATguide(mandatoryinU.S.)

58
Hot Spots
Closed Hopper Vessel
Inside Tank
TiresUndercarriageKingpin Area

59
Indicators from Inspection of Closed Hopper Vessel
Focus heavily on the interview and carefully review documents such as insurance card, bill of lading, medical card, logbook, and driver’s license when inspecting this vehicle.
Indicators include:
•Dischargevalvesandsupportingequipmentshowsigns of rust and corrosion indicating lack of usage
•Inconsistentsoundsresultwhentappingontankersurface
•Companyinsigniaisnotprofessionallyappliedtotanker
•Supportequipment,suchasdischargehosesandadapters, is missing
•Newwelds•Shinyornew-lookingboltsandscrews•Newmetalwork•Inabilityofthedrivertoidentifypointofcontact•Cargodescribedbythedriverdoesnotmatch
manifestCommon CargoWater, milk, dry bulk materials (e.g., cement, flour,
wheat, corn)
Caution: Do not open either the vessel or any discharge valves.
Closed Hopper Vessel
Note: The tank, in most cases, cannot be physically inspected.

60
Hot Spots
Gasoline Trailer
Walls Inside Tank
Fifth Wheel Area
UndercarriageStorage Areas
Outside Storage TubesTires
HazMatsignage

61
Indicators from Inspection of Gasoline Trailer
Focus heavily on the interview and carefully review documents such as insurance card, bill of lading, medical card, logbook, and driver’s license when inspecting this vehicle.
Indicators include:
•Gasolineodorispresent•Dischargevalvesandsupportingequipmentshow
signs of rust and corrosion indicating lack of usage•Supportequipment,suchasdischargehosesand
adapters, is missing•Newwelds•Shinyornew-lookingboltsandscrews•Companyinsigniaisnotprofessionallyappliedto
tanker•Inconsistentsoundsoccurwhentappingsidesof
trailer•Temperaturesalongtanklengthareinconsistent•Drivercannotidentifypointofcontact
•Configurationofoutsidestoragetubeendcaps:typical is open, continuous weld closed; not typical is partial weld closed
•Cargodescribedbythedriverdoesnotmatchmanifest
•LackofproperHAZMATsignageandcopyofHAZMATguide(mandatoryinU.S.)
Caution: Do not open either the tank or any discharge valves.
Gasoline Trailer
Note: The tank, in most cases, cannot be physically inspected.

62 Liquid Tanker
Hot Spots
Walls
Fifth Wheel Area
Storage AreasTires
Undercarriage
Storage Tubes
HazMatsignage
Inside Tank

63 Liquid Tanker
Indicators from Inspection of Liquid TankerFocus heavily on the interview and carefully review documents such as insurance card, bill of lading, medical card, logbook, and driver’s license when inspecting this vehicle.
Indicators include:
•Presenceofcargoodor•Dischargevalvesandsupportingequipmentshowsigns
of rust and corrosion indicating lack of usage•Supportequipment,suchasdischargehosesand
adapters, is missing•Newwelds;shinyornew-lookingbolts,screws•Companyinsigniaisnotprofessionallyappliedto
tanker•Inconsistentsoundsoccurwhentappingsideoftanker•Temperaturesalongtanklengthareinconsistent•Drivercannotidentifypointofcontact•Cargodescribedbythedriverdoesnotmatchmanifest•Inabilityofdrivertooperateordescribefunctionofall
valves, levers, etc.
•Configurationofoutsidestoragetubeendcaps:typical is open, continuous weld closed; not typical is partial weld closed
•LackofproperHAZMATsignageandcopyofHAZMATguide(mandatoryinU.S.)
Common Cargo:Hazardous chemicals; water; food products.
Note: The tank, in most cases, cannot be physically inspected.
Caution: Do not open either the tank or any discharge valves.

64
Hot Spots
Refrigeration Trailer
WallsFalse Ceiling
Doors
Bumper
TiresKingplate/Fifth
Wheel Area
Refrigeration Unit Cargo
UndercarriageFloor
Fuel/Air Tanks

65
Indicators from Inspection of Refrigeration TrailerFocus heavily on the interview and carefully review documents such as insurance card, bill of lading, medical card, logbook, and driver’s license when inspecting this vehicle.
Trailer•Companyinsigniaisnotprofessionallyappliedto
trailer •Inconsistentspacingofwallpanelscrewsorrivets•Missingscrewsorrivetsinwalls•Areaswithshinyornew-lookingscrewsorrivets•Misalignedoroverlappedseamsattheexteriorroof/
wall intersection•Outsideandinsidedimensions(length,height,width)
do not match, indicating false walls•Discrepanciesinnumberofwallribsofinteriorand
exterior walls•Hingesorsignsoftamperingatexteriorroof/wall
intersection•Falsecompartmentsinroof/wallsfoundbytapping•Roofappearstoothick
•Higher-than-normalfloor•Loadedtrailernotbetween32°and55°F(0°and
13°C)•Sealedorcoveredinspectionportsinfrontandrear•Drainholesineachcorneroftraileronfloorare
blocked or missing•Foreignobjectsinhangingrefrigerationtarpon
ceiling•Repairstofloor,particularlyatthefloorandwall
intersection•Fueltankforrefrigerationunitmodified,tampered
with, or missing Cargo•Inabilitytoseefrontoftrailerareawhenalightis
shined below cargo pallets•Levelofboxed,uniformcargonotconsistentfrom
front to rear; cargo is stacked sloppily •U-haulboxesusedforcargoitems•Damagetotopofcargoboxesindicatingsomeone
has walked or crawled on top of cargo•Non-perishablecargo
Refrigeration Trailer

66
Detailed Inspections of Tractors/Trailers and TankersGeneral•Factory-built compartments. When vehicles are
built, natural or factory-built compartments are present throughout the vehicle. These compartments can be excellent areas for hiding items.
•New or shiny bolts and/or screws. New or shiny bolts and/or screws indicate that something in that area has been altered, modified, or moved. A scratched bolt or screw indicates removal and reinsertion.
•Look for unusual scratches or other signs of tampering. Unusual scratches or other signs of tampering indicate that the area possibly has been modified and the repair or replacement was completed sloppily. Look at sheet metal for tears, rips, and small dents.
•Examine spools or remnants of electrical wire, tape, or similar items. These materials are widely used in making vehicle bombs and may indicate that some type of device was constructed or installed in the vehicle.
Tractors
•Check for unusually clean or dirty components in all areas. Clean components in an otherwise dirty area indicate that these items are new or recently repaired or modified. The driver or owner of the vehicle should be able to explain why new or clean components are in the vehicle. Be especially aware of clean or new wiring because these can be connected directly to an explosive device.
•New or broken welds. A common technique in hiding items in “deep concealment” is to cover them with metal welded to the vehicle. Sometimes existing welds are broken and re-welded to hide devices.
•Be aware of oily or greasy fingerprints. Residue from a dirty hand or a smudge left on an excessively dirty area can indicate tampering.

67 Tractors
Exterior•Headlight and taillight wires. The wiring for the
lights can be used to connect an electrical source to a detonator.
•Look around the fifth wheel area. The fifth wheel is the large plate behind the cab where the trailer is connected to the tractor. Check this plate where it is attached to the chassis for signs of modifications. Be sure to check in any factory-built compartments.
•Frame rails. The frame rails are normally open. Compartments can be installed using welding techniques, so look for new welds there.
•Pay particular attention to any fresh bodywork. A close inspection of the body will reveal new bodywork. A typical way to hide devices is to create a false compartment in a section of the body. This false compartment is then covered with fiberglass, paint, undercoating, etc.
•Vertical exhaust pipe. The exhaust pipe should be warm, or you should see the exhaust exit the pipe when the motor is running. Since the motor can run on only one exhaust pipe, the second pipe can be used as a hiding device.
•Visually inspect the area between the front grill and the radiator. This area can be used to hold an explosive device. Electrical power from the headlight wires is readily available.
•Battery box. Ensure that all batteries appear to be connected properly. Empty battery shells can be used as false compartments.
•Look at the fenders for any unusually thick or wide area. False compartments can be integrated into the fenders, especially in the areas above the tires. Look for fresh bodywork and undercoating.

68 Tractors
Fuel Tanks•Fuel tanks are a primary area for hiding explosives
and explosive devices because of the volume of the tanks. Look at these very carefully.
•Look for unusual welds under the holding straps. The holding straps offer cover for new welds. Look on top of the tank where the straps are not in contact withthetank.Youshouldbeabletoseeanyweldsinthis uncovered area.
•Split fuel tanks. Assure two halves contain fuel and hydraulic fluid.
•Tap on the tanks and listen for inconsistent sounds. If there is something in the tanks other than fuel, you will hear different sounds on different areas of the tanks.
Warmer
Cooler
•Missing connections on the tanks. If something other than fuel is in the tank, the smuggler may not bother hooking the fuel lines to the tank.
•Feel the tanks with your hand for temperature inconsistencies. Since the height of the fuel will be level, the temperature should be the same along the length of the tank, whether you are touching the filled or unfilled volume.

69 Tractors
Tires•Tap on the tires. The tires should have a hollow or
ringing sound. Any tire that sounds solid or does not sound hollow should be considered suspicious.
•Unusually clean or dirty lug nuts. Clean lug nuts indicate that the tires have been off the vehicle recently. Unusually dirty lug nuts indicate that someone may be attempting to hide a recent removal of the tire.
•Be suspicious of more than one spare tire or an extra rack/mount. This could be used for the concealment of an explosive device or explosive materials.
Inside the Engine Compartment
Take a moment to observe everything within view for anything obviously wrong or unusual.
•Feel the radiator for cold spots. The radiator temperature should be consistent over the whole surface. Cold spots indicate that part of the radiator is not functioning and therefore can be a hiding area.
•Inspect the windshield washer container for a false compartment or signs of tampering. This container could contain a significant amount of explosive material. Ensure that the windshield washer hose is properly hooked up to the system. Open the container and examine the contents. This container could also be a false fuel tank. If it is, the fuel tanks may contain something other than fuel.
•Inspect the air cleaner for foreign items. On most vehicles, the air filter cover is easily removed. The engine can run properly with a partially blocked air filter, so this area can hold a significant amount of foreign material.
Use a cavity detector if possible. It is the best tool for checking within hollow voids such as body panels and tires.

70
•Feel the oil filter to ensure that it is warm or hot. The oil filter can be modified, and the resulting cavity is large enough to hold a grenade or a few pounds of explosive materials. The oil filter can be modified so it can hold foreign material while the engine is running properly.
•Check under larger components (e.g., the air cleaner and fan blade shrouds) for unusual containers. If the container is legitimate, the driver should be able to explain its purpose. The container could carry explosive materials or fuel. If a vehicle has to move only a short distance, this container could be used as a short-range fuel tank. Open the containers if possible and smell the contents. If it is fuel, then the fuel tanks on the vehicle are probably being used for foreign materials. Look for wires going into the container. These wires could be connected to a detonator.
•Inspect the firewall for signs of modification or tampering. Especially look for signs of sheet metal work indicating the possibility of something hidden behind the firewall.
Inside the Passenger Compartment
•Look closely at the dash for new, damaged, or scratched screws. Behind the dash is a factory-built cavity; to get access, the dash has to be removed. Removing and reinserting the screws can cause damage. A terrorist may decide to use new screws instead of reinstalling the old/damaged ones.
•Look for plugged vents on the dash. The vents are a primary location for hiding something.
•Glove box. Be aware of the typical look and depth of a glove box. Be suspicious of any glove box that looks small and/or shallow. A false compartment could be present.
•Seats, especially the passenger seat, for unusual bumps or bulges. If bumps and/or bulges are present, find out why they exist.
Tractors
Take a moment to observe everything within view. Pay close attention to packages/devices (e.g., alarm clock, iron or PVC pipe) that look out of place.

71 Tractors
•Roof liner for bulges, rips, and/or repairs indicating possible concealment of an explosive device or explosive materials.
•Swing the doors. (Have the driver initially open the doors.) Be aware of the feel of a normal door. If the door feels heavy when swung, something may be hidden inside. The door cavity is an excellent place for hiding materials.
•Look at the floor for anything that appears to be modified. Remove floor mats if necessary. Typically, if anything is hidden in the floor, the floor will appear overly thick. Look for fresh welds or seams.
•Look for the presence of personal items.Knowthe purpose of the incoming vehicle. If the truck has been on a long haul, then the driver should have a suitcase and/or similar items present.
•Look for packages, containers, travel bags, and devices that seem out of place. An explosive device will not necessarily be hidden in the vehicle. A cardboard box on the seat, in the sleeper, or under the seat may be the device.
•Check speakers in the cab and sleeper area for anything unusual. Factory-built cavities behind the speakers are excellent locations for hiding items.
•Use your sense of smell. Be aware of the smell of caulking, glue, or any other unusual materials. These odors may indicate that something has recently been modified or repaired. The driver should be able to explain any recent repairs. Also, the presence of a large number of air fresheners may be an indicator that the driver is attempting to cover a strong smell.
•Under the mattress. Personal items are typically stored in this area. Be suspicious of any non-personal items.

72 Tractors
•Walls and ceiling of the sleeper. These should not be overly thick. They are good places for hiding items, because the ceiling and walls are typically covered with padding material.
•Look for possible indicators that the driver has been doing surveillance work. Items like cameras, video recorders, maps, or diagrams of buildings, and violent extremist-related material or “how to” manuals.
Under the Vehicle
•Be sure all connections are properly made (for example: the gas tank filler tube runs from the fill port to the tank, the exhaust pipe runs from the manifold to themuffler,wiresareconnected, etc.).
•Look at the frame for signs of a false compartment. The frame rails are typically made of C-channel and do not contain any built-in compartments. The frame should not contain any compartments or boxed-in areas. Note: Outside the continental U.S., trailer frames have a large box beam as the support. This box beam is hollow and can be used to smuggle material.
•The oil pan should feel hot or warm. If it has a cold spot, then it may contain a false compartment.
•Be suspicious of signs of recently installed hardware. The driver should be able to explain any repairs or modifications to the vehicle.
•Look for spare or extra tanks on the vehicle that have no obvious uses. A smuggler may add tanks and supporting lines and connectors to the vehicle for the purpose of hiding explosives.
•Check the floor for unusual thickness or evidence of modifications. Evidence includes new floorboards, damaged floor boards, new or shiny screws, and an unusually high floor level.
Use a flashlight and mirror with a creeper (if possible) to carefully inspect under the vehicle.

73
•Be suspicious of new tires on the trailer. Most operators do not buy a complete set of new tires. Typically, trailer tires are heavily worn or are retreads.
•Look for tires obviously smaller than the adjoining tires. The tire presents a good area for hiding material. However, a spinning tire presents a hot, hostile environment for explosives or explosive devices. A smaller tire will not spin and, therefore, will be a suitable environment for smuggling material. The smaller tire will almost always be on the inside of the axle.
•Look for new or strange air tanks. An air tank is necessary for braking the vehicle and is typically near the rear axle of the trailer. This tank should be pressurized. Use the bleeder valve to check for air pressure. If there is no air pressure, the tank may contain an IED. Be suspicious of any other tanks on the vehicle. The driver should be able to explain the purpose of the other tank(s).
Trailer Undercarriages

74 Hot Liquid Asphalt Tanker
Hot Liquid Asphalt Tanker
The hot liquid asphalt tanker has a cylindrical tank that consists of a hard steel inner tank surrounded by a layer of fiberglass insulation and covered by a thin sheet metal jacket on its exterior surface.
Congealed asphalt can be liquefied by two methods:
•Coilsarebuiltintotheinnertankthatcanbeheated electrically to melt the solid asphalt.
•Steamfromanexteriorsourcecanbeforcedintotubing to liquefy the solid asphalt.
An asphalt tanker has one cavity internally and cross-sectional baffles designed to stabilize the asphalt while the vehicle is moving.
•Look at the discharge hoses and supporting equipment. Rust and/or corrosion on the valves indicate lack of use. Ensure that supporting equipment, such as discharge hoses, is present and appears to be in good working order. If lack of use is suspected, ask the driver for an explanation.
Caution: The surface metal is very hot to the touch after loading. The surface temperature drops to a safe level for hands-on inspection about two hours after loading.

75
•Check the temperature of the hot asphalt by looking at the temperature gauge mounted on the outside of the tank. The temperature of hot asphalt shouldbebetween300°and500°Fahrenheit(150°and260°Centigrade).If the temperature is not within this range, find out why from the driver.
•Look at the tank surface for evidence of sheet metal repair. These vehicles are manufactured with insulation between an inner and exterior tank. A pathway to the insulation area, a possible hiding area, would likely be through the exterior sheet metal. If something looks suspicious, ask the driver about recent repairs.
•Look at outside storage tubes. These tubes are generally open so as to support accessory storage. Tubes not used have end caps that are continuously welded closed. Recent welds and/or partial welds could be an indicator of something suspicious.
•Look for proper HAZMAT signage and a copy of theHAZMATguide(mandatoryinU.S.).
Closed Hopper Vessel
Closed Hopper Vessel
Closed hopper vessels are used for transporting and discharging dry bulk powders or granules such as cement, gypsum, or roofing granules and liquid materials such as water and milk.
Hopper pressure vessel trailers are manufactured in the following variations (i.e., number of hoppers):
•Single•Double•Triple•Quadruple

76 Closed Hopper Vessel
•Look at the discharge hoses and supporting equipment. Rust and/or corrosion on the valves indicate lack of use. Ensure that supporting equipment, such as discharge hoses, is present and appears to be in good working order. If lack of use is suspected, ask the driver for an explanation.
•Ifapplicable,look at the company insignia and other items applied to or painted on the surface of the vehicle. All items should be professionally applied. Be suspicious if the company logo and other supporting information is painted or applied poorly.
•Look for new welds and shiny or new looking bolts and screws. Any of these may indicate recent modifications to the vehicle. Ask the driver about any repairs.
•Look for new metal work on the vehicle. New metal work may indicate recent modifications to the vehicle. Ask the driver about any repairs.
•Tap along the surface of the tank with a wooden hammer. The sounds should be consistent along the length of the tank. Any difference in sounds may indicate a false cavity in the tank.

77
Gasoline Trailer
•Look at the discharge hoses and supporting equipment. Rust and/or corrosion on the valves indicate lack of use. Ensure that supporting equipment, such as discharge hoses, is present and appears to be in good working order. If lack of use is suspected, ask the driver for an explanation.
Gasoline is highly dangerous and warrants extra caution during any inspection.
Four factory-built internal compartments are normally found within the gasoline tanker with varying capacities in each compartment. Internal baffles with manhole passageways are built into the bulkhead walls of the compartments.
The highly volatile nature of gasoline and other petroleum products tends to inhibit close inspection of these tankers. It should be noted that empty tankers are often more dangerous than those that are full due to the explosive potential of fumes in a confined area.
Gasoline Trailer
•Ifapplicable,look at the company insignia and other items applied to or painted on the surface of the vehicle. All items should be professionally applied. Be suspicious if the company logo and other supporting information is painted or applied poorly.
•Look for new welds and shiny or new looking bolts and screws. Any of these may indicate recent modifications to the vehicle. Ask the driver about any repairs.
•Look for new metal work on the vehicle. New metal work may indicate recent modifications to the vehicle. Ask the driver about any repairs.
•Feel the sides of the tanker with your hand. The tanker surface temperature should feel consistent along the length of the tank. The lower part of the tank, depending on how full the tank is, should be cool, while the tank surface above the liquid level should feel warmer. Any temperature differences along the length of the tank indicate a possible false cavity inside the tank.

78
•Tap along the surface of the tank with a wooden or rubber hammer. The sounds should be consistent along the length of the tank. Any difference in sounds may indicate a false cavity in the tank.
•Look at outside storage tubes. These tubes are generally open so as to support accessory storage. Tubes not used have end caps that are continuously welded closed. Recent welds and/or partial welds could be an indicator of something suspicious.
•Look for proper HAZMAT signage and a copy of theHAZMATguide(mandatoryinU.S.).
Liquid Tanker
Liquid tankers typically haul chemicals, solvents, etc. Although not normally explosive, these materials can be extremely dangerous and should be treated with the utmost of care. Liquid tankers should have warning placards on their sides in accordance with local laws. Note: This is true for any hazardous cargo. Applies to gasoline, liquid and propane tankers.
Modern chemical transporter tankers are equipped with safety features such as pressure gages, shut off valves, and safety relief valves built right into the topside manhole cover.
It is recommended that the inspector wear overalls, gloves, protective goggles, and a breathing protector when conducting an inspection.
Liquid Tanker

79
•Look at the discharge hoses and supporting equipment. Rust and/or corrosion on the valves indicate lack of use. Ensure that supporting equipment, such as discharge hoses, is present and appears to be in good working order. If lack of use is suspected, ask the driver for an explanation.
•Ifapplicable, look at the company insignia and other items applied to or painted on the surface of the vehicle. All items should be professionally applied. Be suspicious if the company logo and other supporting information is painted or applied poorly.
•Look for new welds and shiny or new looking bolts and screws. Any of these may indicate recent modifications to the vehicle. Ask the driver about any repairs.
•Look for new metal work on the vehicle. New metal work may indicate recent modifications to the vehicle. Ask the driver about any repairs.
•Tap along the surface of the tank with a wooden hammer. The sounds should be consistent along the length of the tank. Any difference in sounds may indicate a possible false cavity in the tank.
•Feel the sides of the tanker with your hand. The tanker surface temperature should feel consistent along the length of the tank. The lower part of the tank, depending on how full the tank is, should be cool, while the tank surface above the liquid level should feel warmer. Any temperature differences along the length of the tank may indicate a false cavity inside the tank. Note: This inspection technique is not possible on insulated tankers.
•Look for proper HAZMAT signage and a copy oftheHAZMATguide(mandatoryinU.S.).
Liquid Tanker

80
Refrigeration Trailer•Look at the company insignia and other items
applied to or painted on the surface of the vehicle. All items should be professionally applied. Be suspicious if the company logo and other supporting information is painted or applied poorly.
•The walls of the trailer are typically constructed using plywood panels held together by rivets and/or screws. Look at the walls for evidence of modifications. Look for possible false walls in the trailer. Items to look for include inconsistent spacing of wall panels; missing rivets or screws; and areas with shiny, damaged, or new looking screw or rivets. In addition, look for misaligned or overlapped seams at the exterior roof/wall intersection and new plywood or other materials in the walls.
•A common hiding technique is to create a false wall in the front of the cargo area. A false wall can be determined by comparing the exterior length of the trailer to the length of the cargo area. Note: Outside the continental U.S., refrigeration trailers have walls and ceilings that may be as much as three to four inches thick.
•Many trailers are constructed with ribs in the walls. Count the number of ribs on the exterior wall of the trailer and compare that to the number of ribs on the wall in the cargo area. An inconsistent count indicates a false wall in the front of the cargo section.
•Another hiding technique is to load the top of the trailer with explosives. Sometimes access to this area is by hinging the roof of the trailer to the wall. Look for signs of hinges at the roof/wall intersection.
Refrigeration Trailer
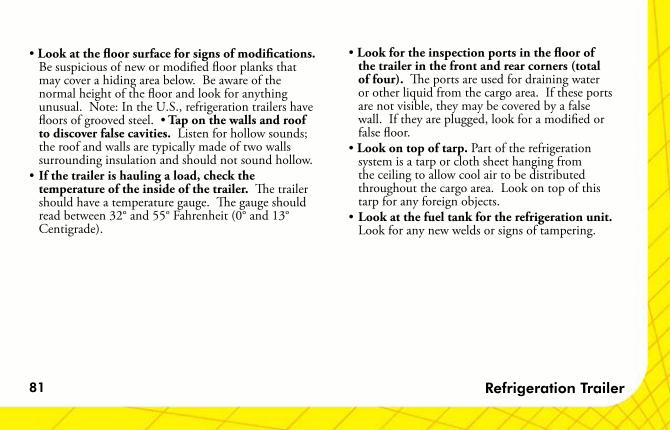
81
•Look at the floor surface for signs of modifications. Be suspicious of new or modified floor planks that may cover a hiding area below. Be aware of the normal height of the floor and look for anything unusual. Note: In the U.S., refrigeration trailers have floorsofgroovedsteel.•Tap on the walls and roof to discover false cavities. Listen for hollow sounds; the roof and walls are typically made of two walls surrounding insulation and should not sound hollow.
•If the trailer is hauling a load, check the temperature of the inside of the trailer. The trailer should have a temperature gauge. The gauge should readbetween32°and55°Fahrenheit(0°and13° Centigrade).
•Look for the inspection ports in the floor of the trailer in the front and rear corners (total of four). The ports are used for draining water or other liquid from the cargo area. If these ports are not visible, they may be covered by a false wall. If they are plugged, look for a modified or false floor.
•Look on top of tarp. Part of the refrigeration system is a tarp or cloth sheet hanging from the ceiling to allow cool air to be distributed throughout the cargo area. Look on top of this tarp for any foreign objects.
•Look at the fuel tank for the refrigeration unit. Look for any new welds or signs of tampering.
Refrigeration Trailer

82
Cargo in a Refrigeration Trailer•The cargo should be appropriate for the trailer, i.e.,
it should be perishable.•Shine a light under the
cargo pallets.Youshouldbe able to see all the way to the front wall of the cargo area. If you cannot, then an unusual item or items may be present.
•Cargo typically consists of a single commodity boxed uniformly. Therefore, when looking over the top of the cargo, the top surface of the load should be even. If there are dips or packages above the normal cargo level, determine the reason for the non-uniformity. Something could be hidden in this area.
•Notice where the cargo boxes were purchased. Companies usually purchase large quantities of boxes with their logos on the side. Be suspicious if the cargo is boxed in “U-Haul” or similarly named boxes, since these boxes are expensive and shipping companies tend to avoid buying them.
•Look at the way the cargo is stacked. It should be neatly stacked on pallets so it can be handled easily. A sloppily stacked cargo or a cargo of many different items could indicate a lack of interest in the safety of the cargo and that it is there strictly for appearance or diversionary reasons.
•Look over the top surface of the cargo. Look for any signs that someone has walked on top of the cargo. No one should be walking on the cargo after it is loaded.
•Notice the shipping labels on packages hauled by the popular shippers. Most, if not all, of the packages and boxes in the cargo area should have the shipper’s name clearly on them.
Refrigeration Trailer Cargo

Large Utility Trucks
83
This page left blank intentionally.

Large Utility Trucks
84 Propane Truck
Hot Spots
Tires
Tractor(refer to Non-Sleeper
Day Tractor)
Inside Tank
UndercarriageStorage AreasBumper
(Note Gauges)

85
Indicators from Inspection of Propane Truck
Focus heavily on the interview and carefully review documents such as insurance card, bill of lading, medical card, logbook, and driver’s license when inspecting this vehicle.
Indicators include:
•Presenceofcargoodor•Absenceofdischargehoses•Inconsistentorhollowsoundswhentappingthe
tanker exterior surfaces•Exteriorsurfacesofloadedtankershouldexhibit
condensation during warm or summerlike temperatures.
•Temperatureandpressuregaugesread incorrectly [a bona fide empty tanker will register between70and150psiatanaveragetemperatureof80°F(27°C)]
•Intakeanddischargevalvesshowrust,areopen,orshow signs of fresh paint indicating no recent use
•Inabilityofthedrivertoidentifypointofcontact•Cargodescribedbythedriverdoesnotmatch
manifest•LackofproperHAZMATsignageandcopyof
HAZMATguide(mandatoryinU.S.)•Inabilityofdrivertooperateordescribefunction
of all valves, levers, etc.
Caution: Do not open either the tank or any discharge valves. Material inside of tank can be extremely dangerous and should be handled with the utmost of care.
Note: The tank, in most cases, cannot be physically inspected.
Propane Truck

86
Hot Spots
Septic Service Truck
TiresUndercarriageStorage Areas
Tractor(refer to Non-Sleeper
Day Tractor)
Inside Tank

87
Indicators from Inspection of Septic Service Truck
Caution: Do not open either the tank or any discharge valves.
Focus heavily on the interview and carefully review documents such as insurance card, bill of lading, medical card, logbook, and driver’s license when inspecting this vehicle.
Indicators include:
•Cargoodorisnotconsistentfromdrivertotruckinterior to cargo
•Conditionoftruckinteriorshouldreflectconditionofcargo area (appearance, odor)
•Appearanceofdrivershouldmatchthevehicleanddriver should be appropriately dressed for this type of work
•Indicatorsofcargoresidueonendoftransferhosethat runs to tank
•Nodischargehosesorapparatus•Drivernotknowledgeableaboutnomenclatureand/or
operating the septic tank unit
Septic Service Truck

88 Box Trucks
Hot Spots
False Ceiling Walls
Cargo
Doors
BumperFloors
UndercarriageFuel TanksFifth Wheel Area
Tractor(see Non-Sleeper
Day Tractor)
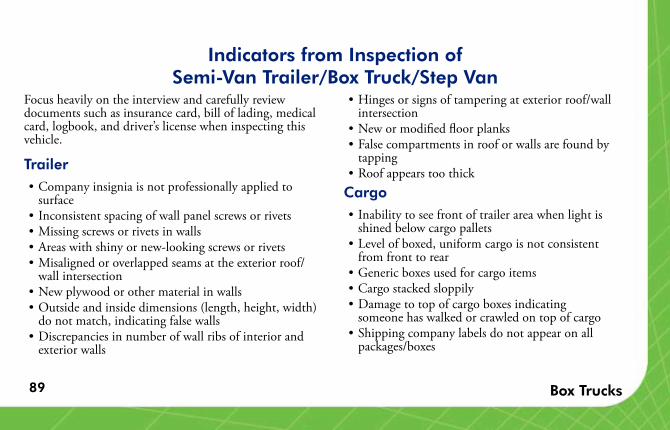
89
Indicators from Inspection of Semi-Van Trailer/Box Truck/Step Van
Focus heavily on the interview and carefully review documents such as insurance card, bill of lading, medical card, logbook, and driver’s license when inspecting this vehicle.
Trailer•Companyinsigniaisnotprofessionallyappliedto
surface•Inconsistentspacingofwallpanelscrewsorrivets•Missingscrewsorrivetsinwalls•Areaswithshinyornew-lookingscrewsorrivets•Misalignedoroverlappedseamsattheexteriorroof/
wall intersection•Newplywoodorothermaterialinwalls•Outsideandinsidedimensions(length,height,width)
do not match, indicating false walls•Discrepanciesinnumberofwallribsofinteriorand
exterior walls
•Hingesorsignsoftamperingatexteriorroof/wallintersection
•Newormodifiedfloorplanks•Falsecompartmentsinrooforwallsarefoundby
tapping •Roofappearstoothick
Cargo•Inabilitytoseefrontoftrailerareawhenlightis
shined below cargo pallets•Levelofboxed,uniformcargoisnotconsistent
from front to rear •Genericboxesusedforcargoitems•Cargostackedsloppily•Damagetotopofcargoboxesindicating
someone has walked or crawled on top of cargo•Shippingcompanylabelsdonotappearonall
packages/boxes
Box Trucks
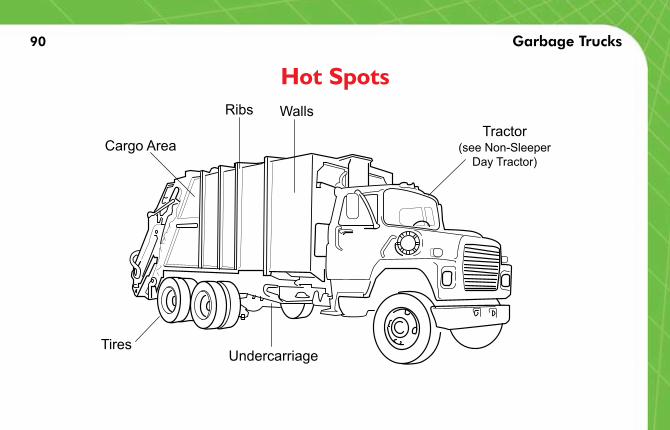
90 Garbage Trucks
Hot Spots
Tractor(see Non-Sleeper
Day Tractor)
WallsRibs
UndercarriageTires
Cargo Area

91
Indicators from Inspection of Garbage Truck —Permanent Bed
Focus heavily on the interview and carefully review documents such as insurance card, bill of lading, medical card, logbook, and driver’s license when inspecting this vehicle.
•Odorshouldbeconsistentfromdrivertotruckinterior to refuse compartment
•Falsewalls•Drivernotknowledgeableaboutoperatingthevehicle•Loadedtruckenteringthefacility(Verifythatthe
truck is empty or find out why truck is partially loaded)
•Searchpartiallyloadedtruck•Truckconfigurationconsistentwithcrew:oneman,
multiple crew •Singlecrewtruckhasspecializedequipment
Garbage Trucks

92 Garbage Trucks
Hot SpotsTractor
(see Non-SleeperDay Tractor)
Storage AreasUndercarriageTires
Walls/Ribs
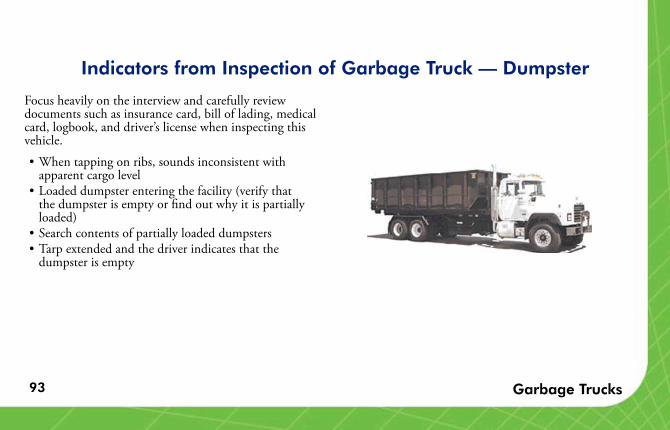
93
Indicators from Inspection of Garbage Truck — Dumpster
Focus heavily on the interview and carefully review documents such as insurance card, bill of lading, medical card, logbook, and driver’s license when inspecting this vehicle.
•Whentappingonribs,soundsinconsistentwithapparent cargo level
•Loadeddumpsterenteringthefacility(verifythatthe dumpster is empty or find out why it is partially loaded)
•Searchcontentsofpartiallyloadeddumpsters•Tarpextendedandthedriverindicatesthatthe
dumpster is empty
Garbage Trucks

94 Dump Trucks
Hot Spots
TiresUndercarriageStorage Areas
Ribs
Cargo AreaWalls
Tractor(see Non-Sleeper
Day Tractor)

95
Indicators from Inspection of Dump Truck
Focus heavily on the interview and carefully review documents such as insurance card, bill of lading, medical card, logbook, and driver’s license when inspecting this vehicle.
•Probingofcargoindicatesthepresenceofaforeignobject
•Companylogoonbedordoorsisnotprofessionallyapplied
•Inabilityofthedrivertoidentifypointofcontact•Cargodescribedbythedriverdoesnotmatch
manifest•Tarpextendedandthedriverindicatesthatthe
dumpster is empty
Dump Trucks

96 Concrete Trucks/Mixers
Hot Spots
Air and Water Tanks Drum
TiresUndercarriage
Tractor(see Non-Sleeper
Day Tractor)

97
Indicators from Inspection of Concrete Truck/Mixer
Focus heavily on the interview and carefully review documents such as insurance card, bill of lading, medical card, logbook, and driver’s license when inspecting this vehicle.
•Thepayloadisnotconcrete(visualinspection)•Foreignobject/itemisinconcreteorinmixer•Mixerdrumnotturning•Driverdoesnotknowhowtoturndrumorindicates
that the drum does not work•Inabilityofdrivertoidentifypointofcontact•Vehicleaccessories,waterhose,chutes,etc.,arenot
consistent in condition and appearance with truck body
Concrete Trucks/Mixers

98
Detailed Inspection of Large Utility Trucks
Propane Truck
•Look for the presence of discharge hoses. If none are present, find out how the propane is to be delivered. A lack of discharge hoses may indicate the lack of propane in the tank and that the truck has an alternative mission.
•Tap along the surface of the tank with a wooden hammer. The sounds should be consistent along the length of the tank. Any difference in sounds may indicate a false cavity in the tank.
•Feel the exterior surfaces of the tank with your hand. If loaded, the tank should feel cool. The tank surface should have condensation on the outside walls during summer weather. Condensation indicates the tank surface temperatureis60°to68°Fahrenheit(15.5°to20°Centigrade)at100to102poundspersquareinch of pressure.
•Check the discharge valves for signs of rust, corrosion, or fresh paint. This could indicate the lack of recent use. Also check that the valves are closed.
•Look at the company insignia and other items applied to or painted on the surface of the tank. All items should be professionally applied. Be suspicious if the company logo and other supporting information is painted or applied poorly.
•Look for proper HAZMAT signage and a copy oftheHAZMATguide(mandatoryinU.S.).
Propane Truck

99 Septic Service Truck
Septic Service Truck•Ensure that the vehicle has discharge hoses and
other supporting apparatus. If there are none, find out why.
•Transferhoseshould have residue on ends. •Have the driver or operator explain how the truck
operates and how valves and controls function. Lack of knowledge necessitates further investigation.
•Look at the company insignia and other items applied to or painted on the surface of the tank. All items should be professionally applied. Be suspicious if the company logo and other supporting information is painted or applied poorly.
•LookforproperHAZMATsignage and a copy of theHAZMATguide(mandatoryinU.S.).

100 Box Trucks
Semi-Van Trailer/Straight Box Truck/Step Van
Trailer•Look at the company insignia and other items
applied to or painted on the surface of the vehicle. All items should be professionally applied. Be suspicious if the company logo and other supporting information is painted or applied poorly.
•Look at the walls for evidence of modifications. The walls of the trailer are typically constructed using plywood panels held together by rivets and/or screws. Look for possible false walls in the trailer. Items to look for include inconsistent spacing of wall panels; missing rivets or screws; and areas with shiny, damaged, or new looking screw or rivets. In addition, look for misaligned or overlapped seams at the exterior roof/wall intersection and new plywood or other materials in the walls. A false wall can be determined by comparing the exterior length of the trailer to the length of the cargo area.
•Many trailers are constructed with ribs in the walls. Count the number of ribs on the exterior wall of the trailer and compare that number to the number of ribs on the wall in the cargo area. An inconsistent count indicates a false wall in the front of the cargo section.
•Another hiding technique is to load the top of the trailer with explosives. Sometimes access to this area is by hinging the roof of the trailer to the wall.
•Look for hinges or signs of tampering where the roof and side walls meet.
•Look at the floor surface for signs of modifications. Be suspicious of new or modified floor planks that may cover a hiding area below. Be aware of the normal height of the floor and look for anything unusual.
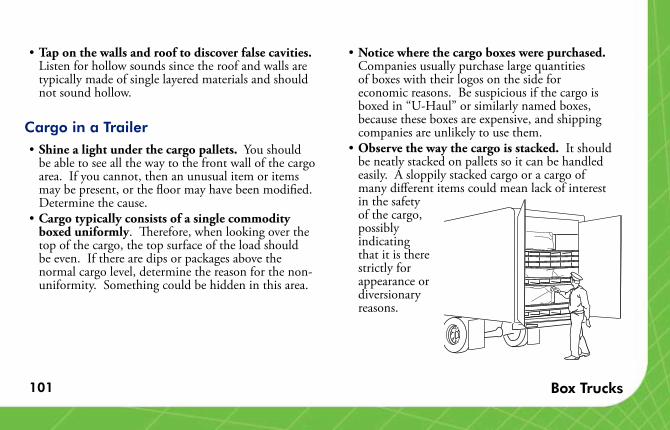
101 Box Trucks
•Tap on the walls and roof to discover false cavities. Listen for hollow sounds since the roof and walls are typically made of single layered materials and should not sound hollow.
Cargo in a Trailer•Shine a light under the cargo pallets. Youshould
be able to see all the way to the front wall of the cargo area. If you cannot, then an unusual item or items may be present, or the floor may have been modified. Determine the cause.
•Cargo typically consists of a single commodity boxed uniformly. Therefore, when looking over the top of the cargo, the top surface of the load should be even. If there are dips or packages above the normal cargo level, determine the reason for the non-uniformity. Something could be hidden in this area.
•Notice where the cargo boxes were purchased. Companies usually purchase large quantities of boxes with their logos on the side for economic reasons. Be suspicious if the cargo is boxed in “U-Haul” or similarly named boxes, because these boxes are expensive, and shipping companies are unlikely to use them.
• Observe the way the cargo is stacked. It should be neatly stacked on pallets so it can be handled easily. A sloppily stacked cargo or a cargo of many different items could mean lack of interest in the safety of the cargo, possibly indicating that it is there strictly for appearance or diversionary reasons.

102 Box Trucks
•Look over the top surface of the cargo. Look for any signs that someone has walked on top of the cargo. No one should be walking on the cargo after it is loaded.
•Notice the shipping labels on packages hauled by the popular shippers. Most, if not all, of the packages and boxes in the cargo area should have the shipper’s name clearly on them.
Permanent Bed Garbage Truck•Have the driver or operator explain how the
truck operates and how valves and controls function. Lack of knowledge necessitates further investigation.
•Look at the walls of the bed for indications of false walls. Look for new welds and new or modified sheet metal.

103 Garbage Trucks
Dumpster Garbage Truck •The driver and number of occupants (i.e., crew
size) should match the configuration of the dumpster. Some dumpsters are configured to support a one-man crew.
•Tap on the ribs of the dumpster with a wooden mallet. Listen for non-hollow or solid sounds indicating that something may be inside the ribs.
•Look for new welds, new sheet metal, or other signs of modifications.
•Visually inspect under tarp. Anytime the tarp is extended it may be intended to hide something.
When entering the facility, the dumpster should be empty. Verify that it is. If it is not, ask the driver to explain why. A full or partially loaded dumpster can easily hide large quantities of explosives.

104
Dump Trucks•Look closely at the tailgate and bed. Look for poor
quality welds and signs of tampering or modifications to the sides of the bed and the tailgate.
•With a wooden rod, probe into the cargo material. Feel for any foreign objects hidden inside. Typically, foreign objects will be on the bed surface or between layers of cargo material.
•Look at the company insignia and other items applied to or painted on the surface of the vehicle. All items should be professionally applied. Be suspicious if the company logo and other supporting information is painted or applied poorly.
•Visually inspect under tarp. Anytime the tarp is extended it may be intended to hide something.
Dump Trucks

105 Concrete Trucks/Mixers
Concrete Trucks/Mixers•When the truck enters the facility, it should be
loaded; therefore, the drum should be turning. If it is not loaded, or if the drum is not turning, find out why.
•Look into the drum and ensure that the load is concrete.
•Look for any foreign objects in the concrete or attached to the inside of the drum.
•Have the driver/operator demonstrate how to control the drum or some other simple function on the truck. Lack of knowledge necessitates further investigation.
•Look for chutes, hoses, and other accessories, such as water in the wash/rinse tank.
•Look at the company insignia and other items applied to or painted on the surface of the drum. All items should be professionally applied. Be suspicious if the company logo and other supporting information is painted or applied poorly.
These trucks are common if construction is occurring at a facility. When concrete trucks enter the facility, they should be loaded and the drum should be turning.
The concrete truck is basically a tractor with a large steel drum. Most of the inspections are similar to those of a semi-truck tractor.

106
This page left blank intentionally.

Buses
107
This page left blank intentionally.

Buses
108 School Buses
Hot Spots
False Ceiling Seats
Engine Compartment
Bumpers
TiresUndercarriage
Floor
Walls
Rear Door

109
Indicators from Inspection of School Buses
Focus heavily on the interview and carefully review documents such as insurance card, bill of lading, medical card, logbook, and driver’s license when inspecting this vehicle.
•Lumpsorbulgesinseats•Missingscrewsorrivetsonexteriorsurfaces•Inconsistentsoundsresultwhentappingonwalls•Unusuallythickceiling/roof•Nonhydraulicoremergencydoorfeelsheavyduring
opening and closing•Floorsurfacematerialappearstohavebeenmodified
or repaired •Floorappearsunusuallythickortobehigherthan
normal•Damagedupholstery•Anythingunusualinbaggage/storageareas
School Buses
For general inspection, see Inspection of Tractor/Trailer Undercarriage (pp. 54-55).

110 Commercial Buses
Hot Spots
Baggage/Storage Areas
ModifiedFloor Surface
Bulgein Seat
DamagedUpholstery
INTERIORSeats
False Ceiling
Rear Door
Undercarriage Tires
BumpersFloor
Walls
Engine Compartment
EXTERIOR

111
Indicators from Inspection of Commercial Buses
Focus heavily on the interview and carefully review documents such as insurance card, bill of lading, medical card, logbook, and driver’s license when inspecting this vehicle.
•Lumpsorbulgesinseats•Missingscrewsorrivetsonexteriorsurfaces•Inconsistentsoundsresultwhentappingonwalls•Unusuallythickceiling/roof•Nonhydraulicoremergencydoorfeelsheavyduring
opening and closing•Floorsurfacematerialappearstohavebeenmodified
or repaired •Floorappearsunusuallythickortobehigherthan
normal•Damagedupholstery•Anythingunusualinbaggage/storageareas•Falsecenterdivider(wall)withinundercarriage
storage areas
Commercial Buses

112 School Buses
School Buses•Look for unusual lumps or
bulges in the seats. The lumps or bulges could contain explosives.
•Look for damaged upholstery where something could have been inserted.
•Tap along the interior and/or exterior bus walls with your hand or a wooden or rubber hammer. The sounds should be consistent along the length of the bus. The taps should mostly yield a hollow sound. Any difference in sounds along the walls may indicate a possible hidden device.
•Look on the exterior sheet metal for missing rivets or screws. Missing rivets or screws may indicate that the sheet metal has been removed, possibly to insert a device.
•Check the ceiling for anything unusual. Be especially aware of the possibility of an overly thick roof. Tap on the ceiling for hollow sounds indicating a false roof.
•Have the driver open the rear door. Swing the door. If the door feels heavy, look for signs of tampering. A heavy door indicates that something may be concealed inside.
•Look at the floor.Knowwhatthenormalfloorlooks like and check for an overly thick floor or for repairs and modifications. The driver should be able to explain repairs.
Detailed Inspection of Buses
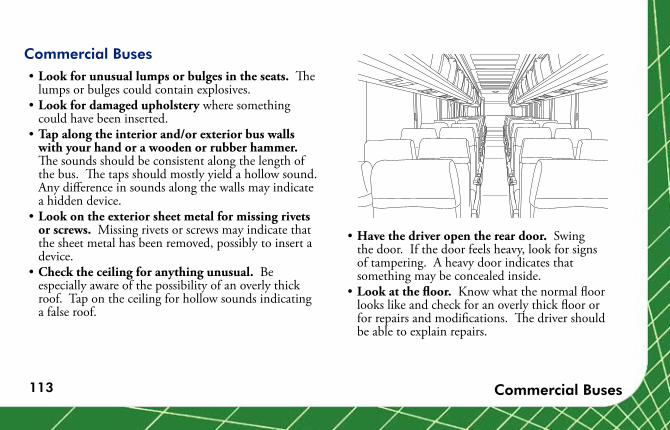
113 Commercial Buses
Commercial Buses•Look for unusual lumps or bulges in the seats. The
lumps or bulges could contain explosives.•Look for damaged upholstery where something
could have been inserted.•Tap along the interior and/or exterior bus walls
with your hand or a wooden or rubber hammer. The sounds should be consistent along the length of the bus. The taps should mostly yield a hollow sound. Any difference in sounds along the walls may indicate a hidden device.
•Look on the exterior sheet metal for missing rivets or screws. Missing rivets or screws may indicate that the sheet metal has been removed, possibly to insert a device.
•Check the ceiling for anything unusual. Be especially aware of the possibility of an overly thick roof. Tap on the ceiling for hollow sounds indicating a false roof.
•Have the driver open the rear door. Swing the door. If the door feels heavy, look for signs of tampering. A heavy door indicates that something may be concealed inside.
•Look at the floor.Knowwhatthenormalfloorlooks like and check for an overly thick floor or for repairs and modifications. The driver should be able to explain repairs.

114
This page left blank intentionally.

Recreational Vehicles
115
This page left blank intentionally.

Recreational Vehicles
116 Camper/Motor Home
Hot Spots
Heating/AC Vents
False Ceiling
CabinetsAppliances
Closets Seats and Mattresses
Dashboard
DoorsFloorsStorage Areas
UndercarriageWallsWater/Sewage Tanks
Sleep Areas

117
Indicators from Inspection of Camper/Motor Home
Focus heavily on the interview and carefully review documents such as insurance card and driver’s license when inspecting this vehicle.
Interior•Lumpsorbulgesinbenchcovers•Inconsistentsoundsinwallswhentapped•Inconsistentthicknessofflooring,walls,androof•Inconsistenciesofageofinteriorcomponents•Falseareasinstoragecompartments•Falsewallsincabinets•Dashboard
– New, damaged, or scratched screws– Plugged air vents– False compartment in glove box
•Lumpsorbulgesinseatsandmattresses•Rips,bulges,orrepairsinroofliner•Doorsfeelheavywhenopenedandclosed
Camper/Motor Home
•Packagesanddevicesthatlookoutofplace•Stresscracksinwindshieldindicatingprevious
removal•Pluggedornonworkingheater/
air conditioning vents•Modifiedspeakercavities•Interiorstrangelycleanordirty•Caulk,glue,oranotherstrangeodor•Unusualitemsinunder-mattresscompartments
Exterior•Originalequipment,suchaspropanetanksfor
cooking, is missing•Evidenceoftampering

118 Boats/Boat Trailers
Hot Spots
Storage Areas
Trailer Frame
Tires Live Wells
Fuel Tanks
Between Innerand Outer Hulls

119
Indicators from Inspection of Boats and Boat Trailers
Focus heavily on the interview and carefully review documents such as insurance card and driver’s license when inspecting this vehicle.
•Anythingunusualinthestoragecompartments•Anythingunusualinthelivingquarters•Unusualweldsorrepairstotrailer•Freshbodywork(freshfiber-glassing,freshpaint,etc.)•Anythinginfactory-builtcompartments•Neworshinyboltsand/orscrews•Signsoftampering,suchasbrokenpartsordamaged
fiberglass•Areasandcomponentscleanerordirtierthan
surrounding areas•Newcaulkingfoundbysmellortouch•Unusualscratches,possiblymadebyscrew-drivers,
wrenches, or similar tools•Unusualitemsattachedtotrailerframe
•Signsofmodificationsorrepairs(askdriveraboutdetails of repairs)
•Unusualbumpsorbulgesintheseatcushionsand backs
•Unusualshapesorweightsoflifevestsandbuoyancy rings
•Anythingunusualaroundengineorinenginecompartment
•Unusuallycleanornew-lookingwiring•Anythingunusualaboutthetires,wheels,orlug
nuts
Boats/Boat Trailers
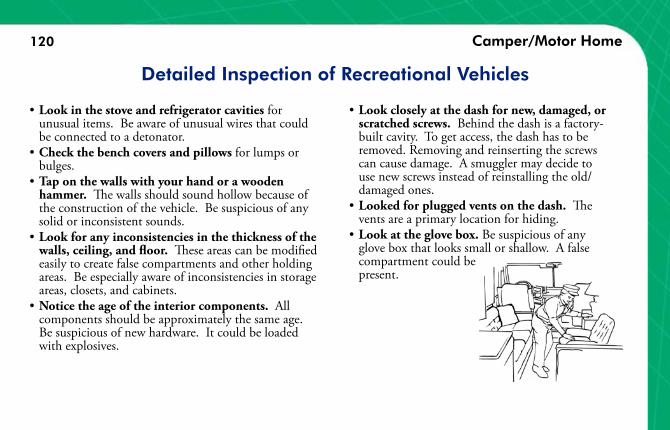
120
•Look in the stove and refrigerator cavities for unusual items. Be aware of unusual wires that could be connected to a detonator.
•Check the bench covers and pillows for lumps or bulges.
•Tap on the walls with your hand or a wooden hammer. The walls should sound hollow because of the construction of the vehicle. Be suspicious of any solid or inconsistent sounds.
•Look for any inconsistencies in the thickness of the walls, ceiling, and floor. These areas can be modified easily to create false compartments and other holding areas. Be especially aware of inconsistencies in storage areas, closets, and cabinets.
•Notice the age of the interior components. All components should be approximately the same age. Be suspicious of new hardware. It could be loaded with explosives.
•Look closely at the dash for new, damaged, or scratched screws. Behind the dash is a factory-built cavity. To get access, the dash has to be removed. Removing and reinserting the screws can cause damage. A smuggler may decide to use new screws instead of reinstalling the old/damaged ones.
•Looked for plugged vents on the dash. The vents are a primary location for hiding.
•Look at the glove box. Be suspicious of any glove box that looks small or shallow. A false compartment could be present.
Camper/Motor Home
Detailed Inspection of Recreational Vehicles

121 Camper/Motor Home
•Look for bits of electrical tape, wire, stripped insulation, string, fine wire, fishing line, or time fuse on the floor, dash, or seats. All of these materials are commonly found in explosive devices.
•Look for unusual lumps or bulges in the seats. The lumps or bulges could contain explosives.
•Check the roof liner for bulges, rips, or repairs. These could indicate possible concealment of an explosive device or explosive materials.
•Have the driver open the rear door. Swing the door. If the door feels heavy, look for signs of tampering. A heavy door indicates that something is concealed inside.
•Look for packages, containers, bags, and devices that look out of place. An explosive device will not necessarily be hidden in the vehicle. A cardboard box on the seat, in the sleeper, or under the seat may hold the device you are looking for.
•Use your sense of smell inside the vehicle. Be aware of the smell of caulking, glue, or any other unusual materials. Caulking, glue, and some other materials indicate that something has recently been modified or repaired. The driver should be able to identify any recent repairs.
•Check the windshield for stress cracks. A stress crack can be identified by the absence of an impact crater. A stress crack may indicate that the windshield was removed. When the windshield is removed, access can be gained to the area below the top of the dash, which can be used as a hiding area. Look closely at the dash area for indications of something hidden.
•Look at the heater/air conditioning vents throughout the living areas. The vents should not be blocked. If they are blocked, find out why.
•Notice whether the interior is unusually clean or dirty. A clean interior may indicate recent activities are attempting to hide something. A dirty interior may indicate that the vehicle has not been used recently.

122 Boats and Boat Trailers
Boats and Boat Trailers
Take a moment to observe everything within view. Pay close attention to packages/devices (e.g., alarm clocks, iron or PVC pipe) that look out of place.
•Tap on the exterior surfaces of the boat. Boats are typically constructed with an inner and outer hull. The spaces between these hulls are primary areas to hide items. When tapping, you should hear a hollow sound. If you hear a thud, then something may be hidden in that area.
•Look for anything in factory-built compartments. All boats are built with compartments that can be excellent areas for hiding items.
•Determine whether the proper safety equipment is present. Safety equipment should always include life preservers. The lack of safety equipment could mean that the boat is not intended for use on water.
•Licensing. In most areas of the United States, recreational boats must be licensed and must display the license number and licensing state on the outside of the boat.
•Look for new or shiny bolts and/or screws. New or shiny bolts and/or screws indicate that something in that area has been altered, modified, or moved. The shiny bolts or screws indicate that the bolts or screws are new, whereas a scratched bolt or screw indicates removal and reinsertion.
•Look for unusual scratches or other signs of tampering. Unusual scratches or other signs of tampering indicate that the area may have been modified, and the repair or replacement was sloppy. Look at the fiberglass for scratches and small dents.

123
•Be aware of clean or new wiring, which can be connected directly to a detonator device. The owner should be able to explain why new or clean components are in the boat.
•Inspect spools or remnants of electrical wire, tape, or similar items. These materials are widely used in making vehicle bombs and may indicate that some type of device was constructed in the vehicle.
•New or broken welds on the trailer or on metal boats. A common technique in hiding items in “deep concealment” is to cover them with metal welded to the vehicle. Sometimes, existing welds are broken and rewelded to hide devices.
•Be aware of unusual dirty or greasy fingerprints. Residue from a dirty hand or a smudge left on an excessively dirty area can indicate tampering.
•Trailer light wiring. Wiring for the lights can be used to connect an electrical source to a detonator.
•Pay particular attention to fresh bodywork and fresh paint. A close inspection of the body will reveal new bodywork. Devices can be hidden by creating false compartments in a section of the body, which are then covered with fiberglass, paint, etc.
•Seat cushions and backs of seats for unusual bumps or bulges. If bumps or bulges are present, find out why.
•Look at the floor for anything that appears to be modified. Remove floor mats if necessary. Typically, if anything is hidden in the floor, the floor will appear overly thick. Look for fresh welds or seams.
•Look for packages, containers, travel bags, and devices that seem out of place. An explosive device may be hidden in a cardboard box on or under the seat.
•Use your sense of smell. Be aware of the smell of caulking, glue, or any other unusual materials, which may indicate that something recently has been modified or repaired. The driver should be able to identify recent repairs.
•Tap on the tires. The tires should have a hollow or ringing sound. Any tire that sounds solid or does not sound hollow should be considered suspicious.
Boats and Boat Trailers

124
•Unusually clean or dirty lug nuts. Clean lug nuts indicate that the tires have been off the vehicle recently. Unusually dirty lug nuts indicate that someone may be attempting to hide a recent removal of the tire.
•Look for possible indicators that the driver has been doing surveillance work. Items like cameras, video recorders, maps, or diagrams of buildings, and terrorist-related propaganda or “how to” manuals.
Boats and Boat Trailers

Reference
125
Reference Information
This reference section provides detailed information about the following:
•Examples of concealments found in a variety of vehicles. Although these concealments did not necessarily involve explosives or explosive devices, the smuggling techniques you encounter will probably be similar.
•Information on explosives, including improvised explosive devices and background information on their use.
The bomb threat stand-off card is provided in the Supplemental Information section.

Reference
126 Example Concealments
Hidden Compartment in Side Panel of Vehicle
False Bottom in Fuel Tank
Concealment in Left Wall of Panel Van

127 Example Concealments
False Wall in Closet of Mobile Home/Camper
Concealment under Bed of Pickup Truck
Concealment in Tires

128 Example Concealments
View of a Tank within the Fuel Tank on a Tractor Truck
Concealment in Back Rest of Rear Passenger Seat

129 Example Concealments
False Compartments in Trailer Roof
False Compartment in Dashboard of Van

130 Explosive Materials/Devices
ExplosivesAn explosive is a material that, when initiated, combusts nearly instantaneously, thereby producing a violent, shattering effect. Explosives are typically classified as commercial/military or homemade.
Military explosives are generally more powerful than commercial explosives. The explosive components are usually TNT, RDX, and PETN based and can be combined with each other or with other materials to produceexplosivemixtures,suchascompositionC-4,toyield the desired results.
Improvised Explosive DeviceAn improvised explosive device (IED) is a device fabricated in an improvised manner incorporating explosives and designed to destroy or incapacitate personnel, vehicles, or other assets. IEDs may incorporate military or commercially sourced explosives, and often combine both types, or they may otherwise be made with home-made explosives (HME).
An IED is typically made of four basic parts usually housed in some type of container. An easy technique to recall the four basic parts is to use the word “PIES.”
•Power Supply•Initiator (Detonator)•Explosive (Main Charge, potentially assisted by a
booster charge)•Switch (Sensor/Timer)
IEDs are extremely diverse in design, and may contain many types of initiators, detonators, and explosive loads. In some cases, IEDs also contain metal objects such as nails, screws, or other rigid materials that produce fragmentation to increase the lethality of the device. IEDs are triggered by various methods, including remote control, infra-red or magnetic triggers, pressure-sensitive bars, and trip wires.
All explosive devices will have a triggering sequence, also called an explosive train, which is a sequence of energetic devices or materials that culminates in the initiation or detonation of the main explosive charge.
Explosive Materials and Devices

131
The basic high-explosive train consists of the primary explosives in the initiator or detonator, the booster (sometimes not used depending on the main charge material), and the main (burster) charge. However, explosive trains are often compounded by the addition of intermediate charges for time delays depending on the materials used and the purpose of the device.
Power SupplyAn electric firing device requires a current to pass between two contacts. The ways in which this can be achieved are unlimited. In most cases, the power source will be a battery.Foravehicle-borneIED(VBIED),asourceofelectrical power would be the vehicle battery; the presence of unusual wires on the battery would be an indicator for a potential IED. The life of a battery-powered IED is typically limited to the life of the battery.
Initiators (Detonators)Initiators (detonators) are used to initiate high explosives. They typically contain small quantities of multiple extremely sensitive initiating explosives. Initiators are also classified according to the method of initiation, usually
Explosive/Main Charge
ContainerSwitch/Fuze
Initiator/Detonator
Booster
Power Supply
electric or non-electric.
Detonators are typically thin tubes of aluminum or copper, although they also can be made of cardboard or paper. Detonators may be initiated either non-electrically by shock tube or fuse, or electrically, such as by a battery. Non-electrical detonators are open on one end to insert a fuse or piece of detonating cord, while electrical detonators are also sensitive to static electricity and RF inductance.
Non-electrical detonators are instantaneous; electrical detonators may incorporate a delay element based on a time period, seismic activity, or an electronic signal.
Explosive Materials/Devices

132
Electric MatchAn electric match (or “squib”) is a metal wire coated with a pyrotechnic mixture designed to produce a small burst of flame, which initiates a low or primary explosive. The pyrotechnic mixture can be black powder and 25percentnitrocelluloselacquer,anonpyrotechnicsubstance, or a variety of other formulations.
Detonating CordDetonating cord, also called detonation cord, detacord, det. cord, detcord, primer cord, primacord or cordtex, is a thin, flexible tube with an explosive core. It is a high-speed fuse which explodes, rather than burns, and is suitable for detonating high explosives. The velocity of detonation is sufficient to use it for synchronizing multiple charges to detonate almost simultaneously.
Typical uses include mining, drilling, and demolition.
A wide variety of detonators is commercially available, and they come in many sizes.
The detonator tube is usually marked with a high explosive statement, and some manufacturers will place their company logo on it as well.
Detonators are used to set off other, less sensitive explosives. They may be initiated electrically (top and bottom) or non-electrically (such as shock tube, center). The color of the wire legs on electrically initiated detonators varies widely.
Explosive Materials/Devices

133
While it looks like nylon cord, the core is a compressed powdered explosive, usually PETN (Pentrite), and it is initiated by the use of a blasting cap. Detonation cord will initiate most commercial high explosives (dynamite, gelignite, sensitized gels, etc.) but will not initiate less sensitive blasting agents like ANFO on its own. For example,25to50grain/foot(5.3to10.6g/m)det.cordhas approximately the same initiation power as a blasting cap, but along its entire length. A small charge of PETN, TNT, or other explosive booster is required to bridge between the cord and a charge of insensitive blasting agent like ANFO or most water gels.
Detonating cord may be any color. The examples in the photo above are 70 grain (left) and 50 grain (right). The detail photo shows the white PETN center.
Black Powder Black powder is one of the oldest explosives known. It is a mixture of finely pulverized potassium nitrate or sodium nitrate along with charcoal and sulfur. The black powder mixture ranges in color from coal black to gray black to cocoa brown. It comes in various forms, ranging from a very fine powder to granules over 1/2-inch in diameter. Black powder is glazed with graphite, which reduces the sliding friction of each grain and imparts a shiny black grain appearance. Sensitivity to friction, heat, impact, and sparks make black powder one of the most dangerous explosives to handle. Even its own grains rubbing against each other have been known to cause accidental ignition. It is particularly sensitive to both electric and non-electric generated sparks and should, therefore, be handled with wooden or plastic tools.
Black powder can absorb water and is subject to rapid deterioration when exposed to moisture. If kept dry, it retains its explosive properties indefinitely.
Explosive Materials/Devices
134
Composition 4 (C-4)C-4isamilitaryexplosivemadeupofanexplosive(RDX)and additives, which make it putty-like for easy molding. C-4iswhitetodullgray,andhasaveryfaint,sweetsmell.C-4isusedintheU.S.militaryM112demolitioncharge.Inthesecharges,theC-4istypicallywhiteandpackedinan olive drab Mylar film bag: although, in earlier version of the M112 includes a pressure-sensitive adhesive tape on one surface, protected by a peelable paper cover. The
Samples of black powder (left) and smokeless powder (right).
flexibilityofC-4allowsittobeformedbyhandandeasily applied to irregular surfaces. It also has a high detonation velocity and is well-suited for cutting steel and breaching concrete.
Explosive Materials/Devices
Composition C-4, top, is dull gray in color and moldable. It is used in the M112 demolition charge, shown above with its protective paper cover.

135
DynamiteDynamite is a commercial explosive made from nitroglycerin absorbed into a porous material and wrapped in wax-covered paper, cardboard, or plastic film. Dynamite is shaped like a tube and comes in a wide variety of diameters. The outer wrapper color also varies from manufacturer to manufacturer. The nitroglycerin contentindynamite,whichcanvaryfrom5to90percent,causes it to have a strong, sweet smell and will cause an immediate headache or dizziness if inhaled. All dynamite can detonate with blasting caps (electric and non-electric) or detonating cord.
Straight dynamite has a loose, slightly moist, oily consistency similar to a mixture of sawdust, clay, and oil. It is light tan to reddish-brown in color. Ammonia dynamite has a pulpy, granular, slightly moist, oily texture and is light tan to light brown. Gelatin dynamite is a water-resistant gel made by dissolving nitrocotton with nitroglycerin and varies from a thick viscous liquid to a tough rubbery substance. Ammonia gelatin dynamite is a version that derives a portion of its strength from ammonium nitrate.
Explosive Materials/Devices
Commercial dynamite is commonly used in construction, mining, and quarrying operations. Its diameter varies widely according to the user’s needs, and the outer wrapper may be any color.

136
NitrocelluloseNitrocellulose is a highly flammable compound formed by exposing cellulose to nitric acid. Nitrocellulose is usually called nitrocotton or guncotton. It is more stable than black powder, and it produces a much greater volume of hot gas. It also burns much faster than black powder when it is in a confined space
Nitrocellulose is extremely flammable. It explodes when initiated and is used to manufacture blasting explosives, smokeless powders, and propellants. It is a white, slightly absorbent fiber extruded and cut into particles. It mixes with nitroguanidine to form flashless powder. Dry nitrocellulose is very sensitive to impact, friction, heat, and spark.
NitroglycerinNitroglycerin is an extremely powerful and shock-sensitive high explosive. Pure nitroglycerin is a heavy liquid that is clear and has the consistency of motor oil. The commercial product is usually a yellowish to brownish liquid. On combustion, nitroglycerin forms toxic fumes. Nitroglycerin can be absorbed into the body through inhalation or contact with the skin, causing dizziness or headaches. It is one of the most important and most frequently used components of explosive materials. Nitromethane and methyl nitrate are liquid compounds very similar to nitroglycerin in that they are both explosive clear liquids. Methyl nitrate is highly volatile, and its vapors are both flammable and explosive and produce headaches.
Nitromethane is a solvent rather than an explosive. It is shock and heat sensitive, is thermally unstable, and reacts violently with a broad range of materials. Its vapors are both flammable and explosive and produce headaches. Nitromethane is used as a fuel additive for race cars and is of interest as a liquid fuel for rockets.
Nitrocellulose or gun cotton is very sensitive to impact, friction, heat, and spark.
Explosive Materials/Devices

137
Potassium Chlorate and Petroleum JellyPlastic explosive filler can be made from potassium
chlorate and petroleum jelly. The potassium chlorate crystals are ground into a very fine powder and then mixed with the petroleum jelly. The compound is white. It may be reddish purple if the potassium chlorate is from match stick heads that contain dyes.
Nitroglycerin is one of the most important and frequently used components of explosive materials. The commercial product is usually a yellowish to brownish liquid.
Explosive Materials/Devices
Sample of potassium chlorate and petroleum jelly prepared as an explosive filler. If match stick heads containing dyes are used as the source of potassium chlorate, the compound may be reddish purple.

138
SemtexSemtex is the trade name of a plastic explosive made in the Czech Republic. It is made of two explosives, RDX and PETN, and an additive to make it flexible. Semtex varies in color from translucent yellow to orange-brown to black; and it is practically odorless, although the waxed paper wrappers may have a waxy smell. The appearance of Semtex may vary from a glossy soft wax to grainy putty with a slight sheen. By itself, Semtex is relatively harmless and can be handled easily. A blasting cap or detonating cord is required to initiate it. Semtex has a shelf life of approximately 10 years, after which it starts to lose flexibility and may become crumbly or hard.
Sheet Explosive (Primasheet™)Primasheet, sometimes called Detasheet, is a flexible, waterproof explosive made of PETN and a rubber-like material to make it flexible. It is generally formed into sheets of various thicknesses, which can then be cut into any size and shape. The flexibility of sheet explosives allows them to be easily applied to irregular surfaces, and they are designed to be used as cutting, breaching, or cratering charges (especially against steel targets).
Explosive Materials/Devices
Compared to C-4, “fresher” Semtex will feel more oily and sticky. Samples shown above are 1-kilogram blocks of Semtex-H.
Sheet explosive varies in thickness depending on the number of grains of explosive per square centimeter. The thin C-1 sheet (left) has less explosive per square centimeter than the thicker C-6 sheet (right). Both are extremely flexible and can be easily shaped to fit most surfaces.

139
Smokeless PowderSmokeless powders are made in three forms: thin circular flakes or wafers; small cylinders; and small spheres. The color may range from light brown to gray green to black. All smokeless powders are extremely flammable. By design they are intended to burn rapidly and vigorously when ignited, and they do not require oxygen from the air to burn. Unconfined smokeless powder burns with little or no ash or smoke; and, when confined, its rate of burning increases with temperature and pressure. For this reason it is frequently used in the construction of pipe bombs.
Smokeless powder manufactured for use in small arms ammunition is usually glazed with graphite to prevent the accumulation of static electricity. Many of these powders are sensitive to friction, so caution should be observed when handling them.
Explosive Materials/Devices
Smokeless powder is extremely flammable and designed to burn rapidly and vigorously when ignited. It does not require oxygen from the air to burn, and its rate of burning increases with temperature and pressure when confined. For these reasons, smokeless powder is frequently used in the construction of pipe bombs.

140
TNT (Trinitrotoluene)TNT is the most common explosive for blasting charges and for military weapons. It is pale yellow to light brown, although recent manufacturing processes may include graphite, resulting in a gray color. Exposure to oxygen and sunlight or ultraviolet light may cause discoloration of TNT, as well as a decrease in stability against impact.
In its basic form, TNT may look like flakes or crystals. Because it is very stable, it can also be melted and formed into any shape. TNT has no obvious smell and is used as a component in many other explosives.
Explosive Materials/Devices
TNT is flake in its basic form (yellow specimens). It can be melted and formed into any shape (top picture), or used as a component in other explosives (bottom, Octol on the left and Composition B on the right). The explosives may be in larger pieces or flakes, and may feel hard like plastic.

141 Explosive Materials/Devices
Homemade ExplosivesHomemade explosives can be liquid, powder, or granules and can be made using commonly available chemicals and equipment.
Chlorate/Perchlorate Mixtures
Black Powder
Pyrotechnics
Ammonium Nitrate Mixtures
EGDN or NG Pure HMTD
HP and Nitromethane or Ethanol MEKP TATP
Urea Nitrate
142
This page may help direct you to information that might be useful in the following situations.If you notice………
Predominantly dry chemical components •More granular than powdery product •Grinding equipment (but not •
necessary)Simplistic safety equipment (gloves, •
dust masks, etc.)Then you might review the information on…
Ammonium Nitrate Mixtures•Black Powder•Chlorate/Perchlorate Mixtures•
If you notice ……… Liquid and some dry chemical •
componentsFiner, more powdery than granular •
product Pyrex, mason jars, or scientific •
glassware Filters (paper, cloth, etc.)•Ice water baths•
Safety eye and respiratory protection•Acid-resistant skin protection•
Then you might review the information on…Hydrogen Peroxide Mixtures•TATP•HMTD•Urea Nitrate •
If you notice ……… Predominantly liquid chemical components •Liquid product •Pyrex, mason jars, or scientific glassware •Safety eye and respiratory protection•Acid-resistant skin protection•
Then you might review the information on…MEKP•EGDN/NG Mixtures•Hydrogen Peroxide •
Mixtures (some)
Explosive Materials/Devices

143
ANFOANFO is widely used for mining and is made by mixing ammonium nitrate and a fuel oil, such as diesel fuel. Ammonium nitrate by itself is white or off-white, although some manufacturers add dyes to produce yellow, pink, or blue colors. It is similar in shape to lawn fertilizer, and it is often packaged in some form of waterproof container since ammonium nitrate loses power and sensitivity with increased moisture content.
Ammonium nitrate has no smell, but it will smell like diesel fuel when mixed with the fuel oil used to create ANFO. A few variations of ANFO include combining ammonium nitrate with sugar (AND), nitromethane, or sulfur. ANS explosive looks like crushed ANFO, but will have no smell. Ammonium nitrate with nitromethane looks similar to ANFO, but has a noticeable smell of sweet plums and diesel fuel.
Ammonium nitrate may vary in color from white to off-white, depending on where it was manufactured. The samples in the top photo are from (left to right) Russia, Egypt, and Lithuania.
Ammonium nitrate is shaped like balls (prills) similar to fertilizer, as shown in the bottom photo. It has no odor, but will smell like diesel fuel when mixed with fuel oil.
Explosive Materials/Devices

144
Black PowderKeyIdentifiers
Powder or granules•Gray, black•Faint, indistinct odor •Sulfur odor (rotten eggs) •when burnedOther names: Gunpowder•
HazardsSensitive to impact, •friction, static spark, and heat
Black PowderPyrotechnics
Gray, Black Powder
Explosive Materials/Devices

145
Chlorate/Perchlorate MixturesKeyIdentifiers
All mixtures are odorless•Flash Powders:•- Powder or granules- Silvery, gray- Other names:
Pyrotechnic PowdersPoorMan’sC4:•- Putty-like, solid
or clumps- White
Armstrong’s Mix:•- Powder- Red
HazardsExtremely sensitive to impact, friction, static spark, •and heat
Flash Powder Poor Man’s C4
Armstrong’s Mix
Explosive Materials/Devices

146
Ethylene Glycol Dinitrate/Nitroglycerin (EGDN/NG Mixtures)KeyIdentifiers
Oily, viscous liquid•Colorless to dark yellow •Odorless•Other names for EGDN: Nitroglycol, Dinitroglycol, •Glycol Dinitrate, Ethylene DinitrateOther names for NG: Trinitroglycerine, Glyceral •Trinitrate
HazardsExtremely sensitive to impact, friction, static spark, and •heatInhalation may cause headaches, dizziness, chest pain, •and low blood pressure
EGDN or NG
Explosive Materials/Devices

147
Hexamethylene Triperoxide Diamine (HMTD) KeyIdentifiers
Crystals or powder•Colorless to white •Dullness like flour•Solids settled at bottom and floating on top of a liquid-•filled containerConsistency of confectioner’s sugar in dry state or pure •formCan smell like dead fish•Fresh product may have little or no odor•Additives can alter the physical appearance•Precursor colors will affect HMTD color•May be stored in refrigerator or freezer•
HazardsContact with metals may produce •dangerous chemical reactionsExtremely sensitive to impact, friction, •static spark, and heat
Solids Settled at Bottom of Container
Crystal HMTD Pure HMTD
Explosive Materials/Devices
148
Hydrogen Peroxide (HP) Mixtures
KeyIdentifiersLiquid or semiliquid gel•Color varies with additives•Slightly pungent, caustic odor (generally)•Odor similar to chemical component•
HazardsLarge quantities can •self-heat and ignite if in sunlight or elevated room temperaturesExtremely sensitive to •impact, friction, static spark, and heat
HP and Nitromethane or Ethanol
HP and Black Pepper
HP and Flour
HP and Coffee
HP and Cumin
Explosive Materials/Devices

149
Methyl Ethyl Ketone Peroxide (MEKP)
KeyIdentifiersLiquid•Clear, colorless•Agreeable odor•Other names: Luberisol DDM•
HazardsExtremely sensitive to impact, friction, static spark, and •heat Contact with sulfuric acid may produce dangerous •chemical reactions
MEKP
Explosive Materials/Devices

150
Triacetone Triperoxide (TATP)
KeyIdentifiersCrystals or powder•Sugar-like appearance•Colorless or white•Solid TATP settles to the bottom of a liquid-filled •containerAdditives can alter the physical appearance and color•Fruity smell, like acetone but gentler•Old TATP smells very acrid, like vinegar•Evaporates in an open container•If stored in a closed jar, glass •may look frostedMay be stored in a refrigerator •or freezerOther names: Acetone Peroxide, •Mother of Satan
HazardsExtremely sensitive to impact, friction, static spark, and •heat
Crude TATP Pure TATP
TATP
Explosive Materials/Devices

151
Urea Nitrate
KeyIdentifiersCrystals•Colorless to off-white •Solids settled to the bottom of a liquid-filled container•Additives can alter the physical appearance•Odorless•Other names: Acidogen Nitrate•
HazardsSensitive to impact, friction, static spark, and heat•
Urea Nitrate
Explosive Materials/Devices

152
This page left blank intentionally.

Supplemental Information
153 Supplemental Information
ThematerialsprovidedinthissectionoftheVehicleInspection Guide include
•BombThreatStand-offCard•DepartmentofTransportationHazardous
Materials•NationalFireProtectionAssociation(NFPA)
Labels
Overview of Supplemental Information
Note: For more information on hazardous materials and initial emergency response related to those materials, see the latest DOT Emergency Response Guidebook.

Supplemental Information
154 Supplemental Information
Bomb Threat Stand-off Card

155 Supplemental Information

156
Transportation Labels
Class 1: Explosives
Class 2: Gases
Class 3: Flammable Liquids
Class 4: Flammable solids, spontaneously combustible materials, and materials that are dangerous when wet
Supplemental Information

157
Class 5: Oxidizers
Class 6: Poisons
Class 7: Radioactive Materials
Class 8: Corrosives
Class 9: Miscellaneous
Class 10: Other regulated materials
Supplemental Information

158 Supplemental Information
National Fire Protection Association (NFPA) Labels
Health (blue)0 = Normal Material1 = Slightly Hazardous2 = Moderately Hazardous3 = Extremely Hazardous4=Deadly
Flammability (flash points) (red)0 = Will not burn1 = Above 200 degrees Fahrenheit2 = Between 100-200 degrees Fahrenheit3 = Below 100 degrees Fahrenheit4=Flashpointbelow73degreesFahrenheit
Reactivity (yellow)0 = Stable1 = Unstable if heated2=Violentchemicalchange3 = Shock or heat may detonate4=Rapidlycapableofdetonationorexplosion
Specific Hazard (white)ACID = acidALK=alkaliCOR = corrosiveOX = oxidizerP = polymerizationW with a line through it = Use no water

SecurityofficialsshouldalsoreviewtheVehicleInspectionVideo,developedbythe Department of Homeland Security as part of a complete vehicle inspection training package. The video demonstrates this guide in action.
Vehicle Inspection Video
