veritas volume manager 4 - oracle documentation
TRANSCRIPT

March 2005
N13114F
VERITAS Volume Manager 4.1
Troubleshooting Guide
Solaris

Disclaimer
The information contained in this publication is subject to change without notice. VERITAS Software Corporation makes no warranty of any kind with regard to this manual, including, but not limited to, the implied warranties of merchantability and fitness for a particular purpose. VERITAS Software Corporation shall not be liable for errors contained herein or for incidental or consequential damages in connection with the furnishing, performance, or use of this manual.
VERITAS Legal Notice
Copyright © 2005 VERITAS Software Corporation. All rights reserved. VERITAS and the VERITAS Logo are trademarks or registered trademarks of VERITAS Software Corporation or its affiliates in the U.S. and other countries. Other names may be trademarks of their respective owners.
VERITAS Software Corporation350 Ellis StreetMountain View, CA 94043 USAPhone 650–527–8000 Fax 650–527–2908www.veritas.com
Third-Party Legal Notices
Data Encryption Standard (DES) Copyright
Copyright © 1990 Dennis Ferguson. All rights reserved.
Commercial use is permitted only if products that are derived from or include this software are made available for purchase and/or use in Canada. Otherwise, redistribution and use in source and binary forms are permitted.
Copyright 1985, 1986, 1987, 1988, 1990 by the Massachusetts Institute of Technology. All rights reserved.
Export of this software from the United States of America may require a specific license from the United States Government. It is the responsibility of any person or organization contemplating export to obtain such a license before exporting.
WITHIN THAT CONSTRAINT, permission to use, copy, modify, and distribute this software and its documentation for any purpose and without fee is hereby granted, provided that the above copyright notice appear in all copies and that both that copyright notice and this permission notice appear in supporting documentation, and that the name of M.I.T. not be used in advertising or publicity pertaining to distribution of the software without specific, written prior permission. M.I.T. makes no representations about the suitability of this software for any purpose. It is provided as is without express or implied warranty.
Sun Microsystems Trademarks
Sun, Solaris, SunOS, Java, Sun Java System Cluster, Sun StorEdge, Solstice DiskSuite, Sun Fire, Sun Enterprise, Online: Backup, and Netra are trademarks or registered trademarks of Sun Microsystems, Inc. in the United States and other countries.
All SPARC trademarks are used under license and are trademarks or registered trademarks of SPARC International, SPARC trademarks are based upon an architecture developed by Sun Microsystems, Inc.
ii VERITAS Volume Manager Troubleshooting Guide

Contents
Preface . . . . . . . . . . . . . . . . . . . . . . . . . . . . . . . . . . . . . . . . . . . . . . . . . . . . . . . . . . . . . .vii
How This Guide Is Organized . . . . . . . . . . . . . . . . . . . . . . . . . . . . . . . . . . . . . . . . . . . . . . .vii
Conventions . . . . . . . . . . . . . . . . . . . . . . . . . . . . . . . . . . . . . . . . . . . . . . . . . . . . . . . . . . . . . viii
Getting Help . . . . . . . . . . . . . . . . . . . . . . . . . . . . . . . . . . . . . . . . . . . . . . . . . . . . . . . . . . . . . . ix
Documentation Feedback . . . . . . . . . . . . . . . . . . . . . . . . . . . . . . . . . . . . . . . . . . . . . . . . . . . ix
Chapter 1. Recovery from Hardware Failure . . . . . . . . . . . . . . . . . . . . . . . . . . . . . . . . .1
Listing Unstartable Volumes . . . . . . . . . . . . . . . . . . . . . . . . . . . . . . . . . . . . . . . . . . . . . . . . . 2
Displaying Volume and Plex States . . . . . . . . . . . . . . . . . . . . . . . . . . . . . . . . . . . . . . . . . . . 2
Understanding the Plex State Cycle . . . . . . . . . . . . . . . . . . . . . . . . . . . . . . . . . . . . . . . . . . . 3
Recovering an Unstartable Mirrored Volume . . . . . . . . . . . . . . . . . . . . . . . . . . . . . . . . . . . 5
Recovering an Unstartable Volume with a Disabled Plex in the RECOVER State . . . . 6
Forcibly Restarting a Disabled Volume . . . . . . . . . . . . . . . . . . . . . . . . . . . . . . . . . . . . . . . . 7
Clearing the Failing Flag for a Disk . . . . . . . . . . . . . . . . . . . . . . . . . . . . . . . . . . . . . . . . . . . . 7
Reattaching Failed Disks . . . . . . . . . . . . . . . . . . . . . . . . . . . . . . . . . . . . . . . . . . . . . . . . . . . . . 8
Failures on RAID-5 Volumes . . . . . . . . . . . . . . . . . . . . . . . . . . . . . . . . . . . . . . . . . . . . . . . . . 9
System Failures . . . . . . . . . . . . . . . . . . . . . . . . . . . . . . . . . . . . . . . . . . . . . . . . . . . . . . . . . . 9
Disk Failures . . . . . . . . . . . . . . . . . . . . . . . . . . . . . . . . . . . . . . . . . . . . . . . . . . . . . . . . . . . 10
Default Startup Recovery Process for RAID-5 . . . . . . . . . . . . . . . . . . . . . . . . . . . . . . 11
Recovering a RAID-5 Volume . . . . . . . . . . . . . . . . . . . . . . . . . . . . . . . . . . . . . . . . . . . . 12
Recovery After Moving RAID-5 Subdisks . . . . . . . . . . . . . . . . . . . . . . . . . . . . . . . . . . 15
Starting RAID-5 Volumes . . . . . . . . . . . . . . . . . . . . . . . . . . . . . . . . . . . . . . . . . . . . . . . . 15
Recovering from Incomplete Disk Group Moves . . . . . . . . . . . . . . . . . . . . . . . . . . . . . . . 18
Recovery from Failure of a DCO Volume . . . . . . . . . . . . . . . . . . . . . . . . . . . . . . . . . . . . . 19
iii

Recovering a Version 0 DCO . . . . . . . . . . . . . . . . . . . . . . . . . . . . . . . . . . . . . . . . . . . . . 21
Recovering a Version 20 DCO . . . . . . . . . . . . . . . . . . . . . . . . . . . . . . . . . . . . . . . . . . . . 22
Chapter 2. Recovery from Failure of Instant Snapshot Operations . . . . . . . . . . . . 25
Failure of vxsnap prepare . . . . . . . . . . . . . . . . . . . . . . . . . . . . . . . . . . . . . . . . . . . . . . . . . . 25
Failure of vxsnap make for Full-Sized Instant Snapshots . . . . . . . . . . . . . . . . . . . . . . . . 26
Failure of vxsnap make for Break-Off Instant Snapshots . . . . . . . . . . . . . . . . . . . . . . . . 26
Failure of vxsnap make for Space-Optimized Instant Snapshots . . . . . . . . . . . . . . . . . 27
Failure of vxsnap restore . . . . . . . . . . . . . . . . . . . . . . . . . . . . . . . . . . . . . . . . . . . . . . . . . . . 27
Failure of vxsnap reattach or refresh . . . . . . . . . . . . . . . . . . . . . . . . . . . . . . . . . . . . . . . . . 27
Copy-on-write Failure . . . . . . . . . . . . . . . . . . . . . . . . . . . . . . . . . . . . . . . . . . . . . . . . . . . . . 28
I/O Errors During Resynchronization . . . . . . . . . . . . . . . . . . . . . . . . . . . . . . . . . . . . . . . . 29
I/O Failure on a DCO Volume . . . . . . . . . . . . . . . . . . . . . . . . . . . . . . . . . . . . . . . . . . . . . . 29
Chapter 3. Recovery from Boot Disk Failure . . . . . . . . . . . . . . . . . . . . . . . . . . . . . . . 31
Possible root, swap, and usr Configurations . . . . . . . . . . . . . . . . . . . . . . . . . . . . . . . . . . 31
Booting from Alternate Boot Disks . . . . . . . . . . . . . . . . . . . . . . . . . . . . . . . . . . . . . . . . . . . 32
The Boot Process on SPARC Systems . . . . . . . . . . . . . . . . . . . . . . . . . . . . . . . . . . . . . . . . . 33
Hot-Relocation and Boot Disk Failure . . . . . . . . . . . . . . . . . . . . . . . . . . . . . . . . . . . . . . . . 34
Unrelocating Subdisks to a Replacement Boot Disk . . . . . . . . . . . . . . . . . . . . . . . . . 34
Recovery from Boot Failure . . . . . . . . . . . . . . . . . . . . . . . . . . . . . . . . . . . . . . . . . . . . . . . . . 35
Boot Device Cannot be Opened . . . . . . . . . . . . . . . . . . . . . . . . . . . . . . . . . . . . . . . . . . 35
Cannot Boot From Unusable or Stale Plexes . . . . . . . . . . . . . . . . . . . . . . . . . . . . . . . . 36
Invalid UNIX Partition . . . . . . . . . . . . . . . . . . . . . . . . . . . . . . . . . . . . . . . . . . . . . . . . . . 37
Incorrect Entries in /etc/vfstab . . . . . . . . . . . . . . . . . . . . . . . . . . . . . . . . . . . . . . . . . . 38
Missing or Damaged Configuration Files . . . . . . . . . . . . . . . . . . . . . . . . . . . . . . . . . . 39
Repairing Root or /usr File Systems on Mirrored Volumes . . . . . . . . . . . . . . . . . . . . . . 41
Recovering a Root Disk and Root Mirror from Backup Tape . . . . . . . . . . . . . . . . . . 41
Re-Adding and Replacing Boot Disks . . . . . . . . . . . . . . . . . . . . . . . . . . . . . . . . . . . . . . . . 45
Re-Adding a Failed Boot Disk . . . . . . . . . . . . . . . . . . . . . . . . . . . . . . . . . . . . . . . . . . . 45
Replacing a Failed Boot Disk . . . . . . . . . . . . . . . . . . . . . . . . . . . . . . . . . . . . . . . . . . . . . 47
iv VERITAS Volume Manager Troubleshooting Guide

Recovery by Reinstallation . . . . . . . . . . . . . . . . . . . . . . . . . . . . . . . . . . . . . . . . . . . . . . . . . . 48
General Reinstallation Information . . . . . . . . . . . . . . . . . . . . . . . . . . . . . . . . . . . . . . . . 48
Reinstalling the System and Recovering VxVM . . . . . . . . . . . . . . . . . . . . . . . . . . . . . 49
Chapter 4. Logging Commands and Transactions . . . . . . . . . . . . . . . . . . . . . . . . . .59
Logging Commands . . . . . . . . . . . . . . . . . . . . . . . . . . . . . . . . . . . . . . . . . . . . . . . . . . . . . . . 59
Logging Transactions . . . . . . . . . . . . . . . . . . . . . . . . . . . . . . . . . . . . . . . . . . . . . . . . . . . . . . 61
Associating Command and Transaction Logs . . . . . . . . . . . . . . . . . . . . . . . . . . . . . . . . . . 63
Chapter 5. Backing Up and Restoring Disk GroupConfigurations . . . . . . . . . . . . . . . . . . . . . . . . . . . . . . . . . . . . . . . . . . . . . . . . . . . . . . . .65
Backing Up a Disk Group Configuration . . . . . . . . . . . . . . . . . . . . . . . . . . . . . . . . . . . . . . 66
Restoring a Disk Group Configuration . . . . . . . . . . . . . . . . . . . . . . . . . . . . . . . . . . . . . . . . 67
Resolving Conflicting Backups for a Disk Group . . . . . . . . . . . . . . . . . . . . . . . . . . . . 68
Chapter 6. Error Messages . . . . . . . . . . . . . . . . . . . . . . . . . . . . . . . . . . . . . . . . . . . . . .71
Logging Error Messages . . . . . . . . . . . . . . . . . . . . . . . . . . . . . . . . . . . . . . . . . . . . . . . . . . . . 71
Configuring Logging in the Startup Script . . . . . . . . . . . . . . . . . . . . . . . . . . . . . . . . . . . . 72
Understanding Messages . . . . . . . . . . . . . . . . . . . . . . . . . . . . . . . . . . . . . . . . . . . . . . . . . . . 73
Messages . . . . . . . . . . . . . . . . . . . . . . . . . . . . . . . . . . . . . . . . . . . . . . . . . . . . . . . . . . . . . . 75
Index . . . . . . . . . . . . . . . . . . . . . . . . . . . . . . . . . . . . . . . . . . . . . . . . . . . . . . . . . . . . . . .123
Contents v

vi VERITAS Volume Manager Troubleshooting Guide

Preface
The VERITAS Volume Manager Troubleshooting Guide provides information about how to recover from hardware failure, and how to understand and deal with VERITAS Volume Manager (VxVM) error messages during normal operation. It includes guidelines for recovering from the failure of disks and other hardware upon which virtual software objects such as subdisks, plexes and volumes are constructed in VxVM. Information is also included on how to configure command and transaction logging, and to back up and restore disk group configurations.
This guide assumes that you have a:
◆ Basic knowledge of the SolarisTM operating system (OS).
◆ Basic understanding of Solaris system administration.
◆ Basic understanding of storage management in VxVM.
Note Most VERITAS Volume Manager commands require superuser or other appropriate privileges.
How This Guide Is Organized This guide is organized as follows:
◆ Recovery from Hardware Failure
◆ Recovery from Failure of Instant Snapshot Operations
◆ Recovery from Boot Disk Failure
◆ Logging Commands and Transactions
◆ Backing Up and Restoring Disk Group Configurations
◆ Error Messages
Refer to the Release Notes for information about the other documentation that is provided with this product.
vii

Conventions
Conventions
Convention Usage Example
monospace Used for path names, commands, output, directory and file names, functions, and parameters.
Read tunables from the /etc/vx/tunefstab file.
See the ls(1) manual page for more information.
monospace (bold)
Indicates user input. # ls pubs
C:\> dir pubs
italic Identifies book titles, new terms, emphasized text, and variables replaced with a name or value.
See the User’s Guide for details.
The variable system_name indicates the system on which to enter the command.
bold Depicts GUI objects, such as fields, list boxes, menu selections, etc. Also depicts GUI commands.
Enter your password in the Password field.
Press Return.
blue text Indicates hypertext links. See “Getting Help” on page ix.
# Unix superuser prompt (all shells).
# cp /pubs/4.0/user_book /release_mgnt/4.0/archive
C:\> Windows user prompt. C:\> copy \pubs\4.0\user_book
c:\release_mgnt\4.0\archive
viii VERITAS Volume Manager Troubleshooting Guide

Getting Help
Getting Help
For technical assistance, visit http://support.veritas.com and select phone or email support. This site also provides access to resources such as TechNotes, product alerts, software downloads, hardware compatibility lists, and the VERITAS customer email notification service. Use the Knowledge Base Search feature to access additional product information, including current and past releases of product documentation.
Diagnostic tools are also available to assist in troubleshooting problems associated with the product. These tools are available on disc or can be downloaded from the VERITAS FTP site. See the README.VRTSspt file in the /support directory for details.
For license information, software updates and sales contacts, visit https://my.veritas.com/productcenter/ContactVeritas.jsp. For information on purchasing product documentation, visit http://webstore.veritas.com.
Documentation Feedback Your feedback on product documentation is important to us. Send suggestions for improvements and reports on errors or omissions to [email protected]. Include the title and part number of the document (located in the lower left corner of the title page), and chapter and section titles of the text on which you are reporting. Our goal is to ensure customer satisfaction by providing effective, quality documentation. For assistance with topics other than documentation, visit http://support.veritas.com.
Preface ix

Documentation Feedback
x VERITAS Volume Manager Troubleshooting Guide
Recovery from Hardware Failure
1 VERITAS Volume Manager (VxVM) protects systems from disk and other hardware failures and helps you to recover from such events. This chapter describes recovery procedures and information to help you prevent loss of data or system access due to disk and other hardware failures.If a volume has a disk I/O failure (for example, because the disk has an uncorrectable error), VxVM can detach the plex involved in the failure. I/O stops on that plex but continues on the remaining plexes of the volume.
If a disk fails completely, VxVM can detach the disk from its disk group. All plexes on the disk are disabled. If there are any unmirrored volumes on a disk when it is detached, those volumes are also disabled.
Note Apparent disk failure may not be due to a fault in the physical disk media or the disk controller, but may instead be caused by a fault in an intermediate or ancillary component such as a cable, host bus adapter, or power supply.
The hot-relocation feature in VxVM automatically detects disk failures, and notifies the system administrator and other nominated users of the failures by electronic mail. Hot-relocation also attempts to use spare disks and free disk space to restore redundancy and to preserve access to mirrored and RAID-5 volumes. For more information, see the “Administering Hot-Relocation” chapter in the VERITAS Volume Manager Administrator’s Guide.
Recovery from failures of the boot (root) disk requires the use of the special procedures described in “Recovery from Boot Disk Failure” on page 31. The chapter also includes procedures for repairing the root (/) and usr file systems.
1

Listing Unstartable Volumes
Listing Unstartable VolumesAn unstartable volume can be incorrectly configured or have other errors or conditions that prevent it from being started. To display unstartable volumes, use the vxinfo command. This displays information about the accessibility and usability of volumes:
# vxinfo [-g diskgroup] [volume ...]
The following example output shows one volume, mkting, as being unstartable:
home fsgen S tarted mkting fsgen U nstartable src fsgen S tarted rootvol root Started swapvol swap Started
Displaying Volume and Plex StatesTo display detailed information about the configuration of a volume including its state and the states of its plexes, use the following form of the vxprint command:
# vxprint [-g diskgroup] -hvt [volume ...]
The following example shows a disabled volume, vol, which has two clean plexes, vol-01 and vol-02, each with a single subdisk:
# vxprint -g mydg -hvt vol Disk group: mydg
V NAME RVG/VSET/COKSTATE STATE LENGTH READPOL PREFPLEXUTYPEPL NAME VOLUME KSTATE STATE LENGTH LAYOUT NCOL/WIDMODESD NAME PLEX DISK DISKOFFSLENGTH [COL/]OFF DEVICE MODESV NAME PLEX VOLNAME NVOLLAYRLENGTH [COL/]OFF AM/NM MODESC NAME PLEX CACHE DISKOFFSLENGTH [COL/]OFF DEVICE MODEDC NAME PARENTVOL LOGVOLSP NAME SNAPVOL DCO
v vol - DISABLED ACTIVE 212880 SELECT - fsgenpl vol-01 vol DISABLED CLEAN 212880 CONCAT - RWsd mydg11-01 vol-01 mydg11 0 212880 0 c1t0d0 ENApl vol-02 vol DISABLED CLEAN 212880 CONCAT - RWsd mydg12-01 vol-02 mydg12 0 212880 0 c1t1d0 ENA
See the “Creating and Administering Plexes” and “Administering Volumes” chapters in the VERITAS Volume Manager Administrator’s Guide for a description of the possible plex and volume states.
2 VERITAS Volume Manager Troubleshooting Guide

Understanding the Plex State Cycle
Understanding the Plex State Cycle Changing plex states are part of normal operations, and do not necessarily indicate abnormalities that must be corrected. A clear understanding of the various plex states and their interrelationship is necessary if you want to be able to perform the recovery procedures described in this chapter.
The figure, “Main Plex State Cycle,” shows the main transitions that take place between plex states in VxVM. (For more information about plex states, see the chapter “Creating and Administering Plexes” in the VERITAS Volume Manager Administrator’s Guide.)
Main Plex State Cycle
Start up
(vxvol start)
PS: CLEAN
PKS: DISABLED
PS: ACTIVE
PKS: ENABLED
Shut down
(vxvol stop)
PS = Plex State
PKS = Plex Kernel State
At system startup, volumes are started automatically and the vxvol start task makes all CLEAN plexes ACTIVE. At shutdown, the vxvol stop task marks all ACTIVE plexes CLEAN. If all plexes are initially CLEAN at startup, this indicates that a controlled shutdown occurred and optimizes the time taken to start up the volumes.
The figure, “Additional Plex State Transitions” on page 4, shows additional transitions that are possible between plex states as a result of hardware problems, abnormal system shutdown, and intervention by the system administrator.
When first created, a plex has state EMPTY until the volume to which it is attached is initialized. Its state is then set to CLEAN. Its plex kernel state remains set to DISABLED and is not set to ENABLED until the volume is started.
Chapter 1, Recovery from Hardware Failure 3

Understanding the Plex State Cycle
Additional Plex State Transitions
Recover data (vxvol resync)
Initialize plex (vxvol init clean) Take plex offline
(vxmend off)
Shut down (vxvol stop)
After crash and reboot (vxvol start)
Uncorrectable I/O failure
Put plex online (vxmend on)
Resync data (vxplex att)
Resync fails
Create plex
PS: EMPTY PKS: DISABLED
PS: ACTIVE PKS: DISABLED
Start up (vxvol start)
PS: CLEAN PKS: DISABLED
PS: ACTIVE PKS: ENABLED
PS: OFFLINE PKS: DISABLED
PS: IOFAIL PKS: DETACHED
PS: STALE PKS: DETACHEDPS = Plex State
PKS = Plex Kernel State
After a system crash and reboot, all plexes of a volume are ACTIVE but marked with plex kernel state DISABLED until their data is recovered by the vxvol resync task.
A plex may be taken offline with the vxmend off command, made available again using vxmend on, and its data resynchronized with the other plexes when it is reattached using vxplex att. A failed resynchronization or uncorrectable I/O failure places the plex in the IOFAIL state.
“Recovering an Unstartable Mirrored Volume” on page 5, and subsequent sections describe the actions that you can take if a system crash or I/O error leaves no plexes of a mirrored volume in a CLEAN or ACTIVE state.
For information on the recovery of RAID-5 volumes, see “Failures on RAID-5 Volumes” on page 9 and subsequent sections.
4 VERITAS Volume Manager Troubleshooting Guide

Recovering an Unstartable Mirrored Volume
Recovering an Unstartable Mirrored Volume A system crash or an I/O error can corrupt one or more plexes of a mirrored volume and leave no plex CLEAN or ACTIVE. You can mark one of the plexes CLEAN and instruct the system to use that plex as the source for reviving the others as follows:
1. Place the desired plex in the CLEAN state using the following command:
# vxmend [-g diskgroup] fix clean plex
For example, to place the plex vol01-02 in the CLEAN state:
# vxmend -g mydg fix clean vol01-02
2. To recover the other plexes in a volume from the CLEAN plex, the volume must be disabled, and the other plexes must be STALE. If necessary, make any other CLEAN or ACTIVE plexes STALE by running the following command on each of these plexes in turn:
# vxmend [-g diskgroup] fix stale plex
3. To enable the CLEAN plex and to recover the STALE plexes from it, use the following command:
# vxvol [-g diskgroup] start volume
For example, to recover volume vol01:
# vxvol -g mydg start vol01
For more information about the vxmend and vxvol command, see the vxmend(1M) and vxvol(1M) manual pages.
Note Following severe hardware failure of several disks or other related subsystems underlying all the mirrored plexes of a volume, it may be impossible to recover the volume using vxmend. In this case, remove the volume, recreate it on hardware that is functioning correctly, and restore the contents of the volume from a backup or from a snapshot image.
Chapter 1, Recovery from Hardware Failure 5

Recovering an Unstartable Volume with a Disabled Plex in the RECOVER State
Recovering an Unstartable Volume with a Disabled Plex in the RECOVER State
A plex is shown in the RECOVER state if its contents are out-of-date with respect to the volume. This can happen if a disk containing one or more of the plex’s subdisks has been replaced or reattached. If a plex is shown as being in this state, it can be recovered as follows:
1. Use the following command to force the plex into the OFFLINE state:
# vxmend [-g diskgroup] -o force off plex
2. Place the plex into the STALE state using this command:
# vxmend [-g diskgroup] on plex
3. If there are other ACTIVE or CLEAN plexes in the volume, use the following command to reattach the plex to the volume:
# vxplex [-g diskgroup] att plex volume
If the volume is already enabled, resynchronization of the plex is started immediately.
If there are no other clean plexes in the volume, use this command to make the plex DISABLED and CLEAN:
# vxmend [-g diskgroup] fix clean plex
4. If the volume is not already enabled, use the following command to start it, and preform any resynchronization of the plexes in the background:
# vxvol [-g diskgroup] -o bg start volume
Note If the data in the plex was corrupted, and the volume has no ACTIVE or CLEAN redundant plexes from which its contents can be resynchronized, it must be restored from a backup or from a snapshot image.
6 VERITAS Volume Manager Troubleshooting Guide

Forcibly Restarting a Disabled Volume
Forcibly Restarting a Disabled Volume If a disk failure caused a volume to be disabled, and the volume does not contain any valid redundant plexes, you must restore the volume from a backup after replacing the failed disk. Any volumes that are listed as Unstartable must be restarted using the vxvol command before restoring their contents from a backup:
# vxvol [-g diskgroup] -o bg -f start volume
The -f option forcibly restarts the volume, and the -o bg option resynchronizes its plexes as a background task. For example, to restart the volume myvol so that it can be restored from backup, use the following command:
# vxvol -g mydg -o bg -f start myvol
Clearing the Failing Flag for a Disk If I/O errors are intermittent rather than persistent, VERITAS Volume Manager sets the failing flag on a disk, rather than detaching the disk. Such errors can occur due to the temporary removal of a cable, controller faults, a partially faulty LUN in a disk array, or a disk with a few bad sectors or tracks.
If the hardware fault is not with the disk itself (for example, it is caused by problems with the controller or the cable path to the disk), you can use the vxedit command to unset the failing flag after correcting the source of the I/O error.
Caution Do not unset the failing flag if the reason for the I/O errors is unknown. If the disk hardware truly is failing, and the flag is cleared, there is a risk of data loss.
To clear the failing flag on a disk:
1. Use the vxdisk list command to find out which disks are failing:
# vxdisk listDEVICE TYPE DISK GROUP STATUSc1t1d0s2 auto:sliced mydg01 mydg onlinec1t2d0s2 auto:sliced mydg02 mydg online failingc1t3d0s2 auto:sliced mydg03 mydg online. . .
2. Use the vxedit set command to clear the flag for each disk that is marked as failing (in this example, mydg02):
# vxedit set failing=off mydg02
Chapter 1, Recovery from Hardware Failure 7

Reattaching Failed Disks
3. Use the vxdisk list command to verify that the failing flag has been cleared:
# vxdisk listDEVICE TYPE DISK GROUP STATUSc1t1d0s2 auto:sliced mydg01 mydg onlinec1t2d0s2 auto:sliced mydg02 mydg onlinec1t3d0s2 auto:sliced mydg03 mydg online. . .
Reattaching Failed Disks You can perform a reattach operation if a disk could not be found at system startup, or if VxVM is started with some disk drivers unloaded and unloadable (causing disks to enter the failed state). If the underlying problem has been fixed (such as a cable or controller fault), use the vxreattach command to reattach the disks without plexes being flagged as STALE. However, the reattach must occur before any volumes on the disk are started.
The vxreattach command is called as part of disk recovery from the vxdiskadm menus and during the boot process. If possible, vxreattach reattaches the failed disk media record to the disk with the same device name. Reattachment places a disk in the same disk group that it was located in before and retains its original disk media name.
To reattach a failed disk:
1. Use the vxdisk list command to see which disks have failed, as shown in the following example:
# vxdisk listDEVICE TYPE DISK GROUP STATUSc1t1d0s2 auto:sliced mydg01 mydg onlinec1t2d0s2 auto:sliced mydg02 mydg online- - mydg03 mydg failed was: c1t3d0s2- - mydg04 mydg failed was: c1t4d0s2
2. Once the fault has been corrected, the disks can be reattached by using the following command to rescan the device list:
# /usr/sbin/vxdctl enable
3. Use the vxreattach command with no options to reattach the disks:
# /etc/vx/bin/vxreattach
After reattachment takes place, recovery may not be necessary unless a disk was faulty and had to be replaced. Reattachment can fail if the original (or another) cause for the disk failure still exists.
8 VERITAS Volume Manager Troubleshooting Guide
Failures on RAID-5 Volumes
You can use the command vxreattach -c to check whether reattachment is possible, without performing the operation. Instead, it displays the disk group and disk media name where the disk can be reattached.
See the vxreattach(1M) manual page for more information on the vxreattach command.
Failures on RAID-5 Volumes Failures are seen in two varieties: system failures and disk failures. A system failure means that the system has abruptly ceased to operate due to an operating system panic or power failure. Disk failures imply that the data on some number of disks has become unavailable due to a system failure (such as a head crash, electronics failure on disk, or disk controller failure).
System Failures RAID-5 volumes are designed to remain available with a minimum of disk space overhead, if there are disk failures. However, many forms of RAID-5 can have data loss after a system failure. Data loss occurs because a system failure causes the data and parity in the RAID-5 volume to become unsynchronized. Loss of synchronization occurs because the status of writes that were outstanding at the time of the failure cannot be determined.
If a loss of sync occurs while a RAID-5 volume is being accessed, the volume is described as having stale parity. The parity must then be reconstructed by reading all the non-parity columns within each stripe, recalculating the parity, and writing out the parity stripe unit in the stripe. This must be done for every stripe in the volume, so it can take a long time to complete.
Caution While the resynchronization of a RAID-5 volume without log plexes is being performed, any failure of a disk within the volume causes its data to be lost.
Besides the vulnerability to failure, the resynchronization process can tax the system resources and slow down system operation.
RAID-5 logs reduce the damage that can be caused by system failures, because they maintain a copy of the data being written at the time of the failure. The process of resynchronization consists of reading that data and parity from the logs and writing it to the appropriate areas of the RAID-5 volume. This greatly reduces the amount of time needed for a resynchronization of data and parity. It also means that the volume never becomes truly stale. The data and parity for all stripes in the volume are known at all times, so the failure of a single disk cannot result in the loss of the data within the volume.
Chapter 1, Recovery from Hardware Failure 9
Failures on RAID-5 Volumes
Disk Failures An uncorrectable I/O error occurs when disk failure, cabling or other problems cause the data on a disk to become unavailable. For a RAID-5 volume, this means that a subdisk becomes unavailable. The subdisk cannot be used to hold data and is considered stale and detached. If the underlying disk becomes available or is replaced, the subdisk is still considered stale and is not used.
If an attempt is made to read data contained on a stale subdisk, the data is reconstructed from data on all other stripe units in the stripe. This operation is called a reconstructing-read. This is a more expensive operation than simply reading the data and can result in degraded read performance. When a RAID-5 volume has stale subdisks, it is considered to be in degraded mode.
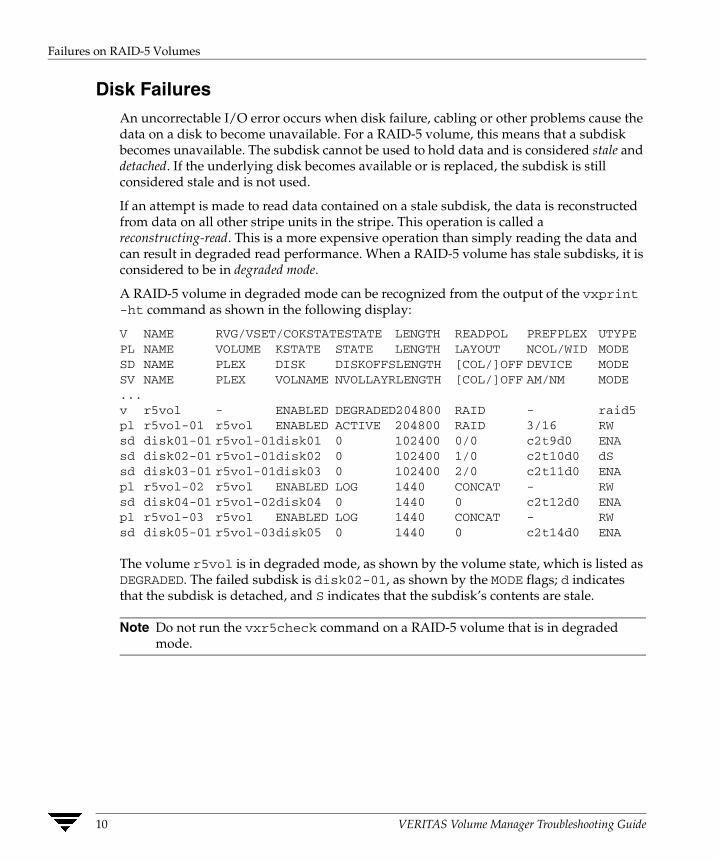
A RAID-5 volume in degraded mode can be recognized from the output of the vxprint -ht command as shown in the following display:
V NAME RVG/VSET/COKSTATESTATE LENGTH READPOL PREFPLEX UTYPE PL NAME VOLUME KSTATE STATE LENGTH LAYOUT NCOL/WID MODE SD NAME PLEX DISK DISKOFFSLENGTH [COL/]OFF DEVICE MODE SV NAME PLEX VOLNAME NVOLLAYRLENGTH [COL/]OFF AM/NM MODE ... v r5vol - ENABLED DEGRADED204800 RAID - raid5 pl r5vol-01 r5vol ENABLED ACTIVE 204800 RAID 3/16 RW sd disk01-01 r5vol-01disk01 0 102400 0/0 c2t9d0 ENA sd disk02-01 r5vol-01disk02 0 102400 1/0 c2t10d0 dS sd disk03-01 r5vol-01disk03 0 102400 2/0 c2t11d0 ENA pl r5vol-02 r5vol ENABLED LOG 1440 CONCAT - RW sd disk04-01 r5vol-02disk04 0 1440 0 c2t12d0 ENA pl r5vol-03 r5vol ENABLED LOG 1440 CONCAT - RW sd disk05-01 r5vol-03disk05 0 1440 0 c2t14d0 ENA
The volume r5vol is in degraded mode, as shown by the volume state, which is listed as DEGRADED. The failed subdisk is disk02-01, as shown by the MODE flags; d indicates that the subdisk is detached, and S indicates that the subdisk’s contents are stale.
Note Do not run the vxr5check command on a RAID-5 volume that is in degraded mode.
10 VERITAS Volume Manager Troubleshooting Guide

Failures on RAID-5 Volumes
A disk containing a RAID-5 log plex can also fail. The failure of a single RAID-5 log plex has no direct effect on the operation of a volume provided that the RAID-5 log is mirrored. However, loss of all RAID-5 log plexes in a volume makes it vulnerable to a complete failure. In the output of the vxprint -ht command, failure within a RAID-5 log plex is indicated by the plex state being shown as BADLOG rather than LOG. This is shown in the following display, where the RAID-5 log plex r5vol-02 has failed:
V NAME RVG/VSET/COKSTATESTATE LENGTH READPOL PREFPLEX UTYPE PL NAME VOLUME KSTATE STATE LENGTH LAYOUT NCOL/WID MODE SD NAME PLEX DISK DISKOFFSLENGTH [COL/]OFF DEVICE MODE SV NAME PLEX VOLNAME NVOLLAYRLENGTH [COL/]OFF AM/NM MODE ... v r5vol - ENABLED ACTIVE 204800 RAID - raid5 pl r5vol-01 r5vol ENABLED ACTIVE 204800 RAID 3/16 RW sd disk01-01 r5vol-01disk01 0 102400 0/0 c2t9d0 ENA sd disk02-01 r5vol-01disk02 0 102400 1/0 c2t10d0 ENA sd disk03-01 r5vol-01disk03 0 102400 2/0 c2t11d0 ENA pl r5vol-02 r5vol DISABLEDBADLOG 1440 CONCAT - RW sd disk04-01 r5vol-02disk04 0 1440 0 c2t12d0 ENA pl r5vol-03 r5vol ENABLED LOG 1440 CONCAT - RW sd disk05-01 r5vol-12disk05 0 1440 0 c2t14d0 ENA
Default Startup Recovery Process for RAID-5 VxVM may need to perform several operations to restore fully the contents of a RAID-5 volume and make it usable. Whenever a volume is started, any RAID-5 log plexes are zeroed before the volume is started. This prevents random data from being interpreted as a log entry and corrupting the volume contents. Also, some subdisks may need to be recovered, or the parity may need to be resynchronized (if RAID-5 logs have failed).
VxVM takes the following steps when a RAID-5 volume is started:
1. If the RAID-5 volume was not cleanly shut down, it is checked for valid RAID-5 log plexes.
◆ If valid log plexes exist, they are replayed. This is done by placing the volume in the DETACHED volume kernel state and setting the volume state to REPLAY, and enabling the RAID-5 log plexes. If the logs can be successfully read and the replay is successful, go to step 2.
◆ If no valid logs exist, the parity must be resynchronized. Resynchronization is done by placing the volume in the DETACHED volume kernel state and setting the volume state to SYNC. Any log plexes are left in the DISABLED plex kernel state.
Chapter 1, Recovery from Hardware Failure 11
Failures on RAID-5 Volumes
The volume is not made available while the parity is resynchronized because any subdisk failures during this period makes the volume unusable. This can be overridden by using the -o unsafe start option with the vxvol command. If any stale subdisks exist, the RAID-5 volume is unusable.
Caution The -o unsafe start option is considered dangerous, as it can make the contents of the volume unusable. Using it is not recommended.
2. Any existing log plexes are zeroed and enabled. If all logs fail during this process, the start process is aborted.
3. If no stale subdisks exist or those that exist are recoverable, the volume is put in the ENABLED volume kernel state and the volume state is set to ACTIVE. The volume is now started.
Recovering a RAID-5 Volume The types of recovery that may typically be required for RAID-5 volumes are the following:
◆ Parity Resynchronization
◆ Log Plex Recovery
◆ Stale Subdisk Recovery
Parity resynchronization and stale subdisk recovery are typically performed when the RAID-5 volume is started, or shortly after the system boots. They can also be performed by running the vxrecover command.
For more information on starting RAID-5 volumes, see “Starting RAID-5 Volumes” on page 15.
If hot-relocation is enabled at the time of a disk failure, system administrator intervention is not required unless no suitable disk space is available for relocation. Hot-relocation is triggered by the failure and the system administrator is notified of the failure by electronic mail.
Hot relocation automatically attempts to relocate the subdisks of a failing RAID-5 plex. After any relocation takes place, the hot-relocation daemon (vxrelocd) also initiates a parity resynchronization.
In the case of a failing RAID-5 log plex, relocation occurs only if the log plex is mirrored; the vxrelocd daemon then initiates a mirror resynchronization to recreate the RAID-5 log plex. If hot-relocation is disabled at the time of a failure, the system administrator may need to initiate a resynchronization or recovery.
12 VERITAS Volume Manager Troubleshooting Guide

Failures on RAID-5 Volumes
Note Following severe hardware failure of several disks or other related subsystems underlying a RAID-5 plex, it may be impossible to recover the volume using the methods described in this chapter. In this case, remove the volume, recreate it on hardware that is functioning correctly, and restore the contents of the volume from a backup.
Parity Resynchronization
In most cases, a RAID-5 array does not have stale parity. Stale parity only occurs after all RAID-5 log plexes for the RAID-5 volume have failed, and then only if there is a system failure. Even if a RAID-5 volume has stale parity, it is usually repaired as part of the volume start process.
If a volume without valid RAID-5 logs is started and the process is killed before the volume is resynchronized, the result is an active volume with stale parity. For an example of the output of the vxprint -ht command, see the following example for a stale RAID-5 volume:
V NAME RVG/VSET/COKSTATESTATE LENGTH READPOL PREFPLEX UTYPE PL NAME VOLUME KSTATE STATE LENGTH LAYOUT NCOL/WID MODE SD NAME PLEX DISK DISKOFFSLENGTH [COL/]OFF DEVICE MODE SV NAME PLEX VOLNAME NVOLLAYRLENGTH [COL/]OFF AM/NM MODE ... v r5vol - ENABLED NEEDSYNC204800 RAID - raid5 pl r5vol-01 r5vol ENABLED ACTIVE 204800 RAID 3/16 RW sd disk01-01 r5vol-01disk01 0 102400 0/0 c2t9d0 ENA sd disk02-01 r5vol-01disk02 0 102400 1/0 c2t10d0 dS sd disk03-01 r5vol-01disk03 0 102400 2/0 c2t11d0 ENA ...
This output lists the volume state as NEEDSYNC, indicating that the parity needs to be resynchronized. The state could also have been SYNC, indicating that a synchronization was attempted at start time and that a synchronization process should be doing the synchronization. If no such process exists or if the volume is in the NEEDSYNC state, a synchronization can be manually started by using the resync keyword for the vxvol command. For example, to resynchronize the RAID-5 volume in the figure “Invalid RAID-5 Volume” on page 16, use the following command:
# vxvol -g mydg resync r5vol
Chapter 1, Recovery from Hardware Failure 13
Failures on RAID-5 Volumes
Parity is regenerated by issuing VOL_R5_RESYNC ioctls to the RAID-5 volume. The resynchronization process starts at the beginning of the RAID-5 volume and resynchronizes a region equal to the number of sectors specified by the -o iosize option. If the -o iosize option is not specified, the default maximum I/O size is used. The resync operation then moves onto the next region until the entire length of the RAID-5 volume has been resynchronized.
For larger volumes, parity regeneration can take a long time. It is possible that the system could be shut down or crash before the operation is completed. In case of a system shutdown, the progress of parity regeneration must be kept across reboots. Otherwise, the process has to start all over again.
To avoid the restart process, parity regeneration is checkpointed. This means that the offset up to which the parity has been regenerated is saved in the configuration database. The -o checkpt=size option controls how often the checkpoint is saved. If the option is not specified, the default checkpoint size is used.
Because saving the checkpoint offset requires a transaction, making the checkpoint size too small can extend the time required to regenerate parity. After a system reboot, a RAID-5 volume that has a checkpoint offset smaller than the volume length starts a parity resynchronization at the checkpoint offset.
Log Plex Recovery
RAID-5 log plexes can become detached due to disk failures. These RAID-5 logs can be reattached by using the att keyword for the vxplex command. To reattach the failed RAID-5 log plex, use the following command:
# vxplex -g mydg att r5vol r5vol-l1
Stale Subdisk Recovery
Stale subdisk recovery is usually done at volume start time. However, the process doing the recovery can crash, or the volume may be started with an option such as -o delayrecover that prevents subdisk recovery. In addition, the disk on which the subdisk resides can be replaced without recovery operations being performed. In such cases, you can perform subdisk recovery using the vxvol recover command. For example, to recover the stale subdisk in the RAID-5 volume shown in the figure “Invalid RAID-5 Volume” on page 16, use the following command:
# vxvol -g mydg recover r5vol disk05-00
A RAID-5 volume that has multiple stale subdisks can be recovered in one operation. To recover multiple stale subdisks, use the vxvol recover command on the volume, as follows:
# vxvol -g mydg recover r5vol
14 VERITAS Volume Manager Troubleshooting Guide

Failures on RAID-5 Volumes
Recovery After Moving RAID-5 Subdisks When RAID-5 subdisks are moved and replaced, the new subdisks are marked as STALE in anticipation of recovery. If the volume is active, the vxsd command may be used to recover the volume. If the volume is not active, it is recovered when it is next started. The RAID-5 volume is degraded for the duration of the recovery operation.
Any failure in the stripes involved in the move makes the volume unusable. The RAID-5 volume can also become invalid if its parity becomes stale. To avoid this occurring, vxsd does not allow a subdisk move in the following situations:
◆ a stale subdisk occupies any of the same stripes as the subdisk being moved
◆ the RAID-5 volume is stopped but was not shut down cleanly; that is, the parity is considered stale
◆ the RAID-5 volume is active and has no valid log areas
Only the third case can be overridden by using the -o force option.
Subdisks of RAID-5 volumes can also be split and joined by using the vxsd split command and the vxsd join command. These operations work the same way as those for mirrored volumes.
Note RAID-5 subdisk moves are performed in the same way as subdisk moves for other volume types, but without the penalty of degraded redundancy.
Starting RAID-5 Volumes When a RAID-5 volume is started, it can be in one of many states. After a normal system shutdown, the volume should be clean and require no recovery. However, if the volume was not closed, or was not unmounted before a crash, it can require recovery when it is started, before it can be made available. This section describes actions that can be taken under certain conditions.
Under normal conditions, volumes are started automatically after a reboot and any recovery takes place automatically or is done through the vxrecover command.
Unstartable RAID-5 Volumes
A RAID-5 volume is unusable if some part of the RAID-5 plex does not map the volume length:
◆ the RAID-5 plex cannot be sparse in relation to the RAID-5 volume length
◆ the RAID-5 plex does not map a region where two subdisks have failed within a stripe, either because they are stale or because they are built on a failed disk
Chapter 1, Recovery from Hardware Failure 15

Failures on RAID-5 Volumes
When this occurs, the vxvol start command returns the following error message:
VxVM vxvol ERROR V-5-1-1236 Volume r5vol is not startable; RAID-5 plex does not map entire volume length.
At this point, the contents of the RAID-5 volume are unusable.
Another possible way that a RAID-5 volume can become unstartable is if the parity is stale and a subdisk becomes detached or stale. This occurs because within the stripes that contain the failed subdisk, the parity stripe unit is invalid (because the parity is stale) and the stripe unit on the bad subdisk is also invalid. The figure, “Invalid RAID-5 Volume” on page 16, illustrates a RAID-5 volume that has become invalid due to stale parity and a failed subdisk.
Invalid RAID-5 Volume
disk00-00 disk01-00 disk02-00
disk03-00 disk04-00 disk05-00
W
X
Y
Z
Data
Data
Data
Data
Data
Data
Data
DataParity
Parity
Parity
Parity
W
X
Y
Z
RAID-5 Plex
This example shows four stripes in the RAID-5 array. All parity is stale and subdisk disk05-00 has failed. This makes stripes X and Y unusable because two failures have occurred within those stripes.
This qualifies as two failures within a stripe and prevents the use of the volume. In this case, the output display from the vxvol start command is as follows:
VxVM vxvol ERROR V-5-1-1237 Volume r5vol is not startable; some subdisks are unusable and the parity is stale.
This situation can be avoided by always using two or more RAID-5 log plexes in RAID-5 volumes. RAID-5 log plexes prevent the parity within the volume from becoming stale which prevents this situation (see “System Failures” on page 9 for details).
16 VERITAS Volume Manager Troubleshooting Guide

Failures on RAID-5 Volumes
Forcibly Starting RAID-5 Volumes
You can start a volume even if subdisks are marked as stale: for example, if a stopped volume has stale parity and no RAID-5 logs, and a disk becomes detached and then reattached.
The subdisk is considered stale even though the data is not out of date (because the volume was in use when the subdisk was unavailable) and the RAID-5 volume is considered invalid. To prevent this case, always have multiple valid RAID-5 logs associated with the array whenever possible.
To start a RAID-5 volume with stale subdisks, you can use the -f option with the vxvol start command. This causes all stale subdisks to be marked as non-stale. Marking takes place before the start operation evaluates the validity of the RAID-5 volume and what is needed to start it. Also, you can mark individual subdisks as non-stale by using the following command:
# vxmend [-g diskgroup] fix unstale subdisk
◆ If some subdisks are stale and need recovery, and if valid logs exist, the volume is enabled by placing it in the ENABLED kernel state and the volume is available for use during the subdisk recovery. Otherwise, the volume kernel state is set to DETACHED and it is not available during subdisk recovery.
This is done because if the system were to crash or the volume was ungracefully stopped while it was active, the parity becomes stale, making the volume unusable. If this is undesirable, the volume can be started with the -o unsafe start option.
Caution The -o unsafe start option is considered dangerous, as it can make the contents of the volume unusable. It is therefore not recommended.
◆ The volume state is set to RECOVER and stale subdisks are restored. As the data on each subdisk becomes valid, the subdisk is marked as no longer stale.
If any subdisk recovery fails and there are no valid logs, the volume start is aborted because the subdisk remains stale and a system crash makes the RAID-5 volume unusable. This can also be overridden by using the -o unsafe start option.
Caution The -o unsafe start option is considered dangerous, as it can make the contents of the volume unusable. It is therefore not recommended.
If the volume has valid logs, subdisk recovery failures are noted but they do not stop the start procedure.
◆ When all subdisks have been recovered, the volume is placed in the ENABLED kernel state and marked as ACTIVE. It is now started.
Chapter 1, Recovery from Hardware Failure 17

Recovering from Incomplete Disk Group Moves
Recovering from Incomplete Disk Group Moves If the system crashes or a subsystem fails while a disk group move, split or join operation is being performed, VxVM attempts either to reverse or to complete the operation when the system is restarted or the subsystem is repaired. Whether the operation is reversed or completed depends on how far it had progressed.
Automatic recovery depends on being able to import both the source and target disk groups. If this is not possible (for example, if one of the disk groups has been imported on another host), perform the following steps to recover the disk group:
1. Use the vxprint command to examine the configuration of both disk groups. Objects in disk groups whose move is incomplete have their TUTIL0 fields set to MOVE.
2. Enter the following command to attempt completion of the move:
# vxdg recover sourcedg
This operation fails if one of the disk groups cannot be imported because it has been imported on another host or because it does not exist:
VxVM vxdg ERROR V-5-1-2907 diskgroup: Disk group does not exist
If the recovery fails, perform one of the following steps as appropriate.
❖ If the disk group has been imported on another host, export it from that host, and import it on the current host. If all the required objects already exist in either the source or target disk group, use the following command to reset the MOVE flags in that disk group:
# vxdg -o clean recover diskgroup1
Use the following command on the other disk group to remove the objects that have TUTIL0 fields marked as MOVE:
# vxdg -o remove recover diskgroup2
❖ If only one disk group is available to be imported, use the following command to reset the MOVE flags on this disk group:
# vxdg -o clean recover diskgroup
18 VERITAS Volume Manager Troubleshooting Guide

Recovery from Failure of a DCO Volume
Recovery from Failure of a DCO Volume
Note The procedures in this section depend on the DCO version number. See the VERITAS Volume Manager Administrator’s Guide for information about DCO versioning.
Persistent FastResync uses a data change object (DCO) volume to perform tracking of changed regions in a volume. If an error occurs while reading or writing a DCO volume, it is detached and the badlog flag is set on the DCO. All further writes to the volume are not tracked by the DCO.
The following sample output from the vxprint command shows a complete volume with a detached DCO volume (the TUTIL0 and PUTIL0 fields are omitted for clarity):
TY NAME ASSOC KSTATE LENGTH PLOFFS STATE ... dg mydg mydg - - - -dm mydg01 c4t50d0s2 - 35521408 - -dm mydg02 c4t51d0s2 - 35521408 - -dm mydg03 c4t52d0s2 - 35521408 - FAILING dm mydg04 c4t53d0s2 - 35521408 - FAILING dm mydg05 c4t54d0s2 - 35521408 - -
v SNAP-vol1 fsgen ENABLED 204800 - ACTIVE pl vol1-03 SNAP-vol1 ENABLED 204800 - ACTIVE sd mydg05-01 vol1-03 ENABLED 204800 0 -
- - - -ENABLED 144 - ACTIVE
dc SNAP-vol1_dcoSNAP-vol1 v SNAP-vol1_dclgen pl vol1_dcl-03 sd mydg05-02 sp vol1_snp
v vol1 pl vol1-01 sd mydg01-01 pl vol1-02 sd mydg02-01 dc vol1_dco v vol1_dcl pl vol1_dcl-01 sd mydg03-01 pl vol1_dcl-02 sd mydg04-01
SNAP-vol1_dclENABLED 144 - ACTIVE vol1_dcl-03 ENABLED 144 0 -SNAP-vol1 - - - -
fsgen ENABLED 204800 - ACTIVE vol1 ENABLED 204800 - ACTIVE vol1-01 ENABLED 204800 0 -vol1 ENABLED 204800 - ACTIVE v ol1-01 ENABLED 204800 0 -vol1 - - - BADLOG gen DETACHED 144 - DETACH vol1_dcl ENABLED 144 - ACTIVE vol1_dcl-01 ENABLED 144 0 -vol1_dcl DETACHED 144 - IOFAIL vol1_dcl-02 ENABLED 144 0 RELOCATE
sp SNAP-vol1_snp vol1 - - - -
This output shows the mirrored volume, vol1, its snapshot volume, SNAP-vol1, and their respective DCOs, vol1_dco and SNAP-vol1_dco. The two disks, mydg03 and mydg04, that hold the DCO plexes for the DCO volume, vol1_dcl, of vol1 have failed.
Chapter 1, Recovery from Hardware Failure 19
Recovery from Failure of a DCO Volume
As a result, the DCO volume, vol1_dcl, of the volume, vol1, has been detached and the state of vol1_dco has been set to BADLOG. For future reference, note the entries for the snap objects, vol1_snp and SNAP-vol1_snp, that point to vol1 and SNAP-vol1 respectively.
You can use such output to deduce the name of a volume’s DCO (in this example, vol1_dco), or you can use the following vxprint command to display the name of a volume’s DCO:
# vxprint [-g diskgroup] -F%dco_name volume
You can use the vxprint command to check if the badlog flag is set for the DCO of a volume as shown here:
# vxprint [-g diskgroup] -F%badlog dco_name
This command returns the value on if the badlog flag is set. For the example output, the command would take this form:
# vxprint -g mydg -F%badlog vol1_dco on
Use the following command to verify the version number of the DCO:
# vxprint [-g diskgroup] -F%version dco_name
This returns a value of 0 or 20. For the example output, the command would take this form:
# vxprint -g mydg -F%version vol1_dco
The DCO version number determines the recovery procedure that you should use:
◆ “Recovering a Version 0 DCO” on page 21
◆ “Recovering a Version 20 DCO” on page 22
20 VERITAS Volume Manager Troubleshooting Guide

Recovery from Failure of a DCO Volume
Recovering a Version 0 DCO For a version 0 DCO, perform the following steps to recover the DCO volume:
1. Correct the problem that caused the I/O failure.
2. Use the following command to remove the badlog flag from the DCO:
# vxdco [-g diskgroup] -o force enable dco_name
For the example output, the command would take this form:
# vxdco -g mydg -o force enable vol1_dco
The entry for vol1_dco in the output from vxprint now looks like this:
dc vol1_dco vol1 - - - -
3. Restart the DCO volume using the following command:
# vxvol [-g diskgroup] start dco_log_vol
For the example output, the command would take this form:
# vxvol -g mydg start vol1_dcl
4. Use the vxassist snapclear command to clear the FastResync maps for the original volume and for all its snapshots. This ensures that potentially stale FastResync maps are not used when the snapshots are snapped back (a full resynchronization is performed). FastResync tracking is re-enabled for any subsequent snapshots of the volume.
Caution You must use the vxassist snapclear command on all the snapshots of the volume after removing the badlog flag from the DCO. Otherwise, data may be lost or corrupted when the snapshots are snapped back.
If a volume and its snapshot volume are in the same disk group, the following command clears the FastResync maps for both volumes:
# vxassist [-g diskgroup] snapclear volume snap_obj_to_snapshot
Here snap_obj_to_snapshot is the name of the snap object associated with volume that points to the snapshot volume.
For the example output, the command would take this form:
# vxassist -g mydg snapclear vol1 SNAP-vol1_snp
Chapter 1, Recovery from Hardware Failure 21
Recovery from Failure of a DCO Volume
If a snapshot volume and the original volume are in different disk groups, you must perform a separate snapclear operation on each volume:
# vxassist -g diskgroup1 snapclear volume snap_obj_to_snapshot # vxassist -g diskgroup2 snapclear snapvol snap_obj_to_volume
Here snap_obj_to_volume is the name of the snap object associated with the snapshot volume, snapvol, that points to the original volume.
For the example output, the commands would take this form if SNAP-vol1 had been moved to the disk group, snapdg:
# vxassist -g mydg snapclear vol1 SNAP-vol1_snp # vxassist -g snapdg snapclear SNAP-vol1 vol1_snp
5. To snap back the snapshot volume on which you performed a snapclear in the previous step, use the following command (after using the vxdg move command to move the snapshot plex back to the original disk group, if necessary):
# vxplex -f [-g diskgroup] snapback volume snapvol_plex
For the example output, the command would take this form:
# vxplex -f -g mydg snapback vol1 vol1-03
Note You cannot use vxassist snapback because the snapclear operation removes the snapshot association information.
Recovering a Version 20 DCO For a version 20 DCO, perform the following steps to recover the DCO volume:
1. Correct the problem that caused the I/O failure.
2. Use the vxsnap command to dissociate each full-sized instant snapshot volume that is associated with the volume:
# vxsnap [-g diskgroup] dis snapvol
For the example output, the command would take this form:
# vxsnap -g mydg dis SNAP-vol1
3. Unprepare the volume using the following command:
# vxsnap [-g diskgroup] unprepare volume
For the example output, the command would take this form:
# vxsnap -g mydg unprepare vol1
22 VERITAS Volume Manager Troubleshooting Guide

Recovery from Failure of a DCO Volume
4. Start the volume using the vxvol command:
# vxvol [-g diskgroup] start volume
For the example output, the command would take this form:
# vxvol -g mydg start vol1
5. Prepare the volume again using the following command:
# vxsnap [-g diskgroup] prepare volume [ndcomirs=number] \ [regionsize=size] [drl=yes|no|sequential] \ [storage_attribute ...]
For the example output, the command might take this form:
# vxsnap -g mydg prepare vol1 ndcomirs=2 drl=yes
This adds a DCO volume with 2 plexes, and also enables DRL and FastResync (if licensed).
See the VERITAS Volume Manager Administrator’s Guide and the vxsnap(1M) manual page for full details of how to use the vxsnap prepare command.
Chapter 1, Recovery from Hardware Failure 23

Recovery from Failure of a DCO Volume
24 VERITAS Volume Manager Troubleshooting Guide
Recovery from Failure of Instant Snapshot Operations
2This chapter describes how to recover from various failure and error conditions that may occur during instant snapshot operations:
◆ Failure of vxsnap prepare
◆ Failure of vxsnap make for Full-Sized Instant Snapshots
◆ Failure of vxsnap make for Break-Off Instant Snapshots
◆ Failure of vxsnap make for Space-Optimized Instant Snapshots
◆ Failure of vxsnap restore
◆ Failure of vxsnap reattach or refresh
◆ Copy-on-write Failure
◆ I/O Errors During Resynchronization
◆ I/O Failure on a DCO Volume
See the VERITAS Volume Manager Administrator’s Guide and the vxsnap(1M) manual page for full details of the creation and administration of instant snapshots.
Failure of vxsnap prepare If a vxsnap prepare operation fails prematurely, the vxprint command may show the new DCO volume in the INSTSNAPTMP state. VxVM can usually recover the DCO volume without intervention. However, in certain situations, this recovery may not succeed. If this happens, use the following command to delete the DCO volume:
# vxedit [-g diskgroup] rm DCO_volume
Alternatively, the DCO volume is removed automatically when the system is next restarted. When the DCO volume has been removed, run the vxsnap prepare command again.
25

Failure of vxsnap make for Full-Sized Instant Snapshots
Failure of vxsnap make for Full-Sized Instant Snapshots If a vxsnap make operation fails during the creation of a full-sized instant snapshot, the snapshot volume may go into the DISABLED state, be marked invalid and be rendered unstartable. You can use the following command to check that the inst_invalid flag is set to on:
# vxprint [-g diskgroup] -F%inst_invalid snapshot_volume
VxVM can usually recover the snapshot volume without intervention. However, in certain situations, this recovery may not succeed. If this happens, use the following steps to delete the DCO volume:
1. Use the vxmend command to clear the snapshot volume’s tutil0 field:
# vxmend [-g diskgroup] clear tutil0 snapshot_volume
2. Run the following command on the snapshot volume:
# vxsnap [-g diskgroup] unprepare snapshot_volume
3. Prepare the snapshot volume again for snapshot operations:
# vxsnap [-g diskgroup] prepare snapshot_volume
Failure of vxsnap make for Break-Off Instant Snapshots If a vxsnap make operation fails during the creation of a third-mirror break-off instant snapshot, the snapshot volume may go into the INSTSNAPTMP state. VxVM can usually recover the snapshot volume without intervention. However, in certain situations, this recovery may not succeed. If this happens, use the following command to delete the snapshot volume:
# vxedit [-g diskgroup] rm snapshot_volume
Alternatively, the snapshot volume is removed automatically when the system is next restarted.
26 VERITAS Volume Manager Troubleshooting Guide
Failure of vxsnap make for Space-Optimized Instant Snapshots
Failure of vxsnap make for Space-Optimized Instant Snapshots
If a vxsnap make operation fails during the creation of a space-optimized instant snapshot, the snapshot volume may go into the INSTSNAPTMP state. VxVM can usually recover the snapshot volume without intervention. However, in certain situations, this recovery may not succeed. If this happens, use the following command to delete the snapshot volume:
# vxedit [-g diskgroup] rm snapshot_volume
Alternatively, the snapshot volume is removed automatically when the system is next restarted.
If the vxsnap make operation was being performed on a prepared cache object by specifying the cache attribute, the cache object remains intact after deleting the snapshot. If the cachesize attribute was used to specify a new cache object, the cache object does not exist after deleting the snapshot.
Failure of vxsnap restore If a vxsnap restore operation fails, the volume being restored may go into the DISABLED state. Use the following command to start the volume:
# vxvol [-g diskgroup] start volume
Failure of vxsnap reattach or refresh If a vxsnap reattach or refresh operation fails, the volume being refreshed may go into the DISABLED state, be marked invalid and be rendered unstartable. You can use the following command to check that the inst_invalid flag is set to on:
# vxprint [-g diskgroup] -F%inst_invalid volume
Use the following steps to recover the volume:
1. Use the vxmend command to clear the volume’s tutil0 field:
# vxmend [-g diskgroup] clear tutil0 volume
2. Use the vxsnap command to dissociate the volume from the snapshot hierarchy:
# vxsnap [-g diskgroup] dis volume
Chapter 2, Recovery from Failure of Instant Snapshot Operations 27

Copy-on-write Failure
3. Use the following command to start the volume:
# vxvol [-g diskgroup] start volume
4. Re-run the failed reattach or refresh command.
Note This results in a full resynchronization of the volume. Alternatively, remove the snapshot volume and recreate it if required.
Copy-on-write Failure If an error is encountered while performing an internal resynchronization of a volume’s snapshot, the snapshot volume goes into the INVALID state, and is made inaccessible for I/O and instant snapshot operations.
Use the following steps to recover the snapshot volume:
1. Use the vxsnap command to dissociate the volume from the snapshot hierarchy:
# vxsnap [-g diskgroup] dis snapshot_volume
2. Unprepare the volume using the following command:
# vxsnap [-g diskgroup] unprepare snapshot_volume
3. Prepare the volume using the following command:
# vxsnap [-g diskgroup] prepare volume [ndcomirs=number] \ [regionsize=size] [drl=yes|no|sequential] \ [storage_attribute ...]
See the VERITAS Volume Manager Administrator’s Guide and the vxsnap(1M) manual page for full details of how to use the vxsnap prepare command.
The volume can now be used again for snapshot operations.
Alternatively, you can remove the snapshot volume and recreate it if required.
28 VERITAS Volume Manager Troubleshooting Guide

I/O Errors During Resynchronization
I/O Errors During Resynchronization Snapshot resynchronization (started by vxsnap syncstart, or by specifying sync=on to vxsnap) stops if an I/O error occurs, and displays the following message on the system console:
VxVM vxsnap ERROR V-5-1-6840 Synchronization of the volume volumestopped due to I/O error
After correcting the source of the error, use the following command to restart the resynchronization operation:
# vxsnap [-b] [-g diskgroup] syncstart volume
See the VERITAS Volume Manager Administrator’s Guide and the vxsnap(1M) manual page for full details of how to use the vxsnap syncstart command.
I/O Failure on a DCO Volume If an I/O failure occurs on a DCO volume, its FastResync maps and DRL log cannot be accessed, and the DCO volume is marked with the BADLOG flag. DRL logging and recovery, and instant snapshot operations are not possible with the volume until you recover its DCO volume using the procedure described in “Recovering a Version 20 DCO” on page 22.
Note If the I/O failure also affects the data volume, it must be recovered before its DCO volume can be recovered.
Chapter 2, Recovery from Failure of Instant Snapshot Operations 29
I/O Failure on a DCO Volume
30 VERITAS Volume Manager Troubleshooting Guide

Recovery from Boot Disk Failure
3 VERITAS Volume Manager (VxVM) protects systems from disk and other hardware failures and helps you to recover from such events. This chapter describes recovery procedures and information to help you prevent loss of data or system access due to the failure of the boot (root) disk. It also includes procedures for repairing the root (/) and usr file systems.For information about recovering volumes and their data on non-boot disks, see “Recovery from Hardware Failure” on page 1.
For more information about protecting your system, see the VERITAS Volume Manager Installation Guide.
Note The examples in this chapter assume that the boot (root) disk is configured on the device c0t0d0s2. Your system may be configured to use a different device.
Possible root, swap, and usr Configurations During installation, it is possible to set up a variety of configurations for the root (/) and usr file systems, and for swap. The following cases are possible:
◆ usr is a directory under / and no separate partition is allocated for it. In this case, usr becomes part of the rootvol volume when the root disk is encapsulated and put under VERITAS Volume Manager control.
◆ usr is on a separate partition from the root partition on the root disk . In this case, a separate volume is created for the usr partition. vxmirror mirrors the usr volume on the destination disk.
◆ usr is on a disk other than the root disk. In this case, a volume is created for the usr partition only if you use VxVM to encapsulate the disk. Note that encapsulating the root disk and having mirrors of the root volume is ineffective in maintaining the availability of your system if the separate usr partition becomes inaccessible for any reason. For maximum availablility of the system, it is recommended that you encapsulate both the root disk and the disk containing the usr partition, and have mirrors for the usr, rootvol, and swapvol volumes.
31
Booting from Alternate Boot Disks
The rootvol volume must exist in the boot disk group. See “Boot-time Volume Restrictions” in the “Administering Disks” chapter of the VERITAS Volume Manager Administrator’s Guide for information on rootvol and usr volume restrictions.
VxVM allows you to put swap partitions on any disk; it does not need an initial swap area during early phases of the boot process. By default, the VERITAS Volume Manager installation chooses partition 0 on the selected root disk as the root partition, and partition 1 as the swap partition. However, it is possible to have the swap partition on a partition not located on the root disk. In such cases, you are advised to encapsulate that disk and create mirrors for the swap volume. If you do not do this, damage to the swap partition eventually causes the system to crash. It may be possible to boot the system, but having mirrors for the swapvol volume prevents system failures.
Booting from Alternate Boot DisksIf the root disk is encapsulated and mirrored, you can use one of its mirrors to boot the system if the primary boot disk fails. To boot the system after failure of the primary boot disk on a Sun SPARCR system, follow these steps:
1. Check that the EEPROM variable use-nvramrc? is set to true by entering the following command at the boot prompt:
ok printenv use-nvramrc?
If set to true, this variable allows the use of alternate boot disks. To set the value of use-nvramrc? to true, enter the following command at the boot prompt:
ok setenv use-nvramrc? true
If use-nvramrc? is set to false, the system fails to boot from the devalias and displays an error message such as the following:
Rebooting with command: boot vx-mirdiskBoot device: /pci@1f,4000/scsi@3/disk@0,0 File and args:vx-mirdiskboot: cannot open vx-mirdiskEnter filename [vx-mirdisk]:
2. Check for available boot disk aliases using the following command at the boot prompt:
ok devalias
Suitable mirrors of the root disk are listed with names of the form vx-diskname.
32 VERITAS Volume Manager Troubleshooting Guide

The Boot Process on SPARC Systems
3. Enter this command:
ok boot alias
where alias is the name of an alternate root mirror found from the previous step.
If a selected disk contains a root mirror that is stale, vxconfigd displays an error stating that the mirror is unusable and lists any non-stale alternate bootable disks.
More information about the boot process may be found in “The Boot Process on SPARC Systems” on page 33.
The Boot Process on SPARC SystemsA Sun SPARCR system prompts for a boot command unless the autoboot flag has been set in the nonvolatile storage area used by the firmware. Machines with older PROMs have different prompts than that for the newer V2 and V3 versions. These newer versions of PROM are also known as OpenBoot PROMs (OBP). The boot command syntax for the newer types of PROMs is:
ok boot [OBP names] [filename] [boot-flags]
OBP names specify the OpenBoot PROM designations. For example, on Desktop SPARC systems, the designation sbus/esp@0,800000/sd@3,0:a indicates a SCSI disk (sd) at target 3, lun 0 on the SCSI bus, with the esp host bus adapter plugged into slot 0.
Note You can use VERITAS Volume Manager boot disk alias names instead of OBP names. Example aliases are vx-rootdisk or vx-disk01. To list the available boot devices, use the devalias command at the OpenBoot prompt.
filename is the name of a file that contains the kernel. The default is /kernel/unix in the root partition. If necessary, you can specify another program (such as /stand/diag) by specifying the -a flag. (Some versions of the firmware allow the default filename to be saved in the nonvolatile storage area of the system.)
Note Do not boot a system running VxVM with rootability enabled using all the defaults presented by the -a flag. See “Restoring a Copy of /etc/system on the Root Disk” on page 39 for the correct responses.
Boot flags are not interpreted by the boot program. The boot program passes all boot-flags to the file identified by filename. See the kernel (1) and kadb (1M) manual pages for information on the options available with the default standalone program, /kernel/unix.
Chapter 3, Recovery from Boot Disk Failure 33

Hot-Relocation and Boot Disk Failure
Hot-Relocation and Boot Disk FailureIf the boot (root) disk fails and it is mirrored, hot-relocation automatically attempts to replace the failed root disk mirror with a new mirror. To achieve this, hot-relocation uses a surviving mirror of the root disk to create a new mirror, either on a spare disk, or on a disk with sufficient free space. This ensures that there are always at least two mirrors of the root disk that can be used for booting. The hot-relocation daemon also calls the vxbootsetup utility to configure the disk with the new mirror as a bootable disk.
Hot-relocation can fail for a root disk if the boot disk group does not contain sufficient spare or free space to fit the volumes from the failed root disk. The rootvol and swapvol volumes require contiguous disk space. If the root volume and other volumes on the failed root disk cannot be relocated to the same new disk, each of these volumes may be relocated to different disks.
Mirrors of rootvol and swapvol volumes must be cylinder-aligned. This means that they can only be created on disks that have enough space to allow their subdisks to begin and end on cylinder boundaries. Hot-relocation fails to create the mirrors if these disks are not available.
Unrelocating Subdisks to a Replacement Boot DiskWhen a boot disk is encapsulated, the root file system and other system areas, such as the swap partition, are made into volumes. VxVM creates a private region using part of the existing swap area, which is usually located in the middle of the disk. However, when a disk is initialized as a VM disk, VxVM creates the private region at the beginning of the disk.
If a mirrored encapsulated boot disk fails, hot-relocation creates new copies of its subdisks on a spare disk. The name of the disk that failed and the offsets of its component subdisks are stored in the subdisk records as part of this process. After the failed boot disk is replaced with one that has the same storage capacity, it is “initialized” and added back to the disk group. vxunreloc can be run to move all the subdisks back to the disk. However, the difference of the disk layout between an initialized disk and an encapsulated disk affects the way the offset into a disk is calculated for each unrelocated subdisk. Use the -f option to vxunreloc to move the subdisks to the disk, but not to the same offsets. For this to be successful, the replacement disk should be at least 2 megabytes larger than the original boot disk.
vxunreloc makes the new disk bootable after it moves all the subdisks to the disk.
Note The system dump device is usually configured to be the swap partition of the root disk. Whenever a swap subdisk is moved (by hot-relocation, or using vxunreloc) from one disk to another, the dump device must be re-configured on the new disk.
34 VERITAS Volume Manager Troubleshooting Guide

Recovery from Boot Failure
You can use the dumpadm command to view and set the dump device. For details, see the dumpadm(1M) manual page.
Recovery from Boot FailureWhile there are many types of failures that can prevent a system from booting, the same basic procedure can be taken to bring the system up. When a system fails to boot, you should first try to identify the failure by the evidence left behind on the screen and then attempt to repair the problem (for example, by turning on a drive that was accidentally powered off). If the problem is one that cannot be repaired (such as data errors on the boot disk), boot the system from an alternate boot disk that contains a mirror of the root volume, so that the damage can be repaired or the failing disk can be replaced.
The following sections outline some possible failures and provide instructions on the corrective actions:
◆ “Boot Device Cannot be Opened” on page 35
◆ “Cannot Boot From Unusable or Stale Plexes” on page 36
◆ “Invalid UNIX Partition” on page 37
◆ “Incorrect Entries in /etc/vfstab” on page 38
◆ “Missing or Damaged Configuration Files” on page 39
Boot Device Cannot be OpenedEarly in the boot process, immediately following system initialization, there may be messages similar to the following:
SCSI device 0,0 is not respondingCan’t open boot device
This means that the system PROM was unable to read the boot program from the boot drive. Common causes for this problem are:
◆ The boot disk is not powered on.
◆ The SCSI bus is not terminated.
◆ There is a controller failure of some sort.
◆� A disk is failing and locking the bus, preventing any disks from identifying themselves to the controller, and making the controller assume that there are no disks attached.
Chapter 3, Recovery from Boot Disk Failure 35

Recovery from Boot Failure
The first step in diagnosing this problem is to check carefully that everything on the SCSI bus is in order. If disks are powered off or the bus is unterminated, correct the problem and reboot the system. If one of the disks has failed, remove the disk from the bus and replace it.
If no hardware problems are found, the error is probably due to data errors on the boot disk. In order to repair this problem, attempt to boot the system from an alternate boot disk (containing a mirror of the root volume). If you are unable to boot from an alternate boot disk, there is still some type of hardware problem. Similarly, if switching the failed boot disk with an alternate boot disk fails to allow the system to boot, this also indicates hardware problems.
Cannot Boot From Unusable or Stale Plexes If a disk is unavailable when the system is running, any mirrors of volumes that reside on that disk become stale. This means that the data on that disk is inconsistent relative to the other mirrors of that volume. During the boot process, the system accesses only one copy of the root volume (the copy on the boot disk) until a complete configuration for this volume can be obtained.
If it turns out that the plex of this volume that was used for booting is stale, the system must be rebooted from an alternate boot disk that contains non-stale plexes. This problem can occur, for example, if the system was booted from one of the disks made bootable by VxVM with the original boot disk turned off. The system boots normally, but the plexes that reside on the unpowered disk are stale. If the system reboots from the original boot disk with the disk turned back on, the system boots using that stale plex.
Another possible problem can occur if errors in the VERITAS Volume Manager headers on the boot disk prevent VxVM from properly identifying the disk. In this case, VxVM does not know the name of that disk. This is a problem because plexes are associated with disk names, so any plexes on the unidentified disk are unusable.
A problem can also occur if the root disk has a failure that affects the root volume plex. At the next boot attempt, the system still expects to use the failed root plex for booting. If the root disk was mirrored at the time of the failure, an alternate root disk (with a valid root plex) can be specified for booting.
If any of these situations occur, the configuration daemon, vxconfigd, notes it when it is configuring the system as part of the init processing of the boot sequence. vxconfigd displays a message describing the error and what can be done about it, and then halts the system. For example, if the plex rootvol-01 of the root volume rootvol on disk rootdisk is stale, vxconfigd may display this message:
VxVM vxconfigd ERROR V-5-1-1049: System boot disk does not have a valid root plexPlease boot from one of the following disks:Disk: disk01 Device: c0t1d0s2
36 VERITAS Volume Manager Troubleshooting Guide

Recovery from Boot Failure
vxvm:vxconfigd: Error: System startup failedThe system is down.
This informs the administrator that the alternate boot disk named disk01 contains a usable copy of the root plex and should be used for booting. When this message is displayed, reboot the system from the alternate boot disk as described in “Booting from Alternate Boot Disks” on page 32.
Once the system has booted, the exact problem needs to be determined. If the plexes on the boot disk were simply stale, they are caught up automatically as the system comes up. If, on the other hand, there was a problem with the private area on the disk or the disk failed, you need to re-add or replace the disk.
If the plexes on the boot disk are unavailable, you should receive mail from VERITAS Volume Manager utilities describing the problem. Another way to determine the problem is by listing the disks with the vxdisk utility. In the above example, if the problem is a failure in the private area of root disk (such as due to media failures or accidentally overwriting the VERITAS Volume Manager private region on the disk), vxdisk list shows this display:
DEVICE TYPE DISK GROUP STATUS- - rootdisk bootdg failed was: c0t3d0s2 c0t1d0s2 sliced disk01 bootdg ONLINE
Invalid UNIX PartitionOnce the boot program has loaded, it attempts to access the boot disk through the normal UNIX partition information. If this information is damaged, the boot program fails with an error such as:
File just loaded does not appear to be executable
If this message appears during the boot attempt, the system should be booted from an alternate boot disk. While booting, most disk drivers display errors on the console about the invalid UNIX partition information on the failing disk. The messages are similar to this:
WARNING: unable to read labelWARNING: corrupt label_sdo
This indicates that the failure was due to an invalid disk partition. You can attempt to re-add the disk as described in “Re-Adding a Failed Boot Disk” on page 45. However, if the reattach fails, then the disk needs to be replaced as described in “Replacing a Failed Boot Disk” on page 47.
Chapter 3, Recovery from Boot Disk Failure 37
Recovery from Boot Failure
Incorrect Entries in /etc/vfstabWhen the root disk is encapsulated and put under VERITAS Volume Manager control, as part of the normal encapsulation process, volumes are created for all of the partitions on the disk. VxVM modifies the /etc/vfstab to use the corresponding volumes instead of the disk partitions. Care should be taken while editing the /etc/vfstab file manually, and you should always make a backup copy before committing any changes to it. The most important entries are those corresponding to / and /usr. The vfstab that existed prior to VERITAS Volume Manager installation is saved in /etc/vfstab.prevm.
Damaged Root (/) Entry in /etc/vfstab
If the entry in /etc/vfstab for the root file system (/) is lost or is incorrect, the system boots in single-user mode. Messages similar to the following are displayed on booting the system:
INIT: Cannot create /var/adm/utmp or /var/adm/utmpxINIT: failed write of utmpx entry:" "
It is recommended that you first run fsck on the root partition as shown in this example:
# fsck -F ufs /dev/rdsk/c0t0d0s0
At this point in the boot process, / is mounted read-only, not read/write. Since the entry in /etc/vfstab was either incorrect or deleted, mount / as read/write manually, using this command:
# mount -o remount /dev/vx/dsk/rootvol /
After mounting / as read/write, exit the shell. The system prompts for a new run level. For multi-user mode, enter run level 3:
ENTER RUN LEVEL (0-6,s or S): 3
Restore the entry in /etc/vfstab for / after the system boots.
Damaged /usr Entry in /etc/vfstab
The /etc/vfstab file has an entry for /usr only if /usr is located on a separate disk partition. After encapsulation of the disk containing the /usr partition, VxVM changes the entry in /etc/vfstab to use the corresponding volume.
In the event of loss of the entry for /usr from /etc/vfstab, the system cannot be booted (even if you have mirrors of the /usr volume). In this case, boot the system from the CD-ROM and restore /etc/vfstab using the following procedure:
38 VERITAS Volume Manager Troubleshooting Guide

Recovery from Boot Failure
1. Boot the operating system into single-user mode from its installation CD-ROM using the following command at the boot prompt:
ok boot cdrom -s
2. Mount/dev/dsk/c0t0d0s0 on a suitable mount point such as /a or /mnt:
# mount /dev/dsk/c0t0d0s0 /a
3. Edit /a/etc/vfstab, and ensure that there is an entry for the /usr file system, such as the following:
/dev/vx/dsk/usr /dev/vx/rdsk/usr /usr ufs 1 yes -
4. Shut down and reboot the system from the same root partition on which the vfstab file was restored.
Missing or Damaged Configuration Files
Note VxVM no longer maintains entries for tunables in /etc/system as was the case for VxVM 3.2 and earlier releases. All entries for VERITAS Volume Manager device driver tunables are now contained in files named /kernel/drv/vx*.conf, such as /kernel/drv/vxio.conf. For more information, see the “Performance Monitoring and Tuning” chapter of the VERITAS Volume Manager Administrator’s Guide.
Caution If you need to modify configuration files such as /etc/system, make a copy of the file in the root file system before editing it.
If your changes to the /etc/system file are incorrect, the saved copy can be specified to the boot program. To specify the saved system file to the boot program, follow the procedure in the next section.
Restoring a Copy of /etc/system on the Root Disk
If the /etc/system file is damaged and a saved copy of the /etc/system file is available, the system can be booted as follows:
1. Boot the system with the following command:
ok boot -a
2. Press Return to accept the default for all prompts except the following:
Chapter 3, Recovery from Boot Disk Failure 39

Recovery from Boot Failure
a. The default pathname for the kernel program, /kernel/unix, may not be appropriate for your system’s architecture. If this is so, enter the correct pathname, such as /platform/sun4u/kernel/unix, at the following prompt:
Enter filename [/kernel/unix]:/platform/sun4u/kernel/unix
b. Enter the name of the saved system file, such as /etc/system.save at the following prompt:
Name of system file [/etc/system]:/etc/system.save
c. Enter /pseudo/vxio@0:0 as the physical name of the root device at the following prompt:
Enter physical name of root device[...]:/pseudo/vxio@0:0
Copy of /etc/system is not Available on the Root Disk
If /etc/system is damaged or missing, and a saved copy of this file is not available on the root disk, the system cannot be booted with the VERITAS Volume Manager rootability feature turned on.
The following procedure assumes the device name of the root disk to be c0t0d0s2, and that the root (/) file system is on partition s0.
To boot the system without VERITAS Volume Manager rootability and restore the configuration files:
1. Boot the operating system into single-user mode from its installation CD-ROM using the following command at the boot prompt:
ok boot cdrom -s
2. Mount/dev/dsk/c0t0d0s0 on a suitable mount point such as /a or /mnt:
# mount /dev/dsk/c0t0d0s0 /a
3. If a backup copy of/etc/system is available, restore this as the file /a/etc/system. If a backup copy is not available, create a new /a/etc/system file. Ensure that /a/etc/system contains the following entries that are required by VxVM:
set vxio:vol_rootdev_is_volume=1forceload: drv/driver...forceload: drv/vxioforceload: drv/vxspecforceload: drv/vxdmp
40 VERITAS Volume Manager Troubleshooting Guide

Repairing Root or /usr File Systems on Mirrored Volumes
rootdev:/pseudo/vxio@0:0
Lines of the form forceload: drv/driver are used to forcibly load the drivers that are required for the root mirror disks. Example driver names are pci, sd, ssd, dad and ide. To find out the names of the drivers, use the ls command to obtain a long listing of the special files that correspond to the devices used for the root disk, for example:
# ls -al /dev/dsk/c0t0d0s2
This produces output similar to the following (with irrelevant detail removed):
lrwxrwxrwx ... /dev/dsk/c0t0d0s2 ->../../devices/pci@1f,0/pci@1/pci@1/SUNW,isptwo@4/sd@0,0:c
This example would require lines to force load both the pci and the sd drivers:
forceload: drv/pciforceload: drv/sd
4. Shut down and reboot the system from the same root partition on which the configuration files were restored.
Repairing Root or /usr File Systems on Mirrored VolumesIf the root or /usr file system is defined on a mirrored volume, errors in the partition that underlies one of the mirrors can result in data corruption or system errors at boot time (when VxVM is started and assumes that the mirrors are synchronized).
Two alternate workarounds exist for this situation:
◆ Mount one plex of the root or /usr file system, repair it, unmount it, and use dd to copy the fixed plex to all other plexes. This procedure is not recommended as it can be error prone.
◆ Restore the system from a valid backup tape. This procedure is described in the following section. It does not require the operating system to be re-installed from the base CD-ROM. It provides a simple, efficient, and reliable means of recovery when both the root disk and its mirror are damaged.
Recovering a Root Disk and Root Mirror from Backup TapeThis procedure assumes that you have:
◆ A listing of the partition table for the original root disk before you encapsulated it.
Chapter 3, Recovery from Boot Disk Failure 41

Repairing Root or /usr File Systems on Mirrored Volumes
◆ A current full backup of all the file systems on the original root disk that was under VERITAS Volume Manager control. If the root file system is of type ufs, you can back it up using the ufsdump command. See the ufsdump(1M) manual page for more information.
◆ A new boot disk installed to replace the original failed boot disk if the original boot disk was physically damaged.
This procedure requires the reinstallation of the root disk. To prevent the loss of data on disks not involved in the reinstallation, only involve the root disk in the reinstallation procedure.
Several of the automatic options for installation access disks other than the root disk without requiring confirmation from the administrator. Therefore, disconnect all other disks containing volumes from the system prior to starting this procedure. This will ensure that these disks are unaffected by the reinstallation. Reconnect the disks after completing the procedure.
The following procedure assumes the device name of the new root disk to be c0t0d0s2, and that you need to recover both the root (/) file system on partition s0, and the /usr file system on partition s6. If your system does not have a separate /usr file system, omit steps 7 and 8.
1. Boot the operating system into single-user mode from its installation CD-ROM using the following command at the boot prompt:
ok boot cdrom -s
2. Use the format command to create partitions on the new root disk (c0t0d0s2). These should be identical in size to those on the original root disk before encapsulation unless you are using this procedure to change their sizes. If you change the size of the partitions, ensure that they are large enough to store the data that is restored to them. See the format(1M) manual page for more information.
Note A maximum of five partitions may be created for file systems or swap areas as encapsulation reserves two partitions for VERITAS Volume Manager private and public regions.
3. Use the mkfs command to make new file systems on the root and usr partitions that you created in the previous step. For example, to make a ufs file system on the root partition, enter:
# mkfs -F ufs /dev/rdsk/c0t0d0s0
See the mkfs(1M) and mkfs_ufs(1M) manual pages for more information.
4. Mount/dev/dsk/c0t0d0s0 on a suitable mount point such as /a or /mnt:
42 VERITAS Volume Manager Troubleshooting Guide

Repairing Root or /usr File Systems on Mirrored Volumes
# mount /dev/dsk/c0t0d0s0 /a
5. Restore the root file system from tape into the /a directory hierarchy. For example, if you used ufsdump to back up the file system, use the ufsrestore command to restore it. See the ufsrestore(1M) manual page for more information.
6. Use the installboot command to install a bootblock device on /a.
7. Use the mkdir command to create a suitable mount point, such as /a/usr/, and mount /dev/dsk/c0t0d0s6 on it:
# mkdir -p /a/usr# mount /dev/dsk/c0t0d0s6 /a/usr
8. Restore the /usr file system from tape into the /a/usr directory hierarchy.
9. Disable startup of VxVM by modifying files in the restored root file system as follows:
a. Create the file /a/etc/vx/reconfig.d/state.d/install-db to prevent the configuration daemon, vxconfigd, from starting:
# touch /a/etc/vx/reconfig.d/state.d/install-db
b. Copy /a/etc/system to a backup file such as /a/etc/system.old.
c. Comment out the following lines from /a/etc/system by putting a * character in front of them:
set vxio:vol_rootdev_is_volume=1rootdev:/pseudo/vxio@0:0
These lines should then read:
* set vxio:vol_rootdev_is_volume=1* rootdev:/pseudo/vxio@0:0
d. Copy /a/etc/vfstab to a backup file such as /a/etc/vfstab.old.
e. Edit /a/etc/vfstab, and replace the volume device names (beginning with /dev/vx/dsk) for the / and /usr file system entries with their standard disk devices, /dev/dsk/c0t0d0s0 and /dev/dsk/c0t0d0s6. For example, replace the following lines:
/dev/vx/dsk/rootvol /dev/vx/rdsk/rootvol / ufs 1 no /dev/vx/dsk/usrvol /dev/vx/rdsk/usrvol /usr ufs 1 yes -
with this line:
Chapter 3, Recovery from Boot Disk Failure 43

Repairing Root or /usr File Systems on Mirrored Volumes
/dev/dsk/c0t0d0s0 /dev/rdsk/c0t0d0s0 / ufs 1 no /dev/dsk/c0t0d0s6 /dev/rdsk/c0t0d0s6 /usr ufs 1 yes -
f. Remove /a/dev/vx/dsk/bootdg and /a/dev/vx/rdsk/bootdg:
# rm /a/dev/vx/dsk/bootdg# rm /a/dev/vx/rdsk/bootdg
10. Shut down the system cleanly using the init 0 command, and reboot from the new root disk. The system comes up thinking that VxVM is not installed.
The next step in the procedure depends on whether there are root disk mirrors in the old boot disk group:
◆ If there are other disks in the old boot disk group that are not used as root disk mirrors, perform only step 11.
◆ If there are only root disk mirrors in the old boot disk group, perform only step 12.
11. If there are other disks in the old boot disk group that are not used as root disk mirrors, follow these steps to bring in the old boot disk group (excluding the boot disk, whichVxVM will interpret as having failed), and set up the new boot disk:
a. Remove files involved with the installation that are no longer needed:
# rm -r /etc/vx/reconfig.d/state.d/install-db
b. Start the VERITAS Volume Manager I/O daemons:
# vxiod set 10
c. Start the VERITAS Volume Manager configuration daemon in disabled mode:
# vxconfigd -m disable
d. Initialize the volboot file:
# vxdctl init
e. Enable vxconfigd:
# vxdctl enable
Steps a through e enable the old boot disk group excluding the root disk that VxVM interprets as failed.
f. Use the vxedit command (or the VERITAS Enterprise Administrator (VEA)) to remove the old root disk volumes and the root disk itself from VERITAS Volume Manager control.
44 VERITAS Volume Manager Troubleshooting Guide
Re-Adding and Replacing Boot Disks
g. Use the vxdiskadm command to encapsulate the new root disk and initialize any disks that are to serve as root disk mirrors. After the required reboot, mirror the root disk onto the root disk mirrors.
12. If there are only root disk mirrors in the old boot disk group:
a. Remove any volumes that were associated with the encapsulated root disk (for example, rootvol, swapvol and usrvol) from the /dev/vx/dsk/bootdg and /dev/vx/rdsk/bootdg directories.
b. Run the vxdiskadm command to encapsulate the new boot disk, and initialize the root disk mirrors.
c. After the required reboot, mirror the root disk onto the root disk mirrors.
Re-Adding and Replacing Boot Disks Data that is not critical for booting the system is only accessed by VxVM after the system is fully operational, so it does not have to be located in specific areas. VxVM can find it. However, boot-critical data must be placed in specific areas on the bootable disks for the boot process to find it.
On some systems, the controller-specific actions performed by the disk controller in the process and the system BIOS constrain the location of this critical data.
If a boot disk fails, one of the following procedures can be used to correct the problem:
◆ If the errors are transient or correctable, re-use the same disk. This is known as re-adding a disk. In some cases, reformatting a failed disk or performing a surface analysis to rebuild the alternate-sector mappings are sufficient to make a disk usable for re-addition.
◆ If the disk has failed completely, replace it.
The following sections describe how to re-add or replace a failed boot disk.
Re-Adding a Failed Boot Disk Re-adding a disk is the same procedure as replacing the disk, except that the same physical disk is used. Normally, a disk that needs to be re-added has been detached. This means that VxVM has detected the disk failure and has ceased to access the disk.
Chapter 3, Recovery from Boot Disk Failure 45

Re-Adding and Replacing Boot Disks
Note Your system may use a device name or path that differs from the examples. See “Disk Devices” in the “Administering Disks” chapter of the VERITAS Volume Manager Administrator’s Guide for more information on device names.
For example, consider a system that has two disks, disk01 and disk02, which are normally mapped into the system configuration during boot as disks c0t0d0s2 and c0t1d0s2, respectively. A failure has caused disk01 to become detached. This can be confirmed by listing the disks with the vxdisk utility with this command:
# vxdisk list
vxdisk displays this (example) list:
DEVICE TYPE DISK GROUP STATUSc0t0d0s2 sliced - - errorc0t1d0s2 sliced disk02 bootdg online- - disk01 bootdg failed was:c0t0d0s2
Note that the disk disk01 has no device associated with it, and has a status of failed with an indication of the device that it was detached from. It is also possible for the device (such as c0t0d0s2 in the example) not to be listed at all should the disk fail completely.
In some cases, the vxdisk list output can differ. For example, if the boot disk has uncorrectable failures associated with the UNIX partition table, a missing root partition cannot be corrected but there are no errors in the VERITAS Volume Manager private area. The vxdisk list command displays a listing such as this:
DEVICE TYPE DISK GROUP STATUSc0t0d0s2 sliced disk01 bootdg onlinec0t1d0s2 sliced disk02 bootdg online
However, because the error was not correctable, the disk is viewed as failed. In such a case, remove the association between the failing device and its disk name using the vxdiskadm “Remove a disk for replacement” menu item. (See the vxdiskadm (1M) manual page for more information.) You can then perform any special procedures to correct the problem, such as reformatting the device.
To re-add the disk, select the vxdiskadm “Replace a failed or removed disk” menu item to replace the disk, and specify the same device as the replacement. For the example above, you would replace disk01 with the device c0t0d0s2.
If hot-relocation is enabled when a mirrored boot disk fails, an attempt is made to create a new mirror and remove the failed subdisks from the failing boot disk. If a re-add succeeds after a successful hot-relocation, the root and other volumes affected by the disk failure no longer exist on the re-added disk. Run vxunreloc to move the hot-relocated subdisks back to the newly replaced disk.
46 VERITAS Volume Manager Troubleshooting Guide

Re-Adding and Replacing Boot Disks
Replacing a Failed Boot Disk The replacement disk must have at least as much storage capacity as was in use on the disk being replaced. It must be large enough to accommodate all subdisks of the original disk at their current disk offsets.
To estimate the size of the replacement disk, use this command:
# vxprint [-g diskgroup] -st -e ’sd_disk=”diskname”’
where diskname is the name of the disk that failed or of one of its mirrors.
The following is sample output from running this command:
# vxprint -g rtdg -st -e 'sd_disk="rtdg01"'Disk group: rtdg
SD NAME PLEX DISK DISKOFFS LENGTH [COL/]OFF DEVICE MODE...sd rtdg01-01 swapvol-01 rtdg01 0 1045296 0 c0t0d0 ENAsd rtdg01-02 rootvol-01 rtdg01 1045296 16751952 0 c0t0d0 ENA
From the resulting output, add the DISKOFFS and LENGTH values for the last subdisk listed for the disk. This size is in 512-byte sectors. Divide this number by 2 for the size in kilobytes. In this example, the DISKOFFS and LENGTH values for the subdisk rtdg01-02 are 1,045,296 and 16,751,952, so the disk size is (1,045,296 + 16,751,952)/2, which equals 8,898,624 kilobytes or approximately 8.5 gigabytes.
Note Disk sizes reported by manufacturers usually represent the unformatted capacity of disks. Also, most manufacturers use the terms megabyte and gigabyte to mean a million (1,000,000) and a billion (1,000,000,000) bytes respectively, rather than the usual meaning of 1,048,576 and1,073,741,824 bytes. For the above example, the actual size for the disk as quoted by the manufacturer was 9.6 gigabytes.
To replace a boot disk:
1. Boot the system from an alternate boot disk (see “Booting from Alternate Boot Disks” on page 32).
2. Remove the association between the failing device and its disk name using the “Remove a disk for replacement” function of vxdiskadm. (See the vxdiskadm (1M) manual page for more information.)
3. Shut down the system and replace the failed hardware.
4. After rebooting from the alternate boot disk, use the vxdiskadm “Replace a failed or removed disk” menu item to notify VxVM that you have replaced the failed disk.
Chapter 3, Recovery from Boot Disk Failure 47
Recovery by Reinstallation
Caution If the replacement disk was previously an encapsulated root disk under VxVM control, select to reorganize the disk when prompted. Otherwise, the disk is left with an invalid VTOC that renders the system unbootable. Ensure that you have made at least one valid copy of any existing data on the disk.
5. Use vxdiskadm to mirror the alternate boot disk to the replacement boot disk.
6. When the volumes on the boot disk have been restored, shut down the system, and test that the system can be booted from the replacement boot disk.
Recovery by ReinstallationReinstallation is necessary if all copies of your boot (root) disk are damaged, or if certain critical files are lost due to file system damage.
If these types of failures occur, attempt to preserve as much of the original VxVM configuration as possible. Any volumes that are not directly involved in the failure do not need to be reconfigured. You do not have to reconfigure any volumes that are preserved.
General Reinstallation Information This section describes procedures used to reinstall VxVM and preserve as much of the original configuration as possible after a failure.
Note System reinstallation destroys the contents of any disks that are used for reinstallation.
All VxVM-related information is removed during reinstallation. Data removed includes data in private areas on removed disks that contain the disk identifier and copies of the VxVM configuration. The removal of this information makes the disk unusable as a VM disk.
The system root disk is always involved in reinstallation. Other disks can also be involved. If the root disk was placed under VxVM control, that disk and any volumes or mirrors on it are lost during reinstallation. Any other disks that are involved in the reinstallation, or that are removed and replaced, can lose VxVM configuration data (including volumes and mirrors).
If a disk, including the root disk, is not under VxVM control prior to the failure, no VxVM configuration data is lost at reinstallation. For information on replacing disks, see “Removing and Replacing Disks” in the “Administering Disks” chapter of the VERITAS Volume Manager Administrator’s Guide.
48 VERITAS Volume Manager Troubleshooting Guide
Recovery by Reinstallation
Although it simplifies the recovery process after reinstallation, not having the root disk under VERITAS Volume Manager control increases the possibility of a reinstallation being necessary. By having the root disk under VxVM control and creating mirrors of the root disk contents, you can eliminate many of the problems that require system reinstallation.
When reinstallation is necessary, the only volumes saved are those that reside on, or have copies on, disks that are not directly involved with the failure and reinstallation. Any volumes on the root disk and other disks involved with the failure or reinstallation are lost during reinstallation. If backup copies of these volumes are available, the volumes can be restored after reinstallation.
Reinstalling the System and Recovering VxVMTo reinstall the system and recover the VERITAS Volume Manager configuration, use the following procedure. These steps are described in detail in the sections that follow:
1. “Prepare the System for Reinstallation” on page 49.
Replace any failed disks or other hardware, and detach any disks not involved in the reinstallation.
2. “Reinstall the Operating System” on page 50.
Reinstall the base system and any other unrelated Volume Manager packages.
3. “Reinstall VxVM” on page 50.
Add the Volume Manager package, but do not execute the vxinstall command.
4. “Recover the VERITAS Volume Manager Configuration” on page 50.
5. “Clean up the System Configuration” on page 52.
Restore any information in volumes affected by the failure or reinstallation, and recreate system volumes (rootvol, swapvol, usr, and other system volumes).
6. “Start up Hot-Relocation” on page 57.
Prepare the System for Reinstallation
To prevent the loss of data on disks not involved in the reinstallation, involve only the root disk and any other disks that contain portions of the operating system in the reinstallation procedure. For example, if the /usr file system is configured on a separate disk, leave that disk connected. Several of the automatic options for installation access disks other than the root disk without requiring confirmation from the administrator.
Chapter 3, Recovery from Boot Disk Failure 49

Recovery by Reinstallation
Disconnect all other disks containing volumes (or other data that should be preserved) prior to reinstalling the operating system. For example, if you originally installed the operating system with the home file system on a separate disk, disconnect that disk to ensure that the home file system remains intact.
Reinstall the Operating System
Once any failed or failing disks have been replaced and disks not involved with the reinstallation have been detached, reinstall the operating system as described in your operating system documentation. Install the operating system prior to installing VxVM.
Ensure that no disks other than the root disk are accessed in any way while the operating system installation is in progress. If anything is written on a disk other than the root disk, the VERITAS Volume Manager configuration on that disk may be destroyed.
Note During reinstallation, you can change the system’s host name (or host ID). It is recommended that you keep the existing host name, as this is assumed by the procedures in the following sections.
Reinstall VxVM
To reinstall VERITAS Volume Manager, follow these steps:
1. Load VERITAS Volume Manager from CD-ROM. Follow the instructions in the Installation Guide.
Caution To reconstruct the Volume Manager configuration that remains on the non-root disks, do not use vxinstall to initialize VxVM after loading the software from CD-ROM.
2. Use the vxlicinst command to install the VERITAS Volume Manager license key (see the vxlicinst(1) manual page for more information).
Recover the VERITAS Volume Manager Configuration
Once the VERITAS Volume Manager packages have been loaded, and you have installed the license for VxVM, recover the VERITAS Volume Manager configuration using the following procedure:
1. Touch /etc/vx/reconfig.d/state.d/install-db.
2. Shut down the system.
50 VERITAS Volume Manager Troubleshooting Guide

Recovery by Reinstallation
3. Reattach the disks that were removed from the system.
4. Reboot the system.
5. When the system comes up, bring the system to single-user mode using the following command:
# exec init S
6. When prompted, enter the password and press Return to continue.
7. Remove files involved with installation that were created when you loaded VxVM, but which are no longer needed, using the following command:
# rm -rf /etc/vx/reconfig.d/state.d/install-db
8. Start some VERITAS Volume Manager I/O daemons using the following command:
# vxiod set 10
9. Start the VERITAS Volume Manager configuration daemon, vxconfigd, in disabled mode using the following command:
# vxconfigd -m disable
10. Initialize the vxconfigd daemon using the following command:
# vxdctl init
11. Initialize the DMP subsystem using the following command:
# vxdctl initdmp
12. Enable vxconfigd using the following command:
# vxdctl enable
The configuration preserved on the disks not involved with the reinstallation has now been recovered. However, because the root disk has been reinstalled, it does not appear to VxVM as a VM disk. The configuration of the preserved disks does not include the root disk as part of the VxVM configuration.
If the root disk of your system and any other disks involved in the reinstallation were not under VxVM control at the time of failure and reinstallation, then the reconfiguration is complete at this point. For information on replacing disks, see “Removing and Replacing
Chapter 3, Recovery from Boot Disk Failure 51

Recovery by Reinstallation
Disks” in the “Administering Disks” chapter of the VERITAS Volume Manager Administrator’s Guide. There are several methods available to replace a disk; choose the method that you prefer.
If the root disk (or another disk) was involved with the reinstallation, any volumes or mirrors on that disk (or other disks no longer attached to the system) are now inaccessible. If a volume had only one plex contained on a disk that was reinstalled, removed, or replaced, then the data in that volume is lost and must be restored from backup.
Clean up the System Configuration
To clean up the configuration of your system after reinstallation of VxVM, you must address the following issues:
◆ Clean up Rootability
◆ Clean up Volumes
◆ Clean up Disk Configuration
◆ Reconfigure Rootability
◆ Final Volume Reconfiguration
Clean up Rootability
To begin the cleanup of the VERITAS Volume Manager configuration, remove any volumes associated with rootability. This must be done if the root disk (and any other disk involved in the system boot process) was under VERITAS Volume Manager control. The volumes to remove are:
◆ rootvol, that contains the root file system
◆ swapvol, that contains the swap area
◆ (on some systems) standvol, that contains the stand file system
◆ usr, that contains the /usr file system
To remove the root volume, use the vxedit command:
# vxedit -fr rm rootvol
Repeat this command, using swapvol and usr (standvol) in place of rootvol, to remove the swap, stand, and usr volumes.
52 VERITAS Volume Manager Troubleshooting Guide

Recovery by Reinstallation
Clean up Volumes
After completing the rootability cleanup, you must determine which volumes need to be restored from backup. The volumes to be restored include those with all mirrors (all copies of the volume) residing on disks that have been reinstalled or removed. These volumes are invalid and must be removed, recreated, and restored from backup. If only some mirrors of a volume exist on reinstalled or removed disks, these mirrors must be removed. The mirrors can be re-added later.
To restore the volumes, perform these steps:
1. Establish which VM disks have been removed or reinstalled using the following command:
# vxdisk list
This displays a list of system disk devices and the status of these devices. For example, for a reinstalled system with three disks and a reinstalled root disk, the output of the vxdisk list command is similar to this:
DEVICE TYPE DISK GROUP STATUSc0t0d0s2 sliced - - errorc0t1d0s2 sliced disk02 mydg onlinec0t2d0s2 sliced disk03 mydg online- - disk01 mydg failed was:c0t0d0s2
The display shows that the reinstalled root device, c0t0d0s2, is not associated with a VM disk and is marked with a status of error. The disks disk02 and disk03 were not involved in the reinstallation and are recognized by VxVM and associated with their devices (c0t1d0s2 and c0t2d0s2). The former disk01, which was the VM disk associated with the replaced disk device, is no longer associated with the device (c0t0d0s2).
If other disks (with volumes or mirrors on them) had been removed or replaced during reinstallation, those disks would also have a disk device listed in error state and a VM disk listed as not associated with a device.
2. Once you know which disks have been removed or replaced, locate all the mirrors on failed disks using the following command:
# vxprint [-g diskgroup] -sF “%vname” -e’sd_disk = “disk”’
where disk is the access name of a disk with a failed status. Be sure to enclose the disk name in quotes in the command. Otherwise, the command returns an error message. The vxprint command returns a list of volumes that have mirrors on the failed disk. Repeat this command for every disk with a failed status.
Chapter 3, Recovery from Boot Disk Failure 53

Recovery by Reinstallation
The following is sample output from running this command:
# vxprint -g mydg -sF “%vname” -e’sd_disk = "disk01"'v01
3. Check the status of each volume and print volume information using the following command:
# vxprint -th volume
where volume is the name of the volume to be examined. The vxprint command displays the status of the volume, its plexes, and the portions of disks that make up those plexes. For example, a volume named v01 with only one plex resides on the reinstalled disk named disk01. The vxprint -th v01 command produces the following output:
V NAME RVG/VSET/COKSTATESTATE LENGTH READPOL PREFPLEXUTYPEPL NAME VOLUME KSTATE STATE LENGTH LAYOUT NCOL/WIDMODESD NAME PLEX DISK DISKOFFSLENGTH [COL/]OFF DEVICE MODE
v v01 - DISABLEDACTIVE 24000 SELECT - fsgenpl v01-01 v01 DISABLEDNODEVICE24000 CONCAT - RWsd disk01-06 v01-01 disk01 245759 24000 0 c1t5d1 ENA
The only plex of the volume is shown in the line beginning with pl. The STATE field for the plex named v01-01 is NODEVICE. The plex has space on a disk that has been replaced, removed, or reinstalled. The plex is no longer valid and must be removed.
4. Because v01-01 was the only plex of the volume, the volume contents are irrecoverable except by restoring the volume from a backup. The volume must also be removed. If a backup copy of the volume exists, you can restore the volume later. Keep a record of the volume name and its length, as you will need it for the backup procedure.
Remove irrecoverable volumes (such as v01) using the following command:
# vxedit -r rm v01
5. It is possible that only part of a plex is located on the failed disk. If the volume has a striped plex associated with it, the volume is divided between several disks. For example, the volume named v02 has one striped plex striped across three disks, one of which is the reinstalled disk disk01. The vxprint -th v02 command produces the following output:
54 VERITAS Volume Manager Troubleshooting Guide

Recovery by Reinstallation
V NAME RVG/VSET/COKSTATESTATE LENGTH READPOL PREFPLEXUTYPEPL NAME VOLUME KSTATE STATE LENGTH LAYOUT NCOL/WIDMODESD NAME PLEX DISK DISKOFFSLENGTH [COL/]OFF DEVICE MODE
v v02 - DISABLEDACTIVE 30720 SELECT v02-01 fsgenpl v02-01 v02 DISABLEDNODEVICE30720 STRIPE 3/128 RWsd disk02-02v02-01 disk01 424144 10240 0/0 c1t5d2 ENAsd disk01-05v02-01 disk01 620544 10240 1/0 c1t5d3 DISsd disk03-01v02-01 disk03 620544 10240 2/0 c1t5d4 ENA
The display shows three disks, across which the plex v02-01 is striped (the lines starting with sd represent the stripes). One of the stripe areas is located on a failed disk. This disk is no longer valid, so the plex named v02-01 has a state of NODEVICE. Since this is the only plex of the volume, the volume is invalid and must be removed. If a copy of v02 exists on the backup media, it can be restored later. Keep a record of the volume name and length of any volume you intend to restore from backup.
Remove invalid volumes (such as v02) using the following command:
# vxedit -r rm v02
6. A volume that has one mirror on a failed disk can also have other mirrors on disks that are still valid. In this case, the volume does not need to be restored from backup, since the data is still valid on the valid disks.
The output of the vxprint -th command for a volume with one plex on a failed disk (disk01) and another plex on a valid disk (disk02) is similar to the following:
V NAME RVG/VSET/COKSTATESTATE LENGTH READPOL PREFPLEX UTYPEPL NAME VOLUME KSTATE STATE LENGTH LAYOUT NCOL/WIDMODESD NAME PLEX DISK DISKOFFSLENGTH [COL/]OFFDEVICE MODE
v v03 - DISABLEDACTIVE 0720 SELECT - fsgenpl v03-01 v03 DISABLEDACTIVE 30720 CONCAT - RWsd disk02-01 v03-01 disk01 620544 30720 0 c1t5d5 ENApl v03-02 v03 DISABLEDNODEVICE30720 CONCAT - RWsd disk01-04 v03-02 disk03 262144 30720 0 c1t5d6 DIS
This volume has two plexes, v03-01 and v03-02. The first plex (v03-01) does not use any space on the invalid disk, so it can still be used. The second plex (v03-02) uses space on invalid disk disk01 and has a state of NODEVICE. Plex v03-02 must be removed. However, the volume still has one valid plex containing valid data. If the volume needs to be mirrored, another plex can be added later. Note the name of the volume to create another plex later.
To remove an invalid plex, use the vxplex command to dissociate and then remove the plex from the volume. For example, to dissociate and remove the plex v03-02, use the following command:
# vxplex -o rm dis v03-02
Chapter 3, Recovery from Boot Disk Failure 55

Recovery by Reinstallation
7. Once all the volumes have been cleaned up, clean up the disk configuration as described in the section, “Clean up Disk Configuration” on page 56.
Clean up Disk Configuration
Once all invalid volumes and plexes have been removed, the disk configuration can be cleaned up. Each disk that was removed, reinstalled, or replaced (as determined from the output of the vxdisk list command) must be removed from the configuration.
To remove the disk, use the vxdg command. To remove the failed disk disk01, use the following command:
# vxdg rmdisk disk01
If the vxdg command returns an error message, some invalid mirrors exist. Repeat the processes described in “Clean up Volumes” on page 53 until all invalid volumes and mirrors are removed.
Reconfigure Rootability
Once all the invalid disks have been removed, the replacement or reinstalled disks can be added to VERITAS Volume Manager control. If the root disk was originally under VERITAS Volume Manager control or you now wish to put the root disk under VERITAS Volume Manager control, add this disk first.
To add the root disk to VERITAS Volume Manager control, use the vxdiskadm command:
# vxdiskadm
From the vxdiskadm main menu, select menu item 2 (Encapsulate a disk). Follow the instructions and encapsulate the root disk for the system.
When the encapsulation is complete, reboot the system to multi-user mode.
Final Volume Reconfiguration
Once the root disk is encapsulated, any other disks that were replaced should be added using the vxdiskadm command. If the disks were reinstalled during the operating system reinstallation, they should be encapsulated; otherwise, they can be added.
Once all the disks have been added to the system, any volumes that were completely removed as part of the configuration cleanup can be recreated and their contents restored from backup. The volume recreation can be done by using the vxassist command or the graphical user interface.
For example, to recreate the volumes v01 and v02, use the following command:
# vxassist make v01 24000 # vxassist make v02 30720 layout=stripe nstripe=3
56 VERITAS Volume Manager Troubleshooting Guide

Recovery by Reinstallation
Once the volumes are created, they can be restored from backup using normal backup/restore procedures.
Recreate any plexes for volumes that had plexes removed as part of the volume cleanup. To replace the plex removed from volume v03, use the following command:
# vxassist mirror v03
Once you have restored the volumes and plexes lost during reinstallation, recovery is complete and your system is configured as it was prior to the failure.
The final step is to start up hot-relocation, if this is required.
Start up Hot-Relocation
To start up the hot-relocation service, either reboot the system or manually start the relocation watch daemon, vxrelocd (this also starts the vxnotify process).
Note Hot-relocation should only be started when you are sure that it will not interfere with other reconfiguration procedures.
See “Modifying the Behavior of Hot-Relocation” in the “Administering Hot-Relocation” chapter of the VERITAS Volume Manager Administrator’s Guide for more information about running vxrelocd and about modifying its behavior.
To determine if hot-relocation has been started, use the following command to search for its entry in the process table:
# ps -ef | grep vxrelocd
Chapter 3, Recovery from Boot Disk Failure 57
Recovery by Reinstallation
58 VERITAS Volume Manager Troubleshooting Guide
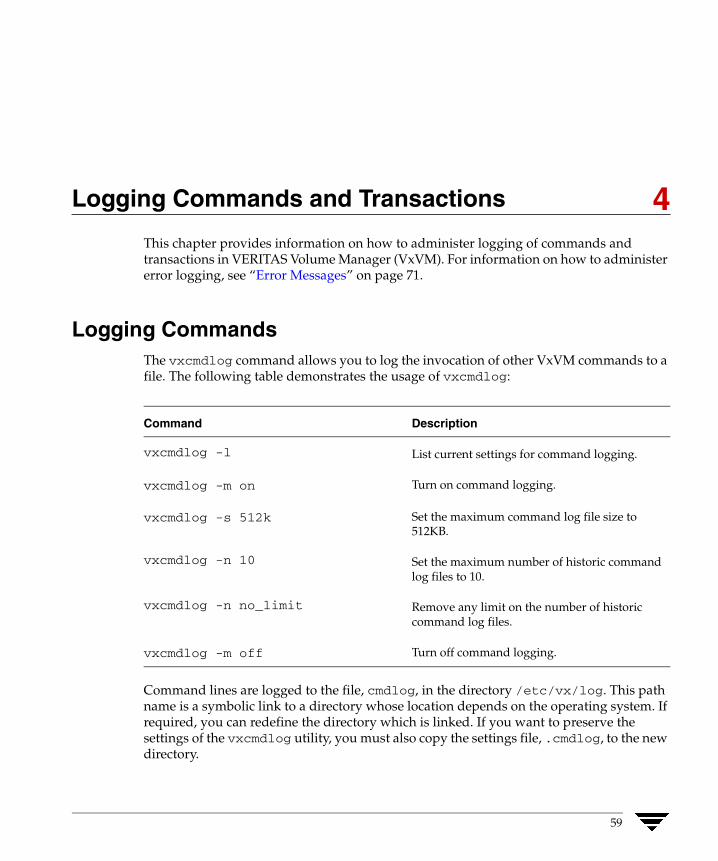
Logging Commands and Transactions
4 This chapter provides information on how to administer logging of commands and transactions in VERITAS Volume Manager (VxVM). For information on how to administer error logging, see “Error Messages” on page 71.Logging CommandsThe vxcmdlog command allows you to log the invocation of other VxVM commands to a file. The following table demonstrates the usage of vxcmdlog:
Command Description
vxcmdlog -l
vxcmdlog -m on
vxcmdlog -s 512k
vxcmdlog -n 10
vxcmdlog -n no_limit
vxcmdlog -m off
List current settings for command logging.
Turn on command logging.
Set the maximum command log file size to 512KB.
Set the maximum number of historic command log files to 10.
Remove any limit on the number of historic command log files.
Turn off command logging.
Command lines are logged to the file, cmdlog, in the directory /etc/vx/log. This path name is a symbolic link to a directory whose location depends on the operating system. If required, you can redefine the directory which is linked. If you want to preserve the settings of the vxcmdlog utility, you must also copy the settings file, .cmdlog, to the new directory.
59

Logging Commands
Note The .cmdlog file is a binary and should not be edited.
The size of the command log is checked after an entry has been written so the actual size may be slightly larger than that specified. When the log reaches a maximum size, the current command log file, cmdlog, is renamed as the next available historic log file, cmdlog.number, where number is an integer from 1 up to the maximum number of historic log files that is currently defined, and a new current log file is created.
A limited number of historic log files is preserved to avoid filling up the file system. If the maximum number of historic log files has been reached, the oldest historic log file is removed, and the current log file is renamed as that file.
Each log file contains a header that records the host name, host ID, and the date and time that the log was created.
The following are sample entries from a command log file:
# 0, 2329, Wed Feb 12 21:19:31 2003/usr/sbin/vxdctl mode
# 17051, 2635, Wed Feb 12 21:19:33 2003/usr/sbin/vxdisk -q -o alldgs list
# 0, 2722, Wed Feb 12 21:19:34 2003/etc/vx/diag.d/vxprivutil dumpconfig /dev/vx/rdmp/Disk_4s2
# 26924, 3001, Thu Feb 13 19:30:57 2003/usr/sbin/vxdisk list Disk_1
Each entry usually contains a client ID that identifies the command connection to the vxconfigd daemon, the process ID of the command that is running, a time stamp, and the command line including any arguments.
If the client ID is 0, as in the third entry shown here, this means that the command did not open a connection to vxconfigd.
Note The client ID is the same as that recorded for the corresponding transactions in the transactions log. See “Logging Transactions” on page 61 and “Associating Command and Transaction Logs” on page 63 for more information.
Most command scripts are not logged, but the command binaries that they call are logged. Exceptions are the vxdisksetup, vxinstall, and vxdiskunsetup scripts, which are logged.
If there is an error reading from the settings file, command logging switches to its built-in default settings. This may mean, for example, that logging remains enabled after being disabled using vxcmdlog -m off command. If this happens, use the vxcmdlog utility to recreate the settings file, or restore the file from a backup.
See the vxcmdlog(1M) manual page for more information about the vxcmdlog utility.
60 VERITAS Volume Manager Troubleshooting Guide

Logging Transactions
Logging TransactionsThe vxtranslog command allows you to log VxVM transactions to a file. The following table demonstrates the usage of vxtranslog:
Command Description
vxtranslog -l
vxtranslog -m on
vxtranslog -s 512k
vxtranslog -n 10
vxtranslog -n no_limit
vxtranslog -q on
vxtranslog -q off
vxtranslog -m off
List current settings for transaction logging.
Turn on transaction logging.
Set the maximum transaction log file size to 512KB.
Set the maximum number of historic transaction log files to 10.
Remove any limit on the number of historic transaction log files.
Turn on query logging.
Turn off query logging.
Turn off transaction logging.
Transactions are logged to the file, translog, in the directory /etc/vx/log. This path name is a symbolic link to a directory whose location depends on the operating system. If required, you can redefine the directory which is linked. If you want to preserve the settings of the vxtranslog utility, you must also copy the settings file, .translog, to the new directory.
Note The .translog file is a binary and should not be edited.
The size of the transaction log is checked after an entry has been written so the actual size may be slightly larger than that specified. When the log reaches a maximum size, the current transaction log file, translog, is renamed as the next available historic log file, translog.number, where number is an integer from 1 up to the maximum number of historic log files that is currently defined, and a new current log file is created.
A limited number of historic log files is preserved to avoid filling up the file system. If the maximum number of historic log files has been reached, the oldest historic log file is removed, and the current log file is renamed as that file.
Chapter 4, Logging Commands and Transactions 61

Logging Transactions
Each log file contains a header that records the host name, host ID, and the date and time that the log was created.
The following are sample entries from a transaction log file:
Thu Feb 13 19:30:57 2003Clid = 26924, PID = 3001, Part = 0, Status = 0, Abort Reason = 0
DA_GET SENA0_1DISK_GET_ATTRS SENA0_1DISK_DISK_OP SENA0_1 8DEVNO_GET SENA0_1DANAME_GET 0x1d801d8 0x1d801a0GET_ARRAYNAME SENA 50800200000e78b8CTLR_PTOLNAME /pci@1f,4000/pci@5/SUNW,qlc@4/fp@0,0GET_ARRAYNAME SENA 50800200000e78b8CTLR_PTOLNAME /pci@1f,4000/pci@5/SUNW,qlc@5/fp@0,0DISCONNECT <no request data>
The first line of each log entry is the time stamp of the transaction. The Clid field corresponds to the client ID for the connection that the command opened to vxconfigd. The PID field shows the process ID of the utility that is requesting the operation. The Status and Abort Reason fields contain error codes if the transaction does not complete normally. The remainder of the record shows the data that was used in processing the transaction.
Note The client ID is the same as that recorded for the corresponding command line in the command log. See “Logging Commands” on page 59 and “Associating Command and Transaction Logs” on page 63 for more information.
If there is an error reading from the settings file, transaction logging switches to its built-in default settings. This may mean, for example, that logging remains enabled after being disabled using vxtranslog -m off command. If this happens, use the vxtranslog utility to recreate the settings file, or restore the file from a backup.
62 VERITAS Volume Manager Troubleshooting Guide

Associating Command and Transaction Logs
Associating Command and Transaction LogsThe Client and process IDs that are recorded for every request and command assist you in correlating entries in the command and transaction logs. To find out which command issued a particular request in transaction log, use a command such as the following to search for the process ID and the client ID in the command log:
# egrep -n PID cmdlog | egrep Clid
In this example, the following request was recorded in the transaction log:
Wed Feb 12 21:19:36 2003Clid = 8309, PID = 2778, Part = 0, Status = 0, Abort Reason = 0
DG_IMPORT foodgDG_IMPORT foodgDISCONNECT <no request data>
To locate the utility that issued this request, the command would be:
# egrep -n 2778 cmdlog | egrep 83097310:# 8309, 2778, Wed Feb 12 21:19:36 2003
The output from the example shows a match at line 7310 in the command log. Examining lines 7310 and 7311 in the command log indicates that the vxdg import command was run on the foodg disk group:
# sed -e ’7310,7311!d’ cmdlog# 8309, 2778, Wed Feb 12 21:19:36 2003 7311/usr/sbin/vxdg -m import foodg
Note If there are multiple matches for the combination of the client and process ID, you can determine the correct match by examining the time stamp.
If a utility opens a conditional connection to vxconfigd, its client ID is shown as zero in the command log, and as a non-zero value in the transaction log. You can use the process ID and time stamp to relate the log entries in such cases.
Chapter 4, Logging Commands and Transactions 63

Associating Command and Transaction Logs
64 VERITAS Volume Manager Troubleshooting Guide

Backing Up and Restoring Disk Group Configurations
5Disk group configuration backup and restoration allows you to backup and restore all configuration data for VERITAS Volume Manager (VxVM) disk groups, and for VxVM objects such as volumes that are configured within the disk groups. Using this feature, you can recover from corruption of a disk group’s configuration that is stored as metadata in the private region of a VM disk. After the disk group configuration has been restored, and the volume enabled, the user data in the public region is available again without the need to restore this from backup media.
Caution The backup and restore utilities act only on VxVM configuration data. They do not back up or restore any user or application data that is contained within volumes or other VxVM objects. If you use vxdiskunsetup and vxdisksetup on a disk, and specify attributes that differ from those in the configuration backup, this may corrupt the public region and any user data therein.
The vxconfigbackupd daemon monitors changes to the VxVM configuration and automatically records any configuration changes that occur. Two utilities, vxconfigbackup and vxconfigrestore, are provided for backing up and restoring a VxVM configuration for a disk group.
When importing a disk group, any of the following errors indicate that the disk group configuration and/or disk private region headers have become corrupted:
VxVM vxconfigd ERROR V-5-1-569 Disk group group,Disk disk:Cannot auto-import group: reason
The reason for the error is usually one of the following:
Configuration records are inconsistentDisk group has no valid configuration copiesDuplicate record in configurationErrors in some configuration copiesFormat error in configuration copyInvalid block numberInvalid magic number
65

Backing Up a Disk Group Configuration
If VxVM cannot update a disk group’s configuration because of disk errors, it disables the disk group and displays the following error:
VxVM vxconfigd ERROR V-5-1-123 Disk group group: Disabled by errors
If such errors occur, you can restore the disk group configuration from a backup after you have corrected any underlying problem such as failed or disconnected hardware.
Configuration data from a backup allows you to reinstall the private region headers of VxVM disks in a disk group whose headers have become damaged, to recreate a corrupted disk group configuration, or to recreate a disk group and the VxVM objects within it. You can also use the configuration data to recreate a disk group on another system if the original system is not available.
Note Restoration of a disk group configuration requires that the same physical disks are used as were configured in the disk group when the backup was taken.
The following sections describe how to back up and restore disk group configurations.
Backing Up a Disk Group Configuration VxVM uses the disk group configuration daemon to monitor the configuration of disk groups, and to back up the configuration whenever it is changed. By default, the five most recent backups are preserved. If required, you can also back up a disk group configuration by running the vxconfigbackup command.
The following table describes the files that record disk group configuration information:
Backup Files Description
/etc/vx/cbr/bk/diskgroup.dgid/dgid.dginfo Disk group information.
/etc/vx/cbr/bk/diskgroup.dgid/dgid .diskinfo Disk attributes.
/etc/vx/cbr/bk/diskgroup.dgid/dgid .binconfig Binary configuration copy.
/etc/vx/cbr/bk/diskgroup.dgid/dgid.cfgrec Configuration records in vxprint -m format.
Here diskgroup is the name of the disk group, and dgid is the disk group ID. If a disk group is to be recreated on another system, copy these files to that system.
Caution Take care that you do not overwrite any files on the target system that are used by a disk group on that system.
66 VERITAS Volume Manager Troubleshooting Guide
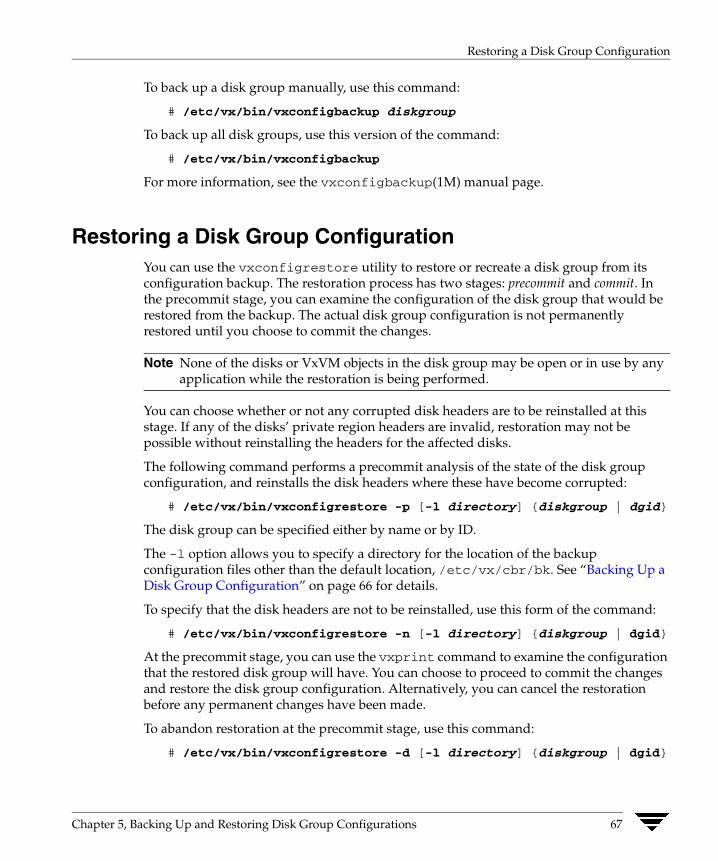
Restoring a Disk Group Configuration
To back up a disk group manually, use this command:
# /etc/vx/bin/vxconfigbackup diskgroup
To back up all disk groups, use this version of the command:
# /etc/vx/bin/vxconfigbackup
For more information, see the vxconfigbackup(1M) manual page.
Restoring a Disk Group Configuration You can use the vxconfigrestore utility to restore or recreate a disk group from its configuration backup. The restoration process has two stages: precommit and commit. In the precommit stage, you can examine the configuration of the disk group that would be restored from the backup. The actual disk group configuration is not permanently restored until you choose to commit the changes.
Note None of the disks or VxVM objects in the disk group may be open or in use by any application while the restoration is being performed.
You can choose whether or not any corrupted disk headers are to be reinstalled at this stage. If any of the disks’ private region headers are invalid, restoration may not be possible without reinstalling the headers for the affected disks.
The following command performs a precommit analysis of the state of the disk group configuration, and reinstalls the disk headers where these have become corrupted:
# /etc/vx/bin/vxconfigrestore -p [-l directory] {diskgroup | dgid}
The disk group can be specified either by name or by ID.
The -l option allows you to specify a directory for the location of the backup configuration files other than the default location, /etc/vx/cbr/bk. See “Backing Up a Disk Group Configuration” on page 66 for details.
To specify that the disk headers are not to be reinstalled, use this form of the command:
# /etc/vx/bin/vxconfigrestore -n [-l directory] {diskgroup | dgid}
At the precommit stage, you can use the vxprint command to examine the configuration that the restored disk group will have. You can choose to proceed to commit the changes and restore the disk group configuration. Alternatively, you can cancel the restoration before any permanent changes have been made.
To abandon restoration at the precommit stage, use this command:
# /etc/vx/bin/vxconfigrestore -d [-l directory] {diskgroup | dgid}
Chapter 5, Backing Up and Restoring Disk Group Configurations 67

Restoring a Disk Group Configuration
To commit the changes that are required to restore the disk group configuration, use the following command:
# /etc/vx/bin/vxconfigrestore -c [-l directory] {diskgroup | dgid}
If no disk headers are reinstalled, the configuration copies in the disks’ private regions are updated from the latest binary copy of the configuration that was saved for the disk group.
If any of the disk headers are reinstalled, a saved copy of the disks’ attributes is used to recreate their private and public regions. These disks are also assigned new disk IDs. The VxVM objects within the disk group are then recreated using the backup configuration records for the disk group. This process also has the effect of creating new configuration copies in the disk group.
Volumes are synchronized in the background. For large volume configurations, it may take some time to perform the synchronization. You can use the vxtask -l list command to monitor the progress of this operation.
Note Disks that are in use or whose layout has been changed are excluded from the restoration process.
For more information, see the vxconfigrestore(1M) manual page.
Resolving Conflicting Backups for a Disk Group In some circumstances where disks have been replaced on a system, there may exist several conflicting backups for a disk group. In this case, you see a message similar to the following from the vxconfigrestore command:
VxVM vxconfigrestore ERROR V-5-1-6012 There are two backups thathave the same diskgroup name with different diskgroup id : 1047336696.19.xxx.veritas.com1049135264.31.xxx.veritas.com
The solution is to specify the disk group by its ID rather than by its name to perform the restoration. The backup file, /etc/vx/cbr/bk/diskgroup. dgid/ dgid.dginfo, contains a timestamp that records when the backup was taken.
68 VERITAS Volume Manager Troubleshooting Guide

Restoring a Disk Group Configuration
The following is a sample extract from such a backup file that shows the timestamp and disk group ID information:
TIMESTAMPTue Apr 15 23:27:01 PDT 2003...DISK_GROUP_CONFIGURATIONGroup: mydgdgid: 1047336696.19.xxx.veritas.com...
Use the timestamp information to decide which backup contains the relevant information, and use the vxconfigrestore command to restore the configuration by specifying the disk group ID instead of the disk group name.
Chapter 5, Backing Up and Restoring Disk Group Configurations 69
Restoring a Disk Group Configuration
70 VERITAS Volume Manager Troubleshooting Guide

Error Messages
6 This chapter provides information on error messages associated with the VERITAS Volume Manager (VxVM) configuration daemon (vxconfigd), the kernel, and other utilities. It covers most informational, failure, and error messages displayed on the console by vxconfigd, and by the VERITAS Volume Manager kernel driver, vxio. These include some errors that are infrequently encountered and difficult to troubleshoot.Note Some error messages described here may not apply to your system.
Clarifications are included to elaborate on the situation or problem that generated a particular message. Wherever possible, a recovery procedure (Action) is provided to help you to locate and correct the problem.
You may find it useful to consult the VxVM command and transaction logs to understand the context in which an error occurred. See “Logging Commands and Transactions” on page 59 for more information.
Logging Error Messages VxVM provides the option of logging console output to a file. This logging is useful in that any messages output just before a system crash will be available in the log file (presuming that the crash does not result in file system corruption). vxconfigd controls whether such logging is turned on or off. If enabled, the default log file is /var/vxvm/vxconfigd.log.
vxconfigd also supports the use of syslog to log all of its regular console messages. When this is enabled, all console output is directed through the syslog interface.
syslog and log file logging can be used together to provide reliable logging to a private log file, along with distributed logging through syslogd.
Note syslog logging is enabled by default. Log file logging is disabled by default.
71

Configuring Logging in the Startup Script
To enable logging of console output to the file /var/vxvm/vxconfigd.log, edit the startup script for vxconfigd as described in “Configuring Logging in the Startup Script,” or invoke vxconfigd under the C locale as shown here:
# vxconfigd [-x [1-9]] -x log
There are 9 possible levels of debug logging; 1 provides the least detail, and 9 the most.
To enable syslog logging of console output, specify the option -x syslog to vxconfigd as shown here:
# vxconfigd [-x [1-9]] -x syslog
Messages with a priority higher than Debug are written to /var/adm/syslog/syslog.log, and all other messages are written to /var/vxvm/vxconfigd.log.If you do not specify a debug level, only Error, Fatal Error, Warning, and Notice messages are logged. Debug messages are not logged.
Configuring Logging in the Startup Script To enable log file or syslog logging, you can edit the following portion of the /etc/init.d/vxvm-sysboot script that starts the VxVM configuration daemon, vxconfigd:
# comment-out or uncomment any of the following lines to enable or# disable the corresponding feature in vxconfigd.
opts=”$opts -x syslog” # use syslog for console messages#opts=”$opts -x log” # messages to vxconfigd.log#opts=”$opts -x logfile=/foo/bar” # specify an alternate log file#opts=”$opts -x timestamp” # timestamp console messages
# To turn on debugging console output, uncomment the following line.# The debug level can be set higher for more output. The highest# debug level is 9.
#debug=1 # enable debugging console output
Comment or uncomment the lines corresponding to the features that you want to be disabled or enabled at startup. For example, the opts=”$opts -x syslog” string is usually uncommented so that vxconfigd uses syslog logging by default. Inserting a # character at the beginning of the line turns off syslog logging for vxconfigd.
72 VERITAS Volume Manager Troubleshooting Guide

Understanding Messages
Note By default, vxconfigd is started at boot time with the -x syslog option. This redirects vxconfigd console messages to syslog. If you want to retain this behavior when restarting vxconfigd from the command line, include the -x syslog argument, as restarting vxconfigd does not preserve the option settings with which it was previously running. Similarly, any VERITAS Volume Manager operations that require vxconfigd to be restarted may not retain the behavior that was previously specified by option settings.
For more information on logging options for vxconfigd, refer to the vxconfigd(1M) manual page.
Understanding Messages VxVM is fault-tolerant and resolves most problems without system administrator intervention. If the configuration daemon (vxconfigd) recognizes the actions that are necessary, it queues up the transactions that are required. VxVM provides atomic changes of system configurations; either a transaction completes fully, or the system is left in the same state as though the transaction was never attempted. If vxconfigd is unable to recognize and fix system problems, the system administrator needs to handle the task of problem solving using the diagnostic messages that are returned from the software. The following sections describe error message numbers and the types of error message that may be seen, and provide a list of the more common errors, a detailed description of the likely cause of the problem together with suggestions for any actions that can be taken.
Messages have the following generic format:
product component severity message_number message_text
For VERITAS Volume Manager, the product is set to VxVM. The component can be the name of a kernel module or driver such as vxdmp, a configuration daemon such as vxconfigd, or a command such as vxassist.
Messages are divided into the following types of severity in decreasing order of impact on the system:
◆ PANIC
A panic is a severe event as it halts a system during its normal operation. A panic message from the kernel module or from a device driver indicates a hardware problem or software inconsistency so severe that the system cannot continue. The operating system may also provide a dump of the CPU register contents and a stack trace to aid in identifying the cause of the panic. The following is an example of such a message:
VxVM vxio PANIC V-5-0-239 Object association depth overflow
Chapter 6, Error Messages 73

Understanding Messages
Note For full information about saving system crash information, see the Solaris System Administation Guide.
◆ FATAL ERROR
A fatal error message from a configuration daemon, such as vxconfigd, indicates a severe problem with the operation of VxVM that prevents it from running. The following is an example of such a message:
VxVM vxconfigd FATAL ERROR V-5-0-591 Disk group bootdg: Inconsistency -- Not loaded into kernel
◆ ERROR
An error message from a command indicates that the requested operation cannot be performed correctly. The following is an example of such a message:
VxVM vxassist ERROR V-5-1-5150 Insufficient number of activesnapshot mirrors in snapshot_volume.
◆ WARNING
A warning message from the kernel indicates that a non-critical operation has failed, possibly because some resource is not available or the operation is not possible. The following is an example of such a message:
VxVM vxio WARNING V-5-0-55 Cannot find device number for boot_path
◆ NOTICE
A notice message indicates that an error has occurred that should be monitored. Shutting down the system is unnecessary, although you may need to take action to remedy the fault at a later date. The following is an example of such a message:
VxVM vxio NOTICE V-5-0-252 read error on object subdisk of mirror plex in volume volume (start offset, length length) corrected.
◆ INFO
An informational message does not indicate an error, and requires no action.
The unique message number consists of an alpha-numeric string that begins with the letter “V”. For example, in the message number, V-5-1-3141, “V” indicates that this is a VERITAS product error message, the first numeric field (5) encodes the product (in this case, VxVM), the second field (1) represents information about the product component, and the third field (3141) is the message index. The text of the error message follows the message number.
74 VERITAS Volume Manager Troubleshooting Guide
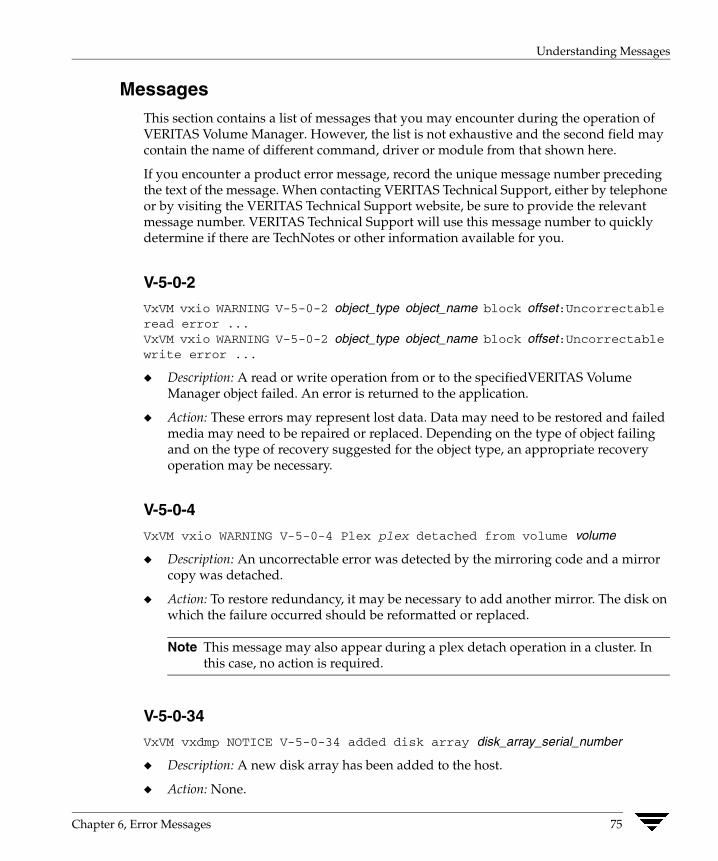
Understanding Messages
Messages This section contains a list of messages that you may encounter during the operation of VERITAS Volume Manager. However, the list is not exhaustive and the second field may contain the name of different command, driver or module from that shown here.
If you encounter a product error message, record the unique message number preceding the text of the message. When contacting VERITAS Technical Support, either by telephone or by visiting the VERITAS Technical Support website, be sure to provide the relevant message number. VERITAS Technical Support will use this message number to quickly determine if there are TechNotes or other information available for you.
V-5-0-2
VxVM vxio WARNING V-5-0-2 object_type object_name block offset:Uncorrectable read error ...VxVM vxio WARNING V-5-0-2 object_type object_name block offset:Uncorrectable write error ...
◆ Description: A read or write operation from or to the specifiedVERITAS Volume Manager object failed. An error is returned to the application.
◆ Action: These errors may represent lost data. Data may need to be restored and failed media may need to be repaired or replaced. Depending on the type of object failing and on the type of recovery suggested for the object type, an appropriate recovery operation may be necessary.
V-5-0-4
VxVM vxio WARNING V-5-0-4 Plex plex detached from volume volume
◆ Description: An uncorrectable error was detected by the mirroring code and a mirror copy was detached.
◆ Action: To restore redundancy, it may be necessary to add another mirror. The disk on which the failure occurred should be reformatted or replaced.
Note This message may also appear during a plex detach operation in a cluster. In this case, no action is required.
V-5-0-34
VxVM vxdmp NOTICE V-5-0-34 added disk array disk_array_serial_number
◆ Description: A new disk array has been added to the host.
◆ Action: None.
Chapter 6, Error Messages 75
Understanding Messages
V-5-0-35
VxVM vxdmp NOTICE V-5-0-35 Attempt to disable controller controller_name failed. Rootdisk has just one enabled path.
◆ Description: An attempt is being made to disable the one remaining active path to the root disk controller.
◆ Action: The path cannot be disabled.
V-5-0-55
VxVM vxio WARNING V-5-0-55 Cannot find device number for boot_path
vxvm vxdmp WARNING V-5-0-55 Cannot find device number for boot_path
◆ Description: The boot path retrieved from the system PROMs cannot be converted to a valid device number.
◆ Action: Check your PROM settings for the correct boot string.
If a target driver, such as an ATF, coexists with VxVM, and the target driver claims the boot disk, the message may be ignored if the device path corresponds to the boot disk.
V-5-0-64
VxVM vxio WARNING V-5-0-64 cannot log commit record for Diskgroup bootdg: error 28
◆ Description: Usually means that multipathing is misconfigured.
◆ Action: See “V-5-1-5929” on page 118 for possible causes and solutions.
V-5-0-106
VxVM vxio WARNING V-5-0-106 detaching RAID-5 volume
◆ Description: Either a double-failure condition in the RAID-5 volume has been detected in the kernel or some other fatal error is preventing further use of the array.
◆ Action: If two or more disks have been lost due to a controller or power failure, use the vxrecover utility to recover them once they have been re-attached to the system. Check for other console error messages that may provide additional information about the failure.
76 VERITAS Volume Manager Troubleshooting Guide

Understanding Messages
V-5-0-108
VxVM vxio WARNING V-5-0-108 Device major, minor: Received spurious close
◆ Description: A close was received for an object that was not open. This can only happen if the operating system is not correctly tracking opens and closes.
◆ Action: No action is necessary; the system will continue.
V-5-0-110
VxVM vxdmp NOTICE V-5-0-110 disabled controller controller_name connected to disk array disk_array_serial_number
◆ Description: All paths through the controller connected to the disk array are disabled. This usually happens if a controller is disabled for maintenance.
◆ Action: None.
V-5-0-111
VxVM vxdmp NOTICE V-5-0-111 disabled dmpnode dmpnode_device_number
◆ Description: A DMP node has been marked disabled in the DMP database. It will no longer be accessible for further IO requests. This occurs when all paths controlled by a DMP node are in the disabled state, and therefore inaccessible.
◆ Action: Check hardware or enable the appropriate controllers to enable at least one path under this DMP node.
V-5-0-112
VxVM vxdmp NOTICE V-5-0-112 disabled path path_device_number belonging to dmpnode dmpnode_device_number
◆ Description: A path has been marked disabled in the DMP database. This path is controlled by the DMP node indicated by the specified device number. This may be due to a hardware failure.
◆ Action: Check the underlying hardware if you want to recover the desired path.
Chapter 6, Error Messages 77

Understanding Messages
V-5-0-144
VxVM vxio WARNING V-5-0-144 Double failure condition detected on RAID-5 volume
◆ Description: I/O errors have been received in more than one column of a RAID-5 volume. This could be caused by:
◆ a controller failure making more than a single drive unavailable
◆ the loss of a second drive while running in degraded mode
◆ two separate disk drives failing simultaneously (unlikely)
◆ Action: Correct the hardware failures if possible. Then recover the volume using the vxrecover command.
V-5-0-145
VxVM vxio WARNING V-5-0-145 DRL volume volume is detached
◆ Description: A Dirty Region Logging volume became detached because a DRL log entry could not be written. If this is due to a media failure, other errors may have been logged to the console.
◆ Action: The volume containing the DRL log continues in operation. If the system fails before the DRL has been repaired, a full recovery of the volume’s contents may be necessary and will be performed automatically when the system is restarted. To recover from this error, use the vxassist addlog command to add a new DRL log to the volume.
V-5-0-146
VxVM vxdmp NOTICE V-5-0-146 enabled controller controller_name connected to disk array disk_array_serial_number
◆ Description: All paths through the controller connected to the disk array are enabled. This usually happens if a controller is enabled after maintenance.
◆ Action: None.
V-5-0-147
VxVM vxdmp NOTICE V-5-0-147 enabled dmpnode dmpnode_device_number
◆ Description: A DMP node has been marked enabled in the DMP database. This happens when at least one path controlled by the DMP node has been enabled.
◆ Action: None.
78 VERITAS Volume Manager Troubleshooting Guide

Understanding Messages
V-5-0-148
VxVM vxdmp NOTICE V-5-0-148 enabled path path_device_number belonging to dmpnode dmpnode_device_number
◆ Description: A path has been marked enabled in the DMP database. This path is controlled by the DMP node indicated by the specified device number. This happens if a previously disabled path has been repaired, the user has reconfigured the DMP database using the vxdctl(1M) command, or the DMP database has been reconfigured automatically.
◆ Action: None.
V-5-0-164
VxVM vxio WARNING V-5-0-164 Failed to join cluster name, aborting
◆ Description: A node failed to join a cluster. This may be caused by the node being unable to see all the shared disks. Other error messages may provide more information about the disks that cannot be found.
◆ Action: Use the vxdisk -s list command on the master node to see what disks should be visible to the slave node. Then check that the operating system and VxVM on the failed node can also see these disks. If the operating system cannot see the disks, check the cabling and hardware configuration of the node. If only VxVM cannot see the disks, use the vxdctl enable command to make it scan again for the disks. When the disks are visible to VxVM on the node, retry the join.
V-5-0-166
VxVM vxio WARNING V-5-0-166 Failed to log the detach of the DRL volumevolume
◆ Description: An attempt failed to write a kernel log entry indicating the loss of a DRL volume. The attempted write to the log failed either because the kernel log is full, or because of a write error to the drive. The volume becomes detached.
◆ Action: Messages about log failures are usually fatal, unless the problem is transient. However, the kernel log is sufficiently redundant that such errors are unlikely to occur.
If the problem is not transient (that is, the drive cannot be fixed and brought back online without data loss), recreate the disk group from scratch and restore all of its volumes from backups. Even if the problem is transient, reboot the system after correcting the problem.
Chapter 6, Error Messages 79

Understanding Messages
If error messages are seen from the disk driver, it is likely that the last copy of the log failed due to a disk error. Replace the failed drive in the disk group. The log re-initializes on the new drive. Finally force the failed volume into an active state and recover the data.
V-5-0-168
VxVM vxio WARNING V-5-0-168 Failure in RAID-5 logging operation
◆ Description: Indicates that a RAID-5 log has failed.
◆ Action: To restore RAID-5 logging to a RAID-5 volume, create a new log plex and attach it to the volume.
V-5-0-181
VxVM vxio WARNING V-5-0-181 Illegal vminor encountered
◆ Description: An attempt was made to open a volume device other than the root volume device before vxconfigd loaded the volume configuration.
◆ Action: None; under normal startup conditions, this message should not occur. If necessary, start VxVM and re-attempt the operation.
V-5-0-194
VxVM vxio WARNING V-5-0-194 Kernel log full: volume detached
◆ Description: A plex detach failed because the kernel log was full. As a result, the mirrored volume will become detached.
◆ Action: It is unlikely that this condition ever occurs. The only corrective action is to reboot the system.
V-5-0-196
VxVM vxio WARNING V-5-0-196 Kernel log update failed: volume detached
◆ Description: Detaching a plex failed because the kernel log could not be flushed to disk. As a result, the mirrored volume became detached. This may be caused by all the disks containing a kernel log going bad.
◆ Action: Repair or replace the failed disks so that kernel logging can once again function.
80 VERITAS Volume Manager Troubleshooting Guide

Understanding Messages
V-5-0-207
VxVM vxio WARNING V-5-0-207 log object object_name detached from RAID-5 volume
◆ Description: Indicates that a RAID-5 log has failed.
◆ Action: To restore RAID-5 logging to a RAID-5 volume, create a new log plex and attach it to the volume.
V-5-0-216
VxVM vxio WARNING V-5-0-216 mod_install returned errno
◆ Description: A call made to the operating system mod_install function to load the vxio driver failed.
◆ Action: Check for additional console messages that may explain why the load failed. Also check the console messages log file for any additional messages that were logged but not displayed on the console.
V-5-0-237
VxVM vxio WARNING V-5-0-237 object subdisk detached from RAID-5 volume at column column offset offset
◆ Description: A subdisk was detached from a RAID-5 volume because of the failure of a disk or an uncorrectable error occurring on that disk.
◆ Action: Check for other console error messages indicating the cause of the failure. Replace a failed disk as soon as possible.
V-5-0-243
VxVM vxio WARNING V-5-0-243 Overlapping mirror plex detached from volume volume
◆ Description: An error has occurred on the last complete plex in a mirrored volume. Any sparse mirrors that map the failing region are detached so that they cannot be accessed to satisfy that failed region inconsistently.
◆ Action: The message indicates that some data in the failing region may no longer be stored redundantly.
Chapter 6, Error Messages 81

Understanding Messages
V-5-0-244
VxVM vxdmp NOTICE V-5-0-244 Path failure on major/minor
◆ Description: A path under the control of the DMP driver failed. The device major and minor numbers of the failed device is supplied in the message.
◆ Action: None.
V-5-0-249
VxVM vxio WARNING V-5-0-249 RAID-5 volume entering degraded mode operation
◆ Description: An uncorrectable error has forced a subdisk to detach. At this point, not all data disks exist to provide the data upon request. Instead, parity regions are used to regenerate the data for each stripe in the array. Consequently, access takes longer and involves reading from all drives in the stripe.
◆ Action: Check for other console error messages that indicate the cause of the failure. Replace any failed disks as soon as possible.
V-5-0-251
VxVM vxio WARNING V-5-0-251 read error on object object of mirror plex in volume volume (start offset length length)
◆ Description: An error was detected while reading from a mirror. This error may lead to further action shown by later error messages.
◆ Action: If the volume is mirrored, no further action is necessary since the alternate mirror’s contents will be written to the failing mirror; this is often sufficient to correct media failures. If this error occurs often, but never leads to a plex detach, there may be a marginally defective region on the disk at the position indicated. It may eventually be necessary to remove data from this disk (see the vxevac(1M) manual page) and then to reformat the drive.
If the volume is not mirrored, this message indicates that some data could not be read. The file system or other application reading the data may report an additional error, but in either event, data has been lost. The volume can be partially salvaged and moved to another location if desired.
Note This message may also appear during a plex detach operation in a cluster. In this case, no action is required.
82 VERITAS Volume Manager Troubleshooting Guide

Understanding Messages
V-5-0-252
VxVM vxio NOTICE V-5-0-252 read error on object subdisk of mirror plex in volume volume (start offset length length) corrected
◆ Description: A read error occurred, which caused a read of an alternate mirror and a writeback to the failing region. This writeback was successful and the data was corrected on disk.
◆ Action: None; the problem was corrected automatically. Note the location of the failure for future reference. If the same region of the subdisk fails again, this may indicate a more insidious failure and the disk should be reformatted at the next reasonable opportunity.
V-5-0-258
VxVM vxdmp NOTICE V-5-0-258 removed disk array disk_array_serial_number
◆ Description: A disk array has been disconnected from the host, or some hardware failure has resulted in the disk array becoming inaccessible to the host.
◆ Action: Replace disk array hardware if this has failed.
V-5-0-281
VxVM vxio WARNING V-5-0-281 Root volumes are not supported on yourPROM version.
◆ Description: If your system’s PROMs are not a recent OpenBoot PROM type, root volumes are unusable.
◆ Action: If you have set up a root volume, undo the configuration by running vxunroot or removing the rootdev line from /etc/system as soon as possible. Contact your hardware vendor for an upgrade to your PROM level.
V-5-0-386
VxVM vxio WARNING V-5-0-386 subdisk subdisk failed in plex plex in volume volume
◆ Description: The kernel has detected a subdisk failure, which may mean that the underlying disk is failing.
◆ Action: Check for obvious problems with the disk (such as a disconnected cable). If hot-relocation is enabled and the disk is failing, recovery from subdisk failure is handled automatically.
Chapter 6, Error Messages 83

Understanding Messages
V-5-1-90
VxVM vxconfigd ERROR V-5-1-90 mode: Unrecognized operating mode
◆ Description: An invalid string was specified as an argument to the -m option. Valid strings are: enable, disable, and boot.
◆ Action: Supply a correct option argument.
VxVM vxconfigd WARNING V-5-1-91 Cannot create device device_path: reason
◆ Description: vxconfigd cannot create a device node either under /dev/vx/dsk or under /dev/vx/rdsk. This should happen only if the root file system has run out of inodes.
◆ Action: Remove some unwanted files from the root file system. Then, regenerate the device node using the command:
# vxdctl enable
V-5-1-92
VxVM vxconfigd WARNING V-5-1-92 Cannot exec /usr/bin/rm to remove directory: reason
◆ Description: The given directory could not be removed because the /usr/bin/rm utility could not be executed by vxconfigd. This is not a serious error. The only side effect of a directory not being removed is that the directory and its contents continue to use space in the root file system. However, this does imply that the /usr file system is not mounted, or on some systems, that the rm utility is missing or is not in its usual location. This may be a serious problem for the general running of your system.
◆ Action: If the /usr file system is not mounted, you need to determine how to get it mounted. If the rm utility is missing, or is not in the /usr/bin directory, restore it.
84 VERITAS Volume Manager Troubleshooting Guide

Understanding Messages
V-5-1-111
VxVM vxconfigd WARNING V-5-1-111 Cannot fork to remove directory directory: reason
◆ Description: The given directory could not be removed because vxconfigd could not fork in order to run the rm utility. This is not a serious error. The only side effect of a directory not being removed is that the directory and its contents will continue to use space in the root file system. The most likely cause for this error is that your system does not have enough memory or paging space to allow vxconfigd to fork.
◆ Action: If your system is this low on memory or paging space, your overall system performance is probably substantially degraded. Consider adding more memory or paging space.
V-5-1-116
VxVM vxconfigd WARNING V-5-1-116 Cannot open log file log_filename: reason
◆ Description: The vxconfigd console output log file could not be opened for the given reason.
◆ Action: Create any needed directories, or use a different log file path name as described in “Logging Error Messages” on page 71.
V-5-1-117
VxVM vxconfigd ERROR V-5-1-117 Cannot start volume volume, no valid plexes
◆ Description: This error indicates that the volume cannot be started because it does not contain any valid plexes. This can happen, for example, if disk failures have caused all plexes to be unusable. It can also happen as a result of actions that caused all plexes to become unusable (for example, forcing the dissociation of subdisks or detaching, dissociation, or offlining of plexes).
◆ Action: It is possible that this error results from a drive that failed to spin up. If so, rebooting may fix the problem. If that does not fix the problem, then the only recourse is to repair the disks involved with the plexes and restore the file system from a backup. Restoring the root or /usr file system requires that you have a valid backup. See “Repairing Root or /usr File Systems on Mirrored Volumes” on page 41 for information on how to fix problems with root or /usr file system volumes.
Chapter 6, Error Messages 85

Understanding Messages
V-5-1-121
VxVM vxconfigd NOTICE V-5-1-121 Detached disk disk
◆ Description: The named disk appears to have become unusable and was detached from its disk group. Additional messages may appear to indicate other records detached as a result of the disk detach.
◆ Action: If hot-relocation is enabled, VERITAS Volume Manager objects affected by the disk failure are taken care of automatically. Mail is sent to root indicating what actions were taken by VxVM and what further actions the administrator should take.
V-5-1-122
VxVM vxconfigd WARNING V-5-1-122 Detaching plex plex from volume volume
◆ Description: This error only happens for volumes that are started automatically by vxconfigd at system startup (that is, for the root and /usr file system volumes). The plex is being detached as a result of I/O failure, disk failure during startup or prior to the last system shutdown or crash, or disk removal prior to the last system shutdown or crash.
◆ Action: To ensure that the root or /usr file system retains the same number of active mirrors, remove the given plex and add a new mirror using the vxassist mirror operation. Also consider replacing any bad disks before running this command.
V-5-1-123
VxVM vxconfigd ERROR V-5-1-123 Disk group group: Disabled by errors
◆ Description: This message indicates that some error condition has made it impossible for VxVM to continue to manage changes to a disk group. The major reason for this is that too many disks have failed, making it impossible for vxconfigd to continue to update configuration copies. There should be a preceding error message that indicates the specific error that was encountered.
If the disk group that was disabled is the boot disk group, the following additional error is displayed:
VxVM vxconfigd ERROR V-5-1-104 All transactions are disabled
This additional message indicates that vxconfigd has entered the disabled state, which makes it impossible to change the configuration of any disk group, not just the boot disk group.
86 VERITAS Volume Manager Troubleshooting Guide

Understanding Messages
◆ Action: If the underlying error resulted from a transient failure, such as a disk cabling error, then you may be able to repair the situation by rebooting. Otherwise, the disk group configuration may have to be recreated by using the procedures given in “Restoring a Disk Group Configuration” on page 67, and the contents of any volumes restored from a backup. Failure of the boot disk group may require reinstallation of the system if your system uses a root or /usr file system that is defined on a volume.
V-5-1-124
VxVM vxconfigd ERROR V-5-1-124 Disk group group: update failed: reason
◆ Description: I/O failures have prevented vxconfigd from updating any active copies of the disk group configuration. This usually implies a large number of disk failures. This error will usually be followed by the error:
VxVM vxconfigd ERROR V-5-1-123 Disk group group: Disabled by errors
◆ Action: If the underlying error resulted from a transient failure, such as a disk cabling error, then you may be able to repair the situation by rebooting. Otherwise, the disk group may have to be recreated and restored from a backup.
V-5-1-134
VxVM vxconfigd ERROR V-5-1-134 Memory allocation failure
◆ Description: This implies that there is insufficient memory to start VxVM and to get the volumes for the root and /usr file systems running.
◆ Action: This error should not normally occur, unless your system has very small amounts of memory. Adding swap space will probably not help because this error is most likely to occur early in the boot sequence, before swap areas have been added.
V-5-1-135
VxVM vxconfigd FATAL ERROR V-5-1-135 Memory allocation failure duringstartup
◆ Description: This implies that there is insufficient memory to start up VxVM and to get the volumes for the root and /usr file systems running.
◆ Action: This error should not normally occur, unless your system has very small amounts of memory. Adding swap space probably will not help, because this error is most likely to occur early in the boot sequence, before swap areas have been added.
Chapter 6, Error Messages 87

Understanding Messages
V-5-1-148
VxVM vxconfigd ERROR V-5-1-148 System startup failed
◆ Description: Either the root or the /usr file system volume could not be started, rendering the system unusable. The error that resulted in this condition should appear prior to this error message.
◆ Action: Look up other error messages appearing on the console and take the actions suggested in the descriptions of those messages.
V-5-1-169
VxVM vxconfigd ERROR V-5-1-169 cannot open /dev/vx/config: reason
◆ Description: The /dev/vx/config device could not be opened. vxconfigd uses this device to communicate with the VERITAS Volume Manager kernel drivers. The most likely reason is “Device is already open.” This indicates that some process (most likely vxconfigd) already has /dev/vx/config open. Less likely reasons are “No such file or directory” or “No such device or address.” For either of these reasons, likely causes are:
◆ The VERITAS Volume Manager package installation did not complete correctly.
◆ The device node was removed by the administrator or by an errant shell script.
◆ Action: If the reason is “Device is already open,” stop or kill the old vxconfigd by running the command:
# vxdctl -k stop
For other failure reasons, consider re-adding the base VERITAS Volume Manager package. This will reconfigure the device node and re-install the VERITAS Volume Manager kernel device drivers. See the Installation Guide for information on how to add the package. If you cannot re-add the package, contact VERITAS Technical Support for more information.
VxVM vxconfigd ERROR V-5-1-169 Cannot open /etc/vfstab: reason
◆ Description: vxconfigd could not open the /etc/vfstab file, for the reason given. The /etc/vfstab file is used to determine which volume (if any) to use for the /usr file system.
◆ Action: This error implies that your root file system is currently unusable. You may be able to repair the root file system by mounting it after booting from a network or CD-ROM root file system. If the root file system is defined on a volume, then see the procedures defined for recovering from a failed root file system in “Recovery from Boot Disk Failure” on page 31.
88 VERITAS Volume Manager Troubleshooting Guide

Understanding Messages
V-5-1-249
VxVM vxconfigd NOTICE V-5-1-249 Volume volume entering degraded mode
◆ Description: Detaching a subdisk in the named RAID-5 volume has caused the volume to enter “degraded” mode. While in degraded mode, performance of the RAID-5 volume is substantially reduced. More importantly, failure of another subdisk may leave the RAID-5 volume unusable. Also, if the RAID-5 volume does not have an active log, then failure of the system may leave the volume unusable.
◆ Action: If hot-relocation is enabled, VERITAS Volume Manager objects affected by the disk failure are taken care of automatically. Mail is sent to root indicating what actions were taken by VxVM and what further actions the administrator should take.
V-5-1-480VxVM vxconfigd ERROR V-5-1-480 Cannot reset VxVM kernel: reason
◆ Description: The -r reset option was specified to vxconfigd, but the VxVM kernel drivers could not be reset. The most common reason is “A virtual disk device is open.” This implies that a VxVM tracing or volume device is open.
◆ Action: If you want to reset the kernel devices, track down and kill all processes that have a volume or VERITAS Volume Manager tracing device open. Also, if any volumes are mounted as file systems, unmount those file systems.
Any reason other than “A virtual disk device is open” does not normally occur unless there is a bug in the operating system or in VxVM.
V-5-1-484
VxVM vxconfigd ERROR V-5-1-484 Cannot start volume volume, no valid complete plexes
◆ Description: These errors indicate that the volume cannot be started because the volume contains no valid complete plexes. This can happen, for example, if disk failures have caused all plexes to be unusable. It can also happen as a result of actions that caused all plexes to become unusable (for example, forcing the dissociation of subdisks or detaching, dissociation, or offlining of plexes).
◆ Action: It is possible that this error results from a drive that failed to spin up. If so, rebooting may fix the problem. If that does not fix the problem, then the only recourse is to repair the disks involved with the plexes and restore the file system from a backup. Restoring the root or /usr file system requires that you have a valid backup. See “Repairing Root or /usr File Systems on Mirrored Volumes” on page 41 for information on how to fix problems with root or /usr file system volumes.
Chapter 6, Error Messages 89

Understanding Messages
V-5-1-485
VxVM vxconfigd ERROR V-5-1-485 Cannot start volume volume, volume state is invalid
◆ Description: The volume for the root or /usr file system is in an unexpected state (not ACTIVE, CLEAN, SYNC or NEEDSYNC). This should not happen unless the system administrator circumvents the mechanisms used by VxVM to create these volumes.
◆ Action: The only recourse is to bring up VxVM on a CD-ROM or NFS-mounted root file system and to fix the state of the volume. See“Repairing Root or /usr File Systems on Mirrored Volumes” on page 41 for further information.
V-5-1-525
VxVM vxconfigd NOTICE V-5-1-525 Detached log for volume volume
◆ Description: The DRL or RAID-5 log for the named volume was detached as a result of a disk failure, or as a result of the administrator removing a disk with vxdg -k rmdisk. A failing disk is indicated by a “Detached disk” message.
◆ Action: If the log is mirrored, hot-relocation tries to relocate the failed log automatically. Use either vxplex dis or vxsd dis to remove the failing logs. Then, use vxassist addlog (see the vxassist(1M) manual page) to add a new log to the volume.
V-5-1-526
VxVM vxconfigd NOTICE V-5-1-526 Detached plex plex in volume volume
◆ Description: The specified plex was disabled as a result of a disk failure, or as a result of the administrator removing a disk with vxdg -k rmdisk. A failing disk is indicated by a “Detached disk” message.
◆ Action: If hot-relocation is enabled, VERITAS Volume Manager objects affected by the disk failure are taken care of automatically. Mail is sent to root indicating what actions were taken by VxVM and what further actions the administrator should take.
90 VERITAS Volume Manager Troubleshooting Guide
Understanding Messages
V-5-1-527
VxVM vxconfigd NOTICE V-5-1-527 Detached subdisk subdisk in volume volume
◆ Description: The specified subdisk was disabled as a result of a disk failure, or as a result of the administrator removing a disk with vxdg -k rmdisk. A failing disk is indicated by a “Detached disk” message.
◆ Action: If hot-relocation is enabled, VERITAS Volume Manager objects affected by the disk failure are taken care of automatically. Mail is sent to root indicating what actions were taken by VxVM and what further actions the administrator should take.
V-5-1-528VxVM vxconfigd NOTICE V-5-1-528 Detached volume volume
◆ Description: The specified volume was detached as a result of a disk failure, or as a result of the administrator removing a disk with vxdg -k rmdisk. A failing disk is indicated by a “Detached disk” message. Unless the disk error is transient and can be fixed with a reboot, the contents of the volume should be considered lost.
◆ Action: Contact VERITAS Technical Support.
V-5-1-543
VxVM vxconfigd ERROR V-5-1-543 Differing version of vxconfigdinstalled
◆ Description: A vxconfigd daemon was started after stopping an earlier vxconfigd with a non-matching version number. This can happen, for example, if you upgrade VxVM and then run vxconfigd without first rebooting.
◆ Action: Reboot the system.
V-5-1-544
VxVM vxconfigd WARNING V-5-1-544 Disk disk in group group flagged as shared; Disk skipped
◆ Description: The given disk is listed as shared, but the running version of VxVM does not support shared disk groups.
◆ Action: This message can usually be ignored. If you want to use the disk on this system, use vxdiskadd to add the disk. Do not do this if the disk really is shared with other systems.
Chapter 6, Error Messages 91

Understanding Messages
V-5-1-545
VxVM vxconfigd WARNING V-5-1-545 Disk disk in group group locked by host hostid Disk skipped
◆ Description: The given disk is listed as locked by the host with the VERITAS Volume Manager host ID (usually the same as the system host name).
◆ Action: This message can usually be ignored. If you want to use the disk on this system, use vxdiskadd to add the disk. Do not do this if the disk really is shared with other systems.
V-5-1-546
VxVM vxconfigd WARNING V-5-1-546 Disk disk in group group: Disk device not found
◆ Description: No physical disk can be found that matches the named disk in the given disk group. This is equivalent to failure of that disk. (Physical disks are located by matching the disk IDs in the disk group configuration records against the disk IDs stored in the VERITAS Volume Manager header on the physical disks.) This error message is displayed for any disk IDs in the configuration that are not located in the disk header of any physical disk. This may result from a transient failure such as a poorly-attached cable, or from a disk that fails to spin up fast enough. Alternately, this may happen as a result of a disk being physically removed from the system, or from a disk that has become unusable due to a head crash or electronics failure.
Any RAID-5 plexes, DRL log plexes, RAID-5 subdisks or mirrored plexes containing subdisks on this disk are unusable. Such disk failures (particularly on multiple disks) may cause one or more volumes to become unusable.
◆ Action: If hot-relocation is enabled, VERITAS Volume Manager objects affected by the disk failure are taken care of automatically. Mail is sent to root indicating what actions were taken by VxVM and what further actions the administrator should take.
92 VERITAS Volume Manager Troubleshooting Guide
Understanding Messages
V-5-1-554
VxVM vxconfigd WARNING V-5-1-554 Disk disk names group group, but group ID differs
◆ Description: As part of a disk group import, a disk was discovered that had a mismatched disk group name and disk group ID. This disk is not imported. This can only happen if two disk groups have the same name but have different disk group ID values. In such a case, one group is imported along with all its disks and the other group is not. This message appears for disks in the un-selected group.
◆ Action: If the disks should be imported into the group, this must be done by adding the disk to the group at a later stage, during which all configuration information for the disk is lost.
V-5-1-557
VxVM vxconfigd ERROR V-5-1-557 Disk disk, group group, device device:not updated with new host IDError: reason
◆ Description: This can result from using vxdctl hostid to change the VERITAS Volume Manager host ID for the system. The error indicates that one of the disks in a disk group could not be updated with the new host ID. This usually indicates that the disk has become inaccessible or has failed in some other way.
◆ Action: Try running the following command to determine whether the disk is still operational:
# vxdisk check device
If the disk is no longer operational, vxdisk should print a message such as:
device: Error: Disk write failure
This will result in the disk being taken out of active use in its disk group, if it has not already been taken out of use. If the disk is still operational, which should not be the case, vxdisk prints:
device: Okay
If the disk is listed as “Okay,” try running vxdctl hostid again. If it still results in an error, contact VERITAS Technical Support.
Chapter 6, Error Messages 93

Understanding Messages
V-5-1-568
VxVM vxconfigd WARNING V-5-1-568 Disk group group is disabled, disks not updated with new host ID
◆ Description: As a result of failures, the named disk group has become disabled. Earlier error messages should indicate the cause. This message indicates that disks in that disk group were not updated with a new VERITAS Volume Manager host ID. This warning message should result only from a vxdctl hostid operation.
◆ Action: Typically, unless a disk group was disabled due to transient errors, there is no way to repair a disabled disk group. The disk group may have to be reconstructed from scratch. If the disk group was disabled due to a transient error such as a cabling problem, then a future reboot may not automatically import the named disk group, due to the change in the system’s VERITAS Volume Manager host ID. In such a case, import the disk group directly using vxdg import with the -C option.
V-5-1-569
VxVM vxconfigd ERROR V-5-1-569 Disk group group,Disk disk:Cannot auto-import group: reason
◆ Description: On system startup, vxconfigd failed to import the disk group associated with the named disk. A message related to the specific failure is given in reason. Additional error messages may be displayed that give more information on the specific error. In particular, this is often followed by:
VxVM vxconfigd ERROR V-5-1-579 Disk group group: Errors in someconfiguration copies: Disk device, copy number: Block bno: error ...
The most common reason for auto-import failures is excessive numbers of disk failures, making it impossible for VxVM to find correct copies of the disk group configuration database and kernel update log. Disk groups usually have enough copies of this configuration information to make such import failures unlikely.
A more serious failure is indicated by errors such as:
Configuration records are inconsistentDisk group has no valid configuration copiesDuplicate record in configurationFormat error in configuration copyInvalid block numberInvalid magic number
These errors indicate that all configuration copies have become corrupt (due to disk failures, writing on the disk by an application or the administrator, or bugs in VxVM).
94 VERITAS Volume Manager Troubleshooting Guide

Understanding Messages
Some correctable errors may be indicated by other error messages that appear in conjunction with the auto-import failure message. Look up those other errors for more information on their cause.
Failure of an auto-import implies that the volumes in that disk group will not be available for use. If there are file systems on those volumes, then the system may yield further errors resulting from inability to access the volume when mounting the file system.
◆ Action: If the error is clearly caused by excessive disk failures, then you may have to recreate the disk group configuration by using the procedures given in “Restoring a Disk Group Configuration” on page 67, and restore contents of any volumes from a backup. There may be other error messages that appear which provide further information. See those other error messages for more information on how to proceed. If those errors do not make it clear how to proceed, contact VERITAS Technical Support.
V-5-1-571
VxVM vxconfigd ERROR V-5-1-571 Disk group group, Disk disk: Skip disk groupwith duplicate name
◆ Description: Two disk groups with the same name are tagged for auto-importing by the same host. Disk groups are identified both by a simple name and by a long unique identifier (disk group ID) assigned when the disk group is created. Thus, this error indicates that two disks indicate the same disk group name but a different disk group ID.
VxVM does not allow you to create a disk group or import a disk group from another machine, if that would cause a collision with a disk group that is already imported. Therefore, this error is unlikely to occur under normal use. However, this error can occur in the following two cases:
◆ A disk group cannot be auto-imported due to some temporary failure. If you create a new disk group with the same name as the failed disk group and reboot, the new disk group is imported first. The auto-import of the older disk group fails because more recently modified disk groups have precedence over older disk groups.
◆ A disk group is deported from one host using the -h option to cause the disk group to be auto-imported on reboot from another host. If the second host was already auto-importing a disk group with the same name, then reboot of that host will yield this error.
◆ Action: If you want to import both disk groups, then rename the second disk group on import. See the vxdg(1M) manual page for information on how to use the import operation to rename a disk group.
Chapter 6, Error Messages 95

Understanding Messages
V-5-1-577
VxVM vxconfigd WARNING V-5-1-577 Disk group group: Disk group log maybe too smallLog size should be at least number blocks
◆ Description: The log areas for the disk group have become too small for the size of configuration currently in the group. This message only occurs during disk group import; it can only occur if the disk was inaccessible while new database objects were added to the configuration, and the disk was then made accessible and the system restarted. This should not normally happen without first displaying a message about the database area size.
◆ Action: Reinitialize the disks in the group with larger log areas. Note that this requires that you restore data on the disks from backups. See the vxdisk(1M) manual page. To reinitialize all of the disks, detach them from the group with which they are associated, reinitialize and re-add them. Then deport and re-import the disk group to effect the changes to the log areas for the group.
V-5-1-579
VxVM vxconfigd ERROR V-5-1-579 Disk group group: Errors in some configuration copies: Disk disk, copy number: [Block number]: reason ...
◆ Description: During a failed disk group import, some of the configuration copies in the named disk group were found to have format or other types of errors which make those copies unusable. This message lists all configuration copies that have uncorrected errors, including any appropriate logical block number. If no other reasons are displayed, then this may be the cause of the disk group import failure.
◆ Action: If some of the copies failed due to transient errors (such as cable failures), then a reboot or re-import may succeed in importing the disk group. Otherwise, the disk group configuration may have to be restored. You can recreate a disk group configuration by using the procedures given in “Restoring a Disk Group Configuration” on page 67
96 VERITAS Volume Manager Troubleshooting Guide

Understanding Messages
V-5-1-583
VxVM vxconfigd ERROR V-5-1-583 Disk group group: Reimport of disk group failed: reason
◆ Description: After vxconfigd was stopped and restarted (or disabled and then enabled), VxVM failed to recreate the import of the indicated disk group. The reason for failure is specified. Additional error messages may be displayed that give further information describing the problem.
◆ Action: A major cause for this kind of failure is disk failures that were not addressed before vxconfigd was stopped or disabled. If the problem is a transient disk failure, then rebooting may take care of the condition. The error may be accompanied by messages such as ‘‘Disk group has no valid configuration copies.’’ This indicates that the disk group configuration copies have become corrupt (due to disk failures, writing on the disk by an application or the administrator, or bugs in VxVM). You can recreate a disk group configuration by using the procedures given in “Restoring a Disk Group Configuration” on page 67.
V-5-1-587
VxVM vxdg ERROR V-5-1-587 disk group groupname: import failed: reason
◆ Description: The import of a disk group failed for the specified reason.
◆ Action: The action to be taken depends on the reason given in the error message:
Disk is in use by another hostNo valid disk found containing disk group
The first message indicates that disks have been moved from a system that has crashed or that failed to detect the group before the disk was moved. The locks stored on the disks must be cleared.
The second message indicates that the disk group does not contain any valid disks (not that it does not contain any disks). The disks may be considered invalid due to a mismatch between the host ID in their configuration copies and that stored in the /etc/vx/volboot file.
To clear locks on a specific set of devices, use the following command:
# vxdisk clearimport devicename ...
To clear the locks during import, use the following command:
# vxdg -C import diskgroup
Chapter 6, Error Messages 97

Understanding Messages
Caution Be careful when using the vxdisk clearimport or vxdg -C import command on systems that have dual-ported disks. Clearing the locks allows those disks to be accessed at the same time from multiple hosts and can result in corrupted data.
An import operation fails if some disks for the disk group cannot be found among the disk drives attached to the system.
Disk for disk group not foundDisk group has no valid configuration copies
The first message indicates a recoverable error.
The second message indicates a fatal error that requires hardware repair or the creation of a new disk group, and recovery of the disk group configuration and data:
If some of the disks in the disk group have failed, you can force the disk group to be imported with this command:
# vxdg -f import diskgroup
Caution Be careful when using the -f option. It can cause the same disk group to be imported twice from different sets of disks, causing the disk group to become inconsistent.
These operations can also be performed using the vxdiskadm utility. To deport a disk group using vxdiskadm, select menu item 9 (Remove access to (deport) a disk group). To import a disk group, select item 8 (Enable access to (import) a disk group). The vxdiskadm import operation checks for host import locks and prompts to see if you want to clear any that are found. It also starts volumes in the disk group.
V-5-1-663
VxVM vxconfigd WARNING V-5-1-663 Group group: Duplicate virtual devicenumber(s): Volume volume remapped from major,minor to major,minor ...
◆ Description: The configuration of the named disk group includes conflicting device numbers. A disk group configuration lists the recommended device number to use for each volume in the disk group. If two volumes in two disk groups happen to list the same device number, then one of the volumes must use an alternate device number. This is called device number remapping. Remapping is a temporary change to a volume. If the other disk group is deported and the system is rebooted, then the
98 VERITAS Volume Manager Troubleshooting Guide

Understanding Messages
volume that was remapped may no longer be remapped. Also, volumes that are remapped once are not guaranteed to be remapped to the same device number in further reboots.
◆ Action: Use the vxdg reminor command to renumber all volumes in the offending disk group permanently. See the vxdg(1M) manual page for more information.
V-5-1-737
VxVM vxconfigd ERROR V-5-1-737 Mount point path: volume not in bootdg disk group
◆ Description: The volume device listed in the /etc/vfstab file for the given mount-point directory (normally /usr) is listed as in a disk group other than the boot disk group. This error should not occur if the standard VERITAS Volume Manager procedures are used for encapsulating the disk containing the /usr file system.
◆ Action: Boot VxVM from a network or CD-ROM mounted root file system. Then, start up VxVM using fixmountroot on a valid mirror disk of the root file system. After starting VxVM, mount the root file system volume and edit the /etc/vfstab file. Change the file to use a direct partition for the file system. There should be a comment in the /etc/vfstab file that indicates which partition to use.
V-5-1-768
VxVM vxconfigd NOTICE V-5-1-768 Offlining config copy number on disk disk: Reason: reason
◆ Description: An I/O error caused the indicated configuration copy to be disabled. This is a notice only, and does not normally imply serious problems, unless this is the last active configuration copy in the disk group.
◆ Action: Consider replacing the indicated disk, since this error implies that the disk has deteriorated to the point where write errors cannot be repaired automatically. The error can also result from transient problems with cabling or power.
Chapter 6, Error Messages 99
Understanding Messages
V-5-1-809
VxVM vxplex ERROR V-5-1-809 Plex plex in volume volume is locked byanother utility.
◆ Description: The vxplex command fails because a previous operation to attach a plex did not complete. The vxprint command should show that one or both of the temporary and persistent utility fields (TUTIL0 and PUTIL0) of the volume and one of its plexes are set.
◆ Action: If the vxtask list command does not show a task running for the volume, use the vxmend command to clear the TUTIL0 and PUTIL0 fields for the volume and all its components for which these fields are set:
# vxmend -g diskgroup clear all volume plex ...
V-5-1-923
VxVM vxplex ERROR V-5-1-923 Record volume is in disk group diskgroup1plex is in group diskgroup2.
◆ Description: An attempt was made to snap back a plex from a different disk group.
◆ Action: Move the snapshot volume into the same disk group as the original volume.
V-5-1-946
VxVM vxconfigd FATAL ERROR V-5-1-946 bootdg cannot be imported duringboot
◆ Description: Usually means that multipathing is misconfigured.
◆ Action: See “V-5-1-5929” on page 118 for possible causes and solutions.
V-5-1-1049
VxVM vxconfigd ERROR V-5-1-1049 System boot disk does not have a valid rootvol plexPlease boot from one of the following disks:DISK MEDIA DEVICE BOOT COMMANDdiskname device boot vx-diskname...
◆ Description: The system is configured to use a volume for the root file system, but was not booted on a disk containing a valid mirror of the root volume. Disks containing valid root mirrors are listed as part of the error message. A disk is usable as a boot disk if there is a root mirror on that disk which is not stale or offline.
◆ Action: Try to boot from one of the named disks using the associated boot command that is listed in the message.
100 VERITAS Volume Manager Troubleshooting Guide

Understanding Messages
V-5-1-1063
VxVM vxconfigd ERROR V-5-1-1063 There is no volume configured for the root device
◆ Description: The system is configured to boot from a root file system defined on a volume, but there is no root volume listed in the configuration of the boot disk group.
There are two possible causes of this error:
◆ Case 1: The /etc/system file was erroneously updated to indicate that the root device is /pseudo/vxio@0:0. This can happen only as a result of direct manipulation by the administrator.
◆ Case 2: The system somehow has a duplicate boot disk group, one of which contains a root file system volume and one of which does not, and vxconfigd somehow chose the wrong one. Since vxconfigd chooses the more recently accessed version of the boot disk group, this error can happen if the system clock was updated incorrectly at some point (reversing the apparent access order of the two disk groups). This can also happen if some disk group was deported and assigned the same name as the boot disk group with locks given to this host.
◆ Action: In case 1, boot the system on a CD-ROM or networking-mounted root file system, directly mount the disk partition of the root file system, and remove the following lines from /etc/system:
rootdev:/pseudo/vxio@0:0set vxio:vol_rootdev_is_volume=1
In case 2, either boot with all drives in the offending version of the boot disk group turned off, or import and rename (see vxdg(1M)) the offending boot disk group from another host. If you turn off the drives, run the following command after booting:
# vxdg flush bootdg
This updates time stamps on the imported version of the specified boot disk group, bootdg, which should make the correct version appear to be the more recently accessed. If this does not correct the problem, contact VERITAS Technical Support.
Chapter 6, Error Messages 101

Understanding Messages
V-5-1-1171
VxVM vxconfigd ERROR V-5-1-1171 Version number of kernel does not match vxconfigd
◆ Description: The release of vxconfigd does not match the release of the VERITAS Volume Manager kernel drivers. This should happen only as a result of upgrading VxVM, and then running vxconfigd without a reboot.
◆ Action: Reboot the system. If that does not cure the problem, re-add the VxVM packages.
V-5-1-1186
VxVM vxconfigd ERROR V-5-1-1186 Volume volume for mount point /usr not found in bootdg disk group
◆ Description: The system is configured to boot with /usr mounted on a volume, but the volume associated with /usr is not listed in the configuration of the boot disk group. There are two possible causes of this error:
◆ Case 1: The /etc/vfstab file was erroneously updated to indicate the device for the /usr file system is a volume, but the volume named is not in the boot disk group. This should happen only as a result of direct manipulation by the administrator.
◆ Case 2: The system somehow has a duplicate boot disk group, one of which contains the /usr file system volume and one of which does not (or uses a different volume name), and vxconfigd somehow chose the wrong boot disk group. Since vxconfigd chooses the more recently accessed version of the boot disk group, this error can happen if the system clock was updated incorrectly at some point (causing the apparent access order of the two disk groups to be reversed). This can also happen if some disk group was deported and assigned the same name as the boot disk group with locks given to this host.
◆ Action: In case 1, boot the system on a CD-ROM or networking-mounted root file system. If the root file system is defined on a volume, then start and mount the root volume. If the root file system is not defined on a volume, mount the root file system directly. Edit the /etc/vfstab file to correct the entry for the /usr file system.
In case 2, either boot with all drives in the offending version of the boot disk group turned off, or import and rename (see vxdg(1M)) the offending boot disk group from another host. If you turn off drives, run the following command after booting:
# vxdg flush bootdg
This updates time stamps on the imported version of the boot disk group, bootdg, which should make the correct version appear to be the more recently accessed. If this does not correct the problem, contact VERITAS Technical Support.
102 VERITAS Volume Manager Troubleshooting Guide
Understanding Messages
V-5-1-1589
VxVM vxconfigd ERROR V-5-1-1589 enable failed: aborting
◆ Description: Regular startup of vxconfigd failed. This error can also result from the command vxdctl enable.
◆ Action: The failure was fatal and vxconfigd was forced to exit. The most likely cause is that the operating system is unable to create interprocess communication channels to other utilities.
VxVM vxconfigd ERROR V-5-1-1589 enable failed: Error check group configuration copies. Database file not found
◆ Description: Regular startup of vxconfigd failed. This error can also result from the command vxdctl enable.
The directory /var/vxvm/tempdb is inaccessible. This may be because of root file system corruption, if the root file system is full, or if /var is a separate file system, because it has become corrupted or has not been mounted.
◆ Action: If the root file system is full, increase its size or remove files to make space for the tempdb file.
If /var is a separate file system, make sure that it has an entry in /etc/vfstab. Otherwise, look for I/O error messages during the boot process that indicate either a hardware problem or misconfiguration of any logical volume management software being used for the /var file system. Also verify that the encapsulation (if configured) of your boot disk is complete and correct.
VxVM vxconfigd ERROR V-5-1-1589 enable failed: transactions are disabled
◆ Description: Regular startup of vxconfigd failed. This error can also result from the command vxdctl enable.
vxconfigd is continuing to run, but no configuration updates are possible until the error condition is repaired.
Additionally, this may be followed with:
VxVM vxconfigd ERROR V-5-1-579 Disk group group: Errors in some configuration copies: Disk device, copy number: Block bno: error ...
Other error messages may be displayed that further indicate the underlying problem.
Chapter 6, Error Messages 103

Understanding Messages
◆ Action: Evaluate the error messages to determine the root cause of the problem. Make changes suggested by the errors and then try rerunning the command.
If the “Errors in some configuration copies” error occurs again, that may indicate the real problem lies with the configuration copies in the disk group. You can recreate a disk group configuration by using the procedures given in “Restoring a Disk Group Configuration” on page 67.
V-5-1-2020
VxVM vxconfigd ERROR V-5-1-2020 Cannot kill existing daemon, pid=process_ID
◆ Description: The -k (kill existing vxconfigd process) option was specified, but a running configuration daemon process could not be killed. A configuration daemon process, for purposes of this discussion, is any process that opens the /dev/vx/config device (only one process can open that device at a time). If there is a configuration daemon process already running, then the -k option causes a SIGKILL signal to be sent to that process. If, within a certain period of time, there is still a running configuration daemon process, the above error message is displayed.
◆ Action: This error can result from a kernel error that has made the configuration daemon process unkillable, from some other kind of kernel error, or from some other user starting another configuration daemon process after the SIGKILL signal. This last condition can be tested for by running vxconfigd -k again. If the error message reappears, contact VERITAS Technical Support.
V-5-1-2197
VxVM vxconfigd ERROR V-5-1-2197 node N: missing vxconfigd
◆ Description: The vxconfigd daemon is not running on the indicated cluster node.
◆ Action: Restart the vxconfigd daemon.
V-5-1-2198
VxVM vxconfigd ERROR V-5-1-2198 node N: vxconfigd not ready
◆ Description: The vxconfigd daemon is not responding properly in a cluster.
◆ Action: Stop and restart the vxconfigd daemon on the node indicated.
104 VERITAS Volume Manager Troubleshooting Guide

Understanding Messages
V-5-1-2274
VxVM vxconfigd ERROR V-5-1-2274 volume:vxconfigd cannot boot-start RAID-5 volumes
◆ Description: A volume that vxconfigd should start immediately upon booting the system (that is, the volume for the /usr file system) has a RAID-5 layout. The /usr file system should never be defined on a RAID-5 volume.
◆ Action: It is likely that the only recovery for this is to boot VxVM from a network-mounted root file system (or from a CD-ROM), and reconfigure the /usr file system to be defined on a regular non-RAID-5 volume.
V-5-1-2290
VxVM vxdmpadm ERROR V-5-1-2290 Attempt to enable a controller that is not available
◆ Description: This message is returned by the vxdmpadm utility when an attempt is made to enable a controller that is not working or is not physically present.
◆ Action: Check hardware and see if the controller is present and whether I/O can be performed through it.
V-5-1-2353
VxVM vxconfigd ERROR V-5-1-2353 Disk group group: Cannot recover temp database: reasonConsider use of "vxconfigd -x cleartempdir" [see vxconfigd(1M)].
◆ Description: This can happen if you kill and restart vxconfigd, or if you disable and enable it with vxdctl disable and vxdctl enable. This error indicates a failure related to reading the file /var/vxvm/tempdb/group. This is a temporary file used to store information that is used when recovering the state of an earlier vxconfigd. The file is recreated on a reboot, so this error should never survive a reboot.
◆ Action: If you can reboot, do so. If you do not want to reboot, then do the following:
a. Ensure that no vxvol, vxplex, or vxsd processes are running.
Use ps -e to search for such processes, and use kill to kill any that you find. You may have to run kill twice to make these processes go away. Killing utilities in this way may make it difficult to make administrative changes to some volumes until the system is rebooted.
Chapter 6, Error Messages 105

Understanding Messages
b. Recreate the temporary database files for all imported disk groups using the following command:
# vxconfigd -x cleartempdir 2> /dev/console
The vxvol, vxplex, and vxsd commands make use of these tempdb files to communicate locking information. If the file is cleared, then locking information can be lost. Without this locking information, two utilities can end up making incompatible changes to the configuration of a volume.
V-5-1-2524
VxVM vxconfigd ERROR V-5-1:2524 VOL_IO_DAEMON_SET failed: daemon countmust be above N while cluster
◆ Description: The number of VERITAS Volume Manager kernel daemons (vxiod) is less than the minimum number needed to join a cluster.
◆ Action: Increase the number of daemons using vxiod.
V-5-1-2630
VxVM vxconfigd WARNING V-5-1-2630 library and vxconfigd disagree on existence of client number
◆ Description: This warning may safely be ignored.
◆ Action: None required.
V-5-1-2824
VxVM vxconfigd ERROR V-5-1-2824 Configuration daemon error 242
◆ Description: A node failed to join a cluster, or a cluster join is taking too long. If the join fails, the node retries the join automatically.
◆ Action: No action is necessary if the join is slow or a retry eventually succeeds.
V-5-1-2829
VxVM vxdg ERROR V-5-1-2829 diskgroup: Disk group version doesn’t support feature; see the vxdg upgrade command
◆ Description: The version of the specified disk group does not support disk group move, split or join operations.
◆ Action: Use the vxdg upgrade diskgroup command to update the disk group version.
106 VERITAS Volume Manager Troubleshooting Guide

Understanding Messages
V-5-1-2830
VxVM vxconfigd ERROR V-5-1-2830 Disk reserved by other host
◆ Description: An attempt was made to online a disk whose controller has been reserved by another host in the cluster.
◆ Action: No action is necessary. The cluster manager frees the disk and VxVM puts it online when the node joins the cluster.
V-5-1-2841
VxVM vxconfigd ERROR V-5-1-2841 enable failed: Error in disk groupconfiguration copiesUnexpected kernel error in configuration update; transactions are disabled.
◆ Description: Usually means that multipathing is misconfigured.
◆ Action: See “V-5-1-5929” on page 118 for possible causes and solutions.
V-5-1-2860
VxVM vxdg ERROR V-5-1-2860 Transaction already in progress
◆ Description: One of the disk groups specified in a disk group move, split or join operation is currently involved in another unrelated disk group move, split or join operation (possibly as the result of recovery from a system failure).
◆ Action: Use the vxprint command to display the status of the disk groups involved. If vxprint shows that the TUTIL0 field for a disk group is set to MOVE, and you are certain that no disk group move, split or join should be in progress, use the vxdg command to clear the field as described in “Recovering from Incomplete Disk Group Moves” on page 18. Otherwise, retry the operation.
V-5-1-2862
VxVM vxdg ERROR V-5-1-2862 object: Operation is not supported
◆ Description: DCO and snap objects dissociated by Persistent FastResync, and VVR objects cannot be moved between disk groups.
◆ Action: None. The operation is not supported.
Chapter 6, Error Messages 107

Understanding Messages
V-5-1-2866
VxVM vxdg ERROR V-5-1-2866 object: Record already exists in disk group
◆ Description: A disk group join operation failed because the name of an object in one disk group is the same as the name of an object in the other disk group. Such name clashes are most likely to occur for snap objects and snapshot plexes.
◆ Action: Use the following command to change the object name in either one of the disk groups:
# vxedit -g diskgroup rename old_name new_name
For more information about using the vxedit command, see the vxedit(1M) manual page.
V-5-1-2870
VxVM vxdg ERROR V-5-1-2870 volume: Volume or plex device is open or mounted
◆ Description: An attempt was made to perform a disk group move, split or join on a disk group containing an open volume.
◆ Action: It is most likely that a file system configured on the volume is still mounted. Stop applications that access volumes configured in the disk group, and unmount any file systems configured in the volumes.
V-5-1-2879
VxVM vxdg ERROR V-5-1-2879 subdisk: Record is associated
◆ Description: The named subdisk is not a top-level object.
◆ Action: Objects specified for a disk group move, split or join must be either disks or top-level volumes.
V-5-1-2907
VxVM vxdg ERROR V-5-1-2907 diskgroup: Disk group does not exist
◆ Description: The disk group does not exist or is not imported
◆ Action: Use the correct name, or import the disk group and try again.
108 VERITAS Volume Manager Troubleshooting Guide
Understanding Messages
V-5-1-2908
VxVM vxdg ERROR V-5-1-2908 diskdevice: Request crosses disk group boundary
◆ Description: The specified disk device is not configured in the source disk group for a disk group move or split operation.
◆ Action: Correct the name of the disk object specified in the disk group move or split operation.
V-5-1-2911
VxVM vxdg ERROR V-5-1-2911 diskname: Disk is not usable
◆ Description: The specified disk has become unusable.
◆ Action: Do not include the disk in any disk group move, split or join operation until it has been replaced or repaired.
V-5-1-2922
VxVM vxconfigd ERROR V-5-1-2922 Disk group exists and is imported
◆ Description: A slave tried to join a cluster, but a shared disk group already exists in the cluster with the same name as one of its private disk groups.
◆ Action: Use the vxdg -n newname import diskgroup operation to rename either the shared disk group on the master, or the private disk group on the slave.
V-5-1-2928
VxVM vxdg ERROR V-5-1-2928 diskgroup: Configuration too large for configuration copies
◆ Description: The disk group’s configuration database is too small to hold the expanded configuration after a disk group move or join operation.
◆ Action: None.
V-5-1-2933
VxVM vxdg ERROR V-5-1-2933 diskgroup: Cannot remove last disk group configuration copy
◆ Description: The requested disk group move, split or join operation would leave the disk group without any configuration copies.
◆ Action: None. The operation is not supported.
Chapter 6, Error Messages 109

Understanding Messages
V-5-1-3009
VxVM vxdg ERROR V-5-1-3009 object: Name conflicts with imported diskgroup
◆ Description: The target disk group of a split operation already exists as an imported disk group.
◆ Action: Choose a different name for the target disk group.
V-5-1-3020
VxVM vxconfigd ERROR V-5-1-3020 Error in cluster processing
◆ Description: This may be due to an operation inconsistent with the current state of a cluster (such as an attempt to import or deport a shared disk group to or from the slave). It may also be caused by an unexpected sequence of commands from vxclust.
◆ Action: Perform the operation from the master node.
V-5-1-3022
VxVM vxconfigd ERROR V-5-1-3022 Cannot find disk on slave node
◆ Description: A slave node in a cluster cannot find a shared disk. This is accompanied by the syslog message:
VxVM vxconfigd ERROR V-5-1-2173 cannot find disk disk
◆ Action: Make sure that the same set of shared disks is online on both nodes. Examine the disks on both the master and the slave with the command vxdisk list and make sure that the same set of disks with the shared flag is visible on both nodes. If not, check the connections to the disks.
V-5-1-3023
VxVM vxconfigd ERROR V-5-1-3023 Disk in use by another cluster
◆ Description: An attempt was made to import a disk group whose disks are stamped with the ID of another cluster.
◆ Action: If the disk group is not imported by another cluster, retry the import using the -C (clear import) flag.
110 VERITAS Volume Manager Troubleshooting Guide

Understanding Messages
V-5-1-3024
VxVM vxconfigd ERROR V-5-1-3024 vxclust not there
◆ Description: An error during an attempt to join a cluster caused vxclust to fail. This may be caused by the failure of another node during a join or by the failure of vxclust.
◆ Action: Retry the join. An error message on the other node may clarify the problem.
V-5-1-3025
VxVM vxconfigd ERROR V-5-1-3025 Unable to add portal for cluster
◆ Description: vxconfigd was not able to create a portal for communication with the vxconfigd on the other node. This may happen in a degraded system that is experiencing shortages of system resources such as memory or file descriptors.
◆ Action: If the system does not appear to be degraded, stop and restart vxconfigd, and try again.
V-5-1-3030
VxVM vxconfigd ERROR V-5-1-3030 Volume recovery in progress
◆ Description: A node that crashed attempted to rejoin the cluster before its DRL map was merged into the recovery map.
◆ Action: Retry the join when the merge operation has completed.
V-5-1-3031
VxVM vxconfigd ERROR V-5-1-3031 Cannot assign minor minor
◆ Description: A slave attempted to join a cluster, but an existing volume on the slave has the same minor number as a shared volume on the master.
This message is accompanied by the following console message:
VxVM vxconfigd ERROR V-5-1-2192 minor number minor disk group groupin use
◆ Action: Before retrying the join, use vxdg reminor (see the vxdg(1M) manual page) to choose a new minor number range either for the disk group on the master or for the conflicting disk group on the slave. If there are open volumes in the disk group, the reminor operation will not take effect until the disk group is deported and updated (either explicitly or by rebooting the system).
Chapter 6, Error Messages 111

Understanding Messages
V-5-1-3032
VxVM vxconfigd ERROR V-5-1-3032 Master sent no data
◆ Description: During the slave join protocol, a message without data was received from the master. This message is only likely to be seen in the case of an internal VxVM error.
◆ Action: Contact VERITAS Technical Support.
V-5-1-3033
VxVM vxconfigd ERROR V-5-1-3033 Join in progress
◆ Description: An attempt was made to import or deport a shared disk group during a cluster reconfiguration.
◆ Action: Retry when the cluster reconfiguration has completed.
V-5-1-3034
VxVM vxconfigd ERROR V-5-1-3034 Join not currently allowed
◆ Description: A slave attempted to join a cluster when the master was not ready. The slave will retry automatically.
◆ Action: No action is necessary if the join eventually completes. Otherwise, investigate the cluster monitor on the master.
V-5-1-3042
VxVM vxconfigd ERROR V-5-1-3042 Clustering license restricts operation
◆ Description: An operation requiring a full clustering license was attempted, and such a license is not available.
◆ Action: If the error occurs when a disk group is being activated, dissociate all but one plex from mirrored volumes before activating the disk group. If the error occurs during a transaction, deactivate the disk group on all nodes except the master.
V-5-1-3046
VxVM vxconfigd ERROR V-5-1-3046 Node activation conflict
◆ Description: The disk group could not be activated because it is activated in a conflicting mode on another node in a cluster.
◆ Action: Retry later, or deactivate the disk group on conflicting nodes.
112 VERITAS Volume Manager Troubleshooting Guide

Understanding Messages
V-5-1-3049
VxVM vxconfigd ERROR V-5-1-3049 Retry rolling upgrade
◆ Description: An attempt was made to upgrade a cluster to a higher protocol version when a transaction was in progress.
◆ Action: Retry the upgrade at a later time.
V-5-1-3050
VxVM vxconfigd ERROR V-5-1-3050 Version out of range for at least one node
◆ Description: Before trying to upgrade a cluster by running vxdctl upgrade, all nodes should be able to support the new protocol version. An upgrade can fail if at least one of them does not support the new protocol version.
◆ Action: Make sure that the VERITAS Volume Manager package that supports the new protocol version is installed on all nodes and retry the upgrade.
V-5-1-3091VxVM vxdg ERROR V-5-1-3091 diskname : Disk not moving, but subdisks onit are
◆ Description: Some volumes have subdisks that are not on the disks implied by the supplied list of objects.
◆ Action: Use the -o expand option to vxdg listmove to produce a self-contained list of objects.
V-5-1-3212
VxVM vxconfigd ERROR V-5-1-3212 Insufficient DRL log size: logging isdisabled.
◆ Description: A volume with an insufficient DRL log size was started successfully, but DRL logging is disabled and a full recovery is performed.
◆ Action: Create a new DRL of sufficient size.
Chapter 6, Error Messages 113

Understanding Messages
V-5-1-3243
VxVM vxdmpadm ERROR V-5-1-3243 The VxVM restore daemon is already running. You can stop and restart the restore daemon with desired arguments for changing any of its parameters.
◆ Description: The vxdmpadm start restore command has been executed while the restore daemon is already running.
◆ Action: Stop the restore daemon and restart it with the required set of parameters as shown in the vxdmpadm(1M) manual page.
V-5-1-3362
VxVM vxdmpadm ERROR V-5-1-3362 Attempt to disable controller failed.One (or more) devices can be accessed only through this controller. Use the -f option if you still want to disable this controller.
◆ Description: Disabling the controller could lead to some devices becoming inaccessible.
◆ Action: To disable the only path connected to a disk, use the -f option.
V-5-1-3486
VxVM vxconfigd ERROR V-5-1-3486 Not in cluster
◆ Description: Checking for the current protocol version (using vxdctl protocol version) does not work if the node is not in a cluster.
◆ Action: Bring the node into the cluster and retry.
V-5-1-3689VxVM vxassist ERROR V-5-1-3689 Volume record id rid is not found in the configuration.
◆ Description: An error was detected while reattaching a snapshot volume using snapback. This happens if a volume’s record identifier (rid) changes as a result of a disk group split that moved the original volume to a new disk group. The snapshot volume is unable to recognize the original volume because its record identifier has changed.
◆ Action: Use the following command to perform the snapback:
# vxplex [-g diskgroup] -f snapback volume plex
114 VERITAS Volume Manager Troubleshooting Guide

Understanding Messages
V-5-1-3828
VxVM vxconfigd ERROR V-5-1-3828 upgrade operation failed: Already athighest version
◆ Description: An upgrade operation has failed because a cluster is already running at the highest protocol version supported by the master.
◆ Action: No further action is possible as the master is already running at the highest protocol version it can support.
V-5-1-3848
VxVM vxconfigd ERROR V-5-1-3848 Incorrect protocol version (number) in volboot file
◆ Description: A node attempted to join a cluster where VxVM software was incorrectly upgraded or the volboot file is corrupted, possibly by being edited manually. The volboot file should contain a supported protocol version before trying to bring the node into the cluster.
◆ Action: Verify the supported cluster protocol versions using the vxdctl protocolversion command. The volboot file should contain a supported protocol version before trying to bring the node into the cluster. Run vxdctl init to write a valid protocol version to the volboot file. Restart vxconfigd and retry the join.
V-5-1-4220
VxVM vxconfigd ERROR V-5-1-4220 DG move: can’t import diskgroup,giving up
◆ Description: The specified disk group cannot be imported during a disk group move operation. (The disk group ID is obtained from the disk group that could be imported.)
◆ Action: The disk group may have been moved to another host. One option is to locate it and use the vxdg recover command on both the source and target disk groups. Specify the -o clean option with one disk group, and the -o remove option with the other disk group. See “Recovering from Incomplete Disk Group Moves” on page 18 for more information.
Chapter 6, Error Messages 115

Understanding Messages
V-5-1-4267
VxVM vxassist WARNING V-5-1-4267 volume volume already has at least one snapshot plexSnapshot volume created with these plexes will have a dco volume withno associated dco plex.
◆ Description: An error was detected while adding a DCO object and DCO volume to a mirrored volume. There is at least one snapshot plex already created on the volume. Because this snapshot plex was created when no DCO was associated with the volume, there is no DCO plex allocated for it.
◆ Action: See the section “Adding a Version 0 DCO and DCO Volume” in the chapter “Administering Volume Snapshots” of the VERITAS Volume Manager Administrator’s Guide.
V-5-1-4277
VxVM vxconfigd ERROR V-5-1-4277 cluster_establish: CVM protocolversion out of range
◆ Description: When a node joins a cluster, it tries to join at the protocol version that is stored in its volboot file. If the cluster is running at a different protocol version, the master rejects the join and sends the current protocol version to the slave. The slave re-tries with the current version (if that version is supported on the joining node), or the join fails.
◆ Action: Make sure that the joining node has a VERITAS Volume Manager release installed that supports the current protocol version of the cluster.
V-5-1-4551
VxVM vxconfigd ERROR V-5-1-4551 dg_move_recover: can’t locate disk(s),giving up
◆ Description: Disks involved in a disk group move operation cannot be found, and one of the specified disk groups cannot be imported.
◆ Action: Manual use of the vxdg recover command may be required to clean the disk group to be imported. See “Recovering from Incomplete Disk Group Moves” on page 18 for more information.
116 VERITAS Volume Manager Troubleshooting Guide

Understanding Messages
V-5-1-4620 VxVM vxassist WARNING V-5-1-4620 Error while retrieving information from SAL
◆ Description: The vxassist command does not recognize the version of the SAN Access Layer (SAL) that is being used, or detects an error in the output from SAL.
◆ Action: If a connection to SAL is desired, ensure that the correct version of SAL is installed and configured correctly. Otherwise, suppress communication between vxassist and SAL by adding the following line to the vxassist defaults file (usually /etc/default/vxassist):
salcontact=no
V-5-1-4625 VxVM vxassist WARNING V-5-1-4625 SAL authentication failed...
◆ Description: The SAN Access Layer (SAL) rejects the credentials that are supplied by the vxassist command.
◆ Action: If connection to SAL is desired, use the vxspcshow command to set a valid user name and password. Otherwise, suppress communication between vxassist and SAL by adding the following line to the vxassist defaults file (usually /etc/default/vxassist):
salcontact=no
V-5-1-5150
VxVM vxassist ERROR V-5-1-5150 Insufficient number of active snapshotmirrors in snapshot_volume.
◆ Description: An attempt to snap back a specified number of snapshot mirrors to their original volume failed.
◆ Action: Specify a number of snapshot mirrors less than or equal to the number in the snapshot volume.
V-5-1-5160
VxVM vxplex ERROR V-5-1-5160 Plex plex not associated to a snapshot volume.
◆ Description: An attempt was made to snap back a plex that is not from a snapshot volume.
◆ Action: Specify a plex from a snapshot volume.
Chapter 6, Error Messages 117

Understanding Messages
V-5-1-5161
VxVM vxplex ERROR V-5-1-5161 Plex plex not attached.
◆ Description: An attempt was made to snap back a detached plex.
◆ Action: Reattach the snapshot plex to the snapshot volume.
V-5-1-5162
VxVM vxplex ERROR V-5-1-5162 Plexes do not belong to the same snapshot volume.
◆ Description: An attempt was made to snap back plexes that belong to different snapshot volumes.
◆ Action: Specify the plexes in separate invocations of vxplex snapback.
V-5-1-5929
VxVM vxconfigd NOTICE V-5-1-5929 Unable to resolve duplicate diskid.
◆ Description: When VxVM detects disks with duplicate disk IDs (unique internal identifiers), VxVM attempts to select the appropriate disk (using logic that is specific to an array). If a disk can not be selected, VxVM does not import any of the duplicated disks into a disk group. In the rare case when VxVM cannot make the choice, you must choose which duplicate disk to use.
Note In releases prior to 3.5, VxVM selected the first disk that it found if the selection process failed. FromVxVM 3.5 onward, the default behavior is to avoid the selection of the wrong disk as this could lead to data corruption. Arrays with mirroring capability in hardware are particularly susceptible to such data corruption.
◆ Action: User intervention is required in the following cases:
◆ Case 1: When DMP is disabled to an array that has multiple paths, then each path to the array is claimed as a unique disk.
If DMP is suppressed, VxVM does not know which path to select as the true path. You must choose which path to use. Decide which path to exclude, and then either edit the file /etc/vx/vxvm.exclude,or, if vxconfigd is running, select item 1 (suppress all paths through a controller from VxVM’s view) or item 2 (suppress a path from VxVM’s view) from vxdiskadm option 17 (Prevent multipathing/Suppress devices from VxVM’s view).
118 VERITAS Volume Manager Troubleshooting Guide

Understanding Messages
The following example shows a vxvm.exclude file with paths c6t0d0s2, c6t0d1s2, and c6t0d2s2 excluded from VxVM:
exclude_all 0pathsc6t0d0s2 /pci@1f,4000/SUNW,ifp@2/ssd@w50060e8003275705,0c6t0d1s2 /pci@1f,4000/SUNW,ifp@2/ssd@w50060e8003275705,1c6t0d2s2 /pci@1f,4000/SUNW,ifp@2/ssd@w50060e8003275705,2#controllers#product#pathgroups
◆ Case 2: Some arrays such as EMC and HDS provide mirroring in hardware. When a LUN pair is split, depending on how the process is performed, this may result in two disks with the same disk ID.
Check with your array vendor to make sure that you are using the correct split procedure. If you know which LUNs you want to use, choose which path to exclude, and then either edit the file /etc/vx/vxvm.exclude, or, if vxconfigd is running, select item 1 (Suppress all paths through a controller from VxVM’s view) or item 2 (Suppress a path from VxVM’s view) from vxdiskadm option 17 (Prevent multipathing/Suppress devices from VxVM’s view).
◆ Case 3: If disks have become duplicated using the dd command or any other disk copying utility, choose which set of duplicate disks you want to exclude, and then either edit the file /etc/vx/vxvm.exclude, or, if vxconfigd is running, select item 1 (Suppress all paths through a controller from VxVM’s view) or item 2 (Suppress a path from VxVM’s view) from vxdiskadm option 17 (Prevent multipathing/Suppress devices from VxVM’s view).
◆ Case 4: (Solaris 9 only) After suppressing one path to a multipathed array from DMP, you then have suppressed that path from VxVM using item 1 (suppress all paths through a controller from VxVM’s view) from vxdiskadm option 17 (Prevent multipathing/Suppress devices from VxVM’s view). If all bootdg disks are from that array, vxconfigd does not start. (You may also see errors V-5-0-64, V-5-1-946 and V-5-1-2841.)
If only one array is connected to the controller, suppress the path from DMP using item 5 (Prevent multipathing of all disks on a controller by VxVM), and then item 1 (Suppress all paths through a controller from VxVM’s view), from vxdiskadm option 17 (Prevent multipathing/Suppress devices from VxVM’s view).
Chapter 6, Error Messages 119

Understanding Messages
If more than one array is connected to the controller, suppress the path from DMP using item 5 (Prevent multipathing of all disks on a controller by VxVM), and then item 2 (Suppress a path from VxVM’s view), from vxdiskadm option 17 (Prevent multipathing/Suppress devices from VxVM’s view).
V-5-1-10128
VxVM vxassist ERROR V-5-1-10128 No more space in disk groupconfiguration.
◆ Description: There is no more space in the disk group’s configuration database for VxVM object records.
◆ Action: Copy the contents of several volumes to another disk group and then delete the volumes from this disk group, or use the disk group split/join feature to move the volumes to another disk group. To avoid the problem in the future, do not create more than a few hundred volumes in a disk group, or specify a larger size for the private region when adding disks to a new disk group.
V-5-2-2400
VxVM vxdisksetup NOTICE V-5-2-2400 daname: Duplicate DA records encountered for this device.
◆ Description: This may occur if a disk has been replaced in a Sun StorEdgeTM A5x00 (or similar) array without using the luxadm command to notify the operating system. Duplicated disk access record entries similar to the following appear in the output from the vxdisk list command:
c1t5d0s2 sliced c1t5d0s2 - errorc1t5d0s2 sliced c1t5d0s2 - online|error
Note The status of the second entry may be online or error.
◆ Action: Perform the following steps to correct the problem:
a. Use the following command for each of the duplicated disk access names to remove them all from VxVM control:
# vxdisk rm daname
Run the vxdisk list command to ensure that you have removed all entries for the disk access name.
120 VERITAS Volume Manager Troubleshooting Guide

Understanding Messages
b. Use the Solaris luxadm command to obtain the A5K array name and slot number of the disk, and then use these with luxadm to remove the disk:
# luxadm disp /dev/rdsk/daname# luxadm remove_device array_name,slot_number
c. Pull out the disk as instructed to by luxadm.
d. Run the following commands:
# devfsadm -C# vxdctl enable
This completes the removal of device entries corresponding to the physical disk.
e. As in step a, run the vxdisk list and vxdisk rm commands to list any remaining entries for the disk access name and remove these from VxVM control.
f. Use the following luxadm command to take the disk offline on all the paths to it. The following example shows how to take a disk offline that is connected to controllers c1 and c2:
# luxadm -e offline /dev/dsk/c1t5d0s2# luxadm -e offline /dev/dsk/c2t5d0s2
g. Repeat step e and step f until no entries remain for the disk in the output from vxdisk list. This completes the removal of stale device entries for the disk from VxVM.
h. Finally, follow the procedure to replace the failed or removed disk that is described in the “Administering Disks” chapter of the VERITAS Volume Manager Administrator’s Guide.
Chapter 6, Error Messages 121
Understanding Messages
122 VERITAS Volume Manager Troubleshooting Guide
Index
Symbols .cmdlog file 59 .translog file 61 /etc/system file
missing or damaged 39 restoring 39, 40
/etc/vfstab file damaged 38 purpose 38
/etc/vx/cbr/bk/diskgroup.dgid dgid .binconfig file 66 dgid .cfgrec file 66 dgid .diskinfo file 66 dgid.dginfo file 66
/etc/vx/log logging directory 59, 61 /var/adm/configd.log file 71 /var/adm/syslog/syslog.log file 72
A ACTIVE plex state 3 ACTIVE volume state 12 aliased disks 32
B backup tapes, recovery 41 badlog flag
clearing for DCO 21 BADLOG plex state 11 boot command
-a flag 33, 39 -s flag 40, 42 syntax 33
boot disks alternate 32 configurations 31 hot-relocation 34 listing aliases 32 re-adding 45 recovering from backup tape 41
recovery 31 relocating subdisks 34 replacing 45 using aliases 32
boot failure cannot open altboot_disk 32 cannot open boot device 35 damaged /usr entry 38 due to stale plexes 36 due to unusable plexes 36 invalid partition 37
booting system aliased disks 32 recovery from failure 35 using CD-ROM 42
C CD-ROM, booting 42 CLEAN plex state 3 client ID
in command logging file 60 in transaction logging file 62
cmdlog file 59 commands
associating with transactions 63 logging 59
configuration backing up for disk groups 65, 66 backup files 66 resolving conflicting backups 68 restoring for disk groups 65, 67
copy-on-write recovery from failure of 28
D data loss, RAID-5 9 DCO
recovering volumes 19 removing badlog flag from 21
123
DCO volumes recovery from I/O failure on 29
degraded mode, RAID-5 10DEGRADED volume state 10detached RAID-5 log plexes 14DETACHED volume kernel state 11devalias command 32DISABLED plex kernel state 3, 11disabling VxVM 43disk group errors
new host ID 93disk groups
backing up configuration of 65, 66configuration backup files 66recovering from failed move, split orjoin 18resolving conflicting backups 68restoring configuration of 65, 67
disk IDsfixing duplicate 118
disksaliased 32causes of failure 1cleaning up configuration 56failing flag 7failures 10fixing duplicated IDs 118invalid partition 37reattaching 8reattaching failed 8
DMPfixing duplicated disk IDs 118
dumpadm command 35
E eeprom
using boot disk aliases 32EEPROM variables
use-nvramrc? 32EMPTY plex state 3ENABLED plex kernel state 3ENABLED volume kernel state 12error message
enable failed 107ERROR messages 74error messages
A virtual disk device is open 89All transactions are disabled 86Already at highest version 115
Attempt to disable controller failed 114Attempt to enable a controller that is not available 105can’t import diskgroup 115Can’t locate disk(s) 116Can’t open boot device 35Cannot assign minor 111Cannot auto-import group 65, 94Cannot create /var/adm/utmp or/var/adm/utmpx 38Cannot find disk on slave node 110Cannot kill existing daemon 104cannot open /dev/vx/config 88Cannot open /etc/vfstab 88cannot open altboot_disk 32Cannot recover temp database 105Cannot remove last disk group configuration copy 109Cannot reset VxVM kernel 89Cannot start volume 85, 89, 90Clustering license restricts operation 112Configuration records are inconsistent 94Configuration too large for configuration copies 109CVM protocol version out of range 116daemon count must be above numberwhile clustered 106default log file 71Device is already open 88Differing version of vxconfigd installed 91Disabled by errors 66, 86Disk for disk group not found 98Disk group does not exist 18, 108Disk group errors
multiple disk failures 86Disk group has no valid configurationcopies 94, 97, 98Disk group version doesn’t supportfeature 106Disk in use by another cluster 110Disk is in use by another host 97Disk is not usable 109Disk not moving, but subdisks on itare 113Disk reserved by another host 107Disk write failure 93Duplicate DA records encountered for
124 VERITAS Volume Manager Troubleshooting Guide
this device 120Duplicate record in configuration 94enable failed 103Error in cluster processing 110Error in disk group configuration copies 107Errors in some configuration copies 94,96, 103failed write of utmpx entry 38File just loaded does not appear to beexecutable 37Format error in configuration copy 94group exists 109import failed 97Incorrect protocol version in volboot file 115Insufficient DRL log size, logging is disabled 113Insufficient number of active snapshotmirrors in snapshot_volume 117Invalid block number 94Invalid magic number 94Join in progress 112Join not allowed now 112logging 71Master sent no data 112Memory allocation failure 87Missing vxconfigd 104Name conflicts with importeddiskgroup 110No more space in disk group configuration 120No such device or address 88No such file or directory 88no valid complete plexes 89No valid disk found containing disk group 97no valid plexes 85Node activation conflict 112Not in cluster 114not updated with new host ID 93Operation is not supported 107Plex plex not associated with a snapshotvolume 117Plex plex not attached 118Plexes do not belong to the samesnapshot volume 118RAID-5 plex does not map entire volume length 16
Record already exists in disk group 108Record is associated 108Record volume is in disk group diskgroup1 plex is in group diskgroup2 100Reimport of disk group failed 97Request crosses disk group boundary 109Retry rolling upgrade 113Return from cluster_establish is Configuration daemon error 106Skip disk group with duplicate name 95some subdisks are unusable and the parity is stale 16startup script 72Synchronization of the volume stopped due to I/O error 29System boot disk does not have a valid root plex 36System boot disk does not have a valid rootvol plex 100System startup failure 36, 88The VxVM restore daemon is alreadyrunning 114There are two backups that have the same diskgroup name with differentdiskgroup id 68There is no volume configured for the root device 101Transaction already in progress 107transactions are disabled 107Unable to add portal for cluster 111Unexpected kernel error in configuration update 107Unrecognized operating mode 84update failed 87upgrade operation failed 115Version number of kernel does notmatch vxconfigd 102Version out of range for at least onenode 113Vol recovery in progress 111Volume for mount point /usr not foundin rootdg disk group 102Volume is not startable 16volume not in rootdg disk group 99Volume or plex device is open ormounted 108Volume record id is not found in the
Index 125

configuration 114volume state is invalid 90vxclust not there 111vxconfigd cannot boot-start RAID-5volumes 105vxconfigd minor number in use 111vxconfigd not ready 104
F failing flag
clearing 7 failures
disk 10 system 9
FATAL ERROR messages 74 fatal error messages
bootdg cannot be imported during boot 100 Memory allocation failure during startup 87
files disk group configuration backup 66
H hardware failure, recovery from 1 hot-relocation
boot disks 34 defined 1 RAID-5 12 root disks 34 starting up 57
I install-db file 43, 51 instant snapshot operations
recovery from failure of 25 IOFAIL plex state 4
L listing
alternate boot disks 32 unstartable volumes 2
log file default 71 syslog error messages 72 vxconfigd 71
LOG plex state 11 log plexes
importance for RAID-5 9 recovering RAID-5 14
logging
associating commands and transactions 63commands and transactions 59directory 59, 61
M mirrored volumes, recovering 5 MOVE flag
set in TUTIL0 field 18
N NEEDSYNC volume state 13 NOTICE messages 74 notice messages
added disk array 75Attempt to disable controller failed 76Detached disk 86Detached log for volume 90Detached plex in volume 90Detached subdisk in volume 91Detached volume 91disabled controller connected to disk array 77disabled dmpnode 77disabled path belonging to dmpnode 77enabled controller connected to disk array 78enabled dmpnode 78enabled path belonging to dmpnode 79Offlining config copy 99Path failure 82read error on object 83removed disk array 83Rootdisk has just one enabled path 76Unable to resolve duplicate diskid 118Volume entering degraded mode 89
O OpenBoot PROMs (OPB) 33
P PANIC messages 73 parity
regeneration checkpointing 14 resynchronization for RAID-5 13 stale 9
partitions, invalid 37 plex kernel states
DISABLED 3, 11 ENABLED 3
plex states
126 VERITAS Volume Manager Troubleshooting Guide

ACTIVE 3 BADLOG 11 CLEAN 3 EMPTY 3 IOFAIL 4 LOG 11 STALE 5
plexes defined 3 displaying states of 2 in RECOVER state 6 mapping problems 15 recovering mirrored volumes 5
primary boot disk failure 32 process ID
in command logging file 60 in transaction logging file 62
PROMs, boot 33
R RAID-5
detached subdisks 10 failures 9 hot-relocation 12 importance of log plexes 9 parity resynchronization 13 recovering log plexes 14 recovering stale subdisk 14 recovering volumes 12 recovery process 11 stale parity 9 starting forcibly 17 starting volumes 15 startup recovery process 11 subdisk move recovery 15 unstartable volumes 15
reattaching disks 8reconstructing-read mode, stale subdisks 10RECOVER state 6recovery
disk 8 reinstalling entire system 48 replacing
boot disks 45 REPLAY volume state 11 restarting disabled volumes 7 resynchronization
RAID-5 parity 13 root disks
booting alternate 32configurations 31hot-relocation 34re-adding 45recovering from backup tape 41recovery 31repairing 41replacing 45
root file system backing up 42 configurations 31 damaged 48 restoring 43
rootability cleaning up 52 reconfiguring 56
S snapshot resynchronization
recovery from errors during 29 stale parity 9 states
displaying for volumes and plexes 2 subdisks
marking as non-stale 17 recovering after moving for RAID-5 15 recovering stale RAID-5 14 stale, starting volume 17 unrelocating to replaced boot disk 34
swap space configurations 31
SYNC volume state 11, 13 syslog
error log file 72 system
reinstalling 48 system failures 9
T Technical assistance ix transactions
associating with commands 63 logging 61
translog file 61 TUTIL0 field
clearing MOVE flag 18
U ufsdump 42 ufsrestore
Index 127

restoring a UFS file system 43 use-nvramrc? 32 usr file system
backing up 42 configurations 31 repairing 41 restoring 43
V V-5-0-106 76 V-5-0-108 77 V-5-0-110 77 V-5-0-111 77 V-5-0-112 77 V-5-0-144 78 V-5-0-145 78 V-5-0-146 78 V-5-0-147 78 V-5-0-148 79 V-5-0-164 79 V-5-0-166 79 V-5-0-168 80 V-5-0-181 80 V-5-0-194 80 V-5-0-196 80 V-5-0-2 75 V-5-0-207 81 V-5-0-216 81 V-5-0-237 81 V-5-0-243 81 V-5-0-244 82 V-5-0-249 82 V-5-0-251 82 V-5-0-252 83 V-5-0-258 83 V-5-0-281 83 V-5-0-34 75 V-5-0-35 76 V-5-0-386 83 V-5-0-4 75 V-5-0-55 76 V-5-0-64 76 V-5-1-10128 120 V-5-1-1049 36, 100 V-5-1-1063 101 V-5-1-111 85 V-5-1-116 85 V-5-1-117 85 V-5-1-1171 102
V-5-1-1186 102 V-5-1-121 86 V-5-1-122 86 V-5-1-123 66, 86 V-5-1-1236 16 V-5-1-1237 16 V-5-1-124 87 V-5-1-134 87 V-5-1-135 87 V-5-1-148 88 V-5-1-1589 103 V-5-1-169 88 V-5-1-2020 104 V-5-1-2173 110 V-5-1-2192 111 V-5-1-2197 104 V-5-1-2198 104 V-5-1-2274 105 V-5-1-2290 105 V-5-1-2353 105 V-5-1-249 89 V-5-1-2524 106 V-5-1-2630 106 V-5-1-2824 106 V-5-1-2829 106 V-5-1-2830 107 V-5-1-2841 107 V-5-1-2860 107 V-5-1-2862 107 V-5-1-2866 108 V-5-1-2870 108 V-5-1-2879 108 V-5-1-2907 18, 108 V-5-1-2908 109 V-5-1-2911 109 V-5-1-2922 109 V-5-1-2928 109 V-5-1-2933 109 V-5-1-3009 110 V-5-1-3020 110 V-5-1-3022 110 V-5-1-3023 110 V-5-1-3024 111 V-5-1-3025 111 V-5-1-3030 111 V-5-1-3031 111 V-5-1-3032 112 V-5-1-3033 112 V-5-1-3034 112
128 VERITAS Volume Manager Troubleshooting Guide

V-5-1-3042 112 V-5-1-3046 112 V-5-1-3049 113 V-5-1-3050 113 V-5-1-3091 113 V-5-1-3212 113 V-5-1-3243 114 V-5-1-3362 114 V-5-1-3486 114 V-5-1-3689 114 V-5-1-3828 115 V-5-1-3848 115 V-5-1-4220 115 V-5-1-4267 116 V-5-1-4277 116 V-5-1-4551 116 V-5-1-4620 117 V-5-1-4625 117 V-5-1-480 89 V-5-1-484 89 V-5-1-485 90 V-5-1-5150 117 V-5-1-5160 117 V-5-1-5161 118 V-5-1-5162 118 V-5-1-525 90 V-5-1-526 90 V-5-1-527 91 V-5-1-528 91 V-5-1-543 91 V-5-1-544 91 V-5-1-545 92 V-5-1-546 92 V-5-1-554 93 V-5-1-557 93 V-5-1-568 94 V-5-1-569 65, 94 V-5-1-571 95 V-5-1-577 96 V-5-1-579 96, 103 V-5-1-583 97 V-5-1-587 97 V-5-1-5929 118 V-5-1-6012 68 V-5-1-663 98 V-5-1-6840 29 V-5-1-737 99 V-5-1-768 99 V-5-1-90 84
V-5-1-92 84V-5-1-923 100V-5-1-946 100V-5-2-2400 120VM disks, aliased 32volume kernel states
DETACHED 11 ENABLED 12
volume states ACTIVE 12 DEGRADED 10 NEEDSYNC 13 REPLAY 11 SYNC 11, 13
volumes cleaning up 53 displaying states of 2 listing unstartable 2 RAID-5 data loss 9 reconfiguring 56 recovering for DCO 19 recovering mirrors 5 recovering RAID-5 12 restarting disabled 7 stale subdisks, starting 17
vxcmdlog controlling command logging 59
vxconfigbackup backing up disk group configuration 67
vxconfigd log file 71
vxconfigd.log file 71 vxconfigrestore
restoring a disk group configuration 67 vxdco
removing badlog flag from DCO 21 vxdg
recovering from failed disk group move, split or join 18
vxedit clearing a disk failing flag 7
vxinfo command 2 vxmend command 5 vxplex command 14 vxprint
displaying volume and plex states 2 vxreattach
reattaching failed disks 8 vxsnap make
Index 129

recovery from failure of 26vxsnap prepare
recovery from failure of 25vxsnap reattach
recovery from failure of 27vxsnap refresh
recovery from failure of 27vxsnap restore
recovery from failure of 27vxtranslog
controlling transaction logging 61vxunreloc command 34VxVM
disabling 43RAID-5 recovery process 11recovering configuration of 50reinstalling 50
vxvol recover command 14vxvol resync command 13vxvol start command 5
W WARNING messages 74warning messages
Cannot create device 84Cannot exec /bin/rm to removedirectory 84Cannot exec /usr/bin/rm to removedirectory 84Cannot find device number 76Cannot fork to remove directory 85cannot log commit record for Diskgroup bootdg 76Cannot open log file 85corrupt label_sdo 37Detaching plex from volume 86detaching RAID-5 76Disk device not found 92Disk group is disabled 94Disk group log may be too small 96Disk in group flagged as shared 91Disk in group locked by host 92Disk names group but group IDdiffers 93
Disk skipped 91disks not updated with new host ID 94Double failure condition detected onRAID-5 78Duplicate virtual device number(s) 98error 28 76Error while retrieving information fromSAL 117Failed to join cluster 79Failed to log the detach of the DRL volume 79Failure in RAID-5 logging operation 80Illegal vminor encountered 80Kernel log full 80Kernel log update failed 80library and vxconfigd disagree on existence of client 106log object detached from RAID-5volume 81Log size should be at least 96mod_install returned errno 81object detached from RAID-5 volume 81object plex detached from volume 75Overlapping mirror plex detached from volume 81Plex for root volume is stale orunusable 36RAID-5 volume entering degradedmode operation 82read error on mirror plex of volume 82Received spurious close 77Root volumes are not supported on your PROM version 83SAL authentication failed 117subdisk failed in plex 83unable to read label 37Uncorrectable read error 75Uncorrectable write error 75volume already has at least one snapshotplex 116volume is detached 78Volume remapped 98
130 VERITAS Volume Manager Troubleshooting Guide