video tutorial - vstarcam€¦ · device share click "settings" on the right corner, then...
TRANSCRIPT


Video Tutorial
If it is your first time to use our products, it is recommended to scan the following QR code to watch the video tutorial.
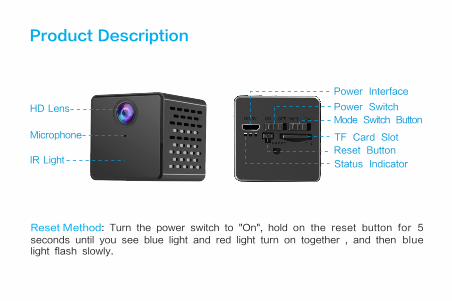
Product Description
Microphone
Mode Switch Button
TF Card Slot
Reset Button
Status Indicator
Power Interface
HD Lens
IR Light
Power Switch
Reset Method: Turn the power switch to "On", hold on the reset button for 5
seconds until you see blue light and red light turn on together , and then blue light flash slowly.
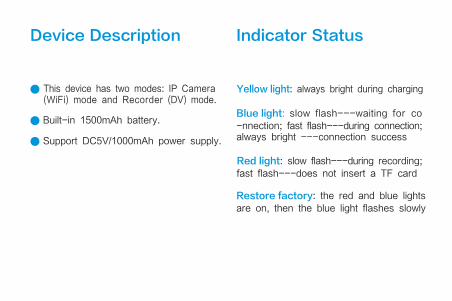
Device Description
Built-in 1500mAh battery.
This device has two modes: IP Camera(WiFi) mode and Recorder (DV) mode.
Support DC5V/1000mAh power supply.
Indicator Status
Yellow light: always bright during charging
Blue light: slow flash---waiting for co
-nnection; fast flash---during connection; always bright ---connection success
Red light: slow flash---during recording;
fast flash---does not insert a TF card
Restore factory: the red and blue lights
are on, then the blue light flashes slowly
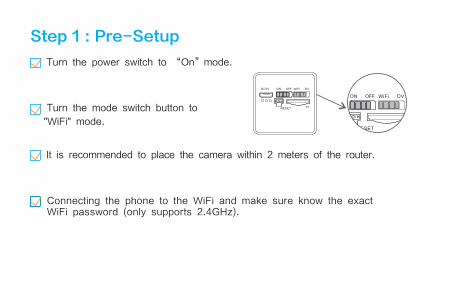
Step 1 : Pre-Setup
Turn the power switch to “On”mode.
Turn the mode switch button to
It is recommended to place the camera within 2 meters of the router.
Connecting the phone to the WiFi and make sure know the exact WiFi password (only supports 2.4GHz).
"WiFi" mode.
DC5V ON OFF WiFi DV
TFRESET
ON OFF WiFi DV
TFRESET

Step 2 : APP Download and Registration
1 2Search for "Eye4" in App Store or Google Play, or scan the QR code to download the app.
Click "Register", enter the user name and password to complete the registration, and also supports the third party such as Facebook to login directly.

Step 3: Add Devices to the APP
1 Open the app, click the "+" in the upper right corner , and scan the QR code on the body of the camera, then follow the prompts on the app to complete the adding. (Note: For Android phone, it will pop up some system permission window, please select "Allow")
DC5V ON OFF WiFi DV
TFRESET

2 If you can't find the QR code, click the "+" in the upper right corner, select "Others"on the bottom right corner — "IP Camera"--- "AP mode adding", then select "There is a router" or "No router" according to the application environment.

You re Done!
Please write down your device information:
Wait for about 30 seconds, it will prompt "binding successfully" on the APP.Click "Configure WiFi" and enter the WiFi password to complete the configuration.Or enter "Settings" --- "WiFi " to complete the configuration.
Eye4 account name:
Eye4 account password:
‘

Configuring WiFi
Click " Settings"---”WiFi ", select the WiFi you want to connect, enter the WiFi password. About 60 seconds the camera restarts and the configuration is complete.
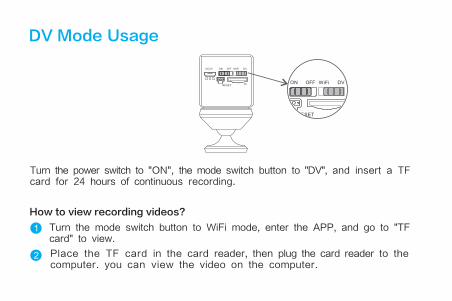
DV Mode Usage
How to view recording videos?
Turn the power switch to "ON", the mode switch button to "DV", and insert a TF card for 24 hours of continuous recording.
Turn the mode switch button to WiFi mode, enter the APP, and go to "TF card" to view.
1
Place the TF card in the card reader, then plug the card reader to the computer. you can view the video on the computer.
2
DC5V ON OFF WiFi DV
TFRESETON OFF WiFi DV
TFRESET

Device Share
Click "Settings" on the right corner, then select "Device Share"--- "QR Code Sharing". Other users can open the app and click the "+" in the upper right corner of the home page to scan the QR code to add the device.

Cloud Storage
The camera supports cloud storage service. After activated the cloud storage service, when the motion detection is triggered, the video will be uploaded to the cloud storage server immediately, and the video can be viewed even if the camera is stolen.
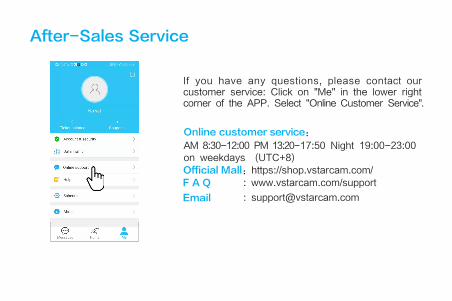
After-Sales Service
Online customer service:
AM 8:30-12:00 PM 13:20-17:50 Night 19:00-23:00
on weekdays (UTC+8)
If you have any questions, please contact our customer service: Click on "Me" in the lower right corner of the APP. Select "Online Customer Service".
: www.vstarcam.com/supportF A Q
Official Mall:https://shop.vstarcam.com/


物料编号:3-05-01-007-3038
封面材质:128g铜版纸(封面/封底覆光膜)
内页材质:128g铜版纸
尺寸:120x80mm
颜色:四色印刷
装订方式:骑马钉(一个钉)