€¦ · web viewstudents will manipulate jumping in a virtual world. ... video tutorials” the...
TRANSCRIPT
Lesson 10
Platform Games
Objectives:
Students will program action qualifiers Students will program player movement by testing the proximity of solid objects relative to the
player Students will program platforms & simulate gravity in a virtual world Students will program gravity simulation Students will manipulate jumping in a virtual world Students will program & refine climbing in a virtual world Students will program intuitive movement keys for ergonomic gameplay Students will program sprite images to match object movement Students will synthesize obstacles & objectives to make a game appropriate for the target market Students will create game refinements Students will demonstrate knowledge of imbedded marketing & advertising in games Students will use industry-standard documents to plan & build an original game

Situation
The Rainforest Laser Tag Company wants a simple platform game. The audience for the game is boys, age 9 to 12. For that reason, the controls should be very user friendly & the actions not complex. Before completing the final game build, you must complete a proof of concept build. Proof of concept is a basic game build to demonstrate that a design is possible before more time & money are invested.
How to Begin
The position of objects in this build & the images used are only for the proof of concept testing. Final design & animations will be updated in alpha & beta versions of the game build.
1. Open Game Maker
2. Save the game as LastName_Platform in your video game design folder.
3. Create the following sprites & objects. The objects should be both visible & solid.
Sprite Name Image File Object Name
SPR_Platform Platform.png OBJ_Platform
SPR_Pineapple Pineapple.png OBJ_Avatar
4. Create a new room & name it Level 1. Also enter Rainforest Laser Tag Platform Game as the caption.
5. Place a row of platform objects at the bottom of the room & a few floating platforms above the ground level.
6. Place a pineapple object on the top platform. This will serve as the basic avatar.

Position Testing
This lesson focuses on using position testing to create smooth movement. In position testing, the computer checks where the player’s avatar is before allowing it to move into that spot. This is an important part of a platform game where the gravity settings need to change based on whether or not the player is in the air or on a platform. To demonstrate this, you will program the avatar (pineapple object) for basic movement using position testing.
7. Open the Object Properties dialog box for the OBJ_Pineapple.
8. Add a keyboard event for the player pressing the left arrow key.
9. Drag & drop Check Empty (Control) into the Actions: column.
10. In the Check Empty dialog box enter the following:
a. Click Self, Enter x: -4, y: 0, Object: Only Solid, Check Relative, & OK.
This actions check to see if the space 4 pixels to the left of the avatar is empty. If this is true & the player is pressing the left arrow key, then the avatar should jump to that position. You will now add this programming. It is a good habit to offset the actions related to a qualifier in a block of code. This helps to visually separate the qualifiers & actions & makes it easy to add a series of action for each qualifier as needed during programming.
11. Drag & Drop a Start Block (Control) into the actions: column below the qualifier you just added.
12. Drag & drop Jump to Position (Move) into the actions: column.
13. In the dialog box enter the following:
a. Click Self, Enter x: -4, y: 0, Check Relative, & OK.
14. Drag & drop an End Block (Control) into the Actions: column.
15. Repeat similar steps to move the avatar 4 pixels to the right.
16. Test play the game. Notice that the avatar moves fine, but will not fall when it moves off of a platform. Gravity needs to be programmed to make the avatar fall.
17. Save your work.
Gravity of the Situation
In the virtual world, gravity is not automatic. The game engine must be programmed to make the avatar fall when it is not on a platform. Programming gravity in Game Maker so the game engine pushes objects toward the bottom of the screen makes objects fall like they would in real life.
18. Click Add Event. Click the Step Event & select Step.

19. Drag & drop Check Empty (Control) into the actions: column.
20. In the dialog box enter the following:
a. Click Self, x: 0, y: 1, Object: Only Solid, Relative, click OK.
b. This will check the space one pixel below the object. If the space is empty, then the avatar is not standing on a solid object & should fall.
21. Drag &drop a Start Block (Control) into the actions: column.
22. Drag & drop Set Gravity (Move) into the actions: column.
23. In the dialog box enter the following:
a. Click Self, Direction: 270, Gravity: 0.3 (This sets how strong of a pull gravity has on the object), Click OK.
24. Drag & drop End Block (Control) into the actions: column.
25. Test play the game. If the avatar will not move, you will fix this in the next section. If the avatar freefalls after moving from the first platform, you will fix this later.
26. Save you work.
Gravity Bug
In Game Maker, gravity does not turn off unless you tell it to. Since the gravity is pushing the avatar down, it cannot move left or right. An ELSE qualifier needs to be added to the step event to address whenever the test for a space 1 pixel below the avatar empty of solid objects is FALSE.
27. Drag & drop ELSE (Control) into the Actions: column.
28. Drag a Start Block (Control) into the actions: column under the ELSE action.
29. Drag & drop Set Gravity (Move) into the actions: column.
30. In the dialog box enter the following:
a. Click Self, Direction: 0, Gravity: 0, & click OK.
31. Drag End Block (Control) into the actins: column.

32. Test play & Save your work.
Freefalling Bug
Right now, the avatar sometimes falls through the platforms, gets stuck inside of a platform, or floats one pixel above a platform. You need to fix these problems before the proof concept can be considered complete.
33. Add and event for a collision between the pineapple & platform.
34. Create an action to change the vertical speed to zero when the avatar collides with the platform. Make sure you do not use the relative setting.
35. Drag & drop Move to Contact (Move) into the actions: column.
36. In the dialog box enter the following:
a. Click Self, Direction: 270, Maximum: 1, Against: Solid objects, Click OK.
37. Test play the game.
38. Debug the movement & gravity so the avatar will fall from the platforms to reach that bottom.
39. Save your work.
Jumping
If the gravity setting is high the avatar may not be able to jump up from the platform because gravity is too strong. Most games require a gravity setting of 0.3 – 0.5. The power of the jump is controlled by the balance between the vertical speed & gravity settings.

As part of its platform-style game, the Rainforest Laser Tag company wants the player to be able to jump over obstacles & climb ladders. Follow the directions below to practice programming a jump move in Game Maker.40. Open the object properties for the pineapple.
41. Add an event for pressing the space bar.
42. Drag & drop Speed Vertical (Move) into the actions: column.
43. In the dialog box enter the following: Vertical speed: -5.
44. Test play the game. Everything seems to work, but try pressing the space bar before the pineapple touches a platform. The jump occurs even if the avatar is not standing on the ground, but in midair. You will fix this glitch in the next section.
45. Save your work.
Platform Jump
To fix the glitch that allows that player to jump wile in midair, you need to add programming to detect when the avatar is touching a solid object beneath it. Since this is a qualifier for the action you just programmed, first set that action in a block of code.
46. Drag & drop Start Block (Control) at the top of the Actions: column.
47. Drag & drop End Block (Control) at the bottom of the actions: column. The jumping action (negative vertical speed) should be in a block of code.
48. Drag & drop Check Collision (Control) to the top of the actions: column above the block of code.
49. In the dialog box enter the following:
a. Click Self, x: 0, y: 1, check relative, click OK.
High Drop Bug
Before testing the new programming, you should also address the possibility of another bug. The jump strength was programmed as a negative vertical speed. The gravity setting will push the avatar down. The avatar will land at a vertical speed equal to the jump speed, but only if it landed on the same platform. If the avatar falls to a lower platform, the avatar will have accelerated to a greater speed because of gravity. This becomes a problem if the vertical speed is great enough for the avatar to pass through a platform before the step event can check for the collision. The downward vertical speed needs to be limited so this will not occur.
50. Select the step event to show the associated actions.
51. Drag & drop Test Variable (Control) into the actions column below the last block of code.
52. In the dialog box enter the following:

a. Click Self, Variable: vspeed (make sure it is spelled right), Value: 12, Operation: Larger than, & Click OK.
53. Program a block of code below the test-variable action to set the vertical speed to 12.
54. Test play the game
55. Debug any movement or jump function if needed.
56. Save your work.
Climbing
Another major gameplay component of platform games is climbing. You will place ladders between platforms to allow the player to move up in the game frame.
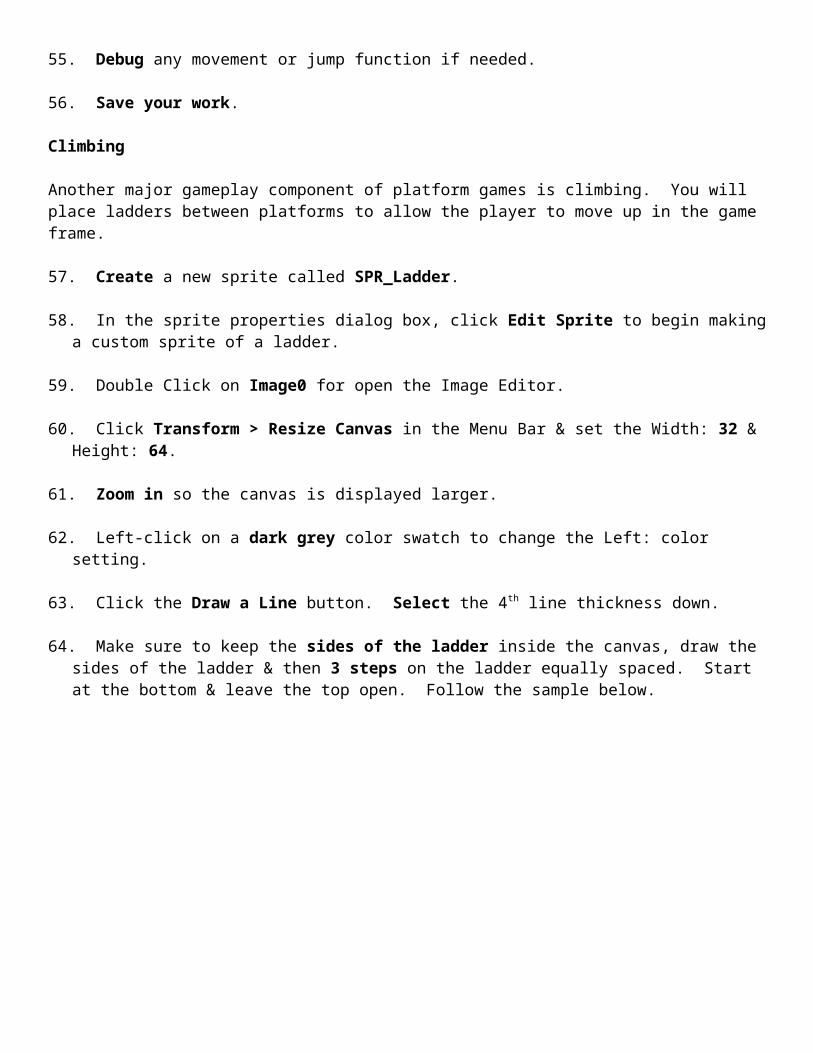
57. Create a new sprite called SPR_Ladder.
58. In the sprite properties dialog box, click Edit Sprite to begin making a custom sprite of a ladder.
59. Double Click on Image0 for open the Image Editor.
60. Click Transform > Resize Canvas in the Menu Bar & set the Width: 32 & Height: 64.
61. Zoom in so the canvas is displayed larger.
62. Left-click on a dark grey color swatch to change the Left: color setting.
63. Click the Draw a Line button. Select the 4th line thickness down.
64. Make sure to keep the sides of the ladder inside the canvas, draw the sides of the ladder & then 3 steps on the ladder equally spaced. Start at the bottom & leave the top open. Follow the sample below.

65. Create a new object named OBJ_Ladder, assign the SPR_Ladder sprite, & set the object to be visible, but not solid.
66. Open the Room Properties for Level 1.
67. On the Objects tab, uncheck the Delete underlying check box. This will allow the ladder to overlap the platform & each other.
68. Add an instance of the OBJ_Ladder object to the bottom platform so the bottom of the ladder is overlapping the platform.
69. Add other instances of the ladder to connect the bottom platform to one above it. If you evenly spaced the rungs on the ladder sprite, the ladder objects will stack nicely.
70. Open the OBJ_Pineapple object properties.
71. Enter -1 for Depth: which is under visible & solid. This moves the avatar 1 unit in front of the other layers (If this setting does not work, enter a higher negative value.)
72. Test play the game & save your work.
Climbing Up & Down
The avatar must be programmed to allow up & down movement along the ladder. First, however, you must add programming to check if the avatar is standing on a ladder.
73. Open the Pineapple object properties.
74. Add a keyboard event for pressing the up arrow key.
75. Drag & drop Check Object (Control) into the actions: column.
76. In the dialog box enter the following:
a. Click Self, Object: Ladder, x: 0, y: 0, Check Relative, & click OK.
b. This will check to see that the pineapple is on a ladder.
77. Start a block of code.
78. Add an action to the block of code to check if the location 4 pixels above the pineapple is free of all solid objects.
79. Add an action to the block of code so the pineapple jumps to the position 4 pixels above it.
80. Close the block of code.
81. Using similar steps, program the down arrow key to move the pineapple down the ladder.
82. Test play the game.

83. In the object properties for the Pineapple, select the step event.
84. Drag & drop Check Object (Control) into the Actions: column.
85. In the Check Object dialog box, click Self, Object: ladder, x: 0, y: 0, check relative.
86. Start a block of code.
87. Add an action to set gravity to 0 in downward direction.
88. Add an action to set the vertical speed to 0.
89. Close the block of code.
90. Test play the game. Try moving up & down ladders & moving over to platforms that are next to the ladder. The avatar should be able to move off the ladder to the left or right.
91. Save your work.
Background
You have finished the testing needed to prove the concept. Before releasing the game for the alpha build, you should create an attractive background to give the game a bit of a finished feel.
92. Click the Create a Background button.
93. Enter BCK_Clouds in the Name: box.
94. Load the Clouds.png image from my web site. Click OK to close Background Properties.
95. Open Room properties for Level 1.
96. In the backgrounds tab, select the clouds background.
97. Make sure the Foreground image check box is unchecked. If checked, the clouds will appear in front of all other objects.
98. Click the Color: swatch & change the color to a dark blue.
99. Click the Tile Horz. & Tile Vert. check boxes so the clouds will be repeated to fill the screen. This is called tiling.
100. Test play the game.
101. Debug any errors.
102. Save your work.
The Rainforest Laser Tag Company has approved the proof of concept. It wants to use the same character from the maze game created in the lesson to keep with the exploration theme. Keep up the good work.

Avatar
103. Change the pineapple avatar to the explorer with an appropriate pose needed for each movement, as shown in the chart below.
Movement SpriteClimbing Up & Down Explorer_climb_strip8.png
Moving Left Explorer_left from Maze folder on my web site
Moving Right Explorer_right from Maze folder on my web site
Stopped Frame 0 from the animation (Explorer down)
Floating Ghost Ghost_floating_strip8.png
Lava or Water Trap Water_strip12.png or lava_strip12.png
104. After downloading the explorer climbing up & down strips from my web site, follow the instructions in the video that is linked “Video Tutorials” the Video Game Programming tab. It is titled “Animating Sprites with Photoshop.”
105. Create Sprites for each of the animated images.
106. Save your work.
Obstacles
107. Create obstacles that the player must jump over, such as pits, water, or gaps in the platform.
108. Create enemy obstacles that move & the player must avoid or destroy.
109. Make the game challenging enough for the target market to win after a few tries.
110. Create a wall along the sides of the room to prevent the player from leaving the edge of the screen.
a. Duplicate the platform sprite & rename SPR_wall.b. Go into edit sprite & resize the canvas to 48 x48 pixels (don’t change the percentage).c. Go to transform > Rotate 90 degrees counter clockwise.
111. Program lives. Subtract a life when the player touches an enemy.
112. Test play the game.
113. Debug as needed. Then save you progress.
Objectives

114. Create scoring objects & objectives for the player.
115. Program scoring. Increase the score when the player collects scoring objects. The reward should reflect the risk taken to receive it.
116. Test play the game & debug as needed. Save you work
Graphics
One way to make a game look better is to use graphic overlays. A graphic overlay is simply an image added over another object. This image does not have any associated programming, it is simply decoration.Graphic overlays are typically stored as a title set. A tile set is a panel of sprites laid out in a grid or tile format. The main reason for using an overlay is to save on programming & the size of the game file. For example, building a game with a basic platform object saves on programming because you do not have to program each new image as a new object.In the game you are building, you will use a tile set to make the platforms & other objects look better. Tile sets can be found on my teacher website under Resources > Tile Sets. You can also find others by searching Game Maker tile sets on the Internet. You will use the platform tile set.png for the 1st level & then you are free to use your own for the other levels.
117. To begin using a tile set, select the Create a Background button. The Background Properties dialog box is displayed.
118. Enter BCK_Tile1 in the Name: box.
119. Click Load Background & select the platform tile set.png file downloaded from my teacher website.
120. Check Use as tile set check box. Once you check the box, the Tile Properties area is displayed in the Background Properties dialog box.
121. Modify the tile properties so the grid aligns with the tiles in the image file. In this case, the tiles in the image file are based on a 32 x 32 grid, so enter 32 in the Tile width: & Tile height: text boxes.
122. The Horizontal offset: & Vertical offset: text boxes are used to shift the entire tile set by a few pixels to get the grids to properly align. In this case, you do not need to modify the offset, so enter 0 in each of these text boxes.
123. The Horizontal sep: (separation) & Vertical sep: text boxes are used to specify a border between tiles. If there are lines separating the tiles, you need to tell Game Maker how many pixels wide the lines are. In this case, the tiles have no separation, so enter 0 in these text boxes.
124. Click OK to save the Tile set.
125. Open the Room Properties dialog box for the Level 1 room.
126. Click the Tiles tab.
127. Click the selection button below the preview image & select BCK_Tile1 as the tile set.

128. In the preview image, click on a grass tile. See below. To select more than 1 tile, hold the [Shift] key & drag to the end of what you want to select.
129. Click on the platforms at the bottom in the room to place the grass. Notice how a little bit of the grass (tile image) show above the platform.
130. Uncheck the Delete underlying check box so you can stack your ties as needed to completely cover the platforms.
131. Test play to see how the level looks & functions.
Finishing Up
The customer has requested a treasure chest appear on the last level, but only when the player has cleared all obstacles & collected all objectives (rewards). Before the treasure chest appears, there should be a sign displayed that tells the player to collect all tokens to win the game & get a free game of laser tag. When the treasure chest appears, the sign should disappear. When the avatar collides with the treasure chest, the winner frame should be displayed.
132. Program 3 lives for the player & a respawn point for each level.
133. Add a sound when you collide with a gem. You should have one from the maze game.
134. In Object Properties for the avatar, check Persistent on the left.
135. Add a title frame, complete with a Start button & instructions on how to play.
136. Add a winner frame that includes Replay & Quit buttons. This frame should also display the coupon for a free game of laser tag.
137. Insert some of the graphics from the tile set throughout the level.

138. Test play the game. Save your game.
Debugging the Animation
Notice the avatar animation in not correct. When you press the left arrow, the current programming is telling the computer to set the sprite to SPR_Left at frame 0. The sprite is constantly set to frame 0 & never gets the chance to go to frame 1 or higher in the animation set. Also, the avatar can change directions in midair. These are significant errors. To fix the errors, you need to change the programming for the left & right arrows.
139. Delete the left & right keyboard events. If you did not use “Key Press” to start
140. Add a left arrow key press event & program the correct movement.
141. Add a key release event for the left arrow.
142. Similarly, debug the right arrow animation.
143. In the right key press event, add an action to test IF there is a platform object 1 pixel below the relative position of the explorer. This test must be above all the other actions. When the test is TRUE (explorer is on a platform), then the explorer will show the walking animation & move right, ELSE the explorer will not move right or be animated.
144. Set the actions below the test as a block of code. If you do not block the actions, the explorer will not animate in midair, but would still move in midair.
145. Change the sprite in the appropriate action to the animated sprite.
146. Repeat this programming on the left movement as well.
147. Edit the SPR_Down sprite & delete all frames except frame 0. This eliminates the animation, but allows the explorer to appear in the correct view when climbing.
148. Test play & Save your work.
For its next promotion, Rainforest Laser Tag Company wants you to build an exciting side scrolling platform game using the explorer character. The decision to have a side-scrolling game was based on the market research generated from the coupons customers turned in for a free game of laser tag.

149. Open the Room Properties for Level 1.
150. On the settings tab, enter Width: 2560. This is 4 times larger than the original width of 640 pixels.
151. Add some more platform & ladder objects to fill out the room. While working on this level & testing it, change the platforms to visible.
152. Move whatever vertical wall you created to the new edge of the room.
Camera Views
If you test play the game at this point, you will see that Game Maker tries to fit the entire game map on your computer screen. As a result, the graphics are all scrunched up. In Game Maker, the camera is controlled per room using the View tab in Room Properties.
153. Check Enable the use of Views check box. This turns on the camera.
154. Check the Visible when the room starts check box. This sets the scrolling feature to start as soon as the room begins.
Notice the white frame that appears in the room to outline the visible play area, or scope. You will make settings later related to this frame. The settings in the View in room area control the size of the scope. In this case, the entire height of the game should be visible to the player, while the width scrolls.
155. Enter x: 0 & y: 0 in the View in room area.
156. Enter W: 640 & H: 480 in the View in room area.
The settings in the Port on Screen area allow the view to zoom in or out. A camera view may be zoomed inward if the gameplay mode changed to a targeting or aiming mode, for example. When the avatar is running, the view should be at a normal zoom factor so the player can see where the avatar is headed. But, when the player is aiming at a target, the camera should zoom in to increase the size of the target so it is easier for the player to see. For the game you area building, there is no zooming requirements, is the settings should be the same as for the view.
157. Enter x: 0 & y: 0 in the Port on Screen area.
158. Enter W: 640 & H: 480 in the Port on screen area.
159. In the Object following area, click the selection button & then choose the avatar in the shortcut menu. This tells Game Maker to automatically follow the avatar as the player moves it on the game map.
Remember the white frame displayed in the room? The Hbor: (horizontal border) & Vbor: (vertical border) settings in the Object following area allow the designer to apply a buffer zone around the object being followed. This is a nice feature to make sure the player does not run up to the edge of the scope & then get hit by an obstacle just outside of the view as the game scrolls. Instead, the game map scrolls when the player reaches the edge of the buffer zone.

160. Enter 32 in the Hbor: & Vbor: boxes. These settings will create a buffer of 32 pixels around the avatar.
161. Enter -1 in the Hsp: & Vsp: boxes.
The Hsp: (horizontal speed) & Vsp: (vertical speed) settings control how fast the scope will follow the object. In other words, these settings control the horizontal & vertical scrolling speeds. Setting these to negative values keeps the followed object in the scope. Positive values move the scope slower than the player.
162. Test play the game to see how the scrolling feature is working.
163. Enter Hsp: 1 & test play the game. Pay attention to how the game scrolls in the horizontal direction. When the avatar is out of the scope, stop moving it. Notice how the scope eventually catches up to the avatar.
164. Enter Hsp: 0 & test play the game. Pay attention to how the game now scrolls in the horizontal direction. Notice that there is no scrolling.
165. Reset the Hsp: to -1.
166. Save your work.
Tying the scrolling to an object is the easiest way to implement it in this game, but scrolling need not be tied to an object. In other games, scrolling may work better by having the game map scroll at a constant speed like in Guitar Hero. Notice when you test play that your avatar gets really close to the edge of the scope before the scrolling occurs. In many games, the avatar is much more centered in the action.
167. Enter Hbor: 300. This, in effect, makes the avatar 600 pixels wide when it comes to calculating how the screen will scroll. In a scope of only 640 pixels wide, that makes almost every left or right movement change the position of the scope.
168. Test play the game. Notice that you can move the avatar very little in the horizontal direction before it stays still & the game map moves.
169. Save your work.