virtualization. what is virtualization virtualization is a technique of partitioning or dividing the...
TRANSCRIPT
Virtualization
What is Virtualization
Virtualization is a technique of partitioning or dividing the resources of a single server into multiple segregated execution environments. Each of these environments runs independently of the other, thus allowing multiple operating systems to run on the same hardware. This concept has been widely used in the world of mainframe computers over the years, and is now gaining a lot of traction in the world of enterprise IT systems. Each execution environment is called a guest and the server on which they execute is called the host. The software running on the host that acts as a bridge between the host and the guests, and that enables these multiple execution environments is commonly referred to as the Virtual Machine Monitor (VMM) or a Hypervisor.

Why Virtualize? Server Consolidation (hard and soft costs) Reduction of Complexity Isolation Platform Uniformity Legacy Support
More effectively manage workloads Provide reliable testing infrastructure Faster deployment/provisioning (golden images)
The Virtualization Approach
OS Instances for running specific apps
Fail-over between OS instances
greatly reduces recovery time
Separate components to avoid failure
Enhanced security with “separation”
Auto-provisioning for recovery
Performance penalties
Virtualization Overview
Single OS image: Virtuozo Group user processes into resource containers
Hard to get strong isolation
Full virtualization: VMware, VirtualPC, QEMU Run multiple unmodified guest OSes
Hard to efficiently virtualize x86
Para-virtualization: UML, Xen Run multiple guest OSes ported to special arch
Arch Xen/x86 is very close to normal x86

Virtual machines
Basic Terminology Host OS: The OS running on a physical machine
Guest OS: The OS running on a virtual machine
Today different approaches Full virtualization: Run an unmodified OS
Paravirtualization: Modification of OS for performance
Emulation: Host OS and Guest OS can have different architecture
Hardware support: Intel-VT, AMD-V
XEN
Xen is an open-source paravirtualization technology that provides a platform for running multiple operating systems in parallel on one physical hardware resource, while providing close to native performance. Xen supports several operating systems—Linux
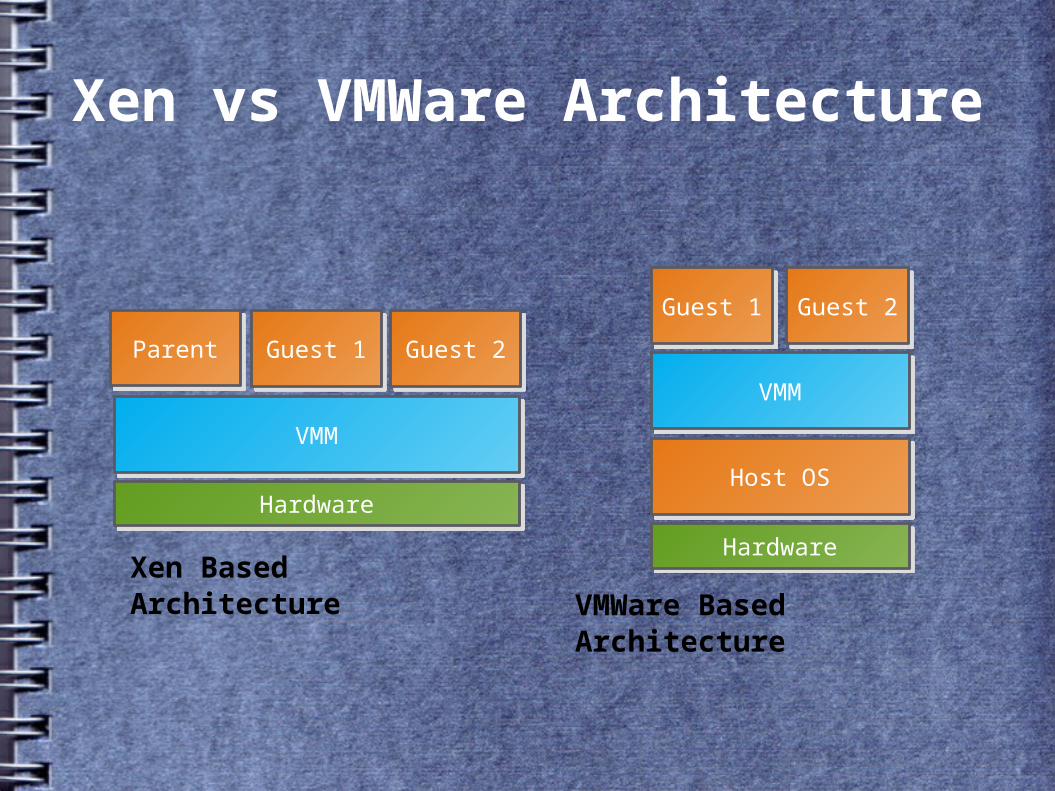
Xen vs VMWare Architecture
ParentParent
VMMVMM
HardwareHardware
Guest 2Guest 2Guest 1Guest 1
VMMVMM
HardwareHardware
Host OSHost OS
Guest 1Guest 1 Guest 2Guest 2
Xen Based ArchitectureVMWare Based Architecture
Full virtualization Full virtualization provides complete abstraction between the
hardware and the guest operating system. In this scenario, the guest operating system is provided a complete virtual physical environment in which to run and, as such, is unaware that it is running inside a virtual machine. One advantage of full virtualization is that the operating system does not need to be modified in order to run in a virtualized environment. This means that proprietary operating systems such as Windows can be run on Linux systems.
Disadvantages of full virtualization are that performance is slightly reduced as compared to para-virtualization, and some virtualization platforms, such as Xen, require CPUs with special virtualization support built in (such as Intel-VT and AMD-V).
Para-Virtualization Para-virtualization requires that a guest operating
system be modified to support virtualization. This typically means that guest operating systems are limited to open source systems such as Linux. It is also not possible to migrate a running guest OS from one server to another. The advantage to this approach, however, is that a para-virtualized guest system comes closer to native performance than a fully virtualized guest, and the latest virtualization CPU support is not needed.
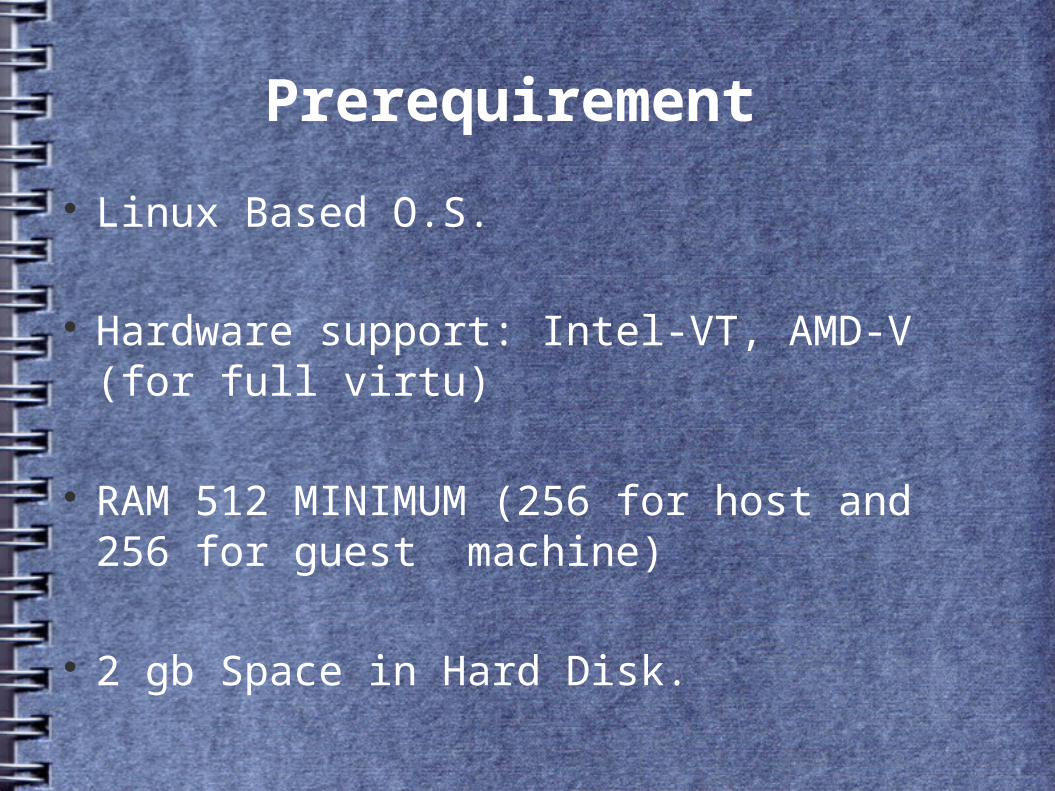
Prerequirement
Linux Based O.S.
Hardware support: Intel-VT, AMD-V (for full virtu)
RAM 512 MINIMUM (256 for host and 256 for guest machine)
2 gb Space in Hard Disk.
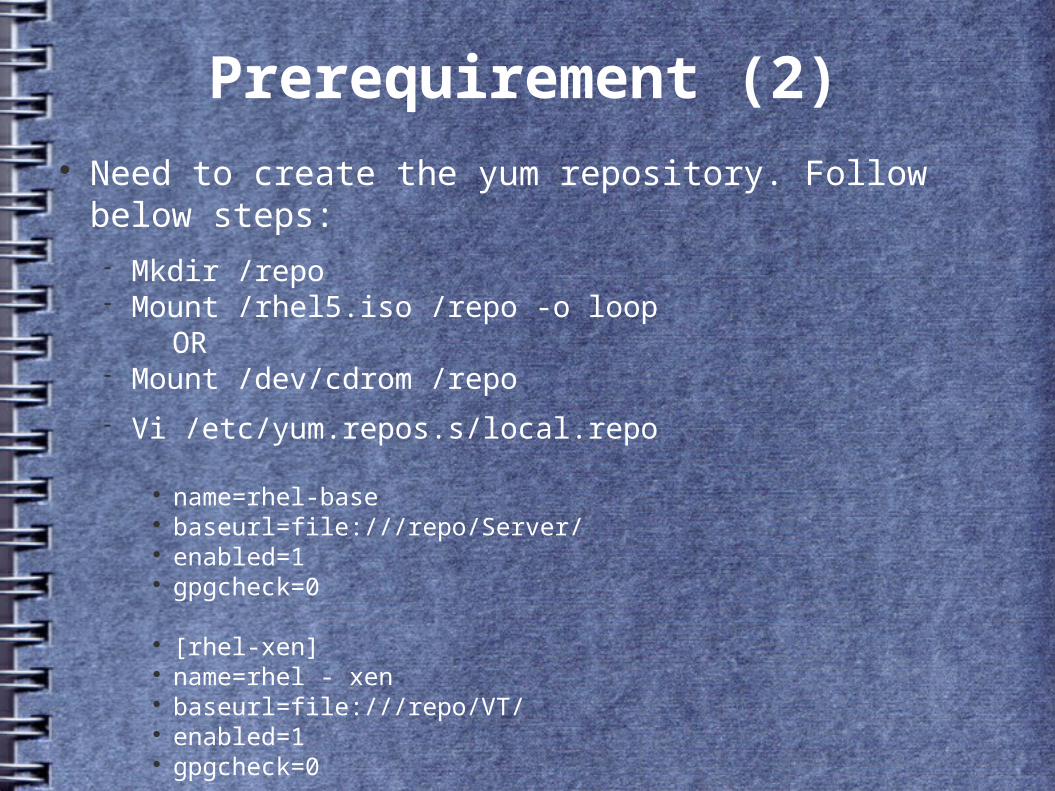
Prerequirement (2) Need to create the yum repository. Follow below steps:
Mkdir /repo Mount /rhel5.iso /repo -o loop
OR Mount /dev/cdrom /repo
Vi /etc/yum.repos.s/local.repo
name=rhel-base baseurl=file:///repo/Server/ enabled=1 gpgcheck=0
[rhel-xen] name=rhel - xen baseurl=file:///repo/VT/ enabled=1 gpgcheck=0
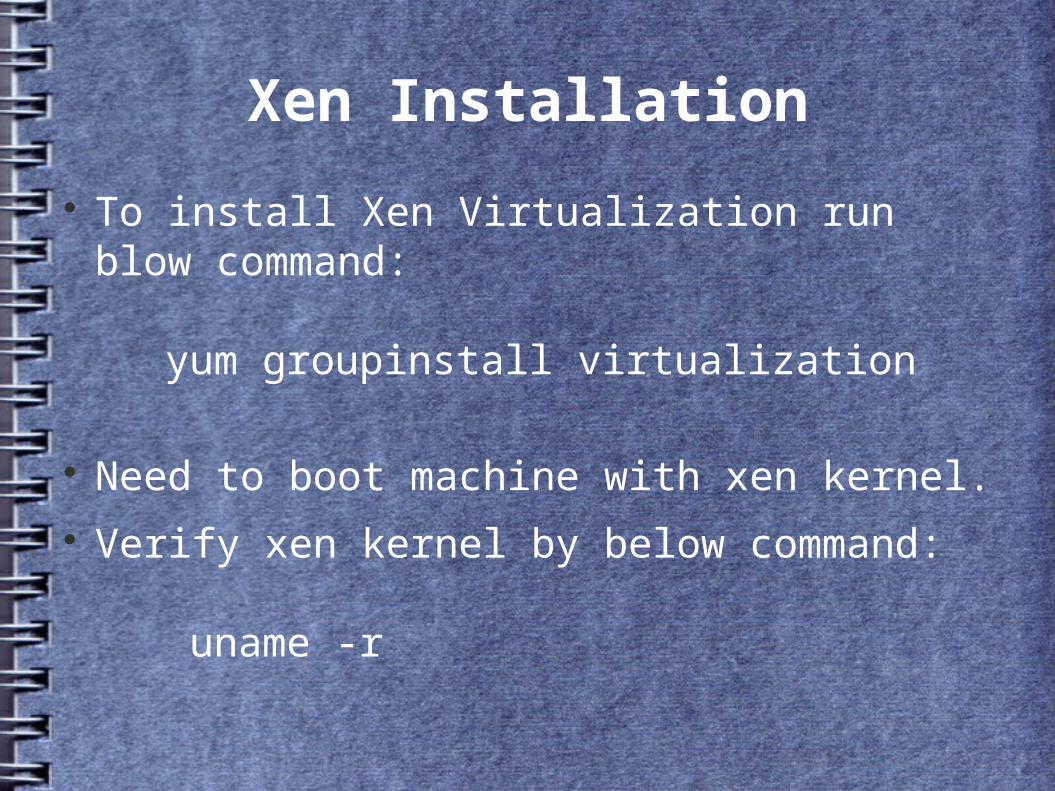
Xen Installation
To install Xen Virtualization run blow command:
yum groupinstall virtualization
Need to boot machine with xen kernel. Verify xen kernel by below command:
uname -r
'
Creating a Paravirtualized Virtual Machine
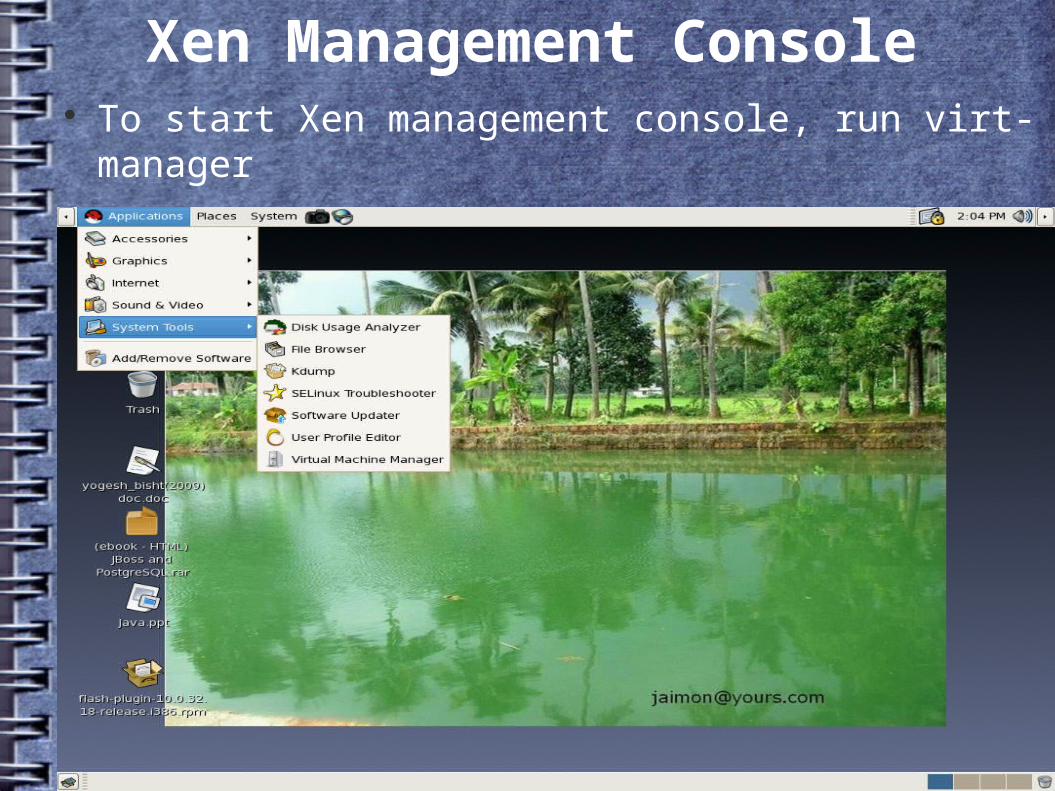
Xen Management Console To start Xen management console, run virt-manager
Application tab --> System Tools --> Virtual Machine Manager
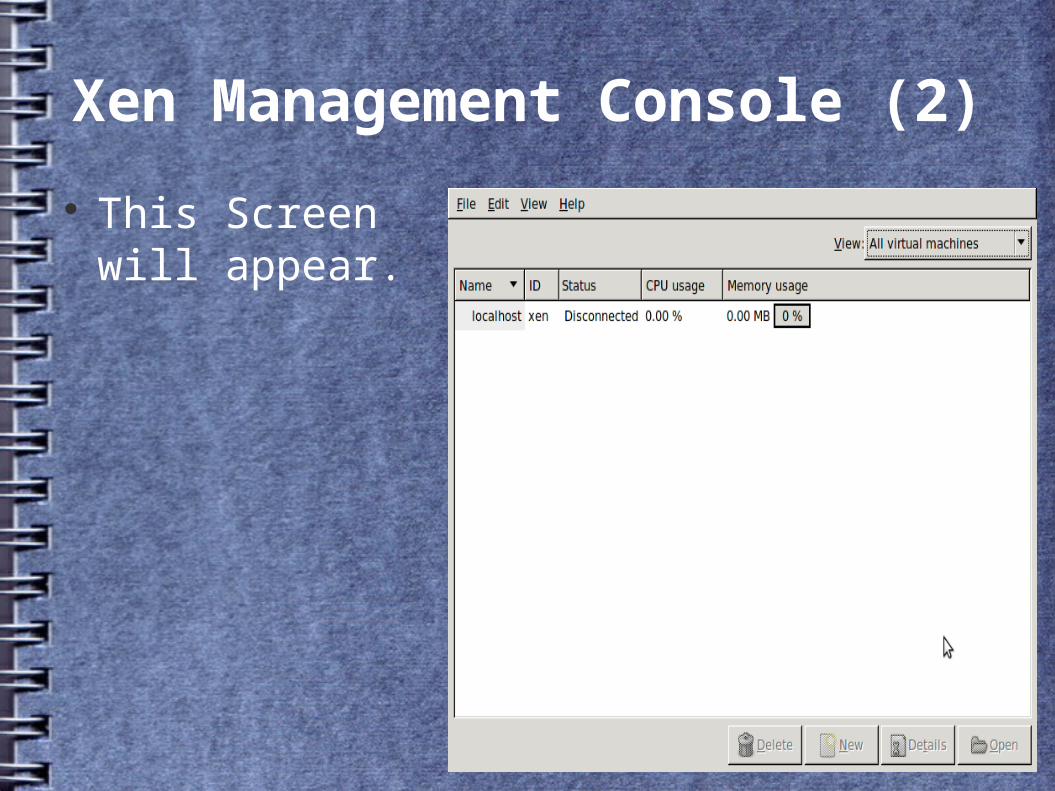
Xen Management Console (2)
This Screen will appear.

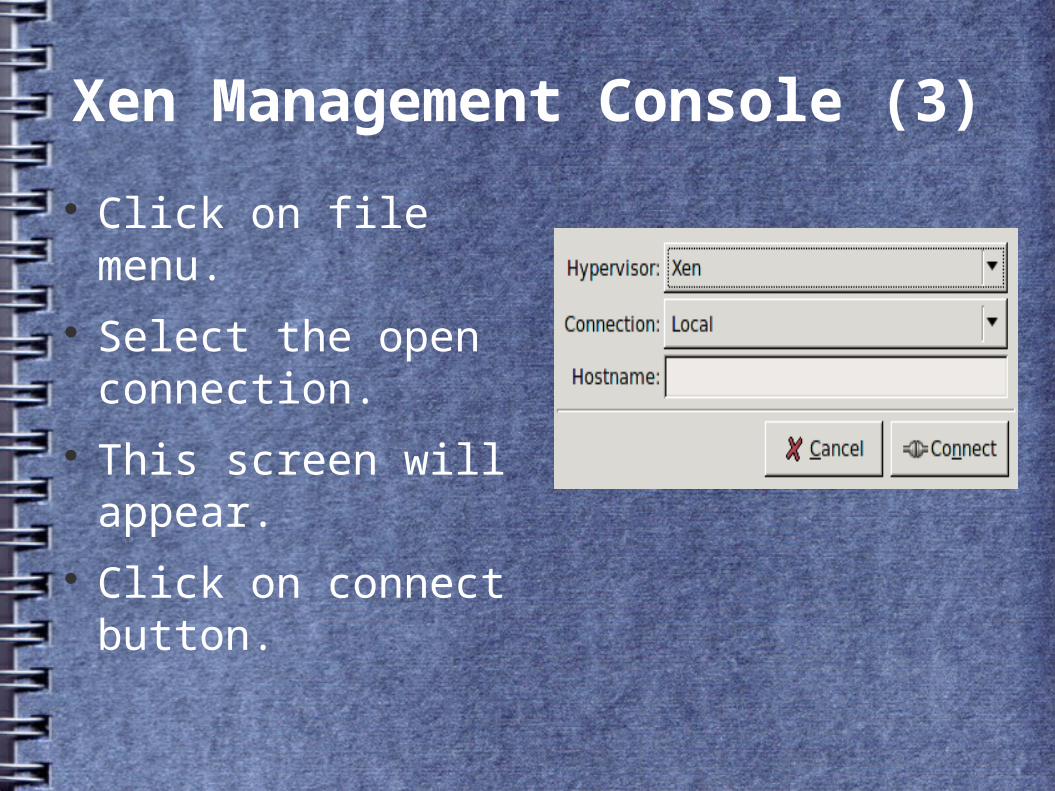
Xen Management Console (3)
Click on file menu. Select the open
connection. This screen will appear. Click on connect
button.

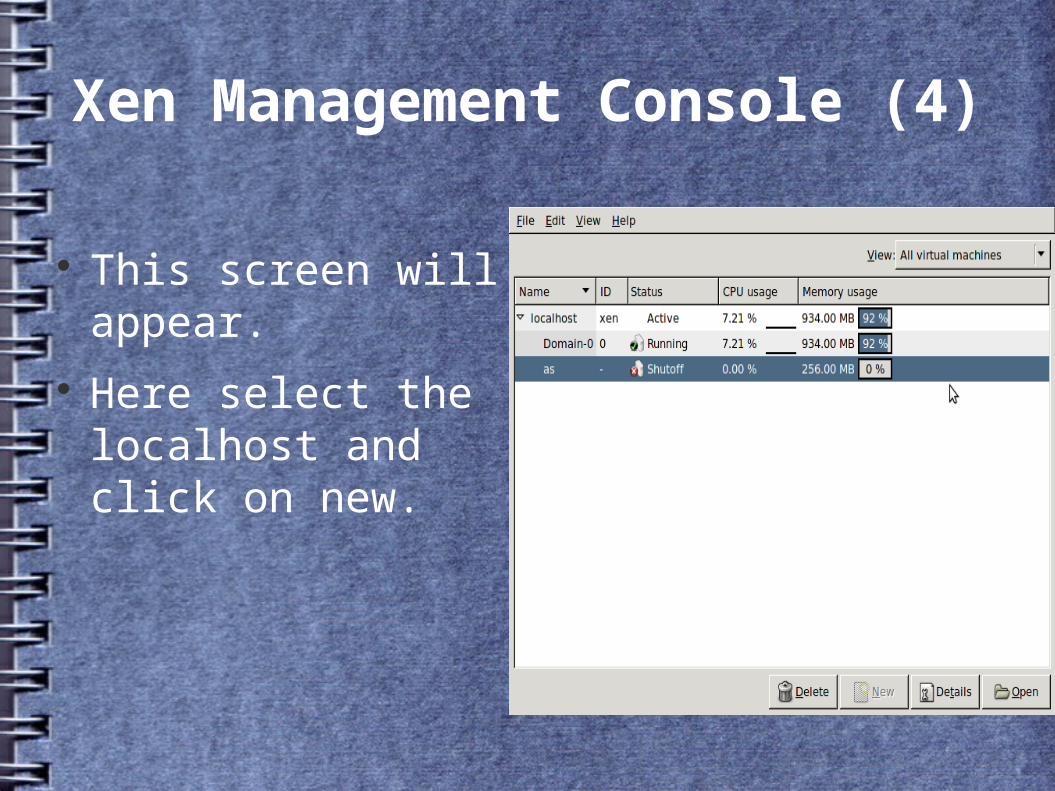
Xen Management Console (4)
This screen will appear. Here select the localhost
and click on new.

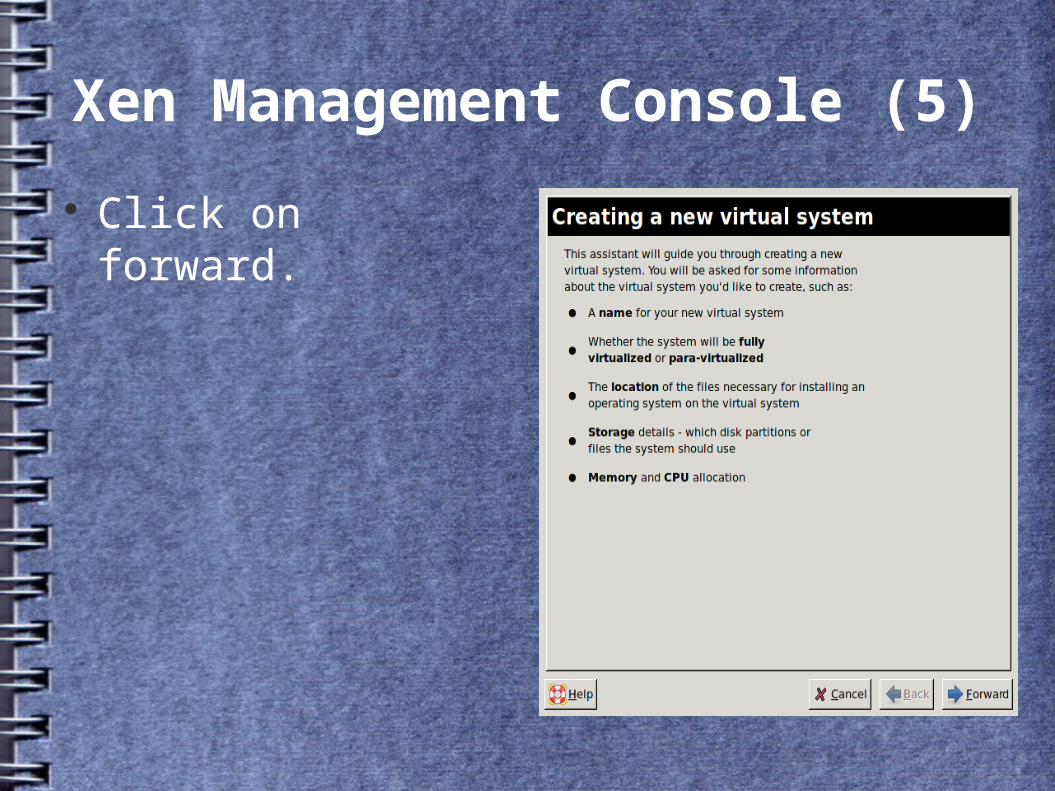
Xen Management Console (5)
Click on forward.
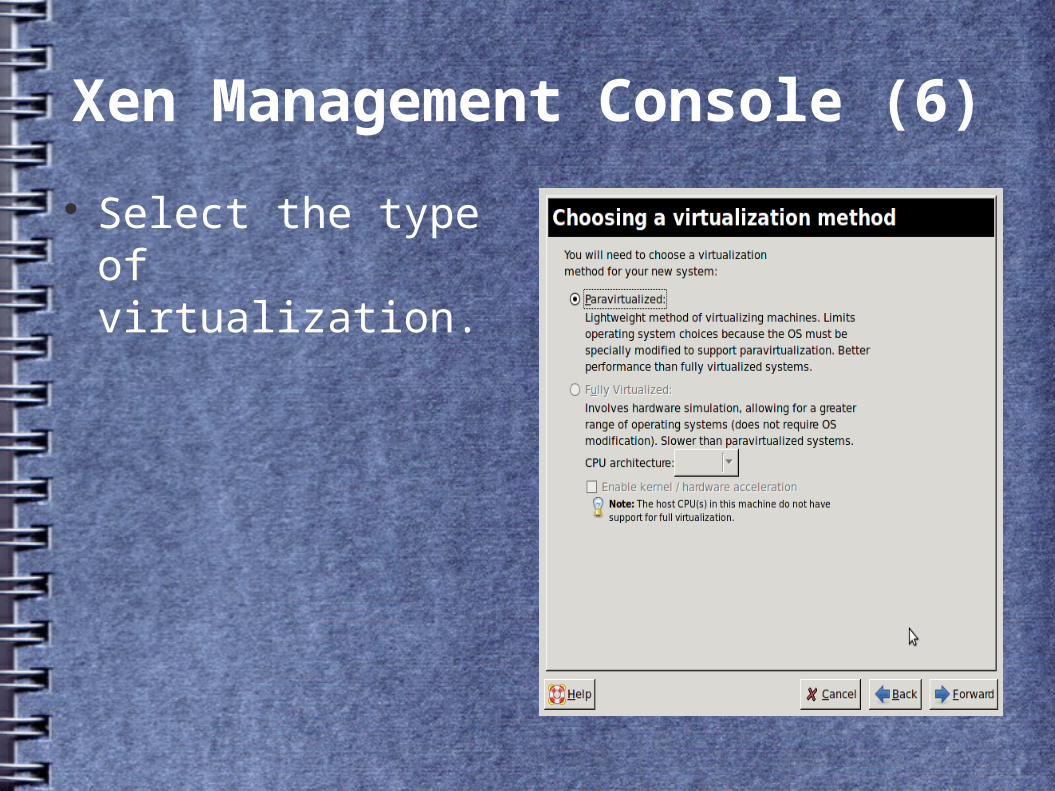
Xen Management Console (6)
Select the type of virtualization.
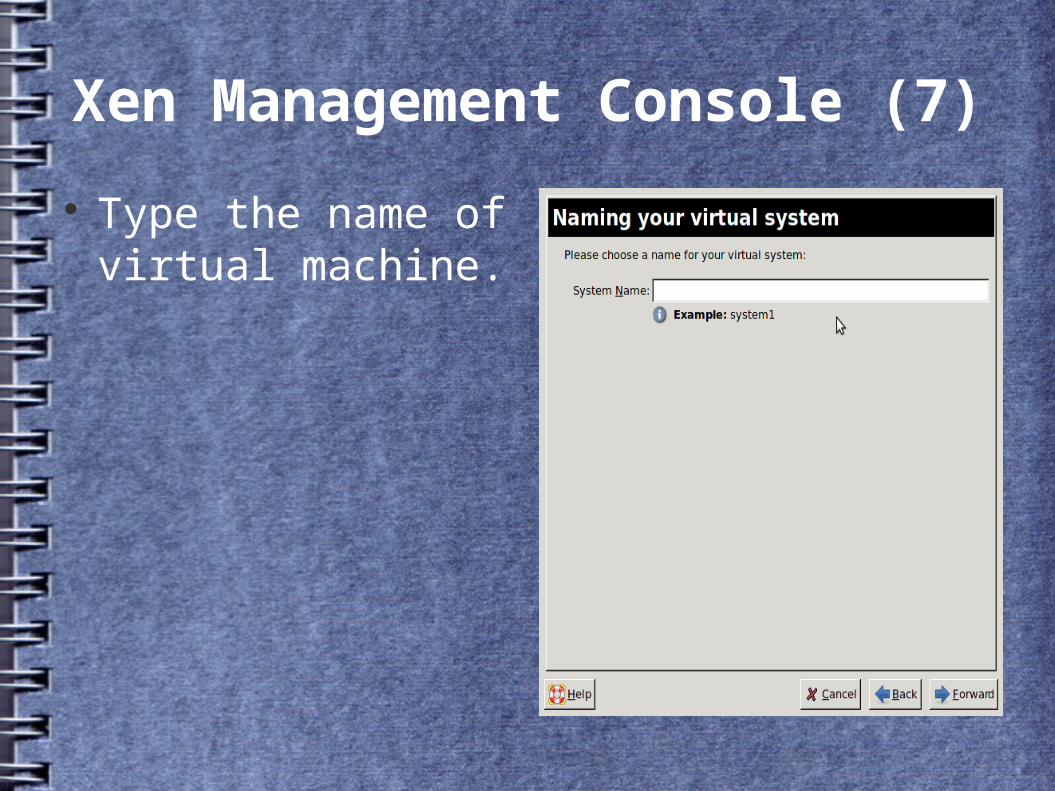
Xen Management Console (7)
Type the name of virtual machine.
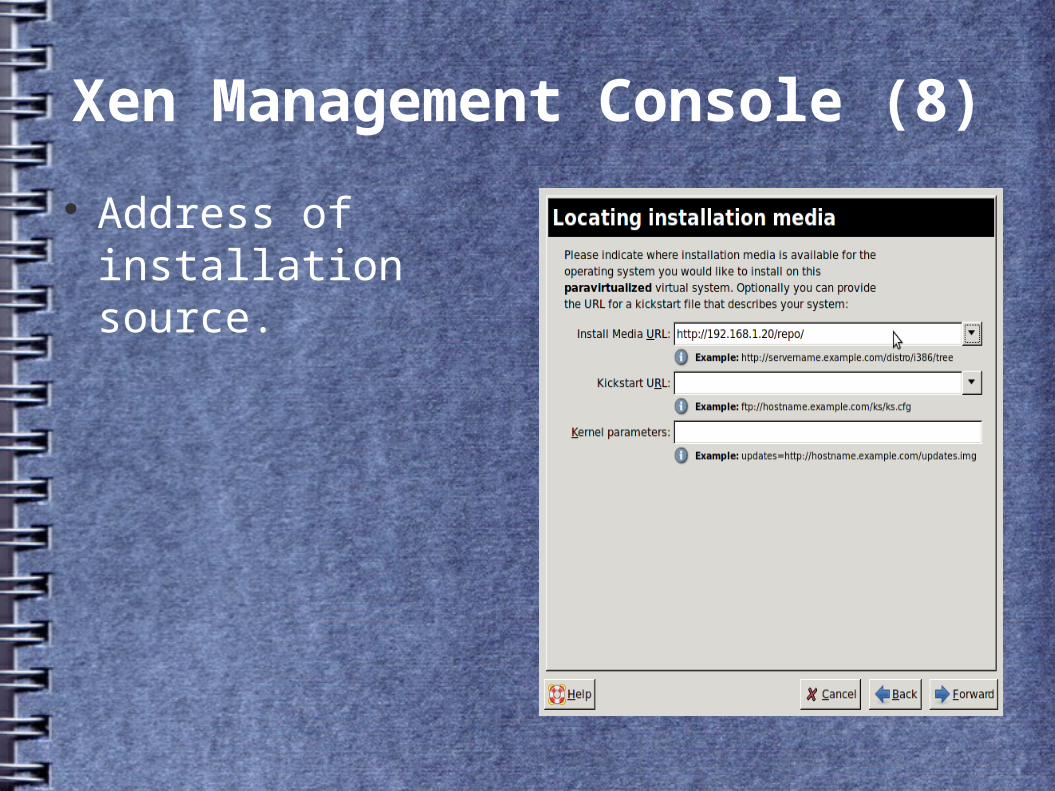
Xen Management Console (8)
Address of installation source.
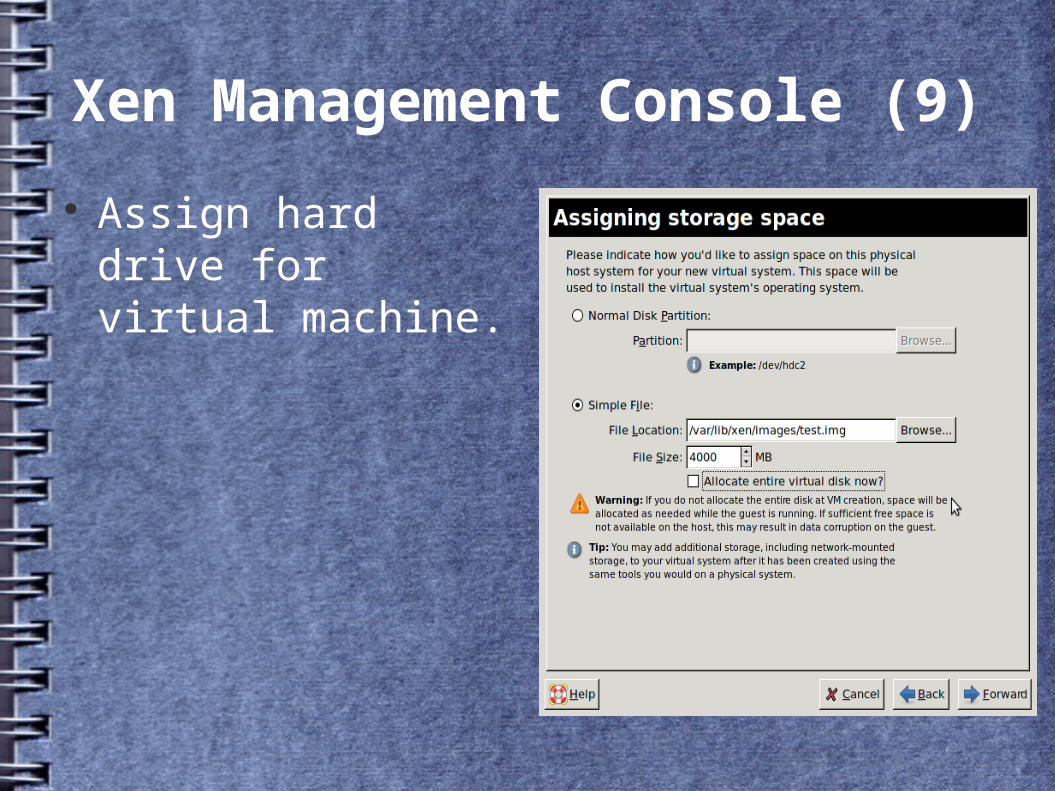
Xen Management Console (9)
Assign hard drive for virtual machine.
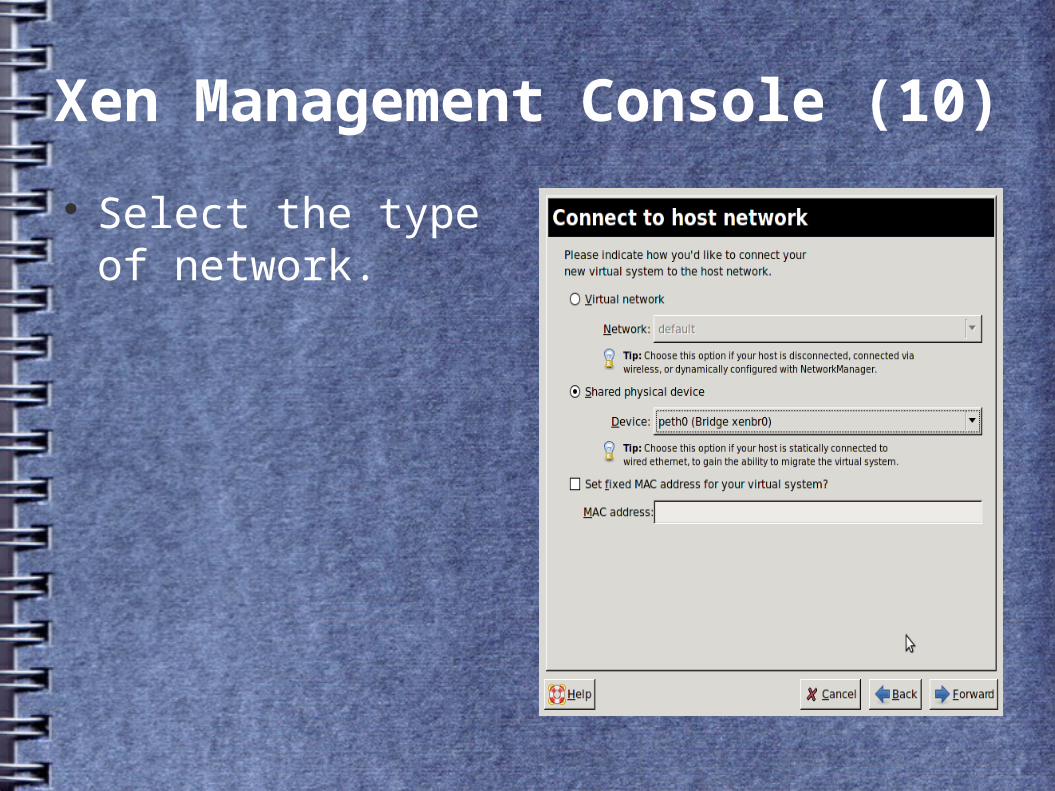
Xen Management Console (10)
Select the type of network.
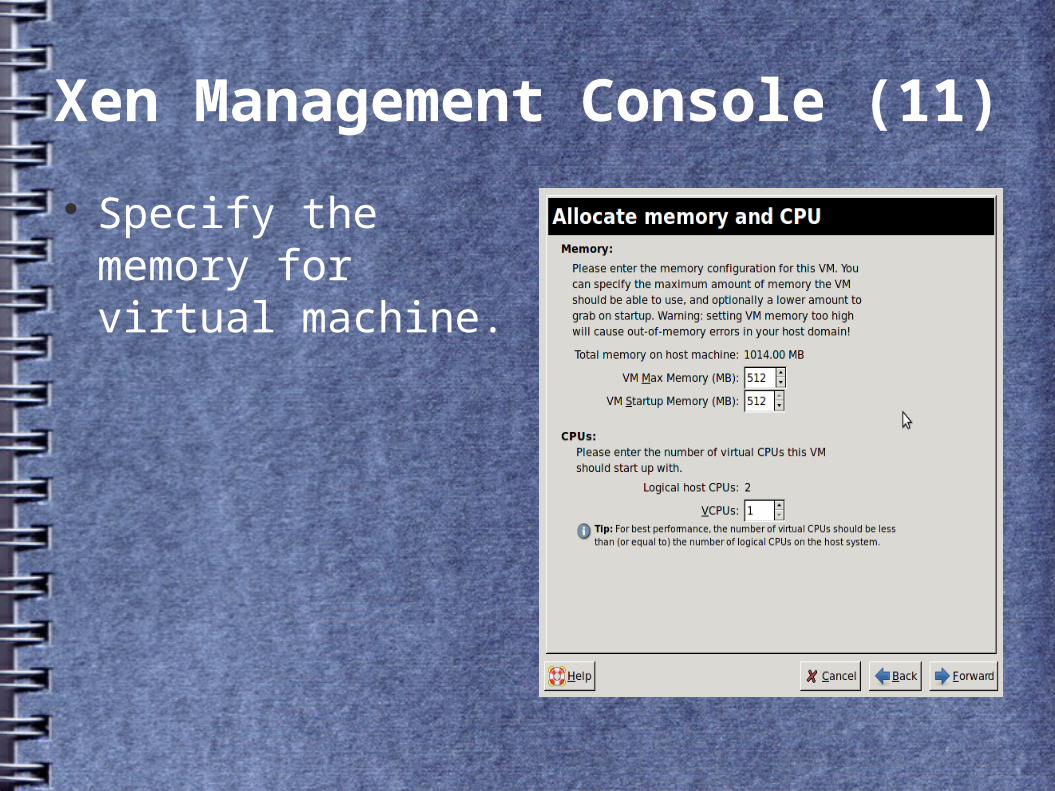
Xen Management Console (11)
Specify the memory for virtual machine.
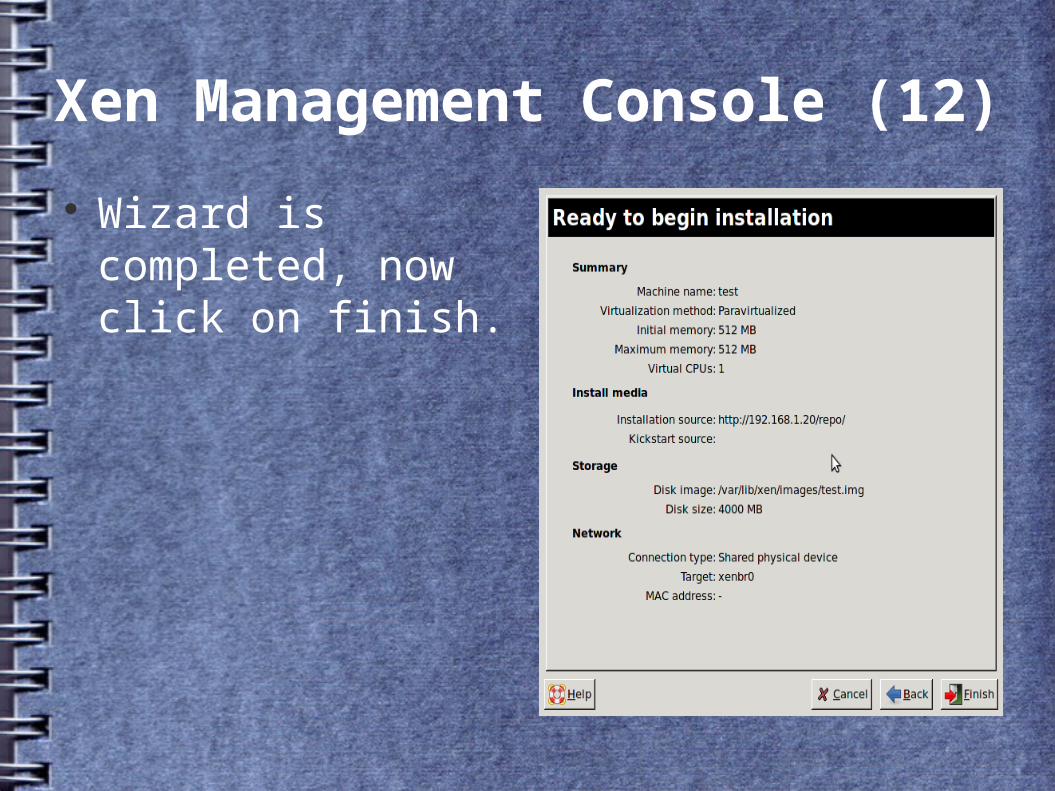
Xen Management Console (12)
Wizard is completed, now click on finish.
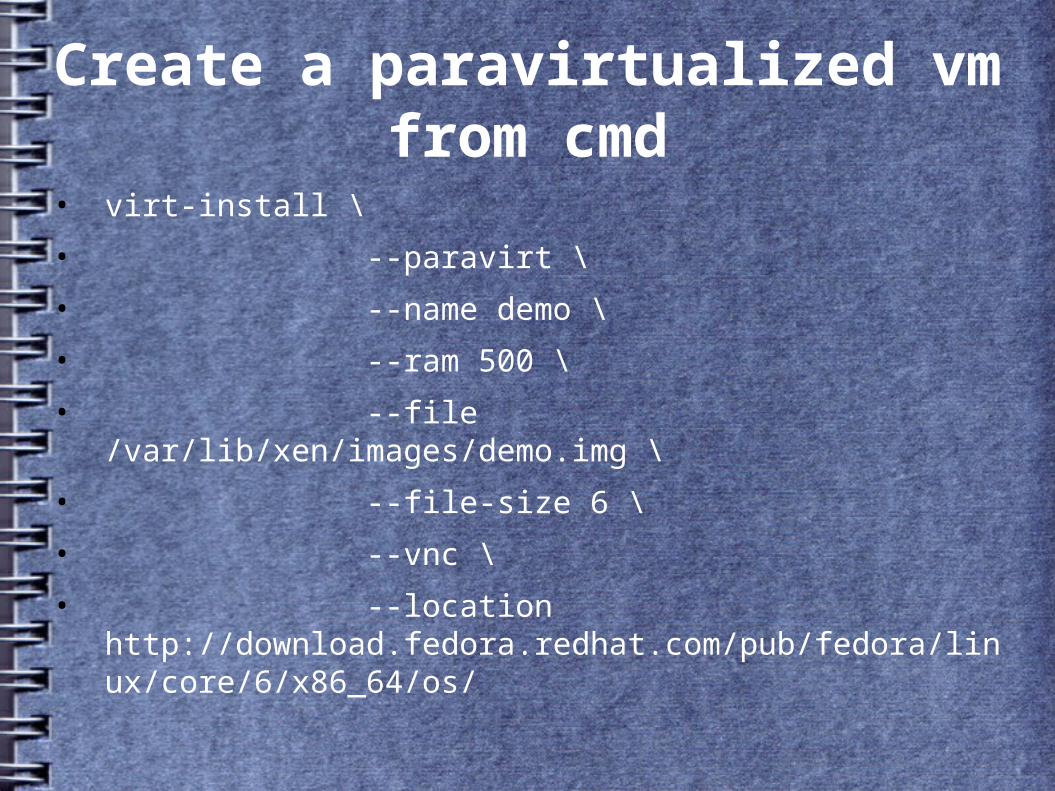
Create a paravirtualized vm from cmd
• virt-install \
• --paravirt \
• --name demo \
• --ram 500 \
• --file /var/lib/xen/images/demo.img \
• --file-size 6 \
• --vnc \
• --location http://download.fedora.redhat.com/pub/fedora/linux/core/6/x86_64/os/
Creating a Full Virtualized Virtual Machine

Xen Management Console To start Xen management console, run virt-manager
Application tab --> System Tools --> Virtual Machine Manager

Xen Management Console (2)
This Screen will appear.
Xen Management Console (3)
Click on file menu. Select the open
connection. This screen will appear. Click on connect
button.
Xen Management Console (4)
This screen will appear. Here select the localhost
and click on new.
Xen Management Console (5)
Click on forward.
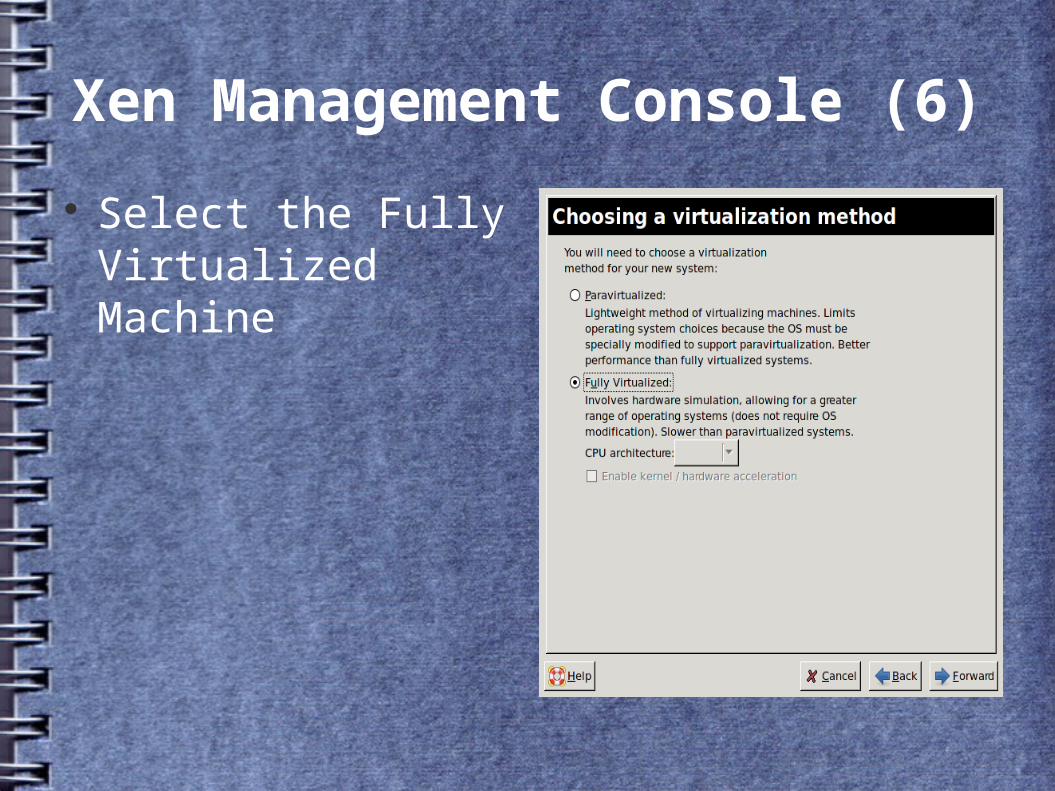
Xen Management Console (6)
Select the Fully Virtualized Machine
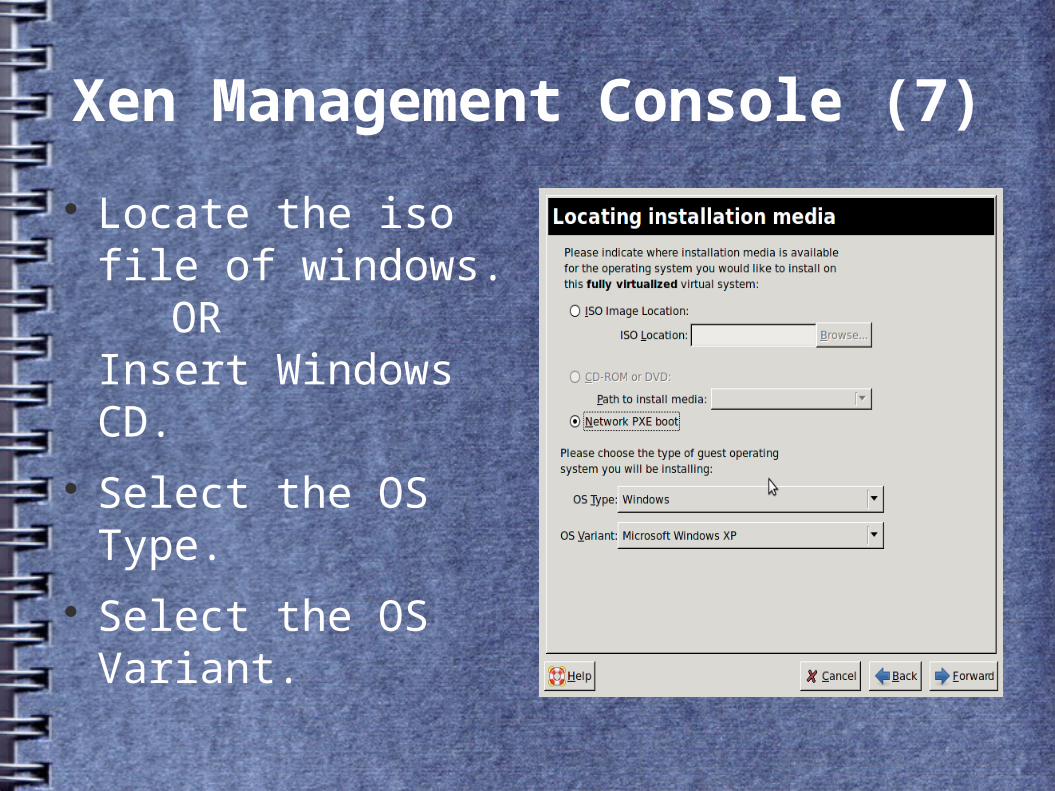
Xen Management Console (7)
Locate the iso file of windows.
ORInsert Windows CD.
Select the OS Type. Select the OS Variant.

Xen Management Console (8)
Assign hard drive for virtual machine.

Xen Management Console (9)
Select the type of network.

Xen Management Console (10)
Specify the memory for virtual machine.

Xen Management Console (11)
Wizard is completed, now click on finish.
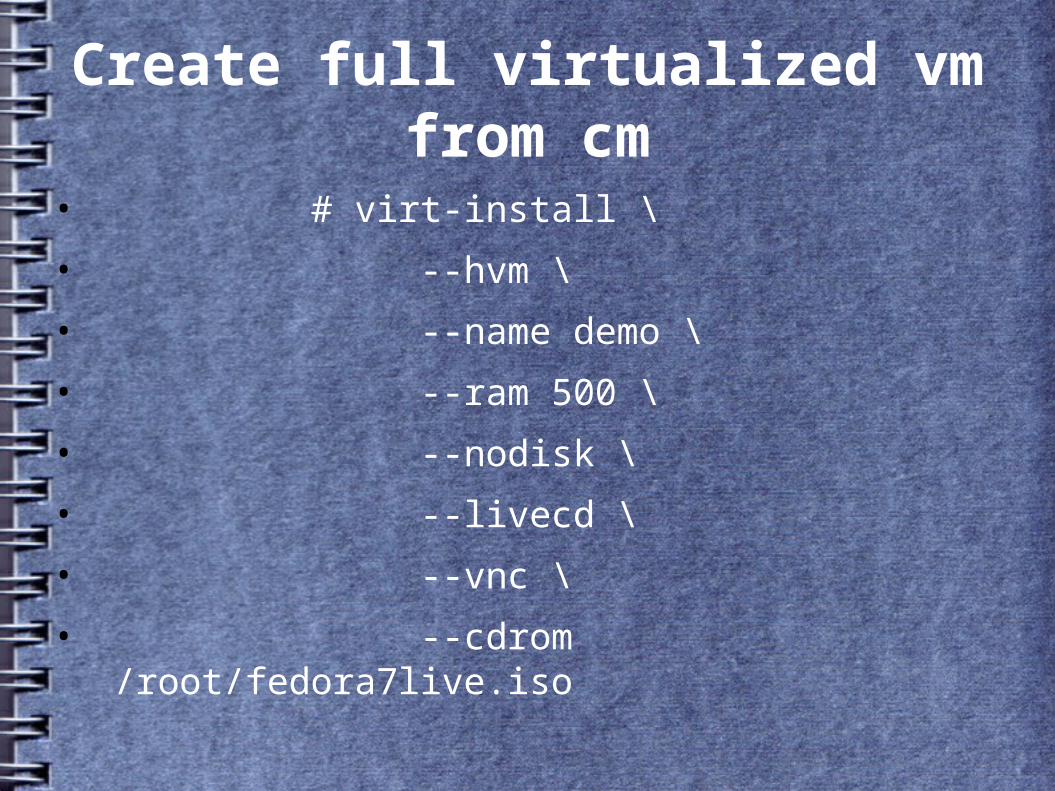
Create full virtualized vm from cm
• # virt-install \
• --hvm \
• --name demo \
• --ram 500 \
• --nodisk \
• --livecd \
• --vnc \
• --cdrom /root/fedora7live.iso
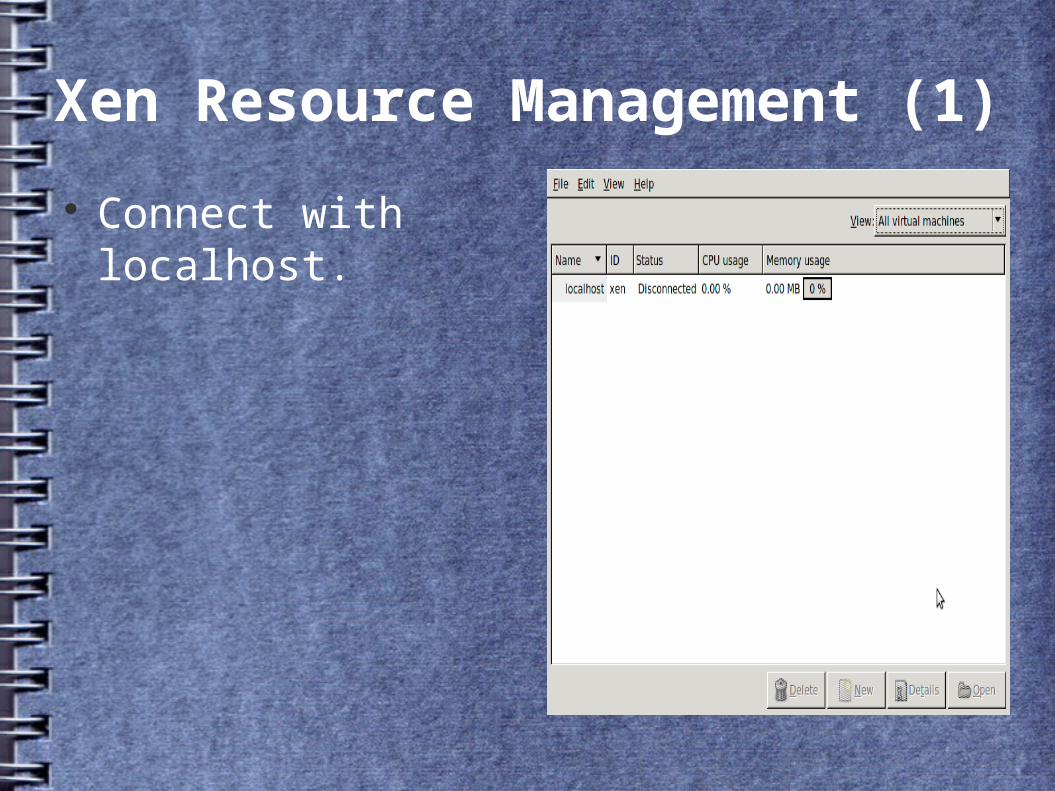
Xen Resource Management (1)
Connect with localhost.

Xen Resource Management (2)
• Click on connect.
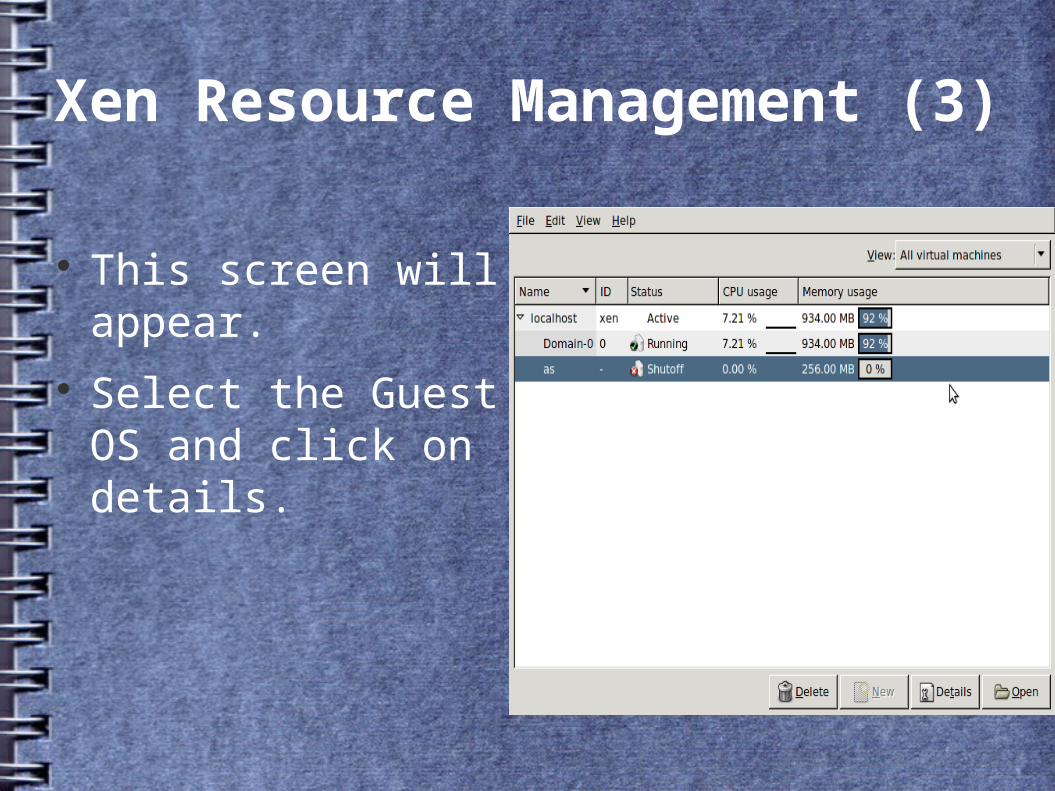
Xen Resource Management (3)
This screen will appear. Select the Guest OS and
click on details.
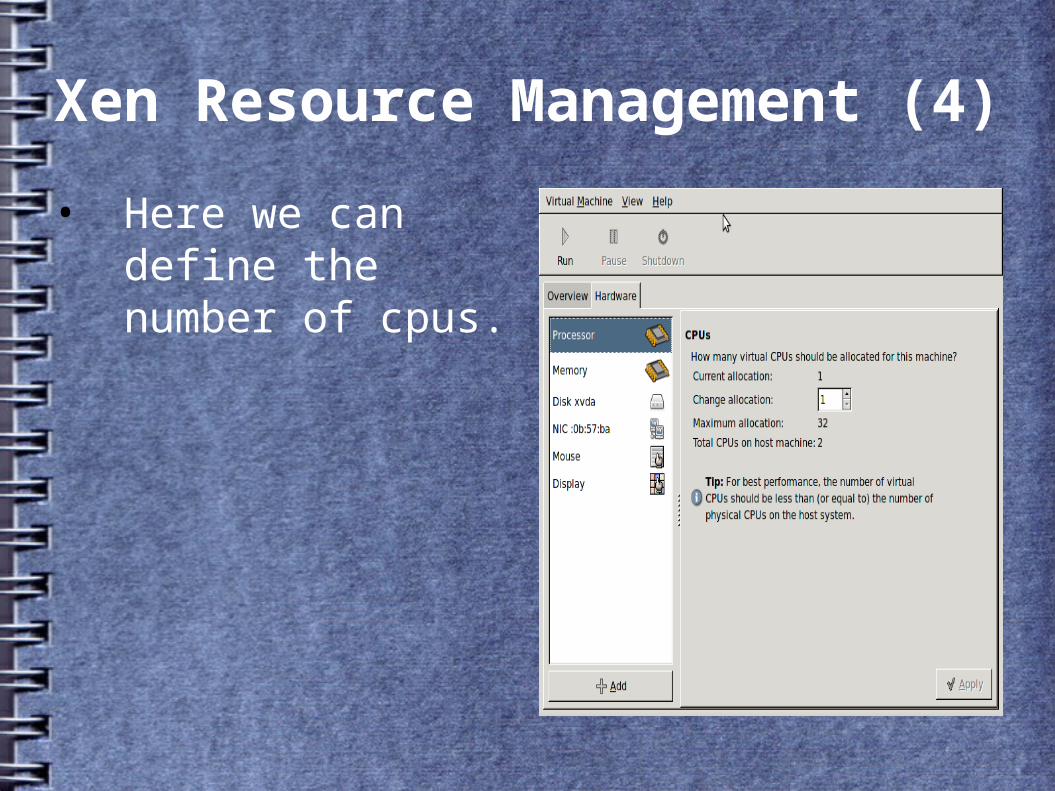
Xen Resource Management (4)
• Here we can define the number of cpus.
Xen Resource Management (5)
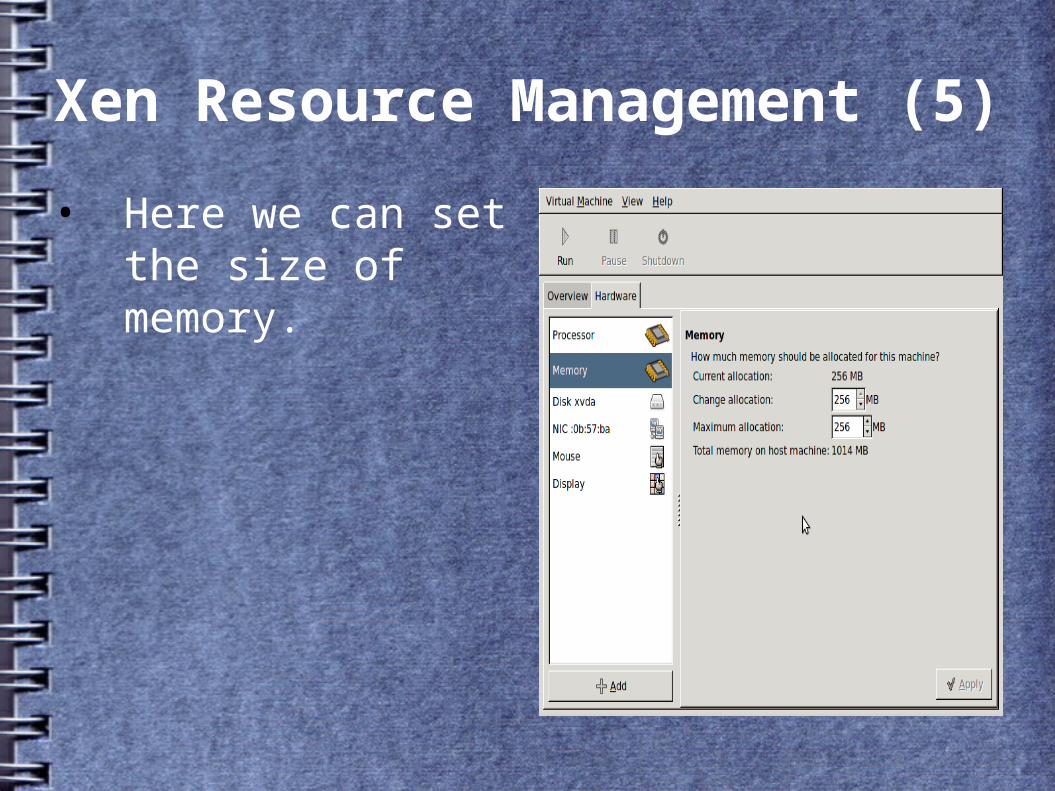
• Here we can set the size of memory.

Xen Resource Management (6)
• Here we can add more virtual harddisk.
Xen Resource Management (7)
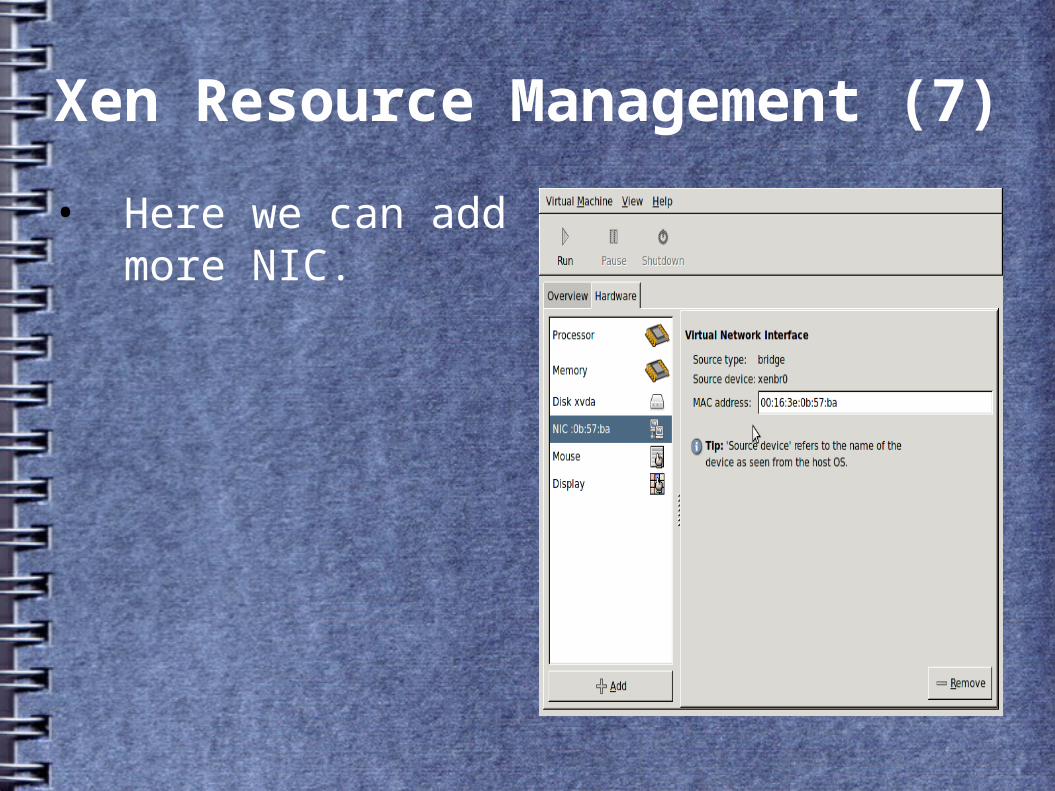
• Here we can add more NIC.
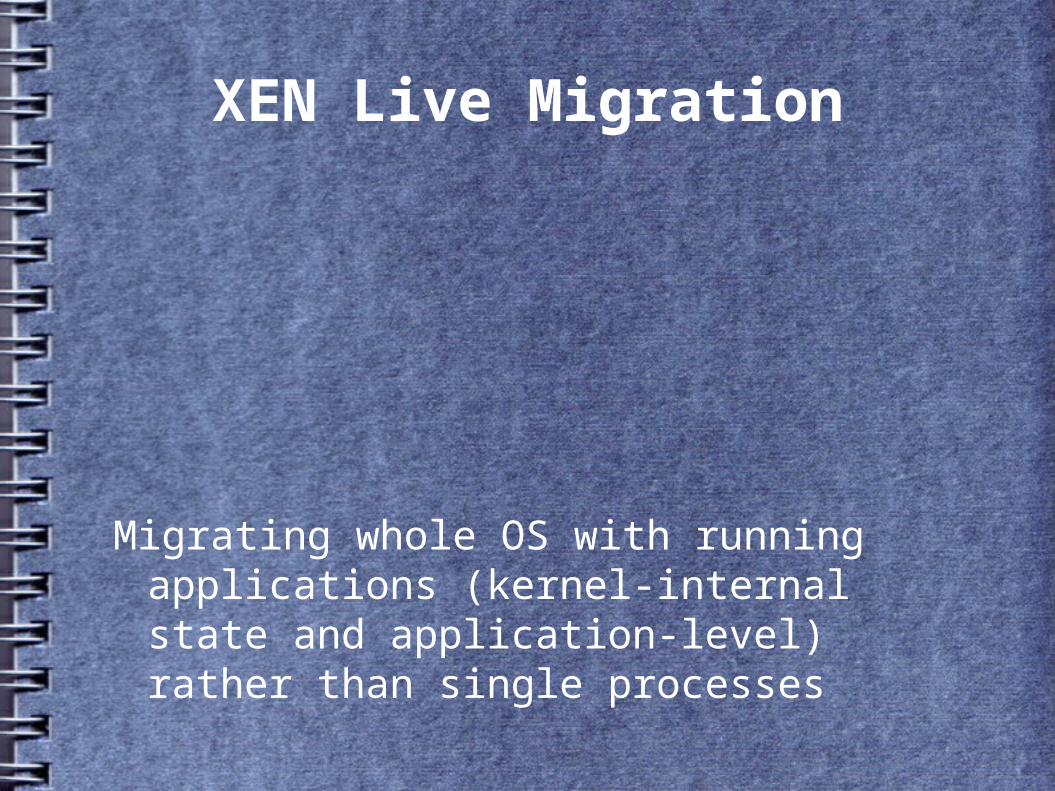
XEN Live Migration
Migrating whole OS with running applications (kernel-internal state and application-level) rather than single processes
Xen Migration type
• Red Hat Virtualization includes the capabilities to support migration of para-virtualized guests between Red Hat Virtualization servers. Migration can either be performed in two ways:
• Offline mode using the command xm migrate VirtualMachineName HostName. In this mode the virtual machine will be stopped on the original host and restarted on the new host.
• Live mode using the --live option for the command xm migrate --live VirtualMachineNameHostName.
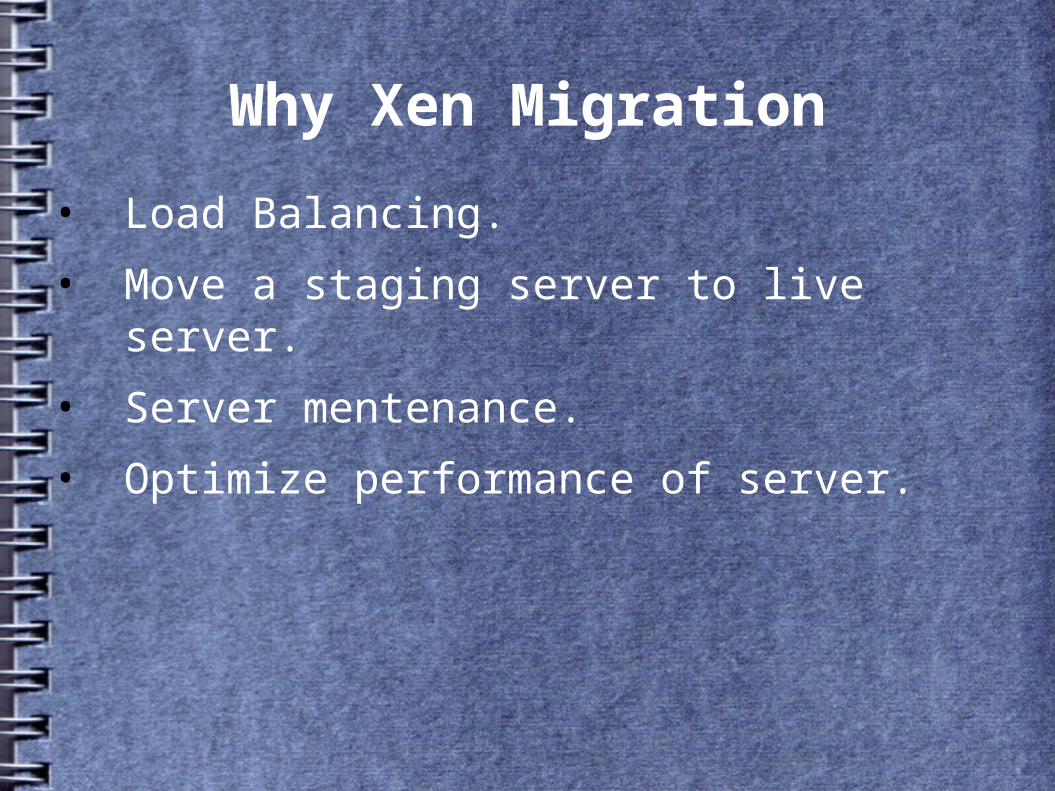
Why Xen Migration
• Load Balancing.
• Move a staging server to live server.
• Server mentenance.
• Optimize performance of server.
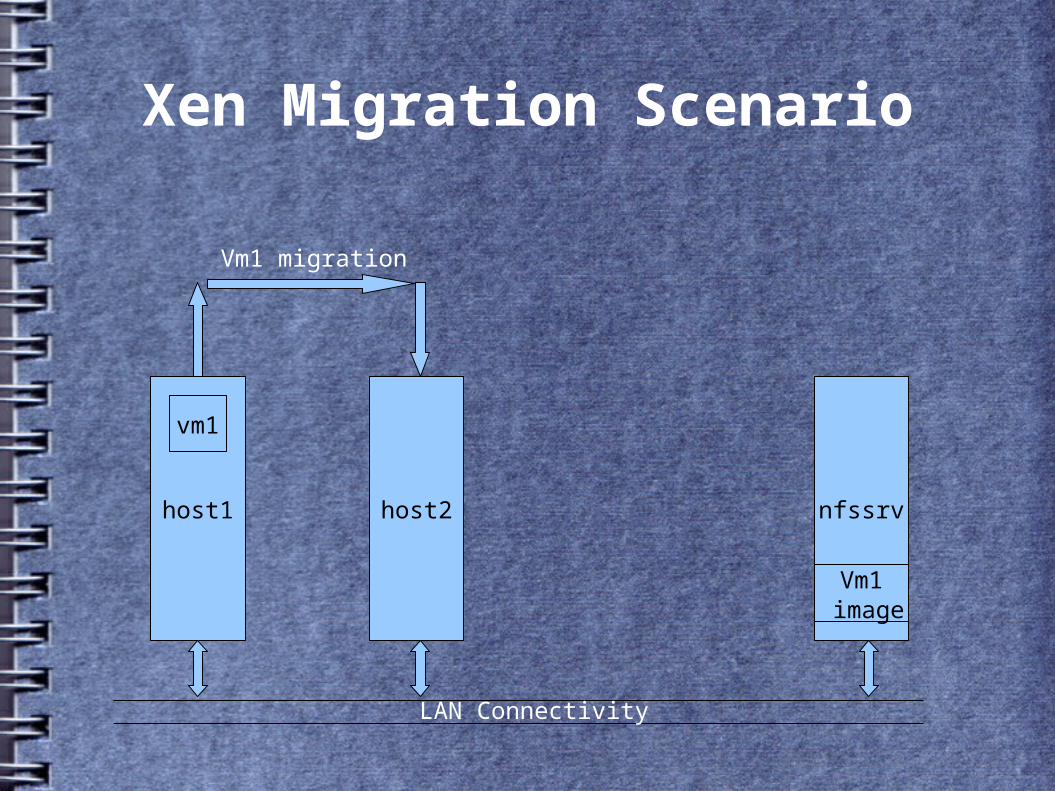
Xen Migration Scenario
host1 nfssrvhost2
vm1
Vm1 migration
LAN Connectivity
Vm1 image
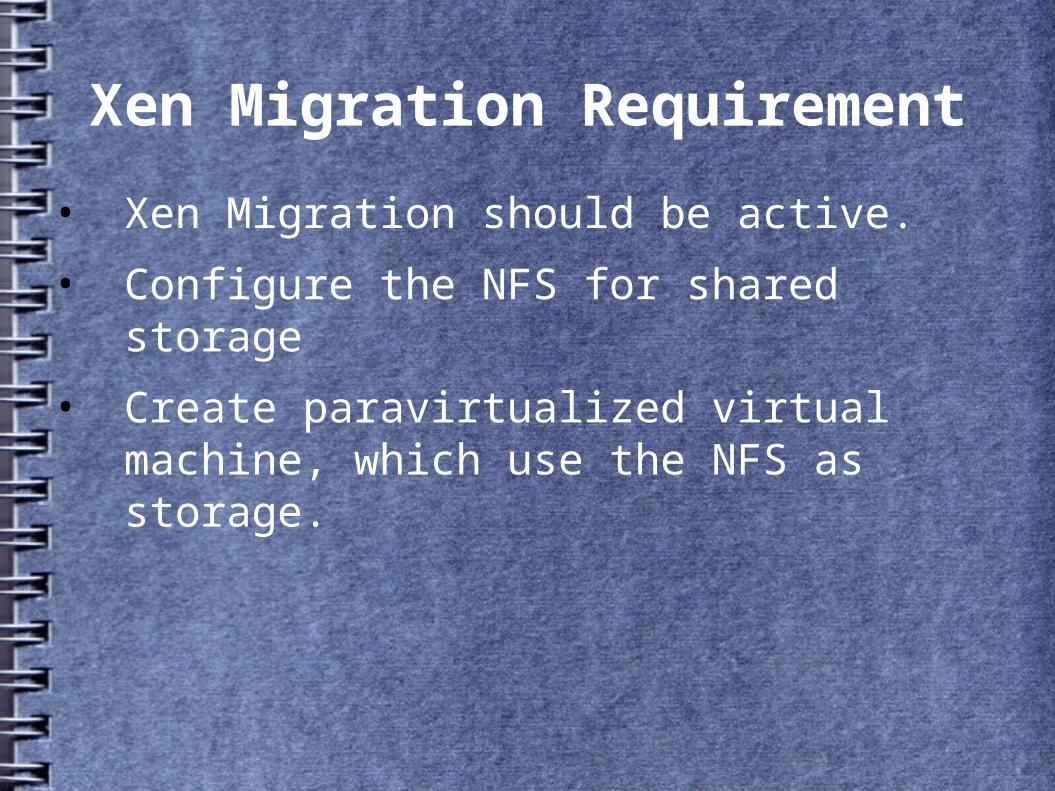
Xen Migration Requirement
• Xen Migration should be active.
• Configure the NFS for shared storage
• Create paravirtualized virtual machine, which use the NFS as storage.
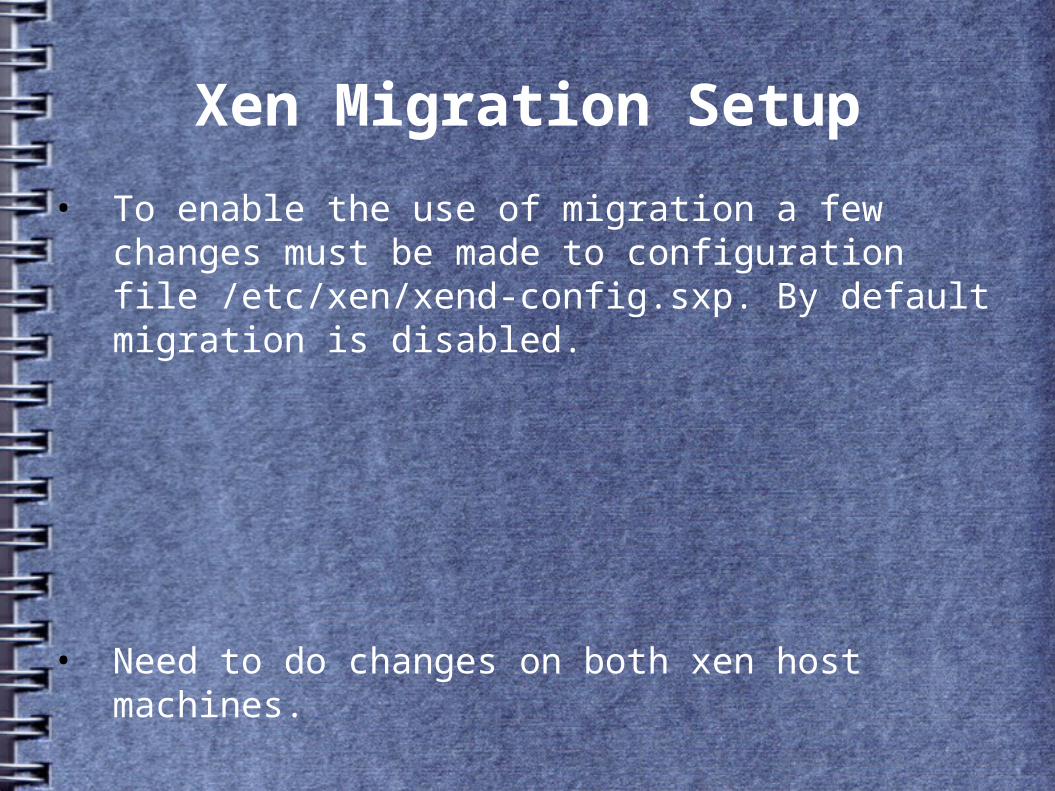
Xen Migration Setup
• To enable the use of migration a few changes must be made to configuration file /etc/xen/xend-config.sxp. By default migration is disabled.
• Need to do changes on both xen host machines.

Xen Migration Setup(1)
• Enabling migration.
– Modify the following entries in /etc/xen/xend-config.sxp to enable migration, remove the comments preceding the parameters in the configuration file:
– (xend-relocation-server yes)
– (xend-relocation-port 8002)
– (xend-relocation-address '')
– (xend-relocation-hosts-allow '')
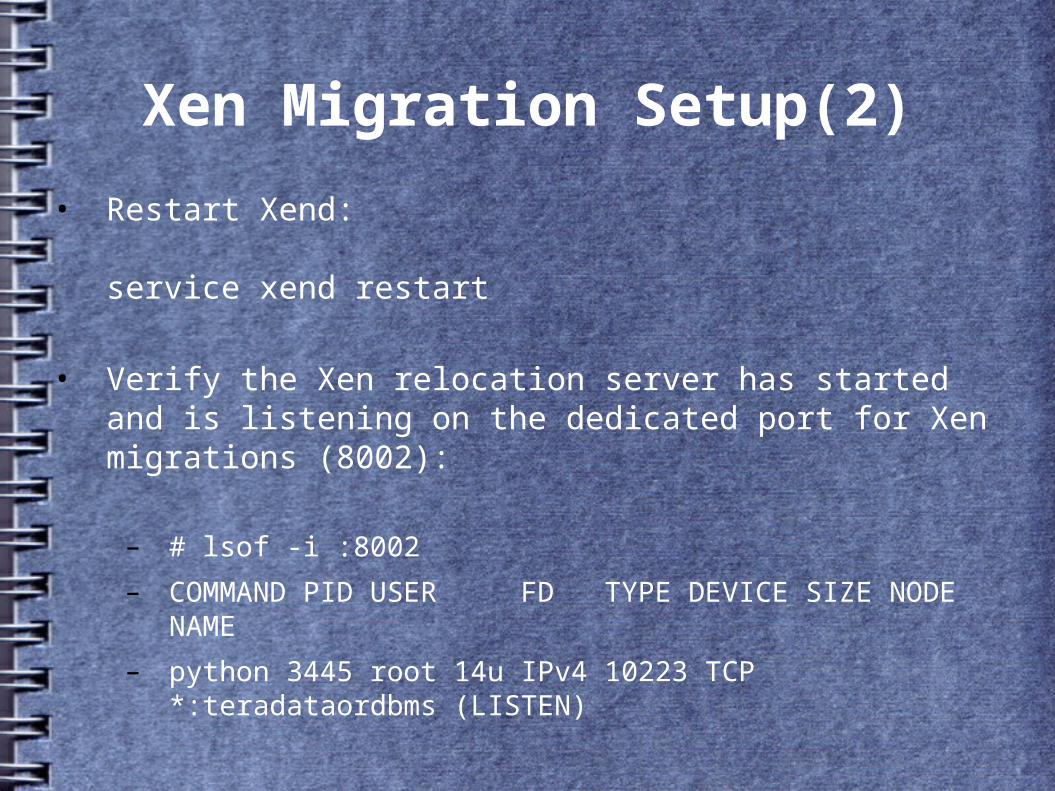
Xen Migration Setup(2)
• Restart Xend:
service xend restart
• Verify the Xen relocation server has started and is listening on the dedicated port for Xen migrations (8002):
– # lsof -i :8002
– COMMAND PID USER FD TYPE DEVICE SIZE NODE NAME
– python 3445 root 14u IPv4 10223 TCP *:teradataordbms (LISTEN)
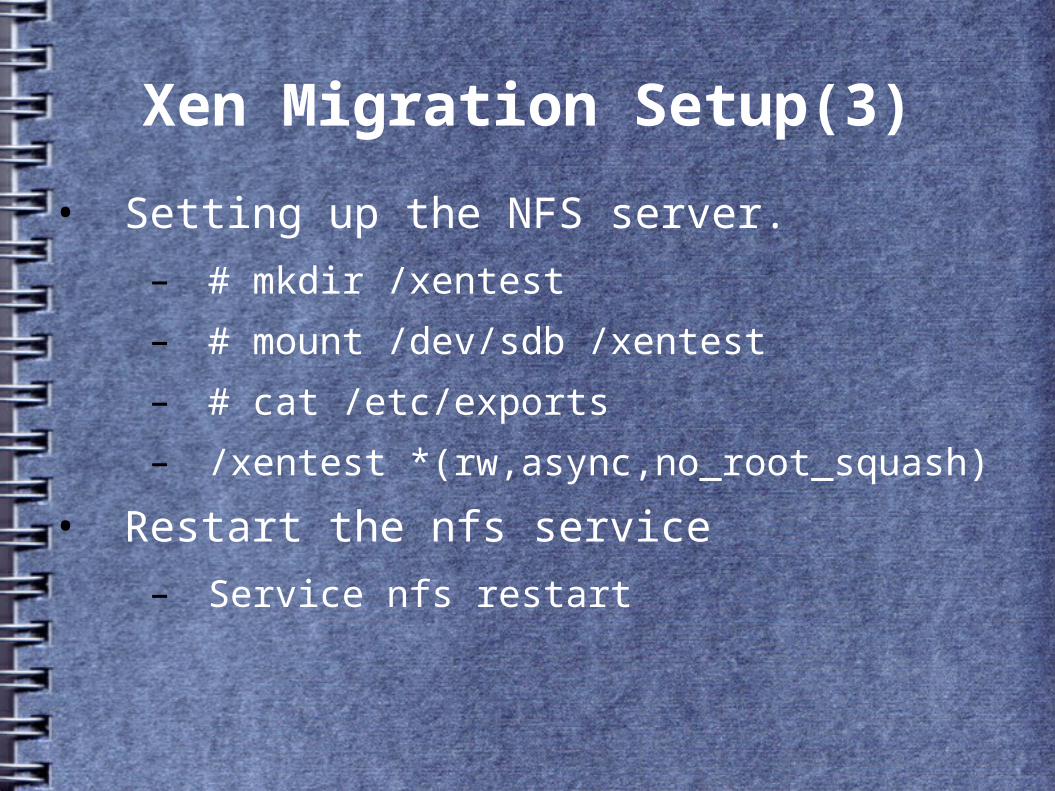
Xen Migration Setup(3)
• Setting up the NFS server.
– # mkdir /xentest
– # mount /dev/sdb /xentest
– # cat /etc/exports
– /xentest *(rw,async,no_root_squash)
• Restart the nfs service
– Service nfs restart
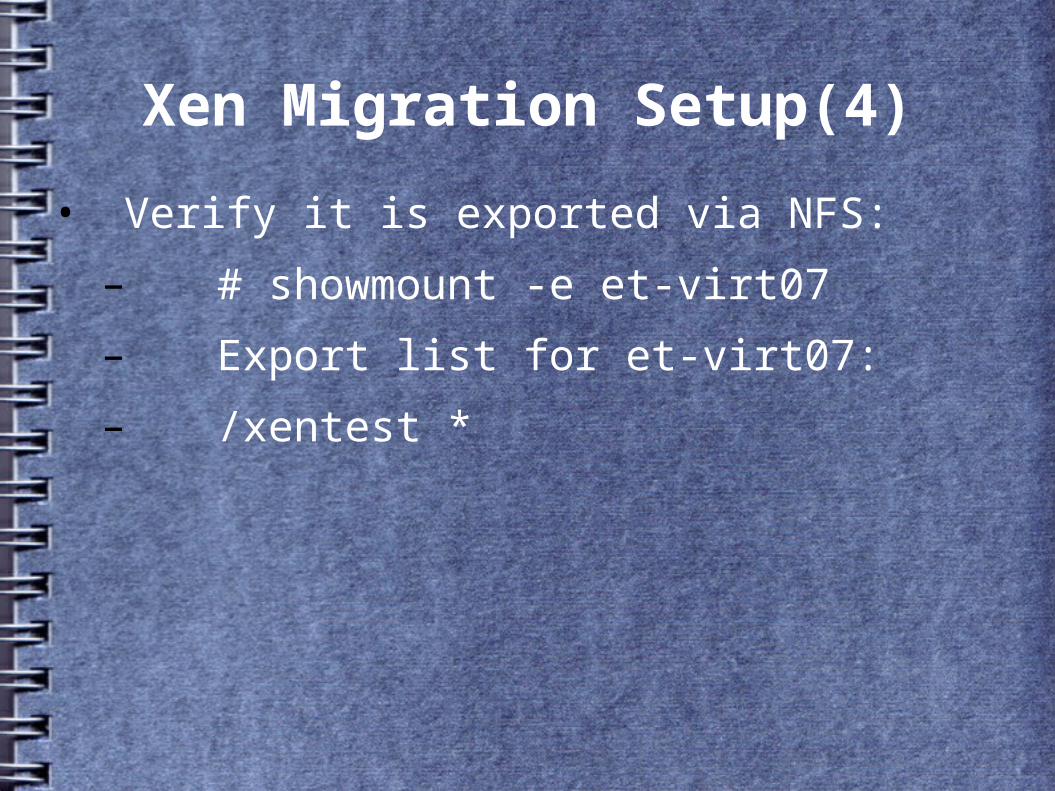
Xen Migration Setup(4)
• Verify it is exported via NFS:
– # showmount -e et-virt07
– Export list for et-virt07:
– /xentest *

Xen Migration Setup(5)
• After starting the NFS server, we can then mount it on host1, host2:
– mount nfssrv:/xen /xen
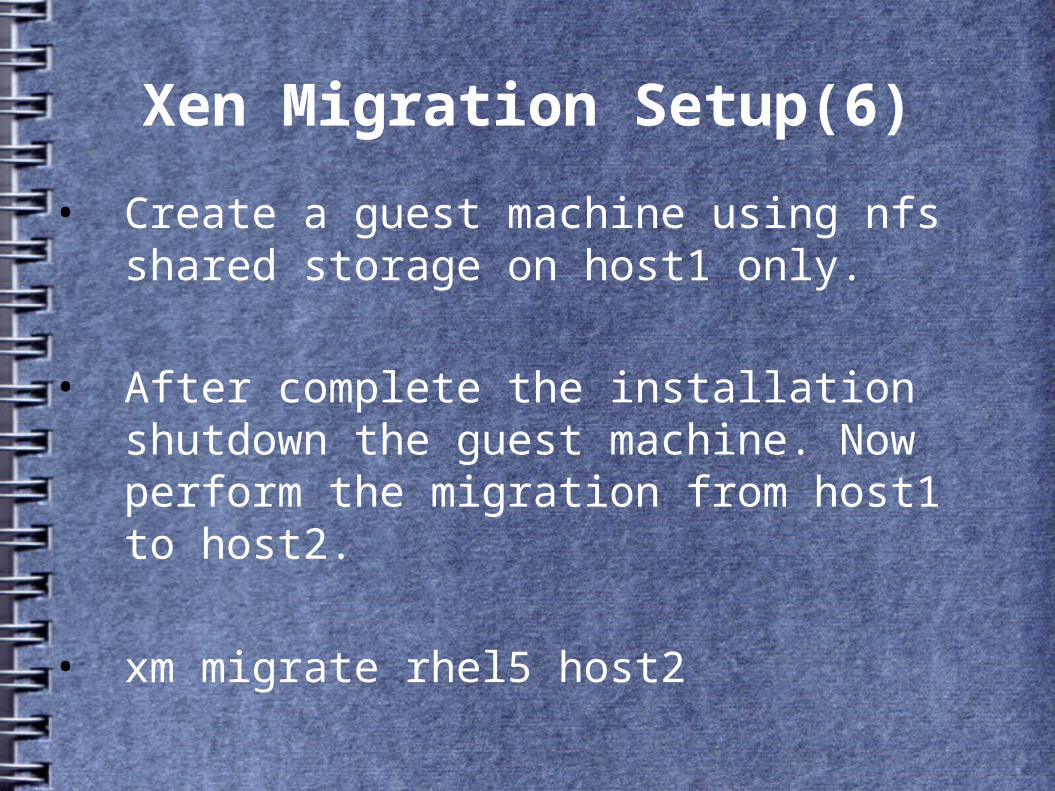
Xen Migration Setup(6)
• Create a guest machine using nfs shared storage on host1 only.
• After complete the installation shutdown the guest machine. Now perform the migration from host1 to host2.
• xm migrate rhel5 host2
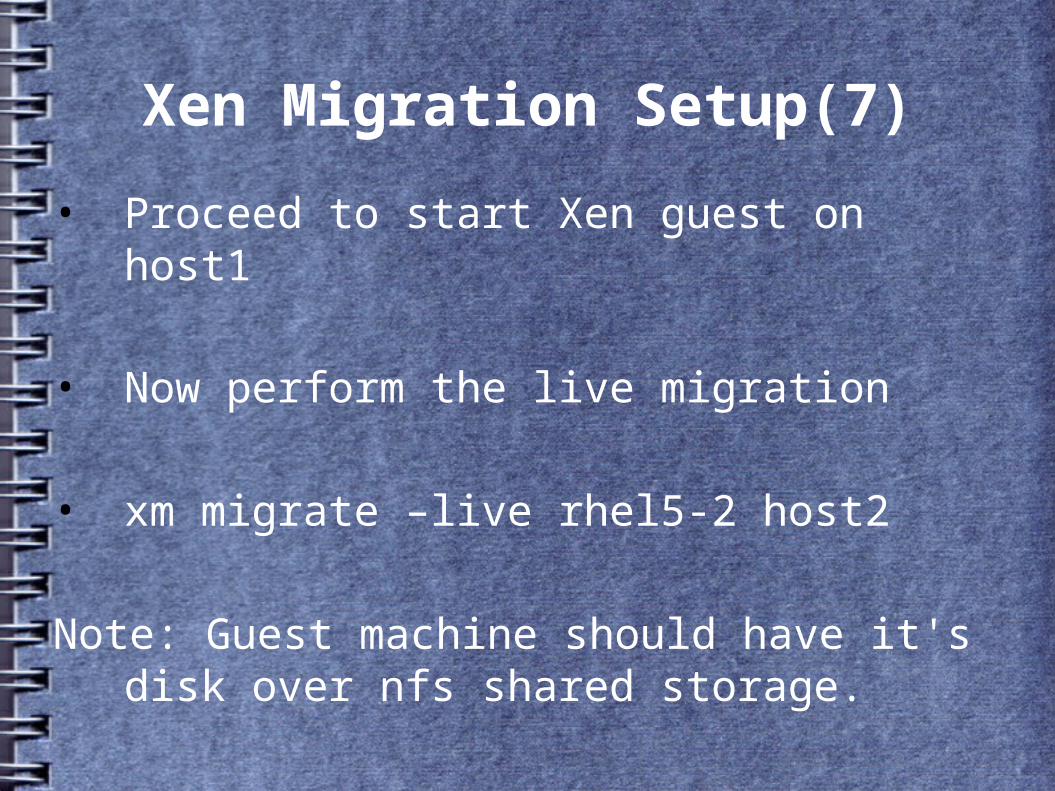
Xen Migration Setup(7)
• Proceed to start Xen guest on host1
• Now perform the live migration
• xm migrate –live rhel5-2 host2
Note: Guest machine should have it's disk over nfs shared storage.

Xen Migration Setup(8)
• Try to open multiple terminal windows on both Xen hosts with the following command:
– watch -n1 xm list
• And ping the guest machine
Xen Management Commands
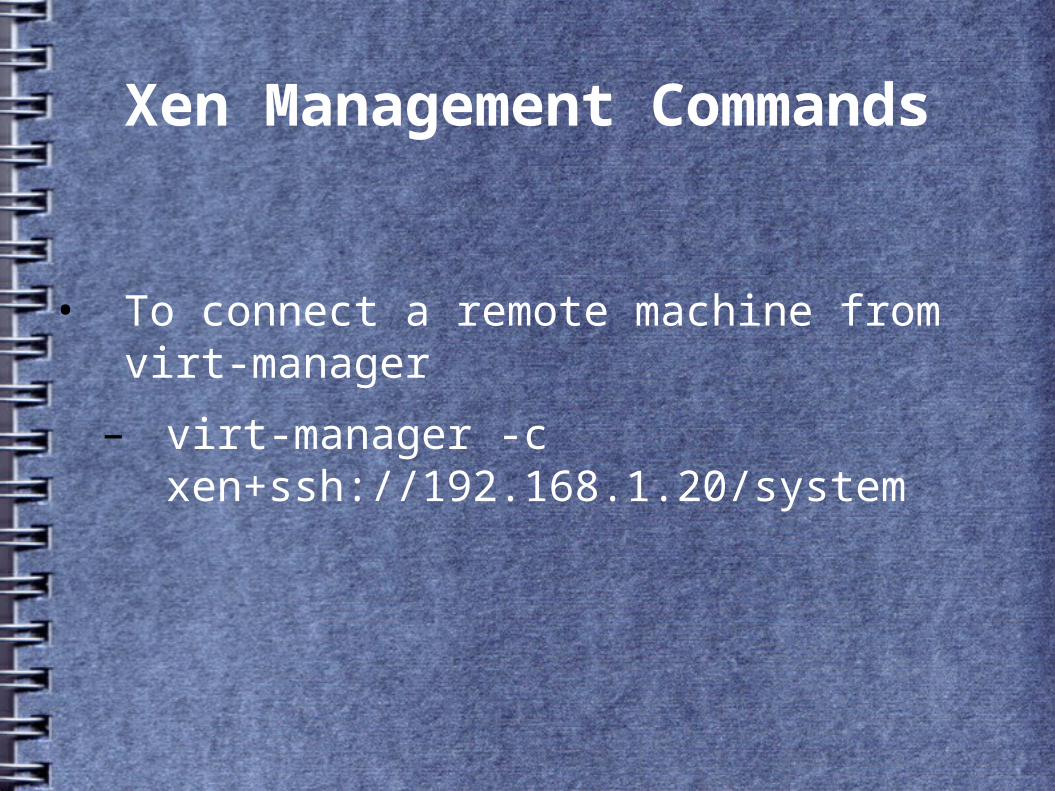
• To connect a remote machine from virt-manager
– virt-manager -c xen+ssh://192.168.1.20/system
Xen Management Commands
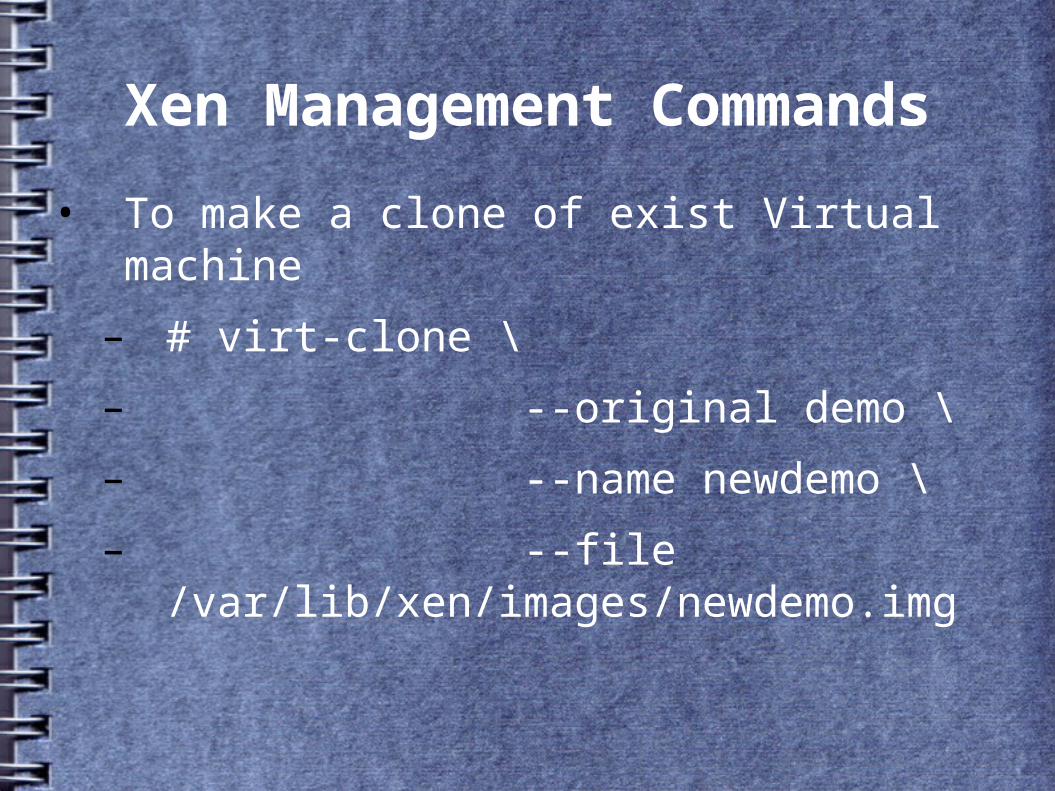
• To make a clone of exist Virtual machine
– # virt-clone \
– --original demo \
– --name newdemo \
– --file /var/lib/xen/images/newdemo.img
Xen Management Commands
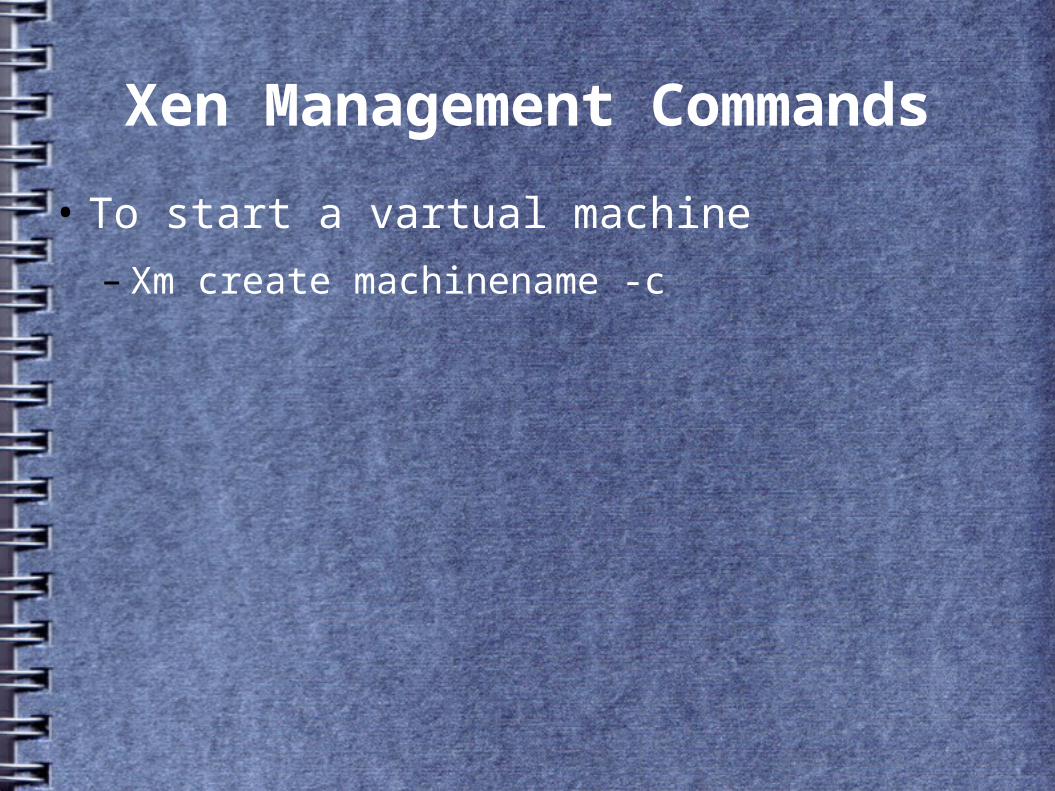
• To start a vartual machine
– Xm create machinename -c
Xen Management Commands
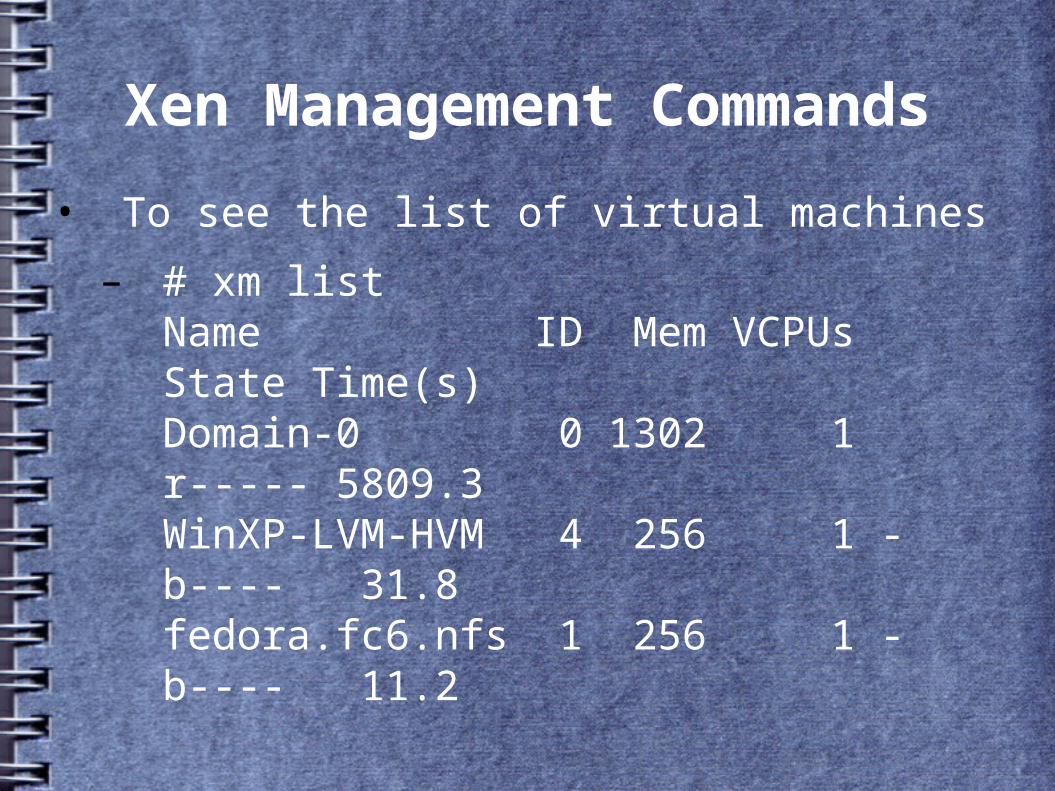
• To see the list of virtual machines
– # xm listName ID Mem VCPUs State Time(s)Domain-0 0 1302 1 r----- 5809.3WinXP-LVM-HVM 4 256 1 -b---- 31.8fedora.fc6.nfs 1 256 1 -b---- 11.2
Xen Management Commands
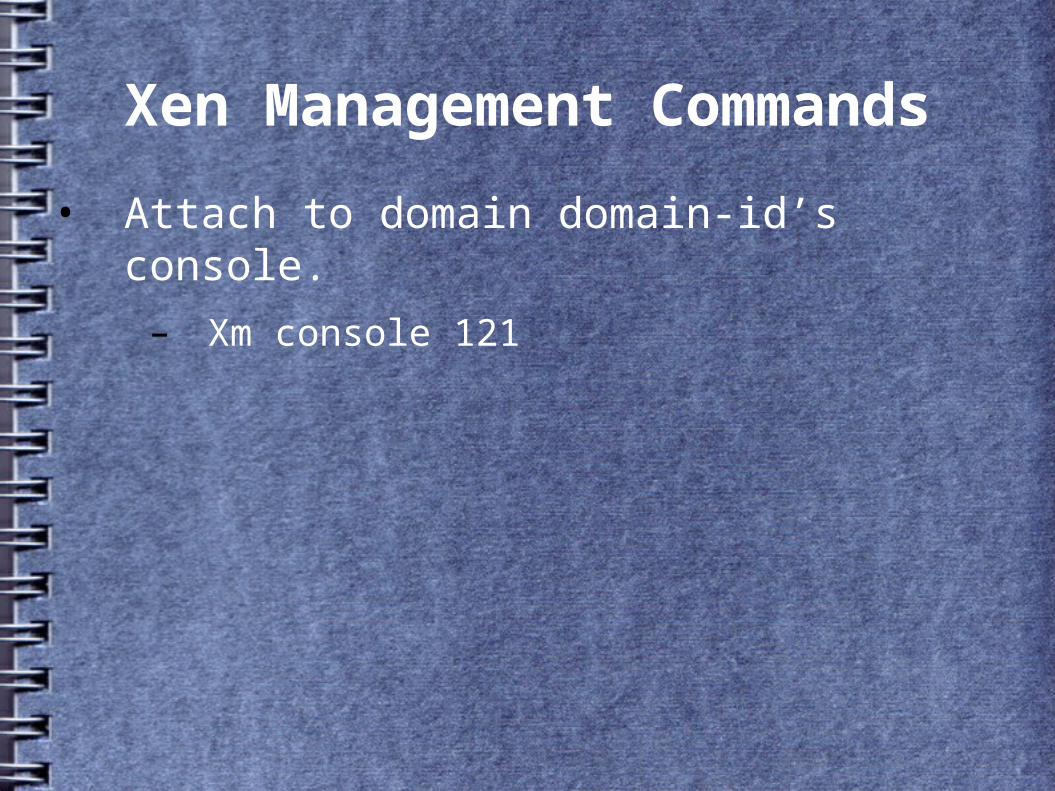
• Attach to domain domain-id’s console.
– Xm console 121
Xen Management Commands
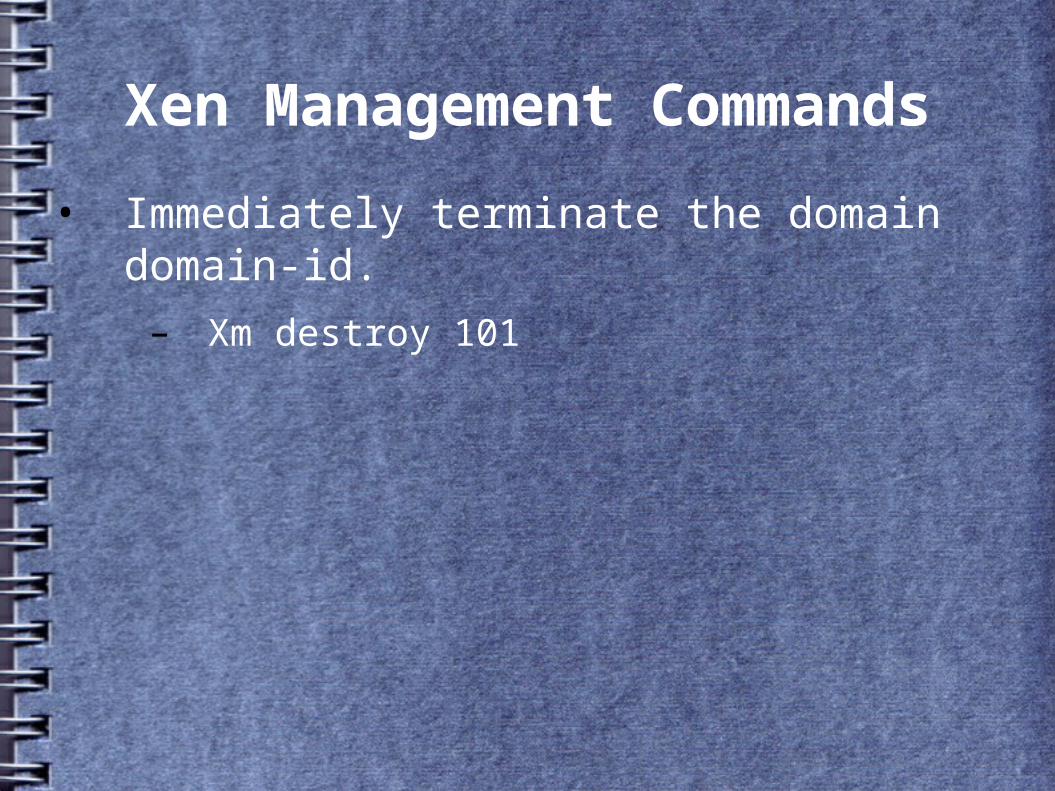
• Immediately terminate the domain domain-id.
– Xm destroy 101

Xen Management Commands
• Adding an ISO file as a CD-ROM to a guest configuration file
– ['file:/var/lib/xen/images/win2003sp1.dsk,hda,w',\
– 'file:/xen/trees/ISO/WIN/en_windows_server_2003_with_sp1_standard.iso,hdc:cdrom,r',]

Xen Management Commands
• Mount an ISO as a Disk
– xm block-attach guestdomain file://opt/rhel5-2.iso /dev/hdc ro
Xen Management Commands
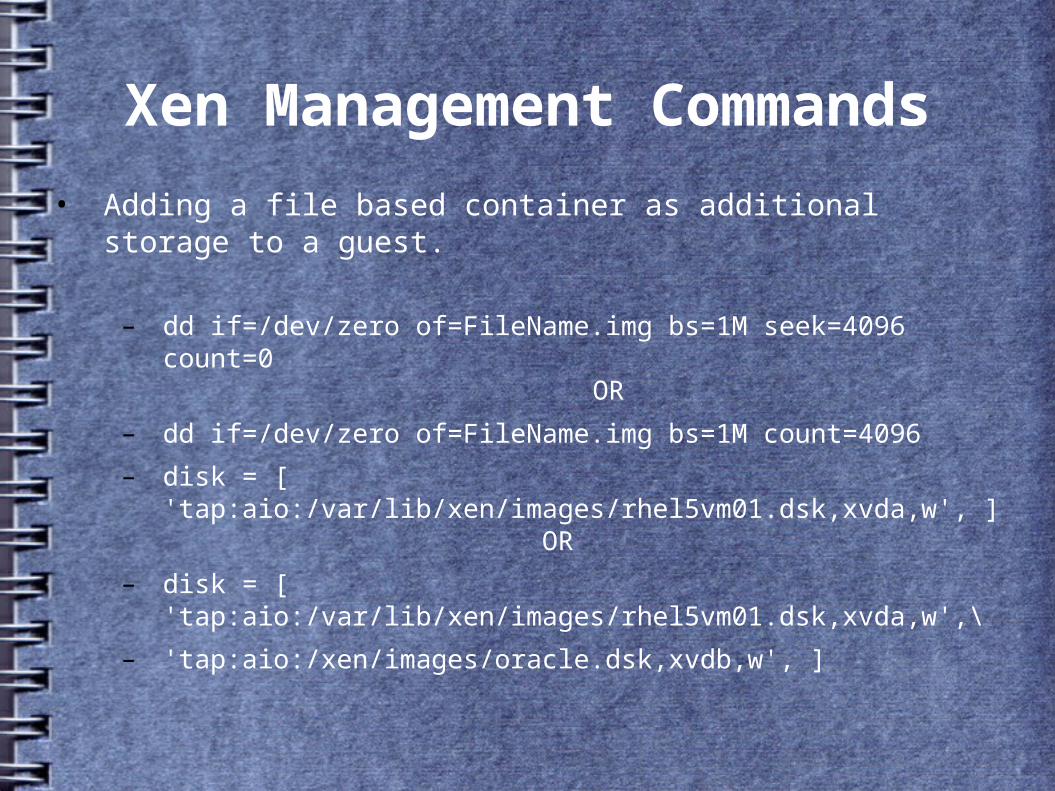
• Adding a file based container as additional storage to a guest.
– dd if=/dev/zero of=FileName.img bs=1M seek=4096 count=0 OR
– dd if=/dev/zero of=FileName.img bs=1M count=4096
– disk = [ 'tap:aio:/var/lib/xen/images/rhel5vm01.dsk,xvda,w', ] OR
– disk = [ 'tap:aio:/var/lib/xen/images/rhel5vm01.dsk,xvda,w',\
– 'tap:aio:/xen/images/oracle.dsk,xvdb,w', ]
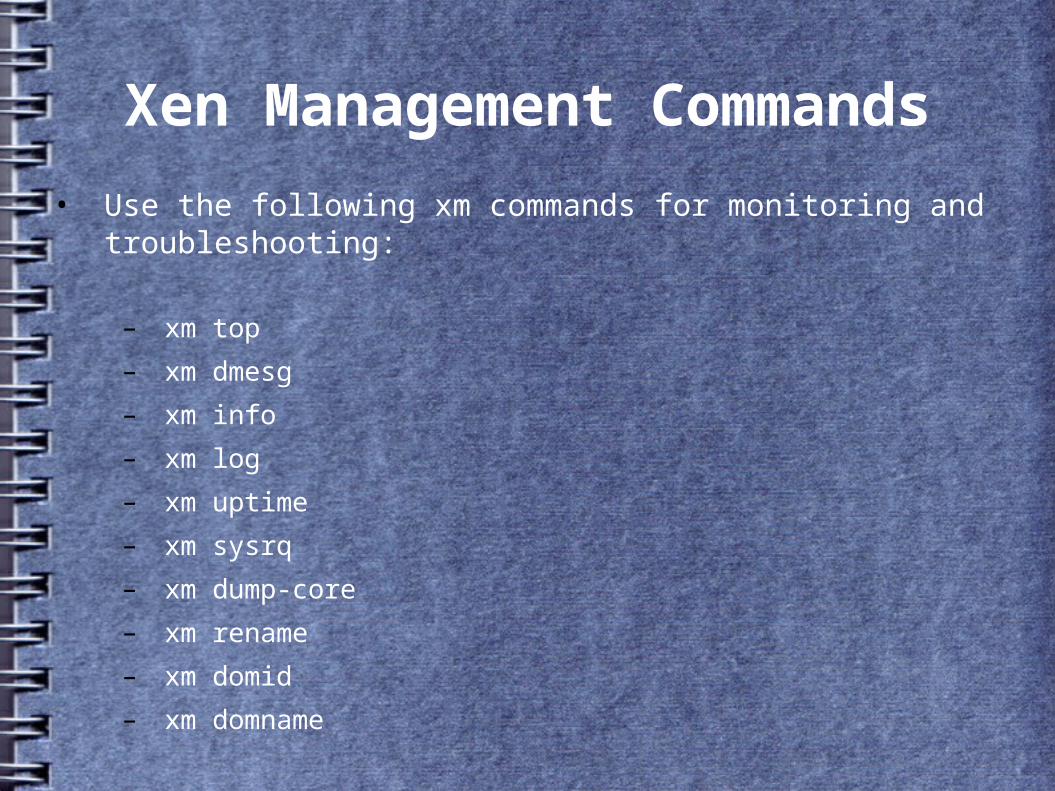
Xen Management Commands
• Use the following xm commands for monitoring and troubleshooting:
– xm top
– xm dmesg
– xm info
– xm log
– xm uptime
– xm sysrq
– xm dump-core
– xm rename
– xm domid
– xm domname
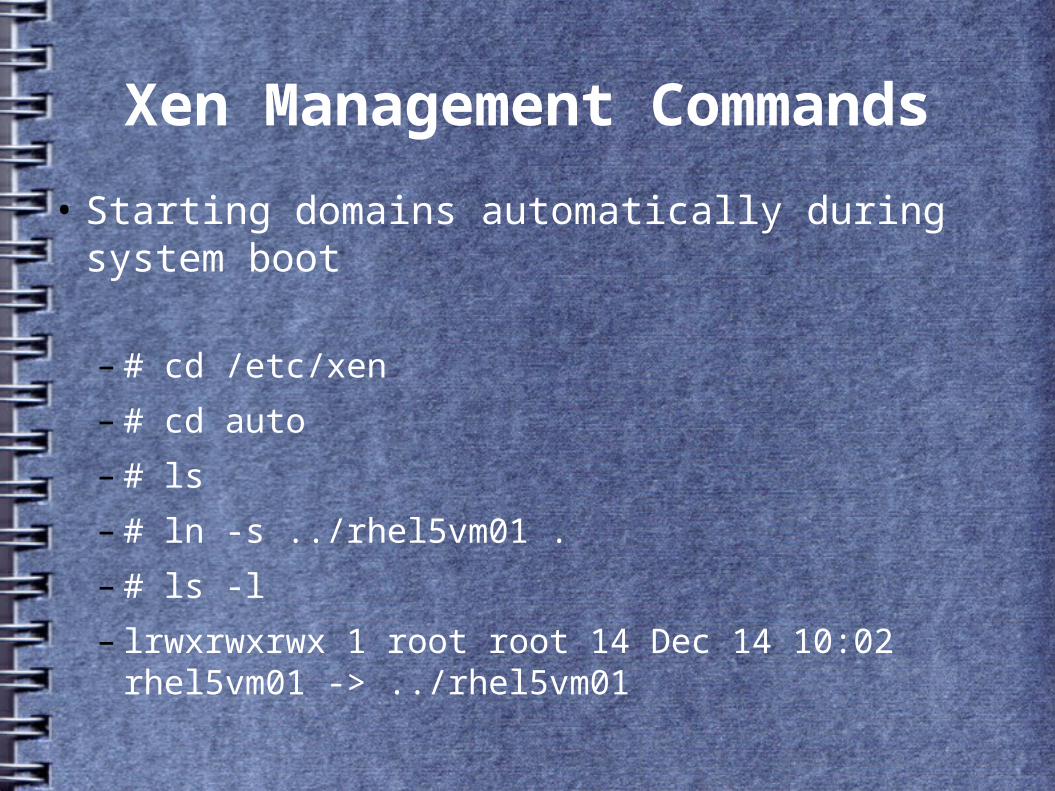
Xen Management Commands
• Starting domains automatically during system boot
– # cd /etc/xen
– # cd auto
– # ls
– # ln -s ../rhel5vm01 .
– # ls -l
– lrwxrwxrwx 1 root root 14 Dec 14 10:02 rhel5vm01 -> ../rhel5vm01
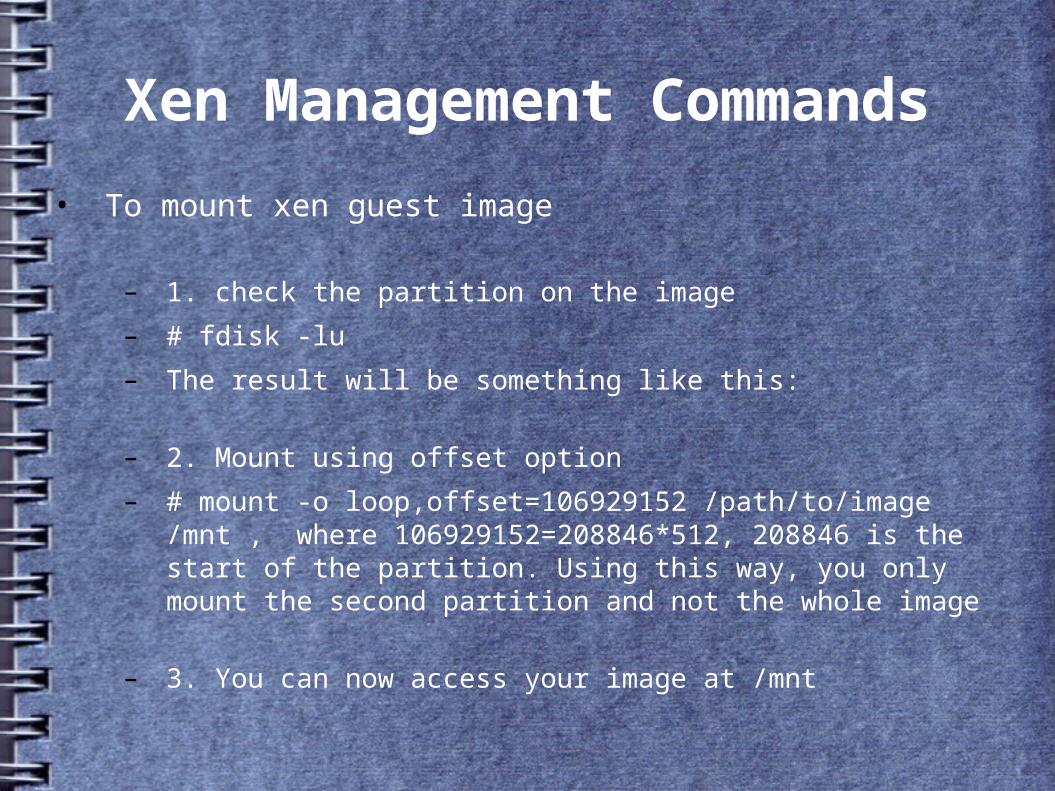
Xen Management Commands
• To mount xen guest image
– 1. check the partition on the image
– # fdisk -lu
– The result will be something like this:
– 2. Mount using offset option
– # mount -o loop,offset=106929152 /path/to/image /mnt , where 106929152=208846*512, 208846 is the start of the partition. Using this way, you only mount the second partition and not the whole image
– 3. You can now access your image at /mnt
Xen Management tool
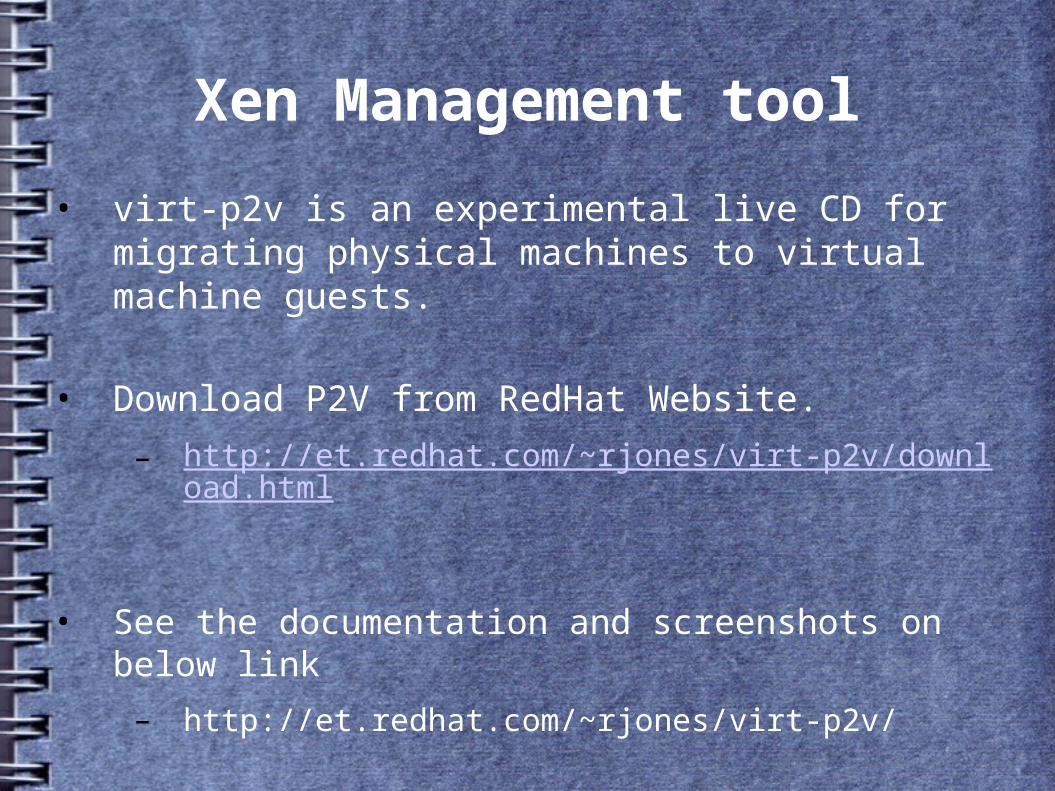
• virt-p2v is an experimental live CD for migrating physical machines to virtual machine guests.
• Download P2V from RedHat Website.
– http://et.redhat.com/~rjones/virt-p2v/download.html
• See the documentation and screenshots on below link
– http://et.redhat.com/~rjones/virt-p2v/
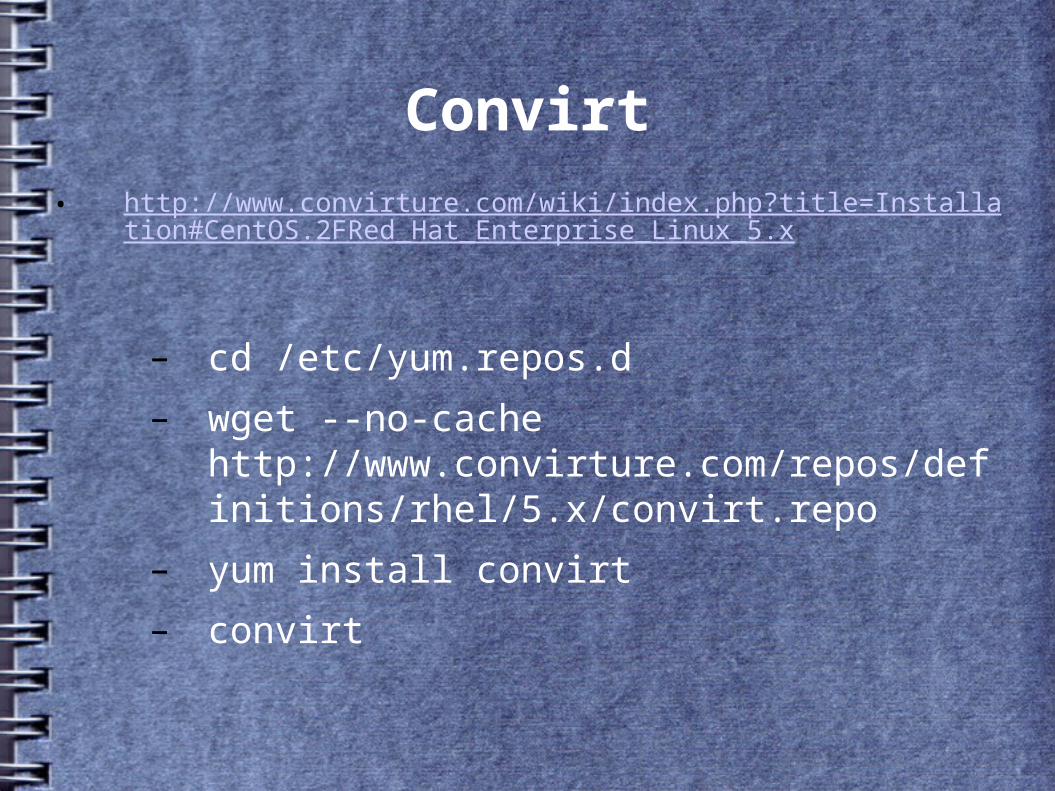
Convirt• http://www.convirture.com/wiki/index.php?title=Installation#CentOS.2FRed_Hat
_Enterprise_Linux_5.x
– cd /etc/yum.repos.d
– wget --no-cache http://www.convirture.com/repos/definitions/rhel/5.x/convirt.repo
– yum install convirt
– convirt