visual components 4.0 extensibility€¦ · caliburn micro caliburn micro is a framework that is...
TRANSCRIPT
1
Visual Components 4.0 Extensibility
.NET API Development Guide (version 0.1)
2
Contents Introduction ....................................................................................................................................... 3
Document Scope ............................................................................................................................ 3
Development Tools ........................................................................................................................ 3
Overview of VC 4.0 .NET API Structure .......................................................................................... 3
Application Extensibility (MEF) ...................................................................................................... 4
Caliburn Micro ................................................................................................................................ 5
Visual Studio Project Setup ............................................................................................................ 6
Extending Ribbon, Ribbon Group and Action Item ............................................................................ 7
A Derived RibbonTabBase Class ..................................................................................................... 7
A Derived RibbonGroupBase Class ................................................................................................. 8
A Derived ActionItem Class ............................................................................................................ 8
VC 4.0 Application Configuration File ............................................................................................ 9
Accessing VC Objects ........................................................................................................................ 10
IPlugin ............................................................................................................................................... 12
Extending Pane and Databinding ..................................................................................................... 13
Class Definition that Derives from DockableScreen Class............................................................ 13
Binding Component’ Nodes to Tree View Control ....................................................................... 14
Adding Action Pane .......................................................................................................................... 18
Basic Class Implementation of ICommandPanelAction Interface ................................................ 19
Basic Class Implementation of ICommandViewModel Interface ................................................. 20
Backstage Extensibility ..................................................................................................................... 21
Screens and Screen Conductors ................................................................................................... 21
Adding Custom Tab to Backstage View ........................................................................................ 22
Metadata Views ........................................................................................................................... 28
Adding Custom Button to Backstage View ................................................................................... 29
Adding Screens to VC 4.0 Backstage Default Menu Tabs (Info, Open, Save As and Options) ..... 31
Configuring User Settings ............................................................................................................. 32
Adding 3D Handles ........................................................................................................................... 35
Taking a closer look (ManipulatorBase, ManipulatorPart and Manipulator Classes).................. 35
Add Handle to Target Matrix in 3D-World ................................................................................... 38
3
Introduction
Visual Components 4.0 (VC 4.0) applications can be extended through Managed Extensibility
Framework (MEF) which was introduced in .NET 4.0 and Silverlight 4 by Microsoft Corporation.
Application developers can extend a licensed copy of VC 4.0 by using MEF to develop custom
plugin components. This guide provides information on how to add custom ribbon, panel, action
panel, backstage item, WPF 3-D graphics to VC 4.0 as well as how to read or write to VC 4.0
application configuration files.
Document Scope The primary purpose of this document is to provide an overview of the recommended procedures
and available .NET API resources that can be used to extend VC 4.0 application. In some cases,
there will be a brief introduction to some of the technologies required for VC 4.0 extensibility but
please note that this guide does not discuss or provide the technical details of the required
technologies required to extend VC 4.0. An understanding of MEF, WPF, WPF 3-D graphics, C#
programming language and Microsoft Visual Studio 2012- is required in order to use this
development guide.
Development Tools A minimum requirement of Microsoft .NET Framework 4.5 is required for VC 4.0 application
installation and Microsoft Visual Studio 2012 and up is required as a development environment
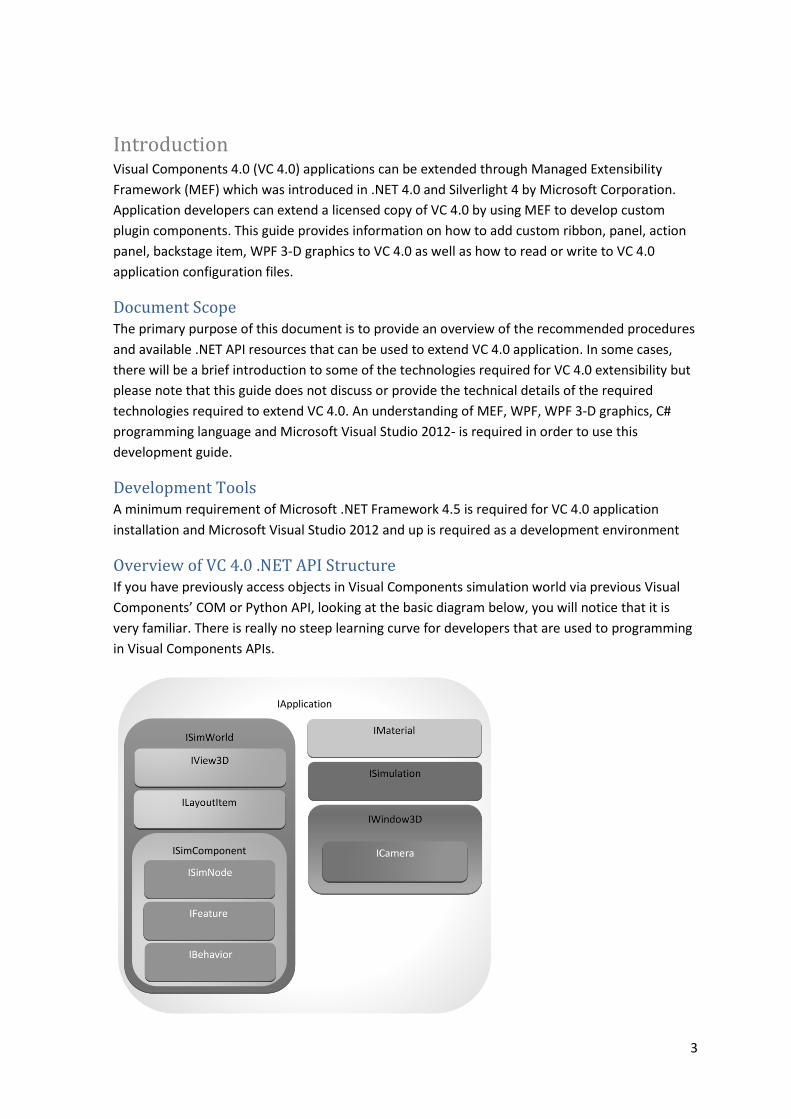
Overview of VC 4.0 .NET API Structure If you have previously access objects in Visual Components simulation world via previous Visual
Components’ COM or Python API, looking at the basic diagram below, you will notice that it is
very familiar. There is really no steep learning curve for developers that are used to programming
in Visual Components APIs.
IApplication
ISimComponent
4
Most of the new concepts in the new VC 4.0 .NET API relates to how to extend VC 4.0 application
and this is the primary purpose of this guide.
Application Extensibility (MEF) The most important new concept in VC 4.0 .NET API is Managed Extensibility Framework or MEF.
MEF uses a programming model to define the set of conceptual objects on which it operates. VC
4.0 .NET API uses MEFs default programming model (referred to as attributed programming
model). In the attributed programming model parts, imports, exports, and other objects are
defined with attributes that decorate ordinary .NET Framework classes.
For example, in the code snippet below, a regular .NET Class named Class1 that implements
IPlugin interface is decorated with ExportAttribute attribute. This export will match an import in
VC 4.0. In order for the export to match an import, they must have the same contract and the
contract here is IPlugin.
using System; using System.Linq; using VisualComponents.UX.Shared; using VisualComponents.Create3D; using System.ComponentModel.Composition; namespace Plugin.Demo { [Export(typeof(IPlugin))] public class Class1: IPlugin { [ImportingConstructor] public Class1([Import]IMessageService messageService, [Import]IApplication application, [Import]ISelectionManager selectionManger) { } public void Exit() { } public void Initialize() { } } }
The core of VC 4.0 MEF’ extensibility is in the discovering and matching of exports and imports
(referred to as composition) by VC 4.0 MEF’ composition container. In Class1 the composition
takes place in the constructor. Application developers do not need to worry about the
compositional container or how it composes parts. The key is to implement a derived class, know
what VC 4.0 base classes or interfaces to derived from and the contract that can be used to export
them.
MSDN has a more detailed information on MEF (https://msdn.microsoft.com/en-
us/library/dd460648(v=vs.110).aspx )
5
Caliburn Micro Caliburn Micro is a framework that is employed in VC 4.0. and it comes with VC 4.0 installation.
Its strong support for MVVM pattern will enable application developers to develop plugins easily
and quickly. The following are some of the key features of Caliburn Micro that will be used in this
section of the guide.
Automatically set ViewModel as the data context of View
Automatically wire events on controls to call methods in the View Model based on naming
convention.
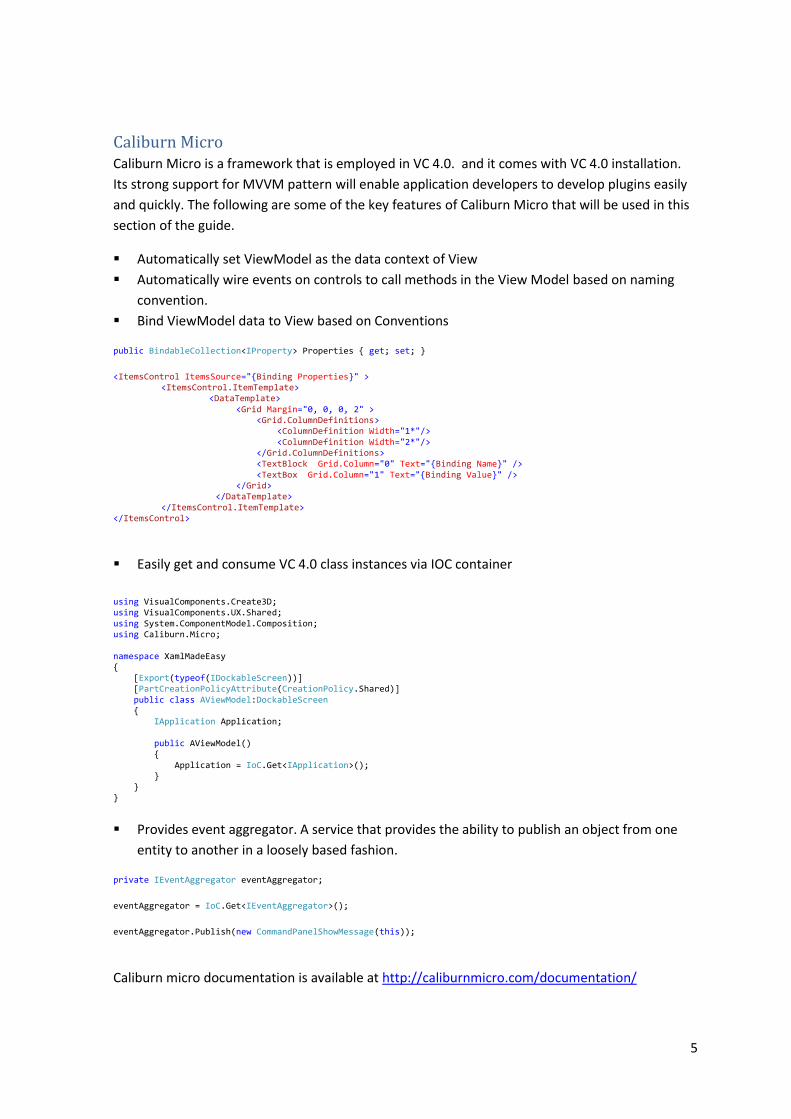
Bind ViewModel data to View based on Conventions
public BindableCollection<IProperty> Properties { get; set; }
<ItemsControl ItemsSource="{Binding Properties}" > <ItemsControl.ItemTemplate>
<DataTemplate> <Grid Margin="0, 0, 0, 2" > <Grid.ColumnDefinitions> <ColumnDefinition Width="1*"/> <ColumnDefinition Width="2*"/> </Grid.ColumnDefinitions> <TextBlock Grid.Column="0" Text="{Binding Name}" /> <TextBox Grid.Column="1" Text="{Binding Value}" /> </Grid> </DataTemplate>
</ItemsControl.ItemTemplate> </ItemsControl>
Easily get and consume VC 4.0 class instances via IOC container
using VisualComponents.Create3D; using VisualComponents.UX.Shared; using System.ComponentModel.Composition; using Caliburn.Micro; namespace XamlMadeEasy { [Export(typeof(IDockableScreen))] [PartCreationPolicyAttribute(CreationPolicy.Shared)] public class AViewModel:DockableScreen { IApplication Application; public AViewModel() { Application = IoC.Get<IApplication>(); } } }
Provides event aggregator. A service that provides the ability to publish an object from one
entity to another in a loosely based fashion.
private IEventAggregator eventAggregator;
eventAggregator = IoC.Get<IEventAggregator>();
eventAggregator.Publish(new CommandPanelShowMessage(this));
Caliburn micro documentation is available at http://caliburnmicro.com/documentation/
6
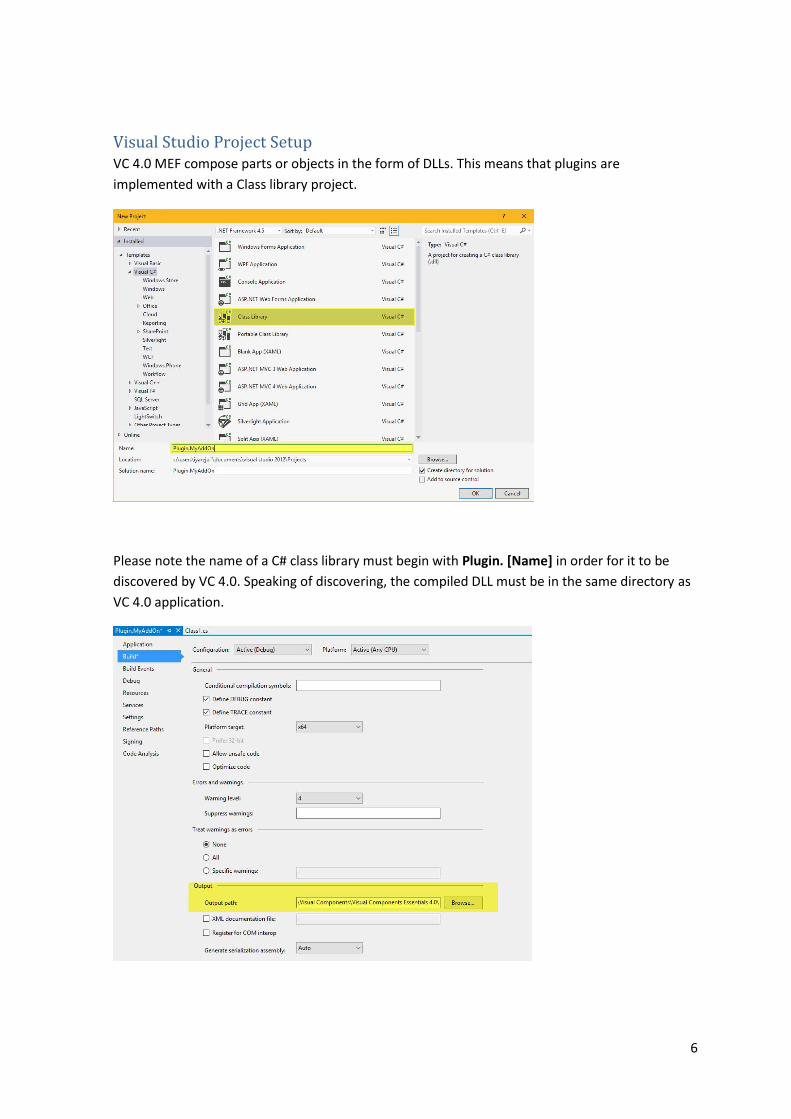
Visual Studio Project Setup VC 4.0 MEF compose parts or objects in the form of DLLs. This means that plugins are
implemented with a Class library project.
Please note the name of a C# class library must begin with Plugin. [Name] in order for it to be
discovered by VC 4.0. Speaking of discovering, the compiled DLL must be in the same directory as
VC 4.0 application.
7
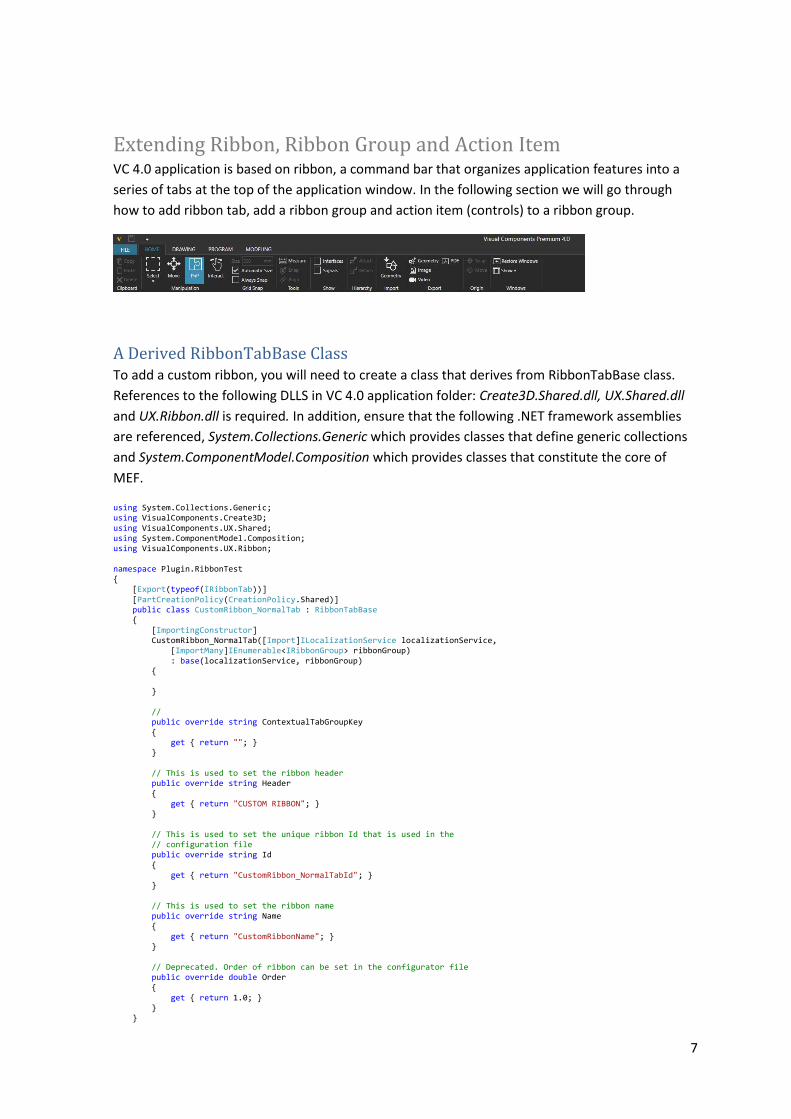
Extending Ribbon, Ribbon Group and Action Item VC 4.0 application is based on ribbon, a command bar that organizes application features into a
series of tabs at the top of the application window. In the following section we will go through
how to add ribbon tab, add a ribbon group and action item (controls) to a ribbon group.
A Derived RibbonTabBase Class To add a custom ribbon, you will need to create a class that derives from RibbonTabBase class.
References to the following DLLS in VC 4.0 application folder: Create3D.Shared.dll, UX.Shared.dll
and UX.Ribbon.dll is required. In addition, ensure that the following .NET framework assemblies
are referenced, System.Collections.Generic which provides classes that define generic collections
and System.ComponentModel.Composition which provides classes that constitute the core of
MEF.
using System.Collections.Generic; using VisualComponents.Create3D; using VisualComponents.UX.Shared; using System.ComponentModel.Composition; using VisualComponents.UX.Ribbon; namespace Plugin.RibbonTest { [Export(typeof(IRibbonTab))] [PartCreationPolicy(CreationPolicy.Shared)] public class CustomRibbon_NormalTab : RibbonTabBase { [ImportingConstructor] CustomRibbon_NormalTab([Import]ILocalizationService localizationService, [ImportMany]IEnumerable<IRibbonGroup> ribbonGroup) : base(localizationService, ribbonGroup) { } // public override string ContextualTabGroupKey { get { return ""; } } // This is used to set the ribbon header public override string Header { get { return "CUSTOM RIBBON"; } } // This is used to set the unique ribbon Id that is used in the // configuration file public override string Id { get { return "CustomRibbon_NormalTabId"; } } // This is used to set the ribbon name public override string Name { get { return "CustomRibbonName"; } } // Deprecated. Order of ribbon can be set in the configurator file public override double Order { get { return 1.0; } } }
8
A Derived RibbonGroupBase Class Next define a class that derives the RibbonGroupBase class. It is used to add or define ribbon
group within a ribbon.
[Export(typeof(IRibbonGroup))] [PartCreationPolicy(CreationPolicy.Shared)] public class CustomRibbonGroup : RibbonGroupBase { CustomRibbonGroup([Import]ILocalizationService localizationService) : base(localizationService) { } // Sets custom ribbon group header public override string Header { get { return "GROUP CAPTION"; } } // Sets custom ribbon group Id that will be used in configuration file public override string Id { get { return "CustomRibbonGroup"; } } // Used to set the ribbon group Icon public override string Icon { get { return ""; } } }
A Derived ActionItem Class In the previous section we successfully created a class that derives RibbonTabBase class (ribbon
tab) and a class that derives RibbonGroupBase class (ribbon group). Now we need to add menu
tools (or controls) to the ribbon group. A class definition that derives ActionItem class can be used
to add menu tools to the ribbon group and in the following example, we will add the ButtonTool
menu tool to our action item.
Define a class that derived from ActionItem base class and then call ActionItem class constructor.
The parameters of the constructor include the action item Id and ButtonTool menu tool. Here is
the code snippet.
[Export(typeof(IActionItem))] public class AnActionItem : ActionItem { /// <summary> /// The first base class contructor parameter is the action item id /// and this will be used in the configuration file /// </summary> AnActionItem() : base("ActionItemId", "Action Item", "", null, MenuTools.ButtonTool, false, false) { this.canExecute = (() => true); } public override void Execute() { VcMessageBox.Show("Hello World"); } } }
9
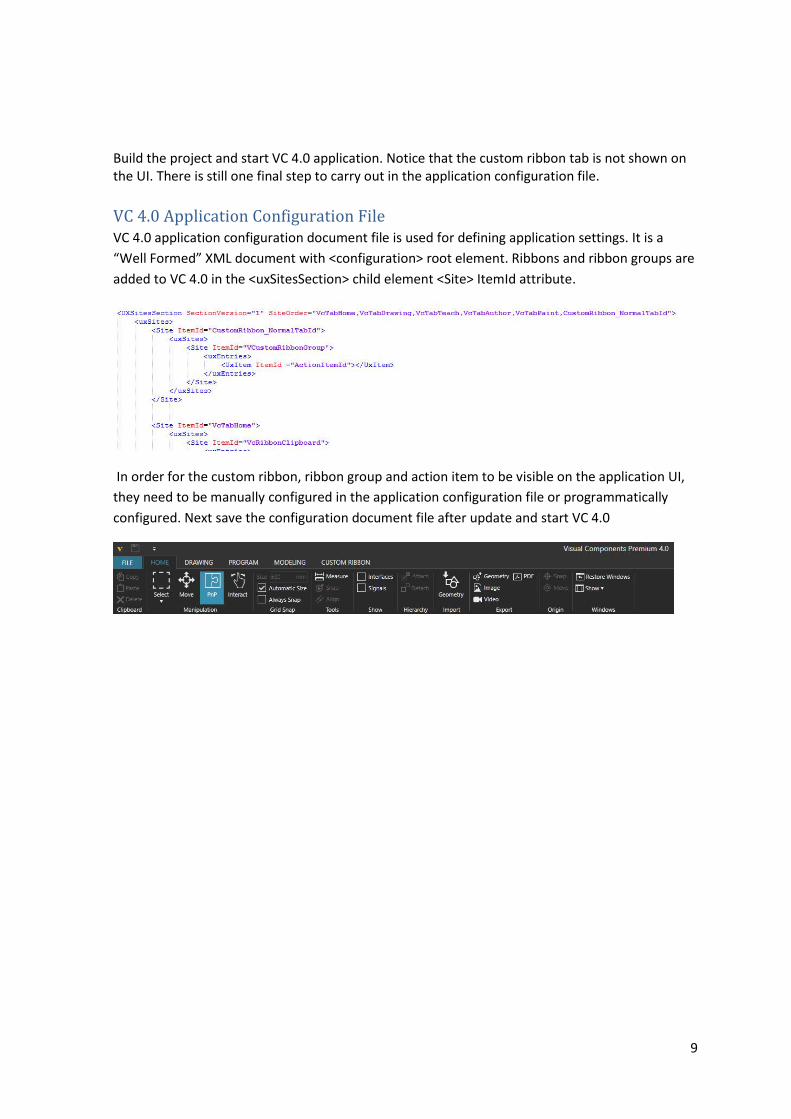
Build the project and start VC 4.0 application. Notice that the custom ribbon tab is not shown on the UI. There is still one final step to carry out in the application configuration file.
VC 4.0 Application Configuration File VC 4.0 application configuration document file is used for defining application settings. It is a
“Well Formed” XML document with <configuration> root element. Ribbons and ribbon groups are
added to VC 4.0 in the <uxSitesSection> child element <Site> ItemId attribute.
In order for the custom ribbon, ribbon group and action item to be visible on the application UI,
they need to be manually configured in the application configuration file or programmatically
configured. Next save the configuration document file after update and start VC 4.0
10
Accessing VC Objects VC objects are in most part collections (i.e. Array<T>, List<T> and ReadOnlyCollection<T> which
implements IEnumerable). This means a collection of VC objects can be iterated. For example,
using the previously implemented derived AnActionItem class, in the Execute method class
member, lets traverse the 3D world for selected components that are robots and then traverse
each robot in order to get available robot tools and then print the robots and the robot tool
names to the output panel. Also if no there is no selection, we simply traverse all components in
world for robot components in order to get the robot tools.
[Export(typeof(IActionItem))] public class GetAllRobotToolsActionItem : ActionItem { [Import] IMessageService MessageService; [Import] IApplication Application; [Import] ISelectionManager SelectionManger; GetAllRobotToolsActionItem() : base("ActionItemGetRobotTools", "Get All/Selected Robot Tools", "", null, MenuTools.ButtonTool, false, false) { this.canExecute = (() => true); } public override void Execute() { var selectedComponents = SelectionManger.GetSelection<ISimComponent>(); // If component objects are selected, traverse selections if (selectedComponents.Length > 0) { foreach (ISimComponent component in selectedComponents) { GetRobotTools(component); } } // If component objects are Not selected, traverse 3D world if (SelectedComponents.Length == 0) { foreach (ISimComponent component in Application.World.Components) { GetRobotTools(component); } } } private void GetRobotTools(ISimComponent component) { foreach (IRobotController robotController in component.Behaviors. Where(b => b.Type == BehaviorType.RobotController)) { messageService.AppendMessage(component.Name, MessageLevel.Warning); foreach (string toolName in robotController.Tools.Select(p => p.Name)) { messageService.AppendMessage(toolName, MessageLevel.Warning); } } messageService.AppendMessage("[][][][][][][][][][]", MessageLevel.Warning); } }
Similarly, the same can be done for robot bases.
11
private void GetRobotBases(ISimComponent component) { foreach (IRobotController robotController in component.Behaviors. Where(b => b.Type == BehaviorType.RobotController)) { if (null != robotController) { messageService.AppendMessage(component.Name, MessageLevel.Warning); foreach (string baseName in robotController.Bases.Select(p => p.Name)) { messageService.AppendMessage(baseName, MessageLevel.Warning); } } } messageService.AppendMessage("[][][][][][][][][][]", MessageLevel.Warning); }
12
IPlugin A class that inherits IPlugin interface and then Export with IPlugin contract can be used to extend
VC 4.0 when the need for UI databinding is not required. For an example, the code snippet below
gets connected interface(s) in a component when it is selected in the 3D world.
using System; using System.Linq; using System.ComponentModel.Composition; using VisualComponents.UX.Shared; using VisualComponents.Create3D; namespace Dot_NET_API_Development_Guide { [Export(typeof(IPlugin))] public class InterfaceConnection : IPlugin { IMessageService MessageService; IApplication Application; ISelectionManager SelectionManger; [ImportingConstructor] public InterfaceConnection([Import]IMessageService messageService, [Import]IApplication application, [Import]ISelectionManager selectionManger) { MessageService = messageService; Application = application; SelectionManger = selectionManger; } private void SelectionManger_SelectionChanged(object sender, EventArgs e) { if (SelectionManger.GetSelected<ISimComponent>() != null) { { foreach (IBehavior behavior in SelectionManger.GetSelected<ISimComponent>(). Behaviors.OfType<ISimInterface>()) { ISimInterface simInterface = (ISimInterface)behavior; if (simInterface.IsConnected) { MessageService.AppendMessage(SelectionManger.GetSelected<ISimComponent>().Name + " " + simInterface.Type + "s " + simInterface.Name + " is connect to:", MessageLevel.Warning); foreach (ISimComponent connectedComp in simInterface.ConnectedComponents) { MessageService.AppendMessage(connectedComp.Name, MessageLevel.Warning); } } } } } } public void Exit() { } public void Initialize() { SelectionManger.SelectionChanged += SelectionManger_SelectionChanged; } } }
13
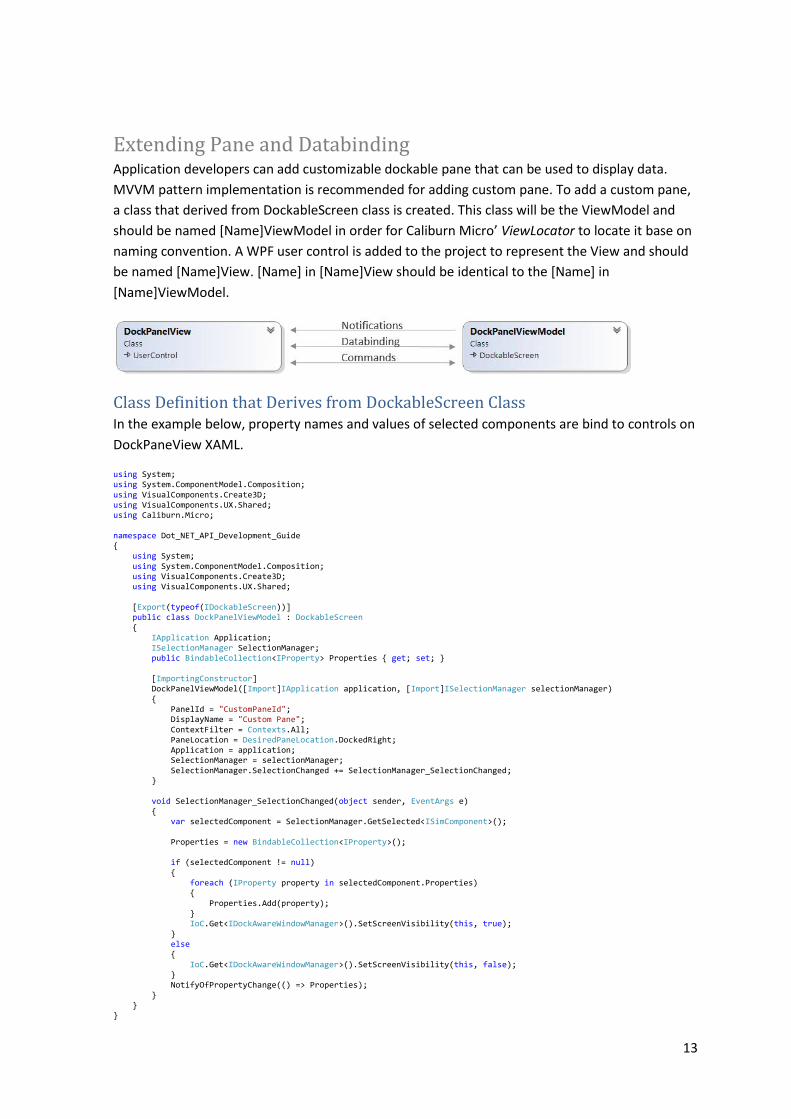
Extending Pane and Databinding Application developers can add customizable dockable pane that can be used to display data.
MVVM pattern implementation is recommended for adding custom pane. To add a custom pane,
a class that derived from DockableScreen class is created. This class will be the ViewModel and
should be named [Name]ViewModel in order for Caliburn Micro’ ViewLocator to locate it base on
naming convention. A WPF user control is added to the project to represent the View and should
be named [Name]View. [Name] in [Name]View should be identical to the [Name] in
[Name]ViewModel.
Class Definition that Derives from DockableScreen Class In the example below, property names and values of selected components are bind to controls on
DockPaneView XAML.
using System; using System.ComponentModel.Composition; using VisualComponents.Create3D; using VisualComponents.UX.Shared; using Caliburn.Micro; namespace Dot_NET_API_Development_Guide { using System; using System.ComponentModel.Composition; using VisualComponents.Create3D; using VisualComponents.UX.Shared; [Export(typeof(IDockableScreen))] public class DockPanelViewModel : DockableScreen { IApplication Application; ISelectionManager SelectionManager; public BindableCollection<IProperty> Properties { get; set; } [ImportingConstructor] DockPanelViewModel([Import]IApplication application, [Import]ISelectionManager selectionManager) { PanelId = "CustomPaneId"; DisplayName = "Custom Pane"; ContextFilter = Contexts.All; PaneLocation = DesiredPaneLocation.DockedRight; Application = application; SelectionManager = selectionManager; SelectionManager.SelectionChanged += SelectionManager_SelectionChanged; } void SelectionManager_SelectionChanged(object sender, EventArgs e) { var selectedComponent = SelectionManager.GetSelected<ISimComponent>(); Properties = new BindableCollection<IProperty>(); if (selectedComponent != null) { foreach (IProperty property in selectedComponent.Properties) { Properties.Add(property); } IoC.Get<IDockAwareWindowManager>().SetScreenVisibility(this, true); } else { IoC.Get<IDockAwareWindowManager>().SetScreenVisibility(this, false); } NotifyOfPropertyChange(() => Properties); } } }
14
And here is the XAML code
<UserControl x:Class="Plugin.DockPanel.DockPanelView" xmlns="http://schemas.microsoft.com/winfx/2006/xaml/presentation" xmlns:x="http://schemas.microsoft.com/winfx/2006/xaml" xmlns:mc="http://schemas.openxmlformats.org/markup-compatibility/2006" xmlns:d="http://schemas.microsoft.com/expression/blend/2008" mc:Ignorable="d" d:DesignHeight="300" d:DesignWidth="300"> <Grid> <Grid Grid.Row="0" VerticalAlignment="Top"> <ItemsControl ItemsSource="{Binding Properties}" > <ItemsControl.ItemTemplate> <DataTemplate> <Grid Margin="0, 0, 0, 2" > <Grid.ColumnDefinitions> <ColumnDefinition Width="1*"/> <ColumnDefinition Width="2*"/> </Grid.ColumnDefinitions> <TextBlock Grid.Column="0" Text="{Binding Name}" /> <TextBox Grid.Column="1" Text="{Binding Value}" /> </Grid> </DataTemplate> </ItemsControl.ItemTemplate> </ItemsControl> </Grid> </Grid> </UserControl>
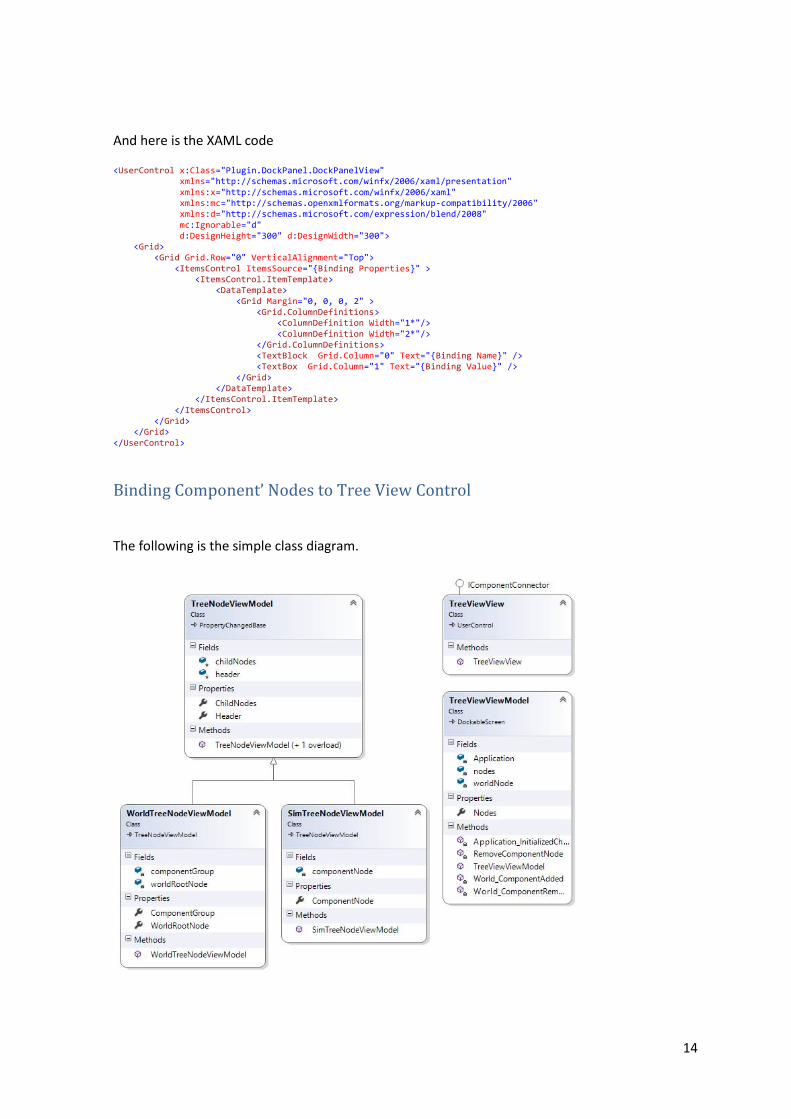
Binding Component’ Nodes to Tree View Control
The following is the simple class diagram.
15
using System; using System.Linq; using Caliburn.Micro; using System.Collections.ObjectModel; using VisualComponents.Create3D; namespace Plugin.TreeView { /// <summary> /// TreeNodeViewModel class /// </summary> public class TreeNodeViewModel : PropertyChangedBase { protected string header; public string Header { get { return header; } set { if (value != header) { header = value; NotifyOfPropertyChange(() => Header); } } } protected ObservableCollection<TreeNodeViewModel> childNodes; public ObservableCollection<TreeNodeViewModel> ChildNodes { get { return childNodes; } } public TreeNodeViewModel() { childNodes = new ObservableCollection<TreeNodeViewModel>(); } public TreeNodeViewModel(string name) : this() { header = name; } } /// <summary> /// WorldTreeNodeViewModel class for components /// </summary> public class WorldTreeNodeViewModel : TreeNodeViewModel { private ISimWorld worldRootNode; public ISimWorld WorldRootNode { get { return worldRootNode; } } private TreeNodeViewModel componentGroup; public TreeNodeViewModel ComponentGroup { get { return componentGroup; } } public WorldTreeNodeViewModel(ISimWorld world, string name) { worldRootNode = world; header = name; componentGroup = new TreeNodeViewModel("Components"); ChildNodes.Add(componentGroup); } }
16
/// <summary> /// SimTreeNodeViewModel class for component' node /// </summary> public class SimTreeNodeViewModel : TreeNodeViewModel { private ISimNode componentNode; public ISimNode ComponentNode { get { return componentNode; } } public SimTreeNodeViewModel(ISimNode simNode) { componentNode = simNode; header = simNode.Name; foreach (ISimNode child in componentNode.Children) { if (!child.IsComponentRoot) { ChildNodes.Add(new SimTreeNodeViewModel(child)); } } } } }
Next create View and ViewModel classes. The XAML for the View is as follows.
<UserControl x:Class="Plugin.TreeView.TreeViewView" xmlns="http://schemas.microsoft.com/winfx/2006/xaml/presentation" xmlns:x="http://schemas.microsoft.com/winfx/2006/xaml" xmlns:mc="http://schemas.openxmlformats.org/markup-compatibility/2006" xmlns:d="http://schemas.microsoft.com/expression/blend/2008" xmlns:local="clr-namespace:Plugin.TreeView" mc:Ignorable="d" d:DesignHeight="300" d:DesignWidth="300"> <Grid Margin="2"> <ScrollViewer VerticalScrollBarVisibility="Auto" HorizontalScrollBarVisibility="Auto" Style="{DynamicResource VCScrollViewerStyle}"> <TreeView ItemsSource="{Binding Nodes}" > <TreeView.ItemTemplate> <HierarchicalDataTemplate ItemsSource="{Binding ChildNodes}"> <TextBlock Text="{Binding Header}" /> </HierarchicalDataTemplate> </TreeView.ItemTemplate> </TreeView> </ScrollViewer> </Grid> </UserControl>

17
And the code snippet for the ViewModel class is as follows.
using System; using System.Linq; using System.ComponentModel.Composition; using VisualComponents.UX.Shared; using VisualComponents.Create3D; using Caliburn.Micro; namespace Plugin.TreeView { [Export(typeof(IDockableScreen))] public class TreeViewViewModel : DockableScreen { private BindableCollection<TreeNodeViewModel> nodes; public BindableCollection<TreeNodeViewModel> Nodes { get { return nodes; } } private WorldTreeNodeViewModel worldNode; IApplication Application; [ImportingConstructor] public TreeViewViewModel([Import]IApplication application) { DisplayName = "Custom Tree View"; PanelId = "CustomTreeView"; nodes = new BindableCollection<TreeNodeViewModel>(); Application = application; Application.InitializedChanged += Application_InitializedChanged; } private void Application_InitializedChanged(object sender, EventArgs e) { if (Application.Initialized) { Application.World.ComponentAdded += World_ComponentAdded; Application.World.ComponentRemoving += World_ComponentRemoving; worldNode = new WorldTreeNodeViewModel(Application.World, "3D-World"); Nodes.Add(worldNode); } } void World_ComponentAdded(object sender, ComponentAddedEventArgs e) { worldNode.ComponentGroup.ChildNodes.Add(new SimTreeNodeViewModel(e.Component.RootNode)); } void World_ComponentRemoving(object sender, ComponentRemovingEventArgs e) { RemoveComponentNode(worldNode, e.Component); } private void RemoveComponentNode(WorldTreeNodeViewModel worldNode, ISimComponent component) { TreeNodeViewModel node = worldNode.ComponentGroup. ChildNodes. Cast<SimTreeNodeViewModel>(). FirstOrDefault(n => n.ComponentNode == component.RootNode); if (node != null) { worldNode.ComponentGroup.ChildNodes.Remove(node); } } } }
18
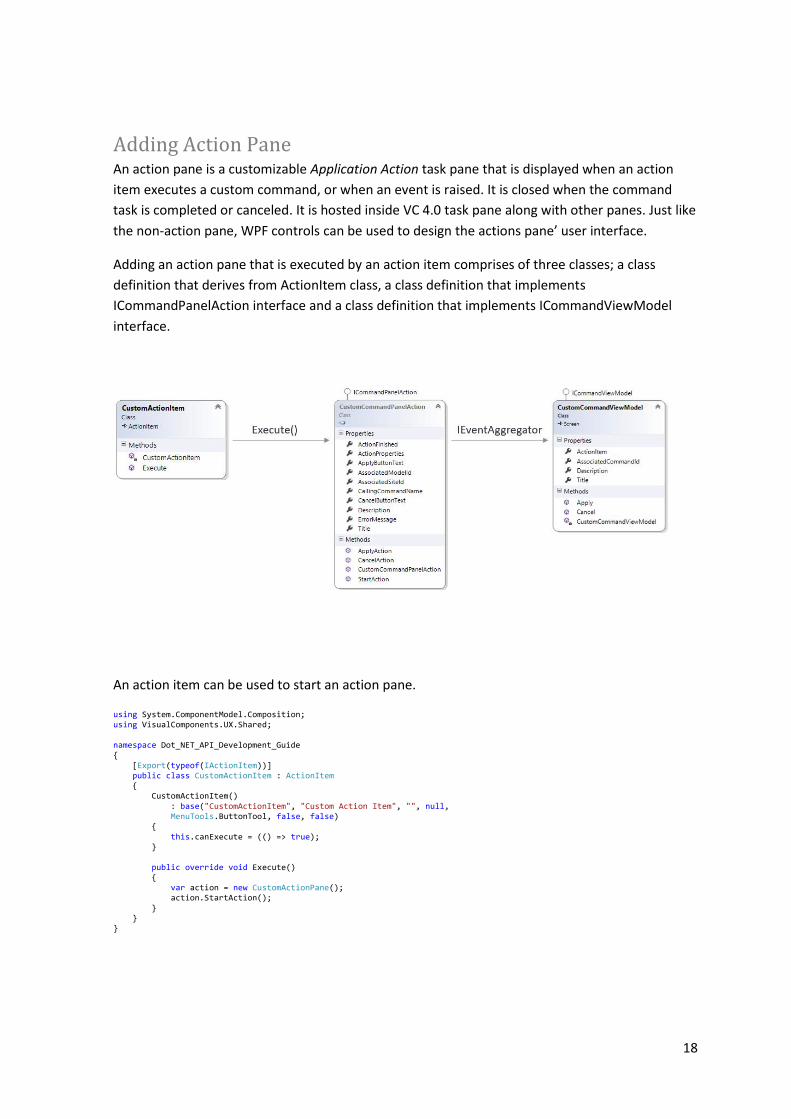
Adding Action Pane An action pane is a customizable Application Action task pane that is displayed when an action
item executes a custom command, or when an event is raised. It is closed when the command
task is completed or canceled. It is hosted inside VC 4.0 task pane along with other panes. Just like
the non-action pane, WPF controls can be used to design the actions pane’ user interface.
Adding an action pane that is executed by an action item comprises of three classes; a class
definition that derives from ActionItem class, a class definition that implements
ICommandPanelAction interface and a class definition that implements ICommandViewModel
interface.
An action item can be used to start an action pane.
using System.ComponentModel.Composition; using VisualComponents.UX.Shared; namespace Dot_NET_API_Development_Guide { [Export(typeof(IActionItem))] public class CustomActionItem : ActionItem { CustomActionItem() : base("CustomActionItem", "Custom Action Item", "", null, MenuTools.ButtonTool, false, false) { this.canExecute = (() => true); } public override void Execute() { var action = new CustomActionPane(); action.StartAction(); } } }

19
Basic Class Implementation of ICommandPanelAction Interface
using System; using System.Collections.Generic; using VisualComponents.UX.Shared; using VisualComponents.Create3D; using Caliburn.Micro; namespace Plugin.CustomCommandPanelAction { public class CustomActionPane: ICommandPanelAction { private IEventAggregator EventAggregator; public CustomActionPane() { EventAggregator = IoC.Get<IEventAggregator>(); } public bool ActionFinished { get { return true; }} public List<IProperty> ActionProperties{ get; set; } public bool ApplyAction() {return true;} public string ApplyButtonText { get { return "";}} public string AssociatedModelId { get { return "CustomCommandViewModel"; }} public string AssociatedSiteId { get { return ""; }} public string CallingCommandName { get; private set; } public void CancelAction() {} public string CancelButtonText { get { return "Cancel"; }} public string Description { get { return ""; } } public string ErrorMessage { get { return ""; } } public void StartAction(EventHandler<ResultCompletionEventArgs> completed = null) { EventAggregator.Publish(new CommandPanelShowMessage(this)); } public string Title { get { return ""; } } } }
s
20
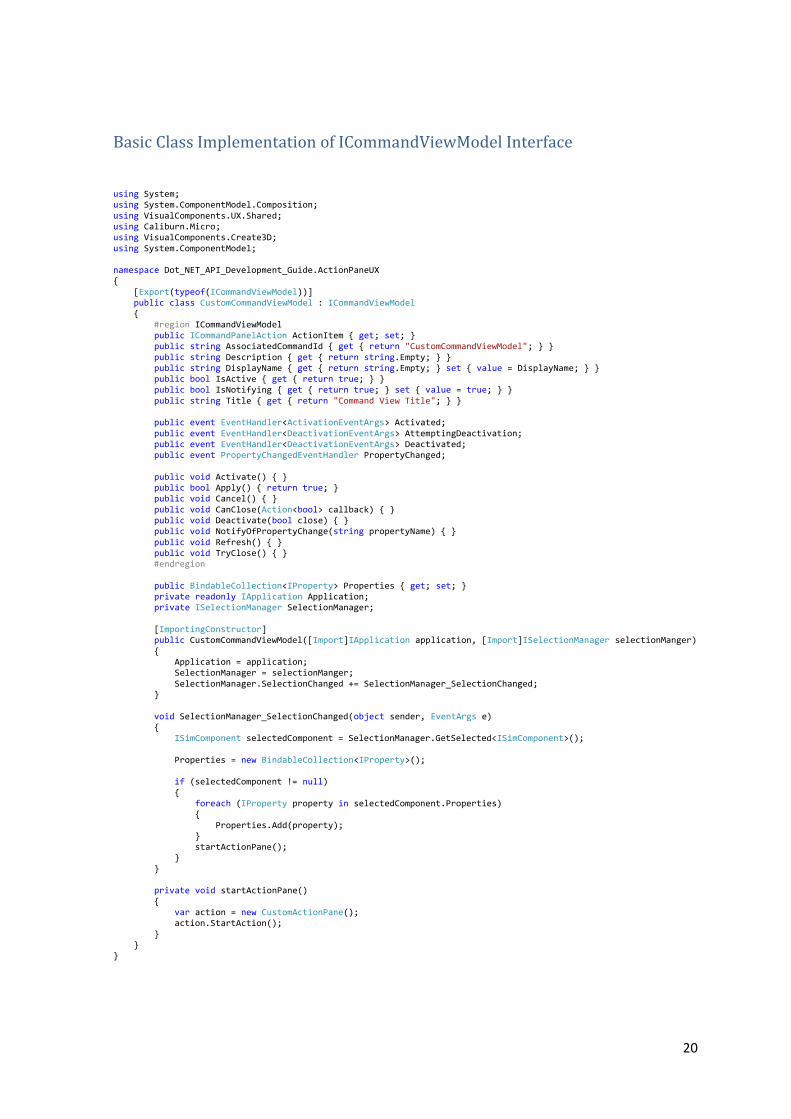
Basic Class Implementation of ICommandViewModel Interface
using System; using System.ComponentModel.Composition; using VisualComponents.UX.Shared; using Caliburn.Micro; using VisualComponents.Create3D; using System.ComponentModel; namespace Dot_NET_API_Development_Guide.ActionPaneUX { [Export(typeof(ICommandViewModel))] public class CustomCommandViewModel : ICommandViewModel { #region ICommandViewModel public ICommandPanelAction ActionItem { get; set; } public string AssociatedCommandId { get { return "CustomCommandViewModel"; } } public string Description { get { return string.Empty; } } public string DisplayName { get { return string.Empty; } set { value = DisplayName; } } public bool IsActive { get { return true; } } public bool IsNotifying { get { return true; } set { value = true; } } public string Title { get { return "Command View Title"; } } public event EventHandler<ActivationEventArgs> Activated; public event EventHandler<DeactivationEventArgs> AttemptingDeactivation; public event EventHandler<DeactivationEventArgs> Deactivated; public event PropertyChangedEventHandler PropertyChanged; public void Activate() { } public bool Apply() { return true; } public void Cancel() { } public void CanClose(Action<bool> callback) { } public void Deactivate(bool close) { } public void NotifyOfPropertyChange(string propertyName) { } public void Refresh() { } public void TryClose() { } #endregion public BindableCollection<IProperty> Properties { get; set; } private readonly IApplication Application; private ISelectionManager SelectionManager; [ImportingConstructor] public CustomCommandViewModel([Import]IApplication application, [Import]ISelectionManager selectionManger) { Application = application; SelectionManager = selectionManger; SelectionManager.SelectionChanged += SelectionManager_SelectionChanged; } void SelectionManager_SelectionChanged(object sender, EventArgs e) { ISimComponent selectedComponent = SelectionManager.GetSelected<ISimComponent>(); Properties = new BindableCollection<IProperty>(); if (selectedComponent != null) { foreach (IProperty property in selectedComponent.Properties) { Properties.Add(property); } startActionPane(); } } private void startActionPane() { var action = new CustomActionPane(); action.StartAction(); } } }
21
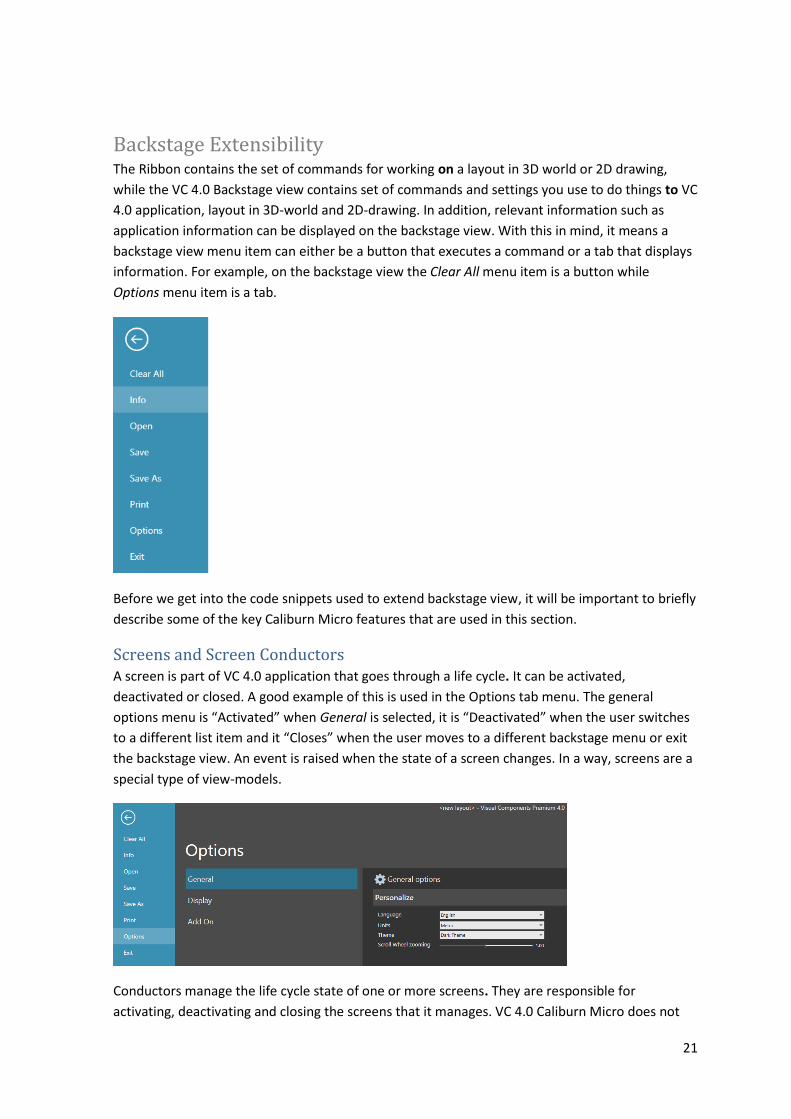
Backstage Extensibility The Ribbon contains the set of commands for working on a layout in 3D world or 2D drawing,
while the VC 4.0 Backstage view contains set of commands and settings you use to do things to VC
4.0 application, layout in 3D-world and 2D-drawing. In addition, relevant information such as
application information can be displayed on the backstage view. With this in mind, it means a
backstage view menu item can either be a button that executes a command or a tab that displays
information. For example, on the backstage view the Clear All menu item is a button while
Options menu item is a tab.
Before we get into the code snippets used to extend backstage view, it will be important to briefly
describe some of the key Caliburn Micro features that are used in this section.
Screens and Screen Conductors A screen is part of VC 4.0 application that goes through a life cycle. It can be activated,
deactivated or closed. A good example of this is used in the Options tab menu. The general
options menu is “Activated” when General is selected, it is “Deactivated” when the user switches
to a different list item and it “Closes” when the user moves to a different backstage menu or exit
the backstage view. An event is raised when the state of a screen changes. In a way, screens are a
special type of view-models.
Conductors manage the life cycle state of one or more screens. They are responsible for
activating, deactivating and closing the screens that it manages. VC 4.0 Caliburn Micro does not
22
expect screens or conductors to implement all the related interfaces; it will just work with
whatever it is given. At this junction I’d like to give a brief description of the three conductors that
VC 4.0 Caliburn Micro provides which are useful for different scenarios.
Conductor<T>: Manages a single screen at a time. Once it activates a new screen, any previous screen is deactivated, closed and forgotten by the conductor. This is used for very simple navigation/display scenarios. Conductor<T>.Collection. OneActive: This one manages many screens at once and allows one screen to be active at one time, much like a tab control. When a screen is activated, the previously active screen is simply deactivated, it is not closed and remains under the management of the conductor. Screens can be explicitly closed to remove them. This type of conductor is also responsible for activating one of its screens if the active screen is closed. Conductor<T>.Collection. AllActive: Very similar to the previous conductor, but allows multiple screens to be in the active state at once.
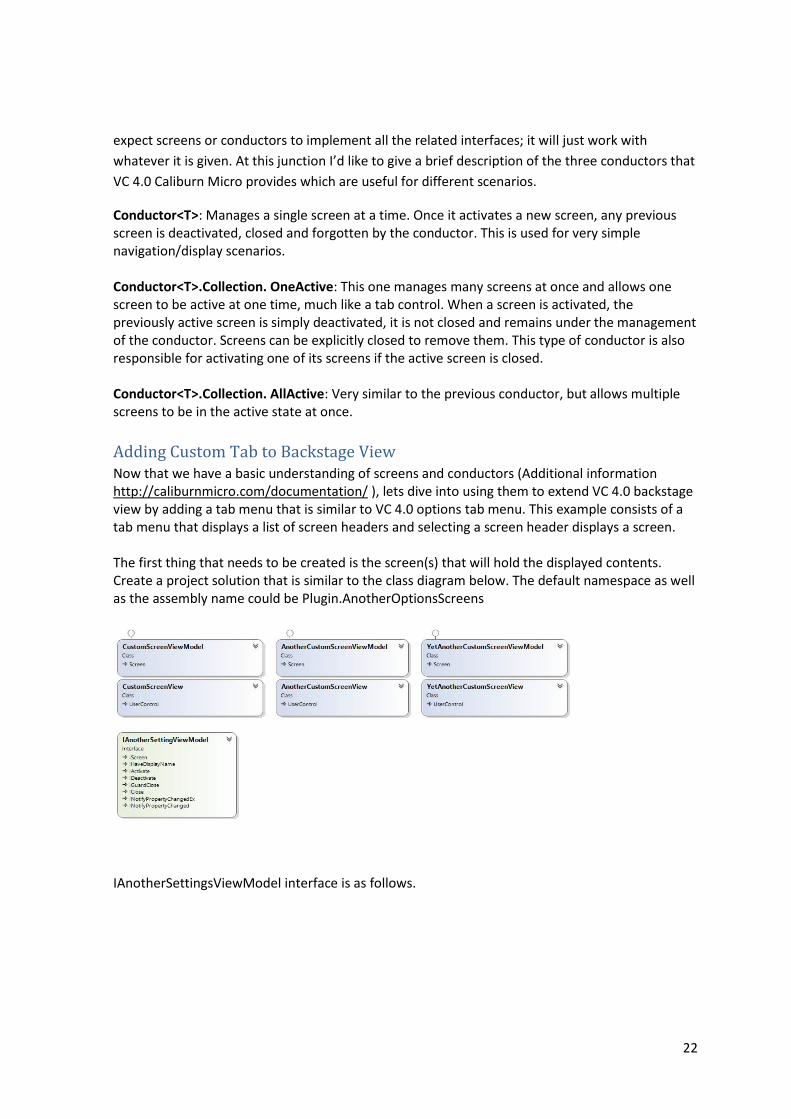
Adding Custom Tab to Backstage View Now that we have a basic understanding of screens and conductors (Additional information http://caliburnmicro.com/documentation/ ), lets dive into using them to extend VC 4.0 backstage view by adding a tab menu that is similar to VC 4.0 options tab menu. This example consists of a tab menu that displays a list of screen headers and selecting a screen header displays a screen. The first thing that needs to be created is the screen(s) that will hold the displayed contents. Create a project solution that is similar to the class diagram below. The default namespace as well as the assembly name could be Plugin.AnotherOptionsScreens
IAnotherSettingsViewModel interface is as follows.
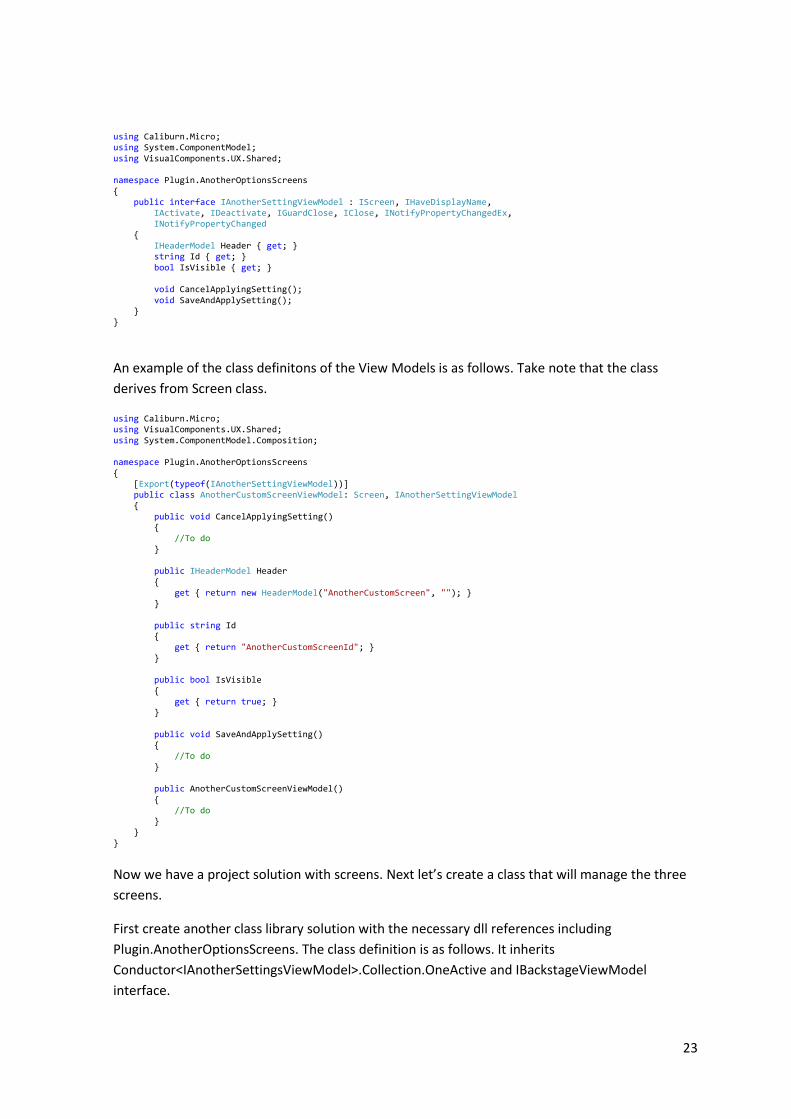
23
using Caliburn.Micro; using System.ComponentModel; using VisualComponents.UX.Shared; namespace Plugin.AnotherOptionsScreens { public interface IAnotherSettingViewModel : IScreen, IHaveDisplayName, IActivate, IDeactivate, IGuardClose, IClose, INotifyPropertyChangedEx, INotifyPropertyChanged { IHeaderModel Header { get; } string Id { get; } bool IsVisible { get; } void CancelApplyingSetting(); void SaveAndApplySetting(); } }
An example of the class definitons of the View Models is as follows. Take note that the class
derives from Screen class.
using Caliburn.Micro; using VisualComponents.UX.Shared; using System.ComponentModel.Composition; namespace Plugin.AnotherOptionsScreens { [Export(typeof(IAnotherSettingViewModel))] public class AnotherCustomScreenViewModel: Screen, IAnotherSettingViewModel { public void CancelApplyingSetting() { //To do } public IHeaderModel Header { get { return new HeaderModel("AnotherCustomScreen", ""); } } public string Id { get { return "AnotherCustomScreenId"; } } public bool IsVisible { get { return true; } } public void SaveAndApplySetting() { //To do } public AnotherCustomScreenViewModel() { //To do } } }
Now we have a project solution with screens. Next let’s create a class that will manage the three
screens.
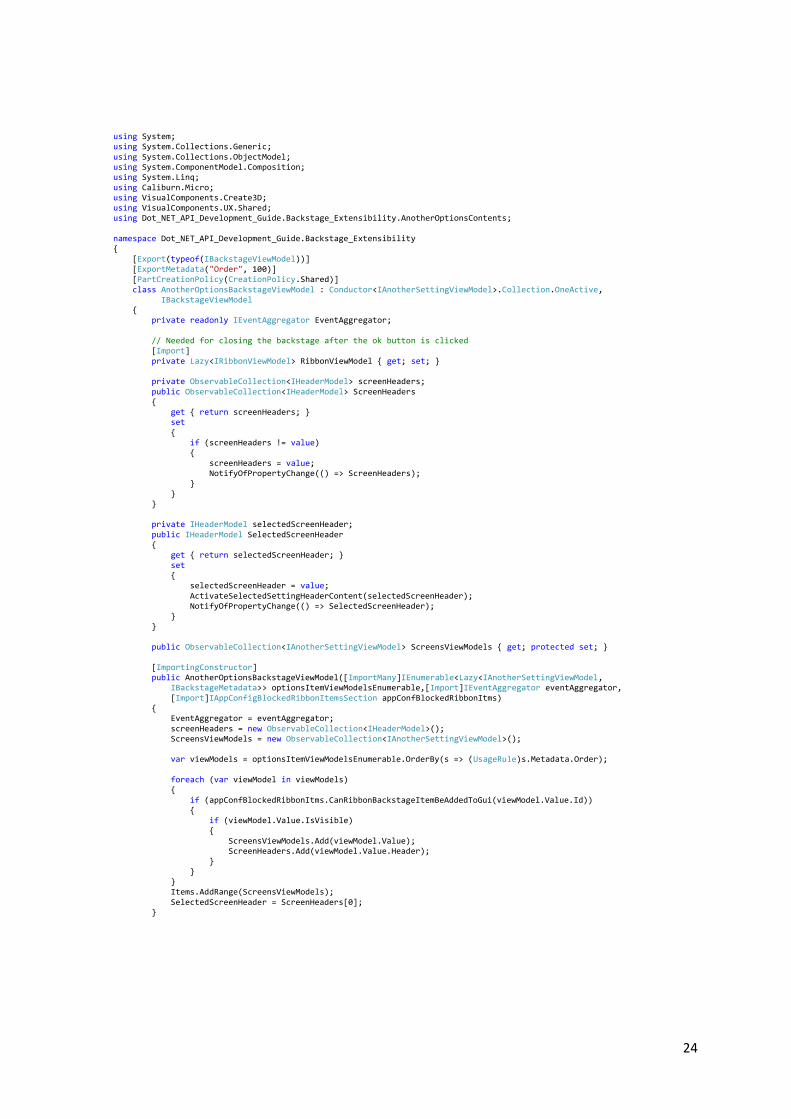
First create another class library solution with the necessary dll references including
Plugin.AnotherOptionsScreens. The class definition is as follows. It inherits
Conductor<IAnotherSettingsViewModel>.Collection.OneActive and IBackstageViewModel
interface.
24
using System; using System.Collections.Generic; using System.Collections.ObjectModel; using System.ComponentModel.Composition; using System.Linq; using Caliburn.Micro; using VisualComponents.Create3D; using VisualComponents.UX.Shared; using Dot_NET_API_Development_Guide.Backstage_Extensibility.AnotherOptionsContents; namespace Dot_NET_API_Development_Guide.Backstage_Extensibility { [Export(typeof(IBackstageViewModel))] [ExportMetadata("Order", 100)] [PartCreationPolicy(CreationPolicy.Shared)] class AnotherOptionsBackstageViewModel : Conductor<IAnotherSettingViewModel>.Collection.OneActive, IBackstageViewModel { private readonly IEventAggregator EventAggregator; // Needed for closing the backstage after the ok button is clicked [Import] private Lazy<IRibbonViewModel> RibbonViewModel { get; set; } private ObservableCollection<IHeaderModel> screenHeaders; public ObservableCollection<IHeaderModel> ScreenHeaders { get { return screenHeaders; } set { if (screenHeaders != value) { screenHeaders = value; NotifyOfPropertyChange(() => ScreenHeaders); } } } private IHeaderModel selectedScreenHeader; public IHeaderModel SelectedScreenHeader { get { return selectedScreenHeader; } set { selectedScreenHeader = value; ActivateSelectedSettingHeaderContent(selectedScreenHeader); NotifyOfPropertyChange(() => SelectedScreenHeader); } } public ObservableCollection<IAnotherSettingViewModel> ScreensViewModels { get; protected set; } [ImportingConstructor] public AnotherOptionsBackstageViewModel([ImportMany]IEnumerable<Lazy<IAnotherSettingViewModel, IBackstageMetadata>> optionsItemViewModelsEnumerable,[Import]IEventAggregator eventAggregator, [Import]IAppConfigBlockedRibbonItemsSection appConfBlockedRibbonItms) { EventAggregator = eventAggregator; screenHeaders = new ObservableCollection<IHeaderModel>(); ScreensViewModels = new ObservableCollection<IAnotherSettingViewModel>(); var viewModels = optionsItemViewModelsEnumerable.OrderBy(s => (UsageRule)s.Metadata.Order); foreach (var viewModel in viewModels) { if (appConfBlockedRibbonItms.CanRibbonBackstageItemBeAddedToGui(viewModel.Value.Id)) { if (viewModel.Value.IsVisible) { ScreensViewModels.Add(viewModel.Value); ScreenHeaders.Add(viewModel.Value.Header); } } } Items.AddRange(ScreensViewModels); SelectedScreenHeader = ScreenHeaders[0]; }
25
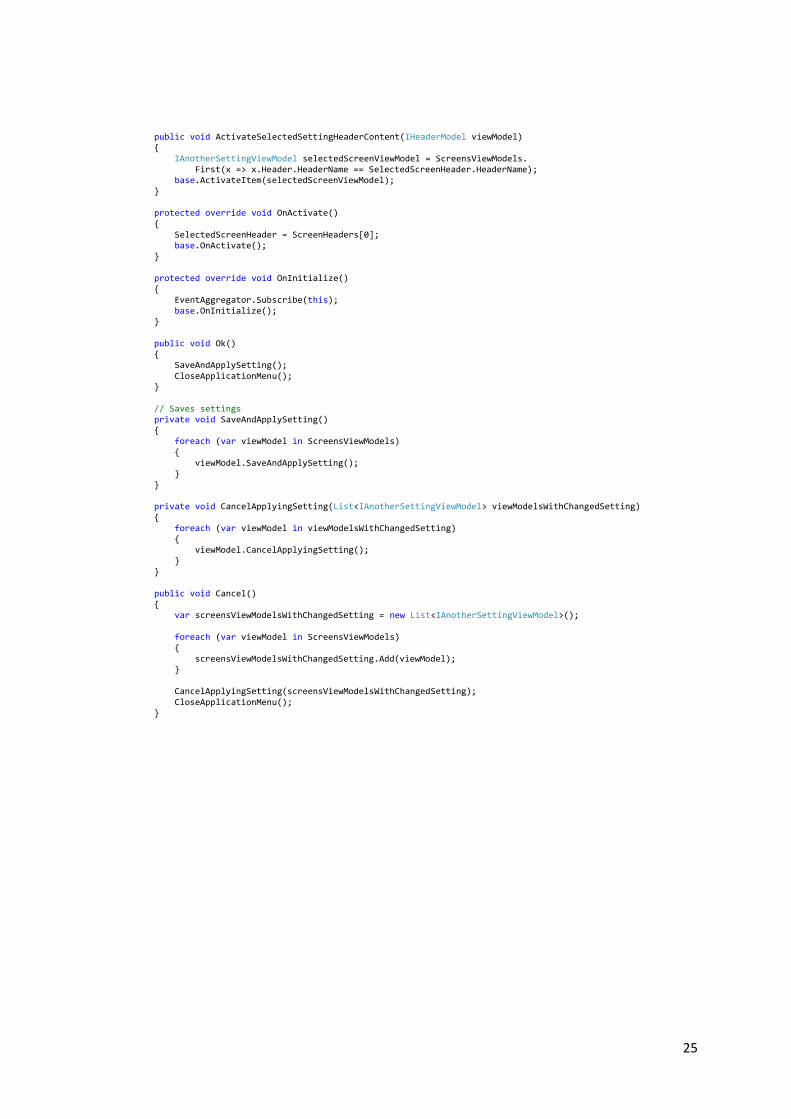
public void ActivateSelectedSettingHeaderContent(IHeaderModel viewModel) { IAnotherSettingViewModel selectedScreenViewModel = ScreensViewModels. First(x => x.Header.HeaderName == SelectedScreenHeader.HeaderName); base.ActivateItem(selectedScreenViewModel); } protected override void OnActivate() { SelectedScreenHeader = ScreenHeaders[0]; base.OnActivate(); } protected override void OnInitialize() { EventAggregator.Subscribe(this); base.OnInitialize(); } public void Ok() { SaveAndApplySetting(); CloseApplicationMenu(); } // Saves settings private void SaveAndApplySetting() { foreach (var viewModel in ScreensViewModels) { viewModel.SaveAndApplySetting(); } } private void CancelApplyingSetting(List<IAnotherSettingViewModel> viewModelsWithChangedSetting) { foreach (var viewModel in viewModelsWithChangedSetting) { viewModel.CancelApplyingSetting(); } } public void Cancel() { var screensViewModelsWithChangedSetting = new List<IAnotherSettingViewModel>(); foreach (var viewModel in ScreensViewModels) { screensViewModelsWithChangedSetting.Add(viewModel); } CancelApplyingSetting(screensViewModelsWithChangedSetting); CloseApplicationMenu(); }
26
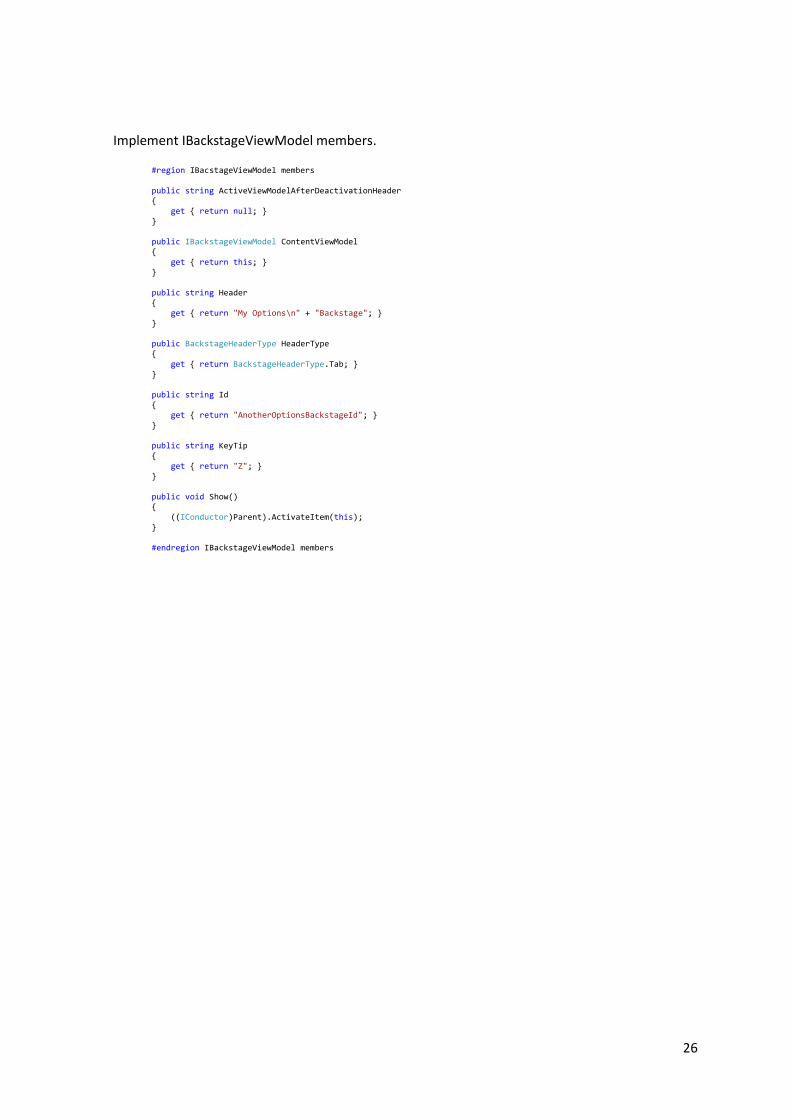
Implement IBackstageViewModel members.
#region IBacstageViewModel members public string ActiveViewModelAfterDeactivationHeader { get { return null; } } public IBackstageViewModel ContentViewModel { get { return this; } } public string Header { get { return "My Options\n" + "Backstage"; } } public BackstageHeaderType HeaderType { get { return BackstageHeaderType.Tab; } } public string Id { get { return "AnotherOptionsBackstageId"; } } public string KeyTip { get { return "Z"; } } public void Show() { ((IConductor)Parent).ActivateItem(this); } #endregion IBackstageViewModel members
27
Add a WPF user control to the project solution and then add the following XAML code.
<UserControl x:Class="Plugin.AnotherOptionsBackstage.AnotherOptionsBackstageView" xmlns="http://schemas.microsoft.com/winfx/2006/xaml/presentation" xmlns:x="http://schemas.microsoft.com/winfx/2006/xaml" xmlns:mc="http://schemas.openxmlformats.org/markup-compatibility/2006" xmlns:d="http://schemas.microsoft.com/expression/blend/2008" mc:Ignorable="d" d:DesignHeight="300" d:DesignWidth="300"> <Grid> <Grid Margin="0 20"> <Grid.RowDefinitions> <RowDefinition Height="Auto"/> <RowDefinition Height="Auto"/> <RowDefinition Height="Auto"/> </Grid.RowDefinitions> <TextBlock Text="{Binding Header}" Margin="25 0 0 0" FontSize="40" Foreground="White" HorizontalAlignment="Left" VerticalAlignment="Center"/> <Grid Grid.Row="1"> <Grid.ColumnDefinitions> <ColumnDefinition Width="*"/> <ColumnDefinition Width="1"/> <ColumnDefinition Width="3*"/> </Grid.ColumnDefinitions> <ListView x:Name="OptionsListView" Margin="25,20,5,10" Grid.Column="0" BorderBrush="Transparent" HorizontalAlignment="Stretch" VerticalAlignment="Stretch" ItemsSource="{Binding ScreenHeaders}" SelectedItem="{Binding SelectedScreenHeader}" Background="Transparent" > <ListView.ItemTemplate> <DataTemplate> <DataTemplate.Resources> <Style TargetType="TextBlock"> <Setter Property="Foreground" Value=""/> <Setter Property="FontSize" Value="18"/> <Setter Property="HorizontalAlignment" Value="Center"/> </Style> </DataTemplate.Resources> <Grid> <WrapPanel Orientation="Vertical"> <Grid Height="50" > <TextBlock x:Name="ScreenHeaderName" Margin="5 0 0 0" Text="{Binding HeaderName}" HorizontalAlignment="Left" VerticalAlignment="Center" /> </Grid> </WrapPanel> </Grid> </DataTemplate> </ListView.ItemTemplate> </ListView> <Rectangle Grid.Column="1" Margin="0 20 0 10"/> <ContentControl x:Name="ActiveItem" Margin="5,20,10,10" Grid.Column="2" VerticalAlignment="Stretch" HorizontalAlignment="Stretch" /> </Grid> <StackPanel Height="30" Grid.Row="2" HorizontalAlignment="Right" Margin="0,0,30,0" Orientation="Horizontal" > <Button x:Name="ok" Content="OK" Margin="10,2" Width="60" Height="25"/> <Button x:Name="cancel" Content="Cancel" Width="60" Height="25"/> </StackPanel> </Grid> </Grid> </UserControl>

28
Now build the project solution and start VCE 4.0.
Metadata Views You might have noticed the following line of code in the ScreenViewModels [ExportMetadata("Order", 100)]. The ExportMetadata attribute is used to provide additional metadata information to your Exports. This is actually mandatory for IBackstageViewModel Exports because without it the backstage menu item will not be visible on the backstage view. This is not the case with the options contents, however, you could use the ExportMetadata attribute to arrange the order of the screens. [Export(typeof(IAnotherSettingViewModel))] [ExportMetadata("Order", 1)] public class CustomScreenViewModel: Screen, IAnotherSettingViewModel {
………… }
[Export(typeof(IAnotherSettingViewModel))] [ExportMetadata("Order", 2)] public class AnotherCustomScreenViewModel : Screen, IAnotherSettingViewModel { ………… }
[Export(typeof(IAnotherSettingViewModel))] [ExportMetadata("Order", 3)] public class YetAnotherCustomScreenViewModel: Screen, IAnotherSettingViewModel {
……………
29
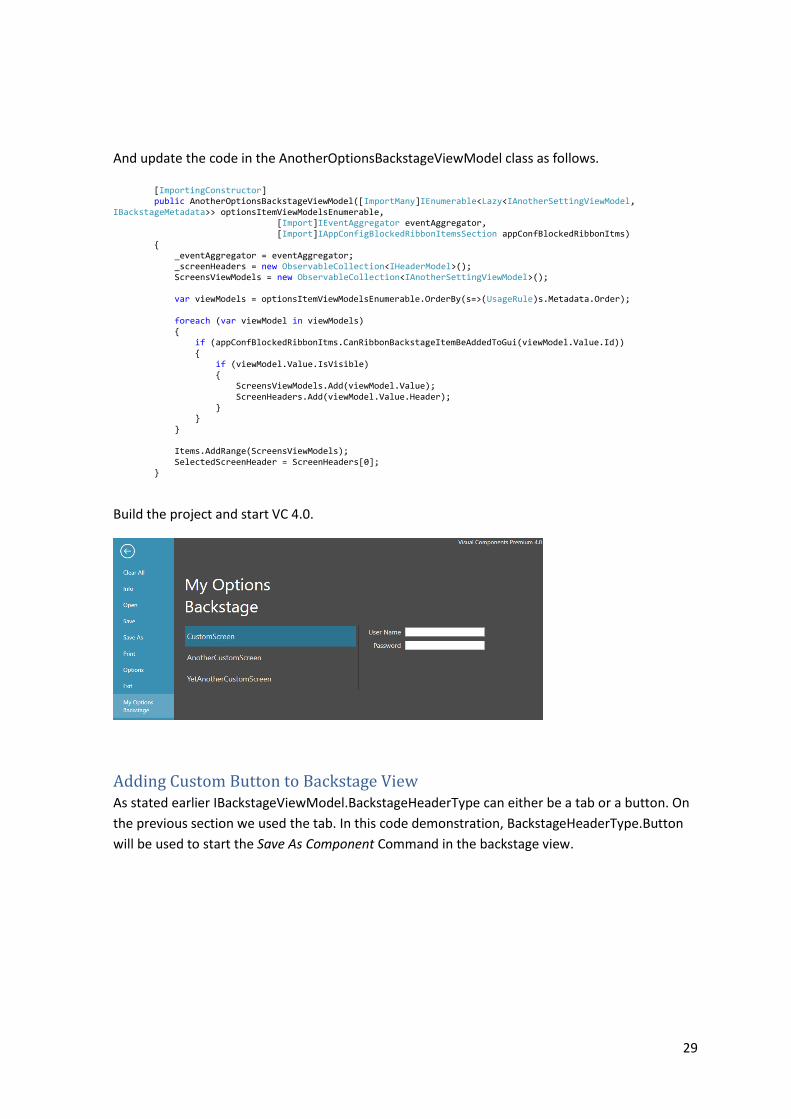
And update the code in the AnotherOptionsBackstageViewModel class as follows. [ImportingConstructor] public AnotherOptionsBackstageViewModel([ImportMany]IEnumerable<Lazy<IAnotherSettingViewModel, IBackstageMetadata>> optionsItemViewModelsEnumerable, [Import]IEventAggregator eventAggregator, [Import]IAppConfigBlockedRibbonItemsSection appConfBlockedRibbonItms) { _eventAggregator = eventAggregator; _screenHeaders = new ObservableCollection<IHeaderModel>(); ScreensViewModels = new ObservableCollection<IAnotherSettingViewModel>(); var viewModels = optionsItemViewModelsEnumerable.OrderBy(s=>(UsageRule)s.Metadata.Order); foreach (var viewModel in viewModels) { if (appConfBlockedRibbonItms.CanRibbonBackstageItemBeAddedToGui(viewModel.Value.Id)) { if (viewModel.Value.IsVisible) { ScreensViewModels.Add(viewModel.Value); ScreenHeaders.Add(viewModel.Value.Header); } } } Items.AddRange(ScreensViewModels); SelectedScreenHeader = ScreenHeaders[0]; }
Build the project and start VC 4.0.
Adding Custom Button to Backstage View As stated earlier IBackstageViewModel.BackstageHeaderType can either be a tab or a button. On
the previous section we used the tab. In this code demonstration, BackstageHeaderType.Button
will be used to start the Save As Component Command in the backstage view.
30
using System; using System.ComponentModel.Composition; using Caliburn.Micro; using VisualComponents.Create3D; using VisualComponents.UX.Shared; using System.Collections.Concurrent; using System.Linq; namespace Dot_NET_API_Development_Guide.Backstage_Extensibility { [Export(typeof(IBackstageViewModel))] [ExportMetadata("Order", 30)] [PartCreationPolicy(CreationPolicy.Shared)] public class SaveAsComponentViewModel : Screen, IBackstageViewModel { # region IBackstageViewModel Members public string ActiveViewModelAfterDeactivationHeader { get { return null; } } public IBackstageViewModel ContentViewModel { get { return this; } } public string Header { get { return "Save As\n" + "Component"; } } public BackstageHeaderType HeaderType { get { return BackstageHeaderType.Button; } } public string Id { get { return "SaveAsCommandId"; } } public string KeyTip { get { return "S"; } } public void Show() { ((IConductor)Parent).ActivateItem(this); } #endregion IBackstageViewModel Members private IEventAggregator EventAggregator; private Lazy<ICommandRegistry> CommandRegistry; private IApplication Application; [Import] private Lazy<IRibbonViewModel> RibbonViewModel { get; set; } [ImportingConstructor] public SaveAsComponentViewModel([Import]IEventAggregator eventAggregator, [Import]Lazy<ICommandRegistry> commandRegistry, [Import]IApplication application) { EventAggregator = eventAggregator; CommandRegistry = commandRegistry; Application = application; } #region Screen class members protected override void OnActivate() { base.OnActivate(); ExecuteSaveAsCommand(); } protected override void OnInitialize() { EventAggregator.Subscribe(this); base.OnInitialize(); } #endregion Screen class members private void ExecuteSaveAsCommand() { var actionItem = CommandRegistry.Value.FindItem("SaveAsComponent"); if (actionItem != null) { actionItem.Execute(); } RibbonViewModel.Value.CloseApplicationMenu(); RibbonViewModel.Value.CloseApplicationMenu(); } public void ActivateSelectedHeaderContent() { Show(); } } }
31
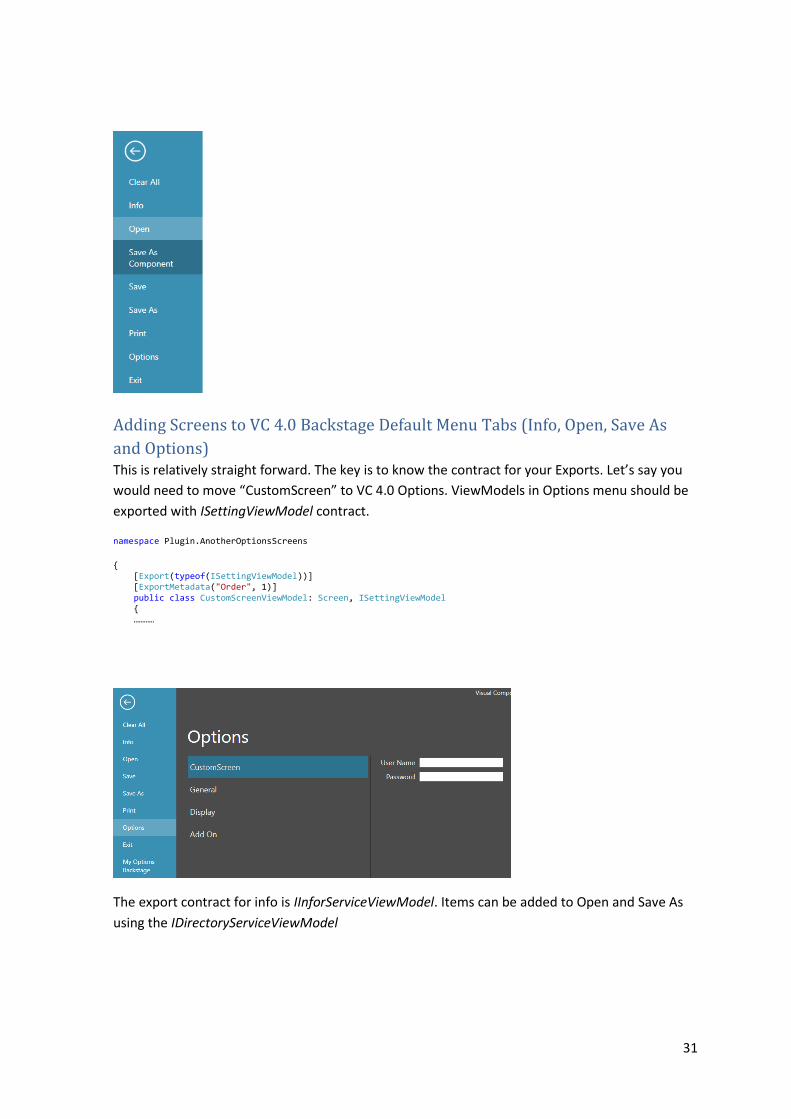
Adding Screens to VC 4.0 Backstage Default Menu Tabs (Info, Open, Save As
and Options) This is relatively straight forward. The key is to know the contract for your Exports. Let’s say you
would need to move “CustomScreen” to VC 4.0 Options. ViewModels in Options menu should be
exported with ISettingViewModel contract.
namespace Plugin.AnotherOptionsScreens
{ [Export(typeof(ISettingViewModel))] [ExportMetadata("Order", 1)] public class CustomScreenViewModel: Screen, ISettingViewModel { …………
The export contract for info is IInforServiceViewModel. Items can be added to Open and Save As
using the IDirectoryServiceViewModel
32
namespace Plugin.AnotherOptionsScreens { [Export(typeof(IDirectoryServiceViewModel))] [ExportMetadata("Used", UsageRule.BothOpenAndSaveAs)] [ExportMetadata("Order", 1)] [PartCreationPolicyAttribute(CreationPolicy.NonShared)] public class CustomScreenViewModel : Screen, IDirectoryServiceViewModel { ………………
Configuring User Settings As the name suggests, VC 4.0 user settings application configuration file is a standard XML based
file that can be used to set or change user settings. The file schema consists of elements that you
can use in the configuration file to control the behavior of VC 4.0 application.
<?xml version="1.0" encoding="utf-8"?> <configuration> <configSections> <section name="CustomSection" /> </configSections> <location allowOverride="true" inheritInChildApplications="true"> <CustomSection SectionVersion="1"> <CustomElement /> </CustomSectionSection> </location> </configuration>
The user settings configuration file is located at C:\Users\ [user name]\AppData\Local\Visual
Components\[VC 4.0 application]\AppConfig folder.
This section describes how to write and read settings from VC 4.0 configuration file through
its .NET API. The System.Configuration namespace contains the types that provide the
programming model for handling configuration data.
The first thing to do is to create a class that inherits ConfigurationElement class. The class can be
added to Plugin.AnotherOptionsScreens project that was created in earlier section. The class
implements user settings properties that needs to written or read from the configuration file. In
this example we can call the class CustomConfigElement and there are two properties, UserName
and Password.
33
using System.Configuration; namespace Plugin.AnotherOptionsScreens.UserSettings { public sealed class CustomConfigElement: ConfigurationElement { public CustomConfigElement() { } private const string usernamePropertyName = "username"; [ConfigurationProperty(usernamePropertyName, DefaultValue = "John Doe", IsRequired = true)] public string UserName { get {return (string)this[usernamePropertyName] ;} set { this[usernamePropertyName] = value ; } } private const string passwordPropertyName = "password"; [ConfigurationProperty(passwordPropertyName, DefaultValue = "12345", IsRequired = true)] public string Password { get { return (string)this[passwordPropertyName]; } set { this[passwordPropertyName] = value; } } } }
Add another class named CustomConfigurationSection to Plugin.AnotherOptionsScreens. It should
inherit a couple of interfaces, IConfigurationSection and ISection. Also create an interface for
CustomConfigurationSection named ICustomConfigurationSection. Here is the detailed code
snippet.
using System; using System.Configuration; using VisualComponents.Create3D; using System.ComponentModel.Composition; namespace Plugin.AnotherOptionsScreens.UserSettings { public interface ICustomConfigurationSection { public CustomConfigElement CustomElement { get; set; } } [Export(typeof(ISection))] public sealed class CustomConfigurationSection : ConfigurationSection, ISection, ICustomConfigurationSection { #region ISection members public void CheckVersion() { const int currentVersion = 1; if (currentVersion > SectionVersion) { SectionVersion = currentVersion; } }
34
public ISection GetSection(Configuration userSettingConfiguration) { return ConfigurationHelper.GetConfigurationSection<CustomConfigurationSection> (this.SectionName, userSettingConfiguration); } public string SectionName { get { return "CustomSection"; } } public Type SectionType { get { return typeof(ICustomConfigurationSection); } } private const string sectionVersionPropertyName = "SectionVersion"; [ConfigurationProperty(sectionVersionPropertyName, DefaultValue = "1", IsRequired = true)] public int SectionVersion { get { return ((int)base[sectionVersionPropertyName]); } private set { base[sectionVersionPropertyName] = value; } } #endregion ISection members private const string CustomElementPropertyName = "customElement"; [ConfigurationProperty(CustomElementPropertyName)] public CustomConfigElement CustomElement { get { return ((CustomConfigElement)this[CustomElementPropertyName]); } set { this[CustomElementPropertyName] = value; } } public override string ToString() { return SectionName; } } }
35
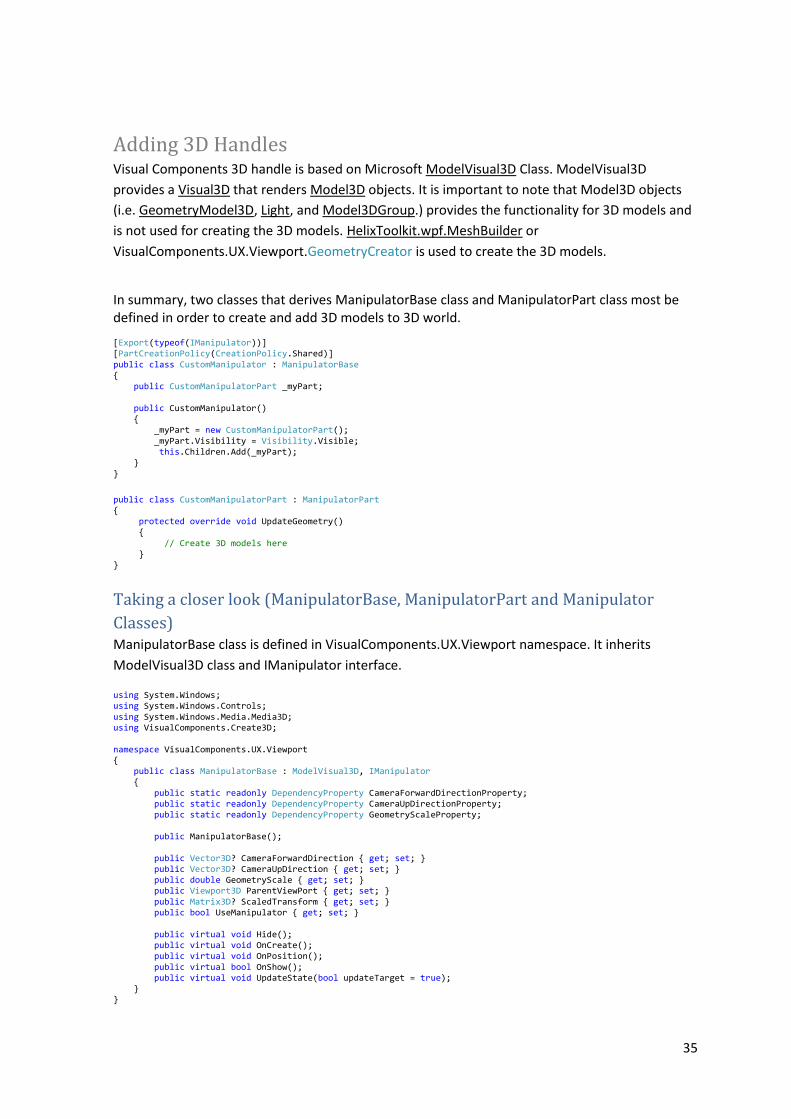
Adding 3D Handles Visual Components 3D handle is based on Microsoft ModelVisual3D Class. ModelVisual3D
provides a Visual3D that renders Model3D objects. It is important to note that Model3D objects
(i.e. GeometryModel3D, Light, and Model3DGroup.) provides the functionality for 3D models and
is not used for creating the 3D models. HelixToolkit.wpf.MeshBuilder or
VisualComponents.UX.Viewport.GeometryCreator is used to create the 3D models.
In summary, two classes that derives ManipulatorBase class and ManipulatorPart class most be defined in order to create and add 3D models to 3D world. [Export(typeof(IManipulator))] [PartCreationPolicy(CreationPolicy.Shared)] public class CustomManipulator : ManipulatorBase { public CustomManipulatorPart _myPart; public CustomManipulator() { _myPart = new CustomManipulatorPart(); _myPart.Visibility = Visibility.Visible; this.Children.Add(_myPart); } }
public class CustomManipulatorPart : ManipulatorPart { protected override void UpdateGeometry() { // Create 3D models here } }
Taking a closer look (ManipulatorBase, ManipulatorPart and Manipulator
Classes) ManipulatorBase class is defined in VisualComponents.UX.Viewport namespace. It inherits
ModelVisual3D class and IManipulator interface.
using System.Windows; using System.Windows.Controls; using System.Windows.Media.Media3D; using VisualComponents.Create3D; namespace VisualComponents.UX.Viewport { public class ManipulatorBase : ModelVisual3D, IManipulator { public static readonly DependencyProperty CameraForwardDirectionProperty; public static readonly DependencyProperty CameraUpDirectionProperty; public static readonly DependencyProperty GeometryScaleProperty; public ManipulatorBase(); public Vector3D? CameraForwardDirection { get; set; } public Vector3D? CameraUpDirection { get; set; } public double GeometryScale { get; set; } public Viewport3D ParentViewPort { get; set; } public Matrix3D? ScaledTransform { get; set; } public bool UseManipulator { get; set; } public virtual void Hide(); public virtual void OnCreate(); public virtual void OnPosition(); public virtual bool OnShow(); public virtual void UpdateState(bool updateTarget = true); } }
36
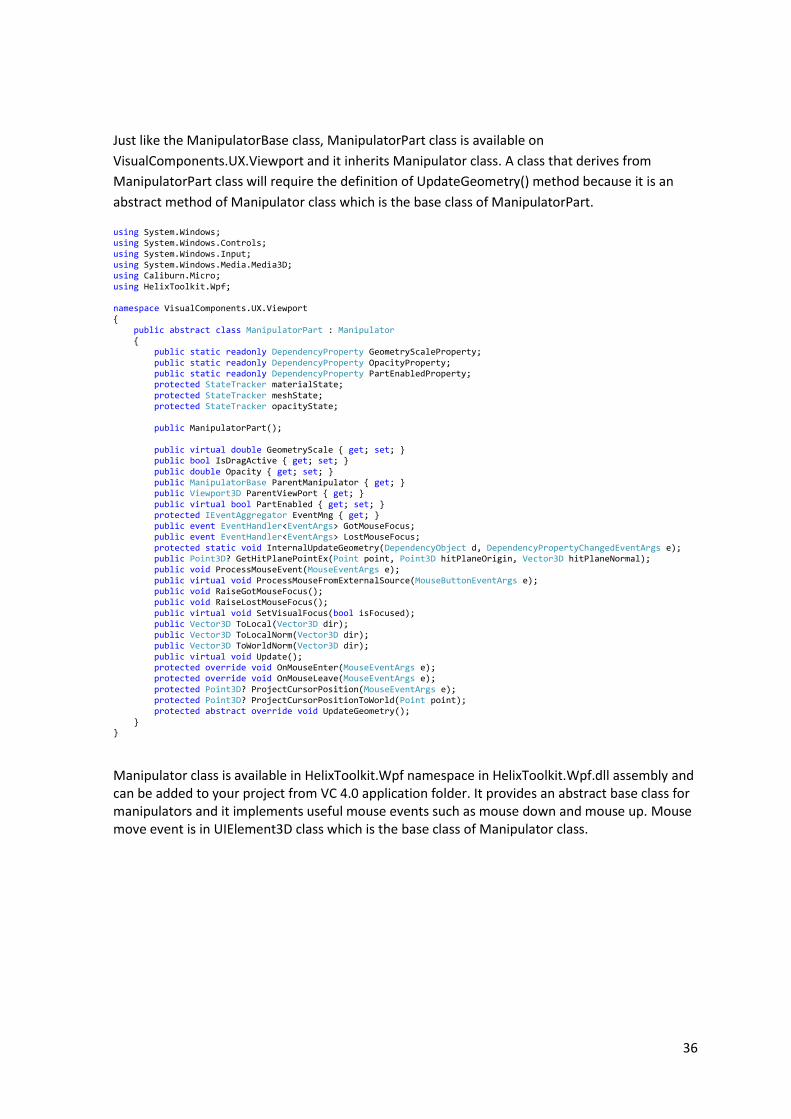
Just like the ManipulatorBase class, ManipulatorPart class is available on
VisualComponents.UX.Viewport and it inherits Manipulator class. A class that derives from
ManipulatorPart class will require the definition of UpdateGeometry() method because it is an
abstract method of Manipulator class which is the base class of ManipulatorPart.
using System.Windows; using System.Windows.Controls; using System.Windows.Input; using System.Windows.Media.Media3D; using Caliburn.Micro; using HelixToolkit.Wpf; namespace VisualComponents.UX.Viewport { public abstract class ManipulatorPart : Manipulator { public static readonly DependencyProperty GeometryScaleProperty; public static readonly DependencyProperty OpacityProperty; public static readonly DependencyProperty PartEnabledProperty; protected StateTracker materialState; protected StateTracker meshState; protected StateTracker opacityState; public ManipulatorPart(); public virtual double GeometryScale { get; set; } public bool IsDragActive { get; set; } public double Opacity { get; set; } public ManipulatorBase ParentManipulator { get; } public Viewport3D ParentViewPort { get; } public virtual bool PartEnabled { get; set; } protected IEventAggregator EventMng { get; } public event EventHandler<EventArgs> GotMouseFocus; public event EventHandler<EventArgs> LostMouseFocus; protected static void InternalUpdateGeometry(DependencyObject d, DependencyPropertyChangedEventArgs e); public Point3D? GetHitPlanePointEx(Point point, Point3D hitPlaneOrigin, Vector3D hitPlaneNormal); public void ProcessMouseEvent(MouseEventArgs e); public virtual void ProcessMouseFromExternalSource(MouseButtonEventArgs e); public void RaiseGotMouseFocus(); public void RaiseLostMouseFocus(); public virtual void SetVisualFocus(bool isFocused); public Vector3D ToLocal(Vector3D dir); public Vector3D ToLocalNorm(Vector3D dir); public Vector3D ToWorldNorm(Vector3D dir); public virtual void Update(); protected override void OnMouseEnter(MouseEventArgs e); protected override void OnMouseLeave(MouseEventArgs e); protected Point3D? ProjectCursorPosition(MouseEventArgs e); protected Point3D? ProjectCursorPositionToWorld(Point point); protected abstract override void UpdateGeometry(); } }
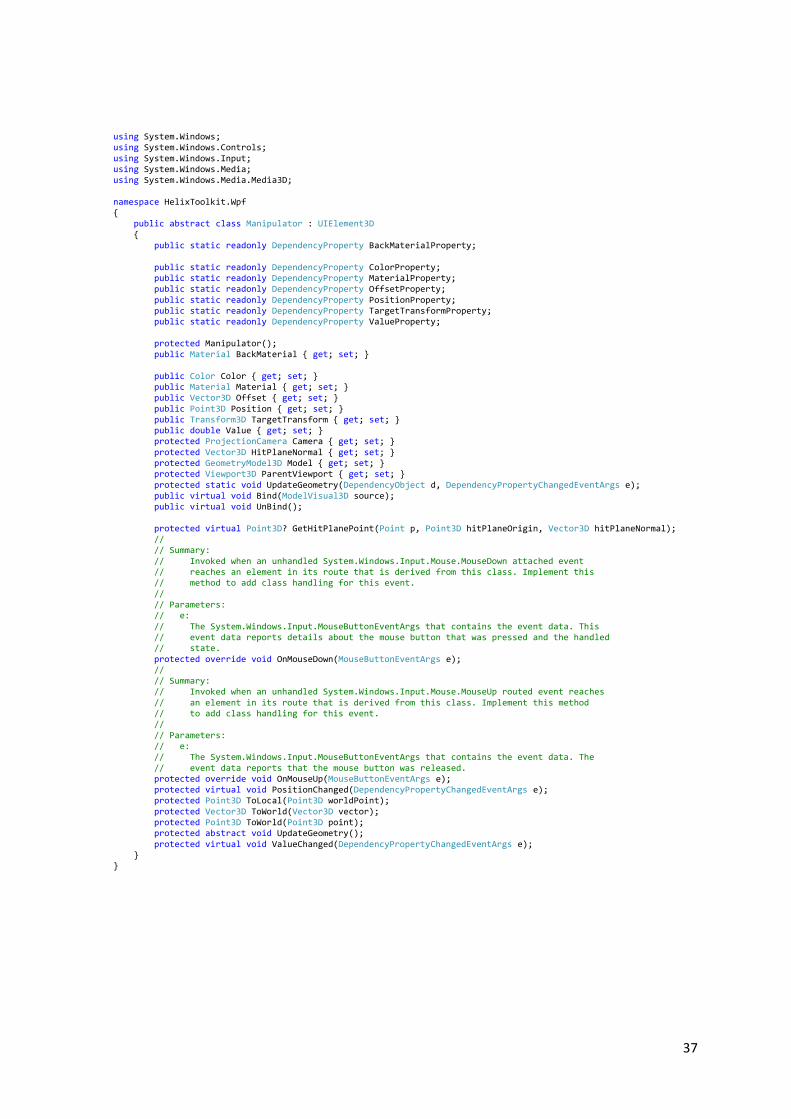
Manipulator class is available in HelixToolkit.Wpf namespace in HelixToolkit.Wpf.dll assembly and can be added to your project from VC 4.0 application folder. It provides an abstract base class for manipulators and it implements useful mouse events such as mouse down and mouse up. Mouse move event is in UIElement3D class which is the base class of Manipulator class.
37
using System.Windows; using System.Windows.Controls; using System.Windows.Input; using System.Windows.Media; using System.Windows.Media.Media3D; namespace HelixToolkit.Wpf { public abstract class Manipulator : UIElement3D { public static readonly DependencyProperty BackMaterialProperty; public static readonly DependencyProperty ColorProperty; public static readonly DependencyProperty MaterialProperty; public static readonly DependencyProperty OffsetProperty; public static readonly DependencyProperty PositionProperty; public static readonly DependencyProperty TargetTransformProperty; public static readonly DependencyProperty ValueProperty; protected Manipulator(); public Material BackMaterial { get; set; } public Color Color { get; set; } public Material Material { get; set; } public Vector3D Offset { get; set; } public Point3D Position { get; set; } public Transform3D TargetTransform { get; set; } public double Value { get; set; } protected ProjectionCamera Camera { get; set; } protected Vector3D HitPlaneNormal { get; set; } protected GeometryModel3D Model { get; set; } protected Viewport3D ParentViewport { get; set; } protected static void UpdateGeometry(DependencyObject d, DependencyPropertyChangedEventArgs e); public virtual void Bind(ModelVisual3D source); public virtual void UnBind(); protected virtual Point3D? GetHitPlanePoint(Point p, Point3D hitPlaneOrigin, Vector3D hitPlaneNormal); // // Summary: // Invoked when an unhandled System.Windows.Input.Mouse.MouseDown attached event // reaches an element in its route that is derived from this class. Implement this // method to add class handling for this event. // // Parameters: // e: // The System.Windows.Input.MouseButtonEventArgs that contains the event data. This // event data reports details about the mouse button that was pressed and the handled // state. protected override void OnMouseDown(MouseButtonEventArgs e); // // Summary: // Invoked when an unhandled System.Windows.Input.Mouse.MouseUp routed event reaches // an element in its route that is derived from this class. Implement this method // to add class handling for this event. // // Parameters: // e: // The System.Windows.Input.MouseButtonEventArgs that contains the event data. The // event data reports that the mouse button was released. protected override void OnMouseUp(MouseButtonEventArgs e); protected virtual void PositionChanged(DependencyPropertyChangedEventArgs e); protected Point3D ToLocal(Point3D worldPoint); protected Vector3D ToWorld(Vector3D vector); protected Point3D ToWorld(Point3D point); protected abstract void UpdateGeometry(); protected virtual void ValueChanged(DependencyPropertyChangedEventArgs e); } }
38
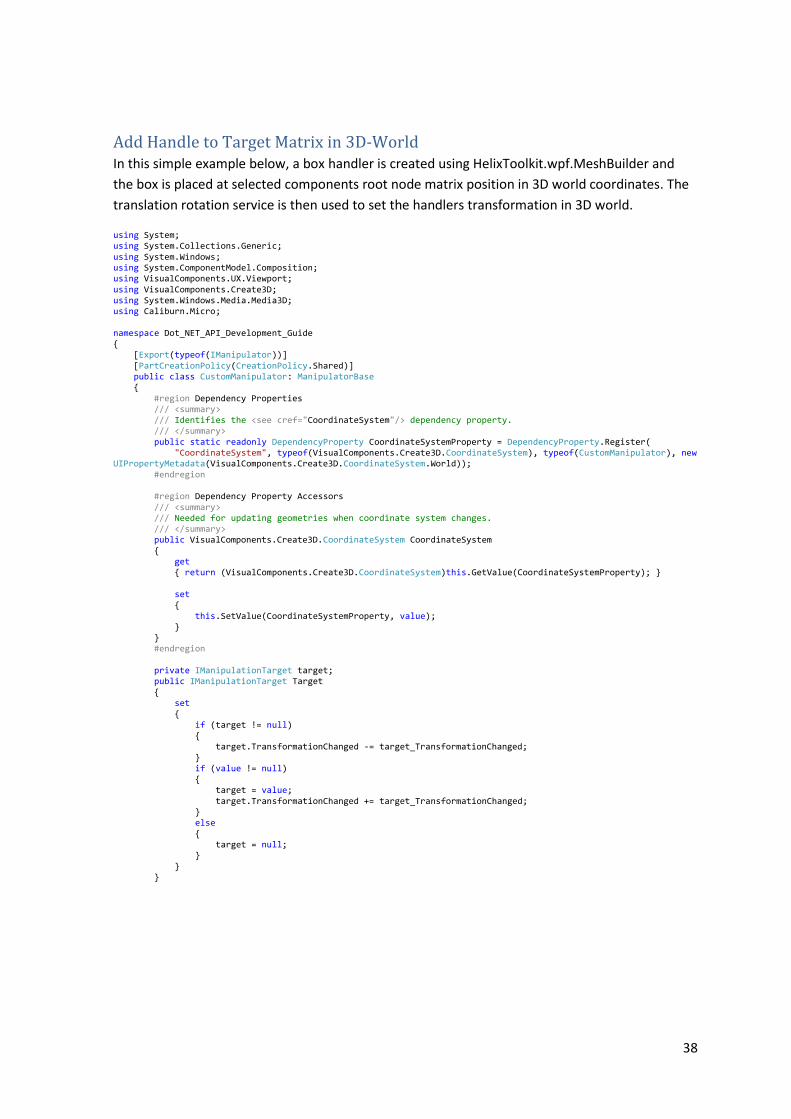
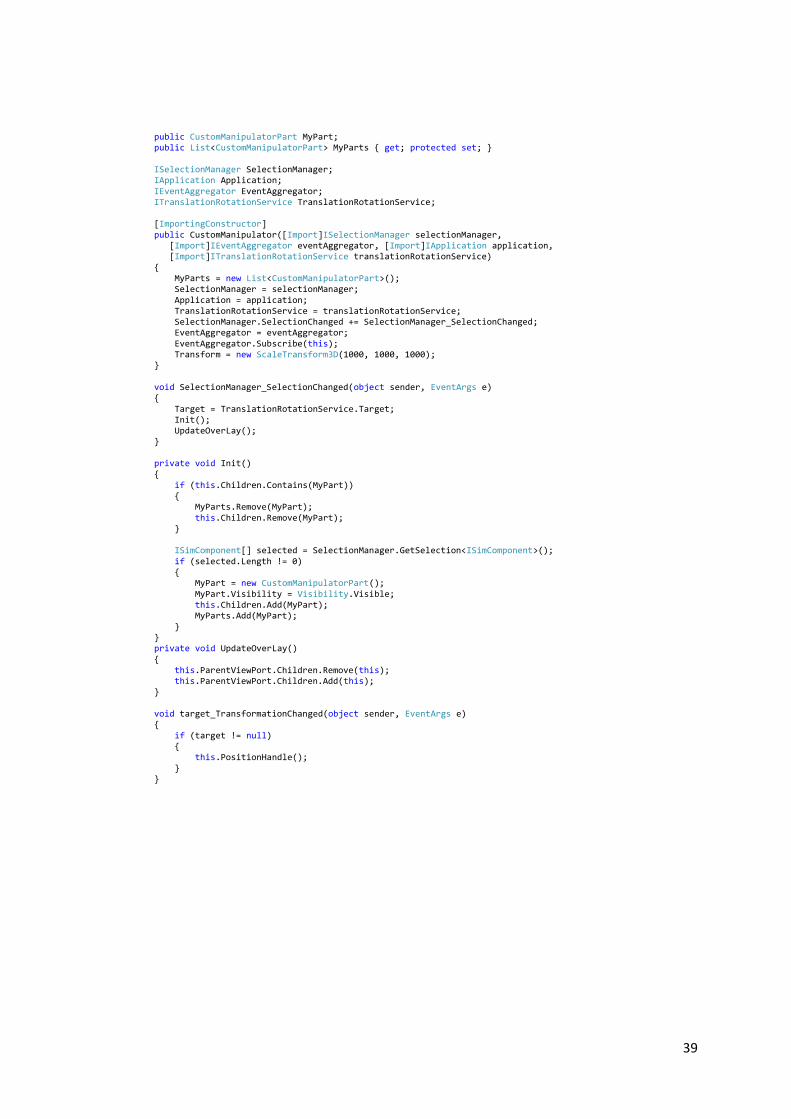
Add Handle to Target Matrix in 3D-World In this simple example below, a box handler is created using HelixToolkit.wpf.MeshBuilder and
the box is placed at selected components root node matrix position in 3D world coordinates. The
translation rotation service is then used to set the handlers transformation in 3D world.
using System; using System.Collections.Generic; using System.Windows; using System.ComponentModel.Composition; using VisualComponents.UX.Viewport; using VisualComponents.Create3D; using System.Windows.Media.Media3D; using Caliburn.Micro; namespace Dot_NET_API_Development_Guide { [Export(typeof(IManipulator))] [PartCreationPolicy(CreationPolicy.Shared)] public class CustomManipulator: ManipulatorBase { #region Dependency Properties /// <summary> /// Identifies the <see cref="CoordinateSystem"/> dependency property. /// </summary> public static readonly DependencyProperty CoordinateSystemProperty = DependencyProperty.Register( "CoordinateSystem", typeof(VisualComponents.Create3D.CoordinateSystem), typeof(CustomManipulator), new UIPropertyMetadata(VisualComponents.Create3D.CoordinateSystem.World)); #endregion #region Dependency Property Accessors /// <summary> /// Needed for updating geometries when coordinate system changes. /// </summary> public VisualComponents.Create3D.CoordinateSystem CoordinateSystem { get { return (VisualComponents.Create3D.CoordinateSystem)this.GetValue(CoordinateSystemProperty); } set { this.SetValue(CoordinateSystemProperty, value); } } #endregion private IManipulationTarget target; public IManipulationTarget Target { set { if (target != null) { target.TransformationChanged -= target_TransformationChanged; } if (value != null) { target = value; target.TransformationChanged += target_TransformationChanged; } else { target = null; } } }
39
public CustomManipulatorPart MyPart; public List<CustomManipulatorPart> MyParts { get; protected set; } ISelectionManager SelectionManager; IApplication Application; IEventAggregator EventAggregator; ITranslationRotationService TranslationRotationService; [ImportingConstructor] public CustomManipulator([Import]ISelectionManager selectionManager, [Import]IEventAggregator eventAggregator, [Import]IApplication application, [Import]ITranslationRotationService translationRotationService) { MyParts = new List<CustomManipulatorPart>(); SelectionManager = selectionManager; Application = application; TranslationRotationService = translationRotationService; SelectionManager.SelectionChanged += SelectionManager_SelectionChanged; EventAggregator = eventAggregator; EventAggregator.Subscribe(this); Transform = new ScaleTransform3D(1000, 1000, 1000); } void SelectionManager_SelectionChanged(object sender, EventArgs e) { Target = TranslationRotationService.Target; Init(); UpdateOverLay(); } private void Init() { if (this.Children.Contains(MyPart)) { MyParts.Remove(MyPart); this.Children.Remove(MyPart); } ISimComponent[] selected = SelectionManager.GetSelection<ISimComponent>(); if (selected.Length != 0) { MyPart = new CustomManipulatorPart(); MyPart.Visibility = Visibility.Visible; this.Children.Add(MyPart); MyParts.Add(MyPart); } } private void UpdateOverLay() { this.ParentViewPort.Children.Remove(this); this.ParentViewPort.Children.Add(this); } void target_TransformationChanged(object sender, EventArgs e) { if (target != null) { this.PositionHandle(); } }
40
/// <summary> /// the position of the handler is given by the Translation Rotation Service /// </summary> private void PositionHandle() { VisualComponents.Create3D.Matrix handlePosition = new VisualComponents.Create3D.Matrix(); handlePosition = target.TransformationInWorld; handlePosition.Px /= 1000; handlePosition.Py /= 1000; handlePosition.Pz /= 1000; MakeUniform(ref handlePosition); MatrixTransform3D newPositionMatrix = new MatrixTransform3D(VisualComponents.Create3D.Matrix.ToMe-dia3D(handlePosition)); newPositionMatrix.Freeze(); Transform = HelixToolkit.Wpf.Transform3DHelper.CombineTransform(newPositionMatrix, new ScaleTransform3D(1000, 1000, 1000)); this.CoordinateSystem = TranslationRotationService.CoordinateSystem; MyParts.ForEach(t => { if (t.IsVisible) { t.Update(); } }); } private void MakeUniform(ref VisualComponents.Create3D.Matrix mat) { var x = mat.GetN(); var y = mat.GetO(); var z = mat.GetA(); x.Normalize(); y.Normalize(); z.Normalize(); mat.SetN(x); mat.SetO(y); mat.SetA(z); mat.Nw = mat.Ow = mat.Aw = 0; mat.Pw = 1; } } }
41
And below is a basic CustomManipulatorPart class that derives ManipulatorPart class.
using System.Windows; using System.Windows.Media; using System.Windows.Media.Media3D; using VisualComponents.UX.Viewport; using HelixToolkit.Wpf; namespace Dot_NET_API_Development_Guide { public class CustomManipulatorPart : ManipulatorPart { public CustomManipulatorPart() { UpdateGeometry(); } protected override void UpdateGeometry() { // System.Windows.Visibility. Specifies the display state of an element if (this.Visibility != Visibility.Visible) { return; } // System.Windows.Media.Colors to set a system predefined color System.Windows.Media.Color color = Colors.Green; this.Color = color; double xlength = 200.0/1000.0; double ylength = 200.0/1000.0; double zlength = 200.0/1000.0; // Initialize a new instance of HelixToolkit.Wpf.MeshBuilder MeshBuilder mb = new MeshBuilder(false, false); // Initialize a new instance of VC matrix VisualComponents.Create3D.Matrix matrix = new VisualComponents.Create3D.Matrix(); matrix.Px = 500.0/1000.0; matrix.Py = 500.0/1000.0; double px = matrix.Px; double py = matrix.Py; double pz = matrix.Pz; var point = new Point3D(px, py, pz); mb.AddBox(point, xlength, ylength, zlength); // and assigned to Geometry3Dmodel that renders or decsribes the box' 3D model this.Model.Geometry = mb.ToMesh(); } } }