vmware
DESCRIPTION
dgadgdsdgdfdgdsfTRANSCRIPT

vRanger®
Version 5.0
Installation and Setup Guide

© 2011 Quest Software, Inc.ALL RIGHTS RESERVED.This guide contains proprietary information protected by copyright. The software described in this guide is furnished under a software license or nondisclosure agreement. This software may be used or copied only in accordance with the terms of the applicable agreement. No part of this guide may be reproduced or transmitted in any form or by any means, electronic or mechanical, including photocopying and recording for any purpose other than the purchaser’s personal use without the written permission of Quest Software, Inc.
The information in this document is provided in connection with Quest products. No license, express or implied, by estoppel or otherwise, to any intellectual property right is granted by this document or in connection with the sale of Quest products. EXCEPT AS SET FORTH IN QUEST'S TERMS AND CONDITIONS AS SPECIFIED IN THE LICENSE AGREEMENT FOR THIS PRODUCT, QUEST ASSUMES NO LIABILITY WHATSOEVER AND DISCLAIMS ANY EXPRESS, IMPLIED OR STATUTORY WARRANTY RELATING TO ITS PRODUCTS INCLUDING, BUT NOT LIMITED TO, THE IMPLIED WARRANTY OF MERCHANTABILITY, FITNESS FOR A PARTICULAR PURPOSE, OR NON-INFRINGEMENT. IN NO EVENT SHALL QUEST BE LIABLE FOR ANY DIRECT, INDIRECT, CONSEQUENTIAL, PUNITIVE, SPECIAL OR INCIDENTAL DAMAGES (INCLUDING, WITHOUT LIMITATION, DAMAGES FOR LOSS OF PROFITS, BUSINESS INTERRUPTION OR LOSS OF INFORMATION) ARISING OUT OF THE USE OR INABILITY TO USE THIS DOCUMENT, EVEN IF QUEST HAS BEEN ADVISED OF THE POSSIBILITY OF SUCH DAMAGES. Quest makes no representations or warranties with respect to the accuracy or completeness of the contents of this document and reserves the right to make changes to specifications and product descriptions at any time without notice. Quest does not make any commitment to update the information contained in this document.
If you have any questions regarding your potential use of this material, contact:Quest Software World HeadquartersLEGAL Dept5 Polaris WayAliso Viejo, CA 92656www.quest.comemail: [email protected]
Refer to our Web site for regional and international office information.
PatentsThis product includes patent pending technology.
TrademarksQuest, Quest Software, the Quest Software logo, AccessManager, ActiveRoles, Aelita, Akonix, Benchmark Factory, Big Brother, BridgeAccess, BridgeAutoEscalate, BridgeSearch, BridgeTrak, BusinessInsight, ChangeAuditor, CI Discovery, Defender, DeployDirector, Desktop Authority, Directory Analyzer, Directory Troubleshooter, DS Analyzer, DS Expert, Foglight, GPOADmin, Help Desk Authority, Imceda, IntelliProfile, InTrust, Invirtus, iToken, JClass, JProbe, LeccoTech, LiteSpeed, LiveReorg, LogADmin, MessageStats, Monosphere, NBSpool, NetBase, NetControl, Npulse, NetPro, PassGo, PerformaSure, Point, Click, Done!, Quest vToolkit, Quest vWorkSpace, ReportADmin, RestoreADmin, ScriptLogic, SelfServiceADmin, SharePlex, Sitraka, SmartAlarm, Spotlight, SQL Navigator, SQL Watch, SQLab, Stat, StealthCollect, Storage Horizon, Tag and Follow, Toad, T.O.A.D., Toad World, vAutomator, vConverter, vEcoShell, VESI, vFoglight, vPackager, vRanger, vSpotlight, vStream, vToad, Vintela, Virtual DBA, VizionCore, Vizioncore vAutomation Suite, Vizioncore vEssentials, Vizioncore vWorkflow, WebDefender, Webthority, Xaffire, and XRT are trademarks and registered trademarks of Quest Software, Inc in the United States of America and other countries. Other trademarks and registered trademarks are property of their respective owners.
Installation and Setup GuideJanuary 2011Version 5.0

Table of Contents
Introduction to this Guide ...................................................................................................5About vRanger ............................................................................................................................... 6About this Guide............................................................................................................................. 6vRanger Documentation Suite ....................................................................................................... 6
Core Documentation Set ......................................................................................................... 7Feedback on the Documentation ............................................................................................ 7Text Conventions .................................................................................................................... 7
vRanger Licensing.......................................................................................................................... 9About Quest Software, Inc. .......................................................................................................... 10
Contacting Quest Software ................................................................................................... 10Contacting Quest Server Virtualization Management Support.............................................. 11
Installation ..........................................................................................................................12vRanger Installation...................................................................................................................... 13Installing vRanger......................................................................................................................... 13
Install vRanger on a New Instance of SQL Express 2005 .................................................... 13
Configuration......................................................................................................................21Configuration ................................................................................................................................ 22Configuration through the Startup Wizard .................................................................................... 22
Select a License.................................................................................................................... 23Add vCenters ........................................................................................................................ 24Hosts Information .................................................................................................................. 25Add and License Hosts ......................................................................................................... 26Add Repositories................................................................................................................... 26Set up Mail Server Information/Add Email Addresses .......................................................... 28
Configuration without Using the Startup Wizard........................................................................... 29
Table of Contents 4
Add a vCenter ....................................................................................................................... 29Add an ESX Server ............................................................................................................... 29Add a Repository................................................................................................................... 30Configure an SMTP Server ................................................................................................... 31Import License File................................................................................................................ 34Manage Host Licensing......................................................................................................... 35Manage Job Configuration Settings...................................................................................... 36
Import Legacy Jobs...................................................................................................................... 38Configuration Options................................................................................................................... 40
Index....................................................................................................................................42

Introduction to this Guide
This chapter provides information about what is contained in Installation and Setup Guide. It also provides information about the vRanger documentation suite and Vizioncore.
This chapter contains the following sections:
About vRanger................................................................................................... 6About this Guide ................................................................................................ 6vRanger Documentation Suite...........................................................................6Core Documentation Set ...................................................................................7Feedback on the Documentation.......................................................................7Text Conventions............................................................................................... 7vRanger Licensing ............................................................................................. 9About Quest Software, Inc...............................................................................10Contacting Quest Software..............................................................................10Contacting Quest Server Virtualization Management Support ........................11

Introduction to this Guide 6About vRanger
About vRangervRanger 5.0 is the market-leading backup, recovery and backup management solution for virtual environments. Featuring a new platform technology, vRanger 5.0 reduces the backup window, provides smarter backup options, and offers more scalability features while using fewer resources.
vRanger 5.0 Capabilities:
• Performs incremental, differential or full image backups of virtual machines.
• Quickly restores the entire virtual machine or just specific files.
• Manages disaster recovery strategies and protects critical data in virtual environments.
• Offers the ability to replicate virtual machines to more than one destination, thus allowing users to accomplish multiple High Availability and Disaster Recovery objectives based on their specific needs.
About this GuideThis guide walks you through a vRanger installation, including basic configurations.
This guide is organized as follows:
Chapter 1, Installation — This chapter describes the process for installing vRanger.
Chapter 2, Configuration — This chapter outlines the process of starting vRanger for the first time, licensing the application, and configuring connections with the Virtual Infrastructure.
vRanger Documentation SuiteThe documentation suite is made up of the core documentation set plus documents set for advanced configurations. Documentation is provided in a combination of online help and PDF.
• Online Help: You can open online help by selecting Help Contents in the Help menu.
• PDF: The Getting Started Guide, What’s New Guide, System Requirements Guide, Installation and Setup Guide, and User Guide, are provided as PDF files. The

Introduction to this Guide 7vRanger Documentation Suite
PDF guides are included in the zip file downloaded from Vizioncore. Adobe® Reader® is required.
Core Documentation SetThe core documentation set consists of the following:
• Release Notes (PDF)
• Getting Started Guide (PDF)
• What’s New Guide (PDF)
• System Requirements Guide (PDF)
• Installation and Setup Guide set (PDF)
• User Guide (PDF and online help)
Feedback on the DocumentationWe are interested in receiving feedback from you about our documentation. For example, did you notice any errors in the documentation? Were any features undocumented? Do you have any suggestions on how we can improve the documentation? All comments are welcome. Please submit your feedback to the following email address:
Please do not submit Technical Support related issues to this email address.
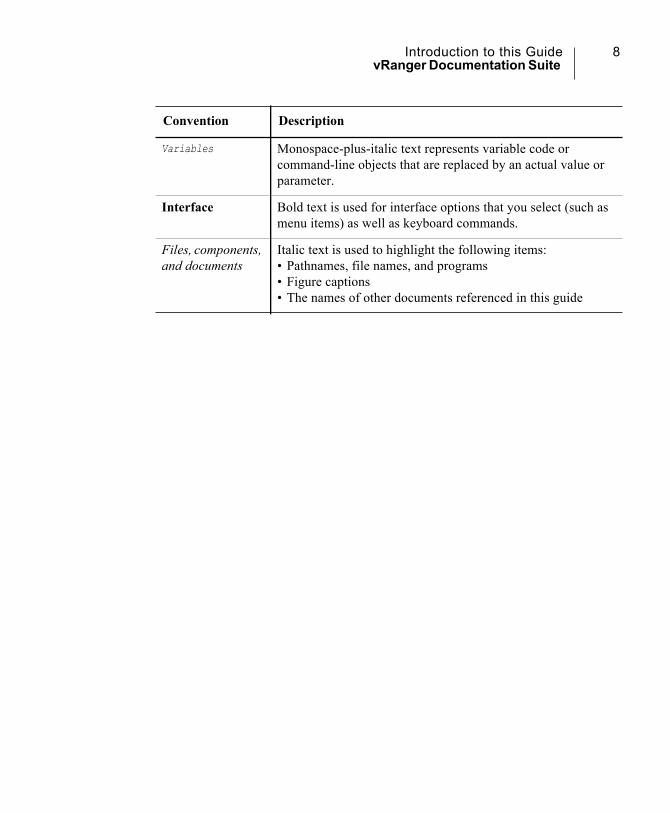
Text ConventionsThe following table summarizes how text styles are used in this guide:
Convention Description
Code Monospace text represents code, code objects, and command-line input. This includes:• Java language source code and examples of file contents• Classes, objects, methods, properties, constants, and events• HTML documents, tags, and attributes
Introduction to this Guide 8vRanger Documentation Suite
Variables Monospace-plus-italic text represents variable code or command-line objects that are replaced by an actual value or parameter.
Interface Bold text is used for interface options that you select (such as menu items) as well as keyboard commands.
Files, components, and documents
Italic text is used to highlight the following items:• Pathnames, file names, and programs• Figure captions• The names of other documents referenced in this guide
Convention Description

Introduction to this Guide 9vRanger Licensing
vRanger LicensingThere are three levels of vRanger Licensing, each with different available features:
• vRanger Standard
• vRanger Pro
• vReplicator
A license for vRanger controls the number of source CPUs that you can configure for backup. For licensing purposes, a dual-core processor is counted as a single CPU.
vRanger Standard*
vRanger Pro vReplicator**
Backup • X • X •
Restore • X • X •
Replication • • X • X
CBT • X • X • X
ABM • X • X • X
Lan Free • • X •
Catalog • • X •
Windows FLR • X • X •
Linux FLR • • X •
* Replication, LAN Free, Catalog, and Linux FLR are present in vRanger Standard, but are not supported and may be disabled in future vRanger Standard upgrades
**Backup, Restore, LAN Free, Catalog, and Windows/Linux FLR are present in vReplicator, but are not sup-ported and may be disabled in future vReplicator upgrades.

Introduction to this Guide 10About Quest Software, Inc.
Therefore, one ESX Server with two dual-core processors would use two CPUs of a license.
If you do not have a permanent license, an evaluation license will be generated for you automatically. Every time you use vRanger to perform a backup using an evaluation license, your Internet browser will open to the Quest website. After you import a permanent license, this will no longer happen. You can import a license through the Startup Wizard or the Configuration Options dialog.
Upgrades from previous versions of vRanger will yield vRanger Pro installations, with the functionality described on the previous page.
Upgrades from previous versions of vReplicator will result in vReplicator only functionality, as described on the previous page.
About Quest Software, Inc.Quest Software simplifies and reduces the cost of managing IT for more than 100,000 customers worldwide. Our innovative solutions make solving the toughest IT management problems easier, enabling customers to save time and money across physical, virtual and cloud environments. For more information about Quest go to www.quest.com.
Contacting Quest Software
Refer to our web site for regional and international office information.
Email [email protected]
Mail Quest Software, Inc.World Headquarters5 Polaris WayAliso Viejo, CA 92656USA
Web site www.quest.com

Introduction to this Guide 11About Quest Software, Inc.
Contacting Quest Server Virtualization Management SupportSupport is available to customers who have a trial version of a Quest Server Virtualization Management product or who have purchased a commercial version and have a valid maintenance contract.
Support is easily accessed in the following ways:
• Email support directly at [email protected] for automatic case creation.
• Contact Quest Server Virtualization Support directly via our global and local telephone numbers available at www.vizioncore.com/support.
• Log and create/update your case, and check its status via the Support Case Management portal.
View the Quest Server Virtualization Support Guide for a detailed explanation of support programs, online services, contact information, and policy and procedures. The guide is available at: http://vizioncore.com/support

Installation
This chapter guides you through the process of installing vRanger using the application installer.
This chapter contains the following sections:
vRanger Installation .........................................................................................13Install vRanger on a New Instance of SQL Express 2005...............................11

Installation 13vRanger Installation
vRanger InstallationThis version of the software can be installed on a physical or virtual machine. There are no plug-ins to install. When you complete one of these processes, three services will be installed: vRanger service, vRanger vAPI service, and vRanger FLR service.
Note If you wish to use the LAN-free feature (backup over fiber), vRanger must be installed on a physical machine.
You will need the following to install vRanger:
• A physical or virtual machine to host the installation.
• Administrator access to the machine on which the software will be installed.
• Administrator access to the target VMs.
Installing vRanger The vRanger Installer includes several options for database configuration. The procedures are included below. For computers running Windows Vista without an SP, the option to install the software with a new instance of SQL Express 2005 is not available.
Install vRanger on a New Instance of SQL Express 2005This procedure assumes that you have already downloaded the vRanger software and saved it to an accessible location.
Step 1: vRanger Setup1 Double-click the vRangerPro-5.0-Setup.exe file.
The vRanger Backup and Replication Setup Wizard opens.

Installation 14Installing vRanger
2 Click Next.
Step 2: License AgreementThe vRanger License Agreement displays.
1 Read the license agreement. Click I Agree.

Installation 15Installing vRanger
Step 3: Select Installation LocationThe Choose Install Location dialog displays.
Note It is not recommended to install vRanger on the same server as VirtualCenter.
1 Click Browse. Select an installation folder.
2 Click Next.
Step 4: User CredentialsThe User Credentials dialog displays. The user account needed for this step must have administrator privileges on the local machine.
Note If you chose to use Windows authentication for your SQL Express database, this is the account that will be used.

Installation 16Installing vRanger
1 In the Domain field, enter the domain in which the user account is located.
2 In the Username field, enter the username for the account.
3 In the Password field, enter the password for the account.
4 Click Next.
Step 5: Database SetupThe Database Setup Wizard displays.

Installation 17Installing vRanger
1 Click Next.
Step 6: Install DatabaseThe Install Database dialog displays. This dialog allows you to select the type of database to use with vRanger.
1 Click Install on new instance of SQL Express 2005.
2 Select a server authentication method.
• SQL Server: Enter and confirm the system administrator (sa) password when you select Mixed Mode authentication. Setting strong passwords is essential to the security of your system. Never set a blank or weak sa password.
• Windows: When a user connects through a Windows user account, SQL Server validates the account name and password using information in the Windows OS. Windows Authentication uses Kerberos security protocol, provides password policy enforcement (complexity validation for strong passwords), provides support for account lockout, and supports password expiration.
3 If you selected SQL Server, you will be prompted for the user name and password.

Installation 18Installing vRanger
or
If you selected Windows, the installation will continue using the account specified in Step 4.
4 Click Verify to test connectivity to the database.
5 When the Connection Successful display, click OK.
6 Click OK or Next, depending on your authentication method.
The Database User Credentials dialog displays.

Installation 19Installing vRanger
Note vRanger creates an account to connect to the Vizioncore database. This account uses a default password of “V!ZionC0re”. Vizioncore recommends changing this default password.
7 Click Next.
Step 7: Automatic SetupThe Install Database dialog displays.

Installation 20Installing vRanger
1 Click Automatic Setup.
The database is installed.
2 When the installation is completed, click Next.
3 Click Finish.
Step 8: Complete the InstallationThe vRanger installation continues. Then, the Completing the Setup Wizard dialog displays.
1 Select Run vRangerPro 5.0 to launch the application immediately.
2 Click Finish.
Configuration
This chapter outlines the process of starting vRanger for the first time, licensing the application, and configuring connections with the Virtual Infrastructure.
This chapter contains the following sections:
Configuration ................................................................................................... 22Configuration through the Startup Wizard .......................................................22Select a License .............................................................................................. 23Add vCenters ................................................................................................... 24Add and License Hosts....................................................................................26Add Repositories ............................................................................................. 26Set up Mail Server Information/Add Email Addresses.....................................28Configuration without Using the Startup Wizard ..............................................29Add a vCenter.................................................................................................. 29Add an ESX Server..........................................................................................29Add a Repository ............................................................................................. 30Configure an SMTP Server..............................................................................31Import License File ..........................................................................................34Manage Host Licensing ...................................................................................35Manage Job Configuration Settings.................................................................36Import Legacy Jobs .........................................................................................38Configuration Options ......................................................................................40

Configuration 22Configuration
ConfigurationBefore you begin configuring vRanger, confirm that you have access to all usernames, passwords, and root passwords for the ESX hosts that you intend to use.
vRanger requires some basic configurations to ensure that the software functions properly. You complete the initial configuration through the Startup Wizard, which launches when you first install vRanger. If you would rather configure settings through the menu commands and icons on the main vRanger screen, you can do so. In either case, you can revise the settings at any time.
After completing the basic configuration process, you can use either the Startup Wizard or the Configuration Options dialog to manage your settings. Although the Configuration Options dialog offers some functionality that the Startup Wizard does you can use either dialog to manage host licensing or email server data. Only the Configuration Options dialog lets you manage resources on the task level. Given the role that tasks play in making backup and restore jobs, this resource is vital.
• Configuration through the Startup Wizard
• Configuration without Using the Startup Wizard
• Configuration Options
Configuration through the Startup WizardYou must have an email SMTP server set up to enable notification during job creation. Later in this process, on the Notification Policy Selection dialog, you will have the option of choosing recipients. A plain text email will be sent when the job completes. The notification will include the backup results, if you select that option.
• Select a License
• Add vCenters
• Add and License Hosts
• Add Repositories
• Set up Mail Server Information/Add Email Addresses

Configuration 23Configuration through the Startup Wizard
1 If you have just installed the software, click Next on the Startup Wizard. If not, access it through Tools-->Startup Wizard and then click Next.
2 Click Next.
Select a LicenseThe License Information dialog displays.
1 Click Import License File.
Note The license file for vRanger 5.0 is different from those used in version 3.X. Do not use a license file for version 3.X for the software.
2 Select the license.

Configuration 24Configuration through the Startup Wizard
3 Click Open.
4 Click Save. Then, click Next.
Add vCentersThe vCenter Information dialog displays. Before vRanger can add targets to the My Inventory pane, you must configure a connection to a vCenter and an ESX Server.
1 If the vCenter that you want is listed in the left pane, click it to populate the fields on the right. Then, click Update and Next. If the vCenter is not listed, follow the directions below to add one.
2 In the DNS Name or IP field, enter the FQDN or IP address of the vCenter server.
3 In the User Name field, enter the user name of an account with administrator privileges on the vCenter server.Note vRanger can only back up VMs that this user can “see.”
4 In the User Password field, enter the password for the account used above.
5 Click Save.
6 Click Next.

Configuration 25Configuration through the Startup Wizard
The vCenter will display in the My Inventory pane and on the VirtualCenter Information dialog.
Hosts InformationThe Hosts Information dialog displays, listing the ESX Hosts managed by the configured vCenter. Through this dialog you can configure credentials for the managed hosts. To complete this process, you must have a root password (unless you have disabled root over SSH).

Configuration 26Configuration through the Startup Wizard
1 In the lefthand checkbox column, select the hosts to which the credentials will apply. If you click more than one checkbox, “Multiple hosts selected” displays in the DNS Name or IP field.
2 In the User Name field, enter the username of a non-root account for the ESX host.
3 In the User Password field, enter the password for the account above.
4 If the account does not yet exist, select Add user if user does not exist.
5 In the Root Password field, enter the password for the root account on the ESX host.
6 Click Save.
7 Repeat steps 1-5 for any remaining ESX hosts.
8 Click Next.
Add and License HostsThe Host Licensing Information dialog displays. It indicates the total number of licenses, the number being used currently, and the number available.
1 View the Currently Licensed CPUs value to confirm the number of sockets that are licensed for protection.
2 The Sockets column indicates the license “cost” of each ESX Host.
3 In the Licensed column, select or deselect ESX Hosts until you have used all of the available licenses, or until all of your ESX Hosts are protected.
4 Click Save.
5 Click Next.
Add RepositoriesvRanger uses repositories to store backup archives. Repositories can be either a CIFS NFS (version 4), FTP, or SFTP share. The procedure below shows mounting a CIFS share to the My Repositories pane. The steps for mounting any of the available

Configuration 27Configuration through the Startup Wizard
repositories are the same.
1 If the repository you want to add is listed on the left of the screen, click it to populate the fields on the right.Click Update and Next. If it is not listed, follow the steps below.
2 In the Repository Type section, select Windows Share (CIFS), if necessary.
3 Populate the Repository Name field.
This value will display in the My Repositories pane.
4 Populate the Description field.
5 Enter a Domain\username and password in the appropriate fields.
6 In the Server field, type the name of the server you want, or browse for the desired server.
Note If you wish to use the Encrytp all backups feature, make certain to retain the password you enter in the following steps. There is no backdoor or admin-level password. If the password is unknown, the backups will not be usable.
7 Select Encrypt all backups to this repository if you wish these backups to be password-protected.

Configuration 28Configuration through the Startup Wizard
8 Enter a Password for the encrypted repository -- confirm the password by re-entering it.
9 Click Update -- the connection to the repository is tested and the repository is added to the My Repositories pane and the Repository Information dialog.
10 Click Next.
Set up Mail Server Information/Add Email AddressesThe Mail Server Information dialog displays. When you configure an SMTP server, select one that does not require authentication so that there are no obstacle to email notification transmission.
Step 1: SMTP Server1 In the SMTP Server field, enter the DNS name or IP of an SMTP server.
2 In the From Address field, enter the email address that vRanger should use.Note Make sure that you use a valid email account registered to the SMTP server that you
added.
3 Click Send Test Email.
Step 2: Address Book1 To add recipients, click Add.
2 Populate the Name and Email Address fields.
3 Click Save to add the information to the Email Addresses list.
4 Repeat steps 1-3 to include additional contacts.
5 Click Finish.
Options

Configuration 29Configuration without Using the Startup Wizard
Configuration without Using the Startup WizardThese instructions describe the process for configuring vRanger without using the Startup Wizard. During this process you will:
• Add a vCenter
• Add an ESX Server
• Add a Repository
• Configure an SMTP Server
• Add Email Address
• Import License File
• Manage Host Licensing
• Manage Job Configuration Settings
Note To configure multiple hosts under the same vCenter, the system retains the data you entered to add credentials for the first host.
Add a vCenter1 To add a vCenter, navigate to the My Inventory view. From the Add icon select
VirtualCenter.
2 On the VirtualCenter Credentials dialog, populate the DNS Name or IP, User Name, and User Password fields. Leave the Port Number default (443) as is. Click Connect.vRanger attempts to connect to the vCenter using the current configuration. If it is successful, the vCenter displays in the My Inventory pane.
Add an ESX Server1 From the My Inventory view, select Add-->ESX Host.
Note: If the connection is unsuccessful, confirm that the configuration settings are correct and that the vCenter is visible to the computer where vRanger is installed.
2 On the Add Host Credentials dialog, populate the DNS Name or IP, User Name, User Password, and Root Password fields. Leave the Port Number

Configuration 30Configuration without Using the Startup Wizard
default (22). Click Connect.The host is added to the tree structure under the vCenter. Confirm this noting that a gold key icon displays adjacent to it in the My Inventory pane.
Add a Repository
1 To add repository, navigate to the My Repositories pane. Click to highlight the desired repository type. Right-click the node and select Add-->Windows Share CIFS, NSF (version 4) FTP, or SFTP.
2 On the Add Repository dialog, populate the Repository Name, DNS Name or IP, Target Directory, User Name, and User Password fields. The Description field is optional.
3 In the Server field, type the name of the server you want.
Note If you wish to use the Encrytp all backups feature, make certain to retain the password you enter in the following steps. There is no backdoor or admin-level password. If the password is unknown, the backups will not be usable.
4 Select Encrypt all backups to this repository if you wish these backups to be password-protected.
5 Enter a Password for the encrypted repository -- confirm the password by re-entering it.
6 Click Update -- the connection to the repository is tested and the repository is added to the My Repositories pane and the Repository Information dialog.
7 Click OK.

Configuration 31Configuration without Using the Startup Wizard
Configure an SMTP Server1 Select Tools-->Options.
2 Under the General node on the Configuration Options dialog, click Email Server.
3 Populate the SMTP Server field.
4 Leave the default (25) in the Port field.
5 In the From Address field, enter an email address from which notifications should be sent.
6 Click Send Test Email. The confirmation message confirms the server connection and successful transmission to the email address you entered.
7 Click OK.
Add Email Address1 Select Tools-->Options.
2 Under the General node on the Configuration Options dialog, click Email Address Book.
3 In the New Email Address section, populate the Name and Email Address fields.

Configuration 32Configuration without Using the Startup Wizard
4 Click the Add button.
5 The data is moved to the Email Addresses section.
6 In the Email Addresses section, click the Add icon . Click OK.
Edit Email Address1 Select Tools-->Options.
2 Under the General node, click Email Address Book.
3 In the Email Addresses section, click to highlight the email address that you want to edit.

Configuration 33Configuration without Using the Startup Wizard
4 In the Edit Email Address section, update the information and click Update.The information is updated and moved to the Email Addresses section.
5 Click OK.
Remove Email Address1 Select Tools-->Options.
2 Under the General node, click Email Address Book.
3 In the Email Addresses section, click to highlight the email address that you want to delete. The listing displays in the Edit Email Address section.
4 Click Remove.The listing is deleted.no confirmation msg here. ok?
5 Click OK.

Configuration 34Configuration without Using the Startup Wizard
Import License FileBefore you start this process, confirm that you have placed your license file in a location that you can reach easily.
1 Select Tools-->Options.
2 Under the Licensing node on the Configuration Options dialog, click Product.
3 Click Import License File.
4 Browse to the location where you stored the license file. Click to select it and click Open.The new license information is added to the dialog.

Configuration 35Configuration without Using the Startup Wizard
5 Click Apply.The dialog refreshes with the new license information added.
6 Click OK.
Manage Host LicensingBefore you start this process, make sure that you have imported the license file and confirmed that it is adequate for managing the hosts that you want to use. The Host Licensing Summary section includes the total number of CPU licenses, the number being used currently, and the number of licenses remaining. These numbers will increment and decrement based on the selections you make on this dialog.
1 Select Tools-->Options.
2 Under the Licensing node, click Host.All available hosts with proper credentials will be listed here. Those for which you have license capacity will have a checkbox selected in the License column.

Configuration 36Configuration without Using the Startup Wizard
3 If you would like to move license coverage from one host to another, click in the checkbox that corresponds to the host you want to include. The numbers in the fields of the Host Licensing Summary section adjust accordingly.
4 Click OK.
Manage Job Configuration SettingsThrough the Configuration Options dialog, you can set limits for the number of tasks running, the timeframe for task execution, and the space allowed on a datastore to accommodate snapshot growth.
Configuration 37Configuration without Using the Startup Wizard
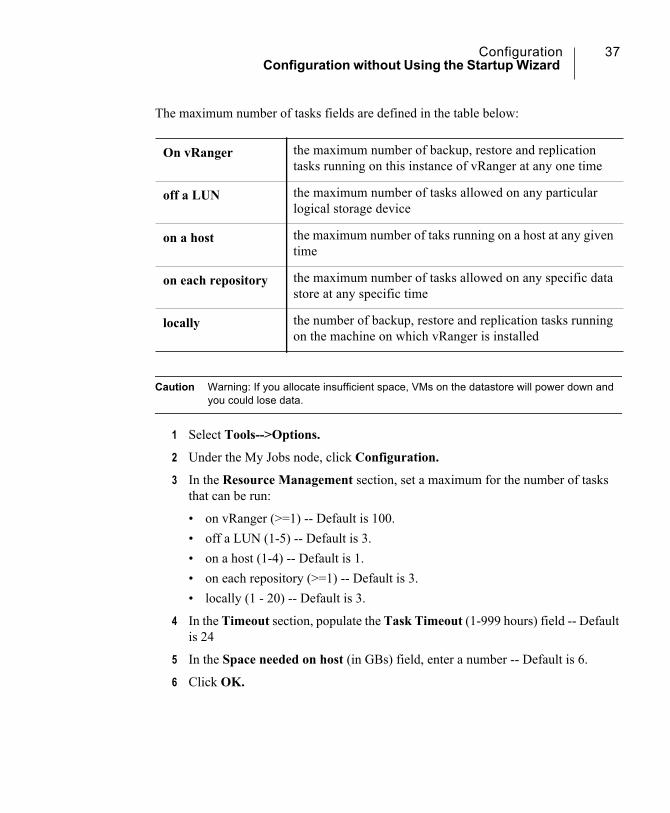
The maximum number of tasks fields are defined in the table below:
Caution Warning: If you allocate insufficient space, VMs on the datastore will power down and you could lose data.
1 Select Tools-->Options.
2 Under the My Jobs node, click Configuration.
3 In the Resource Management section, set a maximum for the number of tasks that can be run:
• on vRanger (>=1) -- Default is 100.• off a LUN (1-5) -- Default is 3.• on a host (1-4) -- Default is 1.• on each repository (>=1) -- Default is 3.• locally (1 - 20) -- Default is 3.
4 In the Timeout section, populate the Task Timeout (1-999 hours) field -- Default is 24
5 In the Space needed on host (in GBs) field, enter a number -- Default is 6.
6 Click OK.
On vRanger the maximum number of backup, restore and replication tasks running on this instance of vRanger at any one time
off a LUN the maximum number of tasks allowed on any particular logical storage device
on a host the maximum number of taks running on a host at any given time
on each repository the maximum number of tasks allowed on any specific data store at any specific time
locally the number of backup, restore and replication tasks running on the machine on which vRanger is installed

Configuration 38Import Legacy Jobs
Import Legacy JobsDue to the differences between vRanger 3x. and 5.0, legacy jobs can not be directly migrated to vRanger 5.0. Instead, job schedules are extracted from vRanger 3.x and imported into 5.0. After importing the job schedules, you will need to configure specific job options such as repository locations and email notifications.
The Legacy Job Import Wizard will detect if the legacy job is a Full or Differential, and import the job schedule with that setting. For Differential job, the Import Wizard will prompt you to configure retention policy and threshold settings.
There are certain settings for vRanger 3.x jobs that do not apply to jobs in 5.0. When legacy jobs are imported, these settings will be ignored.
• VCB - does not support VMware Consolidated Backup (VCB). Legacy jobs configured to use VCB will be imported as standard network jobs.
• VSS - uses a different quiescing method than vRanger 3.x. vRanger 5.0 uses the VSS component of VMware Tools, which is only available on hosts running VMware ESX Server 3.5 Update 2 or later. Legacy jobs configured to use VSS will be imported as standard jobs, with quiescing disabled by default.
To use the Legacy Job Import Wizard:
1 Go to Tools, and select the Legacy Job Import Wizard.

Configuration 39Import Legacy Jobs
2 Importing Legacy Jobs requires the us of an Extraction Utility. Click on Get Extraction Utility.
3 Once the utility has downloaded, click Browse to point to the file’s location.
4 Follow the steps outlined in the Wizard to import any vRanger 3.X jobs desired.

Configuration 40Configuration Options
Configuration OptionsThrough this dialog you can customize the basic settings that you selected in the Startup Wizard. You can access the Configuration Options dialog through Tools in the menubar. The left pane of the dialog is set up in a nested structure.
General • Database: Use the Database dialog to enter a database server address and a username.
• Email Server: On this dialog, you can enter an SMTP server address and verify the connection to the port (default is 25). You can confirm successful transmission to the email address listed in the From Address field by clicking the Send Test Email button.
• Email Address Book: Here you can add and manage the email addresses of recipients to whom you would like reports sent.
Note The New Email Address Section becomes the Edit Email Address section when you select a listing in the Email Addresses section of the dialog.
Licensing • Product License: On this dialog you can view the current product licensing details--the number of licensed CPUs, the number of days allowed by the current license, and the number of days remaining. From this dialog you can import a license when your current one expires or needs to be replaced.
• Host: Use this dialog to allocate licensing to the hosts you added to the system. Refer to the Host Licensing Summary to view the total number of CPU licenses you are allowed, the number of licenses being used, and the number of licenses that remain.

Configuration 41Configuration Options
My Jobs Configuration• Resource Management: This section gives you access to
task management information.-Maximum number of tasks running on vRanger (>=1)Default is 100.-Maximum number tasks running off of a LUN (1 - 5)Default is 3.-Maximum number tasks running on a host (1- 4)Default is 1.-Maximum number tasks running per repository (>=1)Default is 3.-Maximum number tasks running locally (1 - 20)Default is 3.
• Timeout: In this section, you can set the period of time after which a task times out. The range is between 1 and 999 hours.
• Space needed on Hosts: You can define the additional datastore space needed for snapshot growth during backup. Populate this field in GB--Minimum space needed on host (in GBs). The snapshot log file grows on the source while the VM is archived and copied to the destination. The default value is 6.
Warning: If you allocate insufficient space, VMs on the datastore will power down and you could lose data.

Index 42
Index
AAbout
vRanger 6
Cconfiguration
options 40with Startup Wizard 22without Startup Wizard 29
Ddocumentation
core 7feedback 7
IInstall vRanger on a New INstance of SQL
Express 13
SStartup Wizard
add repositories 26add vCenters 24configuring host credentials 25email notification 28license hosts 26select a license 23
support 11
Ttechnical support 11text conventions 7
VvRanger Documentation Suite 6