voki presentation
DESCRIPTION
Voki Presentation. Technology Summit 2010 Presented by Kim Hinton. Go to www.voki.com. First time users will need to create an account. In the upper right-hand corner of the screen click on the register button. - PowerPoint PPT PresentationTRANSCRIPT

Voki Presentation
Technology Summit 2010Presented by Kim Hinton
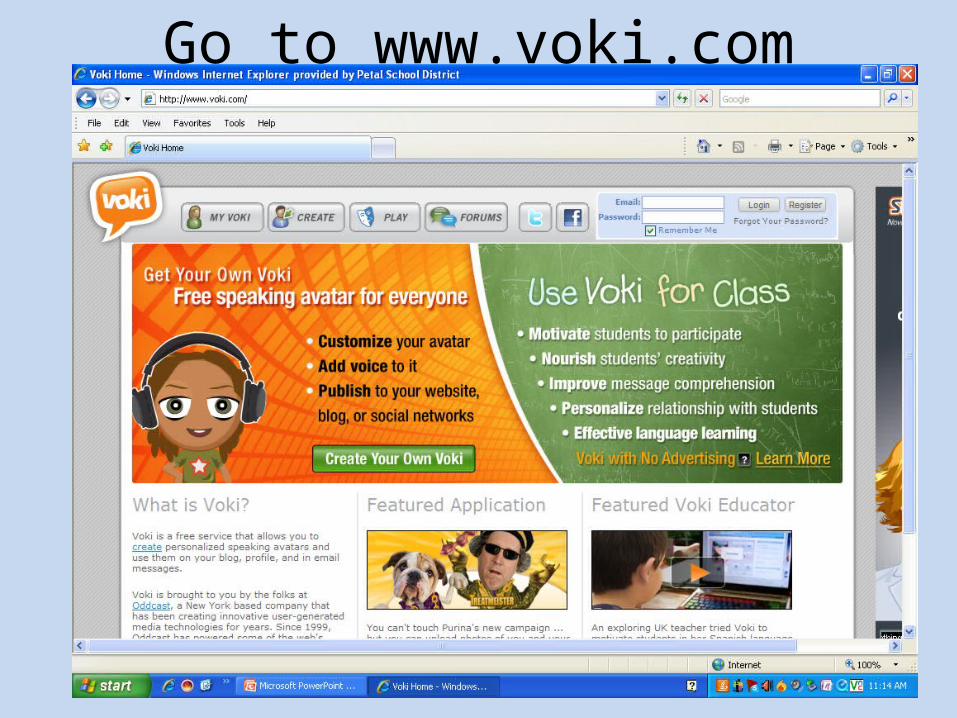
Go to www.voki.com
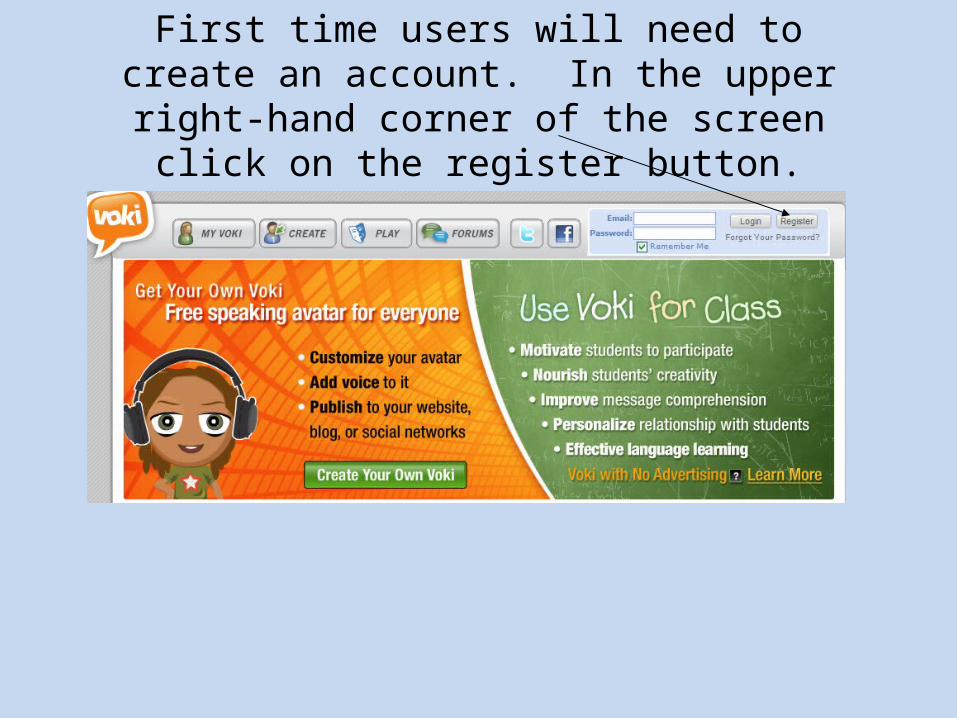
First time users will need to create an account. In the upper right-hand corner of the screen click on
the register button.
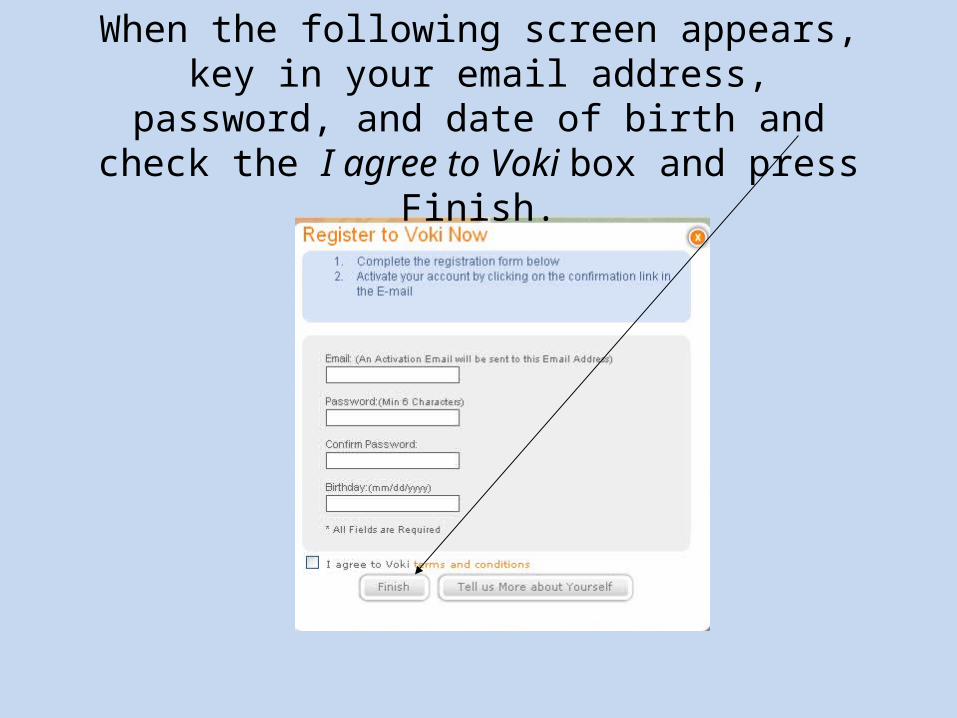
When the following screen appears, key in your email address, password, and date of birth and check the I agree to Voki box and press Finish.
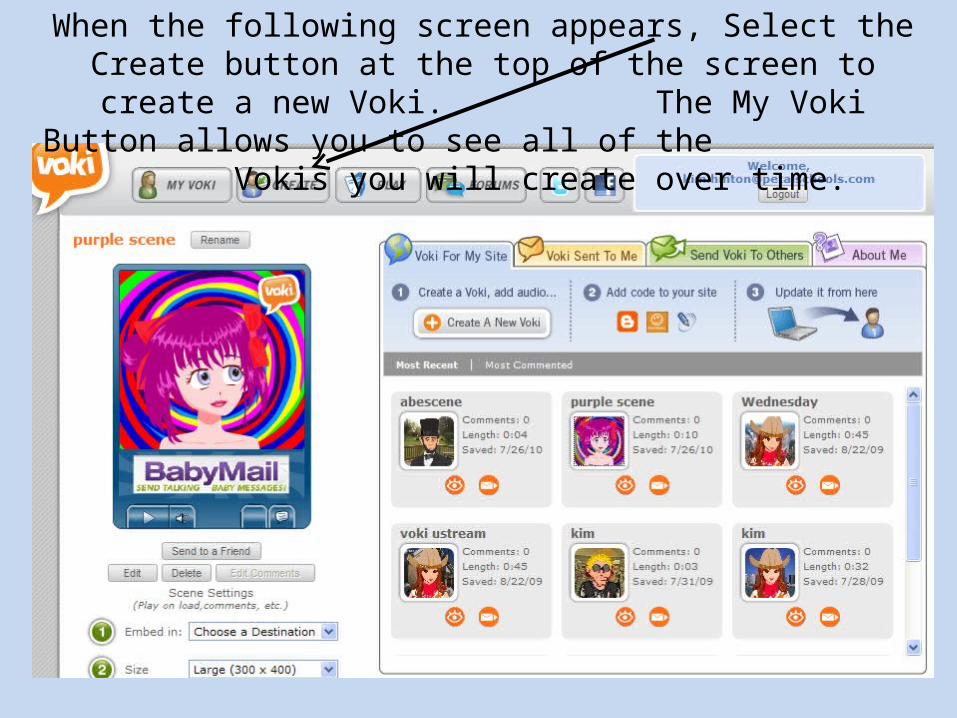
When the following screen appears, Select the Create button at the top of the screen to create a new Voki. The My Voki Button
allows you to see all of the Vokis you will create over time.
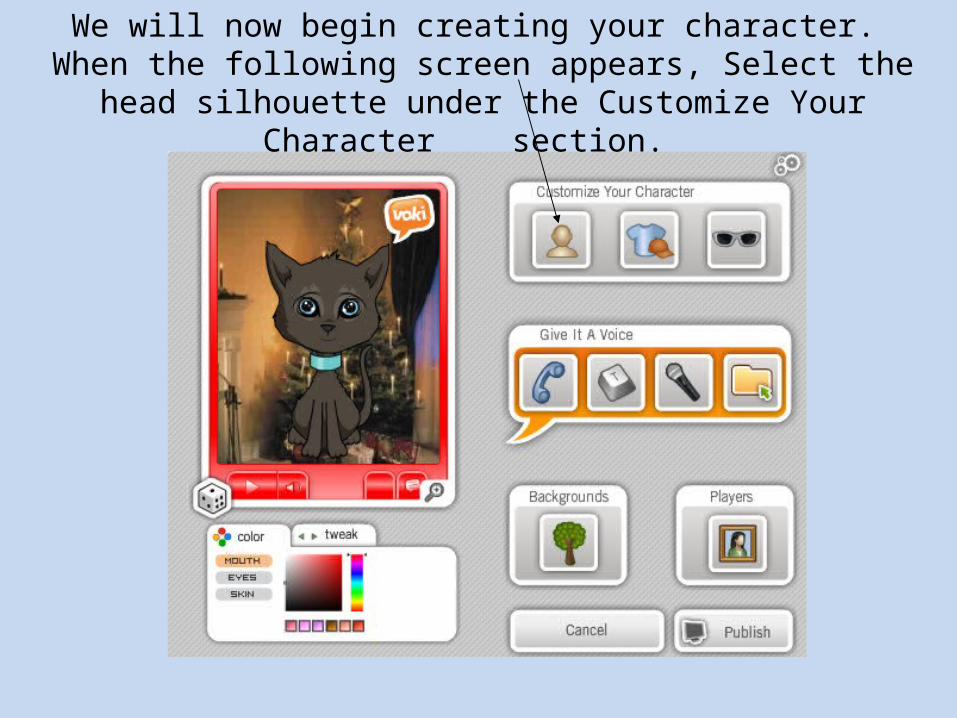
We will now begin creating your character. When the following screen appears, Select the head silhouette under the Customize
Your Character section.
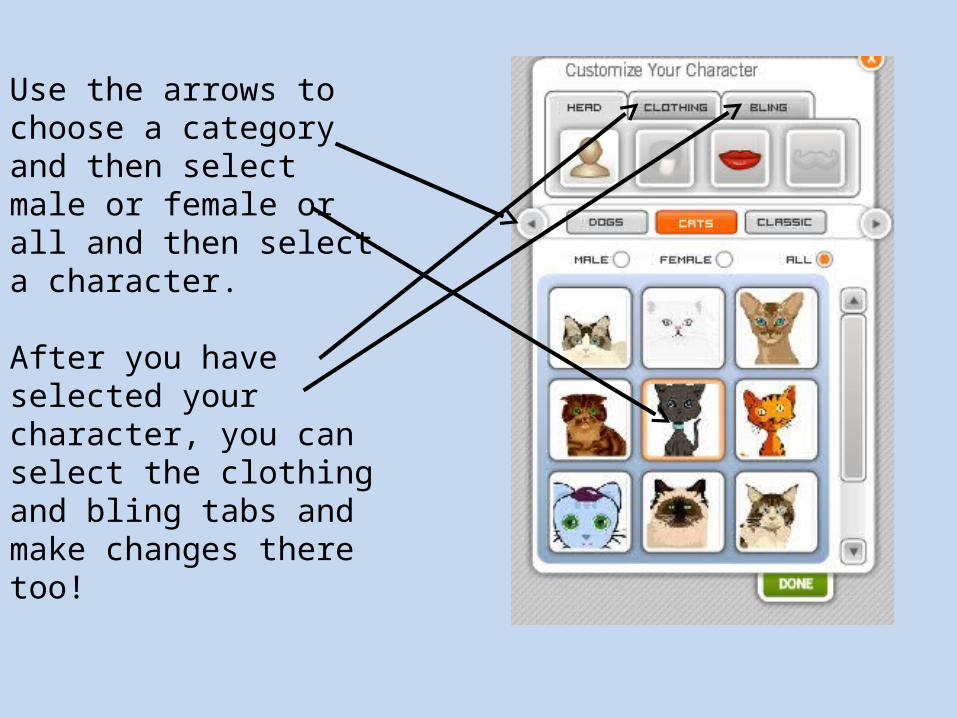
Use the arrows to choose a category and then select male or female or all and then select a character.
After you have selected your character, you can select the clothing and bling tabs and make changes there too!
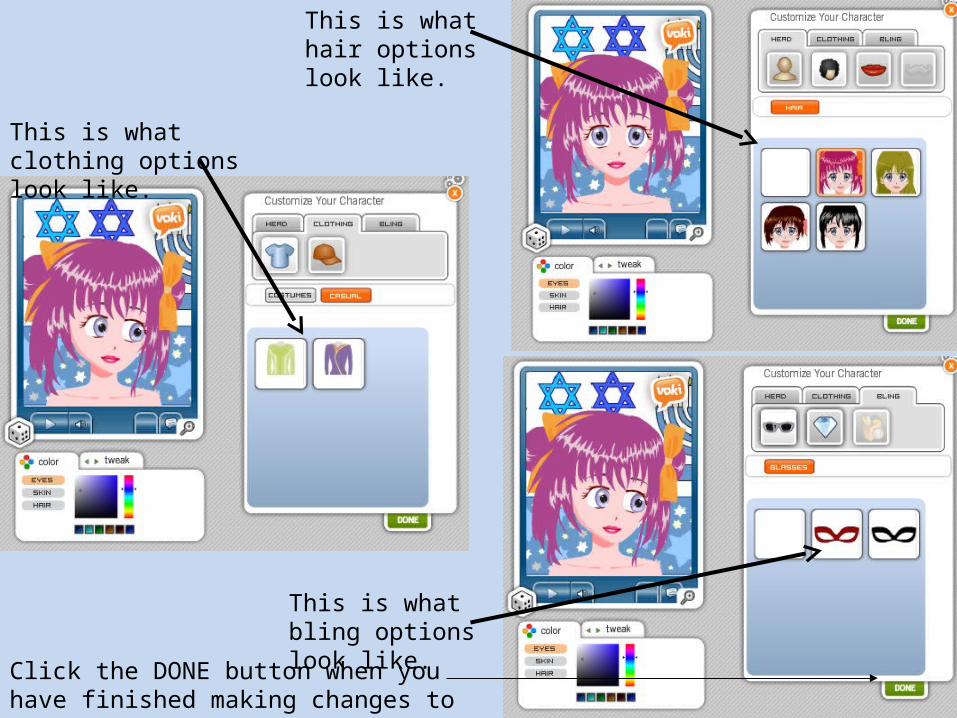
This is what hair options look like.
This is what clothing options look like.
This is what bling options look like.
Click the DONE button when you have finished making changes to your character.
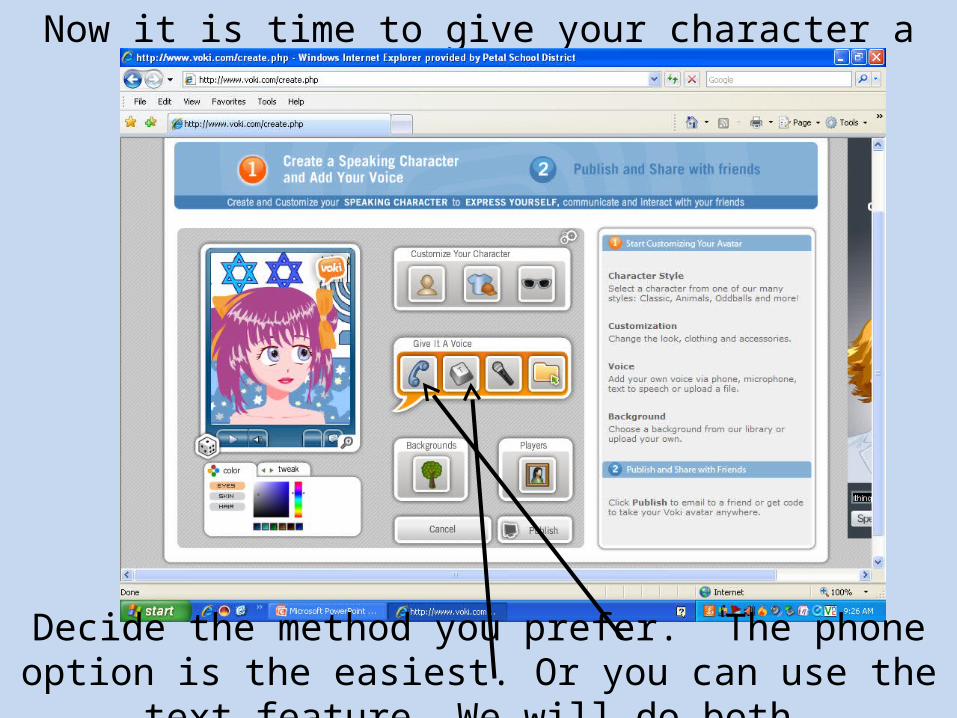
Now it is time to give your character a voice.
Decide the method you prefer. The phone option is the easiest. Or you can use the text feature. We will do both.
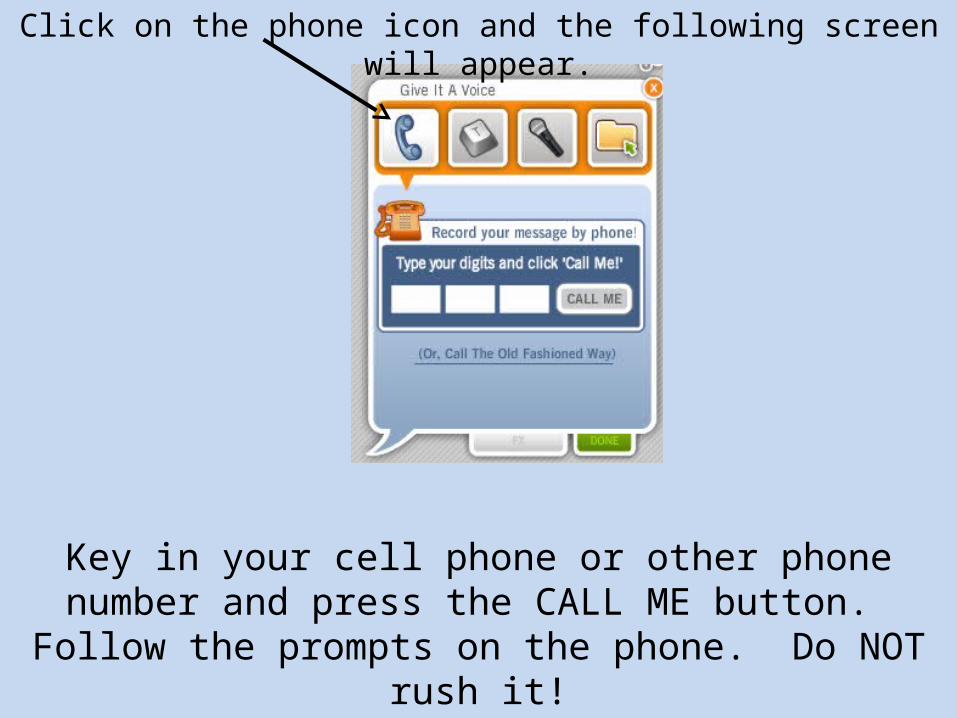
Click on the phone icon and the following screen will appear.
Key in your cell phone or other phone number and press the CALL ME button. Follow the prompts on the phone. Do NOT
rush it!
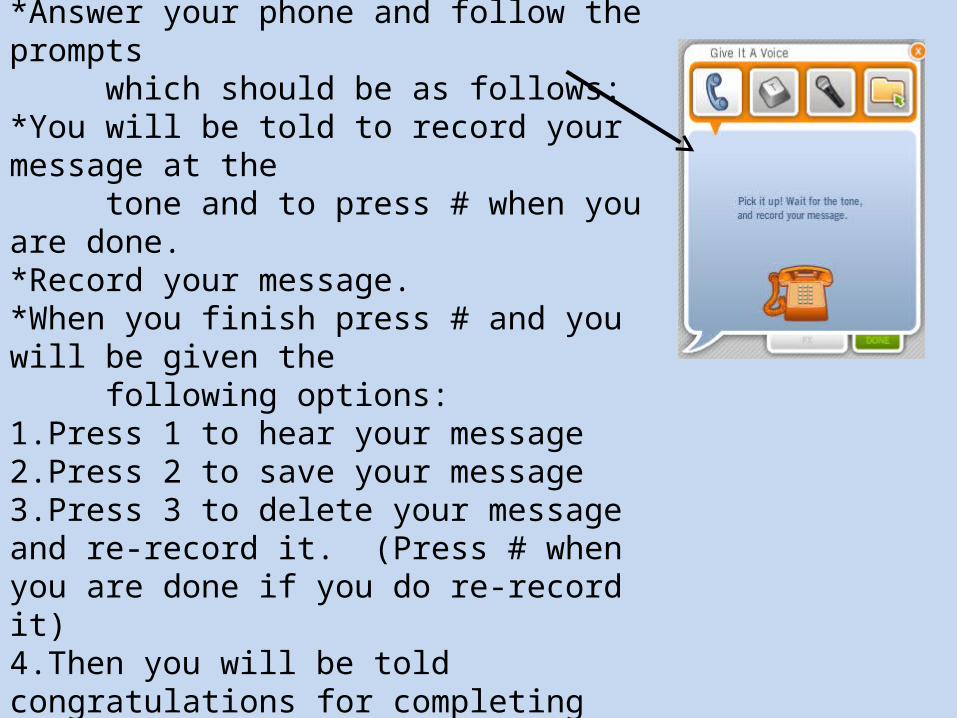
*Your screen will change to what you see. *Answer your phone and follow the prompts
which should be as follows:*You will be told to record your message at the
tone and to press # when you are done.*Record your message. *When you finish press # and you will be given the
following options:1.Press 1 to hear your message2.Press 2 to save your message3.Press 3 to delete your message and re-record it. (Press # when you are done if you do re-record it)4.Then you will be told congratulations for completing your message. It will be available for use.
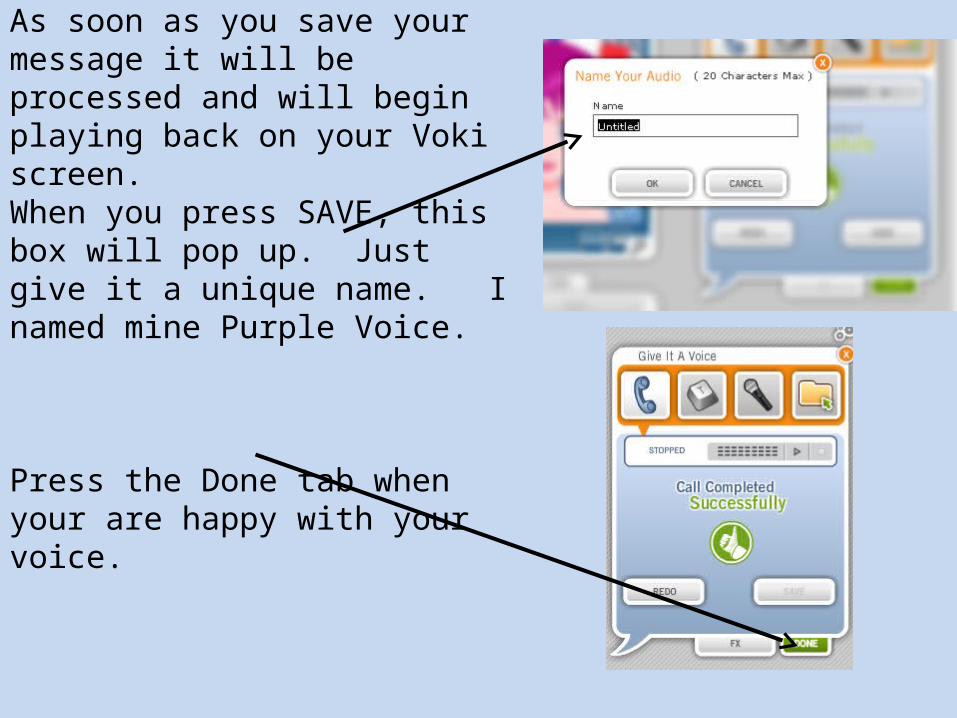
As soon as you save your message it will be processed and will begin playing back on your Voki screen.When you press SAVE, this box will pop up. Just give it a unique name. I named mine Purple Voice.
Press the Done tab when your are happy with your voice.
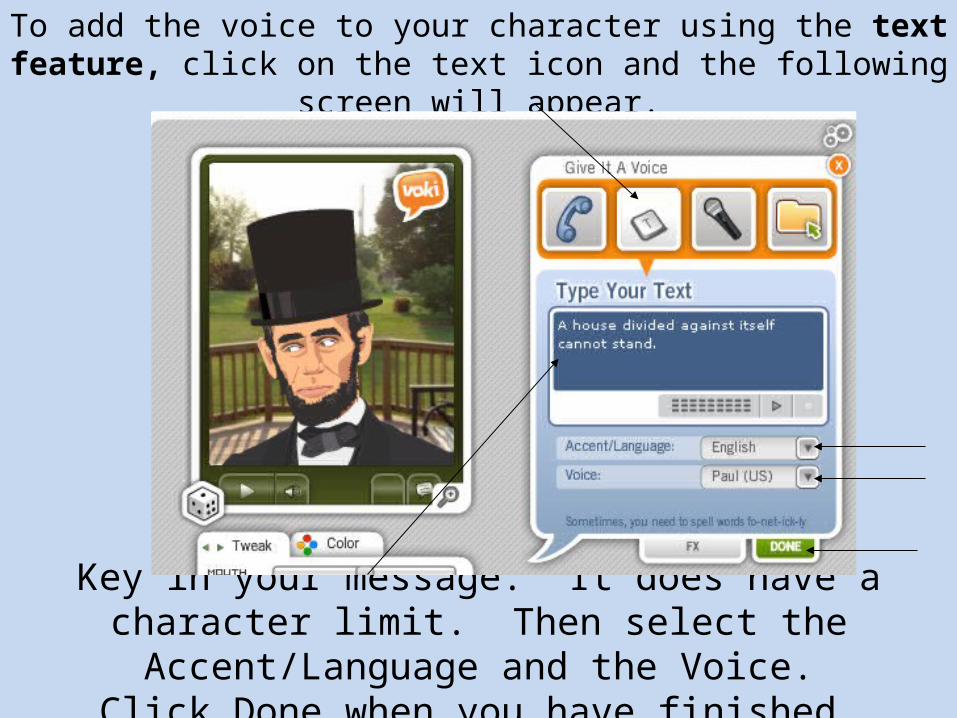
To add the voice to your character using the text feature, click on the text icon and the following screen will appear.
Key in your message. It does have a character limit. Then select the Accent/Language and the Voice.
Click Done when you have finished.
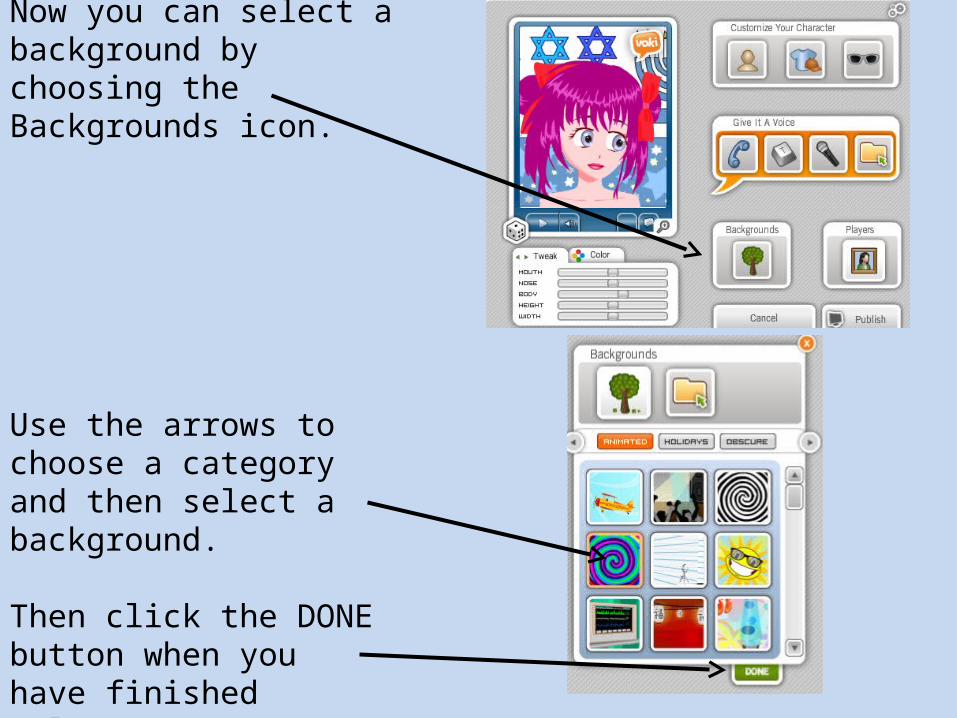
Now you can select a background by choosing the Backgrounds icon.
Use the arrows to choose a category and then select a background.
Then click the DONE button when you have finished selecting your background.
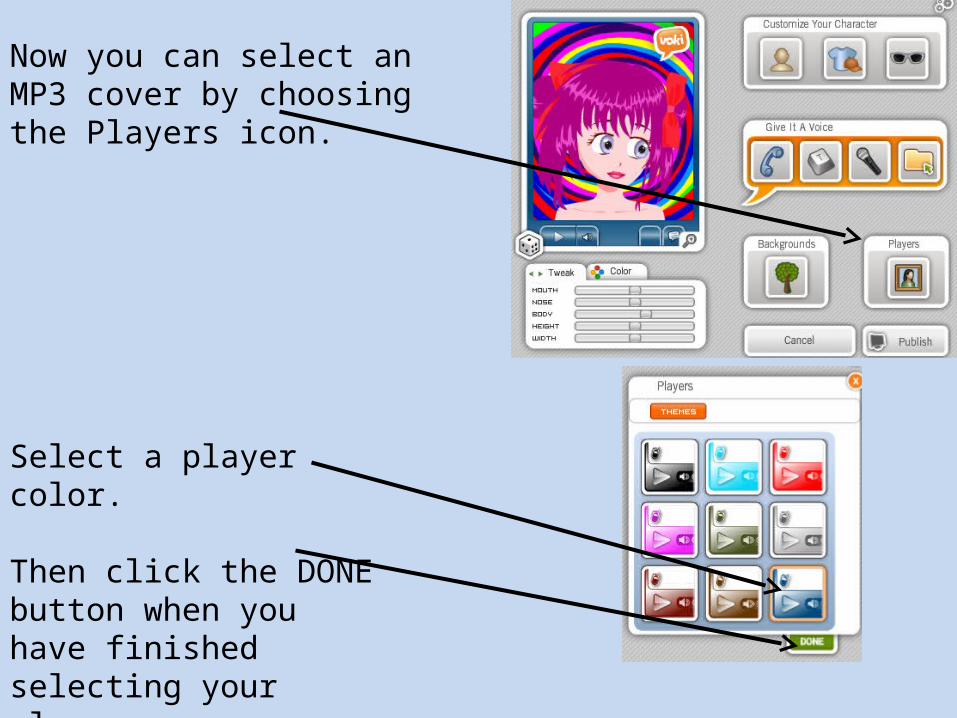
Now you can select an MP3 cover by choosing the Players icon.
Select a player color.
Then click the DONE button when you have finished selecting your player.
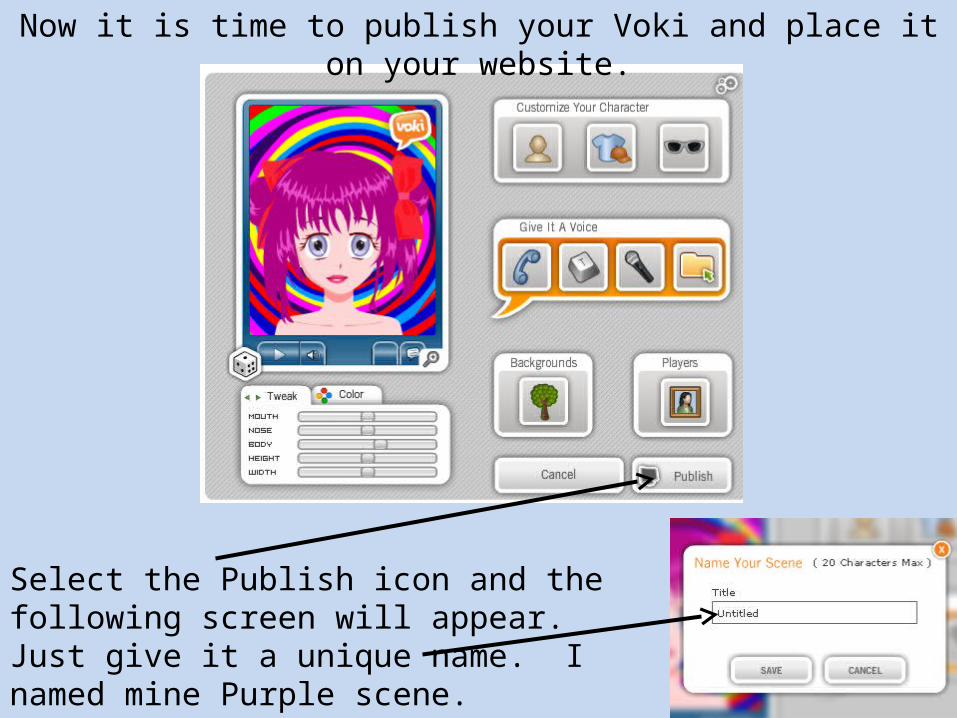
Now it is time to publish your Voki and place it on your website.
Select the Publish icon and the following screen will appear. Just give it a unique name. I named mine Purple scene.
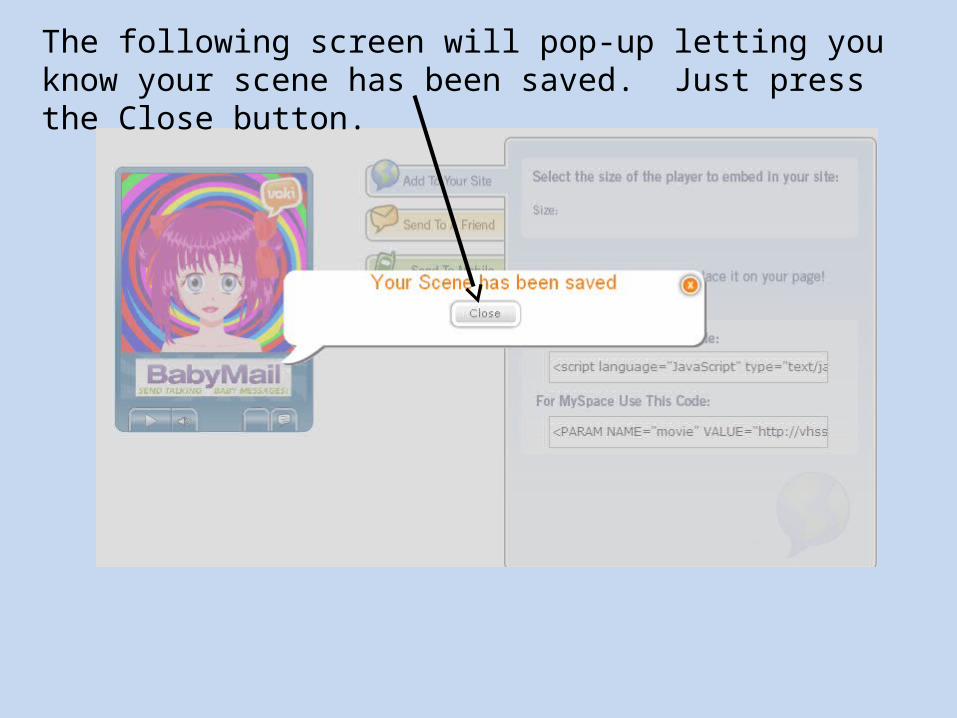
The following screen will pop-up letting you know your scene has been saved. Just press the Close button.
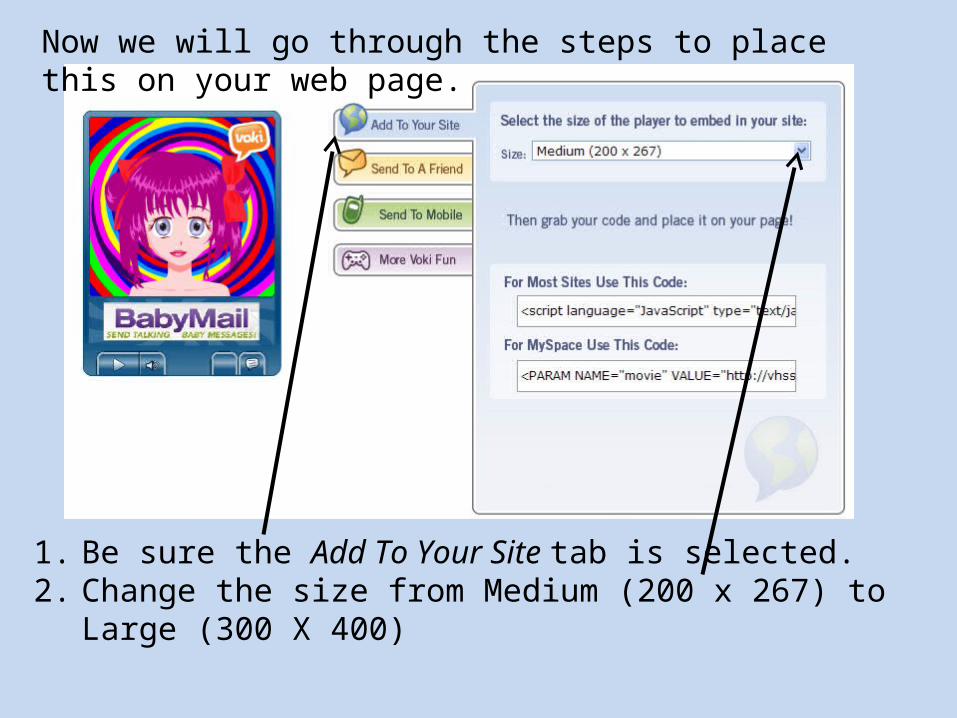
Now we will go through the steps to place this on your web page.
1. Be sure the Add To Your Site tab is selected.2. Change the size from Medium (200 x 267) to Large (300 X 400)

1. Click in the “For Most Sites Use This Code:” box. Highlight the entire character sequence.
2. Right click and select Copy, then paste that code into a word document for safe keeping so we can place it in your web page.
<script language="JavaScript" type="text/javascript" src="http://vhss-d.oddcast.com/voki_embed_functions.php"></script><script language="JavaScript" type="text/javascript">AC_Voki_Embed(300,400,"bb9138106051e3c564ce63d886899f04",2640614, 1, "", 0);</script><BR><a href="http://www.voki.com/"><b>Get a Voki now!</b></a><BR><BR>
Here is what mine looked like! ( This is the java code from your voki)
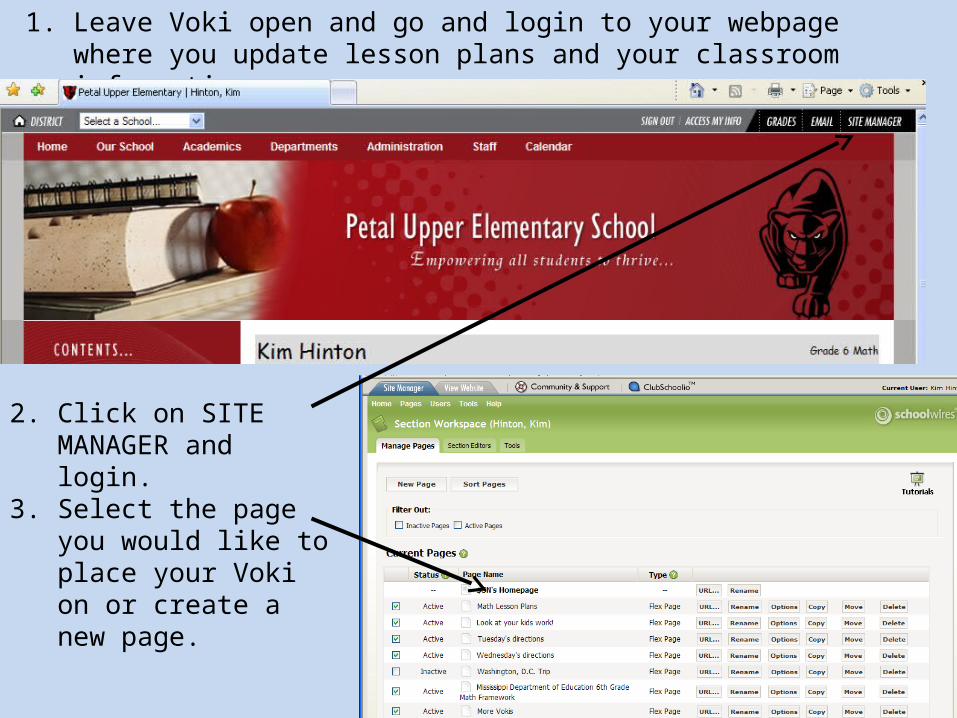
1. Leave Voki open and go and login to your webpage where you update lesson plans and your classroom information.
2. Click on SITE MANAGER and login.
3. Select the page you would like to place your Voki on or create a new page.
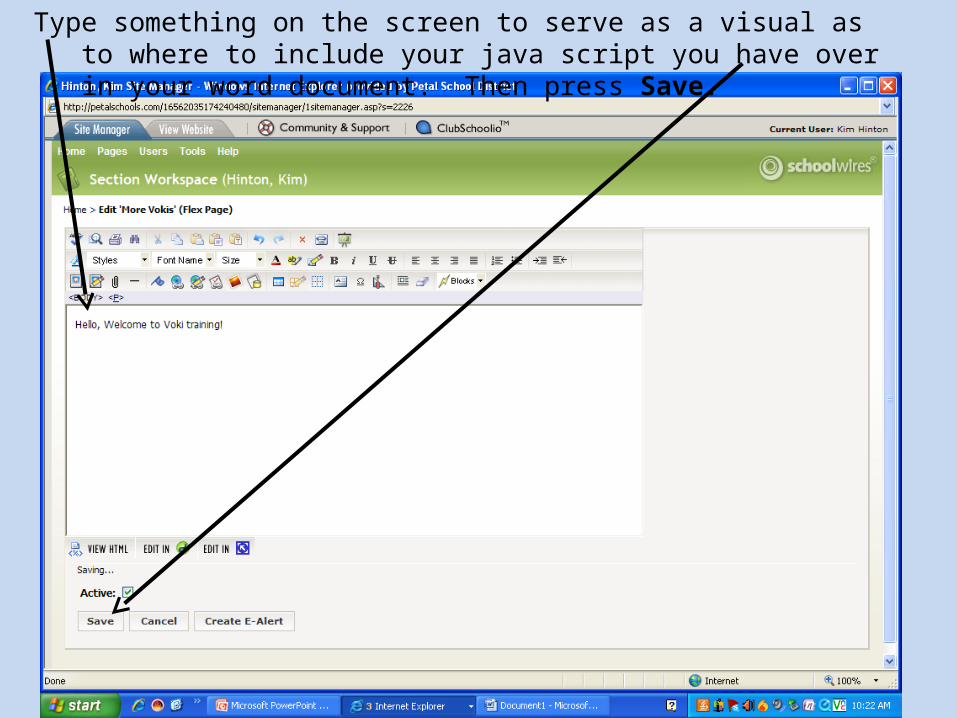
Type something on the screen to serve as a visual as to where to include your java script you have over in your word document. Then press Save.
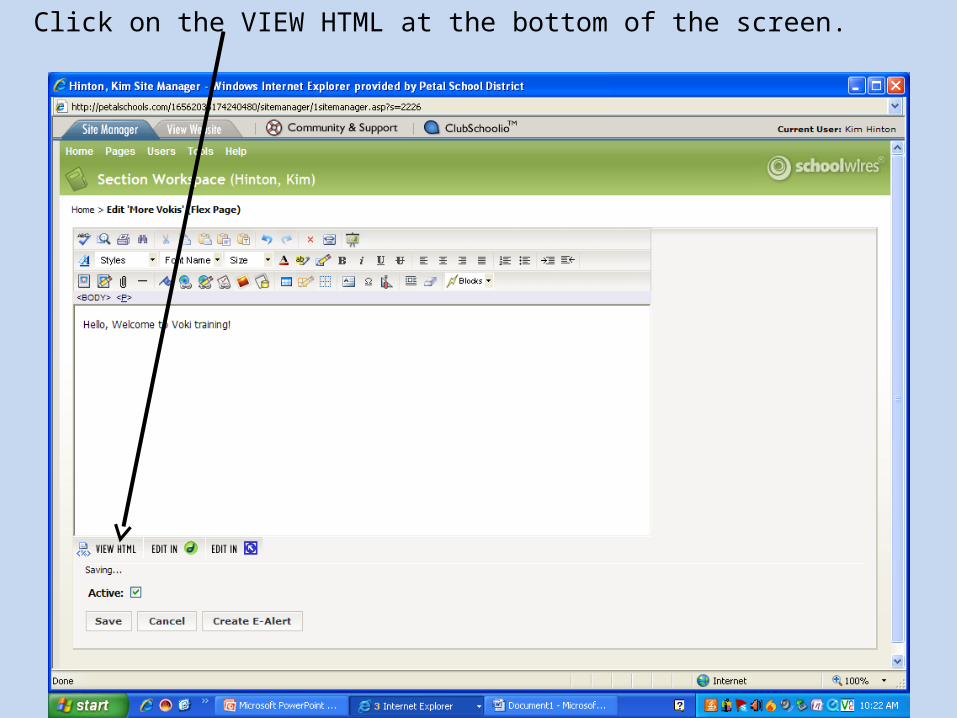
Click on the VIEW HTML at the bottom of the screen.
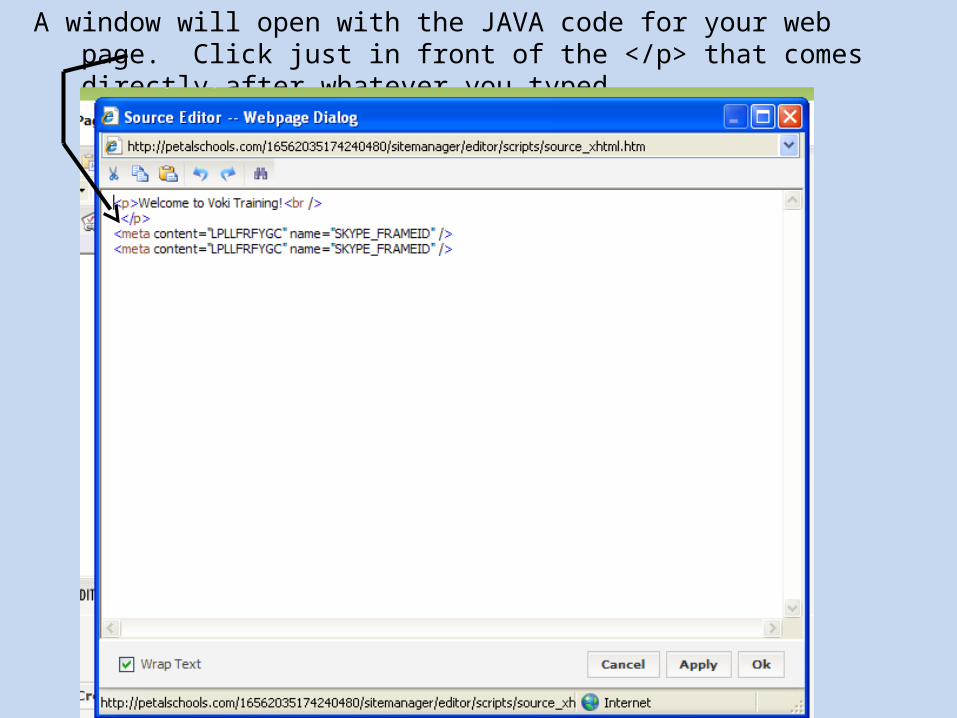
A window will open with the JAVA code for your web page. Click just in front of the </p> that comes directly after whatever you typed.
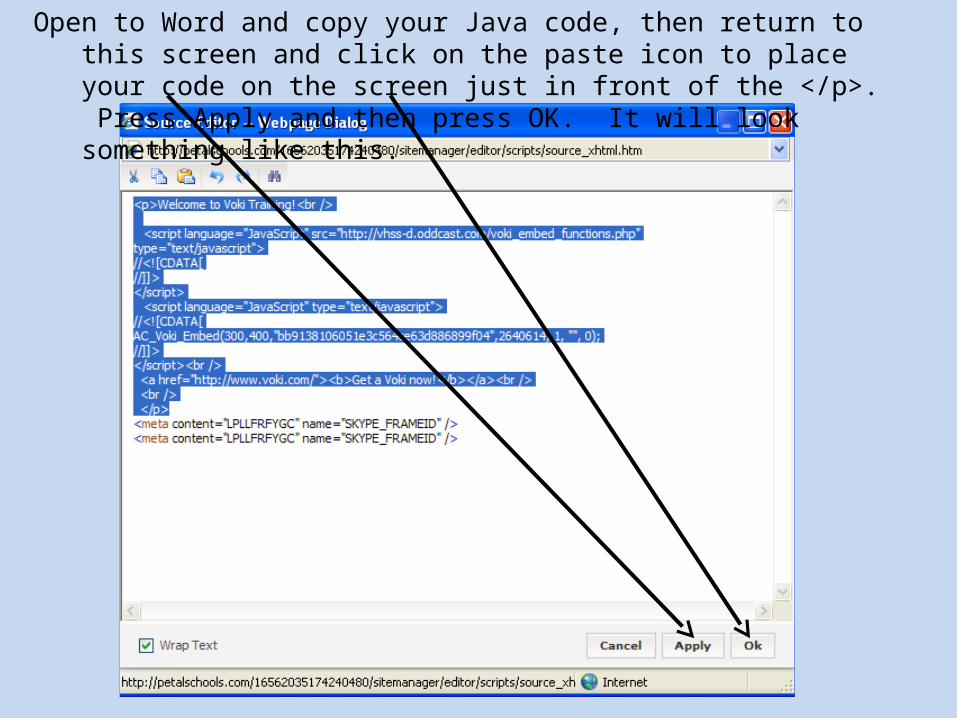
Open to Word and copy your Java code, then return to this screen and click on the paste icon to place your code on the screen just in front of the </p>. Press Apply and then press OK. It will look something like this.
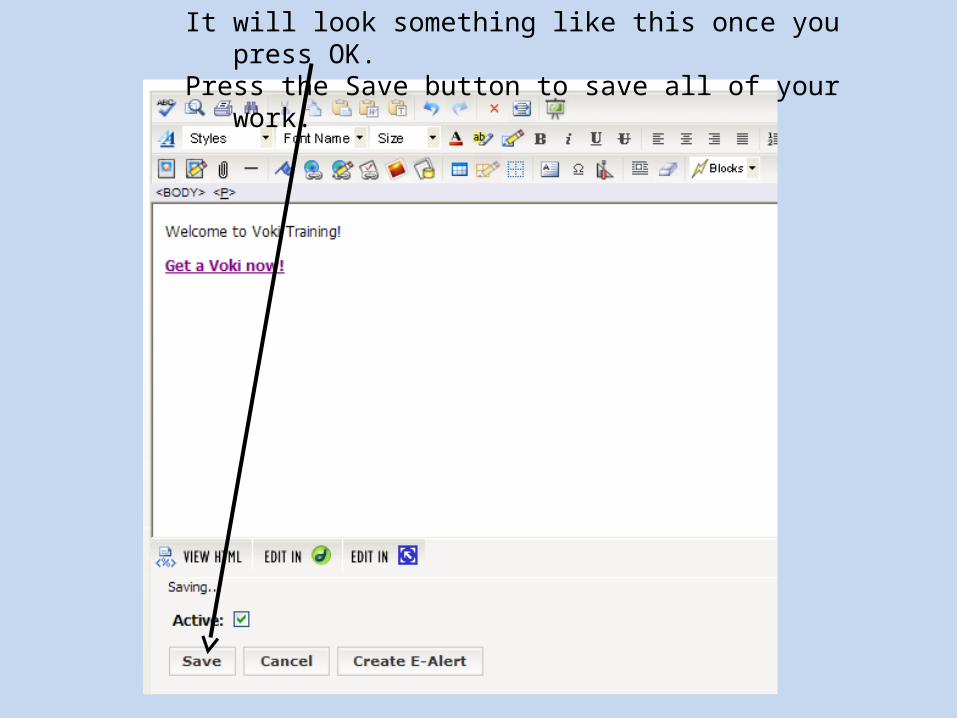
It will look something like this once you press OK.Press the Save button to save all of your work.
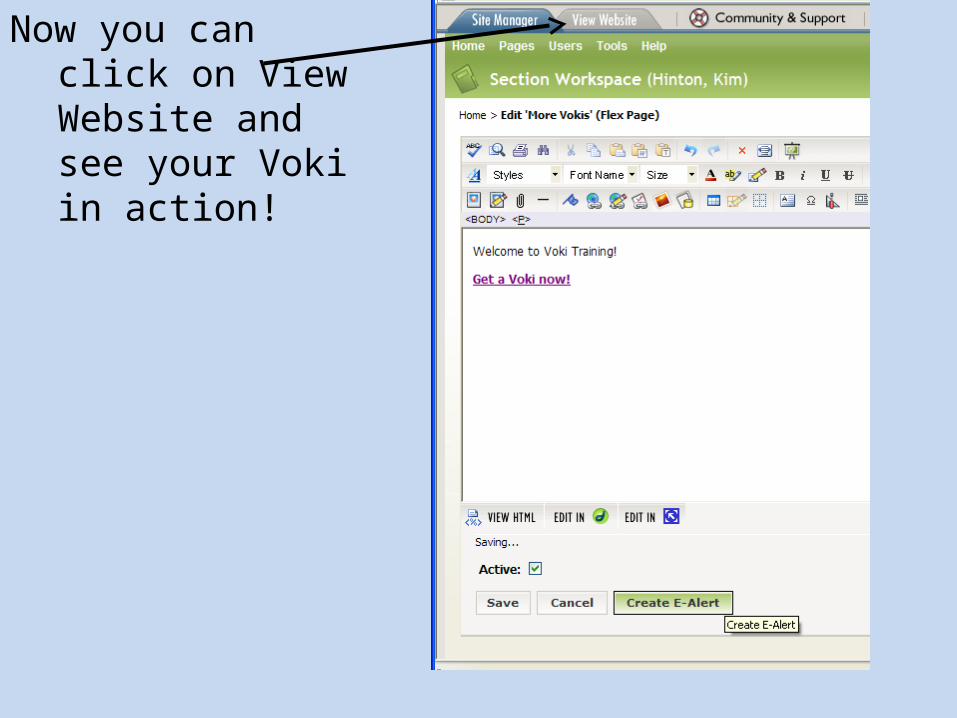
Now you can click on View Website and see your Voki in action!
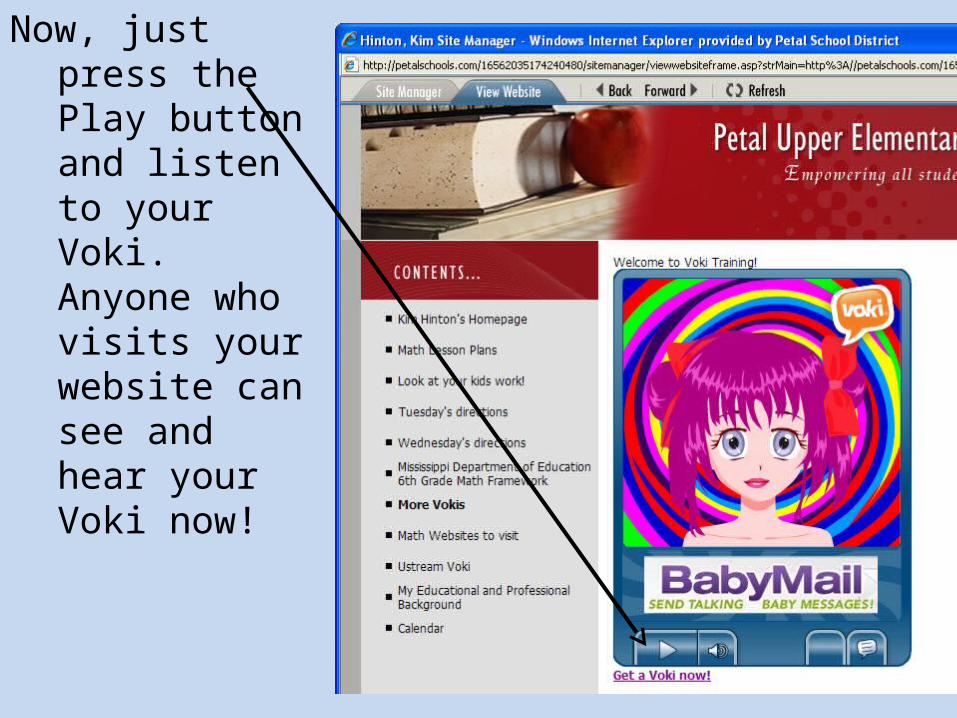
Now, just press the Play button and listen to your Voki. Anyone who visits your website can see and hear your Voki now!
You can close out the word document where you had placed your Java Code, you don’t need it now.
You can sign out of your website because your work is now saved.
You can log out of Voki. Your Voki will now show up under the MY Voki tab when you log back into Voki.
IM or Email me if you need help doing this on your own. It is fun and my students have enjoyed it!
[email protected] 7120