volkswagen steering wheel control interface · vw fusca 2005 - 2011 vw touareg 2010> vw up! 2011...
TRANSCRIPT
www.connects2.com
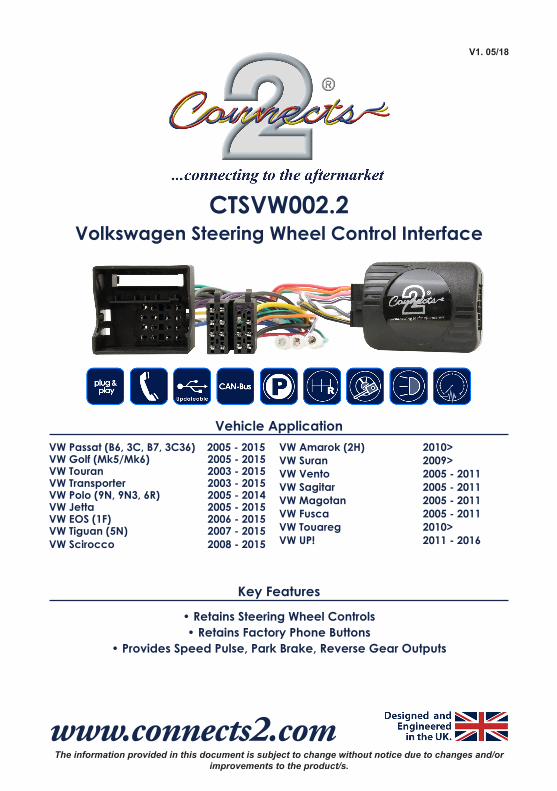
CTSVW002.2Volkswagen Steering Wheel Control Interface
Vehicle ApplicationVW Passat (B6, 3C, B7, 3C36) 2005 - 2015VW Golf (Mk5/Mk6) 2005 - 2015VW Touran 2003 - 2015VW Transporter 2003 - 2015VW Polo (9N, 9N3, 6R) 2005 - 2014VW Jetta 2005 - 2015VW EOS (1F) 2006 - 2015VW Tiguan (5N) 2007 - 2015VW Scirocco 2008 - 2015
Key Features
• Retains Steering Wheel Controls• Retains Factory Phone Buttons
• Provides Speed Pulse, Park Brake, Reverse Gear Outputs
The information provided in this document is subject to change without notice due to changes and/or improvements to the product/s.
V1. 05/18
VW Amarok (2H) 2010>VW Suran 2009>VW Vento 2005 - 2011VW Sagitar 2005 - 2011VW Magotan 2005 - 2011VW Fusca 2005 - 2011VW Touareg 2010>VW UP! 2011 - 2016
www.connects2.com2
ABOUT THIS PRODUCT
CTSVW002.2CAN-Bus Steering Wheel Control Interface for Volkswagen vehicles with RCD200/300/310/ 500/510 original stereo and Quadlock connector
Read the manual prior to installation. Technical knowledge is necessary for installation. The place of installation must be free of moisture and away from heat sources. Please ensure that the correct tools are using during the installation to avoid damage to the vehicle or product. Connects2 can not be held responsible for the installation of this product.
WIRING COLOUR CODESPurple Right Rear Speaker +Purple/Black Right Rear Speaker -Green Left Rear Speaker +Green/Black Left Rear Speaker -Grey Right Front Speaker +Grey/Black Right Front Speaker -White Left Front Speaker +White/Black Left Front Speaker -
Yellow Permanent 12VBlack GroundRed Ignition 12VOrange IlluminationPink Speed PulseGreen Park BrakePurple/White Reverse Gear
PRIOR TO INSTALLATION
TECHNICAL SUPPORTConnects2 Ltd. want to provide a fast and suitable resolution to any problems encountered during installation of this product. To get in touch with our dedicated technical support team, please fill in a ticketat support.connects2.com and provide as much information as possible.
www.connects2.com 3
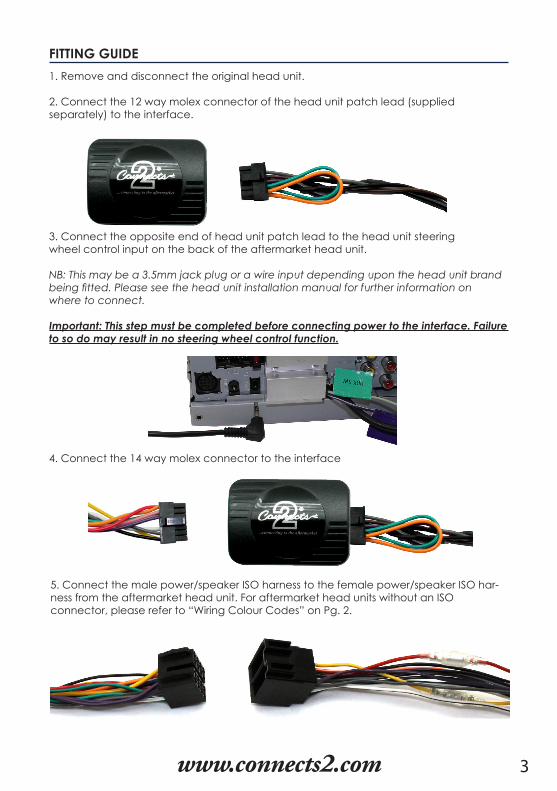
FITTING GUIDE1. Remove and disconnect the original head unit.
2. Connect the 12 way molex connector of the head unit patch lead (supplied separately) to the interface.
3. Connect the opposite end of head unit patch lead to the head unit steeringwheel control input on the back of the aftermarket head unit.
NB: This may be a 3.5mm jack plug or a wire input depending upon the head unit brand being fitted. Please see the head unit installation manual for further information onwhere to connect.
Important: This step must be completed before connecting power to the interface. Failure to so do may result in no steering wheel control function.
4. Connect the 14 way molex connector to the interface
5. Connect the male power/speaker ISO harness to the female power/speaker ISO har-ness from the aftermarket head unit. For aftermarket head units without an ISO connector, please refer to “Wiring Colour Codes” on Pg. 2.
www.connects2.com4
FITTING GUIDE
STEERING WHEEL CONTROL FUNCTIONALITY
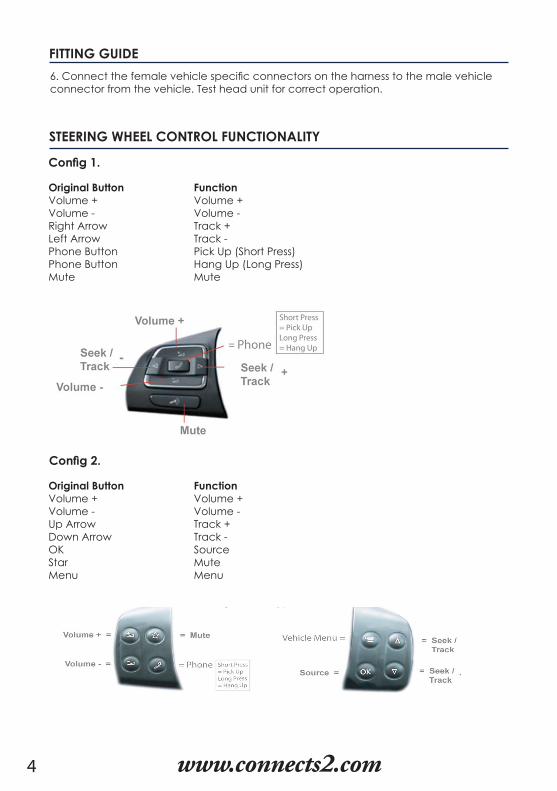
6. Connect the female vehicle specific connectors on the harness to the male vehicle connector from the vehicle. Test head unit for correct operation.
FunctionVolume +Volume -Track +Track -Pick Up (Short Press)Hang Up (Long Press)Mute
Original ButtonVolume +Volume -Right ArrowLeft ArrowPhone ButtonPhone ButtonMute
FunctionVolume +Volume -Track +Track -SourceMuteMenu
Original ButtonVolume +Volume -Up ArrowDown ArrowOKStarMenu
Config 1.
Config 2.