vpl-fhz55 vpl-fh31/36 how to adjust “edge blending” beta2 version sec.2, planning dept. visual...
TRANSCRIPT

VPL-FHZ55VPL-FH31/36
How to adjust “Edge Blending”
Beta2 version
Sec.2, Planning Dept.
Visual Presentation Solutions Business Div.
Professional Solutions Group
Sony Corporation

Contents
1. Adjusting flow outline
2. Position of projectors
3. Adjust “Color Matching”
4. Edge Blending
5. Adjust “Zone Black Level Adj.”
6. Blend Gamma

0.1 Recommendation of PC and Graphic Card
• PC : Tower PC with extra slot.– CPU:Core i7 or more. Memory:4GB or more
• OS : Windows 7– Win7 only support overlapping multi display function
• Graphic Card– Matrox M9120 PCIe x16 (Blending 2 projectors only)– Matrox M9148 LP PCIe x16 (Blending 4 projectors)
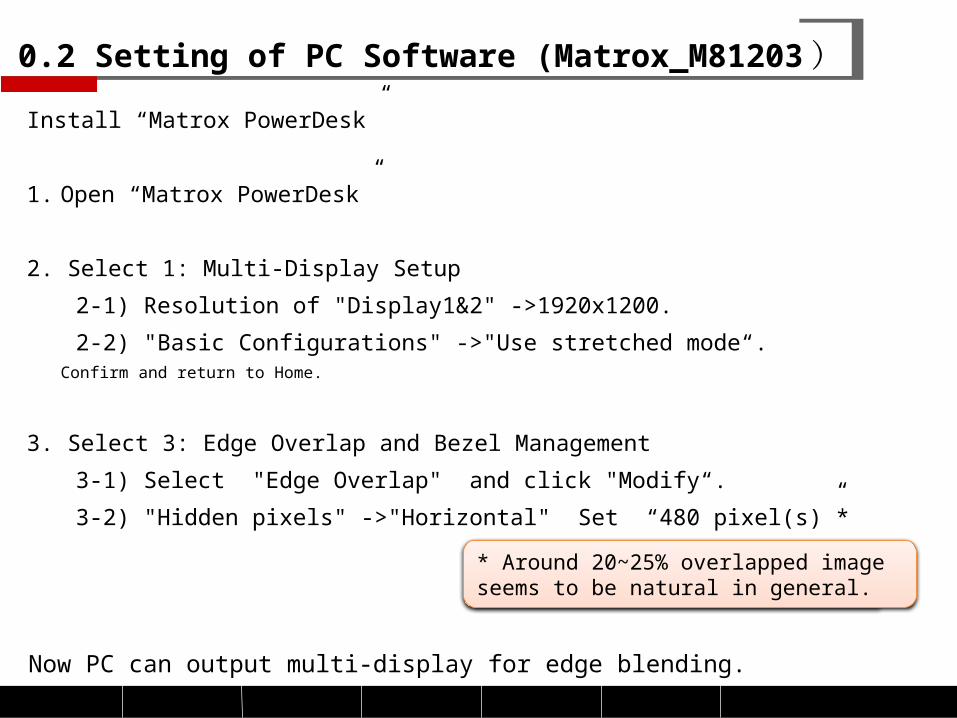
0.2 Setting of PC Software (Matrox_M81203 )
Install “Matrox PowerDesk”
1. Open “Matrox PowerDesk”
2. Select 1: Multi-Display Setup
2-1) Resolution of "Display1&2" ->1920x1200.
2-2) "Basic Configurations" ->"Use stretched mode“.Confirm and return to Home.
3. Select 3: Edge Overlap and Bezel Management
3-1) Select "Edge Overlap" and click "Modify“.
3-2) "Hidden pixels" ->"Horizontal" Set “480 pixel(s)”*
Now PC can output multi-display for edge blending.
* Around 20~25% overlapped image seems to be natural in general.

0.3 Reference
InfoComm2013 FHZ55 tower setting Full HD x3 contents, Not use edge blending function (function is capable)
• PC : Tower PC with extra slot– Motherboard : MSi X79A-GD65
– CPU : Intel i7-3930k @ 3.2ghz
– RAM : 16GB Corsair Vengeance RAM @ DDR3 PC1600
• OS : Win 7 Ultimate• Graphic Card
– Nvidia GTX 680 GPU
• Others– Adaptec 6805E RAID controller– 1 TB Crucial SSD RAID (2 x 256GB, 1 x 512GB)– 12 TB WD GREEN (WD30EZRX) RAID (4 x 3TB)– Corsair HX850 PSU

1. Adjusting flow outline
Calculate the position of projectors
Set edge blending width in PC software attached in the graphic board
Set a different ID number for each projector (ID:1~3)
Set “Picture Menu” of each projector as same setting.Picture Mode : Standard/Color Temp/Gamma Mode : Graphics2 is better
Adjust color and brightness of each projector by using “Color Matching.”
Set the positioning of Edge Blending in order that the green line of one projector overlap with the red line of the other projector.
Adjust the black level of no blending zone using “Zone Black Level Adj.”
Set “Blend Gamma” of blending zone.

2. Position of projectors
• What is your screen size ?– Recommended screen aspect w 3,360 : h 1,200
i.e) Screen size of demo roomW 4,100mm x H 1,610mm
Overlap area 480 dot
12
00
1920
1920
3360
Image size : 4,100mm x 1,464mm
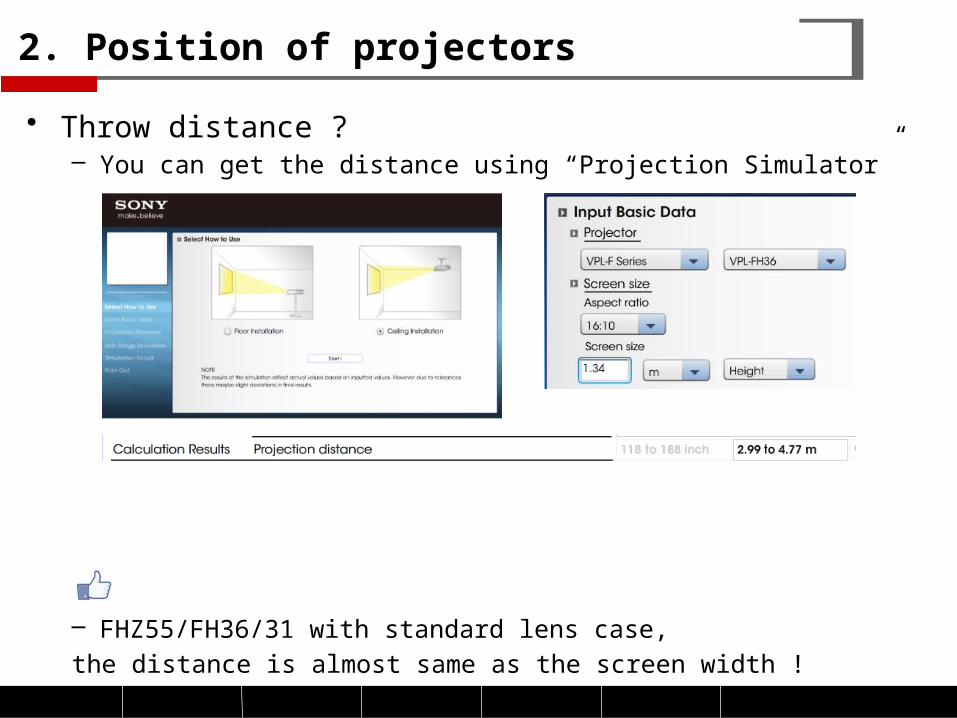
• Throw distance ?– You can get the distance using “Projection Simulator”
– FHZ55/FH36/31 with standard lens case,the distance is almost same as the screen width !
2. Position of projectors

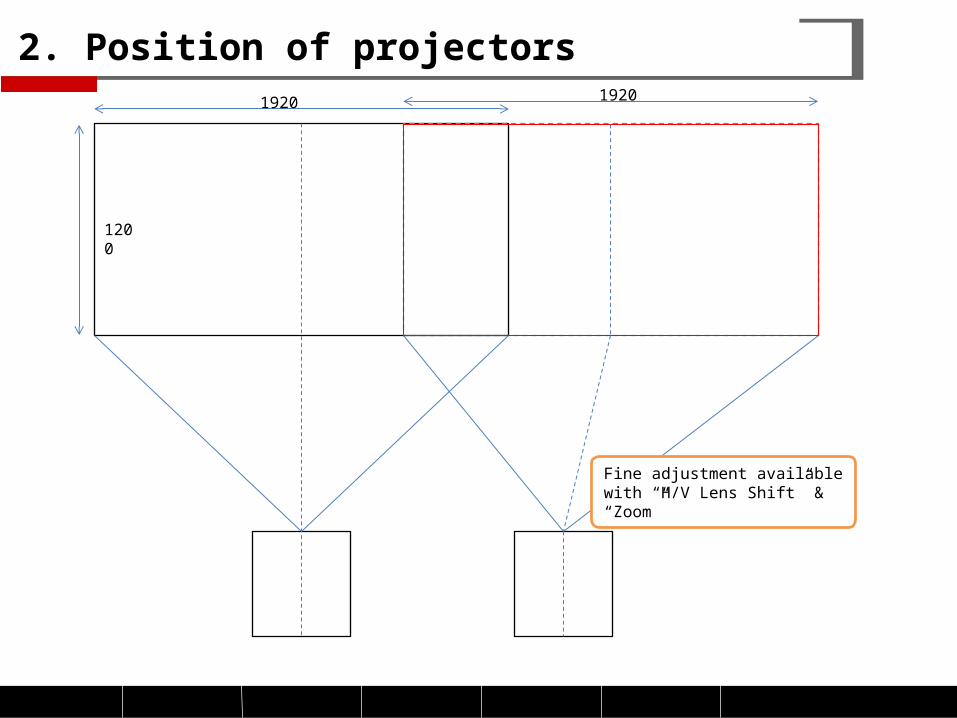
1920 1920
1200
Keep projector body level andright angle to screen
Fine adjustment available with “H/V Lens Shift” & “Zoom”
960
2. Position of projectors

1920 1920
1200
2. Position of projectors
1920 1920
1200
Fine adjustment available with “H/V Lens Shift” & “Zoom”
2. Position of projectors

• Positioning is most difficult in edge blending process– Ceiling mount is better than desktop setting. If someone touch them, the position of
projector would change on the desktop.– Vertical and horizontal lens shift : “0” is ideal. If you use shift function widely, we can’t
project correct rectangle especially horizontal lens shift. It would be a little distorted. So we can’t lap over the red and green line.
• Screen– Don’t use silver screen because we can realize the difference of brightness depend on
the standing point.– Check the screen before you adjusting.
• Set the same dot numbers of overlap zone (edge blending width) as PC software and projector.– PC software may be able to display the adjusting test pattern. So please check it.
2. Position of projectors

3. Adjust “Color Matching”
• What is “Color Matching”– For correcting the brightness and color of the whole projected image
manually from the signal level in six steps, Lv1(black) ~ Lv6(white).• Brightness
• Color (“G” is fixed, adjust “R” and “B”)
• How to adjust– We can only decrease the brightness and color in Lv6(Highest
level). So adjust higher brightness and color projector to lower one.• It is easy to adjust it by using “Incident Color Meter” or such devices.
• Once you set “Picture Menu” of each projector as same setting, it’s easy to adjust them.
– Adjust from Lv6 to Lv2. Don’t need to adjust Lv1.
– Had better to adjust color matching before adjusting edge blending.
• When you adjust color matching, you should set each projector not to overlap. (zooming out is useful)
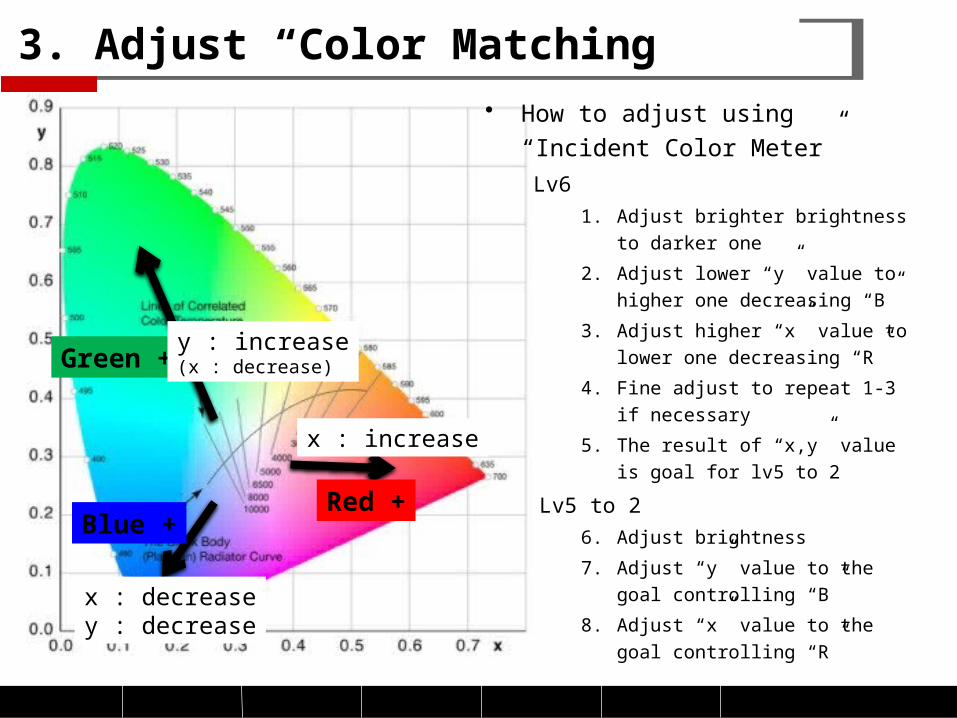
Green +
Red +Blue +
y : increase(x : decrease)
x : increase
x : decreasey : decrease
3. Adjust “Color Matching”• How to adjust using “Incident
Color Meter”
Lv6
1. Adjust brighter brightness to darker one
2. Adjust lower “y” value to higher one decreasing “B”
3. Adjust higher “x” value to lower one decreasing “R”
4. Fine adjust to repeat 1-3 if necessary
5. The result of “x,y” value is goal for lv5 to 2
Lv5 to 2
6. Adjust brightness
7. Adjust “y” value to the goal controlling “B”
8. Adjust “x” value to the goal controlling “R”

3. Adjust “Color Matching”
Incident Color Meter
BrightnessAdjust to 10ths digitIn this case, you can read approx. 310
“x, y” valueAdjust to 3 places of decimalsIn this case, you can read approx. (0.375, 0.394)

4. Edge Blending
• Adjust black level of “A” and “B” to “C”(Zone Black Level Adj.)• Adjust gamma of “C”(Blend Gamma)
100
0
Brightness
Projection area of PJ-No.1
Projection area of PJ-No.2
Edge blending width
A C B
Set the same dot numbers of overlap zone as PC software
and projector.
Brightness decrease linearly in this blending zone.

5. Adjust “Zone Black Level Adj.”
• Black level of Zone “C” is brighter than zone “A” and “B” because 2 projectors project this zone at the same time. Adjust black level of zone “A” and “B” brighter to zone “C”.
• Basically don’t change the black level of zone “C” (Zone 6 of PJ-No.1 and Zone 4 of PJ-No.2).
• Don’t need to adjust “Color Matching Lv1” because we must adjust black level here.
AZone 5 of PJ-
No.1
CZone 6 of PJ-No.1Zone 4 of PJ-No.2
BZone 5 of PJ-No.2
1 2 3
6
987
4 5
Definition of ZoneWhen blending 9 projectors
Projection area of PJ-No.1Projection area of PJ-No.2
Edge blending width

• Had better to adjust black level using “Incident Color Meter” when it is difficult to adjust it only seeing– Measure in the dark place.– Had better to measure around the boundary line of blending
A C B
(When adjusting using xy value)Adjusting (x,y) value of zone ”A” and “B” to zone ”C” .• Adjust “x”
• Increasing : Increase “R”.• Decreasing : Decrease “B”.
• Adjust “y”• Increase or Decrease “G”.• Increase or Decrease “B”.
5. Adjust “Zone Black Level Adj.”
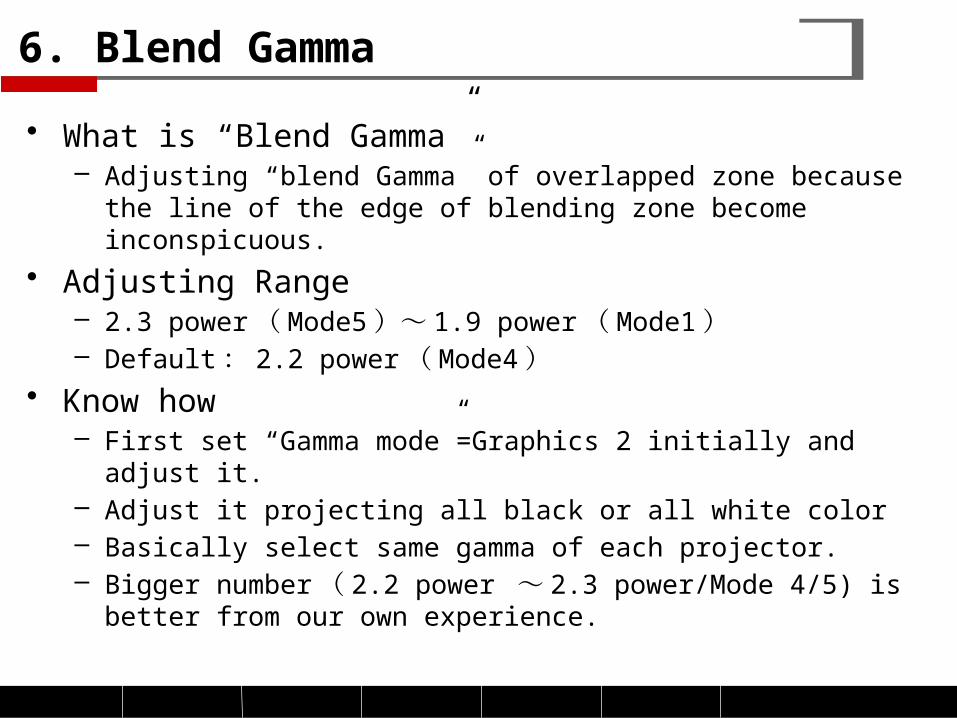
6. Blend Gamma
• What is “Blend Gamma”– Adjusting “blend Gamma” of overlapped zone because the
line of the edge of blending zone become inconspicuous.• Adjusting Range
– 2.3 power ( Mode5 )~ 1.9 power ( Mode1 )– Default : 2.2 power ( Mode4 )
• Know how– First set “Gamma mode”=Graphics 2 initially and adjust it.– Adjust it projecting all black or all white color– Basically select same gamma of each projector.– Bigger number ( 2.2 power ~ 2.3 power/Mode 4/5) is better
from our own experience.