water bin swift
TRANSCRIPT
Simple Swift
Water Bin
Gra
de 6 D
T Wh
eelP
roject Jo
urn
al o
f: Mr. Miller & Mr. Marzouk
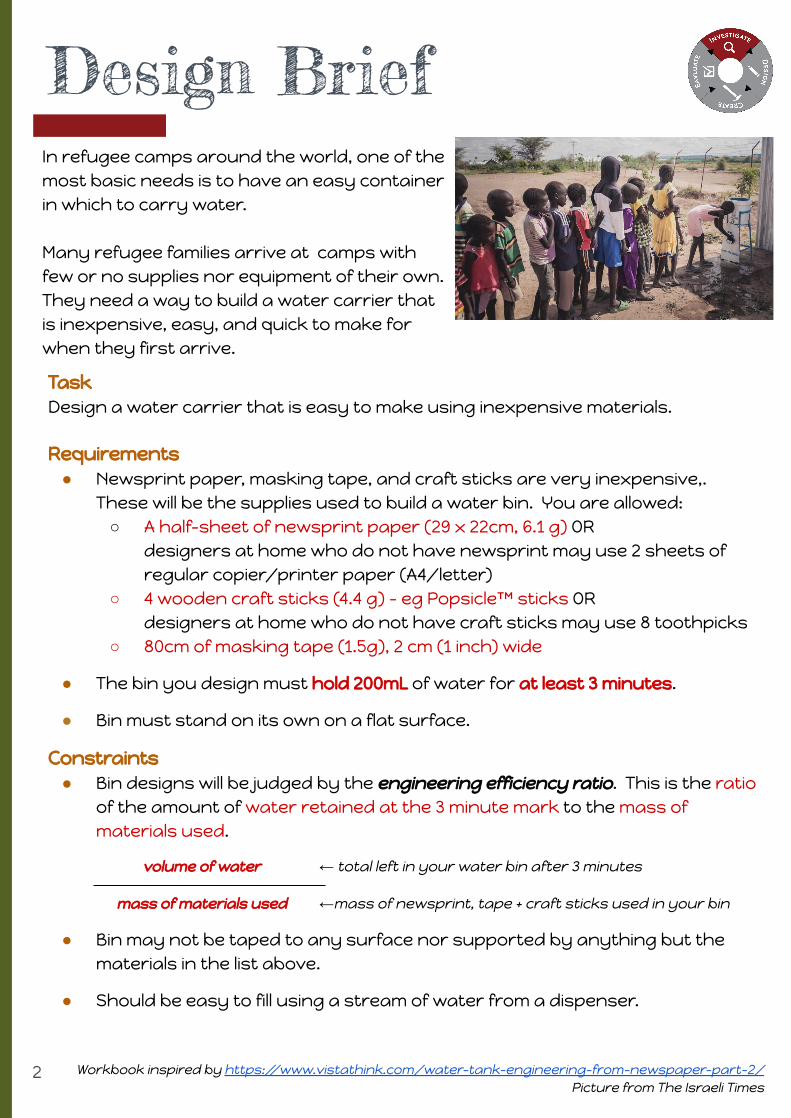
TaskDesign a water carrier that is easy to make using inexpensive materials.
Requirements● Newsprint paper, masking tape, and craft sticks are very inexpensive,.
These will be the supplies used to build a water bin. You are allowed:○ A half-sheet of newsprint paper (29 x 22cm, 6.1 g) OR
designers at home who do not have newsprint may use 2 sheets of regular copier/printer paper (A4/letter)
○ 4 wooden craft sticks (4.4 g) - eg Popsicle™ sticks OR designers at home who do not have craft sticks may use 8 toothpicks
○ 80cm of masking tape (1.5g), 2 cm (1 inch) wide
● The bin you design must hold 200mL of water for at least 3 minutes.
● Bin must stand on its own on a flat surface.
Constraints● Bin designs will be judged by the engineering efficiency ratio. This is the ratio
of the amount of water retained at the 3 minute mark to the mass of materials used.
● Bin may not be taped to any surface nor supported by anything but the materials in the list above.
● Should be easy to fill using a stream of water from a dispenser.
Design BriefIn refugee camps around the world, one of the most basic needs is to have an easy container in which to carry water.
Many refugee families arrive at camps with few or no supplies nor equipment of their own. They need a way to build a water carrier that is inexpensive, easy, and quick to make for when they first arrive.
volume of water ← total left in your water bin after 3 minutes
mass of materials used ←mass of newsprint, tape + craft sticks used in your bin
Workbook inspired by https://www.vistathink.com/water-tank-engineering-from-newspaper-part-2/Picture from The Israeli Times
2
Reflect and RecordNow that you’ve read through the Design Brief, what questions do you have?
ASSIGNMENTS
Check off when you’ve completed in G-Classroom
🕀❏ Most restrictive requirement
In Google Classroom, identify which requirementor constraint will be the most restrictive and explain why.
You may complete this via text, audio, or video.
🕀❏ Half-scale model
Build a one-half-scale model of your first idea for how to solve the problem in the Design Brief.Record your results on the next page. Add anynew questions that occurred to you, above.
Questions
If you can’t think of any questions, consider:
1. What do I need to know, that I don’t already know, in order to work on this challenge?
2. What information is missing from the Design Brief?
3. How can I find out what I don’t even know that I don’t know about this?!?!
3
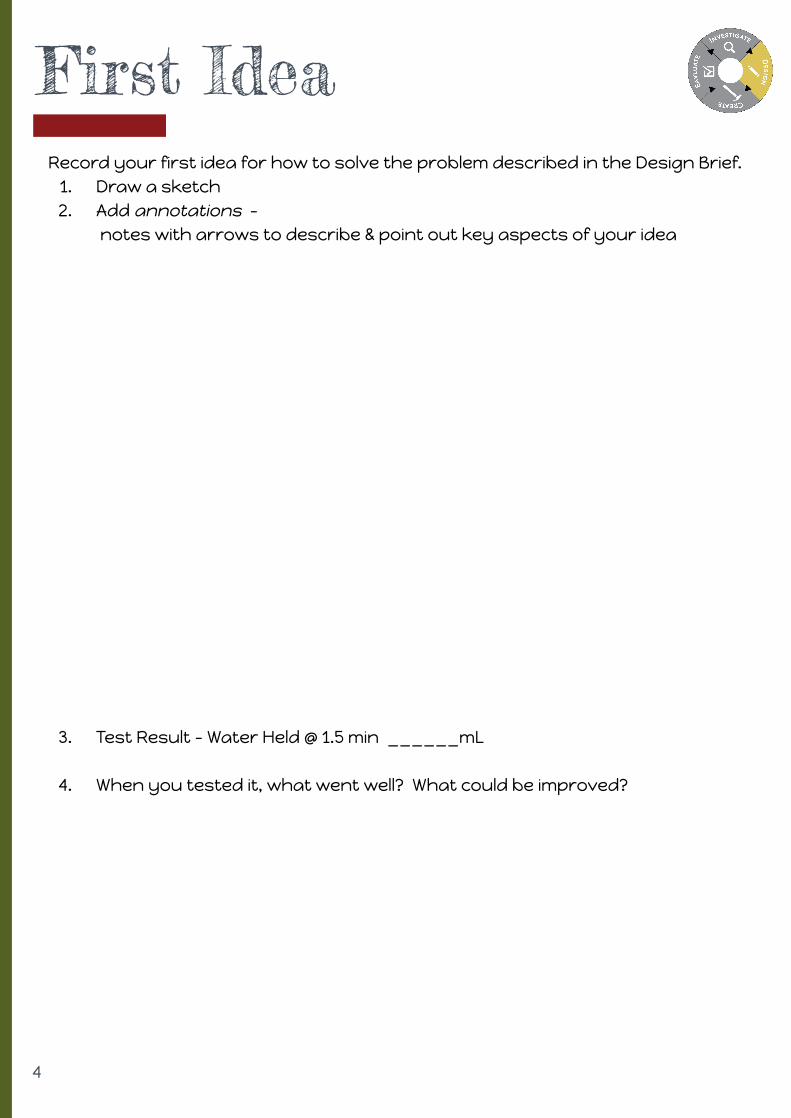
Record your first idea for how to solve the problem described in the Design Brief.1. Draw a sketch2. Add annotations -
notes with arrows to describe & point out key aspects of your idea
3. Test Result - Water Held @ 1.5 min ______mL
4. When you tested it, what went well? What could be improved?
First Idea
4
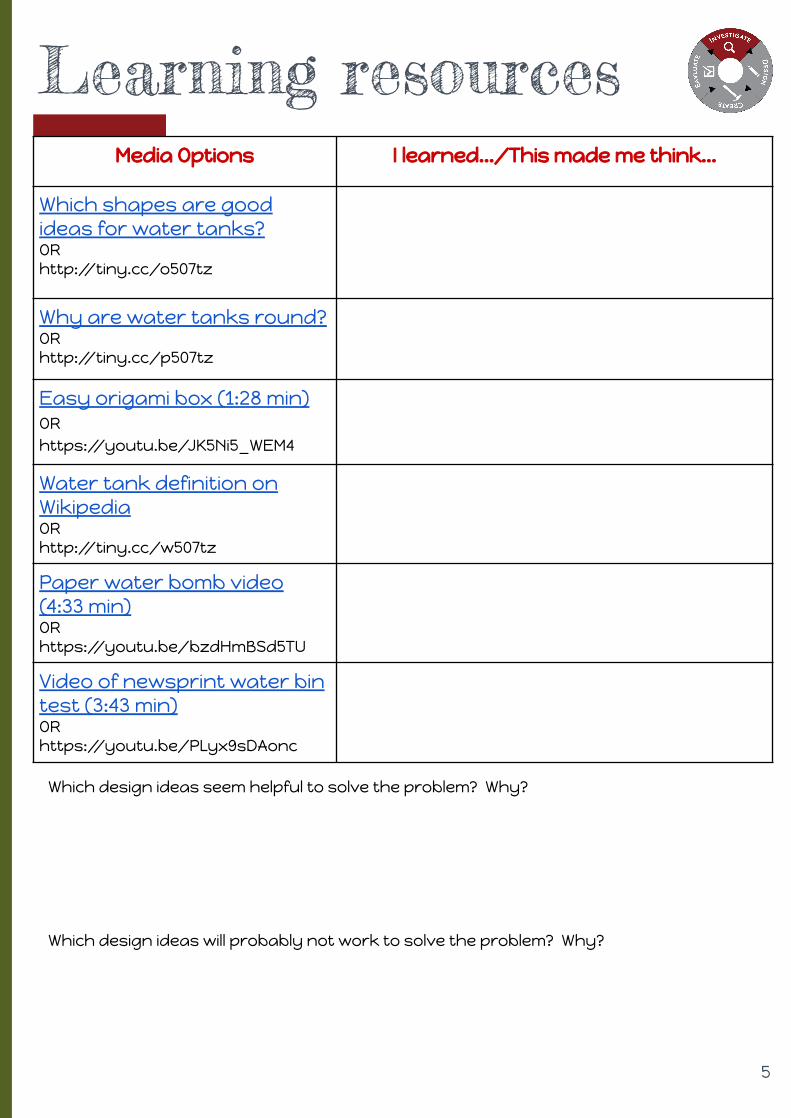
Which design ideas seem helpful to solve the problem? Why?
Which design ideas will probably not work to solve the problem? Why?
Learning resourcesMedia Options I learned.../This made me think...
Which shapes are good ideas for water tanks?ORhttp://tiny.cc/o507tz
Why are water tanks round?ORhttp://tiny.cc/p507tz
Easy origami box (1:28 min)ORhttps://youtu.be/JK5Ni5_WEM4
Water tank definition on WikipediaORhttp://tiny.cc/w507tz
Paper water bomb video (4:33 min)ORhttps://youtu.be/bzdHmBSd5TU
Video of newsprint water bin test (3:43 min)ORhttps://youtu.be/PLyx9sDAonc
5
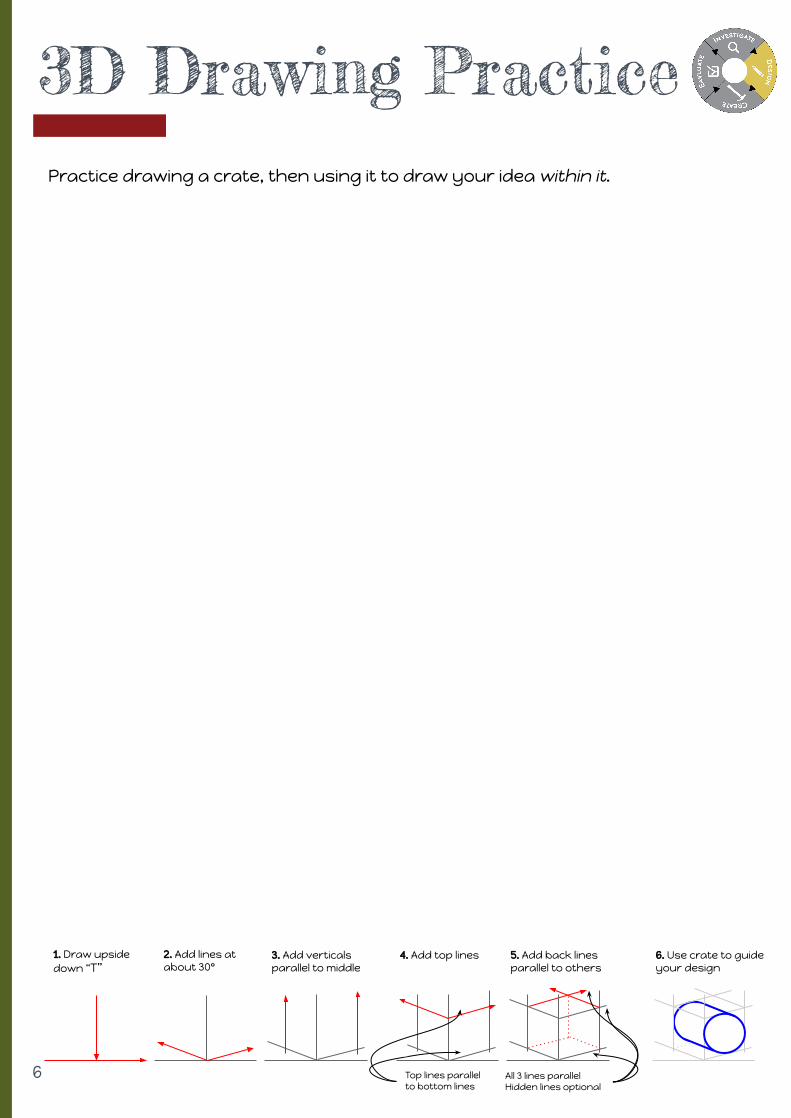
Practice drawing a crate, then using it to draw your idea within it.
3D Drawing Practice
6
1. Draw upside down “T”
2. Add lines at about 30º
3. Add verticals parallel to middle
4. Add top lines
Top lines parallel to bottom lines
5. Add back lines parallel to others
All 3 lines parallelHidden lines optional
6. Use crate to guide your design

. . . . . . . . . . . . . . .
7
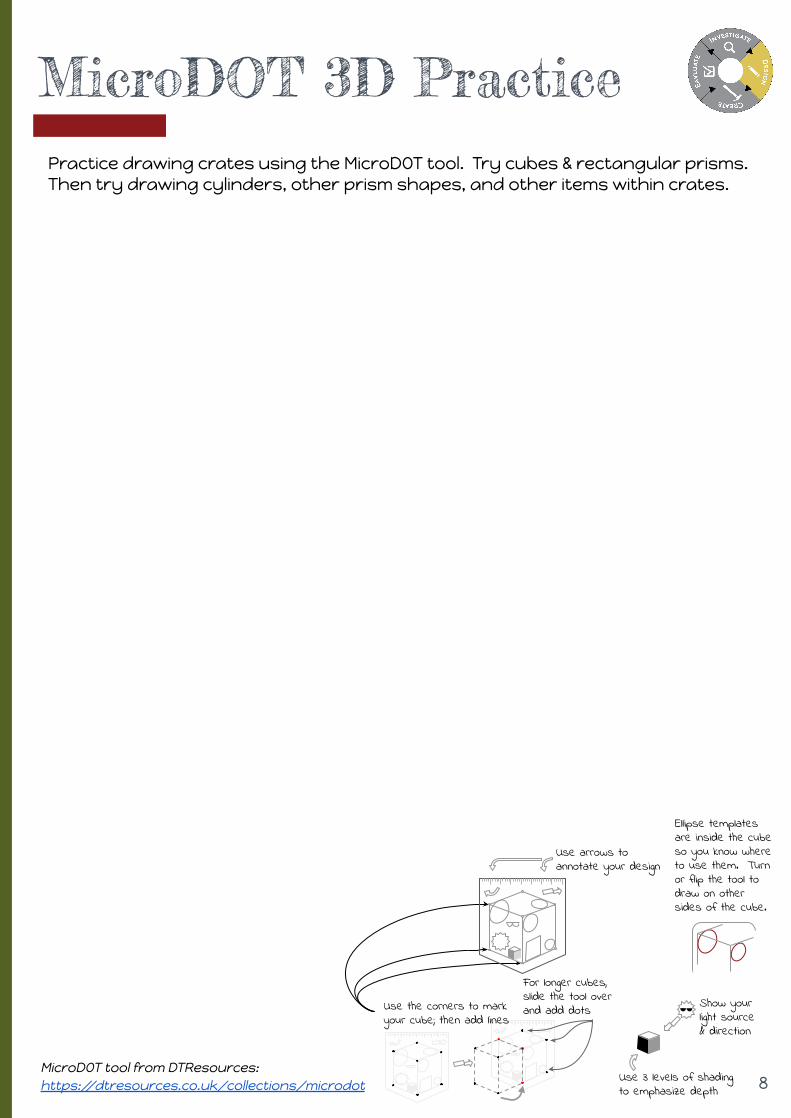
Practice drawing crates using the MicroDOT tool. Try cubes & rectangular prisms. Then try drawing cylinders, other prism shapes, and other items within crates.
MicroDOT 3D Practice
8
Use arrows to annotate your design
Show yourlight source& direction
Use the corners to mark your cube; then add lines
Use 3 levels of shading to emphasize depth
For longer cubes, slide the tool over and add dots
Ellipse templates are inside the cube so you know where to use them. Turn or flip the tool to draw on other sides of the cube.
MicroDOT tool from DTResources: https://dtresources.co.uk/collections/microdot

Sketch 3 different ideas for your water bin solution, in 3D.
Ideation
9
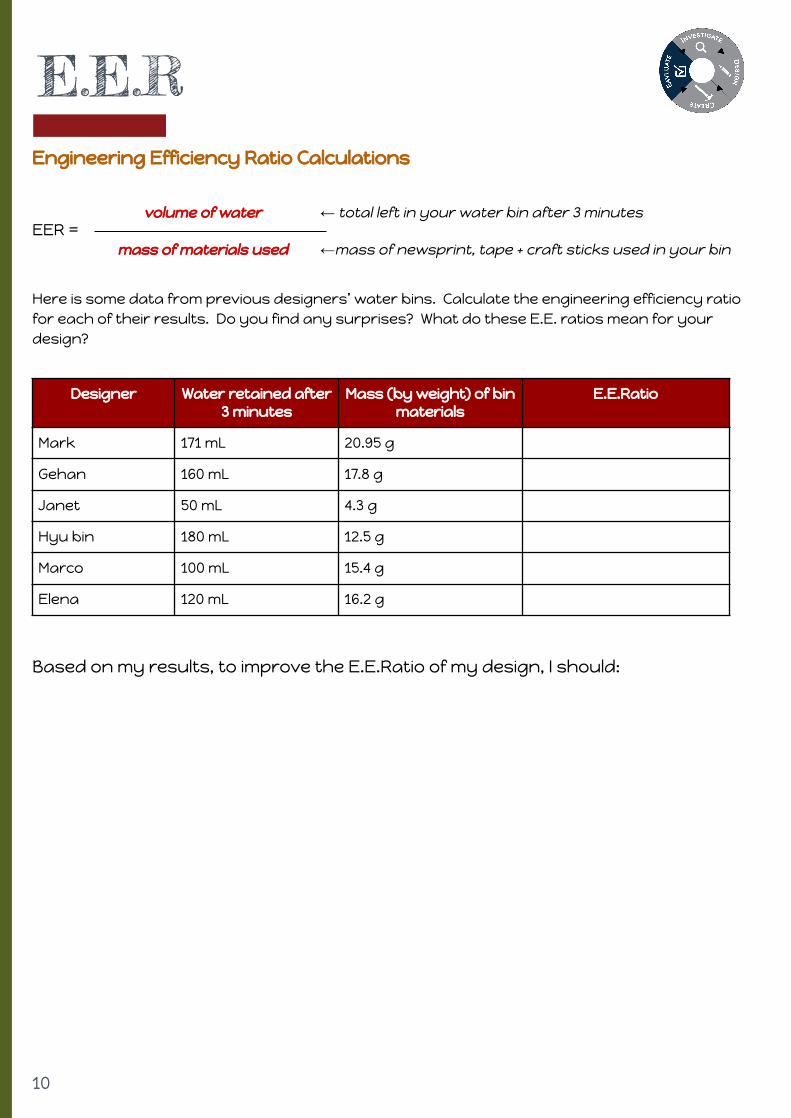
E.E.R
10
Designer Water retained after 3 minutes
Mass (by weight) of bin materials
E.E.Ratio
Mark 171 mL 20.95 g
Gehan 160 mL 17.8 g
Janet 50 mL 4.3 g
Hyu bin 180 mL 12.5 g
Marco 100 mL 15.4 g
Elena 120 mL 16.2 g
Engineering Efficiency Ratio Calculations
EER =
Here is some data from previous designers’ water bins. Calculate the engineering efficiency ratio for each of their results. Do you find any surprises? What do these E.E. ratios mean for your design?
Based on my results, to improve the E.E.Ratio of my design, I should:
volume of water ← total left in your water bin after 3 minutes
mass of materials used ←mass of newsprint, tape + craft sticks used in your bin
Developed in collaboration with JAMBLE D&T http://www.jambledandt.com/literacy--numeracy.html
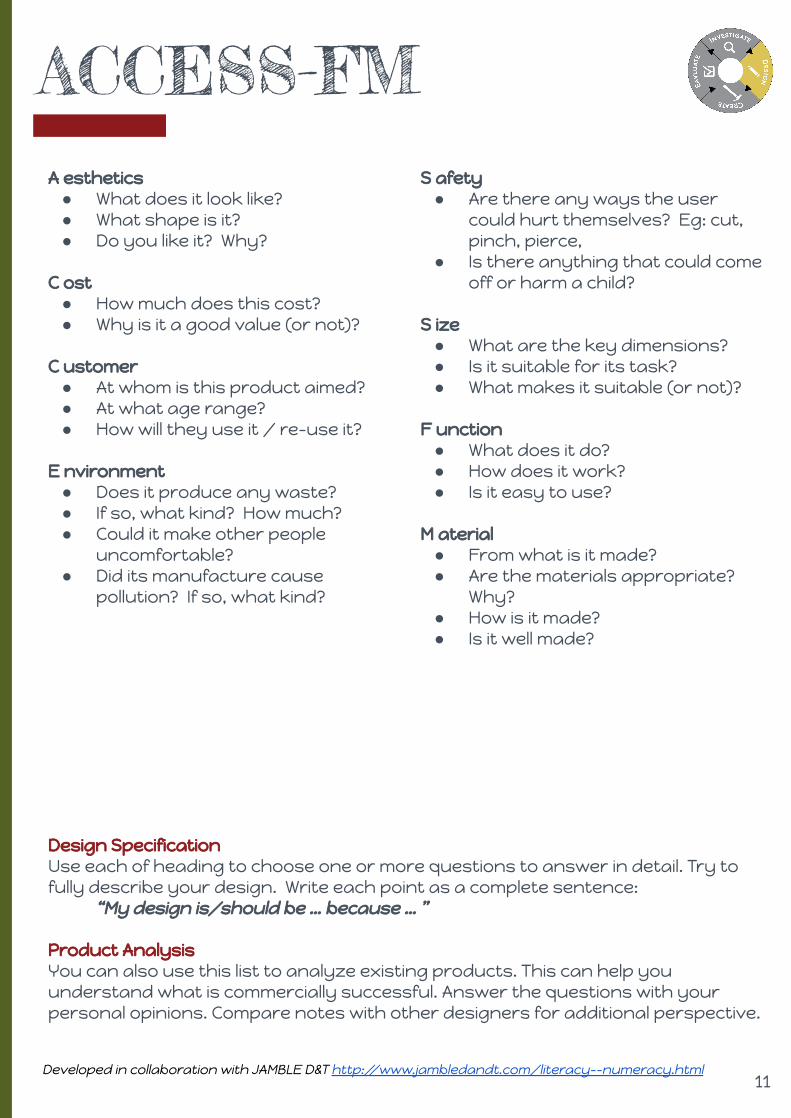
Design SpecificationUse each of heading to choose one or more questions to answer in detail. Try to fully describe your design. Write each point as a complete sentence:
“My design is/should be … because … ”
Product AnalysisYou can also use this list to analyze existing products. This can help you understand what is commercially successful. Answer the questions with your personal opinions. Compare notes with other designers for additional perspective.
ACCESS-FMA esthetics● What does it look like?● What shape is it?● Do you like it? Why?
C ost● How much does this cost?● Why is it a good value (or not)?
C ustomer● At whom is this product aimed?● At what age range?● How will they use it / re-use it?
E nvironment● Does it produce any waste?● If so, what kind? How much?● Could it make other people
uncomfortable?● Did its manufacture cause
pollution? If so, what kind?
S afety● Are there any ways the user
could hurt themselves? Eg: cut, pinch, pierce,
● Is there anything that could come off or harm a child?
S ize● What are the key dimensions?● Is it suitable for its task?● What makes it suitable (or not)?
F unction● What does it do?● How does it work?● Is it easy to use?
M aterial● From what is it made?● Are the materials appropriate?
Why?● How is it made?● Is it well made?
11
Review your 3 ideas and choose the one you think is most feasible. Sketch a clean, annotated 3D version to turn in. Review the rubric on the next page!
Presentation Sketch
12
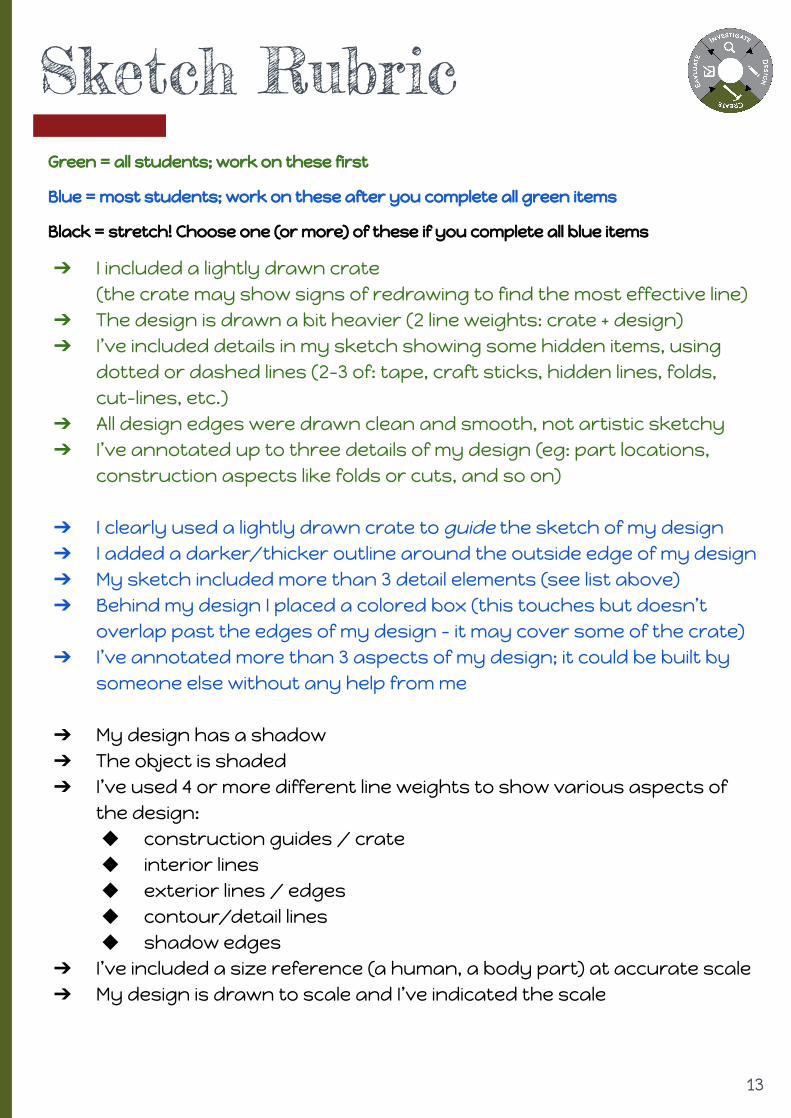
Green = all students; work on these first
Blue = most students; work on these after you complete all green items
Black = stretch! Choose one (or more) of these if you complete all blue items
➔ I included a lightly drawn crate(the crate may show signs of redrawing to find the most effective line)
➔ The design is drawn a bit heavier (2 line weights: crate + design)➔ I’ve included details in my sketch showing some hidden items, using
dotted or dashed lines (2-3 of: tape, craft sticks, hidden lines, folds, cut-lines, etc.)
➔ All design edges were drawn clean and smooth, not artistic sketchy➔ I’ve annotated up to three details of my design (eg: part locations,
construction aspects like folds or cuts, and so on)
➔ I clearly used a lightly drawn crate to guide the sketch of my design➔ I added a darker/thicker outline around the outside edge of my design➔ My sketch included more than 3 detail elements (see list above)➔ Behind my design I placed a colored box (this touches but doesn’t
overlap past the edges of my design - it may cover some of the crate)➔ I’ve annotated more than 3 aspects of my design; it could be built by
someone else without any help from me
➔ My design has a shadow ➔ The object is shaded➔ I’ve used 4 or more different line weights to show various aspects of
the design: ◆ construction guides / crate◆ interior lines◆ exterior lines / edges◆ contour/detail lines◆ shadow edges
➔ I’ve included a size reference (a human, a body part) at accurate scale➔ My design is drawn to scale and I’ve indicated the scale
Sketch Rubric
13
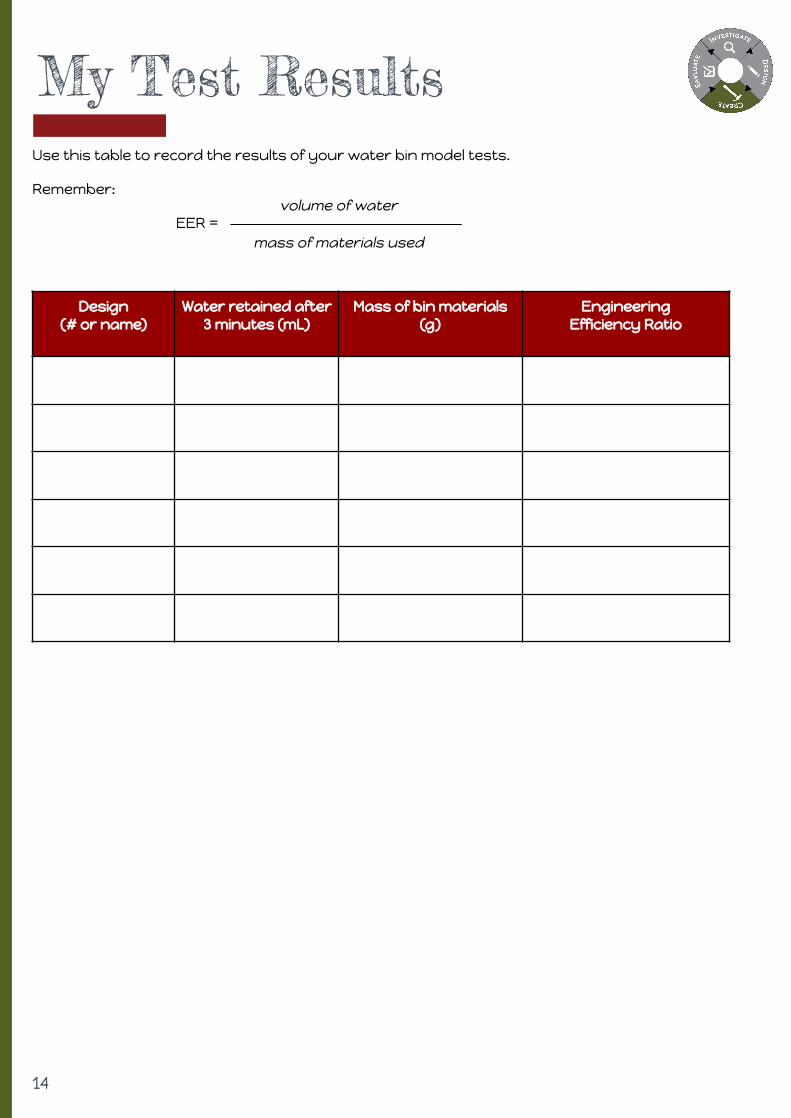
Use this table to record the results of your water bin model tests.
Remember:
EER =
My Test Results
14
Design(# or name)
Water retained after 3 minutes (mL)
Mass of bin materials(g)
EngineeringEfficiency Ratio
volume of water
mass of materials used
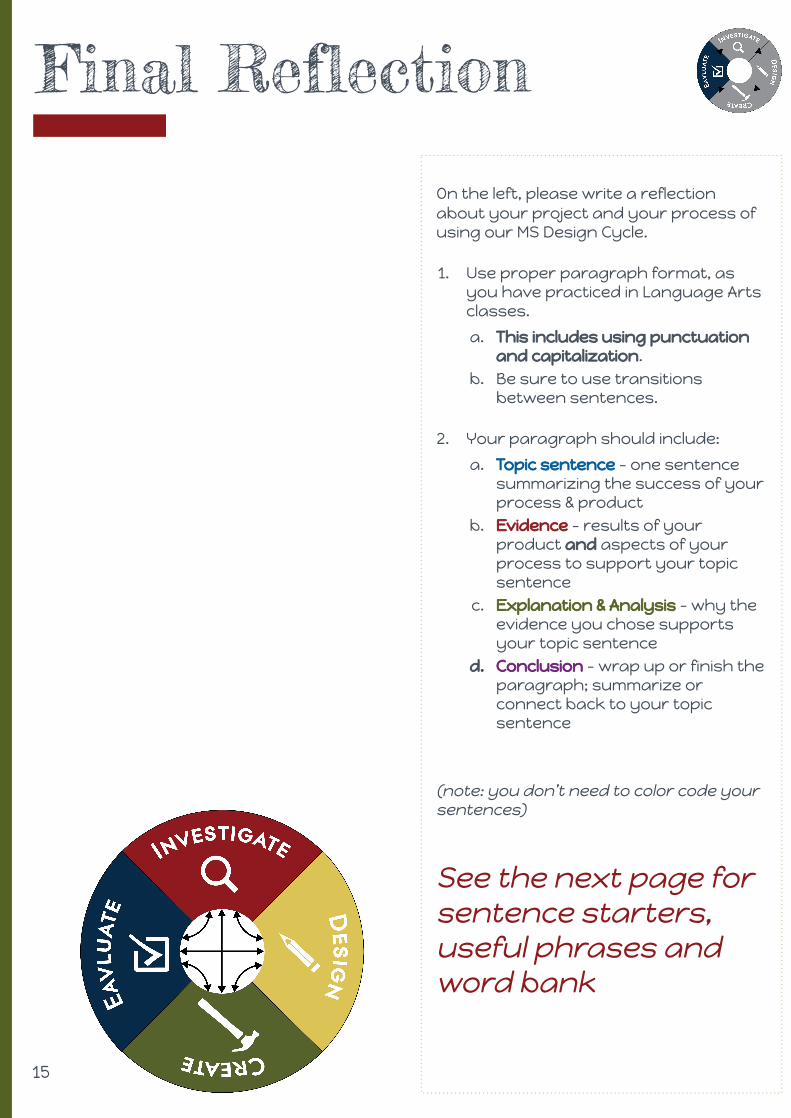
Final Reflection
On the left, please write a reflection about your project and your process of using our MS Design Cycle.
1. Use proper paragraph format, as you have practiced in Language Arts classes.
a. This includes using punctuation and capitalization.
b. Be sure to use transitions between sentences.
2. Your paragraph should include:
a. Topic sentence - one sentence summarizing the success of your process & product
b. Evidence - results of your product and aspects of your process to support your topic sentence
c. Explanation & Analysis - why the evidence you chose supports your topic sentence
d. Conclusion - wrap up or finish the paragraph; summarize or connect back to your topic sentence
(note: you don’t need to color code your sentences)
See the next page for sentence starters, useful phrases and word bank
15
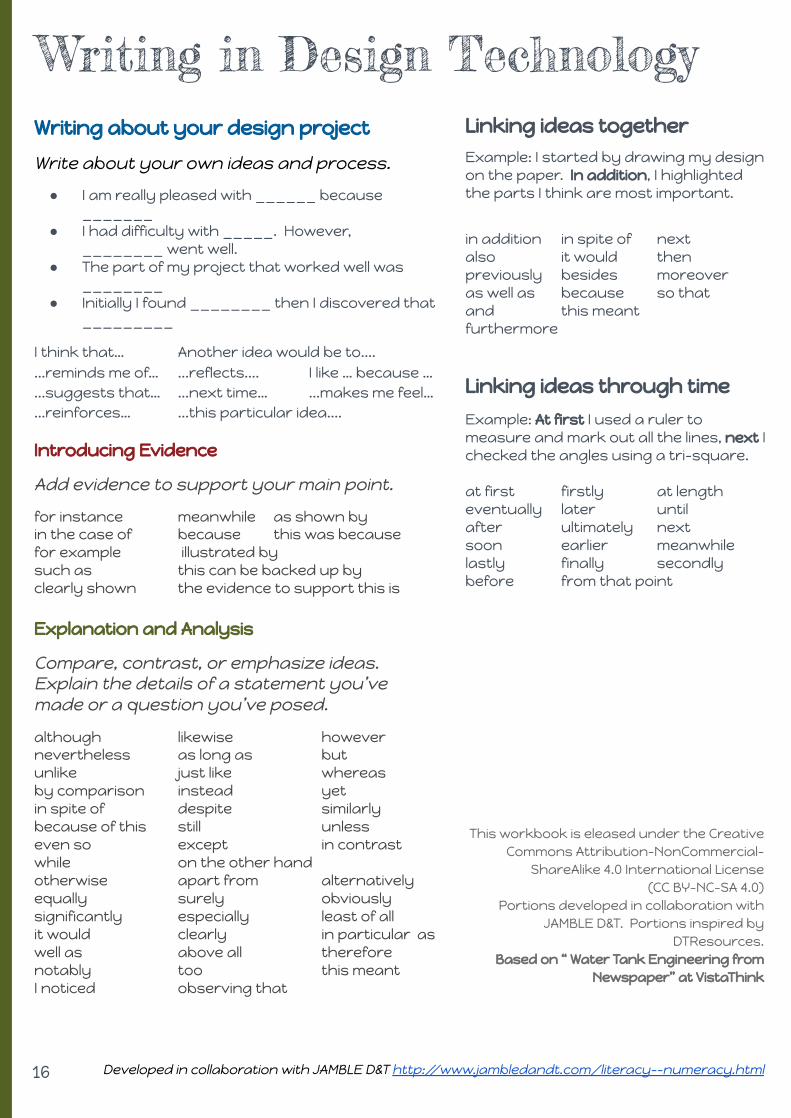
Writing in Design TechnologyLinking ideas together Example: I started by drawing my design on the paper. In addition, I highlighted the parts I think are most important.
in addition in spite of nextalso it would thenpreviously besides moreoveras well as because so thatand this meantfurthermore
Linking ideas through time
Example: At first I used a ruler to measure and mark out all the lines, next I checked the angles using a tri-square.
at first firstly at lengtheventually later untilafter ultimately nextsoon earlier meanwhilelastly finally secondlybefore from that point
Writing about your design project
Write about your own ideas and process.
● I am really pleased with ______ because _______
● I had difficulty with _____. However, ________ went well.
● The part of my project that worked well was ________
● Initially I found ________ then I discovered that _________
I think that… Another idea would be to.......reminds me of… ...reflects.... I like … because …...suggests that… ...next time… ...makes me feel…...reinforces… ...this particular idea....
Introducing Evidence
Add evidence to support your main point.
for instance meanwhile as shown byin the case of because this was becausefor example illustrated by such as this can be backed up byclearly shown the evidence to support this is
Explanation and Analysis
Compare, contrast, or emphasize ideas. Explain the details of a statement you’ve made or a question you’ve posed.
although likewise howevernevertheless as long as butunlike just like whereasby comparison instead yetin spite of despite similarlybecause of this still unlesseven so except in contrastwhile on the other handotherwise apart from alternativelyequally surely obviouslysignificantly especially least of allit would clearly in particular as well as above all thereforenotably too this meantI noticed observing that
16 Developed in collaboration with JAMBLE D&T http://www.jambledandt.com/literacy--numeracy.html
This workbook is eleased under the Creative Commons Attribution-NonCommercial-
ShareAlike 4.0 International License (CC BY-NC-SA 4.0)
Portions developed in collaboration with JAMBLE D&T. Portions inspired by
DTResources.Based on “ Water Tank Engineering from
Newspaper” at VistaThink