web computing ecommerce - york university
TRANSCRIPT

J-R ECOMMERCE ! OF !1 17
Web Computing
eCommerce
Version 2016.1. Copyright © 2015, 2016 by:
m Jenkin + h Roumani

J-R ECOMMERCE ! OF !2 17
1. Introduction This lab takes all of the work that you have done in the course and applies it to the development of a simple eCommerce site. This site does not implement the details of actual purchasing — although that could easily be added. Rather it provides remote access to a database that represents products on hand including their unit price that could in relatively short order be used as the repository for some collection of information that you might be interested in selling to a customer on the web.
The particular articles that are going to be represented in this lab are LP (long playing records). In the previous lab you saw how information could be stored in tables in a database and accessed from the local machine using SQL commands typed on the terminal. In this lab you will use the database and the same access mechanism but rather than typing commands in a terminal window you will utilize a web-based application to enable a remote user access to your database.
So to make this concrete, consider the SQL Table you used in the previous lab to represent a record collection that is being offered for sale. For each album in stock, the online store will represent
• The title of the album (call this album)
• The artist of the album (call this artist)
• The year of pressing (call this pressing)
• The artwork of the album (call this cover)
We will also want to assign to each album a unique id (called id) that will allow us to refer to an album in a unique way. You will note that this is the database table collection that you used in the previous lab.
Now to simulate the operation of an eCommerce site, we will add a very small amount of information to simulate the information that is required to operate a storefront. In particular to each item we will add
• The unit cost of the item

J-R ECOMMERCE ! OF !3 17
• The number of items of this type currently available in the storefront.
Now to actually make this work as a storefront we would likely have to add other information such as shipping cost, and so on. But these are details for another day and time. Here, the goal is to build the basic online infrastructure. In particular, some way of accessing a collection of data, browsing through it (say be year and artist), and computing a simple shopping cart of the material that you might be interested in purchasing. Adding other features would be straightforward, but beyond the scope of the basic project.
As with all labs in this course, this lab is laid out as an ePub. It is expected that you will have read the lab electronic book prior to attending the lab. In order to encourage this, each lab has an associated set of ‘pre lab’ assignments that must be completed prior to attending the lab. You will not receive a grade for this lab unless you have completed the pre lab exercises. Exercises in the lab are to be documented in your ePortfolio lab book.

J-R ECOMMERCE ! OF !4 17
2. Background This lab involves building an interface with HTML, CSS and JavaScript that provides a user access to a SQL database of material that can be queried and that could be used as the backbone of an eCommerce site related to the sale of LP’s to the general public. Many similar commercial sites exist such as discogs. You may want to have a look at sites such as discogs or amazon prior to proceeding to far in this laboratory.
You may want to skim through the background material in your first review of this lab. After wards, go to the actual exercises associated with the lab and then refer back to the material presented here as needed.
2.1 Creating and manipulating the database The consumer is not usually able to add or delete records from the database of material stored on hand. (If they could, you can imagine the sort of trouble that they might cause.) Rather, the database and additions/deletions to the database would be performed by office staff or by special purpose software that exists to automate parts of the process. So for the purpose of the software that you are going to write for this lab, let us assume that someone (you) has gone to the trouble of setting up the database. And to make this even more straightforward, let us use the database that was provided in the previous lab (the collection table in the data.db file found in ~/db in the virtual box).
Working through this lab will cause you to make changes in the database found in the ~/db/data.db file in the virtual box. If you discover that you have “messed up” the database then you can recreate the file and the databased within it. To do this, execute the following command at the command line in the directory ~/db in the virtual box.
node_stop
J-R ECOMMERCE ! OF !5 17
rm data.db
sqlite3 data.db <default.sql
node_start
This first stops the server running in the virtual box, then deletes the existing data.db file and then uses sqlite3 to re-create the file using the sql commands found in default.sql. Finally this re-starts the node server. Do not edit the default.sql file as it is needed to re-initialize the database. To verify that the default database has been restored execute the following at the command line
sqlite3 data.db
sqlite3> select * from collection;
sqlite3> .quit
And you should see the standard screen dump of the original collections table.
2.2 Accessing a remote SQL database The virtual box appliance provided for the course supports access to a database stored within the appliance (the server). The database is represented in sqlite3, and is stored in the file ~/db/data.db. Access to the database is through the URL http://host:8000/sql?query=QUERY. So for example, to execute the query “select * from collection” from a server running on 127.0.0.1, the appropriate URL would be http://127.0.0.1:8000/sql?query=select * from collection
The following code snippet illustrates how one might access the database from JavaScript using AJAX to deal with the asynchronous nature of the remote database.
var ajax; var acallback=null; function access(query, callback) { acallback = mycallback; ajax = new XMLHttpRequest(); ajax.onreadystatechange = ajaxProcess; ajax.open("GET", "http://127.0.0.1:8000/sql?query=" + query); ajax.send(null); }
J-R ECOMMERCE ! OF !6 17
function ajaxProcess() { if((ajax.readyState == 4)&&(ajax.status == 200)){ ajaxCompleted(ajax.responseText) } }
function ajaxCompleted(text) { if(acallback != null) { var data = JSON.parse(text); acallback(data); } }
Note that when accessing the database from somewhere else, it will be necessary to change the 127.0.0.1 IP address to the real address of your computer.
This code uses AJAX to perform an asynchronous http call, and registers a callback that will be passed the JavaScript object that is returned from the SQL call. Given this code it is then possible to query the database and display an alert that contains the response
function mycallback(json) { alert(JSON.stringify(json)); }
function go() { access("select * from collection", mycallback); }
A sample JavaScript program and HTML wrapper to test this can be found on the course web site.
Note: Remember to always select the HTML file from http://127.0.0.1:8000/serve/ not from file:// as cross-site scripting rules apply.
Example: http://127.0.0.1:8000/serve/ecommerce/index.html selects the HTML from the ecommerce directory in ~/server/

J-R ECOMMERCE ! OF !7 17
2.2 Unit testing Unit testing is the process in the development of software in which small portions of the software (called units) are written and tested independently. For example, the code shown above to access the database from JavaScript could be written independently of any code that might later use it. Unit testing can often be automated and code is often written with unit testing tools delivered along with the actual code or library.
The code that you are writing in this lab is relatively complex, and it is worthwhile building the code in small blocks and the validating the individual blocks through unit testing rather than trying to build the software as one large monolithic unit. To make this more specific, imagine trying to test the code module shown above (and provided on the course web site). Here we can test the performance of the function access(query,callback) using different queries and callbacks to ensure that the basic function ‘works’ and also to explore the performance of the function when provided with off-nominal inputs. (What does it do when the query is not a valid query, for example?)
2.3 Building a pull-down menu Although for small collections of information is may be possible to manually search through all of the items in the collection, for any reasonably large collection of data it can be desirable to limit the search to certain subsets. Or for the case of the record collection given here, to limit the search to certain artists or years of production. Now we could do this in many different ways, but for the dataset here, perhaps the most straightforward is to build a collection of pull-down menus that enables the user to select either ‘all’ (by not selecting a specific element from the menu), or to select one specific value from the pulldown menu.
So for the Artists and production years used here, you could imagine building a pulldown menu for Artists and Years similar to that shown below.

J-R ECOMMERCE ! OF !8 17
! The question becomes — how do we build these tables of values? As discussed in class, we could do this programmatically if we knew what values we had to use. For example, the code snippet below will build a pull down menu (a select element) of a number of Artists.
var s = document.createElement(“select”); var h = document.createElement(“option”); h.innerHTML = “<b>Artists</b>”; s.appendChild(h) h = document.createElement(“option”); h.innerHTML = “AC/DC”; s.appendChild(h); … h = document.createElement(“option”); h.innerHTML = “Who, The”; s.appendChild(h);
If the list of artists was available as (say) a list, we could iterate over the list and construct the pull down list automatically. This is the approach taken in the lab and as detailed below.

J-R ECOMMERCE ! OF !9 17
2.4 Adding columns (attributes) to the database To add a column to a database, the SQL command is alter. So to add a new column of type foo of type int (Integer) to the table junk, you would execute the SQL command
sqlite3> alter table junk insert column foo int; In SQL columns have a type. int type columns store integer numbers, real type columns store real numbers and so on. Remember that to change the value of an attribute in the database you use the update command. To set all of the foo values to zero, one could use
sqlite3> update junk set foo=0; To set the foo attribute for only one record, say the record corresponding to id=110 one would execute
sqlite3> update junk set foo=1 where id=110; Remember to use the SQL command .quit to quit from the database and save its state to the disk. You may also find the following dot commands useful .tables - lists all tables in the database .schema table_name - shows the schema of the table table_name Note: prior to making changes to the SQL database data.db and to ensure consistency with the web-based version of the database, it is important to stop the node server (node_stop). Don’t forget to restart the node server (node_start) afterwards so that you can access the node services in the virtual machine.

J-R ECOMMERCE ! OF !10 17
3. Exercises As with other labs in this course, lab exercises are broken down into three sections, A, B and C. Exercises in section A are Pre-Lab exercises. All Pre-lab exercises must be completed prior to attending your lab. You will not be allowed to participate in the lab if you have not completed these exercised prior to attending the lab. Furthermore, you will not receive course credit for a lab for which the Part A lab was not completed. You will also get much more out of each laboratory if you spend some time going through the B and C exercises for each laboratory before attending your laboratory session.
A. Pre-lab 1. Download the storefront.sql file from the course web site and have a look at it.
How does the table defined in this text file differ from the one that you used in the previous lab? If you are using your own machine, install this table into the default database file within the VBOX.
2. Download the code from the course web site and if you are using your own machine download it to the virtual box.
3. Complete the pre-lab quiz on the course moodle page.
4. Look at the collections table in the SQL database in the virtual box. If you were going to sell these LP’s, what would a reasonable price be for each one?
5. You are going to modify the collections table in the SQL database so that it has two new columns, number (an int) and price (a real). What SQL commands would you execute on the command line in order for this to happen?
6. Initially the online store will have 3 copies of each of the albums in the collection available for sale at $19.99 each. What SQL commands would you execute on the command line in order for this to happen?

J-R ECOMMERCE ! OF !11 17
7. How would you verify that the changes to the database have been executed properly? How would you do this on the command line? How would you do this using the web-based interface to the database?
B. In-lab 1. Update the SQL table collection in data.db so that there are two new columns
number (an int) and price (a real). Initialize the number on hand to be 3 and the price to be 19.99. Ensure that you use node_stop prior to making changes to the database and use node_start afterwards to restart the node server. Verify that you have correctly added this information to the database both using the terminal access to the database as well as using the web-based interface to it.
2. This lab will build the entire software enterprise in terms of small units that can be developed and tested individually, using the concept of unit testing. After all of the modules have been built the entire package will be put together into one large application. The first thing you are going to do in this lab is to build a module that creates pull-down menus for artist, and year so that shoppers can browse the database by these values. Now you could imagine creating the pull-down menus manually, but a more attractive mechanism is to query the database for the limit of the possible values. Now, if the set of possible categories gets too large this is likely to be impractical. But for reasonably small possible values this is an attractive approach. This lab will work by building small components, validating they are working (unit tests) and then moving forward.
3. Use the code provided on the course web site to obtain all of the artists that exist in the database. Specifically, modify the code provided so that the go() function invokes an artistCallback as shown below
function artistCallback(json) { alert(JSON.stringify(json)); }
function go() { access("select distinct artist from collection order by artist", artistCallback); }

J-R ECOMMERCE ! OF !12 17
Test this code to make sure that it works. Look at the database using the tools from the previous lab to ensure that the code retrieves all of the artists (without duplication). Note that we accomplished removing duplicates through the use of the ‘distinct’ keyword in the SQL query, and that we sorted the list using the ‘order by artist’ query option.
4. Modify the artistCallback so that after displaying the alert (which is useful in debugging but should probably be removed before deployment), the artistCallback invokes the following method which you should include in your JavaScript file
function buildArtistPullDown(json) { var s = document.createElement(“select"); s.setAttribute(“id”, “artist”); var h = document.createElement("option"); h.innerHTML = "<b>Artists</b>"; s.appendChild(h); for(var i=0;i<json.length;i++) { var v = json[i].artist; var q = document.createElement("option"); q.innerHTML = v; s.appendChild(q); } return s; }
5. Walk through the buildArtistPullDown code. What does it do? (It may be helpful to use the JavaScript debugger in Firefox to see exactly what this code does.) Remember that you will have to access the URL as http://127.0.0.1:8000/serve/ecommerce (assuming the site is in the server/ecommerce directory) in order to avoid cross site scripting errors when executing the database access calls.
6. Modify your artistCallback code so that after calling buildArtistPullDown(json) it adds the returned pulldown interaction element to the HTML element with id=“selection”. Test your code. Is the proper pulldown menu created? Does it match with the alert you generate?
7. You are now going to modify the code so that after creating the Artist pulldown menu a second menu for Year will be created. To do this you will leverage the

J-R ECOMMERCE ! OF !13 17
code that you have already written. Inner the following as the last line of your artistCallback code.
access("select distinct year from collection order by year", yearCallback);
Duplicate your artistCallback as yearCallback and create a new buildYearPullDown that duplicates the work done by buildArtistPullDown but that puts ‘Year’ at the top of the pulldown list rather than ‘Artists’. Also make sure that the id for this select element is ‘year’. Add this created pull down list to the right of the Artists pull down list in the HTML element with id=“selection”. When this is done you should have an interactive display that looks similar to the figure given in Section 2.3 above. Document this in your ePortfolio.
8. Now modify your yearCallback so that after you have created the Year pulldown input element and added it to the output HTML element, you create a Button HTML element with innerHTML ‘Find’ and onclick value find, and add this to the output HTML element with id=“selection”. Also create a function find() that just creates an alert with ‘Find’ in it. Test your code. You should have two workable pulldown menus and a find button. Each should work as you might expect, although we have yet to actually query the database or capture the current preferences given by the user.
9. Now you are going to modify the find() function so that it retrieves the values set by the user in the pulldown menu’s. An HTML element that corresponds to a select HTML element has an element selectedIndex which retrieves the selected element from the list (0 is the first element, 1 is the second element and so on). Modify the alert() in the find() function so that it outputs the selected element number from the year and artist pull down selections.
10. You are now going to recover the selected year and artist. Suppose that you have stored the selectedIndex for year in the variable y and that e is a reference to the HTML select element. If y is greater than zero, then e[y].text is the text of the pull down element that was selected. Modify the find() alert() so that it displays the text for both the year and artist pulldown. Test your code and record this performance in your ePortfolio.

J-R ECOMMERCE ! OF !14 17
11. You are now going to use the information that you recovered in the previous step to query the database to obtain all records that meet the user’s specifications as given in the pull down menu. First, you will construct the appropriate query string. To do this, use the following logic: Suppose year is a reference to the HTML select element for the year selection and artist is a reference to the HTML select element for the artists selection. Then if artist is 0 and year is 0 then the query is “select * from collection”. Otherwise if only the artist is 0 then the query is “select * from collection where year=‘value’” where value is the value of the year. If only year is 0 then the query is “select * from collection where artist=‘value’” where value is the value of the artist. Finally, if neither artist or year is 0 then the query is “select * from collection where artist=‘avalue’ and year=‘yvalue’” where avalue is the artist value and yvalue is the year value. Use an alert to display this value. Test all four possible cases and record this in your eReport.
12. Once you have computed the appropriate query, use the access function used earlier to query the database for the appropriate records. Create a new function selectCalback(json) to service the callback and initially define it so that it creates an alert with JSON.stringify(json) to display the output of the query. Test that this is working before moving on.
13. Add a new <div> to the index.html file with id of results. Rewrite the queryCallback method so that it does the following. First, it should delete all children of the ‘results’ node. (Code to do this was provided in class earlier, but the simplest approach is to loop as long as the results node has a firstChild, and to delete this firstChild node if it exists. Then, for each of the elements in the array object described in json, do the following: Create a new div HTML node. Then to this node add the following items (in order).
13.1.An img HTML element, and set its width and height to 100 pixels. Also set its src field to be json[i].cover where i is the index over the json array.
13.2.A span HTML element. Set its innerText field to be the string json[i].album where i is the index over the json array. Append to this string a blank and then json[i].price.
J-R ECOMMERCE ! OF !15 17
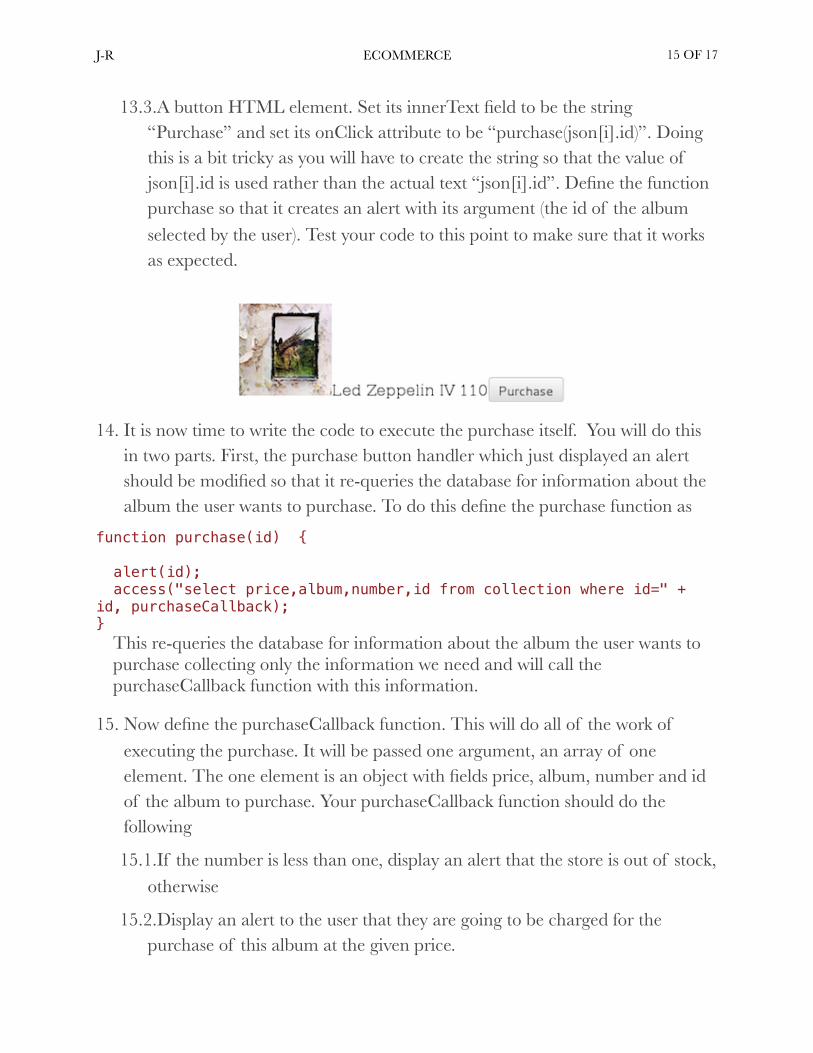
13.3.A button HTML element. Set its innerText field to be the string “Purchase” and set its onClick attribute to be “purchase(json[i].id)”. Doing this is a bit tricky as you will have to create the string so that the value of json[i].id is used rather than the actual text “json[i].id”. Define the function purchase so that it creates an alert with its argument (the id of the album selected by the user). Test your code to this point to make sure that it works as expected.
14. It is now time to write the code to execute the purchase itself. You will do this in two parts. First, the purchase button handler which just displayed an alert should be modified so that it re-queries the database for information about the album the user wants to purchase. To do this define the purchase function as
function purchase(id) { alert(id); access("select price,album,number,id from collection where id=" + id, purchaseCallback); }
This re-queries the database for information about the album the user wants to purchase collecting only the information we need and will call the purchaseCallback function with this information.
15. Now define the purchaseCallback function. This will do all of the work of executing the purchase. It will be passed one argument, an array of one element. The one element is an object with fields price, album, number and id of the album to purchase. Your purchaseCallback function should do the following
15.1.If the number is less than one, display an alert that the store is out of stock, otherwise
15.2.Display an alert to the user that they are going to be charged for the purchase of this album at the given price.

J-R ECOMMERCE ! OF !16 17
15.3.Access the database again to reduce the number of items on hand by 1. Note that you will have to define a callback to service the call.
16. Finally, test the system on the android device. Remember that you will have to change the IP address in order to make this all work.
C. Advanced 1. There are many different ways you can augment the basic lab. Perhaps the
simplest is to add a logo and other style elements to make the web page appear more attractive.
2. Although the basic application retrieves the records that meet the search criteria, there is considerably more information about each album available in the database. When you created the cover image HTML element (suppose that it is called x), then execute x.setAttribute(‘onclick’, ‘doSelect(‘ + v + ‘)’), where v is the id of the album in the database. Then define a function doSelect(id) that creates an alert with the value id being displayed. You can imagine in some more complete system, this could bring up detailed information on the LP selected.

J-R ECOMMERCE ! OF !17 17
5. Credits