web view“trackbacks” are a way to notify legacy blog systems that you’ve linked to...
TRANSCRIPT

Welcome to your new site! The Wordpress publishing platform is a robust tool that helps you publish your content to the web without getting too involved with the code. This guide is designed to help you navigate through the most common screens and any particular screens relevant to your site.
The Wordpress software is also a very well documented system, and there are many tutorials and tips on the web to help you on your content publishing journey. We will list some resources at the end of this document.
Logging in to the management system
http://www.trimarkusa.com/wp-admin
Login using the credential provided. If you lost your password you can use the automated password retrieval system by clicking the lost password link and entering your email address.
Dashboard
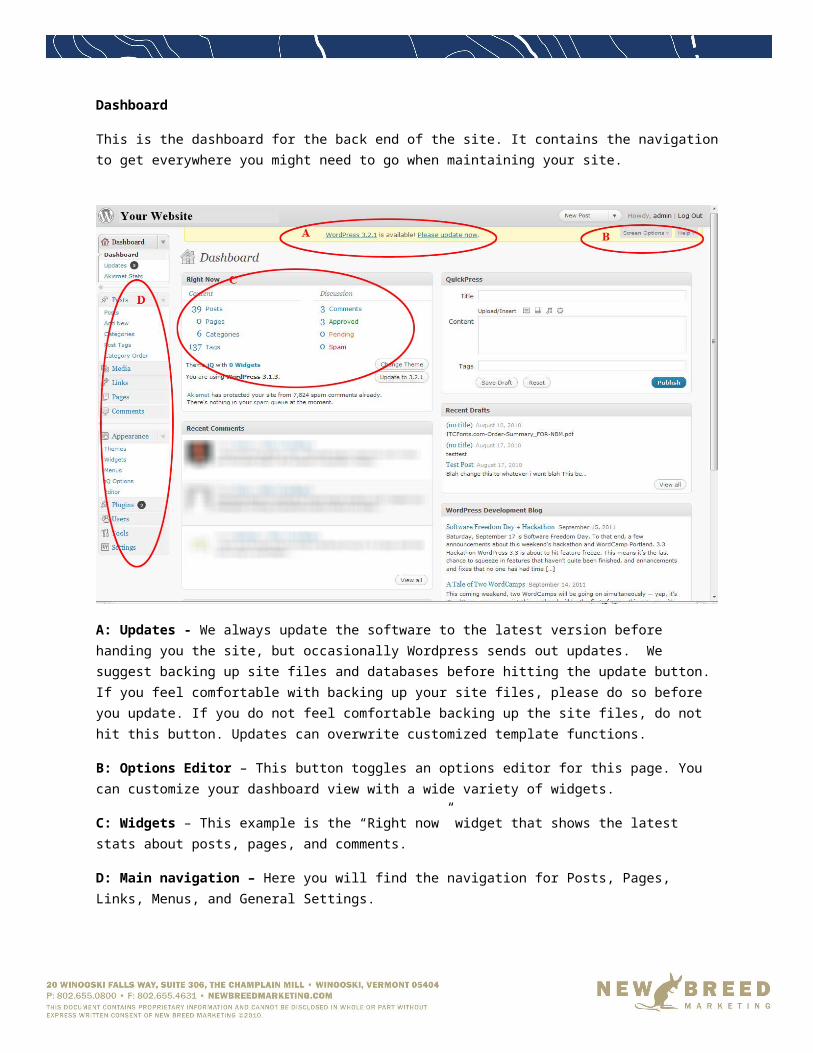
This is the dashboard for the back end of the site. It contains the navigation to get everywhere you might need to go when maintaining your site.
A: Updates - We always update the software to the latest version before handing you the site, but occasionally Wordpress sends out updates. We suggest backing up site files and databases before hitting the update button. If you feel comfortable with backing up your site files, please do so before you update. If you do not feel comfortable backing up the site files, do not hit this button. Updates can overwrite customized template functions.
B: Options Editor – This button toggles an options editor for this page. You can customize your dashboard view with a wide variety of widgets.
C: Widgets – This example is the “Right now” widget that shows the latest stats about posts, pages, and comments.
D: Main navigation – Here you will find the navigation for Posts, Pages, Links, Menus, and General Settings.
Posts vs Pages.
Posts relate to blog or news entries. They show up on the blog, or news page of the site. A quick story about a recent award your company received is a good example of a post. Pages, on the other hand are more permanent pages of the site. About Us, Home, Products, and Services are good examples of pages.
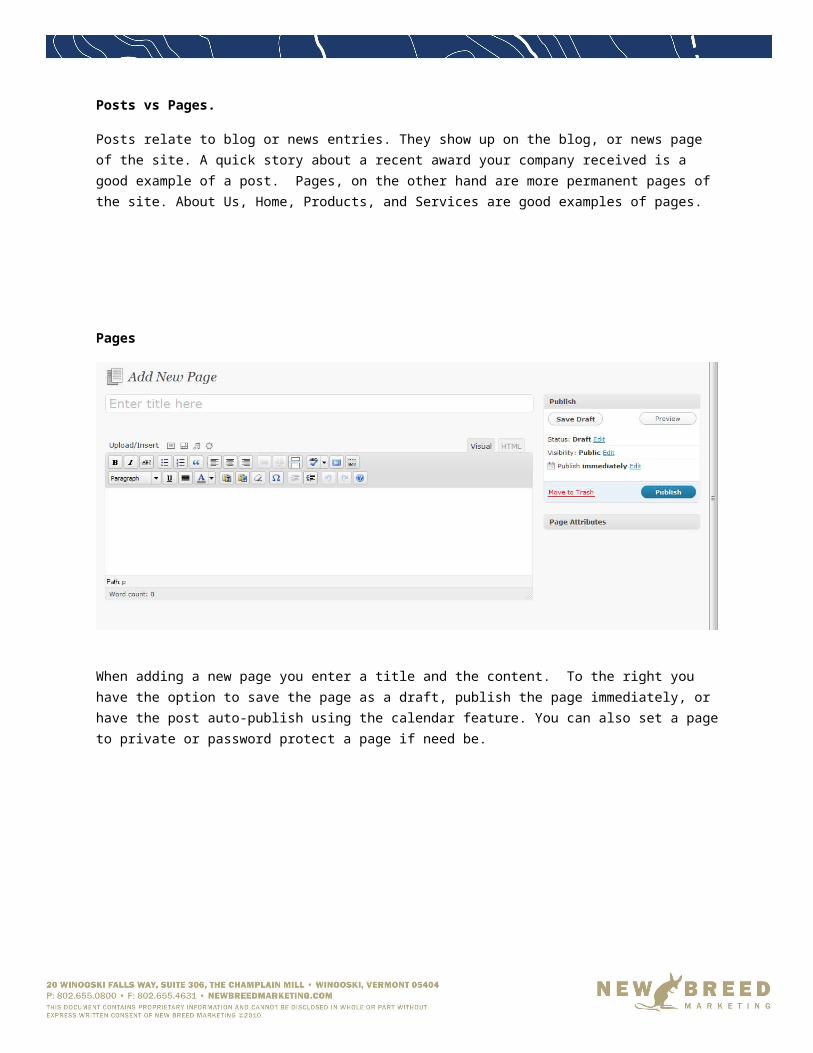
Pages
When adding a new page you enter a title and the content. To the right you have the option to save the page as a draft, publish the page immediately, or have the post auto-publish using the calendar feature. You can also set a page to private or password protect a page if need be.

Posts
When adding posts you have the same options as pages with additional options for specifying a category, adding tags, and adding excerpts. Your blog design might not use these tools.
“Trackbacks” are a way to notify legacy blog systems that you’ve linked to them. Feel free to ignore this field.
On this page you can also specify whether you want to allow comments, set the author name, and utilize custom fields if your blog theme incorporates them.

Adding media, links, and customizing text
The text editor contains a great many features and formatting tools, some of which are very similar to Microsoft Word. By hovering over each button you will get a description of what each button does. You can format text as lists, add links, and add quotes. We find the “Paste from Word” button very helpful when copying and pasting from Word documents. By using this feature, Wordpress will strip away the unnecessary code that Word adds in.
You can also toggle to the HTML view of the content. This is very useful when pasting content from sites that offer embedded content, like YouTube. You can grab the HTML embed code, toggle to HTML view and paste where appropriate.

Adding links
To add a link highlight the words you want to be the link, as in this example, we highlighted “click here.” Once the words are highlighted the chain icon will become active. When you click on the chain icon this box will popup. Add the URL to your link in the “URL” field. You can also use the “Link to Existing Content” link to browse to pages that already exist on your site. The Title field is used for SEO purposes. Use the best descriptor to accurately describe the link: i.e.: Our Facebook Page.
Adding pictures, pdfs and other media
Pictures: The following page shows the adding media pop-up. You browse to the content on your computer and select the file, and hit “Upload.” Once the picture uploaded we suggest filling out all the fields as accurately as possible, choosing the size that best fits the style of the site. Once that is done, hit the “Insert into Post” button.
PDF’s – Upload the PDF just as you would a picture, then copy the LINK URL to your clipboard. You can then close the popup window by hitting the “Save All Changes” button. Now highlight the text you want people to click on to open the PDF (such as “Our Whitepaper on Business Growth”) and by using the link tool described on the previous page you can paste in the LINK URL in the appropriate field.

Settings Screens
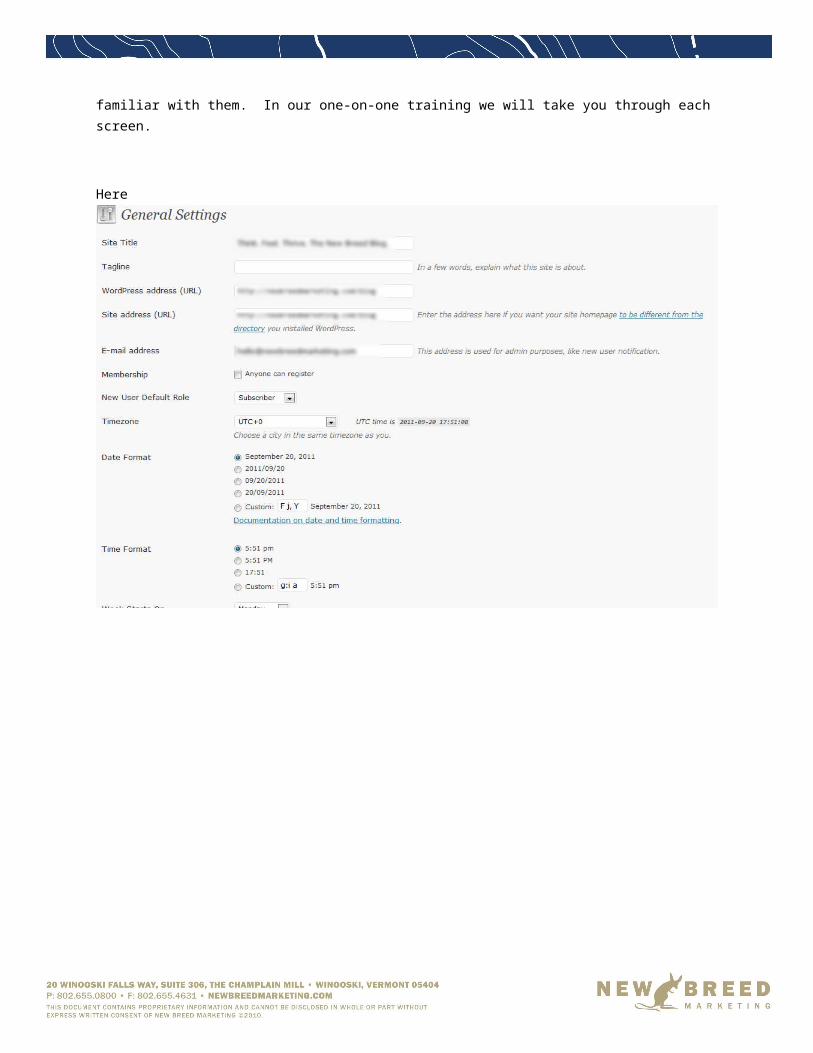
In the settings section you will find General Settings for your site, as well as the settings for writing, reading, and discussion. These settings have been customized to match the look, feel and functionality of your site, but there may be settings that you wish to change as the site lives for a while and gains a following. We recommend that you browse these settings and get familiar with them. In our one-on-one training we will take you through each screen.
Here
SITE SPECIFIC INSTRUCTIONS
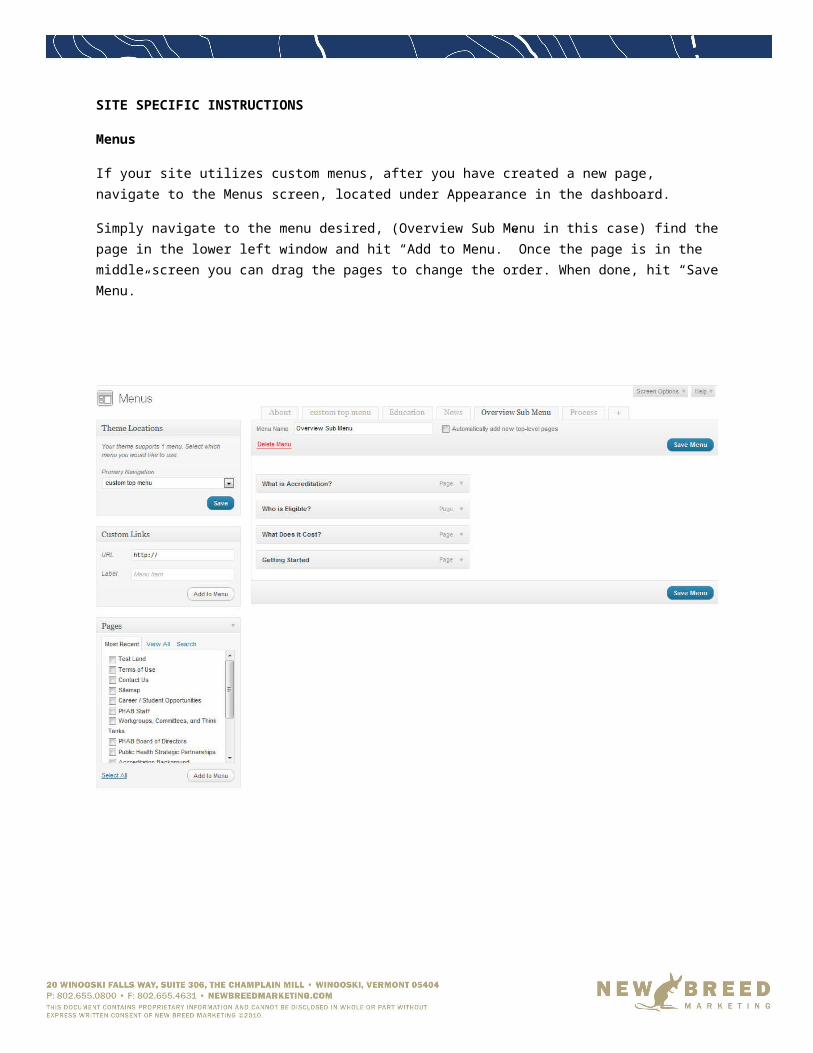
Menus
If your site utilizes custom menus, after you have created a new page, navigate to the Menus screen, located under Appearance in the dashboard.
Simply navigate to the menu desired, (Overview Sub Menu in this case) find the page in the lower left window and hit “Add to Menu.” Once the page is in the middle screen you can drag the pages to change the order. When done, hit “Save Menu.”
Checking Form Submissions
1. In WordPress choose Contact -> Database2. Now select the form you’d like to see submissions from3. You will now see the submission and if you’d like you can export this to an Excel
compatible .CSV file you’re the Export tool near the top of the page
Editing Forms
1. To edit a contact form choose “Contact” from the left side and then choose the form you’d like to modify
2. The tool on the right lets you generate a new form field without having to know HTML3. Insert the new field where you’d like it to appear on the page keeping the general
<p> tag scheme as is.4. The “To:” field below is where you set who should receive an email when the form is
submitted, each address should be separated by a comma5. When finished hit save
Changing Homepage Sliders
1. Open up the “trimark-home-header.psd” template and create your new slider. (Make sure to adjust the red dot position to reflect the number of the slider that you are updating).
2. Using the “Save for Web & Devices” feature in Photoshop Save out a new JPG file at 80% quality.
3. Now go to Settings -> Cimy Image Header and scroll down to the bottom of the page4. Click “Choose File” and upload your new image. 5. In the list below add the link to where you’d like to direct users who click on the
image (Note: the current design implies there are 4 total sliders so make sure you remove the slider you are replacing).
Quote Boxes
1. Open up the “quotes.psd” template in Photoshop and create your new quote.2. Using the “Save for Web & Devices” feature in Photoshop save out a new 24bit PNG
file.3. You must save the file in the format 0.png, 1.png, 2.png, etc. (note 0 – 6 already exist
on the main site so if adding an additional items you would start with 7.png)4. In WordPress go to Media –> Add New and then choose the file you just created.5. The last step is to go to Appearance -> Widgets -> Secondary Widget Area -> PHP
widget: Quotes, and then adjust the one value to shown below to add the new quote to the array. So since in this case we just uploaded 7.png we could update the end

range of the array to be 7.