welcome to ac301, intermediate accounting ii professor michael j. bootsma unit 1 seminar – excel...
TRANSCRIPT

Welcome to AC301, Intermediate Accounting II
Professor Michael J. BootsmaUnit 1 Seminar – Excel Template Guide
• Aid in completing the homework in a timely manner.
• Comprehension of the material is better when using the templates because they are interactive.
• The format is in place allowing you to focus on solving the problem.
• The templates will “guide” you through the assignment.
• Outlines each part of the problem to complete so there are not parts missed.
• Uniformity among units so you get your grade and feedback faster.
PurposePurpose

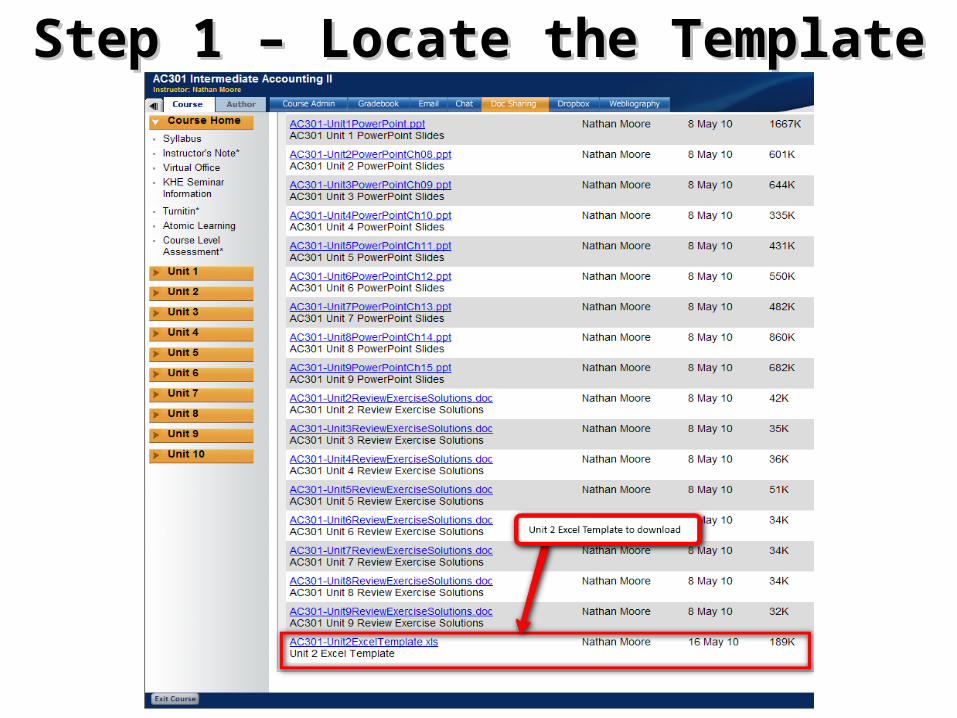
• Locate the Excel template in Doc SharingDoc Sharing.– This is where you will find all the units for which
the Excel Templates apply. Usually Units 2-9.– There may be many items in Doc Sharing so be
sure you are downloading and working on the correct unit that is due.
Step 1 – Locate the TemplateStep 1 – Locate the Template
Step 1 – Locate the TemplateStep 1 – Locate the Template

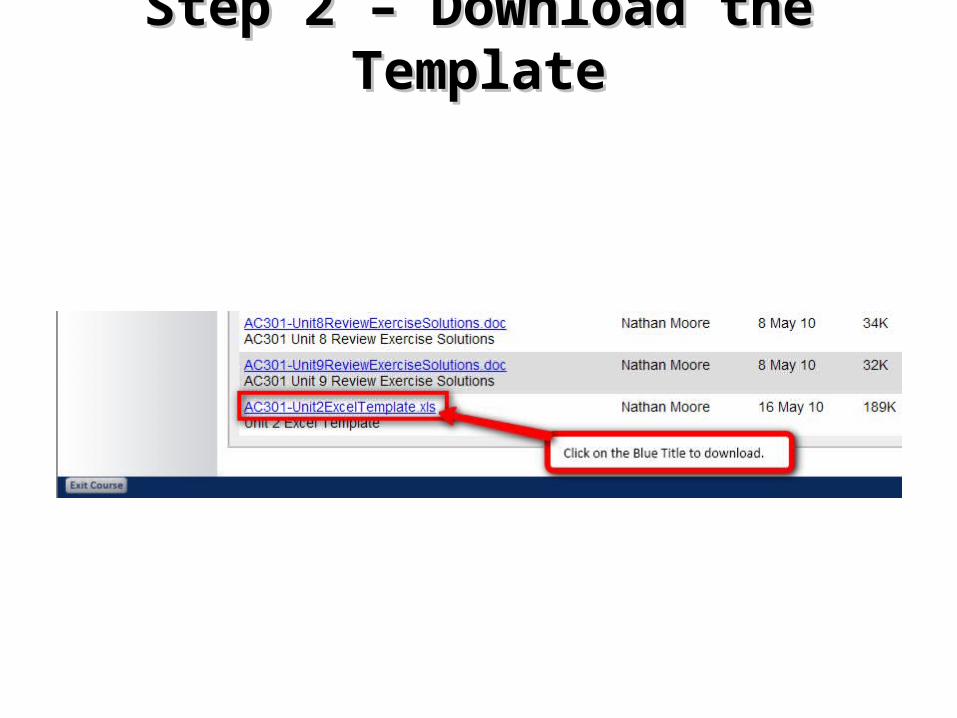
Step 2 – Download the TemplateStep 2 – Download the Template• After locating the Excel Template we now should
download the template from Doc Sharingdownload the template from Doc Sharing.– Click on the blue title to download.– When the other window pops-up asking “Do you want to
open or save this file?” click on “Save”– When the “Save As” window appears click on “Desktop” in
the left-hand menu or locate your desktop in the drop-down menu.
• You can always save it to a different location of your choice. The desktop is quickest and easiest to access which is where I save everything to first for further processing.
• You should always back-up your school work just in case your computer crashes!
– Flash Drive (or some other external storage device)

Step 2 – Download the TemplateStep 2 – Download the Template– Online Storage (Windows Live SkyDrive, which is free if you
have Hotmail, Live, or MSN email account)– Send an email to yourself with the Excel Template attached. I
suggest doing this after a major milestones and deleting the old version from your email, which avoids confusion.
– Name the document by putting your first and last name in front of the current name.
• So, in this case it would be “Nathan Moore AC301-Unit2ExcelTemplate” as the file name.
– Click on the “Save” button– At this point you can start working on it by clicking
on “Open” or by clicking on “Close” you can retrieve it from the desktop for a later time.
Step 2 – Download the TemplateStep 2 – Download the Template

Step 2 – Download the TemplateStep 2 – Download the Template

Step 2 – Download the TemplateStep 2 – Download the Template

Step 2 – Download the TemplateStep 2 – Download the Template

Step 2 – Download the TemplateStep 2 – Download the Template

Step 2 – Download the TemplateStep 2 – Download the Template

Step 2 – Download the TemplateStep 2 – Download the Template

Step 2 – Download the TemplateStep 2 – Download the Template

Step 3 – Layout of the TemplateStep 3 – Layout of the Template
• Lets take a look at the layoutlayout of the Excel template.
• Notice the multiple tabsmultiple tabs at the bottom of the Excel Template. There are two for each exercise/problem:– One contains the problem data from the book
which uses “Data” in the name of the tab.– Second contains only the exercise/problem
number. This is where you will be typing in all of your answers.

Step 3 – Layout of the TemplateStep 3 – Layout of the Template
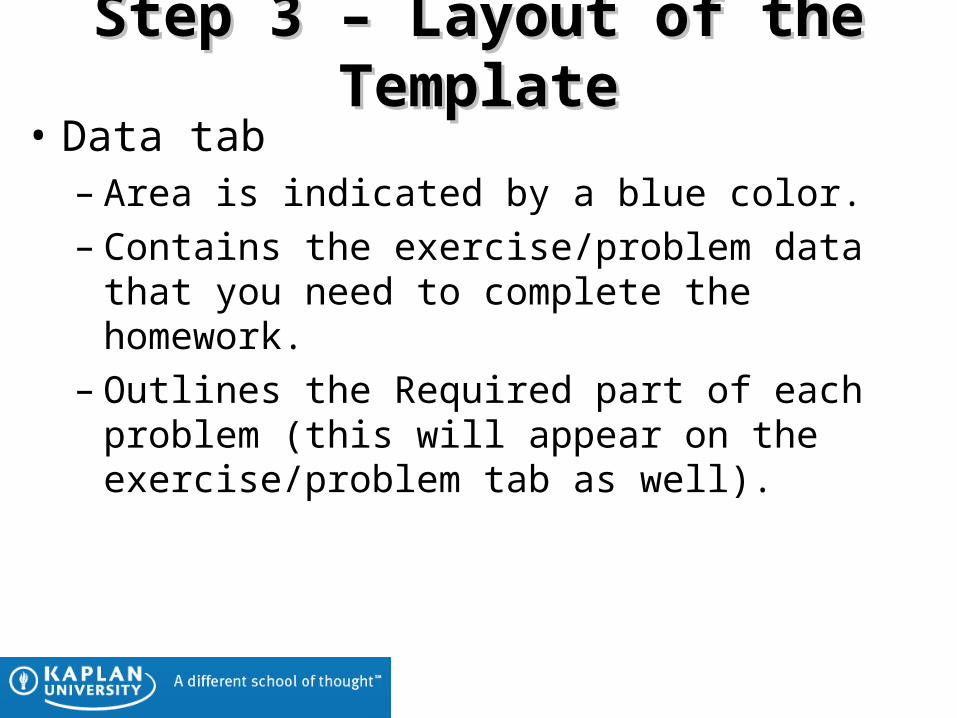
Step 3 – Layout of the TemplateStep 3 – Layout of the Template• Data tab
– Area is indicated by a blue color.– Contains the exercise/problem data that you need
to complete the homework.– Outlines the Required part of each problem (this
will appear on the exercise/problem tab as well).

Step 3 – Layout of the TemplateStep 3 – Layout of the Template

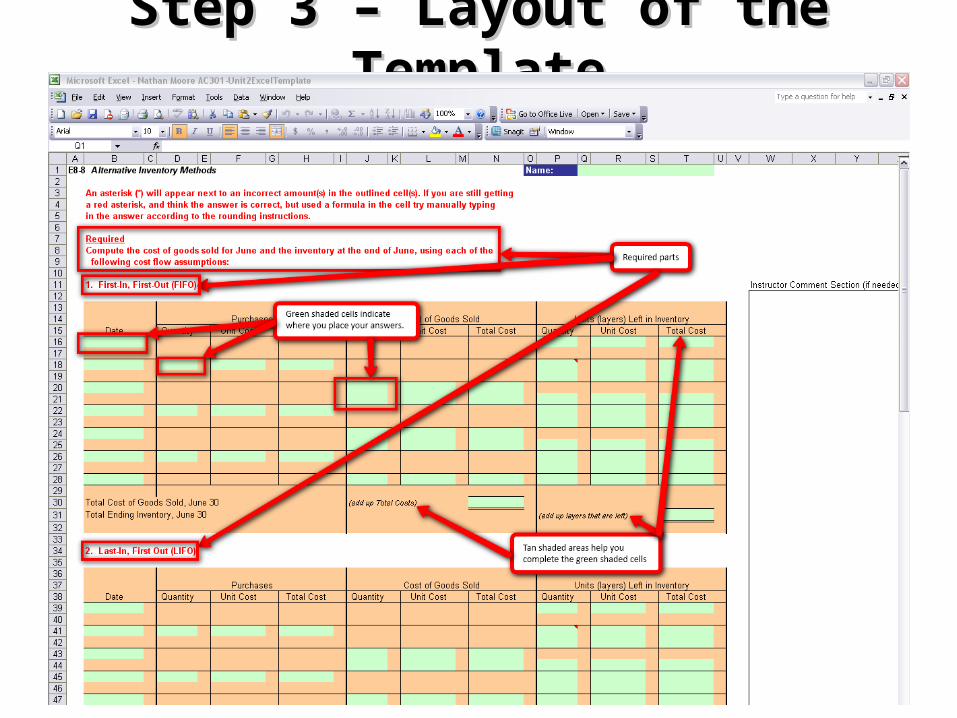
Step 3 – Layout of the TemplateStep 3 – Layout of the Template• Exercise/Problem tab
– Has the required parts listed which are the same as the Data tab to help you identify which part is which.
– This is the “working” tab where you will be placing all of your answers to each required part.
• Indicated with a “green” box.• Allows you to enter data.
– Also in the tan shaded areas you will find account titles, formulas, and other useful items to assist you in completing the problem.
Step 3 – Layout of the TemplateStep 3 – Layout of the Template
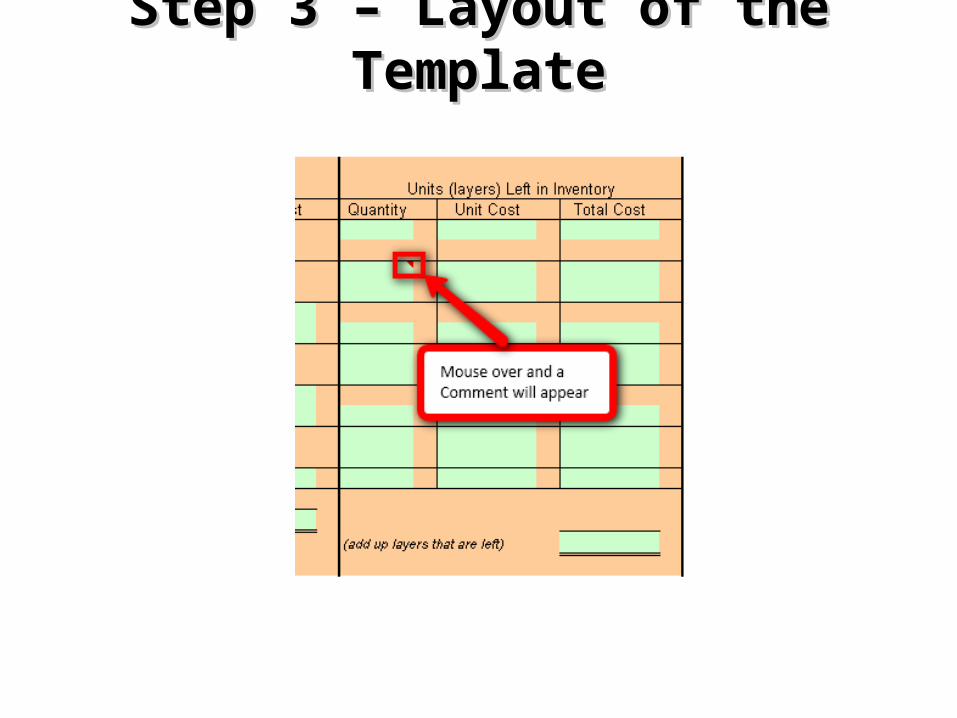
Step 3 – Layout of the TemplateStep 3 – Layout of the Template• Exercise/Problem tab
– Some green shaded cells have a red box in them which indicates a comment.
• If you mouse over red part the comment will appear.• These may give you hints and instructions on what to
do with the problem or cell.
Step 3 – Layout of the TemplateStep 3 – Layout of the Template
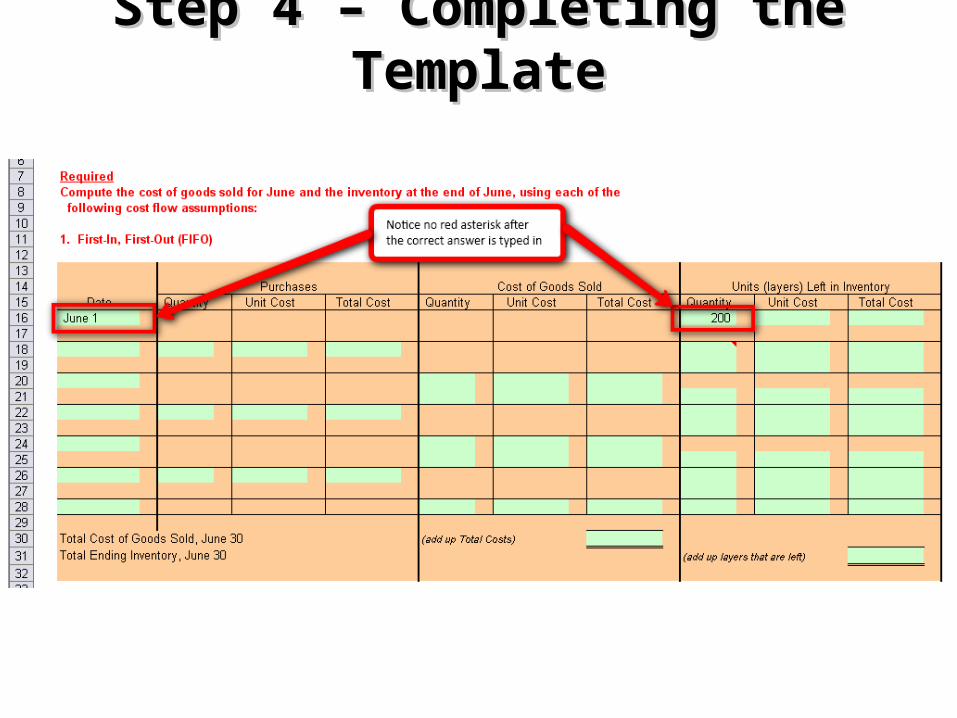
Step 4 – Completing the TemplateStep 4 – Completing the Template
• Entering data into the problem.– A red asterisk will appear for incorrect answers after you type in
your initial answer (or select using the drop-down menu provided). It will look like * next to each green cell.
• Formulas– You may use formulas, however, they don’t automatically round
for you even though the cell is pre-formatted and appears to be already rounded.
– You will have to type in the number manually in order to get ride of the red asterisk when there are rounding issues.
• Before submission make sure all red asterisks are resolved. If there is a red asterisk, this indicates the answer is incorrect.

Step 4 – Completing the TemplateStep 4 – Completing the Template
Step 4 – Completing the TemplateStep 4 – Completing the Template

Step 5 – Submitting the TemplateStep 5 – Submitting the Template• Once all other steps are complete and you
are ready to submit.– Remember to submit before Tuesday at 11:59pm
EST (which is when each unit ends).– Please review the course late policy located in
your syllabus.
• Use the Drop Box in the class to submit.• Make sure you choose the correct “basket” to
attached your template to.

Step 5 – Submitting the TemplateStep 5 – Submitting the Template

Step 5 – Submitting the TemplateStep 5 – Submitting the Template

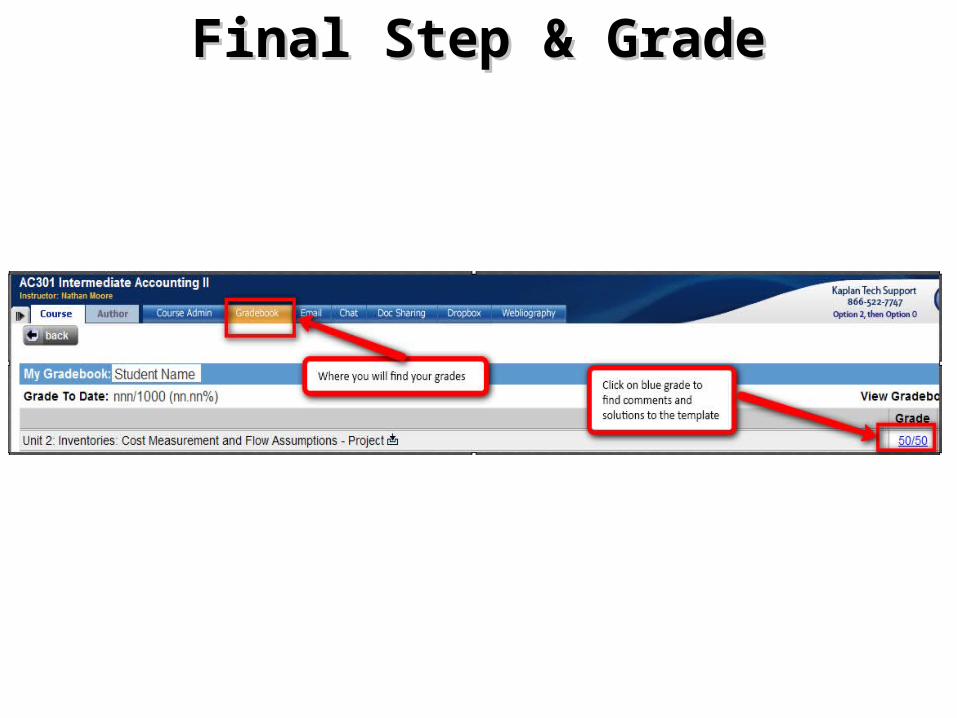
Final Step & GradeFinal Step & Grade• You are now complete and submitted your
Excel template. What now?– Your template will be graded by the time frame
indicated in the syllabus.
• After your template is graded you can view the comments and grade by clicking on the blue grade in your Gradebook.
Final Step & GradeFinal Step & Grade

Questions?Questions?